ASUSTeK Computer M303 M303 GSM Camera Phone User Manual M303 UserMan
ASUSTeK Computer Inc M303 GSM Camera Phone M303 UserMan
UserManual.wiki
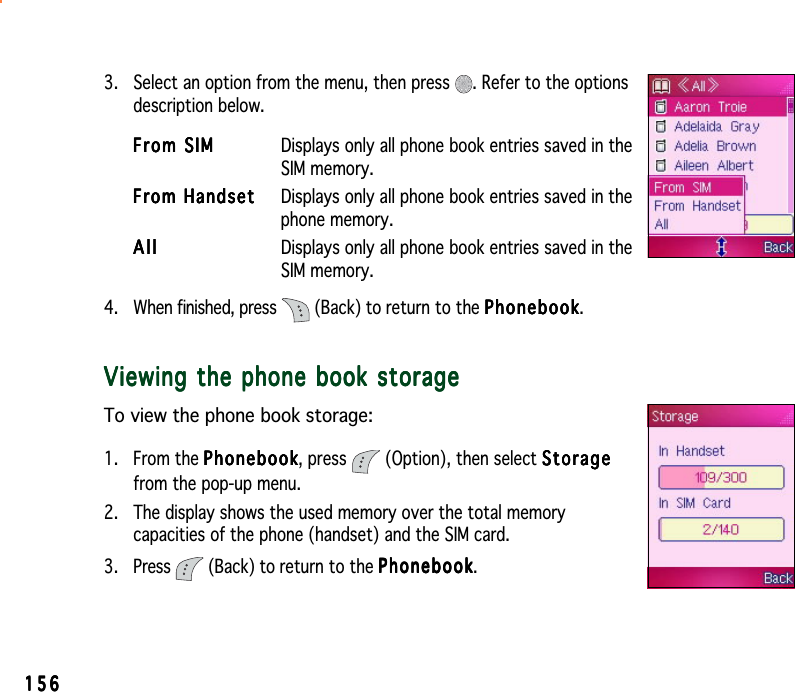
>
ASUSTeK Computer
>
M303 User Manual
>
Part 2
Contents
1.
Part 1
2.
Part 2
3.
Part 3
4.
Part 4
5.
Part 5
Part 2
Navigation menu
Upload a User Manual
Namespaces
Wiki Guide
HTML
PDF
Info
Views
User Manual
Discussion / Help
Navigation
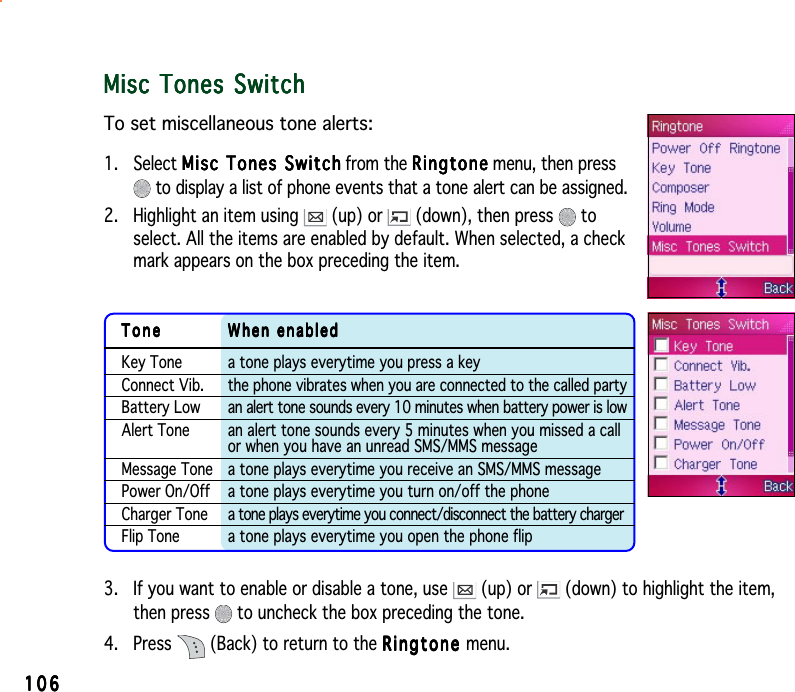
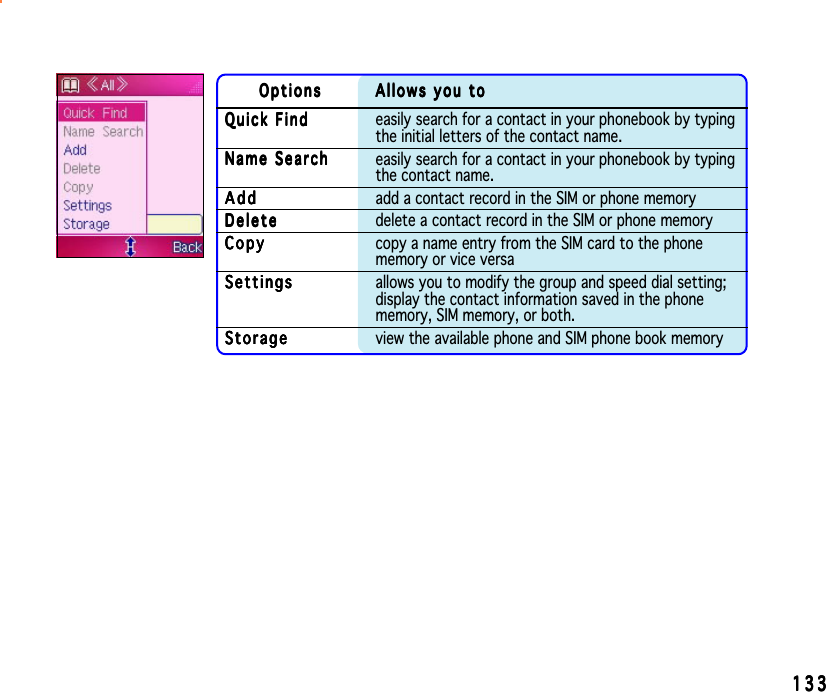
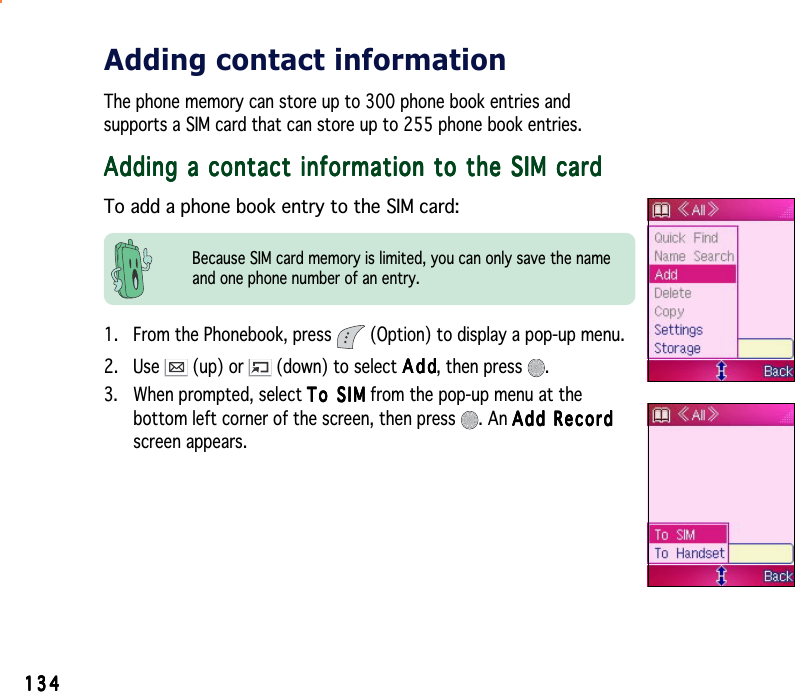
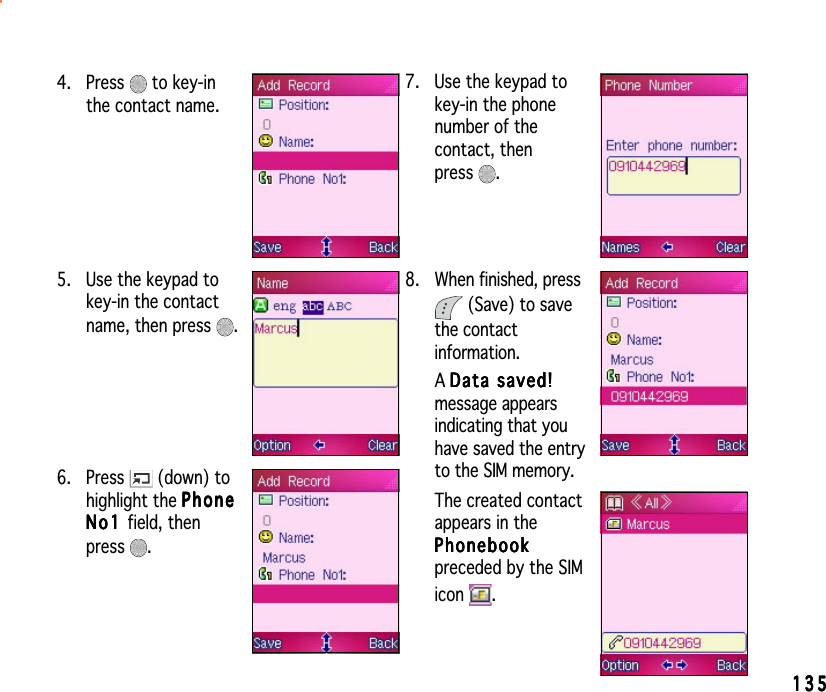
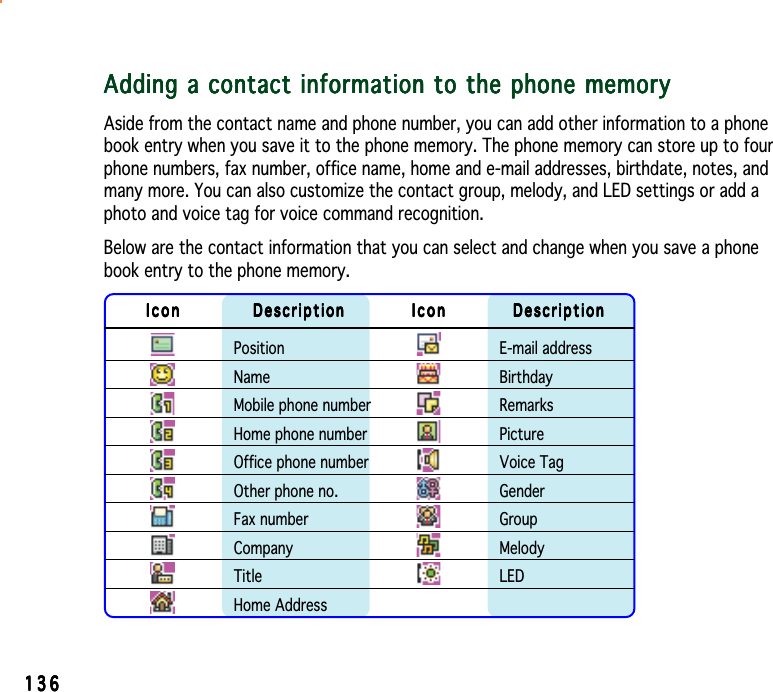
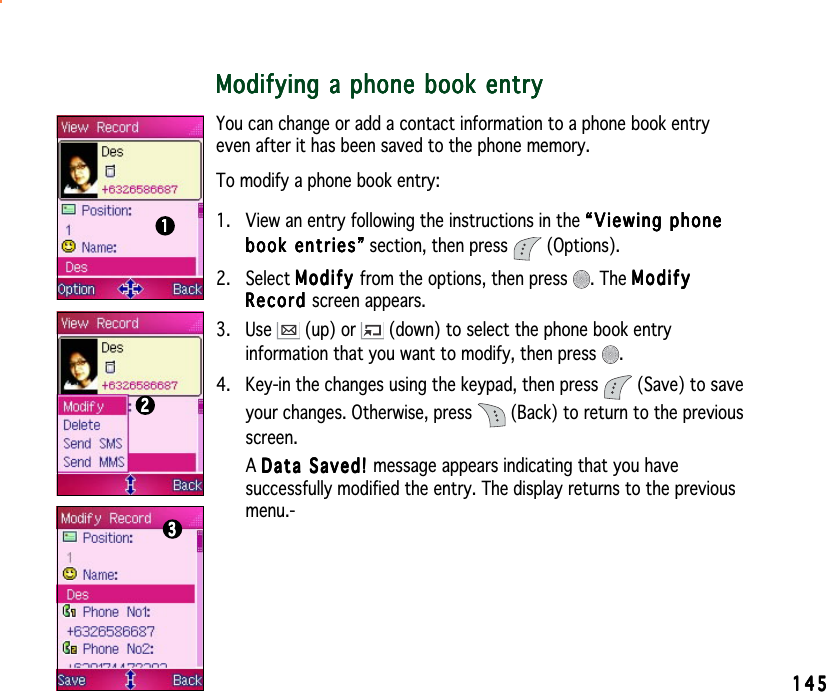
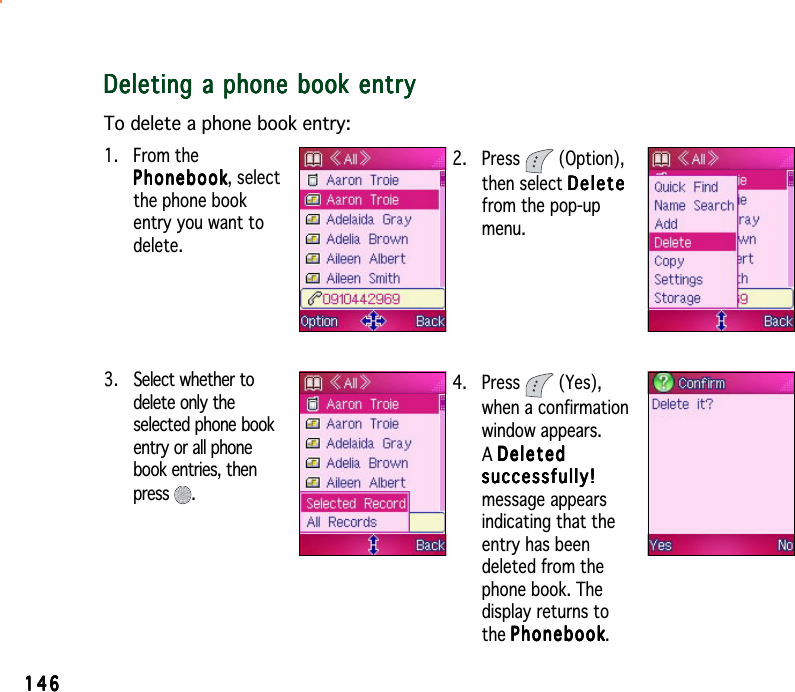
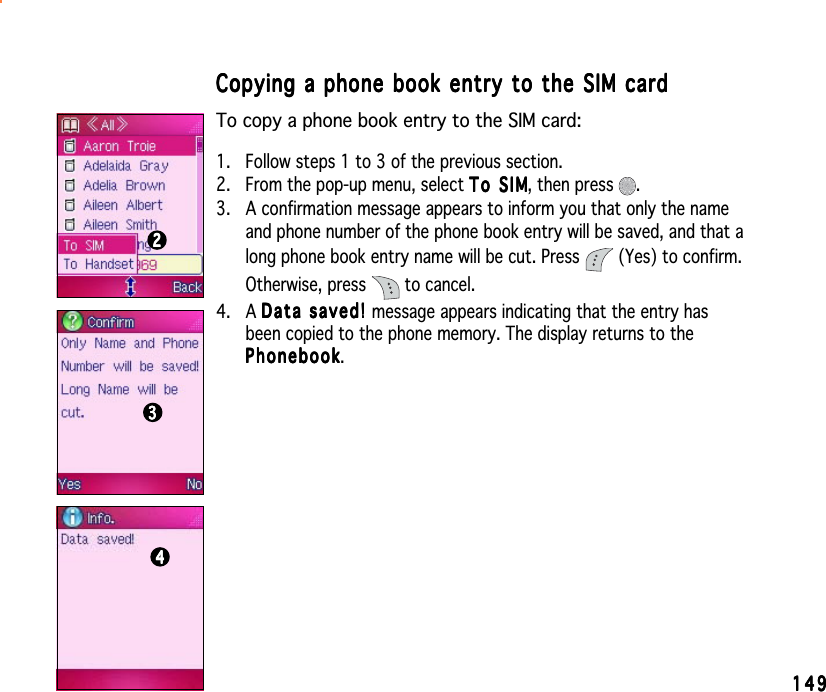
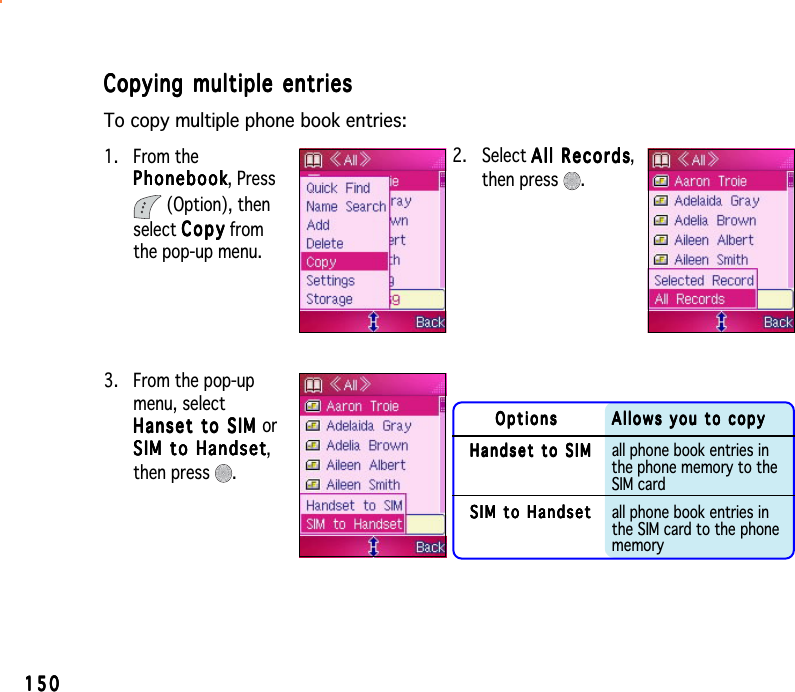
![132132132132132PhonebookThe PhonebookPhonebookPhonebookPhonebookPh o n e b o o k allows you to store, use, share, and manage contactinformation such as names, phone numbers, company and homeaddresses, e-mail address, etc. You can also add a voice recording andpersonalize the ringtone and LED settings for a particular contact usingthis menu.To access the PhonebookPhonebookPhonebookPhonebookPhonebook:1. Put the phone in idle mode, then press to display the main menu.2. Use the navigation keys to select the PhonebookPhonebookPhonebookPhonebookPhonebook icon , thenpress to open the PhonebookPhonebookPhonebookPhonebookPhonebook.ORORORORORPress to open the PhonebookPhonebookPhonebookPhonebookPhonebook.3. Press (Option) to display the phone book menu. Refer to thenext section for details.When in idle mode, you can press [ ] to open the phonebook.](https://usermanual.wiki/ASUSTeK-Computer/M303.Part-2/User-Guide-509485-Page-12.png)