ASUSTeK Computer UGPZ5 Bluetooth Module User Manual UserMan MSQUGPZ5
ASUSTeK Computer Inc Bluetooth Module UserMan MSQUGPZ5
Contents
Users Manual 1
Bluetooth Stack for Windows
by Toshiba
- Universal Edition
User’s Guide
December 28, 2004
TOSHIBA Corporation
Introduction ........................................................................ 5
Trademarks......................................................................... 6
What is Bluetooth? ............................................................. 7
Using PCs with Bluetooth built in .................................... 10
Varieties of Bluetooth devices you can use ...................... 12
Contents of the Bluetooth Utility...................................... 15
Using the Bluetooth Utility............................................... 20
Flow of operation ............................................................. 21
Basic settings.................................................................... 23
Express Mode Set-up........................................................ 24
Custom Mode Set-up........................................................ 26
Detecting Bluetooth devices............................................. 28
Detecting Bluetooth devices............................................. 31
Detecting services............................................................. 34
Detecting services............................................................. 38
Registering settings information....................................... 43
Registering settings information....................................... 45
One-touch connection to Bluetooth devices ..................... 47
Manually connecting to a Bluetooth device...................... 49
Changing a connection icon.............................................. 52
Changing a connection icon name .................................... 55
Connecting to the Internet using a modem station [DUN]..... 57
Connecting to the Internet using a mobile telephone [DUN].67
Connecting to a LAN using an access point (PAN) [PAN] ... 77
Connecting to a LAN (PAN) ............................................ 82
Connecting to a LAN using an access point (LAP) [LAP].... 85
Connecting to a LAN (LAP)............................................. 93
Using a modem station for fax transmissions [FAX] ............ 97
Receiving a fax............................................................... 109
Sending a fax .................................................................. 111
Setting COM Auto Connect............................................ 116
Using a commercially available fax application ............. 118
Using a mobile telephone for fax transmissions [FAX] ...... 121
Receiving a fax............................................................... 133
Sending a fax .................................................................. 135
Printing documents and images [HCRP] [SPP] ........................ 140
Printing images directly from a digital camera or other
device [BIP]........................................................................ 149
Printing business card data [OPP] ....................................... 155
Listening to music using the stereo headphones GAVDP
A2DPAVRCP................................................................... 161
Using a wireless keyboard [HID]........................................ 169
Using a wireless mouse [HID] ............................................ 174
Exchanging files with a PC or PDA [FTP] ......................... 179
Sending images to a mobile telephone [BIP]...................... 191
Sending images to a PC or PDA [BIP] ............................... 196
Exchanging business card data with a PC or PDA [OPP] ... 203
Creating business card data in the vCARD format ......... 220
Using a Bluetooth-compatible camera [BIP] ...................... 223
Using a headset to communicate [HSP] .............................. 229
Synchronising information using ActiveSync [SPP] .......... 238
Building a personal area network [PAN] ........................... 250
Making a device undiscoverable to other users .............. 260
Encrypting the content of your transmissions................. 262
Changing the default connection .................................... 264
Manually creating a virtual Bluetooth COM port ........... 268
Creating a Bluetooth virtual COM port for a client ........ 273
Creating a Bluetooth virtual COM port for a server ....... 275
Sending business card data from Outlook ...................... 278
Bluetooth Settings .......................................................... 285
Bluetooth Manager ......................................................... 289
Bluetooth Information Exchanger .................................. 295
Bluetooth Properties ....................................................... 299
Bluetooth Local COM .................................................... 318
Wireless File Transfer .................................................... 320
Troubleshooting.............................................................. 322
General operation of the Bluetooth Utility ..................... 323
Using a wireless modem station ..................................... 326
Using an access point ..................................................... 331
Using a printer ................................................................ 333
Using a keyboard or mouse ............................................ 334
Using a camera ............................................................... 335
Using a PDA................................................................... 336
Using a mobile telephone ............................................... 337
Using a Bluetooth Headset ............................................. 341
Glossary.......................................................................... 343

Introduction
Thank you very much for selecting the Bluetooth Utility.
This Help facility will show you how to use the Bluetooth Utility for configuring
Bluetooth devices and how it can be used in other convenient ways.
We hope that the Help facility will enable you to be able to make full use of the
Bluetooth Utility.
• What is Bluetooth?
• What you need to know about using Bluetooth
• Varieties of Bluetooth devices you can use
• Contents of the Bluetooth Utility
[Trademark information]
(C) 2003, 2004 TOSHIBA Corporation All Rights Reserved

Trademarks
• Research and development on and the formulation of a Bluetooth™ standard is
being conducted by the Bluetooth Special Interest Group (SIG), which is operated
by TOSHIBA, Ericsson, Nokia, Intel, IBM, 3Com, Lucent Technologies,
Microsoft and Motorola. Currently over 1,800 prominent telecommunications and
computing companies are participating in the Bluetooth SIG. Please refer to
http://www.bluetooth.com/ for more information about the Bluetooth SIG.
• Microsoft, Windows, Windows Media, NetMeeting and Outlook messaging
software are the registered trademarks of Microsoft Corporation in the United
States and/or other countries.
• Bluetooth is a trademark owned by its proprietor and used by TOSHIBA under
license.
• InterVideo and WinDVD are registered trademarks of InterVideo Incorporated.
• BeatJam is a registered trademark of Justsystem Corporation.
• BeatJam is a copyright of Justsystem Corporation, and the copyrights and other
rights pertaining to BeatJam belong to Justsystem Corporation and other rightful
claimants.
• All product names listed herein are used as the trademarks or registered
trademarks of their respective owners.
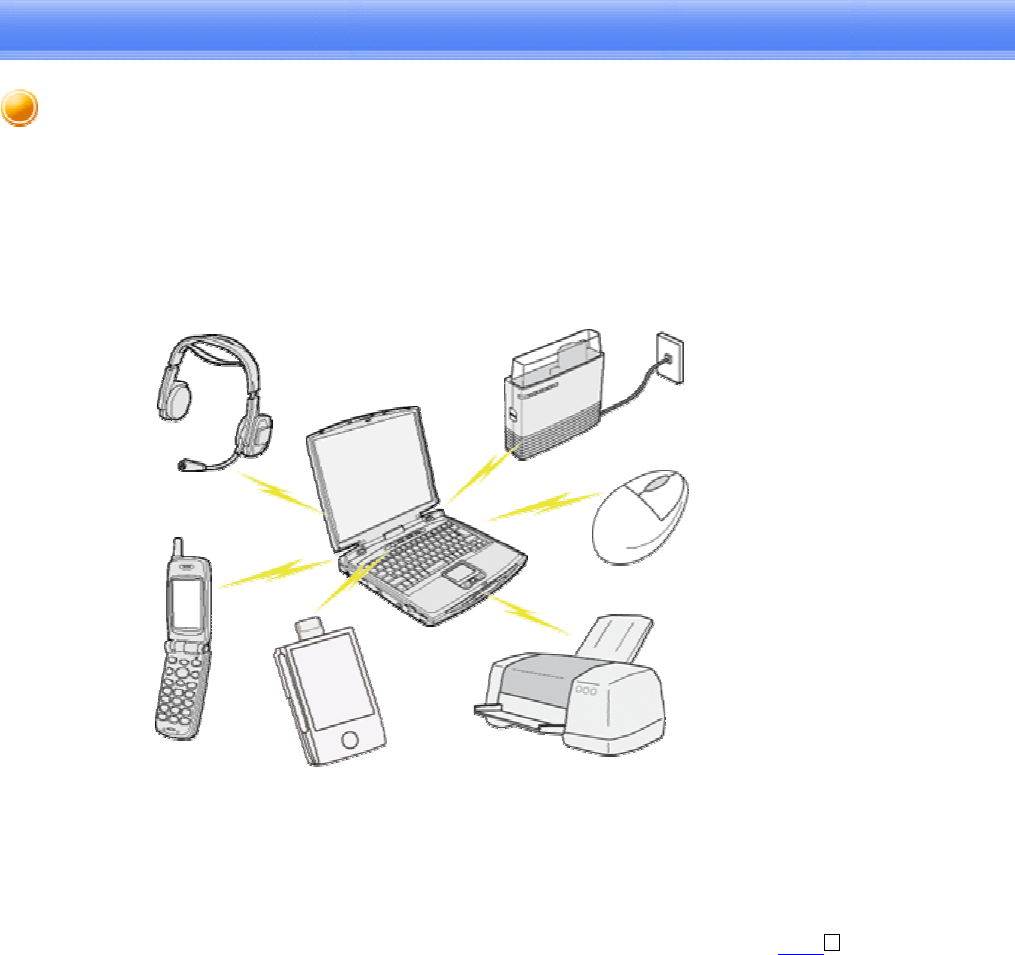
What is Bluetooth?
Bluetooth is a global standard telecommunications method that enables data to be
exchanged wirelessly between personal computers, peripheral components, mobile
telephones and other electronic devices.
Data can be readily exchanged between Bluetooth devices if they have been registered as
components able to communicate with each other.
A maximum of seven Bluetooth devices may be connected together. By using Bluetooth
to connect to a mouse, keyboard, modem, printer, or other device, you can do away with
messy cabling and not have to be concerned about space restrictions, which will allow
you to work more comfortably.
Next
What you need to know about using Bluetooth
Bluetooth exchanges data using radio waves.
The following points are critical in order to configure and use Bluetooth devices
correctly.
• The devices must be Bluetooth-compatible
• The Bluetooth devices must be close enough to be able to communicate
• The devices must be in a connectable state
• No other radio wave-emitting devices should be operated nearby
• The Bluetooth devices must be turned on
The devices must be Bluetooth-compatible
The hardware and software used in your PC and other components must be Bluetooth-
compatible.
Bluetooth-compatible products normally bear the following logo:
For further details, please refer to your local retailer or consult the product instruction
manual.
Note
• A Bluetooth communication card, adapter, or other similar device (not included)
needstobeinstalledinPCsorPDAs(personal digital assistants) that do not have
Bluetooth built in.
The Bluetooth devices must be close enough to be able to communicate
Bluetooth devices situated in places beyond the reach of the radio waves will not
recognize each other, making communication impossible.
In particular, please ensure that your Bluetooth devices can communicate with each other
before you register and configure them for the first time.

Note
• PCs have a communication distance restriction of ten meters. Please refer to the
instruction manuals for information on the communication distance restrictions
specific to each device.
• Communication interference may occur if any obstructions are located between
the devices. Devices may not communicate properly if they have been located, for
example, on the ground and first floors of a residence, despite their being within
the acceptable distance.
The devices must be in a connectable state
The Bluetooth devices must recognize each other in order to be connectable for use.
In certain devices, simply turning on the power will not produce a connectable state.
Moreover, the energy-saving feature may come into effect after a certain amount of time,
which will prevent the devices from being detected. Please refer to the specific product
instruction manual for further details.
No other radio wave-emitting devices should be operated nearby
Microwave ovens, wireless LANs and other radio wave-emitting devices located nearby
may affect Bluetooth communication.
Please ensure that your devices have been accordingly situated, and that the above
devices are not in use when you are operating your Bluetooth device.
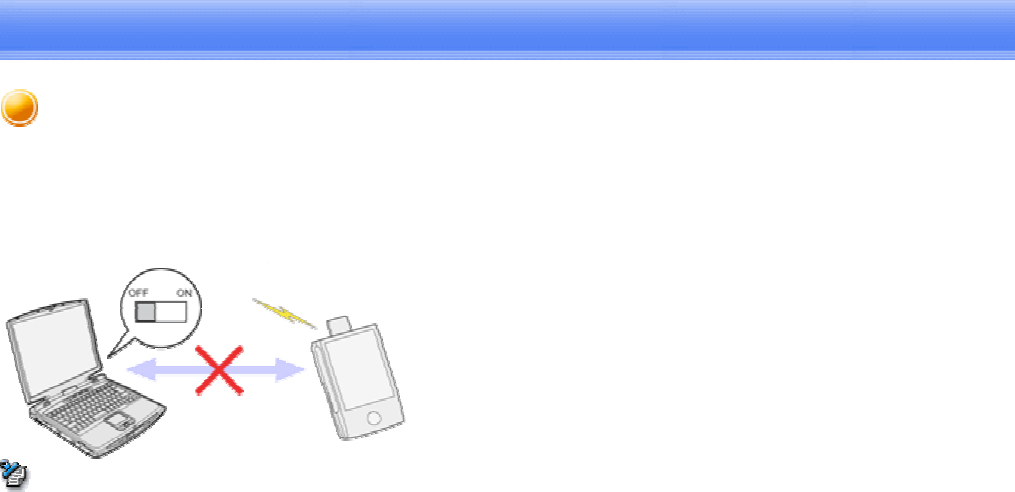
The Bluetooth devices must be turned on
Bluetooth cannot be used if the devices have not been turned on.
Some PCs and other components have a Bluetooth communication switch that operates
independently of the main power. Bluetooth cannot function if this switch has been
turned off.
• Using PCs with Bluetooth built in
• When using a Bluetooth USB adapter or SD card
Using PCs with Bluetooth built in
Communication will be impossible if the wireless communication switch on the PC has
been turned off.
Please turn this switch on when using Bluetooth.
Note
• Please refer to your PC instruction manual for further details.

When using a Bluetooth USB adapter or SD card
If the Bluetooth USB adapter or SD card has not been properly inserted into the device,
poor contact or other problems between the two may prevent devices from properly
communicating. Please ensure that the card has been securely inserted into the slot.
Note
• Battery-operated devices may not be able to communicate properly if the battery
level is low.
Please either recharge or replace the battery if the level appears as below:
Varieties of Bluetooth devices you can use
It is important to understand the concepts of "services" and "profiles" in order to
determine whether an intended function can be properly utilized when you use a
Bluetooth device.
What is a "profile"?
Examples of Bluetooth devices include mice and keyboards (input devices), printers
(output devices) and wireless modems (communication devices). Functions that can be
utilized by such devices are called "services."
In order for these services to be used reliably, Bluetooth devices are provided with
common specifications known as "profiles."
For example, when a PC makes a connection to a Bluetooth device, it obtains the profile
of the corresponding device and thereby ascertains which functions (services) the device
offers.
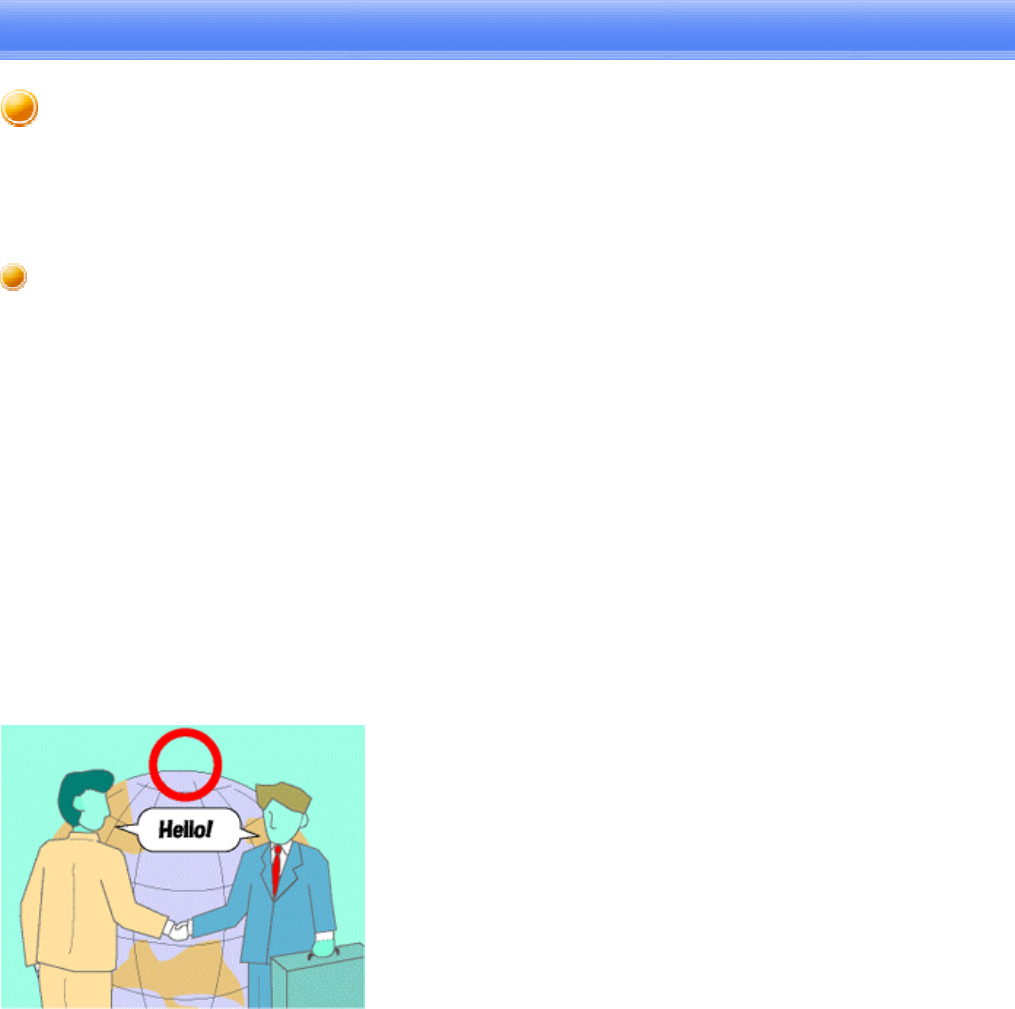
As an example, imagine someone who travels overseas.
The traveller is only able to converse properly with their counterpart if both speak a
language (English, Japanese, Chinese, etc.) they both understand.
However, no dialogue will occur if they do not share a common language.
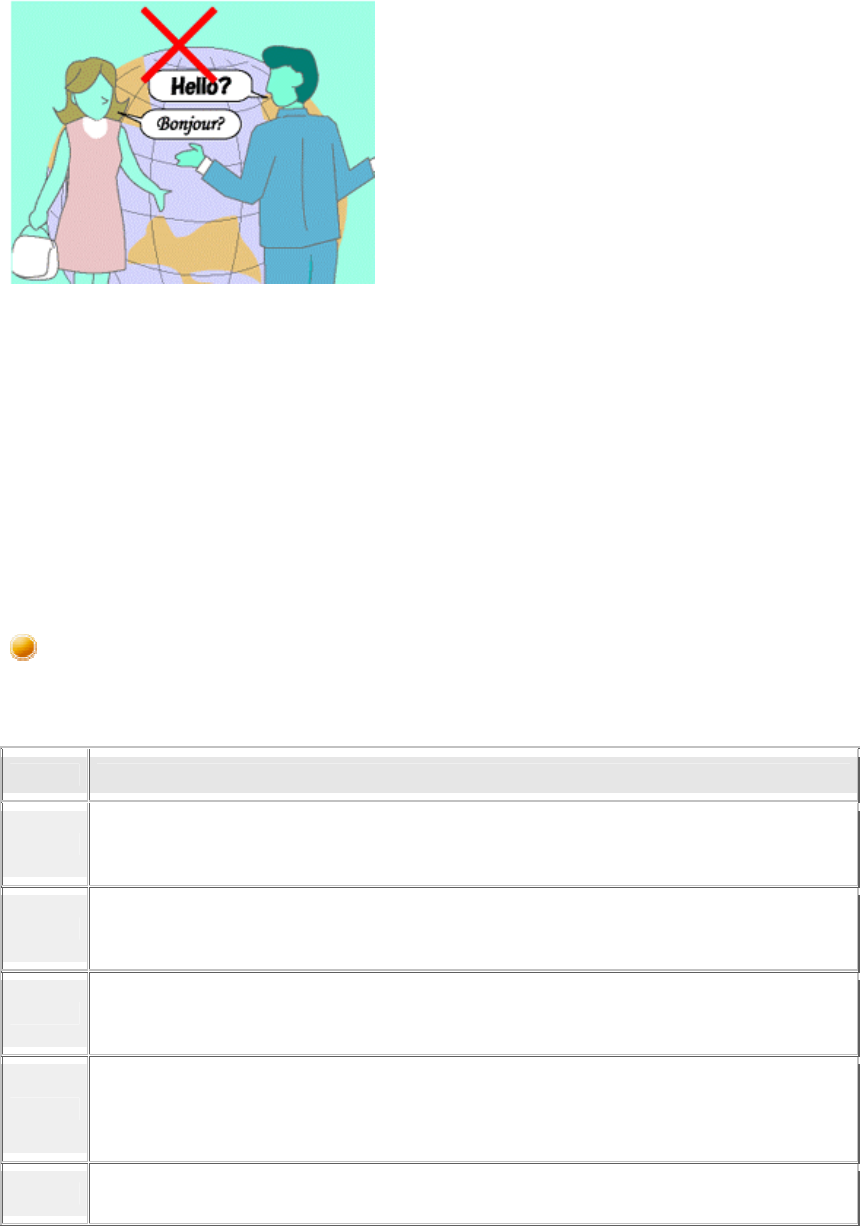
In the above example, the traveller and his/her counterpart correspond to the devices, the
languages to the profiles, and the dialogues between the two people to the services. The
former example refers to a situation where a service can be performed because the
devices support a common profile, whereas the latter example refers to a situation where
a service cannot be performed because a common profile is not supported.
In other words, you will be able to use Bluetooth devices that have a profile supported by
a PC (the Bluetooth Utility in this case).
If the profiles belonging to the device are not supported by the PC, the functions
corresponding to those profiles will not be able to be utilized. Also, a device can only be
used if its profiles are supported by the PC.
Types of profiles
The following profiles are supported by the Bluetooth Utility:
Term Definition
DUN
Dial-Up Networking
Enables you to establish a dial-up Bluetooth connection to the Internet or other networks with a
wireless modem station, mobile telephone, or similar device.
FAX
FAX
Enables you to establish a Bluetooth connection with a wireless modem station, mobile
telephone, or similar device to send or receive a fax.
LAP
LAN Access Profile
Enables you to establish a Bluetooth connection with a LAN access point to access the services
of a LAN using PPP.
SPP
Serial Port Profile
Enables communication with a device through a virtual serial port configured for a Bluetooth
connection. This can be used for printers and printer adapters with PDAs, using a different
method from HCRP or ActiveSync.
HID Human Interface Device Profile
Allows connections to wireless mice, keyboards and other input devices.

HCRP Hardcopy Cable Replacement Profile
Enables printing with a printer driver.
FTP
File Transfer Profile
Enables you to browse folders on a wireless device and transfer files to and from the local
device.
OPP Object Push Profile
Allows business card data to be exchanged with a wireless device.
A2DP
Advanced Audio Distribution Profile
Allows audio data to be exchanged between wireless headsets and other audio devices, as well
as allowing high-quality music playback.
AVRCP
Audio/Video Remote Control Profile
A/V remote control functions such as play and stop. The Bluetooth Utility supports remote
control operation.
GAVDP Generic Audio/Video Distribution Profile
Basic profile used to support A2DP, AVRCP and other protocols.
HSP
Head Set Profile
Profile used for headsets.
Allows you to connect to a PC and communicate as well as connect to a mobile telephone.
PAN Personal Area Networking Profile
Supports IP base network. Allows connection to an ad-hoc or wired network via an access point.
BIP
Basic Imaging Profile
Allows image files to be sent and received after having been converted to a size suitable for the
destination. In addition to being able to transfer image files, the Bluetooth Utility allows camera
shutters to be operated by remote control, as well as other offering other functionalities.

Contents of the Bluetooth Utility
The Bluetooth Utility is a software tool used to configure a variety of settings once a
connection has been established between the PC and the Bluetooth device. It also
facilitates the exchange of files between Bluetooth devices.
The Bluetooth Utility comprises the following six tools. Descriptions are provided for the
functions and the supported profiles for the respective tools.
• Bluetooth Settings
• Bluetooth Manager
• Bluetooth Information Exchanger
• Remote Camera
• Bluetooth Local COM
• Wireless File Transfer
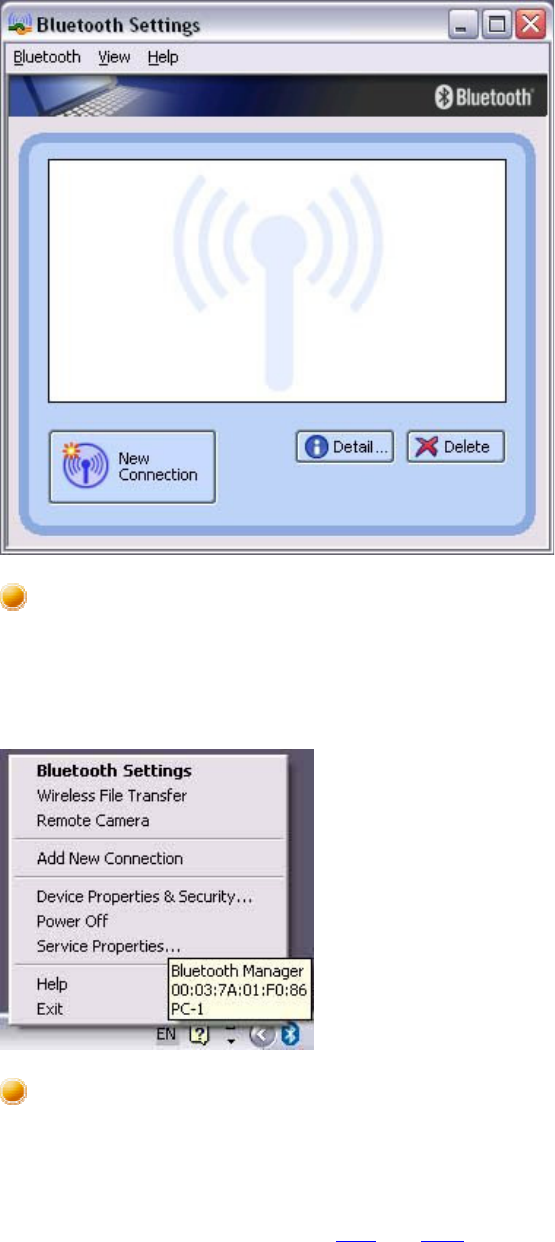
Bluetooth Settings
This program enables you to easily configure settings when you connect to a Bluetooth
device for the first time. The function of a configured and registered device is displayed
on the main window as a connection icon.
As a rule, the Bluetooth device will be connected automatically after having been set up;
however, a shortcut can be created for a manual connection, if so required.
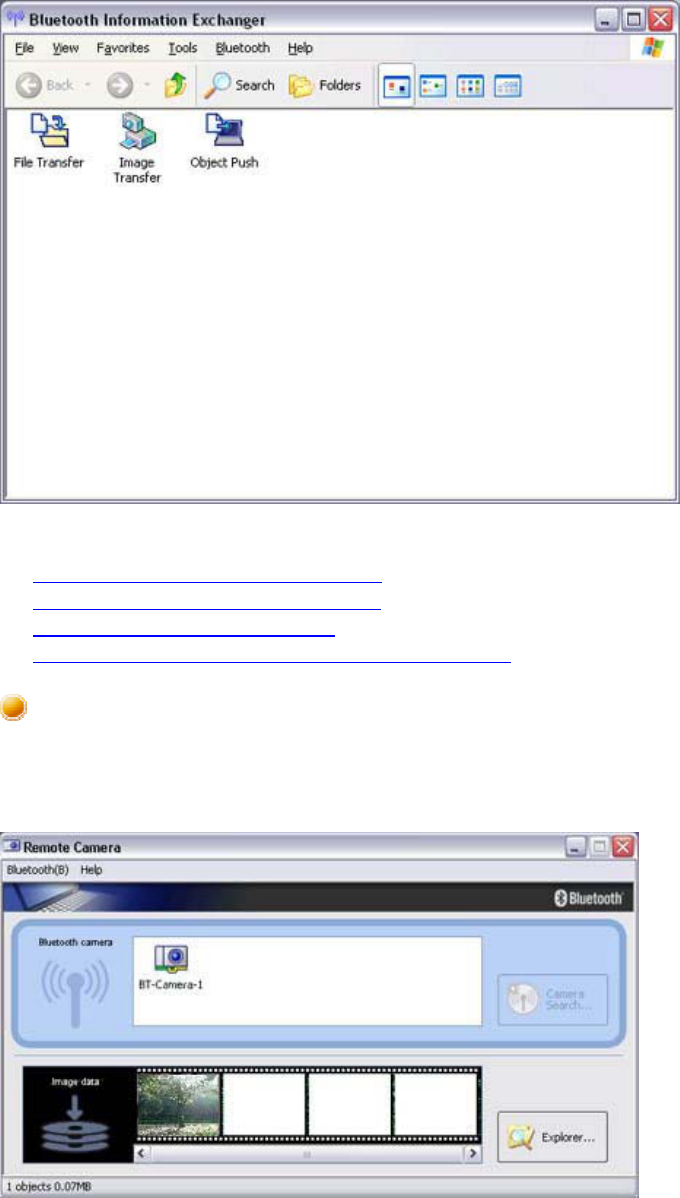
Bluetooth Manager
This program, which appears as a Taskbar icon, monitors and controls the power and
operating status of Bluetooth devices. It can be used to start the Bluetooth Setup Utility,
add a new connection, disconnect from a remote device, and perform other tasks.
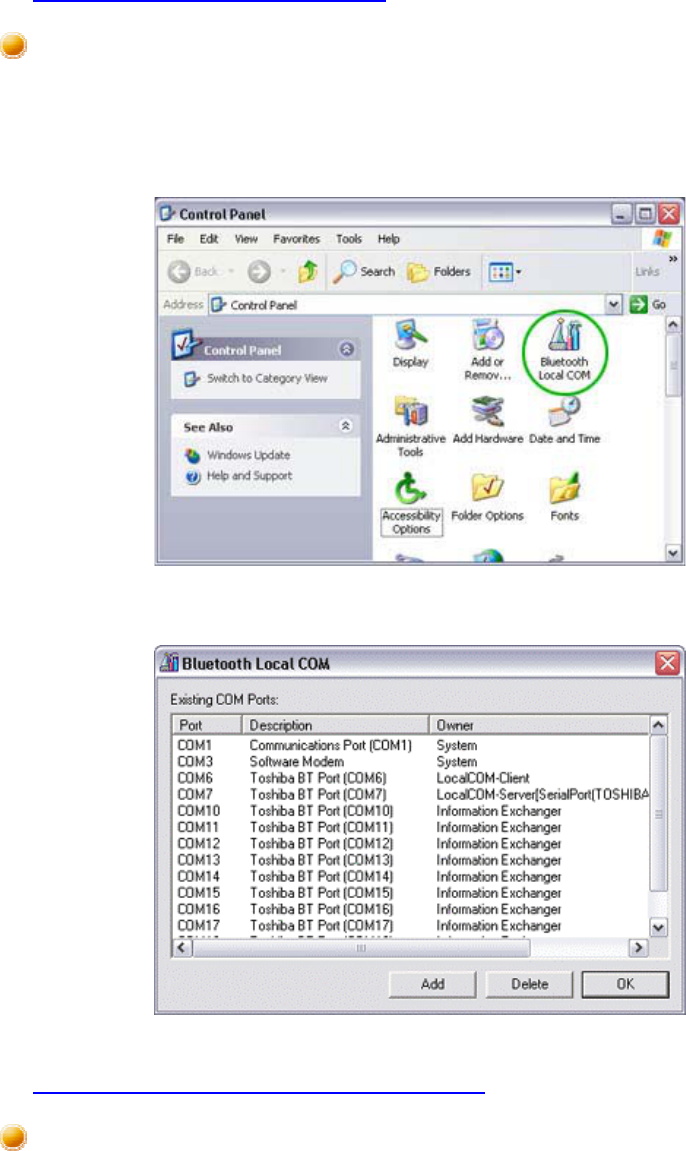
Bluetooth Information Exchanger
This program enables you to easily transfer files and images to or exchange business card
data with a wireless device by selecting the icon of the counterpart device, or using the
right-click menu in Explorer. The wireless devices to which you are connecting must also
support the same service functions (FTP and OPP).
Related topics
"Exchanging files with PCs and PDAs"
"Sending images to mobile telephones"
"Sending images to PCs or PDAs"
"Exchanging business card data with PCs and PDAs"
Remote Camera
Connecting to a Bluetooth-compatible digital camera allows the device to be operated
from the PC side, and captured images to be sent to the PC.
Related topics
"Using a Bluetooth-compatible camera"
Bluetooth Local COM
This program, which is registered in the Control Panel, can create a virtual COM port for
use with the Bluetooth Utility. If you need to create a client COM port with the Bluetooth
Setup Utility, it can be created automatically without having to start the program.
Related topics
"Manually creating a virtual Bluetooth COM port"
Wireless File Transfer
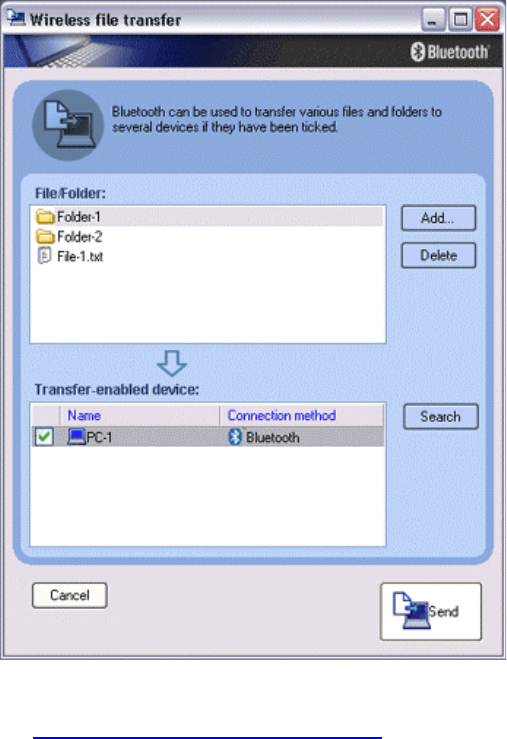
You can send a file wirelessly to another device by right-clicking on the intended file and
using the "Sending to Bluetooth Device" menu that appears.
Related topics
"Exchanging files with PCs and PDAs"

Using the Bluetooth Utility
Actual examples of how to establish a connection to a Bluetooth device using the
Bluetooth Utility are described in this section.
Descriptions of more convenient methods and detailed information on the Bluetooth
Utility functions are also provided.
• Flow of operation
• Basic settings
• Making the most of your Bluetooth device
• Using the features more effectively
• Bluetooth Utility functions in detail
Note
• The Bluetooth Utility operates under Windows XP and Windows 2000.
The descriptions in the examples mainly pertain to operation under Windows XP.
Windows XP: Microsoft® Windows® XP Operating System
Windows 2000: Microsoft® Windows® 2000 Operating System
Next
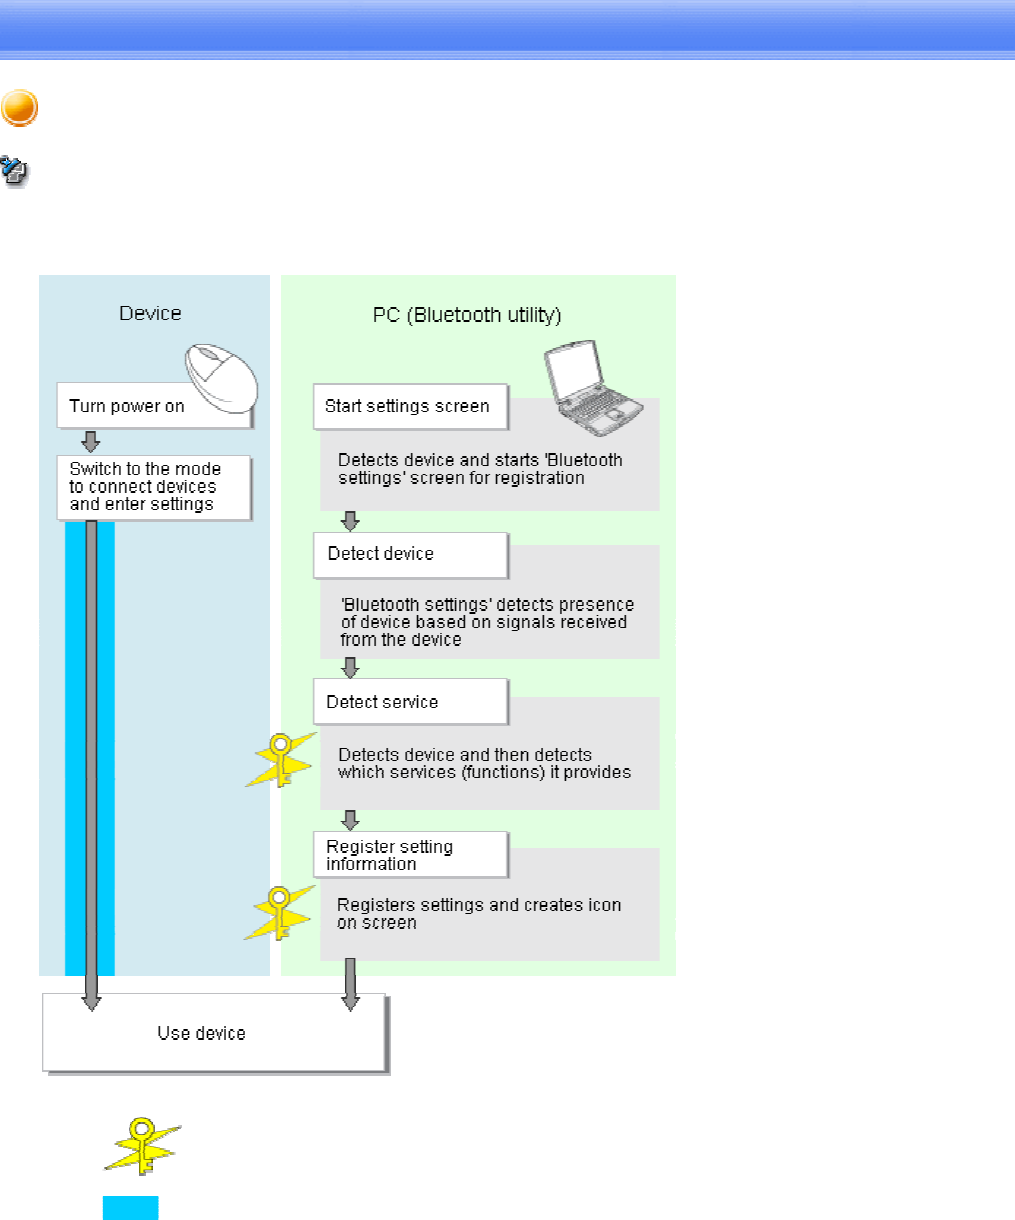
Flow of operation
The procedure below is used to set up Bluetooth devices using the Bluetooth Utility.
Note
• It is assumed that the set-up is performed from the [Bluetooth Settings] window.
: Enter Bluetooth passkey (PIN code), if required by the device.
: During these stages of the set-up process, the Bluetooth device
must be set to Connectability mode.

* Simply turning the power on will activate Connectability
mode in certain devices. Please refer to the device instruction
manual for further details.
Next

Basic settings
Methods for registering new devices using the Bluetooth Utility shall now be described.
A Bluetooth mouse shall be connected and set up using [Bluetooth Settings] as an
example.
[Bluetooth Settings] provides two set-up methods: "Express Mode" and "Custom Mode."
• Express Mode
[Bluetooth Settings] will automatically detect and register services. If several
services (profiles) are supported by the device, the service that has been set to the
highest priority shall be selected and registered.
Express Mode is normally recommended for device set-up.
• Custom Mode
After having been detected, the services supported by the device are displayed as
a list, from which you can select the desired function(s).
Custom Mode must be used to set up a device if, for example, you wish to use a
modem station to send a fax (because in Express Mode, the DUN profile will be
automatically selected since it has a higher priority than the FAX profile).
The differences between setting up the same device (a Bluetooth mouse) using Express
Mode and Custom Mode are described on the following pages.
• Express Mode Set-up
• Custom Mode Set-up

Express Mode Set-up
The procedure for setting up the device using Express Mode shall now be described.
Starting Bluetooth Settings
Procedure
1. Click [Start][All Programs][Bluetooth][Bluetooth Settings].
(Under Windows 2000, click [Start][Programs][Bluetooth][Bluetooth
Settings].)
Note
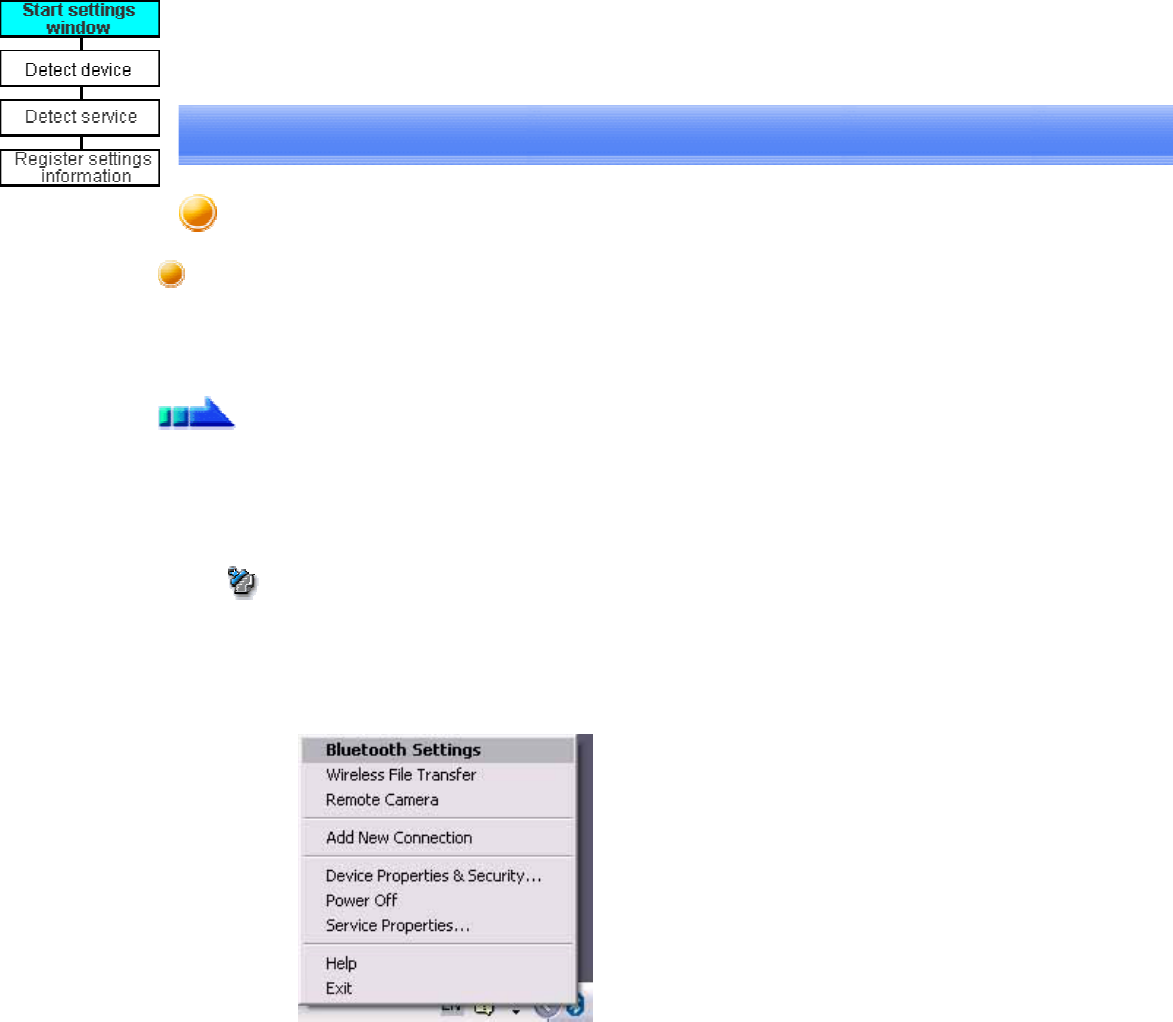
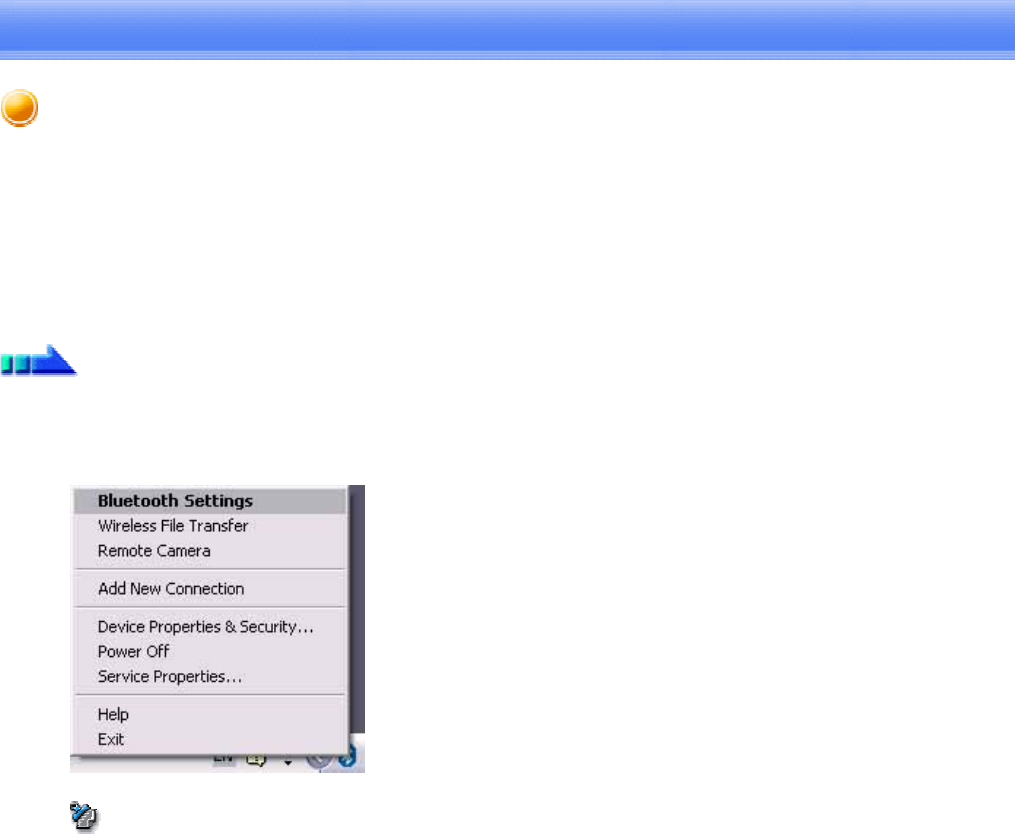
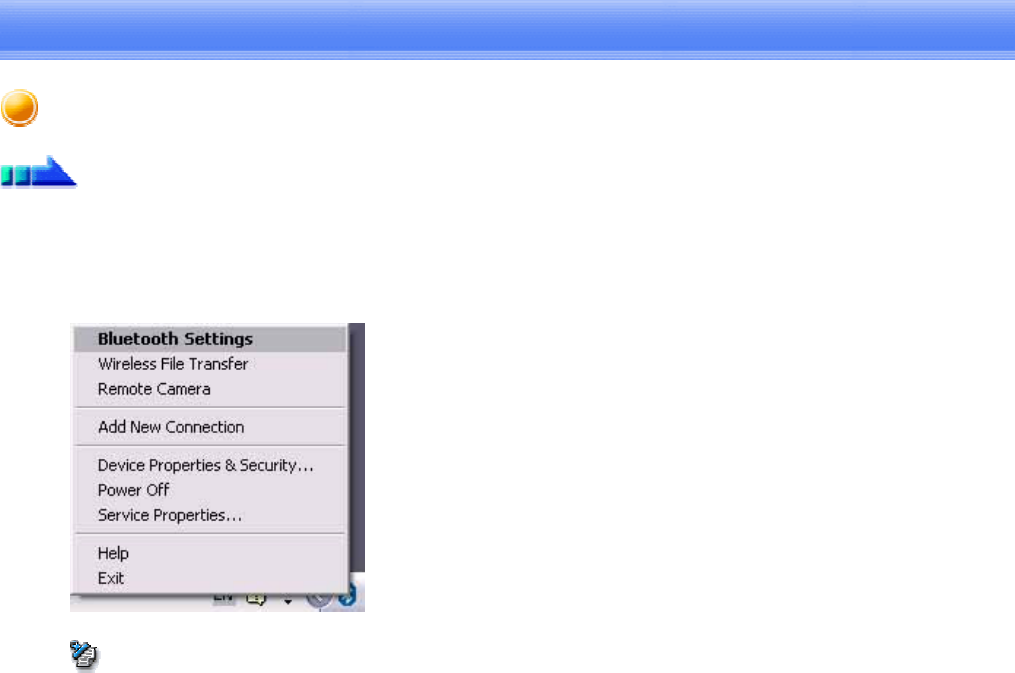
oThe same result can be achieved by right-clicking on the Bluetooth icon in
the task tray and selecting [Bluetooth Settings] from the menu that
appears.
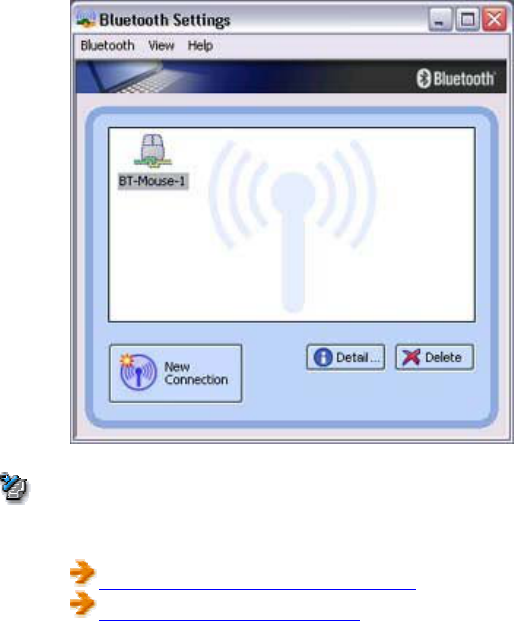
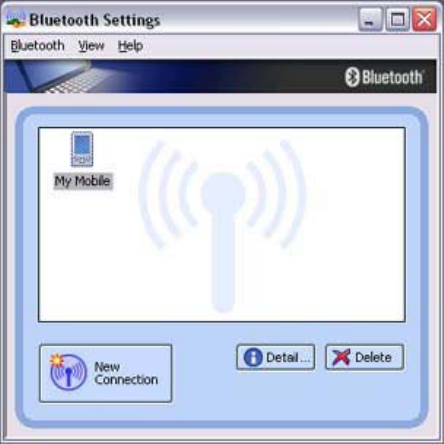
The [Bluetooth Settings] window below will appear when other devices have
already been registered.
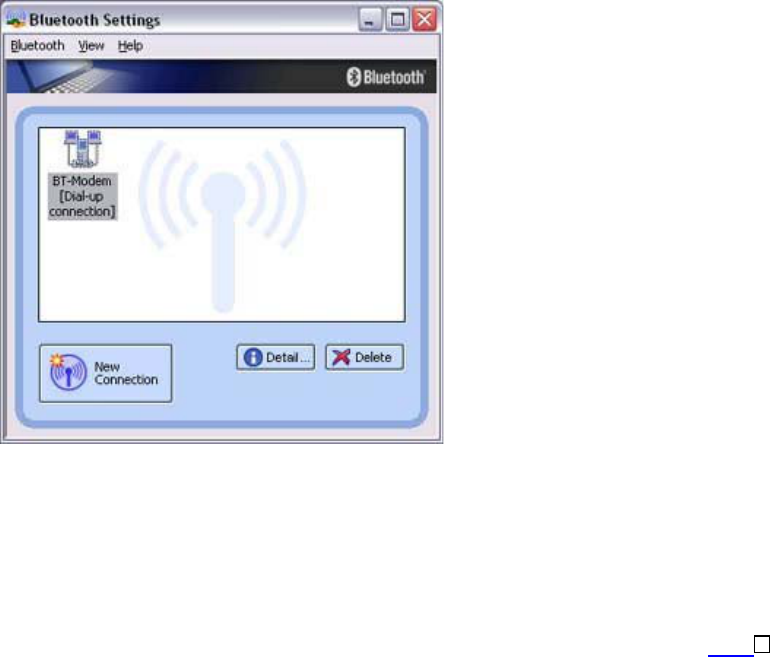
Please click the [New Connection] button to open the [Add New Connection
Wizard] window. If no devices have been registered yet, please proceed directly
to "Detecting Bluetooth Devices."
(continued in "Detecting Bluetooth Devices"...)
Next
Custom Mode Set-up
The procedure for setting up the device using Custom Mode shall now be described.
Starting Bluetooth Settings
Procedure
1. Click [Start][All Programs][Bluetooth][Bluetooth Settings].
(Under Windows 2000, click [Start][Programs][Bluetooth][Bluetooth
Settings].
Note
oThe same result can be achieved by right-clicking on the Bluetooth icon in
the task tray and selecting [Bluetooth Settings] from the menu that
appears.
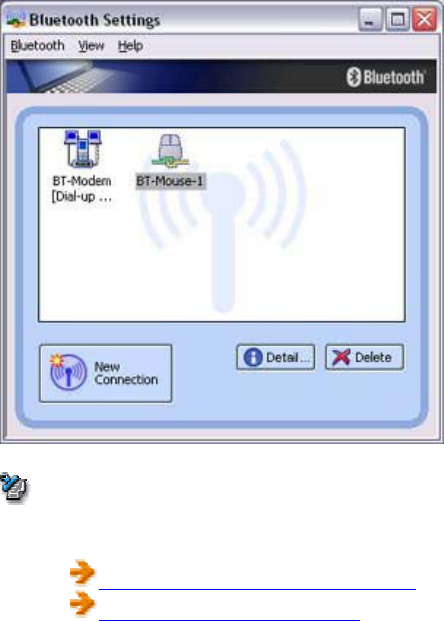
The [Bluetooth Settings] window below will appear when other devices have
already been registered.

Please click the [New Connection] button to open the [Add New Connection
Wizard] window. If no devices have been registered yet, please proceed directly
to "Detecting Bluetooth Devices".
(continued in "Detecting Bluetooth Devices"...)
Next
Detecting Bluetooth devices
Procedure
(...continued from previous step)
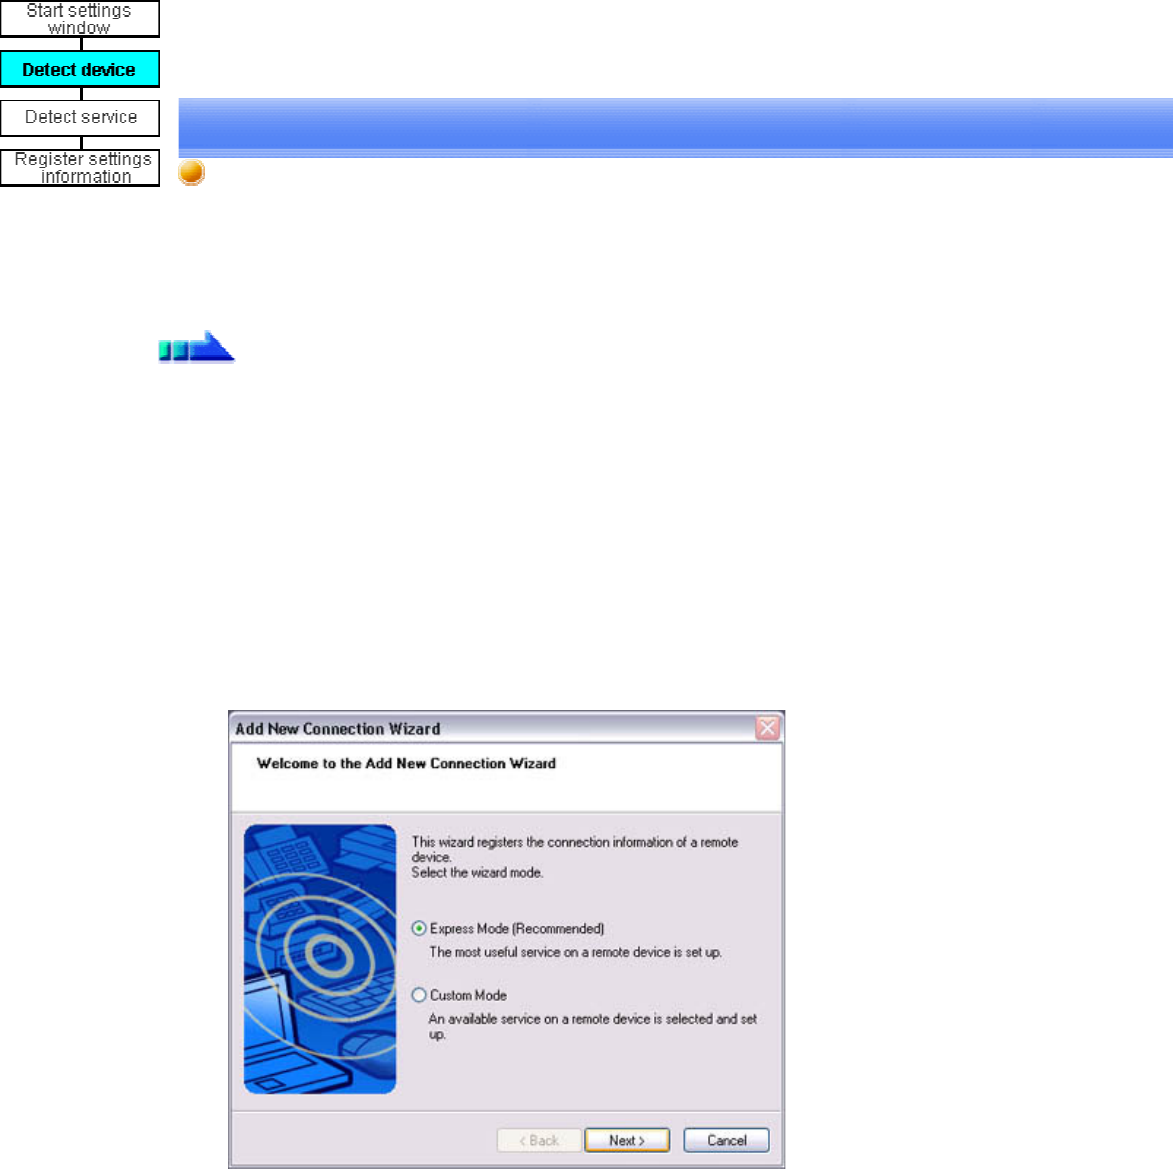
The [Add New Connection Wizard (Welcome to the Add New Connection Wizard)]
window will appear.
1. Switch the mouse power ON to make it connectable via Bluetooth.
Please refer to the mouse instruction manual for details on this procedure.
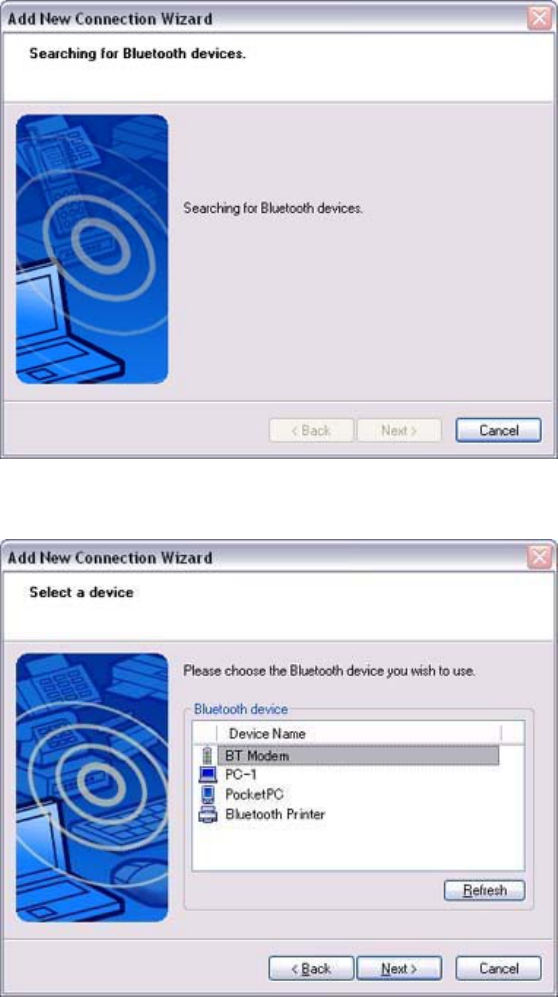
2. Confirm that [Express Mode] has been selected in the [Add New Connection
Wizard (Welcome to the Add New Connection Wizard)] window, and click
on the [Next] button.
Searching for Bluetooth devices will start.
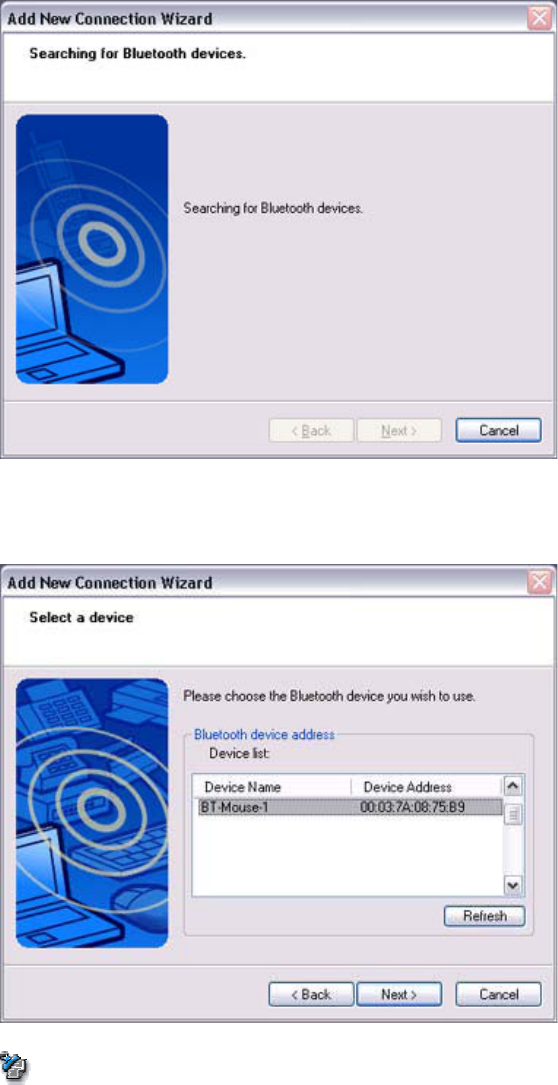
When the mouse has been detected, the name and address of the device will
appear in the [Add New Connection Wizard (Select Device)] window.
Note
oIf no device is found, please confirm that the device has been made connectable via
Bluetooth, and click on the [Update] button.
A further device search will be performed.

(continued in [Detecting Services]...)
Next
Detecting Bluetooth devices
Procedure
(...continued from previous step)
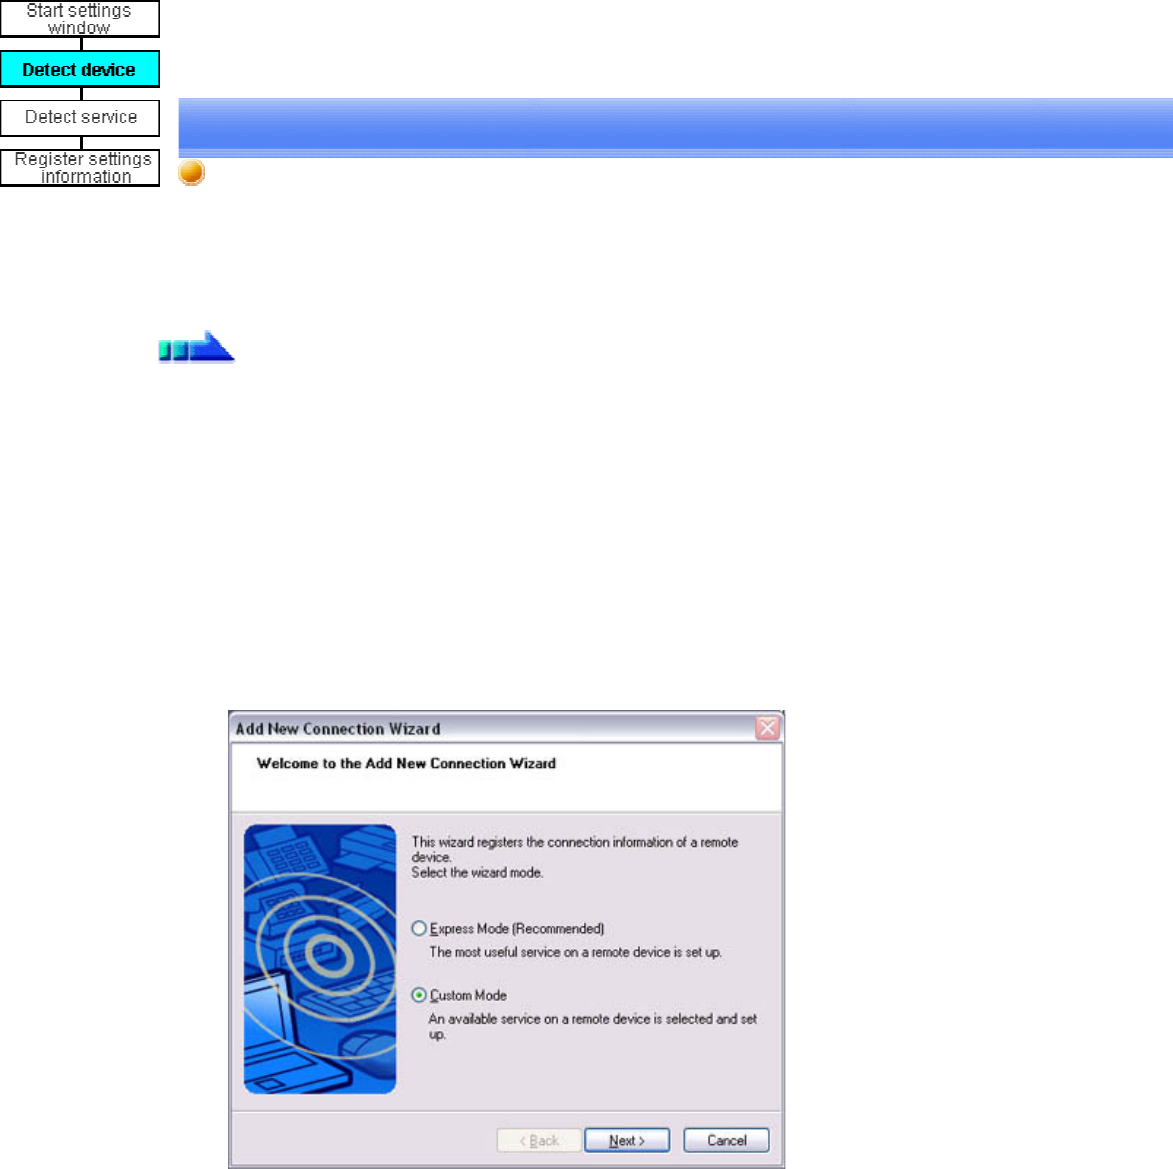
The [Add New Connection Wizard (Welcome to the Add New Connection Wizard)]
window will appear.
1. Switch the mouse power ON to make it connectable via Bluetooth.
Please refer to the mouse instruction manual for details on this procedure.
2. Confirm that [Custom Mode] has been selected in the [Add New Connection
Wizard (Welcome to the Add New Connection Wizard)] window, and click
on the [Next] button.
Searching for Bluetooth devices will start.

When the mouse has been detected, the name and address of the device will
appear in the [Add New Connection Wizard (Select Device)] window.
Note
oIf no device is found, please confirm that the device has been made connectable via
Bluetooth, and click on the [Update] button.
A further device search will be performed.

(continued in [Detecting Services]...)
Next
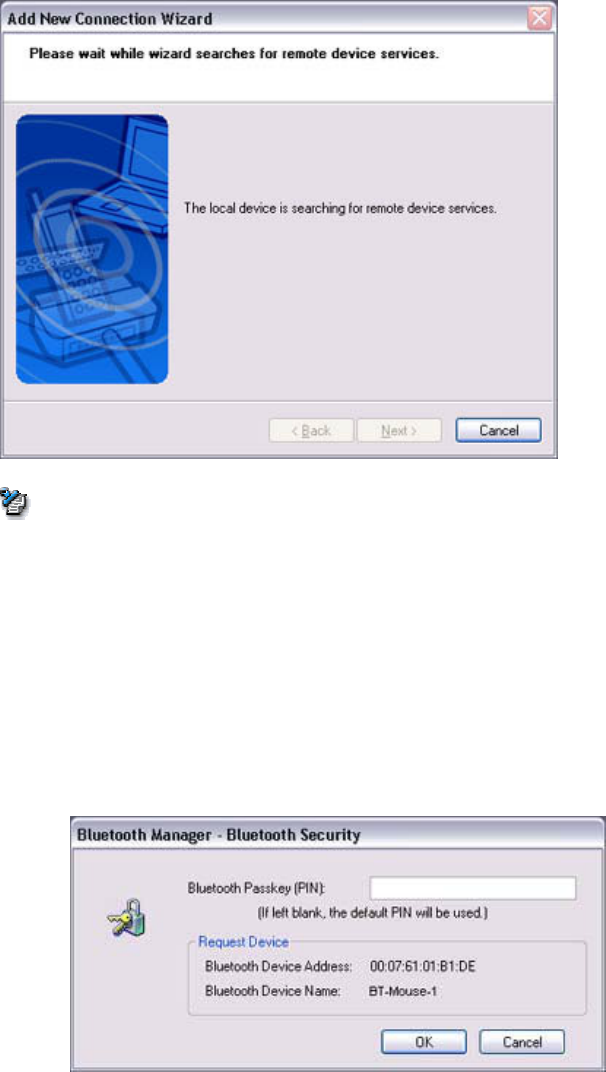
Detecting services
Procedure
(...continued from previous step)
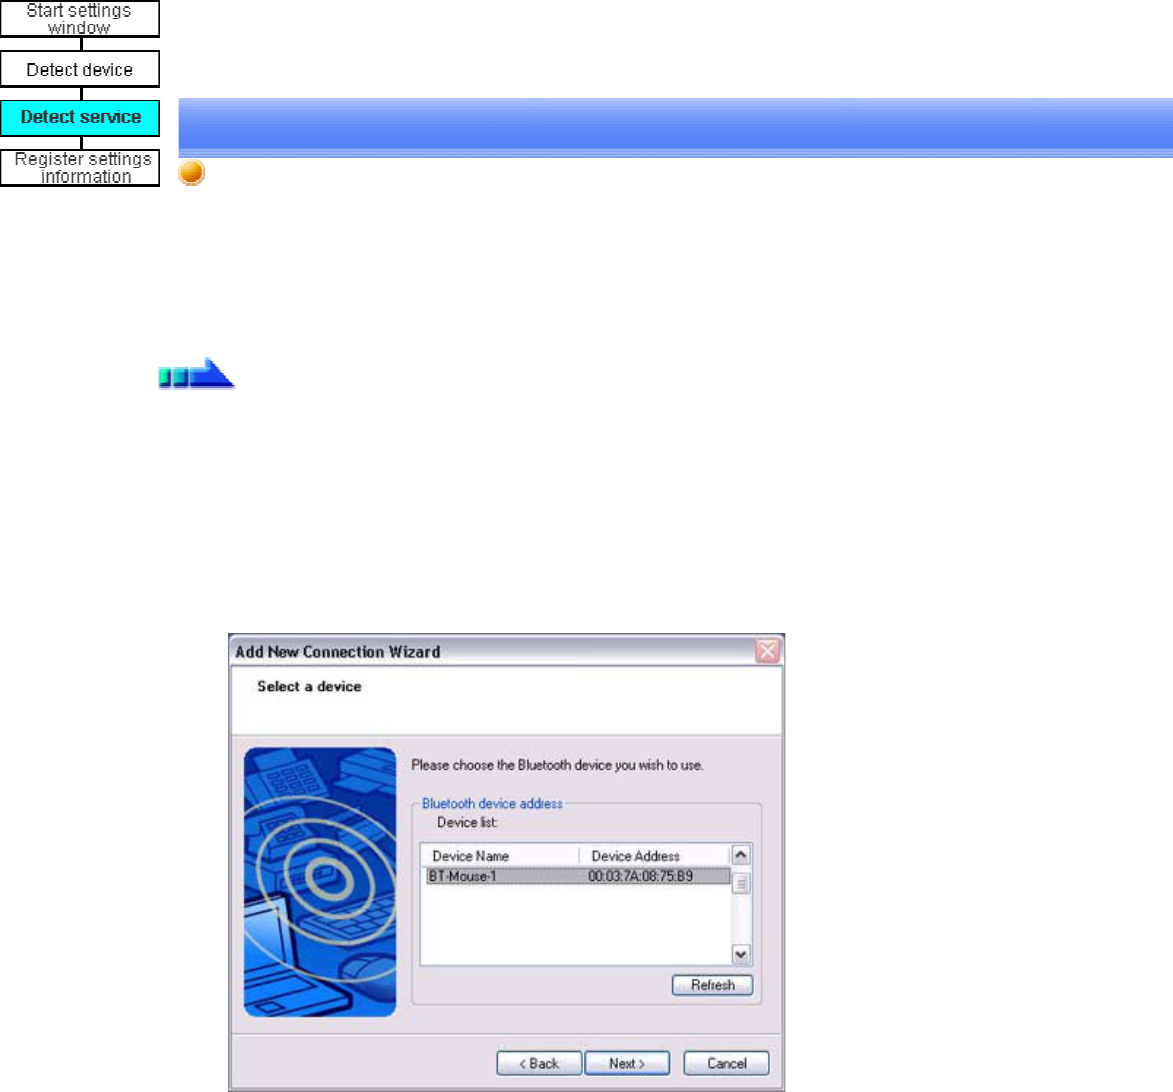
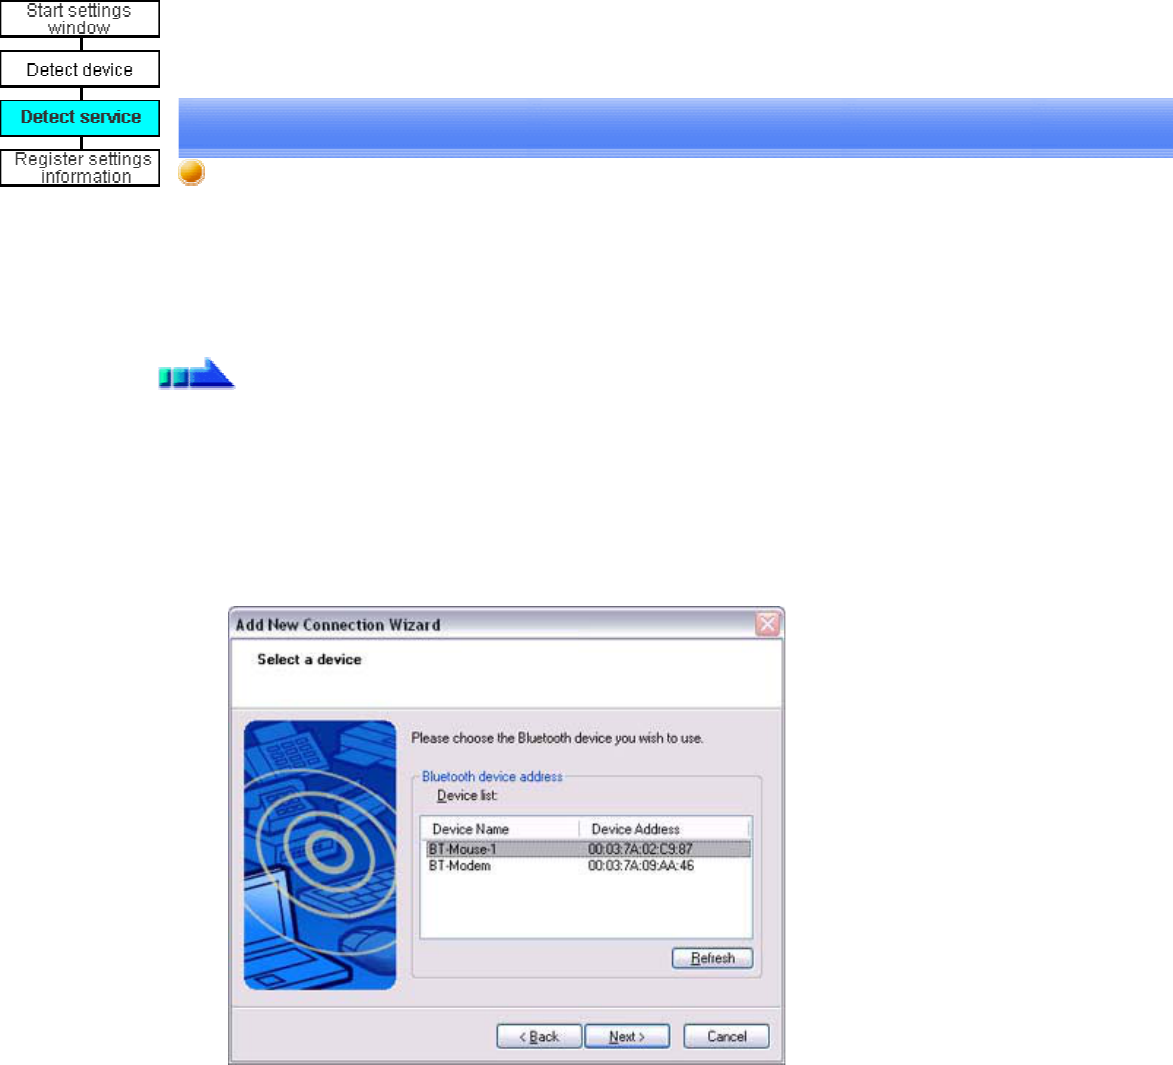
When the mouse has been detected, the name and address of the device will appear in the
[Add New Connection Wizard (Select Device)] window.
1. Select the mouse device name from [Device List] and click on the [Next]
button.
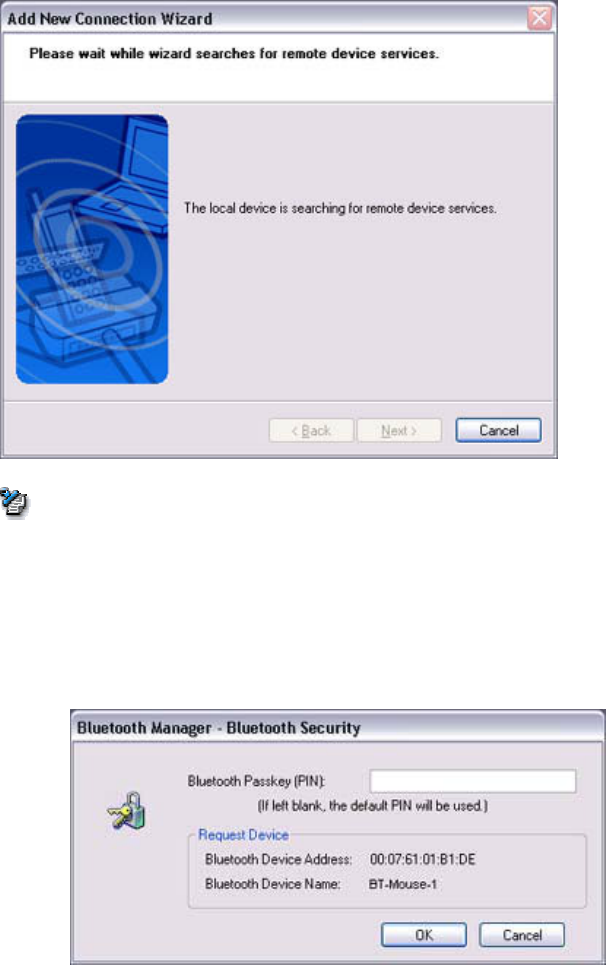
Bluetooth device detection will commence.
Note
oIf several services (profiles) are supported by the device, the service that
has been set to the highest priority shall be automatically selected and set
up in Express Mode.
Please use Custom Mode if you wish to select desired services manually.
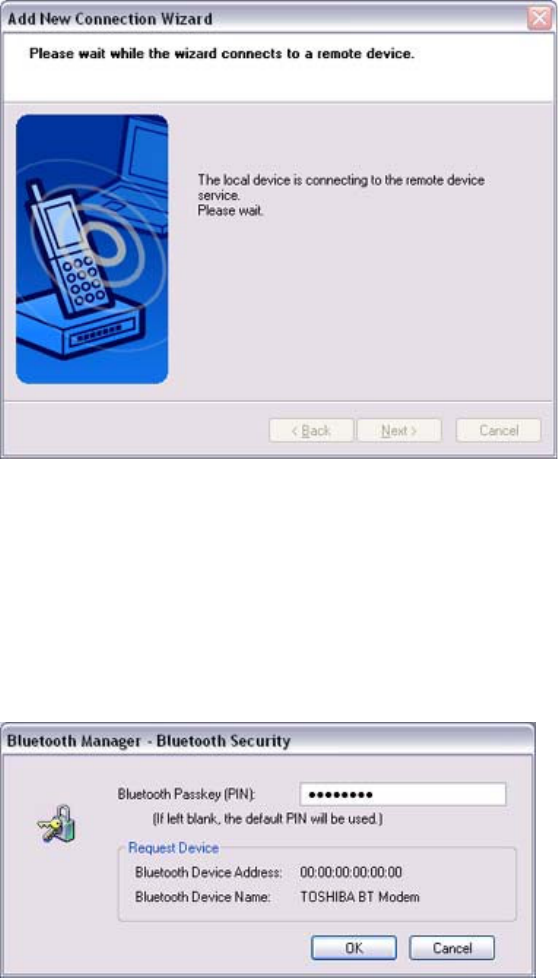
oWhen a service has been detected, a window prompting you to enter the
Bluetooth passkey (PIN code) may appear. Please enter the passkey and
click on the [OK] button.
Please refer to your device instruction manual for information on which
passkey to use.
oIf you have not entered your Bluetooth passkey after a certain amount of
time has passed, the connection process will be cancelled for security
reasons. Please perform the passkey entry process again.
A message will appear prompting you to prepare the device for connection.
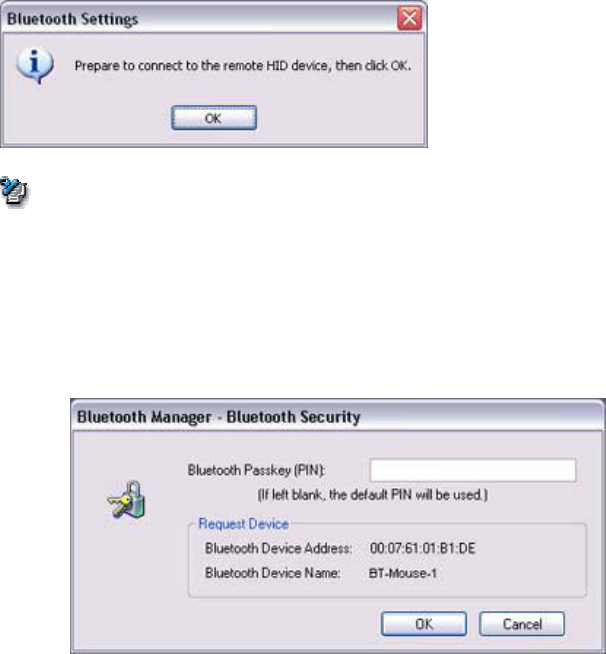
2. Click on the [OK] button
Note
oWhen the settings information has been registered, a window prompting
you to enter your Bluetooth passkey (PIN code) may appear. Please enter
your passkey and click on the [OK] button.
Please refer to your device instruction manual for information on which
passkey to use.
oIf you have not entered your Bluetooth passkey after a certain amount of
time has passed, the connection process will be cancelled for security
reasons. Please perform the passkey entry process again.
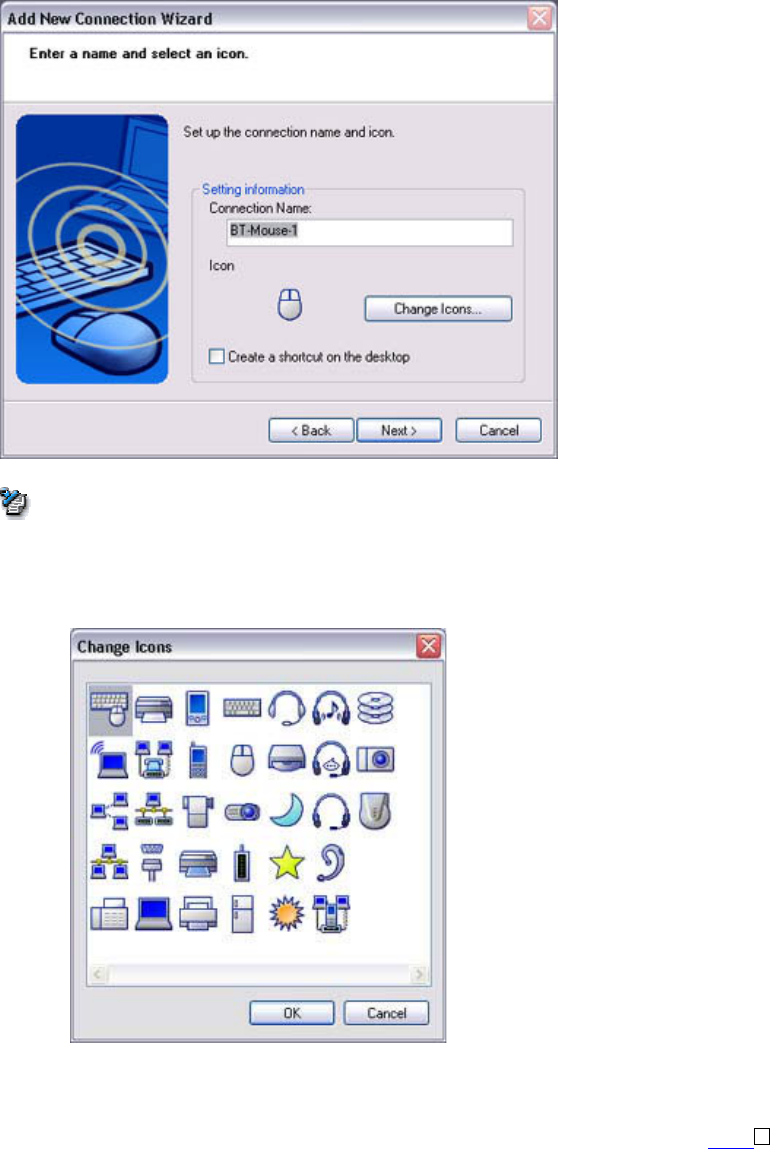
The [Add New Connection Wizard (Connection Name Setup)] window will
appear if a service has been properly detected.
3. Select the type and name of the icon to be displayed once the device has been
registered, and click on the [Next] button.
Note
oIf you wish to change the icon, please click on the [Change Icon] button
and select your preferred icon from the list that appears.
(continued in [Registering Settings Information]...)
Next
Detecting services
Procedure
(...continued from previous step)
When the mouse has been detected, the name and address of the device will appear in the
[Add New Connection Wizard (Select Device)] window.
1. Select the mouse device name from [Device List] and click on the [Next]
button
Bluetooth device detection will commence.
Note
oWhen a service has been detected, a window prompting you to enter the
Bluetooth passkey (PIN code) may appear. Please enter the passkey and
click on the [OK] button.
Please refer to your device instruction manual for information on which
passkey to use.
oIf you have not entered your Bluetooth passkey after a certain amount of
time has passed, the connection process will be cancelled for security
reasons. Please perform the passkey entry process again.
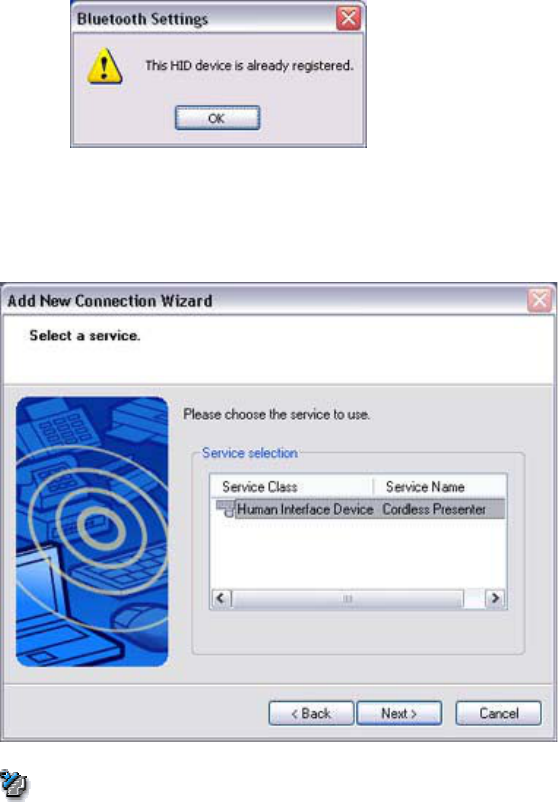
oIf you try to register a device that has already been registered, the
following message will appear, and you will not be able to proceed with
further operation.
Please click on the [OK] button to close the message.
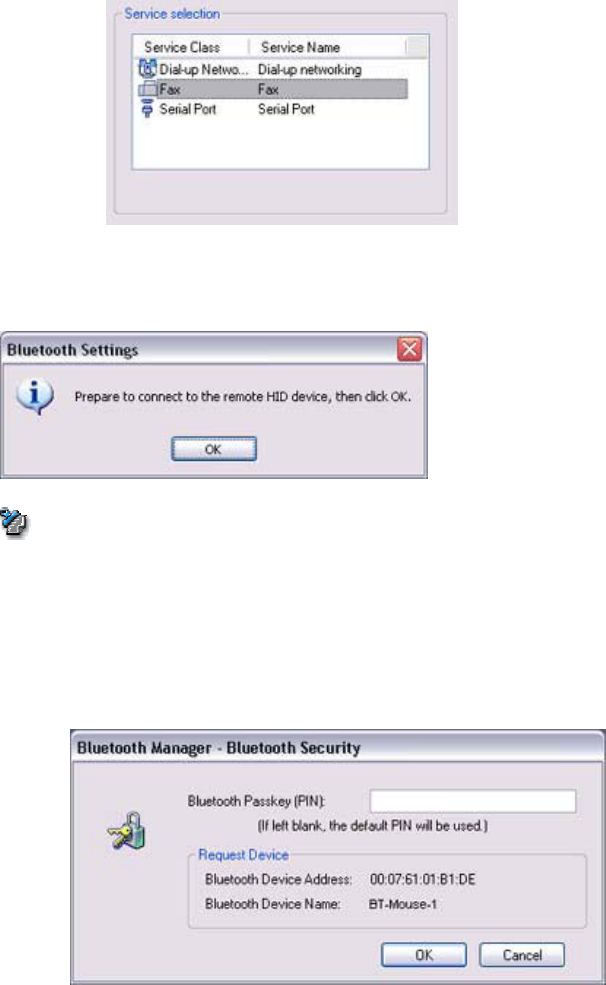
The services supported by the device will be displayed.
2. Select the desired service and click on the [Next] button
Note
oWhen a device supports several services
If the device supports several services, you can use Custom Mode to
manually select the services (profiles) you wish to use from the list that
appears under [Select Services].
Example: List of wireless modem station services
If Express Mode is used to perform the set-up, the highest-priority service
in the device will be automatically selected and configured.
3. Click on the [OK] button.
Note
oWhen the settings information has been registered, a window prompting
you to enter the Bluetooth passkey (PIN code) may appear. Please enter
the passkey and click on the [OK] button.
Please refer to your device instruction manual for information on which
passkey to use.
oIf you have not entered your Bluetooth passkey after a certain amount of
time has passed, the connection process will be cancelled for security
reasons. Please perform the passkey entry process again.
The [Add New Connection Wizard (Connection Name Setup)] window will
appear if a service has been properly detected.
4. Select the type and name of the icon to be displayed once the device has been
registered, and click on the [Next] button.

Note
oIf you wish to change the icon, please click on the [Change Icon] button
and select your preferred icon from the list that appears.
(continued in [Registering Settings Information]...)
Next
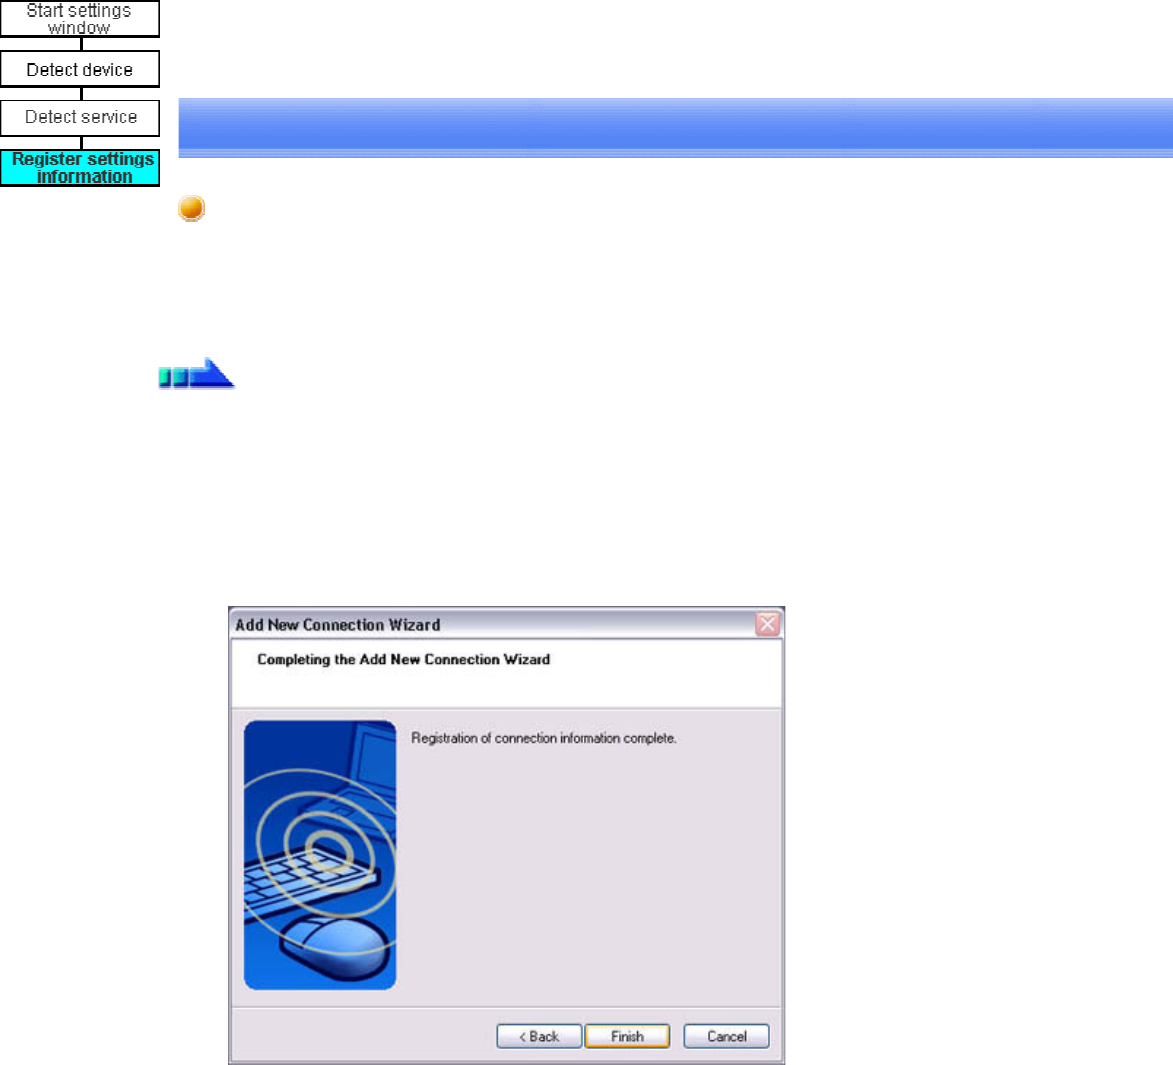
Registering settings information
Procedure
(...continued from previous step)
The [Add New Connection Wizard (Completing the Add New Connection Wizard)]
window will appear.
1. Click on the [Finish] button
The [Bluetooth Settings] window will appear.
The icons of the registered devices will appear, and the devices will be ready to
use.
Note
• The connection icons and icon names can be changed.
Changing a connection icon name
Changing a connection icon

Registering settings information
Procedure
(...continued from previous step)
The [Add New Connection Wizard (Completing the Add New Connection Wizard)]
window will appear.
1. Click on the [Finish] button
The [Bluetooth Settings] window will appear.
The icons of the registered devices will appear, and the devices will be ready to
use.
Note
oThe connection icons and icon names can be changed.
Changing a connection icon name
Changing a connection icon

One-touch connection to Bluetooth devices
Creating a Shortcut
If you have created a shortcut icon on the Desktop, you can easily establish a connection
to a device that has been registered using Bluetooth Settings without having to open the
Bluetooth Settings window.
Procedure
1. Right-clickonBluetoothiconintasktrayandclickon[BluetoothSettings]
Note
oAlternatively, you can click [Start][All
Programs][Bluetooth][Bluetooth Settings].
The [Bluetooth Settings] screen will appear, from where you can create a Shortcut
entitled "Bluetooth Mouse."
2. Right-click on the [BT-Mouse-01] icon, and then click on [Create Shortcut on
Desktop]
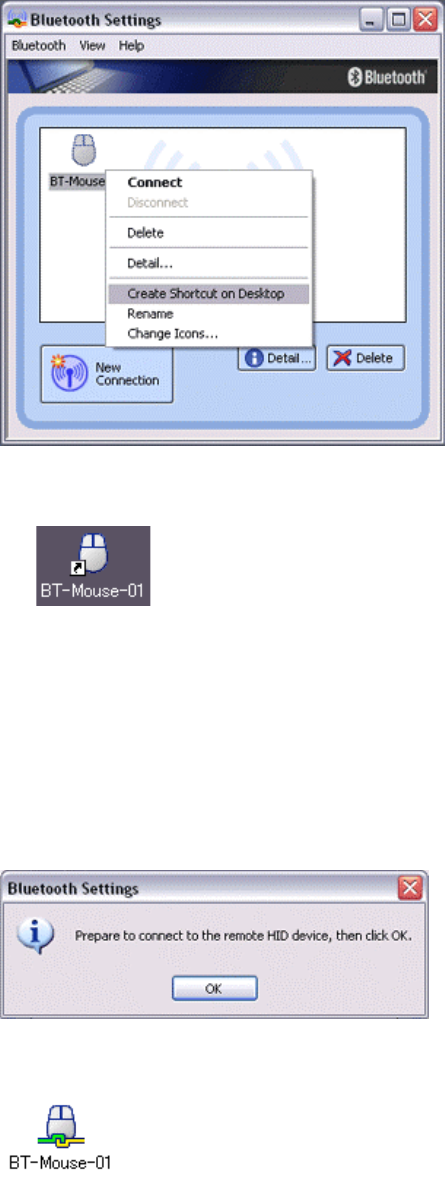
A shortcut icon entitled "BT-Mouse-01" will appear on the Desktop.
Establishing a connection from the Shortcut
1. Double-click on the "BT-Mouse-01" icon from the Desktop
The [Bluetooth Settings] window will open.
2. Turn on the mouse, set it to Bluetooth-connectable mode, and then click on
the [OK] button in the [Bluetooth Settings] window.
The mouse will be connected.
Manually connecting to a Bluetooth device
After a keyboard or mouse (HID profile), printer (HCRP or SPP profiles), or other device
has been set up for the first time, subsequent connections will be automatically restored
whenever you operate the device, print out a document from the PC, or perform another
similar activity.
Should the connection not have been properly restored, please establish a manual
connection to the device using the procedure below.
Procedure
1. Right-clickonBluetoothiconintasktrayandclickon[BluetoothSettings]
Note
oAlternatively, click [Start][All Programs][Bluetooth][Bluetooth
Settings].
The [Bluetooth Settings] screen will appear, from where you can create a Shortcut
entitled "BT Mouse."
2. Right-click on the [BT-Mouse-01] icon, and then click on the [Connect]
button
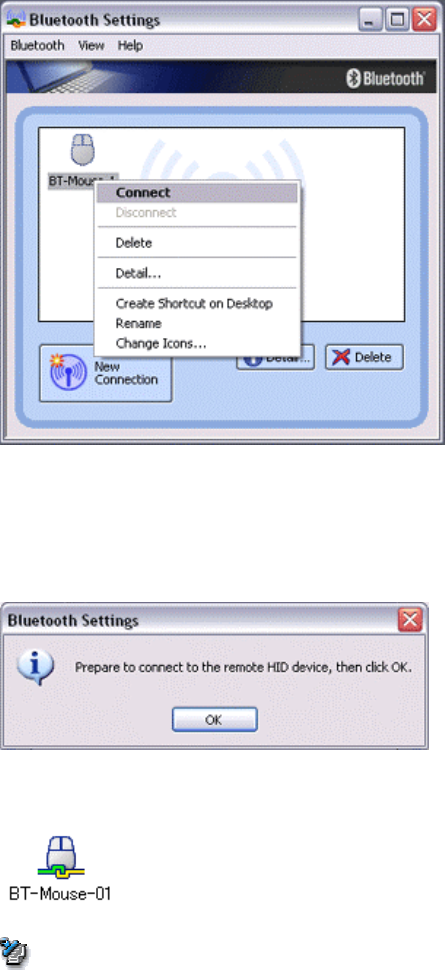
The [Bluetooth Settings] window will open.
3. Turn on the mouse, enable Bluetooth-connectionmode,andclickonthe
[OK] button in the [Bluetooth Settings] window.
The mouse will be connected.
Note
oIf you wish to manually disconnect a device, right-click on its icon and
click [Disconnect].
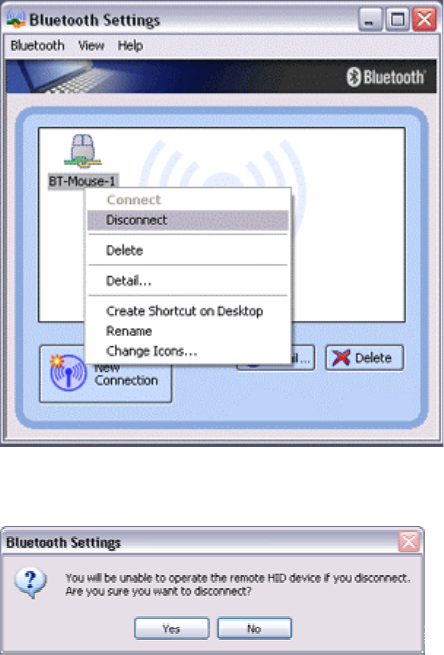
When the following message appears, click on the [Yes] button.
Changing a connection icon
You can change a device icon that has been registered on the Bluetooth Settings screen.
Procedure
1. Right-clickontheBluetoothiconinthetasktray,andthenclickon
[Bluetooth Settings]
Note
oAlternatively, click [Start][All Programs][Bluetooth][Bluetooth
Settings].
The [Bluetooth Settings] window will appear. Now try to change the icon for "My
Mobile."
2. Right-click on the "My Mobile" icon, and then click on [Change Icon]
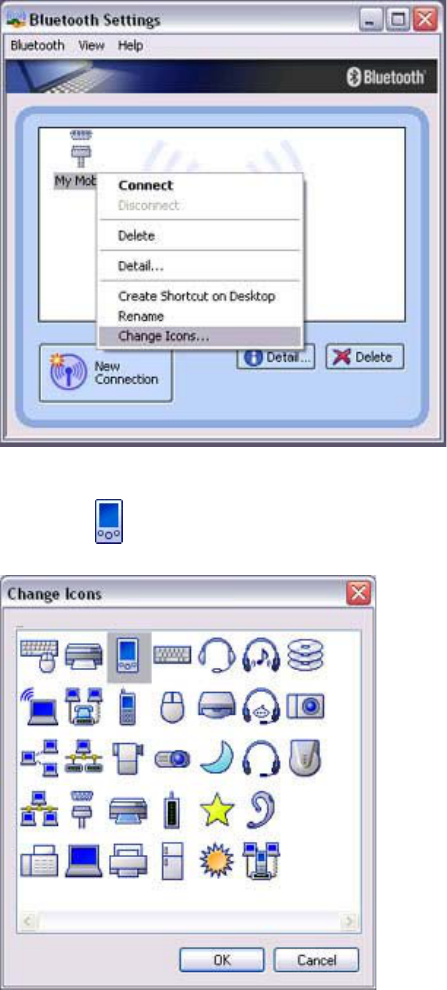
A list of available icons will appear.
3. Select the icon, and then click on the [OK] button
The new icon will appear.

Changing a connection icon name
You can change a the name of a device icon that has been registered on the Bluetooth
Settings screen.
Procedure
1. Right-clickontheBluetoothiconinthetasktray,andthenclickon
[Bluetooth Settings]
Note
oAlternatively, click [Start][All Programs][Bluetooth][Bluetooth
Settings].
The [Bluetooth Settings] window will appear. Now try to change the connection
name for "My Mobile" to "Pocket PC."
2. Right-clickon"MyMobile",andthenclickon[ChangeName]
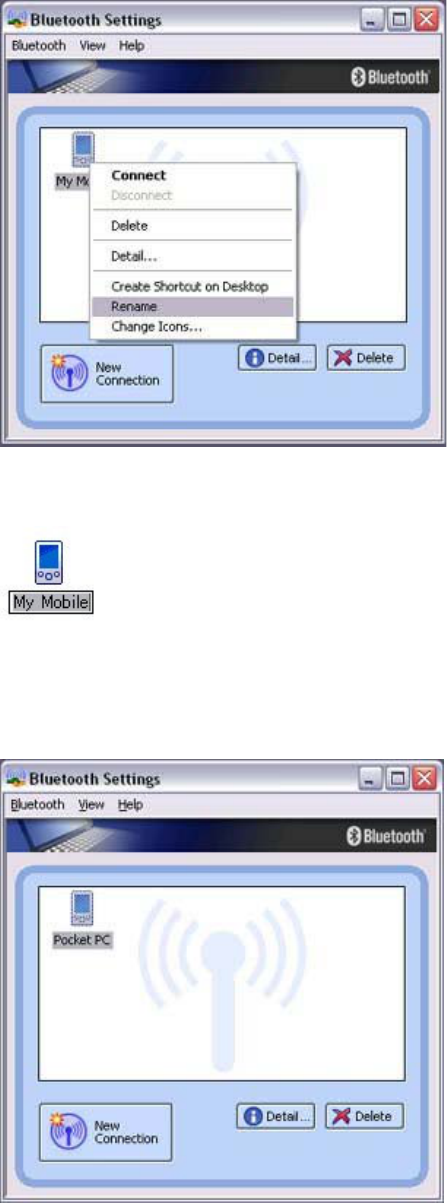
You will now be able to enter a name.
3. Enter "Pocket PC", and then hit the [Enter] key
The new name will appear.
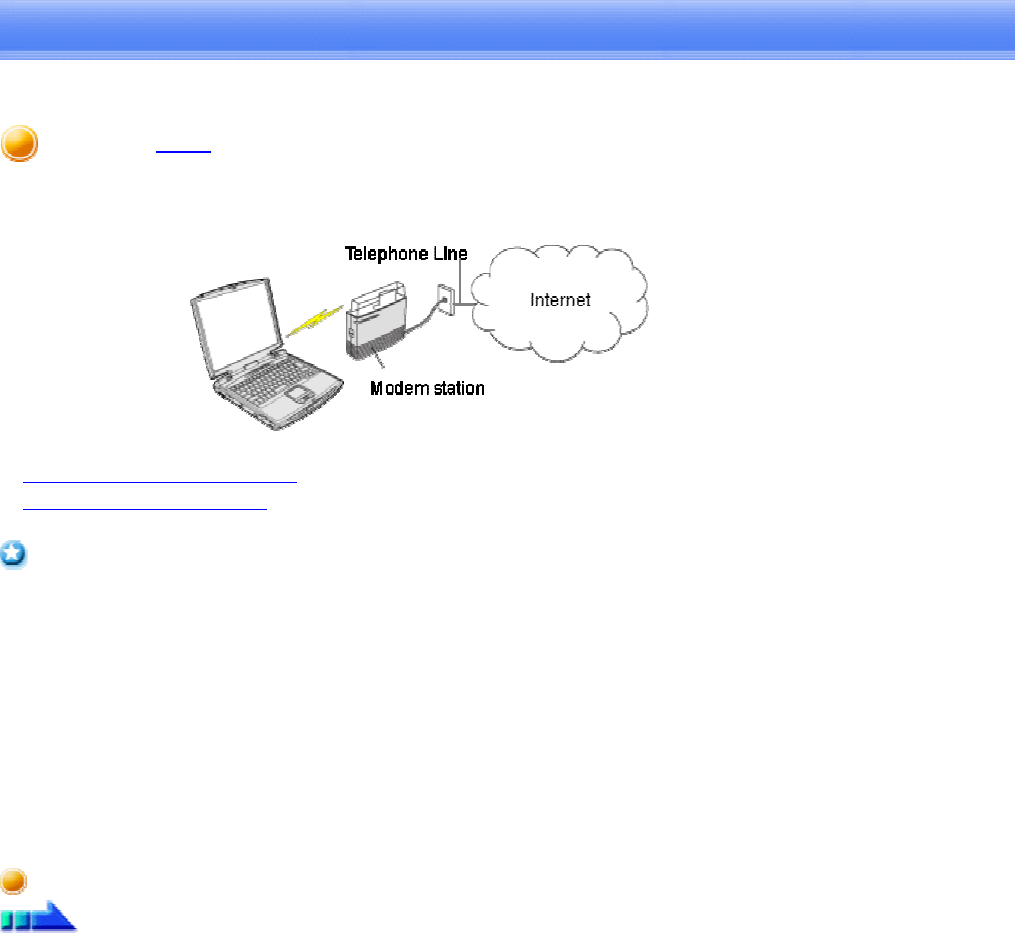
Connecting to the Internet using a modem
station [DUN]
You can use a Bluetooth wireless modem to connect to the Internet via a telephone line.
Setting up the modem station
Connecting to the Internet
Important
• In order to connect to the Internet, you must have already signed up with a
provider and obtained a connection ID and password. Please ensure you have
confirmed the ID, password and telephone number of your provider's access point
before you begin the set-up process.
• Please refer to your instruction manual for information on connecting the modem
station to a telephone line.
• A Bluetooth passkey (PIN code) is required for you to connect to the modem
station. Please make a note of your Bluetooth passkey before you start the set-up
process.
Setting up the modem station
Procedure
1. Turn on the wireless modem station
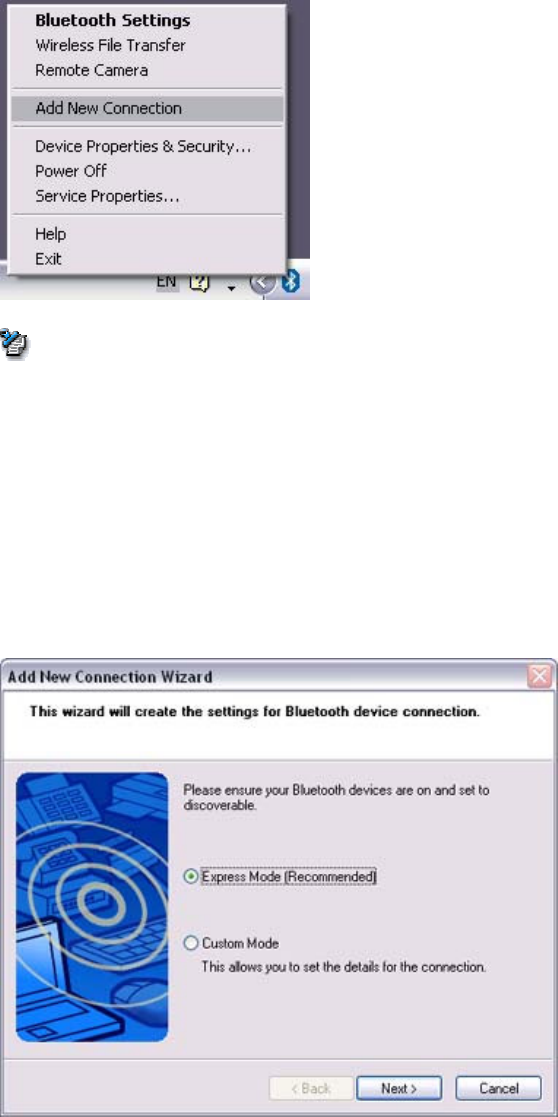
2. Right-clicktheBluetoothiconinthetasktray,andthenclickon[AddNew
Connection]
Note
oAlternatively, click [Start][All Programs][Bluetooth][Bluetooth
Settings], and then click on [New Connection] from the active [Bluetooth
Settings] window.
The [Add New Connection Wizard (Welcome to the Add New Connection
Wizard)] window will appear.
3. Confirm that [Express Mode] has been selected, and then click on the [Next]
button
The [Add New Connection Wizard (Searching for Bluetooth devices)] window
will appear.
4. Select the device name of the wireless modem station from [Device List], and
then click on the [Next] button
The [Add New Connection Wizard (Searching for Services)] window will appear.
Once a service has been detected successfully, connection to the device and COM
port creation will be performed automatically, after which the [Add New
Connection Wizard (Modem Settings)] window will appear.
5. If you are connecting to a wireless modem station for the first time, enter the
passkey for the modem station under [Bluetooth Passkey (PIN code)], and
then click on the [OK] button
Once the program has finished searching for the devices, the [Add New
Connection Wizard (Device Selection)] window will appear.
6. Click on the [Next] button