ASUSTeK Computer UGPZ5 Bluetooth Module User Manual UserMan MSQUGPZ5
ASUSTeK Computer Inc Bluetooth Module UserMan MSQUGPZ5
Contents
Users Manual 4
Listening to music using the stereo headphones
GAVDP A2DP AVRCP
This section describes how to use the stereo headphones to listen to your favourite music
or other audio files stored on your PC.
Configuring the stereo headphones
Connecting to the stereo headphones
Listening to music or other audio files
Playing music using remote control
Copyright protection function
Configuring the stereo headphones
Procedure
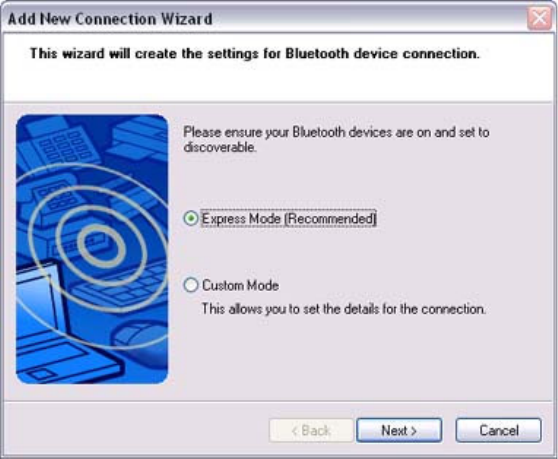
1. Right-clickontheBluetoothiconinthetasktray,andclickon[AddNew
Connection].
Note
oAlternatively, click [Start][All Programs][Bluetooth][Bluetooth
Settings], and then click on [New Connection] from the [Bluetooth
Settings] screen that has opened.
The [Add New Connection Wizard (Welcome to the Add New Connection
Wizard)] will appear.
2. Switch ON the stereo headphones and activate "Discoverable" mode
Please refer to the user guide for the stereo headphones for further information on
how to operate them.
3. Confirm that [Express Mode] has been selected, and then click on the [Next]
button
The [Add New Connection Wizard (Searching for Bluetooth Devices)] screen will
appear.
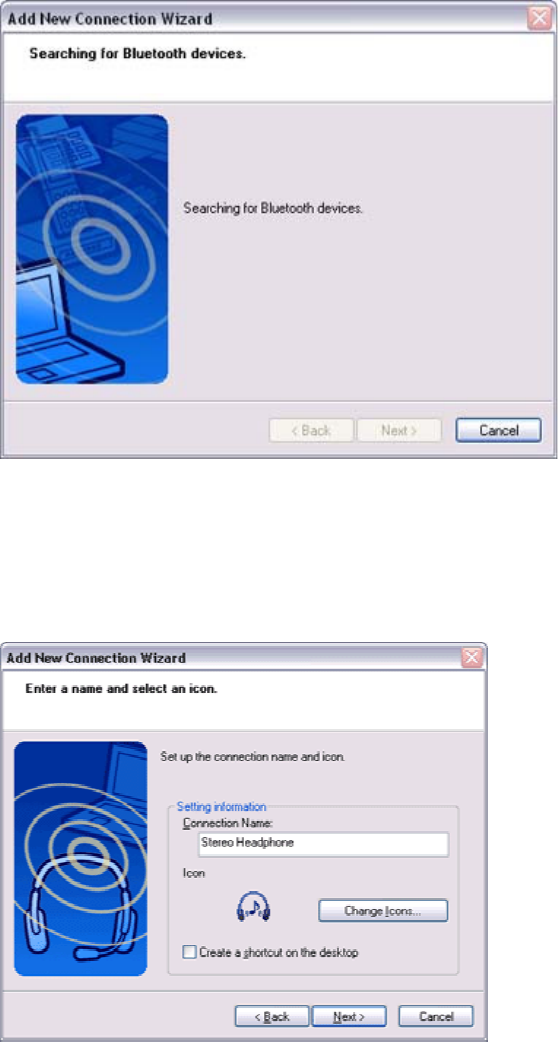
Once the search for the devices has ended, the [Add New Connection Wizard
(Select Device)] screen will appear.
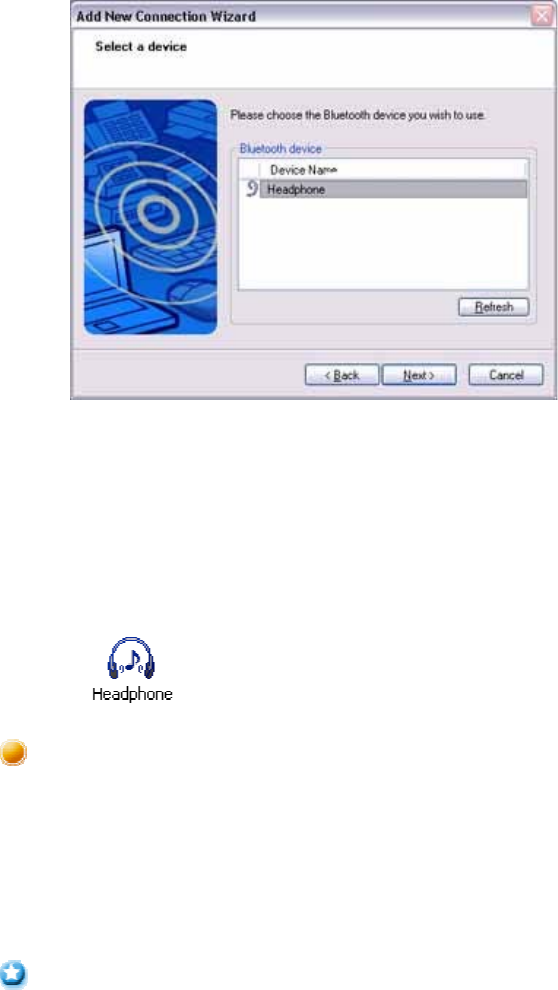
4. Select the device name of the stereo headphones from the list, and click on
the [Next] button
The [Add New Connection Wizard (Searching for Services)] screen will appear.
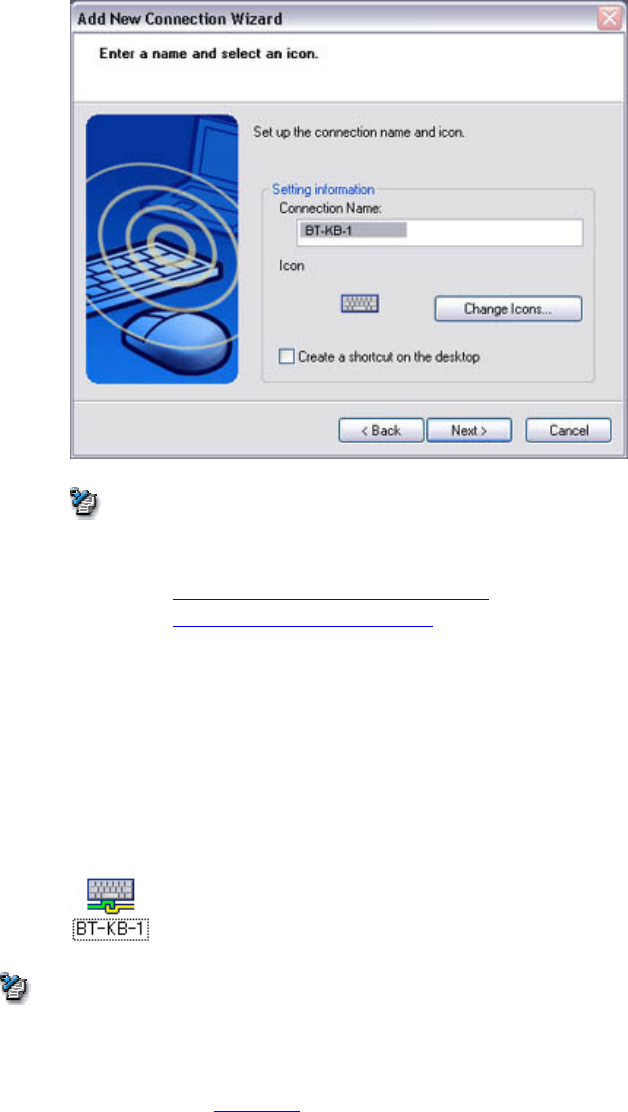
5. Configure the type and name of the icon to appear once registration is
complete, and click on the [Next] button
Please click the [Next] button once you are satisfied with the configuration.
The [Add New Connection Wizard (Configure Connection Name)] screen will
appear.
6. Click on the [Finish] button
The settings will be registered, and the icon will appear on the [Bluetooth
Settings] screen.
Connecting to the stereo headphones
You can connect to the stereo headphones from the icon registered in [Bluetooth
Settings]. Please refer to the user guide for information on how to make a connection
from the stereo headphones.
Important
• Please close the following audio applications before any connection is made
between your stereo headphones and PC.
oMusic/video playback applications
oe-Conferencing applications
oVoice-recognition applications
Please finish connecting the stereo headphones before launching any of these
applications.
Listening to music or other audio files
1. Playing music or other audio files on your PC
Important
oPlease confirm the points below if you are unable to hear anything despite
having properly connected the stereo headphones.
Click [Start][All
Programs][Accessories][Entertainment][Volume Control].
Remove the tick next to [Mute] if it has been ticked. If the volume is at its
lowest setting, please adjust it to an appropriate level.
oMusic playback may be interrupted if other Bluetooth devices are
currently connected to your PC. When you are listening to music, it is
recommended that the stereo headphones be the only connected device.
oMusic playback may be interrupted if you are some distance away from
the PC, or if there are any obstructions between you and the PC.
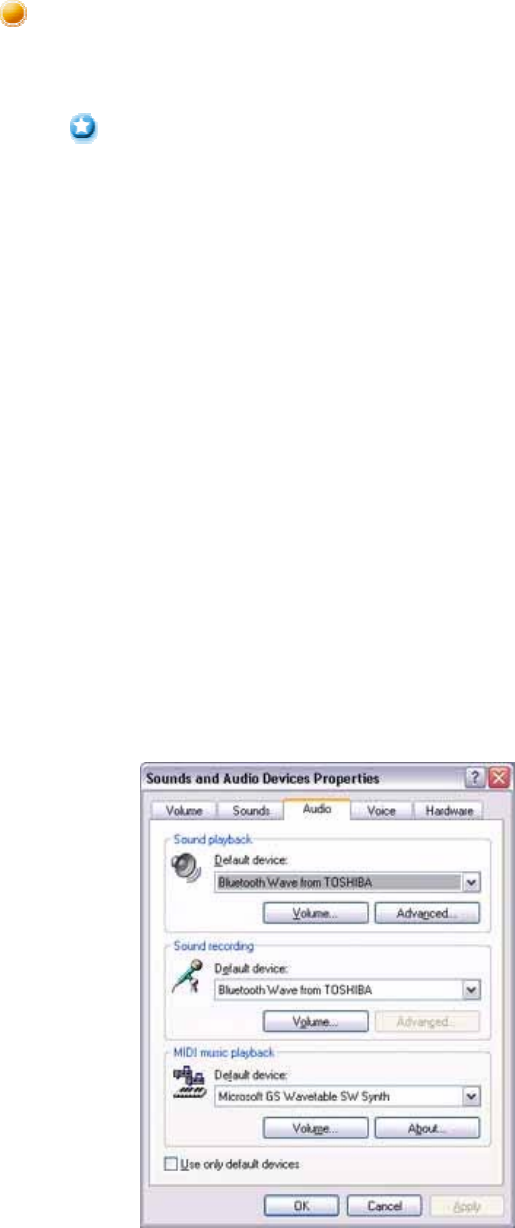
oIf you are unable to hear any sound out of your stereo headphones while
music or audio is currently playing in a related application, please stop the
files being played, open [Sounds and Audio Devices] from the Control
Panel, and change the default device to "Toshiba Bluetooth Wave."
If you are still unable to hear any sound from the stereo headphones even
after having set "Toshiba Bluetooth Wave" as the default device, please
re-launch the application.
2. Finishing listening to music and disconnecting

1. Right-click on the icon for the currently connected mode from
[Bluetooth Settings] on your PC,andclickon"Disconnect."
A message confirming the disconnection may appear.
2. Clickonthe"Yes"buttonafterhaving followed the instructions in
the message.
The icon will indicate that the device has been disconnected.
Important
oPlease close the following audio applications before you disconnect the
stereo headphones from your PC:
Music/video playback applications
e-Conferencing applications
Voice-recognition applications
Please completely disconnect the stereo headphones before launching any
of these applications.
Please refer to the user guide for information on terminating a connection
from the stereo headphones.
Playing music using remote control
Music applications and video playback applications installed on your PC
(e.g.,"Windows Media Player 9" and "InterVideo WinDVD") may be
operated with the remote control button/switch on your stereo headphones.
The remote control used with the stereo headphones must be compliant
with the Bluetooth AVRCP profile. Please refer to the headphones user
guide for further information.
You can configure the application to be operated using the switch/button
according to the following procedure.
Procedure
1. Double-click on the Bluetooth icon in the taskbar
Launches "Bluetooth Settings."
2. Click on [Bluetooth][Select AV Player] from the menu bar
The [Select AV Player] screen will appear.
3. Select the application, and click on the [OK] button
The functions and switch/button that can be operated may differ
depending on the application used for music/video playback as well as the
version.

The procedure below can be performed in order to change the position
where the receive command is displayed or to not have the command
displayed.
Procedure
1. Double-click on the Bluetooth icon in the taskbar
Launches "Bluetooth Settings."
2. Click on [Bluetooth][Select AV Player] from the menu bar.
The [Select AV Player] screen will appear.
3. Select the appropriate item from the pull-down menu of
positions where the receive command is to be displayed, and
then click on the [OK] button.
If the receive command appears but does not function properly, sometimes
the problem may be rectified by changing the setting to "Do not display."
The commands supported by this application are shown below. Please
refer to the headphone user guide for commands that are supported by the
stereo headphones. Problems with operation may be encountered with
certain versions of "Windows Media Player 9" and "InterVideo
WinDVD."
[Windows Media Player 9]
• Play
• Stop
• Pause
• Next
• Previous
• Fast forward
• Rewind
[InterVideo WinDVD]
• Play
• Stop
• Pause
• Next chapter
• Previous chapter
• Fast Forward
• Fast Backward
• Up
• Down
• Left

• Right
• Select
• Root menu
• Angle
Copyright protection function
A copyright protection function is supported according to the SCMS-T
format as defined in the Bluetooth specifications. Follow the configuration
procedure below to establish connections only with devices that support
this function.
Procedure
1. Double-clickontheBluetoothiconinthetasktray.
Launches "Bluetooth Settings."
2. Select [Bluetooth] from the menu, and click on [Copyright Protection
Setting].
The copyright protection dialog will appear.
3. Tick the box next to "Only connect to devices that are copyright-protected
under the SCMS-T format," and click on the OK button.

Using a wireless keyboard [HID]
This section describes how to connect a Bluetooth-compatible keyboard to a PC.
Setting up the wireless keyboard
Procedure
1. Right-clickontheBluetoothiconinthetasktray,andthenclickon[Add
New Connection]
Note
oAlternatively, click [Start][All Programs][Bluetooth][Bluetooth
Settings], and then click on [New Connection] from the active [Bluetooth
Settings] window.
The [Add New Connection Wizard (Welcome to the Add New Connection
Wizard)] window will appear.
2. Confirm that [Express Mode] has been selected, and then click on the [Next]
button
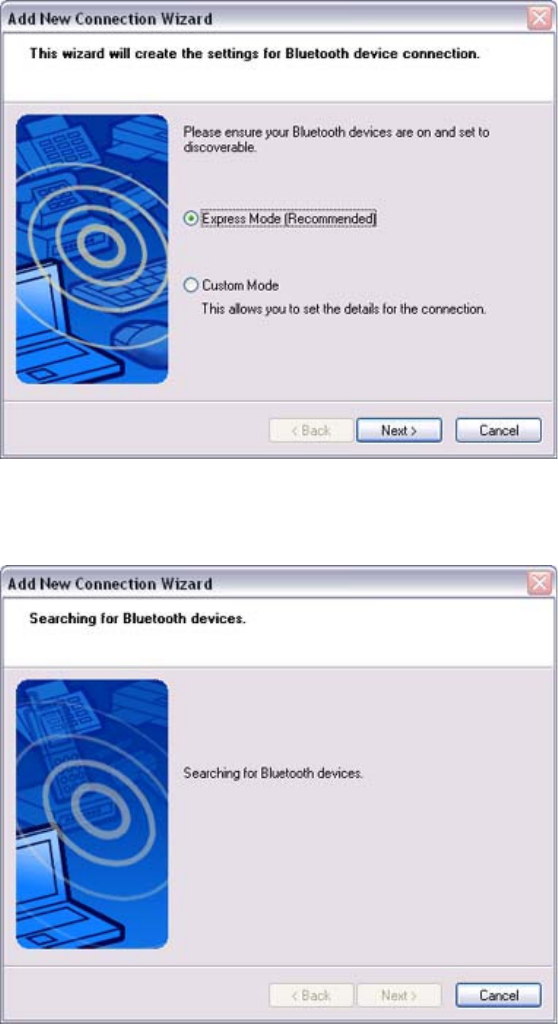
The [Add New Connection Wizard (Searching for Bluetooth devices)] window
will appear.
Once the program has finished searching for the devices, the [Add New
Connection Wizard (Device Selection)] window will appear.
3. Select the device name of the keyboard from[DeviceList],andthenclickon
the [Next] button
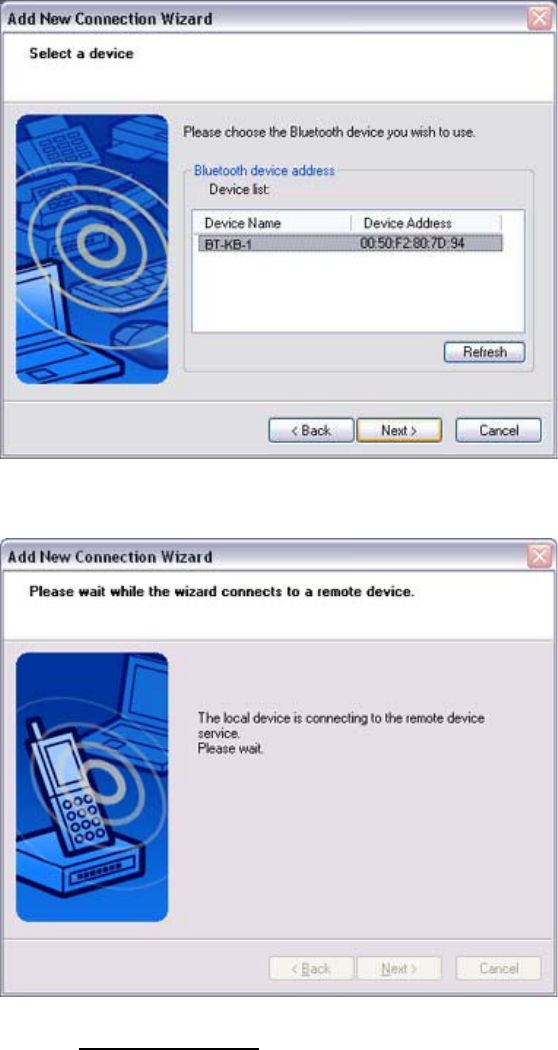
The [Add New Connection Wizard (Searching for Services)] window will appear.
4. Use the wireless keyboard to enter the numbers that appear in [Bluetooth
Passkey (PIN Code)], and then hit the [Enter] key
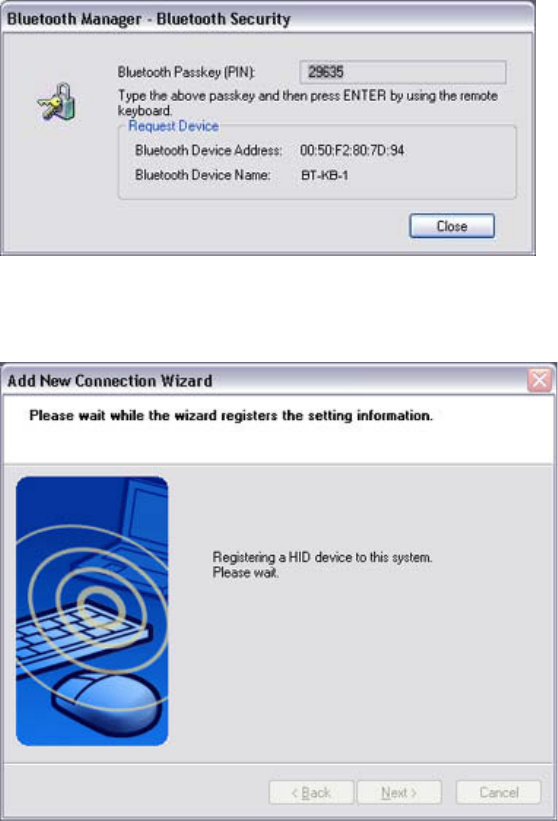
Once the program has detected the services successfully, connection to the device
and registration of settings information will be performed automatically.
The [Add New Connection Wizard (Connection Name Settings)] window will
appear.
5. Enter the type and name of the icon displayed after registration, and then
click on the [Next] button
Please click on the [Next] button if you are satisfied with the settings.
Note
oYou can change the connection icon and icon name.
"Changing a connection icon name"
"Changing a connection icon"
The [Add New Connection Wizard (Completing the Add New Connection
Wizard)] window will appear.
6. Click on the [Finish] button
The settings information will be registered, and an icon will appear in the
[Bluetooth Settings] window.
Note
• Pressing any key on the wireless keyboard will automatically connect it to the PC
thereafter.
Please connect manually if automatic connection is unsuccessful.
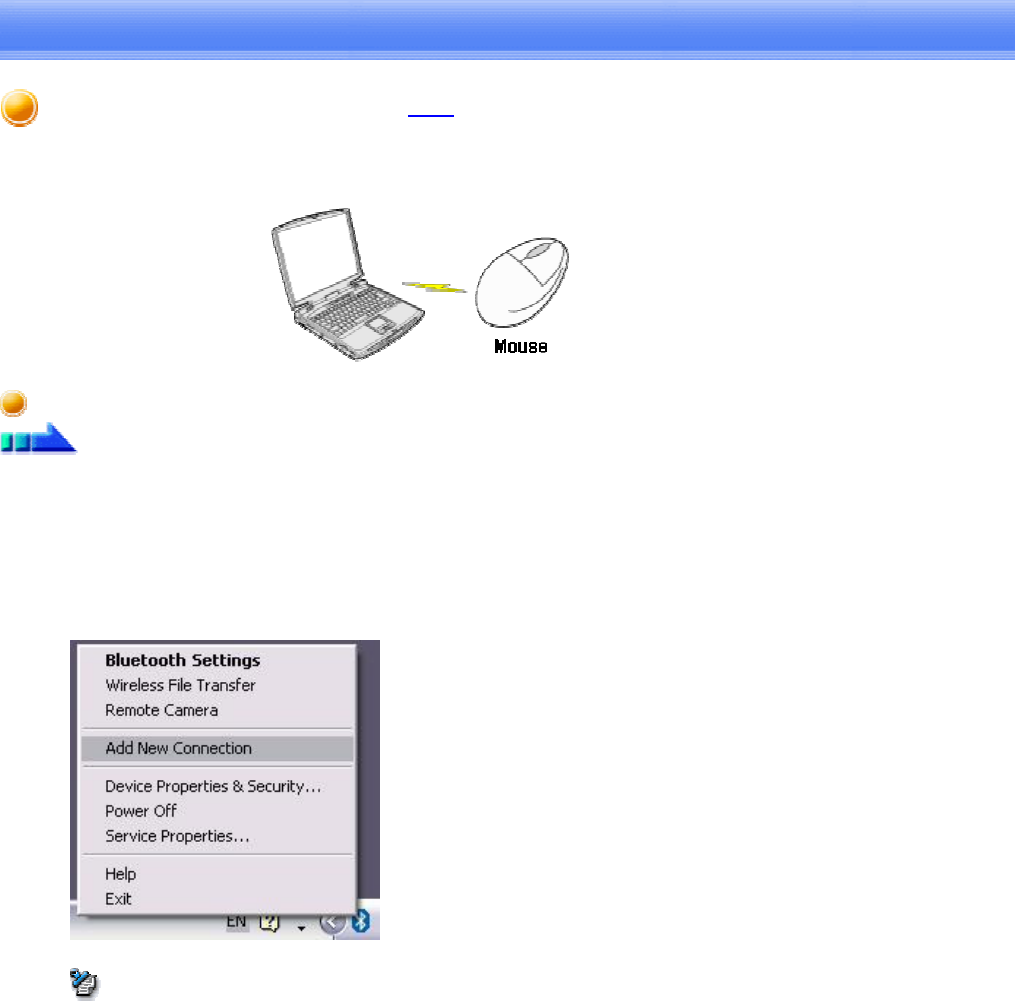
Using a wireless mouse [HID]
This section describes how to connect a Bluetooth-compatible mouse to a PC.
Setting up the wireless mouse
Procedure
1. Turn on the wireless mouse, and set it to be connectable via Bluetooth
Please refer to the instruction manual for details on how to operate the mouse.
2. Right-clickontheBluetoothiconinthetasktray,andthenclickon[Add
New Connection]
Note
oAlternatively, click [Start][All Programs][Bluetooth][Bluetooth
Settings], and then click on [New Connection] from the active [Bluetooth
Settings] window.
The [Add New Connection Wizard (Welcome to the Add New Connection
Wizard)] window will appear.

3. Confirm that [Express Mode] has been selected, and then click on the [Next]
button
The [Add New Connection Wizard (Searching for Bluetooth devices)] window
will appear.
Once the program has finished searching for the devices, the [Add New
Connection Wizard (Device Selection)] window will appear.
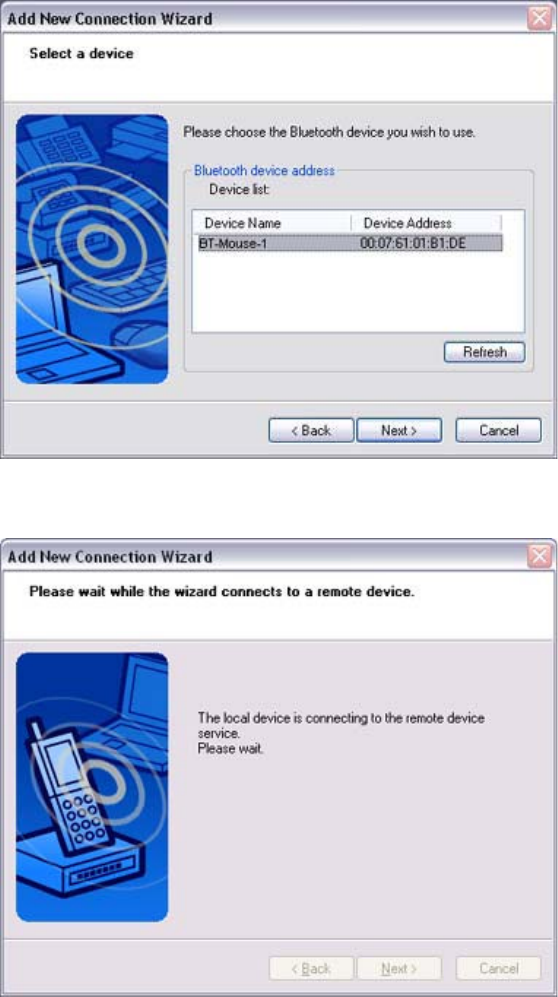
4. Select the device name of the mouse from [Device List], and then click on the
[Next] button
The [Add New Connection Wizard (Searching for Services)] window will appear.
A message confirming a device connection will appear.
5. Click on the [OK] button
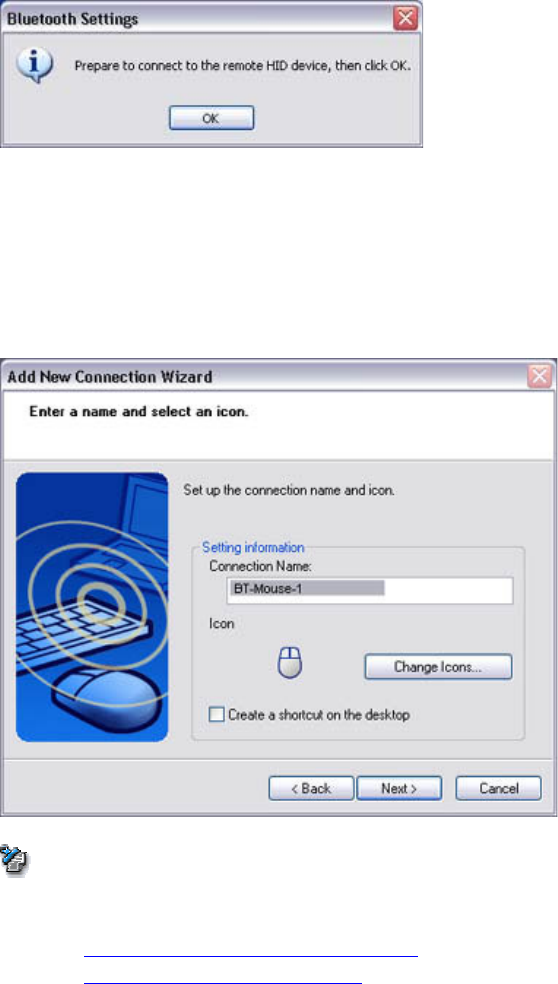
The [Add New Connection Wizard (Connection Name Settings)] window will
appear.
6. Enter the type and name of the icon displayed after registration, and then
click on the [Next] button
Please click on the [Next] button if you are satisfied with the settings.
Note
oPlease use this window to change the connection name and icon.
-Changing the connection icon name
-Changing the connection icon
The [Add New Connection Wizard (Completing the Add New Connection
Wizard)] window will appear.
7. Click on the [Finish] button
The settings information will be have been registered, and an icon will appear in
the [Bluetooth Settings] window.

Note
oClicking on one of the mouse buttons or otherwise operating it will
automatically connect it to the PC thereafter. Please connect manually if
automatic connection is unsuccessful.
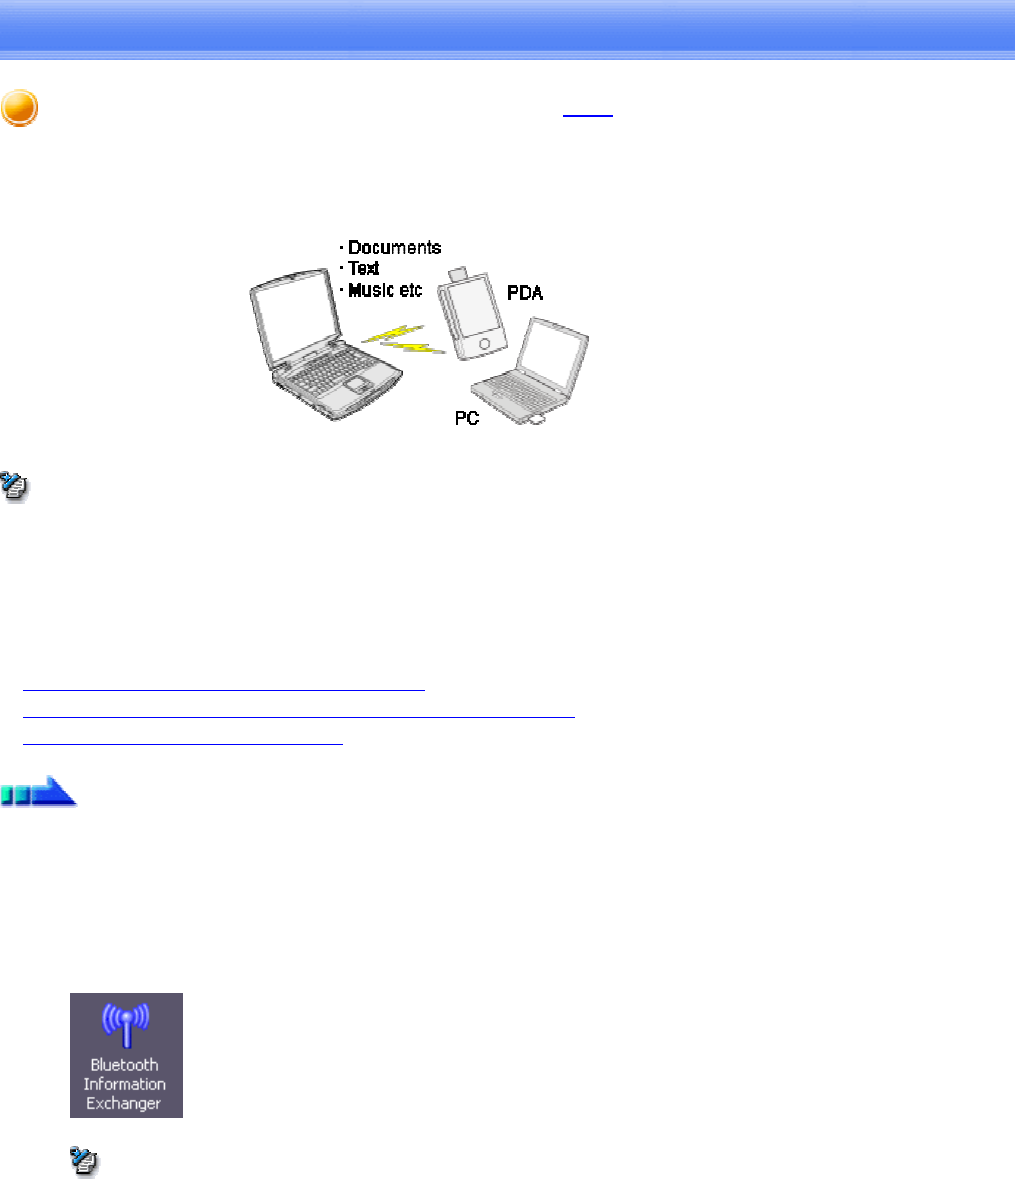
Exchanging files with a PC or PDA [FTP]
You can send and receive files other than business card data with a Bluetooth-enabled PC
or PDA.
Use "File transfer" in the Bluetooth Information Exchanger to exchange files.
Note
• The same operations will be valid as long as the PC and PDA support the FTP
profile.
• "File transfer" cannot be used to send or receive business card data. Please instead
use "Object Push" to perform these activities.
Sending files to a PC or PDA (using icons)
Sending files to a PC or PDA (by right-clicking the mouse)
Receiving files from a PC or PDA
Procedure
Sending files to a PC or PDA (using icons)
1. Turn on the PC or PDA
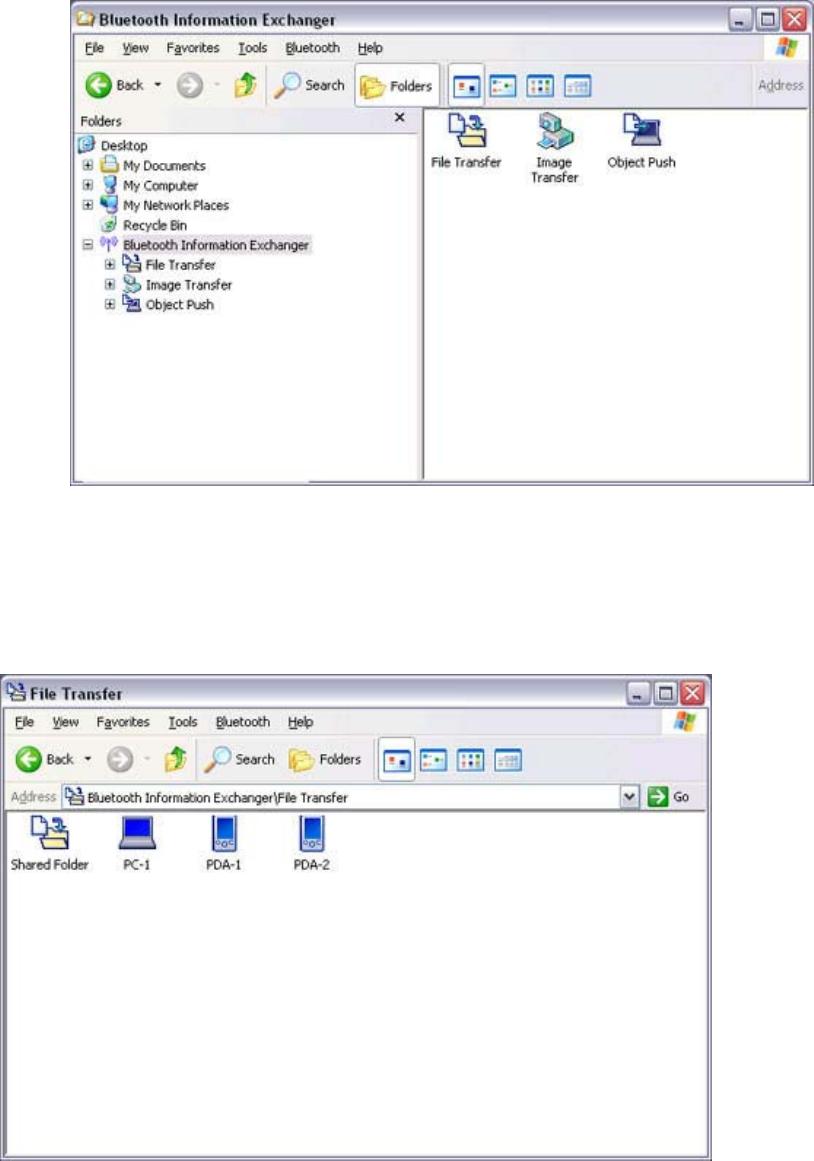
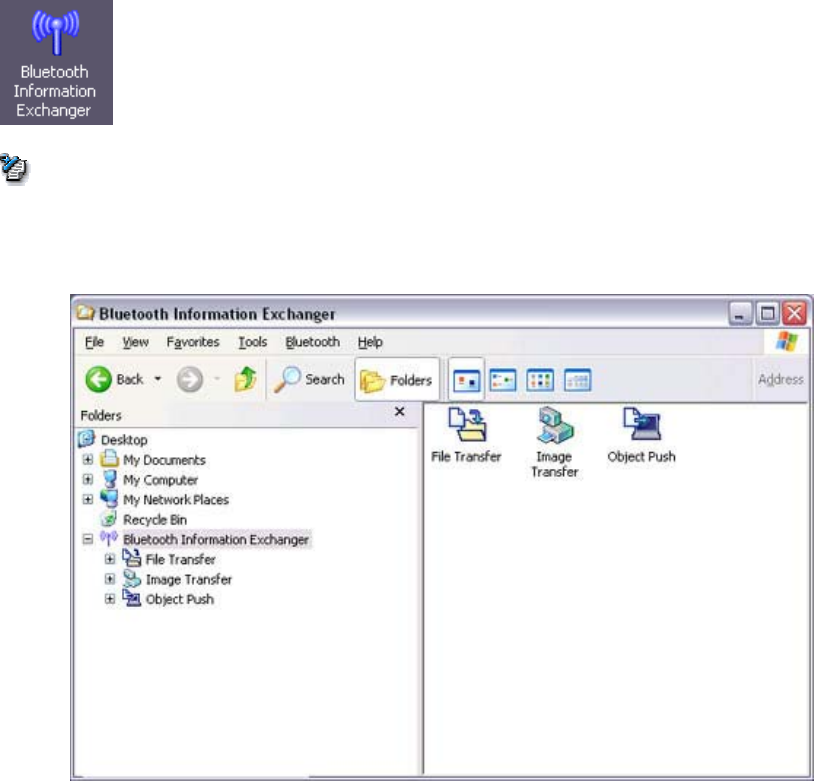
2. Double-click on the Bluetooth Information Exchanger icon on the Desktop
Note
oAlternatively, opening Explorer and clicking on the Bluetooth Information
Exchanger folder will produce the same result.
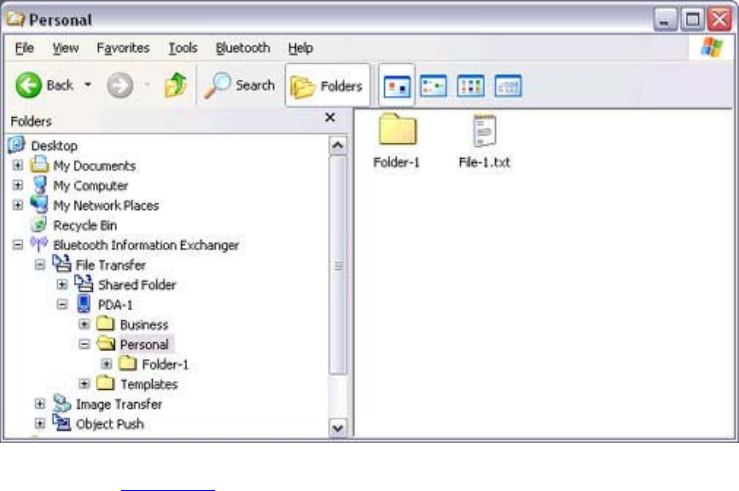
The [Bluetooth Information Exchanger] window will appear.
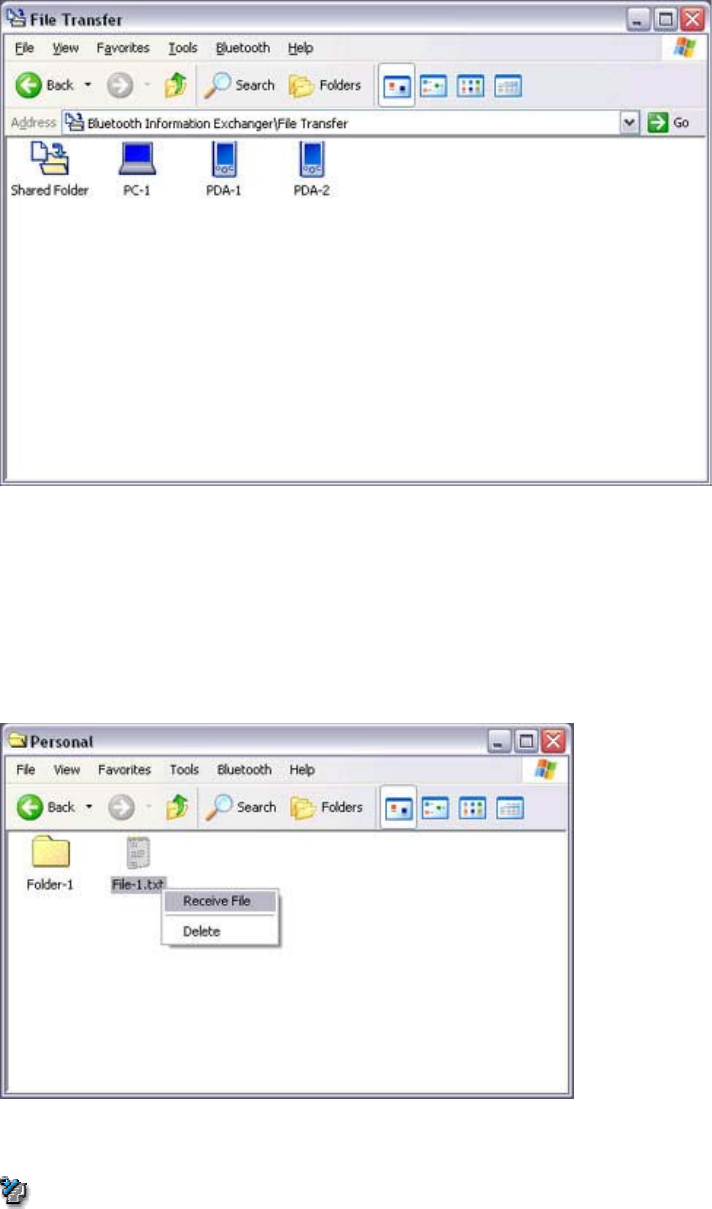
3. Double-click on the [File transfer] icon
A list of devices will appear in the [File transfer] window.
Note
oIf the desired device does not appear in the list, please confirm that the
device has been turned on, and then select [Bluetooth][Search Devices].
A device search will be performed.
oYou can also use "Image transfer" when sending individual image files.
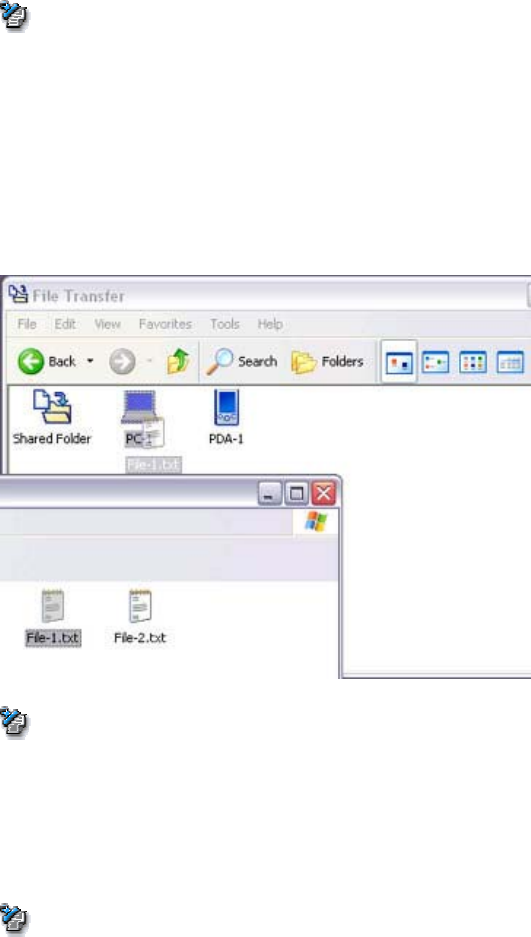
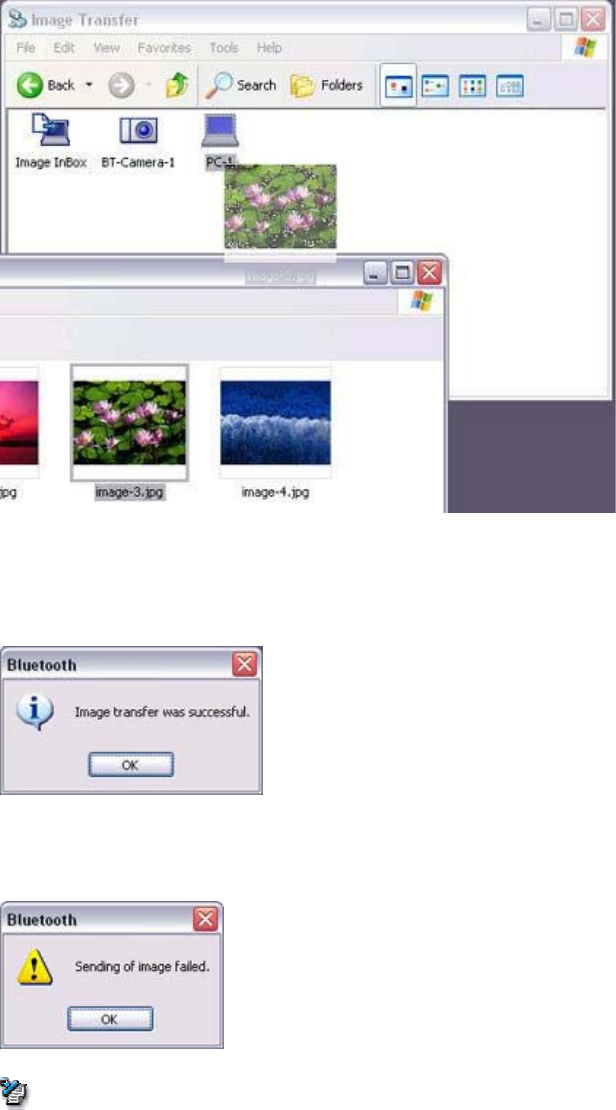
4. Use the mouse to drag and drop the file you wish to send over the destination
icon
In this case, the file will be sent to a PC named "PC-1".
Note
oWhen using "File transfer", you can send individual files as well as entire
folders.
5. Confirm that the file is being sent
The file will be sent to the PC.
Note
oWhen sending files using "File transfer", a message requesting permission
to receive the files may appear on the destination (receiving) device. The
content of the message will vary with the Bluetooth software installed on
the destination device, so please be sure to follow the instructions
provided.
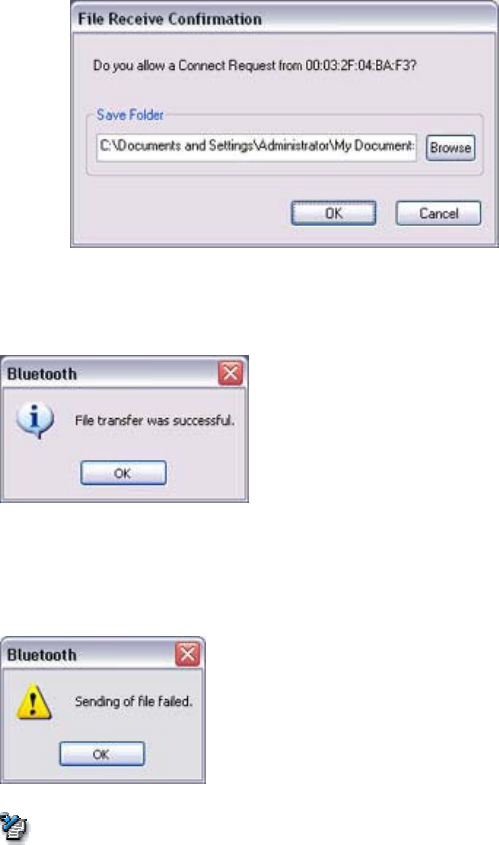
If you are using the Bluetooth Utility, a message similar to the one below
will appear.
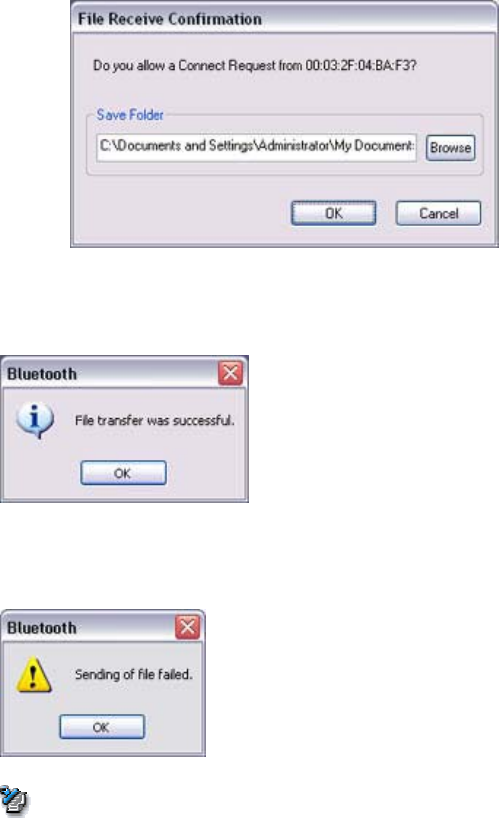
If the file has been sent successfully, the message below will appear.
Please click on the [OK] button.
The message below will appear if the file transmission was unsuccessful.
Please click on the [OK] button to close the message, and repeat the procedure.
Note
oFiles that have been sent will be saved in a file transfer shared folder on
the destination device.
oAdditionally, with "File transfer", you can open the shared folder on the
destination device using Explorer, specify a subfolder, and then send the
file there.
oYou can use Properties in the Bluetooth Information Exchanger to change
the location of the "Shared folder" on the hard drive.
Sending files to a PC or PDA (by right-clicking the mouse)
1. Turn on the PC or PDA
Confirm that a Bluetooth connection has been enabled before proceeding.
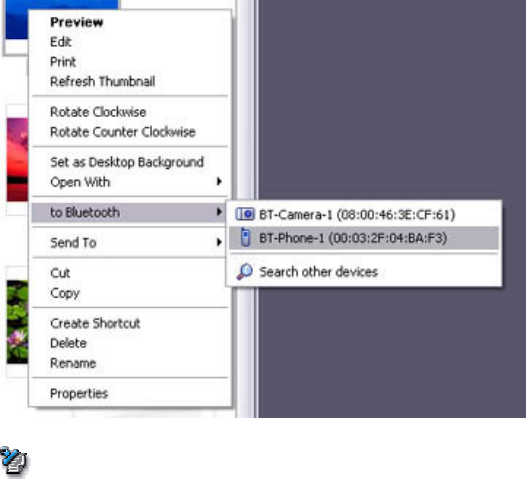
2. Right-click on the file you wish to send, and then select its destination from
[to Bluetooth]
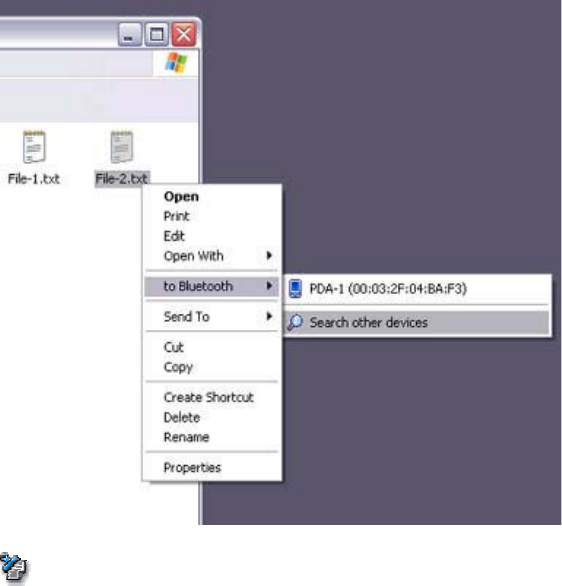
Note
oIf the desired device does not appear in the list, please confirm that the
device has been turned on, and then select [to Bluetooth][Search other
devices].
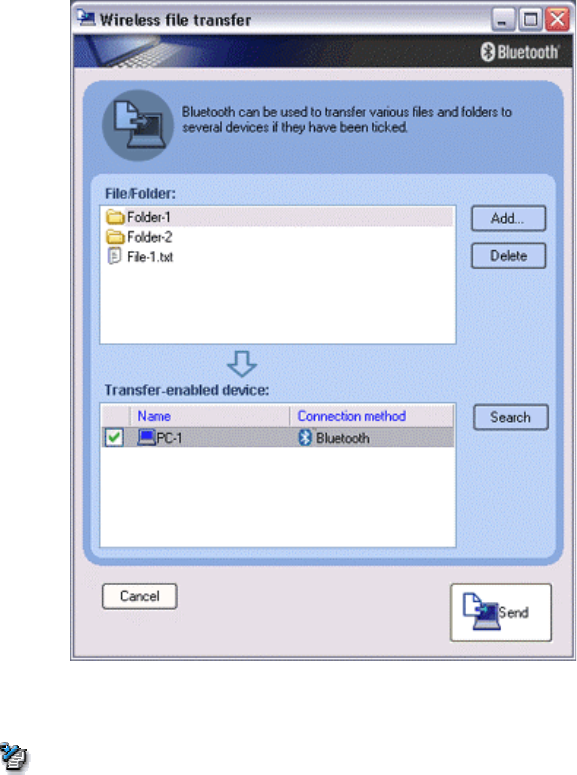
Once the devices have been detected, the message below will appear.
Please select the destination device, and then click on the [Send] button.
3. Confirm that the file is being sent
The file will be sent to the PC.
Note
oWhen sending files using "File transfer", a message requesting permission
to receive the files may appear on the destination (receiving) device. The
content of the message will vary with the Bluetooth software installed on
the destination device, so please be sure to follow the instructions
provided.
If you are using the Bluetooth Utility, a message similar to the one below
will appear.
If the file has been sent successfully, the message below will appear.
Please click on the [OK] button.
The message below will appear if the file transmission was unsuccessful.
Please click on the [OK] button to close the message, and then repeat the
procedure.
Note
oFiles that have been sent will be saved in a file transfer shared folder on
the destination device.
Receiving files from a PC or PDA
Your PC is able to receive files that have been saved in the shared folder on the
destination PC or PDA. Received files will be saved in the shared folder under "File
transfer".
1. Turn on the PC or PDA
Confirm that a Bluetooth connection has been enabled before proceeding.

2. Double-click on the Bluetooth Information Exchanger icon on the Desktop
Note
oAlternatively, opening Explorer and clicking on the Bluetooth Information
Exchanger folder will produce the same result.
The [Bluetooth Information Exchanger] window will appear.
3. Double-click on the [File transfer] icon
A list of devices will appear in the [File transfer] window.
In this case, the file will be received from the PDA named "My Mobile".
4. Double-click on the [PDA-1] icon
The file saved in the shared folder in "My Mobile" will appear.
5. Right-click on the file you wish to receive, and then select "Receive file".
The file will be received from a PDA.
Note
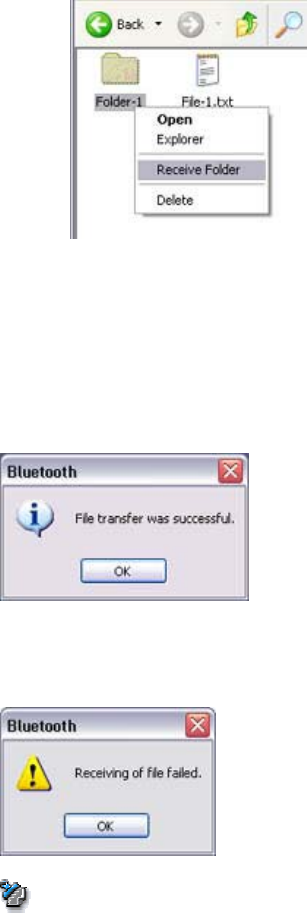
oWith "File transfer", you can send individual files as well as entire folders.
Please right-click on the folder you wish to receive, and select "Receive
folder".
Subsequent operations should be performed in the same manner as when
receiving individual files.
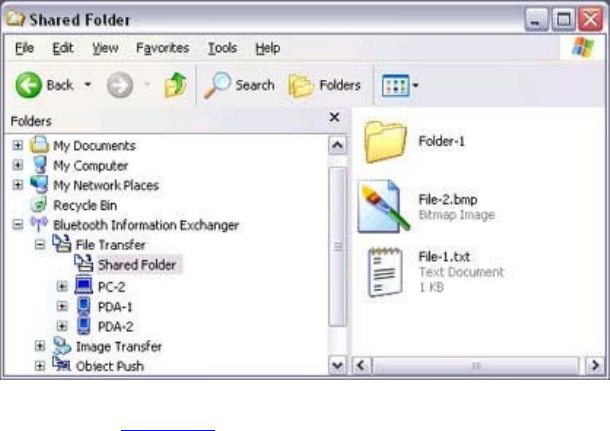
If the file has been received successfully, the message below will appear.
Please click on the [OK] button.
The message below will appear if the file transmission was unsuccessful. Please
click on the [OK] button to close the message, and repeat the procedure.
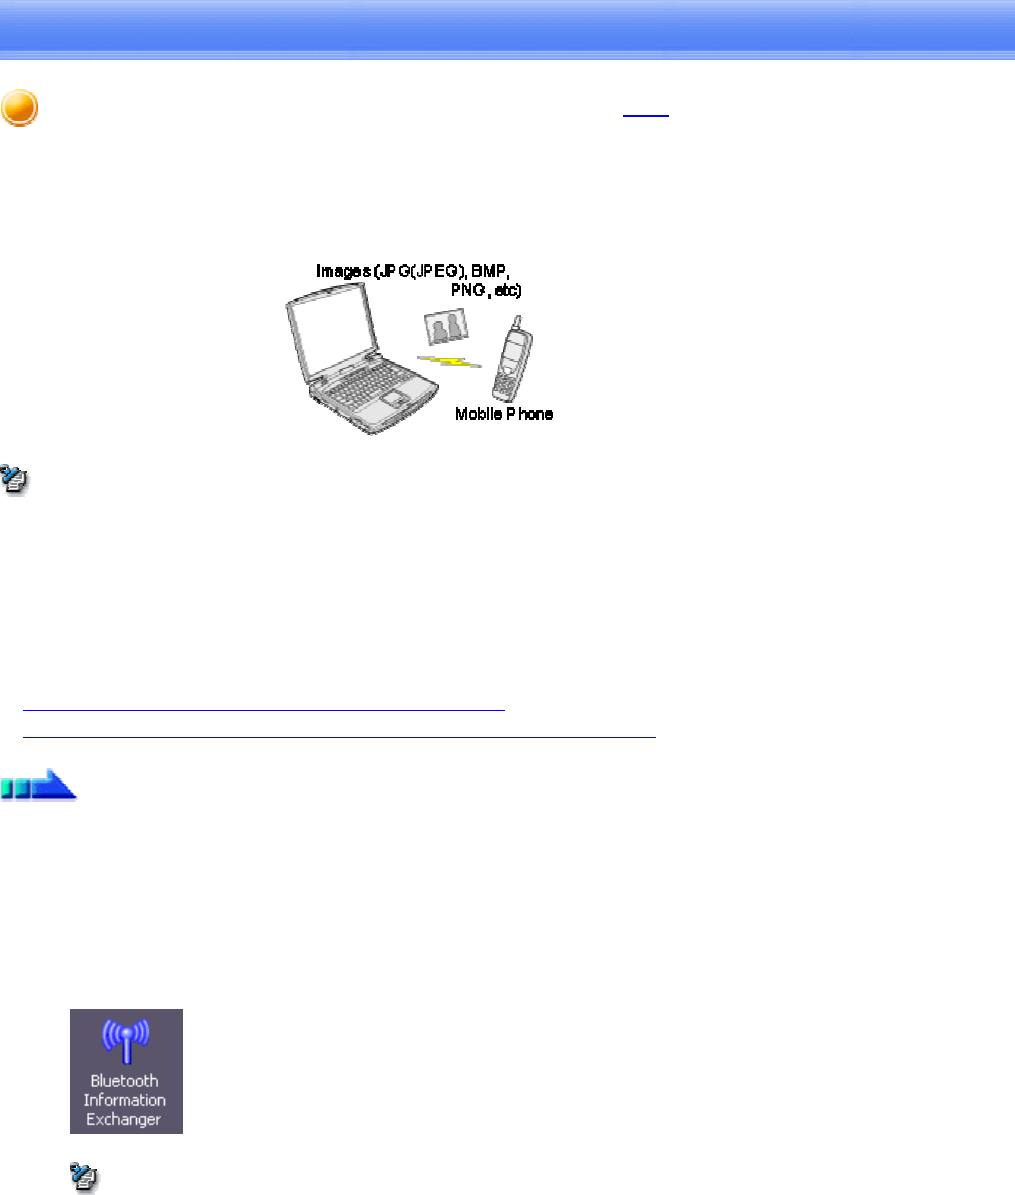
Note
oThe received file will be saved in the "Shared folder" under "File transfer"
in the Bluetooth Information Exchanger
You can use Properties under the Bluetooth Information Exchanger to
specify the location of the "Shared folder" on the hard drive.
Sending images to a mobile telephone [BIP]
You can send image data to a Bluetooth-compatible mobile telephone.
Large images will be automatically reduced to fit on the telephone display screen.
Images are sent using "Image transfer" under Bluetooth Information Exchanger.
Note
• The mobile telephone must support the BIP profile.
• The following image file formats can be sent and received using "Image transfer":
oBitmap (*.bmp)
oJPEG (*.jpg, *.jpeg)
oPNG (*.png)
Sending images to a mobile telephone (using icons)
Sending images to a mobile telephone (by right-clicking the mouse)
Procedure
Sending images to a mobile telephone (using icons)
1. Turn on the PC or PDA
Confirm that a Bluetooth connection has been enabled before proceeding.
2. Double-click on the Bluetooth Information Exchanger icon on the Desktop
Note
oAlternatively, opening Explorer and clicking on the Bluetooth Information
Exchanger folder will produce the same result.
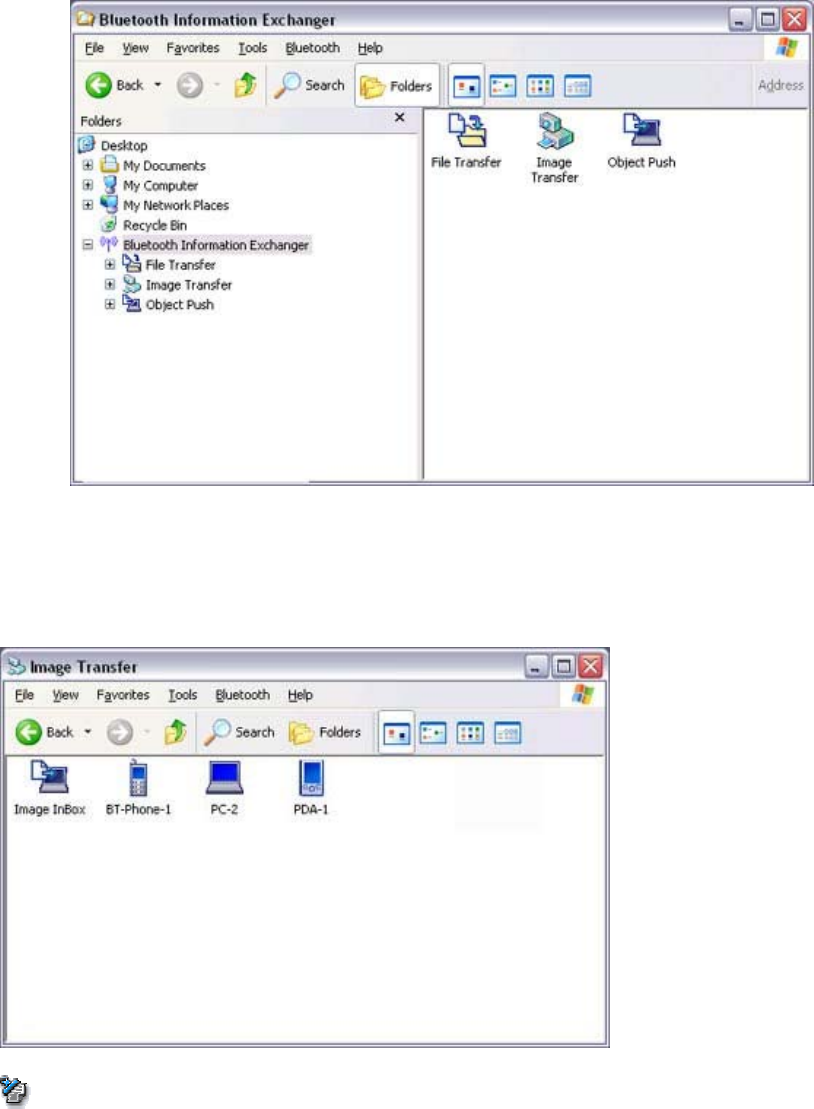
The [Bluetooth Information Exchanger] window will appear.
3. Double-click on the [Image transfer] icon
A list of devices will appear in the [Image transfer] window.
Note
oIf the desired device does not appear in the list, please confirm that the
device has been turned on, and then select [Bluetooth][Search Devices].
A device search will be performed.
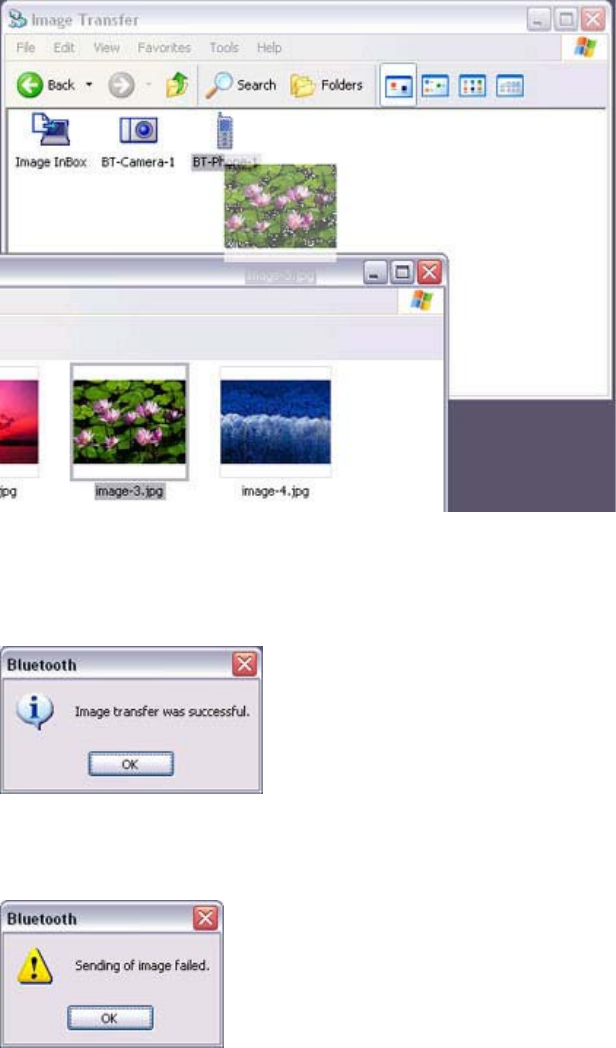
4. Drag and drop the file you wish to send over the destination icon
In this case, the image will be sent to a mobile telephone named "BT-Phone-1".
The image will be sent.
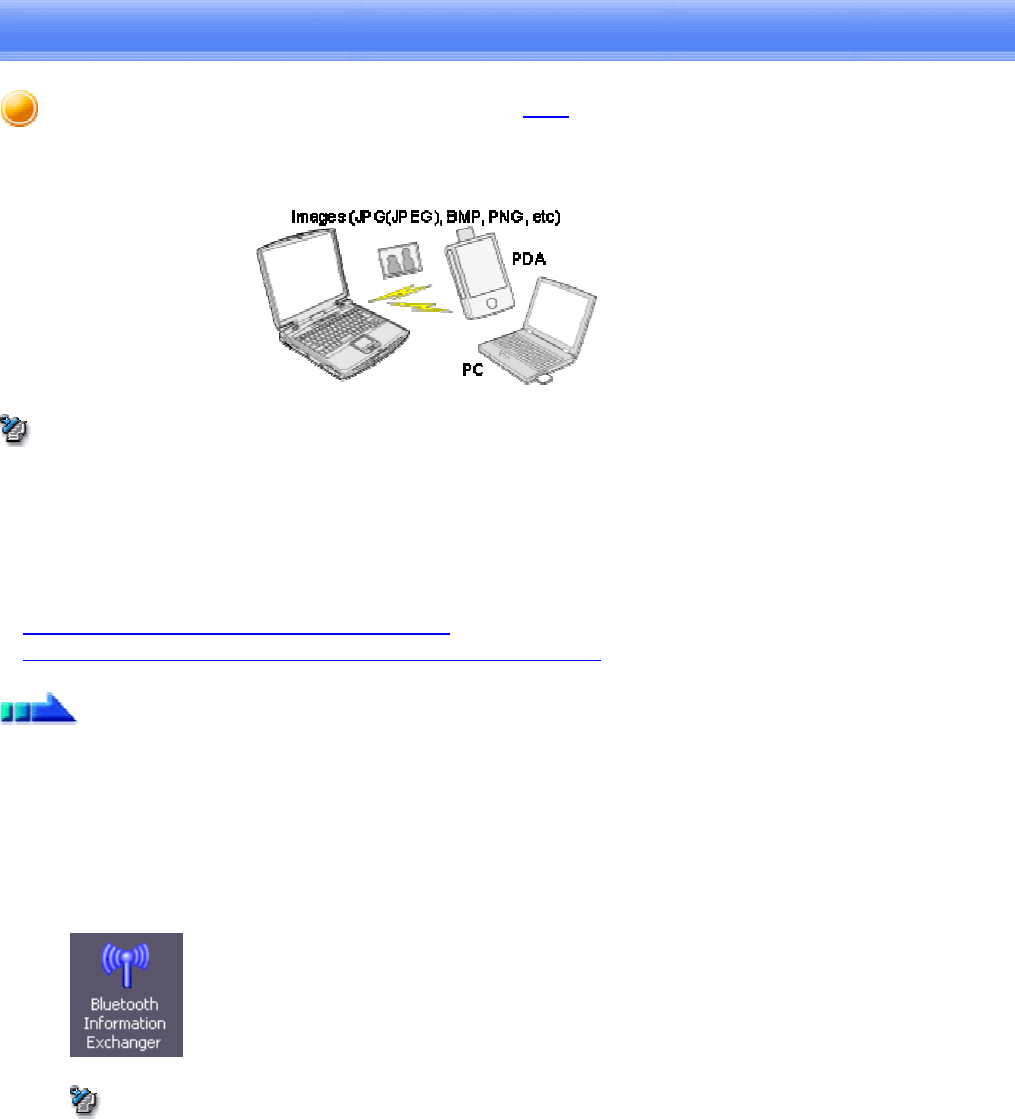
If the image has been sent successfully, the message below will appear.
Please click on the [OK] button.
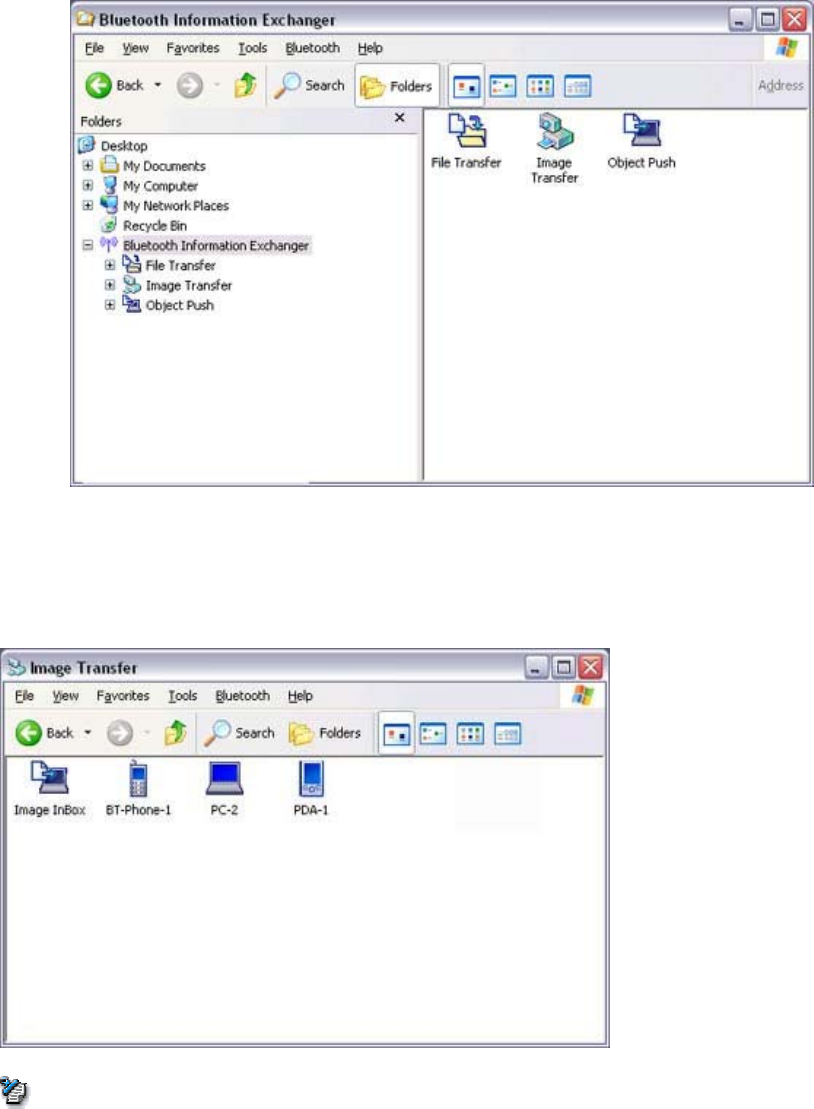
The message below will appear if the image transmission was unsuccessful.
Please click on the [OK] button to close the message, and repeat the procedure.

Sending images to a mobile telephone (by right-clicking the mouse)
1. Turn on the mobile telephone
Confirm that a Bluetooth connection has been enabled before proceeding.
2. Right-clickonthefileyouwishtosend,andthenclickonitsdestinationfrom
[to Bluetooth]
Note
oIf the desired device does not appear in the list, please confirm that the
device has been turned on, and then select [to Bluetooth][Search other
devices].
Once the devices have been detected, the message below will appear.
Please select the destination device, and then click on the [Send] button.

The image will be sent.
If the image has been sent successfully, the message below will appear.
Please click on the [OK] button.
The message below will appear if the image transmission was unsuccessful.
Please click on the [OK] button to close the message, and repeat the procedure.
Sending images to a PC or PDA [BIP]
You can send image data to a Bluetooth-enabled PC or PDA.
Images are sent using "Image transfer" under Bluetooth Information Exchanger.
Note
• The following image file formats can be sent and received using "Image transfer":
oBitmap (*.bmp)
oJPEG (*.jpg, *.jpeg)
oPNG (*.png)
Sending images to a PC or PDA (using icons)
Sending images to a PC or PDA (by right-clicking the mouse)
Procedure
Sending images to a PC or PDA (using icons)
1. Turn on the PC or PDA
Confirm that a Bluetooth connection has been enabled before proceeding.
2. Double-click on the Bluetooth Information Exchanger icon on the Desktop
Note
oAlternatively, opening Explorer and clicking on the Bluetooth Information
Exchanger folder will produce the same result.
The [Bluetooth Information Exchanger] window will appear.
3. Double-click on the [Image transfer] icon
A list of devices will appear in the [Image transfer] window.
Note
oIf the desired device does not appear in the list, please confirm that the
device has been turned on, and then select [Bluetooth][Search Devices].
A device search will be performed.
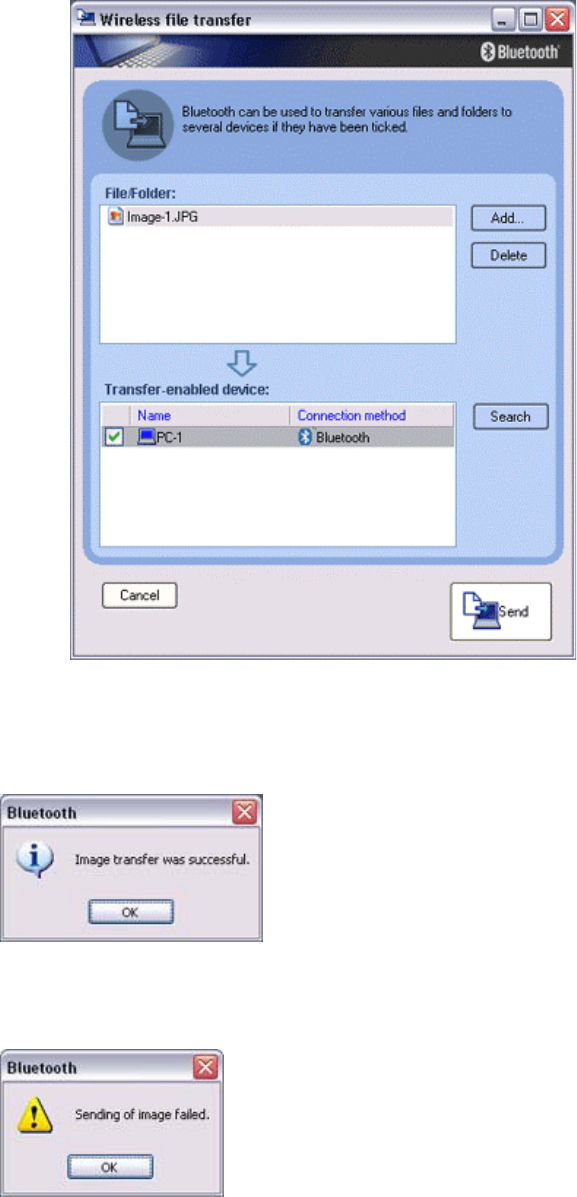
4. Drag and drop the file you wish to send over the destination icon
In this case, the image will be sent to a PC named "PC-1".
The image will be sent.
If the image has been sent successfully, the message below will appear.
Please click on the [OK] button.
The message below will appear if the image transmission was unsuccessful.
Please click on the [OK] button to close the message, and repeat the procedure.
Note

oImages that have been sent will be saved in an image transfer folder on the
destination device.
oImages received using "Image transfer" in the Bluetooth Information
Exchanger will be saved in the "Image Box" in "Image transfer".
oYou can use Properties under the Bluetooth Information Exchanger to
change the location of the "Image Box" folder on the hard drive.
Sending images to a PC or PDA (by right-clicking the mouse)
1. Turn on the PC or PDA
Confirm that a Bluetooth connection has been enabled before proceeding
2. Right-clickonthefileyouwishtosend,andthenclickonitsdestinationfrom
[to Bluetooth]
Note
oIf the desired device does not appear in the list, please confirm that the
device has been turned on, and then select [to Bluetooth][Search other
devices].
Once the devices have been detected, the message below will appear.
Please select the destination device, and then click on the [Send] button.
The image will be sent.
If the image has been sent successfully, the message below will appear.
Please click on the [OK] button.
The message below will appear if the image transmission was unsuccessful.
Please click on the [OK] button to close the message, and repeat the procedure.

Note
oWhen you send images by right-clicking the mouse, the image data that
has been sent will be saved in the image transfer shared folder on the
destination device. This is also the case when you send images using
icons.
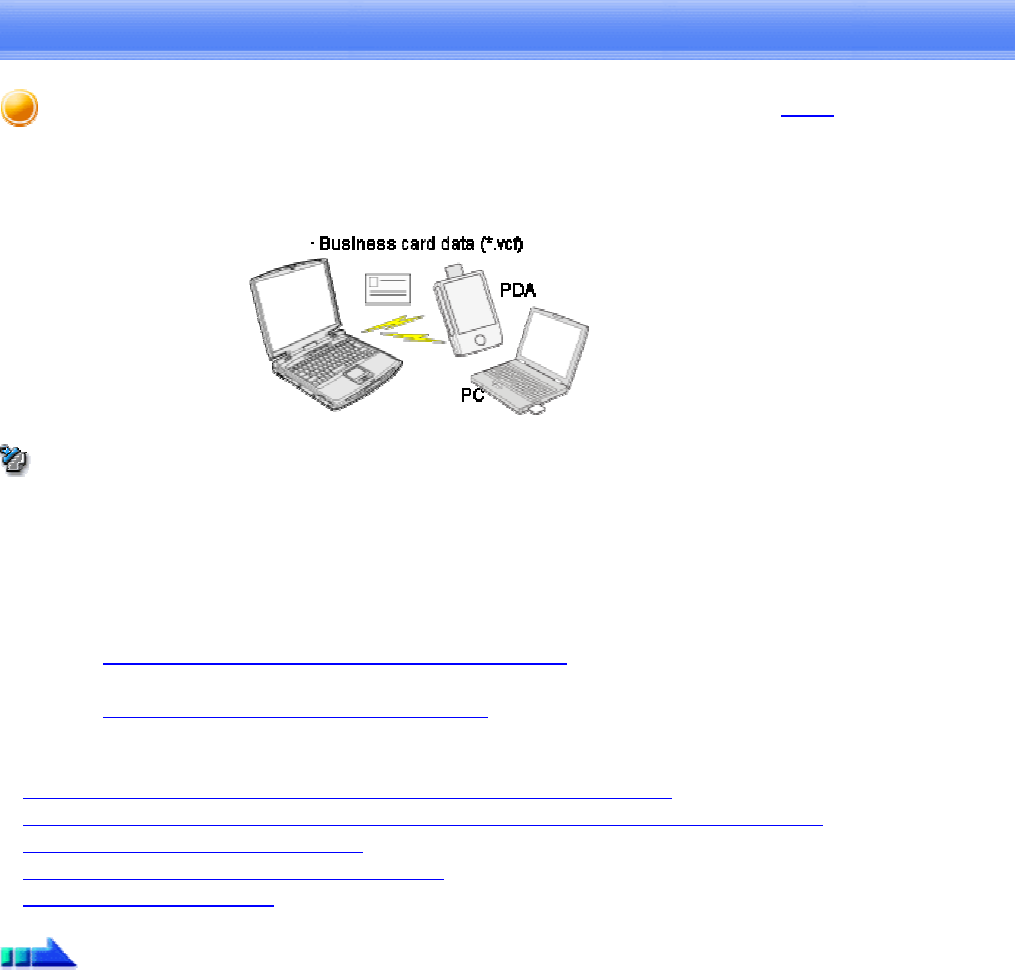
Exchanging business card data with a PC or PDA [OPP]
You can exchange business card data with a Bluetooth-enabled PC or PDA.
Business card data are exchanged using "Object Push" under Bluetooth Information
Exchanger.
Note
• Data compliant with the "vCARD" standard are the only type of business card
data able to be sent and received with "Object Push".
Business card data can be used by applications such as Microsoft Outlook.
• Business card data can be created in vCARD format by Microsoft Outlook and
other similar applications.
"Creating business card data in the vCARD format"
• You can send business card data directly from Microsoft Outlook.
"Sending business card data from Outlook"
• The OPP profile must be supported by the PC or PDA of the other party.
Selecting a business card and sending it to a PC or PDA (using icons)
Selecting a business card and sending it to a PC or PDA (by right-clicking the mouse)
Sending your personal business card
Receiving a business card from another party
Exchanging business cards
Procedure
Selecting a business card and sending it to a PC or PDA (using icons)
Select a business card you wish to send from among all the business card data you have
already received through exchanges with your business or other contacts, and then send it
to another party.
1. Turn on the PC or PDA
Confirm that a Bluetooth connection has been enabled before proceeding.
2. Double-click on the Bluetooth Information Exchanger icon on the Desktop
Note
oAlternatively, opening Explorer and clicking on the Bluetooth Information
Exchanger folder will produce the same result.
The [Bluetooth Information Exchanger] window will appear.
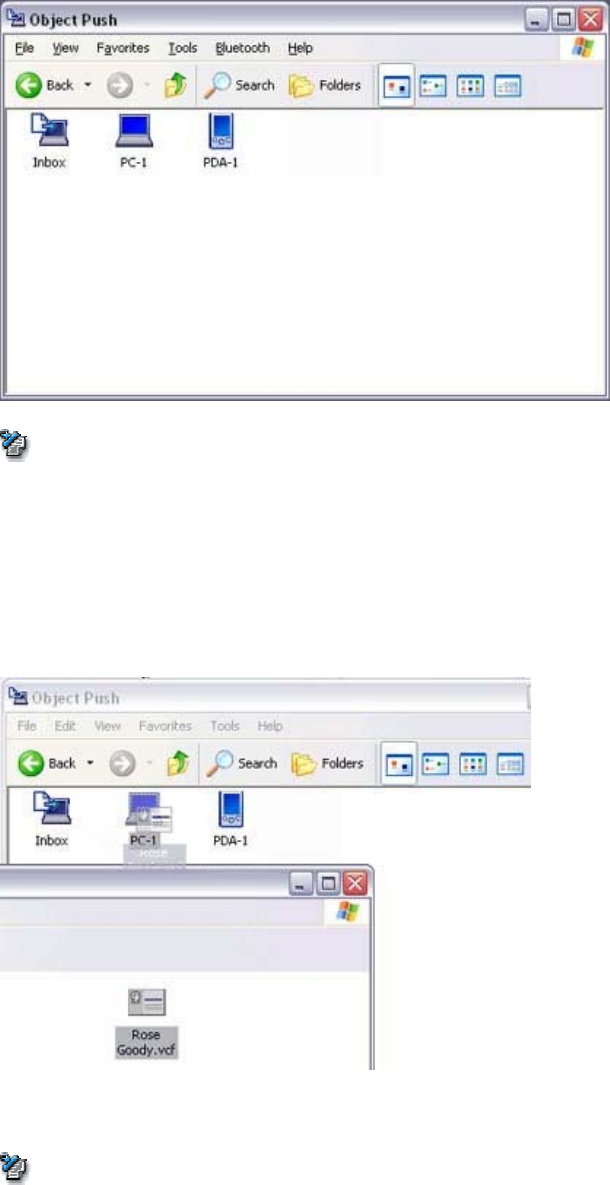
3. Double-click on the [Object Push] icon
A list of devices will appear in the [Object Push] window.
Note
oIf the desired device does not appear in the list, please confirm that the
device has been turned on, and then select [Bluetooth][Search Devices].
A device search will be performed.
4. Use the mouse to drag and drop the business card you wish to send over the
destination icon
In this case, the business card will be sent to a PC named "PC-1".
The business card will be sent.
Note
oWhen you try to send a business card, a message requesting permission to
receive the card may appear on the device belonging to the other party
(i.e., on the receiving end). The content of the message will vary with the
Bluetooth software installed on the destination device, so please be sure to
follow the instructions provided. If you are using the Bluetooth Utility, a
message similar to the one below will appear.
If the business card has been sent successfully, the message below will appear.
Please click on the [OK] button.
The message below will appear if the business card transmission was
unsuccessful.
Please click on the [OK] button to close the message, and repeat the procedure.
Memo
oData that have been sent will be saved in a folder for exchanged business
cards on the destination device.
oYou can configure an associated application (Microsoft Outlook etc) to
start automatically when you have received a business card, allowing you
to view the card details.
You can use Properties under Bluetooth Information Exchanger to
configure whether or not you would like such an application to start
automatically.
Selecting a business card and sending it to a PC or PDA (by right-clicking the
mouse)
1. Turn on the PC or PDA
Confirm that a Bluetooth connection has been enabled before proceeding.
2. Right-clickonthebusinesscardyouwishtosend,andthenclickonits
destination from [to Bluetooth]

Note
oIf the desired device does not appear in the list, please confirm that the
device has been turned on, and then select [to Bluetooth][Search other
devices].
Once the devices have been detected, the message below will appear.
Please select the destination device, and then click on the [Send] button.
The business card will be sent.
Note
oWhen you try to send a business card, a message requesting permission to
receive the files may appear on the device belonging to the other party
(i.e., on the receiving end). The content of the message will vary with the
Bluetooth software installed on the destination device, so please be sure to
follow the instructions provided.
If you are using the Bluetooth Utility, a message similar to the one below
will appear.
If the business card has been sent successfully, the message below will appear.
Please click on the [OK] button.
The message below will appear if the business card transmission was
unsuccessful.
Please click on the [OK] button to close the message, and repeat the procedure.
Note
oData that have been sent will be saved in a folder for exchanged business
cards on the destination device.
Sending your personal business card

You can prepare a business card bearing your name and other details such as your
company and telephone numbers, and then send it to another party.
Note
• Please use Properties under Bluetooth Information Exchanger beforehand to
configure which data to use for your own business card.
• You can only have one business card registered as your own that is able to be
sent.
1. Turn on the PC or PDA
Confirm that a Bluetooth connection has been enabled before proceeding
2. Double-click on the Bluetooth Information Exchanger icon on the Desktop
Note
oAlternatively, opening Explorer and clicking on the Bluetooth Information
Exchanger folder will produce the same result.
The [Bluetooth Information Exchanger] window will appear.
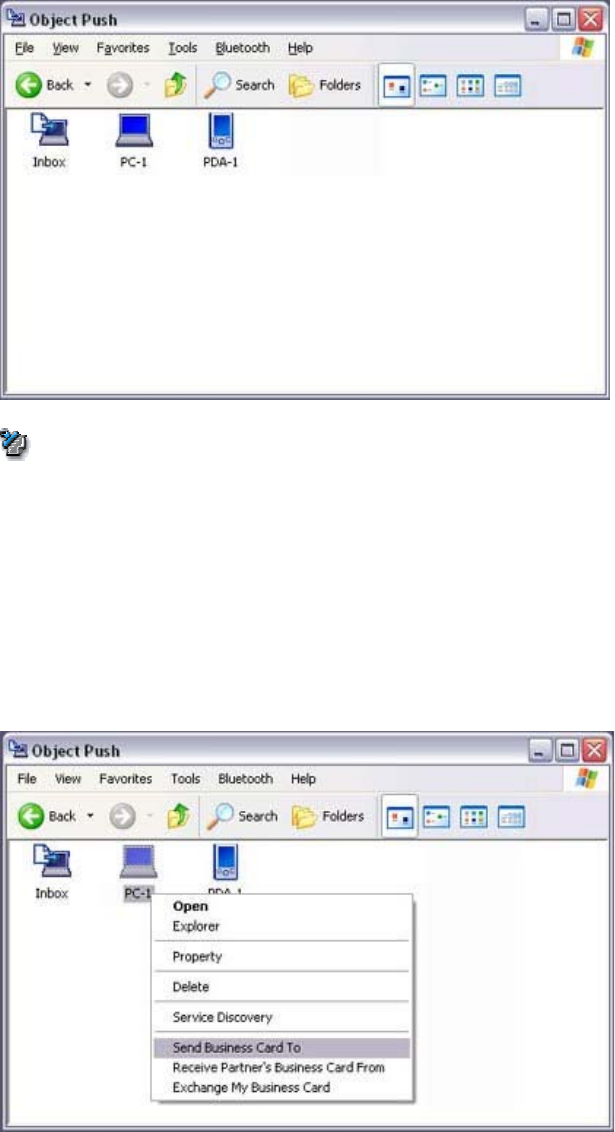
3. Double-click on the [Object Push] icon
A list of devices will appear in the [Object Push] window.
Note
oIf the desired device does not appear in the list, please confirm that the
device has been turned on, and then select [Bluetooth][Search Devices].
A device search will be performed.
4. Right-clickonthedestinationicon,andthenclickon[SendbusinesscardTo]
In this case, your personal business card will be sent to a PC named "PC-1".
The business card will be sent.
Note
oWhen you try to send a business card, a message requesting permission to
receive the files may appear on the device belonging to the other party
(i.e., on the receiving end). The content of the message will vary with the
Bluetooth software installed on the destination device, so please be sure to
follow the instructions provided. If you are using the Bluetooth Utility, a
message similar to the one below will appear.
oBusiness cards that have been sent will be saved in the Inbox of the
destination party.
If your business card has been sent successfully, the message below will appear.
Please click on the [OK] button.
The message below will appear if the business card transmission was
unsuccessful. Please click on the [OK] button to close the message, and repeat the
procedure.
Note

oData that has been sent will be saved in a folder for exchanged business
cards on the destination device.
Acquiring a business card from another party
You can use your PC to acquire a business card from a party containing their details.
1. Turn on the PC or PDA
Confirm that a Bluetooth connection has been enabled before proceeding
2. Double-click on the Bluetooth Information Exchanger icon on the Desktop
Note
oAlternatively, opening Explorer and clicking on the Bluetooth Information
Exchanger folder will produce the same result.
The [Bluetooth Information Exchanger] window will appear.
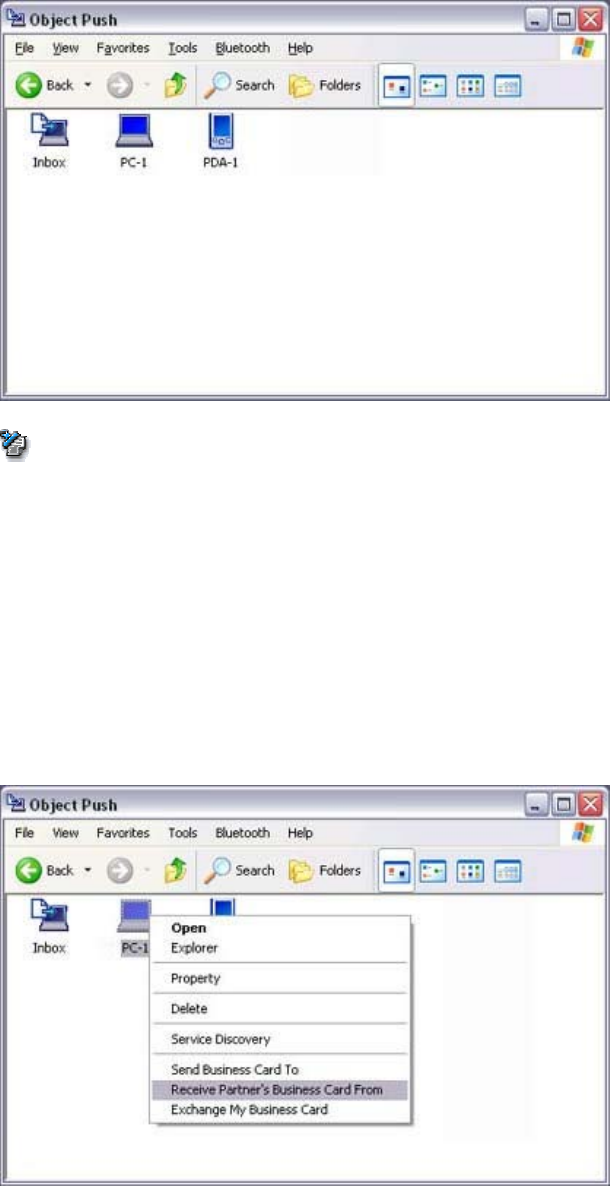
3. Double-click on the [Object Push] icon
A list of devices will appear in the [Object Push] window.
Note
oIf the desired device does not appear in the list, please confirm that the
device has been turned on, and then select [Bluetooth][Search Devices].
A device search will be performed.
4. Right-click on the icon of the party whose card you wish to acquire, and then
click on [Receive business card]
In this case, the business card of the other party will be acquired from a PC named
"PC-1".
The business card will be received.
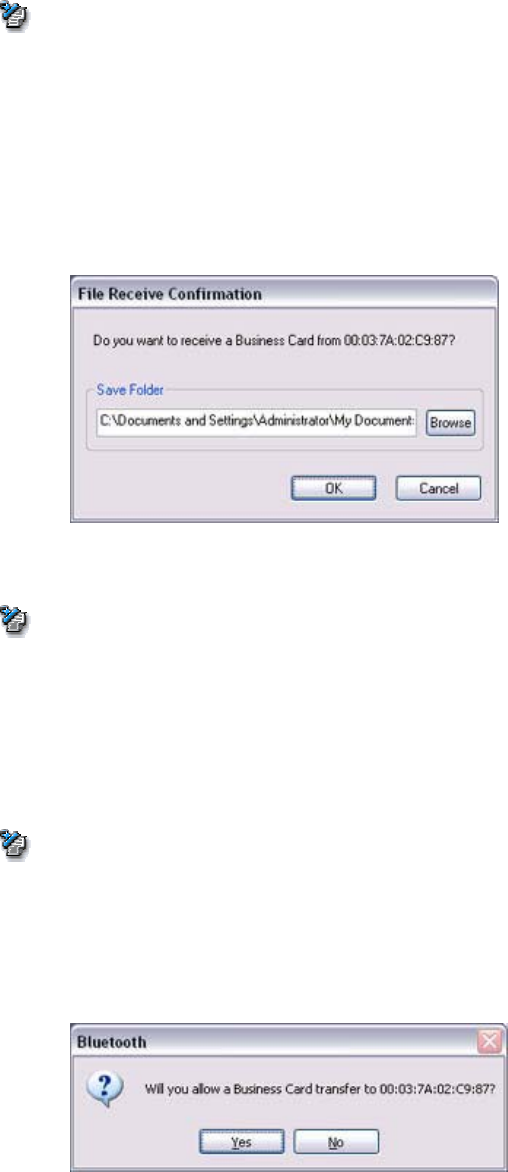
Note
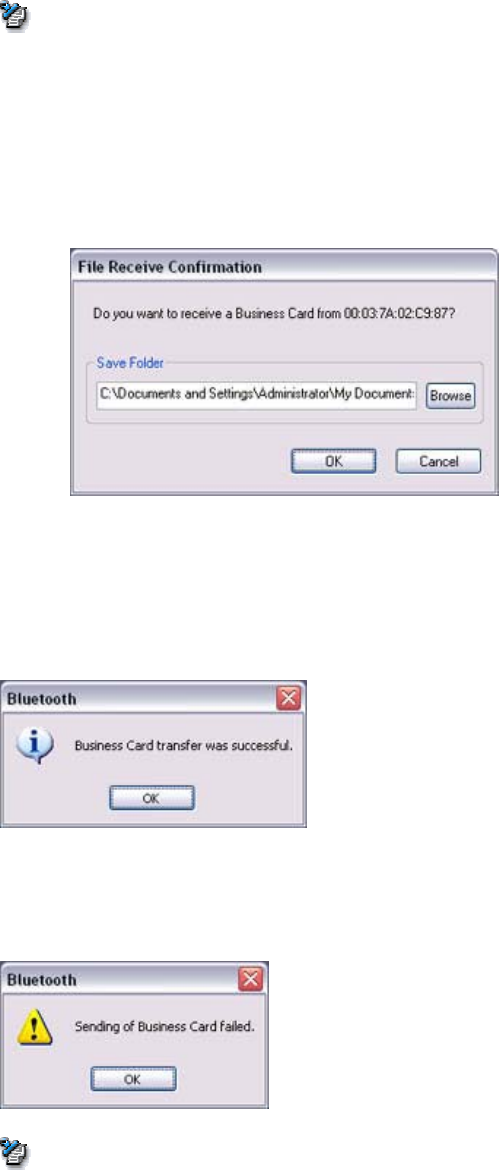
oWhen you try to acquire a business card, a message requesting permission
to send the files may appear on the device belonging to the other party
(i.e., on the sending end). The content of the message will vary with the
Bluetooth software installed on the destination device, so please be sure to
follow the instructions provided.
If you are using the Bluetooth Utility, a message similar to the one below
will appear.
If the business card has been received successfully, the message below will
appear.
Please click on the [OK] button.
The message below will appear if the business card was unsuccessfully received.
Please click on the [OK] button to close the message, and repeat the procedure.
Note
oBusiness card data that have been received will be saved in the Inbox
under "Object Push".
You can use Properties under the Bluetooth Information Exchanger to set
the location of the Inbox on the hard drive.

Exchanging business cards
Simultaneously exchange your business card with one belonging to another party.
1. Turn on the PC or PDA
Confirm that a Bluetooth connection has been enabled before proceeding.
2. Double-click on the Bluetooth Information Exchanger icon on the Desktop
Note
oAlternatively, opening Explorer and clicking on the Bluetooth Information
Exchanger folder will produce the same result.
The [Bluetooth Information Exchanger] window will appear.
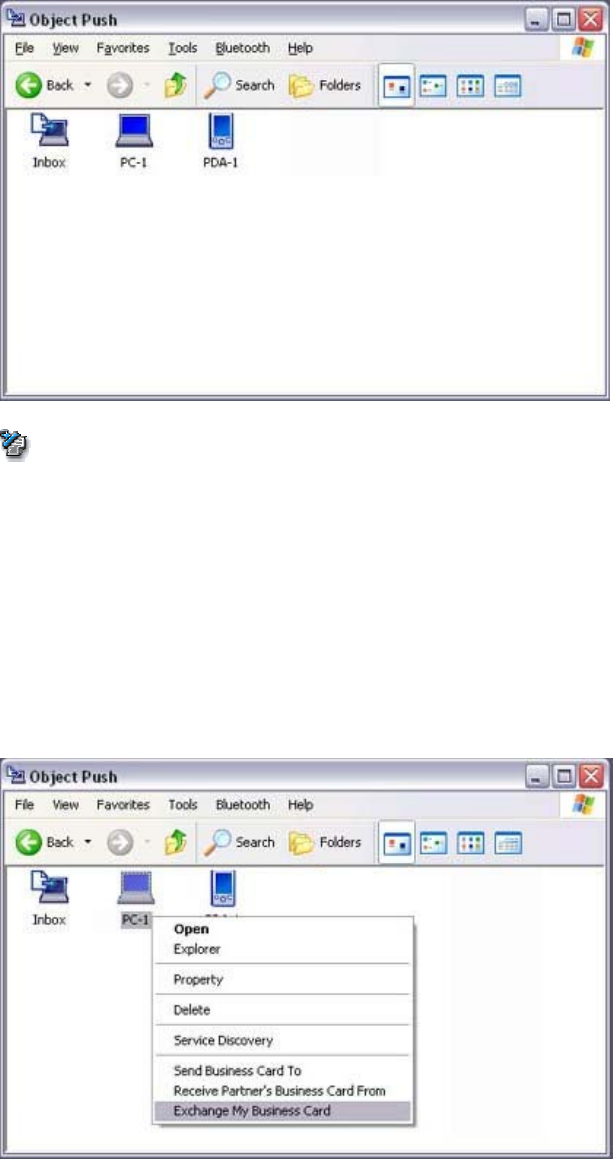
3. Double-click on the [Object Push] icon
A list of devices will appear in the [Object Push] window.
Note
oIf the desired device does not appear in the list, please confirm that the
device has been turned on, and then select [Bluetooth][Search Devices].
A device search will be performed.
4. Right-click on the icon of the party with whom you wish to exchange business
cards,andthenclickon[ObjectPush]
In this case, the business cards will be exchanged with a PC named "PC-1".
The business card from the party who executed the "Exchange business cards"
command will be sent first.
Note
oWhen you try to send a business card, a message requesting permission to
receive the files may appear on the device belonging to the other party
(i.e., on the receiving end). The content of the message will vary with the
Bluetooth software installed on the destination device, so please be sure to
follow the instructions provided.
If you are using the Bluetooth Utility, a message similar to the one below
will appear.
A message of confirmation will appear if the card has been successfully sent.
Note
oBusiness cards that have been sent will be saved in the Inbox of the
destination party.
Once your business card has finished being sent, the program will start receiving
the business card belonging to the other party.
Note
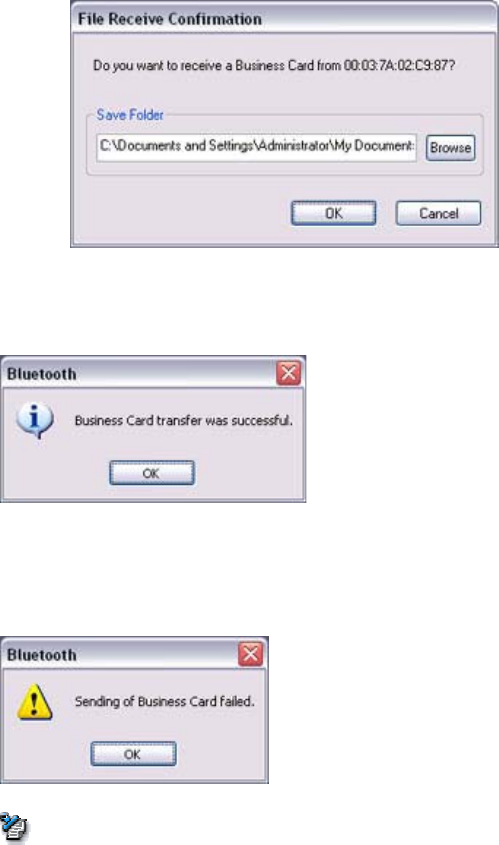
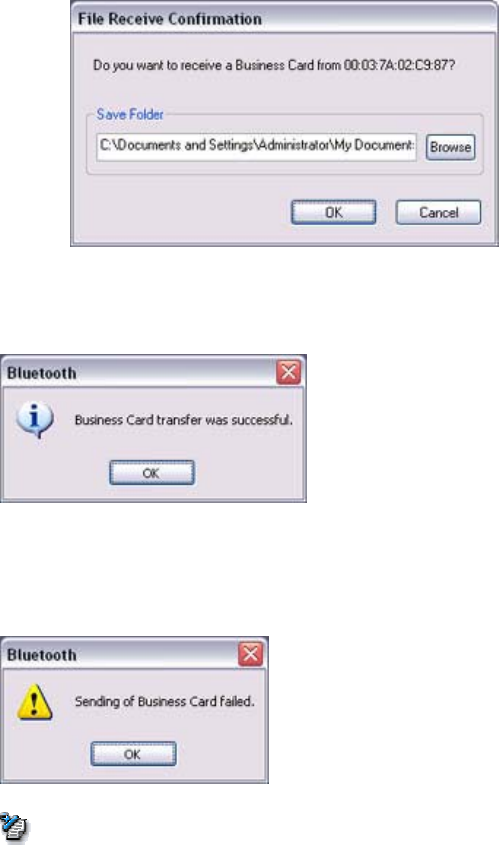
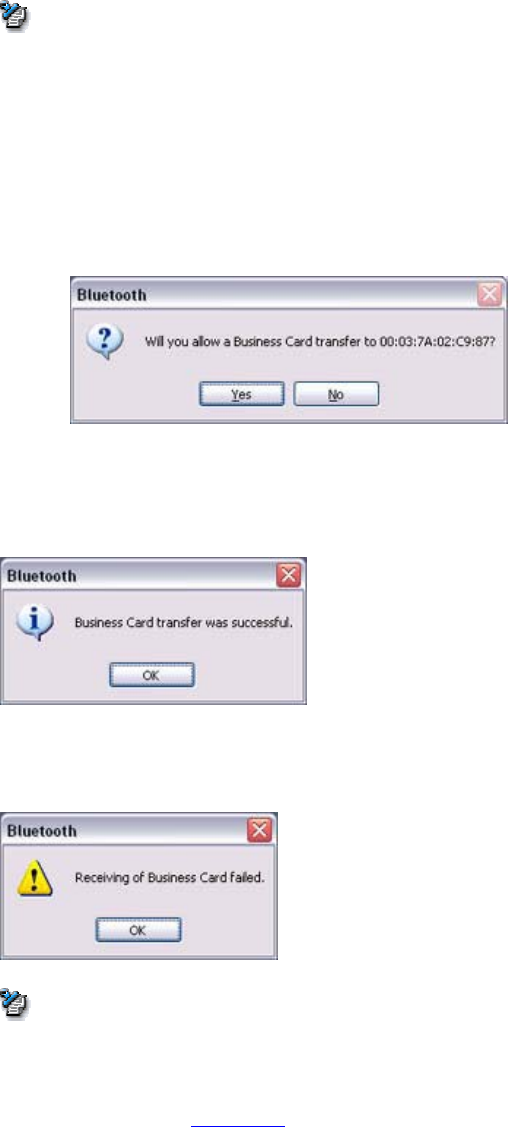
oWhen a business card is to be received, a message such as the one below
may appear on the device belonging to the other party.
Please click on the [Yes] button if you give permission for the business
card to be sent.

A message of confirmation will appear if the card has been successfully received.
Note
oBusiness cards that have been received will be saved in the "Inbox" under
"Object Push".
You can use Properties under the Bluetooth Information Exchanger to set
the location of the Inbox on the hard drive.
Creating business card data in the vCARD format
This section describes how to create business card data in the vCARD format using
Microsoft Outlook 2002.
Important
• The method for creating business card data will differ according to the type and
version of application used. Please refer to the application user guide for details.
Procedure
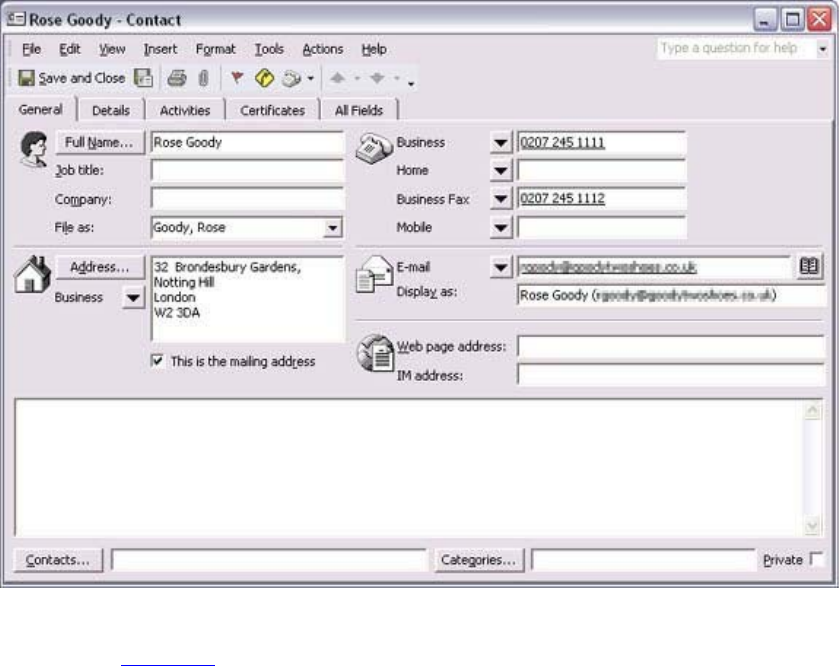
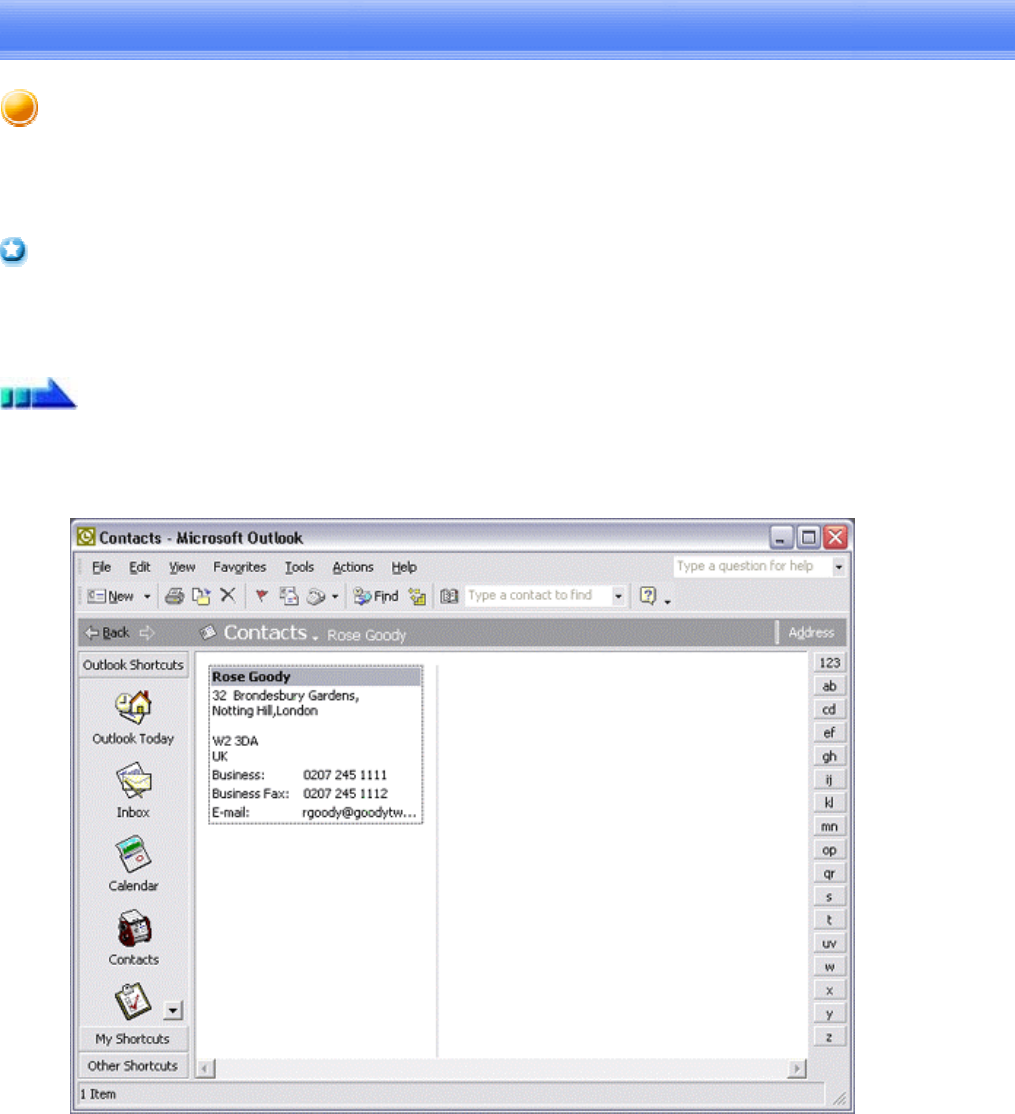
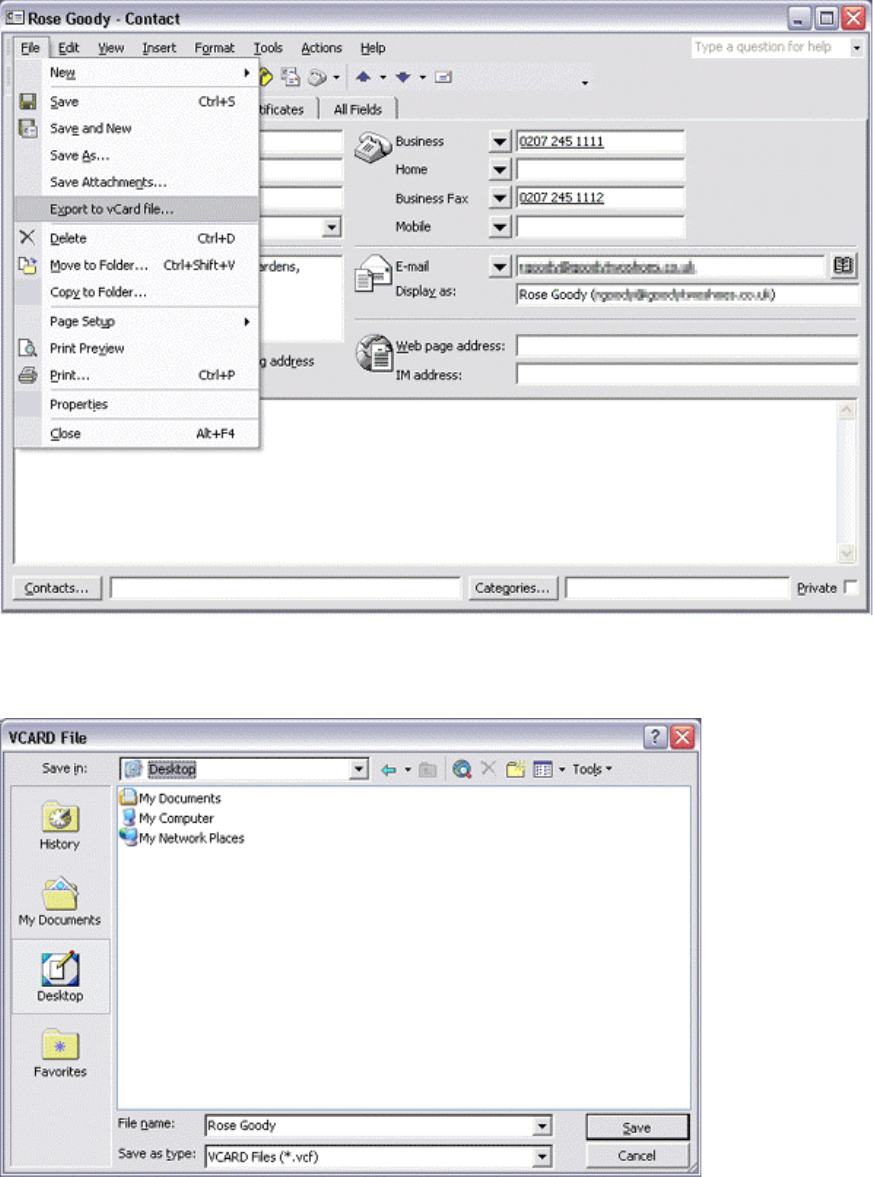
1. Start Outlook, and then click on the [Contacts] icon.
The list of your contacts will appear.
2. Double-click to open the contact for whom you wish to create a business
card, and then click on [File][Export to vCard file...]
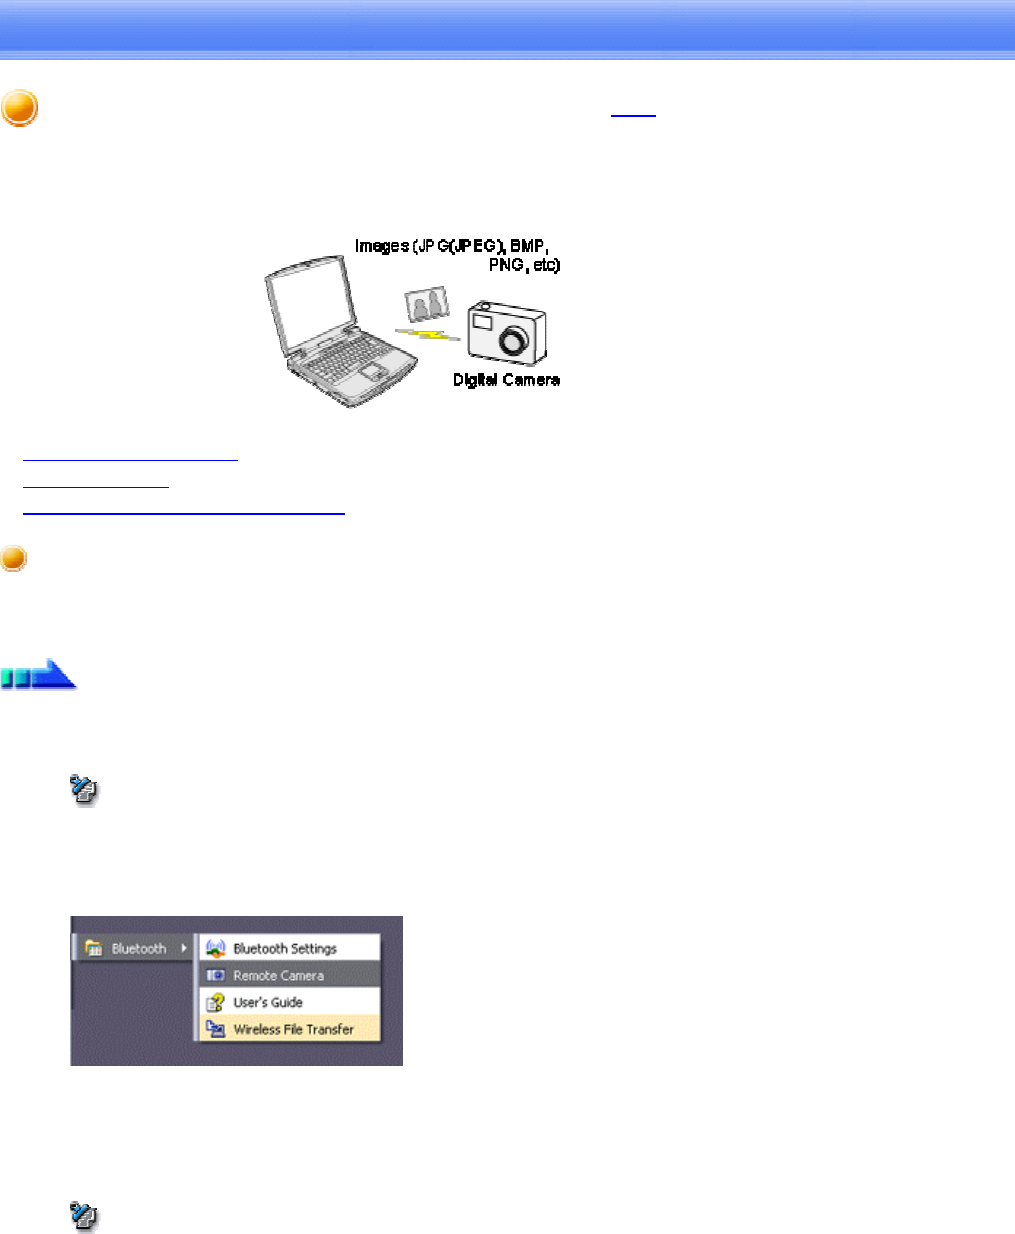
3. In the [vCard file] dialog box, specify the file name and save destination, and
then click on the [Save] button.
A vCARD file will have been created in the specified location.

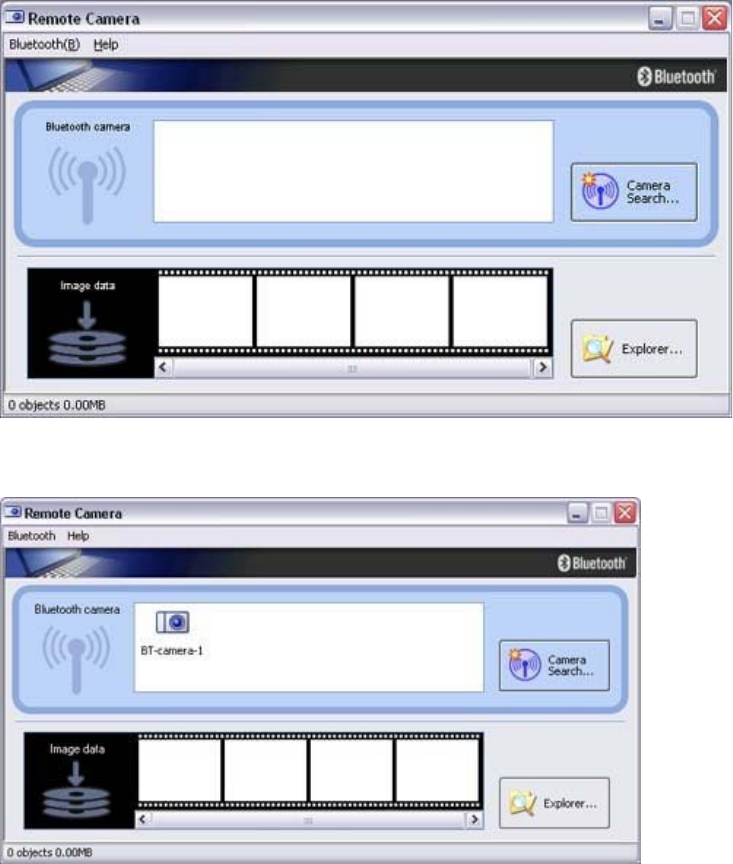
Using a Bluetooth-compatible camera [BIP]
By connecting a Bluetooth-compatible digital camera to your PC via Bluetooth, you will
be able to operate the camera shutter from the PC and transmit the captured images to it
as well.
Connecting the camera
Taking pictures
Viewing images saved on your PC
Connecting the camera
Use the "Remote Camera" tool in the Bluetooth Utility to connect the camera to your PC.
Procedure
1. Clickon[Start][All Programs][Bluetooth][Remote Camera]
Note
oIn Windows 2000, click on [Start][Programs][Bluetooth][Remote
Camera].
The [Remote Camera] window will appear.
2. Turn on the camera, and set it to be connectable via Bluetooth
Note
oDifferent cameras are operated in different ways, depending on the
manufacturer and model used. Please refer to the instruction manual for
further details on how to operate your camera.
3. Click on the [Camera Search...] button
The camera will be detected and its icon displayed.
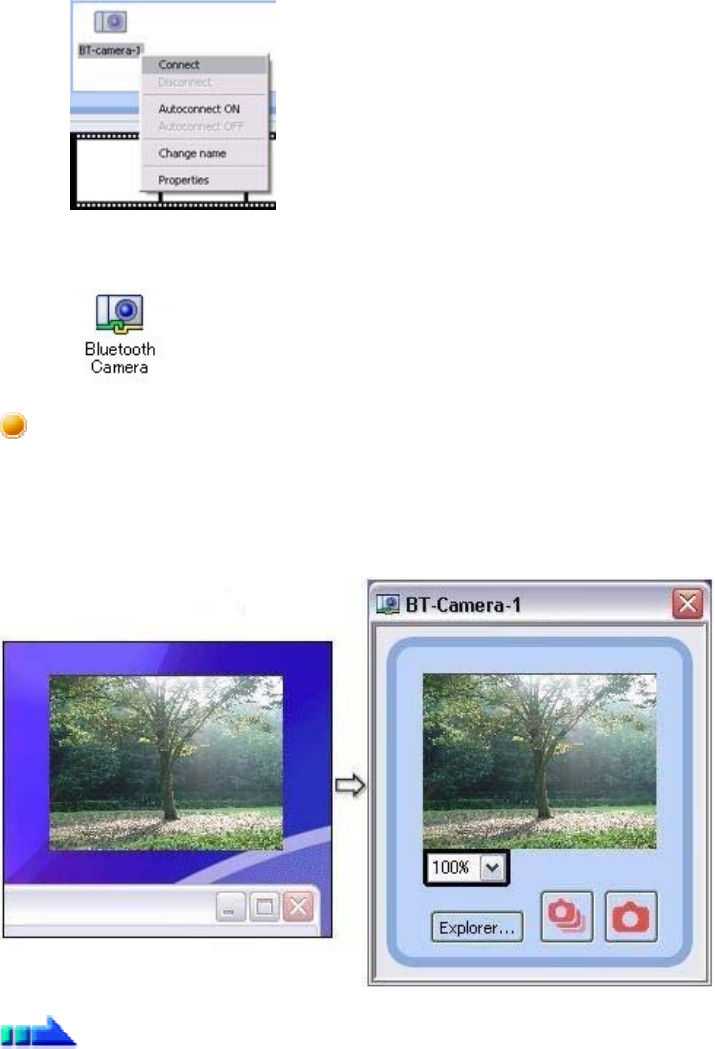
4. Right-click on the camera icon, and select [Connect]
The camera will be connected, and images from the camera will appear on-screen.
Taking pictures
By placing the mouse cursor over the on-screen image, the camera's operating window
will appear.
You can operate the camera from this window.
Procedure
Taking a single picture
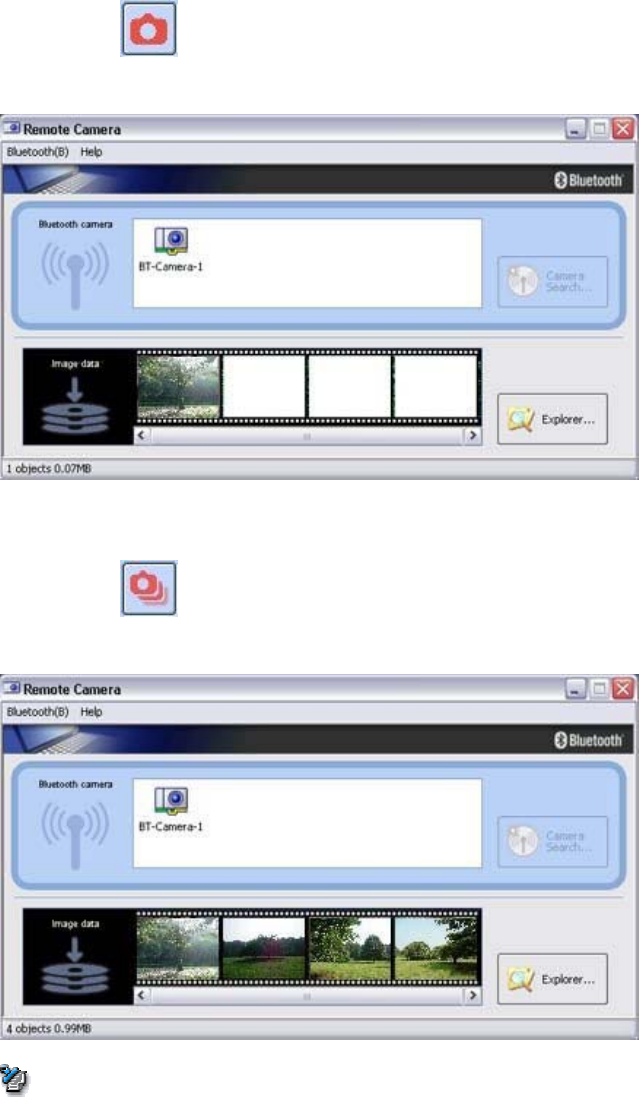
1. Clickonthe button in the operating window.
A single image will be captured and sent to the PC.
Taking several consecutive frames
1. Clickonthe button in the operating window
A succession of images will be captured and sent to the PC.
Note
oThe remote camera shutter cannot be operated while the camera is
connected to the PC.
oThe number of consecutive pictures taken can be set to anywhere between
2 and 16
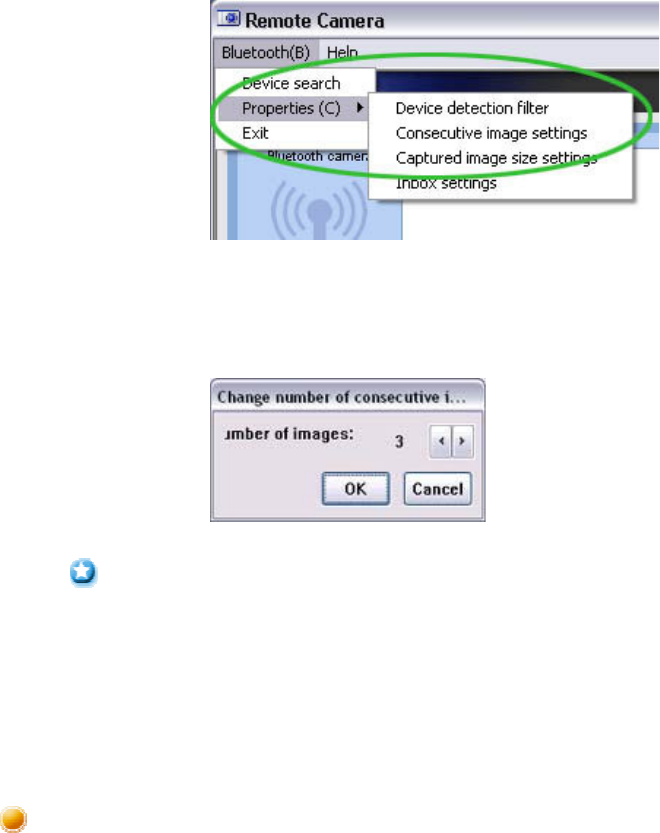
1. In the [Remote Camera] window, click on
[Bluetooth][Properties][Consecutive Image Settings]
The [Change number of consecutive images] dialog box will appear
2. Click on the [<][>] buttons to select the number of consecutive
images to be captured
Important
oImages are not only sent to the PC, but are stored in the camera's on-board
memory as well.
Please be aware of the remaining memory capacity when you are taking a
large number of pictures.
oLarge file sizes are common for high-resolution images, and may take
some time to be transferred to the PC.
Viewing images saves on your PC
A "Remote Camera" folder will be created in the "Bluetooth" folder under "My
Documents" during initial set-up. A folder bearing the same name as the camera will be
created in it, and images will be saved in this folder.
Click the [Explorer] button in the [Remote Camera] window to display the folder where
the images have been saved.
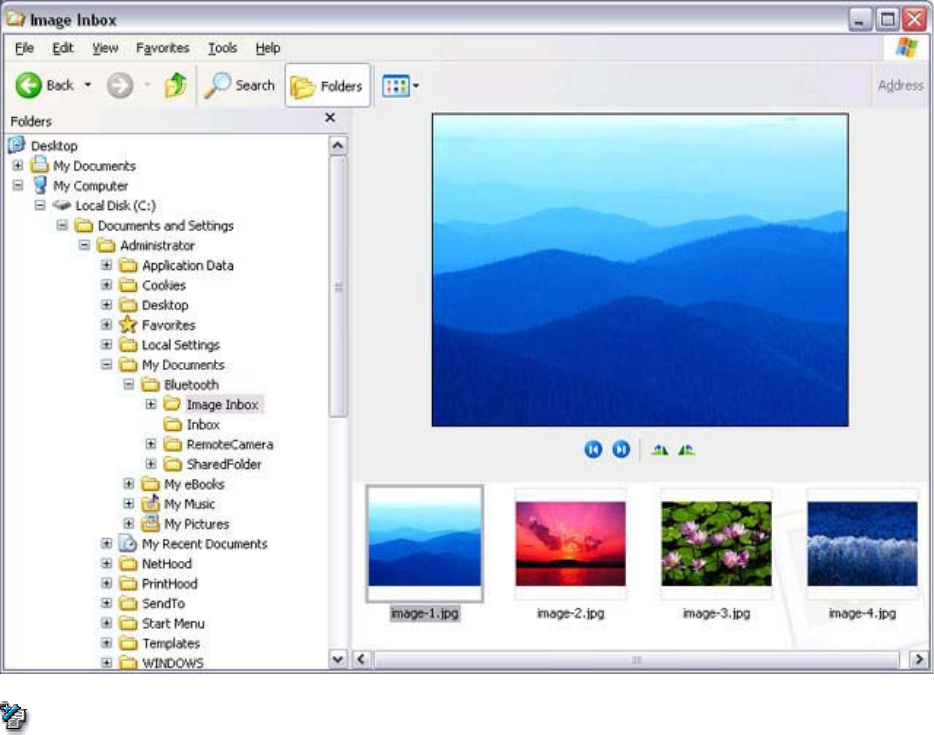
Note
• This window is an example showing pictures when [Filmstrip] has been selected
from the [View] menu in Explorer.
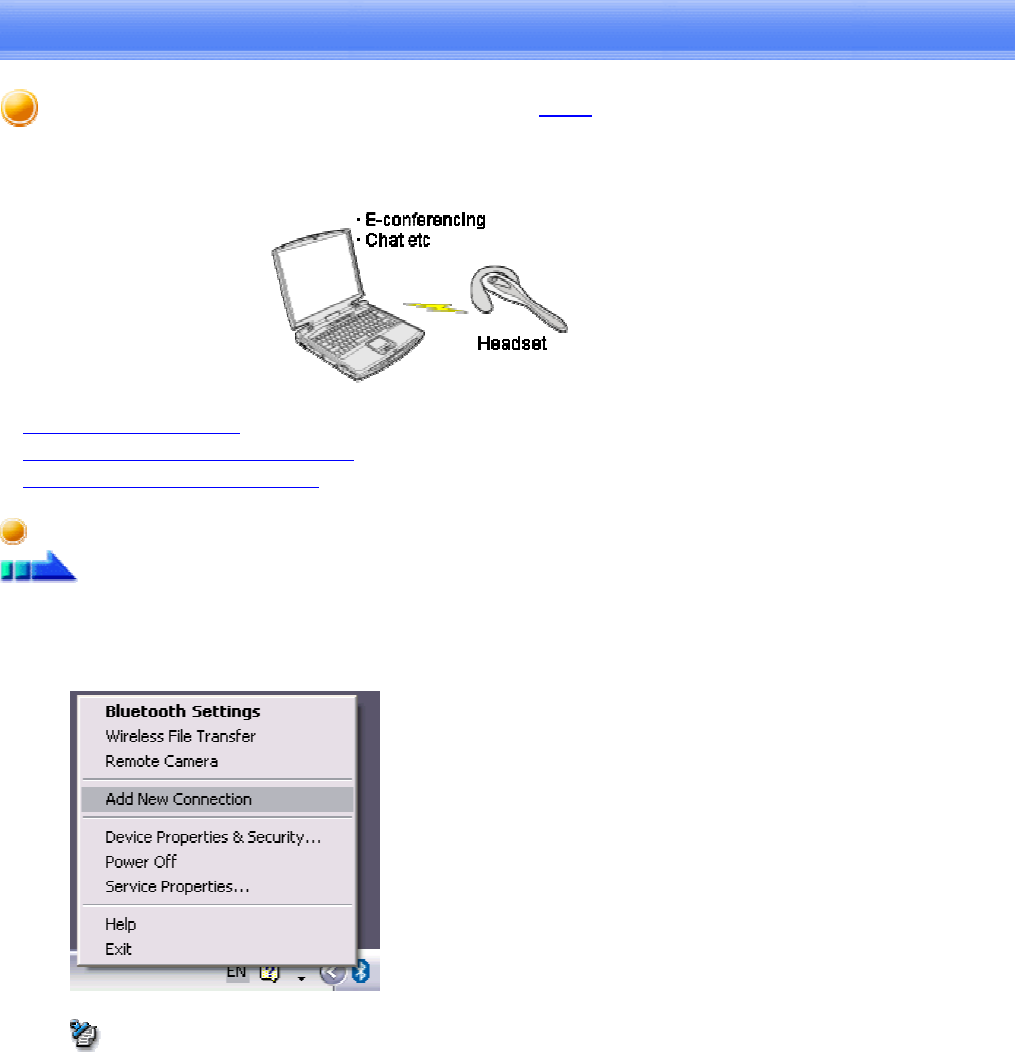
Using a headset to communicate [HSP]
This section provides a description of how to use a Bluetooth-compatible wireless
headset to communicate (chat) using Microsoft NetMeeting or other software.
Registering the headset
Making a connection to the headset
Disconnecting from the headset
Registering the headset
Procedure
1. Right-clickontheBluetoothiconinthetasktray,thenclickon[AddNew
Connection Wizard]
Note
oAlternatively, you can click on [Start]>[All
Programs]>[Bluetooth]>[Bluetooth Settings], then click on [New
Connection] in the [Bluetooth Settings] screen that has opened.
The [Add New Connection Wizard (Welcome to the Add New Connection
Wizard)] screen will appear.

2. Turn the headset power on
Once you have turned on the headset, set the mode to enable a Bluetooth
connection.
Important
oThe procedure for operating the headset may differ depending on the
manufacturer and model.
Please consult your user guide for a detailed description of how to operate
the unit.
3. Confirm that [Express Mode] has been selected, then click on the [Next]
button
The [Add New Connection Wizard (Searching for Bluetooth Devices)] screen will
appear.