Agfa NV 5365 Drystar 5300/xxx tabletop printer User Manual 2923 B EN PnP Drystar 5300 A5
Agfa Gevaert N V Drystar 5300/xxx tabletop printer 2923 B EN PnP Drystar 5300 A5
Agfa NV >
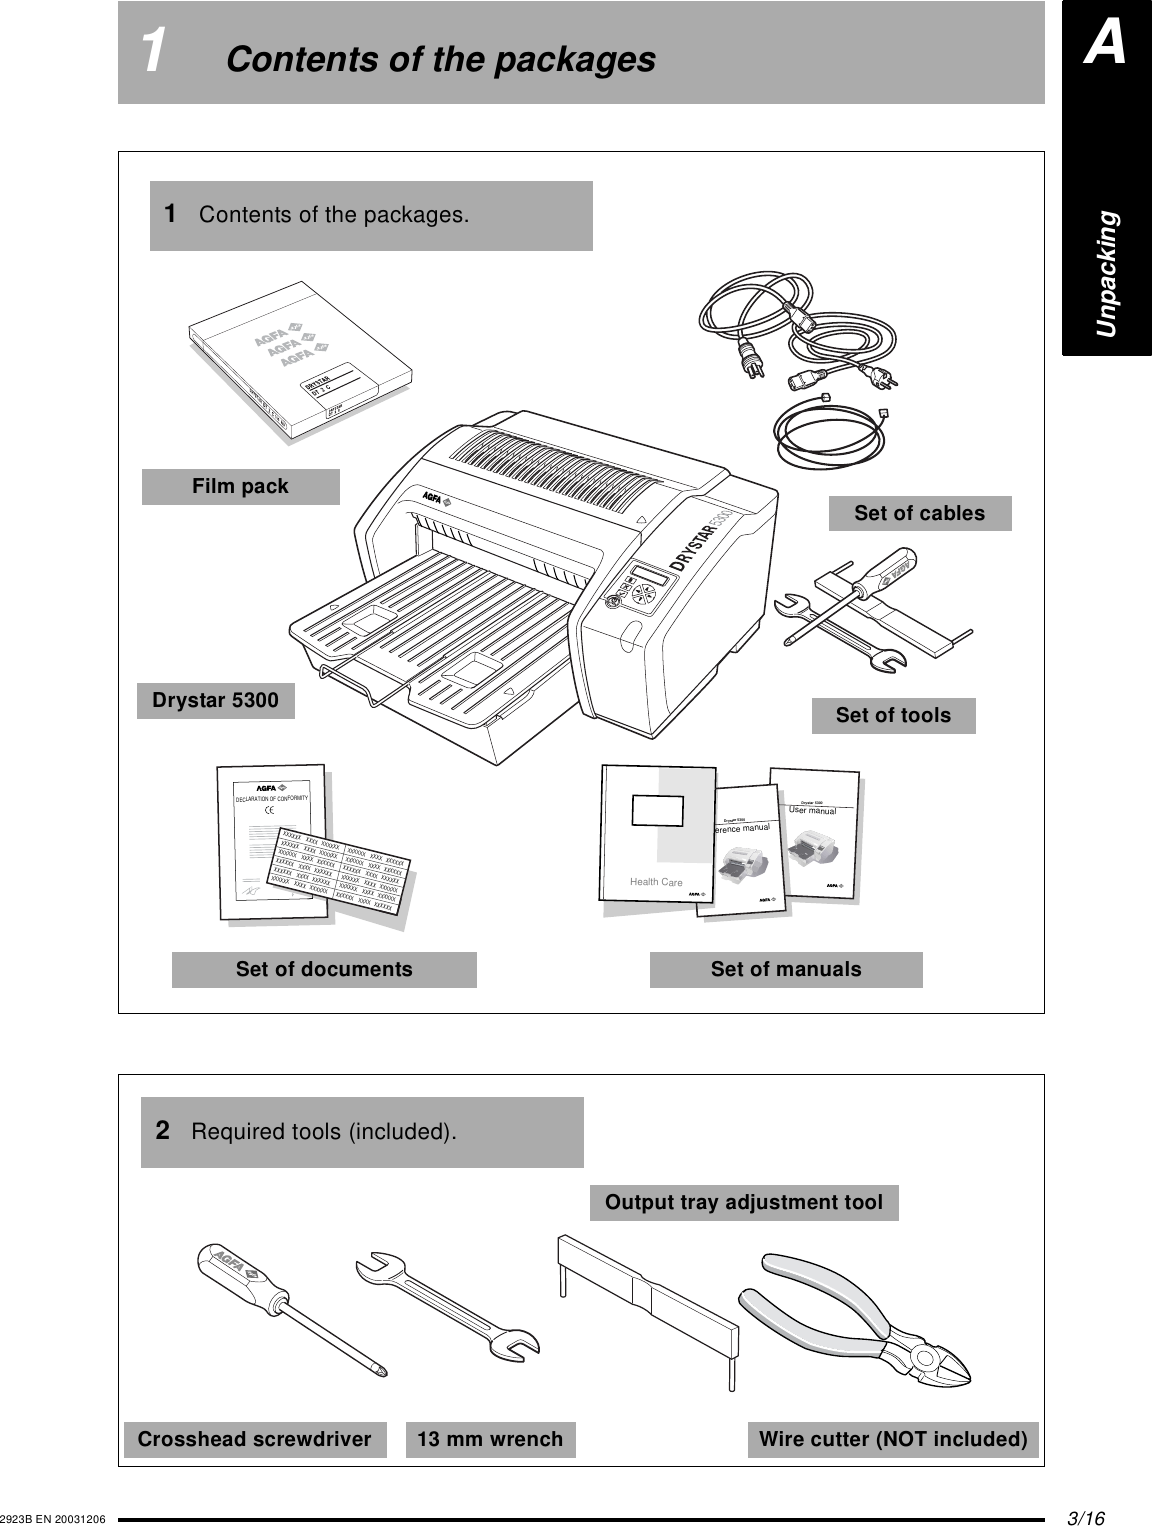
Contents
- 1. User manual part 1
- 2. User manual part 2
- 3. User manual part 3
- 4. User manual part 4
User manual part 1
![5/162923B EN 200312063Remove Drystar 5300 from pallet1Take 13 mm wrench.MOBILE or SEISMIC INSTALLATION ONLY:reuse screws to fix printer at its location.3Shift printer to the right [1] and lift it from pallet [2].122Remove 2 screws.4Put printer on a table.Align with the table edge.AUnpacking](https://usermanual.wiki/Agfa-NV/5365.User-manual-part-1/User-Guide-514501-Page-5.png)
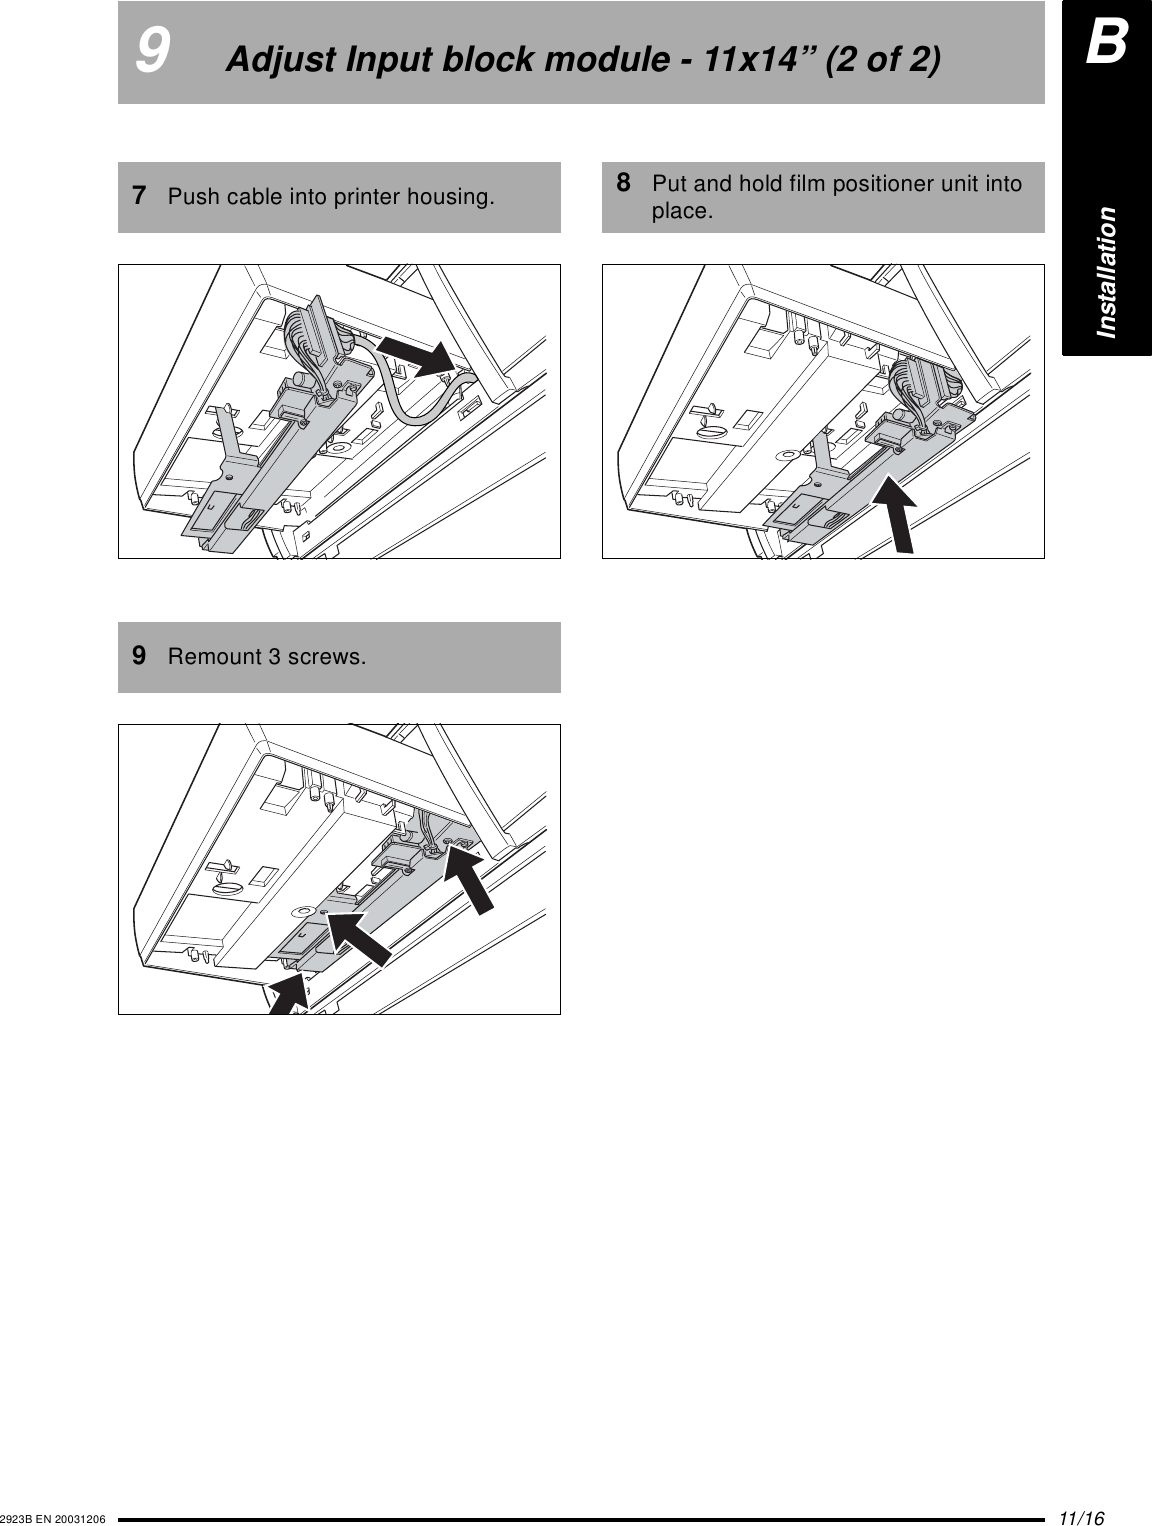
![10/16 2923B EN 200312068Adjust Input block module - 11x14” (1 of 2)1Take output tray adjustment tool.3Take crosshead screwdriver.5Lower film positioner unit.2Push tool down into output tray holes [1]. Push bracket until it clicks [2].4Remove 3 screws.6Loosen cable.12Click!InstallationB](https://usermanual.wiki/Agfa-NV/5365.User-manual-part-1/User-Guide-514501-Page-10.png)