Arcadyan Technology WA4001CB WLAN ACCESS POINT User Manual P74841 F5D7233 man indd
Arcadyan Technology Corporation WLAN ACCESS POINT P74841 F5D7233 man indd
Contents
USER MANUAL 5 OF 7

Using the Web-Based Advanced User Interface
51
section
2
1
3
4
5
6
7
8
9
10
11
5.
For a home or small business user, select “WPA-PSK” under
“Network Authentication”.
Note:
Select “WPA” if you are using this computer to connect to
a corporate network that supports an authentication server such
as a radius server. Please consult your network administrator for
further information.
6.
Select “TKIP” or “AES” under “Data Encryption”. This setting will
have to be identical to the Router that you set up.
7.
Type in your encryption key in the “Network key” box.
Important:
Enter your pre-shared key. This can be from eight to 63
characters and can be letters, numbers, or symbols. This same key
must be used on all of the clients that you set up.
8.
Click “OK” to apply settings.
52
Using the Web-Based Advanced User Interface
Using the Web-Based Advanced User Interface
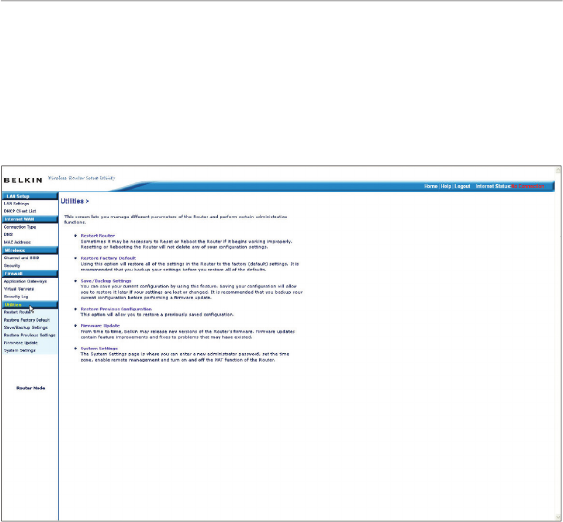
Utilities Tab
This screen lets you manage different parameters of the Router and
perform certain administrative functions.
Using the Web-Based Advanced User Interface
53
section
2
1
3
4
5
6
7
8
9
10
11
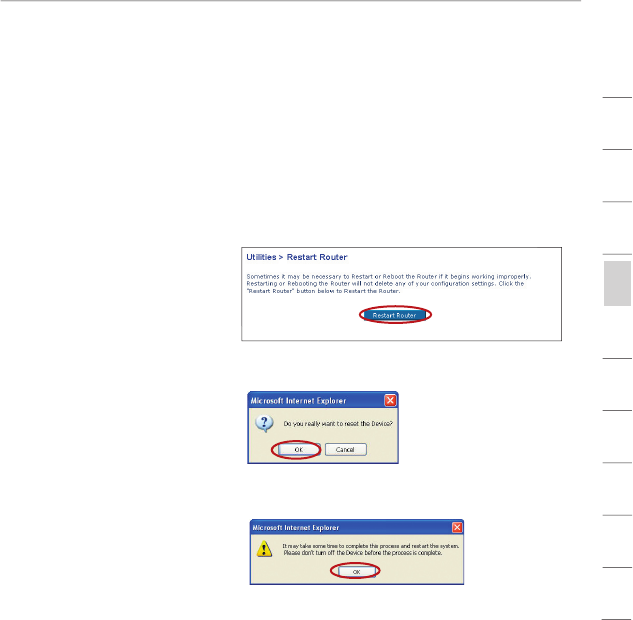
Restarting the Router
Sometimes it may be necessary to restart or reboot the Router if it
begins working improperly. Restarting or rebooting the Router will
NOT delete any of your configuration settings.
Restarting the Router to Restore Normal Operation
1.
Click the “Restart
Router” button.
2.
The following message
will appear. Click “OK”.
3.
The following message
will appear. Restarting
the Router can take
up to 25 seconds. It is
important not to turn off
the power to the Router
during the restart.
4.
A 25-second countdown will appear on the screen. When the
countdown reaches zero, the Router will be restarted. The
Router’s home page should appear automatically. If not, type in
the Router’s address (default = 192.168.2.1) into the navigation
bar of your browser.
54
Using the Web-Based Advanced User Interface
Using the Web-Based Advanced User Interface
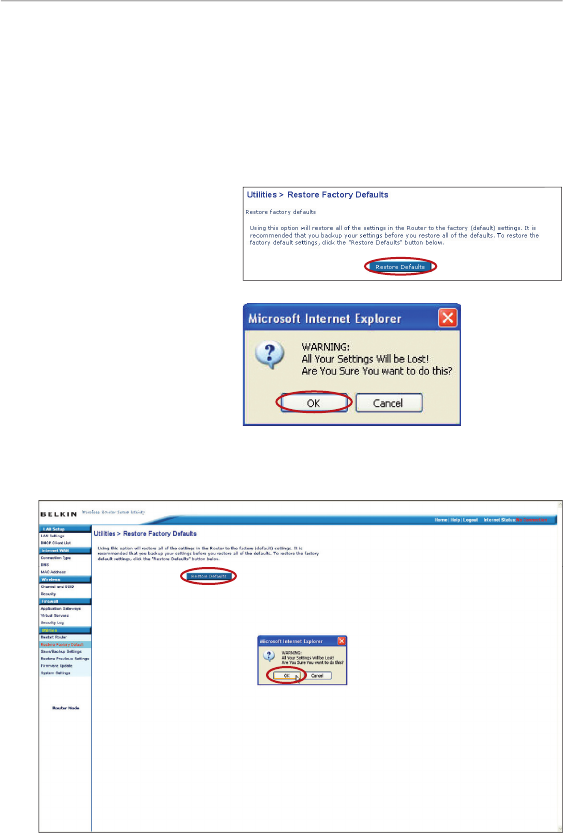
Restoring Factory Default Settings
Using this option will restore all of the settings in the Router to the
factory (default) settings. It is recommended that you back up your
settings before you restore all of the defaults.
1.
Click the “Restore
Defaults” button.
2.
The following message
will appear. Click “OK”.
3.
The following message will appear. Restoring the defaults includes
restarting the Router. It can take up to 25 seconds. It is important
not to turn the power to the Router off during the restart.
4.
A 25-second countdown will appear on the screen. When the
countdown reaches zero, the Router’s defaults will be restored.
The Router’s home page should appear automatically. If it does
not, type in the Router’s address (default = 192.168.2.1) into the
navigation bar of your browser.
Using the Web-Based Advanced User Interface
55
section
2
1
3
4
5
6
7
8
9
10
11
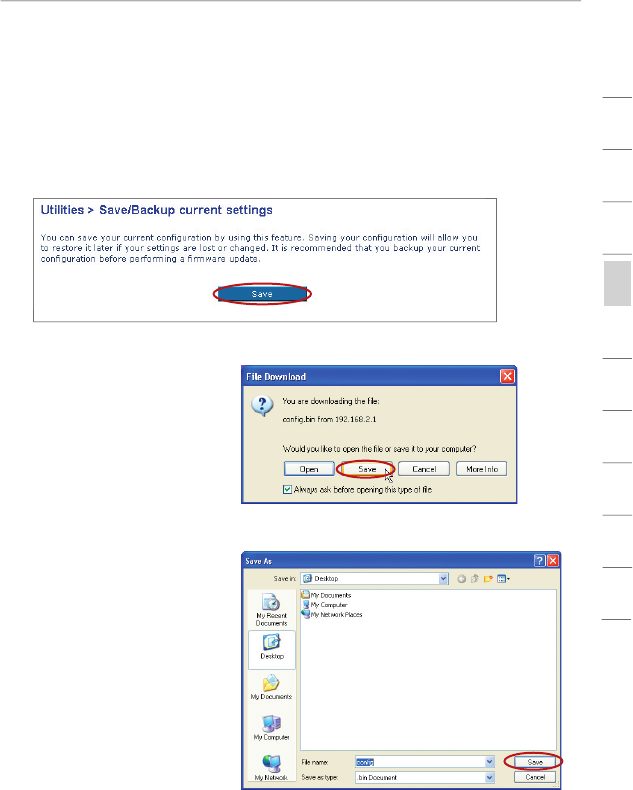
Saving a Current Configuration
You can save your current configuration by using this feature. Saving
your configuration will allow you to restore it later if your settings are
lost or changed. It is recommended that you back up your current
configuration before performing a firmware update.
1.
Click “Save”. A window
called “File Download”
will open. Click “Save”.
2.
A window will open
that allows you to
select the location
where you want to
save the configuration
file. Select a location.
You can name the file
anything you want, or
use the default name
“Config”. Be sure to
name the file so you
can locate it yourself
later. When you have
selected the location
and name of the file,
click “Save”.
56
Using the Web-Based Advanced User Interface
Using the Web-Based Advanced User Interface
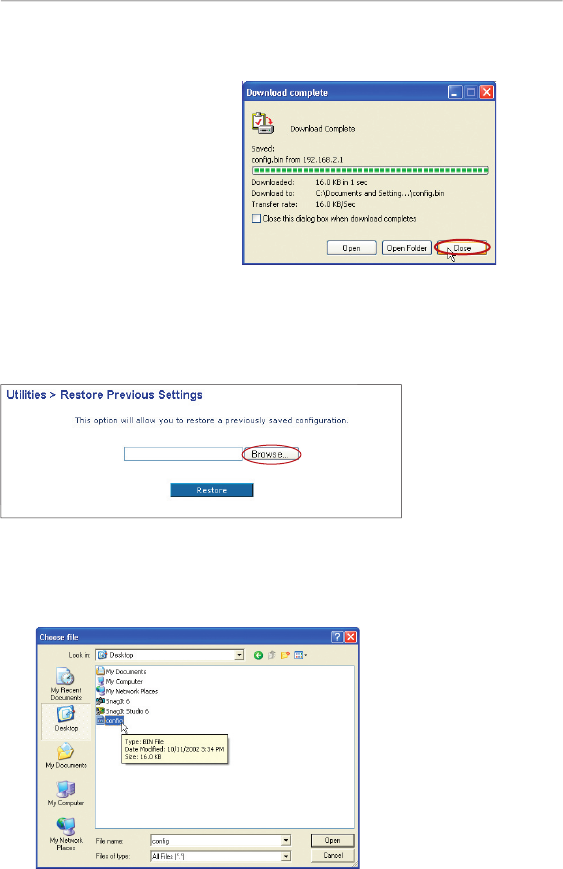
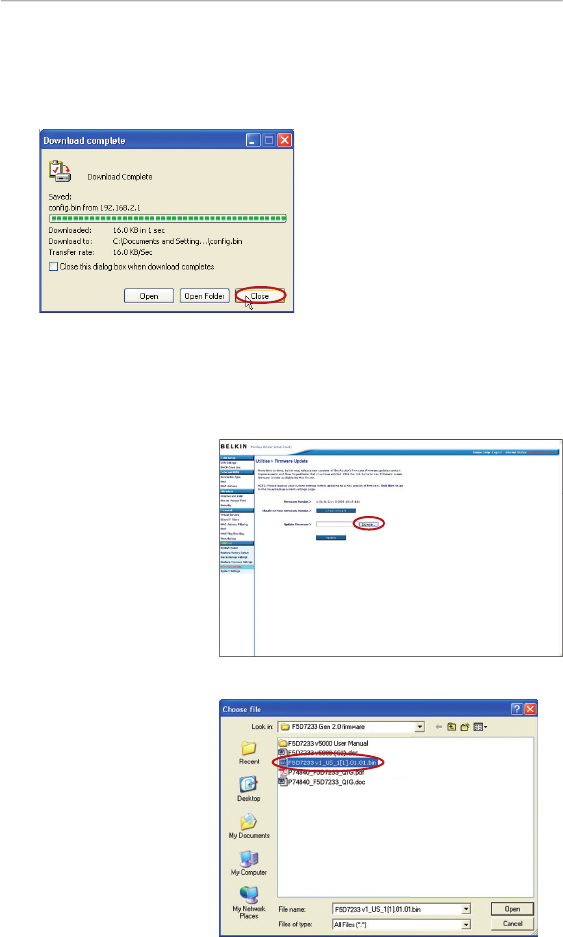
3.
When the save is
complete, you will see
the following window.
Click “Close”.
The configuration is
now saved.
Restoring a Previous Configuration
This option will allow you to restore a previously saved configuration.
1.
Click “Browse”. A window will open that allows you to select the
location of the configuration file. All configuration files end with
a “.bin”. Locate the configuration file you want to restore and
double-click on it.
Using the Web-Based Advanced User Interface
57
section
2
1
3
4
5
6
7
8
9
10
11
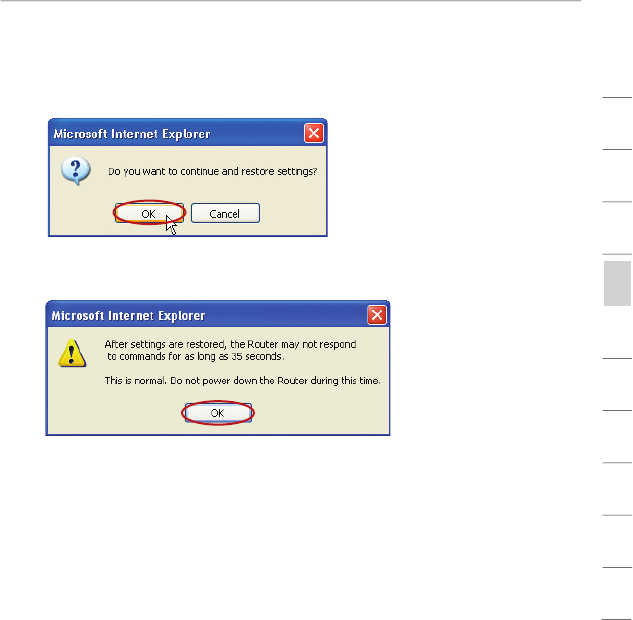
2.
You will be asked if you want to continue. Click “OK”.
3.
A reminder window will appear. It will take up to 35 seconds for
the configuration restoration to complete. Click “OK”.
4.
A 35-second countdown will appear on the screen. When the
countdown reaches zero, the Router’s configuration will be
restored. The Router’s home page should appear automatically. If
not, type in the Router’s address (default = 192.168.2.1) into the
navigation bar of your browser.
58
Using the Web-Based Advanced User Interface
Using the Web-Based Advanced User Interface
Updating the Firmware
From time to time, Belkin may release new versions of the Router’s
firmware. Firmware updates contain feature improvements and fixes
to problems that may exist. When Belkin releases new firmware,
you can download the firmware from the Belkin update website and
update your Router’s firmware to the latest version.
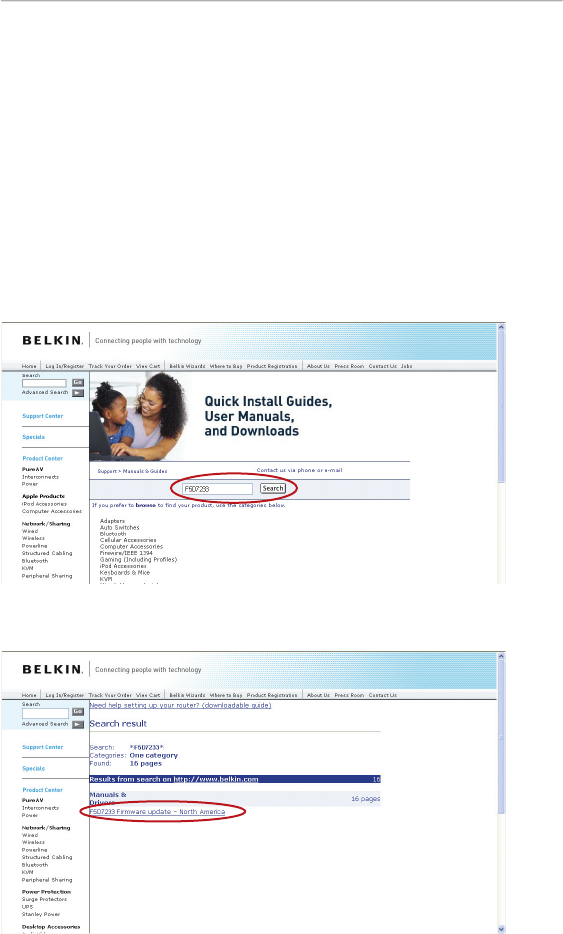
Searching for a New Version of Firmware
From
http://www.belkin.com/support/downloads.asp,
type in
the
Belkin part number “F5D7233” on the “Search” field. Click “Search”.
From the results page, click “F5D7233 Firmware update -
North America”.
Using the Web-Based Advanced User Interface
59
section
2
1
3
4
5
6
7
8
9
10
11
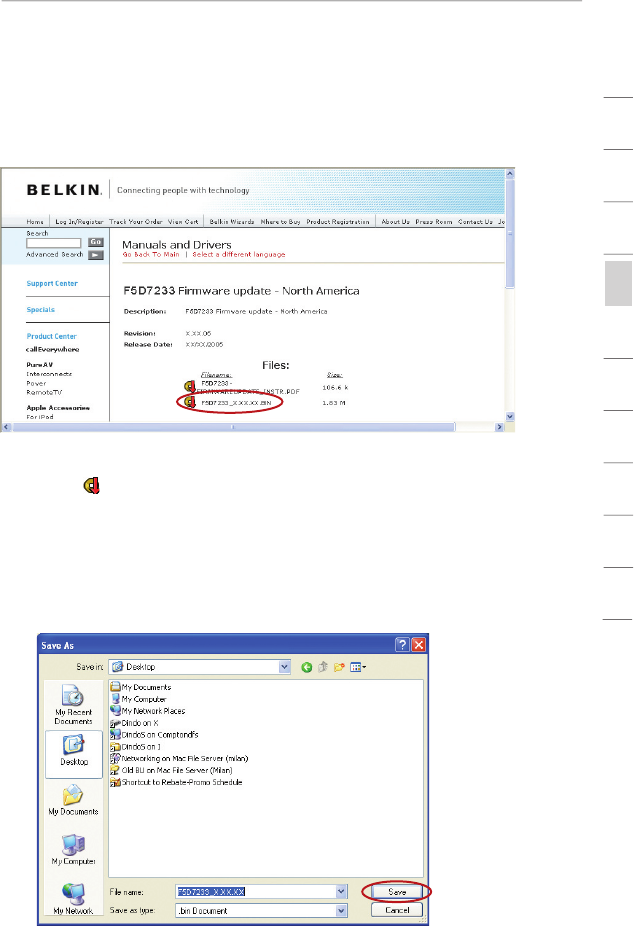
Downloading a New Version of Firmware
You will now be taken to the download page of “F5D7233 Firmware
update - North America”.
1.
To download the new version of firmware, click the download
logo (
)
.
2.
A window will open that allows you to select the location where
you want to save the firmware file. Select a location. You can
name the file anything you want, or use the default name. Be sure
to save the file in a place where you can locate it yourself later.
Note:
We suggest saving this to your desktop to make it easy to
locate the file. When you have selected the location, click “Save”.
60
Using the Web-Based Advanced User Interface
Using the Web-Based Advanced User Interface
Updating the Router’s Firmware
1.
In the “Firmware
Update” page, click
“Browse”. A window
will open that allows
you to select the
location of the
firmware update file.
2.
Browse to the
firmware file you
downloaded.
Select the file by
double-clicking on
the file name.
3.
When the save is complete, you will see the following window.
Click “Close”.
The download of the firmware is complete. To update the firmware,
follow the next steps in “Updating the Router’s Firmware”.