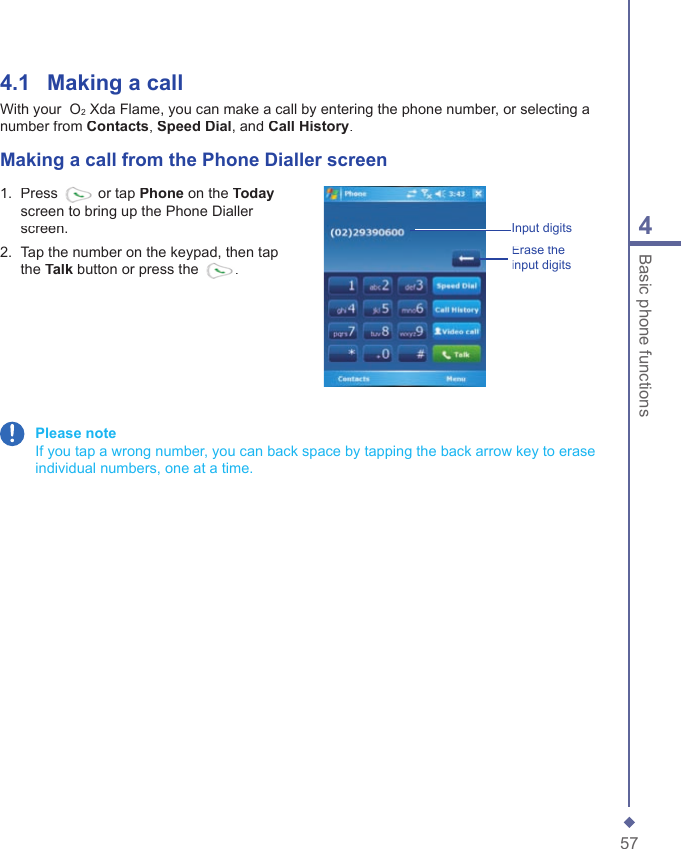
Arima Communication 3600 3G Pocket PC phone with BT and WLAN User Manual Ch01 Xda Star IM Eng indd
Arima Communication Corporation 3G Pocket PC phone with BT and WLAN Ch01 Xda Star IM Eng indd
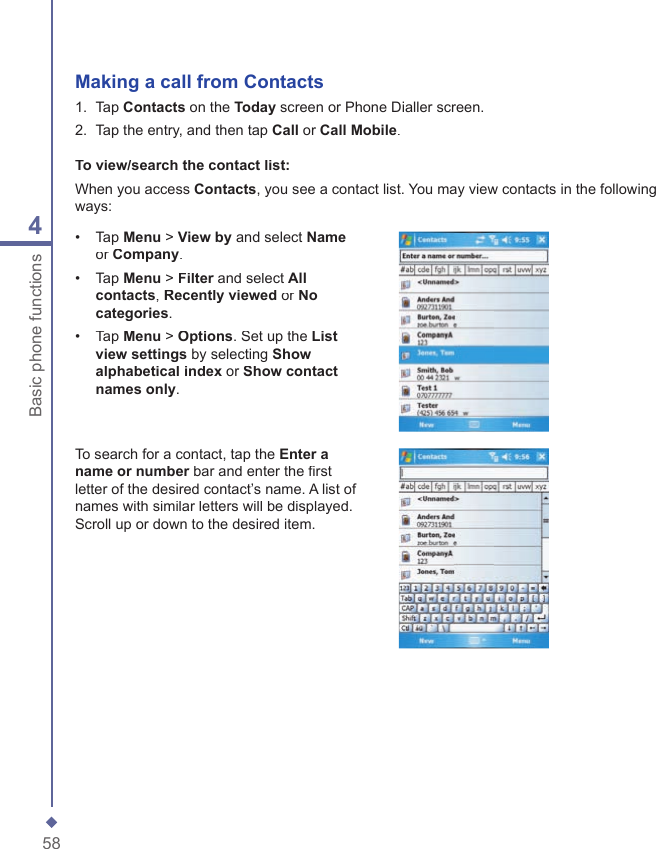
Contents
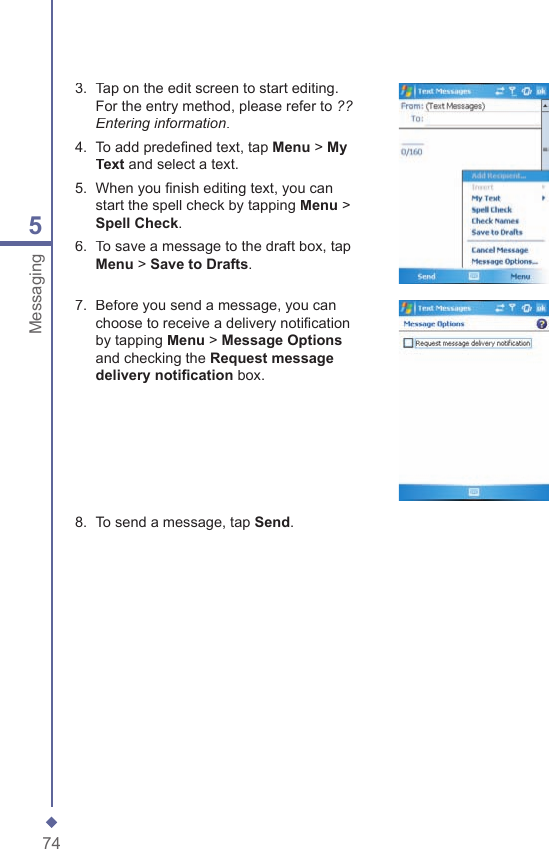
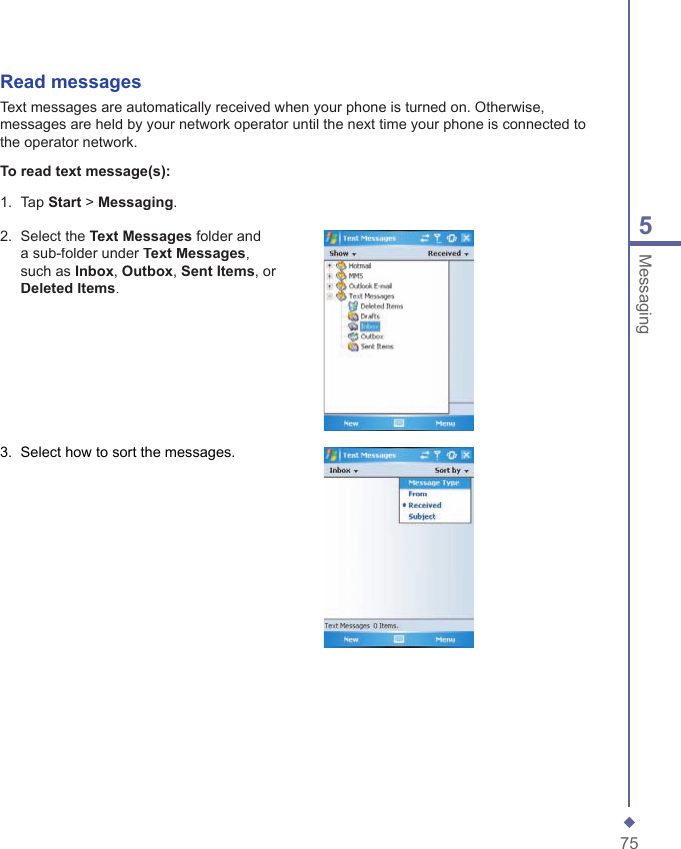
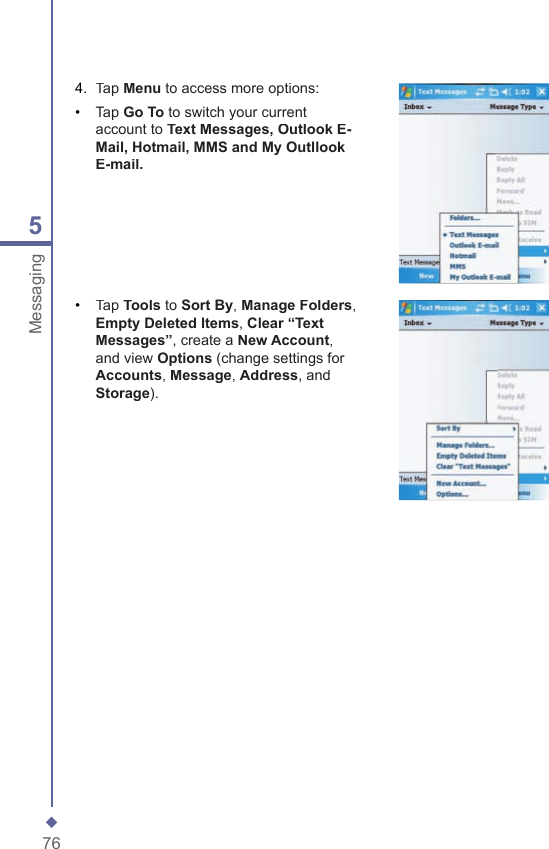
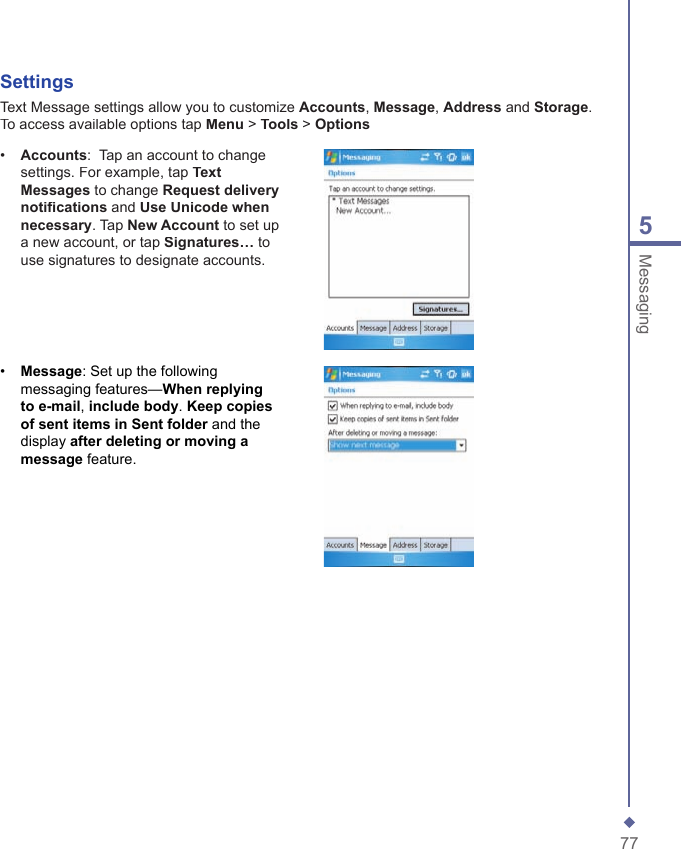
- 1. User manual 1
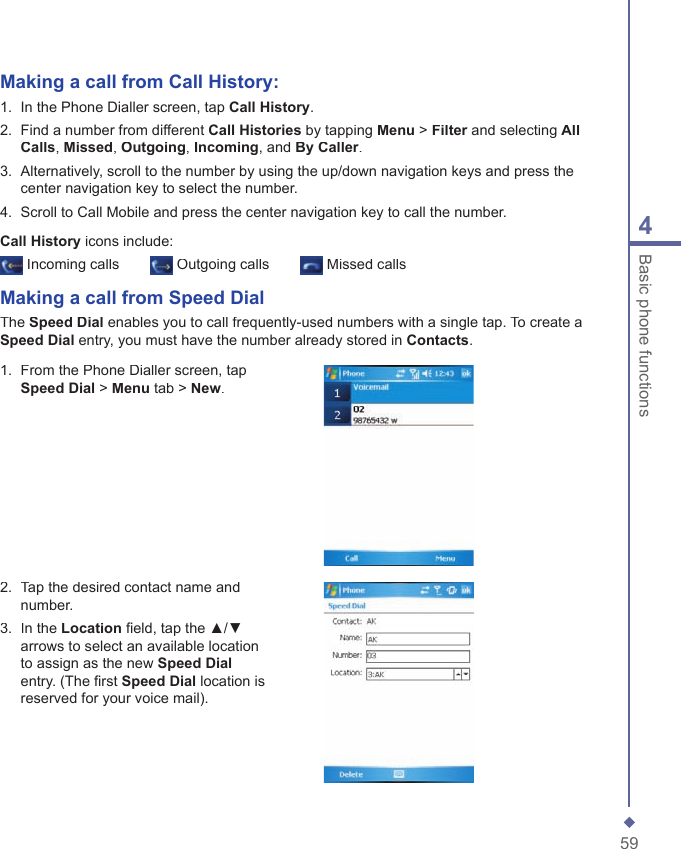
- 2. User manual 2
- 3. User manual 3
User manual 1


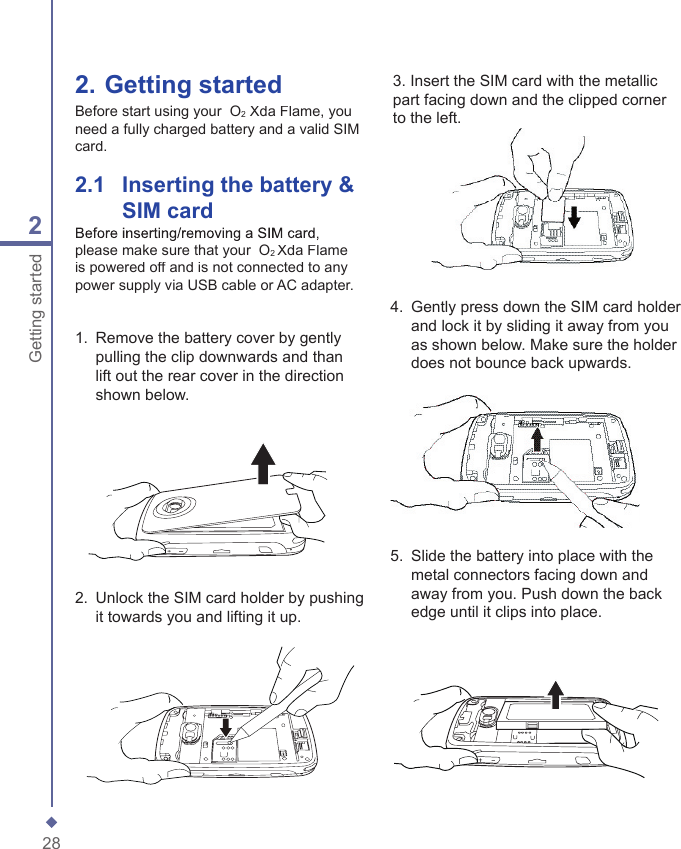
![292Getting started2.2 SIM cardBefore using your O2 Xda Flame, you must contact a network operator to get a personal SIM (Subscriber Identity Module).The SIM card contains your O2 Xda Flame number, the services included in your subscription, and your personal data such as your phonebook and messages. The phone is unusable (except for emergency calls) until a valid SIM card is inserted. Your O2Xda Flame will display a warning message if the SIM card is not inserted properly. Please note If the phone or the SIM card is lost or stolen, you should contact your network operator immediately in order to prevent unauthorized use. Copy SIM contacts to phone memoryTo copy your SIM contacts to your O2 Xda Flame, tap Contacts > [fi nd the contact] > Menu > Copy Contact.2.3 BatteryYour O2 Xda Flame contains a removable and rechargeable Li-ion polymer battery. Battery life will depend on actual usage, network coverage and whether the device is on standby mode.Battery life estimates:• Talk-time: 4-6 hrs.• Standby: 200-260 hrs (approximate).The above timings are based on the assumption that the user only uses one function at a time. Battery life may also vary depending on how frequently the user switches between functions. For battery safety, please refer to Chapter 1� ������ ����������� Please note Using any battery pack or AC adapter (charger) not specifi ed/endorsed by O2 on this phone may be dangerous and may invalidate any warranty and approval given to the phone. Unplug the charger from the power supply when it is not in use.7. Slide the cover back into place and push down until it clicks.6. Once the battery has been inserted push the side facing you down until it clips into place (1). Slide the clip (2) on the right of the battery compartment towards the battery.](https://usermanual.wiki/Arima-Communication/3600.User-manual-1/User-Guide-749414-Page-23.png)
![654Basic phone functions4.8 Contact informationContacts can be imported in the following ways:• From your SIM card: Use your SIM card in your O2 Xda Flame and another device; while using the other device you create one or more new contacts on the SIM card.• From your Call History: New contact numbers can be found in incoming or missed calls.Why import contacts?• You can back up your SIM numbers to your O2 Xda Flame.• Creating contacts in Contacts creates more detailed records.• Only Contacts can have Photo Contacts for an individual contact entry.SIM ContactsTo copy your SIM contacts to Contacts on your phone:1. Select the contact with the SIM card icon next to it [insert icon]2. Tap Menu > Save to Contacts to go to the Contacts screen to add further details.3. Press OK to save the details.](https://usermanual.wiki/Arima-Communication/3600.User-manual-1/User-Guide-749414-Page-56.png)