Arima Communication 3600 3G Pocket PC phone with BT and WLAN User Manual Ch06 Xda Star IM Eng Camera indd
Arima Communication Corporation 3G Pocket PC phone with BT and WLAN Ch06 Xda Star IM Eng Camera indd
Contents
- 1. User manual 1
- 2. User manual 2
- 3. User manual 3
User manual 2
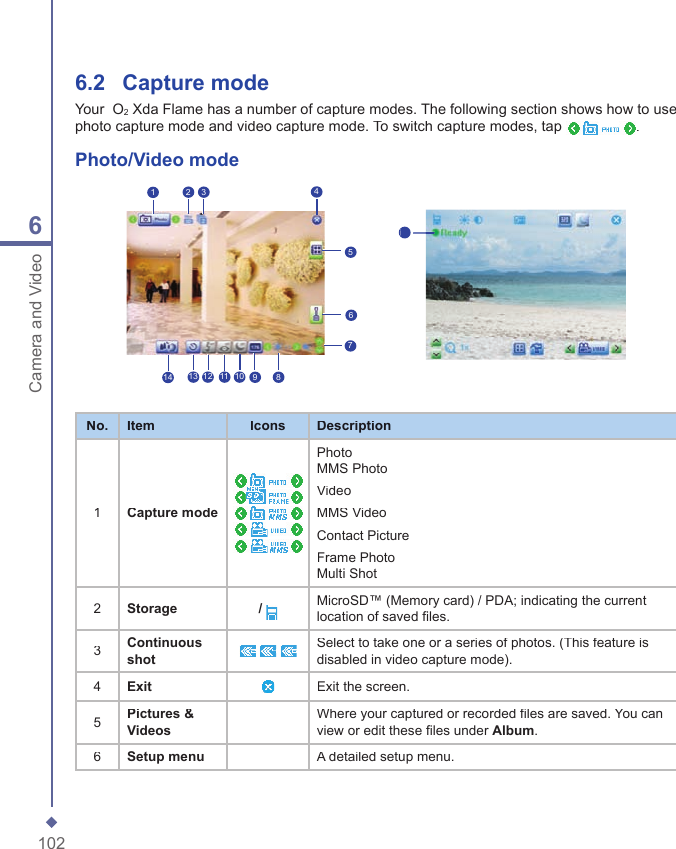
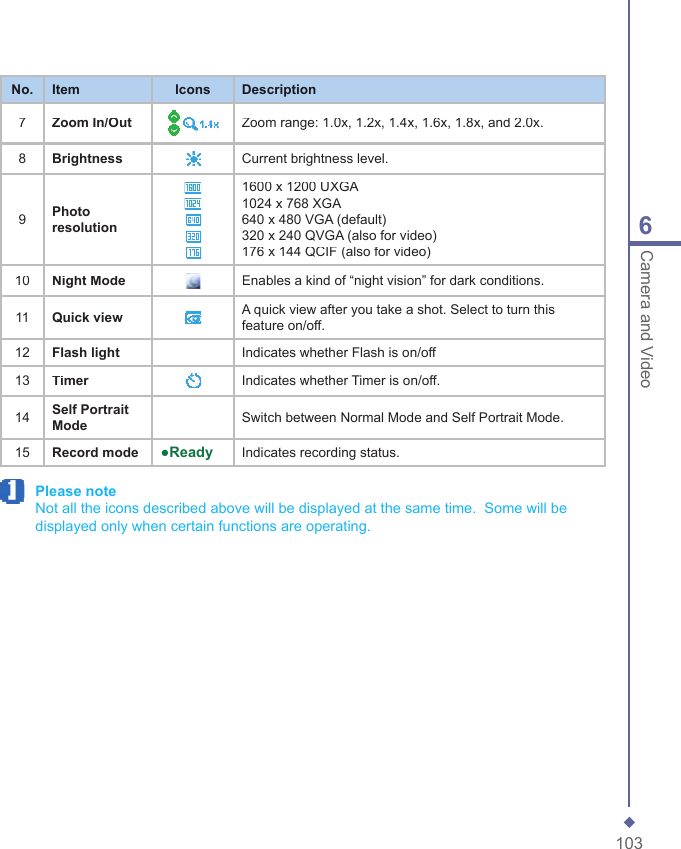
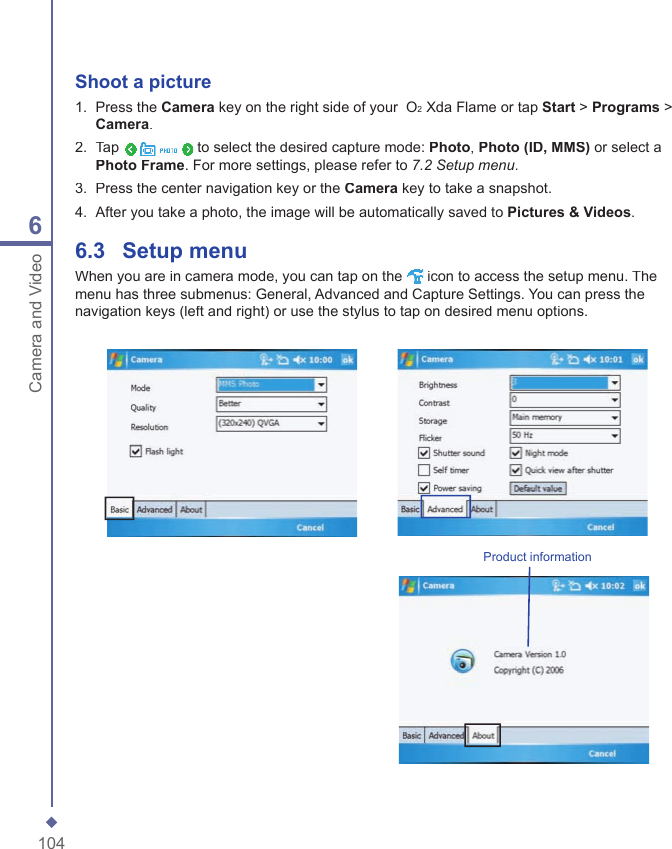
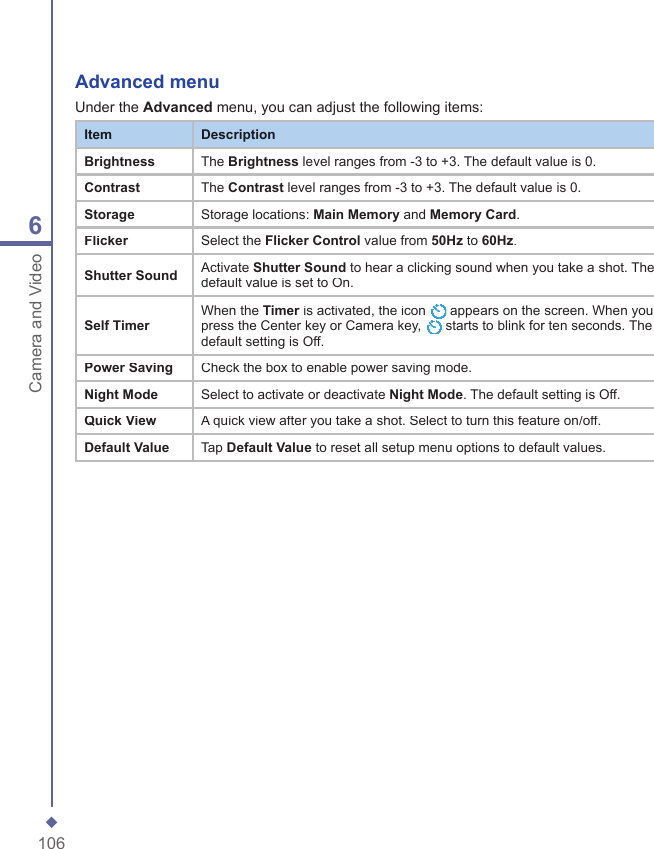
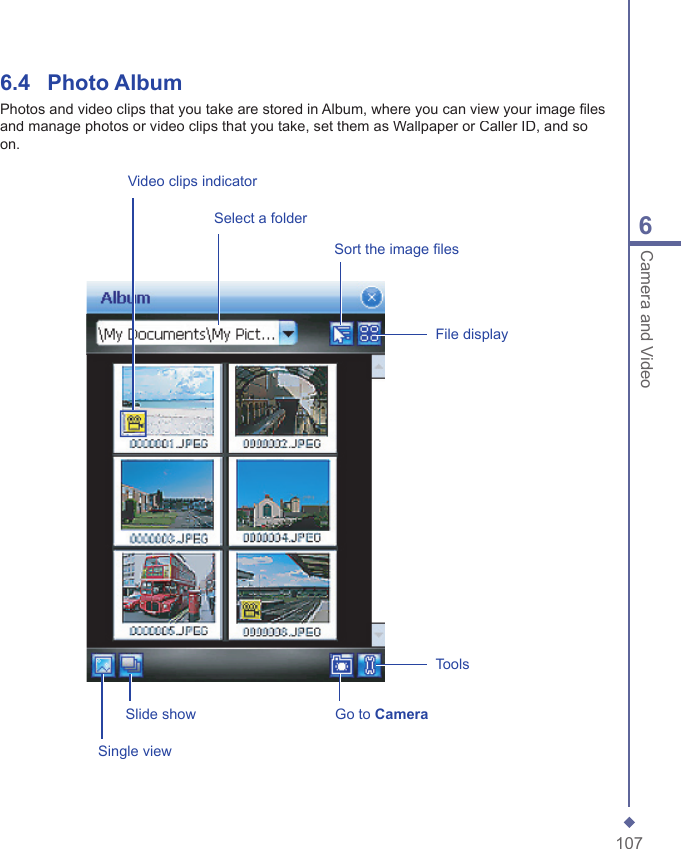
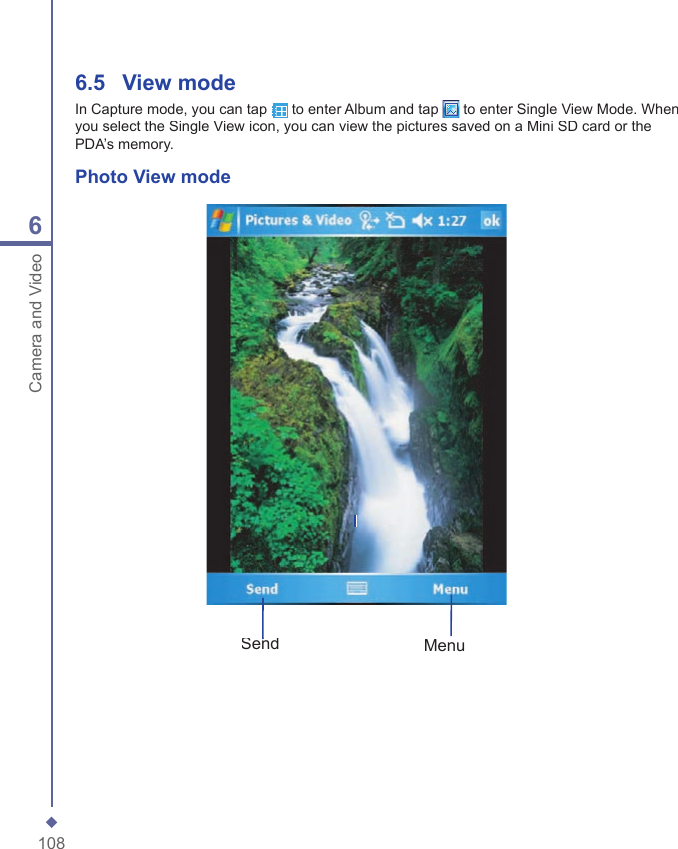
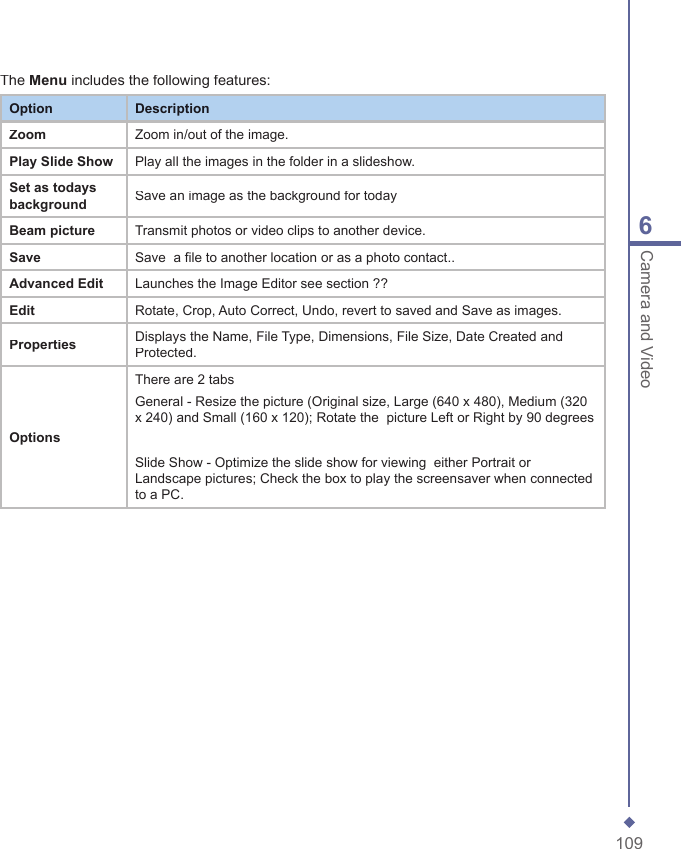
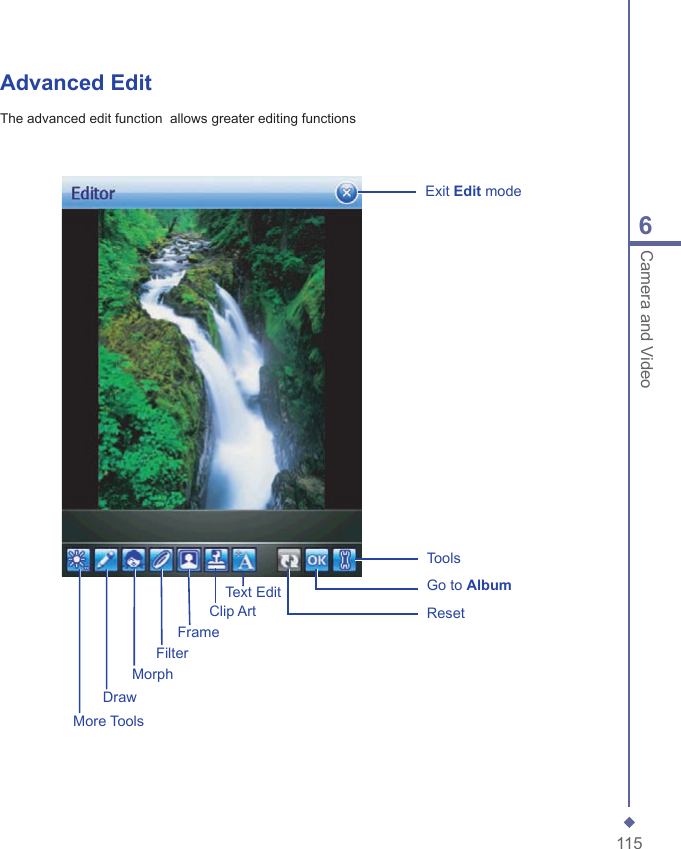
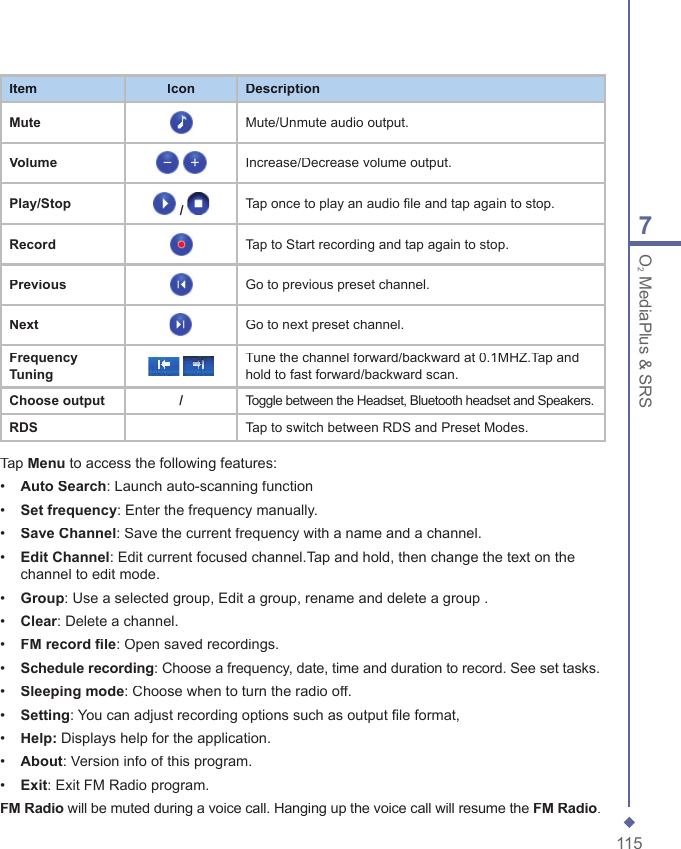
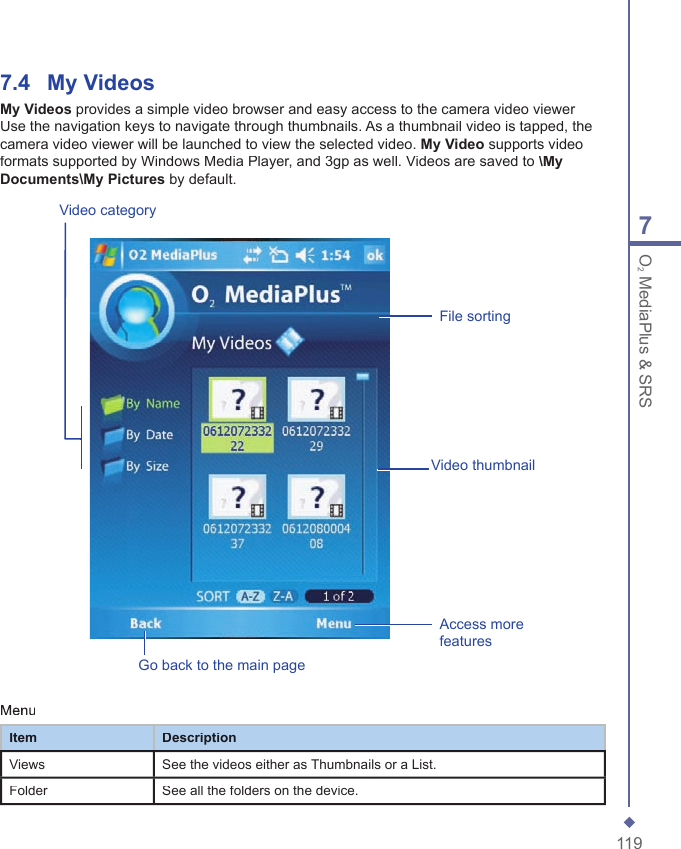
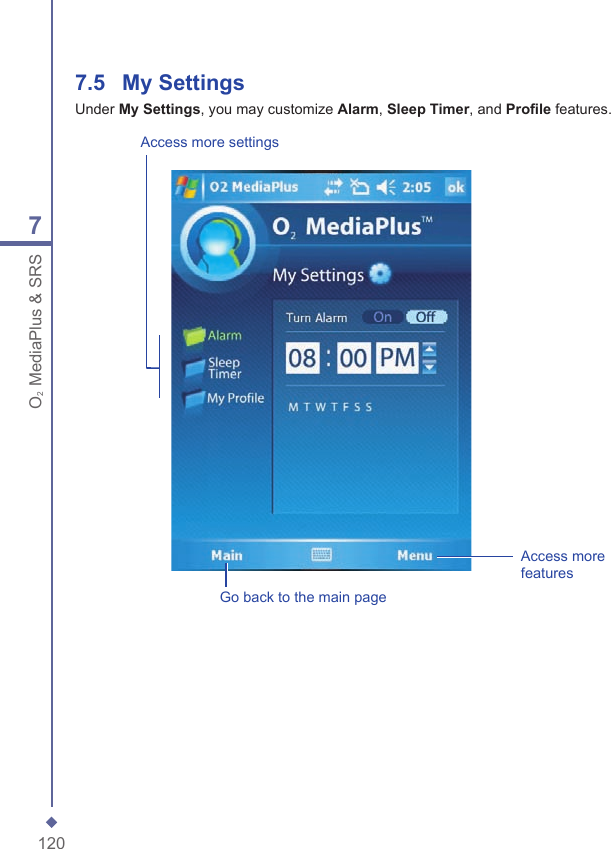
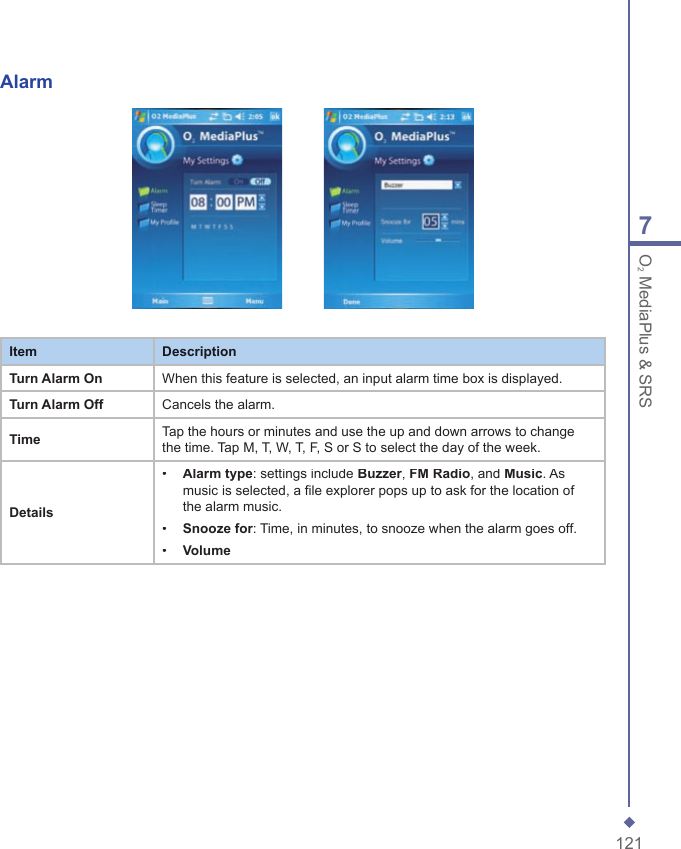
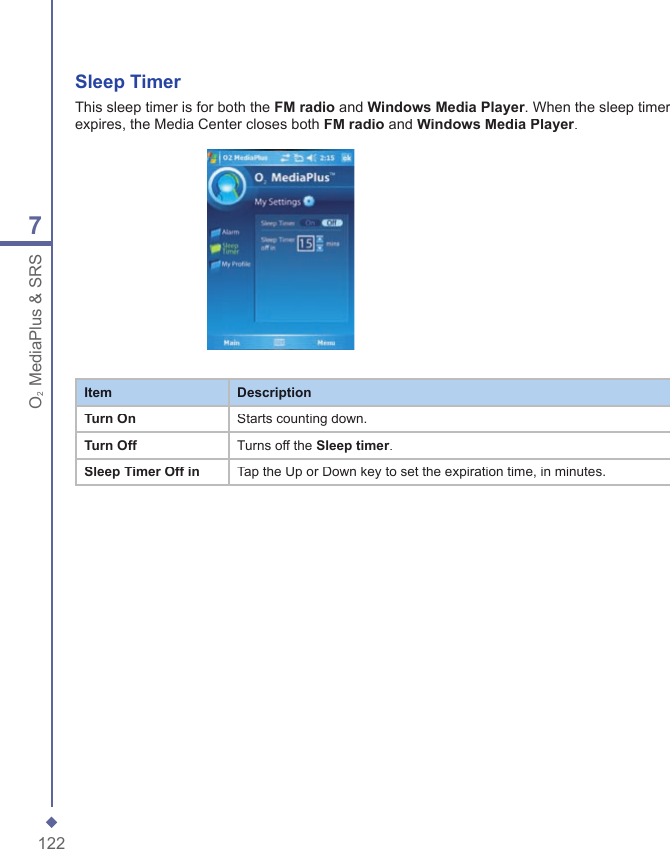
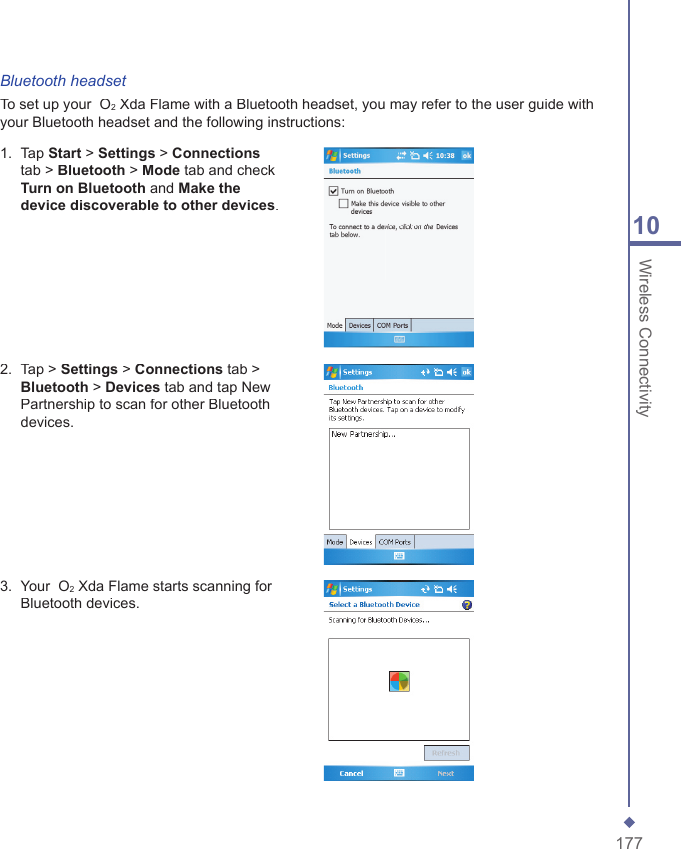
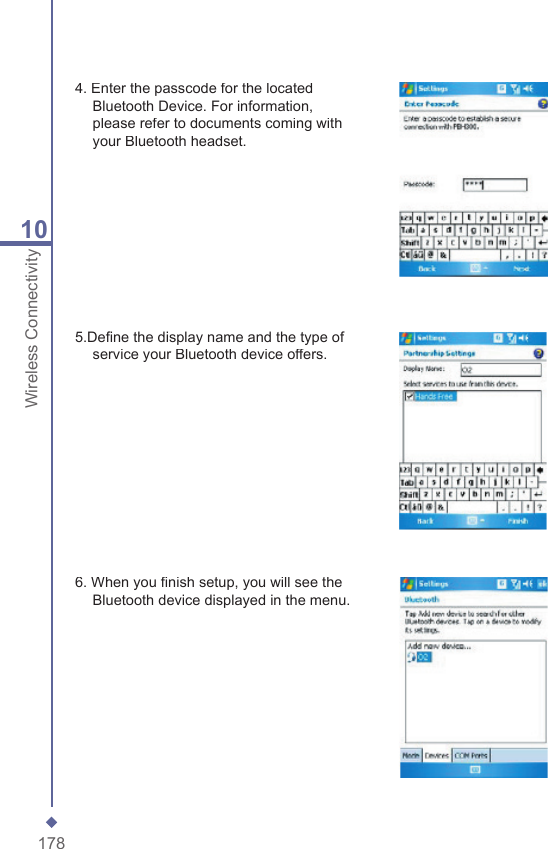
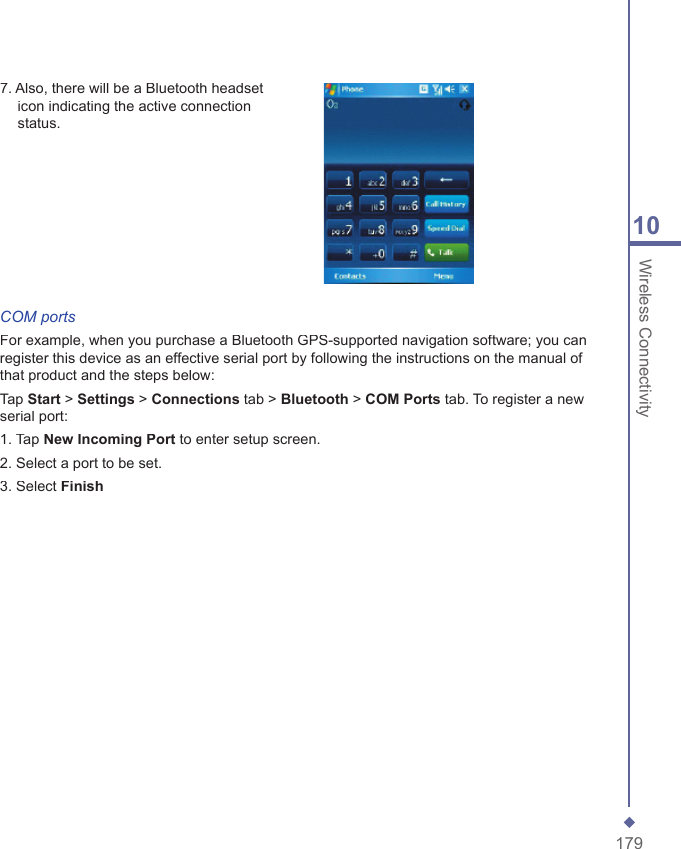
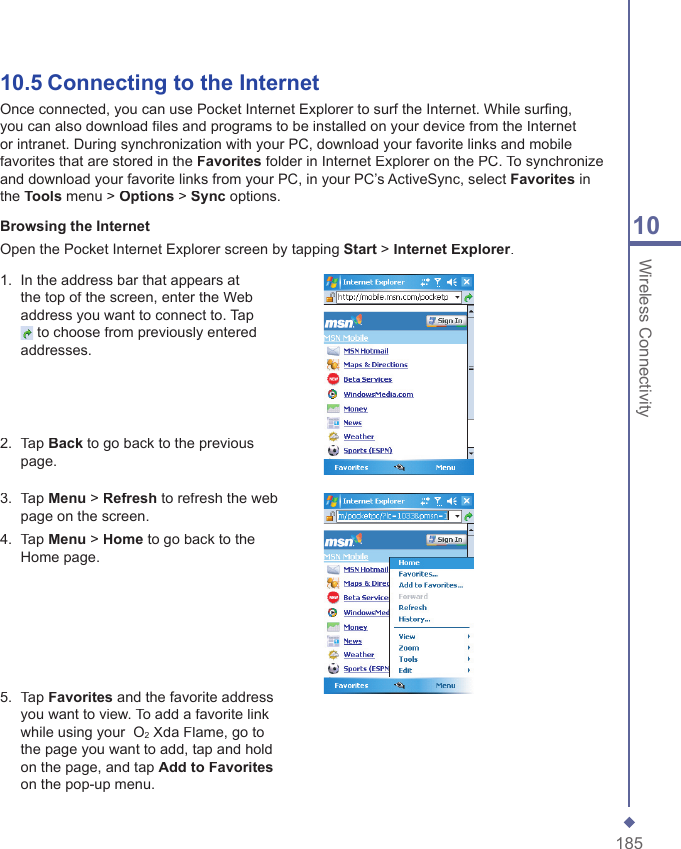
![1146Camera and Video Please note In this process, you can click anywhere outside the selected area to abort the operation.4. Before saving the edited picture, you can tap to clear the edited result.FrameIn Frame, you can select a frame and apply it to the selected image. To select a frame:1. Tap the frame icon [insert icon]2. Use the navigation pad (up/down/left/down) or scroll bar to see all available frames.3. Tap the required frame to select the frame 4. After selection, tap OK to save the image.To cancel a frame:1. Tap the frame icon again.2. Select the fi rst one without a frame. 3. Tap OK to confi rm that all stamps are attached and return to the previous screen mode.](https://usermanual.wiki/Arima-Communication/3600.User-manual-2/User-Guide-749415-Page-16.png)