Avery Dennison Retail Information Services 9460IPLA3021 Wireless Printer User Manual 9460ipad
Avery Dennison Retail Information Services, LLC Wireless Printer 9460ipad
Contents
- 1. Manual
- 2. Service manual
- 3. Symbol manual
- 4. Radio confiuration
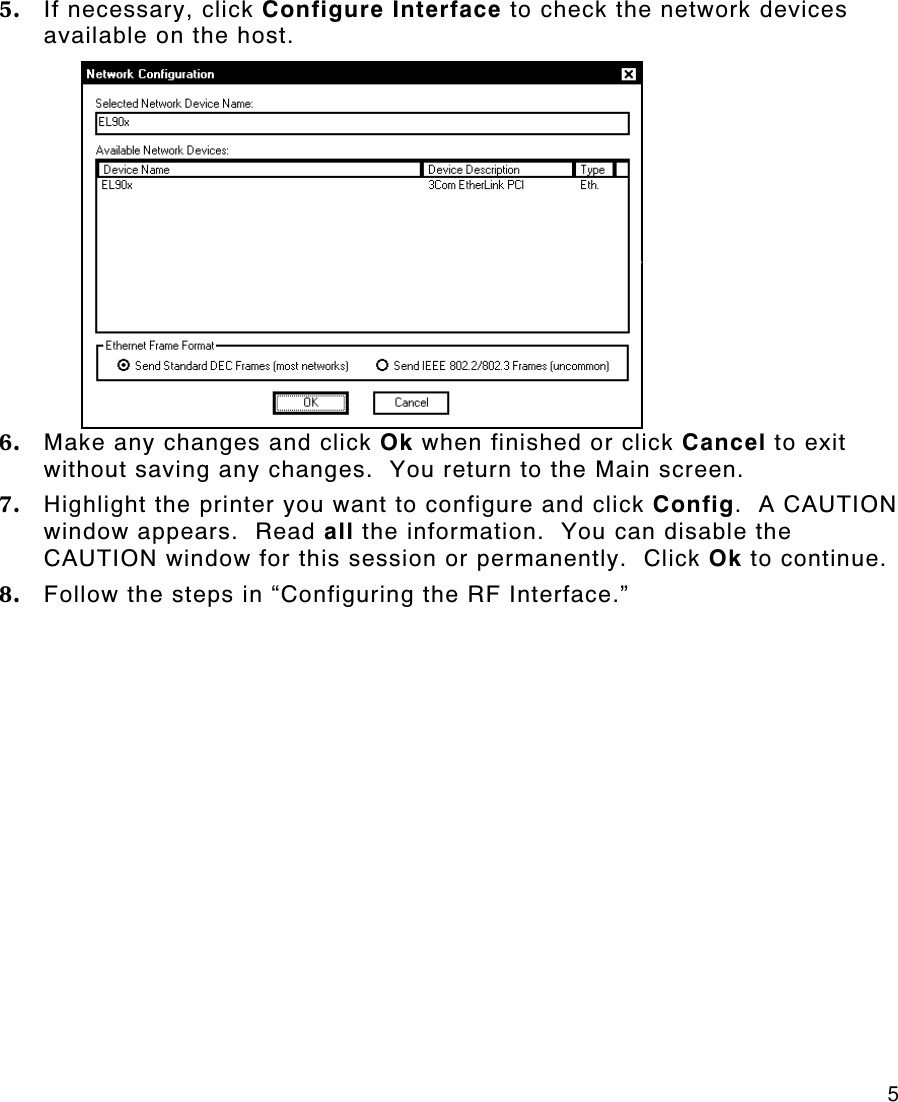
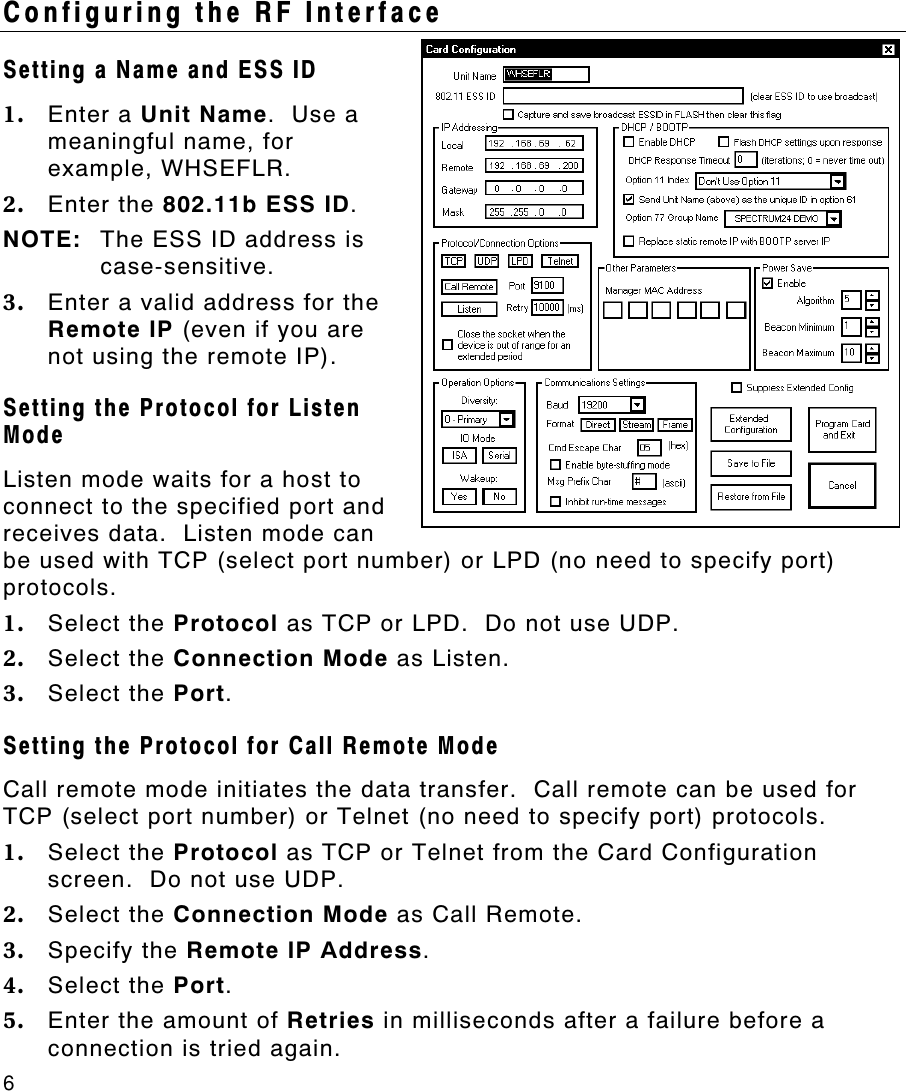
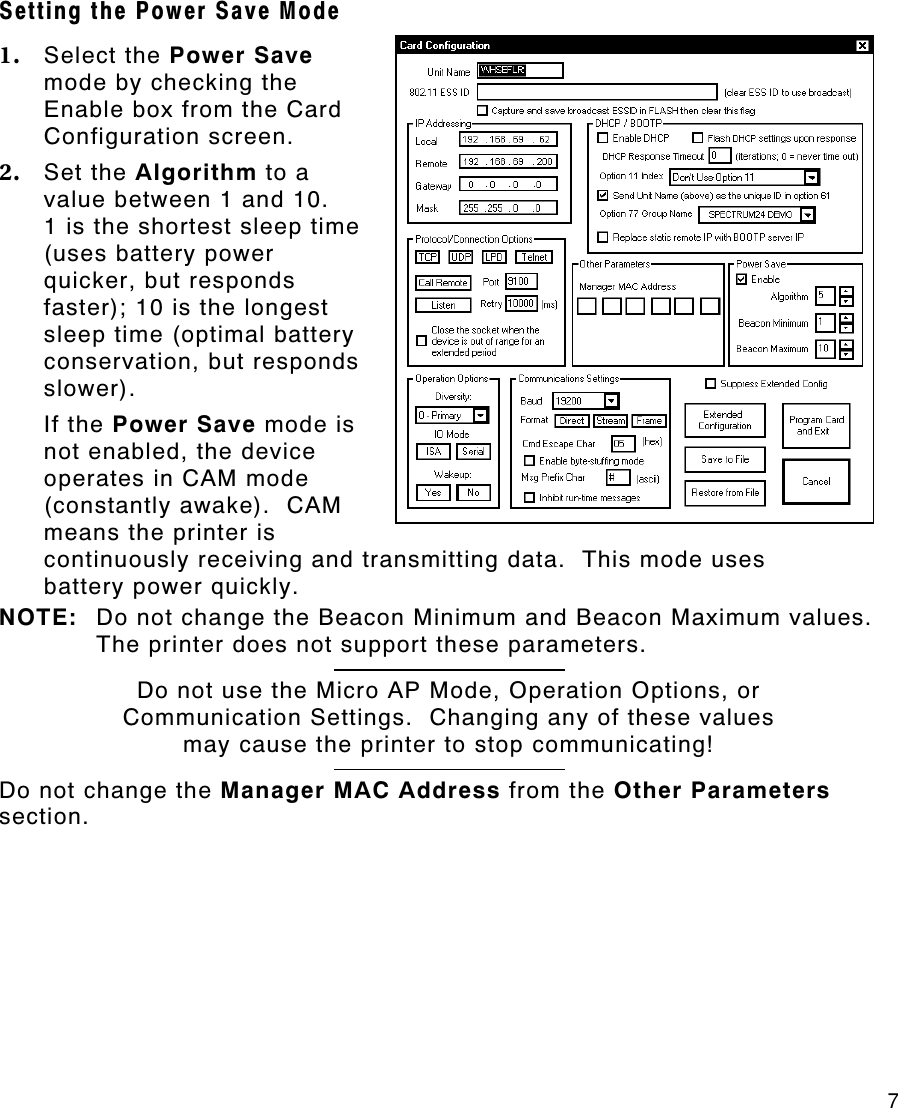
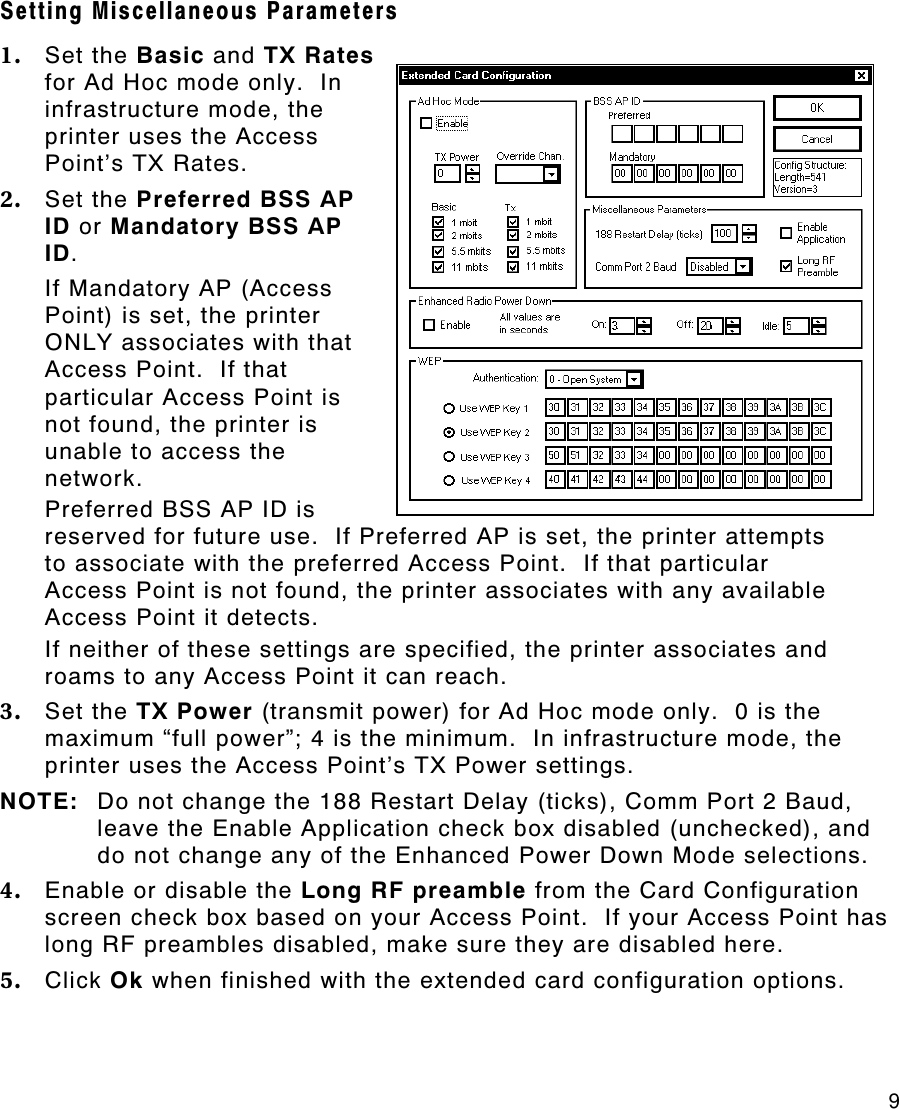
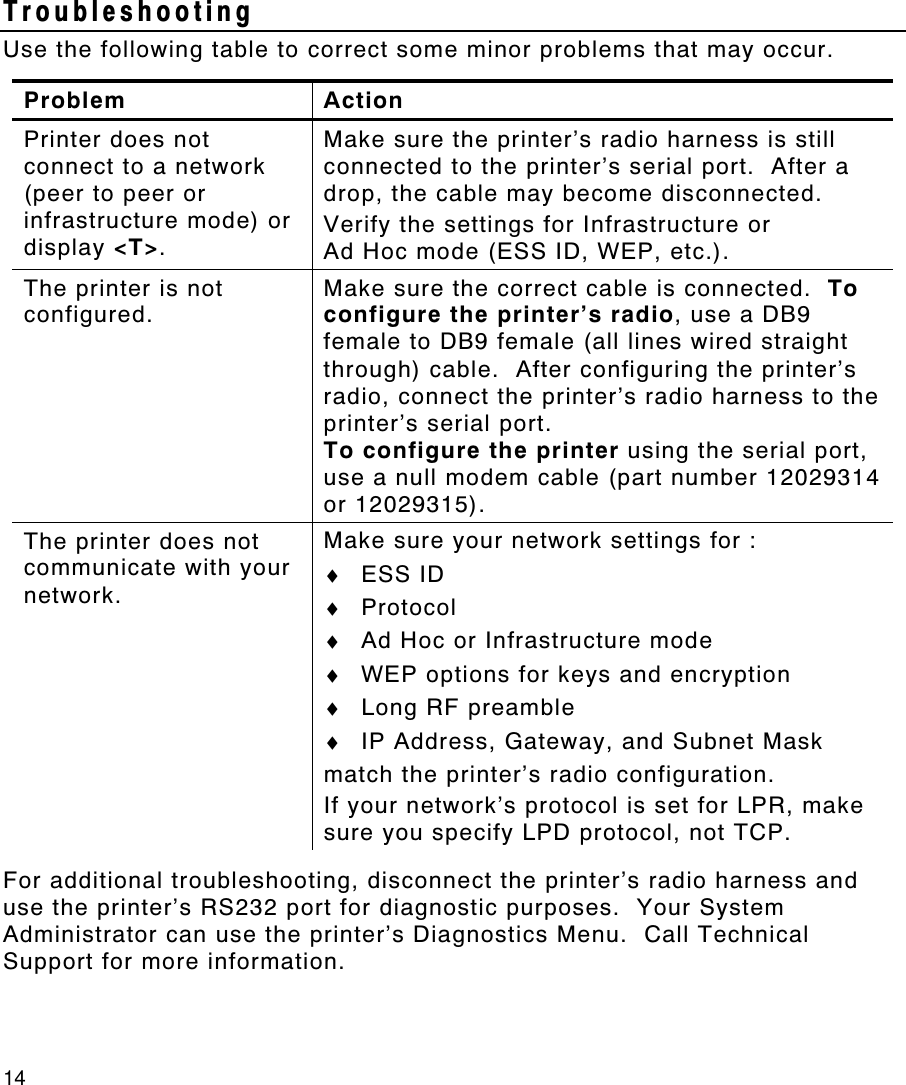
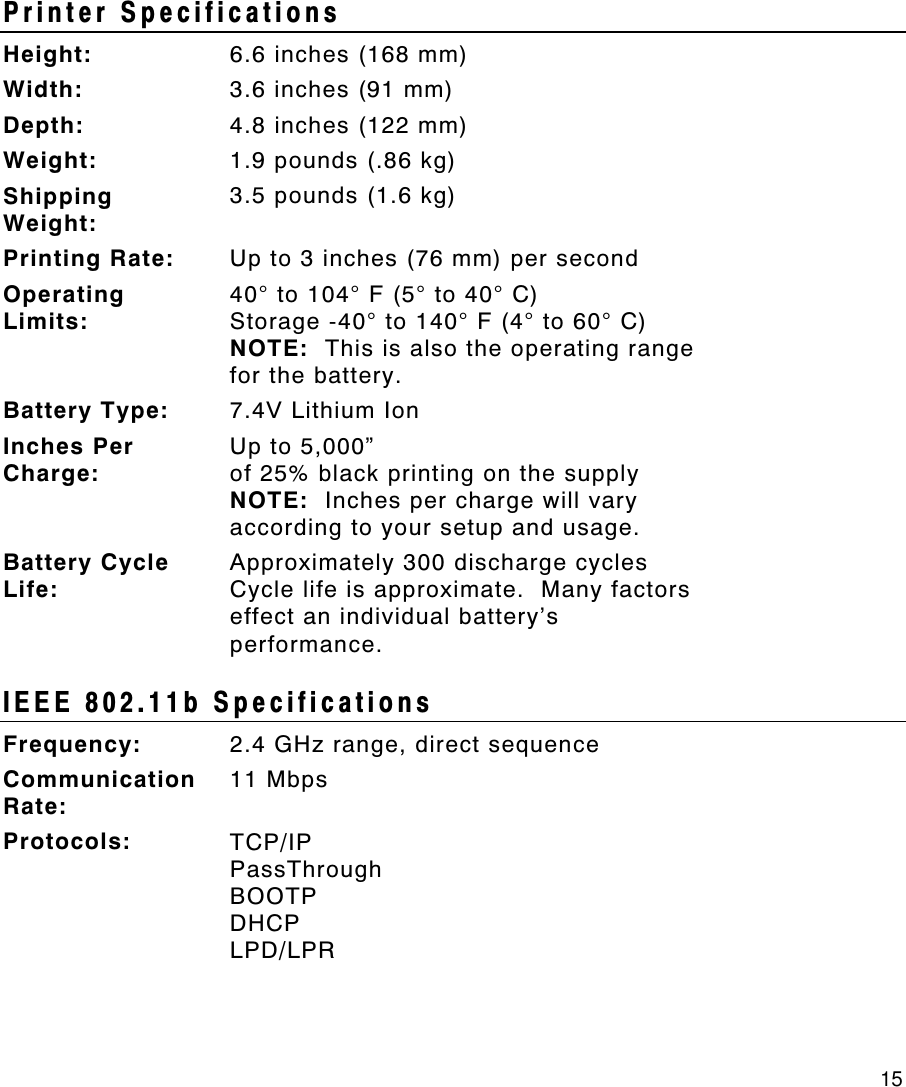
Radio confiuration