Broadcom BRCM1017 Broadcom 802.11ag WLAN mini PCI card User Manual 4n142bk0
Broadcom Corporation Broadcom 802.11ag WLAN mini PCI card 4n142bk0
Broadcom >
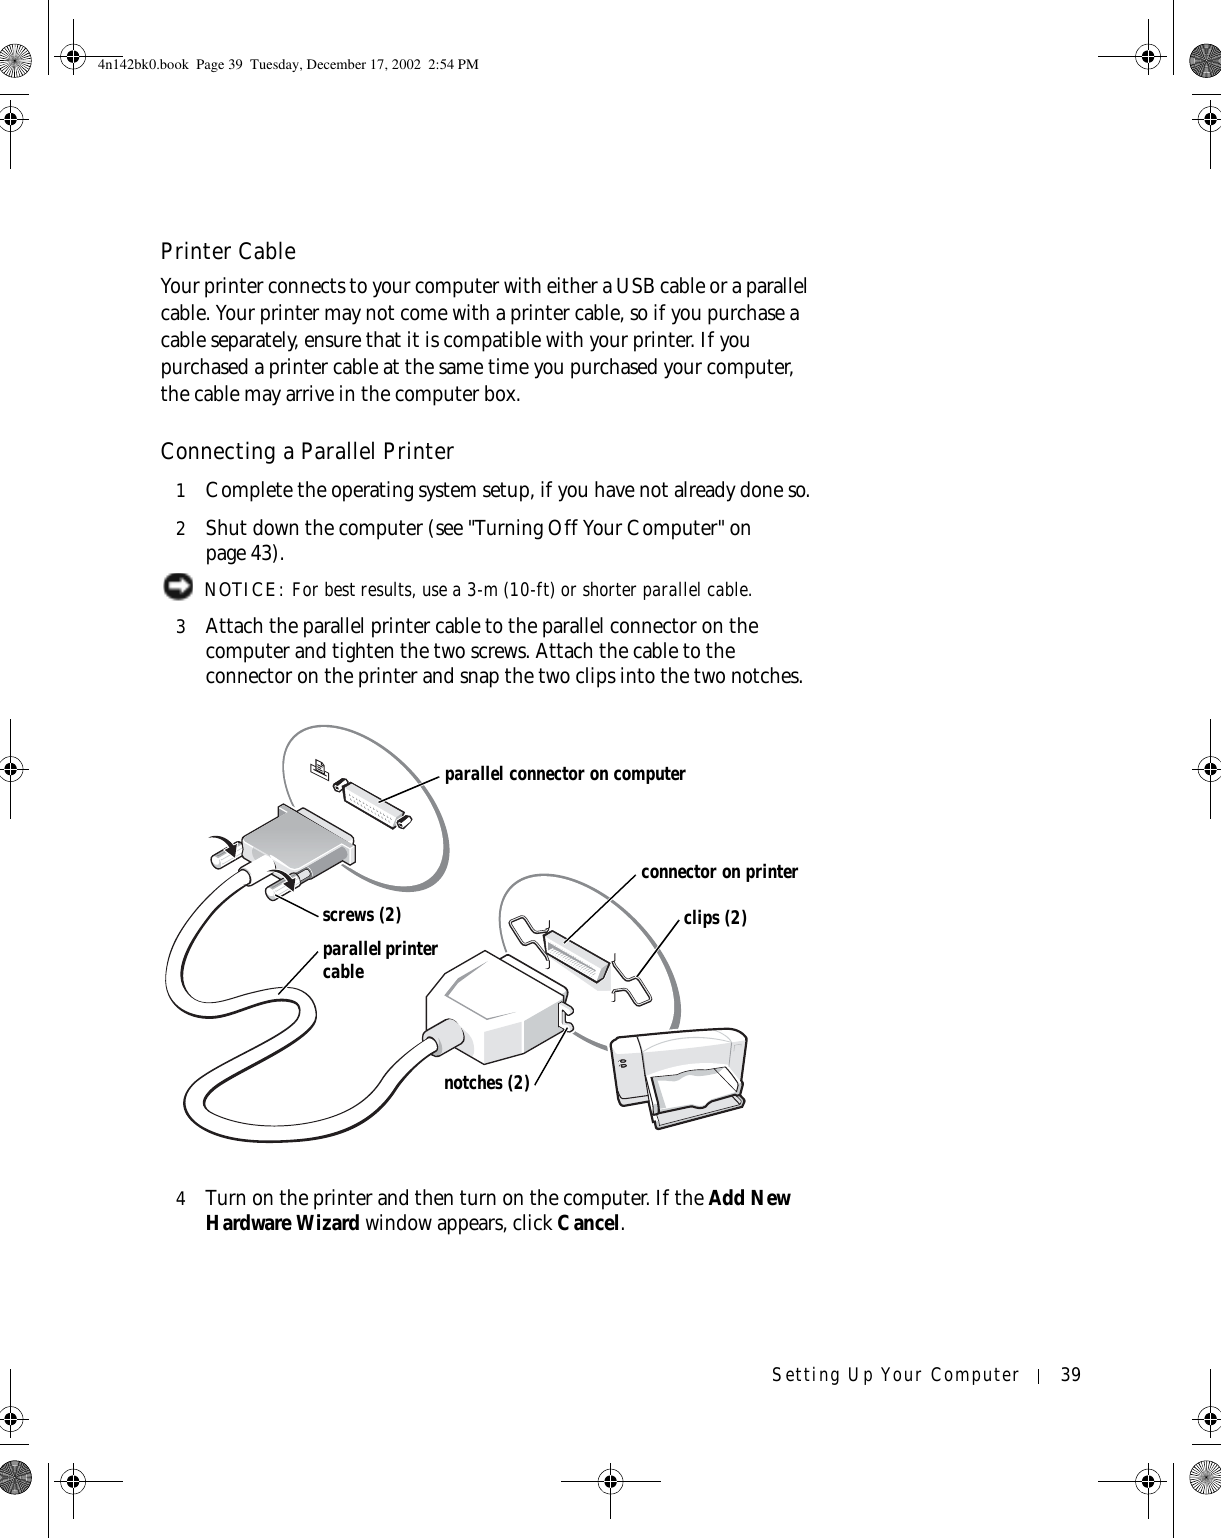
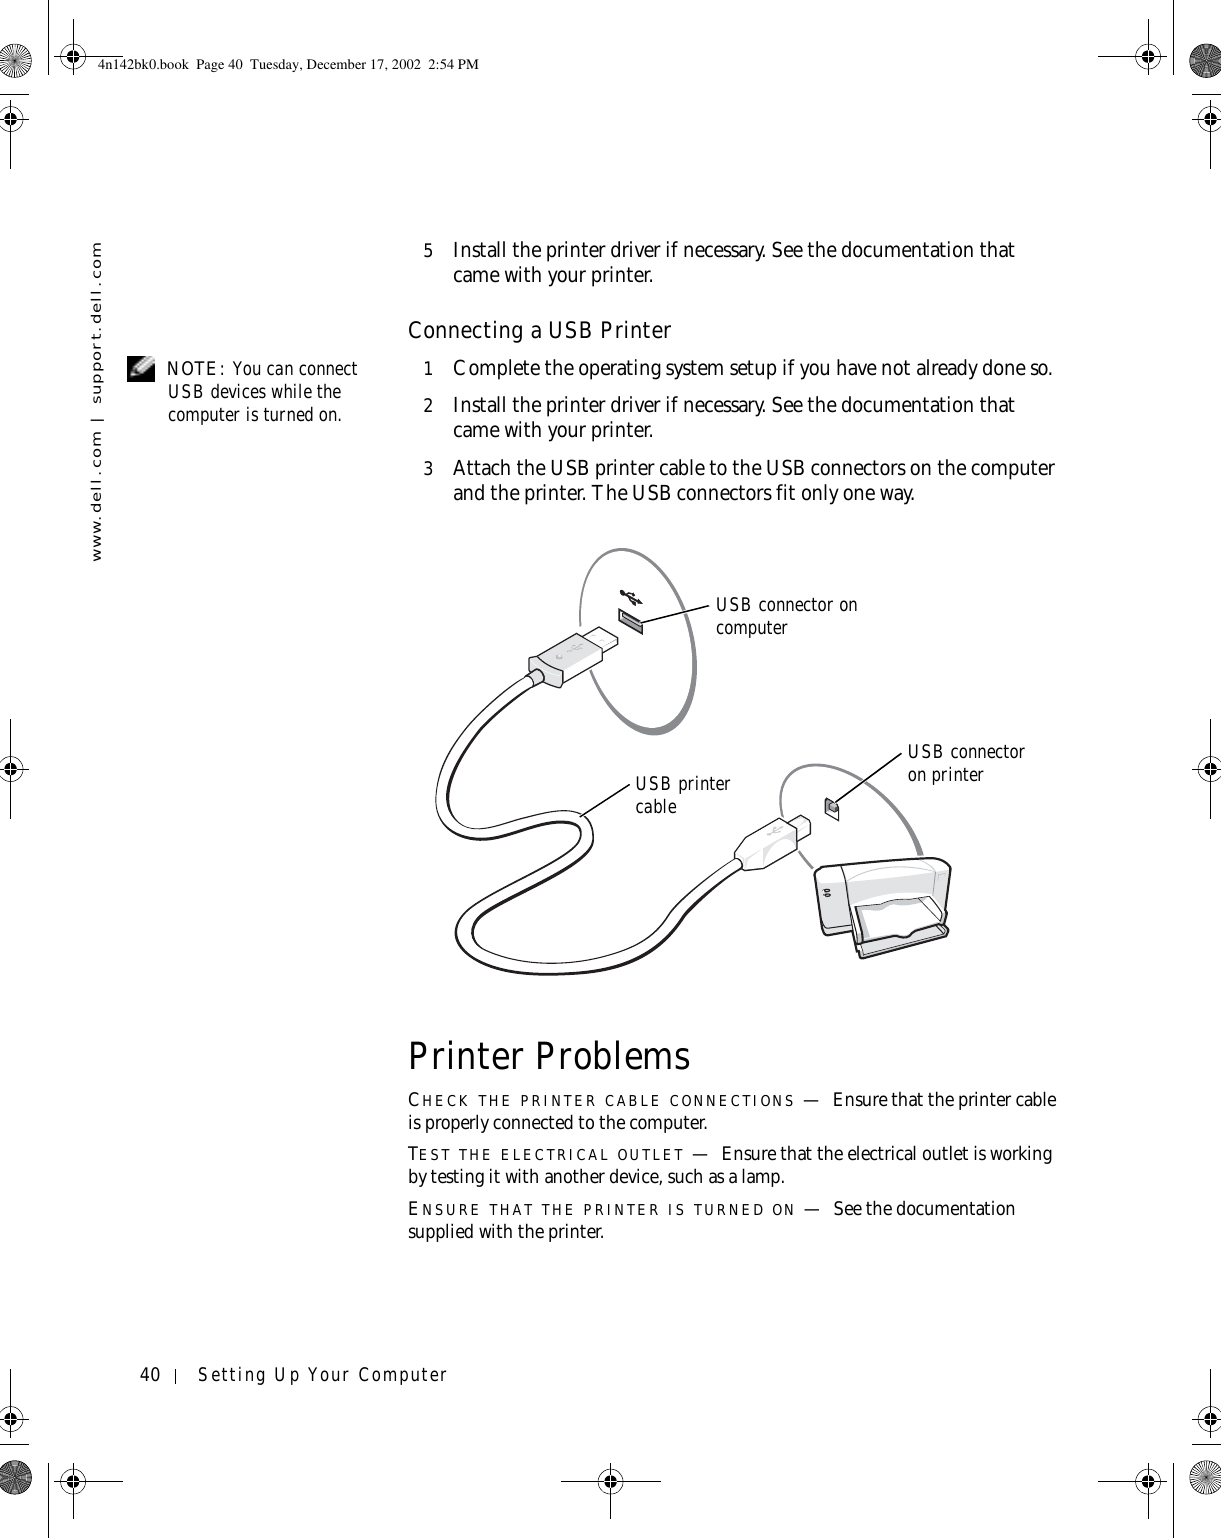
Contents
- 1. Users Guide
- 2. user guide
- 3. Updated portable user guide
- 4. user guide PP07L
- 5. user guide PPT
- 6. PP02X user guide part 1
- 7. PP02X user guide part 2
- 8. PP05L user guide part 1
- 9. PP05L user guide part 2
- 10. Updated User guide partable platform
- 11. User guide PP02X part 1
- 12. User guide PP02X part 2
- 13. User guide PP05L part 1
- 14. User guide PP05L part 2
- 15. User guide PP07L
- 16. User guide PPT
- 17. users manual
- 18. Host Manual 1
- 19. Host Manual 2
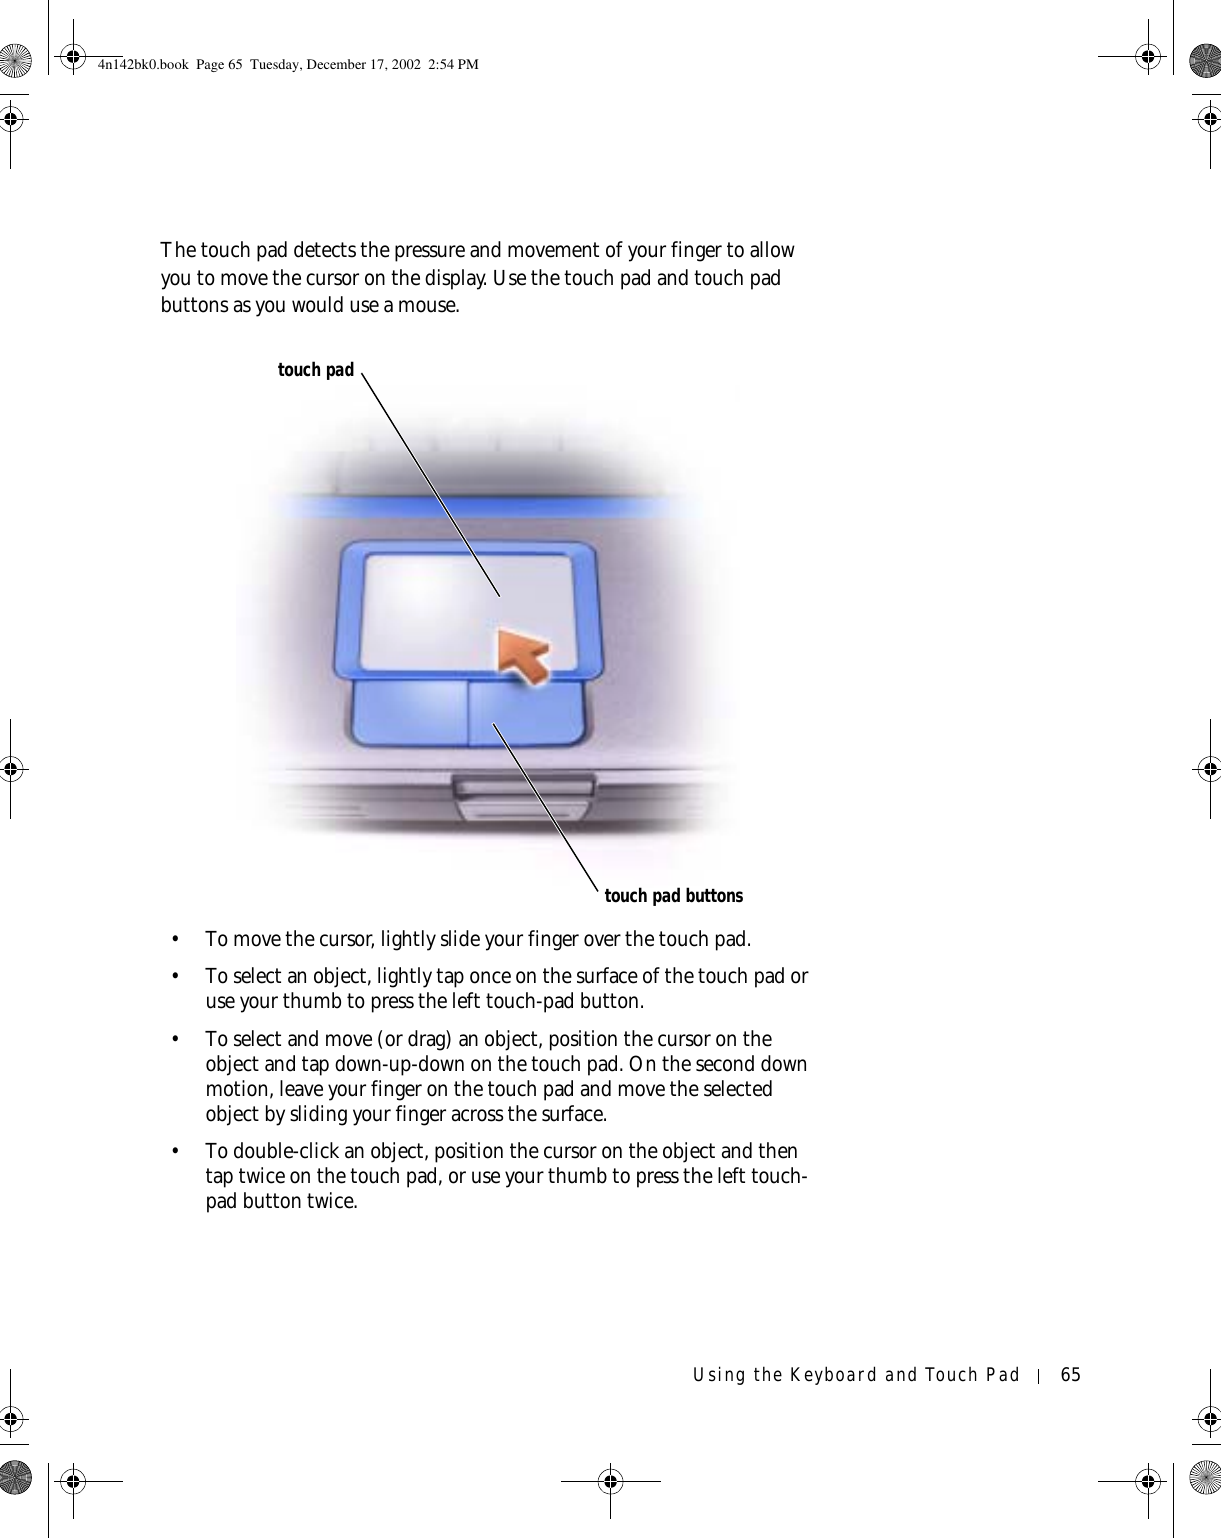
User guide PP05L part 1