Brother 8CAA19 Spread Spectrum Transmitter User Manual MFC 440CN UG US
Brother Industries, Ltd. Spread Spectrum Transmitter MFC 440CN UG US
Brother >
Contents
- 1. User Manual 1
- 2. User Manual 2
- 3. User Manual 3
- 4. User Manual 4
- 5. User Manual 5
User Manual 2
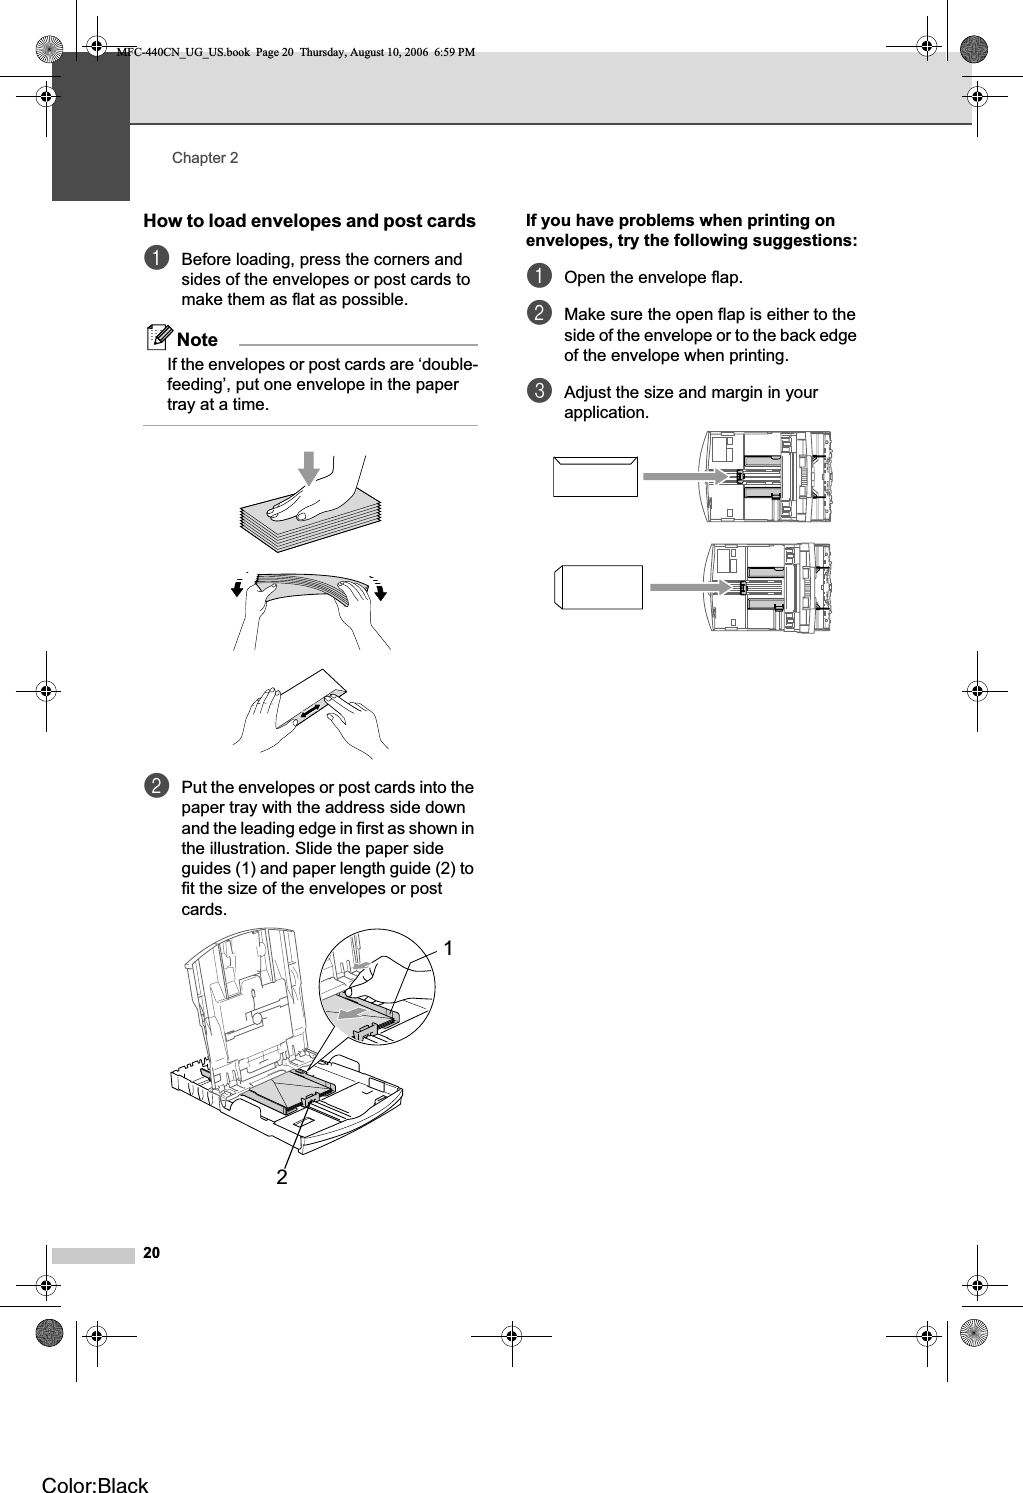
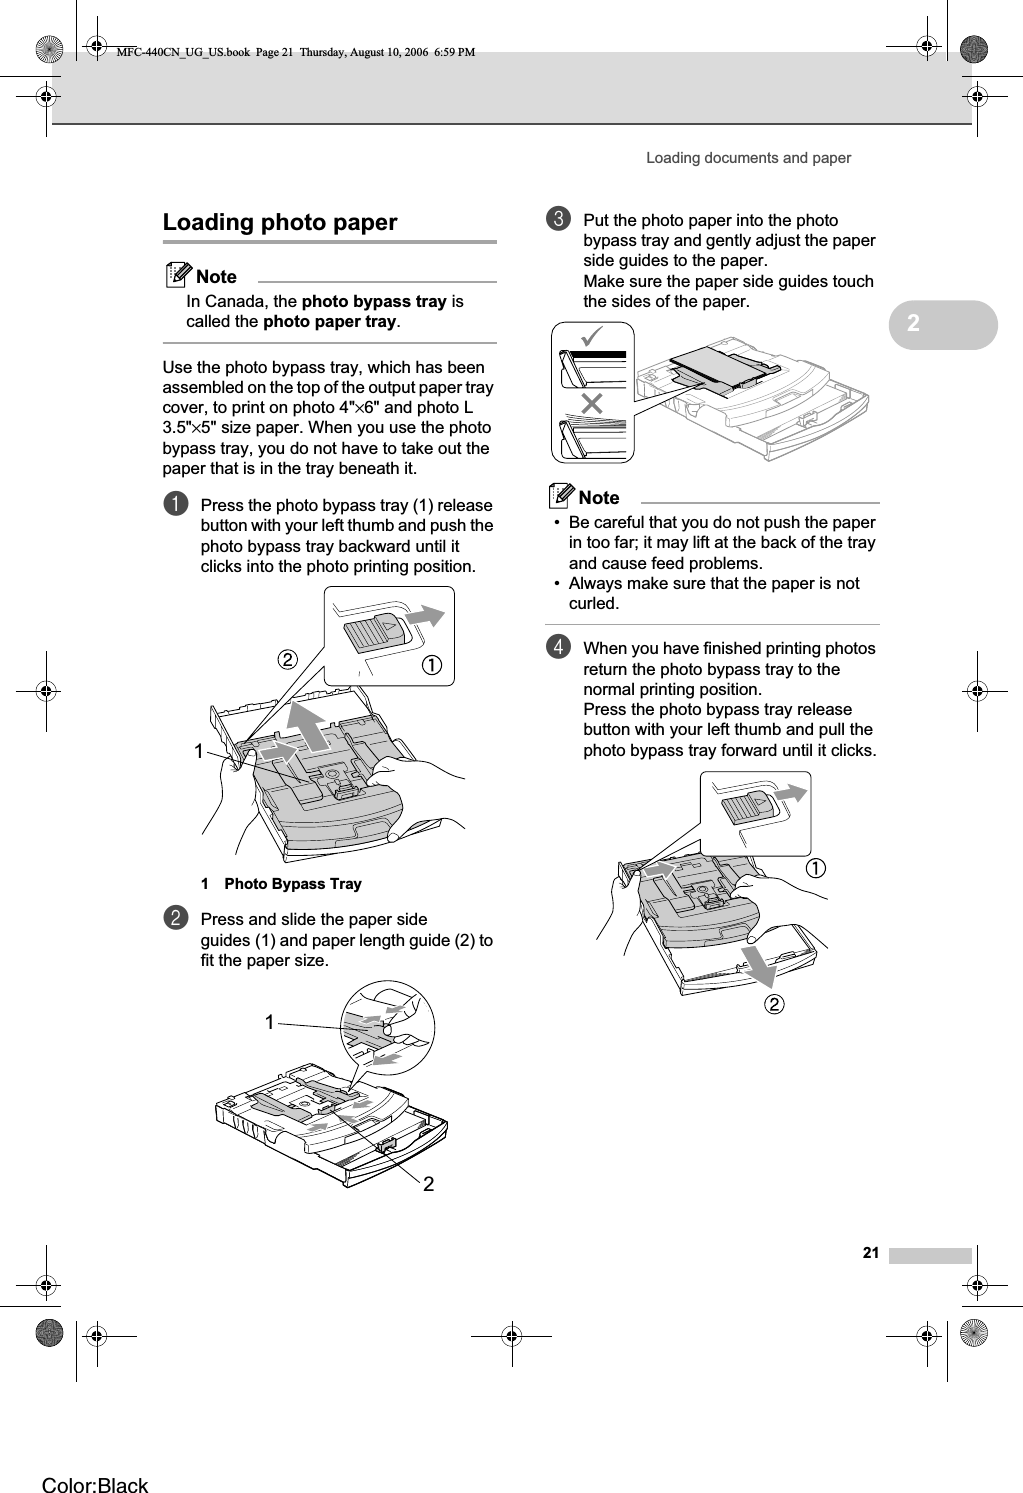
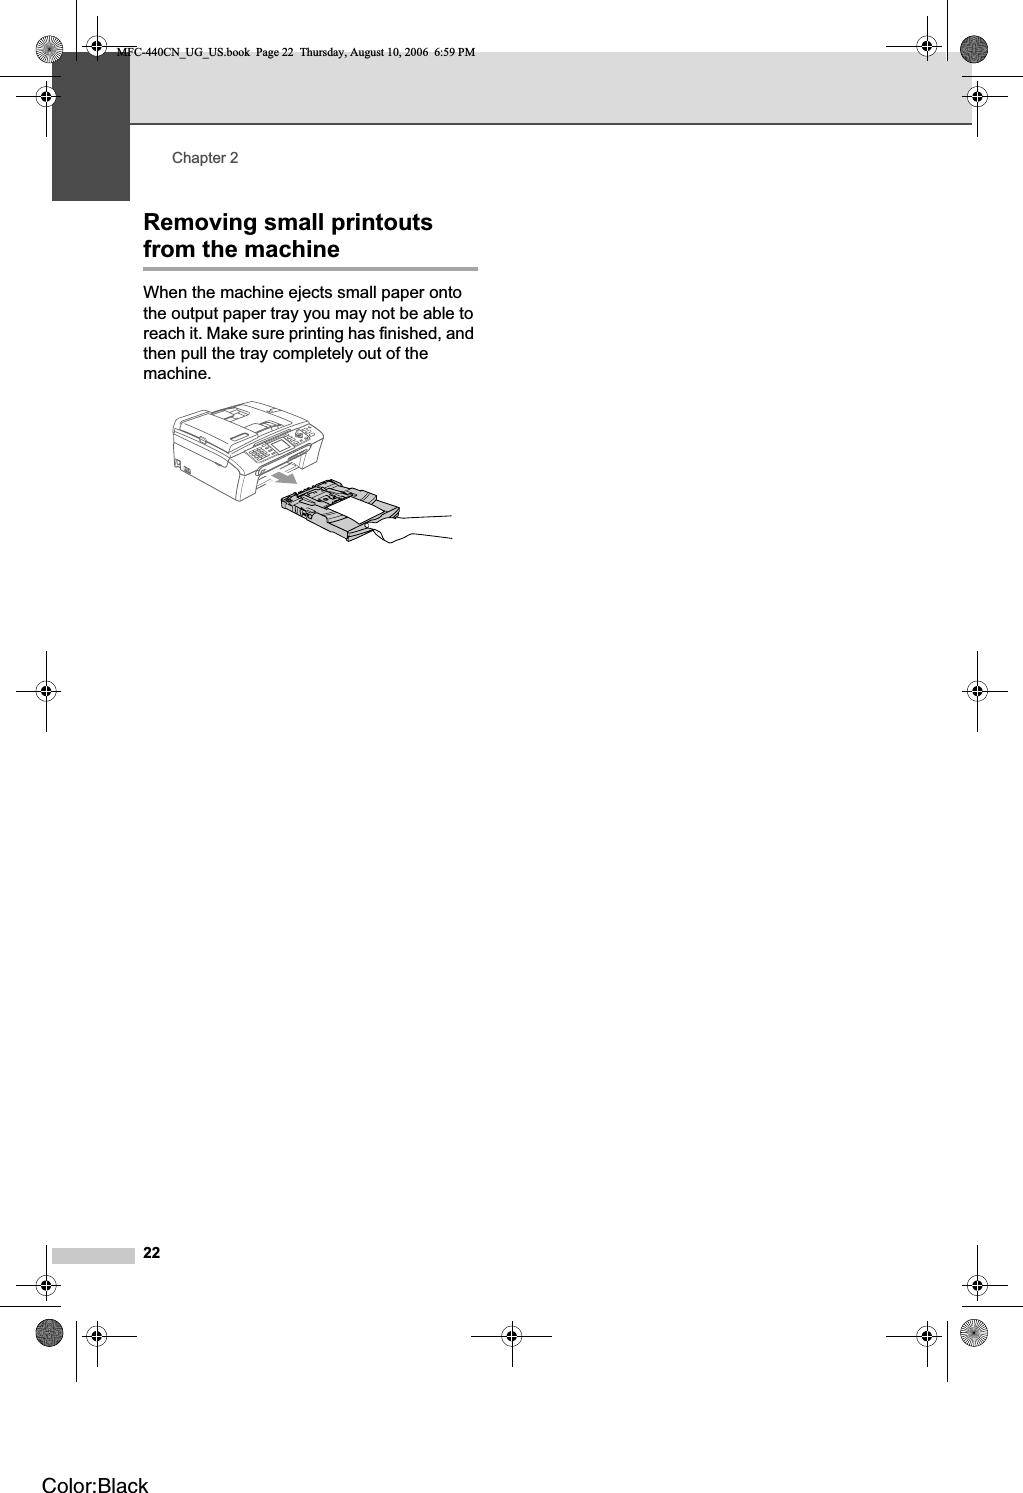
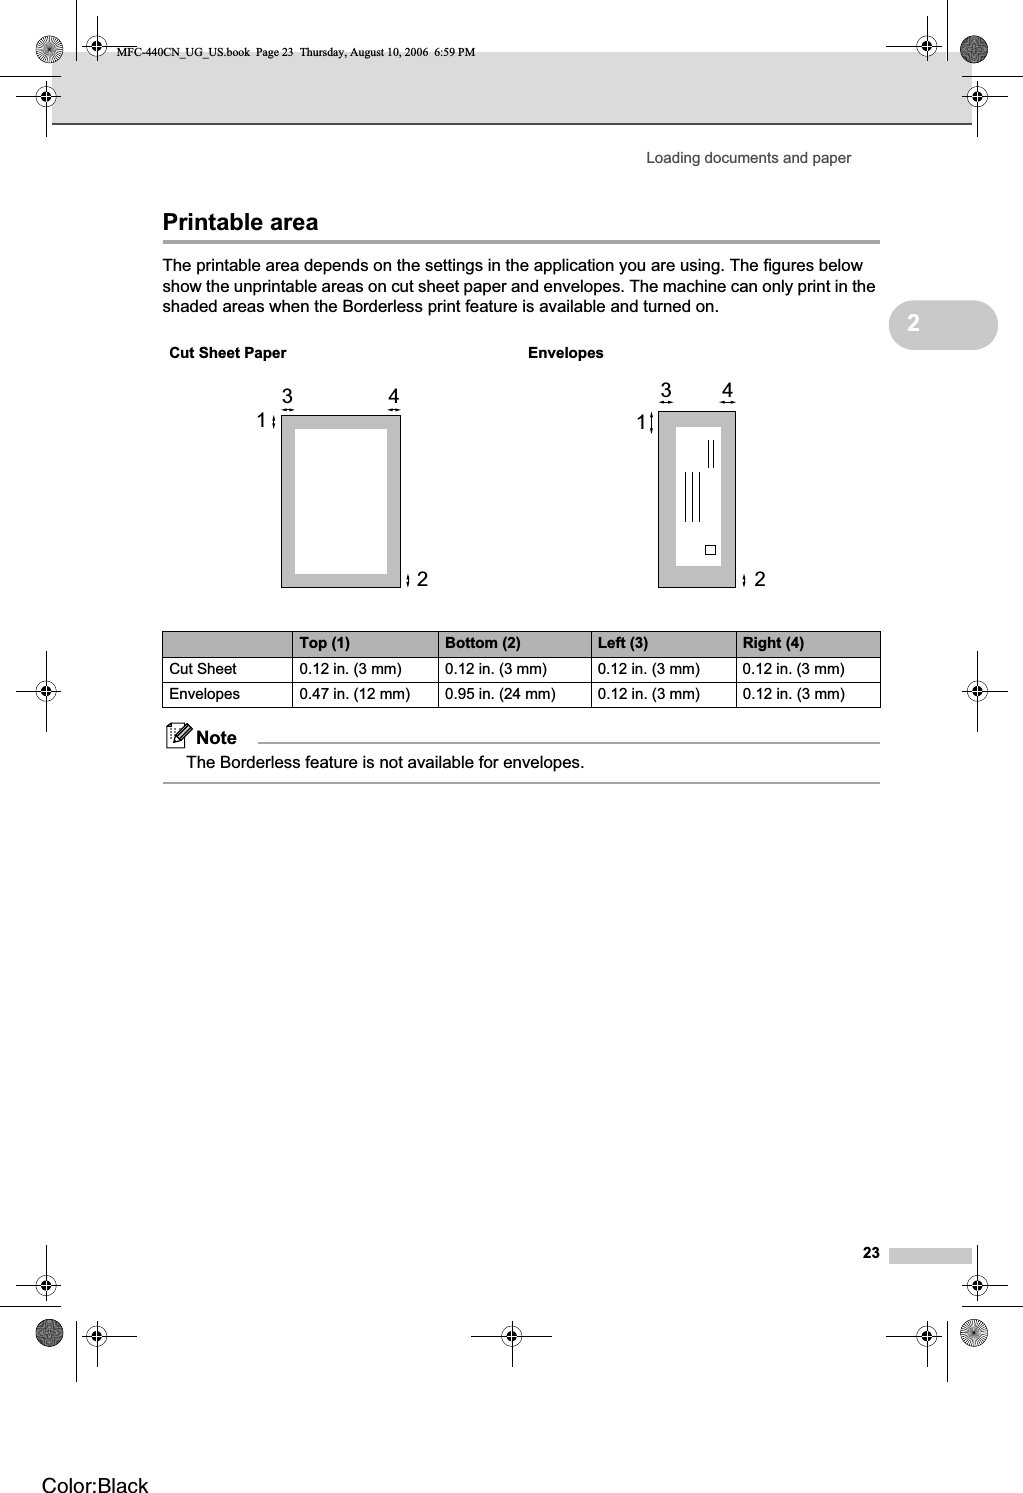
![iBrother numbersIMPORTANTFor technical help, you must call the country where you bought the machine. Calls must be made from within that country.Register your productBy registering your product with Brother International Corporation, you will be recorded as the original owner of the product. Your registration with Brother:may serve as confirmation of the purchase date of your product should you lose your receipt;may support an insurance claim by you in the event of product loss covered by insurance; and,will help us notify you of enhancements to your product and special offers.Please complete and fax the Brother Warranty Registration And Test Sheet or, for your convenience and most efficient way to register your new product, register on-line at http://www.brother.com/registration/FAQs (frequently asked questions)The Brother Solutions Center is our one-stop resource for all your Fax Machine/Multi-Function Center needs. You can download the latest software documents and utilities, read FAQs and troubleshooting tips, and learn how to get the most from your Brother product.http://solutions.brother.comNote• You can check here for Brother driver updates.• To keep your machine performance up to date, check here for the latest firmware upgrade (for Windows® only).For Customer Service In USA: 1-800-284-4329 (voice)1-901-379-1215 (fax)1-800-284-3238 (TTY service for the hearing-impaired)In Canada: 1-877-BROTHER (voice)(514) 685-4898 (fax)MFC-440CN_UG_US.book Page i Thursday, August 10, 2006 6:59 PMColor:BlackPlease see "User manual 4[Short-Term Confidentiality].pdf" for FCC manual statements.](https://usermanual.wiki/Brother/8CAA19.User-Manual-2/User-Guide-692779-Page-1.png)