CIDMATE Technology XG21501 2.4 GHz Analog Cordless Phone User Manual XG2150 IB 0225
CIDMATE International Technology Inc. 2.4 GHz Analog Cordless Phone XG2150 IB 0225
Contents
- 1. user manual 1
- 2. user manual 2
- 3. user manual 3
user manual 3
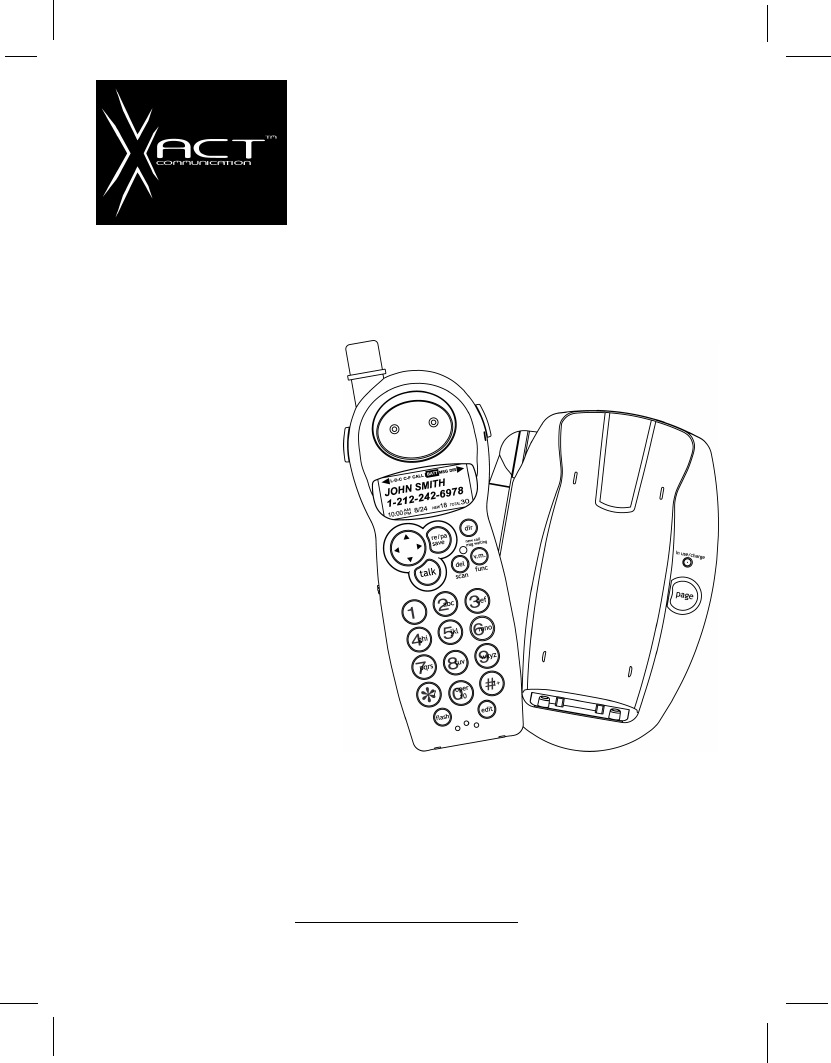
2.4 GHz CORDLESS CALLER ID TELEPHONE
WITH CALL WAITING
40 CHANNEL AUTOSCAN
PLEASE READ THIS
MANUAL CAREFULLY
BEFORE USE.
KEEP FOR YOUR
REFERENCE.
Visit Us on the Web:
www.uselectronics.info
©2003 XXXX Corporation
or installation information, please
see
“
Getting Started
”
instructions
on page 5 or your separate Quick
Start Guide.
OWNER’S MANUAL INSTALLATION
AND OPERATING INSTRUCTIONS
Model XG2150

Make certain you receive the best
performance from your telephone.
Read this manual first.
STOP
Visit Us on the Web:
www.uselectronics.info
Made in China
CM
03-09
Special Features
Congratulations on your selection of a quality XXXX product. With proper care, and by
following the set-up and user instructions in this Owner’s Manual, this unit will provide you with
years of trouble-free service.
XXXX is committed to providing quality products that fit your needs. We would like to have any
comments or suggestions you might have on this product. You may mail your comments to:
U.S. Electronics
105 Madison Avenue
New York, NY 10016
When examining your new XXXX cordless telephone, you will find an array of special features
including:
Filtered SoundTM Syst m- Gets considerably less noise than conventional cordless telephones
because of a special circuit which delivers the clearest possible reception.
40 Channel Auto Scan - Press the button on the HANDSET to find and lock on to the
clearest channel for any call.
Desk or Wall Mount - Use this equipment as a desk phone or as a wall phone.
TONE or PULSE Dialing - Use this phone for either TONE (push-button) or PULSE (rotary) dialing.
Automated Functions - Redial the last number called and automatic STANDBY mode.
Security - Ensures greater privacy because a built-in security code with 65,536 combinations
prevents use of your telephone line by another nearby cordless phone.
Dependable Battery - Recharge your BATTERY PACK many times with the built-in charger. The
battery low warning tone tells you when the BATTERY PACK needs recharging. (See page
29.)
Special Services - Use the button to access special services such as Call Waiting
supplied by your telephone company or company switchboard.
STANDBY Mode - When in STANDBYmode (ON-HOOK), the phone is capable of receiving a call.
When the HANDSET is on the BASE UNIT, it is automatically in the STANDBY mode (ON-
HOOK). When the HANDSET is taken off the BASE UNIT, it remains in the STANDBY
mode until you activate the button.
Battery Power Saver - Once fully charged, in STANDBY mode, the HANDSET can receive/send
calls for a maximum of five days without the need for recharging. Length of charge depends
on frequency of use.
Luminous LCD Screen - The LCD Screen emits light for 5 seconds every time you press any of the
buttons on the HANDSET.
HANDSET Ringer Level - Select the ringer volume level (HI, LOW, OFF).
HANDSET VOLUME CONTROL Switch - Select the receiver volume level (HI, MID, LOW).
HEADSET JACK -Your telephone can utilize a headset for hands-free communication.
BELT CLIP - Use the BELT CLIP to hang your HANDSET on your belt.
TALK
FLASH
DELETE
SCAN

Special Features
CALLER ID SYSTEM
Multi-Function Large LCD Screen - Shows the number you are dialing, and with Caller ID service
(available through subscription from your local telephone company), displays information
about the caller before you answer the call.
Name and Number DIRECTORY - Stores up to 40 names and numbers so that you can call them with
a single key stroke.
Caller List - Available with Caller ID service. Stores up to 80 calls to keep track of everyone who
called. The name, phone number, time, and date of the call are recorded. Allows you
toreturn their calls with a single key stroke.
Preferred Calls -You can mark the name and number of a welcome caller in the DIRECTORY.
When that number calls in, the caller’s name will appear on the LCD Screen and a special
ring sound will be heard.
Blocked Calls - You can mark the name and number of an unwelcome caller in the DIRECTORY.
When that number calls in, the caller’s name will appear on the LCD Screen and the ringer
will be disabled.
Repeat Call Indicator - Shows if a new incoming call has called more than once. Out of Area Call
Indicator - Advises you that the incoming call is not in a Caller ID service area, or does not
support the Caller ID system.
Private Call Indicator - Advises you that the caller’s name and/or telephone number of the
incoming call is blocked by the system.
Call Waiting Service - Displays the name and number of the second caller, if you have subscribed
to call waiting service from your local telephone company (See page 15).
Voice Mail - Indicates message waiting signal if you subscribed to Voice Mail message service
and requested Visual Message Indication from your local telephone company (see page
15). This telephone also detects a Stutter Dial Tone signal every time there is a Voice Mail
message for your Voice Mail message provider if you have subscribed to Voice Mail
message service.
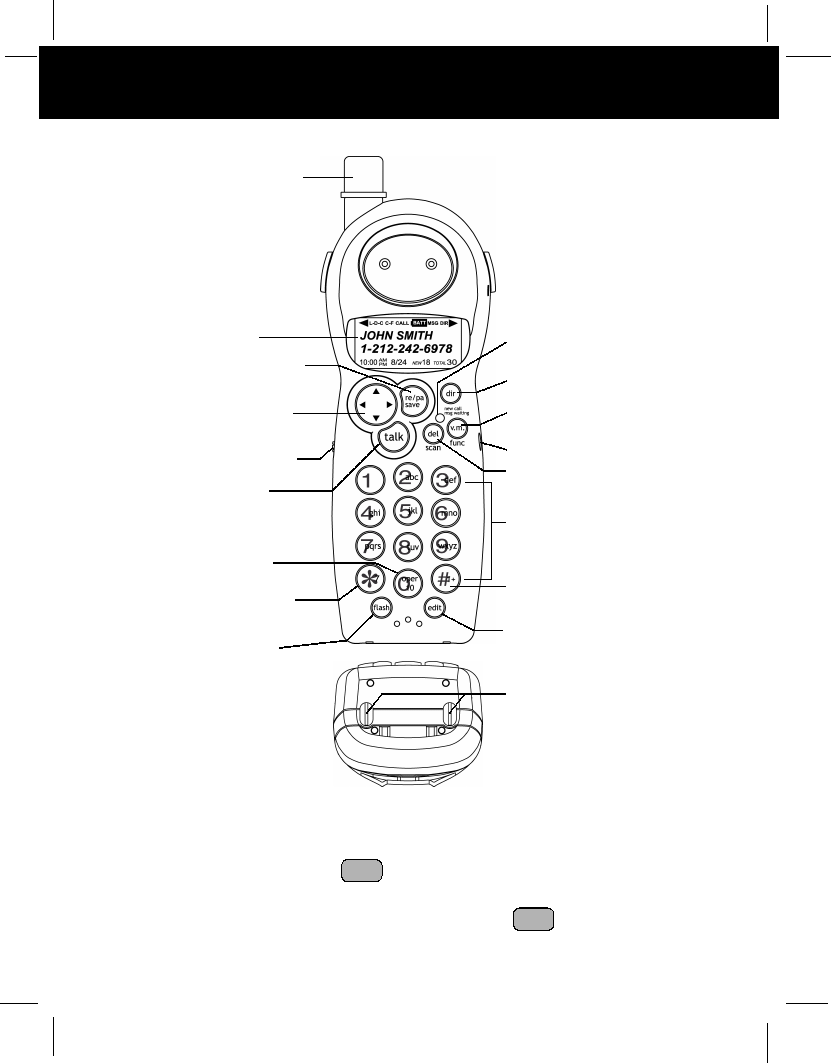
HANDSET Controls
HANDSET Controls
1. HANDSET ANTENNA
2. LCD Screen: Shows call information, phone status, prompts and directory items.
3. SAVE/RE(REDIAL)/PA(PAUSE) Button: (SAVE) Press and hold down to save the
changes on the listed items. (REDIAL) Press to redial the last number you dialed. (PAUSE)
Press to insert a pause while dialing. (You will need the button to dial numbers
which use an alternative Long Distance Access Code.)
RE/PA
SAVE
RE/PA
SAVE
1. HANDSET ANTENNA
2. LCD SCREEN
4. SCROLL UP-DOWN/
SHIFT LEFT-RIGHT
BUTTON Pg. 14, 16~27
5. VOLUME CONTROL
(HI, MID, LOW) SWITCH
3. REDIAL/PAUSE/SAVE
BUTTON
Pg. 13, 16~20, 23~26
7. DIAL 10 BUTTON
Pg. 12, 16, 20~21, 25
8. DIAL 7/TEMPORARY
TONE(*) BUTTON
Pg. 12, 16, 19~21, 25 17. EDIT BUTTON
Pg. 16, 18~20, 23~27
11. DIR BUTTON
Pg. 16~21, 27
13. HEADSET JACK Pg. 13
10. NEW CALL/MESSAGE
WAITING INDICATOR
Pg. 14
6. TALK BUTTON
Pg. 6, 7, 11~13, 15~16,
20, 21, 31
14. DELETE/SCAN BUTTON
Pg. 16, 17, 19~21, 27~28,
31, 38
12. FUNCTION/VOICE MAIL
BUTTON Pg. 15, 22~26
15. TELEPHONE KEYPAD
Pg. 16, 18~20, 22~27
16. DIAL 1+/# BUTTON
Pg. 12, 16, 19~21, 25
9. FLASH BUTTON
Pg. 15
18. CHARGE CONTACTS
HANDSET Controls
4. SCROLL UP-DOWN, SHIFT LEFT-RIGHT Button: Press to move around the
large LCD Screen.
5. HANDSET VOLUME CONTROL (HI, MID, LOW) Switch: Select the receiver volume
level (HI, MID, LOW).
6. TALK Button: Press to answer an incoming call or to place a call. Press to end
a call.
7. DIAL 10/0 Button: (DIAL 10) Press and hold down to place a local call with Area
Code.
8. DIAL 7/TEMPORARYTONE Button: (DIAL7) Press and hold down to place a local
call. (*) Press to temporarily change the Dialing mode from Pulse to Tone for Rotary
Service Users. (Press once before entering numbers to access the answering system or
electronic banking service, etc.)
9. FLASH Button: Press to answer a call if you have Call Waiting.
10. NEW CALL/MSG (MESSAGE) WAITING LED Indicator: Blinks when recording a new
incoming call or when receiving a Message Waiting signal, if you have subscribed to a
Voice Mail message service from your local telephone company. (See page 14 for details.)
11. DIR (DIRECTORY) Button: Press to access names and numbers stored in the
DIRECTORY. (See pages 16 to 21 for details.)
12. FUNC (FUNCTION)/VOICE MAIL Button: (FUNCTION) Press and hold to
access special functions operation in STANDBY mode. (For special functions see page
22.)
(VOICE MAIL) - Press to automatically dial the Voice Mail Post Code in your area to
access your Voice Mail message.
13. HEADSET JACK: For connecting your headset plug to enjoy hands-free communication.
(See page 13 for detail.)
14. DELETE/SCAN Button: (DELETE) Press and hold down to delete items or
individual characters. (SCAN) Press to change the operating channel when you hear
interference.
15. TELEPHONE KEYPAD ~ Buttons: Allows you to make a call depending
on pressed button. (For TELEPHONE KEYPAD characters, see page 27 .)
16. DIAL 1+/# Button: (DIAL 1+) Press and hold down to place a long distance call.
(Automatically adds the number 1 at the beginning of the displayed telephone number.)
17. EDIT Button: Press to edit listed items.
18. CHARGE CONTACTS: For charging the BATTERY PACK inside the HANDSET. We
recommend cleaning the CHARGE CONTACTS periodically with a damp cloth.
EDIT
1+ #
WXY 9
DELETE
SCAN
FUNC
VOICE MAIL
DIR
FLASH
TALK
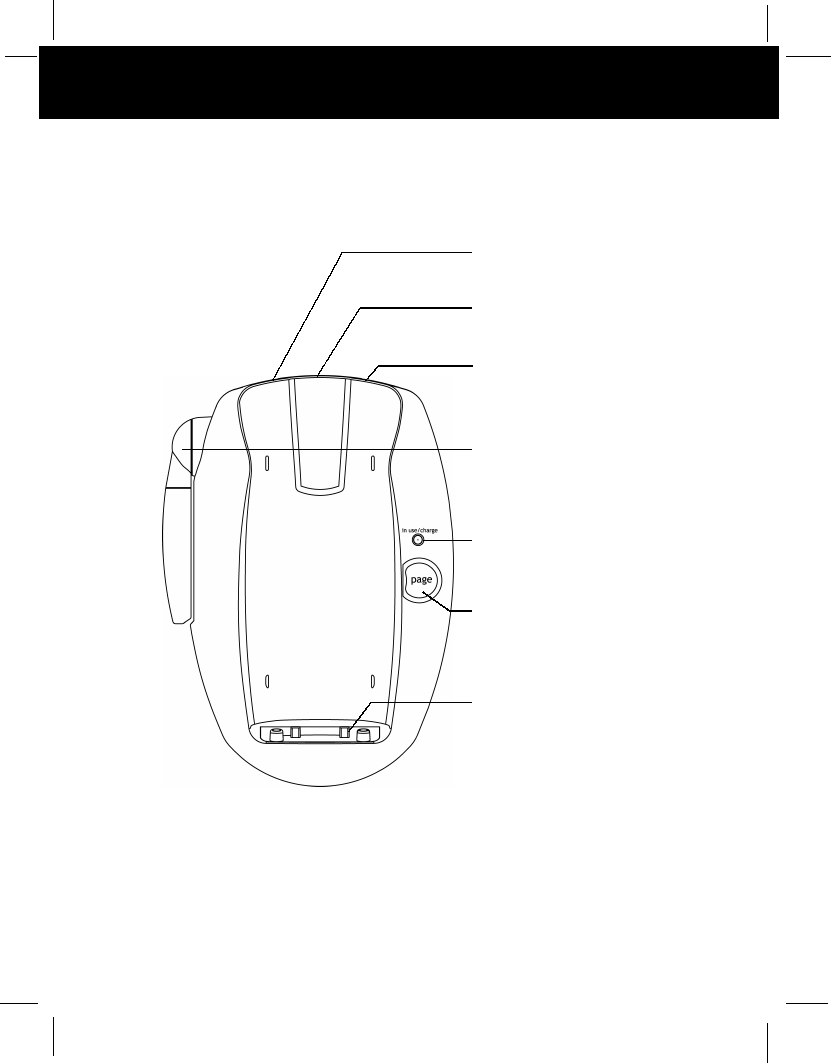
BASE UNIT Controls
1. TONE/PULSE SELECT
SWITCH
Pg. 6, 31
3. POWER-IN
CONNECTION JACK
Pg. 5
2. TELEPHONE LINE
CONNECTION JACK
Pg. 5, 9, 11, 31
4. BASE UNIT ANTENNA
7. CHARGE TERMINALS
5. CHARGE/IN USE LED
INDICATOR
Pg. 11~13
6. PAGE BUTTON

BASE UNIT Controls
1. TONE/PULSE Select Switch
2. TELEPHONE LINE CONNECTION JACK
3. POWER-IN CONNECTION JACK
4. ANTENNA
5. IN USE/CHARGE LED Indicator: (IN USE) Lights up to indicate that the HANDSET is in
TALK mode. (CHARGE) Lights up when the HANDSET is placed on the BASE UNIT for
charging.
6. PAGE Button: Press to page the HANDSET.
7. CHARGE TERMINALS: For charging the HANDSET BATTERY PACK. For best
performance, clean the CHARGE TERMINALS periodically with a damp cloth.
PAGE
IMPORTANT
Placing your BASE UNIT near appliances such as
televisions, refrigerators, radios, or microwave ovens
may cause interference.