Cisco Systems 2400-MDM08-R1 CPE Transceiver-Model 2.4 GHz LCD Modem Release 1 User Manual Ripwave Modem Quick Installation Guide
Cisco Systems, Inc CPE Transceiver-Model 2.4 GHz LCD Modem Release 1 Ripwave Modem Quick Installation Guide
Contents
- 1. User guide
- 2. Installation guide
Installation guide
Ripwave Modem Quick Installation Guide Navini Networks, Inc.
RipwaveTM Modem Quick Installation Guide
The following instructions are for the experienced user as a quick setup
guide for the Ripwave unit. For more details on installation of the Ripwave
unit and software, see the Ripwave Modem User Guide.
Hardware Installation
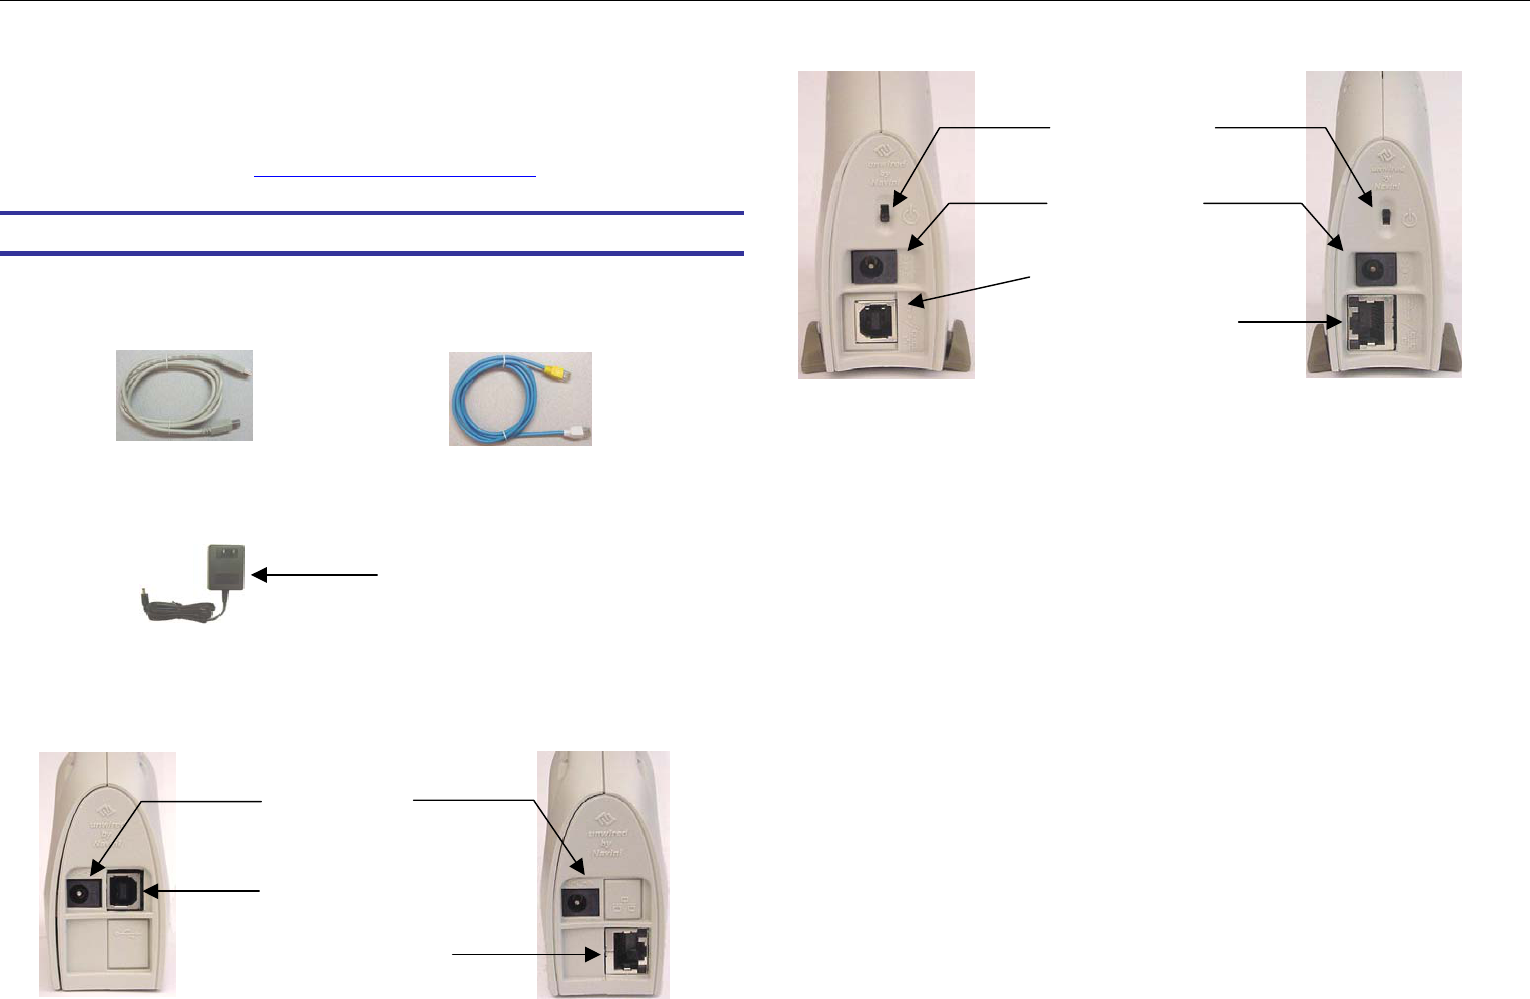
1. Turn the computer off before installation. Connect the USB or Ethernet
straight cable to the unit and to the corresponding port on the PC.
USB Cable Ethernet Cable
2. Connect the AC power adapter to the Ripwave unit and to a 110 VAC
outlet.
3. Rotate the antenna clockwise to the UP position.
4. Push the On/Off switch on the Ripwave unit to turn the unit ON. The
lower indicator light on the Ripwave unit illuminates green.
On/Off Switch
Power adapter
cab
l
e
jack
USB Port
Ethernet Port
(
2400E
)
5. Set the power switch on the computer to the ON position. When the
system is up, log in to the computer.
Note: For Windows NT® and Windows® 2000, you must be logged into
an account having administrative privileges to install the Ripwave
Modem and its software.
AC power adapter 6. For an Ethernet connection, go to the Navini Monitoring Software
Installation section. For a USB connection, Plug and Play will detect
the new hardware – click Next in the Add New Hardware Wizard
dialog box, and continue on with the hardware installation.
7. Insert the Navini Networks Ripwave Installation CD in the CD-ROM
drive.
8. Follow the instructions for the ‘Add New Hardware Wizard’ to install
the device driver for the Ripwave Modem.
9. Select the ‘CD-ROM drive’ checkbox. Click Next to continue.
10. Restart the computer, and proceed to the Navini Monitoring Software
Installation.
Note: Navini Monitor & Ripwave Monitor refer to the same software.
Ethernet Port
(
2600E
)
USB Port
Power adapter
cable jack

Navini Monitoring Software Installation
1. Navini Networks offers two types of monitoring software: Navini
Ripwave Monitor and Navini Diagnostics Tool. The Navini Ripwave
Monitor is available with software releases prior to Release 4 while the
Navini Diagnostics Tool is available with a software release of 4 or
greater. Before installing either the Navini Monitor or Navini
Diagnostics software, shut down all programs. This includes all anti-
virus software.
2. Insert the Navini Networks Ripwave Installation CD in the CD-ROM
drive.
3. Click Start > Run from the menu at the bottom left corner of your
screen. In the Run window, enter e:\setup (where “e” represents the CD
drive; use the letter representing your specific CD drive) in the Open
field. Click OK.
4. Follow the instructions given by the Navini Monitor Installation Wizard
or the Navini Diagnostics Installation Wizard to install the monitoring
software.
5. Restart the computer. When the system is up, log in to the computer and
open the Web browser.
6. LET IT RIP…BEGIN SURFING THE INTERNET!
Copyright© 2001, 2002, 2003, 2004 Navini Networks, Inc. All rights reserved. Printed in the USA. Navini
Networks, Internet at the Speed of Thought, Zero-Install, Ripwave, and Unwired by Navini are trademarks of
Navini Networks, Inc. Other product and company names mentioned herein may be trademarks and/or service
marks of their respective owners.
Ripwave™ Modem
Quick Installation Guide
Part Number 40-00098-00
Revision G Version 1.0
May 21, 2004