ELITEGROUP COMPUTER SYSTEMS ED2LN30PA1 DATA CARD User Manual
ELITEGROUP COMPUTER SYSTEMS CO., LTD DATA CARD
UserManual.wiki
>
ELITEGROUP COMPUTER SYSTEMS
>
ED2LN30PA1 User Manual
>
User Manual
Contents
1.
User Manual Part 1
2.
User Manual Part 2
3.
User Manual
User Manual
Navigation menu
Upload a User Manual
Namespaces
Wiki Guide
HTML
PDF
Info
Views
User Manual
Discussion / Help
Navigation


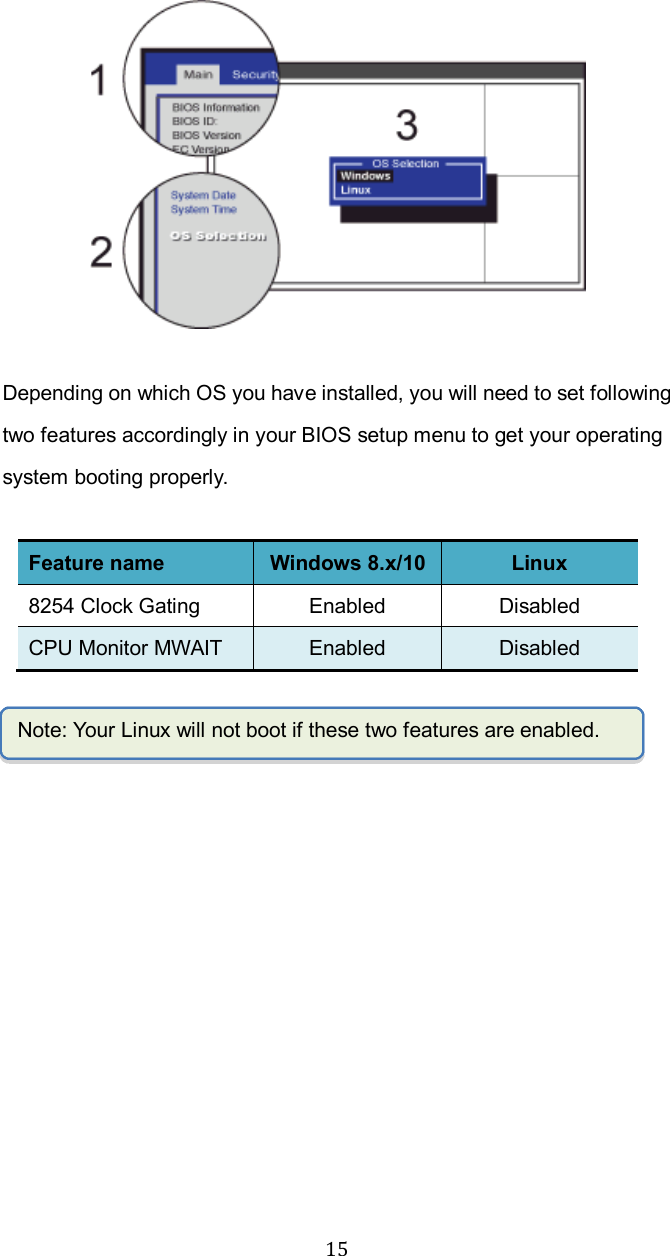
![14Pinch or Move two fingers together or apart while touching the screen. This is to zoom in and out on visual apps, such as pictures and maps. Rotate Place two or more fingers on an item and then turn your hand. This enables you to turn an object. (Note: Not all items can be rotated, depending upon the app.) Slide Drag your finger across the screen. This can scroll through lists and pages, and can also move an object or be used to draw or write, depending upon your apps. Linux supporting You laptop supports Windows and Linux and you can choose which one to install in the BIOS setup menu. To make the operating system selection, you need to: 1. Open the BIOS Main menu. 2. Find and click [OS Selection]. 3. In the popup menu, select your OS to be installed.](https://usermanual.wiki/ELITEGROUP-COMPUTER-SYSTEMS/ED2LN30PA1.User-Manual/User-Guide-3446842-Page-22.png)