Electronic Controls Design E47-6342-45 MEGA M.O.L.E. User Manual Quickref1 indd
Electronic Controls Design Inc MEGA M.O.L.E. Quickref1 indd
Contents
- 1. Quick Reference Guide
- 2. User Manual part 1
- 3. User Manual part 2
- 4. User Manual part 3
Quick Reference Guide

What is MAP?
Process is the thermal “profile”
specified by the Solder Paste
manufacturer for proper reflow.
Assembly is the Printed Circuit Board.
Machine is the Reflow Oven.
QUICK
REFERENCE
GUIDE
Optimizing Your
Machine, Assembly, and Process
Collecting M.O.L.E. Data
This procedure guides you through a
typical collection process. If you need
additional detail, consult the online
Users Help Guide.
The M.O.L.E. Profi ler depends on the MAP
(Machine-Assembly-Process) software to
control how it collects and interprets data.
Several kinds of data runs may need to be
performed to achieve desired information,
or the same data run may be performed
repeatedly over time to monitor one
process. Either way, each data run must
be set up at least once.
The MAP software includes wizards that
help you get started quickly, even if you are
a beginner or infrequent user. With settings
for the three likely refl ow work fl ows, you
can get up and running in no time. This
Guide documents the process used with
the
Fresh Start
workfl ow wizard.
This procedure uses the
“
Fresh Start
” wizard for a
typical data run process.
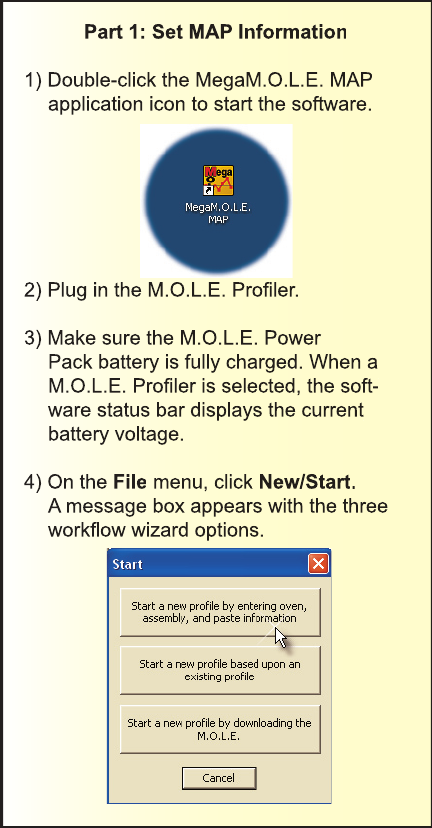
Part 1: Set MAP Information
1) Double-click the MegaM.O.L.E. MAP
application icon to start the software.
2) Plug in the M.O.L.E. Profi ler.
3) Make sure the M.O.L.E. Power
Pack battery is fully charged. When a
M.O.L.E. Profi ler is selected, the soft-
ware status bar displays the current
battery voltage.
4) On the
File
menu, click
New/Start
.
A message box appears with the three
workfl ow wizard options.
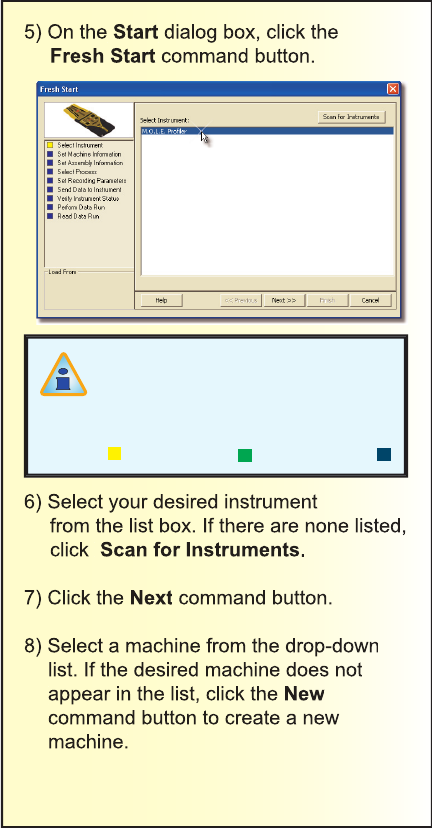
5) On the
Start
dialog box, click the
Fresh Start
command button.
6) Select your desired instrument
from the list box. If there are none listed,
click
Scan for Instruments
.
7) Click the
Next
command button.
8) Select a machine from the drop-down
list. If the desired machine does not
appear in the list, click the
New
command button to create a new
machine.
The step list on the left of the
Wizard is color keyed to indicate
step status:
Current Complete Remaining
The software includes
features to save and load
machine recipe setting fi les.
These fi les help you to quickly
recall machine information and
ensure consistency.
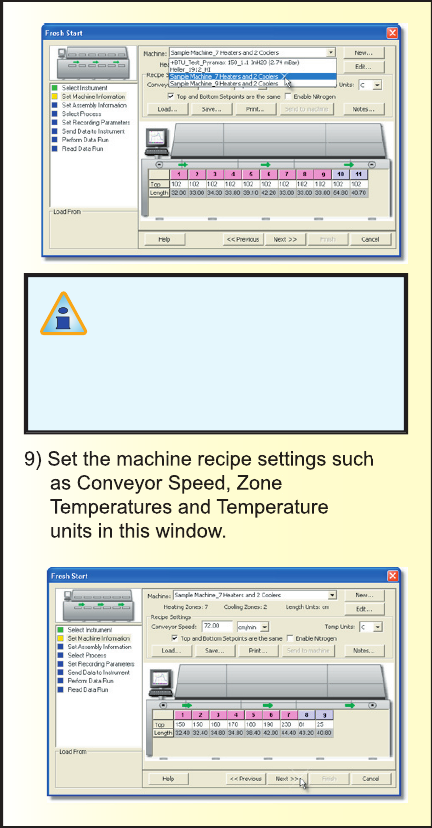
9) Set the machine recipe settings such
as Conveyor Speed, Zone
Temperatures and Temperature
units in this window.
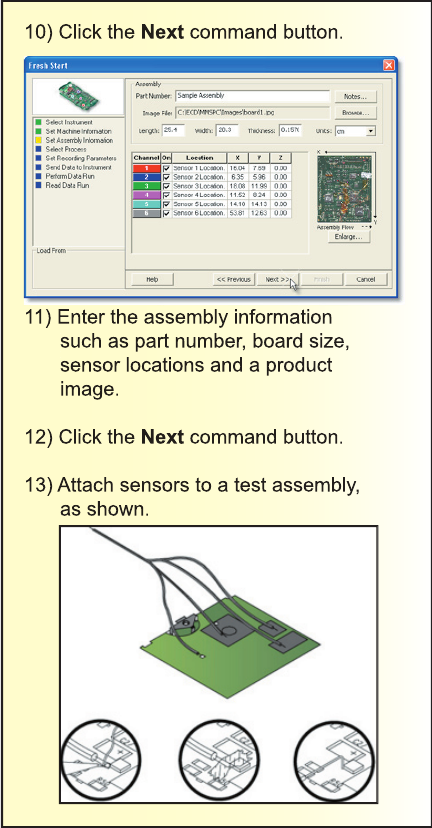
10) Click the
Next
command button.
11) Enter the assembly information
such as part number, board size,
sensor locations and a product
image.
12) Click the
Next
command button.
13) Attach sensors to a test assembly,
as shown.
14) Unwind the sensor leads and attach
the connectors to the M.O.L.E. Profi ler.
Make sure to connect the leads to the
same channel(s) that were confi gured
in the wizard workfl ow.
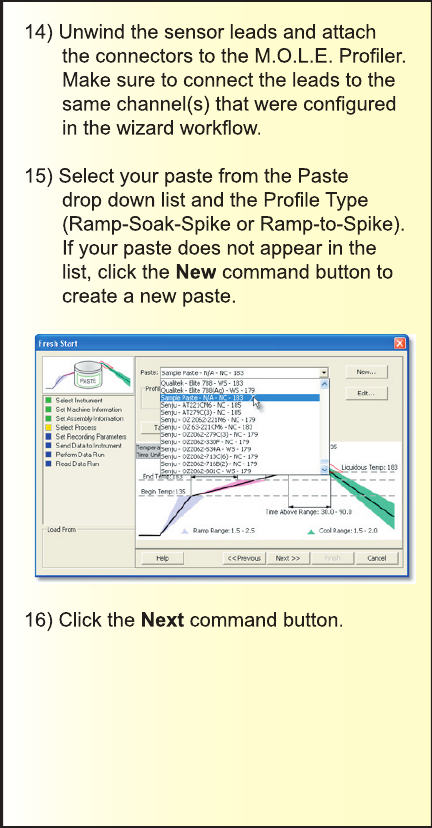
15) Select your paste from the Paste
drop down list and the Profi le Type
(Ramp-Soak-Spike or Ramp-to-Spike).
If your paste does not appear in the
list, click the
New
command button to
create a new paste.
16) Click the
Next
command button.
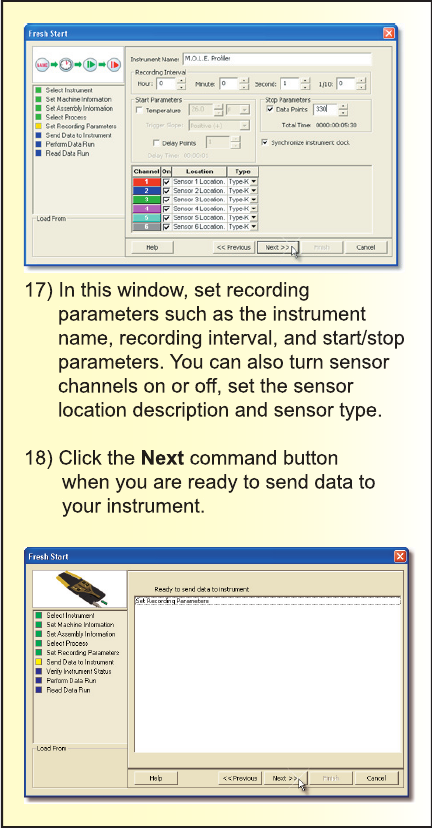
17) In this window, set recording
parameters such as the instrument
name, recording interval, and start/stop
parameters. You can also turn sensor
channels on or off, set the sensor
location description and sensor type.
18) Click the
Next
command button
when you are ready to send data to
your instrument.
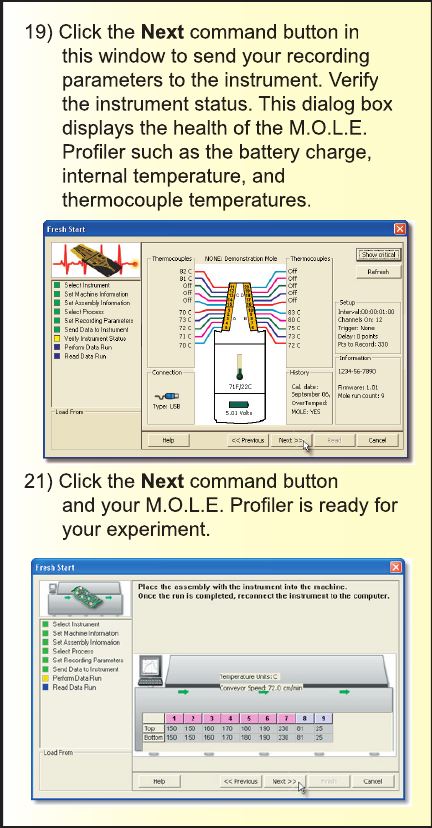
19) Click the
Next
command button in
this window to send your recording
parameters to the instrument. Verify
the instrument status. This dialog box
displays the health of the M.O.L.E.
Profi ler such as the battery charge,
internal temperature, and
thermocouple temperatures.
21) Click the
Next
command button
and your M.O.L.E. Profi ler is ready for
your experiment.
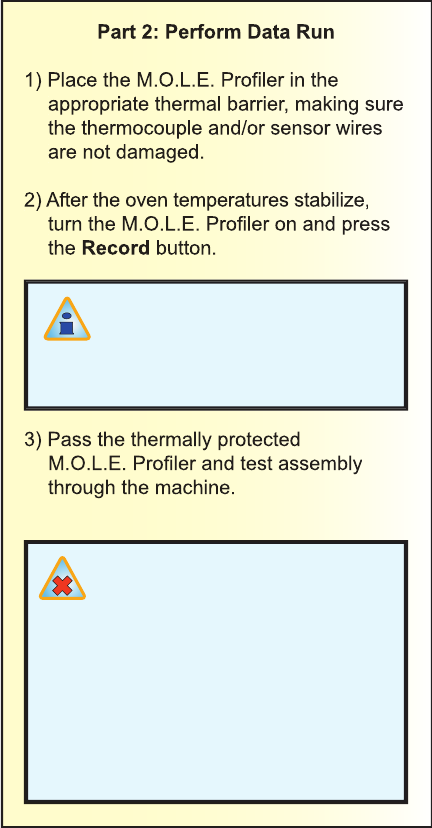
Part 2: Perform Data Run
1) Place the M.O.L.E. Profi ler in the
appropriate thermal barrier, making sure
the thermocouple and/or sensor wires
are not damaged.
2) After the oven temperatures stabilize,
turn the M.O.L.E. Profi ler on and press
the
Record
button.
Never permit the M.O.L.E.
Profi ler to exceed the
absolute maximum warranteed
internal temperature, as
permanent damage may result.
The instrument warranty will not
cover damage caused by
exceeding the maximum
specifi ed internal temperature.
You must press the
Record
button even if the Trigger
Temperature or Points Delay
parameters are confi gured.
3) Pass the thermally protected
M.O.L.E. Profi ler and test assembly
through the machine.
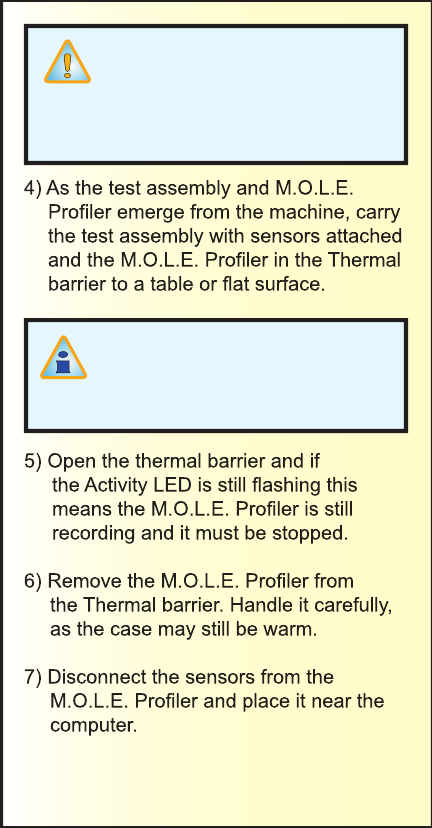
4) As the test assembly and M.O.L.E.
Profi ler emerge from the machine, carry
the test assembly with sensors attached
and the M.O.L.E. Profi ler in the Thermal
barrier to a table or fl at surface.
It is highly recommended that
protective gloves are used when
retrieving the thermal barrier
from the oven and when opening
the thermal barrier.
If a sensor is removed before the
M.O.L.E. Profi ler has stopped
collecting data, the data for that
channel might become distorted.
5) Open the thermal barrier and if
the Activity LED is still fl ashing this
means the M.O.L.E. Profi ler is still
recording and it must be stopped.
6) Remove the M.O.L.E. Profi ler from
the Thermal barrier. Handle it carefully,
as the case may still be warm.
7) Disconnect the sensors from the
M.O.L.E. Profi ler and place it near the
computer.
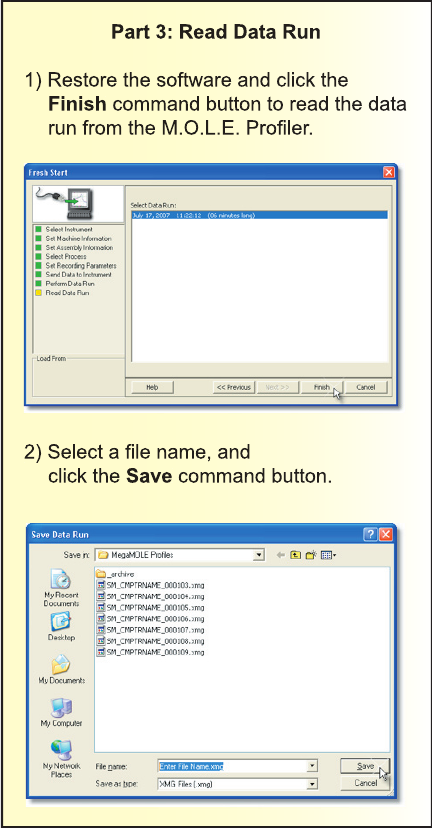
Part 3: Read Data Run
1) Restore the software and click the
Finish
command button to read the data
run from the M.O.L.E. Profi ler.
2) Select a fi le name, and
click the
Save
command button.
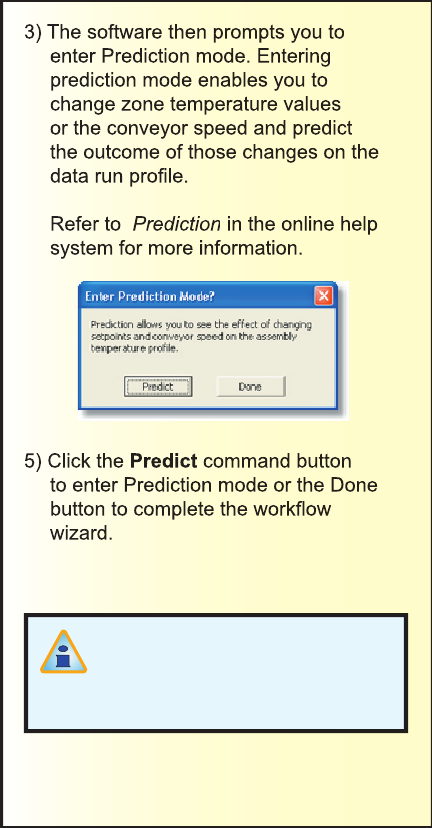
3) The software then prompts you to
enter Prediction mode. Entering
prediction mode enables you to
change zone temperature values
or the conveyor speed and predict
the outcome of those changes on the
data run profi le.
Refer to
Prediction
in the online help
system for more information.
5) Click the
Predict
command button
to enter Prediction mode or the Done
button to complete the workfl ow
wizard.
Your data is automatically saved
in the run fi le (.XMG) and you
can now analyze your experiment
data with the software tools.

© 2007 ECD. All Rights Reserved. Foreign and US
Products of ECD are covered by US Patents and
Patents Pending.
The trapezoidal ECD logo®, and M.O.L.E.® (Multi-
Channel Occurrent Logger Evaluator) are registered
trademarks of ECD.
Electronic Controls Design, Inc.
World Headquarters
4287B S.E. International Way
Milwaukie, Oregon 97222-8825 U.S.A.
Telephone: +(1) 800.323.4548
+(1) 503.659.6100
FAX: +(1) 503.659.4422
Technical Support: +(1) 800.323.4548
Email: ecd@ecd.com
Internet: http://www.ecd.com
ECD, Inc. - Logo Black N/A
A47-5342-16 Rev 1.3