Ensemble Communications ODU-2800-001 Fiberless 2800 Series Outdoor Unit transceiver User Manual Users manual 2 of 3 ODU Install

Ensemble Communications Inc. Fiberless 2800 Series Outdoor Unit transceiver Users manual 2 of 3 ODU Install

Users manual 2 of 3 ODU Install
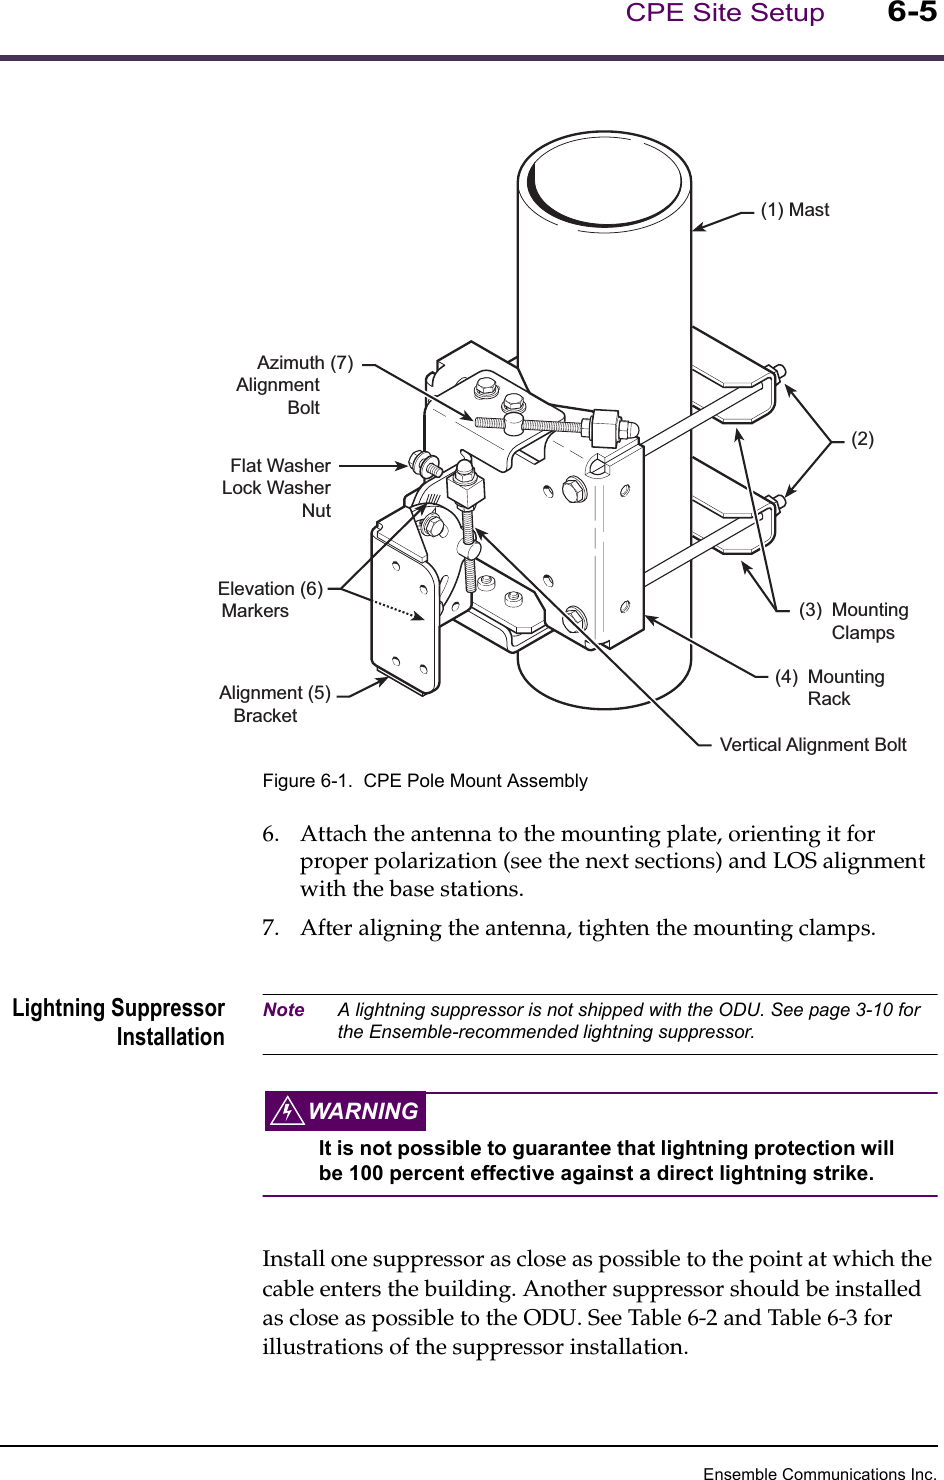
Ensemble Communications Inc.6-4Operator’s Guide to the Fiberless SystemODU InstallationNote Installers are responsible for supplying mounting bolts.Ground Mast All steel mounting structures attached to the building and the antenna mast must be connected to the building grounding system. If no grounding system or ring is available, ground the antenna mounting structures to the nearest structural beam. The grounding conductor should be set at least a # 2 (AWG) solid tinned copper wire. Use exothermic welds (Cad Welds) when possible to connect to the mounting structure and the building grounding system.Antenna Mounting 1. Attach the ODU mounting bracket to a mast between 2- and 4-inches in diameter (1 in Figure 6-1). 2. Remove the nuts and washers (2 in Figure 6-1) from one side of each of the two mounting clamps (3) and slide the mounting clamps off the bolts. Set them aside in a safe place.3. Slip the mounting rack (4 in Figure 6-1) around the mast.4. Reattach each of the two mounting clamps with the flat washer, lock washer, and nut. 5. Tighten with a 1/2-inch socket wrench until secure.
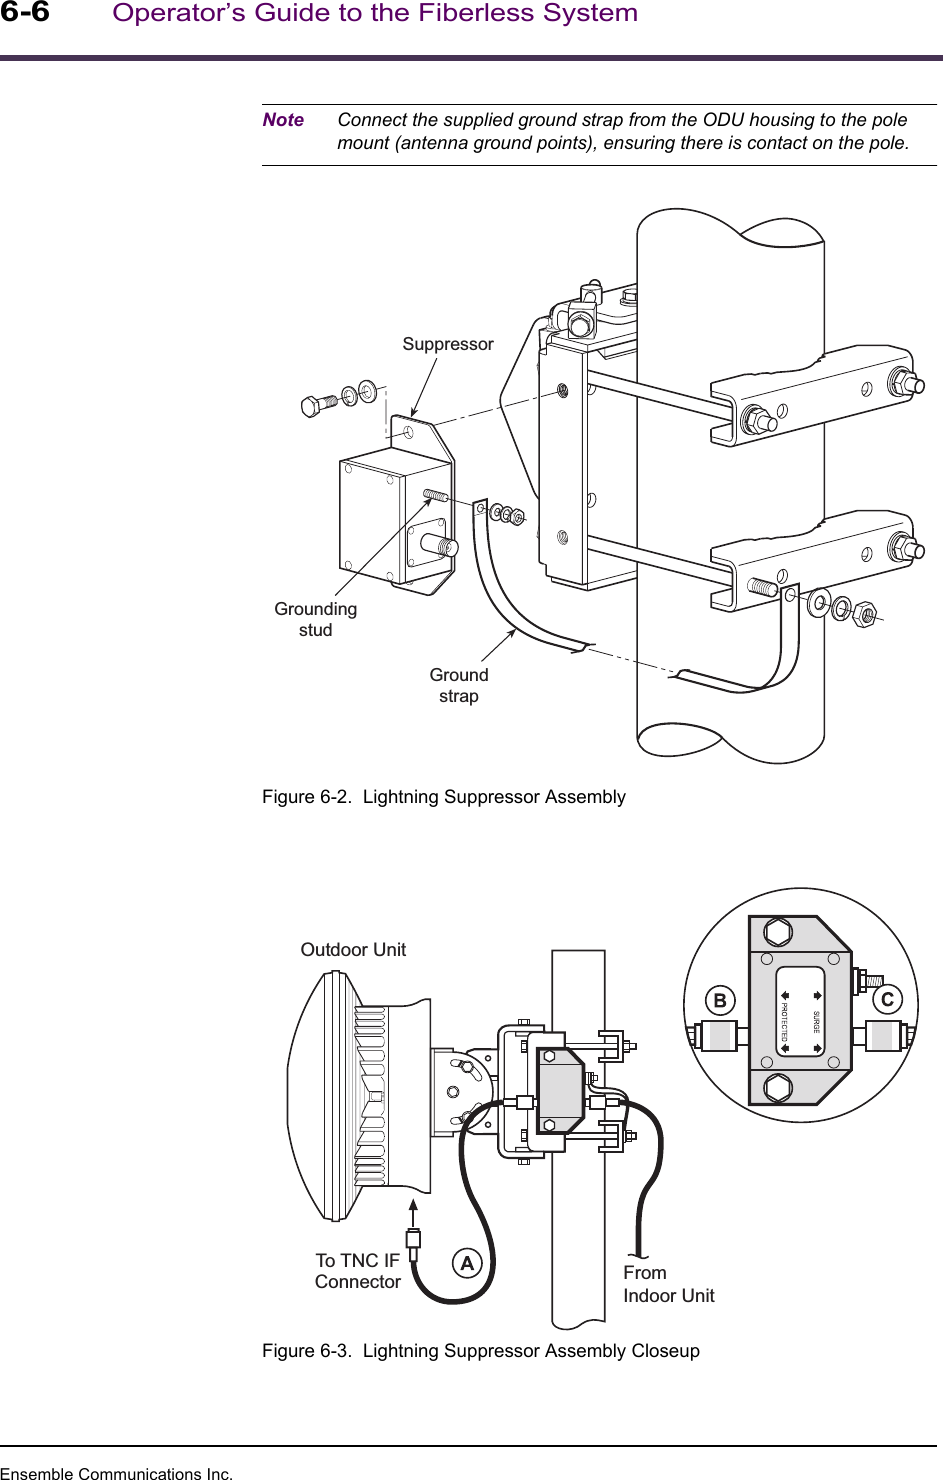
Ensemble Communications Inc.CPE Site Setup6-5Figure 6-1.  CPE Pole Mount Assembly6. Attach the antenna to the mounting plate, orienting it for proper polarization (see the next sections) and LOS alignment with the base stations.7. After aligning the antenna, tighten the mounting clamps.Lightning SuppressorInstallationNote A lightning suppressor is not shipped with the ODU. See page 3-10 for the Ensemble-recommended lightning suppressor.WARNINGIt is not possible to guarantee that lightning protection will be 100 percent effective against a direct lightning strike.Install one suppressor as close as possible to the point at which the cable enters the building. Another suppressor should be installed as close as possible to the ODU. See Table 6-2 and Table 6-3 for illustrations of the suppressor installation.Elevation (6)MarkersAlignment (5)BracketAzimuth (7)AlignmentBoltVertical Alignment Bolt(2)(1) MastFlat WasherLock WasherNut(3) MountingClamps(4) MountingRack
Ensemble Communications Inc.6-6Operator’s Guide to the Fiberless SystemNote Connect the supplied ground strap from the ODU housing to the pole mount (antenna ground points), ensuring there is contact on the pole.Figure 6-2.  Lightning Suppressor AssemblyFigure 6-3.  Lightning Suppressor Assembly CloseupGroundingstudGroundstrapSuppressorFromIndoor UnitOutdoor UnitTo TNC IFConnector
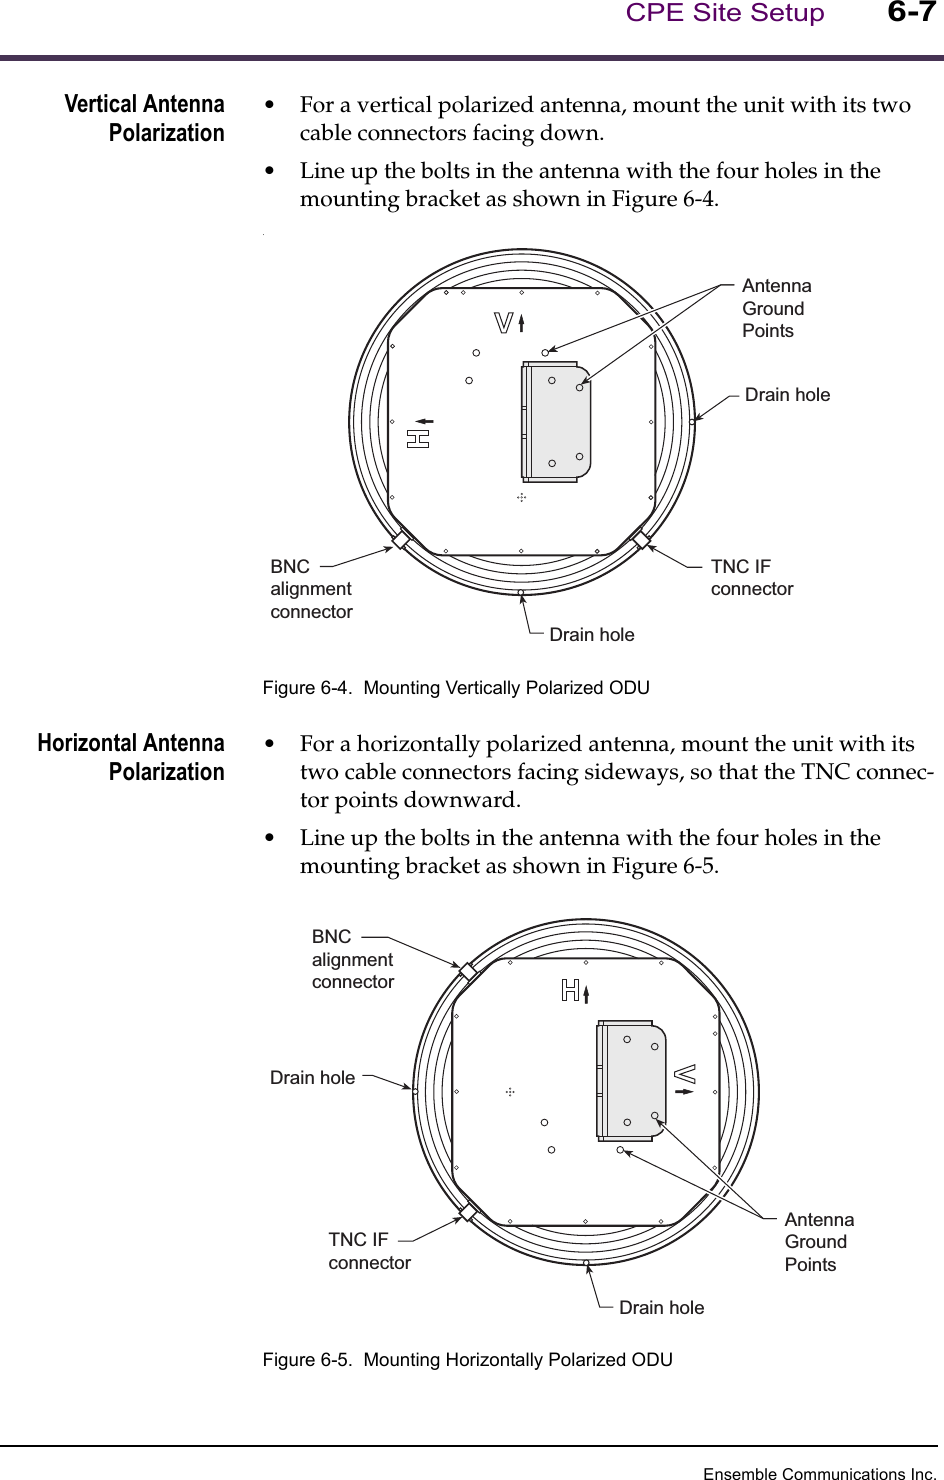
Ensemble Communications Inc.CPE Site Setup6-7Vertical AntennaPolarization•For a vertical polarized antenna, mount the unit with its two cable connectors facing down.•Line up the bolts in the antenna with the four holes in the mounting bracket as shown in Figure 6-4..Figure 6-4.  Mounting Vertically Polarized ODUHorizontal AntennaPolarization•For a horizontally polarized antenna, mount the unit with its two cable connectors facing sideways, so that the TNC connec-tor points downward.•Line up the bolts in the antenna with the four holes in the mounting bracket as shown in Figure 6-5.Figure 6-5.  Mounting Horizontally Polarized ODUBNCalignmentconnectorDrain holeTNC IFconnectorDrain holeAntennaGroundPointsBNCalignmentconnectorDrain holeTNC IFconnectorDrain holeAntennaGroundPoints

Navigation menu