Escort Data Logging Systems REDI PORTABLE DATA LOGGING DEVICE User Manual REDi 13 02 06
Escort Data Logging Systems Ltd PORTABLE DATA LOGGING DEVICE REDi 13 02 06
Contents
- 1. TECHNICAL MANUAL
- 2. USERS MANUAL
USERS MANUAL

1
2
1 - Introduction .....................................................................................................................4
1.1 – Safety Precautions .....................................................................................................4
1.2 – About REDi ................................................................................................................5
1.3 – Package Contents ......................................................................................................6
1.4 – Part Descriptions ........................................................................................................7
2 – Getting sta rted................................................................................................................8
2.1 – Installing Batteries ......................................................................................................8
2.2 – Turning on/off your REDi.............................................................................................9
2.3 – Entering Password (Code) ........................................................................................10
2.4 – Setting REDi Date and Time .....................................................................................12
2.5 – Downloading Software..............................................................................................12
3 – REDi Functions .............................................................................................................13
3.1 – Downloading Wireless Data Loggers .........................................................................13
3.1.1 - Read New..........................................................................................................13
3.1.2 - Read All.............................................................................................................14
3.2 – Viewing and Interpreting Data ...................................................................................15
3.2.1 – View Recent......................................................................................................16
3.2.2 – View All.............................................................................................................18
3.2.3 – View Summary ..................................................................................................19
3.2.4 – View out of Specification....................................................................................21
3.2.5 Restart the logger .............................................................................................22
3.3 – Transferring Data to your PC .....................................................................................23
4 – System options .............................................................................................................24
4.1 – Shut Down...............................................................................................................24
4.2 – Auto off....................................................................................................................24
4 3 – Backlight..................................................................................................................25
4.4 – Available Memory.....................................................................................................25
4.5 – Rechargeable Batteries ............................................................................................26
4.6 – Temperature Unit Conversion....................................................................................26
4.7 – Erase All Data ..........................................................................................................27
4.8 – System Information...................................................................................................27
4.9 – Exit..........................................................................................................................28
5 - Software.........................................................................................................................29
5.1 - Installation ................................................................................................................29
5.2 - Connecting your REDi ...............................................................................................29
5.3 - Software Setup .........................................................................................................30
5.4 – Configuring REDi......................................................................................................31
5.4.1 – Enter Password.................................................................................................32
5.4.2 – Description ........................................................................................................32
5.4.3 –Password Settings..............................................................................................33
5.4.4 – Temperature Scale ............................................................................................33
5.4.5 – Date Format ......................................................................................................34
5.4.6 – Time Format......................................................................................................34
5.4.7 – Auto Off Delay...................................................................................................35
5.4.8 – Backlight On Time .............................................................................................35
5.4.9 – Rechargeable Batteries......................................................................................36
5.4.10 – Delete Data .....................................................................................................36
5.4.11 - Summary .........................................................................................................36
5.5 - Download logger data to PC ......................................................................................37
5.5.1 – Selecting Logger Data for Download...................................................................38
5.5.2 - Download password protection............................................................................39
5.5.3 – Logger Properties ..............................................................................................39
5.5.4 – Retrieving Logger Data from the REDi ................................................................40
5.5.5 – Deleting Logger Data Blocks ..............................................................................40
6 – Useful Information.........................................................................................................42
3
6.1- Battery Specifications .................................................................................................42
6.1.1 - Battery Indicator .....................................................................................................42
6.1.2 - Prolonging the battery life of wireless loggers.......................................................42
6.2 – Successful REDi to Wireless Communication.............................................................43
6.3 – Recharging your REDi ..............................................................................................43
6.4 – Specifications...........................................................................................................44
6.4.1 – Storage & Database ..........................................................................................44
6.4.2 – Readout ............................................................................................................44
6.4.3 – Power Supply ....................................................................................................44
6.4.4 – Processor .........................................................................................................44
6.4.5 – Communication .................................................................................................45
6.4.6 – Communication Frequency.................................................................................45
6.4.7 – Keyboard ..........................................................................................................45
6.4.8 – Other Features ..................................................................................................45
6.4.9 – User Software...................................................................................................45
6.5 Wireless Regulations...................................................................................................46
6.6 – Warranty ..................................................................................................................47
6.6 – Recycling of electronic devices ..................................................................................48
4
1 - Introduction
1.1 – Safety Precautions
a. Please be sure to follow the instructions, warnings and notices specified
within this document to avoid malfunction.
b. The REDi device’s IP rating is 54 and therefore is protected against a
limited amount of dust and vertically falling drops of water. Users should
not use the device in any environments where moisture could enter the
case of the device. If the REDi unit requires cleaning ESCORT Data
Logging Systems recommends users wipe the device with a clean dry
cloth and mild detergent.
c. ESCORT Data Logging Systems does not recommend the use of any AC
adapter other than those specified. The use of an unspecified AC adapter
could cause your REDi device to malfunction or result in personal injury.
d. If your REDi device is not to be used for prolonged periods of time,
remove the batteries to prevent loss of battery life and possible battery
leakages that may damage the device.
e. Force should never be applied to this device.
f. Your REDi device should only be operated within the parameters specified
within this manual.
g. Never attempt to recharge non-rechargeable batteries.
h. Never attempt to repair this device. If you experience any problems with
this device, please contact your local distributor to arrange repair.
i. Your REDi has a sensitive antenna and at no time should you attempt to
tamper with, turn or remove the antenna. Interactions of this nature could
result in communication failure between your REDi and other wireless
devices.
j. Use of the protective rubber boot is recommended.
k. Variations of data transfer distance can occur due to interference.
5
1.2 – About REDi
The REDi is a portable, handheld device that facilitates radio communication with
Wireless Mini loggers. The REDi enables a user to gather recorded data from
selected loggers and to collect the log data from many remote sites before
transferring this data to a PC. In addition, the REDi has the ability to display
statistics about the data (including readings out of specificat ion) and to restart
loggers.
The unit is physically arranged in an easy to hold handheld plastic case which is
battery powered and contains a large liquid crystal display (160 x 160 bitmap)
and 7 key keyboard. A communications connector, which allows the REDi to be
connected to a PC, is supplied with the unit and can be mounted at the top of the
unit.
The REDi is menu based. To trigger actions and display data the user must
select a menu item by using the up / down arrow keys to move a highlight bar
over that option then select it using the Select key (OK button). The Select key is
also used to toggle between states and to return to a higher level menu.
The REDi has a power down key (bottom left hand button) which will
immediately put the unit into sleep mode, as well as an escape key which will
return the screen to an earlier menu (generally Menu 1).
6
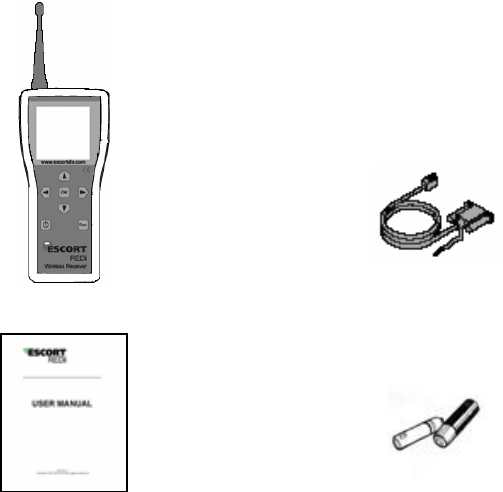
1.3 – Package Contents
Your REDi package contains the following items:
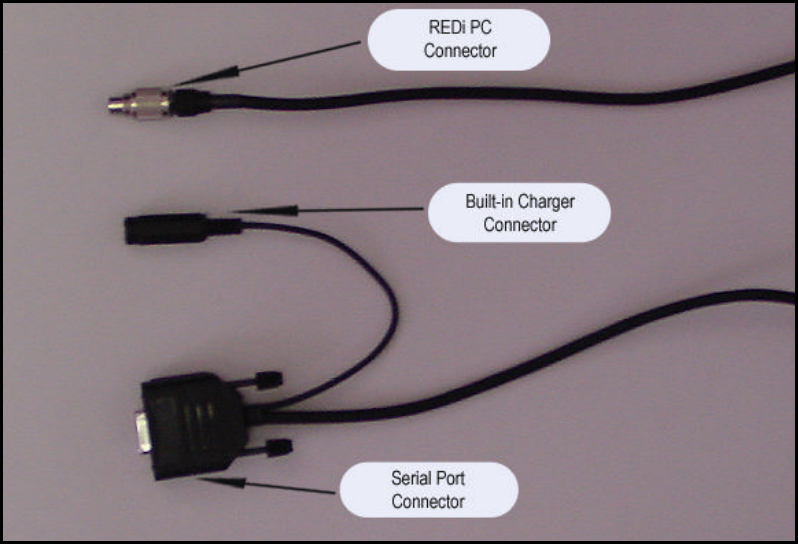
1x REDi Device 1x Serial port connector
1x REDi user manual 2x AA batteries (re-chargeable)
7
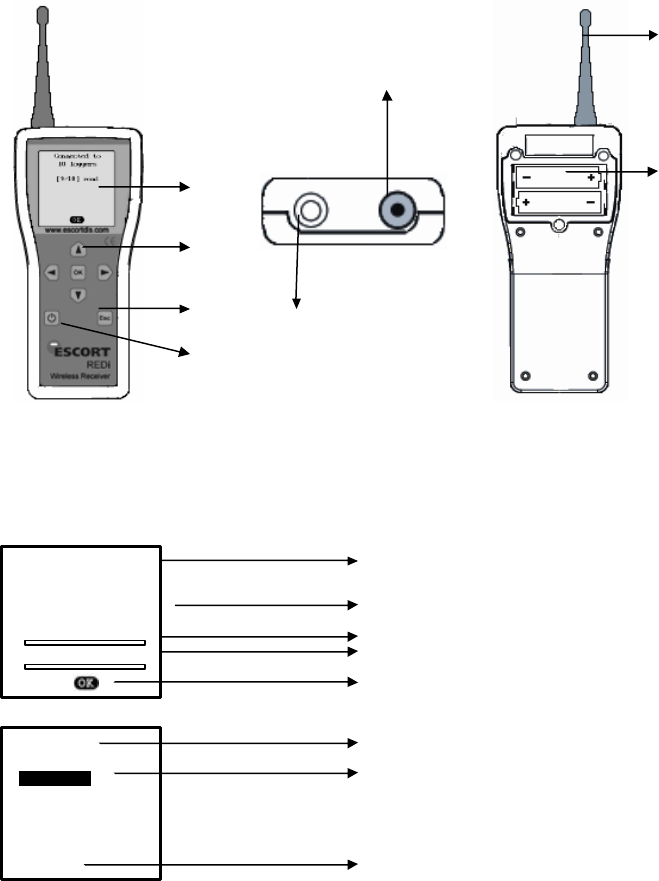
1.4 – Part Descriptions
1
2
3
4
5
6
7
8
1. Liquid-Crystal-Display 5. Antenna (top view)
2. Keypad and OK button 6. Interface Connector
3. Escape button (Esc) 7. Antenna (side view)
4. Power button 8. Battery compartment
Message text
Loggers connected to
Status bar
Loggers downloaded with scrolling
OK button
Option
Selected Option
Time
Connected to
10 loggers
[9/10] read
Read new
Read all
View data
System Options
15:54
8
2 – Getting started
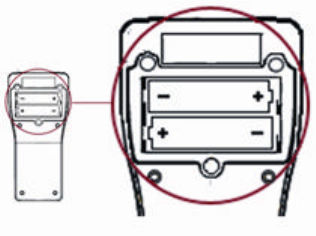
2.1 – Installing Batteries
Your REDi requires two AA batteries to operate. You can use either alkaline or
re-chargeable (for example, NiCd or NiMH) batteries, however please remember
that you must never attempt to charge alkaline batteries.
The two AA batteries delivered with your REDi are rechargeable. They have
been installed for your convenience.
To install new batteries first remove the battery panel located at the top of back
of your REDi device (see figure 2.0). The REDi battery panel is fastened with
three small Philips head screws and you will require a Philips screwdriver to
remove these.
Insert the two batteries with the correct polarity (as marked inside the
compartment).
Before replacing the lid, ensure that the batteries are fully inserted. If the
batteries are not inserted correctly, the lid will not fit properly, and could
consequently damage the seal or the batteries.
Carefully place the cover of the battery compartment back on, and gently tighten
the three screws.
Figure 2.0 (REDi battery compartment)
If you switch to alkaline batteries, please remember to change the corresponding
option in the System Options to “Rechargeable N”. See chapter 6.3 for more.
Important – To ensure that the REDi device functions to an optimum level for the
duration required, it is vital that the REDi device is recharged regularly, preferably
at the end of each assignment.
9
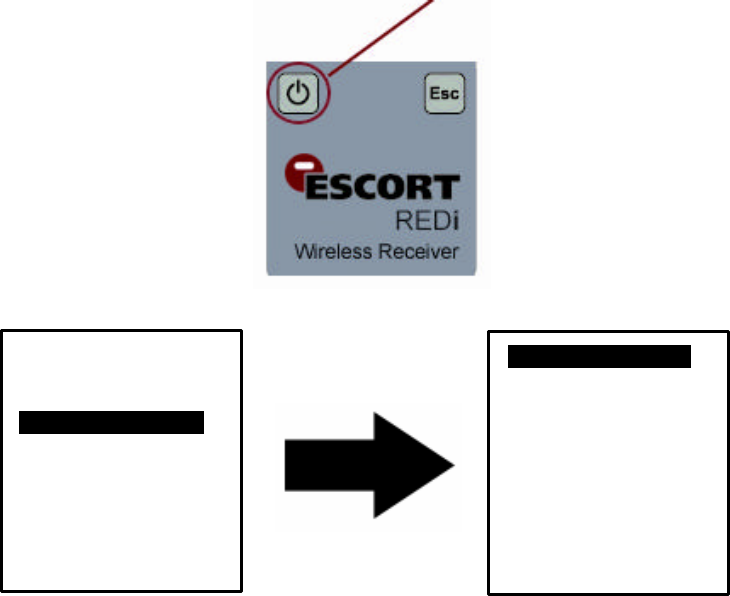
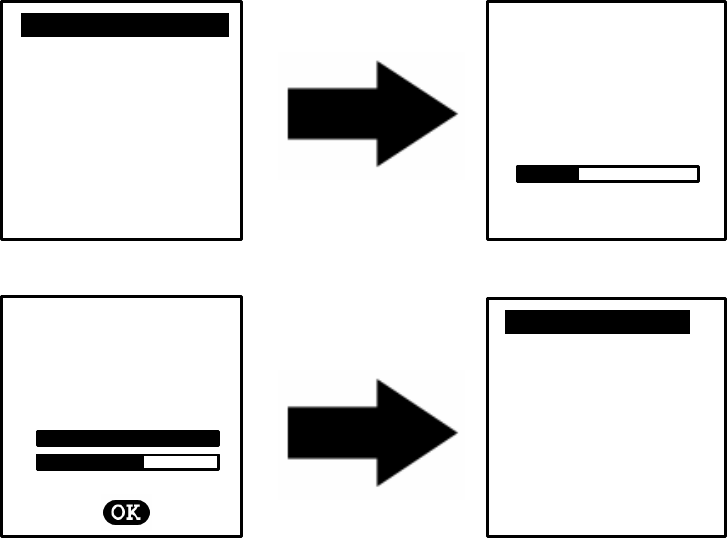
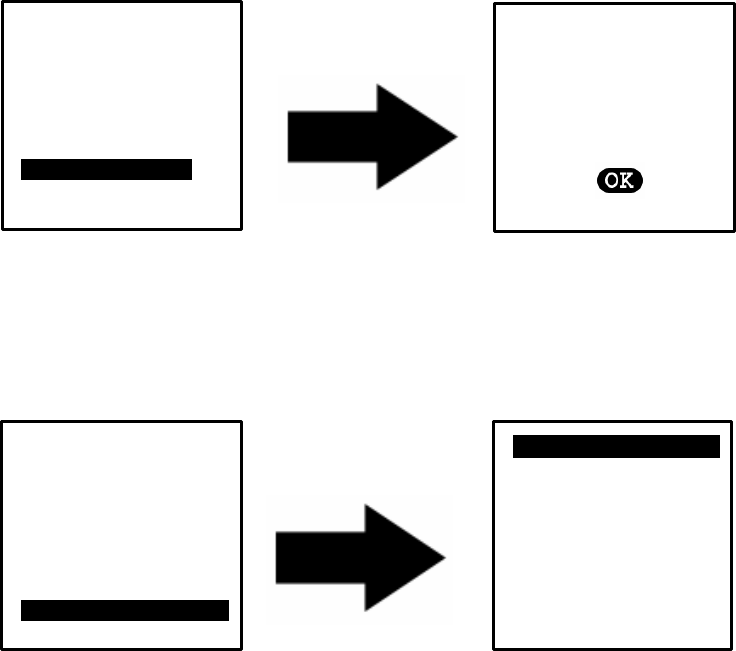
2.2 – Turning on/off your REDi
There are several ways in which you can switch your REDi device on and off. To
turn the device on, simply press any one of the REDi keyboard keys. The Unit
will briefly show ‘System Info’ (see chapter 4.7) and then display the ‘Main Menu’.
To switch your REDi device off you can either press the on/off button located at
bottom left of the REDi interface (see figure 2.1). If you would prefer to shut your
REDi device down via the menu screens you can do so by selecting ‘System
Options’ and then ‘Shut Down’ (see figure 2.2).
For information regarding REDi’s ‘AutoOff’ function refer to chapter 4 ‘System
Options’ of the REDi user manual.
Press the power button to turn on and/or off.
Figure 2.1 (REDi Power Button)
Figure 2.2 (REDi Shut Down Screenshots)
Your REDi will switch on automatically when it is connected to a serial port (COM
port) of your PC, or to mains power (for recharging the batteries).
Read new
Read all
View data
System Options.
15:54
Shut Down
…………….
AutoOff 30 min
Backlight 90 s
Mem. left 801K
Rechargeable Y
Temp Unit ºC
Erase all data
System info
Exit
15:54

10
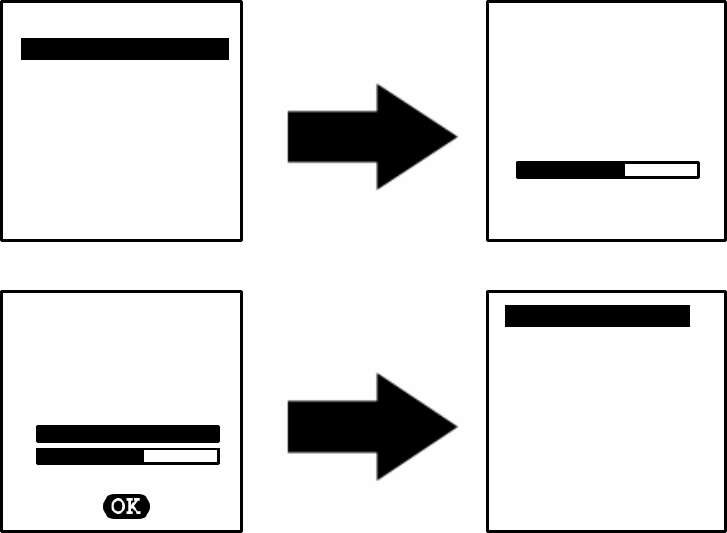
2.3 – Entering Password (Code)
Your REDi device has the ability to be Password protected. Each REDi device is
capable of having one password allocated. The REDi device defines the
password as a ‘Code’ (see figure 2.3). REDi password is setup using ESCORT
Console software. To learn more about how to password protect your REDi
device please refer to the Software chapter (chapt er 5) of this user manual.
If your REDi device has the password function enabled but you have not
assigned a password using ESCORT Console the default password is ‘0000’
(see figure 2.3).
Once a password has been assigned to your REDi device, a screen will be
displayed upon start up that prompts users to enter their password (see figure
2.3).
Figure 2.3 (Enter Password Screenshot)
To enter your password use the up and down arrow keys on the key pad to
change the numbers (from 0 to 9) and the left and right arrow keys to move to the
next. Once you have entered the correct password click the ‘OK’ key located in
the middle of the arrow keys on the keypad (see figure 2.4).
Figure 2.4 (REDi Keypad)
ENTER CODE
0***

11
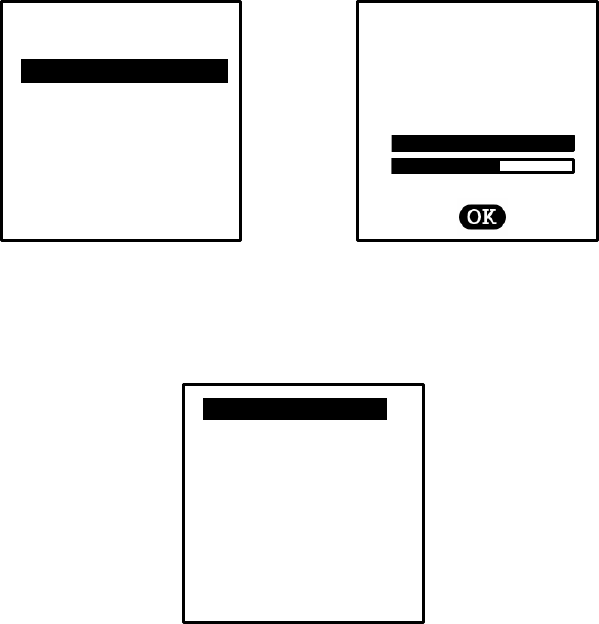
If an invalid password is entered, your REDi device will display the message ‘*
INVALID *’ (see figure 2.5) and shut down immediately. To make another attempt
at entering a password, press any key to restart your REDi device and re-enter
your four digit password as per the instructions above.
Figure 2.5 (Invalid Password screenshot)
Once the correct password has been entered, your REDi device will proceed to
the ‘System Info’ (see chapter 4.7) and after that automatically to the ‘Main Menu’
(see figure 2.6). You will then be able to access all of the menus and functions
that your REDi device offers.
Figure 2.6 (REDi Main Screen)
ENTER CODE
0***
* INVALID *
Read new
Read all
View data
System Options.
15:54

12
2.4 – Setting REDi Date and Time
The REDi clock is located in the bottom left of the REDi display (see figure 2.5).
For your convenience your REDi device has been designed to automatically
configure its date and time to your PC’s date and time. This takes place when
using either the program and configure or the download function in ESCORT
Console.
2.5 – Downloading Software
In order to access your REDi using your PC, you need to download ESCORT
Console software from the Escort Data Logging Systems website
(www.escortdls.com). The standard version of ESCORT Console software is free
to download and use.
However, if you require advanced features (such as multi-graph) it is
recommended that you purchase ‘ESCORT Console Professional’. To learn
more about ESCORT Console Professional, please contact your local distributor,
or refer to the explanation on our website.
13
3 – REDi Functions
3.1 – Downloading Wireless Data Loggers
The REDi uses a short wave radio signal to communicate with Wireless Mini data
loggers (MI-IN-D-2-LR8, MI-OE-D-2-LR8, MI-IN-D-LR9 and MI-OE-D-LR9).
Radio communication depends on communication distance, interference by other
objects and other radio waves. Metal and water (rain) especially can disturb the
signal. Further, both the orientation of the REDi and the logger antenna strongly
influence the quality of the communication. There should be at least 0.5m of clear
space around the antenna. To improve communication, get closer to the logger,
remove obstacles in the way or metal in the surrounding area, and hold the REDi
at different angles for each attempt.
The first screen, referred to as the main menu screen, is the first visible menu
(which follows the System Info, see 4.7) after initiating your REDi device and
allows for two download options ‘Read New’ and Read All’.
3.1.1 - Read New
The ‘Read New’ option allows you to locate and download loggers that have not
previously been downloaded by a specific REDi unit. The highlight bar
automatically defaults to the first option (Read new) on the main menu.
If you select ‘Read New’ and press ‘OK’, the next screen displayed is the ‘search’
screen. REDi communicates with the loggers in range and checks their serial
numbers against all records already in the REDi memory. Connection will only be
established with loggers that cannot be found in the REDi memory already. The
device then displays the ‘Connected to loggers’ screen (see figure 3.1). Once the
REDi has downloaded all data of new loggers, you are given the option to either
view the data just downloaded with ‘View recent’, or view all of the data stored in
the REDi memory (see 3.2.1 and 3.2.2) using ‘View all’. ‘Exit’ will take you back
to the main menu.
14
Screen 1 Screen 2
Screen 3 Screen 4
Figure 3.1 (Steps to download new logger data)
You will typically use the ‘Read New’ function when you have already
downloaded some of the loggers you are searching for and want to find any
loggers that the REDi could not connect to during your previous try.
3.1.2 - Read All
The ‘Read All’ option allows you to locate and download data from all of the
loggers (both new and downloaded previously) that are within communicating
distance. The ‘Read All’ option is located on the ‘Main Menu’ screen and is option
number two.
To download all of the available logger data select ‘Read All’ and press ‘OK’, the
next screen displayed is the ‘search’ screen followed by the ‘connected to
loggers screen (see figure 3.2). Once the REDi has downloaded all of the found
logger information you’re given the option to either view the recently downloaded
data or view all of the data stored in the REDi memory (see 3.2.1 View Recent
and 3.2.2 View All for more information).
Read new
…………………….
Read all
View data
System Options
15:54
Searching…
Connected
to
10 loggers
[9/15] read
View recent
……….
View all
Exit
15:54
15
Screen 1 Screen 2
Screen 3 Screen 4
Figure 3.2 (Steps to download all logger data)
This function will typically be used if you need to repeat the download of some
loggers because additional readings have been taken. The existing data will not
be overwritten, but a new logger data block for the same logger will be added in
the REDi.
The REDi can only connect to a maximum of 32 loggers at the same time. If you
did not connect to all loggers you were expecting, try to get closer to those you
are missing and repeat ‘Read all’. If those missing loggers have not been
downloaded before, use the ‘Read new’ function.
3.2 – Viewing and Interpreting Data
Your REDi device is designed to provide several different ways in which to view
the logger data that has been downloaded into its memory.
There are two ways in which you can access logger data from the REDi’s
memory. Firstly, you can access data saved from previous download sessions by
choosing the ‘View Data’ option from the main menu (see figure 3.3). Secondly,
you are given the option to view logger data immediately after downloading has
finished (see figure 3.4).
Read new
Read all…………………….
View data
System Options
15:54
Searching…
Connected to
27 loggers
[22/27] read
View recent
……….
View all
Exit
15:54
16
Figure 3.3 (Main Screen – View Data) 3.4 (Download Screen – Read Loggers)
Both the main screen and the download screen direct you to the ‘View Screen’,
where you have two viewing options, “View recent’ and ‘View all’ (see figure 3.5).
For more information on the ‘View Recent’ and ‘View All’ options please read
sections 3.2.1 and 3.2.2.
Figure 3.5 (View Screen)
For Wireless Mini loggers which have the downloaded data password protected,
you can only view the Overview, not summary or out of specification information.
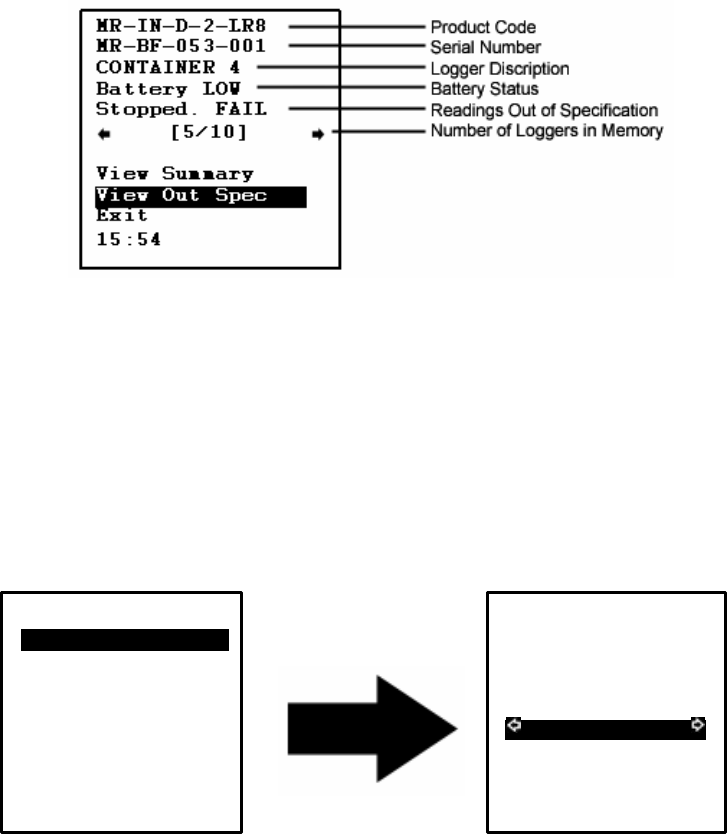
3.2.1 – View Recent
The ‘View Recent’ option will only display data which has been collected during
the REDi’s most recent scan (see figure 3.6). To scroll through the different
loggers, first the ‘Number of Loggers in Memory’ window (see figure 3.8) must be
highlighted. By pressing the left and right arrow keys on the key pad you can
move through the logger list.
For information regarding the viewing of detailed logger information please refer
to 3.2.3 ‘View Summary’ and 3.2.4 ‘View out of Specification’.
Read n
e
w
Read all
View data………………….
System Options
15:54
Connected to
10 loggers
[9/10] read
View recent
……….
View all
Exit
15:54
17
Figure 3.6 (‘View recent’ to ‘Overview’ Screenshots)
If there have been no recent downloads of data the REDi with display a screen
with the message ‘No Loggers’ (see figure 3.7). To return to the ‘View Screen’
select the ‘Exit’ option (near the bottom of the screen) or press the ‘Esc’ button.
Figure 3.7 (No Loggers screen)
If your REDi registers recently downloaded data within its memory, your REDi
screen will display the basic information relating to that logger data (‘Overview’),
Items such as; product code, serial number, battery status and whether the
logger has logged readings out of specification (see figure 3.8).
No loggers
..…………[0/0]…………..
Exit
15:54
View recent
……….
View all
Exit
15:54
MR
-
IN
-
D
-
2
-
LR8
MR-BF-053-001
CONTAINER 4
Battery LOW
Stopped. PASS
[5/10]
View Summary
View Out Spec
Restart Logger
15:54
18
Figure 3.8 (Downloaded screen)
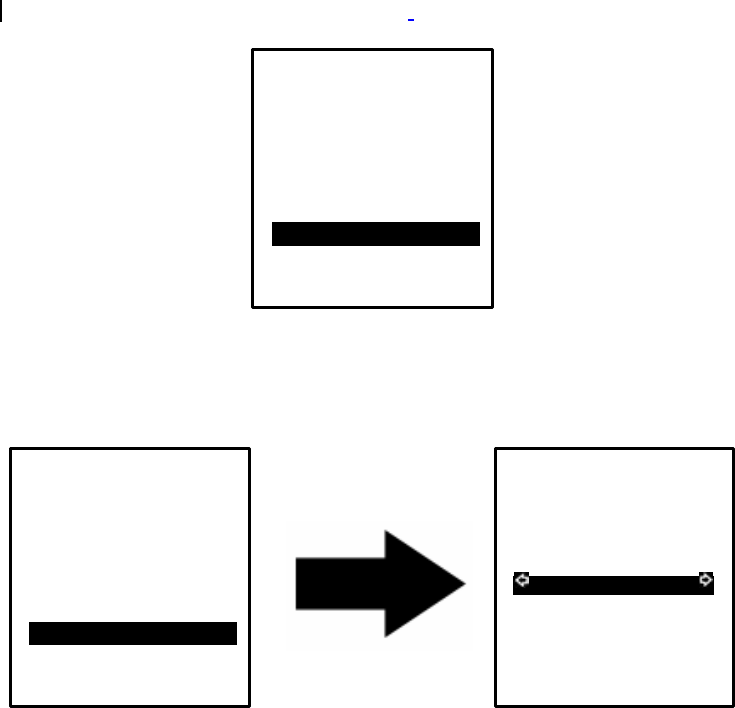
3.2.2 – View All
The ‘View All’ screen allows you to access and view all logger data currently in
the REDi’s memory. This includes data that has been downloaded before the
REDi’s most recent scan. Once you have selected the ‘View All’ function the
REDi will precede to the ‘Overview’ menu (see figure 3.9). To scroll through the
different loggers, first highlight the ‘Number of Loggers in Memory’ window. By
pressing the left and right arrow keys on the key pad you will be able to move
through the logger list.
For explanations regarding the viewing of detailed logger information please refer
to 3.2.3 ‘View Summary’ and 3.2.4 View out of Specification.
Figure 3.9 (View All and Overview)
View recent
View all…………………….
Exit
15:54
MR
-
IN
-
D
-
2
-
LR8
MR-BF-053 -001
CONTAINER 4
Battery LOW
Stopped. PASS
[5/10]
View Summary
View Out Spec
Exit
15:54
and Position of displayed
logger in memory

19
3.2.3 – View Summary
The ‘View Summary’ option allows you to view in detail each logger ’s
downloaded data apart from each individual reading. Individual readings can be
viewed using ESCORT Console software (see Chapter 5).
Your REDi will display the following information within the summary screen (see
figure 3.10).
RF Mini Product type
MR-BF-053-001 Serial Number
CONTAINER 7 Logger description
Trip No: 0 Trip number
Battery: LOW Battery status
Time Zone: GMT+13:00 Time zone
Sampling: 2 min Sampling rate
Readings: 1868 Number of readings taken
Start Time: Starting Time
11/04/05 11:20
End Time: Finishing time
14/04/05 01:34
Active: -40˜70ºC Temperature where active
High Spec: 32.0ºC High alarm temperature
Low Spec: -6.5ºC Low alarm temperature
Max: 56.0 º C Maximum temperature reached
Avg: 14.0 º C Average temperature reached
Min: -20.5 º C Minimum temperature reached
Alarm: None Alarm On/Off
Time Over: 32.0ºC Time over specification
17:32:00
Time Under:-6.5ºC Time under specification
23:12:00
State: Stopped Logger status
Figure 3.10 (View Summary screen)
20
Once you have reviewed the summary information of the logger that you have
chosen you are given two options, which are ‘View new logger’ and ‘Exit’. These
are the last two fields of the ‘View Summary’ screen (see figure 3.11).
Figure 3.11 (View Summary Screen)
The ‘View new logger’ option allows you to return to the ‘Overview’ where you
can choose to look at another logger’s data file that is saved in your REDi
memory (see figure 3.12). You also get there by pressing the ‘Esc’ button.
Figure 3.12 (Return to ‘Overview’)
Min:
-
20.5ºC
Alarm: None
Time over: 32.0ºC
17:32:00
Time under:-6.5ºC
23:12:00
State: Stopped
View new logger….
Exit
15:54
MR
-
IN
-
D
-
2
-
LR8
MR-BF-053 -001
CONTAINER 4
Battery LOW
Stopped. FAIL
[5/10]
View Summary
View Out Spec
Restart Logger
Exit
15:54
Min:
-
20.5ºC
Alarm: None
Time over: 32.0ºC
17:32:00
Time under:-6.5ºC
23:12:00
State: Stopped
View new logger….
Exit
15:54
21
The ‘Exit’ option allows you to return to the ‘Main Menu’ (see figure 3.13).
Figure 3.13 (Return to ‘Main Menu’)
If you accidentally exit the ‘View Summary’ screen you can return to the ‘View
Summary’ screen by selecting the ‘View data’ option. From this screen you can
return to the ‘View’ menu where you have the option to either choose ‘View
recent’; or ‘View all’ (see 3.2.1 and 3.2.2).
3.2.4 – View out of Specification
Your REDi device allows you to view specific readings when an ‘Out of
Specification’ event has occurred. You can access these readings by selecting
the ‘View Out Spec’ option from the ‘Overview’ screen (see figure 3.14).
Figure 3.14 (Viewing ‘out of specification’ readings)
Once you have chosen the ‘View Out Spec’ option a list of readings does appear
on your REDi screen. You can view all of the readings by selecting the ‘Next’
option located at the top and bottom of the ‘Out of Specification’ screen. If you
would like to exit this screen simply press the escape key (‘Esc’) located at the
bottom right of your REDi keypad, after which, you will be returned to the
‘Overview’ screen (see figure 3.15).
Min:
-
20.5ºC
Alarm: None
Time over: 32.0ºC
17:32:00
Time under:-6.5ºC
23:12:00
State: Stopped
View new logger
Exit………………………..
15:54
Read n
ew
Read all
View data ………………….
System Options
15:54
MR
-
IN
-
D
-
2
-
LR8
MR-BF-053 -001
CONTAINER 4
Battery LOW
Stopped. FAIL
[5/10]
View Summary
View Out Spec……
Exit
15:54
Next
……………………………….
13/01/13 16:43
Reading: 41.5ºC
13/01/13 16:44
Reading: 41.5ºC
13/01/13 16:45
Reading: 42.0ºC
13/01/13 16:46
Reading: 40.5ºC
11:23
22
Figure 3.15 (Returning to “Overview’ screen)
3.2.5 Restart the logger
Through the ‘Overview’ menu you have the ability to restart loggers (3.16).
Figure 3.16 (Restart Function)
When you have successfully started the logger, it will run exactly the same
programme again that it had been running for the last trip. This includes any start
delays, as well as the specification limits and recording frequency. Please note
that you do not need to push the button to start your Wireless Mini; the ‘Restart’
function starts the programme immediately (The logger will show ‘d’ for start
delay or the latest reading if no delay was specified).
This function is not available if the program of the logger has been password
protected, or the available trips of the logger have been used up.
In case the logger program had been password protected, you need to connect
the logger to ESCORT Console for re-arming and supply the correct password. If
the password has been lost, the logger has to be returned to your ESCORT
distributor for password reset.
Next
13/01/13 16:43
Reading: 41.5ºC
13/01/13 16:44
Reading: 41.5ºC
13/01/13 16:45….
Reading: 42.0ºC
13/01/13 16:46
Reading: 40.5ºC
11:23
MR
-
IN
-
D
-
2
-
LR8
MR-BF-053-001
CONTAINER 4
Battery LOW
Stopped. FAIL
[5/10]
View Summary
View Out Spec
Restart Logger
Exit
15:54
MR
-
IN
-
D
-
2
-
LR8
MR-BF-053 -001
CONTAINER 4
Battery LOW
Stopped. FAIL
[5/10]
View Summary
View Out Spec
Restart Logger
Exit
15:54
MR-BF-158-006
Started!
OK
23
3.3 – Transferring Data to your PC
To be able to load a configuration to and read data from the REDi device, you
need to install ESCORT Console software from the Internet or from CD on your
PC and follow the instructions regarding the use of the software (see chapter 5).
To ensure the REDi device can successfully communicate with the software,
connect the interface cable (see figure 3.17) to a serial communication port
(COM port, DB9) on your PC.
Figure 3.17 (Serial port connector)

24
4 – System options
The ‘System Options’ option provides you with useful information related to your
REDi device and allows you to configure several different features to better suit
your requirements. The ‘System Options’ menu provides information on your
REDi’s available memory and other menu options (see figure 4.1);
Figure 4.1 (‘System options’ menu)
4.1 – Shut Down
The ‘Shut Down’ option in the ‘System Options’ menu simply allows you to shut
down your REDi device down. This option is automatically highlighted as it is the
first option on the ‘System Options’ menu. To initiate the shutting down of the
device press the ‘OK’ button when the option is highlighted (see figure 4.1).
You can also shut your REDi device down by pressing the power key located at
the bottom left of your REDi keypad at any time.
4.2 – Auto off
The ‘Auto Off’ option is the second option your REDi device displays in the
‘System Options’ screen (see figure 4.2). This option allows you to set an
automatic shut down time if no key has been pressed for a certain amount of
time. You have an ability to select a time frame from 2 to 30 minutes. To alter the
auto off time use the left and right arrow keys located on the REDi keypad.
Alternatively, you can set your required auto off time using ESCORT Console
software, for more information regarding this refer to chapter 5 of this user
manual.
S
hut Down
…………….
AutoOff 30 min
Backlight 10 s
Mem left 801K
Rechargeable Y
Temp Unit ºC
Erase all data
System info
Exit
15:54

25
Figure 4.2 (‘Auto Off’ Option)
4 3 – Backlight
The ‘Backlight’ option is the third option your REDi device displays in the ‘System
Options’ screen (see figure 4.3). This option allows you to set the length of time
the display will remain illuminated after each key press on your REDi. You have
the ability to select a time frame from 0 to 180 seconds (3 minutes) by using the
left and right arrow keys on the key pad. Alternatively, you can set your required
backlight time frame using ESCORT Console software, for more information
regarding this refer to chapter 5 of this user manual.
Figure 4.1 (‘Backlight’ Option)
4.4 – Available Memory
The ‘Mem left’ option is the fourth option in the ‘System Options’ screen (see
figure 4.4). This is a read only option and displays your REDi’s available memory
space in kilobytes.
Shut Down
AutoOff 30 min…….
Backlight 10 s
Mem left 988k
Rechargeable Y
Temp Unit ºC
Erase all data
System info
Exit
15:54
Shut Down
AutoOff 30 min
Backlight 10 s….…
Mem left 988k
Rechargeable Y
Temp Unit ºC
Erase all data
System info
Exit
15:54

26
Figure 4.4 (‘Memory Left’ Option)
4.5 – Rechargeable Batteries
With Rechargeable Y/N you can specify if the REDi is equipped with
rechargeable batteries. You can change the value from ‘Y’ (rechargeable
batteries fitted) to ‘N’ (normal batteries used) by using the left and right arrow
keys on your keypad.
For more information regarding re-chargeable batteries see chapters 2.1 and 6.3.
4.6 – Temperature Unit Conversion
The ‘Temp Unit’ option is the fifth option your REDi device displays in the
‘System Options’ screen (see figure 4.5). This option allows you to set the
temperature unit to either ºC or ºF. You change between the two temperature
units by using the left and right arrow keys on the REDi keypad. Alternatively,
you can set your required temperature unit using ESCORT Console software, for
more information regarding this refer to Chapter 5 of this user manual.
Figure 4.5 (‘Temperature Unit Conversion’ Option)
Shut Down
AutoOff 30 min
Backlight 10 s
Mem left 988k
Rechargeable Y
Temp Unit ºC
Erase all data
System info
Exit
15:54
Shut Down
AutoOff 30 min
Backlight 10 s
Mem left 988k
Rechargeable Y
Temp Unit .ºC …………
Erase all data
System info
Exit
15:54

27
4.7 – Erase All Data
The ‘Erase All’ option is the sixth option on the ‘System Options’ menu (see
figure 4.7). This option erases all of the saved logger data from your REDi’s
memory. Once you have erased the data it is impossible to retrieve and it is
strongly advisable that you transfer the data to a PC before deleting.
Alternatively, you can erase all of the data blocks saved from your REDi memory
using ESCORT Console software. For more information regarding this refer to
Chapter 5 of this user manual.
If your REDi does not have the ability to delete all data blocks manually, your
REDi will display the following message notifying you of this by showing ‘Current
REDi configuration will not allow this’ (see figure 4.7). This blockade was
implemented as a safety lock to prevent users from accidentally erasing
important data.
In these instances you can only delete data blocks from the REDi via ESCORT
Console software.
Figure 4.6 (‘Erase all data’)
4.8 – System Information
The ‘System info’ option is the eighth option your REDi device displays in the
‘System Options’ screen (see figure 4.8). This screen displays general
information relating to your REDi device. The system information screen includes
(from top to bottom) Description (as configured in ESCORT Console), Firmware
version, Battery voltage (full batteries have about 3.0V, below 2.0V the unit will
not work), Part number (identifying the communication frequency; see
specification sheet), Serial number (identifying your unit).
Current REDi
configuration
won’t allow this.
OK
15:54
Shut Down
AutoOff 30 min
Backlight 10 s
Mem left 988k
Rechargeable Y
Temp UnitºC
Erase all data……
System info
Exit
15:54
28
Figure 4.8 (System Information screen)
4.9 – Exit
The ‘Exit’ option is the seventh option your REDi device displays in the ‘System
Options’ screen and simply allows you to return to the ‘Main Menu’ (see figure
4.9).
Figure 4.9 (Exit to ‘Main Menu’ from ‘System Options’)
Read new
…………………..
Read all
View data
System Options
15:54
Shut Down
AutoOff 30 min
Backlight 10 s
Mem left 988k
Rechargeable Y
Temp Unit ºC
Erase all data
System info
Exit……………………………….
15:54
Shut Down
AutoOff 30 min
Backlight 10 s
Mem left 988k
Rechargeable Y
Temp UnitºC
Erase all data
System info………
Exit
15:54
ESC
ORT REDi
REDi F/W 1.1h
Batt 2.83
P/N: EA:RI-9
S/N: 0515 -1234
15:54
29
5 - Software
For help regarding the use of ESCORT Console software, please refer to the
Help file in ESCORT Console. This help file is accessible through the command
‘Help Topics’ in the ‘Help’ menu and contains the full manual for ESCORT
products.
5.1 - Installation
In order to configure your REDi or download logger data stored in the REDi to
your PC, you need to install ESCORT Console software on your PC. Further,
your PC requires a serial port (COM port, DB9). If your PC has a USB port but no
COM port, you can use a USB to serial port adapter (available from your local
electronics store) to create a COM port. Please follow the installation instructions
supplied with the adapter
You can download ESCORT Console from the ESCORT DLS website on the
Internet http://www.escortdls.com/software/software.htm. Alternatively, you can
purchase the ESCORT Console software CD (Product code JA-SWP-WIN)
through your local distributor. Please follow the instructions provided on the
website or the CD insert respectively.
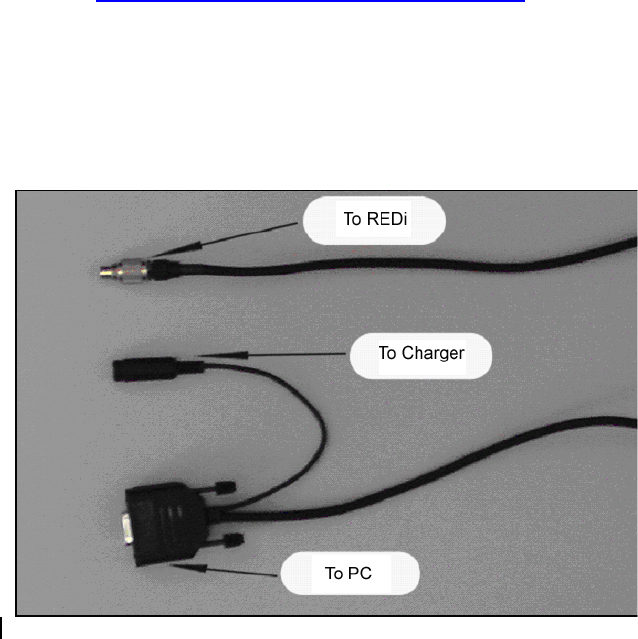
5.2 - Connecting your REDi
Please use the REDi serial port connector, supplied with your REDi unit (see
chapter 1.3 and 3.3) to connect your REDi with a DB9 COM port on your PC.
Figure 5.1: (Connecting the REDi)
30
When connecting your REDi to your PC’s COM port, the unit will automatically
turn on. However, your REDi will switch off after the time defined by the Auto Off
settings saved within your REDi. When trying to communicate with your REDi,
make sure the unit is switched on and the auto off feature is set to a time that
allows for the completion of REDi to PC interaction.
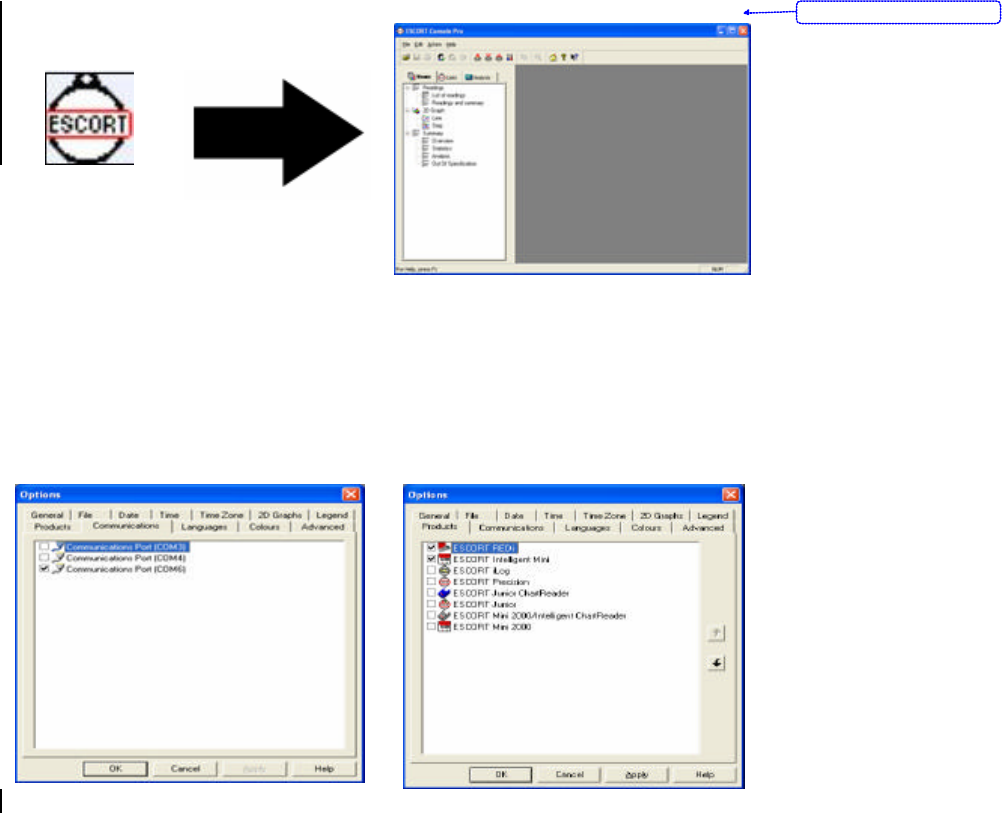
5.3 - Software Setup
Once the ESCORT Console is installed, you can open the software by clicking on
the ESCORT icon on your desktop, or selecting ESCORT Console from All
Programs in the Start menu.
Figure 5.2: Opening ESCORT Console software
In ESCORT Console you can choose both the COM port the software uses for
communication with your REDi and loggers, as well as the products you are
using. In the Edit menu choose the Options command, then go to the
Communications tab to choose the COM port you have connected the REDi to.
Further, check in the Products tab that REDi was selected as one of the product
you wish to work with.
Figure 5.3 ESCORT Console Options dialog box
Formatted: Centered
31
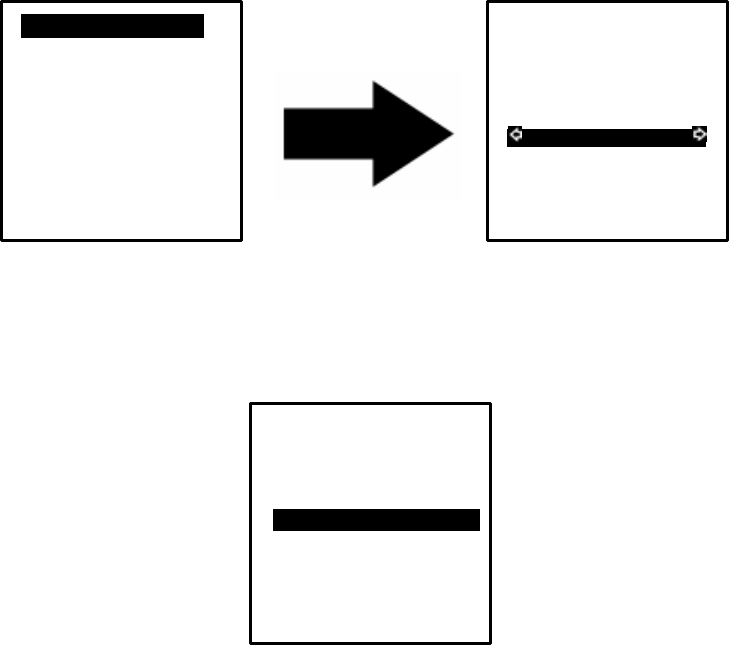
5.4 – Configuring REDi
The REDi configuration allows you to define a password for your unit, select the
appropriate temperature unit (ºC or ºF), auto off and backlight times, and further
offers you the option to delete all data blocks within the REDi.
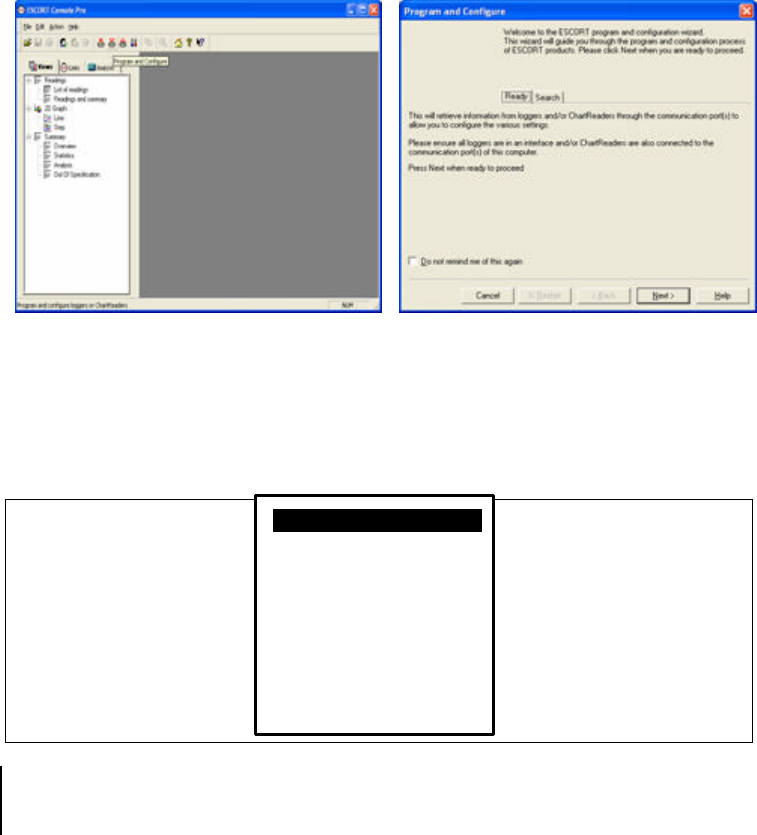
To configure the REDi, choose the ‘Program and Configure’ command from the
Action menu, or click on the ‘Program and Configure’ icon.
Figure 5.4: Configure wizard
Please follow the instructions on the screen of the Configuration Wizard to
proceed to the Search screen. Make sure your REDi is switched on when trying
to communicate to the unit. The REDi will show a double arrow at the bottom of
the current screen while it is communicating with ESCORT Console.
Figure 5.5: REDi in communication mode
Read new
…………………….
Read all
View data
System Options
15:54 D
32
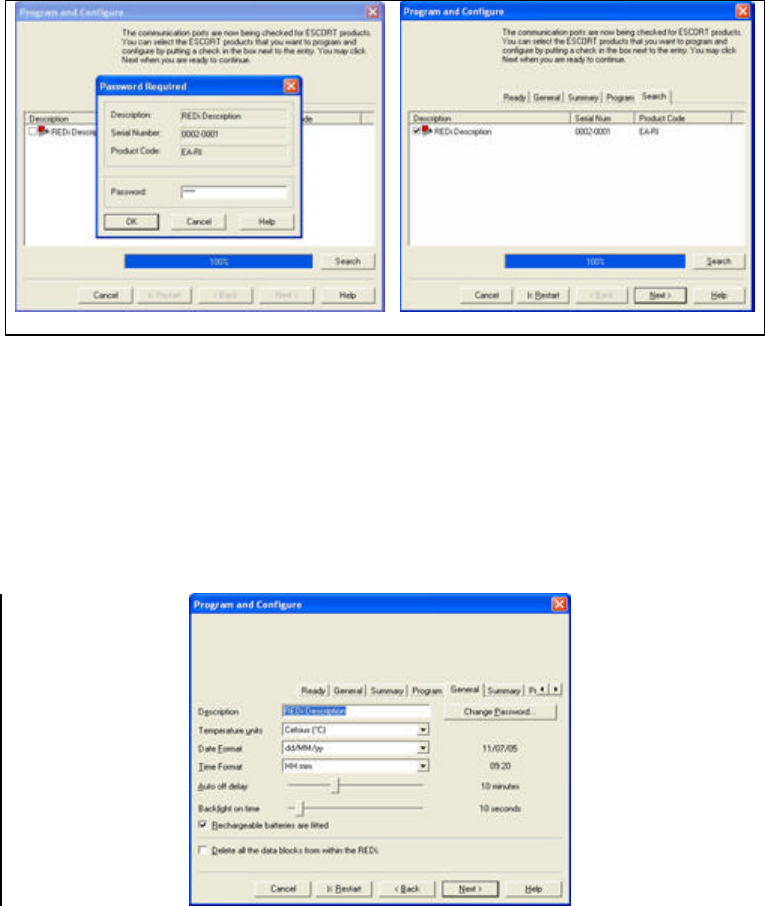
5.4.1 – Enter Password
If your REDi is password protected, the tick box next to ‘REDi Device’ in the
Search screen will be empty. Click on the tick box and enter the password to
proceed. The factory default for your REDi password is 0000.
Figure 5.6: (Password input)
5.4.2 – Description
After clicking ‘Next’ on the Search screen, you can view and adjust the
configuration of your REDi unit.
The description can be up to 42 characters long, consisting of numbers and
letters. Simply type the desired description for this unit in the Description field.
This information will show within the System Information of the unit, and on the
Search screen in Console.
Figur e 5.7: (‘Description’ menu option)
33
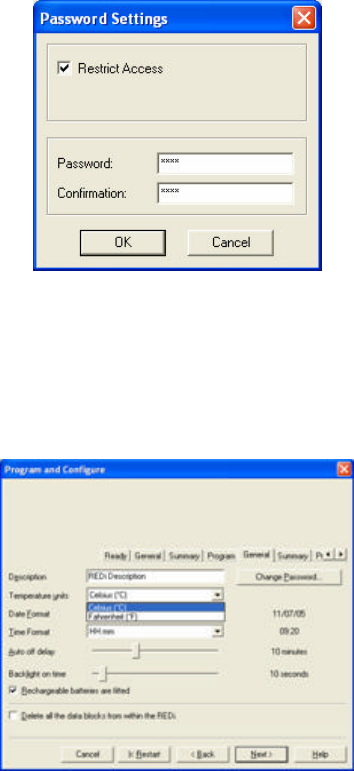
5.4.3 –Password Settings
The ‘Change Password’ button is located on the right hand side of the ‘Program
and Configure’ window and next to the ‘Description’ field. This button opens the
‘Password Settings’ window. To assign a password to your REDi, simply click the
‘Change Password’ button and enter your desired password in both the
‘Password’ and ‘Confirmation’ fields. In addition, you have the option to turn the
password protection on or off by selecting the ‘Restrict Access’ tick box (see
figure 5.8).
Figure 5.8: (‘Password Settings’ window)
5.4.4 – Temperature Scale
Below the ‘Description’ field in the ‘Program and Configure’ window there is a
drop-down box allowing you to select the temperature scale. Simply, select the
scale that you would prefer your REDi to display when showing information about
downloaded loggers (ºC or ºF).
Figure 5.9: (‘Temperature units’ drop down menu)
34
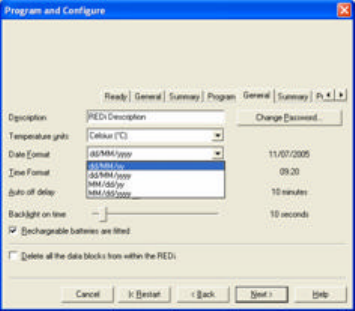
5.4.5 – Date Format
The ‘Date Format’ drop-down box is located under the ‘Temperature Unit’ drop-
down box. This is where you select the format the REDi will use to display the
dates of events or readings. A sample of today’s date in the selected format is
displayed to the right of the drop-down box.
yy is the abbreviation for the year in two digits (e.g. 05 for 2005),
yyyy means the year will be reported in full (e.g. 2005 for 2005).
MM is the abbreviation for the month (e.g. 05 for May)
dd marks the position of the day of the month (e.g. 10 for the 10th
day of the
month)
Figure 5.10: (‘Date Format’ drop-down menu)
5.4.6 – Time Format
The ‘Time Format’ drop-down box is located under the ‘Date Format’ drop-down
box. This is where you format your REDi’s date and time functions. You will use
this feature to display the time of events or readings, as well as the clock of the
REDi. A sample of the current time in the selected format is shown on the right
hand side.
HH will show the hour of the day in 24 hour format (17 for 5pm)
hh will show the hour of the day on 12 hour format (05 for 5pm)
mm is the abbreviation for the minutes
ss marks the position of the seconds.
tt is the abbreviation for the morning or afternoon indicator (am or pm)
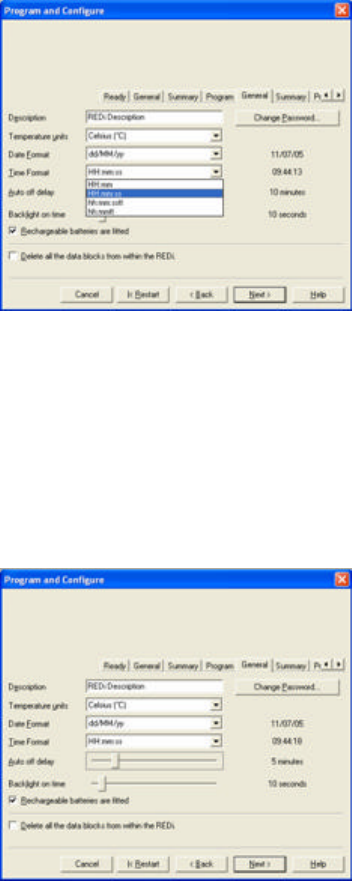
35
Figure 5.11: (‘Time Format ’ drop-down menu)
5.4.7 – Auto Off Delay
This option lets you choose the time the REDi will remain switched on while no
key is pressed. After this time has elapsed, the unit will automatically shut down
to save battery life.
Please use the sliding control to adjust the auto off time; the time in minutes is
displayed on the right hand side. The auto off time can be between 2 and 30
minutes.
Figure 5.12: (‘Auto off’ control)
5.4.8 – Backlight On Time
The ‘Backlight On Time’ control configures for how long the screen (LCD) of the
REDi will be lit after a key is pressed. Backlight helps you see the data on the
screen in the dark. You can choose to use your REDi without the backlight by
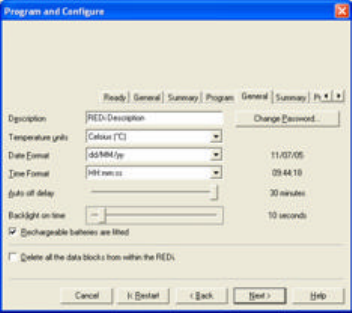
36
selecting a backlight time of 0 seconds. The maximum backlight time is 3
minutes (180 seconds).
Figure 5.13: (‘Backlight On Time’ control)
5.4.9 – Rechargeable Batteries
If the REDi has been fitted with rechargeable batteries, you can tick the
‘Rechargeable Batteries Fitted’ tick box. Please make sure that this box is not
ticked if you are working with disposable batteries.
Important: Charging disposable batteries may cause those batteries to explode.
Never try to charge batteries unless they are clearly marked as re-chargeable.
5.4.10 – Delete Data
The REDi configuration offers you to delete all the data blocks that are currently
stored in your REDi unit. Before you tick this option, make sure that the logger
data currently in the memory is no longer used or has been downloaded to a PC
and saved.
If you select the tick box next to ‘Delete’ all the data blocks from within the REDi’,
the whole memory will be reset, and all logger data is deleted. This action cannot
be reversed!
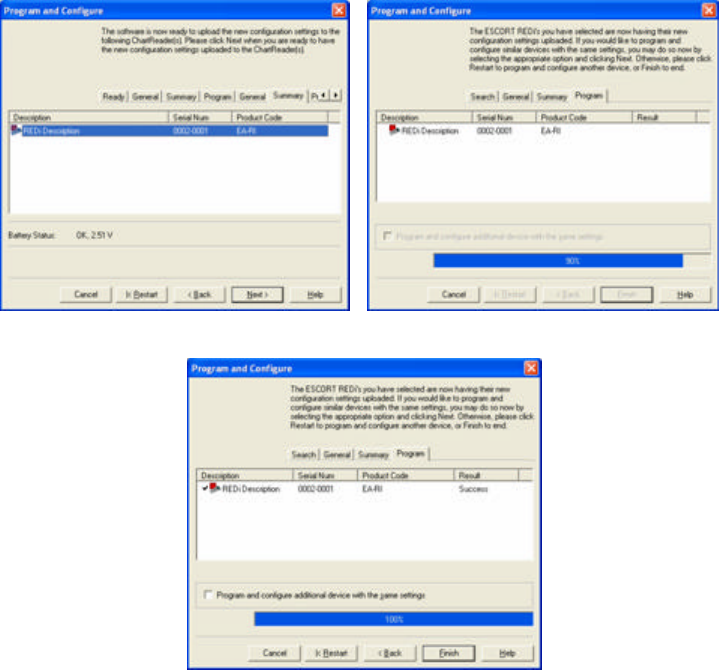
5.4.11 - Summary
After selecting the ‘Next’ button on the Configuration screen, you see the
summary screen. If you wish to make further adjustments to your configuration,
you can still go ‘Back’. Once you click ‚Next’, the new configuration will be loaded
into your REDi. Please make sure that the communication with the REDi is not
interrupted during this process. Wait until the Finish button becomes active
before you close down the Configuration wizard or disconnect the REDi.
37
Summary screen
During communication
Communication finished
Figure 5.14: Uploading configuration to REDi
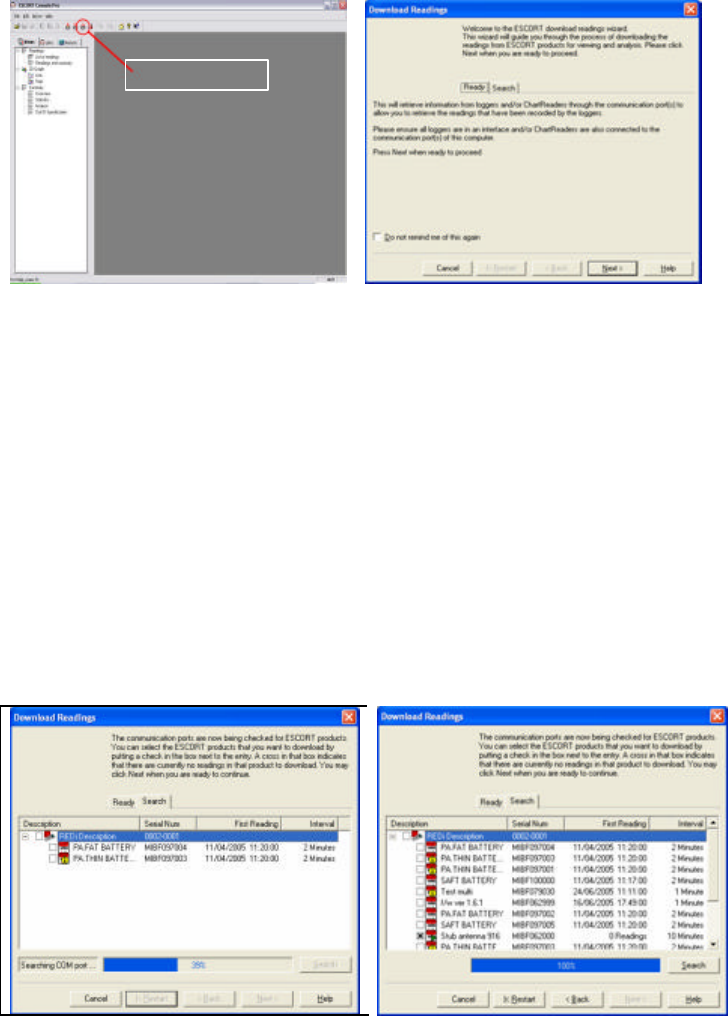
5.5 - Download logger data to PC
Through using ESCORT Console software you can download the logger data
stored in your REDi memory to a PC. This is made possible via the ‘Download
Readings’ wizard. In addition, the ‘Download Readings’ wizard offers you the
option to delete all data blocks from your REDi’s memory.
To download the dat a blocks, choose the ‘Download’ command from the Action
menu, or click on the ‘Download’ icon which is located on the task bar below the
action menu.
38
Figure 5.15: (‘Download Readings’ wizard)
Please follow the instructions displayed in the ‘Download Wizard’ to proceed to
the Search screen, making sure that your REDi is switched on. The REDi will
show a double arrow at the bottom of the screen during communication with
ESCORT Console (see figure 5.15).
For password protected units please follow the instructions described in chapter
5.4.1.
5.5.1 – Selecting Logger Data for Download
Once the ‘Download Readings’ wizard has located your REDi device via one of
your PC’s available ports (COM and/or USB) the ‘Download readings’ wizard will
display a REDi icon, the logger files ready for download and a series of tick
boxes. With a full REDi memory (162 logger files), it may take several minutes to
populate this screen.
Figure 5.16 (‘Download Readings’ Search screen)
Download icon
39
You can now select which logger files you wish to download by clicking on the
tick box located to the right of the logger description. If you wish to select all of
the logger files, simply click the tick box located beside the REDi description.
5.5.2 - Download password protection
If you attempt to select a logger file for download that has been password
protected against download, you will be asked to supply the password. You
cannot download protected data without entering the correct password. If the
password has been lost, the logger has to be returned to your ESCORT
distributor for password reset.
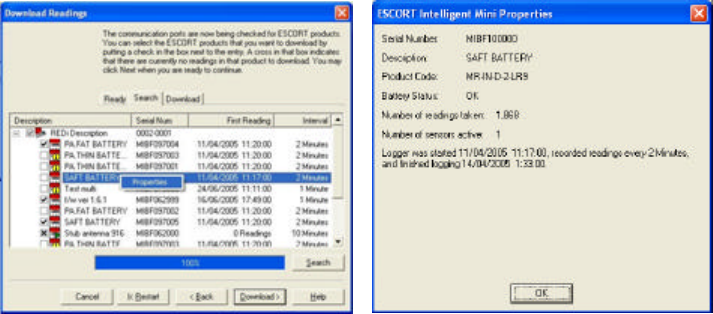
5.5.3 – Logger Properties
Logger data with a cross in the tick box next to the logger information cannot be
downloaded. You can, however, view the logger information of any logger by
right-clicking on the description of the logger and selecting Properties.
Figure 5.17: Logger properties
40
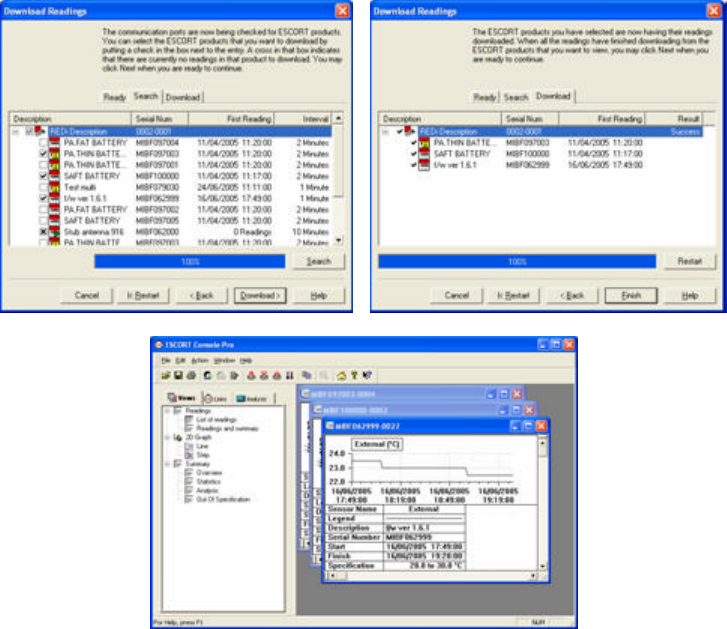
5.5.4 – Retrieving Logger Data from the REDi
After selecting the logger data files you wish to view, click ‘Download’. Please
make sure that the REDi is switched on for this step. When you click ‘Finish’, the
data of the selected loggers will be displayed in ESCORT Console (see figure
5.18).
Figure 5.18: Download data from REDi
For more details on analysing logger data using ESCORT Console software,
please refer to the Help file located under the help dropdown menu of the menu
bar.
5.5.5 – Deleting Logger Data Blocks
You have the ability to delete all logger files currently stored in your REDi once
they have all been downloaded. To perform this function, simply select the
‘Delete all the data blocks from within this device’ tick box (see figure 5.19).
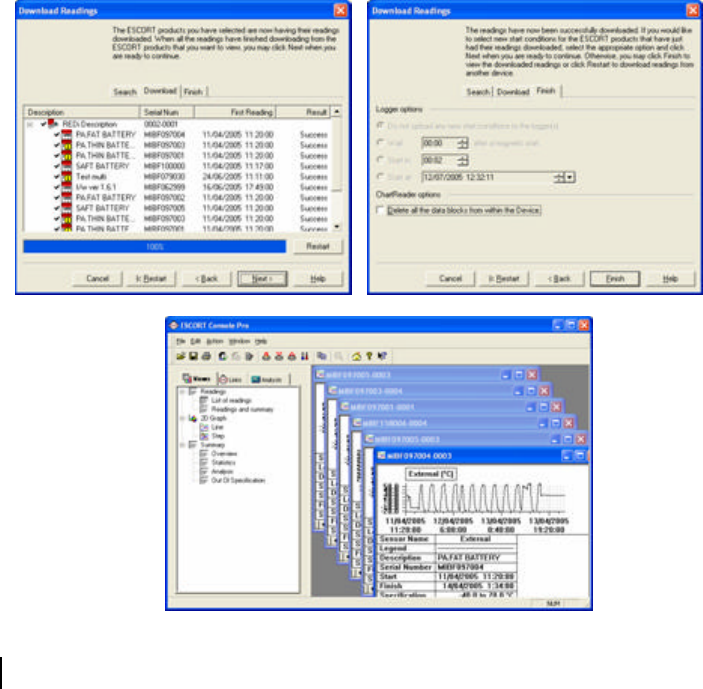
41
Important: Please ensure that you save the files displayed in ESCORT Console
as the data cannot be retrieved once it has been deleted from the REDi (see
figure 5.19).
Figure 5.19: (‘Downloading all logger data and deleting all data blocks’)
42
6 – Useful Information
6.1- Battery Specifications
Communicating via radio transmission requires a significant amount of power to
be effective. This fact is even more prevalent in regard to facilitating radio
communication via portable devices because a high degree of strain is placed on
the batteries required to power such devices. The REDi is no different to any
other radio transmission device and the battery life is comparably limited.
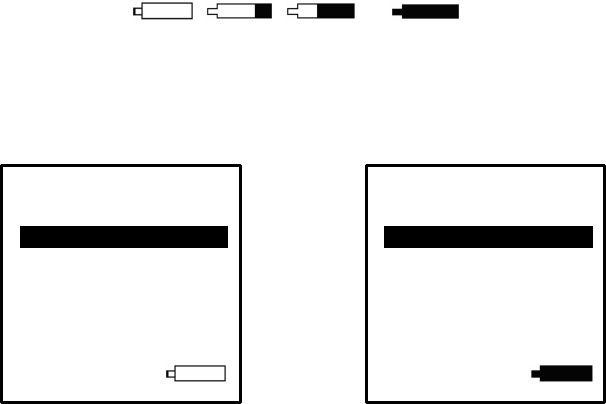
6.1.1 - Battery Indicator
When your REDi batteries are getting low, an empty battery symbol will be
displayed. When your REDi batteries are charging, an animation of changing
battery is shown. , , , . This is simpl y an
animation and does not reflect your current battery capacity. At the completion of
the charge cycle the charger switches to trickle charge. In this state the battery
symbol will flash once every 20 seconds.
Under normal operation conditions, with a fresh battery, no symbol is shown.
Figure 6.1 (Low battery) Figure 6.2 (High battery)
6.1.2 - Prolonging the battery life of wireless loggers
In a communication system one device must initiate communications by sending
a signal and the other device must reply with a compatible signal. In the case of
the REDi/ Wireless Mini system it is the REDi that sends a signal and the loggers
that replies with a compatible signal. This means, that each Mini must be active
all the time. This requires significant battery power. If you will not be using your
Wireless Mini for some time then it is recommend that you remove the battery to
save power.
Read n
ew
Read all
View data ………………….
System Options
15:54
Read n
ew
Read all
View data ………………….
System Options
15:54
43
6.2 – Successful REDi to Wireless Communication
In order to ensure an optimum communication environment for both the ESCORT
Wireless loggers and the ESCORT REDi, ESCORT Data Logging Systems
strongly recommend that the following points or procedure are followed.
• Optimum REDi to Wireless logger communication will be achieved when
an empty, unobstructed space is provided to allow for a clear line of
communication between the two devices (Electrically conductive
obstructions such as metal screens or walls create the biggest barrier).
• When using Wireless loggers with external sensors it is important that the
loggers are not inside the packaging of the goods being shipped but are
attached to the outside of the packaging.
• The Wireless loggers’ antennae should be pointing in a horizontal position
and free of interference. There should be at least 0.5m of free space
around the antenna in all directions.
• The Wireless loggers should be securely attached to the outside of the
package that it is being shipped with.
• The package should be secured so that it cannot move during the course
of its transportation, as that might result in damage to the logger or
obstruction of the REDi and Wireless logger’s line of communication.
• You should always test REDi to Wireless logger communication before a
consignment is shipped.
• To ensure that all the data from all loggers in the consignment is
downloaded you should attempt the REDi’s ‘Read New’ function several
times.
• Your REDi will operate more effectively when it has fully charged or new
batteries.
• Try holding your REDi device at different angles and from different
positions around your consignment in order to gain optimum
communication.
6.3 – Recharging your REDi
You have the ability to recharge your REDi batteries via the interface cable
supplied with your REDi (see figure 3.0). This should only be attempted if you
have fitted your REDi with rechargeable batteries, you should never attempt to
charge your REDi with standard batteries.
In order to recharge your REDi’s batteries you will first need to purchase an AC
Adaptor with the following specifications:
• Output DC6V 400mA
• Polarity – C +
To recharge your REDi simply attach your REDi PC Connector to your REDi
device and to your AC Adaptor and switch your power supply on (see chapter
2.2). The battery status icon located in the bottom right corner of your REDi’s
screen will be initiated and will fill (in black) from right to left (see figure 6.3). If the

44
battery symbol does not appear or appears but disappears quickly either your
REDi batteries have been sufficiently charged or the polarity of your AC Adaptor
is incorrect.
The REDi uses a fast charge algorithm so it will charge your batteries in just a
few hours. Once fully charged it will switch into trickle charge mode to keep your
batteries topped up. In this phase the battery symbol will flick on for 1 second,
every 20 second
Figure 6.3 (Recharging Battery Indicator)
Caution: The use of an incorrect AC Adapter could result in considerable
damage to you REDi device, please ensure that you only use an AC Adapter that
matches the above specifications.
6.4 – Specifications
6.4.1 – Storage & Database
• Up to 1Mbyte of logged data.
• Up to 160 sets of logger data.
6.4.2 – Readout
• Dot Matrix LCD 160 x 160 pixels, back-lit.
• Menu driven interface.
6.4.3 – Power Supply
• Type: 2 x Alkaline or NiCd AA batteries.
• Design target life for continuous use (NiCd batteries): 8 hours
• In-built 3hour NiCd Charger.
6.4.4 – Processor
• Mitsubishi M16 / 20K RAM / 128k ROM.
Read n
e
w
Read all
View data ………………….
System Options
15:54
Read n
ew
Read all
View data ………………….
System Options
15:54
45
6.4.5 – Communication
• Between REDi and PC - RS232 as 9600 baud.
• Between REDi and Logger - Radio Communication 83Kbaud
(roughly 2.5KB per second transfer rate).
6.4.6 – Communication Frequency
• EA-RI-8 at 868.35 MHZ (European standard; also for South
Africa).
• EA-RI-9 at 916.5 MHZ (American standard; also for Oceania and
Asia).
6.4.7 – Keyboard
• 7 Mechanical buttons - up, down, left, right, select, escape and
power down.
6.4.8 – Other Features
• Firmware update possible via PC.
6.4.9 – User Software
• ESCORT Console version 2.02.01 or later
• IBM PC and Windows 98 or later required.

46
6.5 Wireless Regulations
Radio, EMC and Safety Regulations
This device complies with part 15 of the Federal
Communications Commission (FCC) rules. Operation is
subject to the following conditions:
1. This device may not cause harmful interference,
2. This device must accept any interference received, including
interference that may cause undesired operation.
Note: This equipment has been tested and found to comply with the limits for a
Class B Digital Device, pursuant to Part 15 of the FCC Rules. These limits are
designed to provide reasonable protection against harmful interference in a
residential installation. This equipment generates, uses and can radiate radio
frequency energy and, if not installed and used in accordance with the
instructions, may cause harmful interference to radio communications.
However, there is no guarantee that interference will not occur in a particular
installation. If this equipment does cause harmful interference to radio or
television reception, which can be determined by turning the equipment off and
on, the user is encouraged to try to correct the interference by one or more of the
following measures:
§ Reorient or relocate the receiving antenna.
§ Increase the separation between the equipment and receiver.
§ Connect the equipment into an outlet on a circuit different from that to
which the receiver is connected.
§ Consult the dealer or an experienced radio/TV technician for help.
Note: The Manufacturer is not responsible for any radio or TV interference
caused by unauthorised modifications to this equipment. Such modifications
could void the user’s authority to operate the equipment.

47
6.6 – Warranty
Warrant conditions are set out in the ESCORT Data Logging Systems’ current Terms and
Conditions as published on the date a claim is made. Below please find the wording as per
version TCEDLSINT042. This is, however, not binding and the current Terms and Conditions will
prevail over the details given here.
Product Warranty period is 12 months (excluding batteries).
Warranty does not cover:
- Loss of use or consequential loss,
- Calibration if the unit has been subject to environmental conditions
outside the specified ones
- Willful damage, mistreatment , misuse or abuse of the product,
- Loss or damage caused by the ingress of moisture, unless ordered with
immersion rating,
- Batteries,
- Circumstances where the unit has been modified from manufacturers
specifications,
- Exposure of the logger to temperatures outside the specified storage
temperature,
- Exposure of the logger to environmental conditions outside the specified
ones
In case of a warranty claim ESCORT Data Logging Systems Ltd. will repair the
goods or supply an equivalent replacement.
In some circumstances, where a specific return was authorized, ESCORT Data
Logging Systems Ltd. may permit the use of its Federal Express account for
returning goods. Such permission is valid ONLY for the authorized shipment.
ESCORT Data Logging Systems Ltd. will not accept any freight charges for
goods that have been returned without ESCORT Data Logging Systems Ltd’ s
expressed permission.
Customers and distributors may return product to us for accuracy testing, if they
have doubts as to the product’s overall accuracy:
- If the product is returned within the warranty period, a Traceability
certification will be performed, and a certificate issued.
- If the logger does not pass the certification, i.e. the logger is at fault, the
logger will be replaced or repaired as per the warranty conditions and no
charges (other than freight charges) will apply. The new logger will be
issued with a Traceability certificate free of charge.
- If the logger reads within the specifications, a Traceability certificate
will be issued and you will be charged for this service.
- If the product is returned outside the warranty period, a Traceability
certificate will be issued and charged regardless of the outcome of the
test.

48
- ESCORT Data Logging Systems Ltd. will not pay for any performance
tests undertaken by any outside organization without prior approval.
6.6 – Recycling of electronic devices
Some parts in products from ESCORT Data Logging Systems consist of
recyclable materials, but others should not be disposed of in household waste.
To avoid pollution, we kindly ask you to adhere to national policies and
regulations concerning waste disposal and recycling. Wireless Mini loggers and
REDi devices must not be placed in your household rubbish (European Standard
EN 50419:2005).
If you have any questions please do not hesitate to ask at your nearest
electronics shop or send an e-mail to sales@escortdls.com. Thank you for your
understanding.