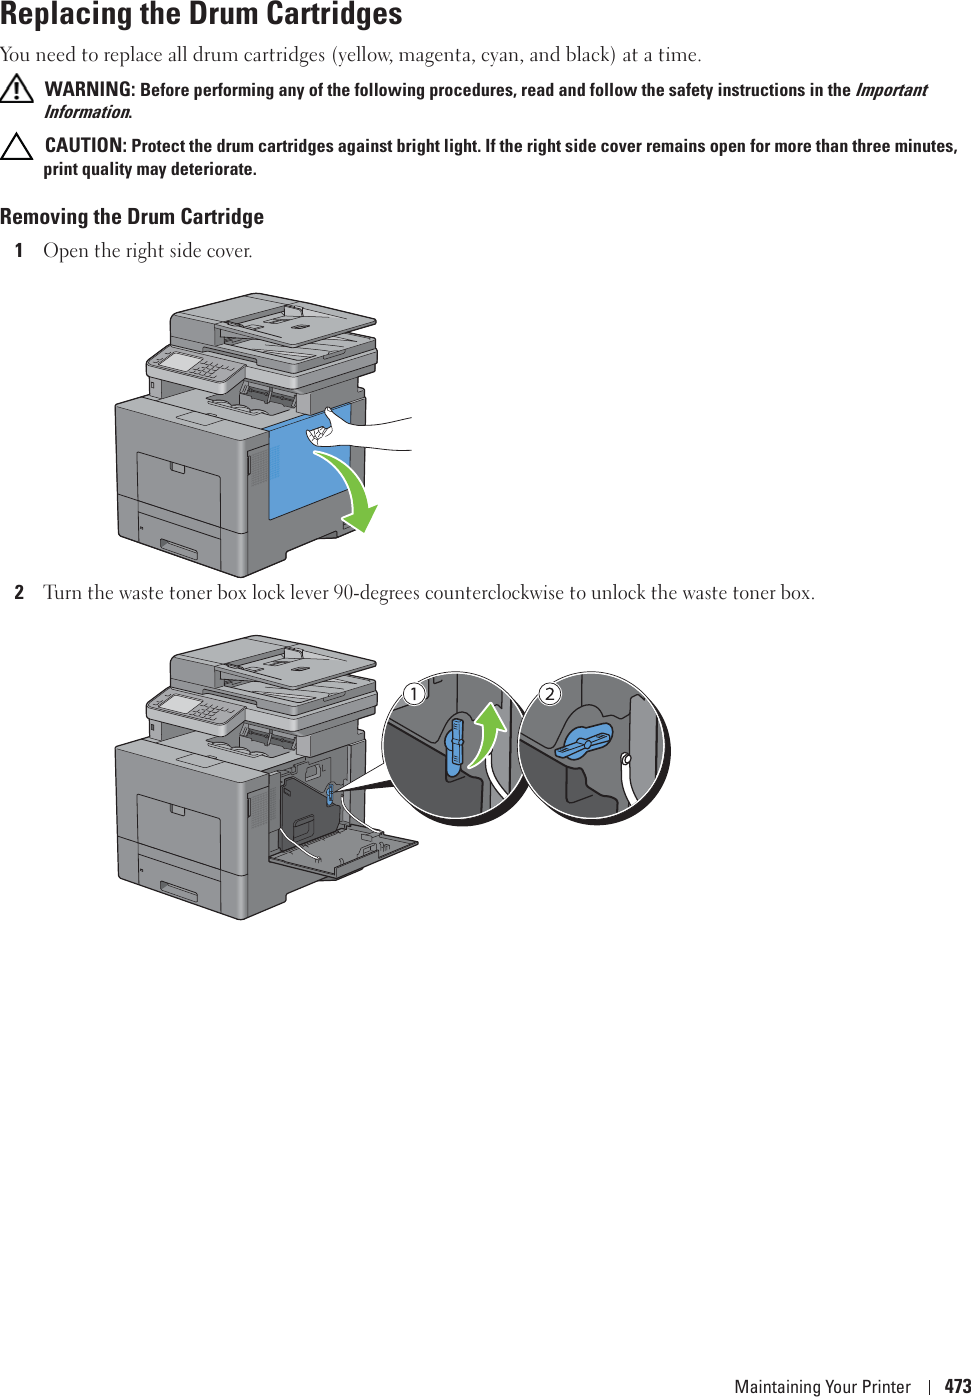
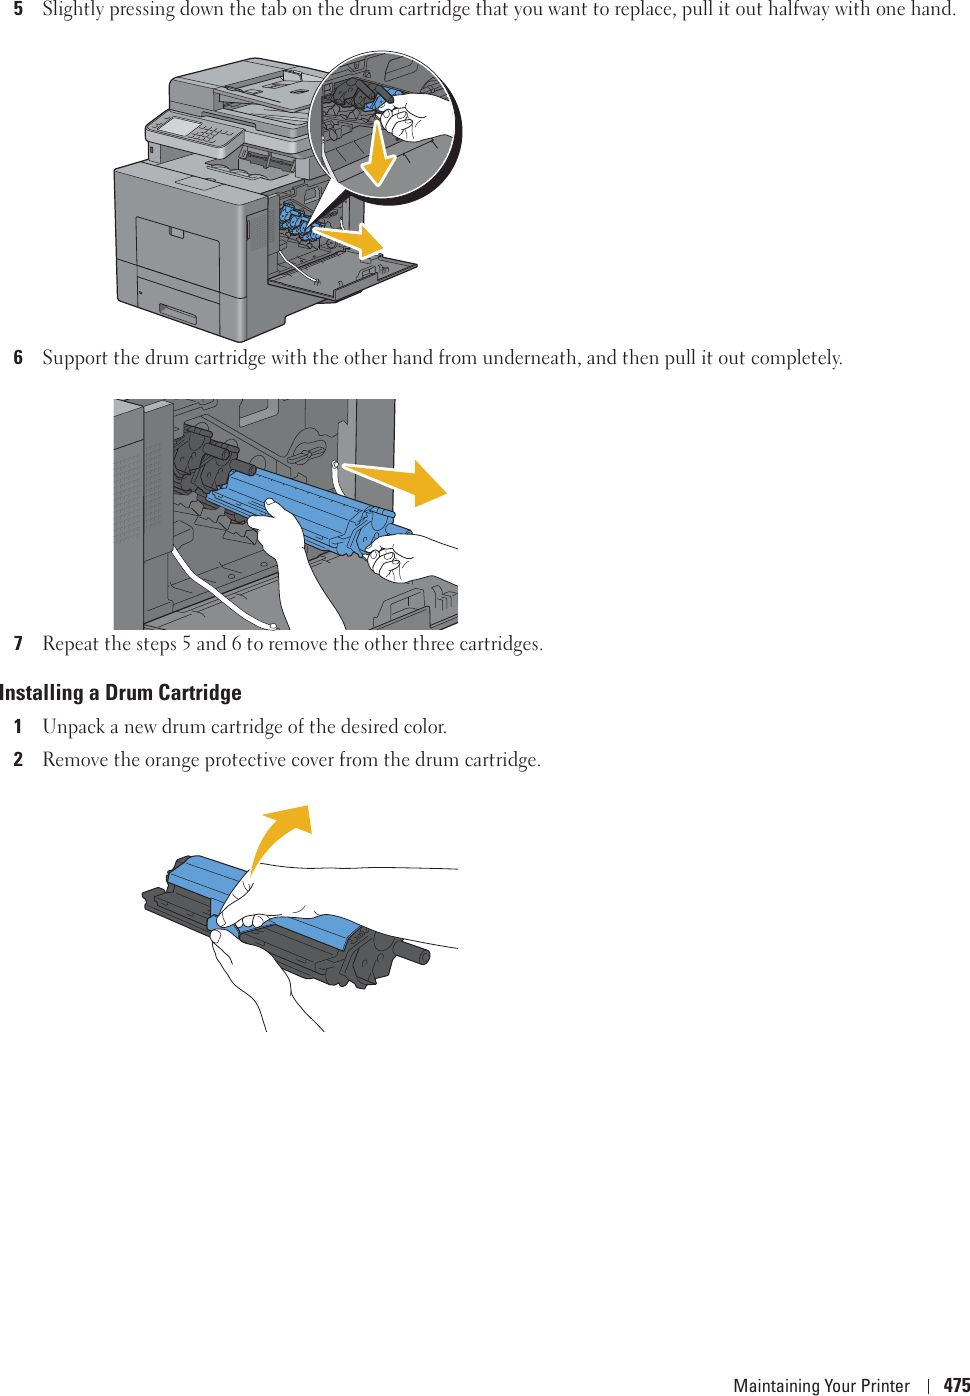
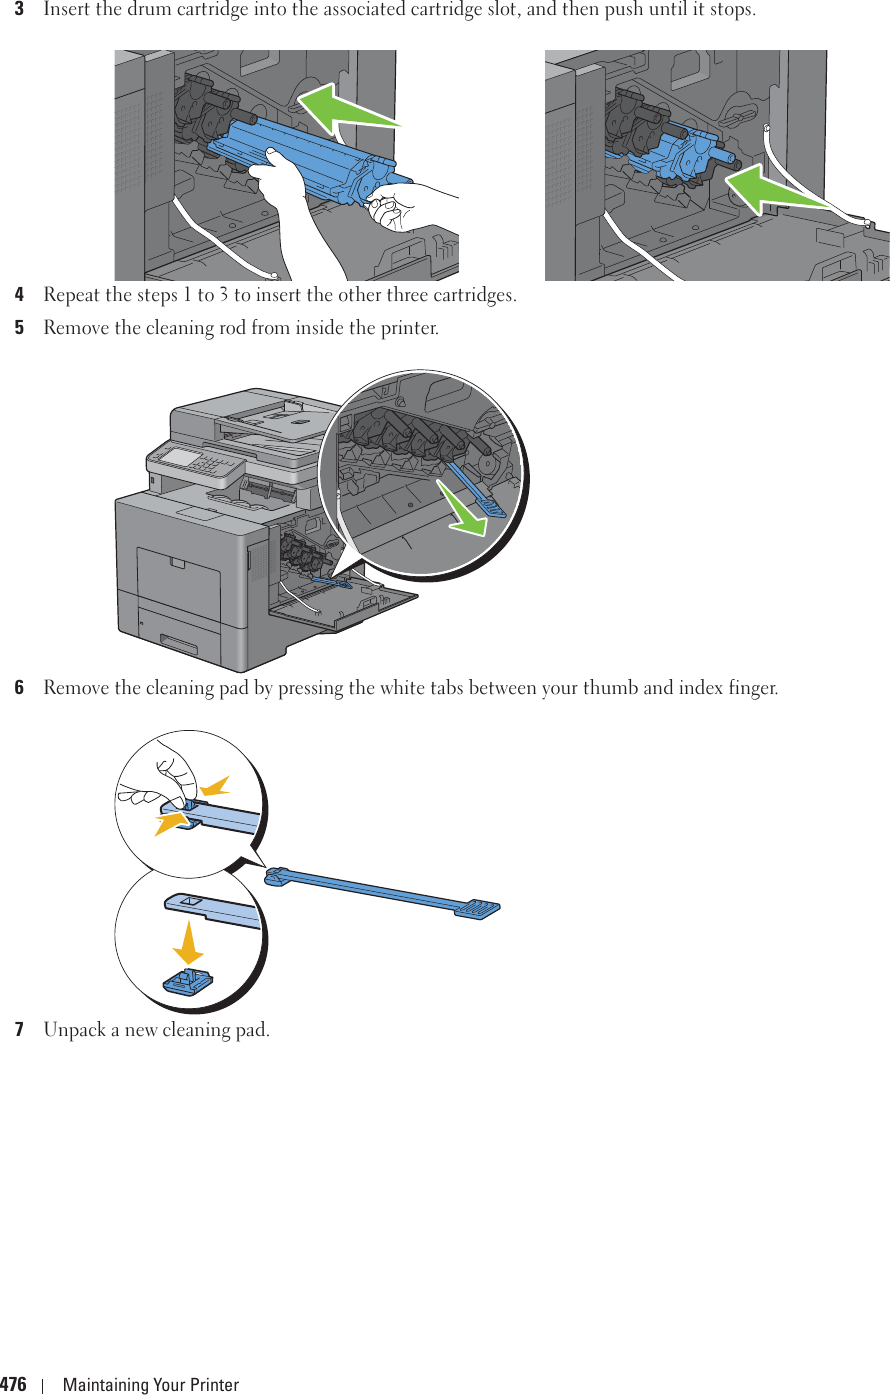
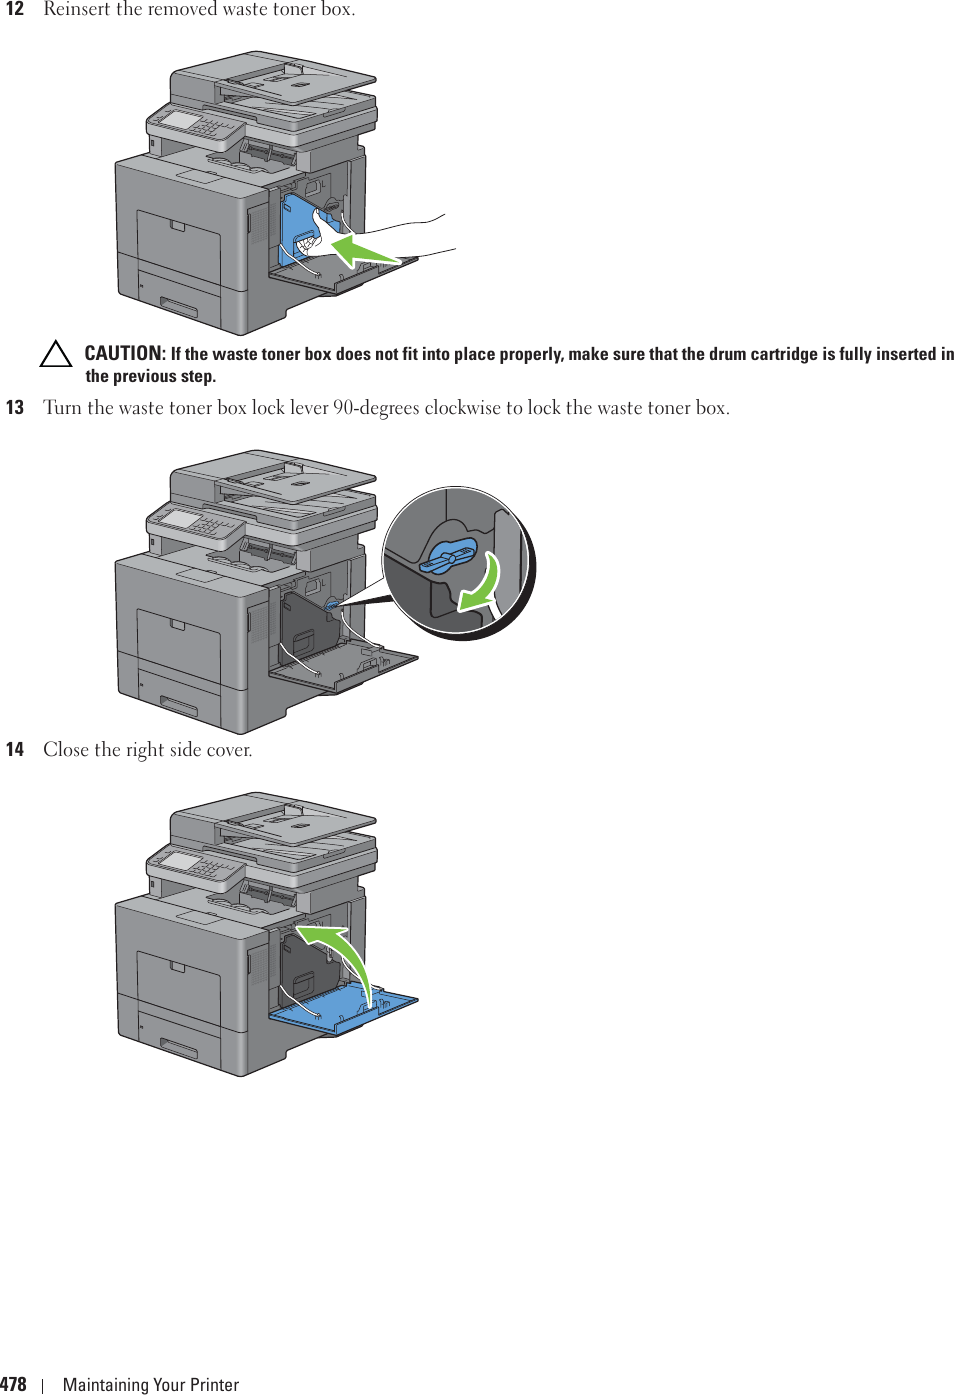
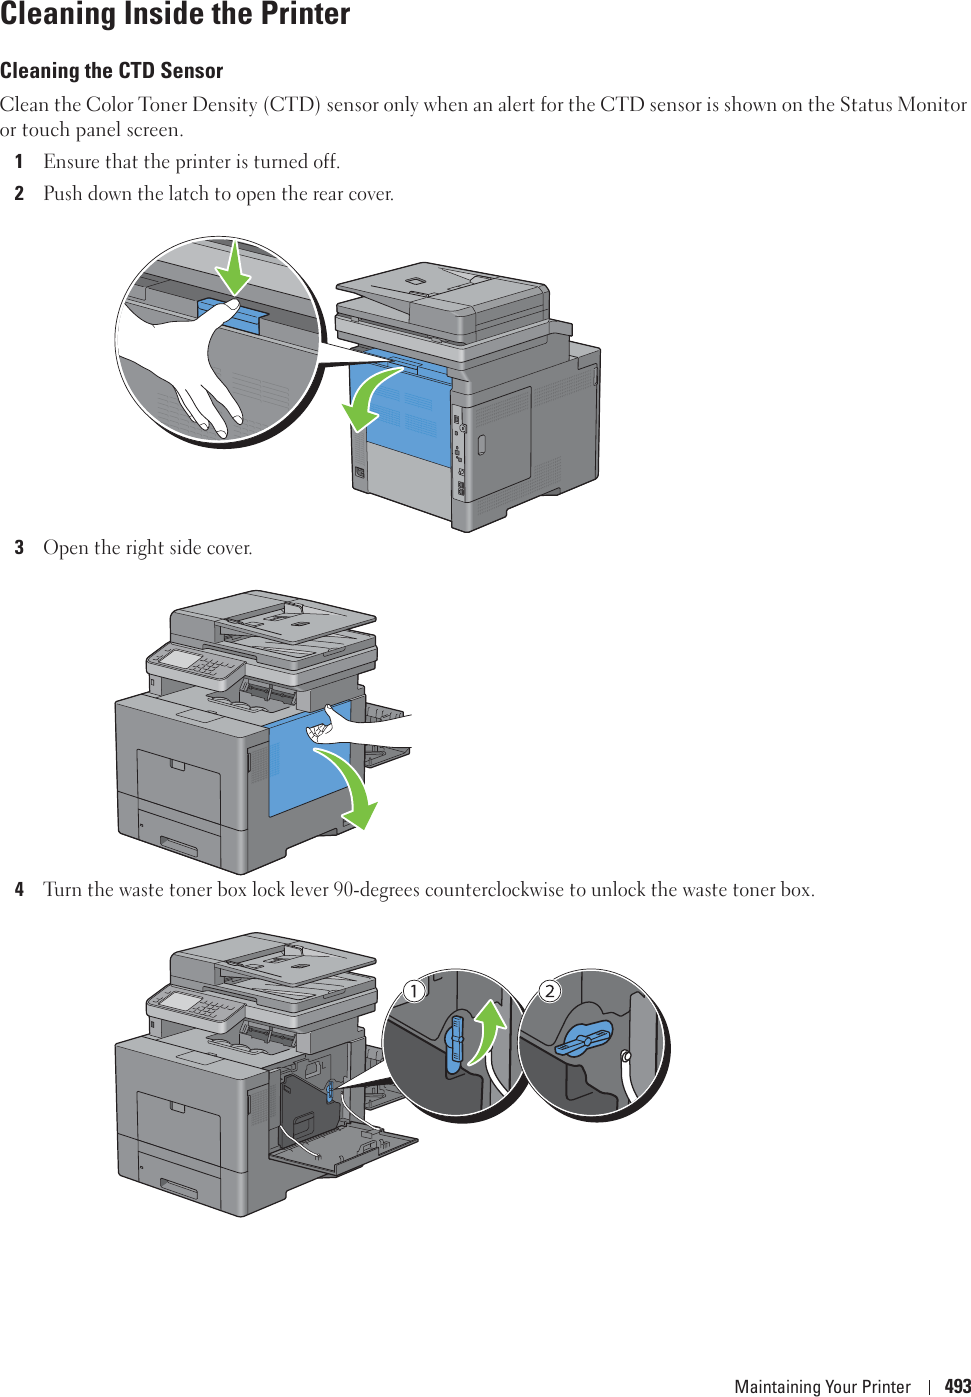
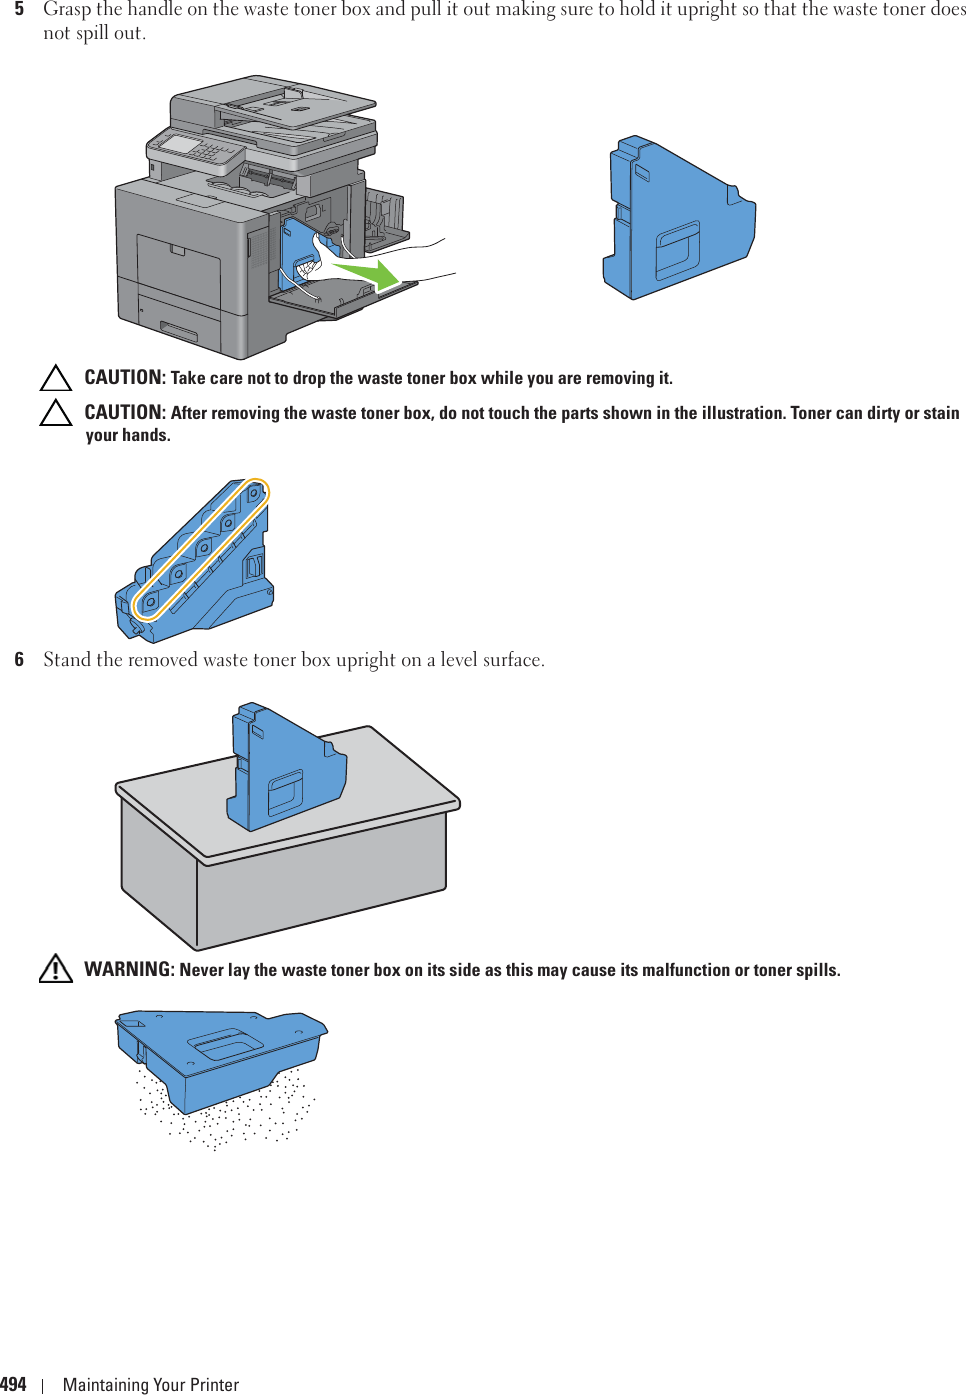
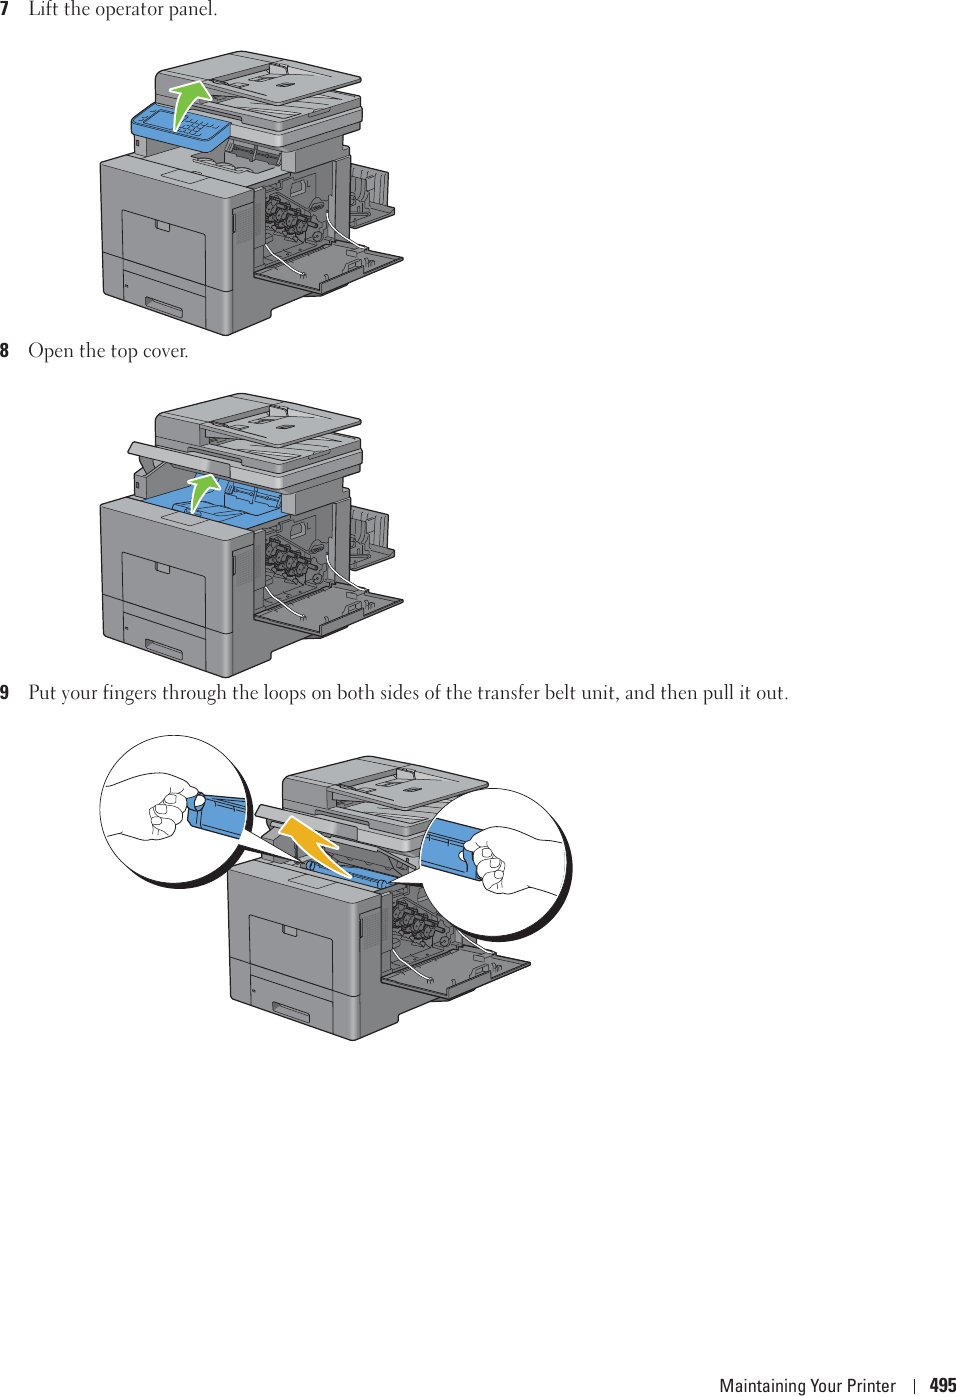
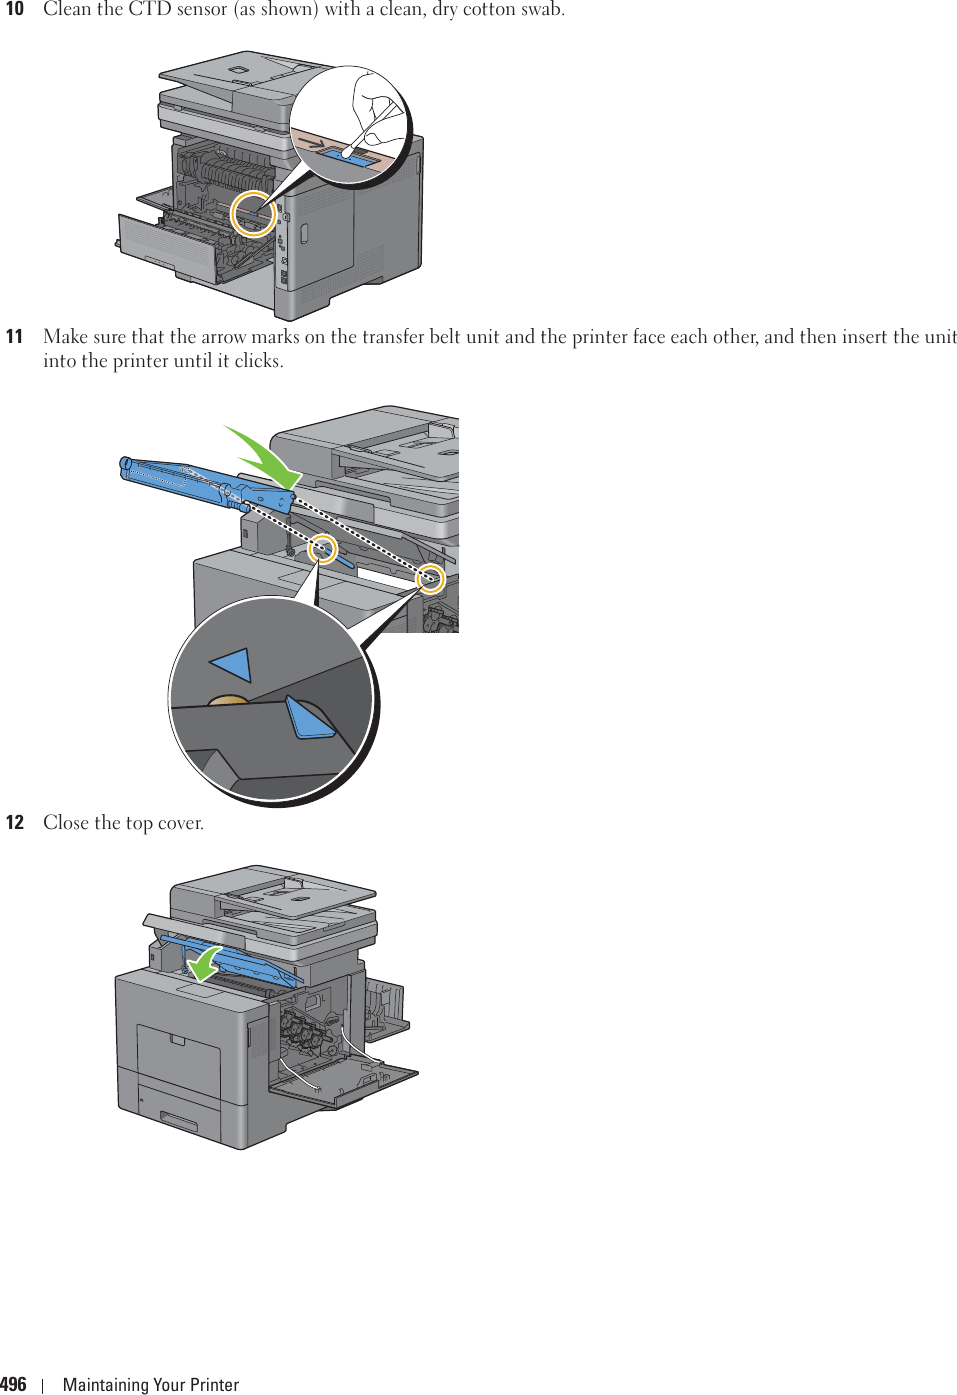
FUJIFILM Business Innovation C2665DNF Dell C2665dnf Color Laser Multifunction Printer User Manual 05 Short Term Confidential 3
Fuji Xerox Co., Ltd. Dell C2665dnf Color Laser Multifunction Printer 05 Short Term Confidential 3
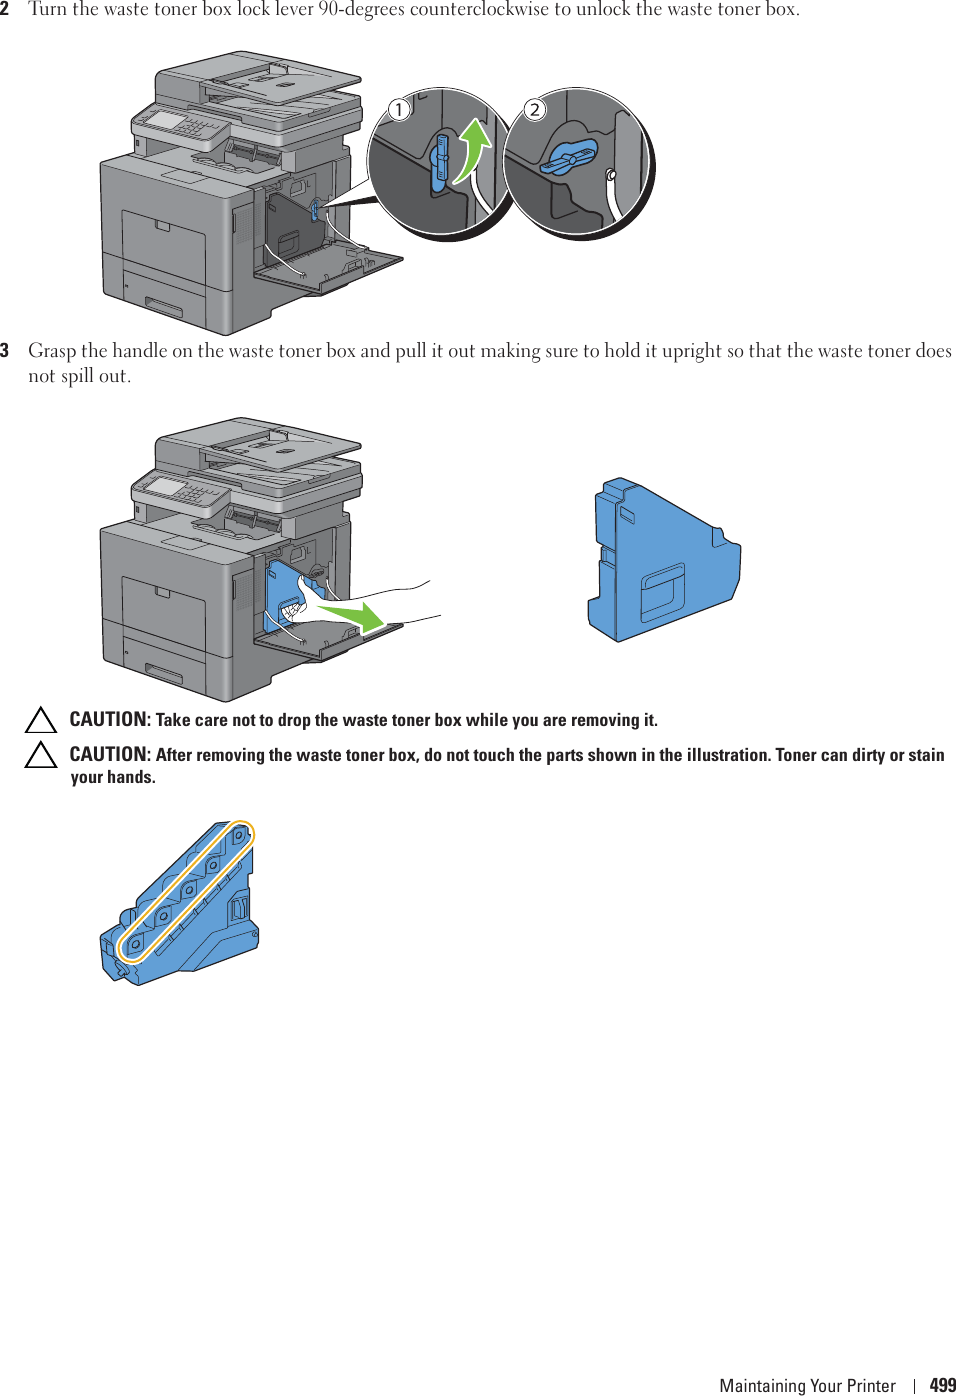
UserManual.wiki
>
FUJIFILM Business Innovation
>
C2665DNF User Manual
>
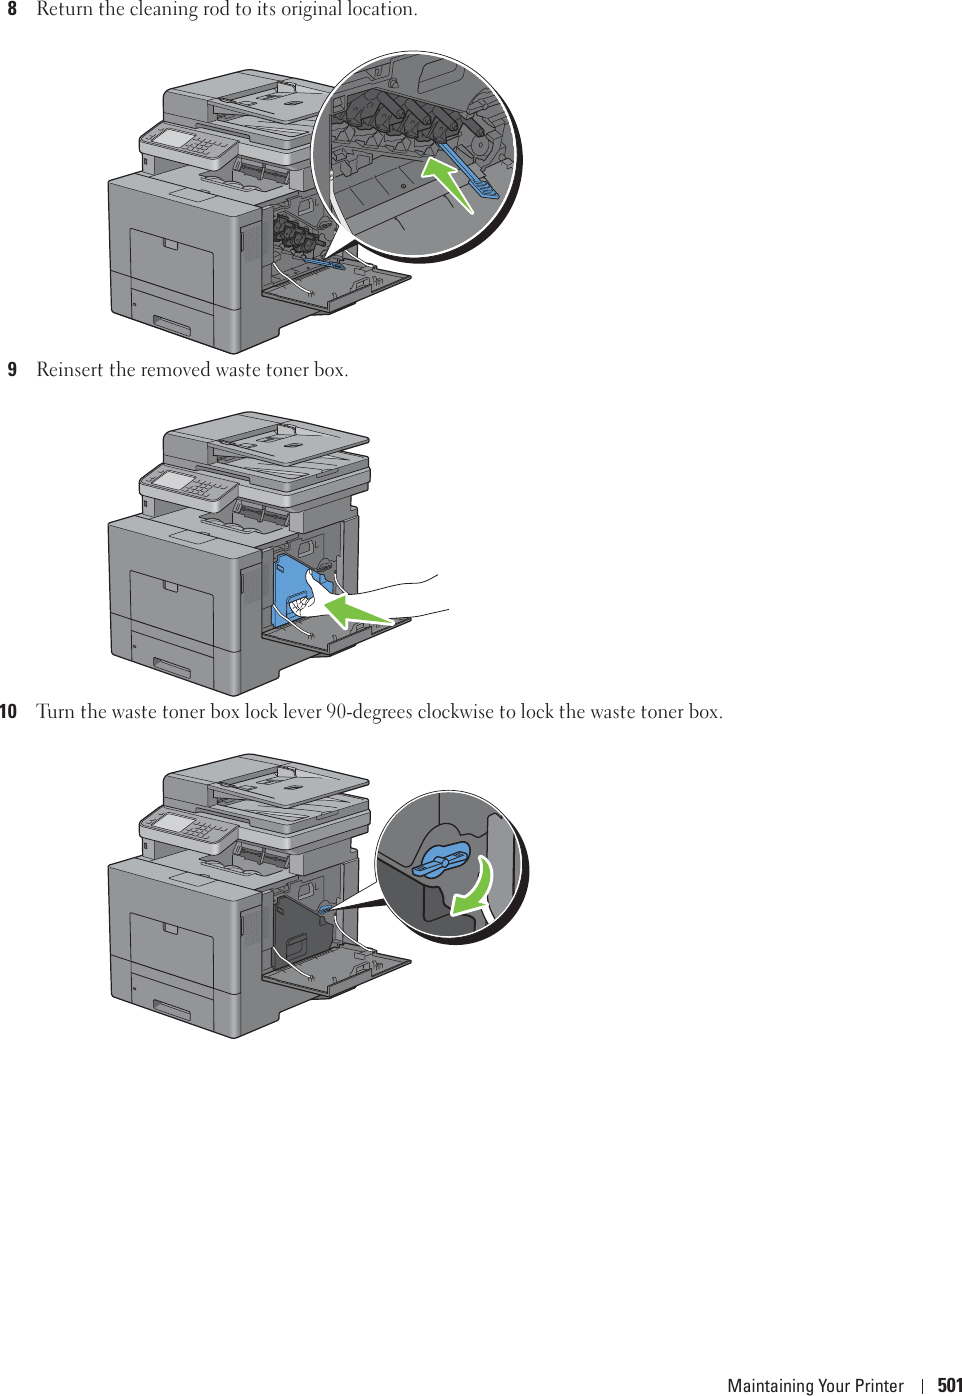
User manual-3
Contents
1.
User manual(Booklet)
2.
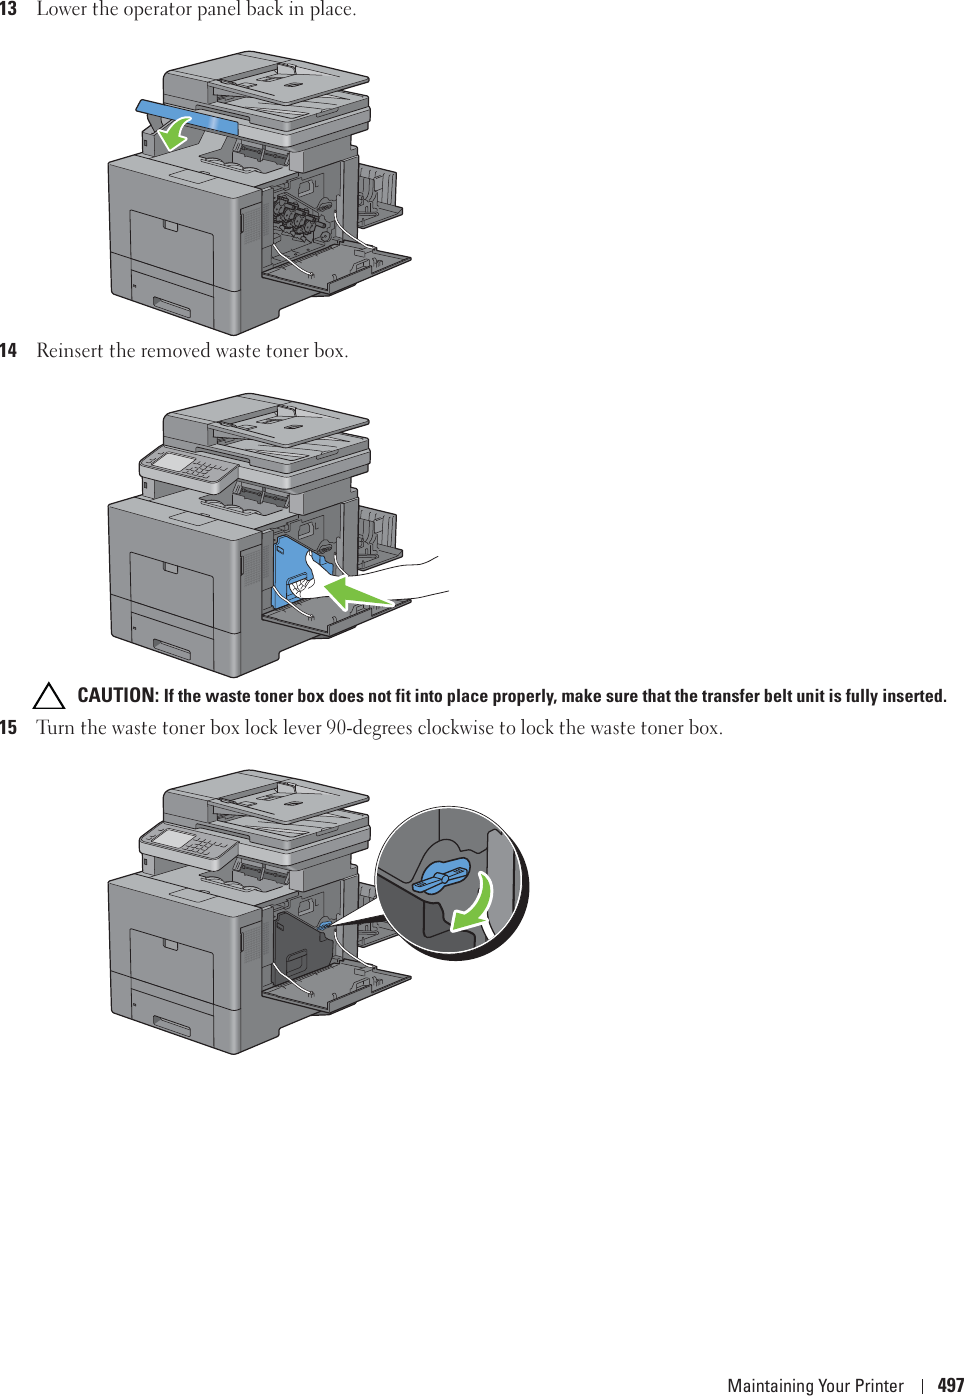
User manual-1
3.
User manual-2
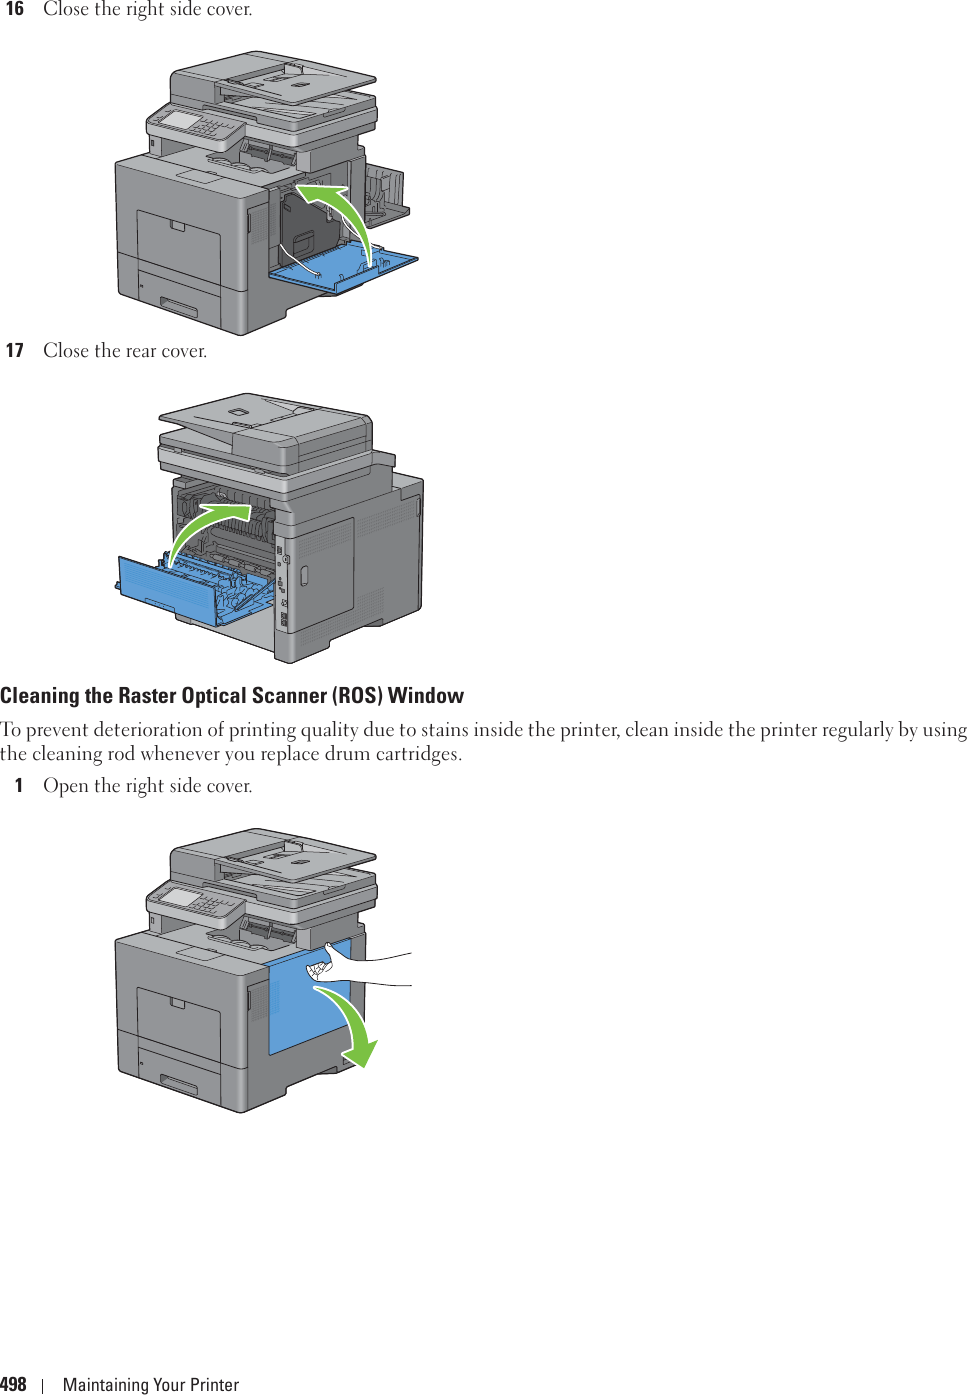
4.
User manual-3
5.
User manual-4
6.
User manual-6
7.
User manual(Statement)
8.
User manual-5
User manual-3
Navigation menu
Upload a User Manual
Namespaces
Wiki Guide
HTML
PDF
Info
Views
User Manual
Discussion / Help
Navigation