Gallagher Group G031404 Controller BR Series Reader User Manual 3E0680 SmartReader BR Series
Gallagher Group Ltd Controller BR Series Reader 3E0680 SmartReader BR Series
Contents
Part 1

3E0680 SmartReader BR Series 3E0680
Page i
Gallagher SmartReader BR Series
Instruction Manual

Page ii
3E0680 3E0680 SmartReader BR Series
PUBLISHED BY
Gallagher Group Limited
Kahikatea Drive, Private Bag 3026
Hamilton, New Zealand
Copyright© Gallagher Group Limited 2006.
All rights reserved. Patents Pending.
Gallagher SmartReader BR Series Instruction Manual
3E0680 - Ed 4 - January 2007
DISCLAIMER Whilst every effort has been made
to ensure accuracy, neither Gallagher Group
Limited nor any employee of the company, shall be
liable on any ground whatsoever to any party in
respect of decisions or actions they may make as a
result of using this information.
In accordance with the Gallagher policy of
continuing development, design and specifications
are subject to change without notice.
Developed and manufactured by Gallagher Group
Limited, an ISO 9001:2000 Certified Supplier.

3E0680 SmartReader BR Series 3E0680
Page iii
Table of Contents
Overview.....................................................................................................................1
Tag types read ....................................................................................................3
Storage of Electronic Controller when not in use ................................................3
Configurator ........................................................................................................3
MyScale Pro........................................................................................................3
User information........................................................................................................4
Electronic Controller Features - BR.....................................................................4
Rotary dial.......................................................................................................4
Buttons............................................................................................................5
Audible beep...................................................................................................5
Display ............................................................................................................6
Bargraph .........................................................................................................7
Electronic Controller Connectors.........................................................................9
Connecting the Electronic Controller to the Antenna Panel ..............................10
Using the SmartReader.....................................................................................12
Configuring the Electronic Controller for use ................................................12
Scanning Electronic ID tags..........................................................................13
Finishing a scanning session ........................................................................14
Power options in BR Series SmartReader ........................................................15
Charging internal batteries............................................................................15
Connecting to an external 12 volt battery......................................................16
Low voltage shutdown ..................................................................................17
High voltage shutdown..................................................................................17
Installation................................................................................................................18
Connecting the Electronic Controller batteries ..................................................18
Mounting the Antenna Panel.............................................................................20
Antenna Panel Kit .........................................................................................20
Notes on locating the Antenna Panel............................................................20
Considerations..............................................................................................20
Procedure .....................................................................................................21
Mounting the Electronic Controller ....................................................................23
Electronic Controller kit .................................................................................23
Connecting the Electronic Controller to the Antenna Panel ..........................24
Testing the SmartReader EID tag read range...................................................26
Testing the read range..................................................................................27
Connect the Electronic Controller to a computer ..........................................28
Investigating SmartReader read range issues ..............................................29
Accessing and exiting Setup mode...............................................................29
Advanced Electronic ID tag read range testing .................................................30
Start the Diagnostics Wizard.........................................................................31
Assessing the background noise ..................................................................33
Test read range.............................................................................................34
Testing with live animals ...............................................................................35

Page iv
3E0680 3E0680 SmartReader BR Series
Installing multiple SmartReaders...........................................................................36
Wireless installation ..........................................................................................37
Wired installation...............................................................................................39
Cabling requirements for connecting SmartReaders.........................................41
MyScale Pro......................................................................................................42
Introduction ...................................................................................................42
Installation.....................................................................................................43
Basic Terminology ........................................................................................47
Starting MyScale Pro ....................................................................................48
Closing MyScale Pro.....................................................................................48
MyScale Pro main menu...............................................................................49
Copy sessions from Electronic Controller to computer .................................53
Reviewing SmartReader session file names.................................................55
Session files..................................................................................................56
MyScale Session Editor ................................................................................58
Using the Configurator............................................................................................59
Installing the Configurator .................................................................................59
Connecting the Electronic Controller to the computer.......................................60
Viewing the current Electronic Controller settings.............................................60
Altering Electronic Controller Settings...............................................................60
Screen descriptions...........................................................................................61
Operational Settings .....................................................................................61
ID Code Format ............................................................................................66
Panel Settings...............................................................................................68
Communication Settings ...............................................................................69
Diagnostics ...................................................................................................70
Menu options.....................................................................................................72
Reader menu ................................................................................................72
Connection menu..........................................................................................72
Tools menu ...................................................................................................72
Advanced menu............................................................................................73
Toolbars ............................................................................................................74
Connection toolbar........................................................................................74
Reader toolbar ..............................................................................................75
Accessories .............................................................................................................76
SmartReader Extension Mounting Kit installation .............................................76
Mount the Antenna Panel .............................................................................76
Mounting the Electronic Controller................................................................76
Specifications ..........................................................................................................79
Small Antenna Panels.......................................................................................79
Large Antenna Panels.......................................................................................80
Electronic Controller..........................................................................................81
Standards..........................................................................................................82
Battery...............................................................................................................84
Battery charger..................................................................................................84
3E0680 SmartReader BR Series 3E0680
Page 1
Overview
The Gallagher SmartReader enables Electronic ID tags to be
automatically read as animals pass by the SmartReader. The
Electronic ID tag data can be downloaded and stored on a computer as
required.
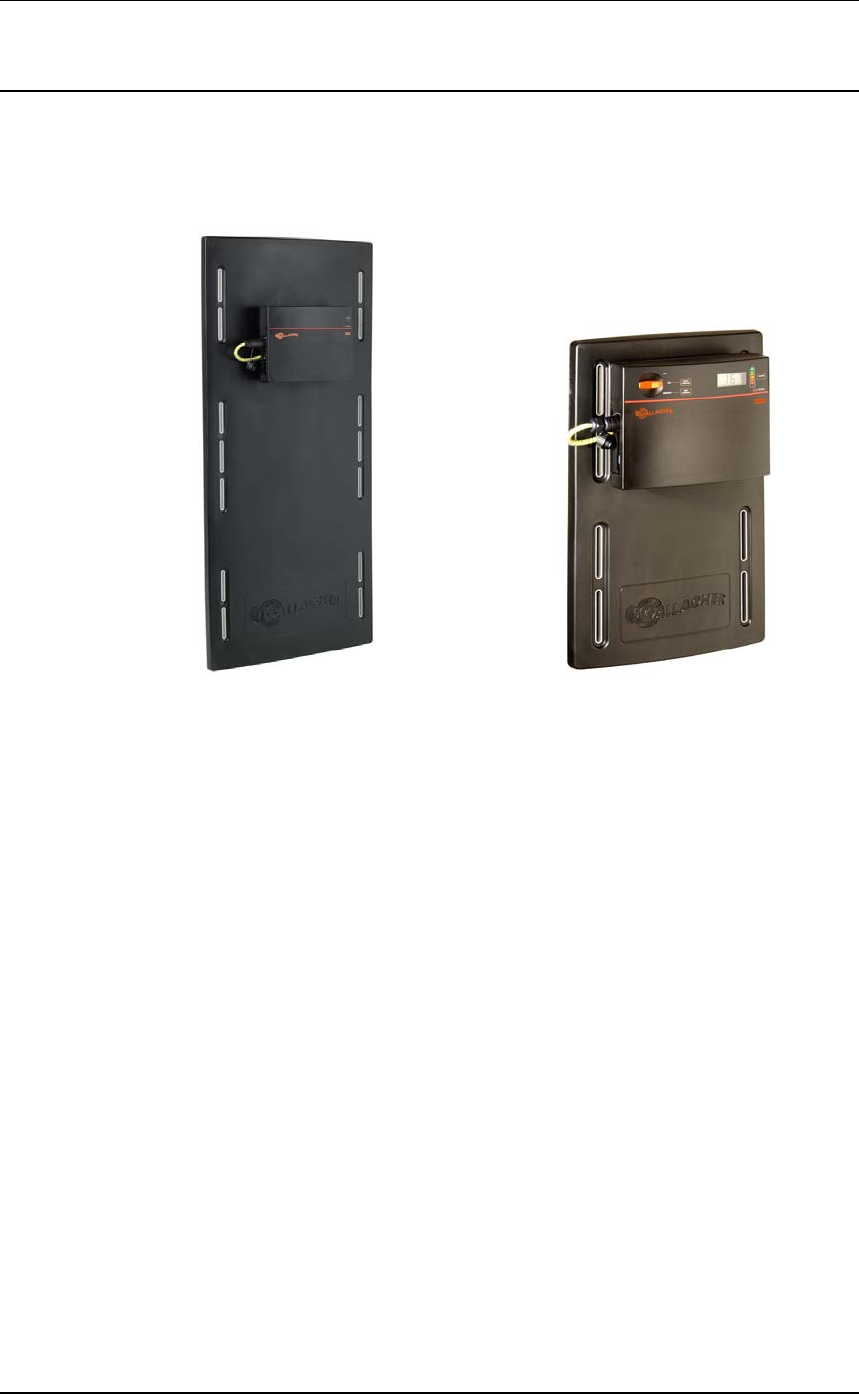
The Gallagher SmartReader has two parts:
•the Electronic Controller and
•the Antenna Panel.
The Electronic Controller contains the internal memory and internal
rechargeable batteries. The Antenna Panel contains the aerial used to
capture the Electronic ID tag data.
The internal rechargeable batteries run the Antenna Panel for up to 8
hours and internal memory can store up to 20 000 tag numbers.

3E0680 3E0680 SmartReader BR Series
Page 2
Two Antenna Panel sizes are available to suit the animals being
scanned.
There are two models in the Gallagher SmartReader BR Series:
•BR600
•Small Antenna Panel (600 mm x 400 mm)
•Electronic Controller with internal memory and internal re-
chargeable batteries.
•Serial port (DB9) for downloading collected information to a
computer or hand held device.
•USB adapter
•Recommended for use when scanning constrained animals
(Sheep and cattle) and sheep on the move.
•BR1300
•Large Antenna Panel (1300 mm x 600 mm)
•Electronic Controller with internal memory and internal re-
chargeable batteries.
•Serial port (DB9) for downloading collected information to a
computer or hand held device.
•USB adapter
•Recommended for use when scanning animals (Cattle and
Deer) on the move.
If required, multiple SmartReader's can operate in close proximity, so
long as they are set up to ensure all Electronic ID tags are read
correctly.

3E0680 SmartReader BR Series 3E0680
Page 3
Tag types read
The Gallagher SmartReader BR Series enables you to read both HDX
(Half Duplex) and FDX-B (Full Duplex-B) Electronic ID tags.
HDX and FDX-B Electronic ID tags operate differently and therefore
have different applications.
Storage of Electronic Controller when not
in use
For optimal battery life, Gallagher recommends that you store the
Electronic Controller in a cool, dry area (15 to 25 ° Centigrade) out of
direct sunlight.
Configurator
The Configurator is a software program provided with the
SmartReader. Use it to alter settings in the Electronic Controller and
to diagnose performance problems when the SmartReader is installed.
The Configurator is for advanced users and should be used with care
as altering settings affects the operation of the SmartReader.
The Configurator software is automatically installed with the MyScale
Pro software.
MyScale Pro
The MyScale Pro software enables you to transfer Electronic ID tag
numbers stored in the SmartReader memory from the Electronic
Controller to a computer.
Note: The Electronic Controller does not need to be connected to the panel
for this activity.
With MyScale Pro you can perform the following functions;
•Copy sessions from the Electronic Controller.
•Change session file names.
•View and Edit sessions.
•Print sessions.
•Create long term record storage using MyScale Pro to backup
information from the Electronic Controller.
See MyScale Pro (p 42) for further details.
3E0680 3E0680 SmartReader BR Series
Page 4
User information
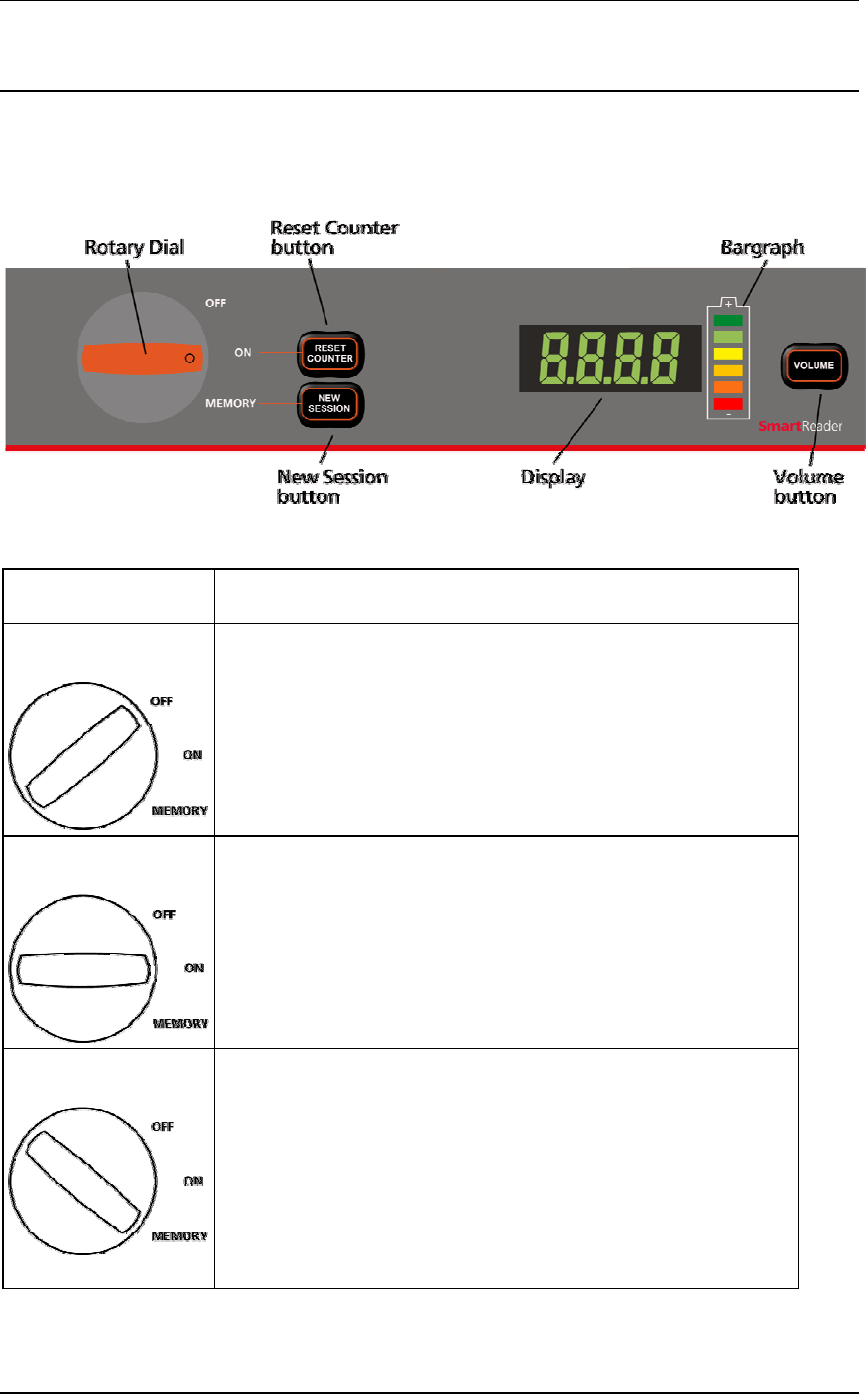
Electronic Controller Features - BR
Rotary dial
Mode Description
OFF Electronic Controller is off.
ON The Electronic Controller is on.
The scanned Electronic ID data is sent out the Serial
port (DB9). The data can then be captured by an
external device such as a Scale or computer.
Note: Data is not stored in the internal memory.
MEMORY The Electronic Controller is on.
The scanned Electronic ID data is:
•savedtotheinternalmemory,and
•sent out via the Serial port (DB9) on the
Electronic Controller. The data can then be
captured by an external device such as a Scale or
computer.

3E0680 SmartReader BR Series 3E0680
Page 5
Buttons
Reset
Counter
Note: Only operational when Electronic
Controller is in ON mode.
Press the Reset Counter button to reset the
counter on the Electronic Controller.
New Session Note: Only operational when Electronic
Controller is in MEMORY mode.
Press the New Session button to create a new
session on the Electronic Controller and add all
new Electronic ID tag reads to this session.
All previous sessions are maintained until they
are downloaded to the computer via MyScale Pro.
A new session is created each time the Electronic
Controller is turned on.
Volume Therearetwovolumelevels on the Electronic
Controller:
•Off
•On
To change the volume on the Electronic
Controller while it is operating, press the Volume
button.
Note: Warning beeps (low battery warning etc)
ignore the Volume setting and beep as required.
Audible beep
The Electronic Controller beeps whenever one of the following
situations occurs:
•An Electronic ID tag has been read, except if the volume is set to
OFF.
•The volume level is set. For more details on setting the volume of
the beep, see Buttons (p 5).
•The battery charge level is low. This warning sounds regardless
of the volume level setting.

3E0680 3E0680 SmartReader BR Series
Page 6
Display
Message Description
Blank The display is blank when the internal batteries are charging.
BATT Displayed when the battery charge level is at a critically low level
and the Electronic Controller is shutting down
For additional information, see Low voltage shutdown (p 17).
VOLT Displayed when a power source providing a voltage greater than 16
V is connected to the Electronic Controller. The Electronic
Controller automatically shuts down to protect the electronics.
For additional information, see High voltage shutdown (p 17).
FULL Displayed when the internal memory is full of Electronic ID tag
data.
YouneedtodownloadtheElectronicIDtagdatatoacomputer.
See Copy sessions from Electronic Controller to computer (p 53).
<Tag count> Displays the number of Electronic ID tags read in this session, or
the counter was reset to zero.
3E0680 SmartReader BR Series 3E0680
Page 7
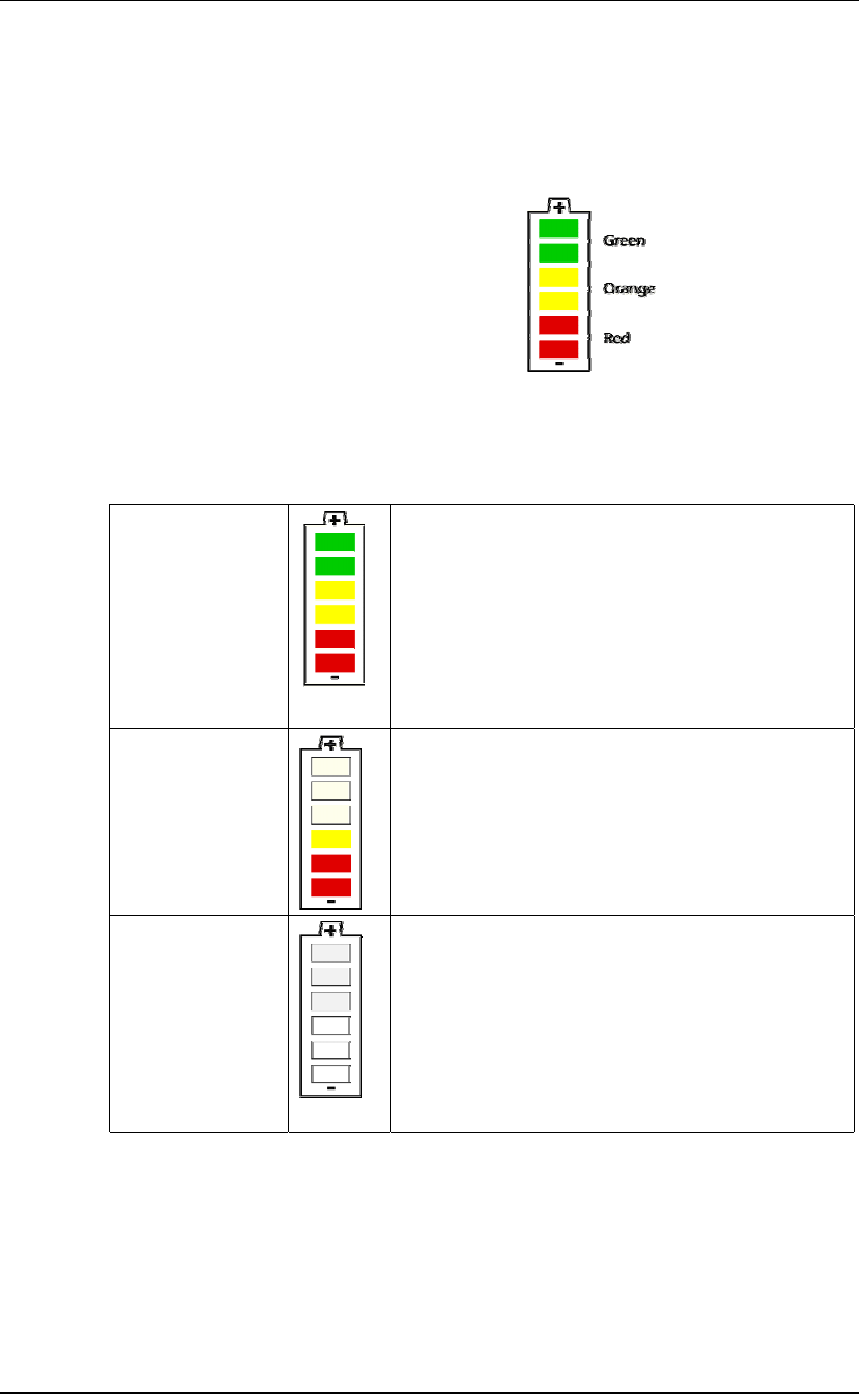
Bargraph
The bargraph on the Electronic Controller is used to indicate the
following:
•battery charge level
•battery charging
•beeper volume
•successful tag read
Battery charge level
Fully charged All bargraph lights are constantly
displayed.
Partially
charged
Some bargraph lights are constantly
displayed
Note: The low battery warning will
sound once only one red bar is remaining.
Flat battery No bargraph lights are displayed.
3E0680 3E0680 SmartReader BR Series
Page 8
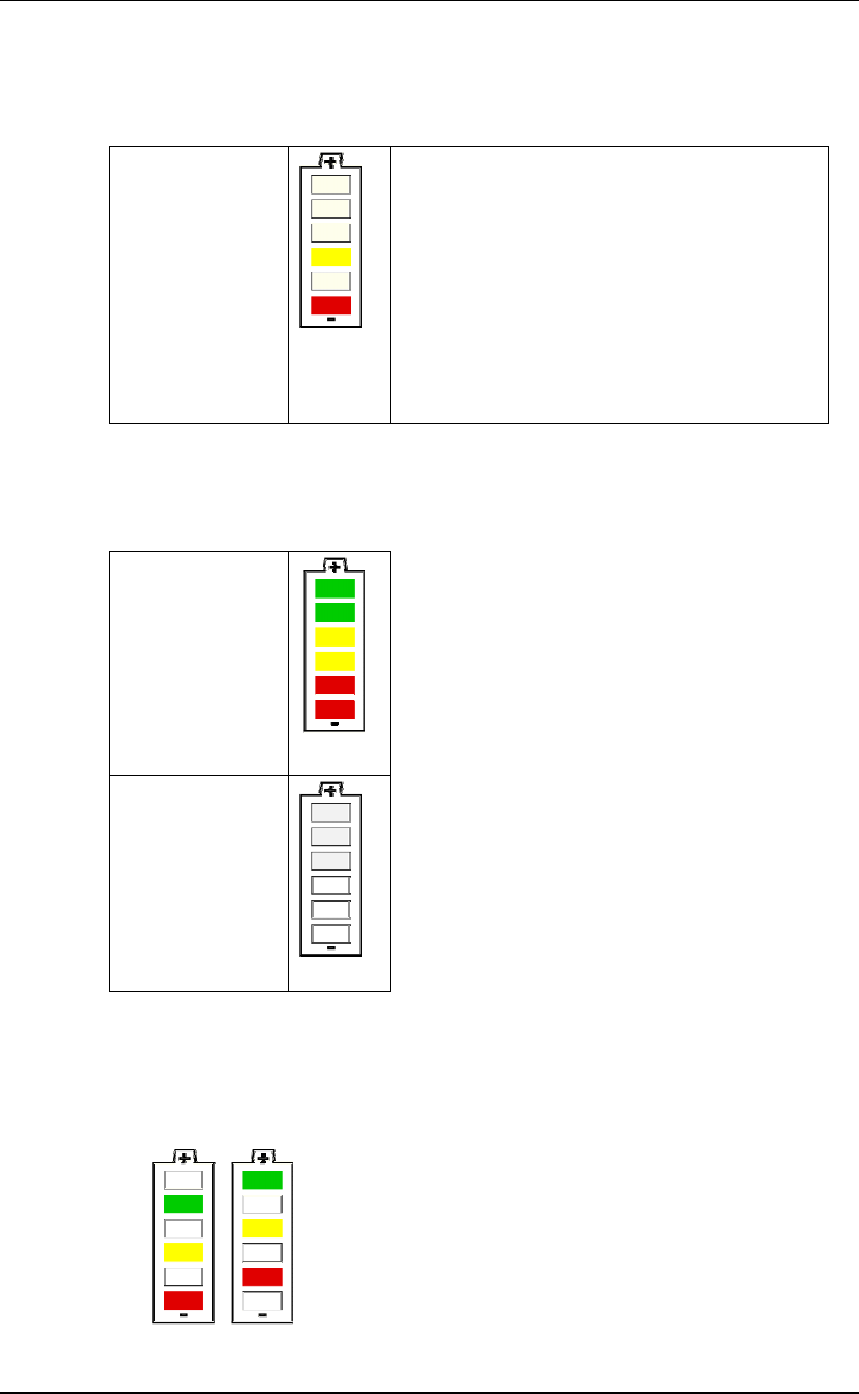
Battery charging
When the SmartReader is connected to a battery charger, the bargraph
displays the charging status:
Charging The battery level is indicated by the
number of lights lit.
The flashing bars indicate that charging
is occurring.
Note: The battery charger controls the
charging of the internal batteries and
stops the charging once the batteries
are fully charged.
Beeper volume
Press the Volume button to change the beeper volume.
Volume on
Volume off
Successful tag read
If set in the Configurator, each successful tag read triggers the
bargraph to flash multiple times in an alternating pattern.
3E0680 SmartReader BR Series 3E0680
Page 9
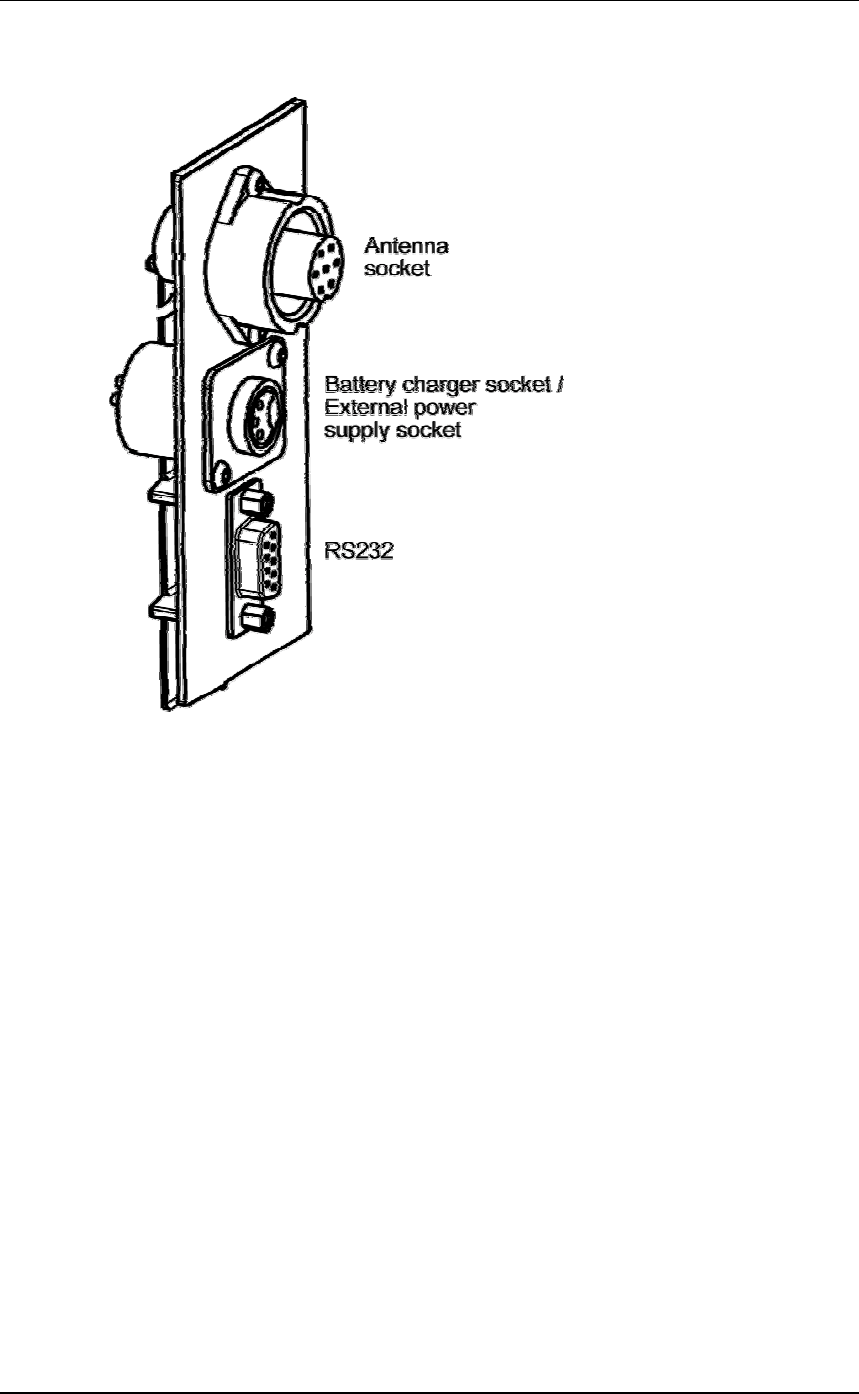
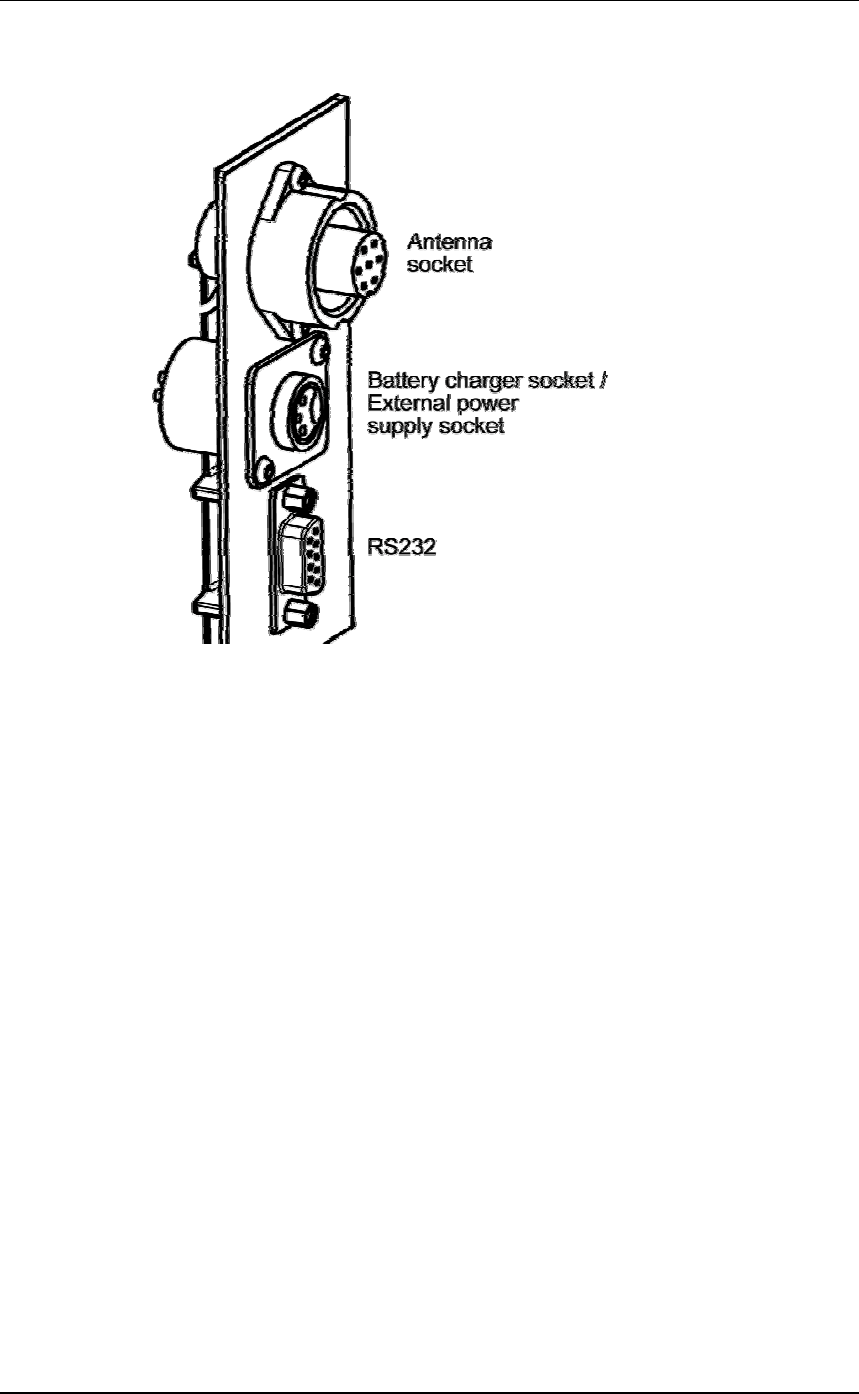
Electronic Controller Connectors
3E0680 3E0680 SmartReader BR Series
Page 10
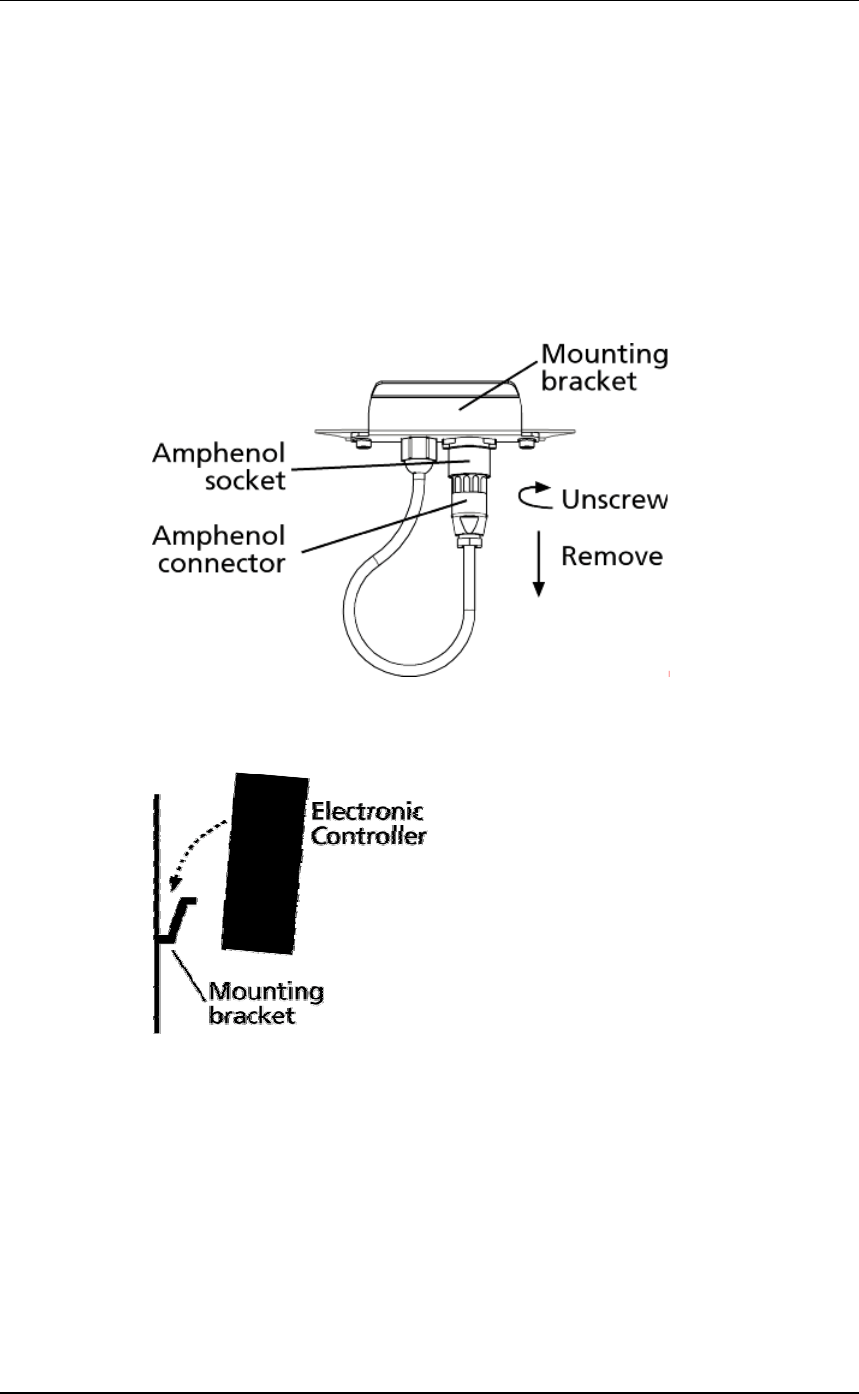
Connecting the Electronic Controller to the
Antenna Panel
For information on using the Extension Mounting Kit see
SmartReader Extension Mounting Kit installation (p 76).
1. Ensure the Electronic Controller is turned off.
2. On the Antenna Panel, unscrew the Amphenol connector locking
nut from the Amphenol socket and pull it down to unplug from the
Antenna Panel.
3. Mount the Electronic Controller on the mounting bracket by
grasping the Electronic Controller on both sides and slide the back
handle onto the mounting bracket.
3E0680 SmartReader BR Series 3E0680
Page 11
4. Connect the antenna cable to the Electronic Controller and tighten
the locking nut.