Getac Technology 007 Notebook PC User Manual chapter 3
Getac Technology Corp. Notebook PC chapter 3
UserManual.wiki
>
Getac Technology
>
007 User Manual
>
chapter 3
Contents
1.
contents
2.
chapter 1
3.
chapter 2
4.
chapter 3
5.
users manual 1 of 6
6.
users manual 2 of 6
7.
users manual 3 of 6
8.
users manual 4 of 6
9.
users manual 5 of 6
10.
users manual 6 of 6
chapter 3
Navigation menu
Upload a User Manual
Namespaces
Wiki Guide
HTML
PDF
Info
Views
User Manual
Discussion / Help
Navigation
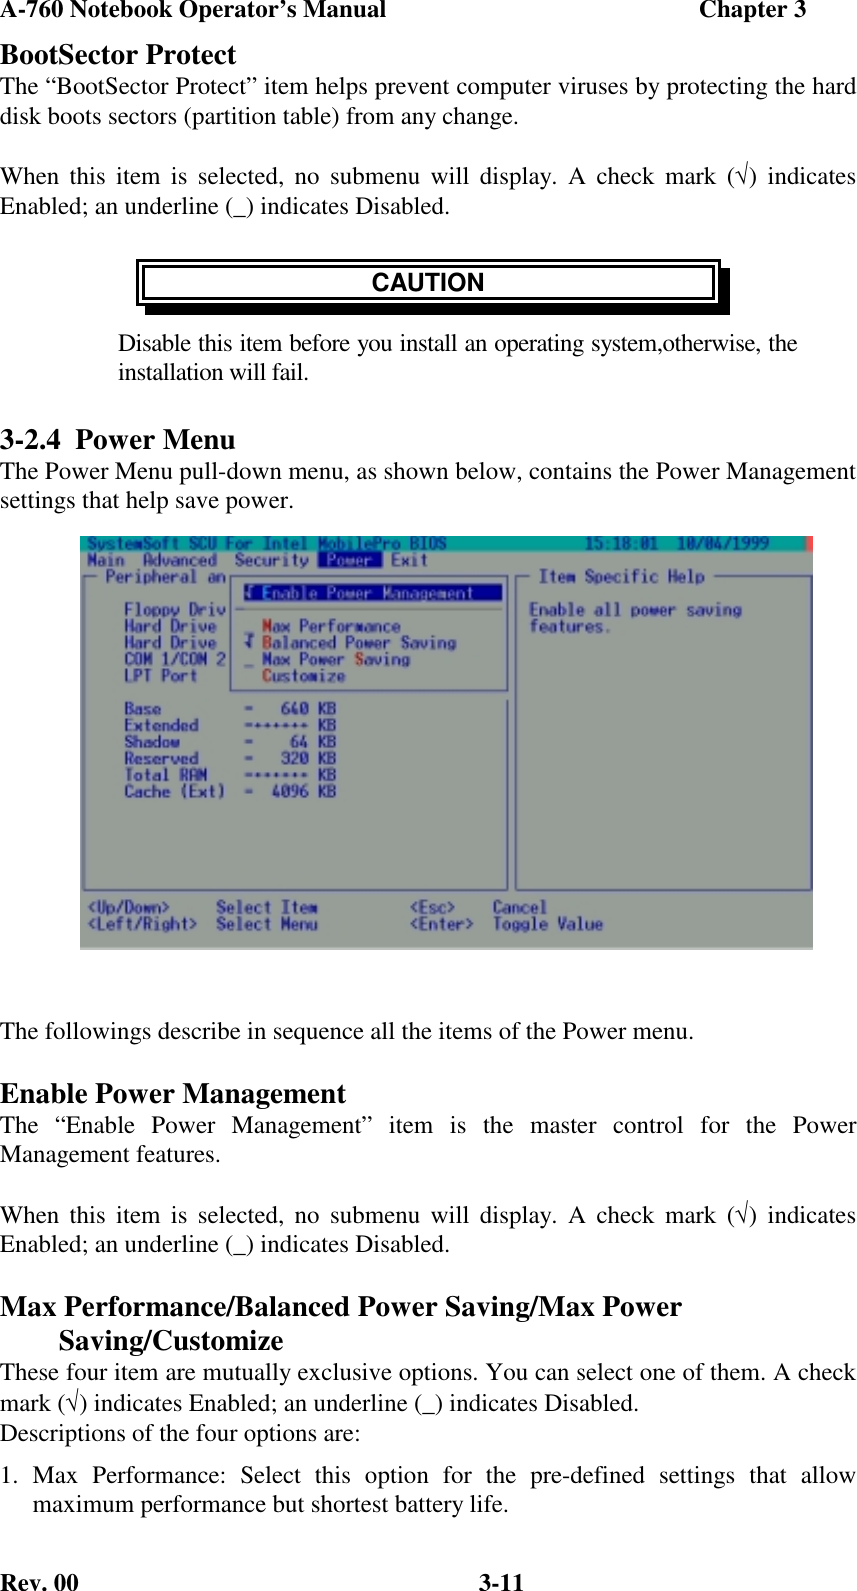
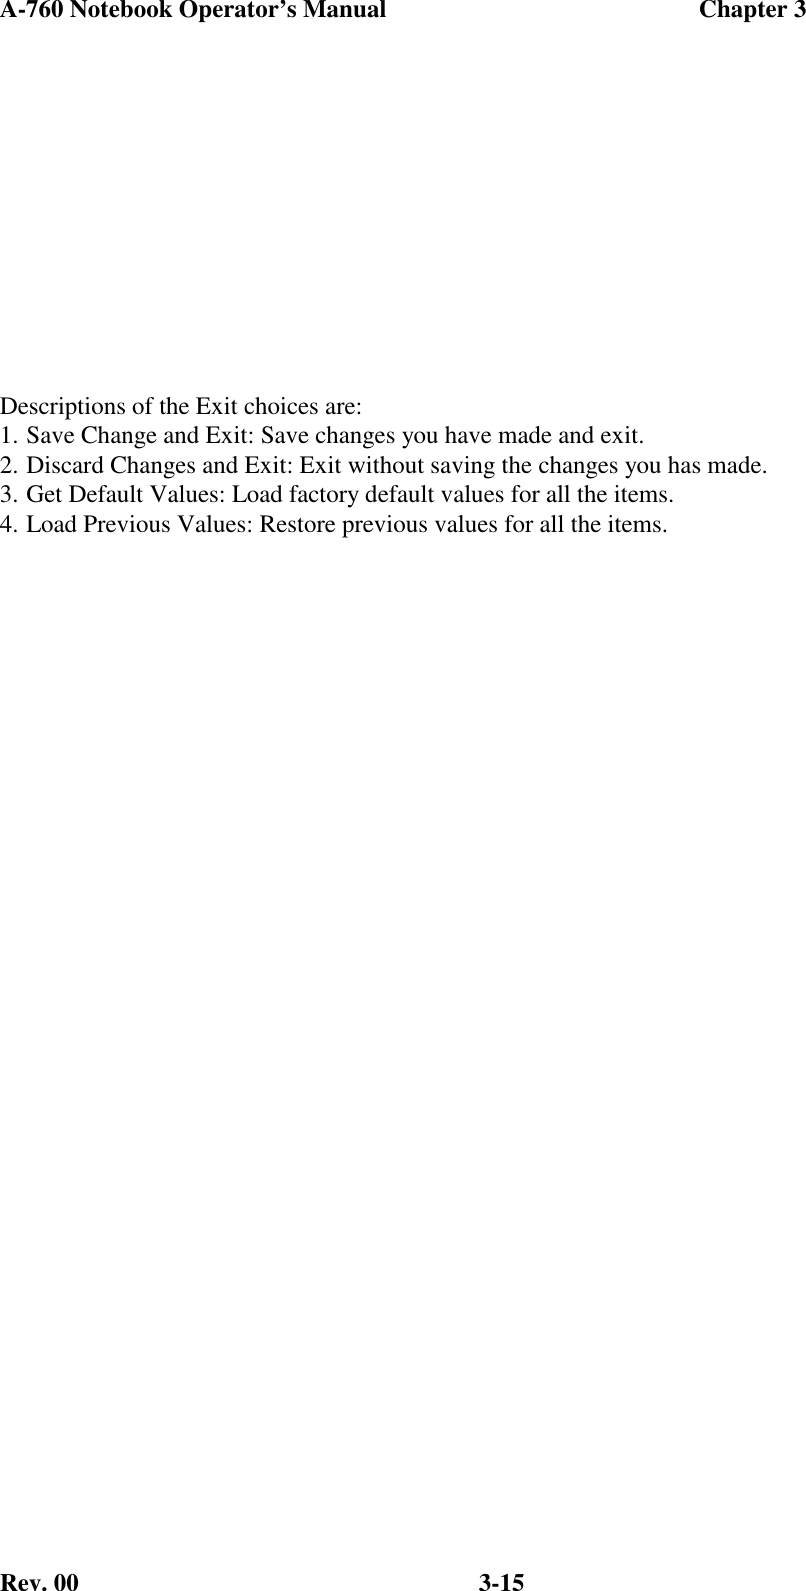
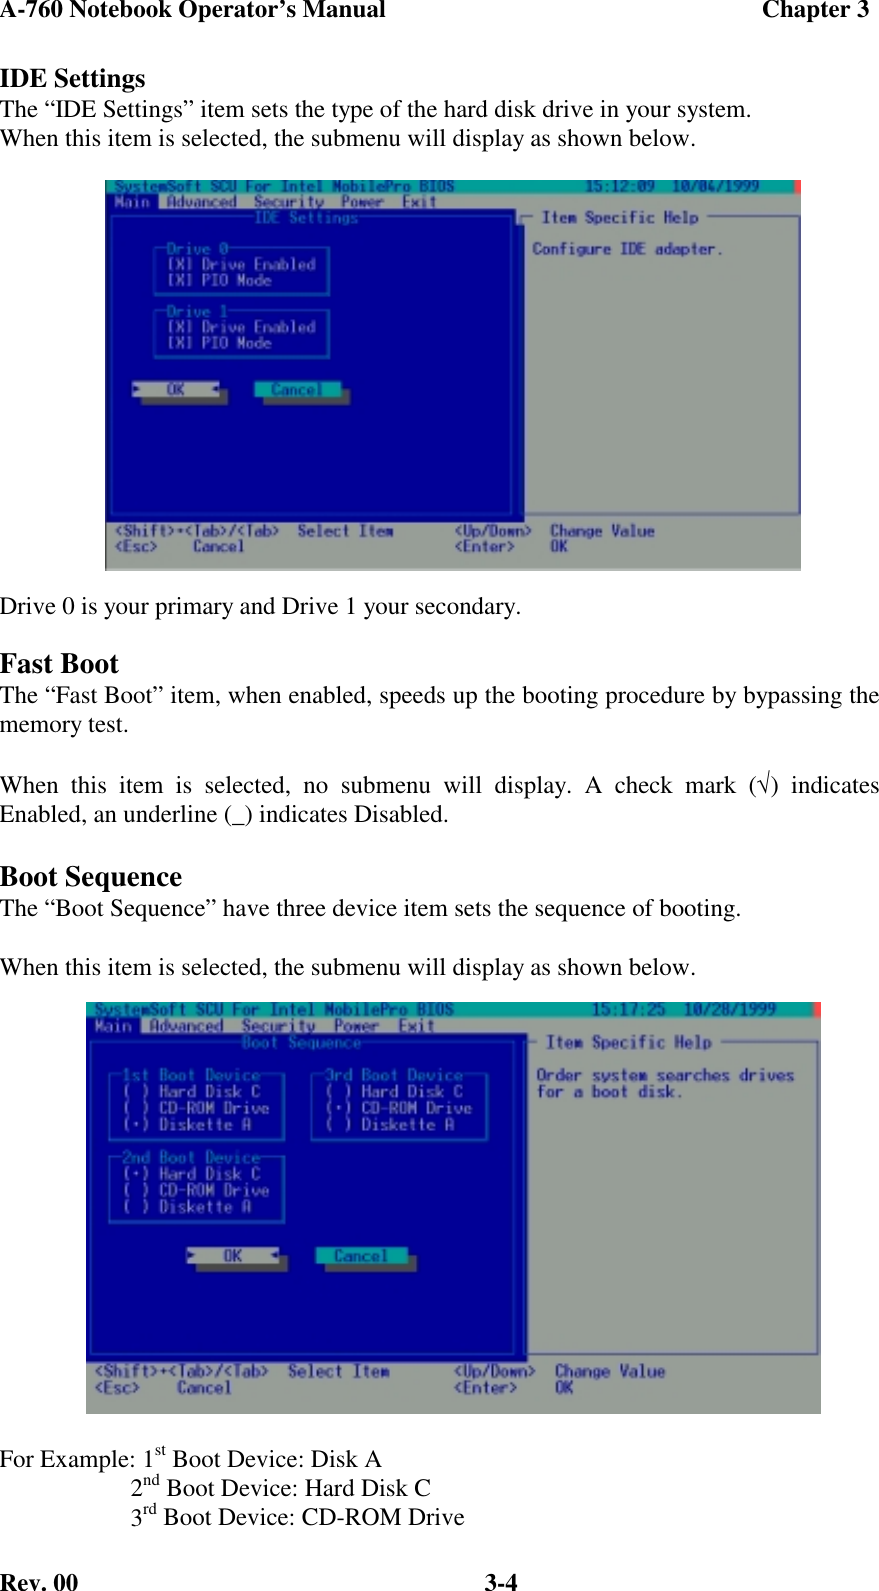
![A-760 Notebook Operator’s Manual Chapter 3Rev. 00 3-3Described below is the general procedure for using the keyboard to complete setting ofan item:1. Select a menu title with the left/right arrow key a press [Enter] to pull down themenu. You can also directly pull down a menu by pressing the shortcut key.2. Inside the pull-down menu, select an item with the up/down arrow key and press[Enter] to access the submenu. You can also directly access the submenu by pressingThe submenu displays the options you can select. If no submenu appears, simplypress [Enter] to enable or disable the item.3. Inside most submenus, press the [Tab] key to go to the entry field. Select yourdesired option with the up/down arrow key or the shortcut key. To complete thesetting and leave the submenu, press [Enter] and select the “OK” button. To cancelyour selection, press [Esc] or select the “Cancel” button.3.2.2.1 Main MenuThe Main pull-down menu, as shown below, contains the basic configuration settings ofthe system.Date and TimeThe “Date and Time” item sets the system date and time.When this item is selected, the submenu will display as shown below.](https://usermanual.wiki/Getac-Technology/007.chapter-3/User-Guide-71996-Page-3.png)
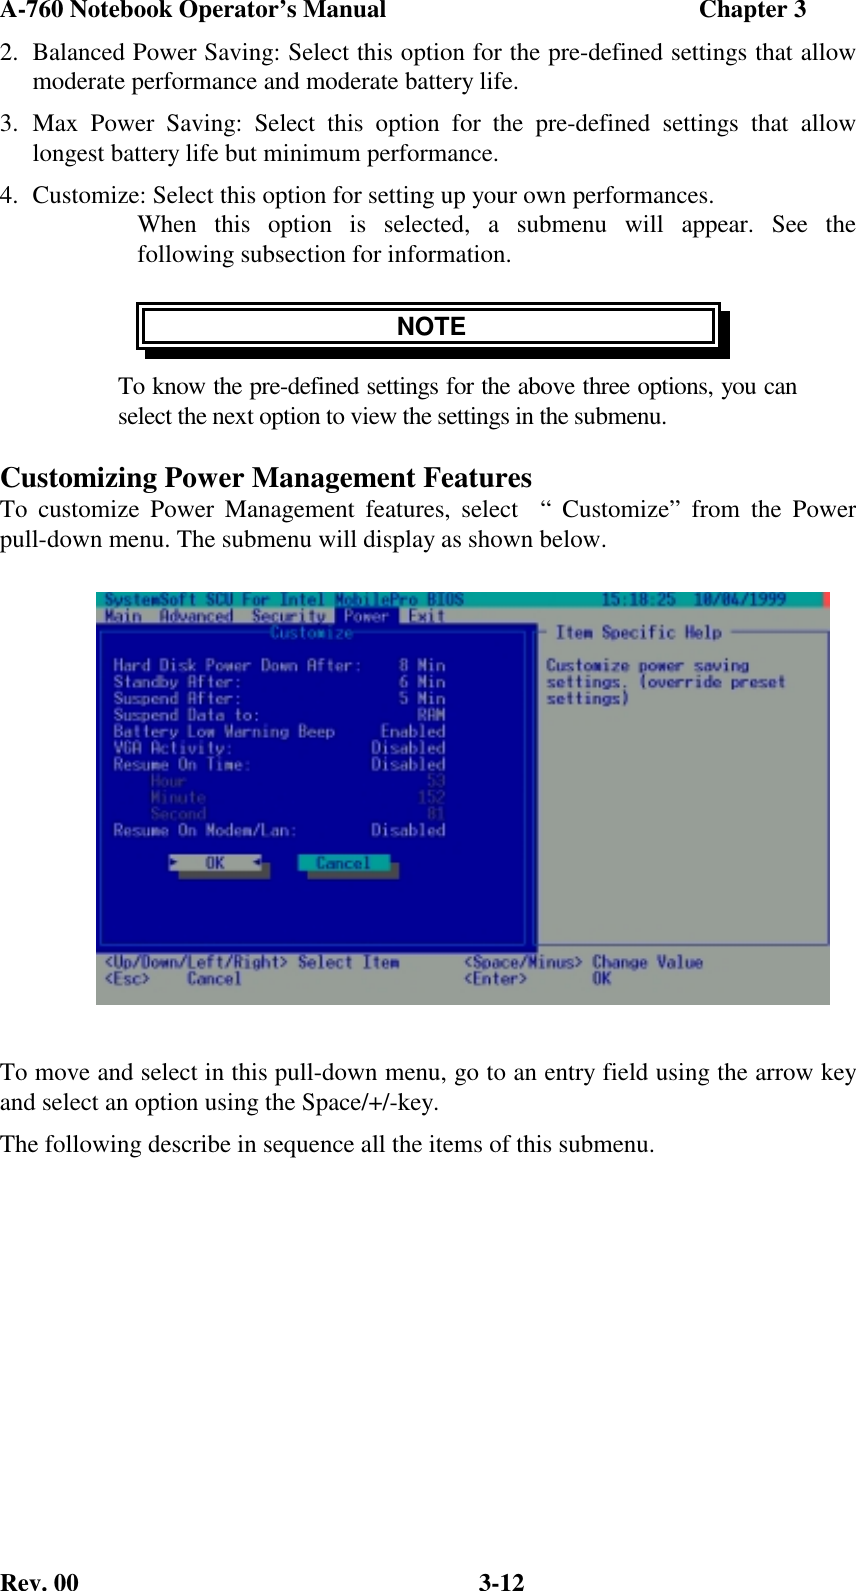
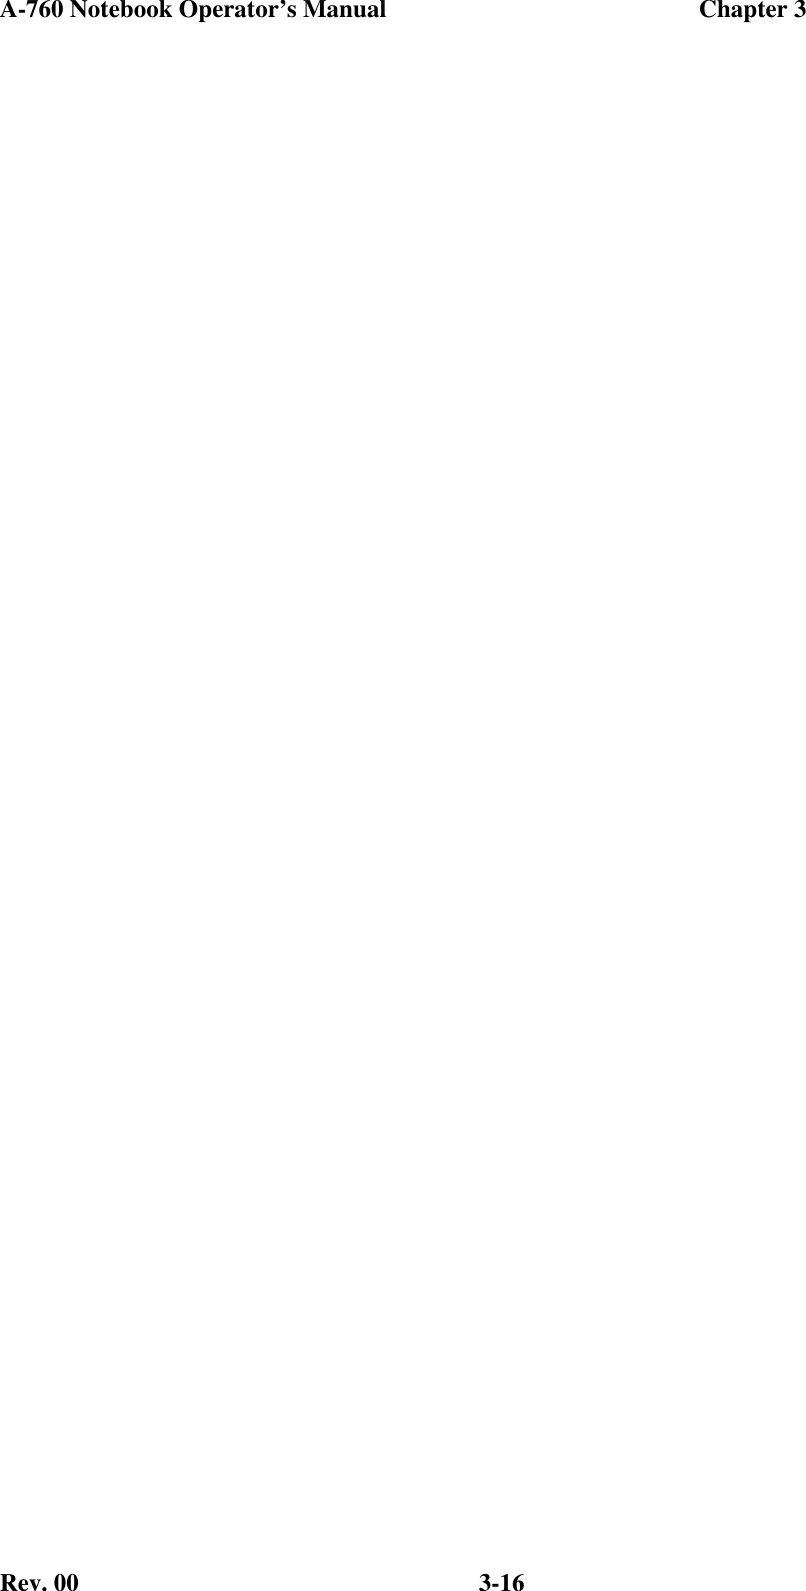
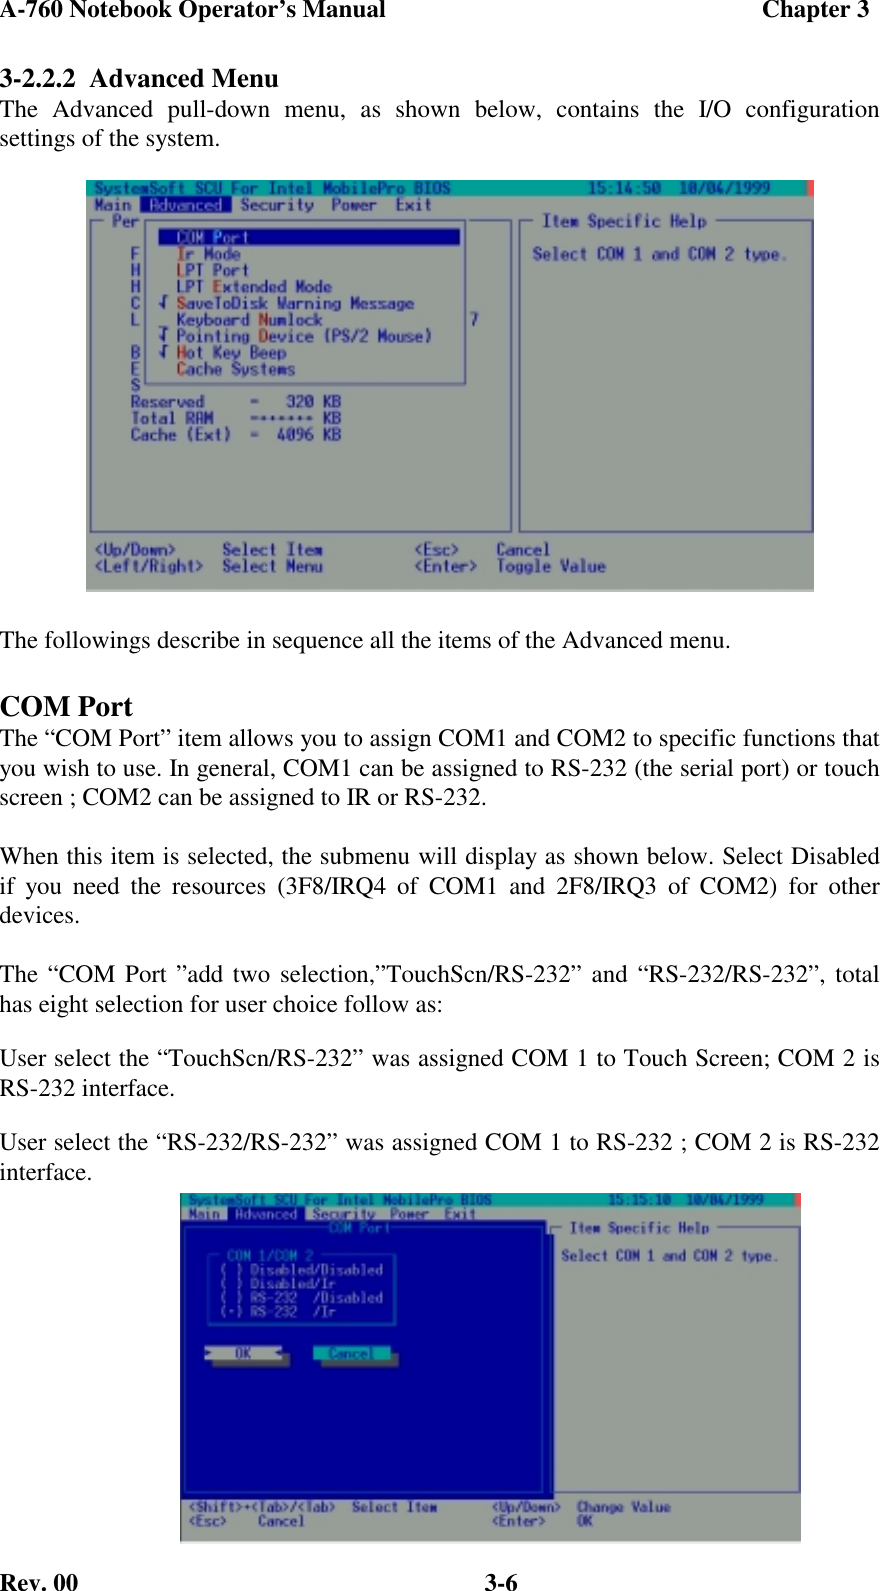
![A-760 Notebook Operator’s Manual Chapter 3Rev. 00 3-5Descriptions of the available options are:The system will try to boot from drive A then Hard Disk C then CD-ROM Drive.Key ClickThe “Key Click” items sets if there will be a click sound whenever a key is pressed.When this item is selected, no submenu will display. A check mark (√) indicatesEnabled; an underline (_) indicates Disabled.Display ModeThe “Display Mode” item sets the display device to respond after system power on.When this item is selected, the submenu will display as shown below.Descriptions of the available options are:1. Auto: The external CRT monitors (if connected) will respond after power on. If a monitor is not connected, the LCD will respond.2. LCD Only: Only the LCD will respond after power on even if an external CRT monitor is connected.3. Simultaneously: Both the CRT monitor (if connected) and the LCD will respondafter power on. If a monitor is not connected, only the LCD will respond.CAUTIONBe careful with the setting “AUTO”. This setting can make the [Fn+F9]hot keys invalid if the CRT monitor connected requires higher verticalscan frequency than the LCD.](https://usermanual.wiki/Getac-Technology/007.chapter-3/User-Guide-71996-Page-5.png)

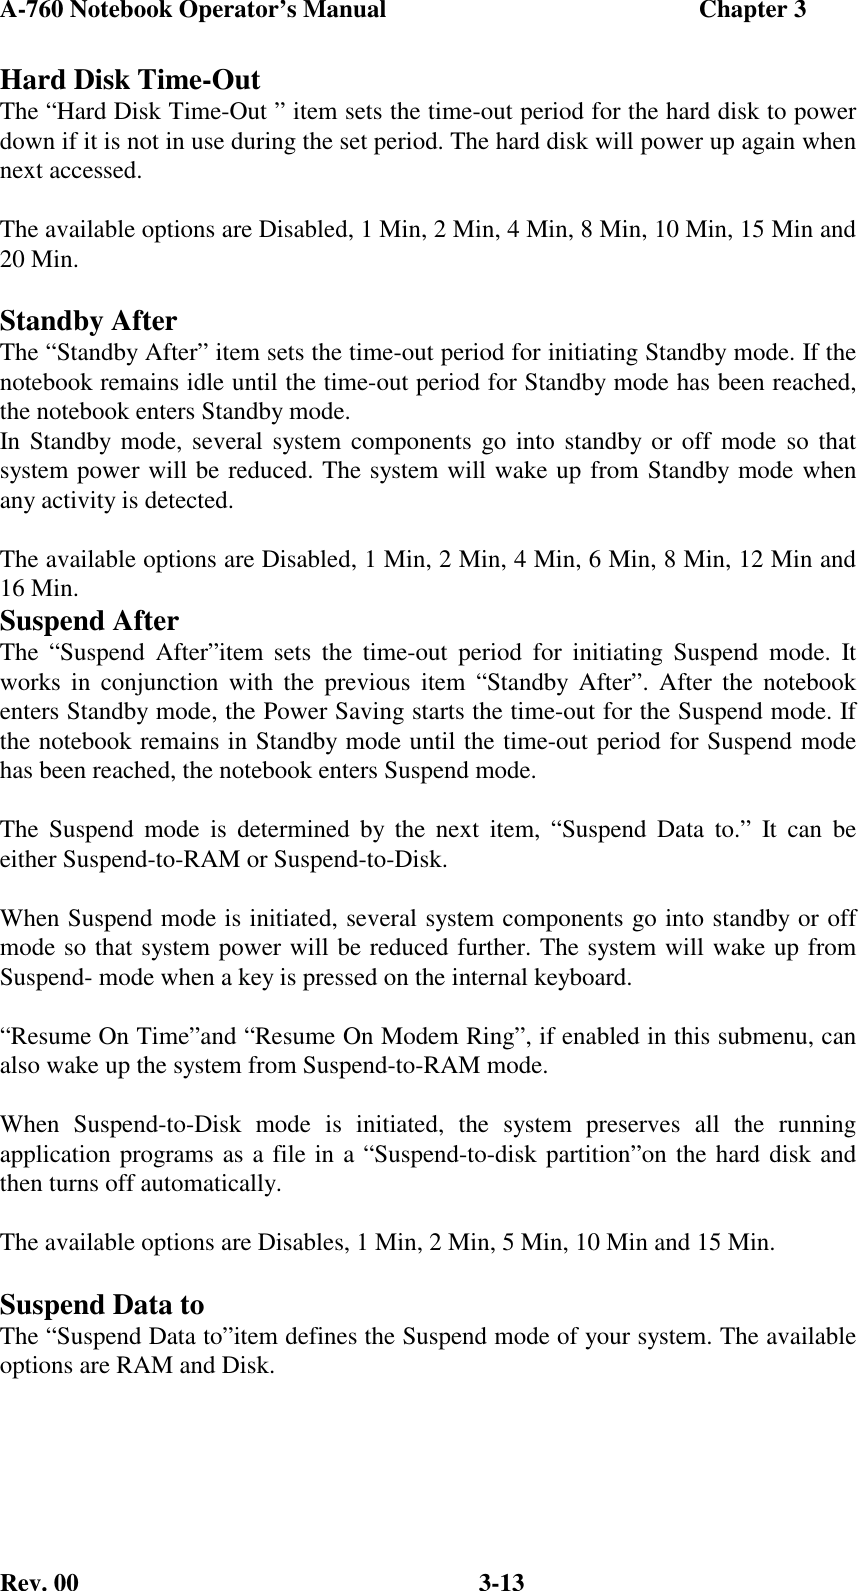
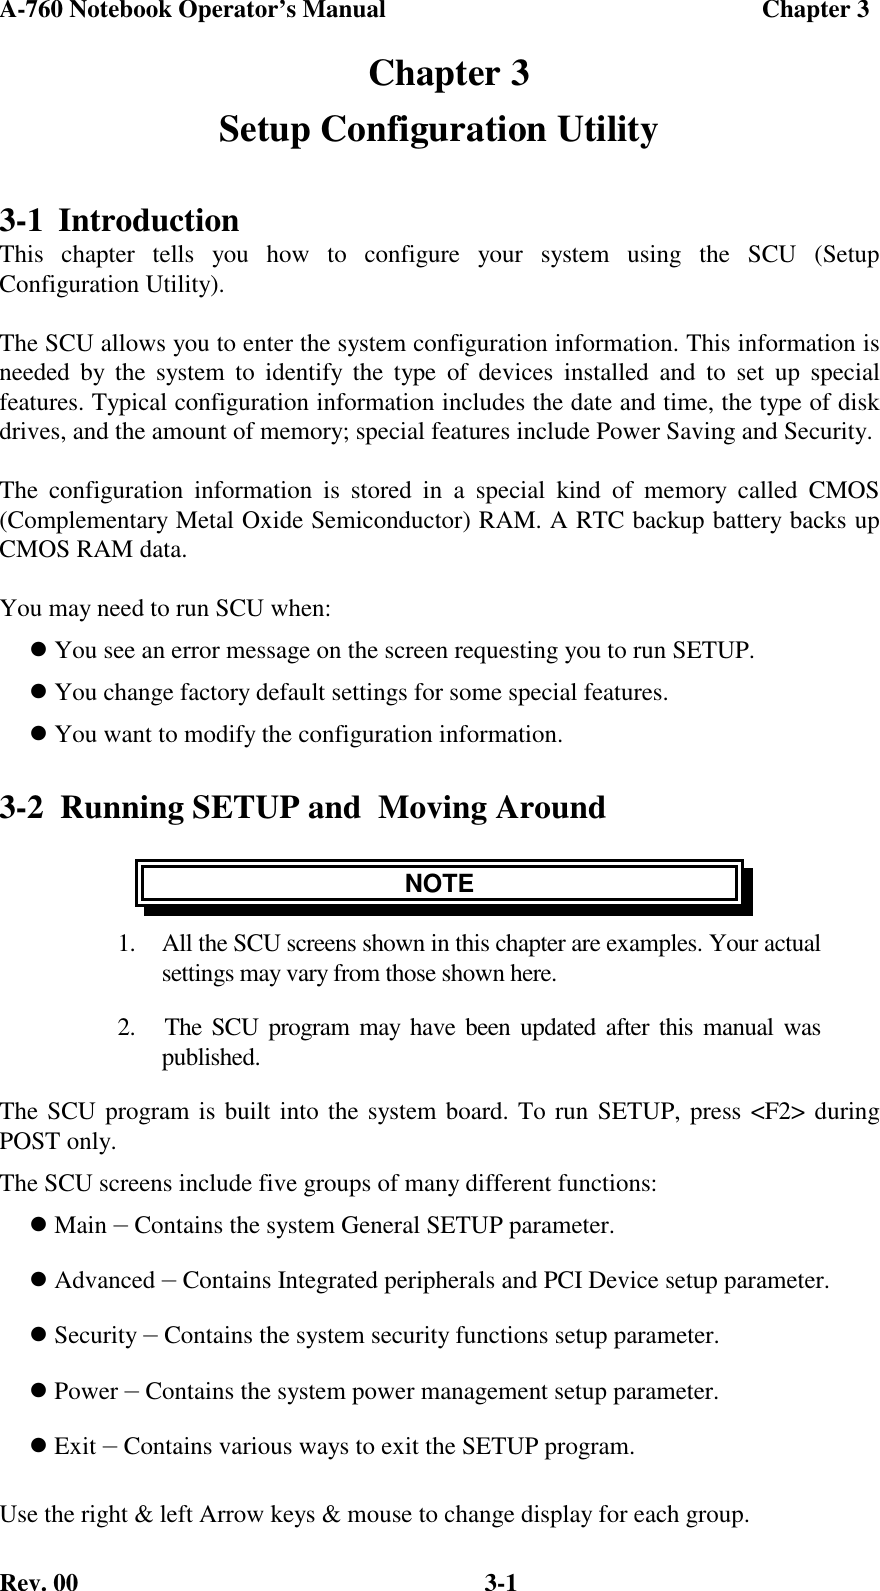
![A-760 Notebook Operator’s Manual Chapter 3Rev. 00 3-10The followings describe in sequence all the items of the Security menu.System PasswordThe “System Password”item allows you to set the password for your system. Thepassword is required for starting up the system and running the SCU program.When the item is selected, the submenu will display as shown below. When setting apassword, first make sure that Num Lock is off, then type your password in the entryfield and press [Enter]. Confirm your password by typing it again and pressing[Enter].For the password to take effect, enable the “Enable Password” item.Virus AlertThe “Virus Alert”item, when enabled, gives warning messages if the hard disk bootsector (partition table) has been changed.When this item is selected, no submenu will display. A check mark (√) indicatesEnabled; an underline (_) indicates Disabled.](https://usermanual.wiki/Getac-Technology/007.chapter-3/User-Guide-71996-Page-10.png)