HTC TP Dual Band GSM/GPRS Smartphone With Bluetooth User Manual Typhoon Feelers AWS manual book indb
HTC Corporation Dual Band GSM/GPRS Smartphone With Bluetooth Typhoon Feelers AWS manual book indb
UserManual.wiki
>
HTC
>
TP User Manual
>
User Manual
Contents
1.
User Manual
2.
Users Manual Part 1
3.
Users Manual Part 2
4.
Users Manual Part 3
5.
Users Manual Part 4
User Manual
Navigation menu
Upload a User Manual
Namespaces
Wiki Guide
HTML
PDF
Info
Views
User Manual
Discussion / Help
Navigation


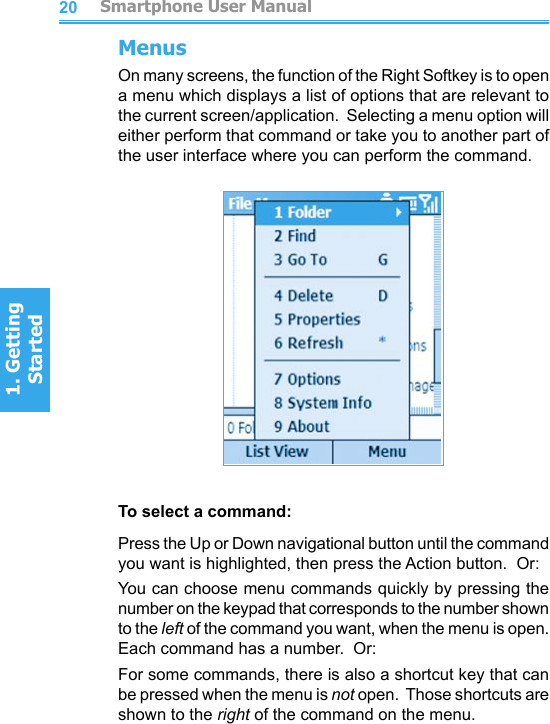


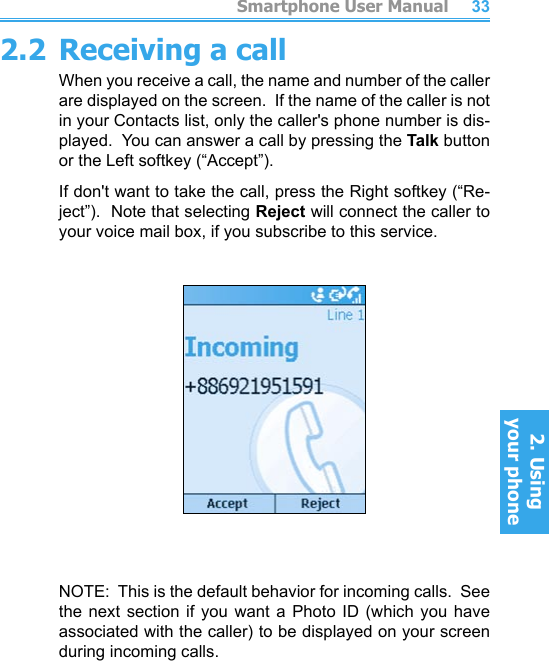


![Smartphone User Manual7. Synchronizing Smartphone User Manual7. Synchronizing 1261277.3 Server ActiveSyncBefore synchronizing information with a server, make sure all the requested server authentication information such as username, password, and the name of the Microsoft Mobile Information Server are correct. In the New Partnership wizard, select Synchronize with Microsoft Mobile Infor-mation Server and/or this PC, instead of Synchronize with this PC.To set up Server ActiveSync:1. In the Home screen, press the Start softkey, then select ActiveSync from the list of programs.2. Select Menu and then Options. 3. Select Server Settings, and then Connection.4. In User name, enter your Microsoft Exchange user name.5. In Password, enter your Microsoft Exchange password.6. In Domain, enter the name of the domain of your Exchange server (if required).7. If you want the device to save your password so that you need not enter it when connecting, select Save password.8. If conguring a Server Name, enter the name of your Exchange server.9. Select Done. To begin synchronizing with the server, press the Sync softkey.To change server synchronization settings:First, disconnect your phone from the PC. In your Smart-phone's Home screen, select Start > ActiveSync. In the ActiveSync screen, open the menu and select Options > Server Settings. Select synchronization settings to edit Cal-endar, Contacts, or Inbox; change the amount of information to be synchronized. To synchronize the information, select the Sync [Information Type] with a server checkbox on the appropriate synchronization settings page.](https://usermanual.wiki/HTC/TP.User-Manual/User-Guide-465287-Page-126.png)