Hyundai IBT PT42AH000 42” PDP Monitor User Manual 1
Hyundai IBT Corp. 42” PDP Monitor 1
Contents
- 1. Users mnanual 1
- 2. Users mnanual 2
- 3. Users manual 3
Users mnanual 1

FCC ID : PJIPT42AH000
ATTACHMENT E-1.
- USER’S MANUAL -
REPORT NO. : HCT-F03-1103 HYUNDAI C–TECH
Hyundai
Plasma Display
PT42AH000
User’s Guide
www.hyundaiQ.com
P/N 632 0236 102 Rev.02
GENERAL INFORMATION
GENERAL INFORMATION
U.S.A.
U.S.FEDERAL COMMUNICATIONS COMMISSION RADIO FREQUENCY
INTERFERENCE STATEMENT INFORMATION TO THE USER
NOTE : This equipment has been tested and found to comply with the limits for a
Class B digital device pursuant to Part 15 of the FCC Rules.
These limits are designed to provide reasonable protection against harmful
interference in a residential installation.
This equipment generates, uses, and can radiate radio frequency energy and, if not
installed and used in accordance with the instructions, may cause harmful
interference to radio communications.
However, there is no guarantee that interference will not occur in a particular
installation.
If this equipment does cause harmful interference to radio or television reception,
which can be determined by turning the equipment off and on, the user is
encouraged to try to correct the interference by one or more of the following
measures:
• Reorient or relocate the receiving antenna.
• Increase the separation between the equipment and receiver.
• Connect the equipment into an outlet of a circuit different from that to which the
receiver is connected.
• Consult the dealer or an experienced radio/TV technician for assistance.
Changes or modification not expressly approved by the party responsible for
compliance could void the user's authority to operate the equipment.
Connecting of peripherals requires the use of grounded shielded signal cables.
Kind of equipment : PDP TV
Safety : IEC60065:1998 / EN60065:1998
EMC : EN 55022 : 1998+A1:2000, EN 55024 : 1998+A1:2001
EN 61000-3-2 : 2000 / EN 61000-3-3 : 1995+A1:2001
EN 55013:1990+A12:1994+A13:1996+A14:1999
Ty pe-Designation : PT42AH000
WE ImageQuest CO., LTD.
Ami-ri Bubal-Eub Ichon-Si Kyungki-Do
467-860 KOREA
declare under our sole responsibility that the product:
to which this declaration relates is in conformity with the
following standard(s) or other normative document(s)
following the provisions of the Low Voltage Directive 73/23/EEC,
93/68/EEC and the EMC Directive 89/336/EEC.
KOREA /November 26, 2003 HONG KI, KIM
Place and date of issue) (Name and signature of
authorized person)
Accredited testlaboratory:
TÜV Rheinland
Am Grauen Stein
51105 Köln
DECLARATION OF CONFORMITY
EN55020:1994+A11:1996+A13:1999+A14:1999+A12:1999
GENERAL INFORMATION
Safety Precaution ............................................................. 5
Contents of the Package ................................................... 7
Separately Sold Products ................................................ 7
Parts Names and Functions ............................................ 9
Remote Control ............................................................... 11
General Information
HYUNDAI PLASMA DISPLAY
GENERAL INFORMATION
HYUNDAI Plasma Display PT421/421H
65
GENERAL INFORMATION
Safety Precaution
The contents of this section are provided for the safety of users and their property.
Please read the contents before using.
Safety instructions are divided into “warning” and “alert”. Their meanings are as follows.
This pictorial sign is used when a caution is needed on a potentially dangerous items and operations.
Warning : When there is a possibility of serious injury or death upon violation of the displayed instruction.
Alert : When there is a possibility of slight injury or product damage upon violation of the displayed instruction.
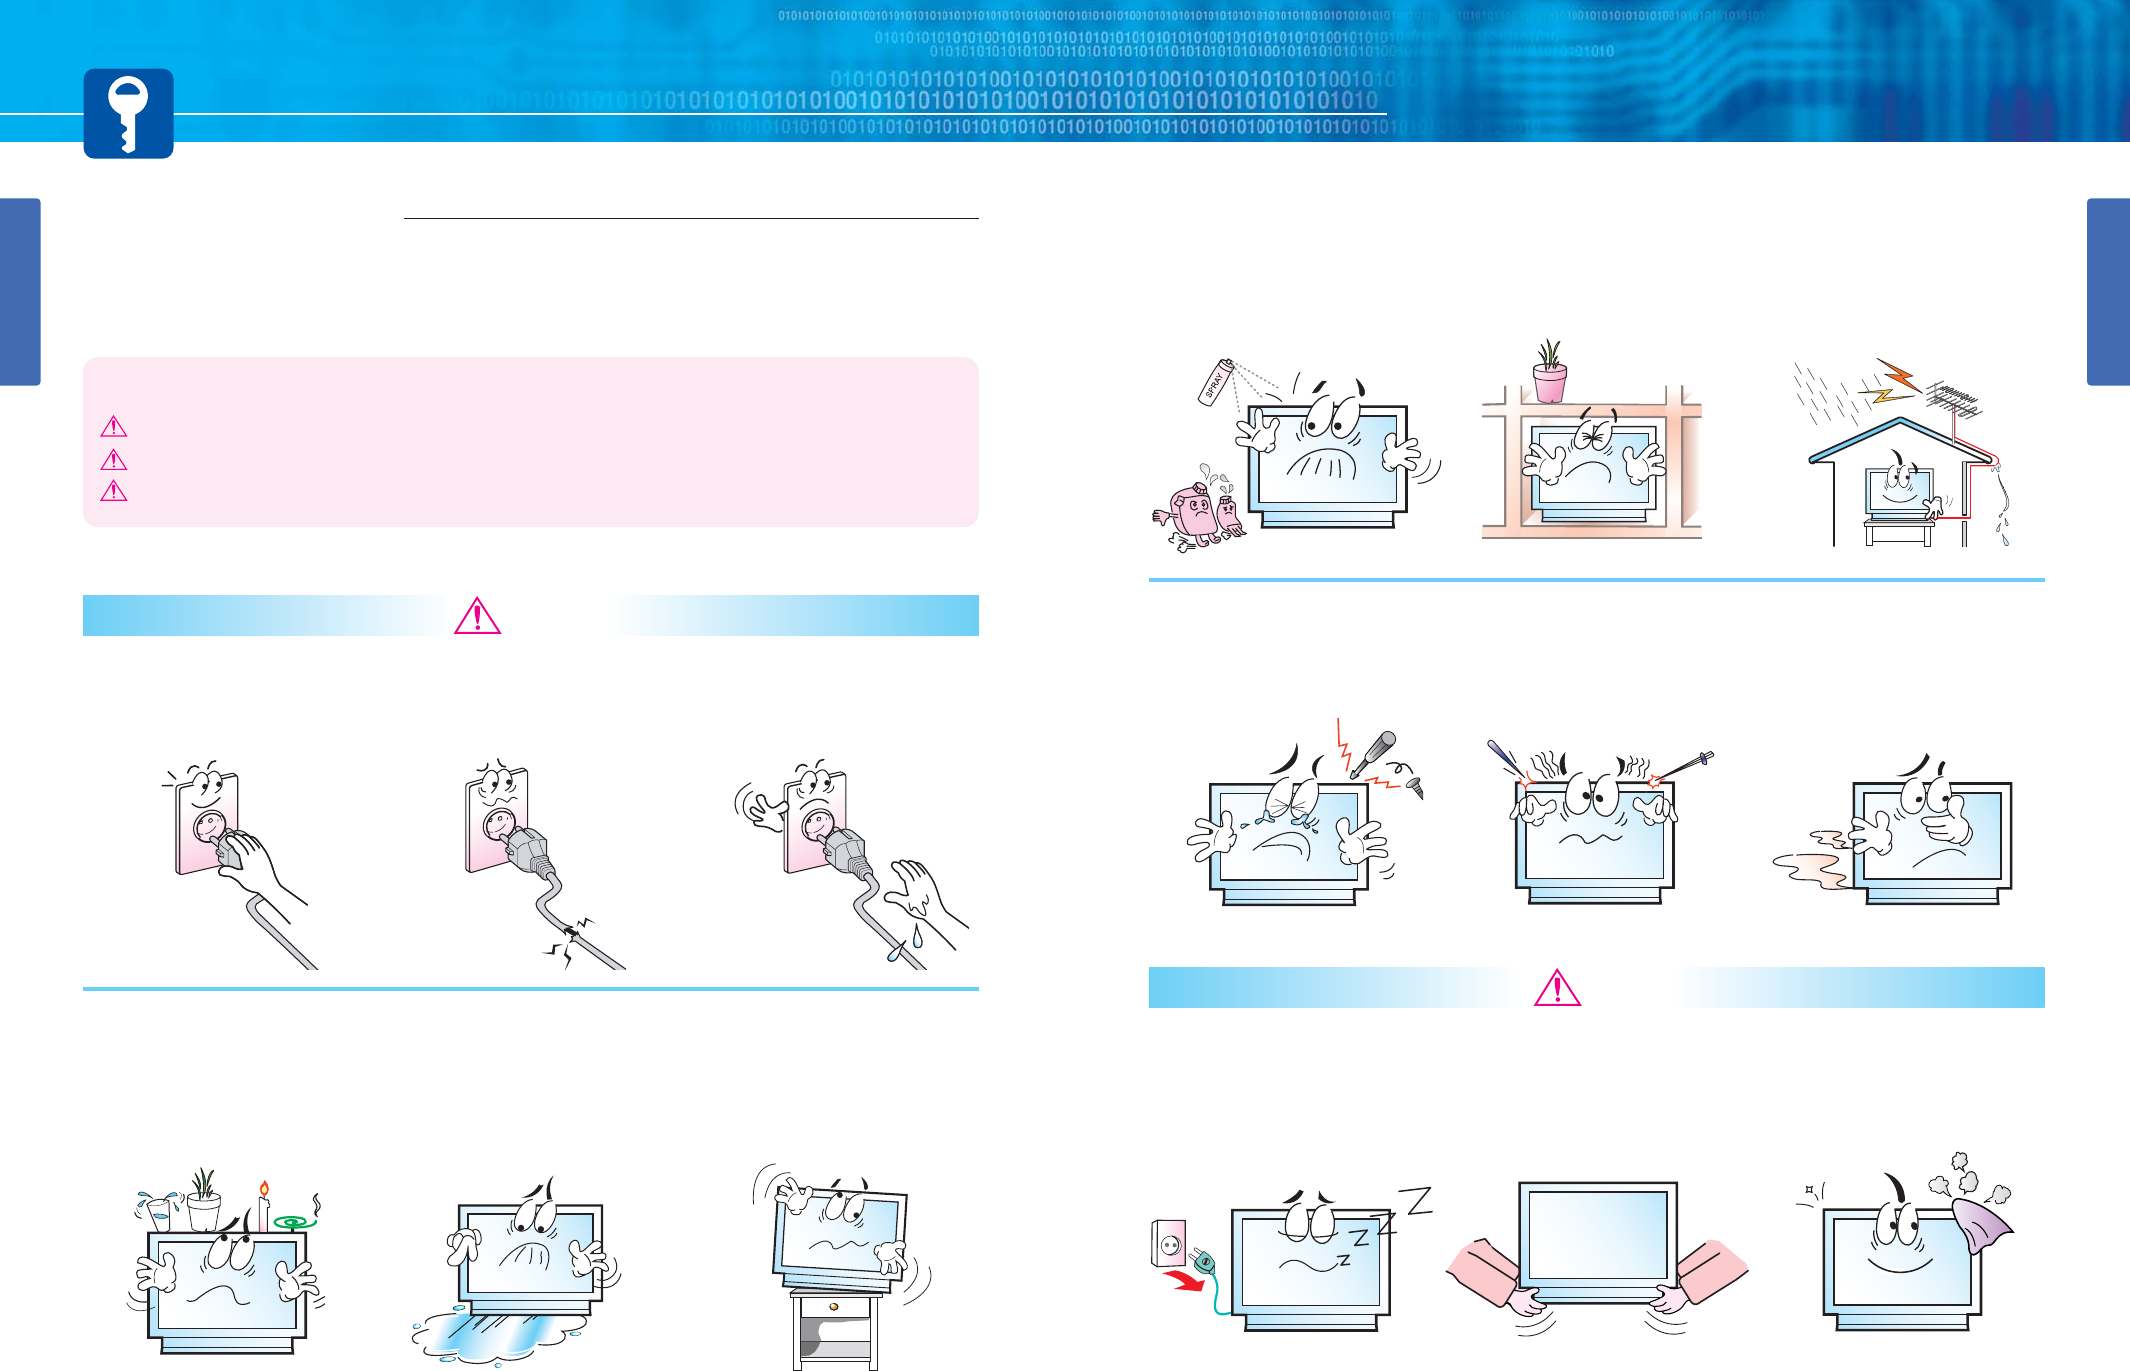
Firmly plus the power cord so
that it does not pull out.
- Unstable connection may cause fire.
Do not use damaged power
cord or plug, or loose outlet.
- They may cause electric shock or fire.
Never touch power plug with
wet hand.
- They may cause electrocution.
Do not put water bowl, vase,
candle, bug repellant smoke,
cigarette, small metal palette,
or heavy thing on a PDP.
- It may cause electric shock or fire and
also heavy things may cause injury
when it falls.
Do not install in a place where
there are oil, smoke, or
humidity, or where water is
sprinkled or in a car.
- They may cause electric shock or fire.
Do not install on an unstable
place or small support.
- If a child touch a PDP on such place
while playing, PDP may fall and injury
the child.
Warning
Do not use or store flammable
spray or inflammables in a
place near a PDP.
- They may cause explosion or fire.
Do not install a PDP in a
bookshelf, closet, or a place
where air is not well circulated.
- Fire may be caused due to the rise of
internal temperature.
Bend an antenna line downward
on a point where the line pass
through from outdoor to indoor
so that rainwater may not
penetrate indoor.
- If raindrop gets into a PDP, fire or electric
shock may be caused.
Never separate, fix, or modify
at user’s discretion.
- When there is a need for fixing, call a
service center. Fire or electric shock
may be caused.
Do not put a metallic object like
chopstick, wire, or puncher or
inflammables like paper or a
match in a vent, headphone
jack, or AV jacks of PDP.
- Electric shock or fire may be caused.
When a PDP produces
abnormal noise, burning smell,
or smoke, unplug the PDP
immediately and call a service
center.
- Electric shock or fire may be caused.
Unplug when you do not use
your PDP for long time.
- If dust is stacked on a PDP, electric
shock or fire may be caused from heat,
fire, or deterioration of insulation.
When moving a PDP, 2 or more
people are advised to carry it.
- Injury or damage may be caused when a
PDP falls.
Consult a service center or
customer service for inside
cleaning about once a year.
- When dust is collected inside a PDP for
long time, fire or malfunction may be
caused.
Alert
GENERAL INFORMATION
GENERAL INFORMATION
HYUNDAI Plasma Display PT421/421H
7 8
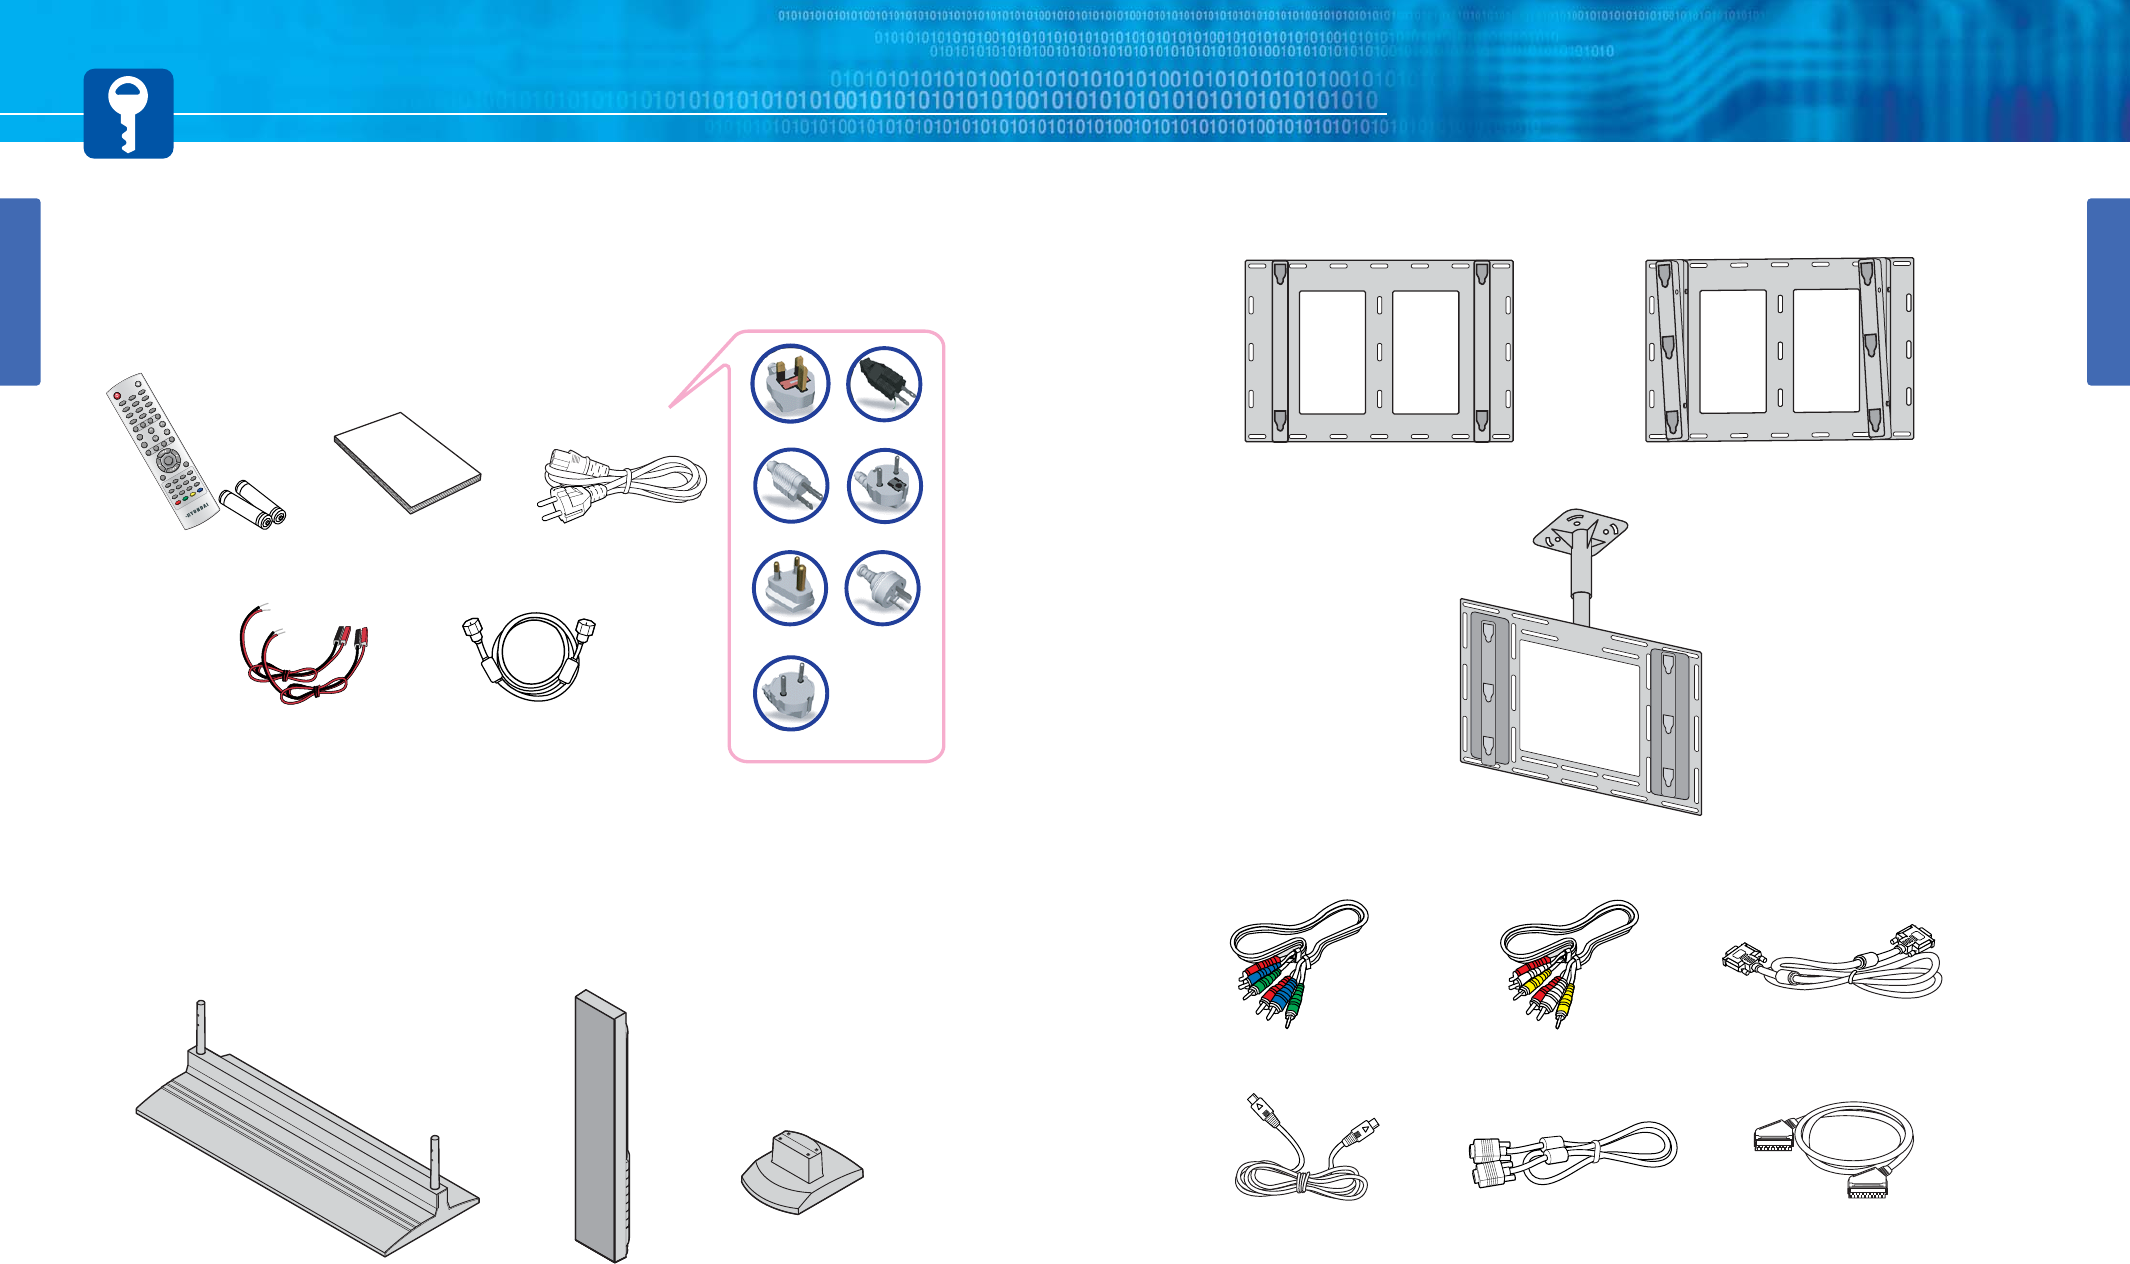
Contents of the Package
To purchase additional parts, consult a distributor or selling agent.
Separately Sold Products
If you want to purchase separately sold products, consult a service center, electronics shops,
or parts seller.
Desk type speakerDesk type stand Desk type speaker
stand
Fixed wall mount frame Adjustable wall mount frame
Ceiling mount frame
12
0
3
4
7
5
8
6
9
PIP
MENU
TV/AV
INFO
MUTE
PREVIEW
SOUND
MTS
VOLUME
SLEEP
ON/OFF
HIGH/LOW PROTECTION PC.AUTOC
APTION
TTX/MIX INDEXLIST/FLOFSTORE
HOLDSI
ZE REVEALSUB PAGE
SOURCESIZE SWAP
CHANNEL
PICTURE ASPECTSTILL
POWER
UK
America/Canada
Japan
Australia
Korea
Europe
South Africa
User’s Guide Power Cord
Remote Control/2 Batteries
(1.5V AAA)
Antenna CableSpeaker Cables
PC signal Cable Scart cable S-video cable
Component(Y, Pb, Pr)
Cable Composite(Video & Audio)
Cable
DVI PC video(digital) cable
GENERAL INFORMATION
Parts Names and Functions
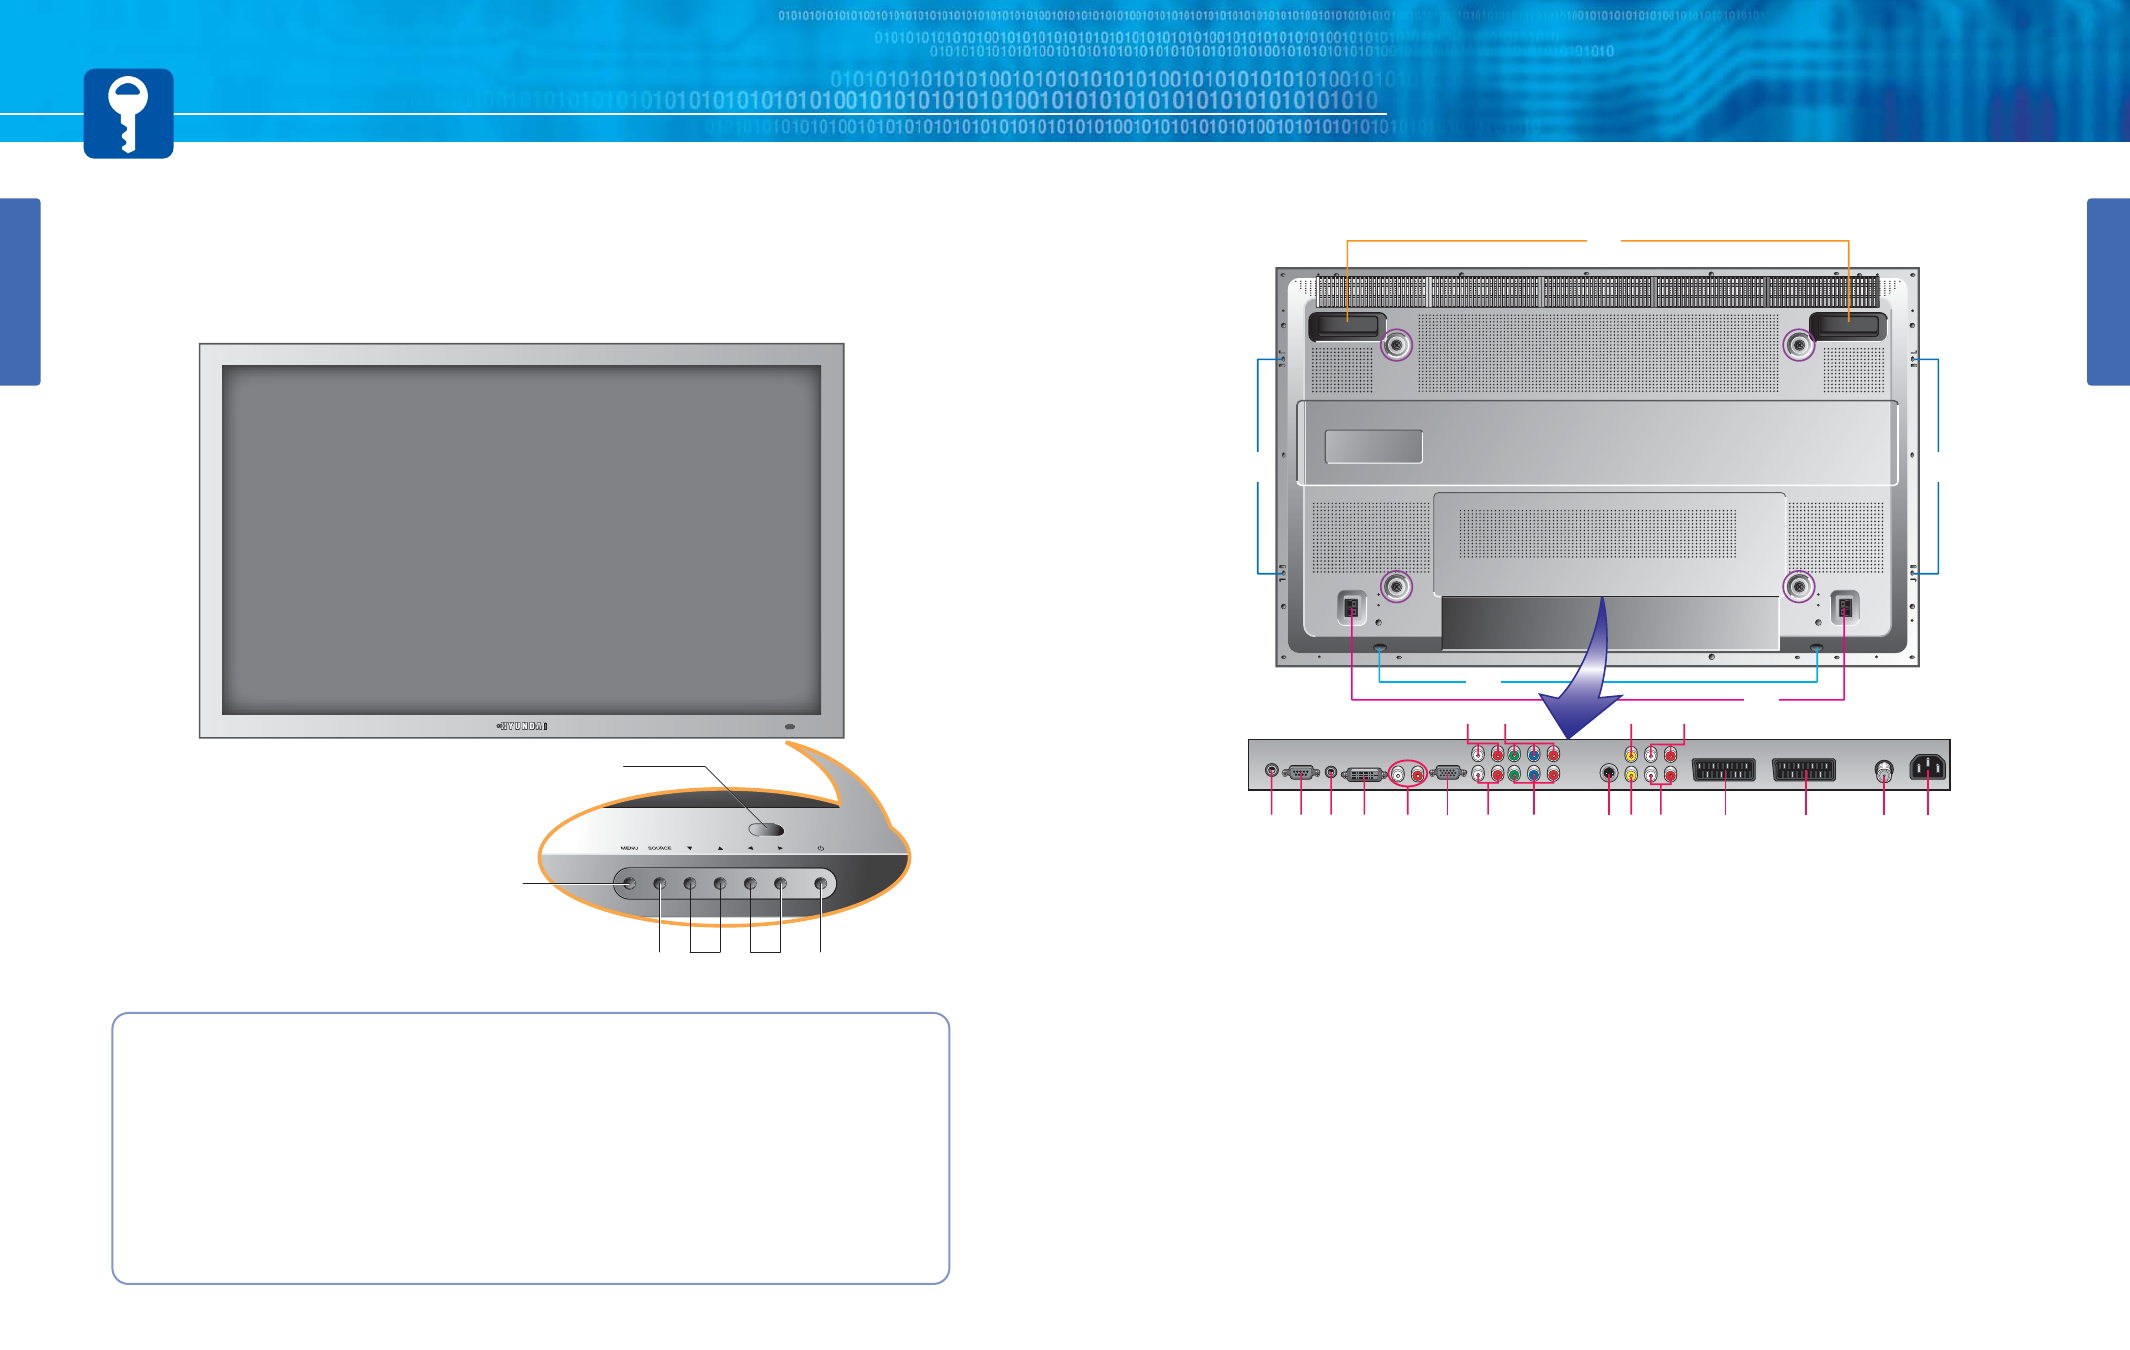
Front View
9
GENERAL INFORMATION
HYUNDAI Plasma Display PT421/421H
10
Remote sensor and power LED.
Point the remote control toward here.
It displays standby or operation status.
Menu button
Use this button to display or exit from
menus.
Source button (Page 11~15)
Use this button to switch among inputs
connected to PDP.
Channel buttons
Volume buttons
Power button:
Use this button to turn on or off a PDP
Rear View
Sub woofer output
Connect to the Sub woofer
speaker
RS-232 input terminal
Connect to the RS-232
terminal of a PC for the
service check.
*For the control method
using this terminal, consult
an authorized PDP monitor
dealer.
❸❸Phone Jack
Extend an RS-232 input.
❹❹DVI input terminal
DVI Terminal
PC/DVI Audio input
terminal
Connect to the audio output
terminal of a PC.
❻❻D-SUB input terminal
Connect to the video output
terminal of a PC.
❼❼Audio input terminal for
DVD
Connect to the audio output
terminal of DVD player.
❽❽Component input
terminal for DVD or DTV
Connect to the Component
output terminal of DVD
player/DTV receiver.
Audio input terminal for
DTV Component
Connect to the audio output
terminal of DTV receiver.
Component input
terminal for DTV
Connect to the Component
output terminal of DTV
receiver for Digital
broadcast.
S-video input terminal
Use this for the better video
quality than video input
terminal.
Video Composite input
terminal for VCR
Connect to the Composite
Video output terminal of
VCR or DVD player.
Audio input terminal for
VCR
Connect this when S-video
or Composite Video inputs.
Video output
Audio output
SCART input terminal
For Composite Video inputs
and audio inputs used in
the European area.
SCART 2 input terminal
For Composite Video/Audio
or R,G,B inputs used in the
European area.
ANT. input
Power input terminal
Power cord is connected
here.
Speaker terminal
Stand assembly
Speaker assembly
Carrying handles
Screw hole for fixing on a
wall
CONNECTIONS
CONNECTIONS
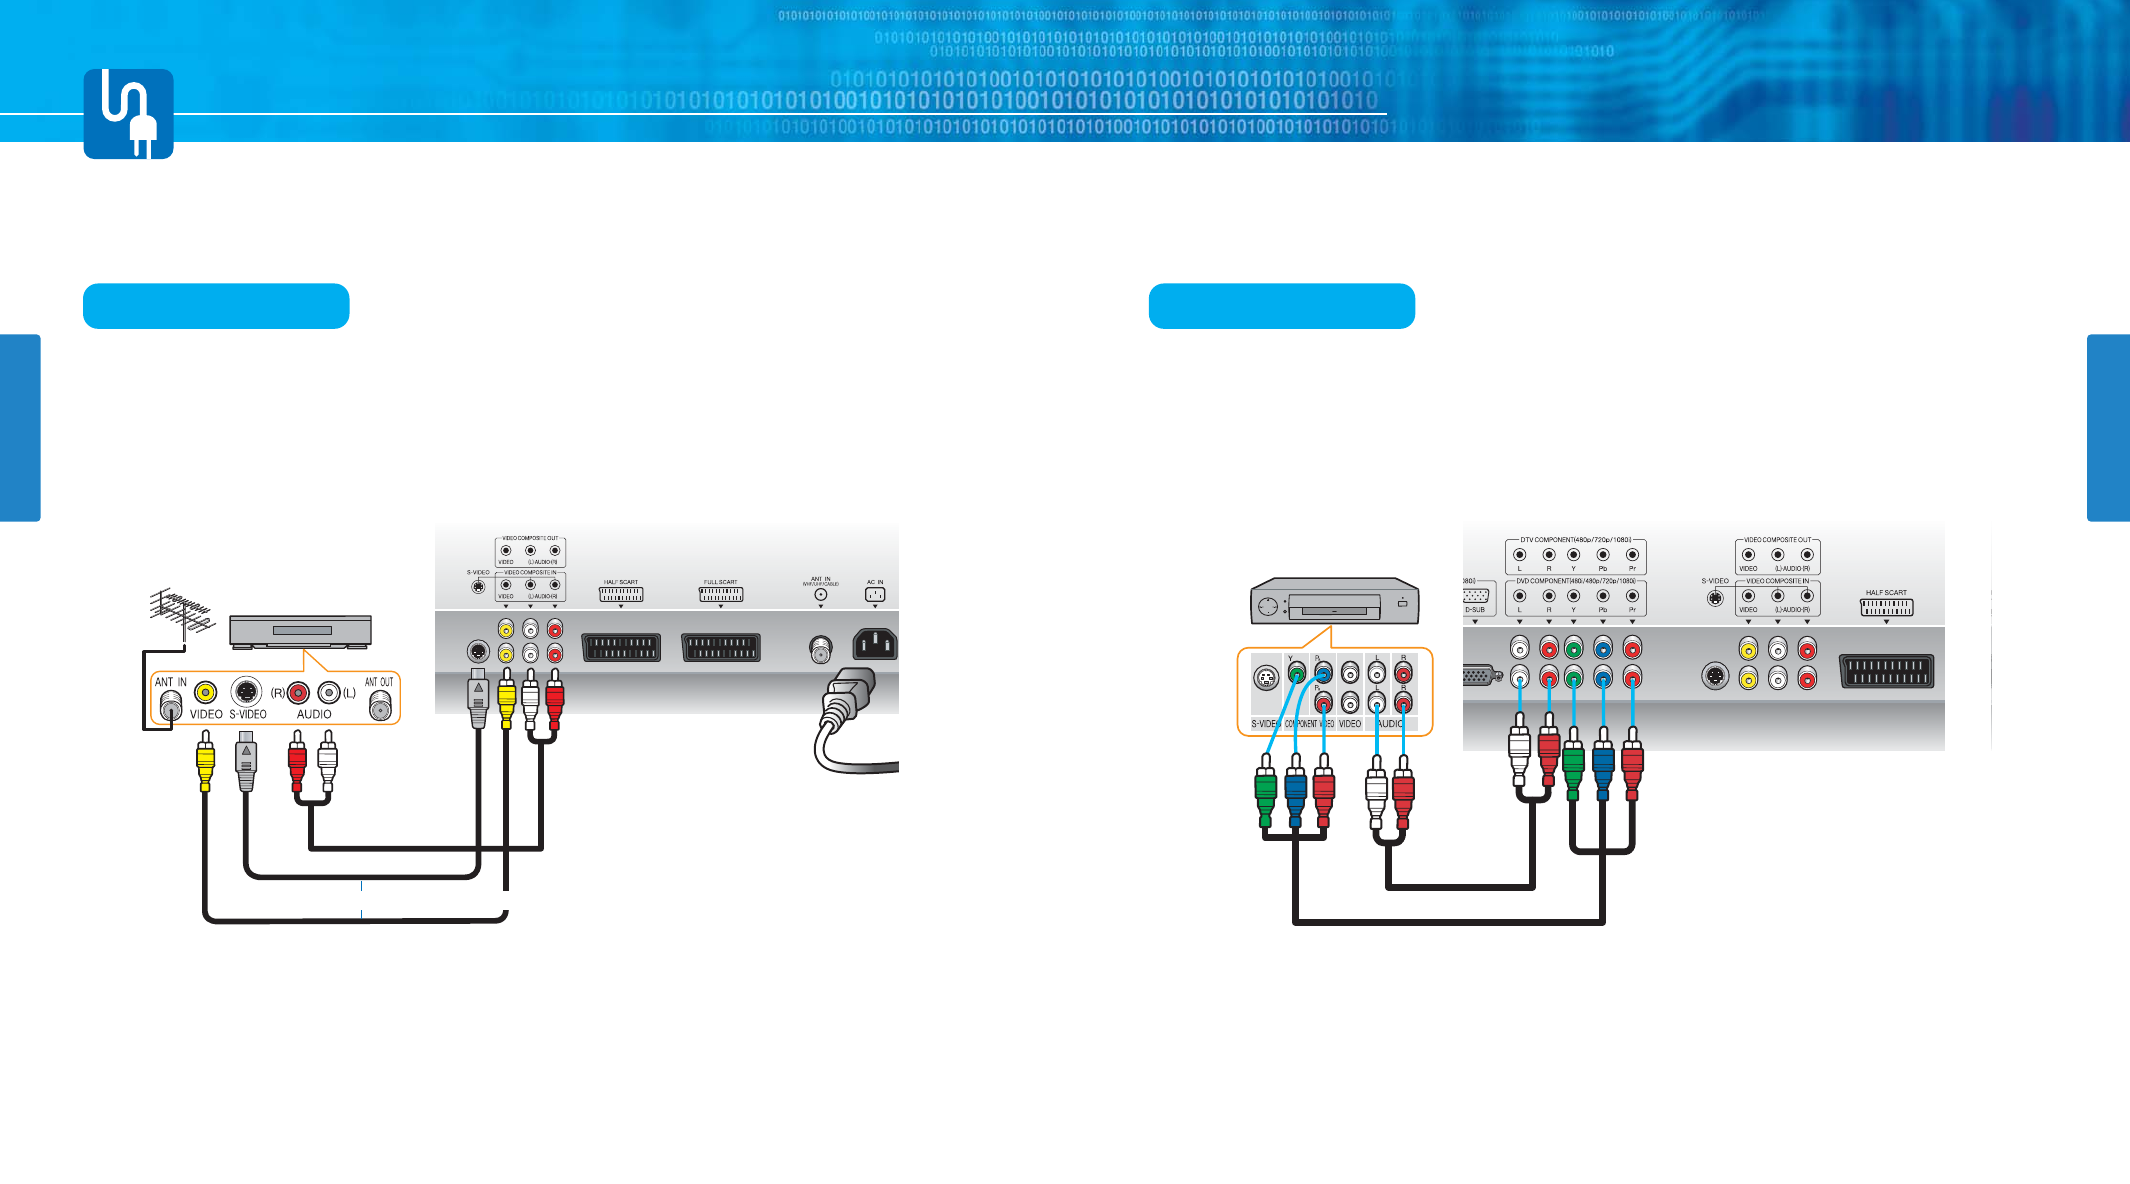
Connecting VCR, Cable/Satellite Receiver
Connection Method
Connect Video/S-Video cable between Video/S-Video output terminal of VCR or Cable/Satellite
receiver and Video/S-Video input terminal of PDP.
(Connect cables and terminal in the same colors)
Connect Audio cable (left:white color, right:red color) between Audio output terminal of VCR or
cable/satellite receiver and Audio input terminal of PDP.
(Connect cables and terminal in the same colors)
How to Watch
VCR/Cable Receiver
HYUNDAI Plasma Display PT421/421H
1817
1
2
POWER Cable
AUDIO Cable
VIDEO Cableor
Use S-video cables for better picture quality.
Connecting a DVD player
Connection Method
Connect video cables(Y, Pb, Pr) between output terminals(Y, Pb, Pr) of DVD player and the input
terminals(Y, Pb, Pr) of DVD(480i/480p/720p/1080i) on the rear of PDP.
(Connect cables and terminal in the same colors)
Connect Audio cable between Audio output terminal of DVD player and Audio input terminal for DVD
Audio on the rear of PDP.
(Connect cables and terminal in the same colors)
How to Watch
DVD Player
VIDEO(Y, Pb, Pr) Cable
AUDIO Cable
1
2
1
2
CONNECTIONS
HYUNDAI Plasma Display PT421/421H
2019
CONNECTIONS
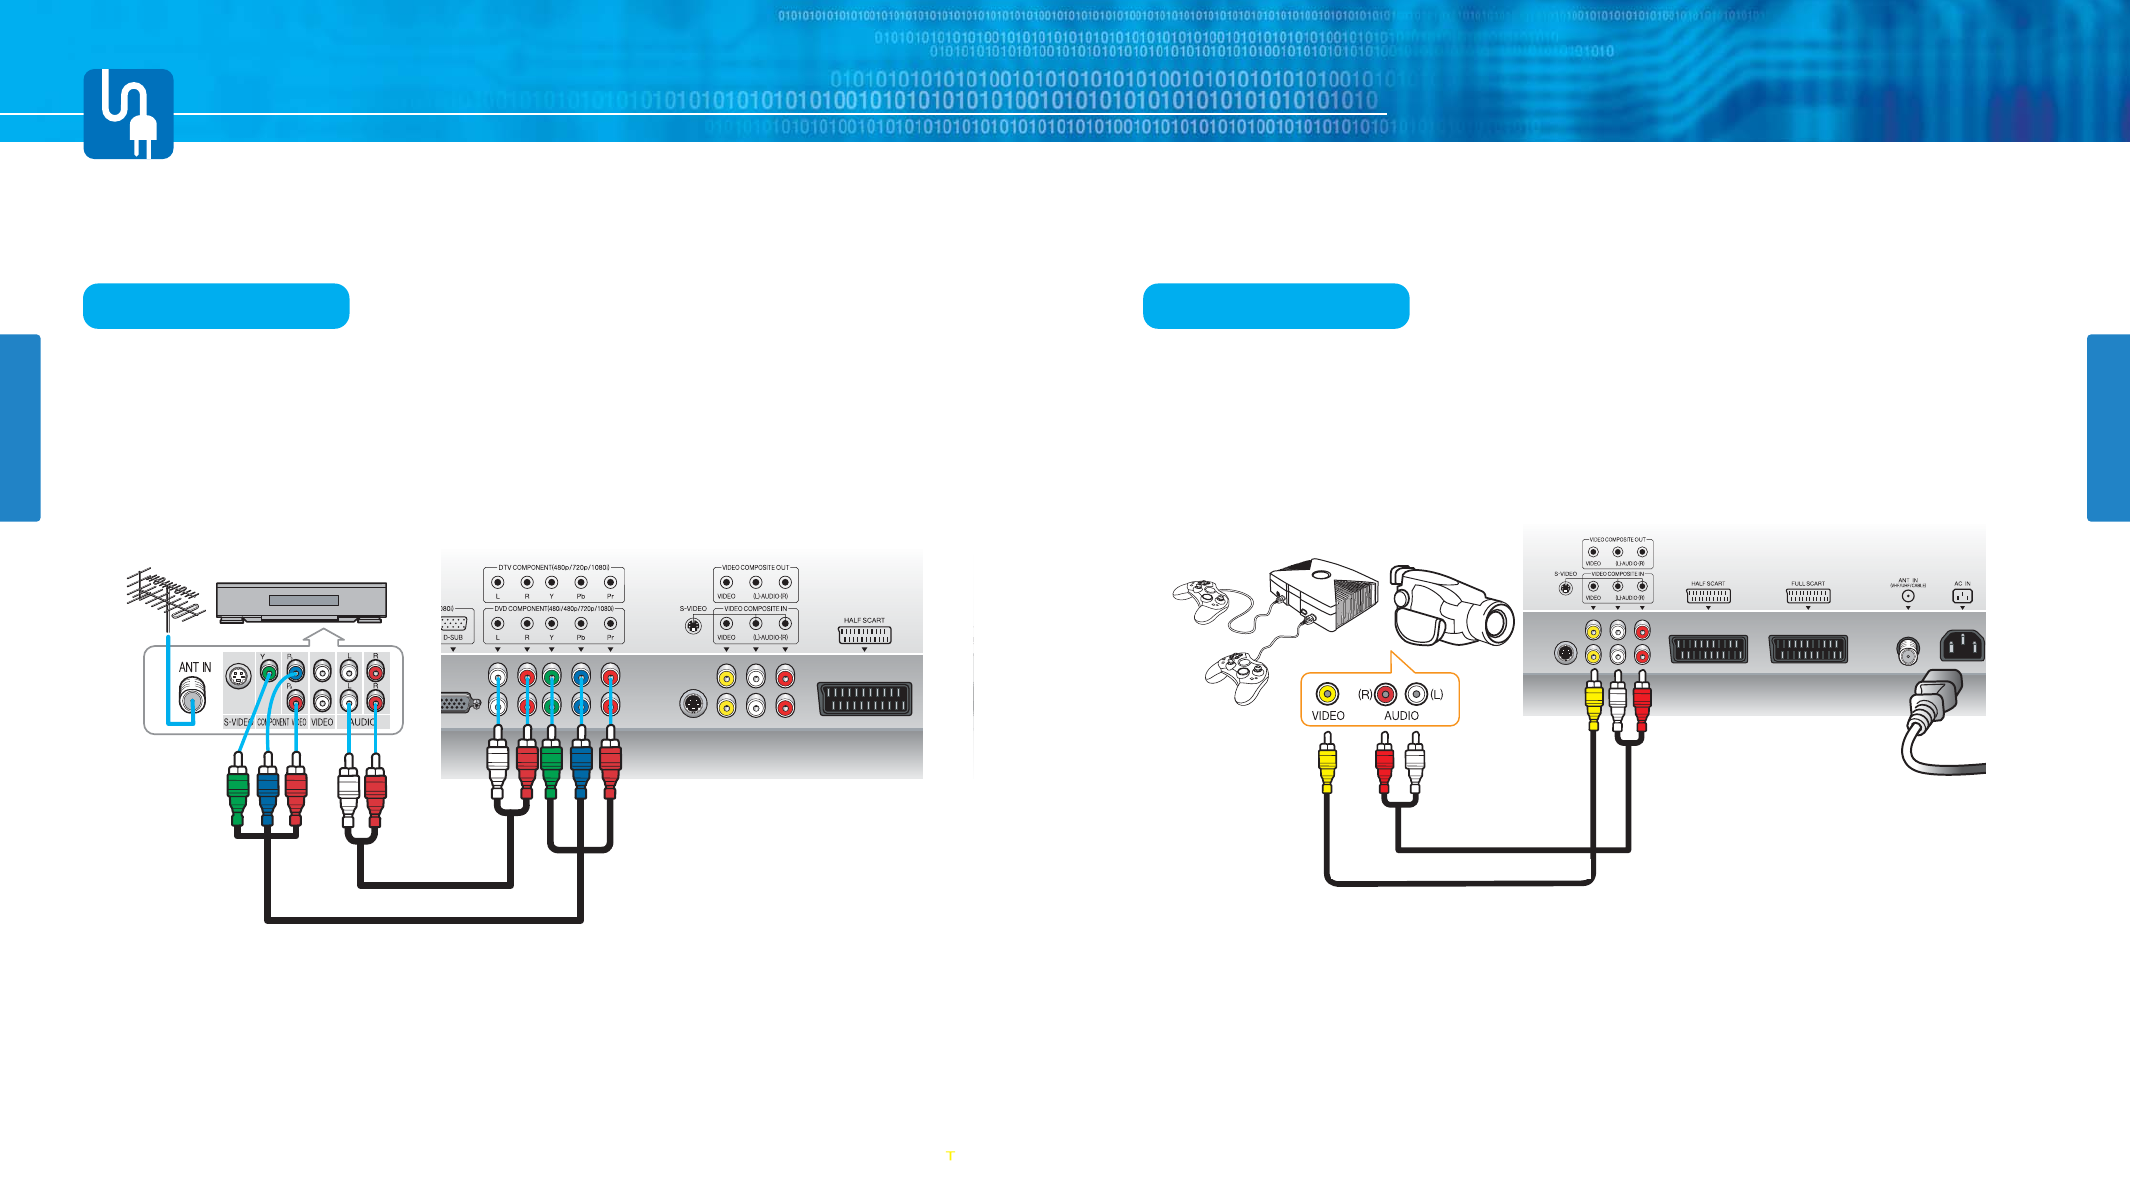
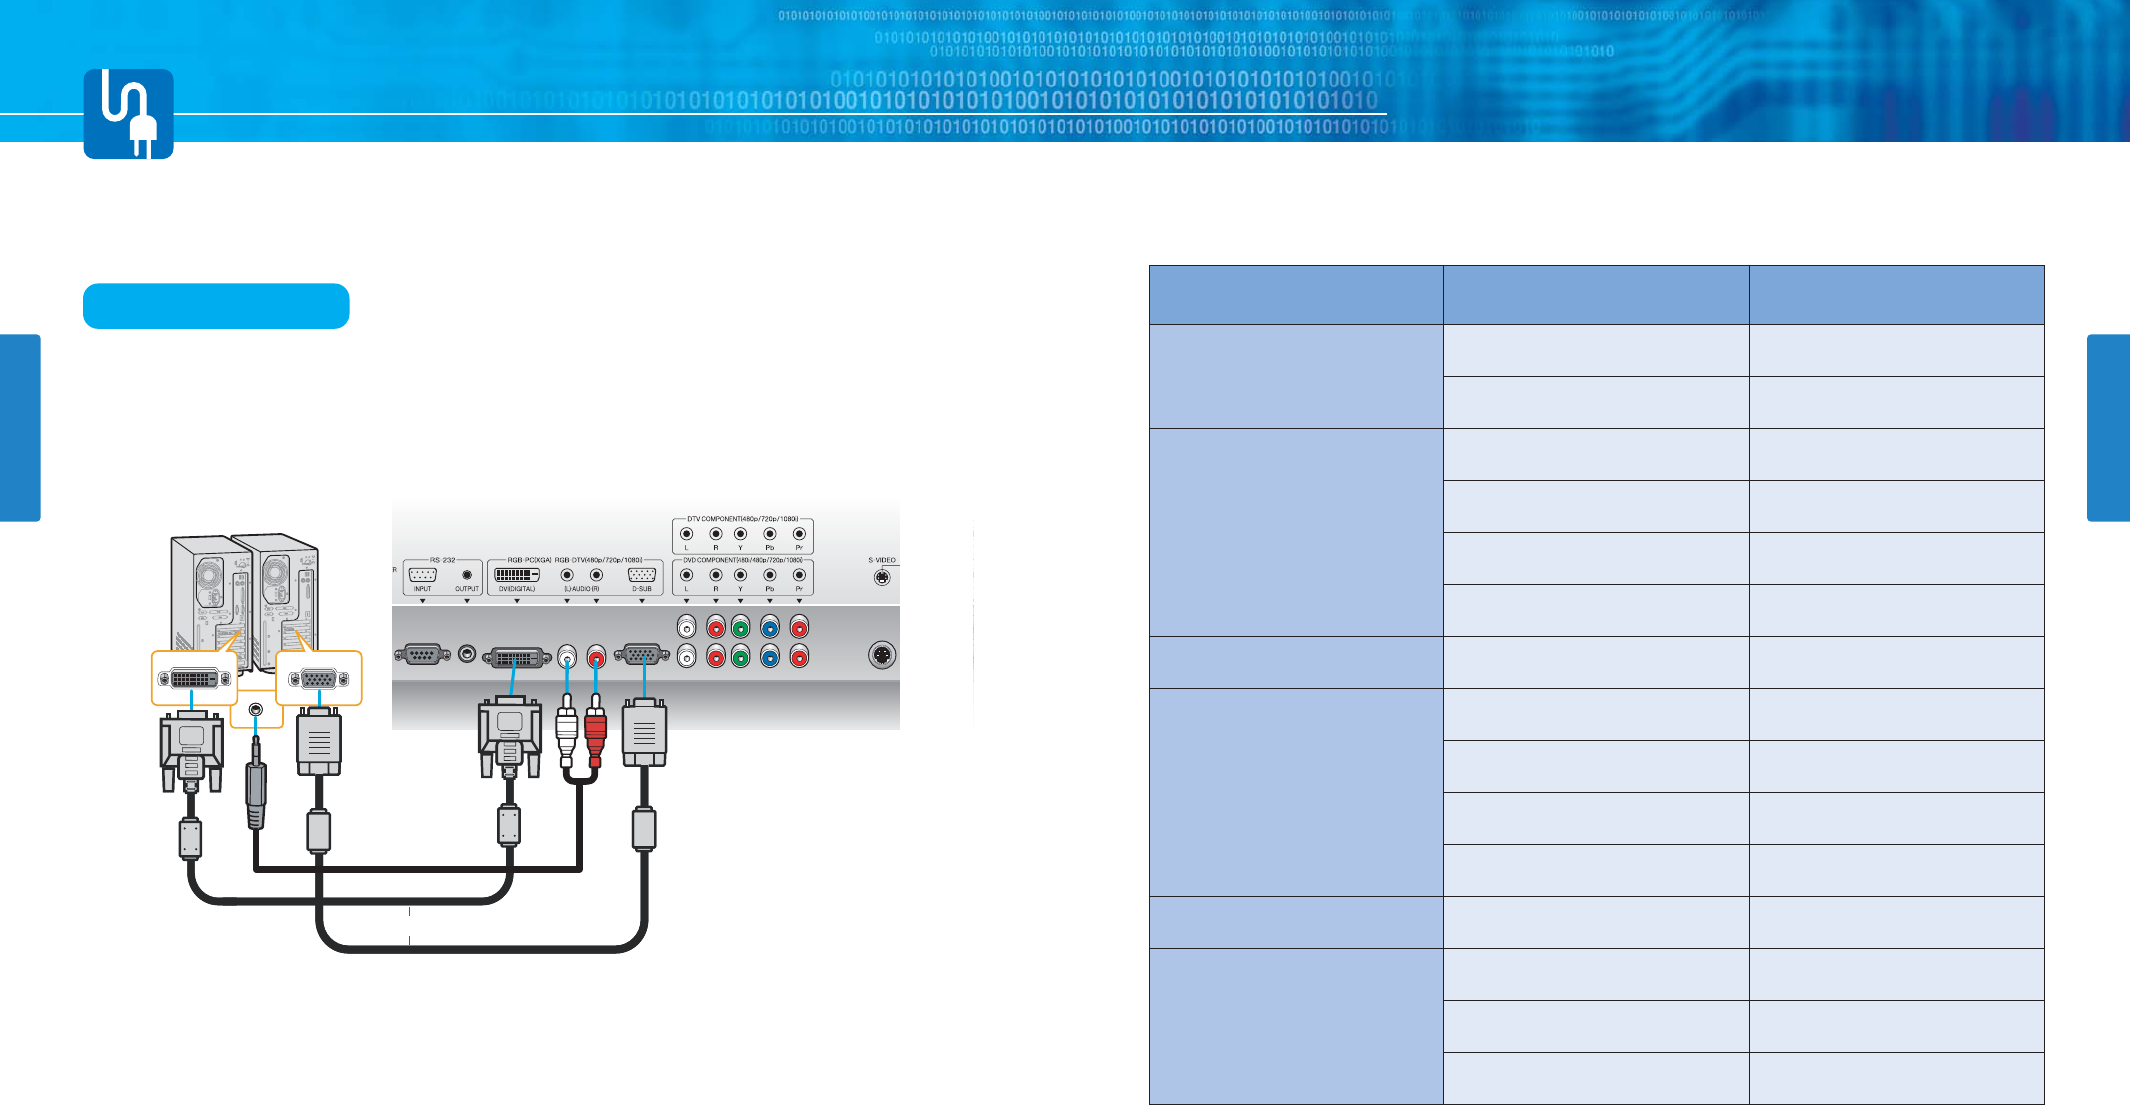
Connecting DTV(Digital Broadcast) Receiver See The Camcoder
Connection Method
Connect video cables(Y, Pb, Pr) between output terminals(Y, Pb, Pr) of DTV Receiver and the input
terminals(Y, Pb, Pr) of DTV(480p/720p/1080i) on the rear of PDP. (Connect cables and terminal in
the same colors)
Connect Audio cable between Audio output terminal of DTV Receiver and Audio input terminal for
DTV Audio on the rear of PDP. (Connect cables and terminal in the same colors)
How to Watch
1
2
1
2
DTV Receiver
VIDEO(Y, Pb, Pr) Cable
AUDIO Cable
Connection Method
Connect Video cable between Video output terminal of Camcoder/Game player and Video input
terminal of PDP.
(Connect cables and terminal in the same colors)
Connect Audio cable (left:white color, right:red color) between Audio output terminal of Camcoder
/Game player and Audio input terminal of PDP.
(Connect cables and terminal in the same colors)
How to Watch
1
2
Game Player Camcorder
AUDIO Cable
CONNECTIONS
CONNECTIONS
HYUNDAI Plasma Display PT421/421H
2221
Resolutions Supported in PC
* Recommend Resolution is 1024x768@60Hz
Resolution
31.47
37.86
31.47
37.86
37.50
43.27
31.47
37.88
48.08
46.88
53.67
49.72
48.36
60.02
68.68
Vertical frequency
70.09
85.08
59.94
72.80
75.00
85.01
70.08
60.32
72.18
75.00
85.06
74.55
60.00
75.03
85.00
640 x 350
720 x 400
800 x 600
832 x 624
1024 x 768
640 x 480
Horizontal frequency
Connecting to a PC(DVI, D-SUB)
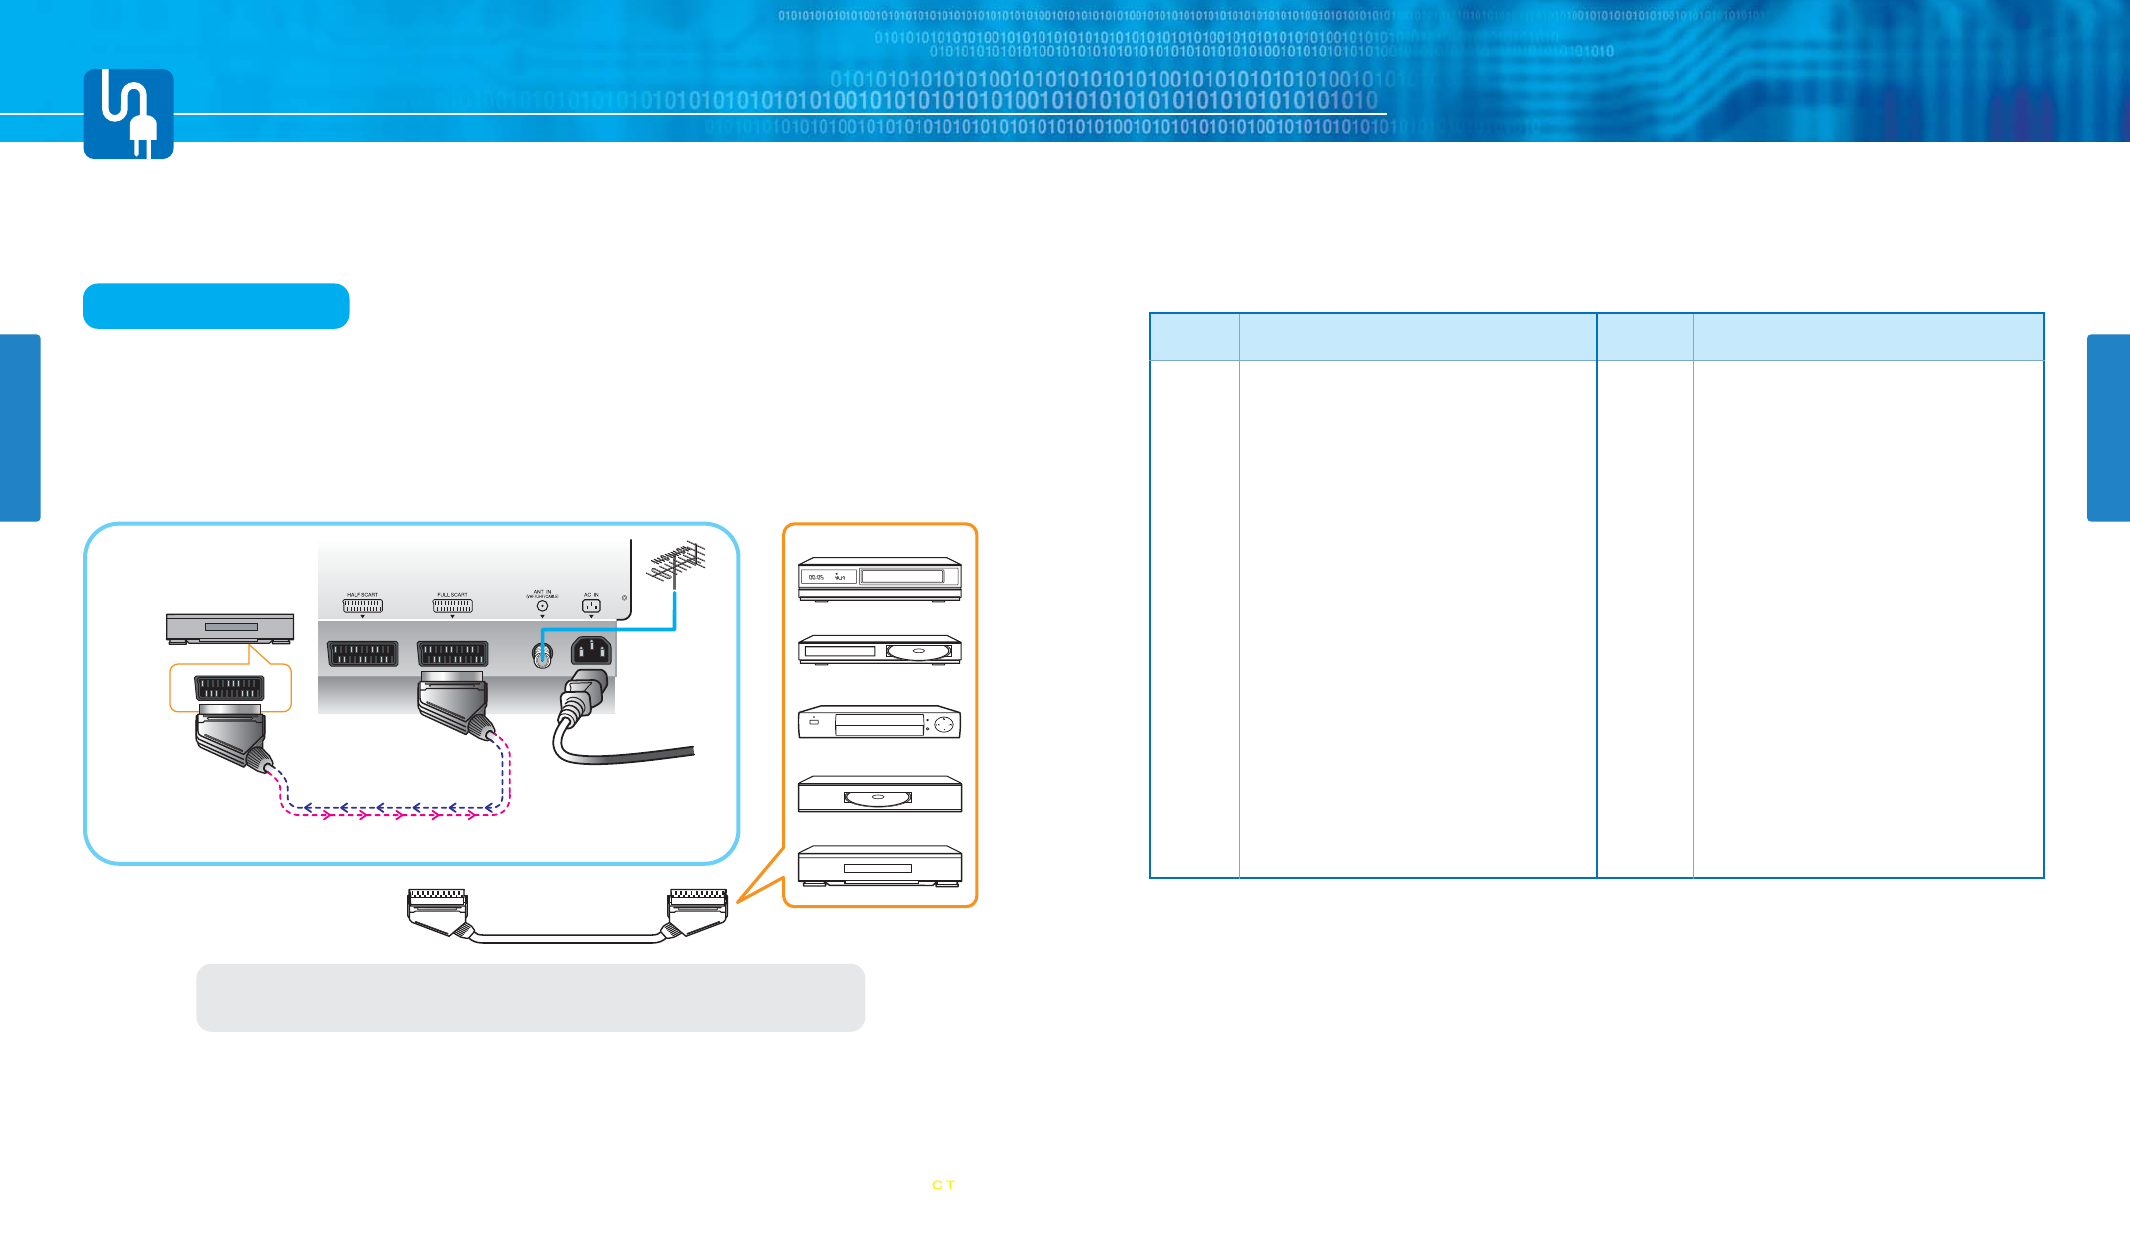
Connection Method
Connect PC signal cable(15 pins D-sub) between output terminal of PC and the D-sub input terminal
of a PDP. In case of DVI(Digital) cable, connect it between output terminal for DVI(DIGITAL) of PC
and input terminal for DVI of PDP.
Connect Audio cable between Audio output terminal of PC and Audio input terminal for PC of PDP.
(Connect cables and terminal in the same colors)
When Using As a PC Monitor
1
2
1
2
AUDIO Cable
D-SUB Cable(15pin)
DVI Cable(DIGITAL)
or
CONNECTIONS
HYUNDAI Plasma Display PT421/421H
Scart Pin Specifications
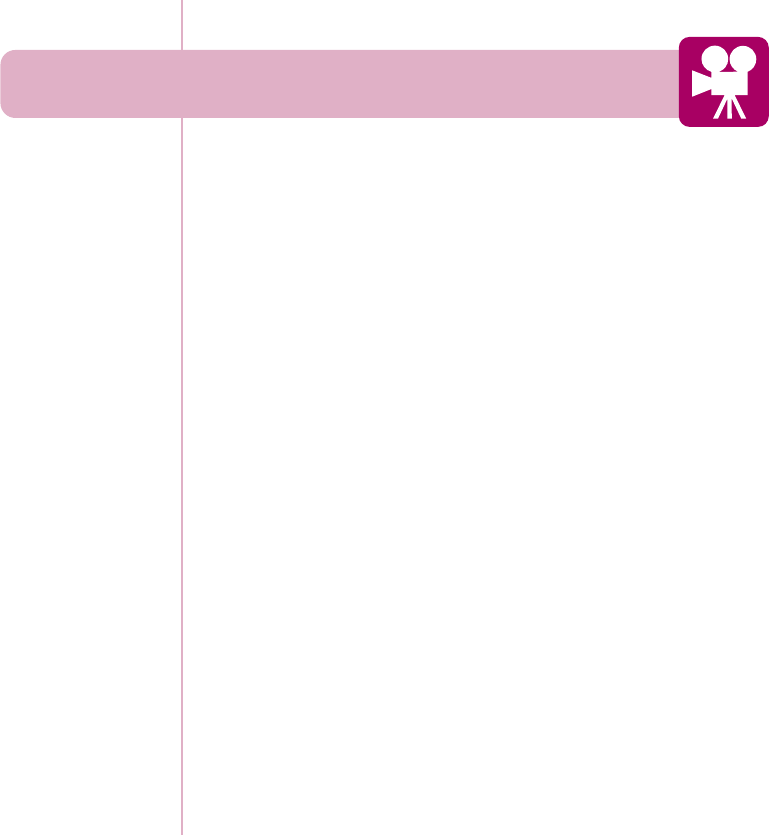
If you wish to connect other equipment via the scart connectors on your TV, contact your dealer or a
qualified technician to wire the A/V cable as illustrated below.
24
CONNECTIONS
23
VCR
DVD
Video Game Device
Video Disc Player
Satellite Receiver
SET TOP BOX
Scart Connection to the External Input/Output
Connection Method
This end can be fitted with : A Scart connector
If you have a second VCR and wish to copy casettes tape. Connect the source VCR to “F Scart” and
the target VCR to “H Scart” so that you can redirect the signal from “H Scart” to “F Scart”.
-
How to Watch
1
2
1
2
TV IN
TV OUT
VIDEO(CVBS) + Audio(L/R)
F SCART
• F Scart input : RGB, CVBS • F Scart output : CVBS(TV Out)
• H Scart input : CVBS • H Scart output : CVBS(Monitor Out)
PIN SIGNAL
1Audio Output R
2Audio Iutput R
3Audio Output L
4Audio Iutput GND
5Blue Iutput GND
6Audio Iutput L
7RGB Blue Input
8Switching Voltage input
9Green Iutput GND
10 -
11 RGB Green Iutput
PIN SIGNAL
12 -
13 Red Iutput GND
14 -
15 RGB Red Input
16 RGB Blinkng Signal Input
17 Video Output GND
18 Video Iutput GND
19 Video Output (CVBS)
20 Video Iutput (CVBS)
21 Scrat Connetor GND
How to Select Picture Mode ........................................... 27
How to Set the User Picture ............................................ 28
How to Set Blue Screen ................................................. 29
How to Set Film Mode ................................................... 30
How to Select Color Temperature ................................... 31
How to Set PIP [Mode] .................................................... 32
How to Set Multi-Screen [Input Source/Position/Size] .... 33
Noise Reduct .................................................................. 36
Picture Setup
HYUNDAI PLASMA DISPLAY
HYUNDAI Plasma Display PT421/421H
27 28
PICTURE SETUP
PICTURE SETUP
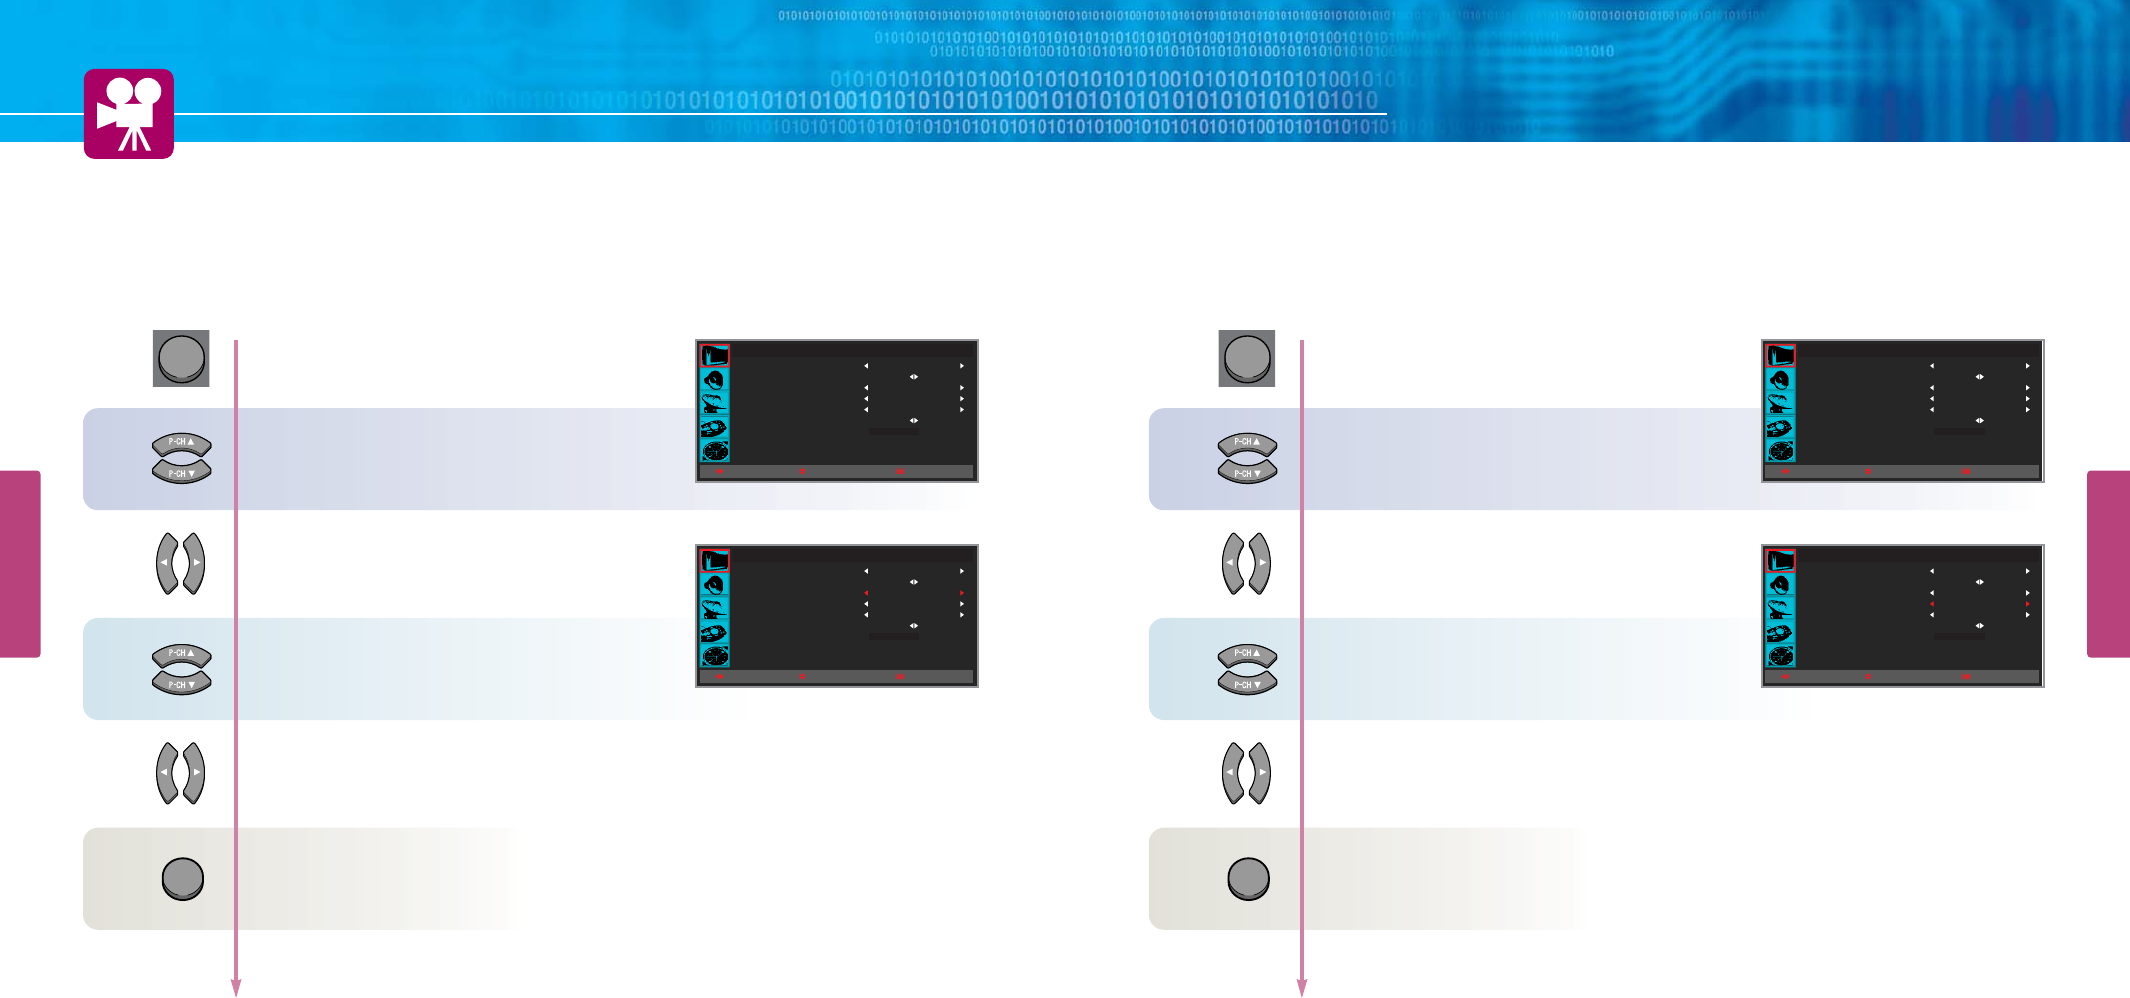
How to Set the User Picture
Users can manually adjust the picture in their own ways.
Press Menu button.
Menu items appear on the screen.
Press Up and Down buttons to move to
“PICTURE” icon.
Press Left and Right button to select
“MODE”.
Press Left and Right button, then the menu
changes in order below.
STANDARD DYNAMIC MOVIE
MILD USER
Press MENU button after the setting is done, and Menu goes to the previous menu.
If the EXIT button is pressed, the menu disappears.
STANDARD : For general contents. It fits most video contents.
DYNAMIC : For a clear display.
MOVIE : For movies.
MILD : For a soft display.
USER : When the user wants to set the values see the next page
1
2
3
PICTURE
MODE
PICTURE CUSTOM
BLUE SCREEN
FILM MODE
COLOR TEMP
PIP
NOISE REDUCT
STANDARD
OFF
OFF
STANDARD
MOVE
+ 000
SELECT MENU
PICTURE
MODE
PICTURE CUSTOM
BLUE SCREEN
FILM MODE
COLOR TEMP
PIP
NOISE REDUCT
STANDARD
OFF
OFF
STANDARD
MOVE
+ 000
SELECT MENU
EXIT
Press Menu button.
Menu items appear on the screen.
Press Up and Down buttons to move to
“PICTURE” icon.
Press Left and Right button to select
“PICTURE”
Press Up and Down button to move to
“PICTURE CUSTOME”.
Press Left and Right button to select
“PICTURE CUSTOME”.
Picture Custome menu appears.
Choose item, then Press Left and Right button
to adjust.
Press MENU button after the setting is done, and Menu goes to the previous menu.
If the EXIT button is pressed, the menu disappears.
CONTRAST : Adjust the brightness and darkness of object and background.
BRIGHTNESS : Adjust the brightness of the entire picture.
SHARPNESS : Adjust clarity of outline of objects.
COLOR : Adjust colors into deeper or lighter colors.
TINT : Adjust colors naturally. (The NTSC only mode it operates)
1
Setting of Color and Tint is not supported in PC, DVI and DTV input modes.
PICTURE
MENU
MENU
PICTURE
MODE
PICTURE CUSTOM
BLUE SCREEN
FILM MODE
COLOR TEMP
PIP
NOISE REDUCT
STANDARD
OFF
OFF
STANDARD
MOVE
+ 000
SELECT MENU
PICTURE
MODE
PICTURE CUSTOM
BLUE SCREEN
FILM MODE
COLOR TEMP
PIP
NOISE REDUCT
STANDARD
OFF
OFF
STANDARD
MOVE
+ 000
SELECT MENU
PICTURE CUSTOM
CONTRAST
BRIGHTNESS
SHARPNESS
COLOR
MOVESELECT MENU
080
070
050
050
1
2
3
4
5
EXIT
How to Select Picture Mode
Users can adjust picture mode automatically accrding to the input mode(TV, Vedio, S-Video, F/H Scart,
DVD, DTV).
How To Directly Select Picture Mode : Press button.
- Users can select STANDARD DYNAMIC MOVIE MILD USER, when the input mode is TV,
S-Vedio, F/H Scart, DVD, DTV.
- Users can select STANDARD LOW(Text Mode) HIGH(Movie), when the input mode is PC or
DVI.
PICTURE SETUP
HYUNDAI Plasma Display PT421/421H
How to Set Film Mode
.TQKSMZ࿖ၦ ຫමၡ ။વ໓ၕ ໓ዻ གྷᅯዻཇ ઠဨ ໕ႜዻཊགྷ
29 30
PICTURE SETUP
How to Set Blue Screen
Press Menu button.
Menu items appear on the screen.
Press Up and Down buttons to move to
“PICTURE” icon.
Press Left and Right button to select
“PICTURE”.
Press Up and Down button to move to
“BLUE SCREEN”.
Press Left and Right button to “ON/OFF”.
Press MENU button after the setting is done, and Menu goes to the previous menu.
If the EXIT button is pressed, the menu disappears.
PICTURE
MODE
PICTURE CUSTOM
BLUE SCREEN
FILM MODE
COLOR TEMP
PIP
NOISE REDUCT
STANDARD
OFF
OFF
STANDARD
MOVE
+ 000
SELECT MENU
PICTURE
MODE
PICTURE CUSTOM
BLUE SCREEN
FILM MODE
COLOR TEMP
PIP
NOISE REDUCT
STANDARD
OFF
OFF
STANDARD
MOVE
+ 000
SELECT MENU
MENU
1
2
3
4
EXIT
Press Menu button.
Menu items appear on the screen.
Press Up and Down buttons to move to
“PICTURE” icon.
Press Left and Right button to select
“PICTURE”.
Press Up and Down button to move to
“FILM MODE”.
Press Left and Right button to “ON/OFF”.
Press MENU button after the setting is done, and Menu goes to the previous menu.
If the EXIT button is pressed, the menu disappears.
PICTURE
MODE
PICTURE CUSTOM
BLUE SCREEN
FILM MODE
COLOR TEMP
PIP
NOISE REDUCT
STANDARD
OFF
OFF
STANDARD
MOVE
+ 000
SELECT MENU
PICTURE
MODE
PICTURE CUSTOM
BLUE SCREEN
FILM MODE
COLOR TEMP
PIP
NOISE REDUCT
STANDARD
OFF
OFF
STANDARD
MOVE
+ 000
SELECT MENU
MENU
1
2
3
4
EXIT
HYUNDAI Plasma Display PT421/421H
How to Select Color Temperature
Users can adjust Color as users want.
How to Set PIP [Mode]
This is to set PIP(Picture In Picture) mode or Twin mode.
31 32
PICTURE SETUP
PICTURE SETUP
PICTURE
MODE
PICTURE CUSTOM
BLUE SCREEN
FILM MODE
COLOR TEMP
PIP
NOISE REDUCT
STANDARD
OFF
OFF
STANDARD
MOVE
+ 000
SELECT MENU
PICTURE
MODE
PICTURE CUSTOM
BLUE SCREEN
FILM MODE
COLOR TEMP
PIP
NOISE REDUCT
STANDARD
OFF
OFF
STANDARD
MOVE
+ 000
SELECT MENU
MENU
1
2
3
4
EXIT
PICTURE
MODE
PICTURE CUSTOM
BLUE SCREEN
FILM MODE
COLOR TEMP
PIP
NOISE REDUCT
STANDARD
OFF
OFF
STANDARD
MOVE
+ 000
SELECT MENU
PICTURE
MODE
PICTURE CUSTOM
BLUE SCREEN
FILM MODE
COLOR TEMP
PIP
NOISE REDUCT
STANDARD
OFF
OFF
STANDARD
MOVE
+ 000
SELECT MENU
PIP
MODE
SOURCE
SWAP
SIZE
POSITION
CHANNEL
OFF
TV
SWAP
LARGE
RIGHT DOWN
037
MOVESELECT MENU
MENU
1
2
3
4
5
6
Press Menu button.
Menu items appear on the screen.
Press Up and Down buttons to move to
“PICTURE” icon.
Press Left and Right button to select
“PICTURE” icon.
Press Up and Down button to move to
“COLOR TEMP”.
Press Left and Right button, then Mode changes in order below.
STANDARD COOL WARM
Press MENU button after the setting is done, and Menu goes to the previous menu.
If the EXIT button is pressed, the menu disappears.
STANDARD : Colors for general picture.
COOL : Cool colors with bluish tone.
WARM : Warm colors with reddish tone.
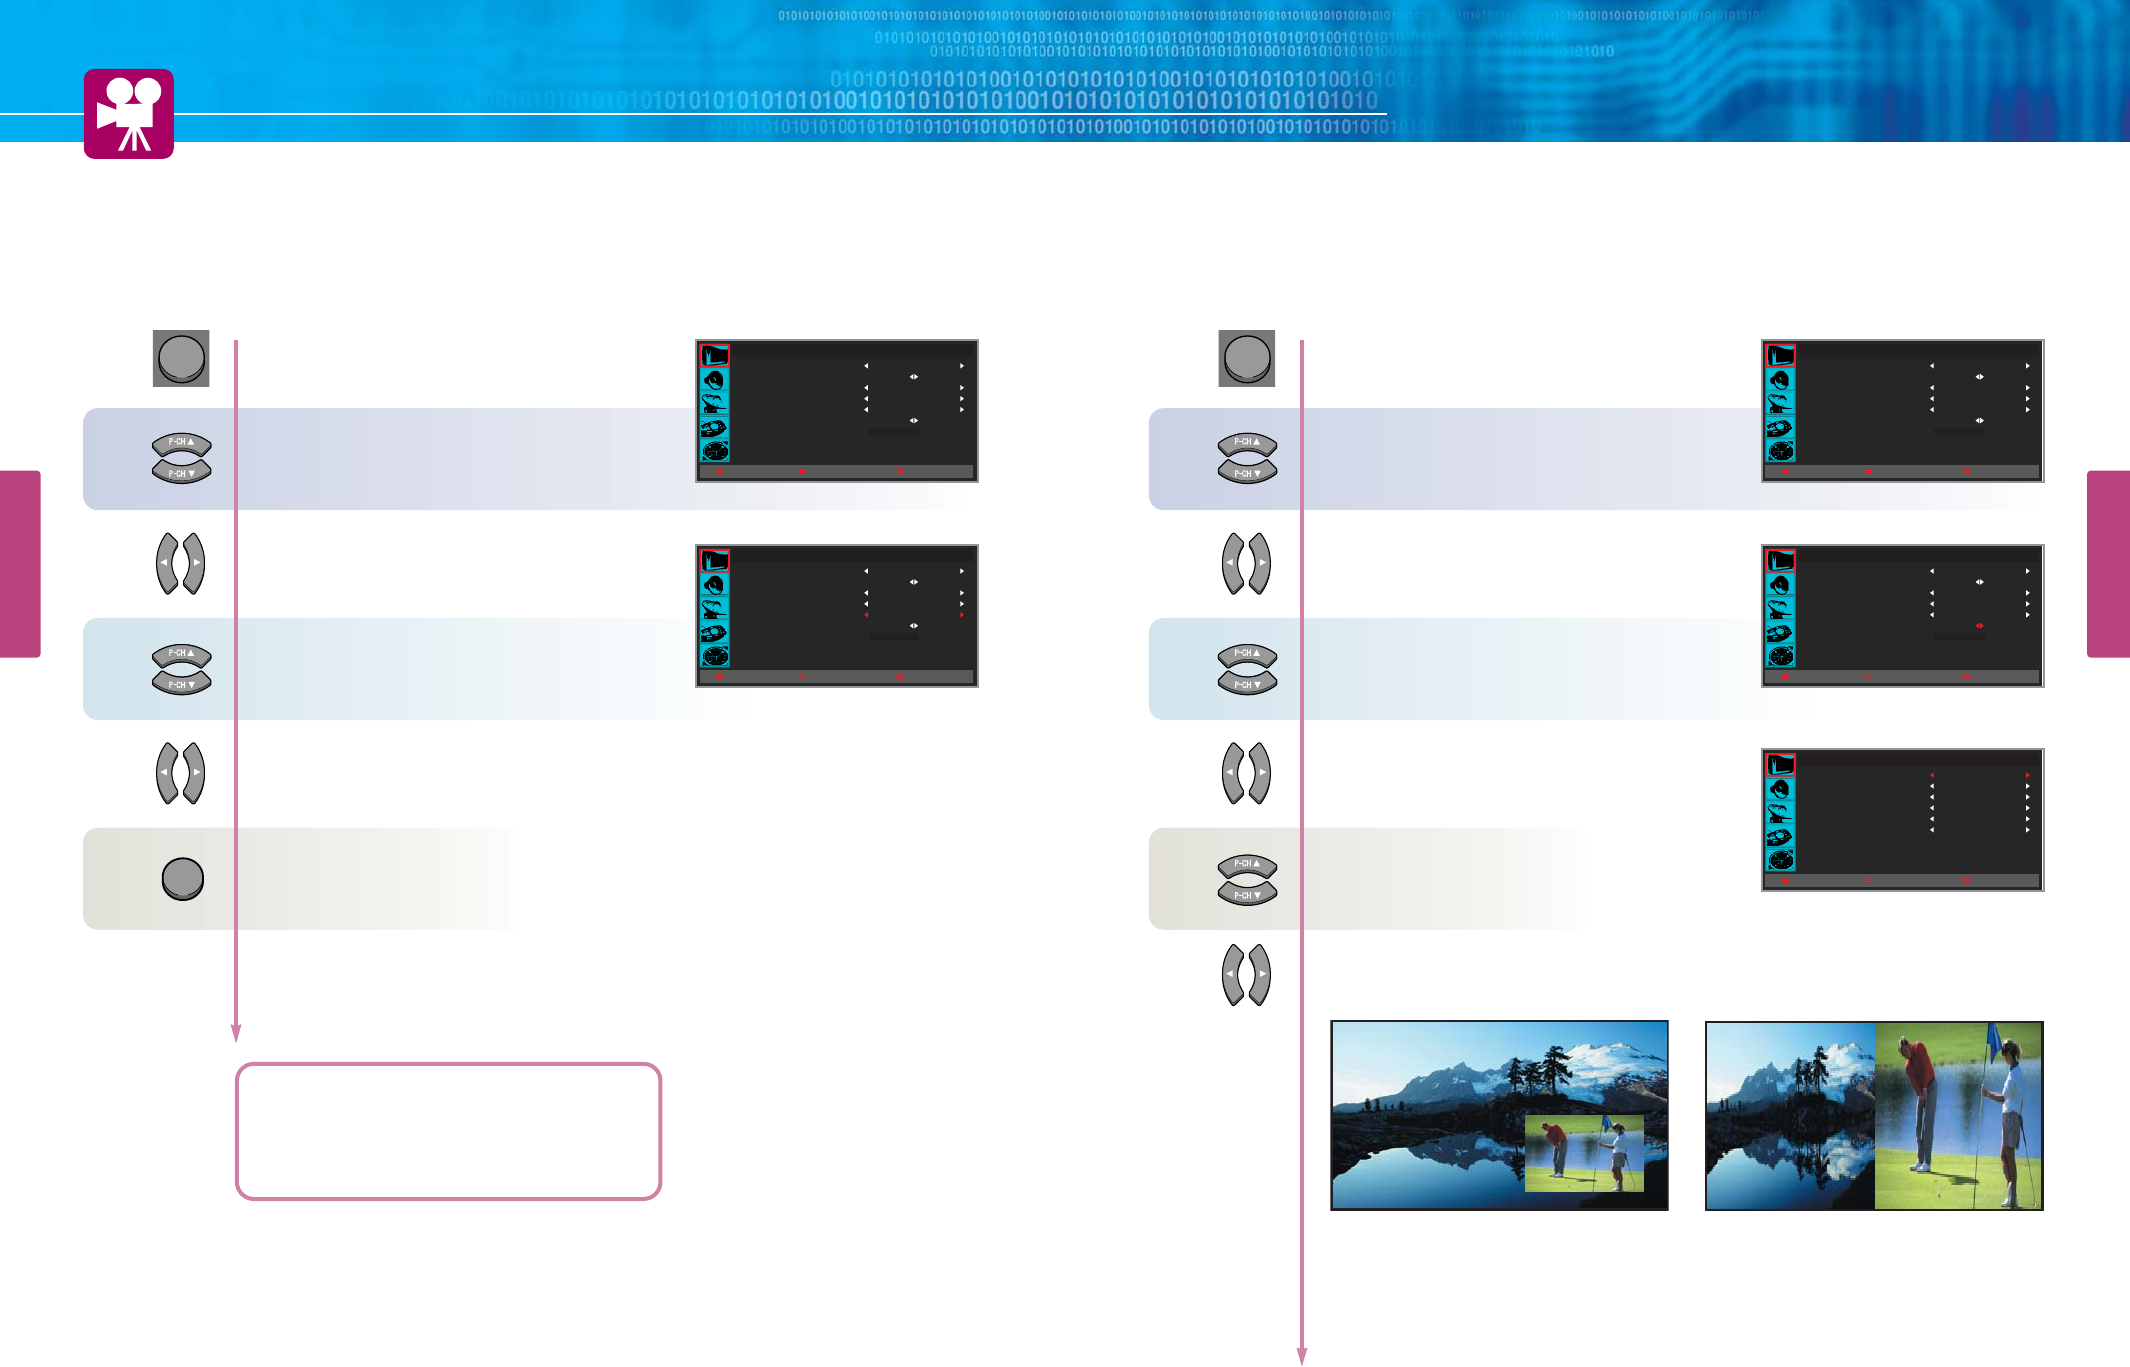
Press Menu button.
Menu items appear on the screen.
Press Up and Down buttons to move to
“PICTURE” icon.
Press Left and Right button to select
“PICTURE” icon.
Press Up and Down button to move to
“PIP”.
Press Left and Right button to select
“PIP”.
PIP Menu appears.
Press Up and Down button to move to
“MODE”.
Press Left and Right button, then Mode changes in order below.
PIP TWIN OFF
After setting this, go to step 7 to set the SOURCE.
TWIN : To watch two screens in half
and half.
PIP : To watch the Sub screen in a
main screen at once.
5
5I
IQ
QV
V5
5I
IQ
QV
V;
;]
]J
J
;
;]
]J
J