Intermec Technologies 1000CP01SX1 1000CP01S, 1000CP02S, 1001CP01S User Manual 70 Series Mobile Computer DRAFT
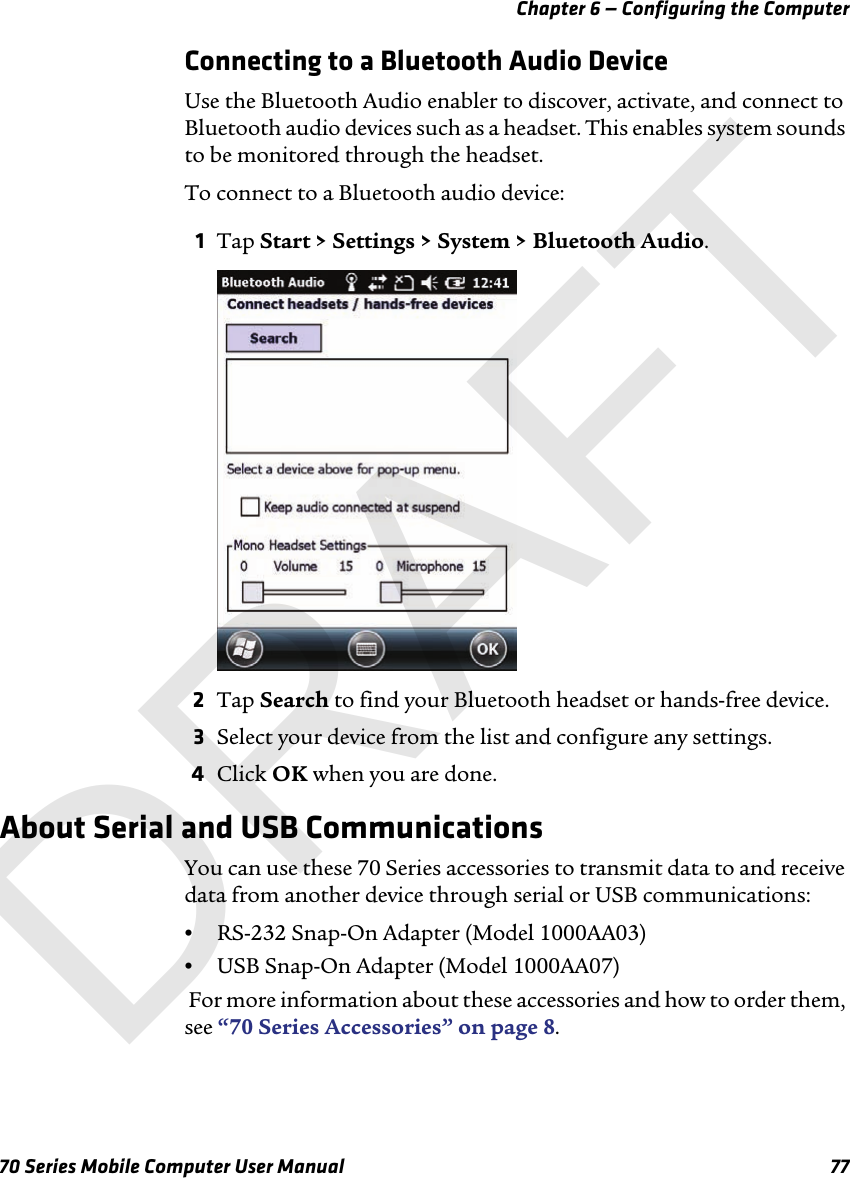
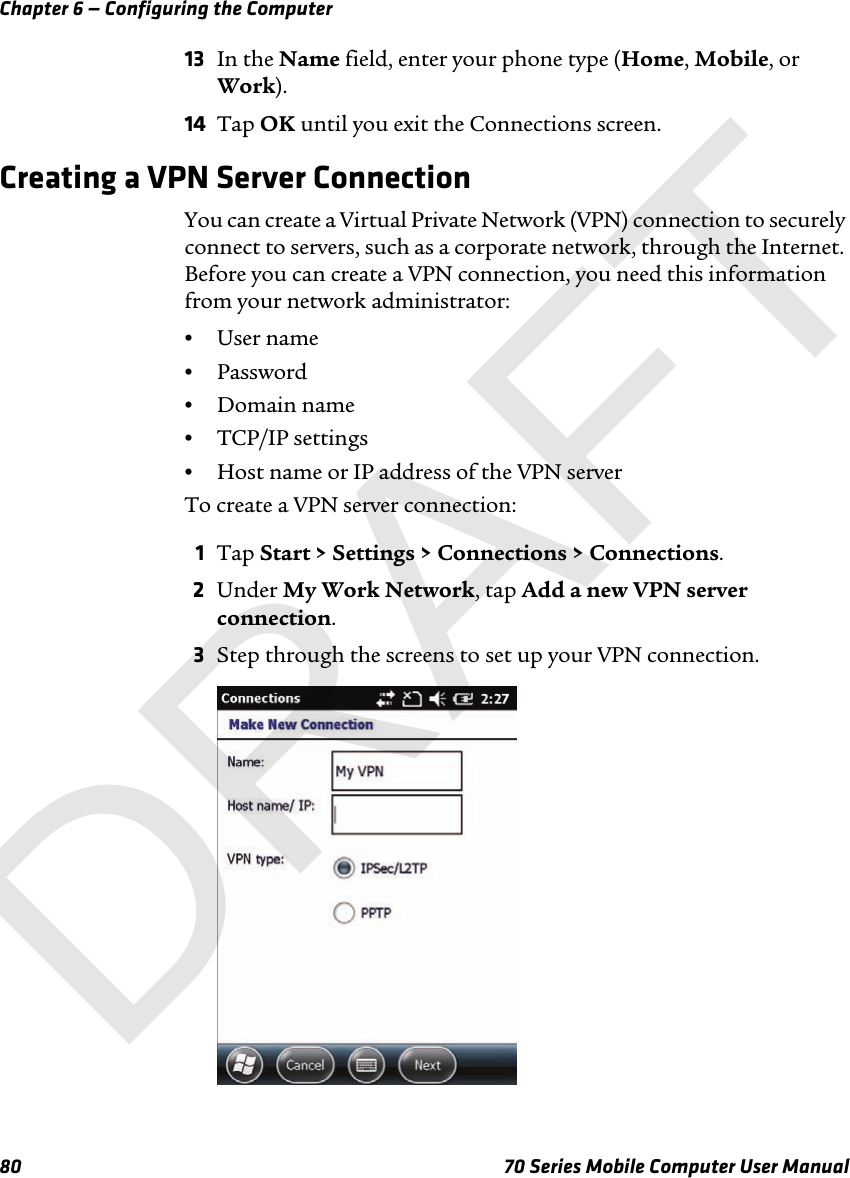
Intermec Technologies Corporation 1000CP01S, 1000CP02S, 1001CP01S 70 Series Mobile Computer DRAFT
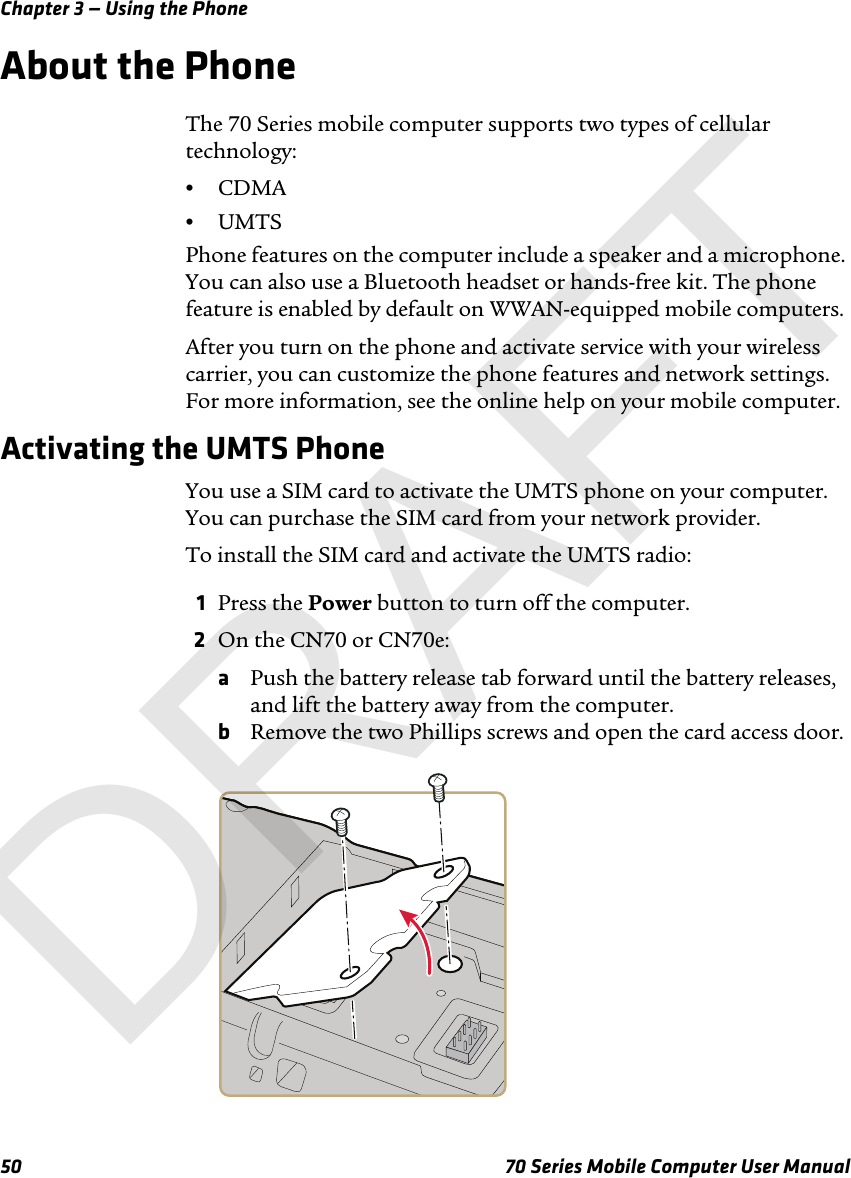
UserManual.wiki
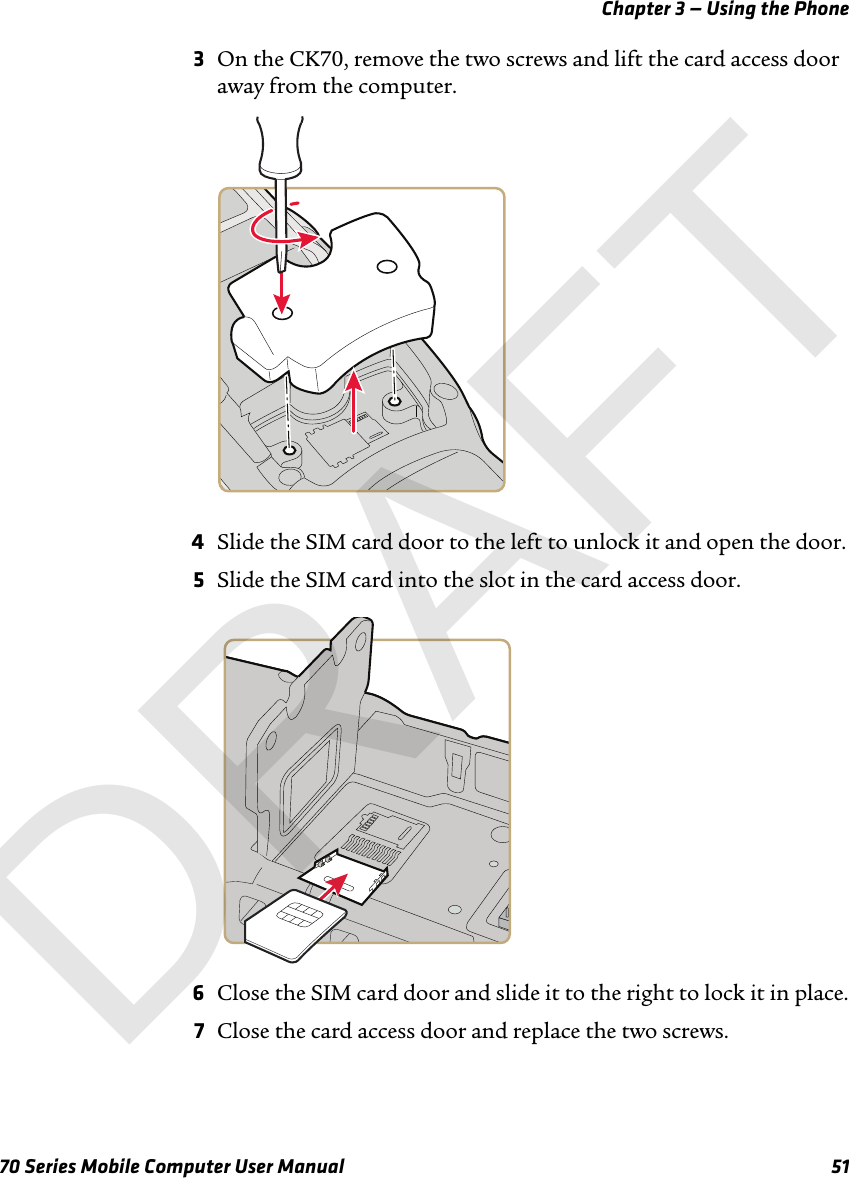
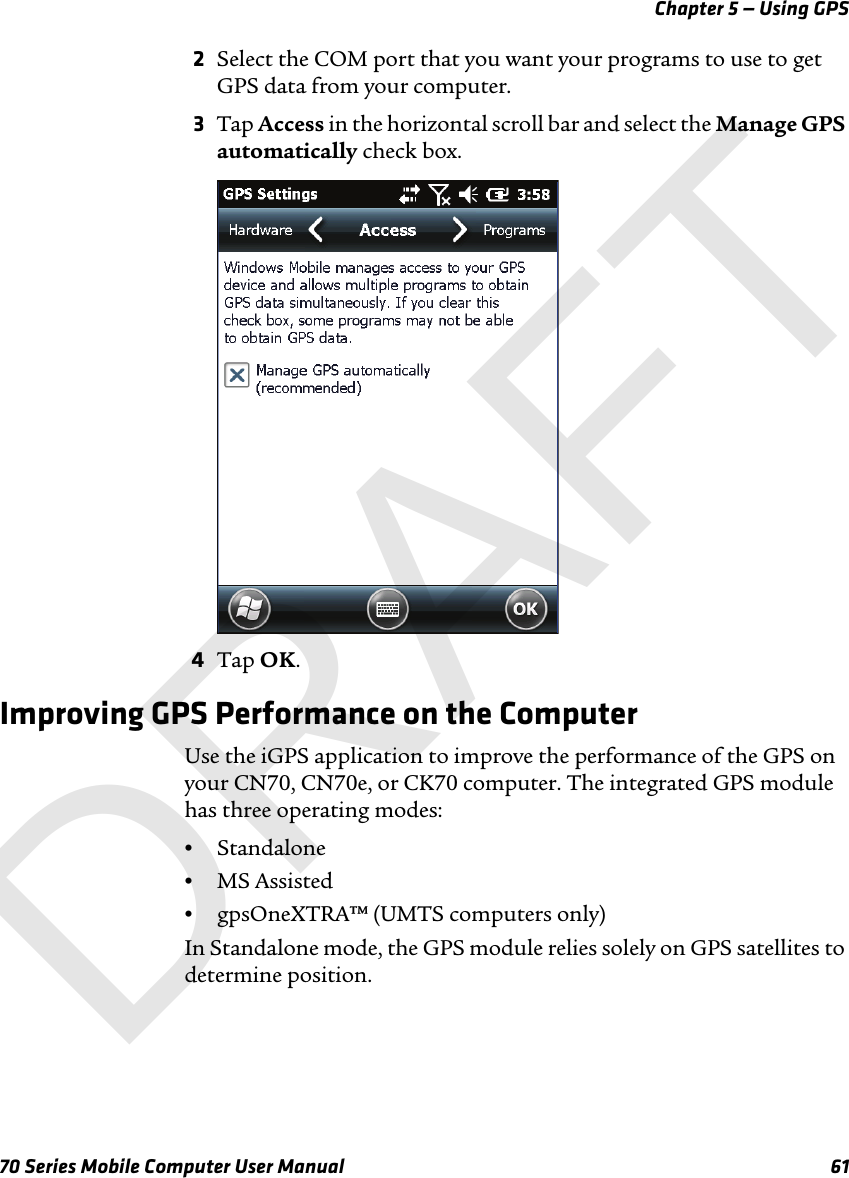
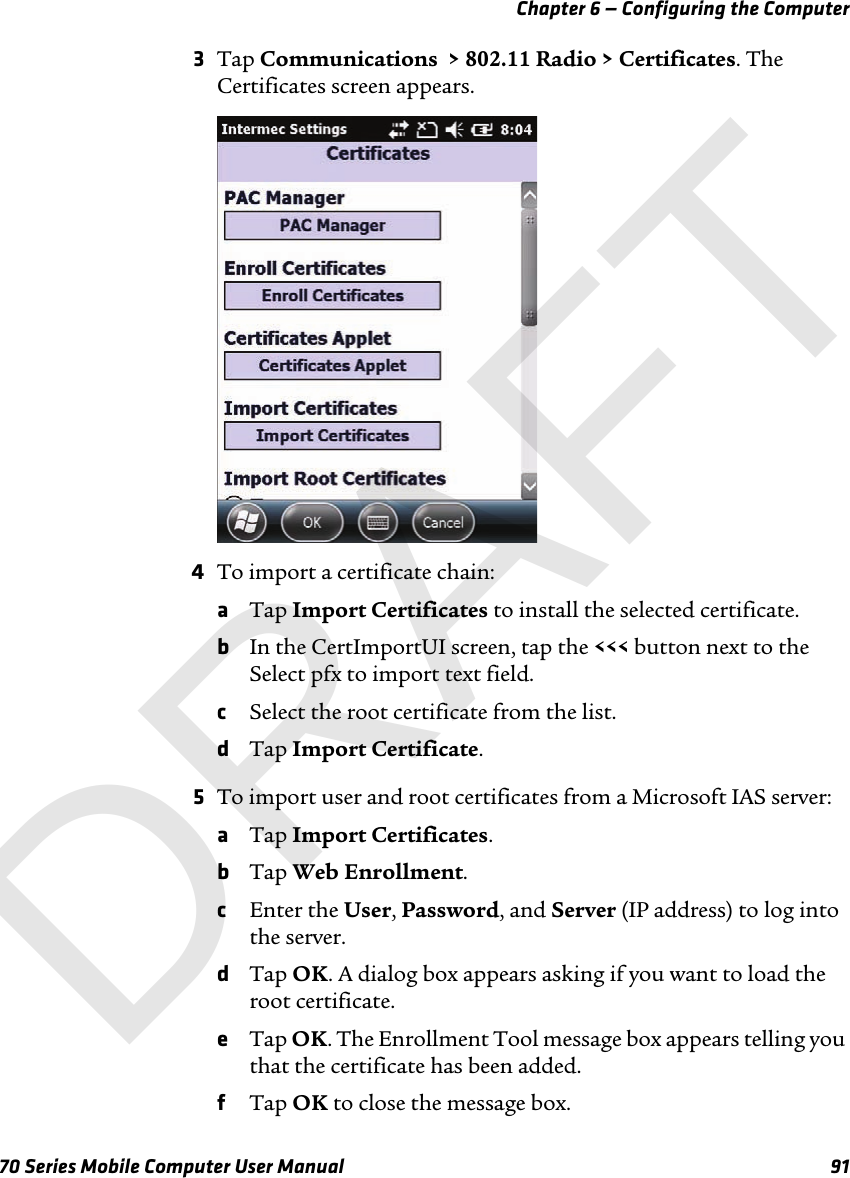
>
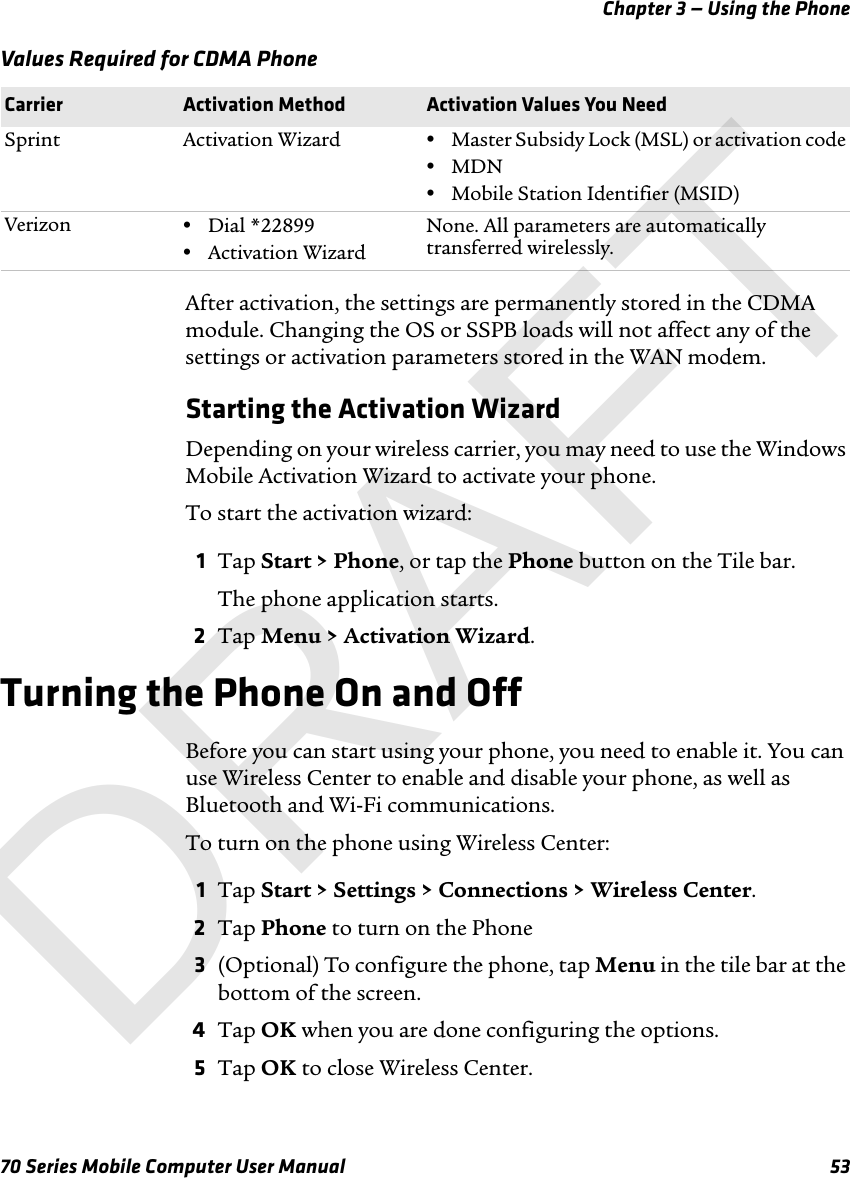
Intermec Technologies
>
1000CP01SX1 User Manual
>
User Manual part 1 of 2
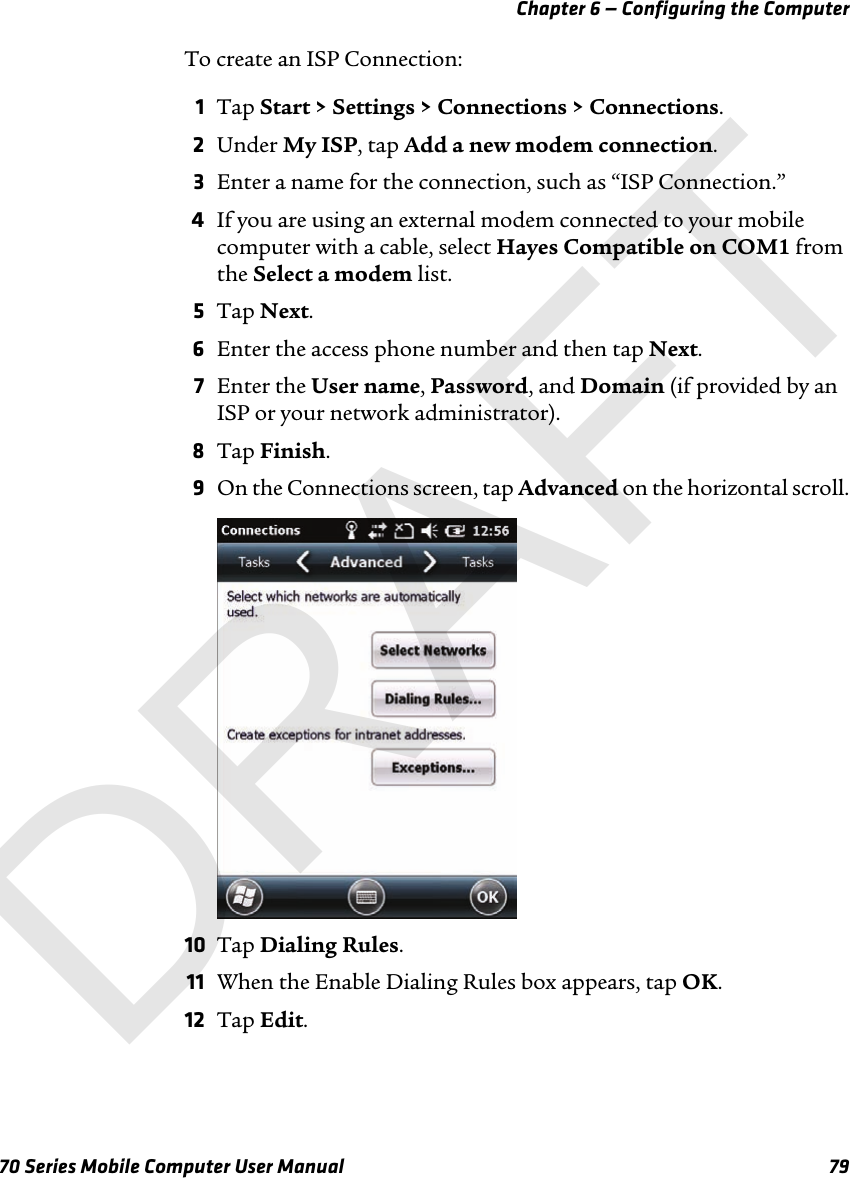
Contents
1.
Compliance Insert 1000CP01S
2.
Compliance Insert 1000CP02S
3.
Compliance Insert 1001CP01S
4.
QSG 1000CP01S
5.
QSG 1000CP02S
6.
QSG 1001CP01S
7.
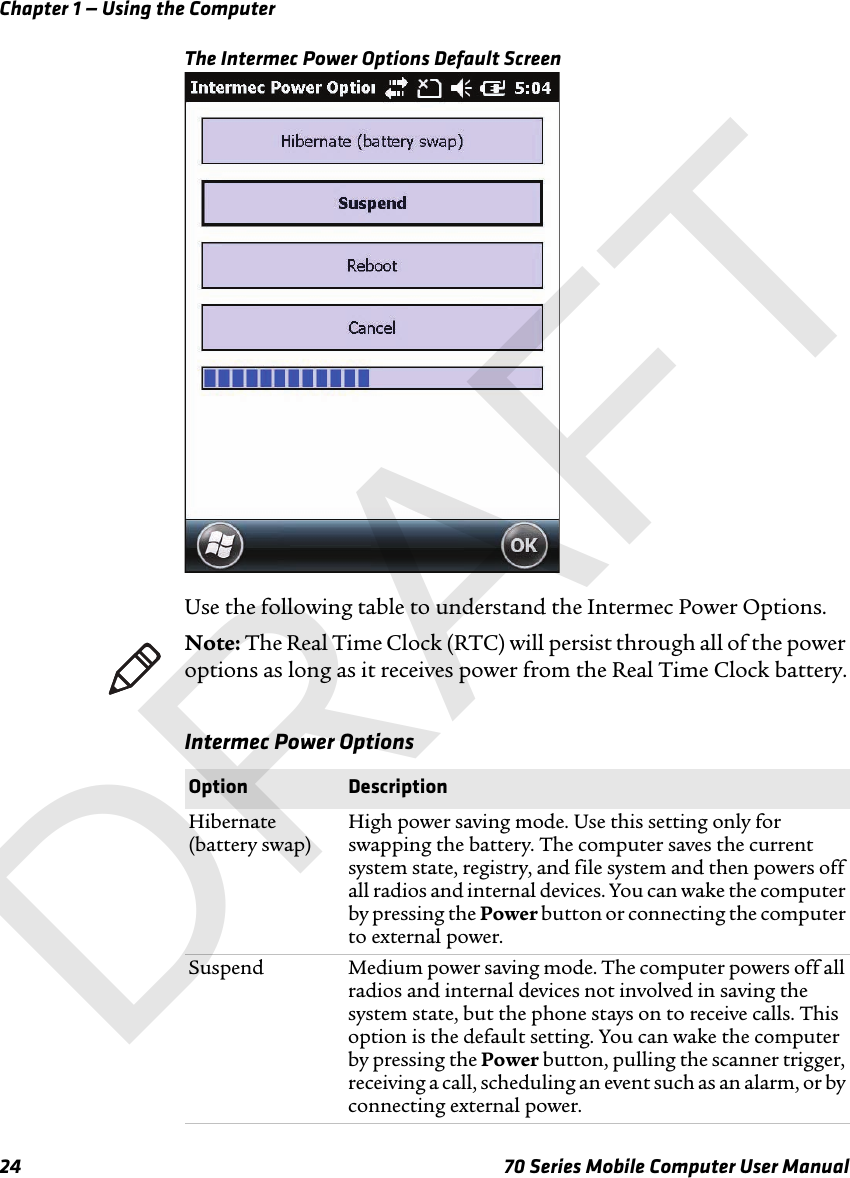
User Manual part 1 of 2
8.
User Manual part 2 of 2
9.
Compliance Insert
User Manual part 1 of 2
Navigation menu
Upload a User Manual
Namespaces
Wiki Guide
HTML
PDF
Info
Views
User Manual
Discussion / Help
Navigation


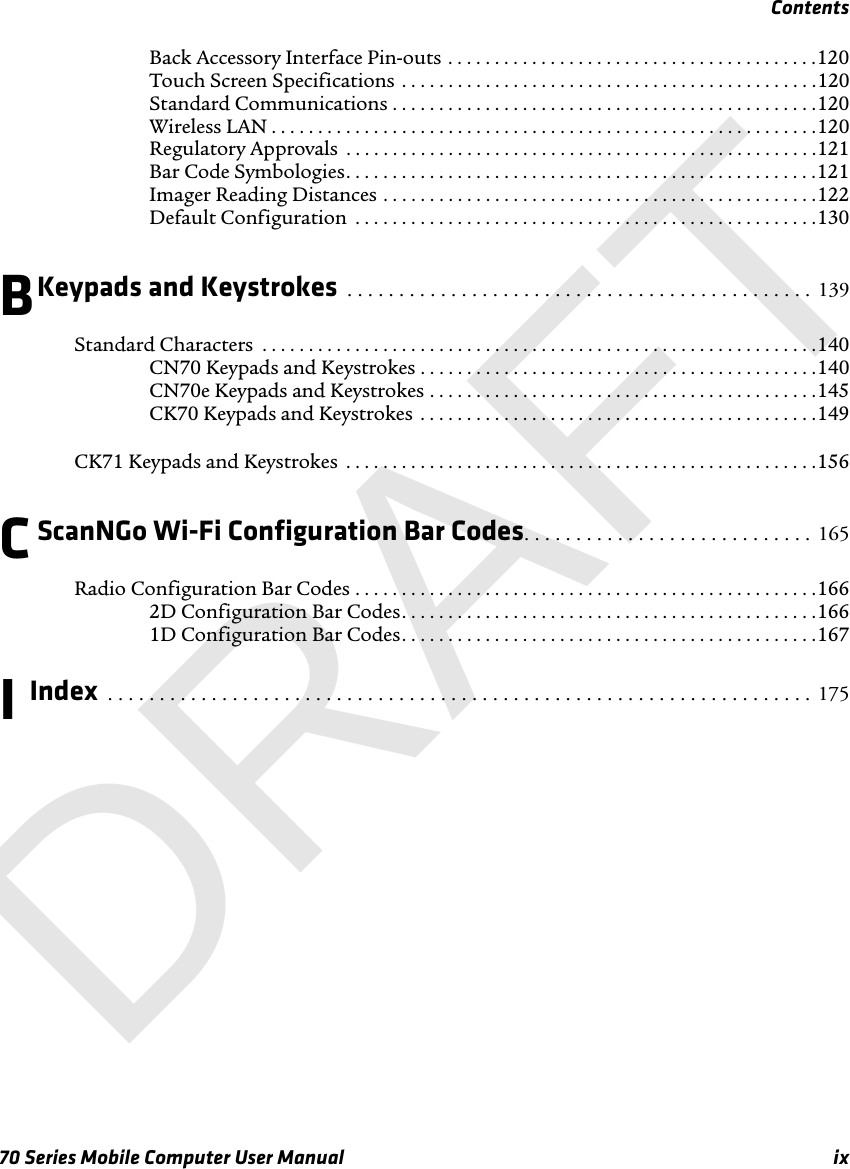

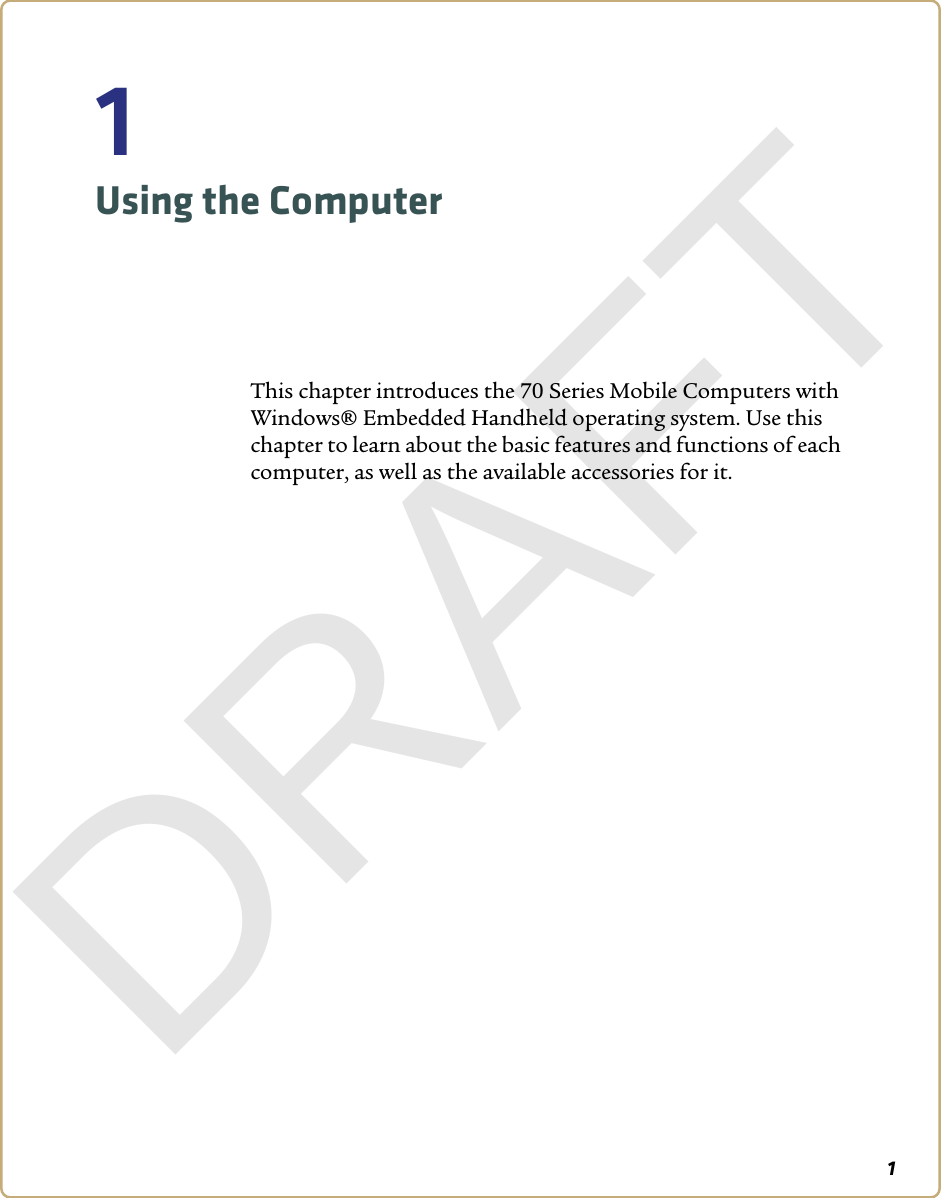
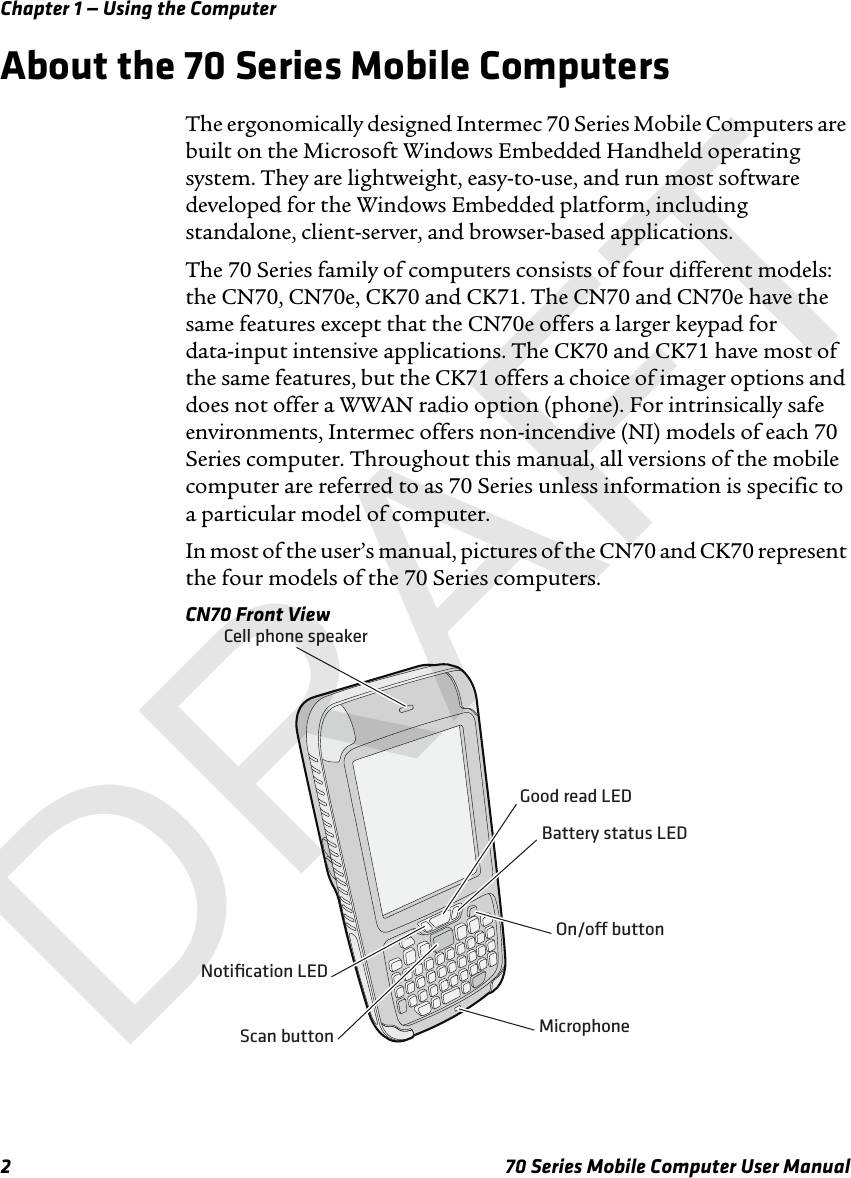
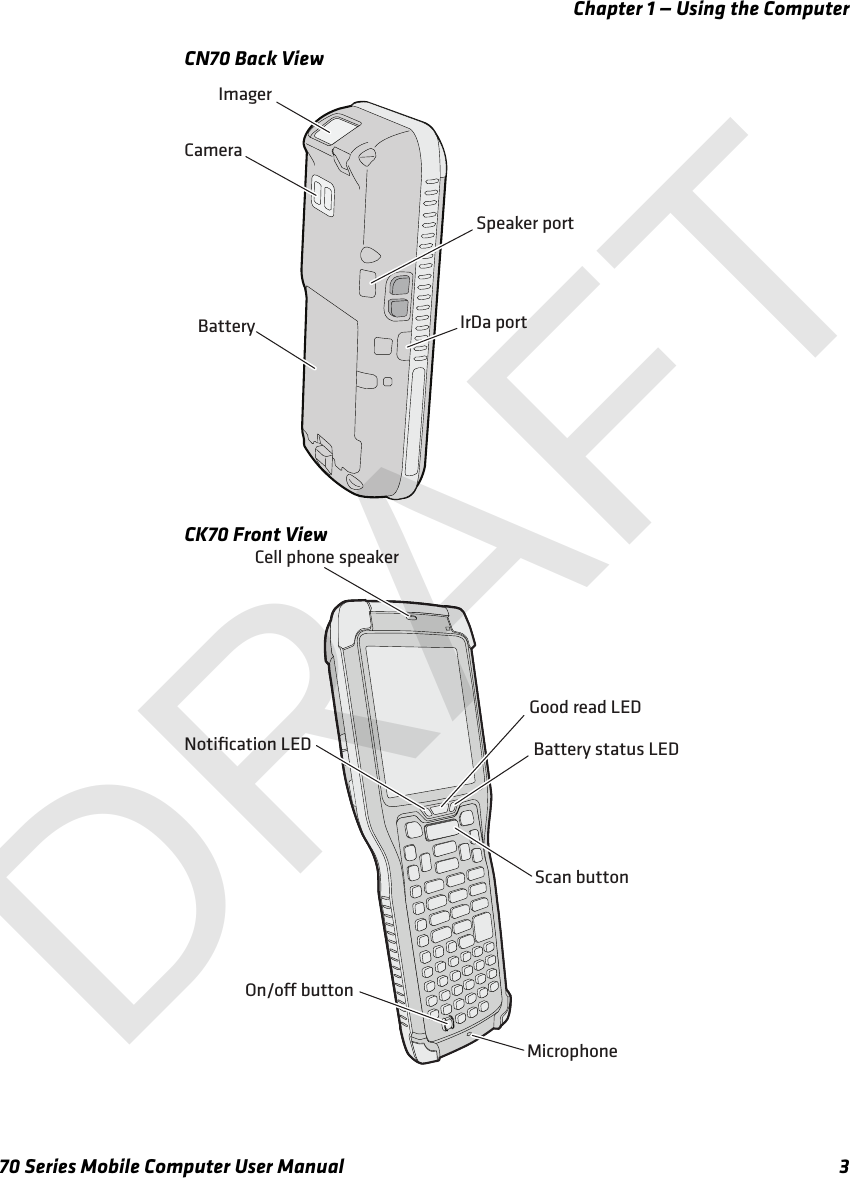
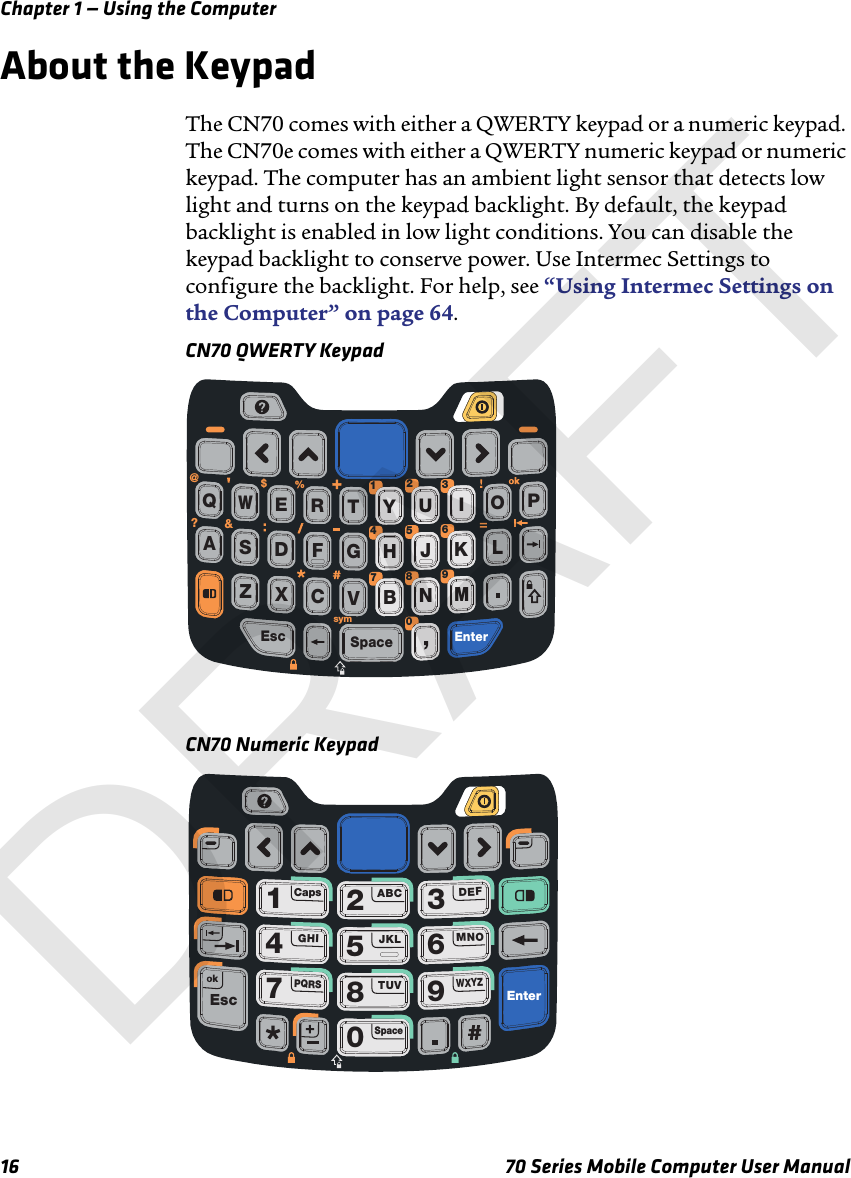
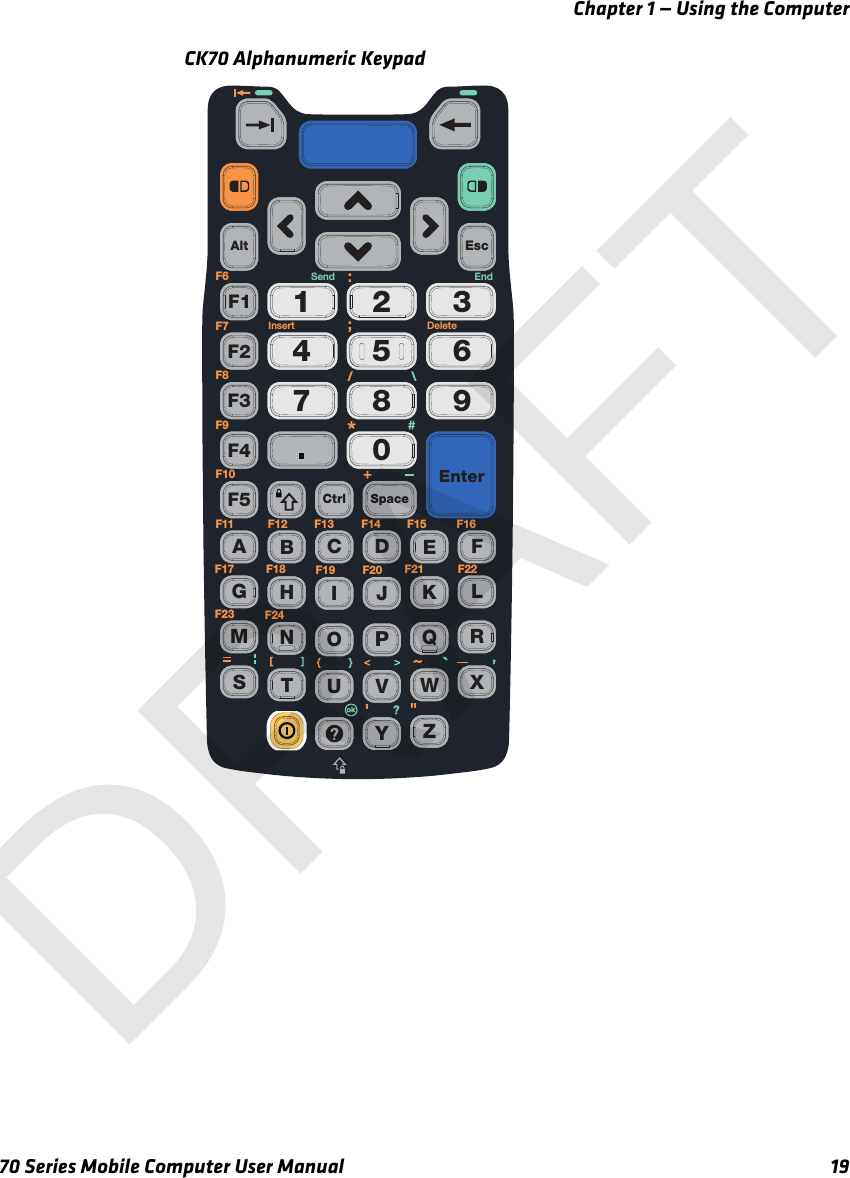
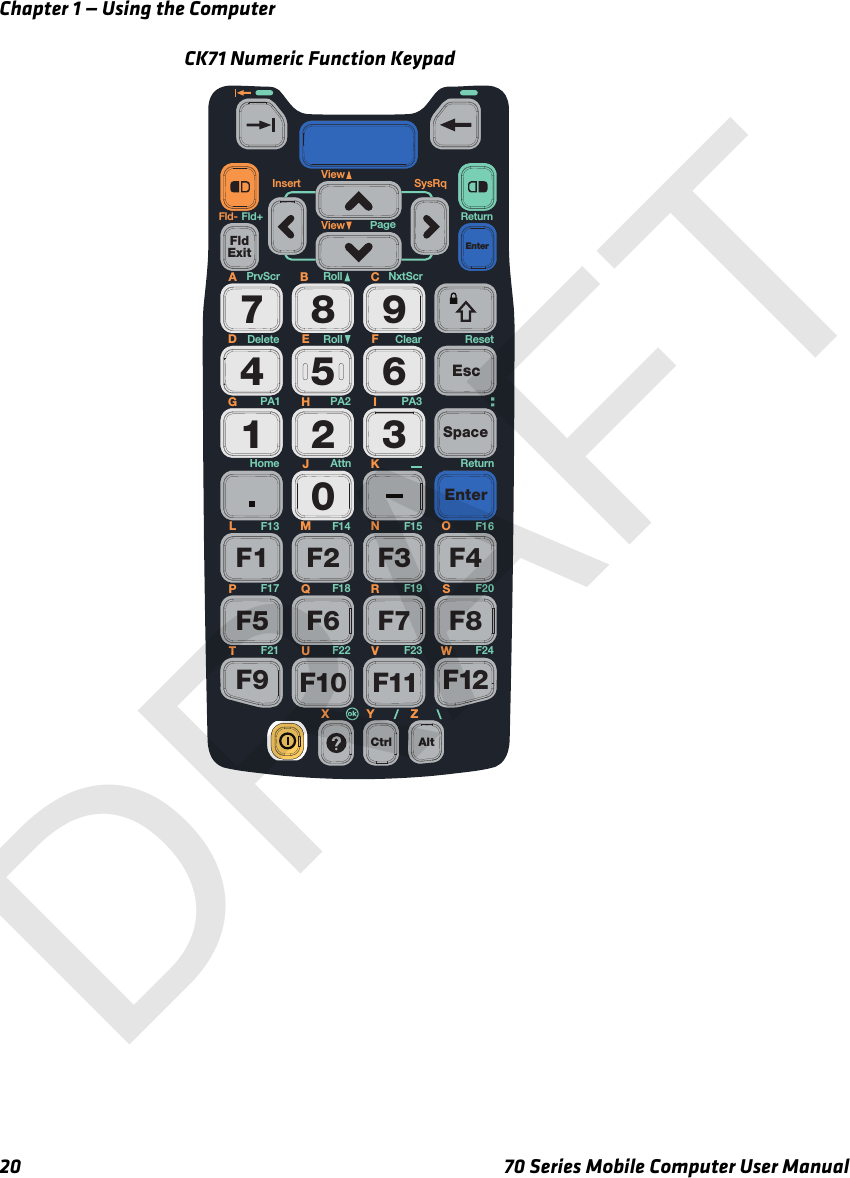
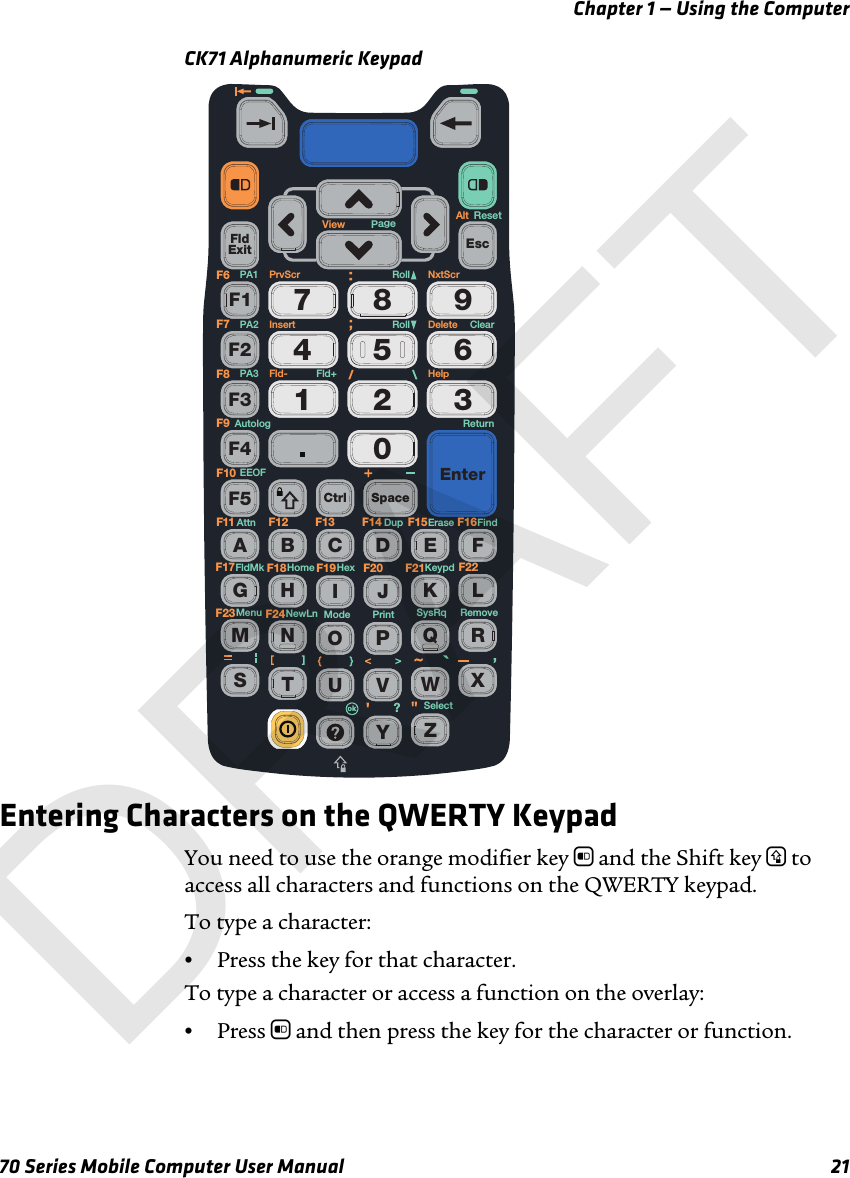
![Chapter 1 — Using the Computer18 70 Series Mobile Computer User ManualThe CK70 comes with either a large alpha or an alphanumeric keypad. The CK71 comes with either a numeric function keypad or an alphanumeric keypad. The computer has an ambient light sensor that detects low light and turns on the keypad backlight. By default, the keypad backlight is enabled in low light conditions. You can disable the keypad backlight to conserve power. Use Intermec Settings to configure the backlight. For help, see “Using Intermec Settings on the Computer” on page 64.CK70 Large Alpha KeypadEscCtrlYZEnterSpaceAB CDHLPRSTUVWXEFGIKMOQ0123456789JN@Send EndDeleteInsert\[]+=F1 F2 F3F4F8F5 F6F7 F9F10><%()symDRAFT](https://usermanual.wiki/Intermec-Technologies/1000CP01SX1.User-Manual-part-1-of-2/User-Guide-1531580-Page-32.png)