Intermec Technologies 1000CP01SX1 1000CP01S, 1000CP02S, 1001CP01S User Manual 70 Series Mobile Computer DRAFT
Intermec Technologies Corporation 1000CP01S, 1000CP02S, 1001CP01S 70 Series Mobile Computer DRAFT
UserManual.wiki
>
Intermec Technologies
>
1000CP01SX1 User Manual
>
User Manual part 2 of 2
Contents
1.
Compliance Insert 1000CP01S
2.
Compliance Insert 1000CP02S
3.
Compliance Insert 1001CP01S
4.
QSG 1000CP01S
5.
QSG 1000CP02S
6.
QSG 1001CP01S
7.
User Manual part 1 of 2
8.
User Manual part 2 of 2
9.
Compliance Insert
User Manual part 2 of 2
Navigation menu
Upload a User Manual
Namespaces
Wiki Guide
HTML
PDF
Info
Views
User Manual
Discussion / Help
Navigation
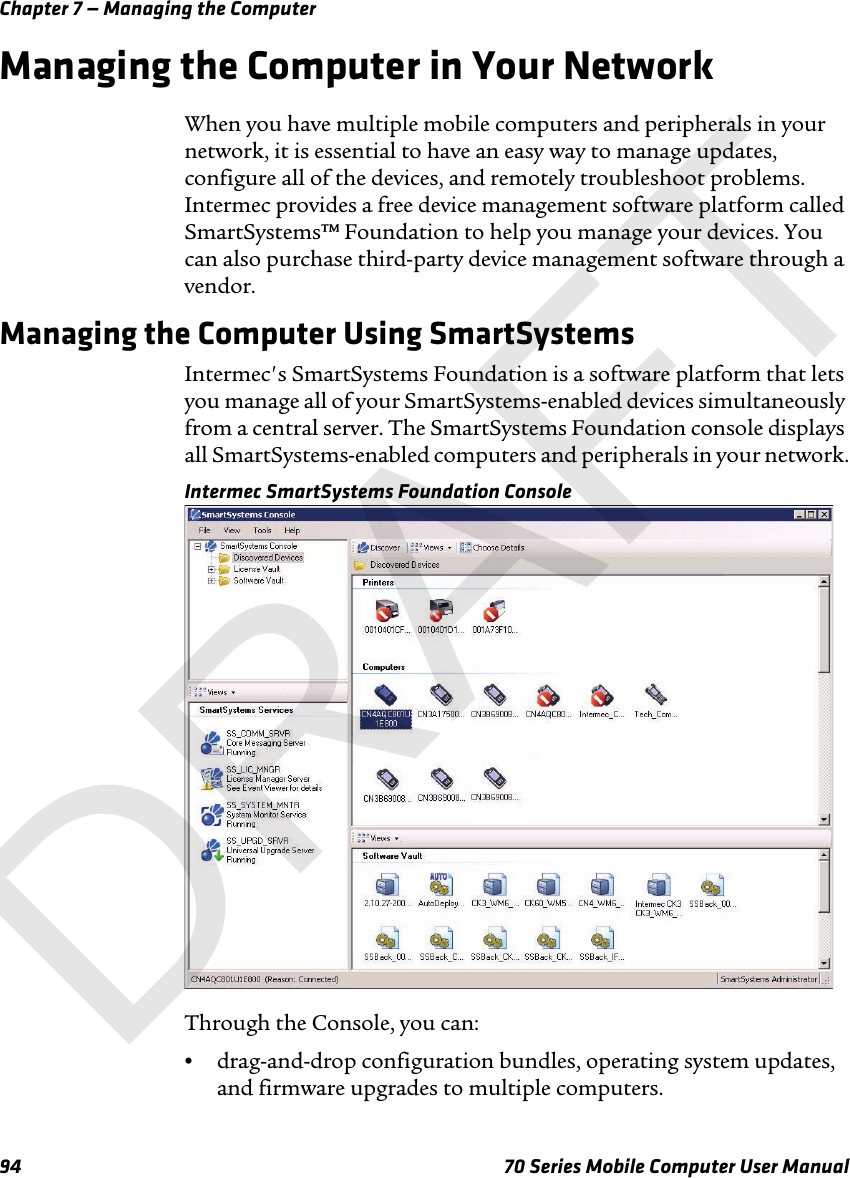
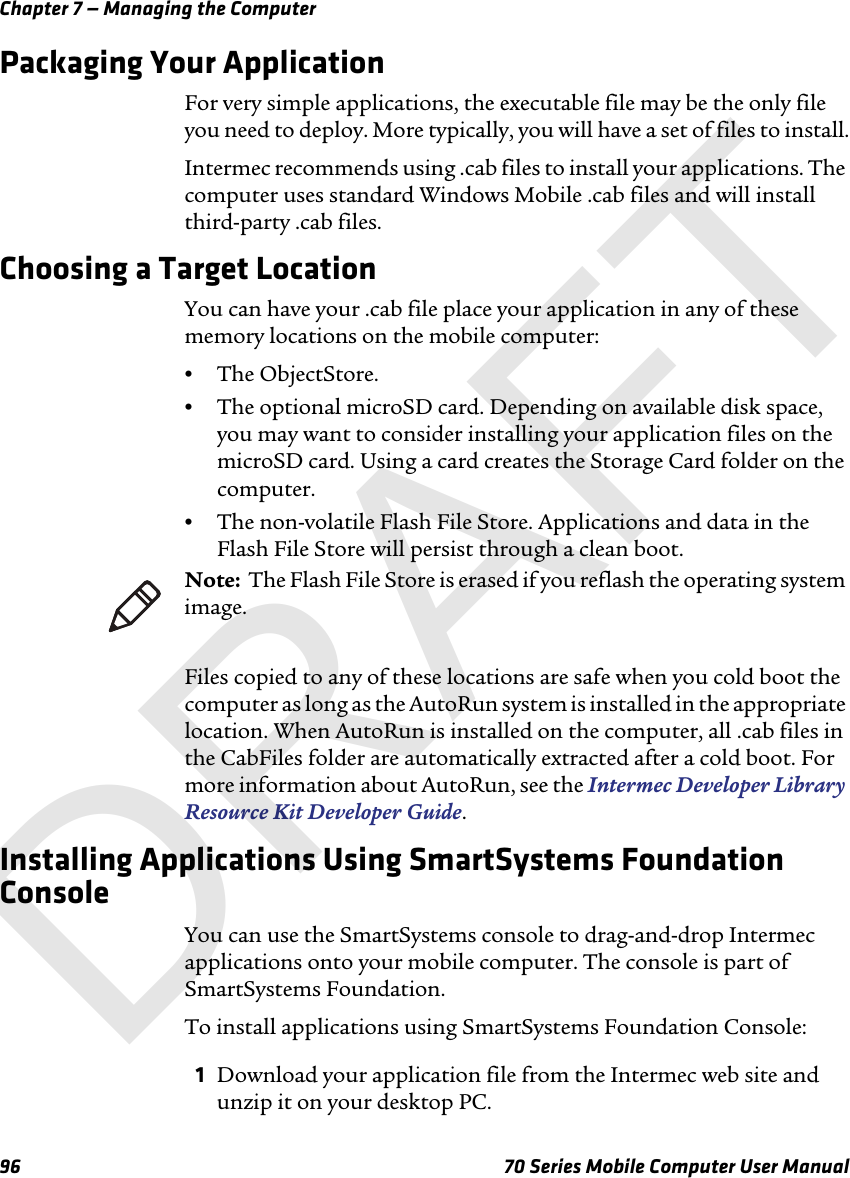


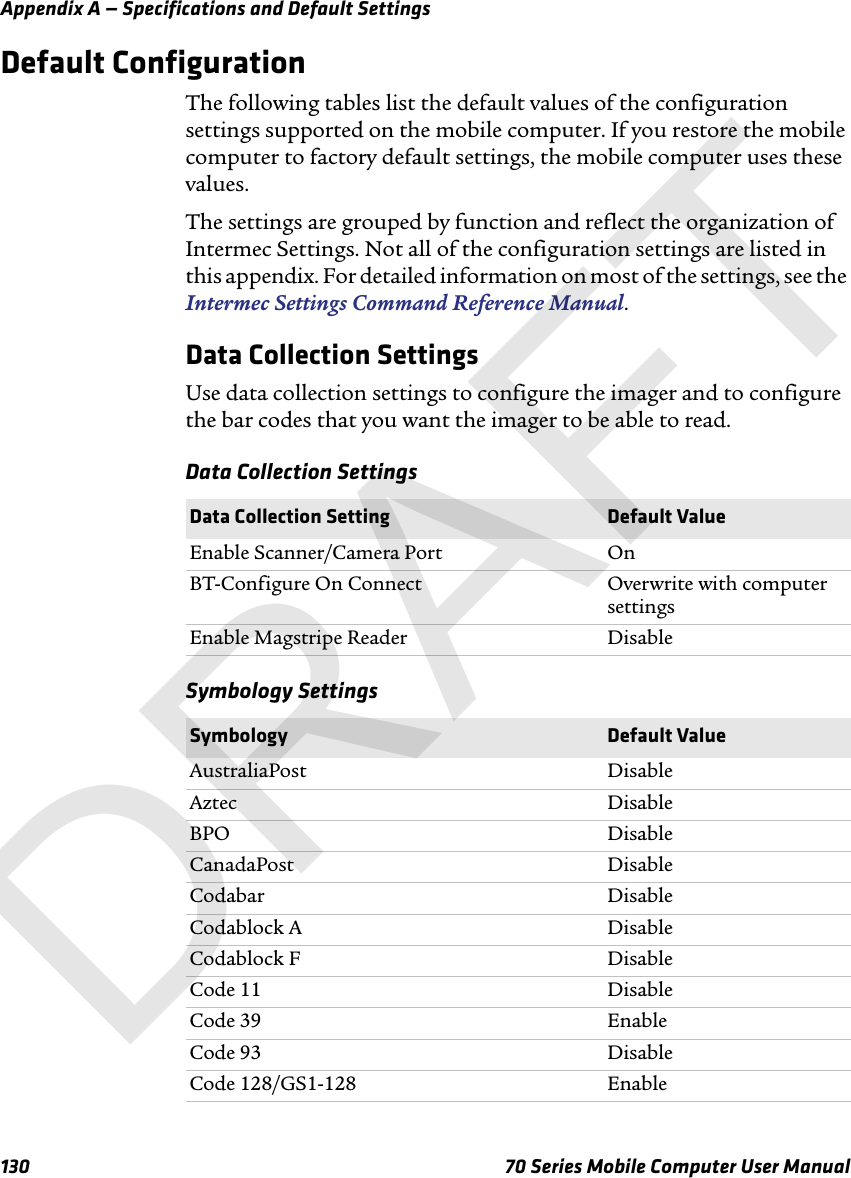


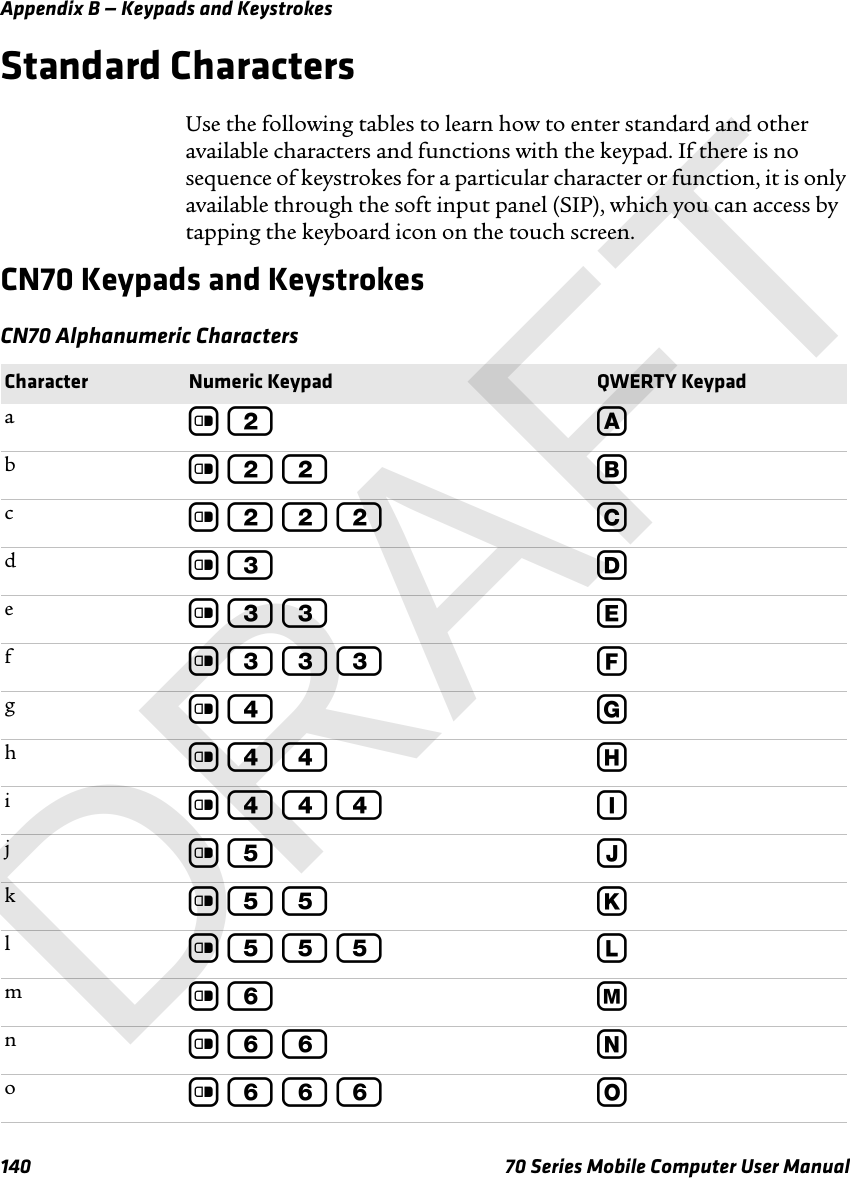

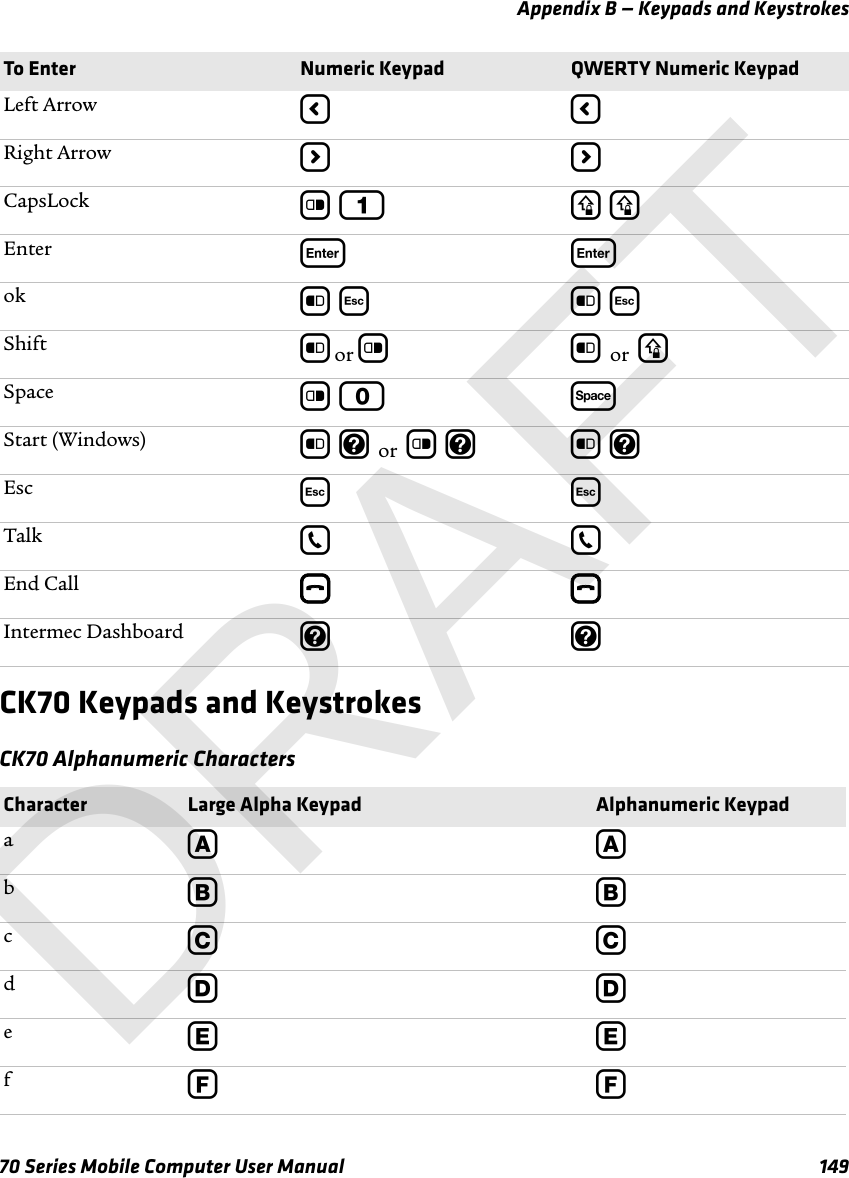

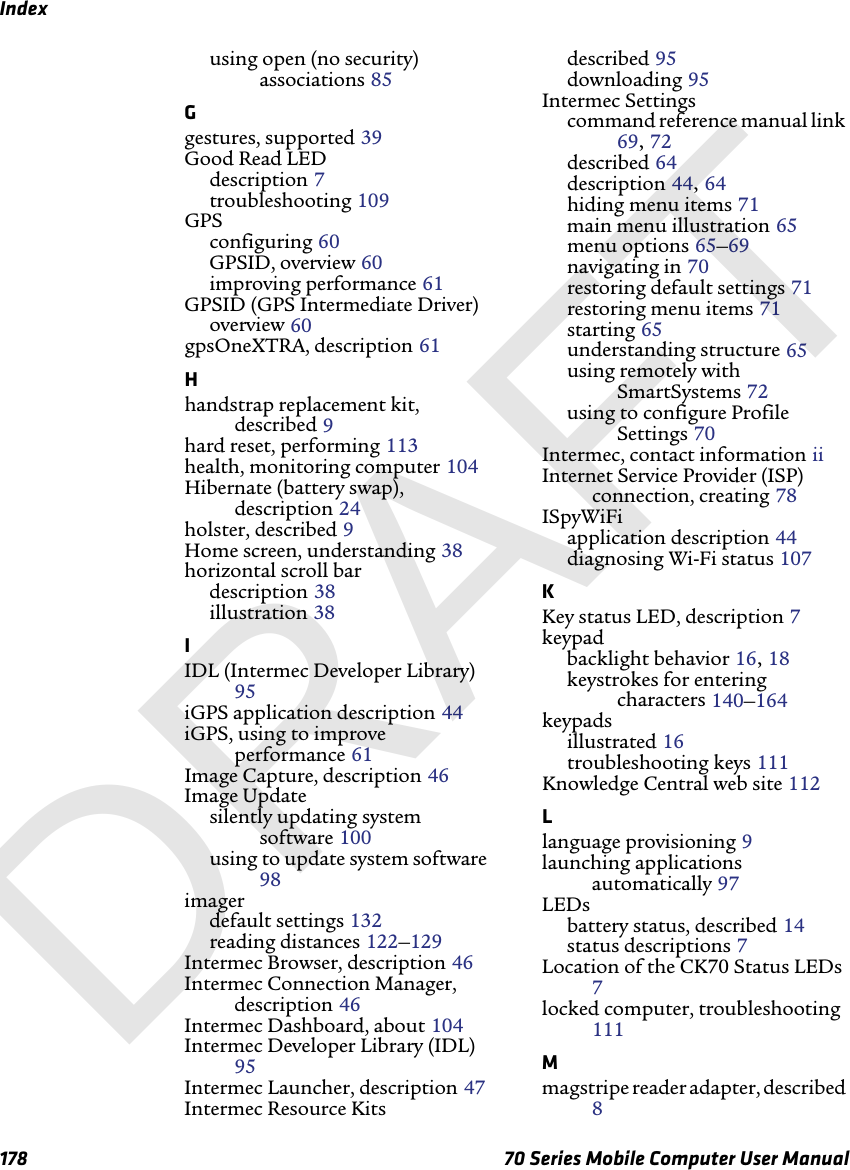
![Appendix B — Keypads and Keystrokes70 Series Mobile Computer User Manual 153 , (comma) b T c X$ (dollar) c S N/A! (exclamation) c W N/A- (hyphen or minus) c X c s% (percent) c O N/A. (period) ..+ (plus) b X b s# (pound) b Q c 0? (question mark) c Q c Y‘ (apostrophe) c T b Y= (equals) b Y b S_ (underscore) c Y c X> (greater than) c N c V< (less than) b N b V[ (left square bracket) b V b T] (right square bracket) c V c T{ (left curly brace) N/A b U} (right curly brace) N/A c U~ (tilde) N/A b W\ (backslash) c U c 8/ (forward slash) b U b 8To Enter Large Alpha Keypad Alphanumeric KeypadDRAFT](https://usermanual.wiki/Intermec-Technologies/1000CP01SX1.User-Manual-part-2-of-2/User-Guide-1531581-Page-61.png)
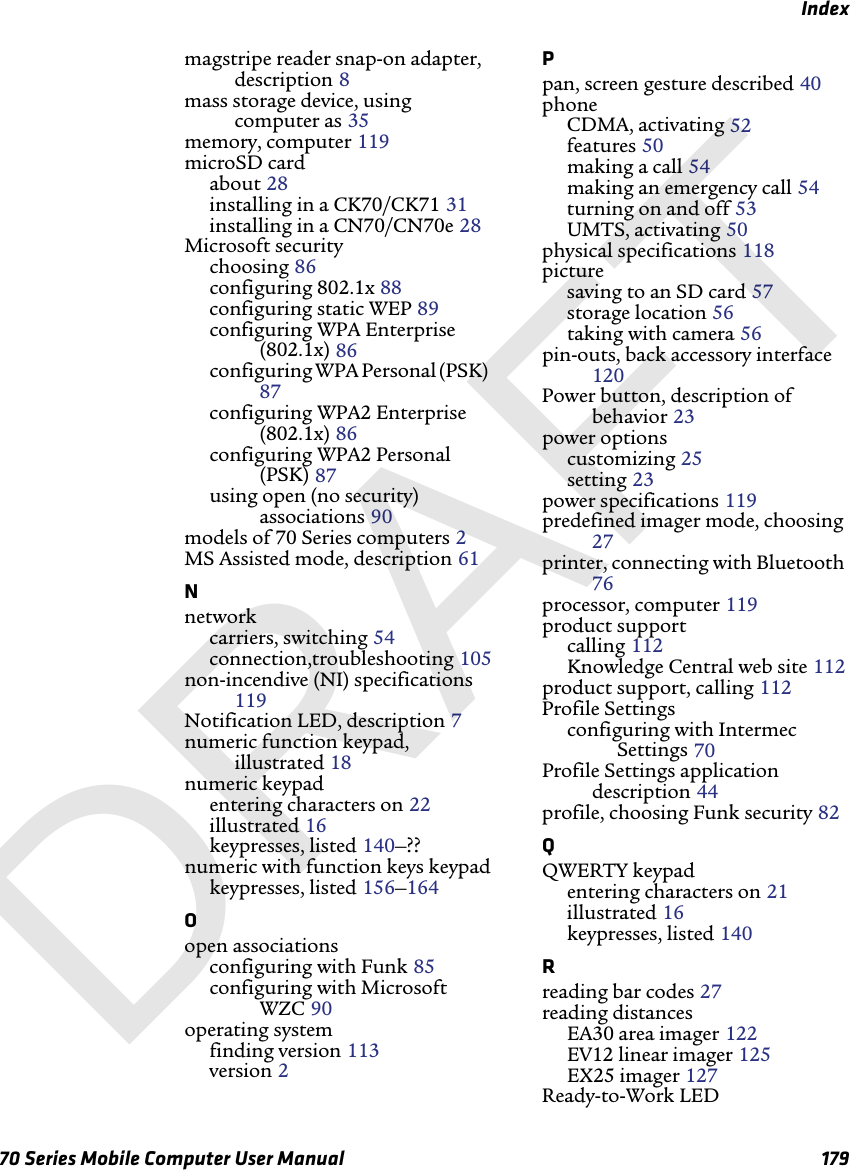
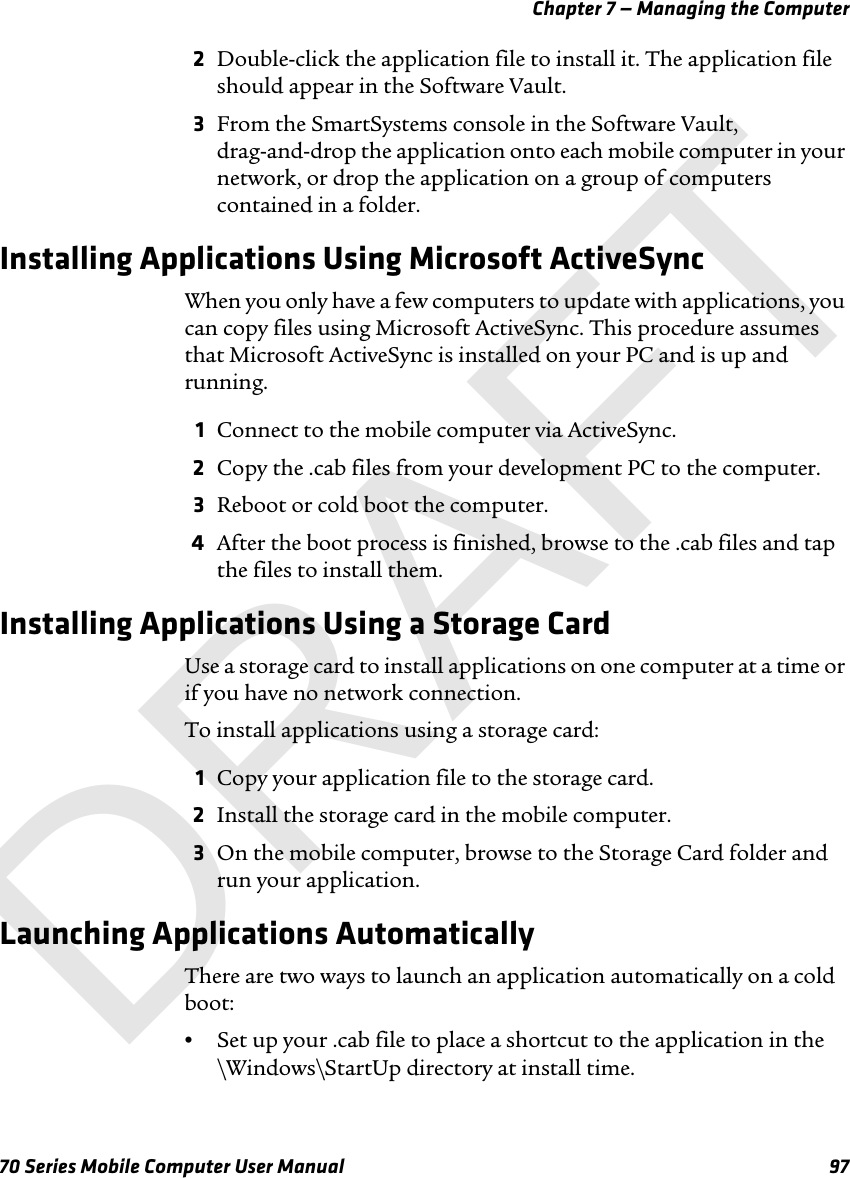
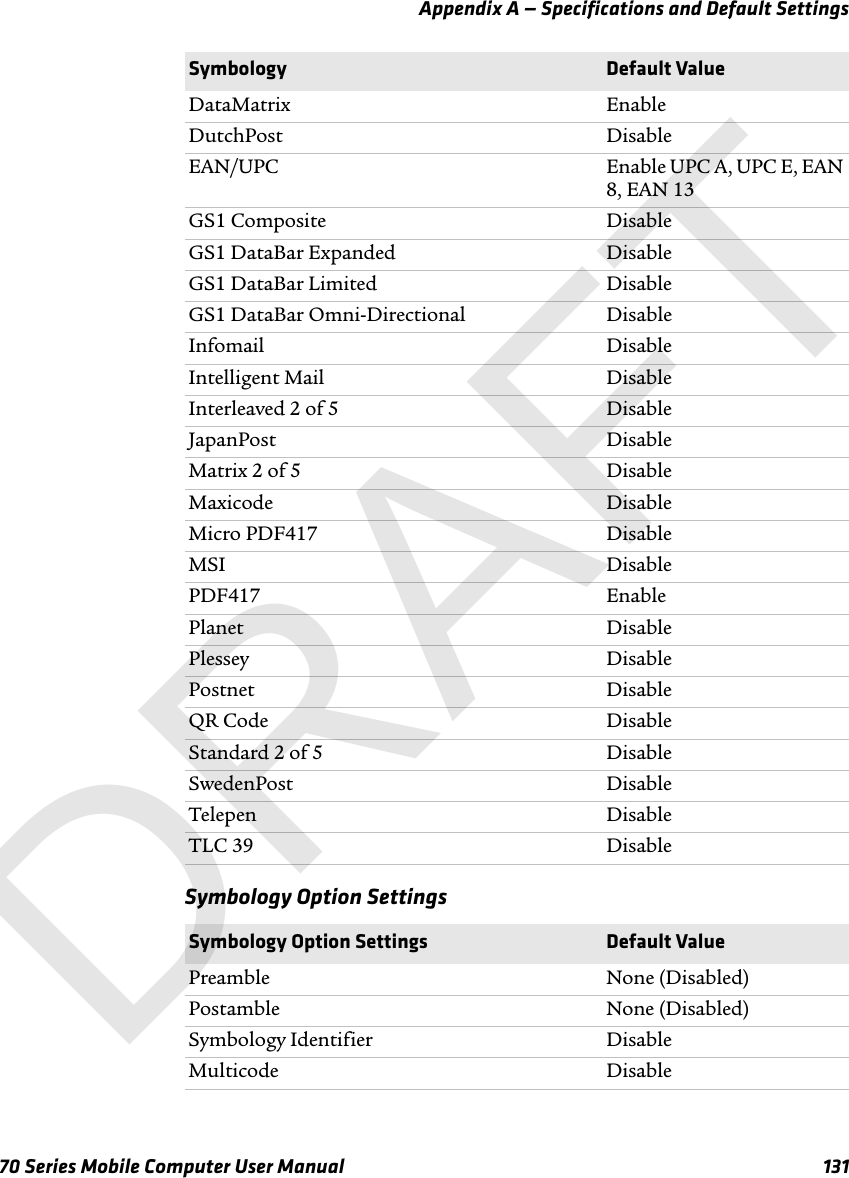
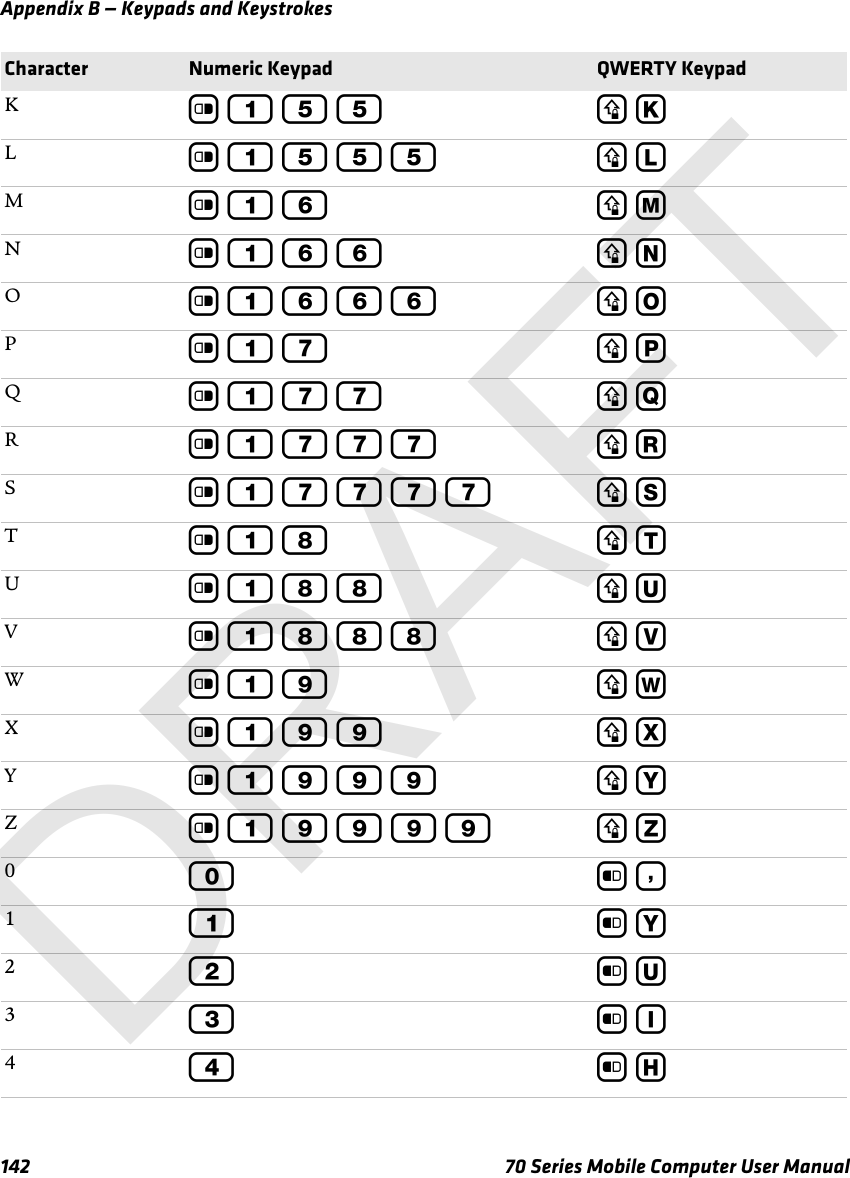
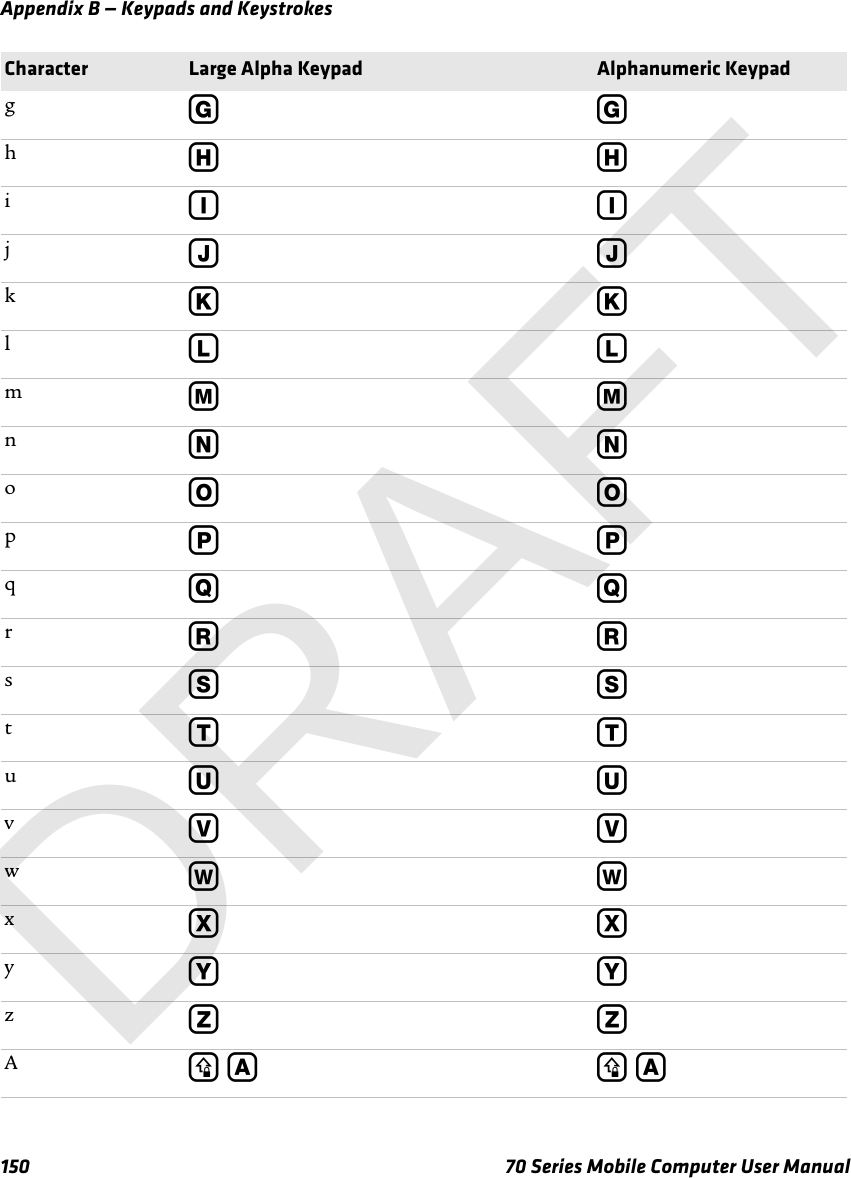
![Appendix B — Keypads and Keystrokes160 70 Series Mobile Computer User Manual‘ (apostrophe) N/A b Y= (equals) N/A b S_ (underscore) c - c X> (greater than) N/A c V< (less than) N/A b V[ (left square bracket) N/A b T] (right square bracket) N/A c T{ (left curly brace) N/A b U} (right curly brace) N/A c U~ (tilde) N/A b W\ (backslash) c Alt c 2/ (forward slash) c Ctrl b 2“ (quotes) N/A b ZInsert b l b 4Delete c 4 b 6¦ (broken vertical bar) N/A c S ̀ (grave) N/A c WForward Tab jjBackspace { {Up Arrow uuDown Arrow ddTo Enter Numeric With Function Keys Keypad Alphanumeric KeypadDRAFT](https://usermanual.wiki/Intermec-Technologies/1000CP01SX1.User-Manual-part-2-of-2/User-Guide-1531581-Page-68.png)