Intermec Technologies 2610CF 2610CF User Manual CN2Busermanual
Intermec Technologies Corporation 2610CF CN2Busermanual
UserManual.wiki
>
Intermec Technologies
>
2610CF User Manual
>
User Manual 1 of 3
Contents
1.
700C User Manual 1 of 3
2.
700C User Manual 2 of 3
3.
700C User Manual 3 of 3
4.
CN2 Users Manual 1 of 2
5.
CN2 Users Manual 2 of 2
6.
Compliance Statement Insert
7.
Users Manual
8.
User Manual 1 of 3
9.
User Manual 2 of 3
10.
User Manual 3 of 3
11.
Compliance Insert
User Manual 1 of 3
Navigation menu
Upload a User Manual
Namespaces
Wiki Guide
HTML
PDF
Info
Views
User Manual
Discussion / Help
Navigation
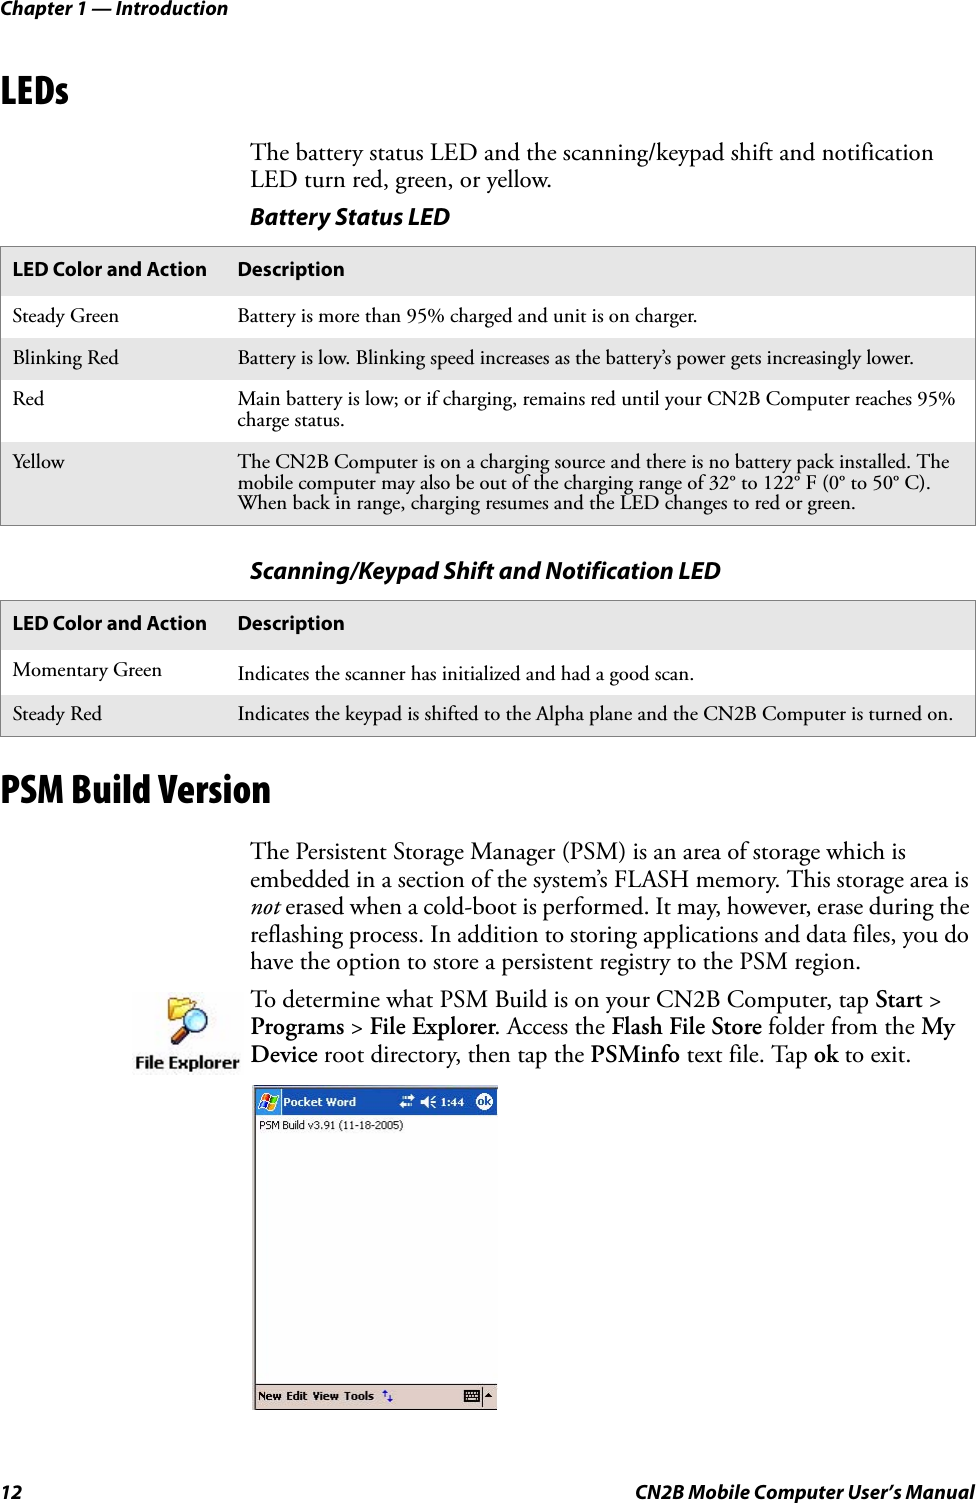
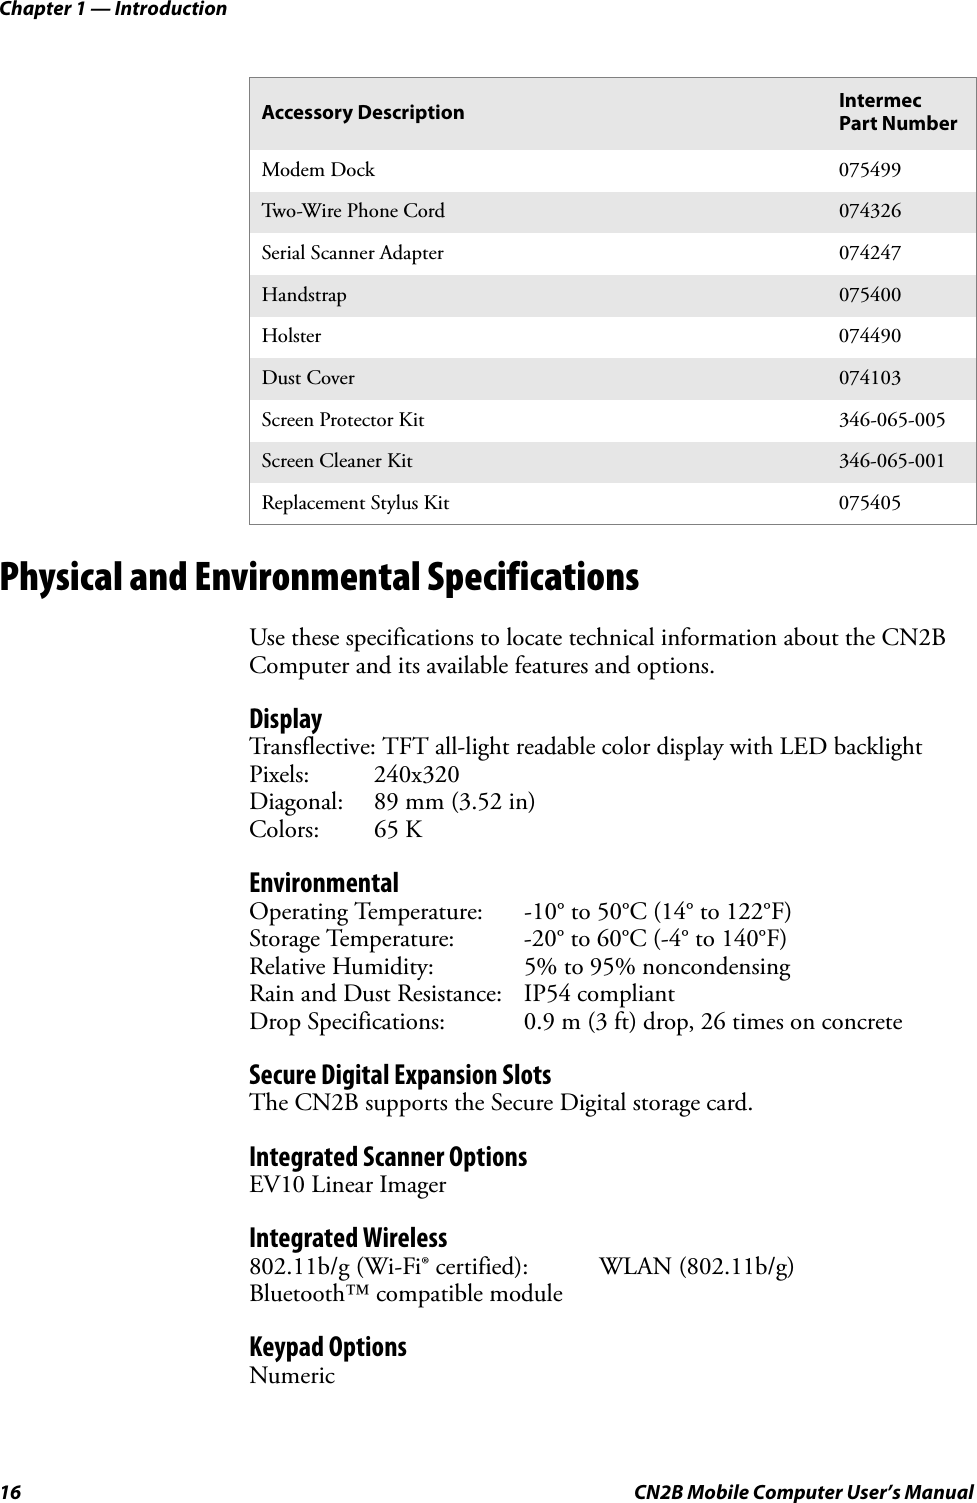
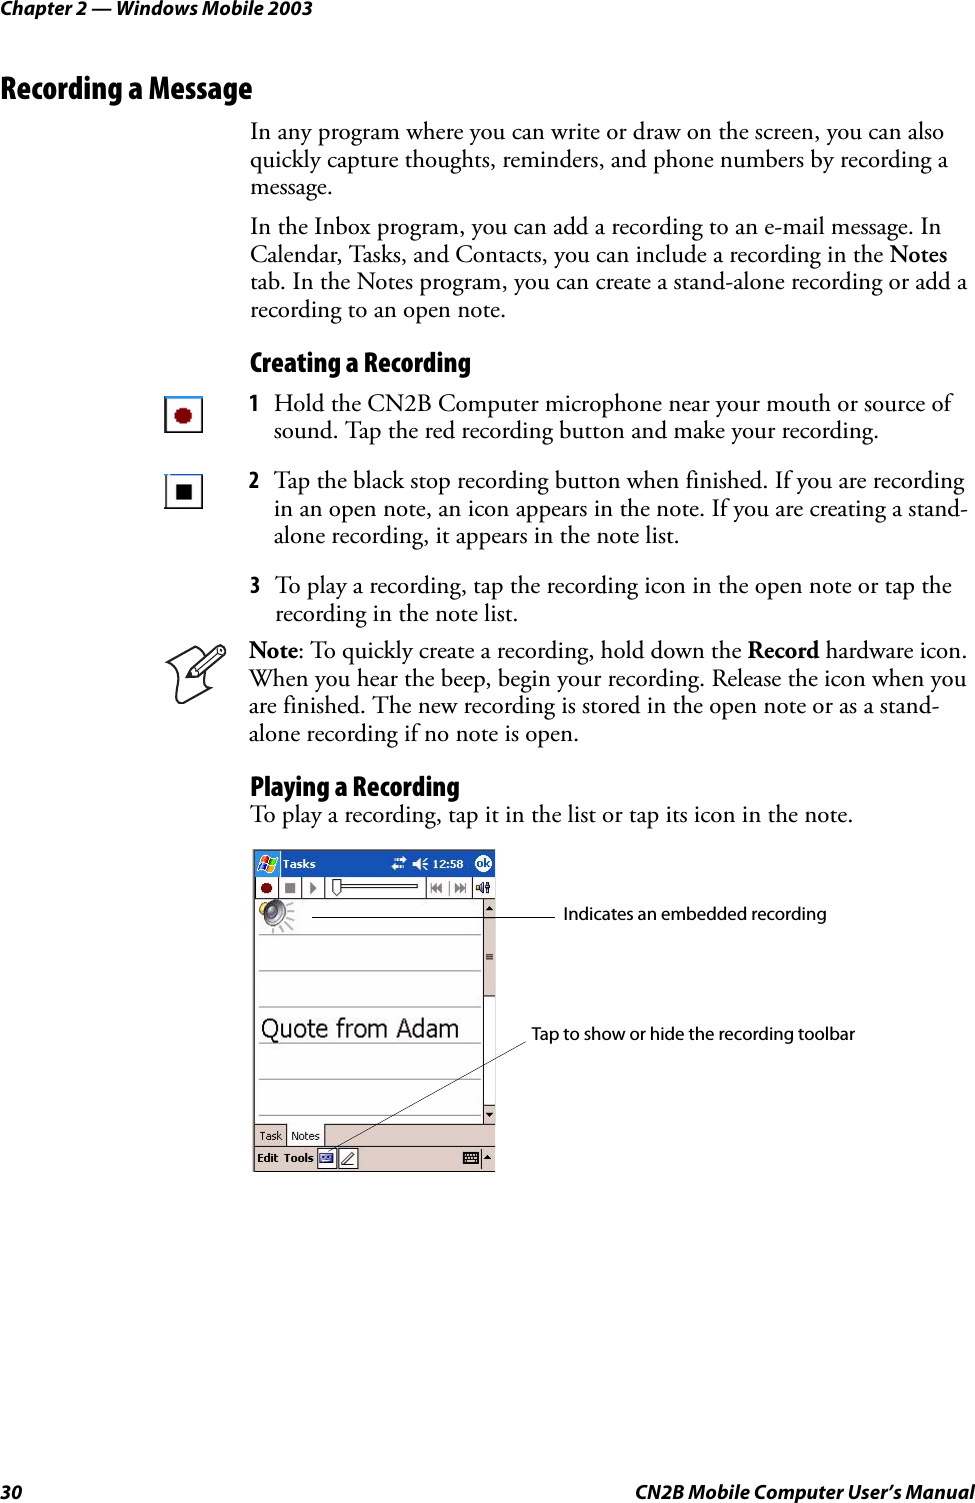
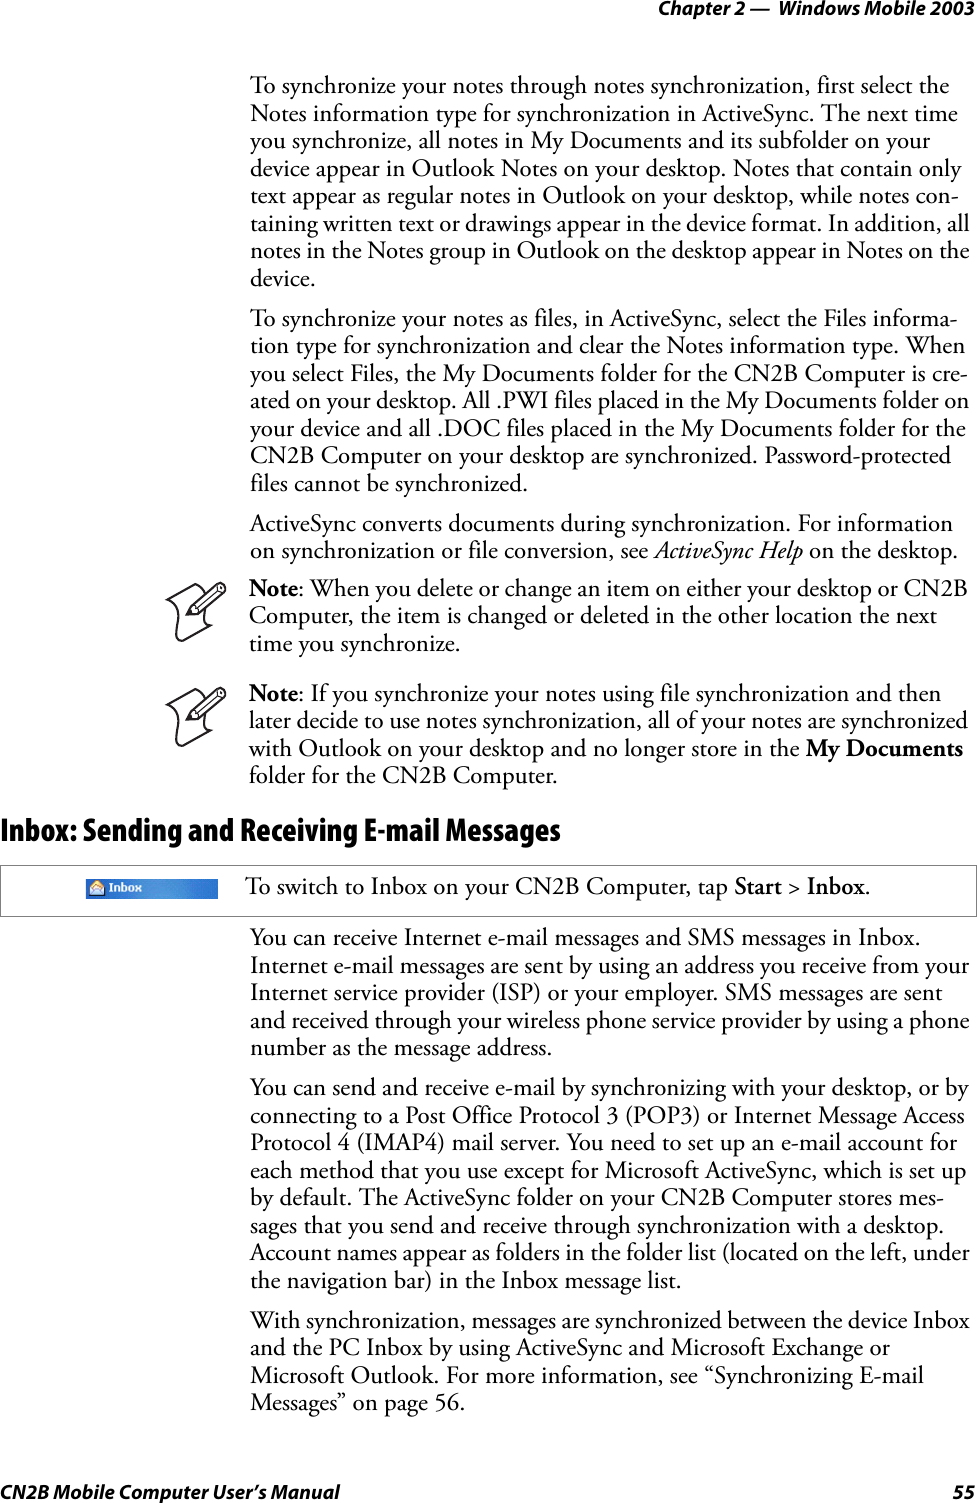
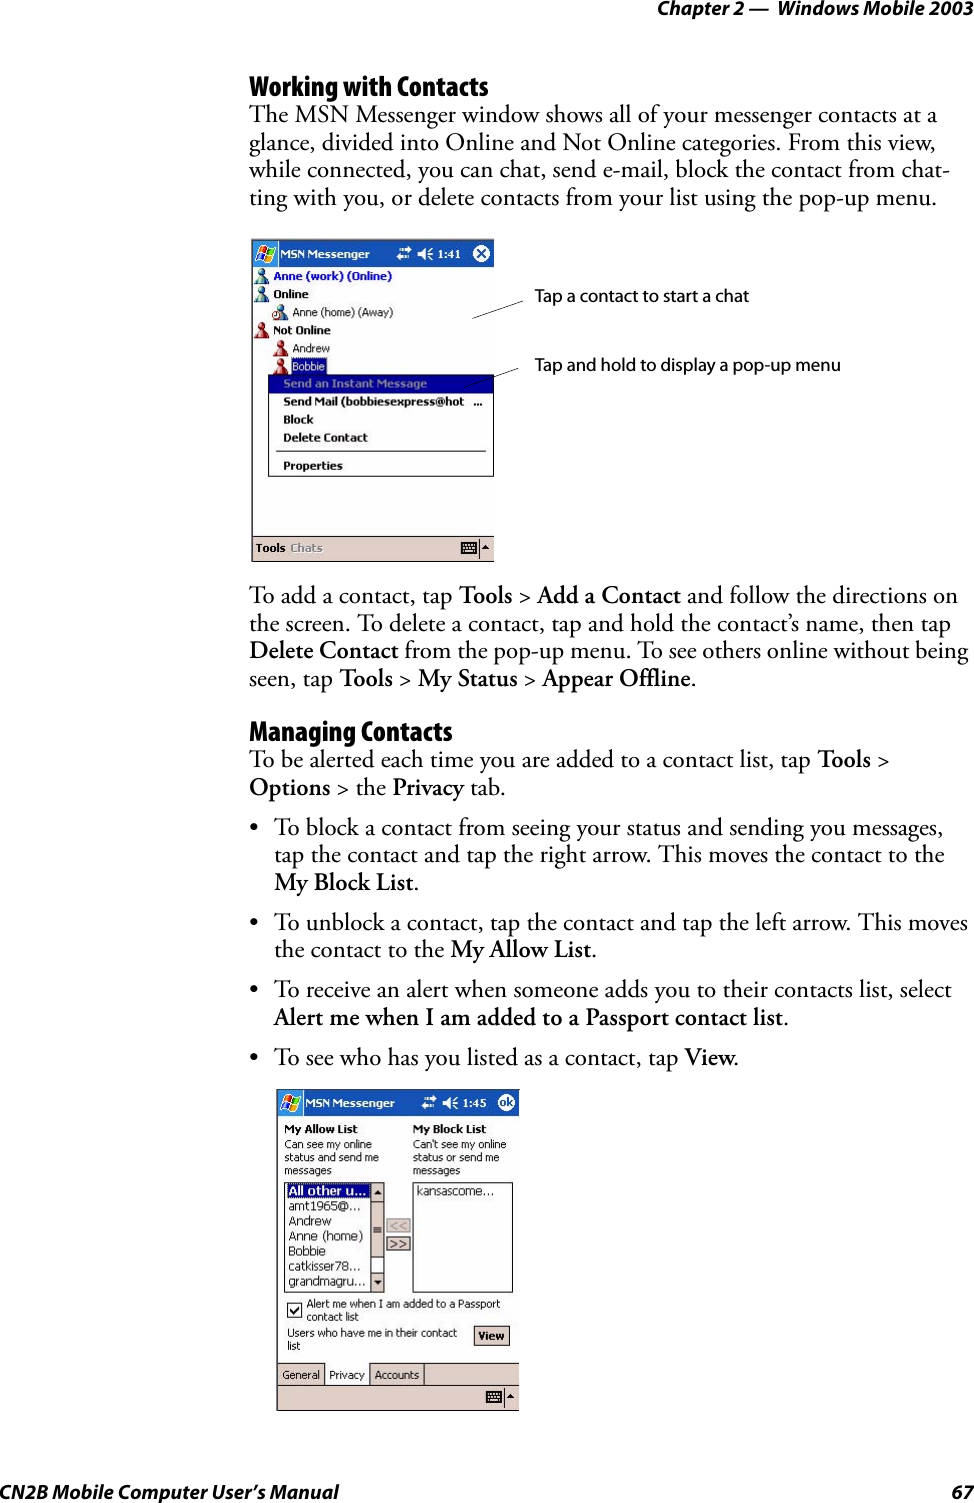
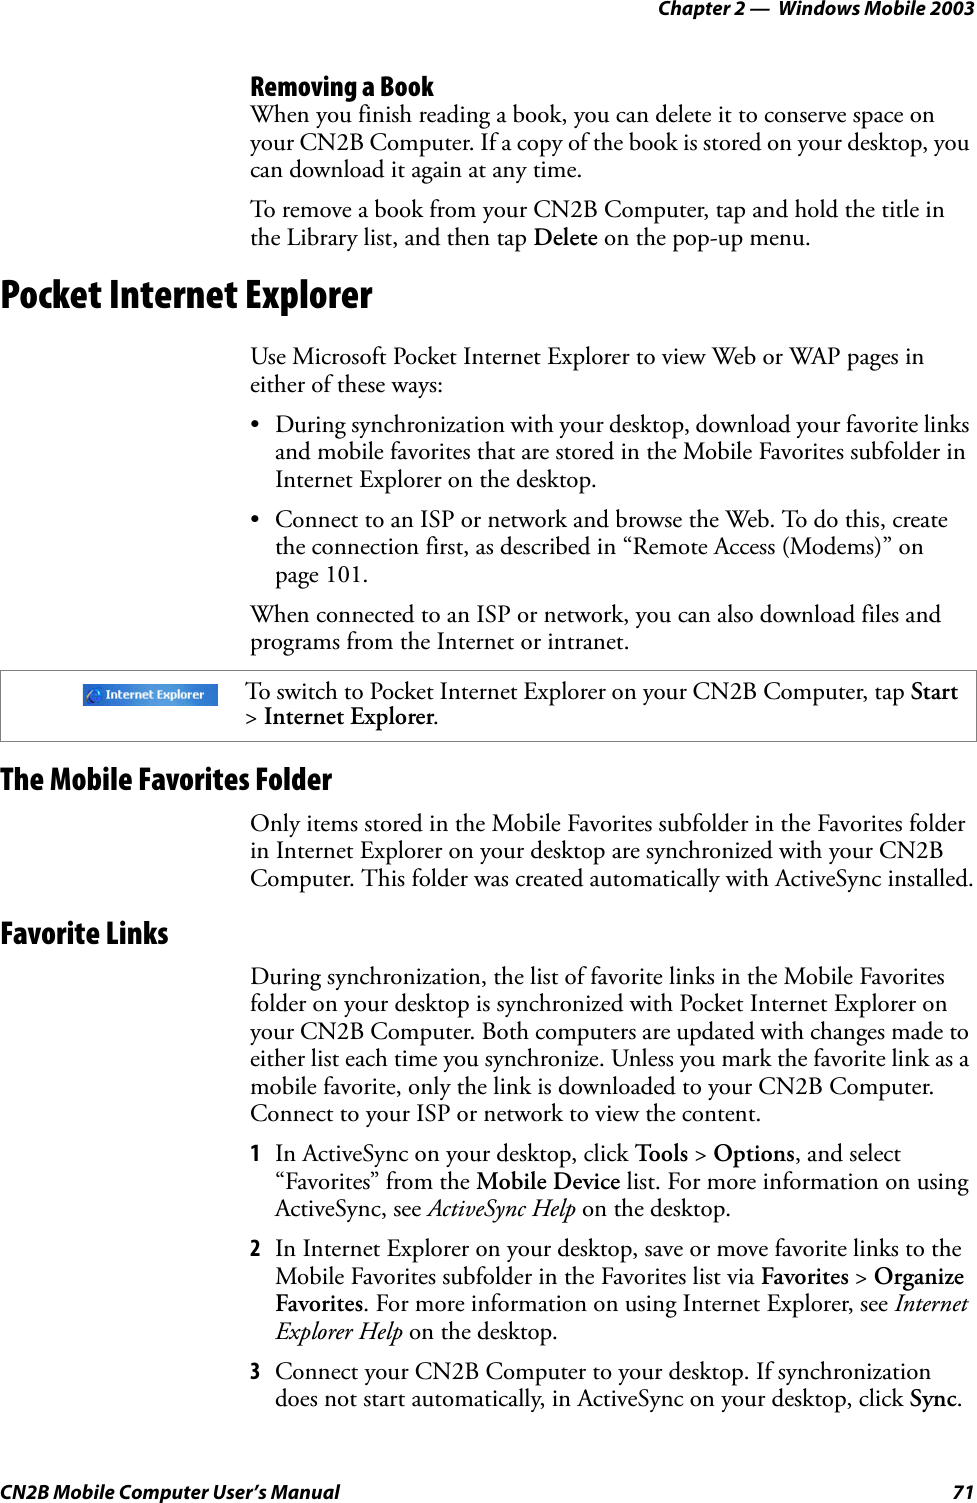
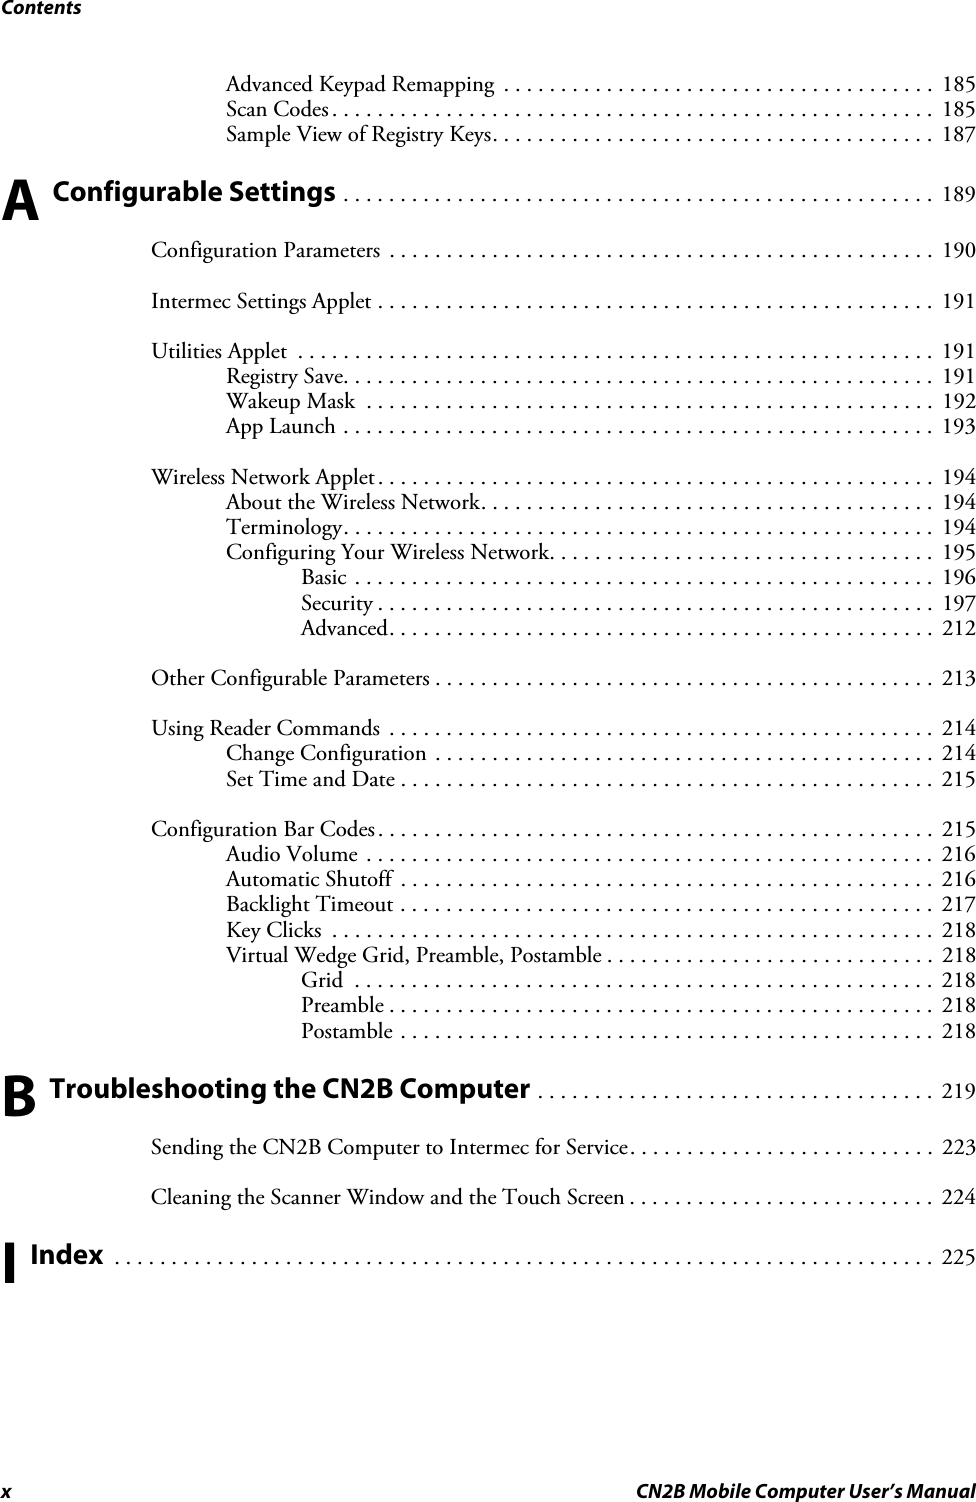
![ContentsCN2B Mobile Computer User’s Manual iiiContentsBefore You Begin . . . . . . . . . . . . . . . . . . . . . . . . . . . . . . . . . . . . . . . . . . . . . . . . . . . . . . . . .xiSafety Information . . . . . . . . . . . . . . . . . . . . . . . . . . . . . . . . . . . . . . . . . . . . . . . . . xiGlobal Services and Support. . . . . . . . . . . . . . . . . . . . . . . . . . . . . . . . . . . . . . . . . . xiWho Should Read This Document? . . . . . . . . . . . . . . . . . . . . . . . . . . . . . . . . . . . xiiRelated Documents . . . . . . . . . . . . . . . . . . . . . . . . . . . . . . . . . . . . . . . . . . . . . . . xiiPatent Information . . . . . . . . . . . . . . . . . . . . . . . . . . . . . . . . . . . . . . . . . . . . . . . . xiii1 Introduction . . . . . . . . . . . . . . . . . . . . . . . . . . . . . . . . . . . . . . . . . . . . . . . . . . . . . . . . . . . . . . . . . 1Audio System. . . . . . . . . . . . . . . . . . . . . . . . . . . . . . . . . . . . . . . . . . . . . . . . . . . . . . . . . . . . 2Speaker. . . . . . . . . . . . . . . . . . . . . . . . . . . . . . . . . . . . . . . . . . . . . . . . . . . . . . . . . . 2Microphone . . . . . . . . . . . . . . . . . . . . . . . . . . . . . . . . . . . . . . . . . . . . . . . . . . . . . . 2External Headset Jack. . . . . . . . . . . . . . . . . . . . . . . . . . . . . . . . . . . . . . . . . . . . . . . 3Battery. . . . . . . . . . . . . . . . . . . . . . . . . . . . . . . . . . . . . . . . . . . . . . . . . . . . . . . . . . . . . . . . . 3Installing and Charging the Battery . . . . . . . . . . . . . . . . . . . . . . . . . . . . . . . . . . . . 5Removing the Battery . . . . . . . . . . . . . . . . . . . . . . . . . . . . . . . . . . . . . . . . . . . . . . . 6Maximizing Battery Life . . . . . . . . . . . . . . . . . . . . . . . . . . . . . . . . . . . . . . . . . . . . . 7Beeper . . . . . . . . . . . . . . . . . . . . . . . . . . . . . . . . . . . . . . . . . . . . . . . . . . . . . . . . . . . . . . . . . 8Enabling the Beeper . . . . . . . . . . . . . . . . . . . . . . . . . . . . . . . . . . . . . . . . . . . . . . . . 8Adjusting the Beeper Volume . . . . . . . . . . . . . . . . . . . . . . . . . . . . . . . . . . . . . . . . . 8Disabling the Beeper. . . . . . . . . . . . . . . . . . . . . . . . . . . . . . . . . . . . . . . . . . . . . . . . 8Intermec Settings Applet . . . . . . . . . . . . . . . . . . . . . . . . . . . . . . . . . . . . . . . . . . . . . . . . . . . 9Key Sequences . . . . . . . . . . . . . . . . . . . . . . . . . . . . . . . . . . . . . . . . . . . . . . . . . . . . . . . . . . . 9[Orange] Plane Keys. . . . . . . . . . . . . . . . . . . . . . . . . . . . . . . . . . . . . . . . . . . . . . . . 9Alpha (Green) Plane Keys. . . . . . . . . . . . . . . . . . . . . . . . . . . . . . . . . . . . . . . . . . . 10LEDs . . . . . . . . . . . . . . . . . . . . . . . . . . . . . . . . . . . . . . . . . . . . . . . . . . . . . . . . . . . . . . . . . 12PSM Build Version . . . . . . . . . . . . . . . . . . . . . . . . . . . . . . . . . . . . . . . . . . . . . . . . . . . . . . 12Resetting Your CN2B Computer. . . . . . . . . . . . . . . . . . . . . . . . . . . . . . . . . . . . . . . . . . . . 13Performing a Warm-Boot. . . . . . . . . . . . . . . . . . . . . . . . . . . . . . . . . . . . . . . . . . . 13Performing a Cold-Boot . . . . . . . . . . . . . . . . . . . . . . . . . . . . . . . . . . . . . . . . . . . . 13Software Build Version . . . . . . . . . . . . . . . . . . . . . . . . . . . . . . . . . . . . . . . . . . . . . . . . . . . 14Software Tools. . . . . . . . . . . . . . . . . . . . . . . . . . . . . . . . . . . . . . . . . . . . . . . . . . . . . . . . . . 14SmartSystems Foundation Console (www.intermec.com/SmartSystems) . . . . . . . 14Intermec Resource Kits (www.intermec.com/IDL) . . . . . . . . . . . . . . . . . . . . . . . . 14Storage Media . . . . . . . . . . . . . . . . . . . . . . . . . . . . . . . . . . . . . . . . . . . . . . . . . . . . . . . . . . 15Wireless Network Support. . . . . . . . . . . . . . . . . . . . . . . . . . . . . . . . . . . . . . . . . . . . . . . . . 15Accessories . . . . . . . . . . . . . . . . . . . . . . . . . . . . . . . . . . . . . . . . . . . . . . . . . . . . . . . . . . . . . 15](https://usermanual.wiki/Intermec-Technologies/2610CF.User-Manual-1-of-3/User-Guide-616311-Page-3.png)
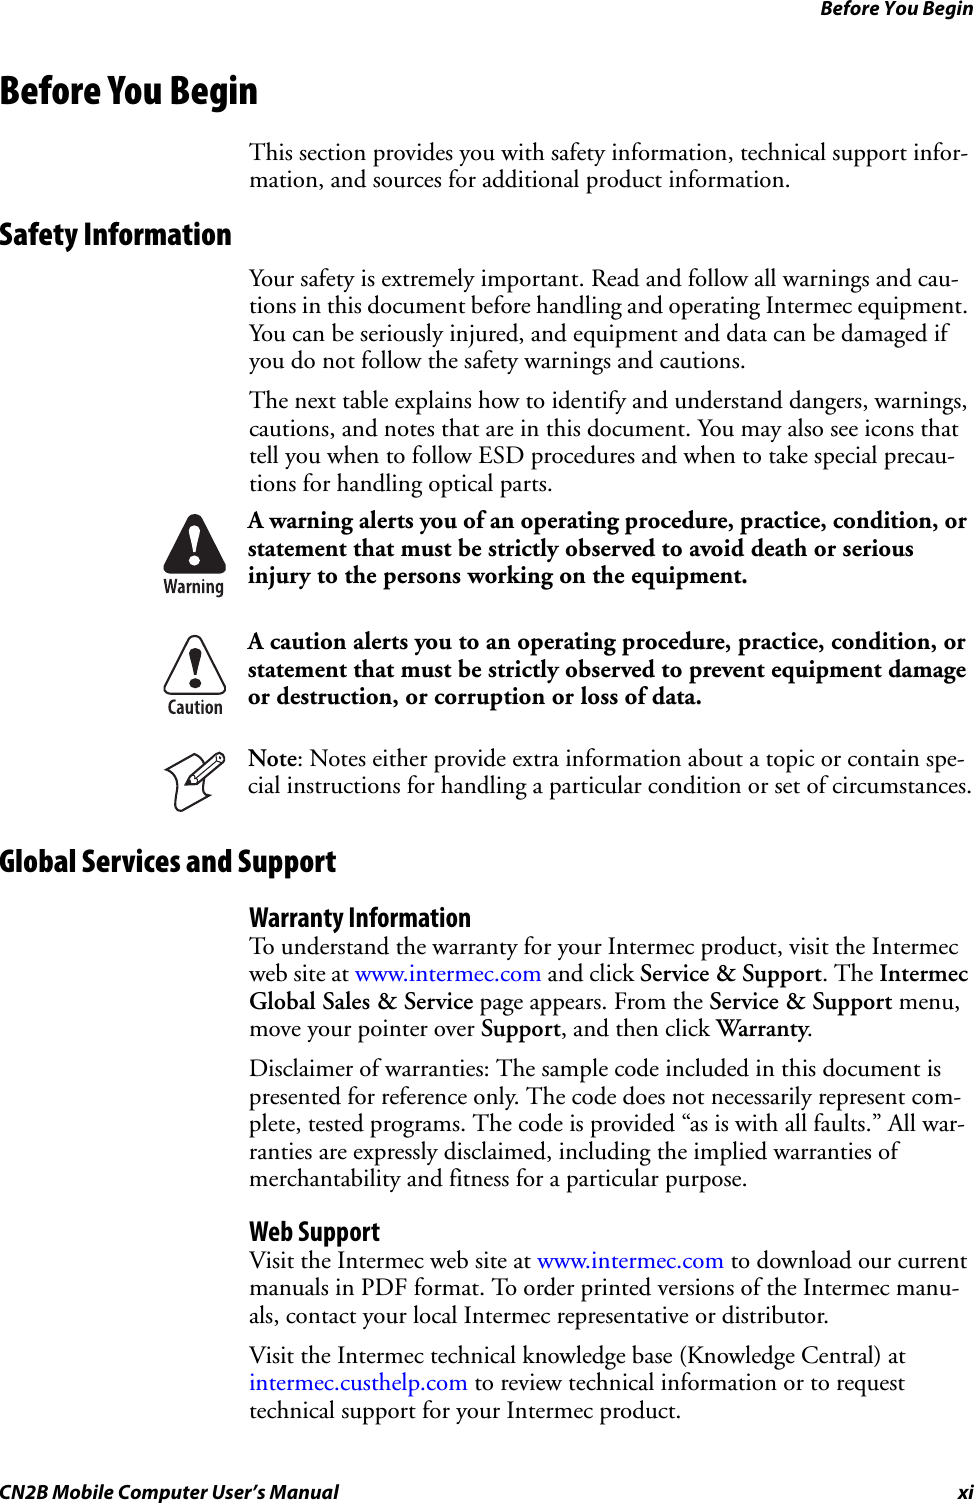

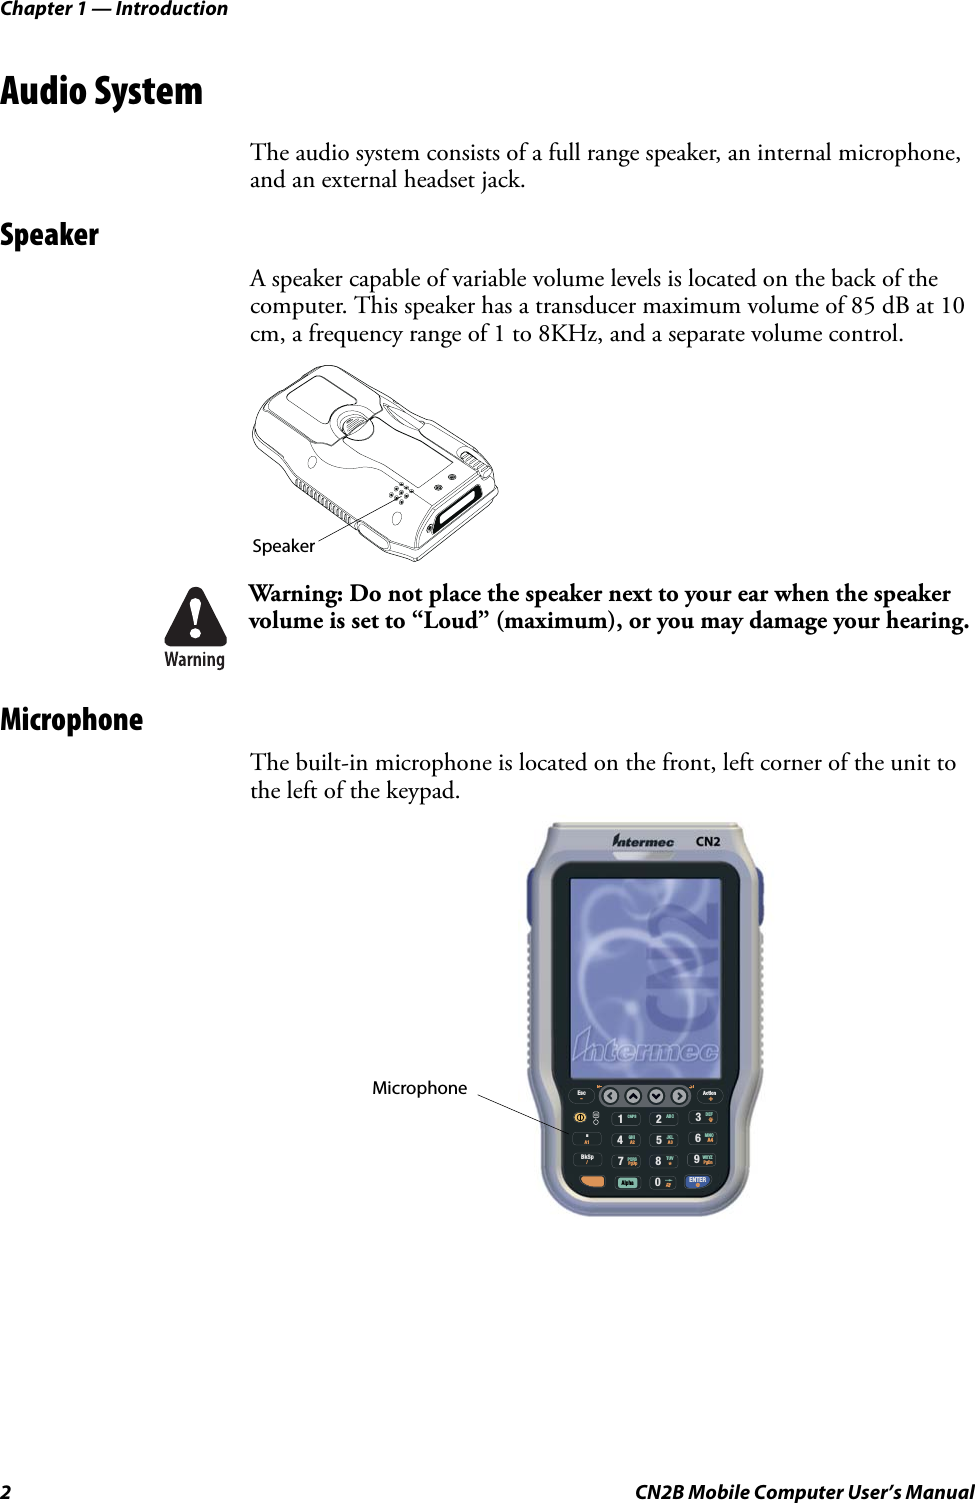
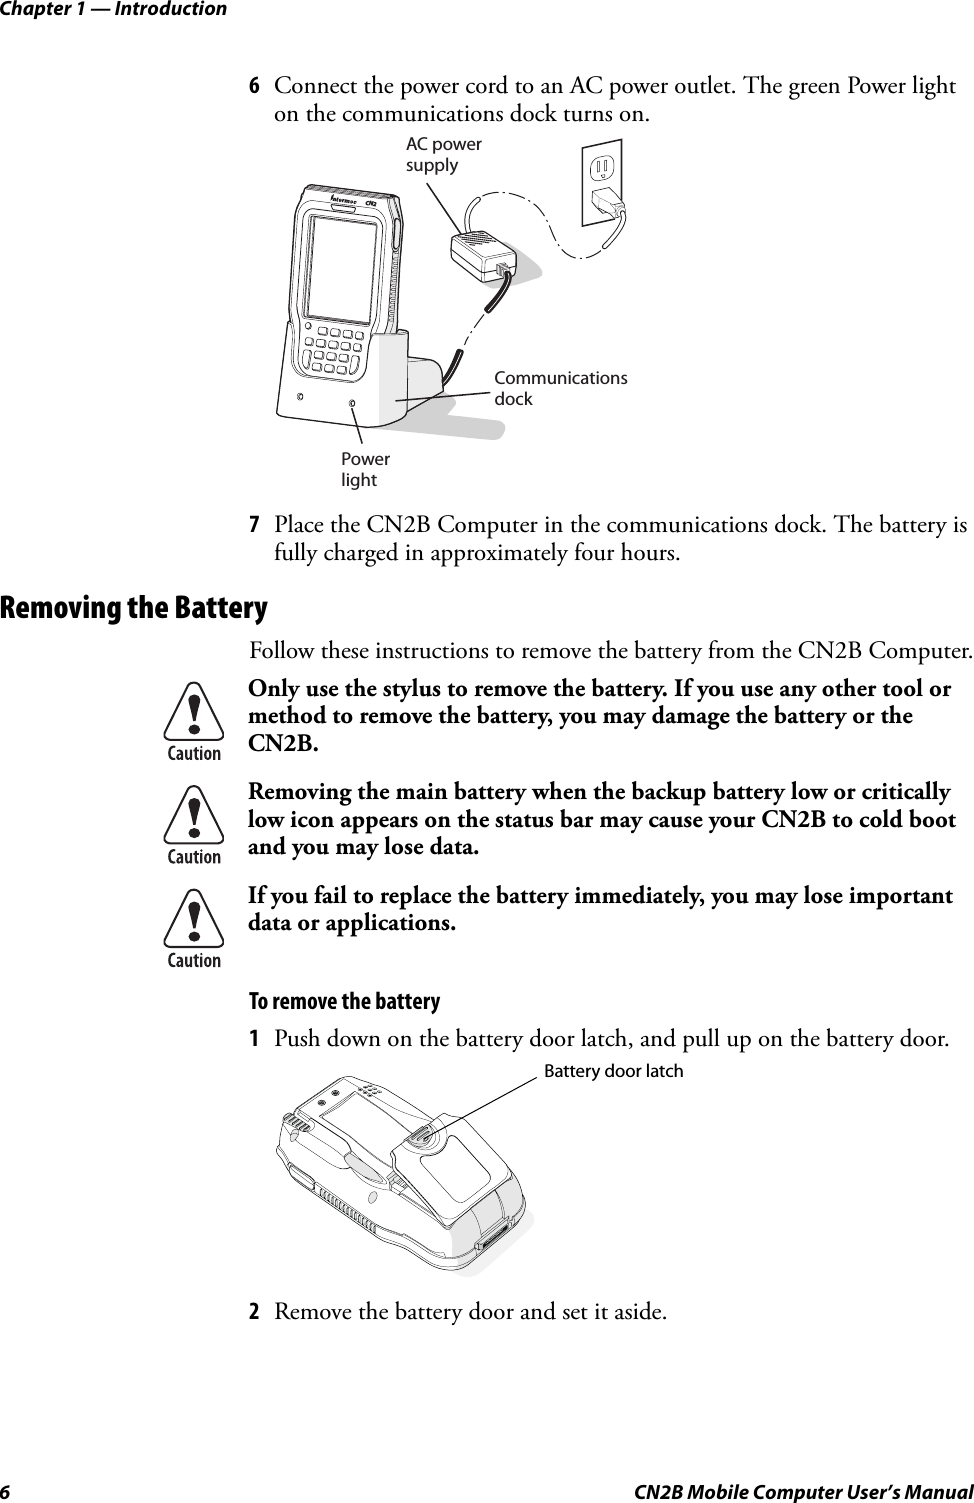
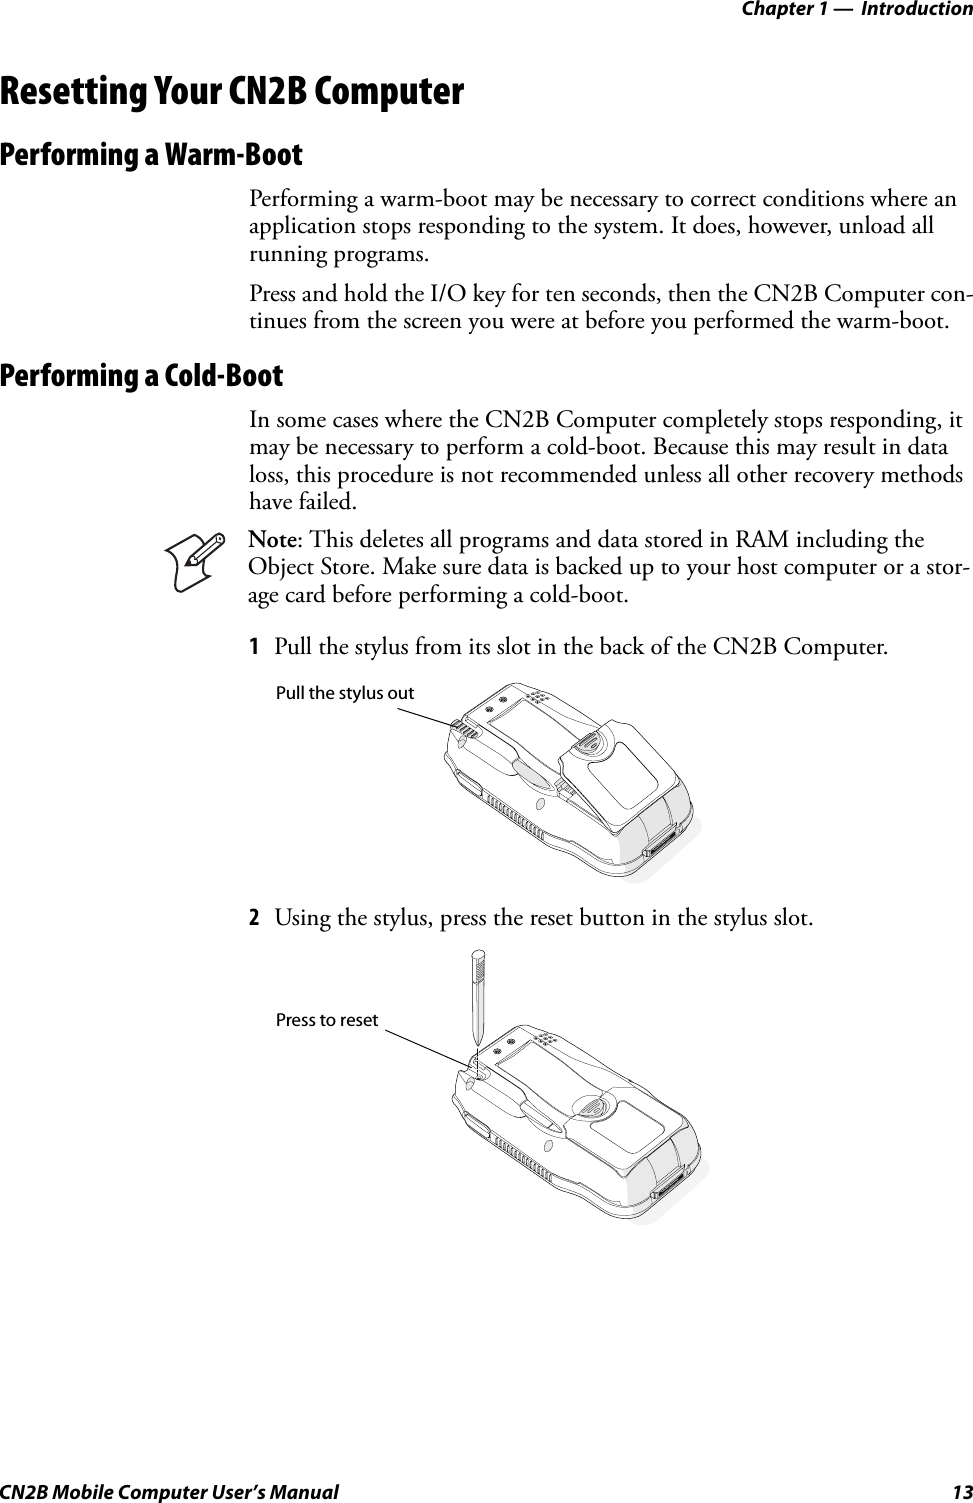
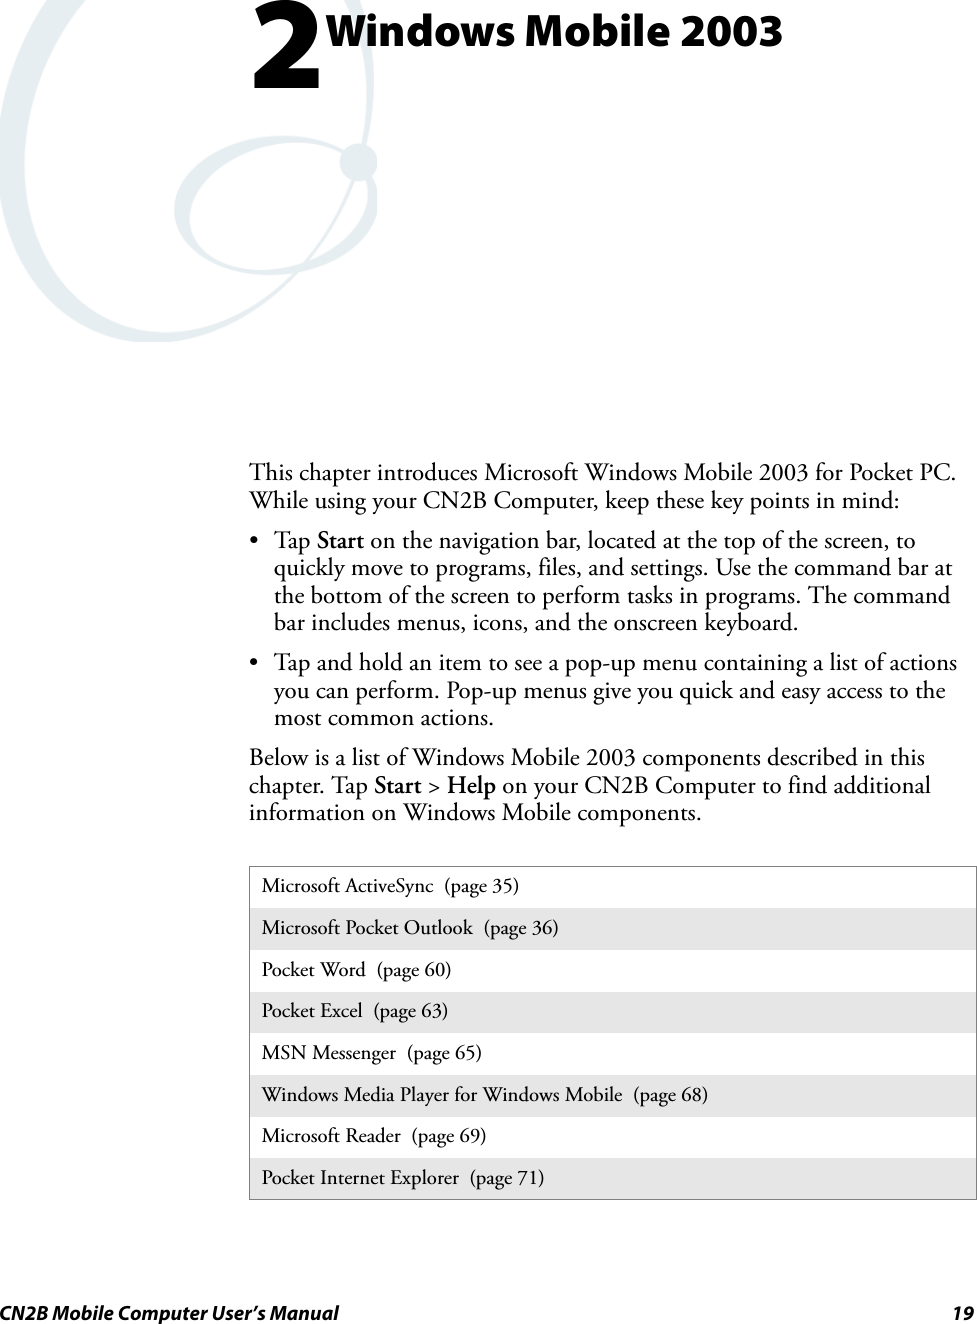
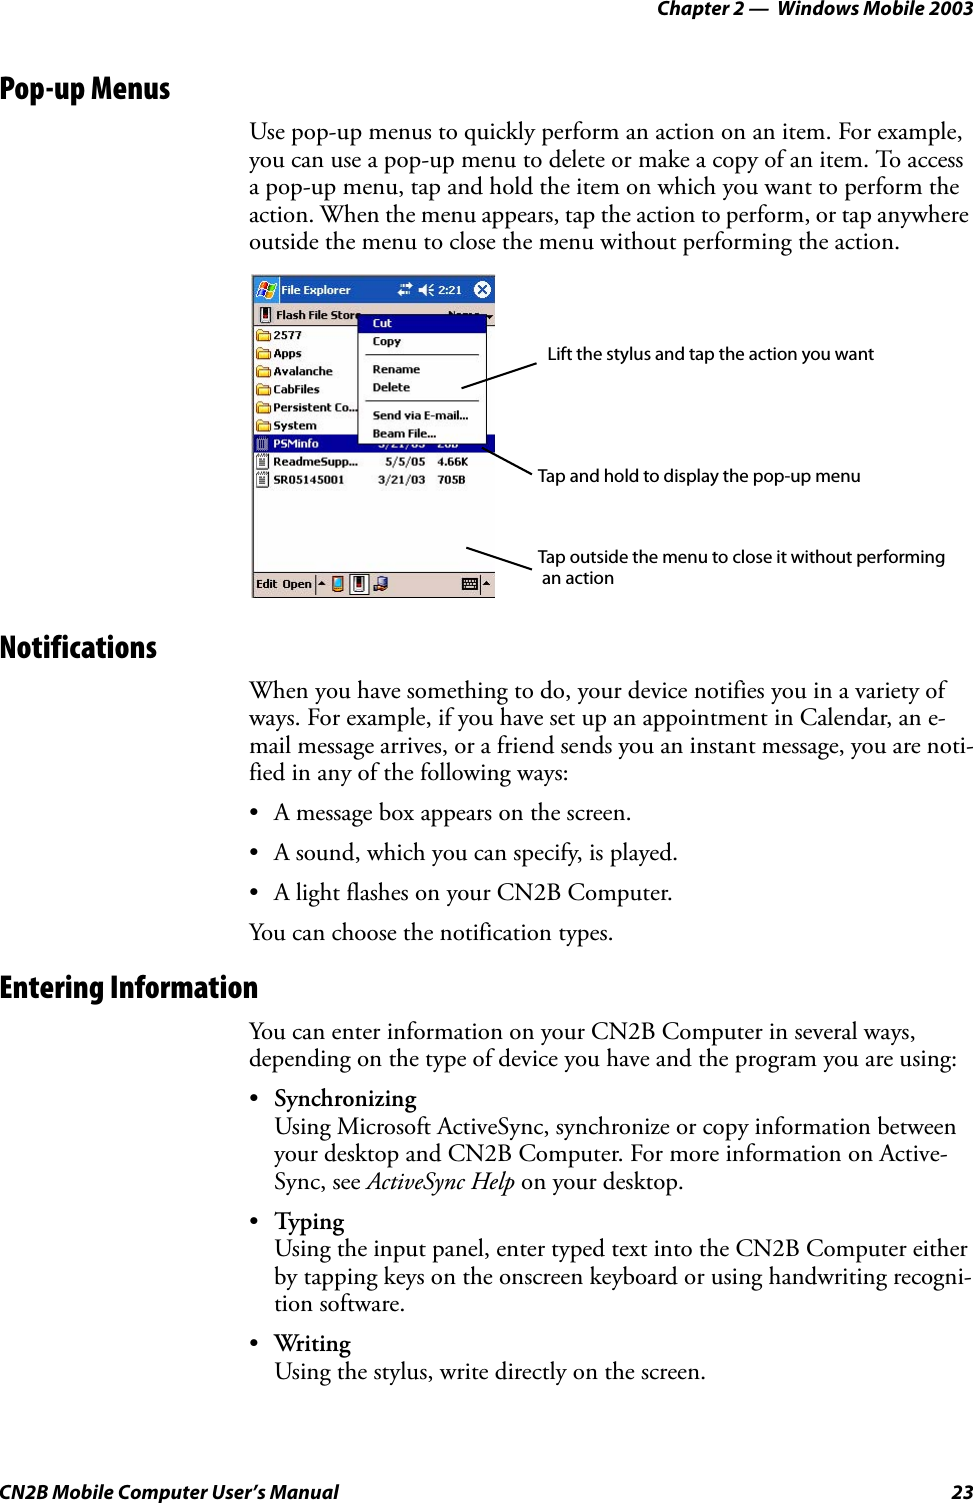
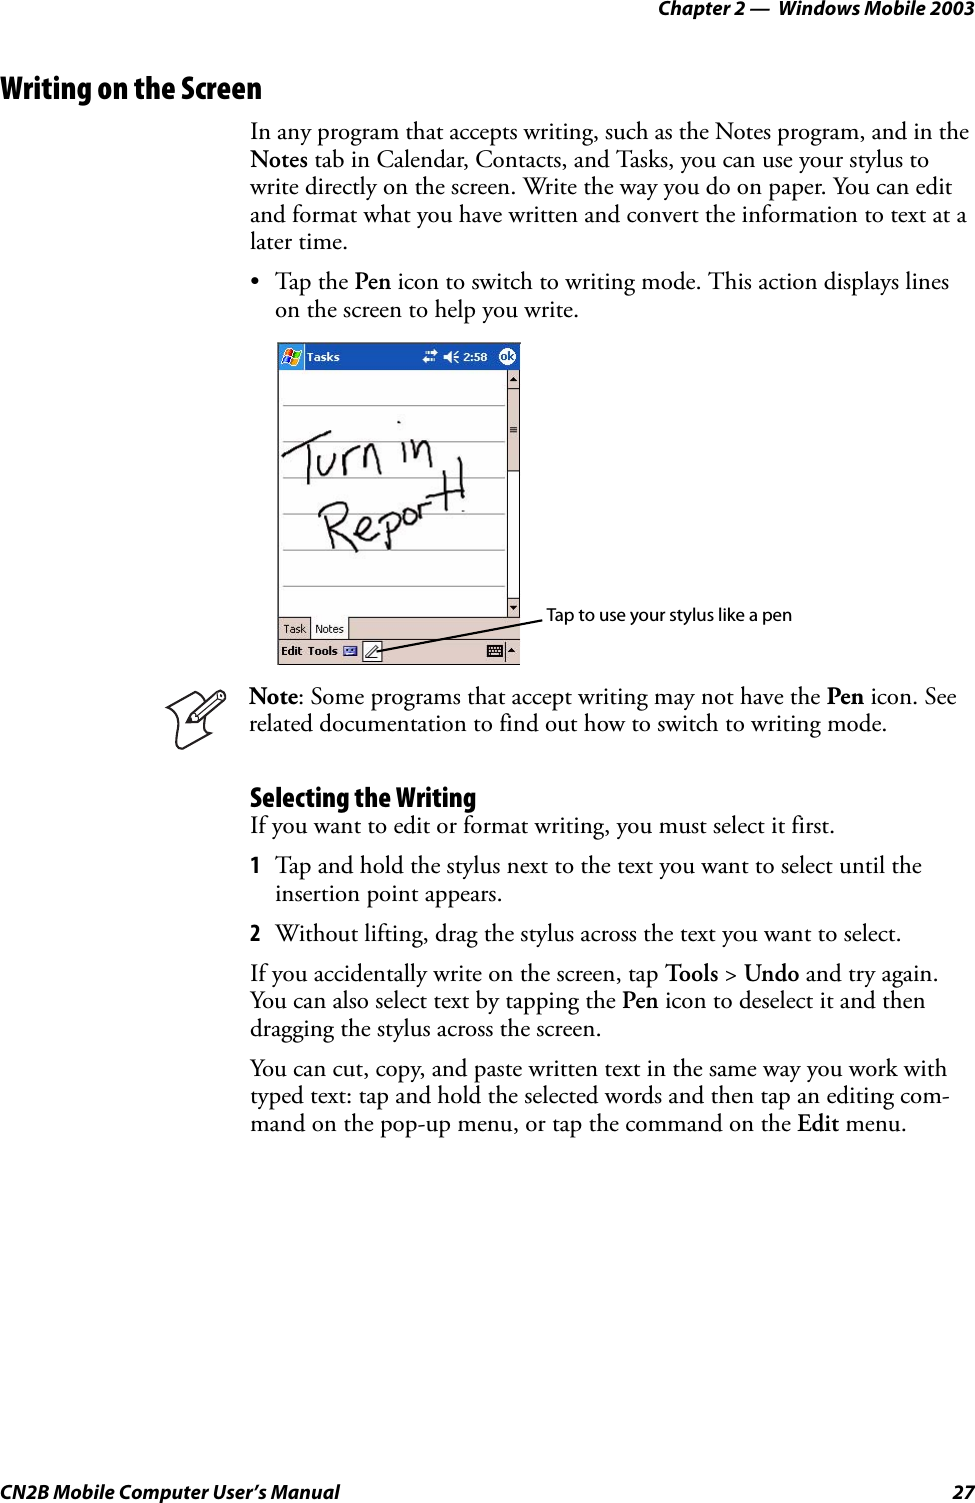
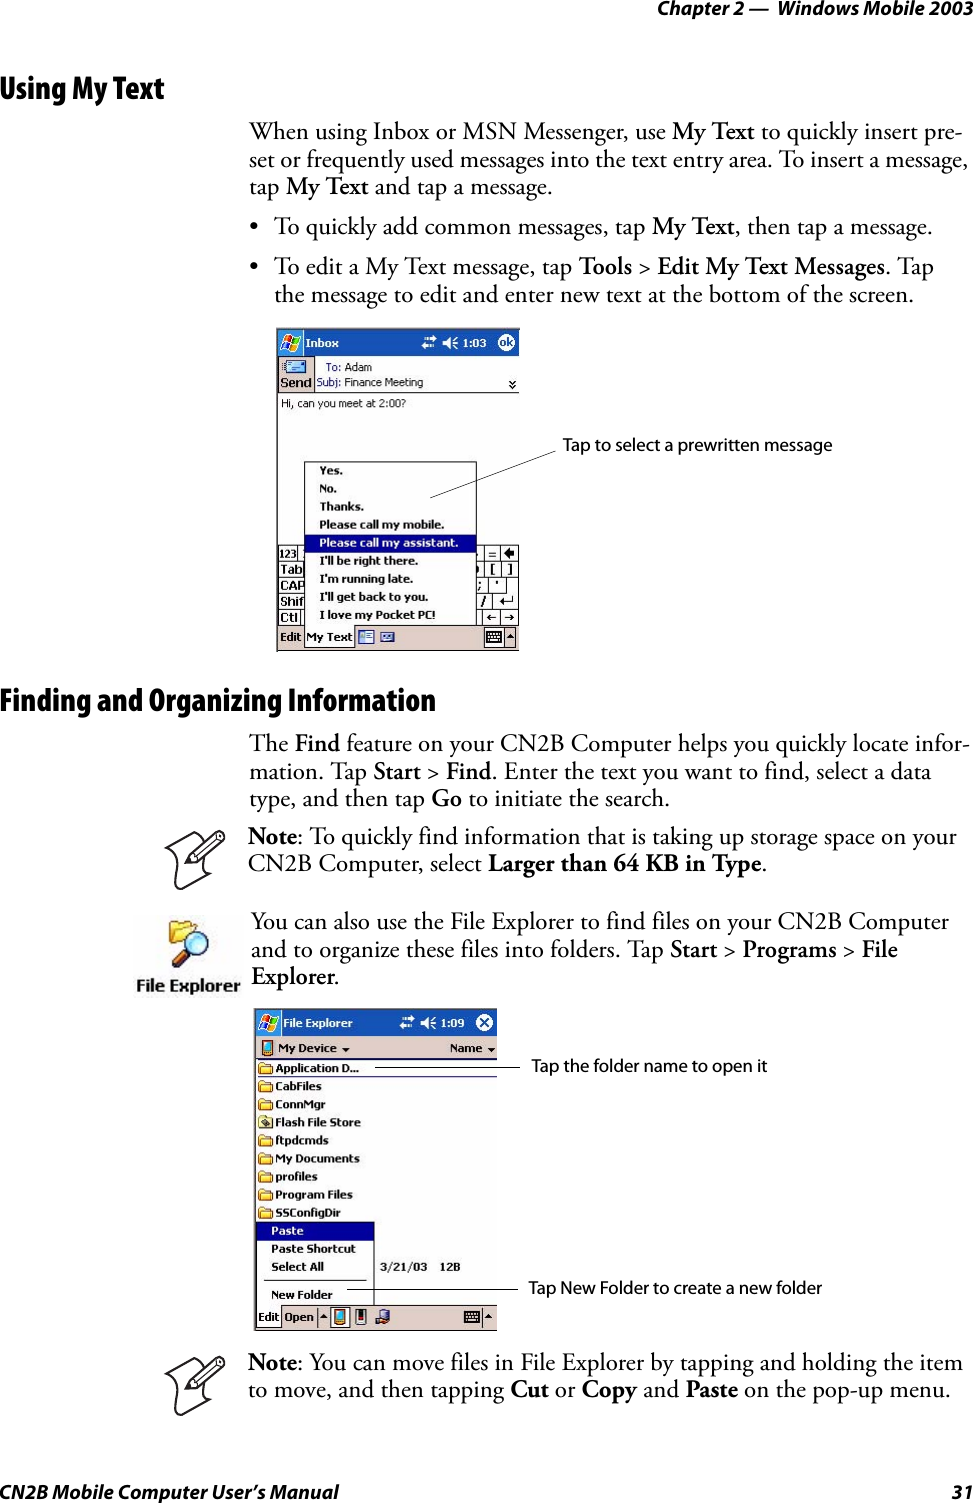
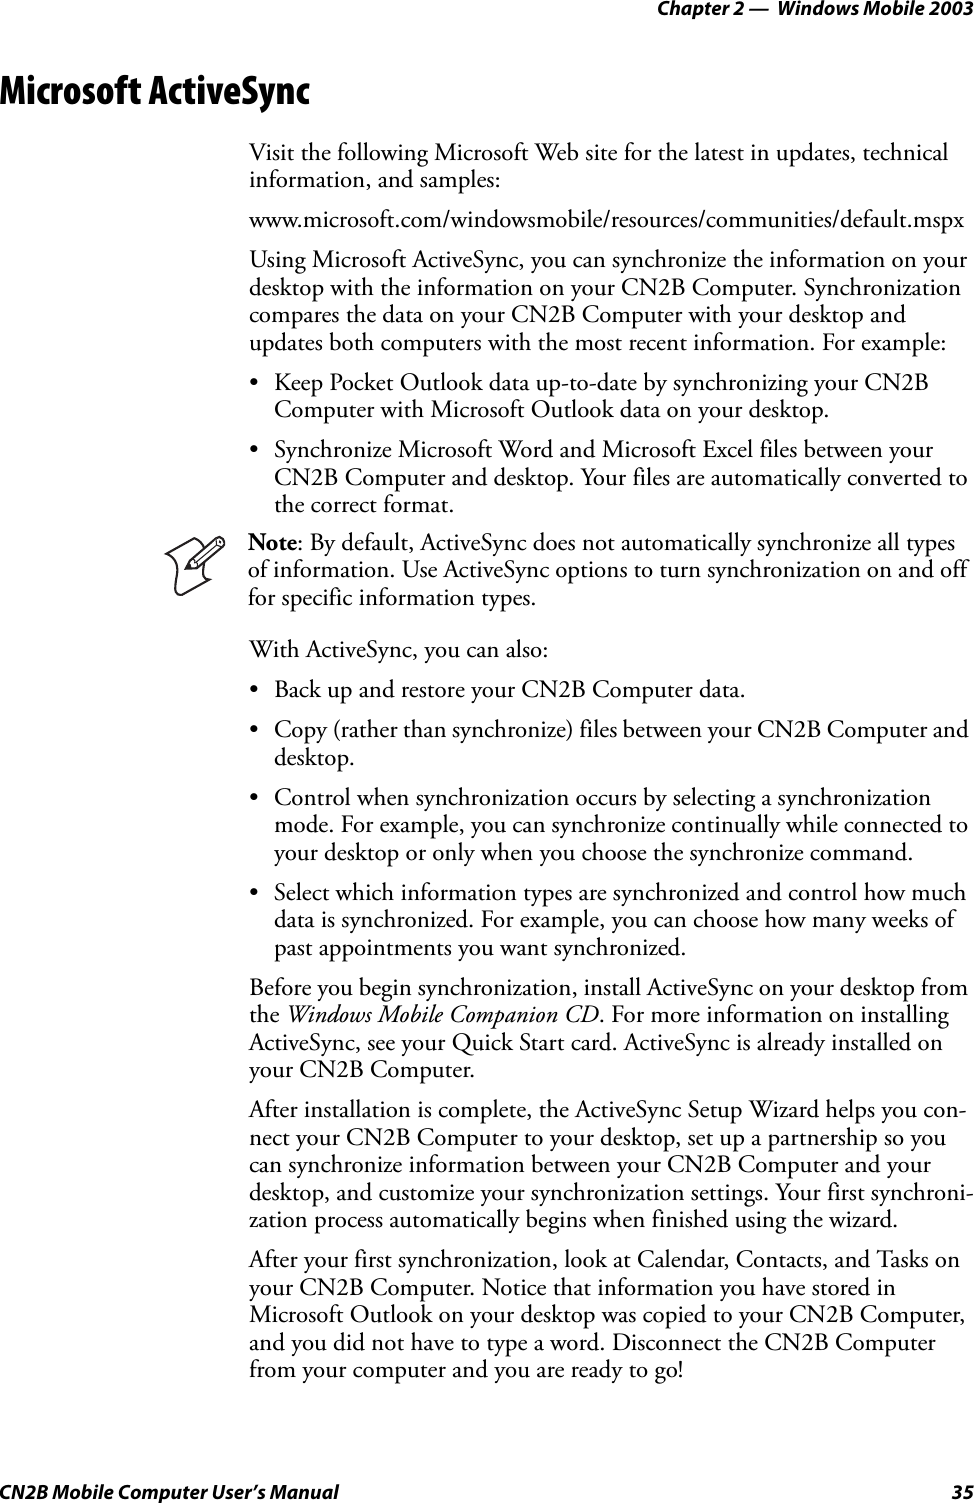
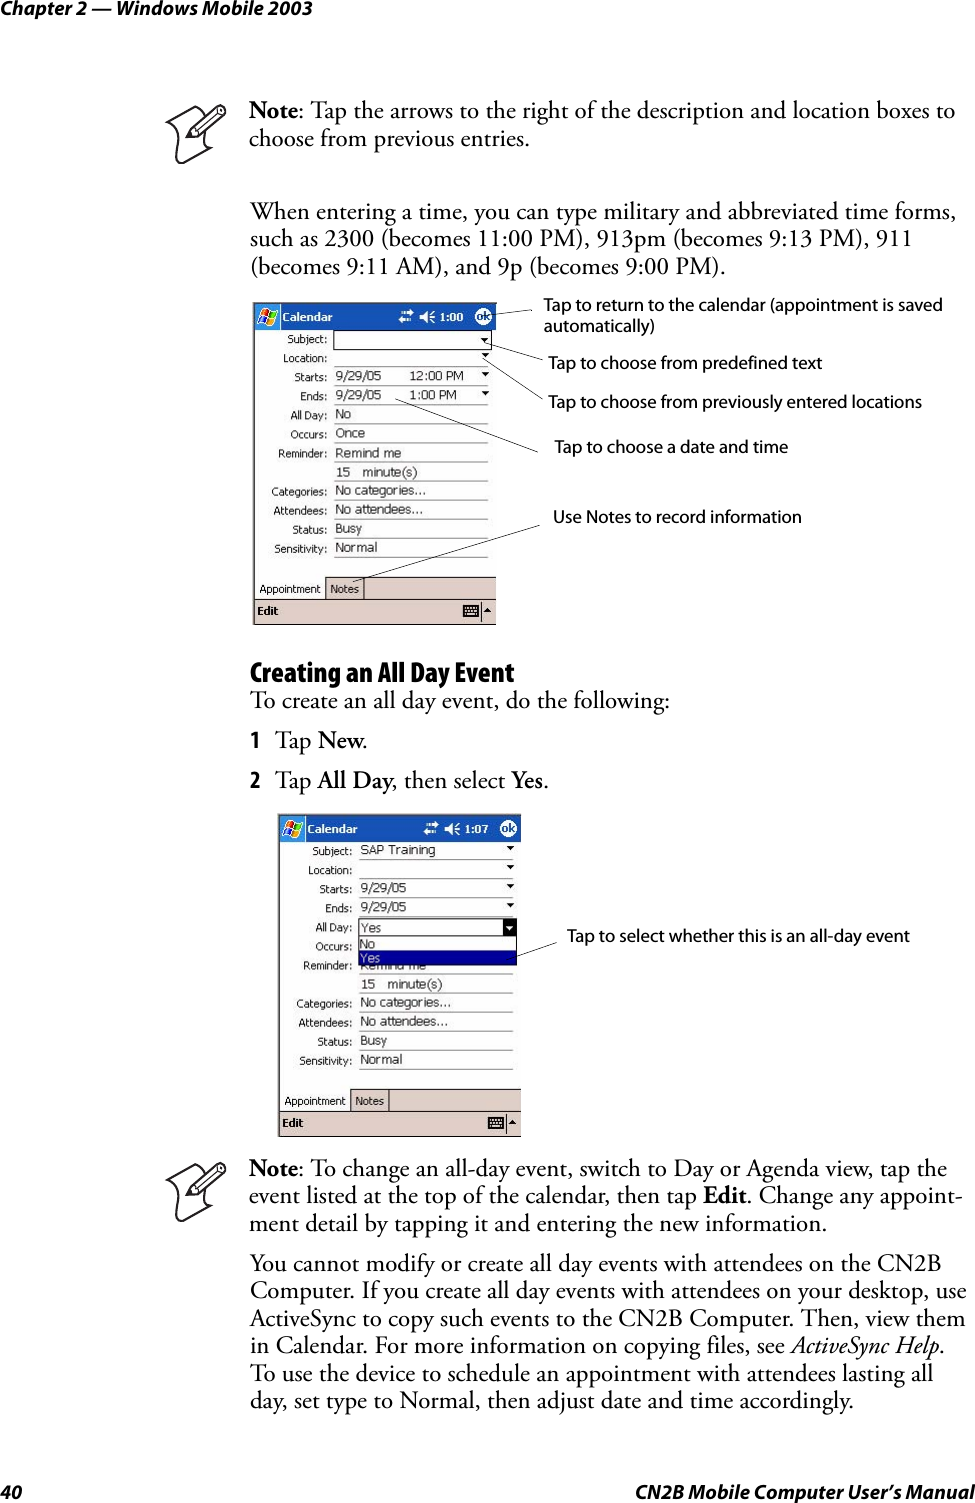
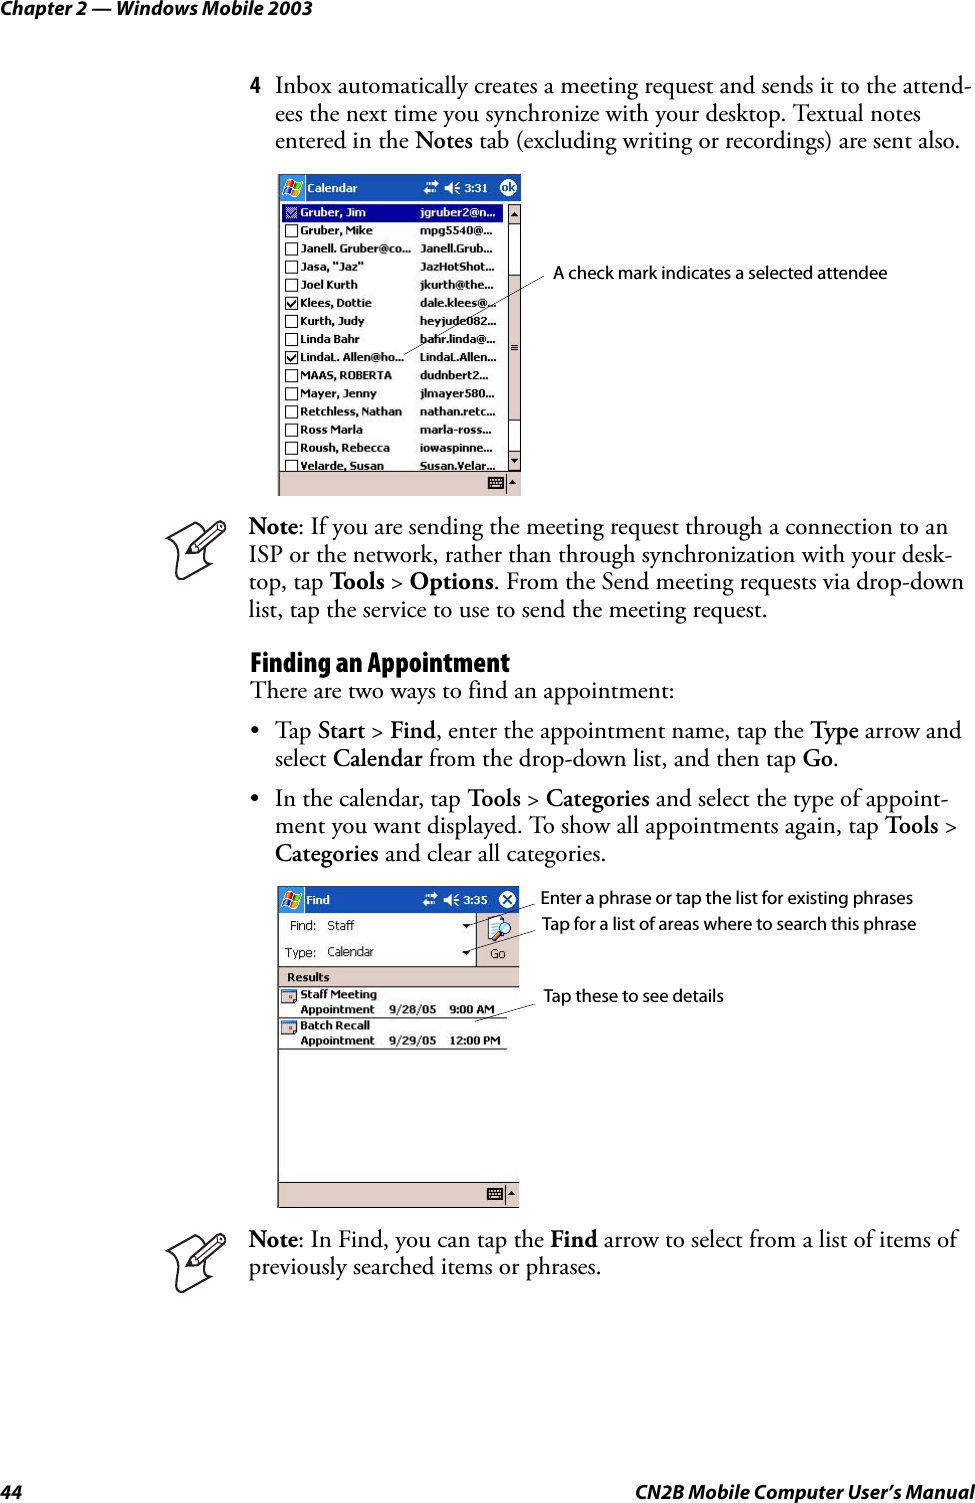
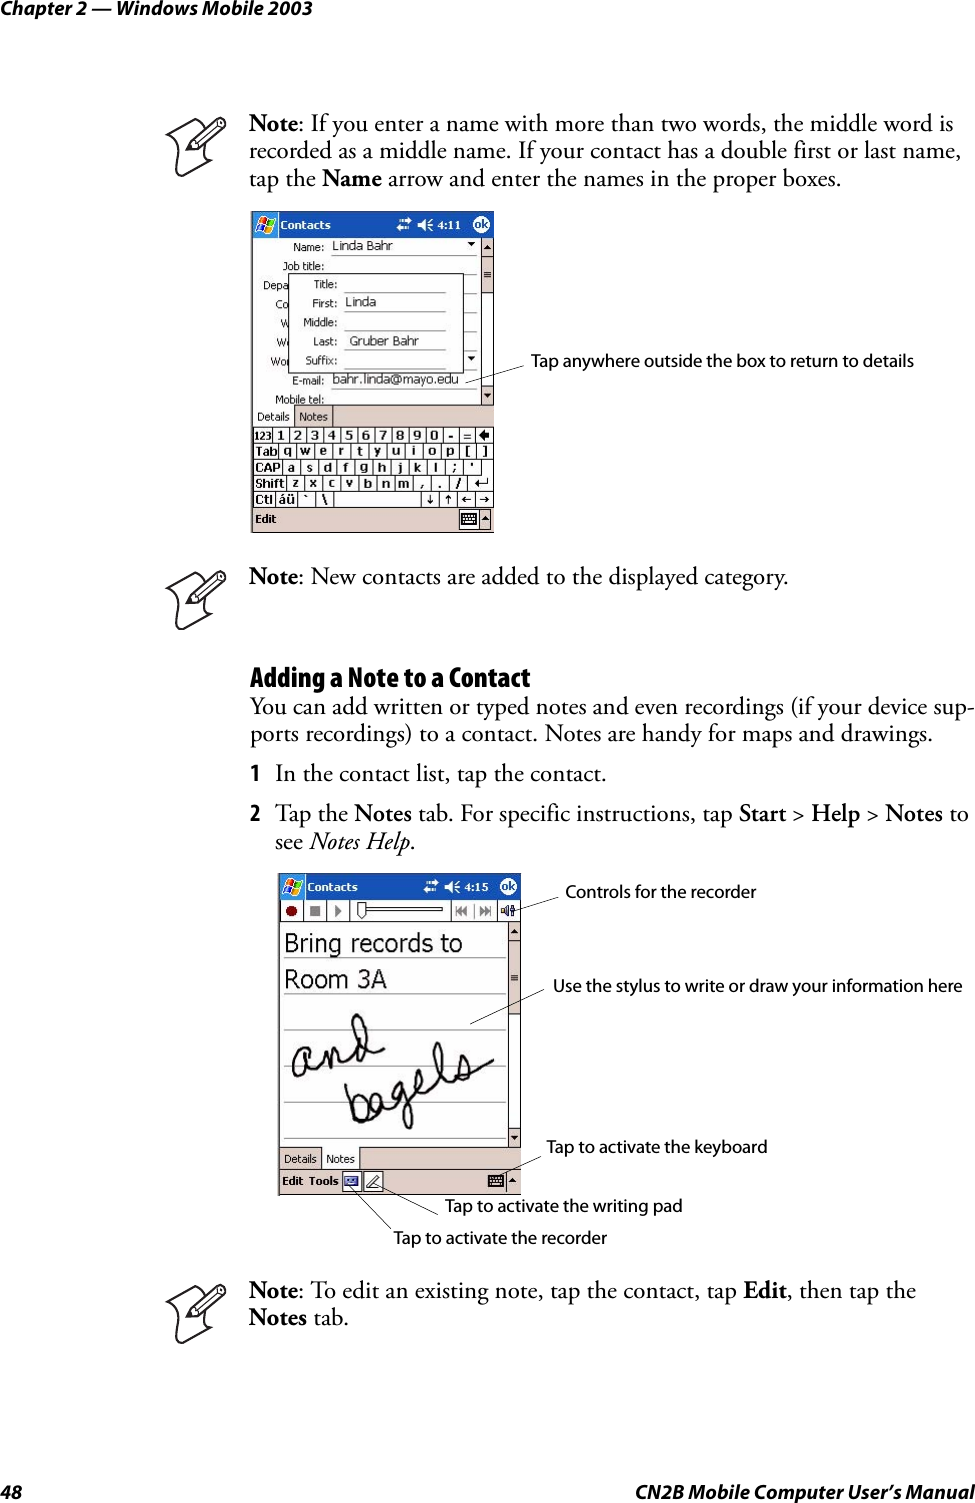
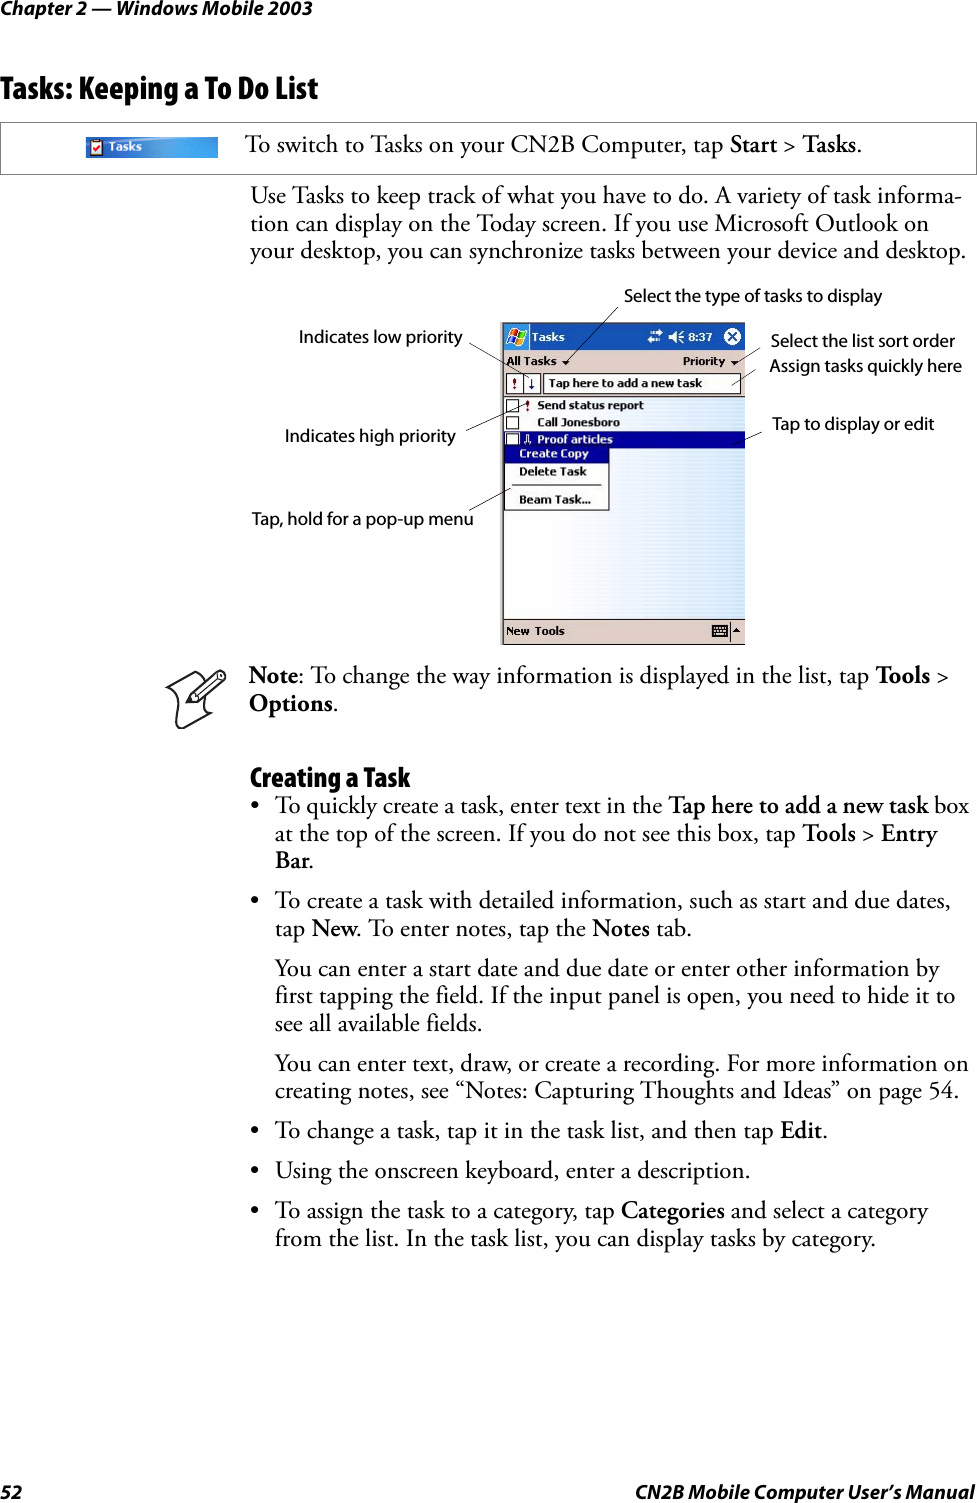
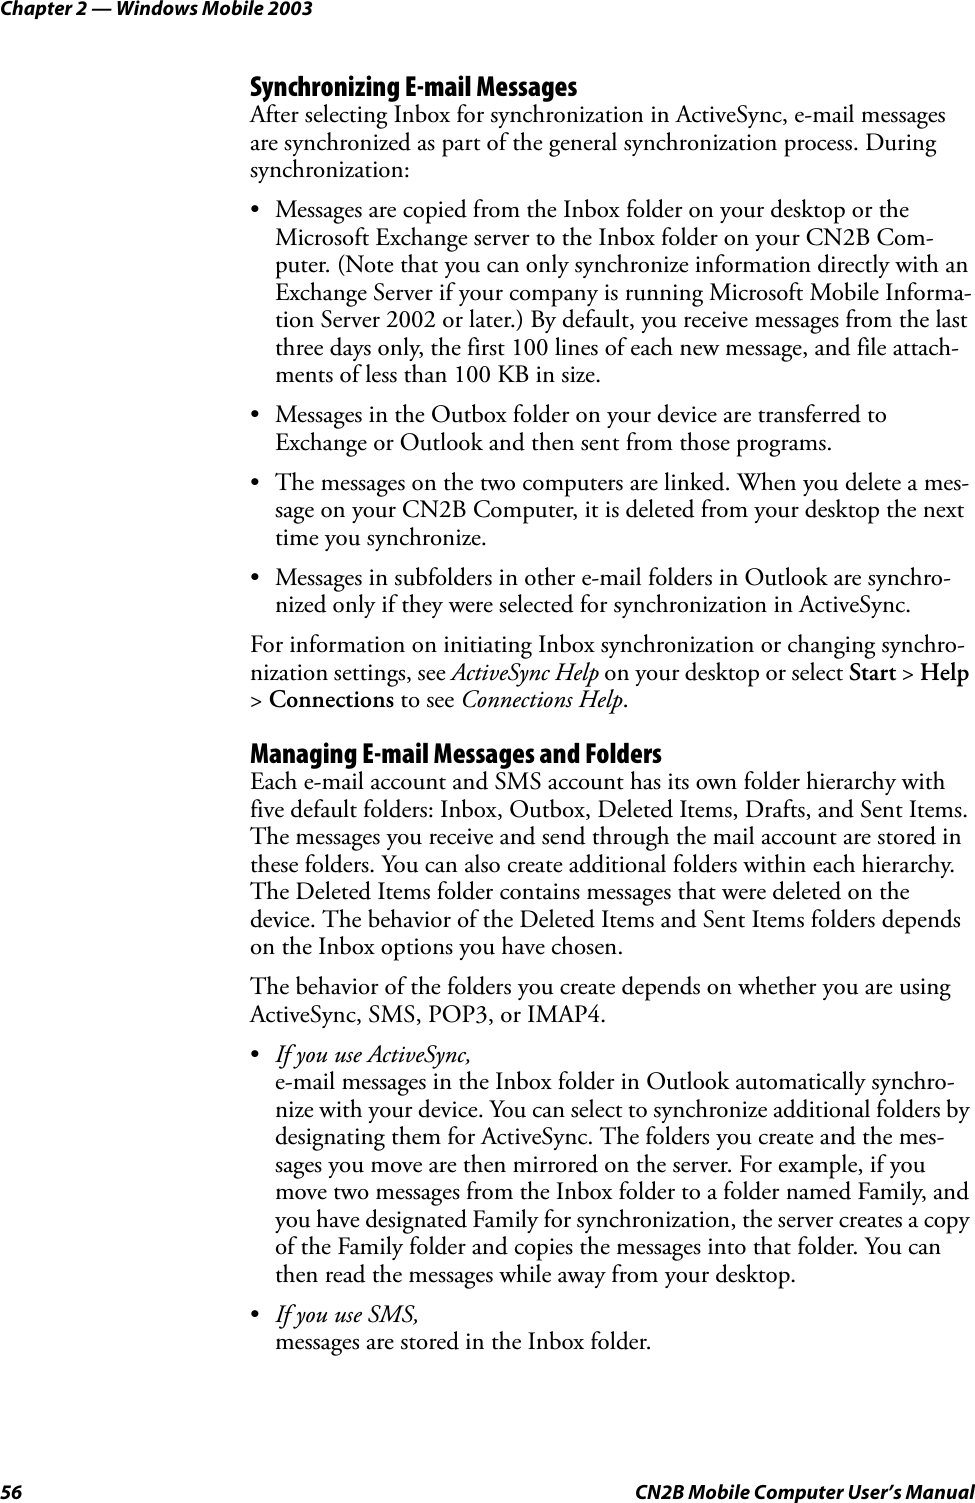
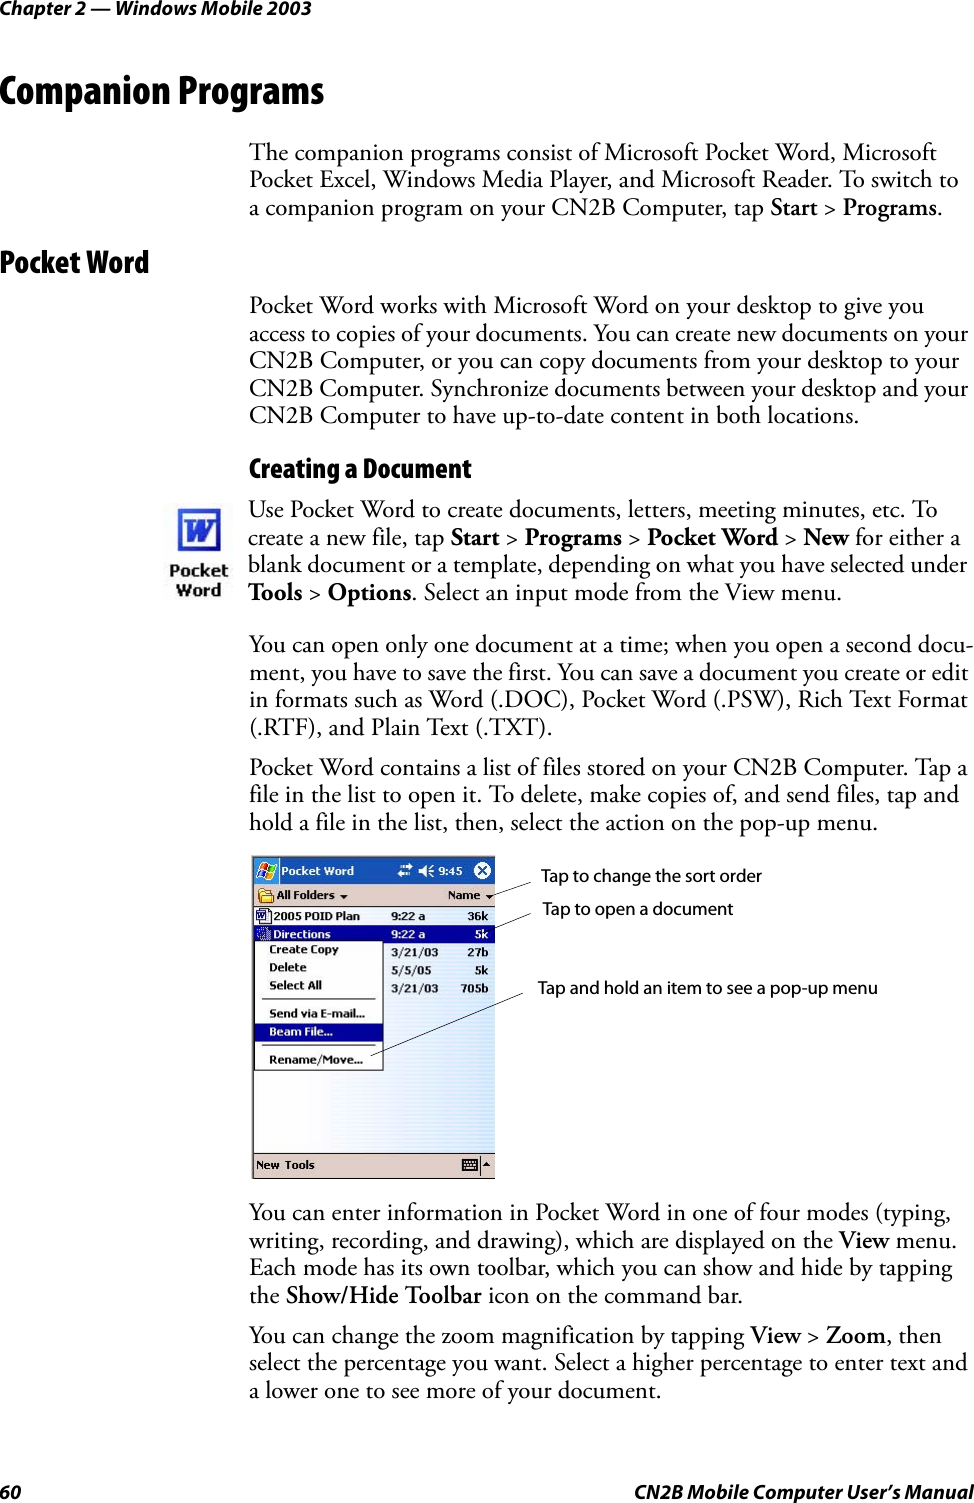
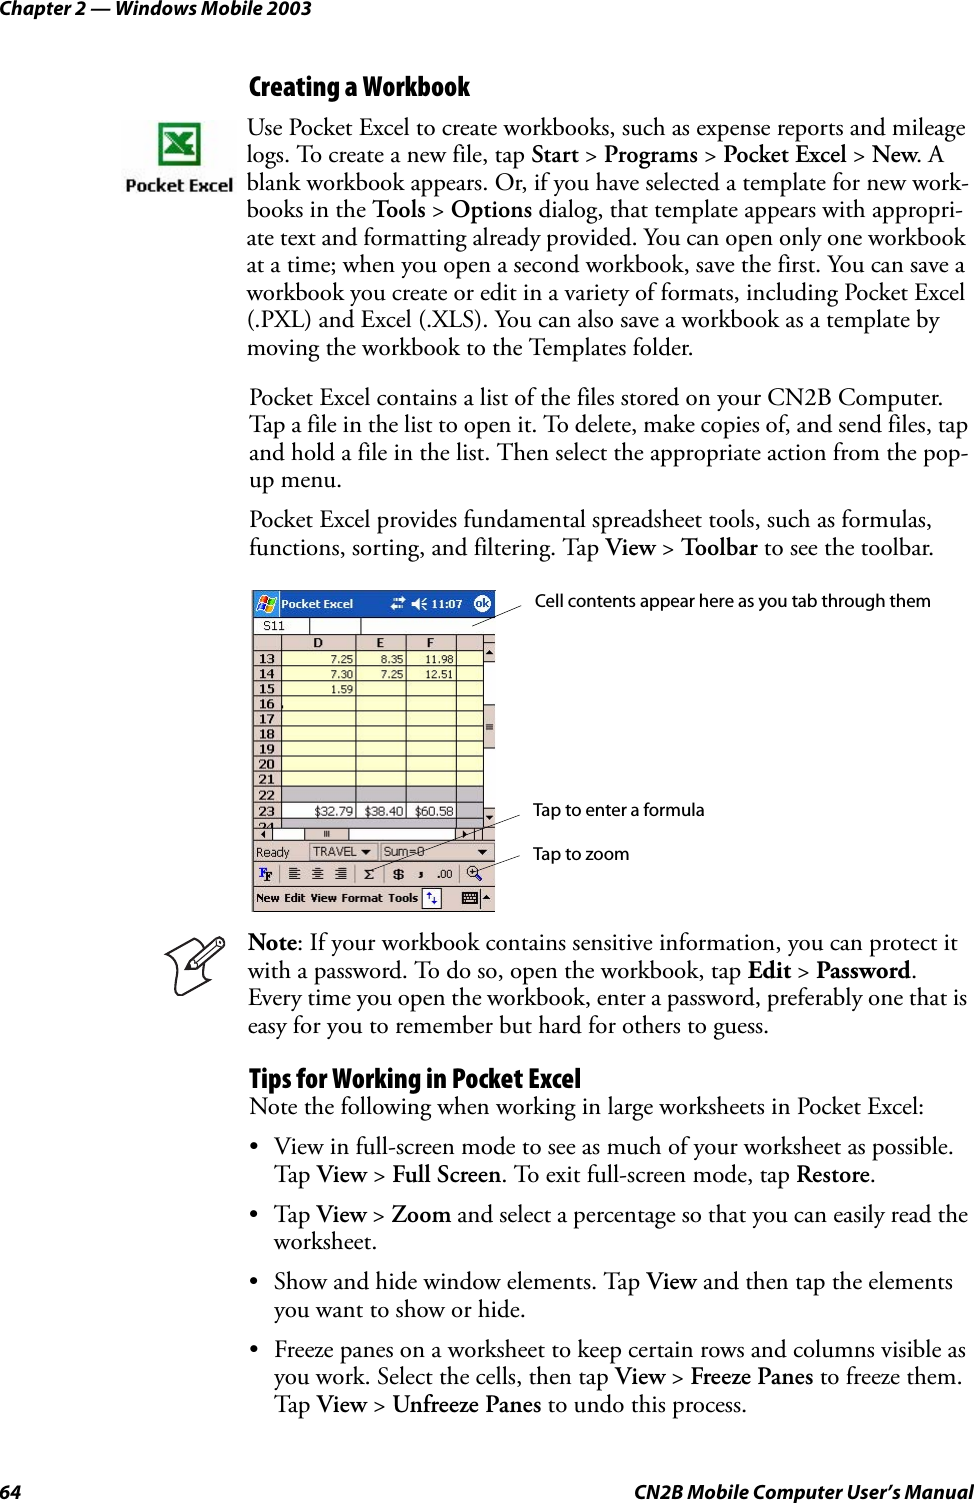
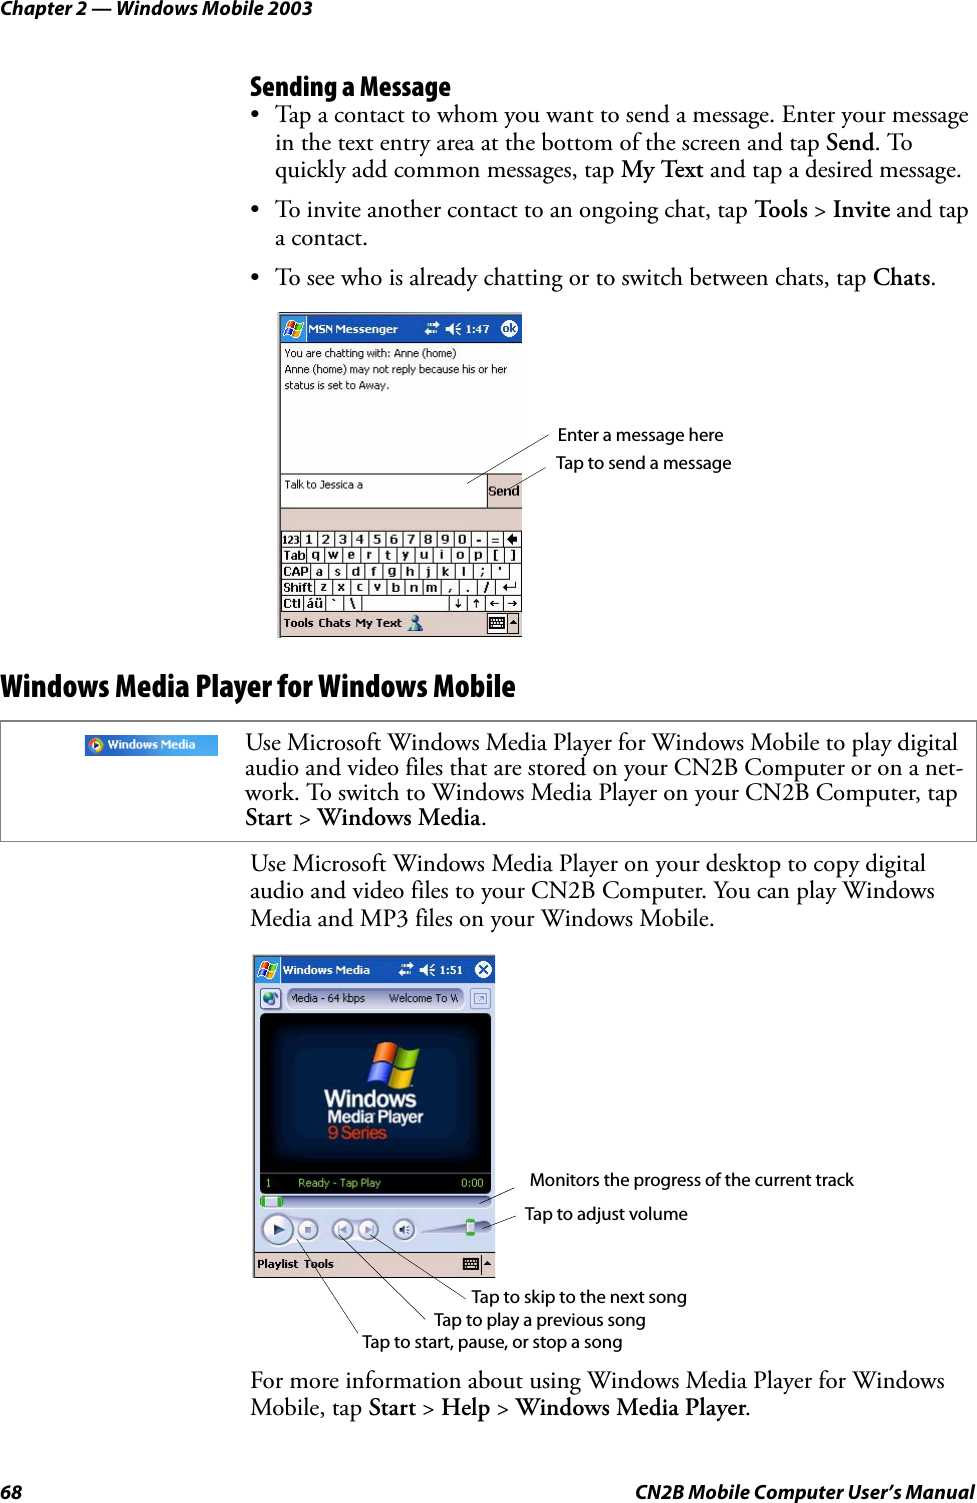
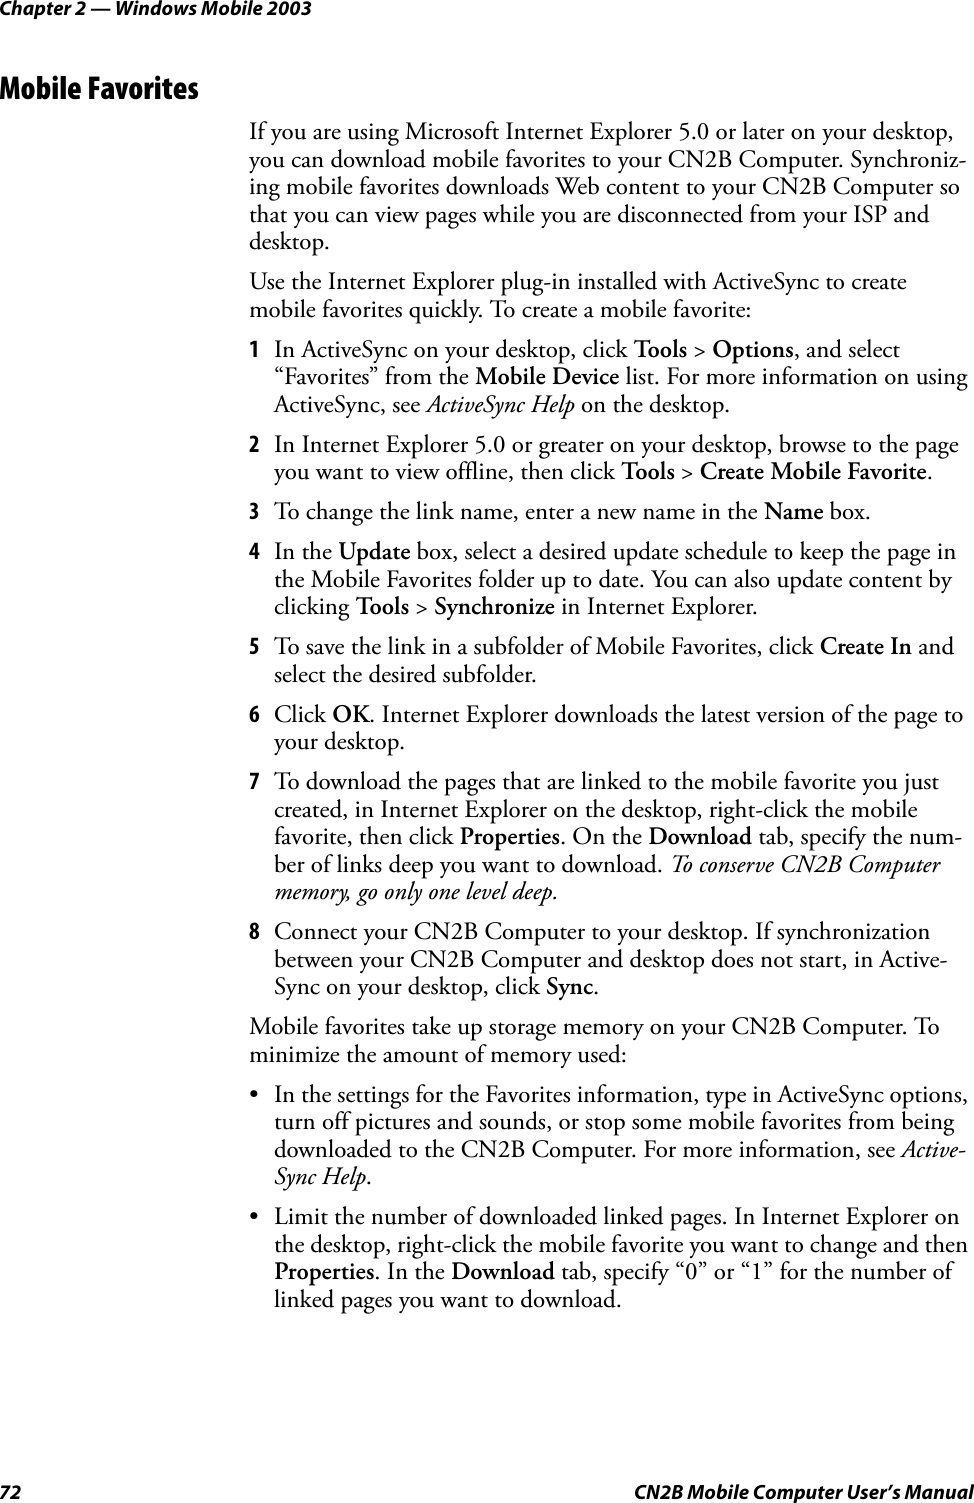
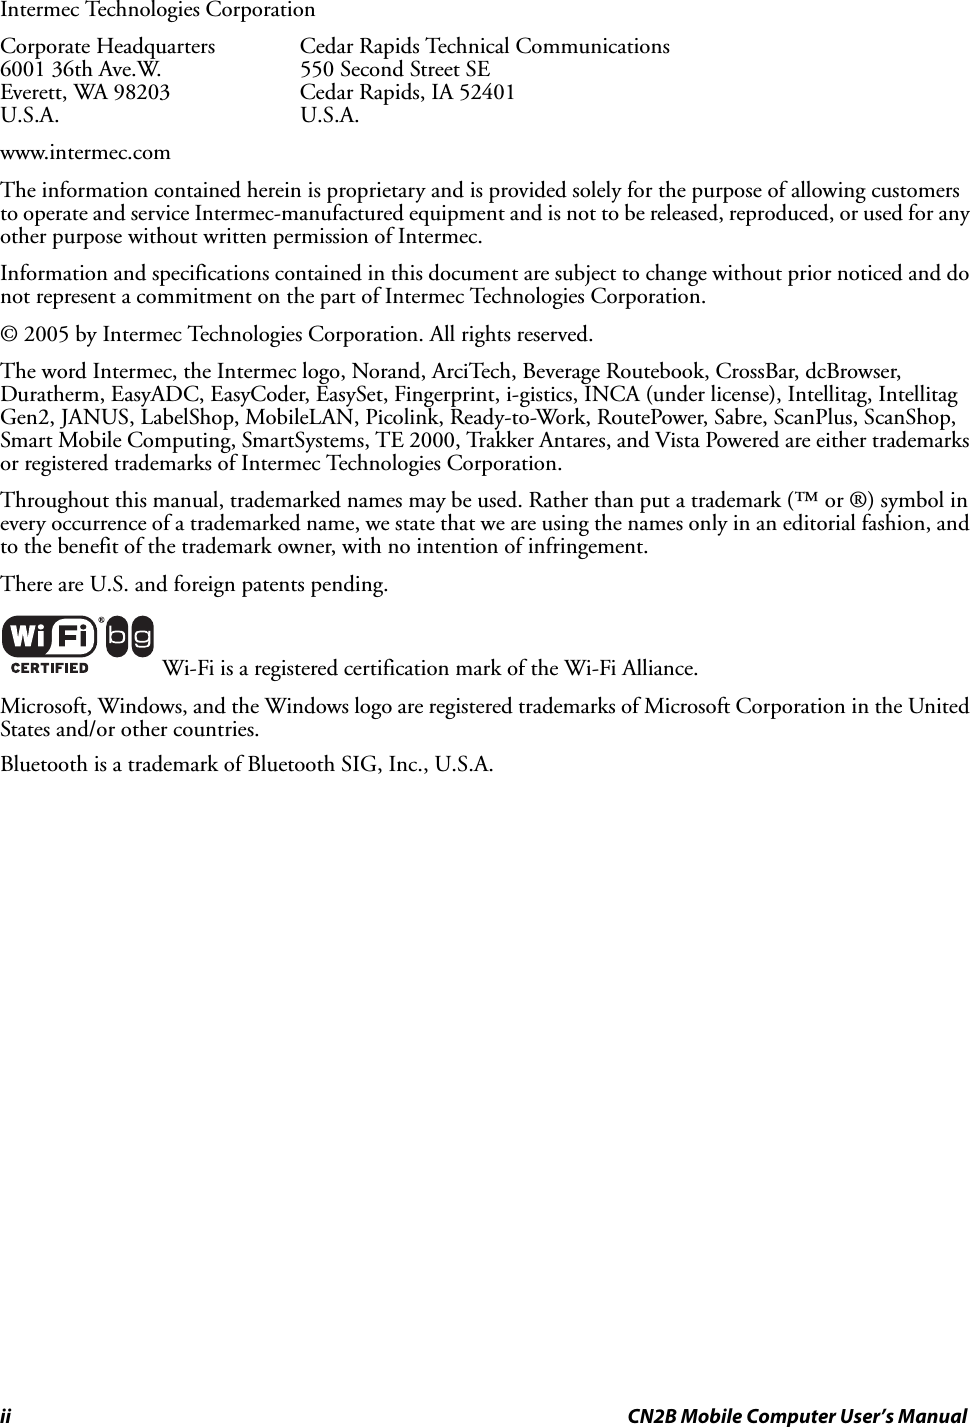
![Chapter 1 — IntroductionCN2B Mobile Computer User’s Manual 9Intermec Settings AppletUse the Intermec Settings applet to gather, view, and update device config-uration settings. Information about the settings you can configure with the Intermec Settings applet is in the Intermec Computer Command Reference Manual (P/N: 073529) available online at www.intermec.com.See the Data Collection Resource Kit in the Intermec Developer Library (IDL) for information about data collection functions. The IDL is available as a download from the Intermec web site at www.intermec.com/idl. Con-tact your Intermec representative for more information. Key SequencesUse these key sequences to enter characters into your CN2B Computer.[Orange] Plane KeysThe orange plane key provides you access to display controls, special char-acters, and Pocket PC options.Press the orange key for each orange plane key stroke you wish to make. For example to turn on the front light, press and hold the orange key plus the [3] key. To turn the front light off, press the appropriate keys again. Below and on the next page are the key sequences.This table lists sequences that use the orange plane key. See Chapter 2, “Windows Mobile 2003” to learn about the Pocket PC applications.Tap Start > Settings > the System tab > the Intermec Settings icon to access the applet.Press the Keys To Do Thisorange [3] Toggle the backlight on or off (also goes through backlight power levels if held down)orange [.] Access the Pocket PC Record application (see Note).](https://usermanual.wiki/Intermec-Technologies/2610CF.User-Manual-1-of-3/User-Guide-616311-Page-23.png)
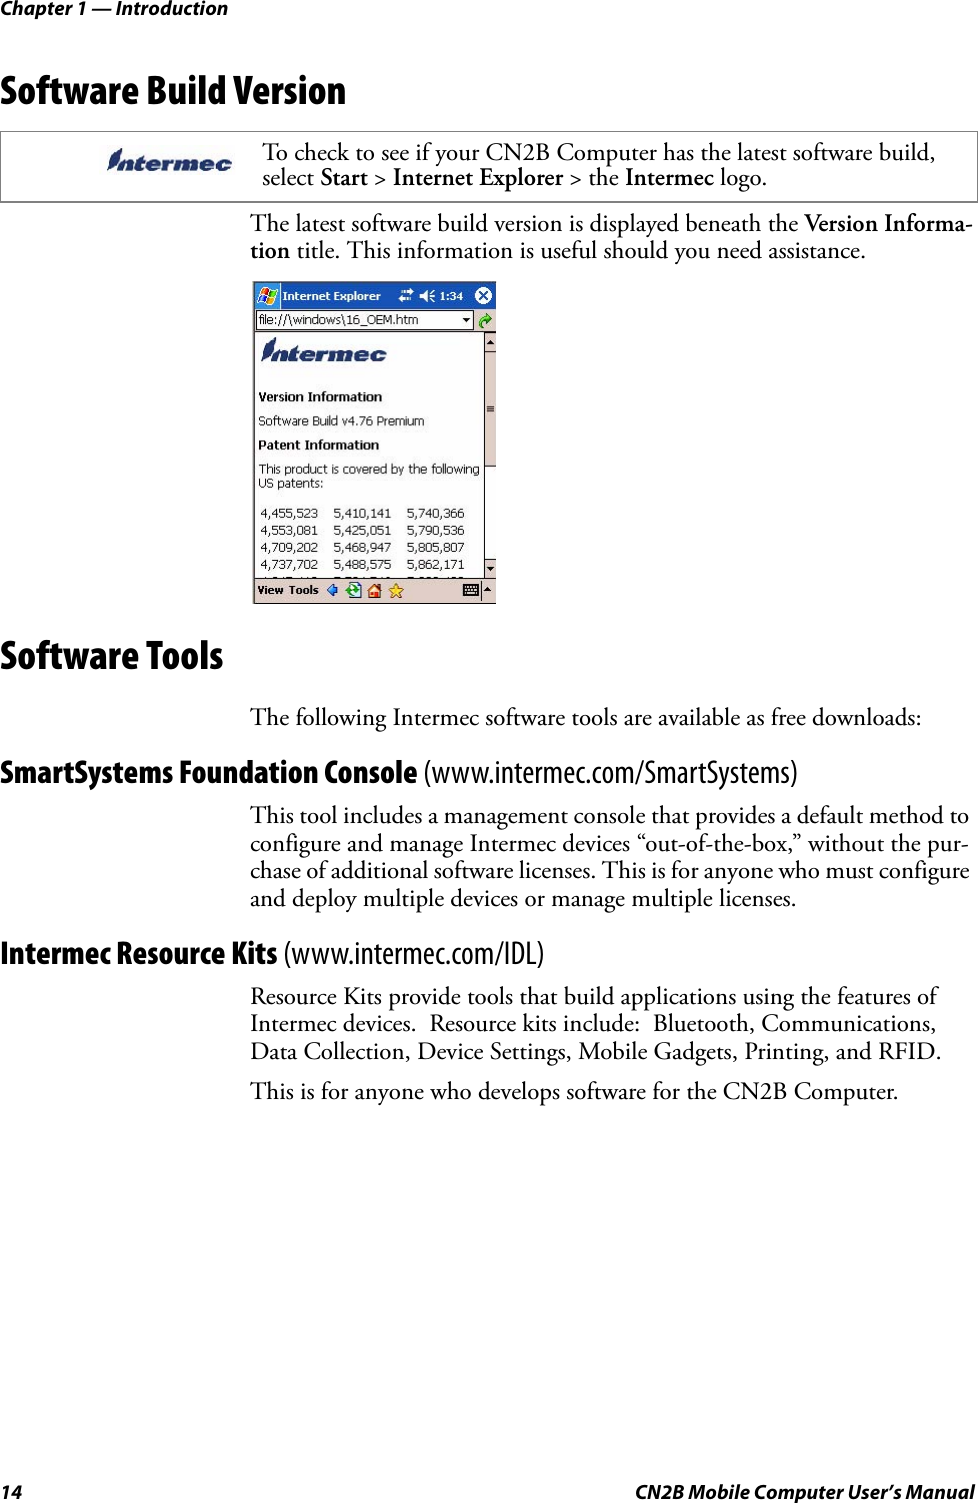
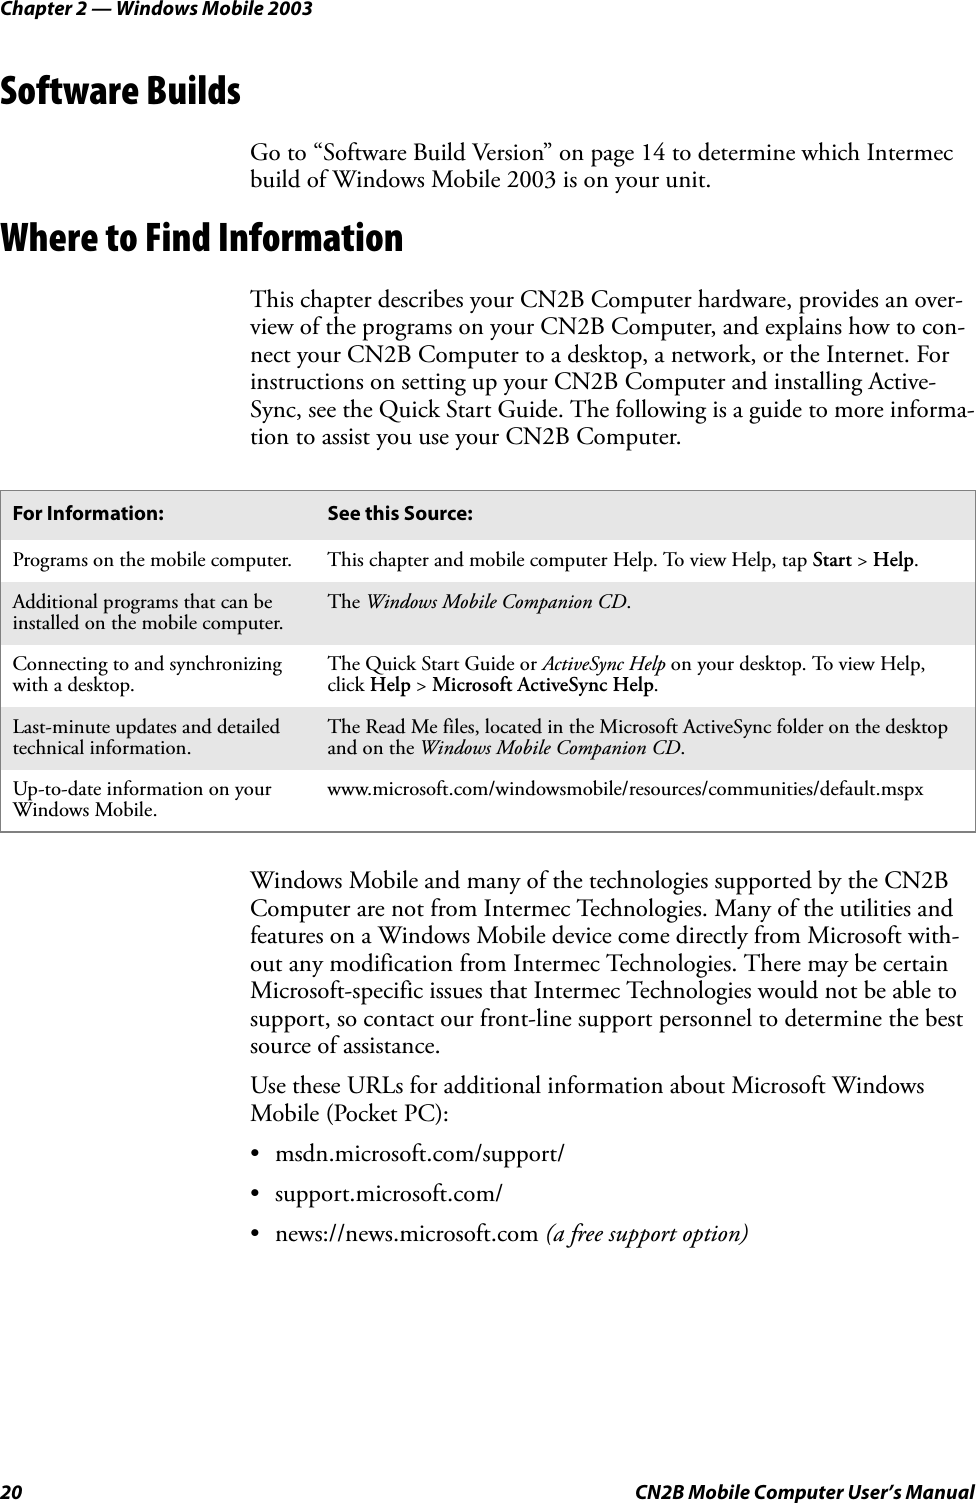
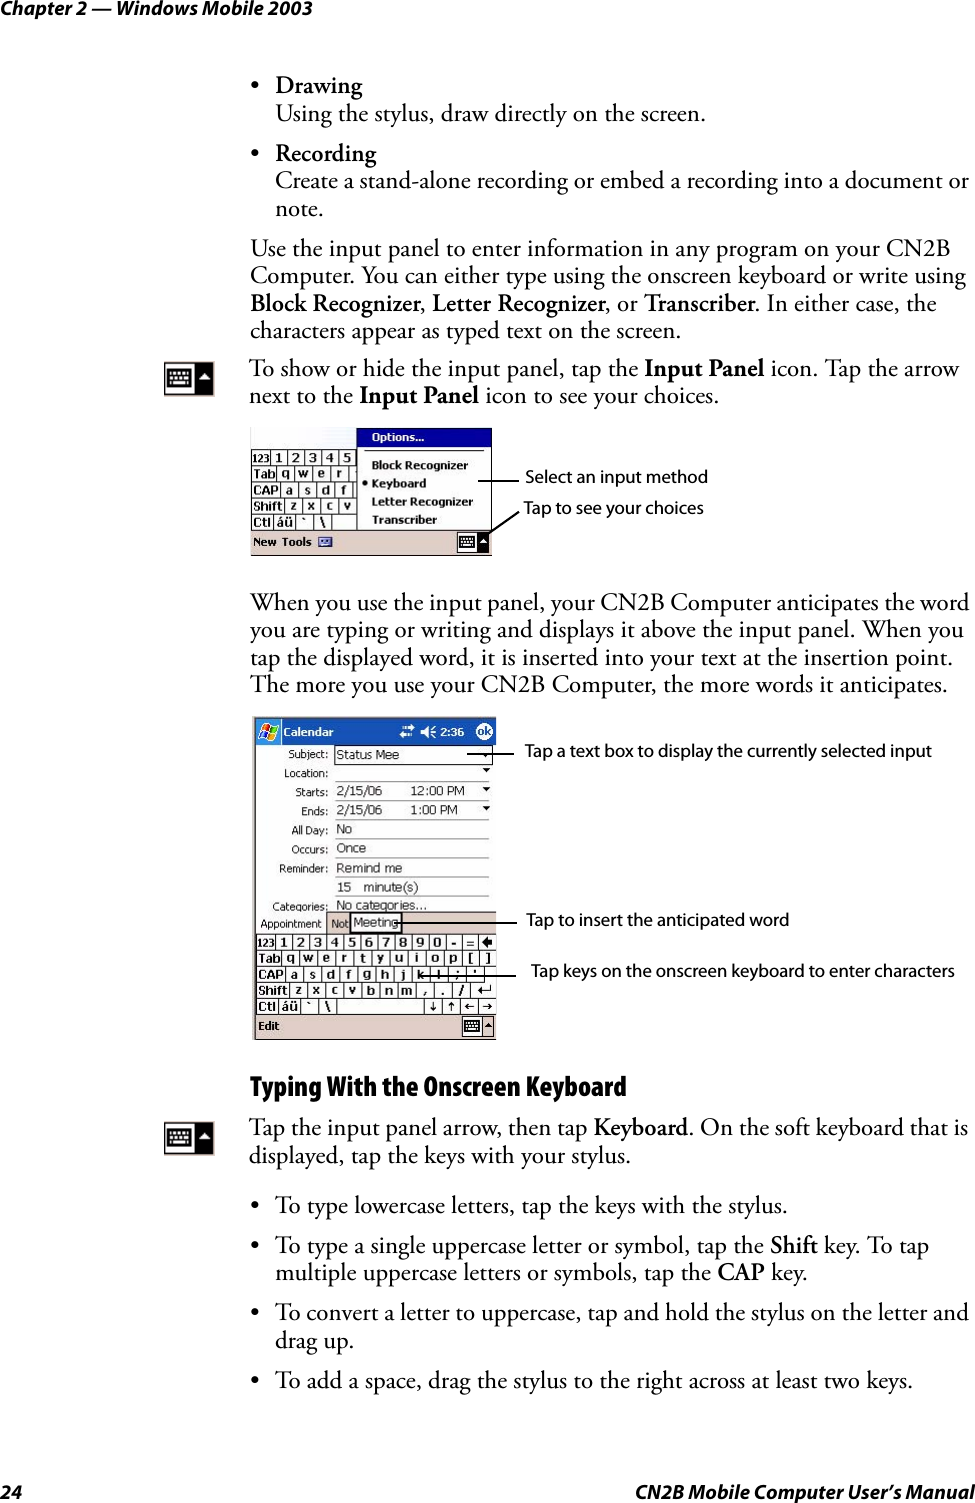
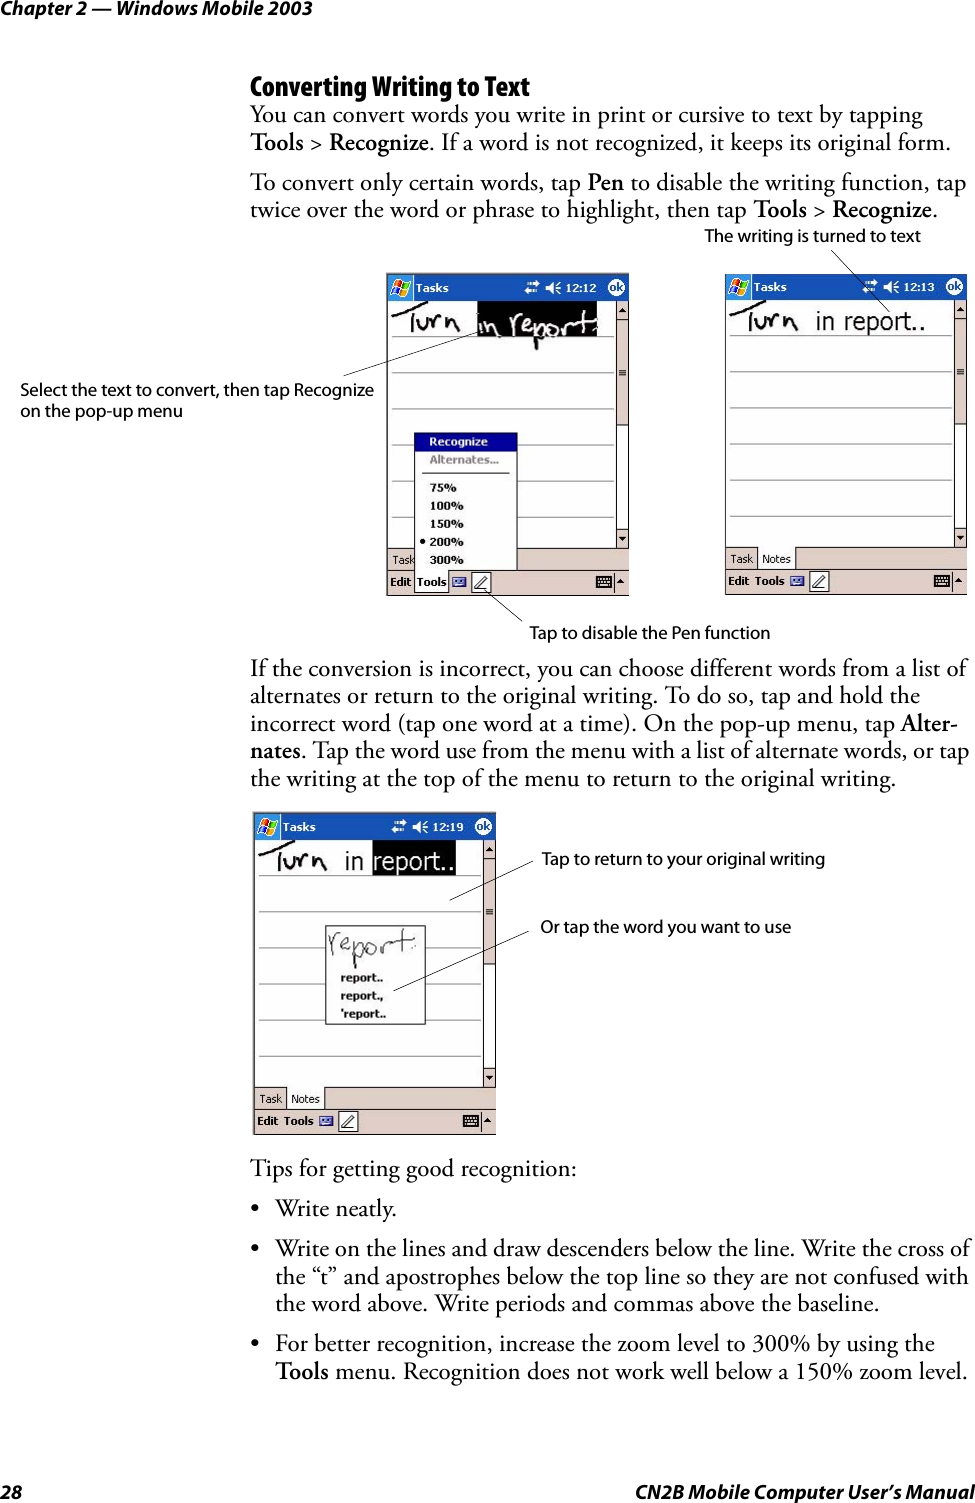
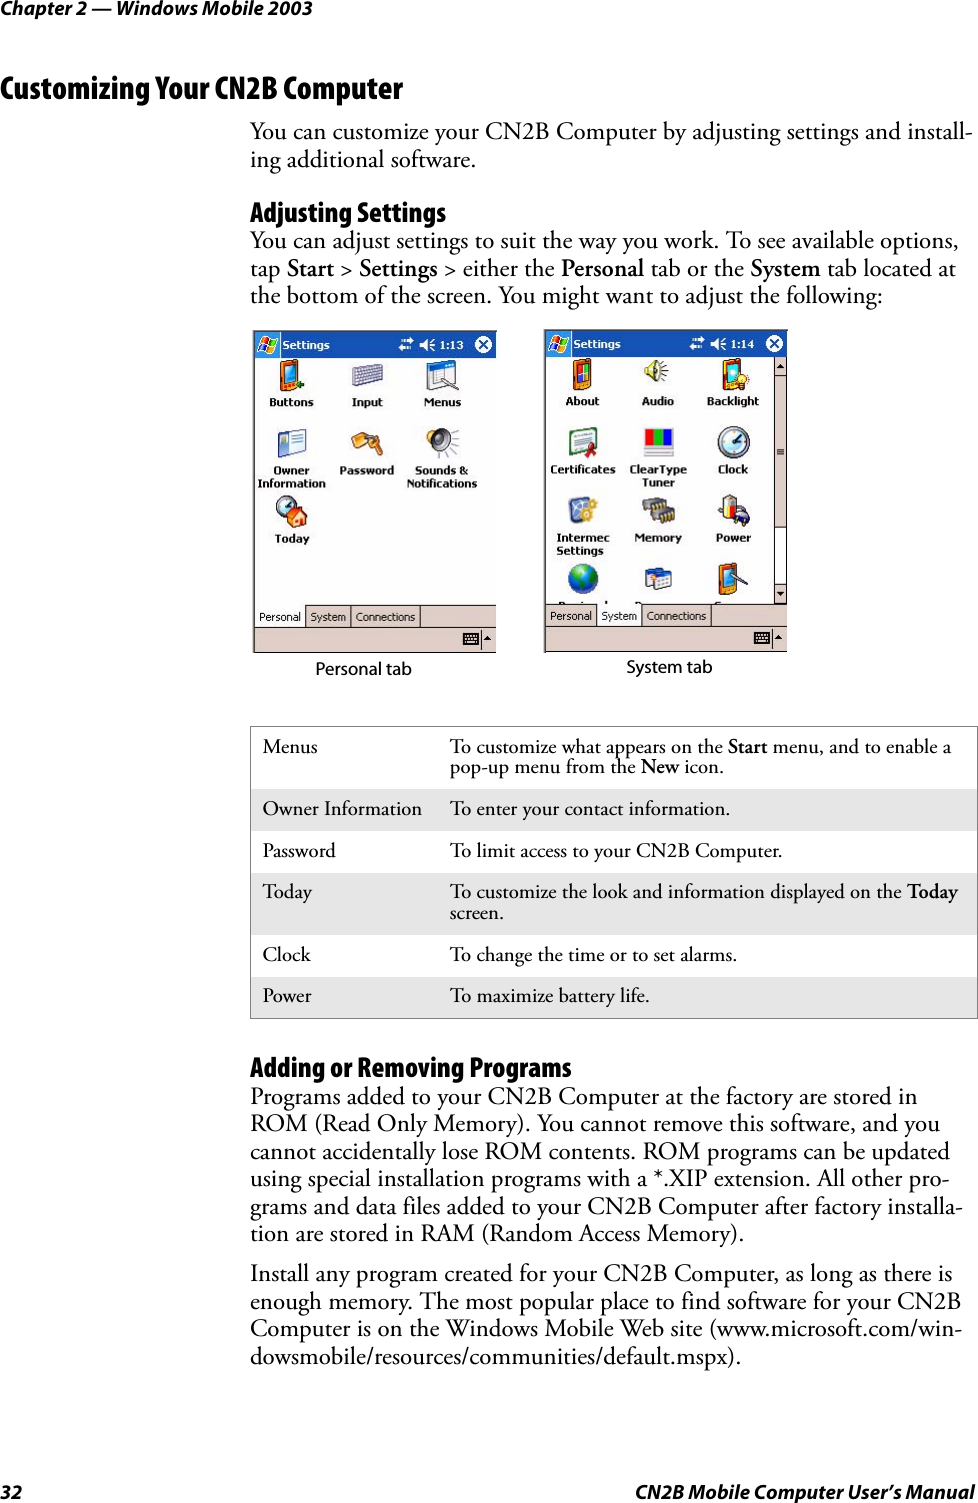
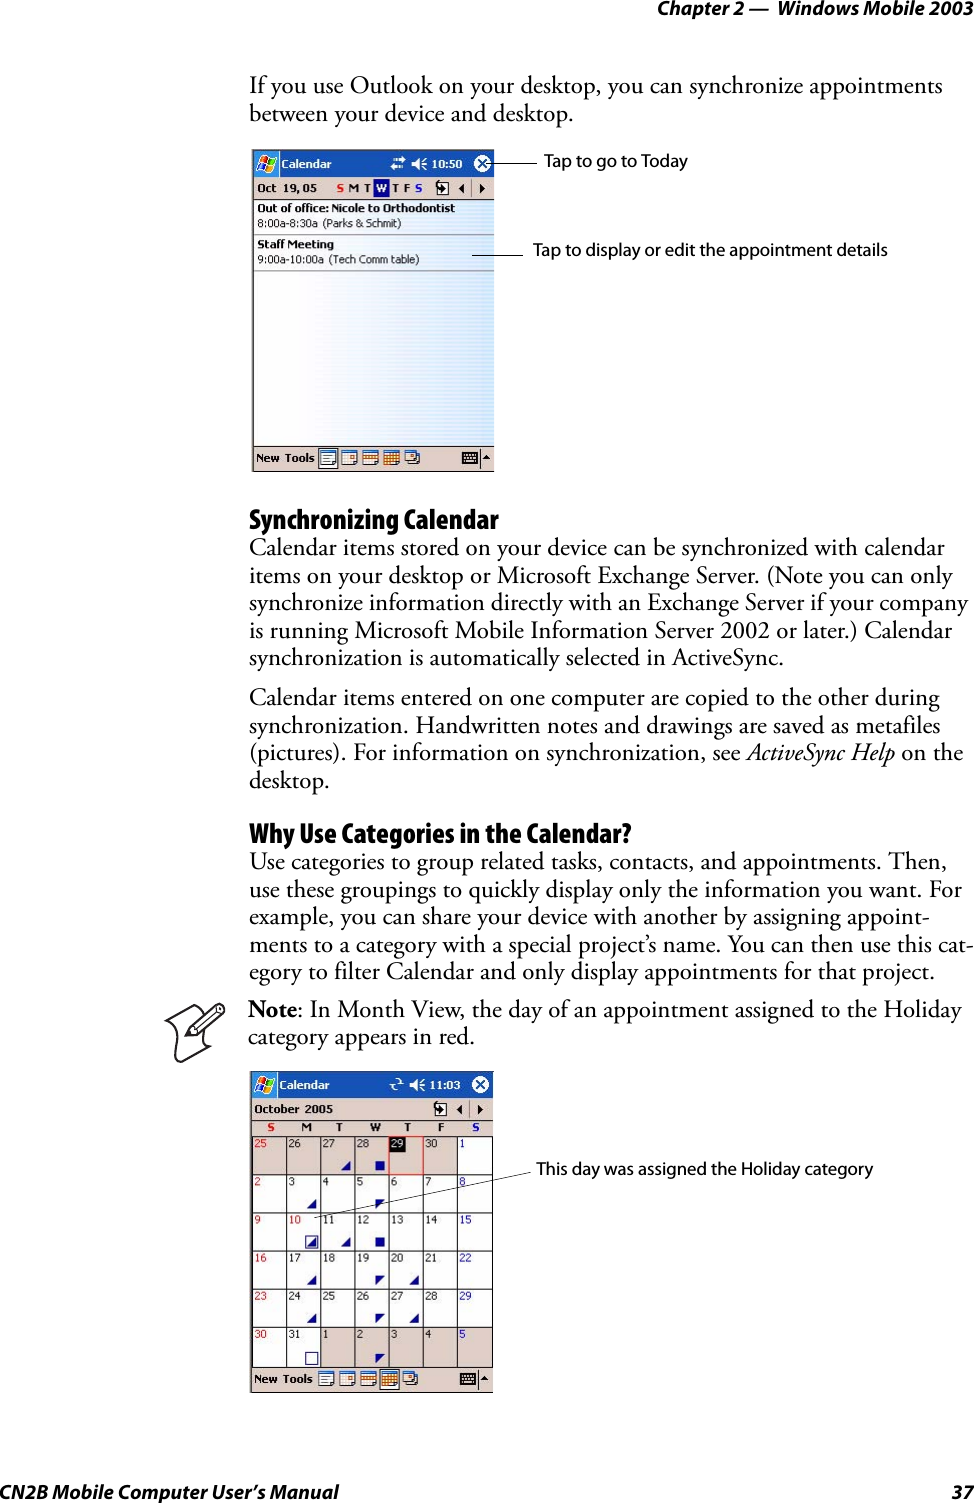
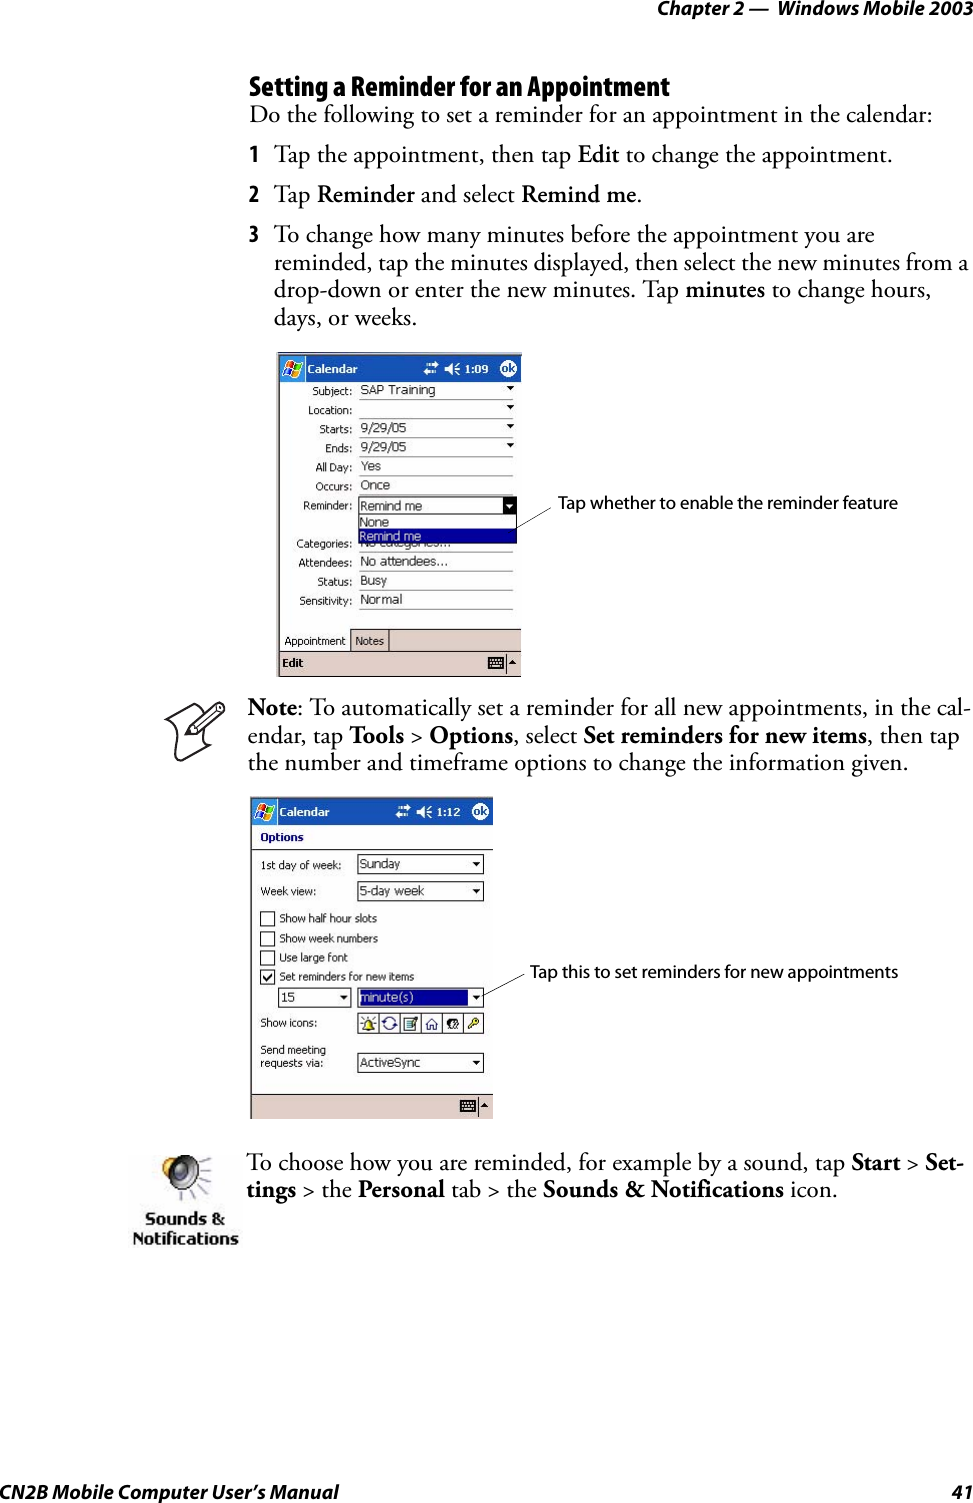
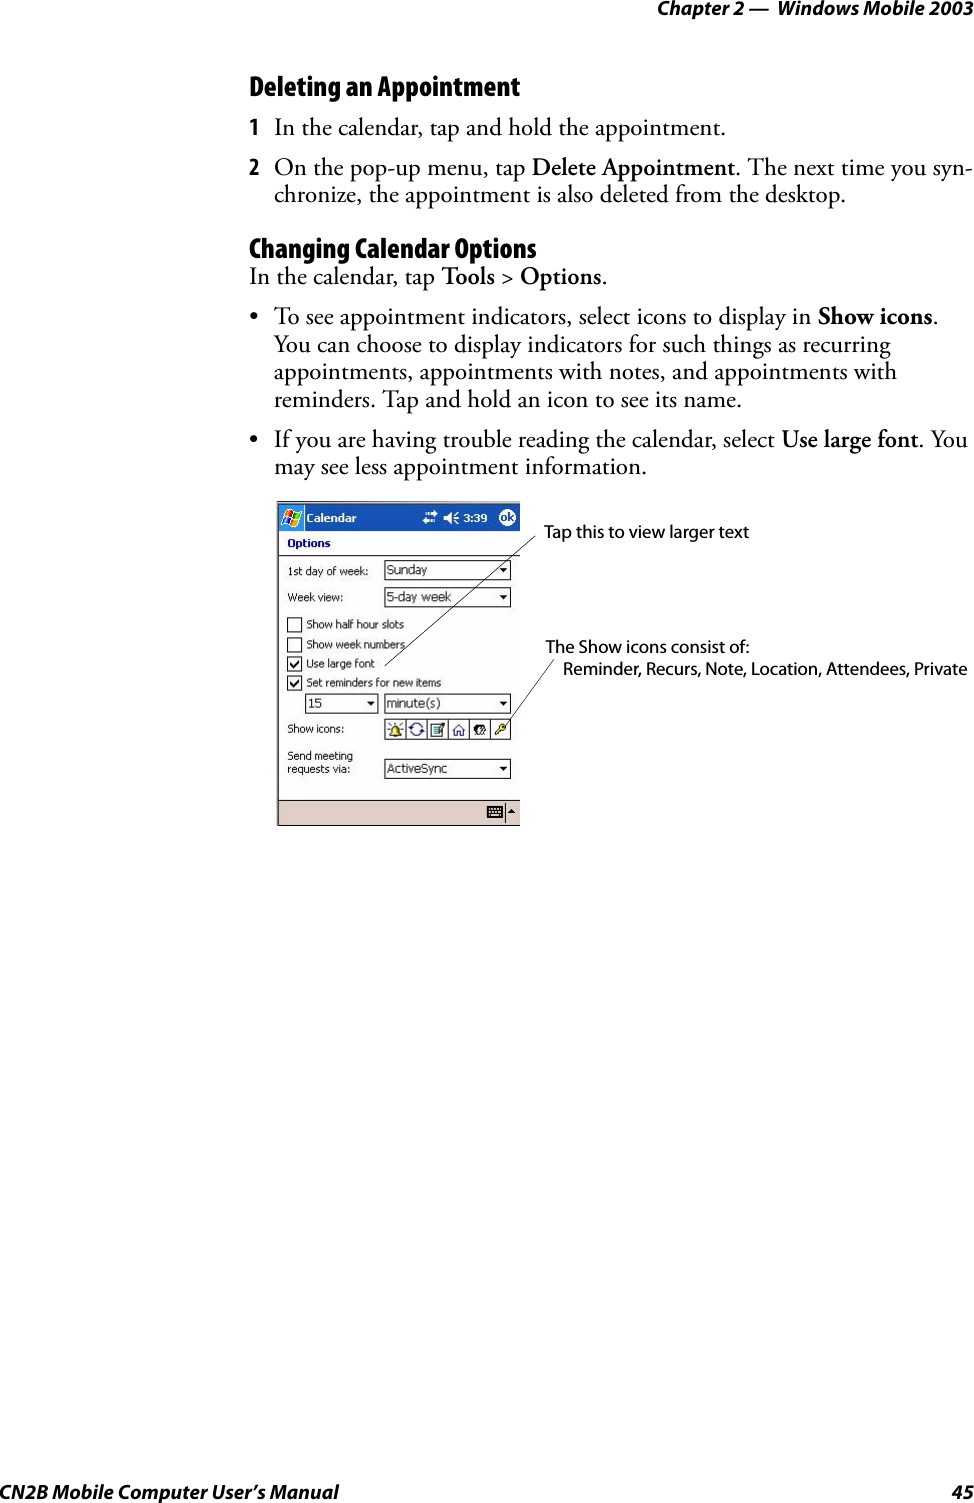
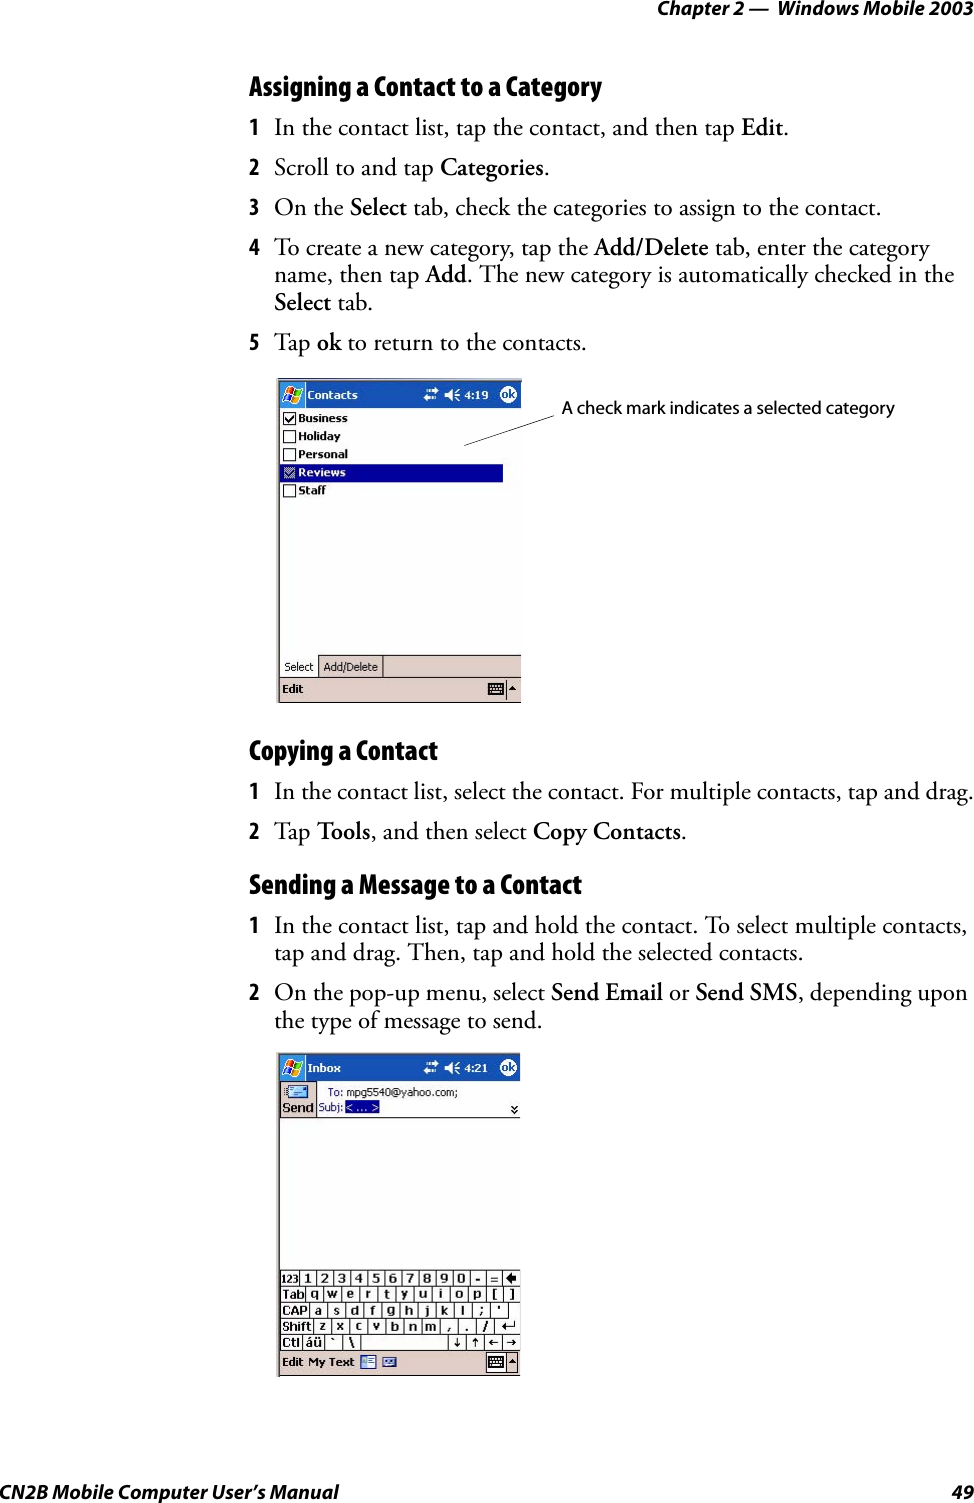
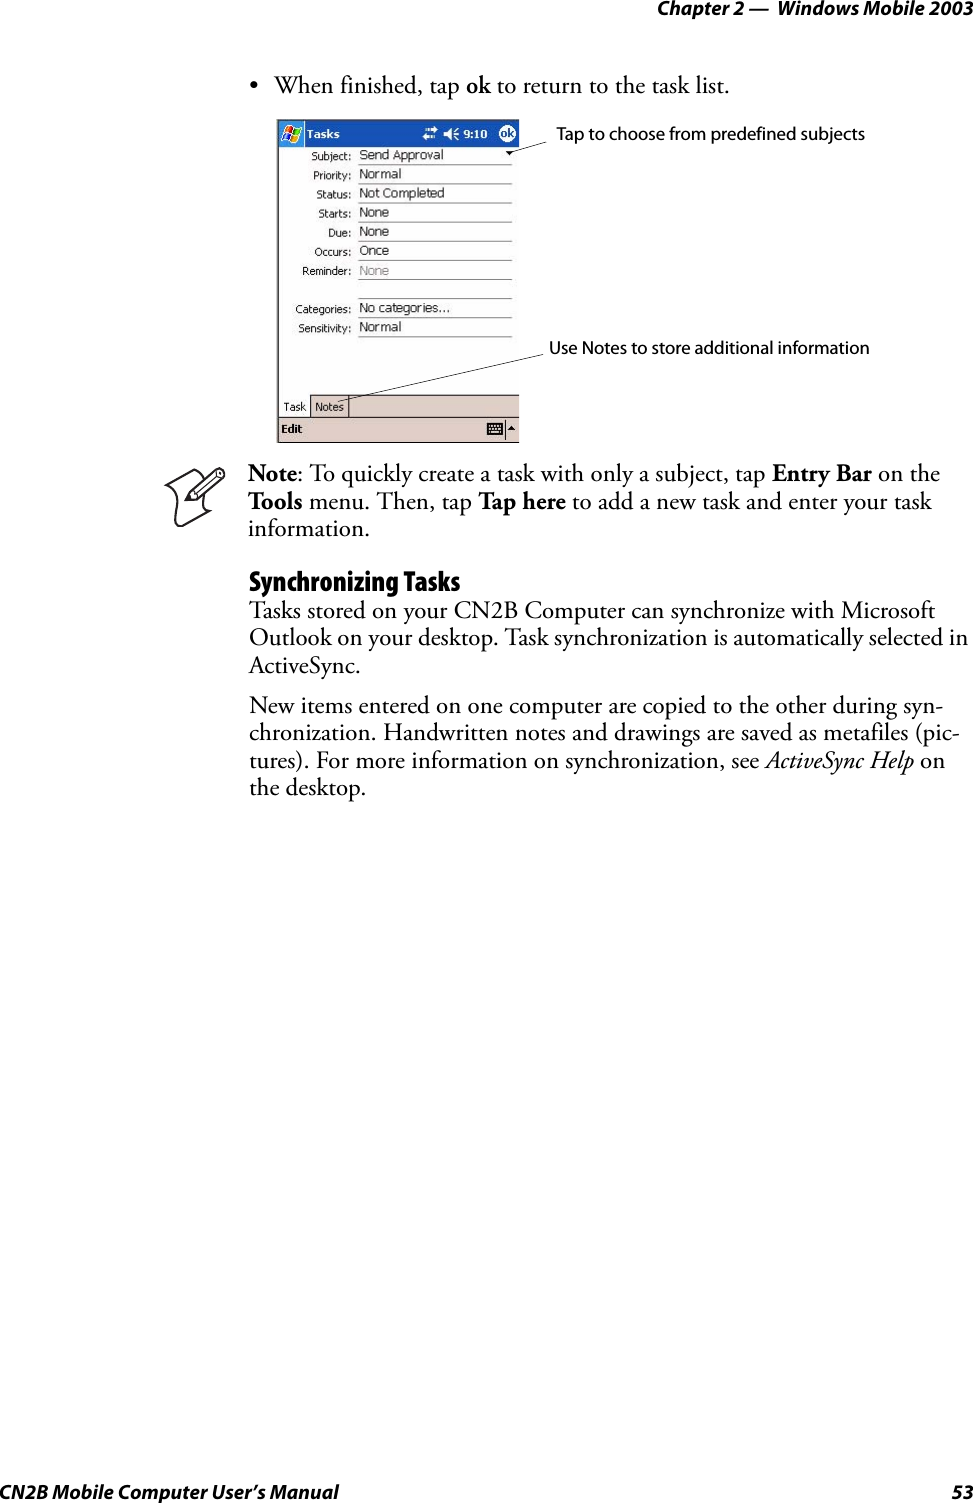
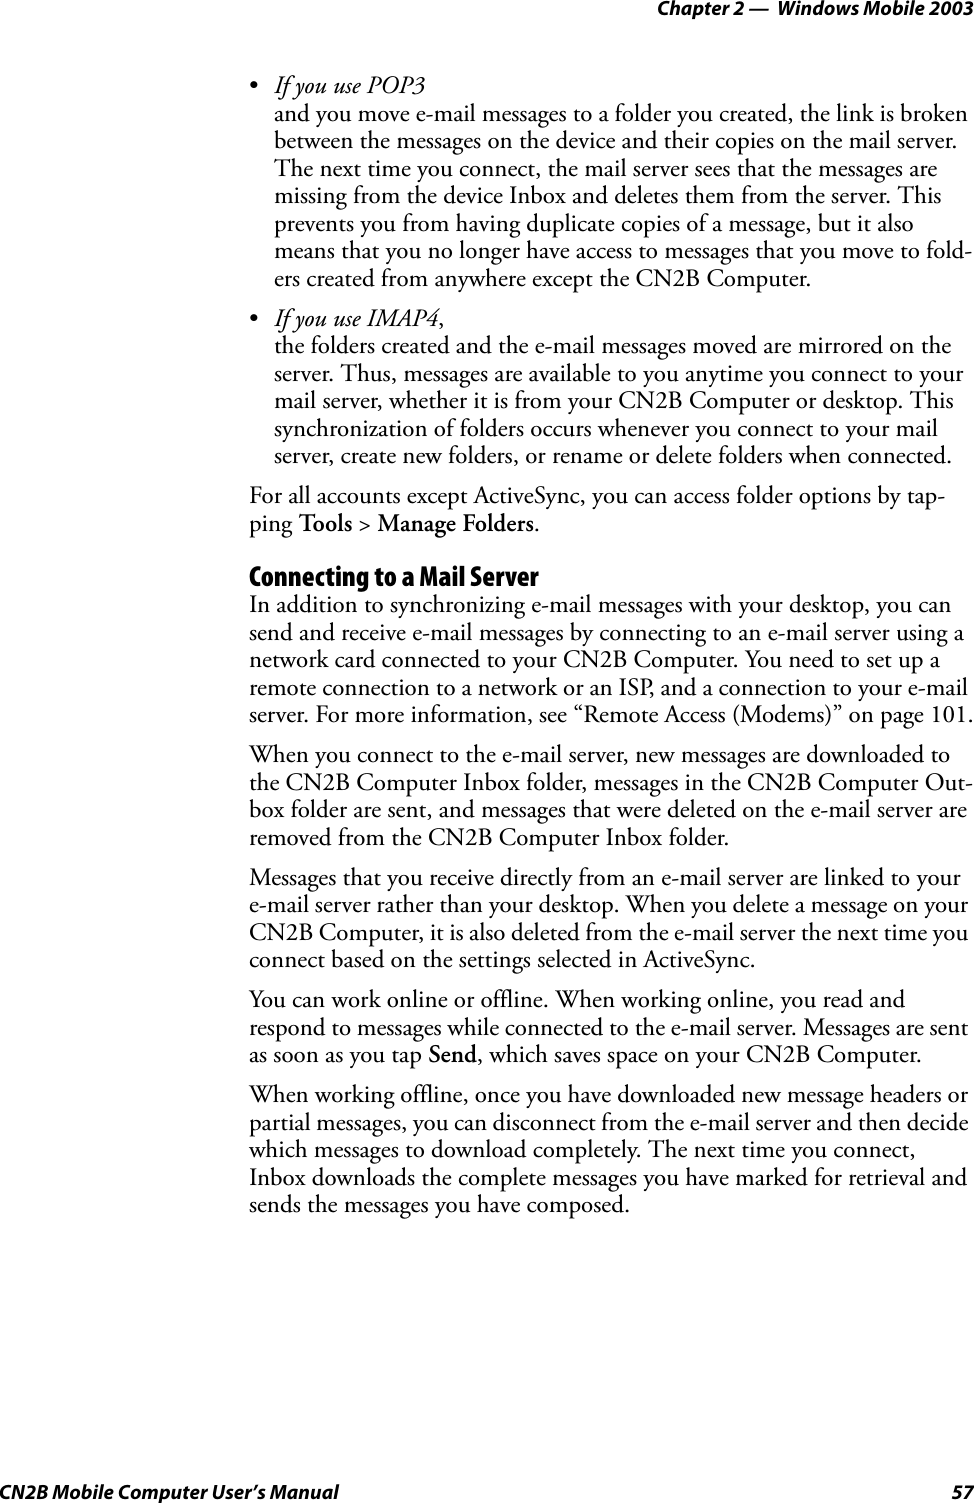
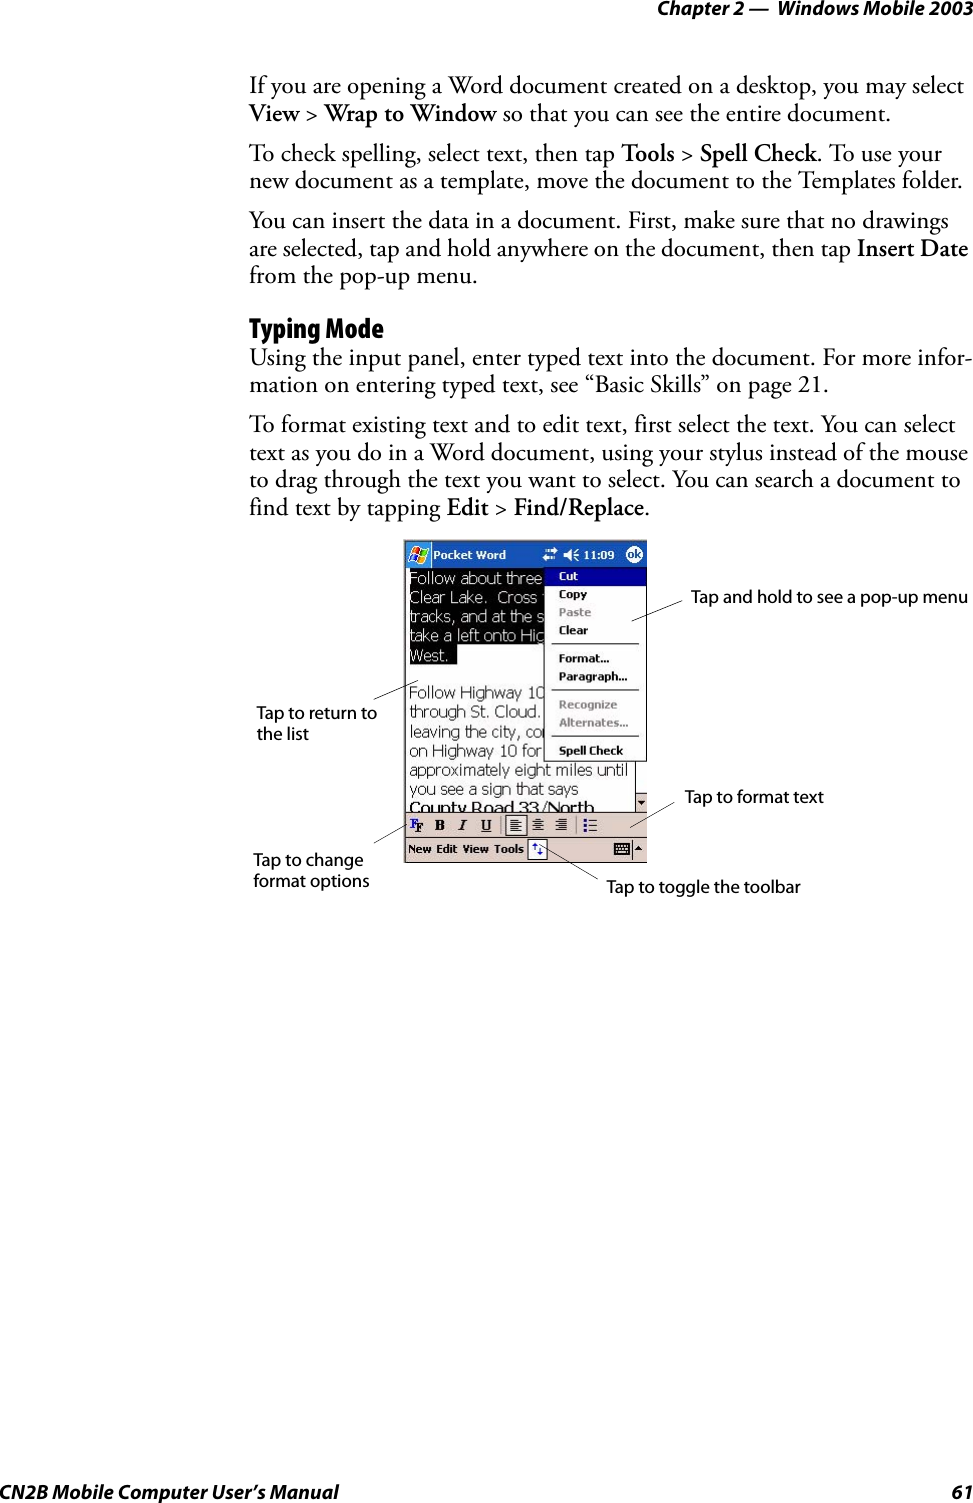
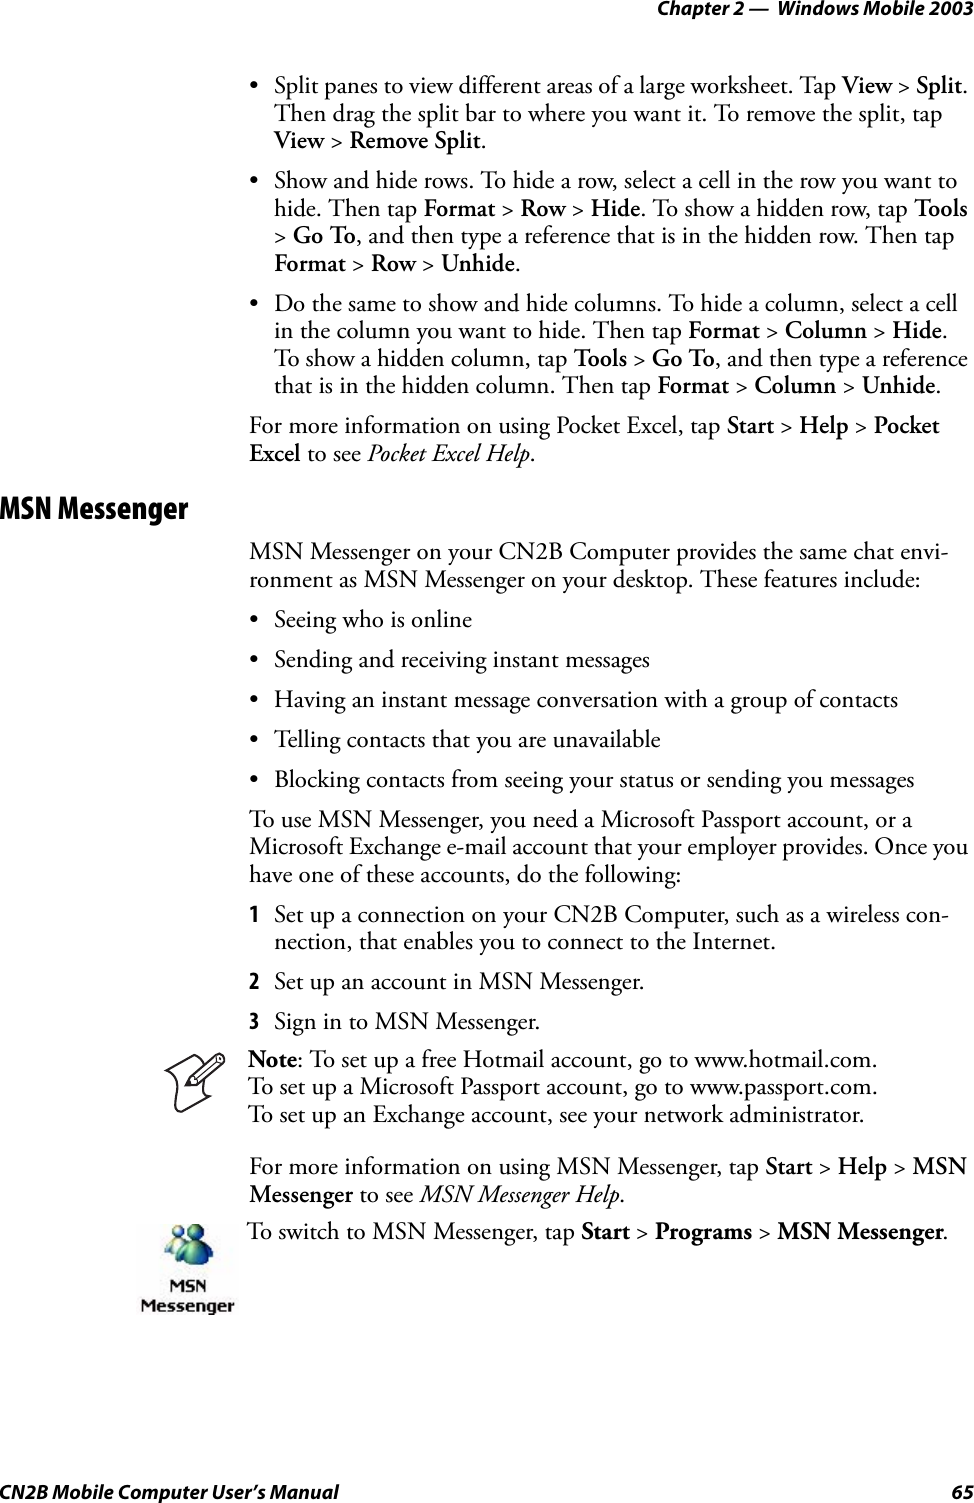
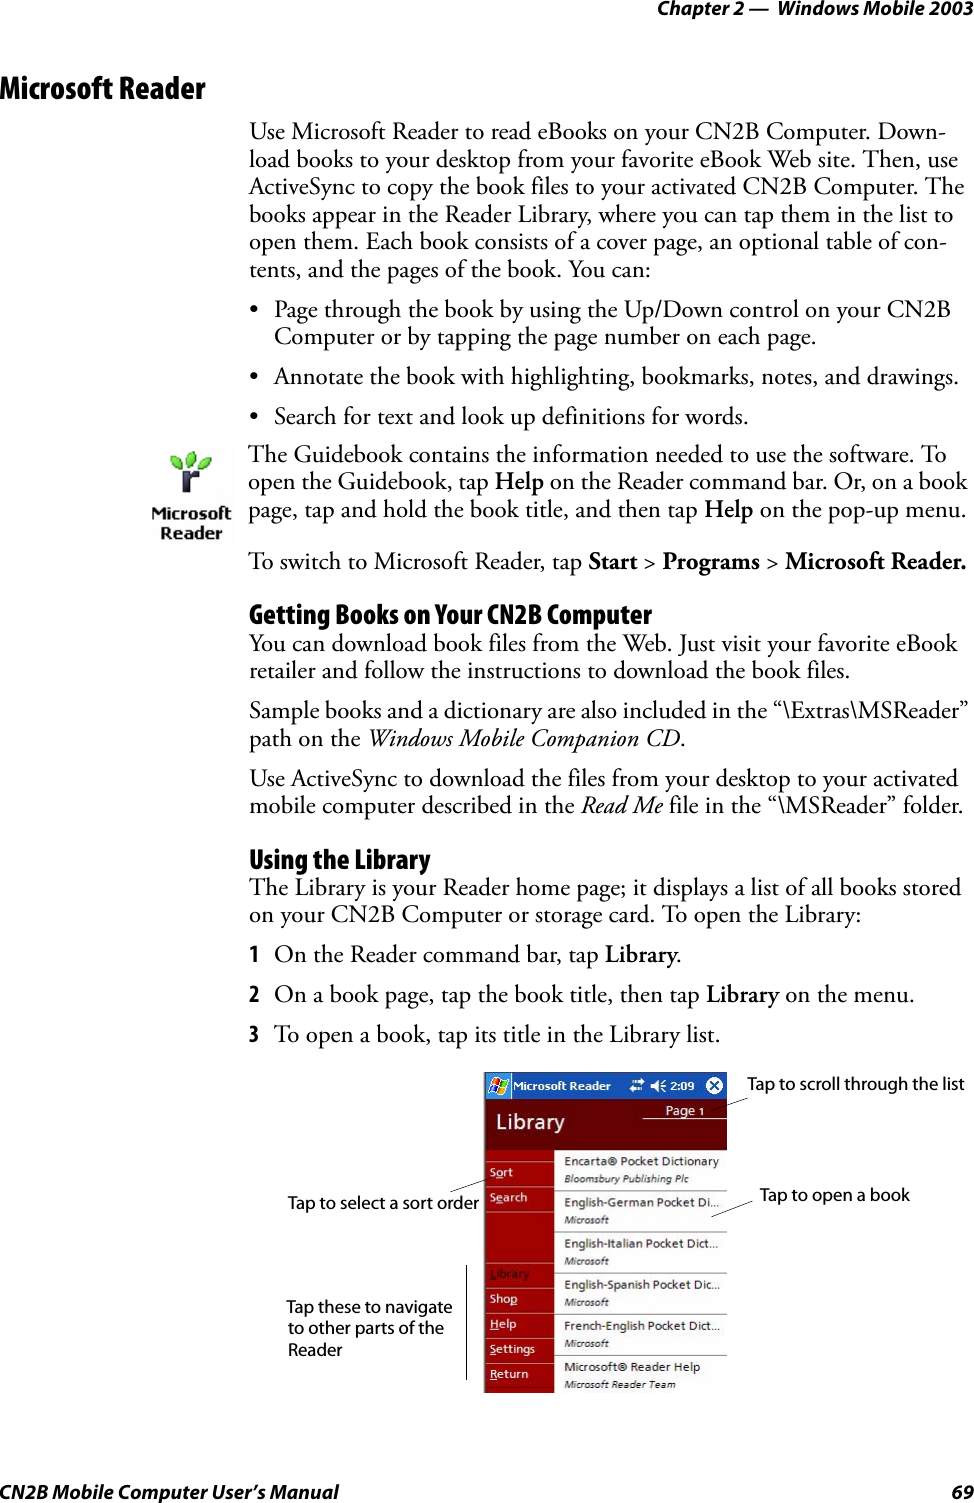
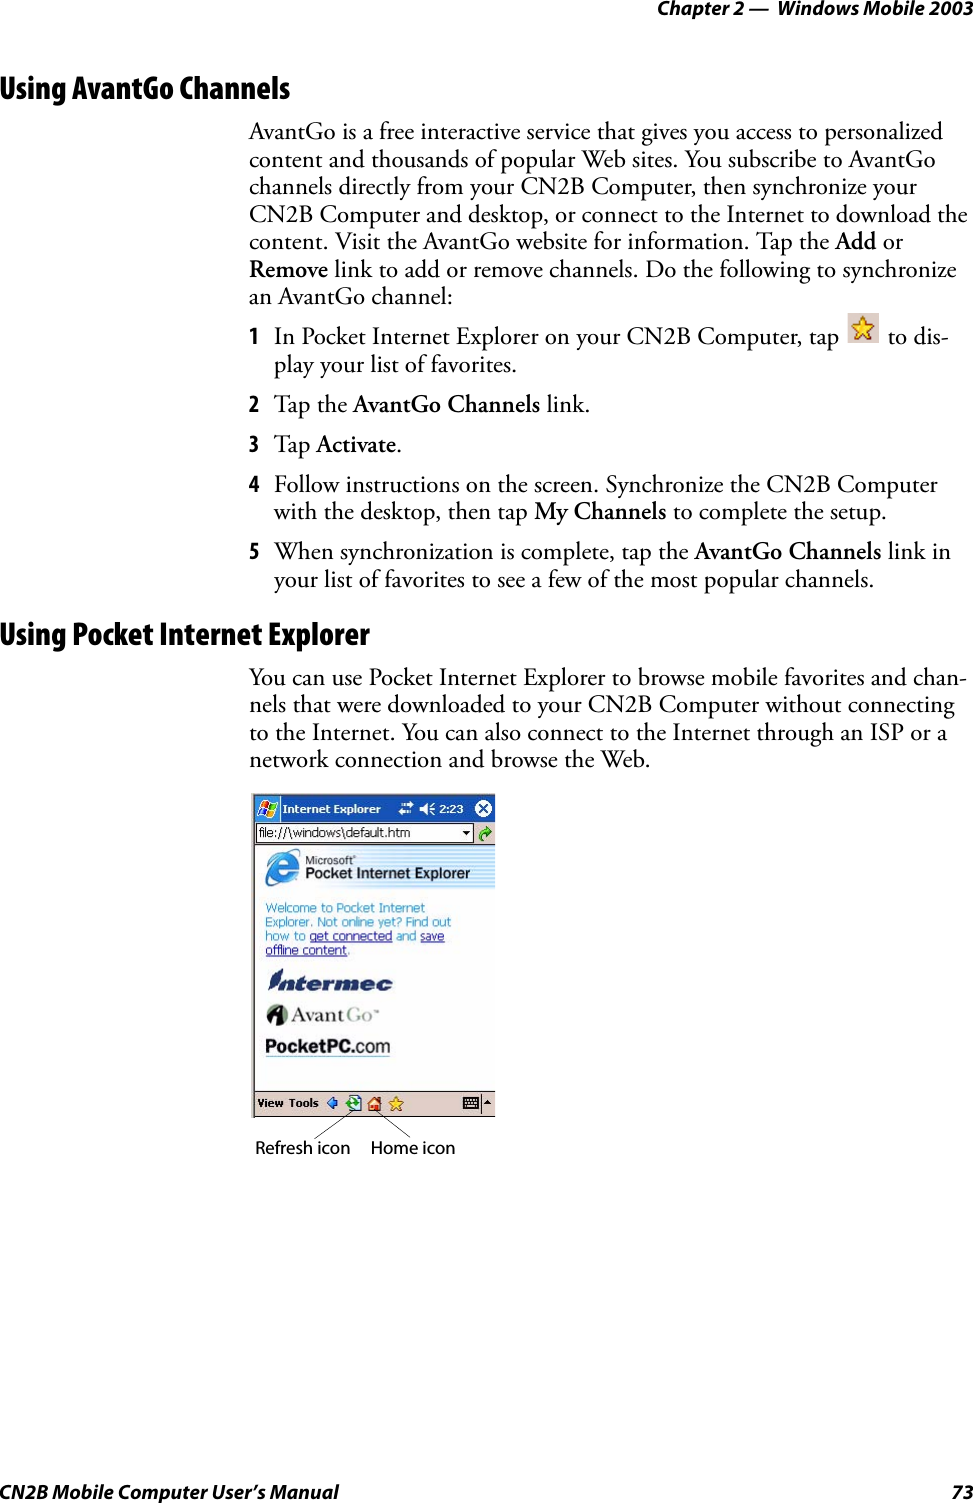
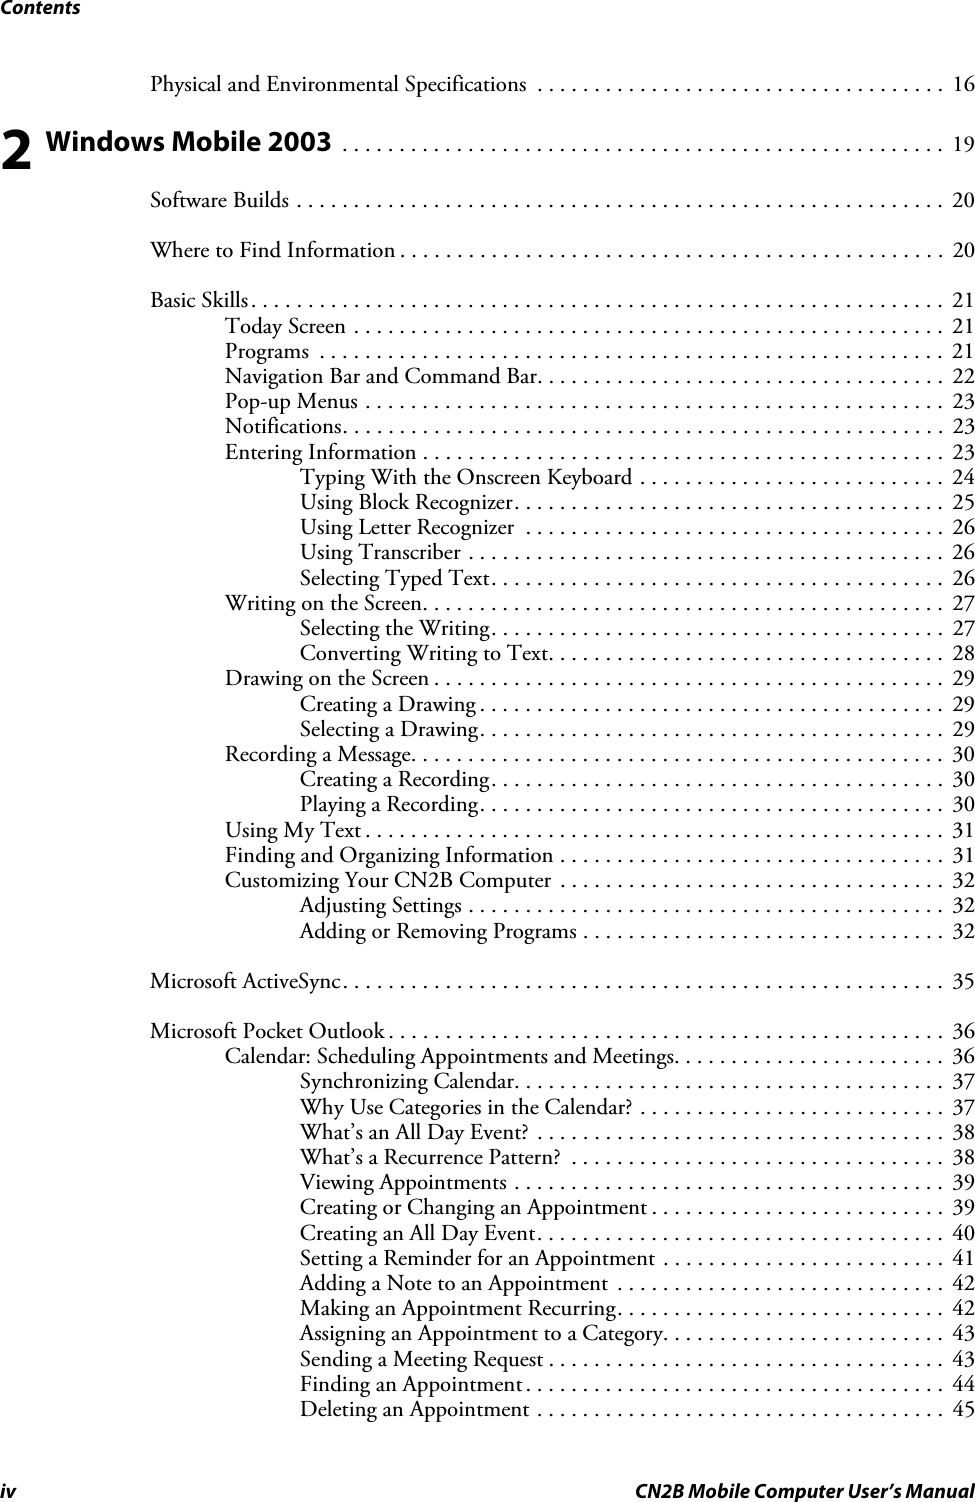
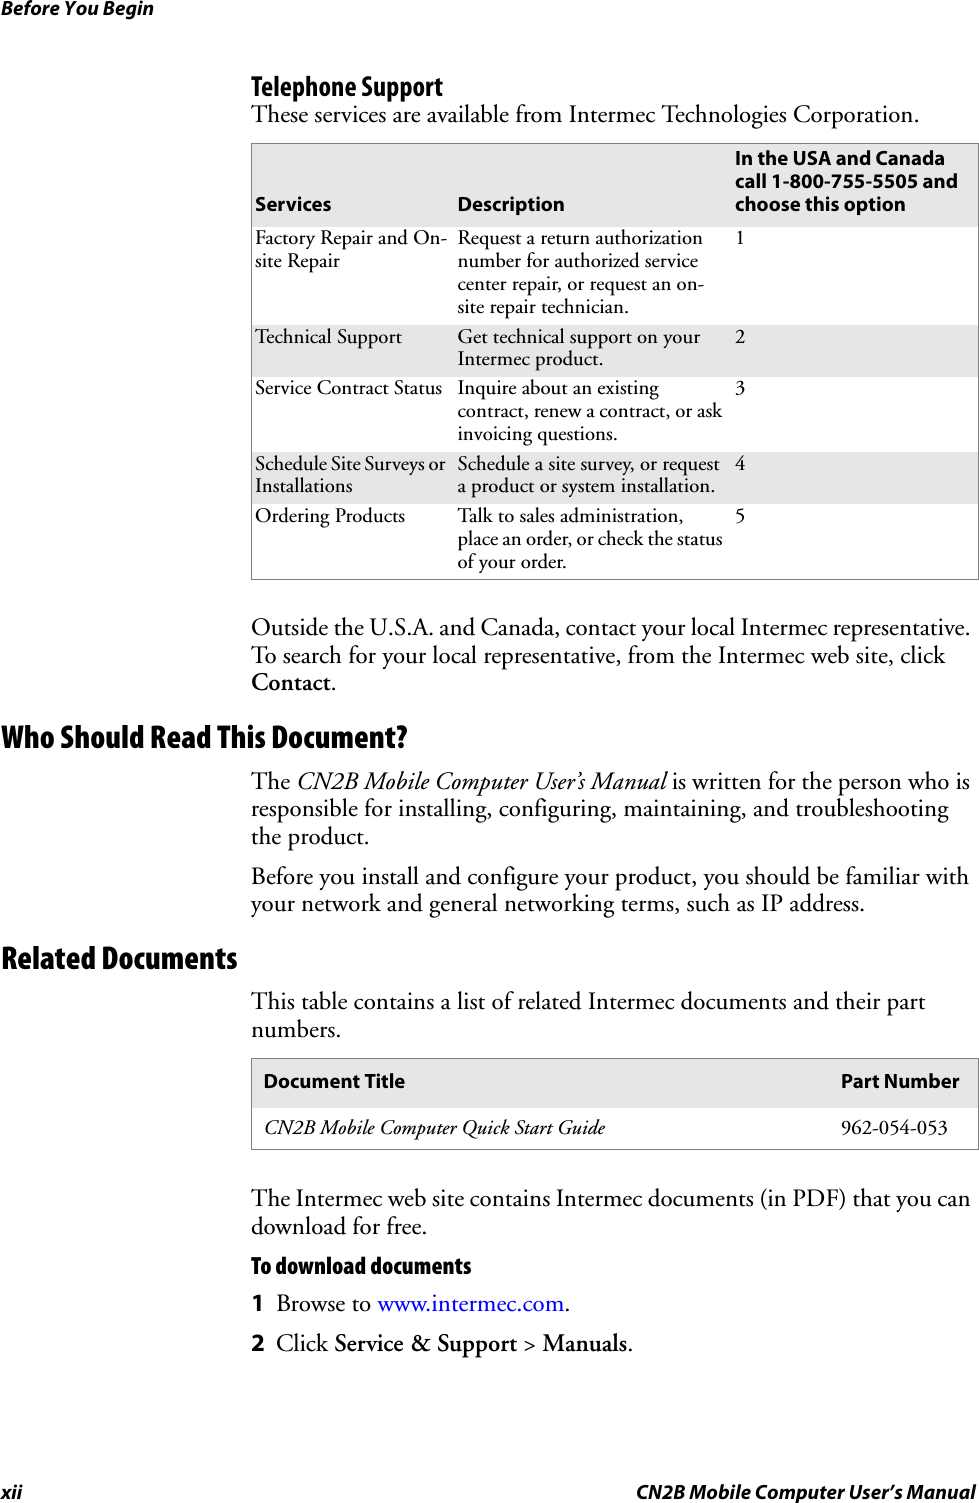
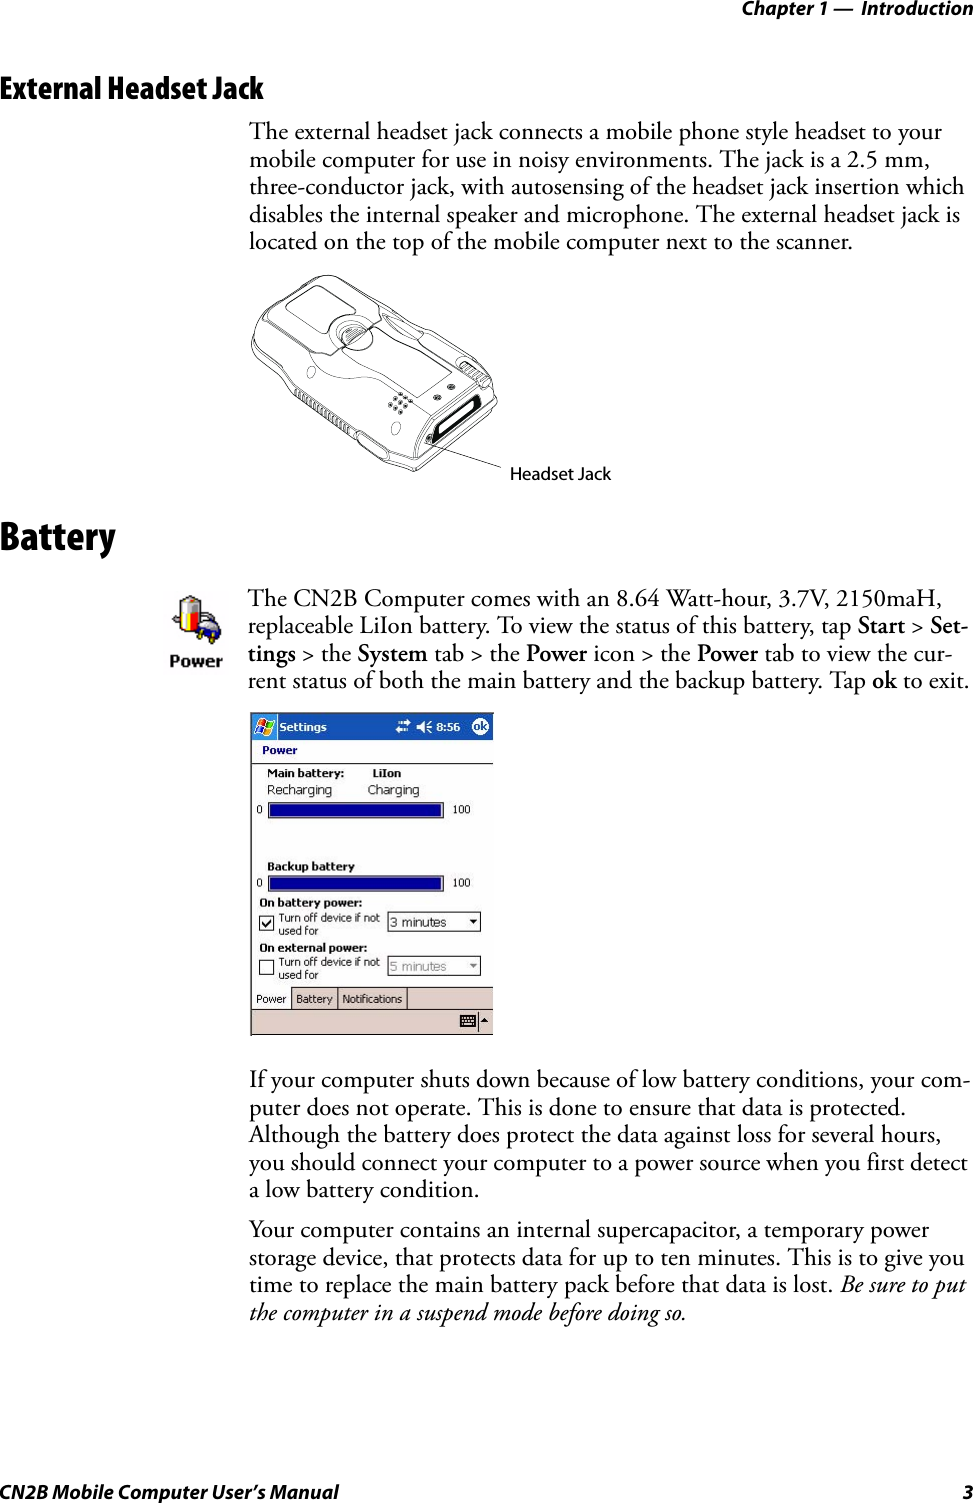
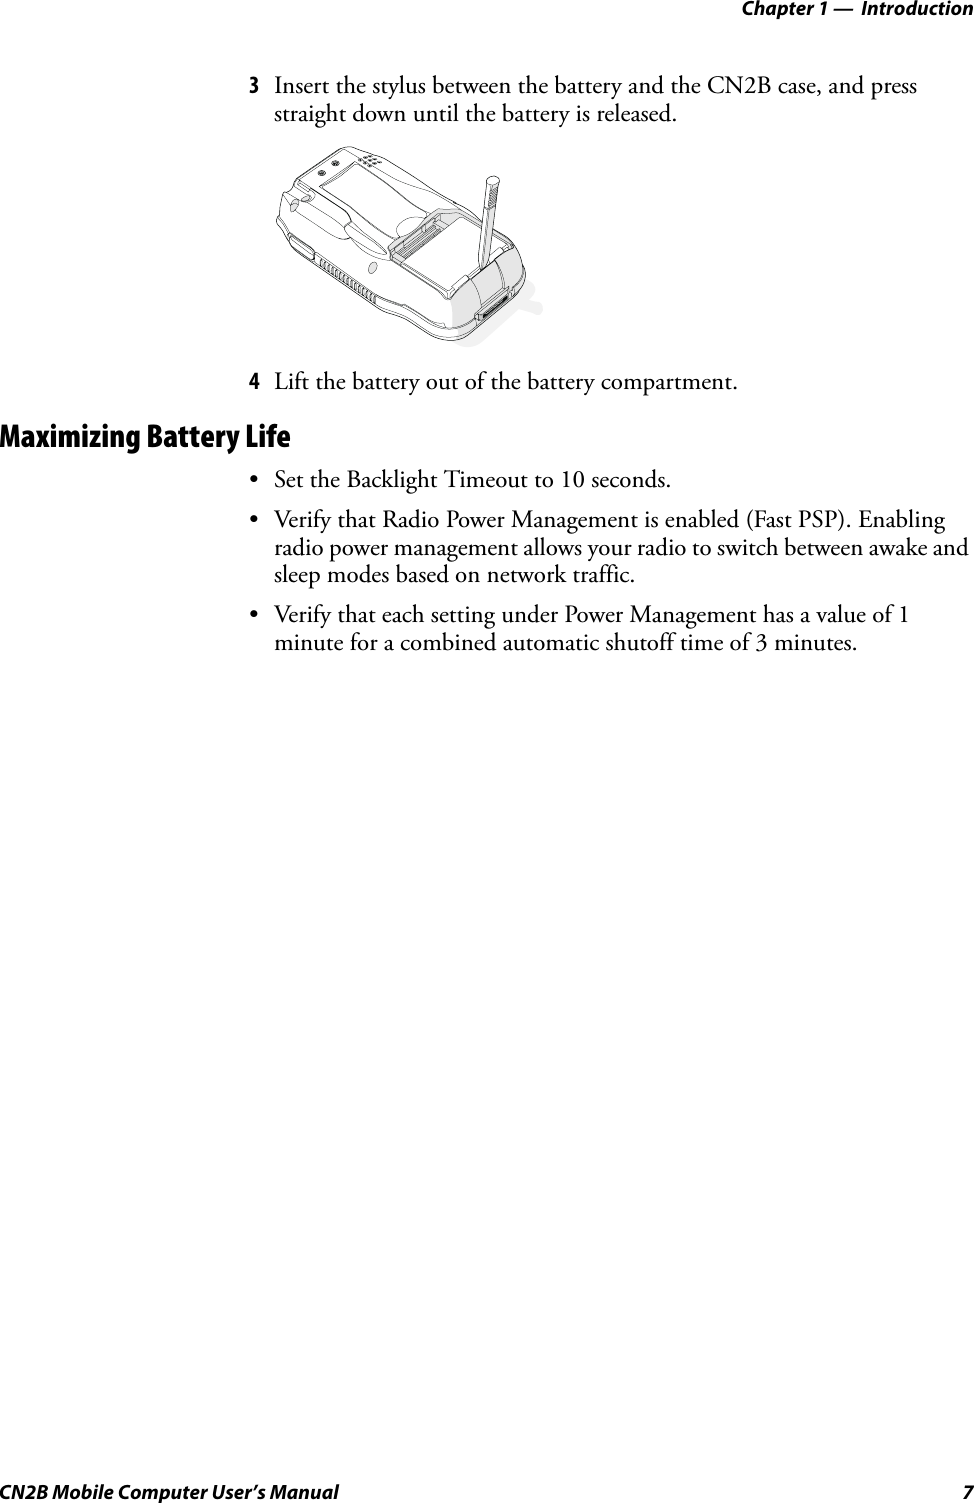
![Chapter 1 — Introduction10 CN2B Mobile Computer User’s ManualAlpha (Green) Plane KeysYou can enter the alphabet using the Alpha (green) plane keys. Below and on the next page are the key sequences.When you press [Alpha], the Scanning/Alpha LED shows red for the Alpha mode. The keypad stays in Alpha mode until you press [Alpha] again.To type a lowercase “c,” press [Alpha] [2] [2] [2]. To type a letter on the same key as the last letter entered, wait two seconds, then enter the correct series of keystrokes to create the next letter.While you are in the Alpha mode and you press [1] to initiate the CAPS mode, you will render a CAPS LOCK until you press [1] again. Once you are in CAPS mode, you stay in CAPS until it is pressed again.Press [0] to enter a space.orange [4] Access the Pocket PC Calendar application (see Note).orange [5] Access the Pocket PC Contacts application (see Note).orange [6] Access the Pocket PC Tasks application (see Note).orange [7] Move up one page.orange [8] Enter an asterisk (*).orange [9] Move down one page.orange [0] Access the Pocket PC Start menu.orange [ENTER] Enter an at symbol (@).orange [BkSp] Enter a backslash (/).orange [Esc] Enter a minus sign (–).orange [Action] Enter a plus sign (+).orange [] Tab to the right.orange [] Tab to the left.Note: Pocket PC applications are accessible only if configured to do so in the App Launch portion of the Utilities applet. See page 193 for more information.To Enter Press the Keys To Enter Press the Keysa[Alpha] [2] A[Alpha] [1] [2]b[Alpha] [2] [2] B[Alpha] [1] [2] [2]Press the Keys To Do This](https://usermanual.wiki/Intermec-Technologies/2610CF.User-Manual-1-of-3/User-Guide-616311-Page-24.png)
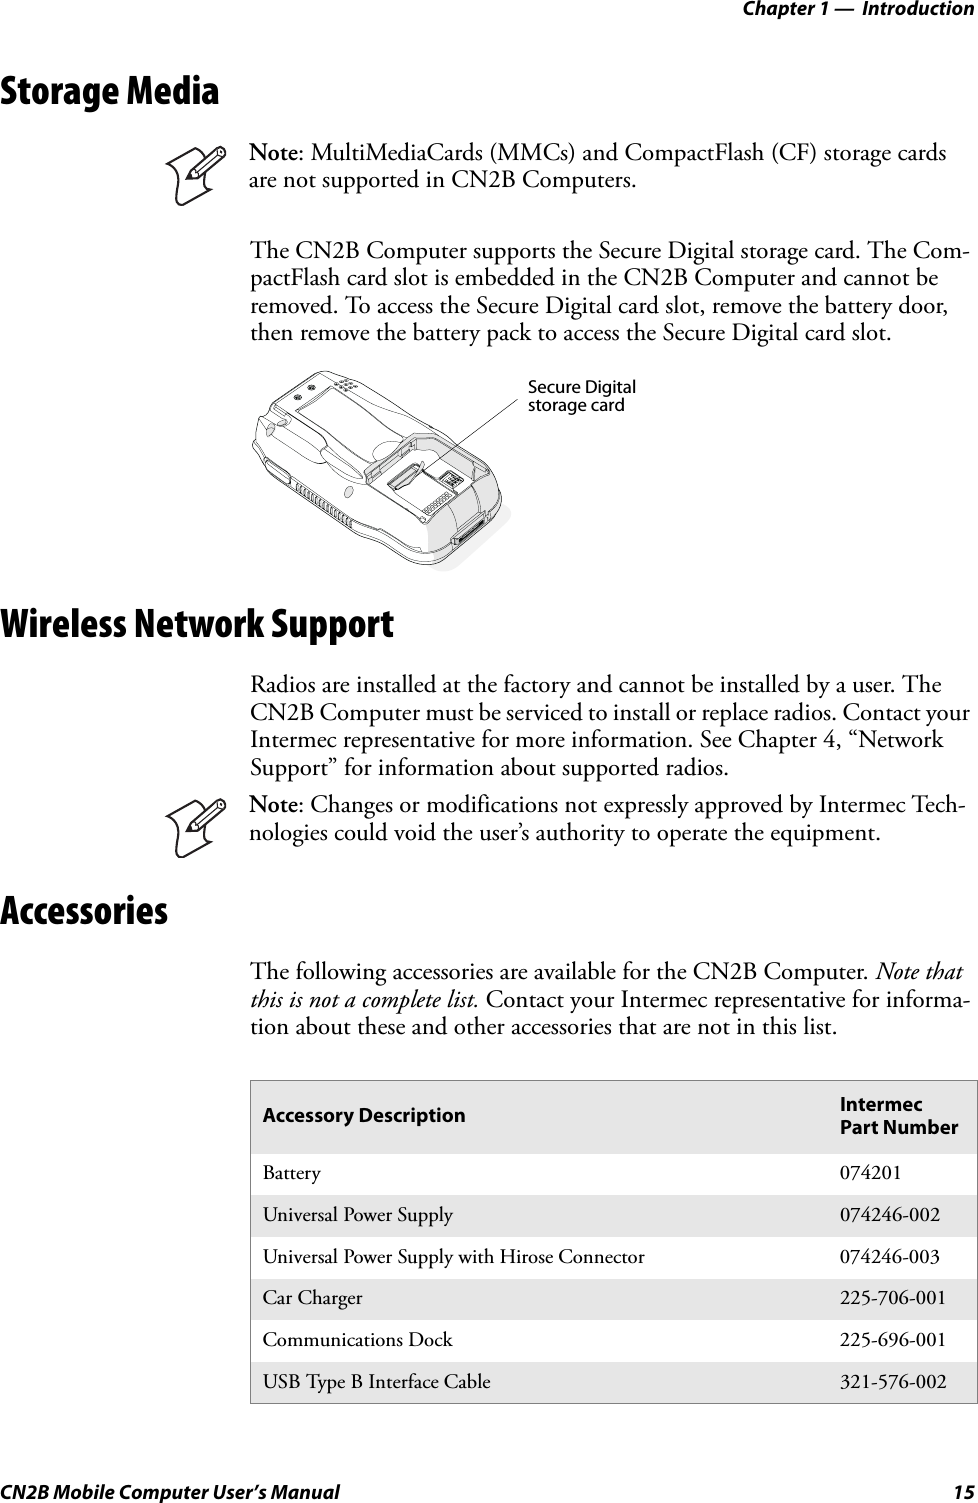
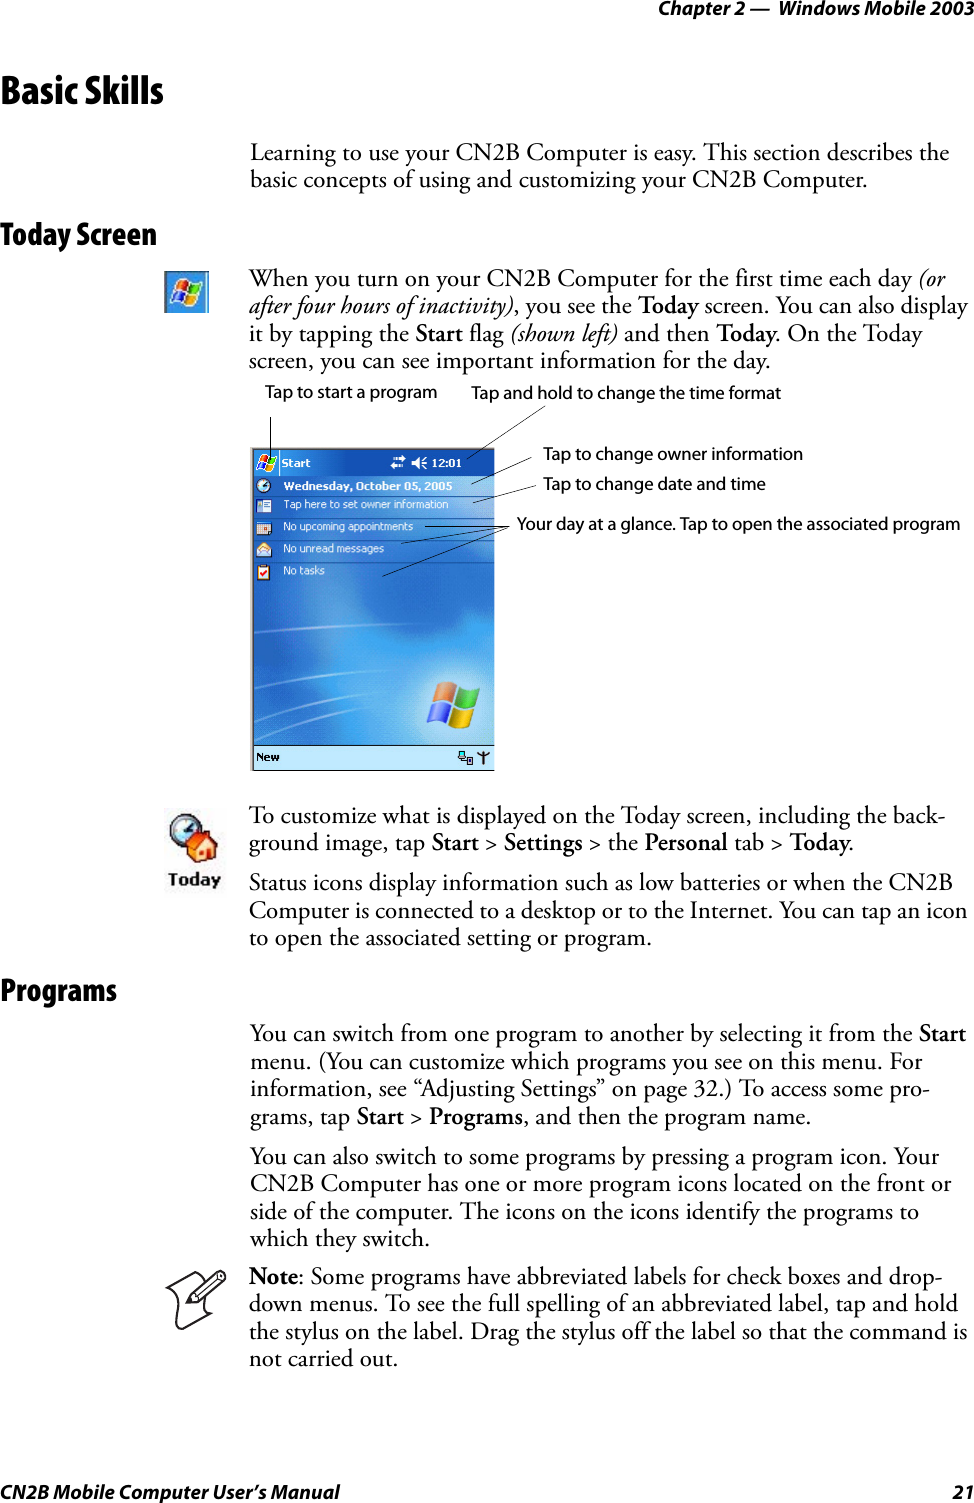
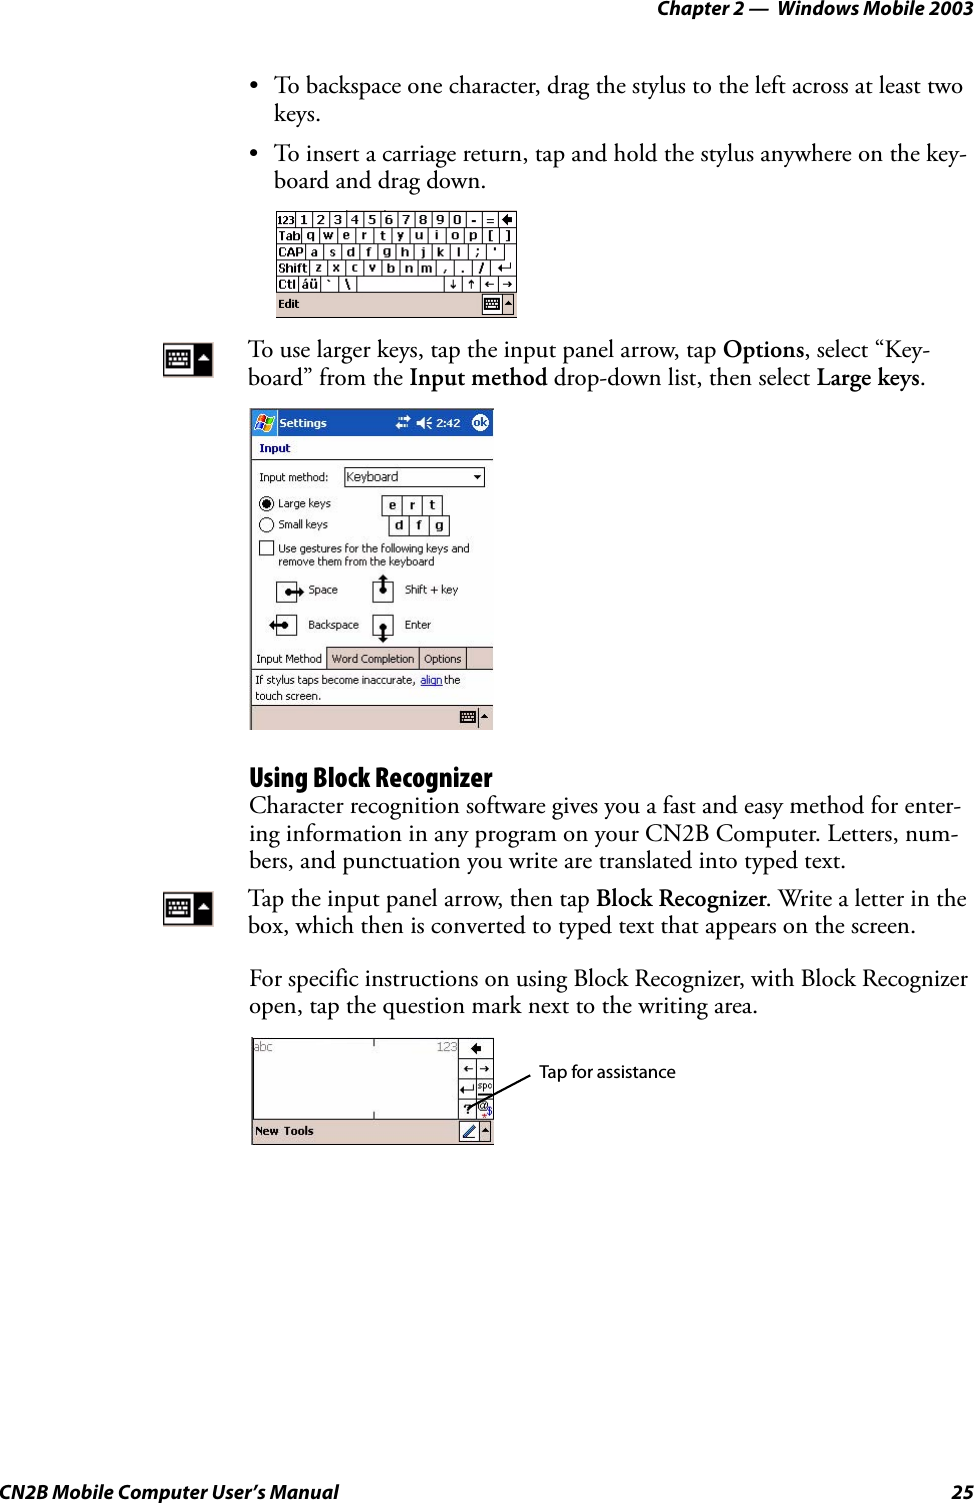
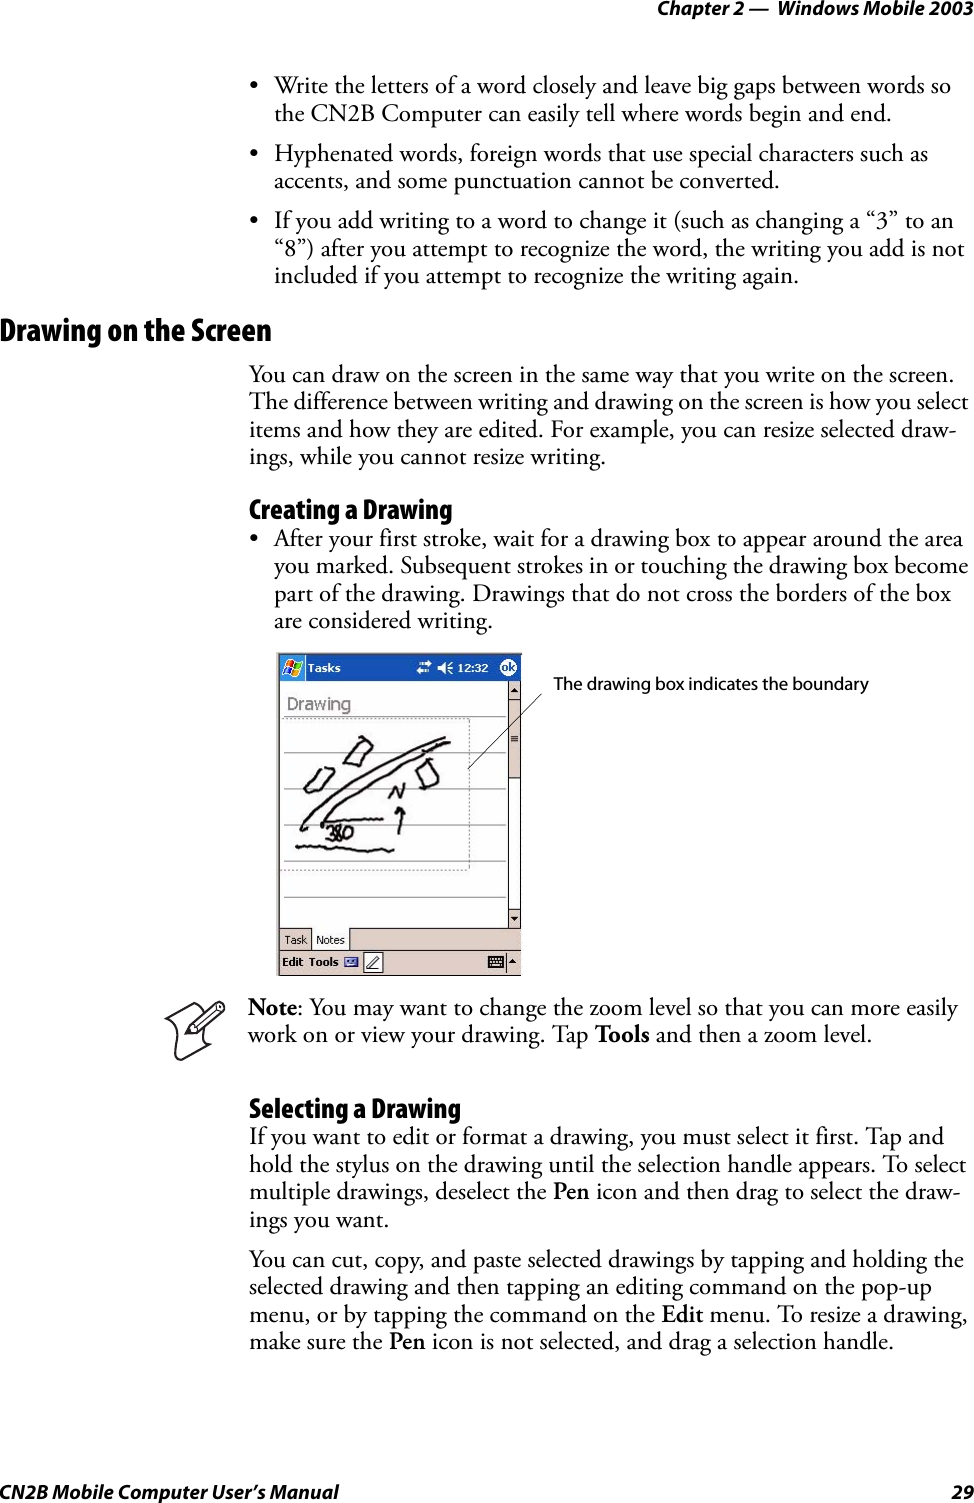
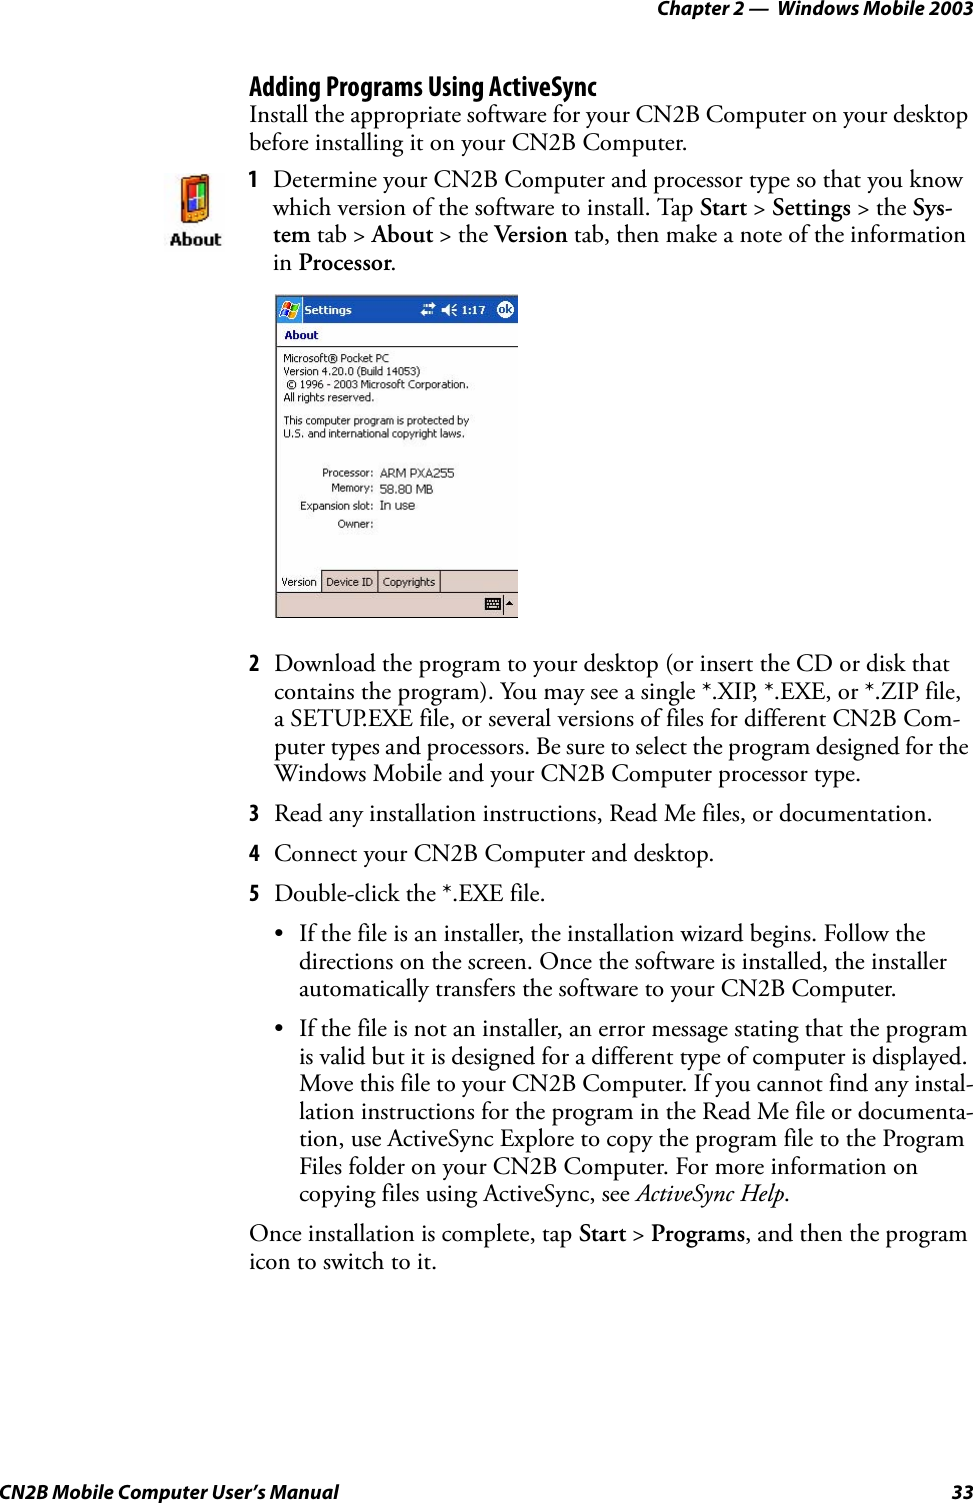
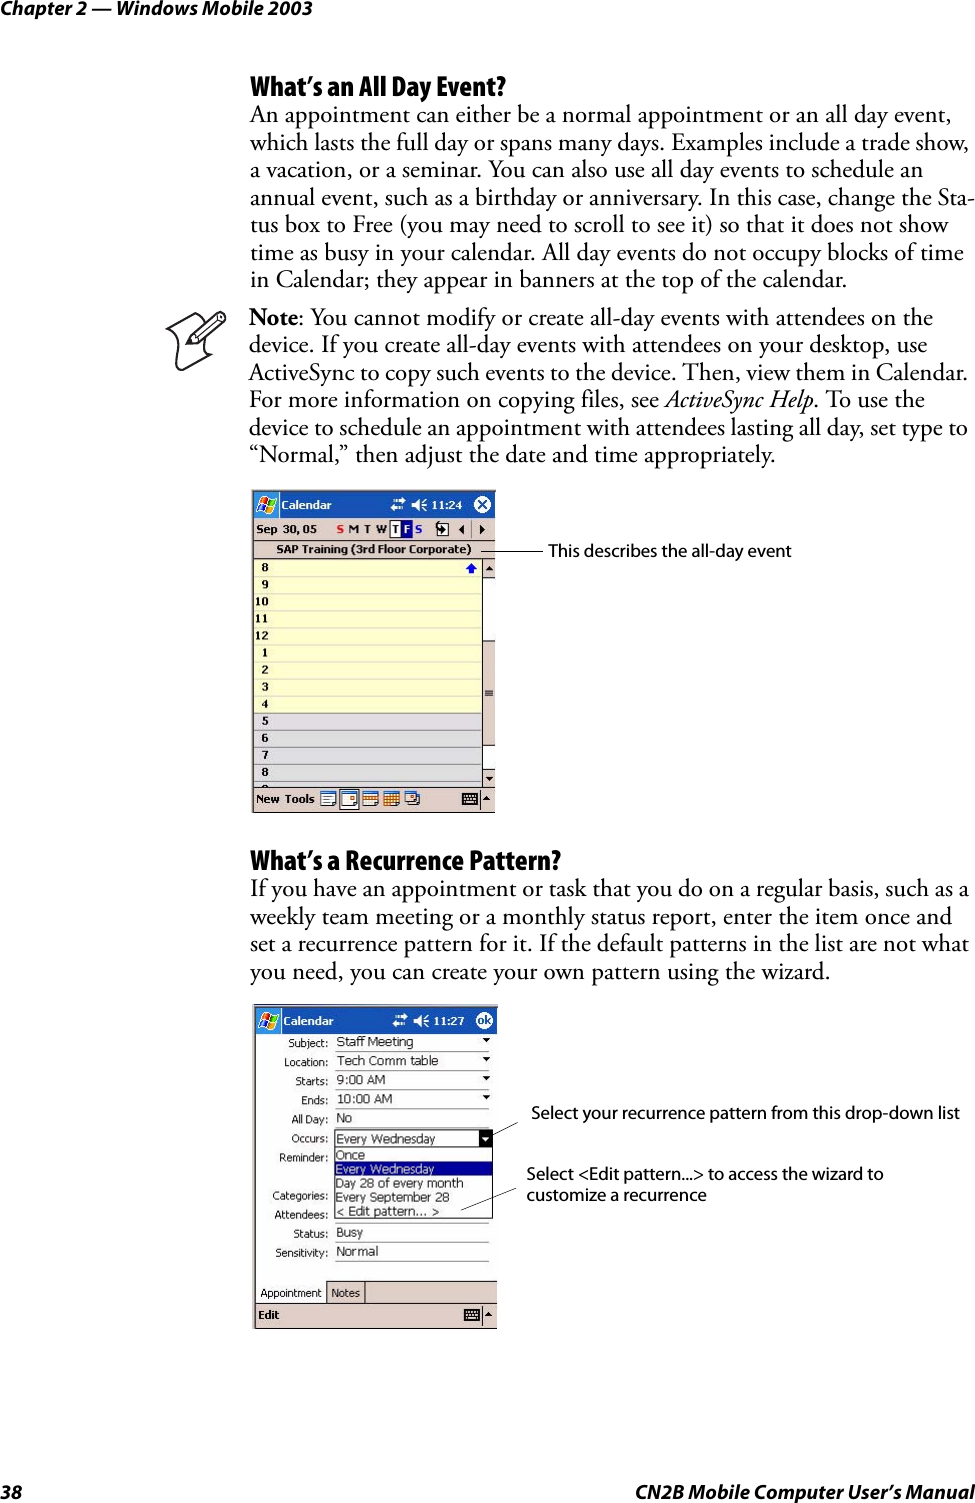
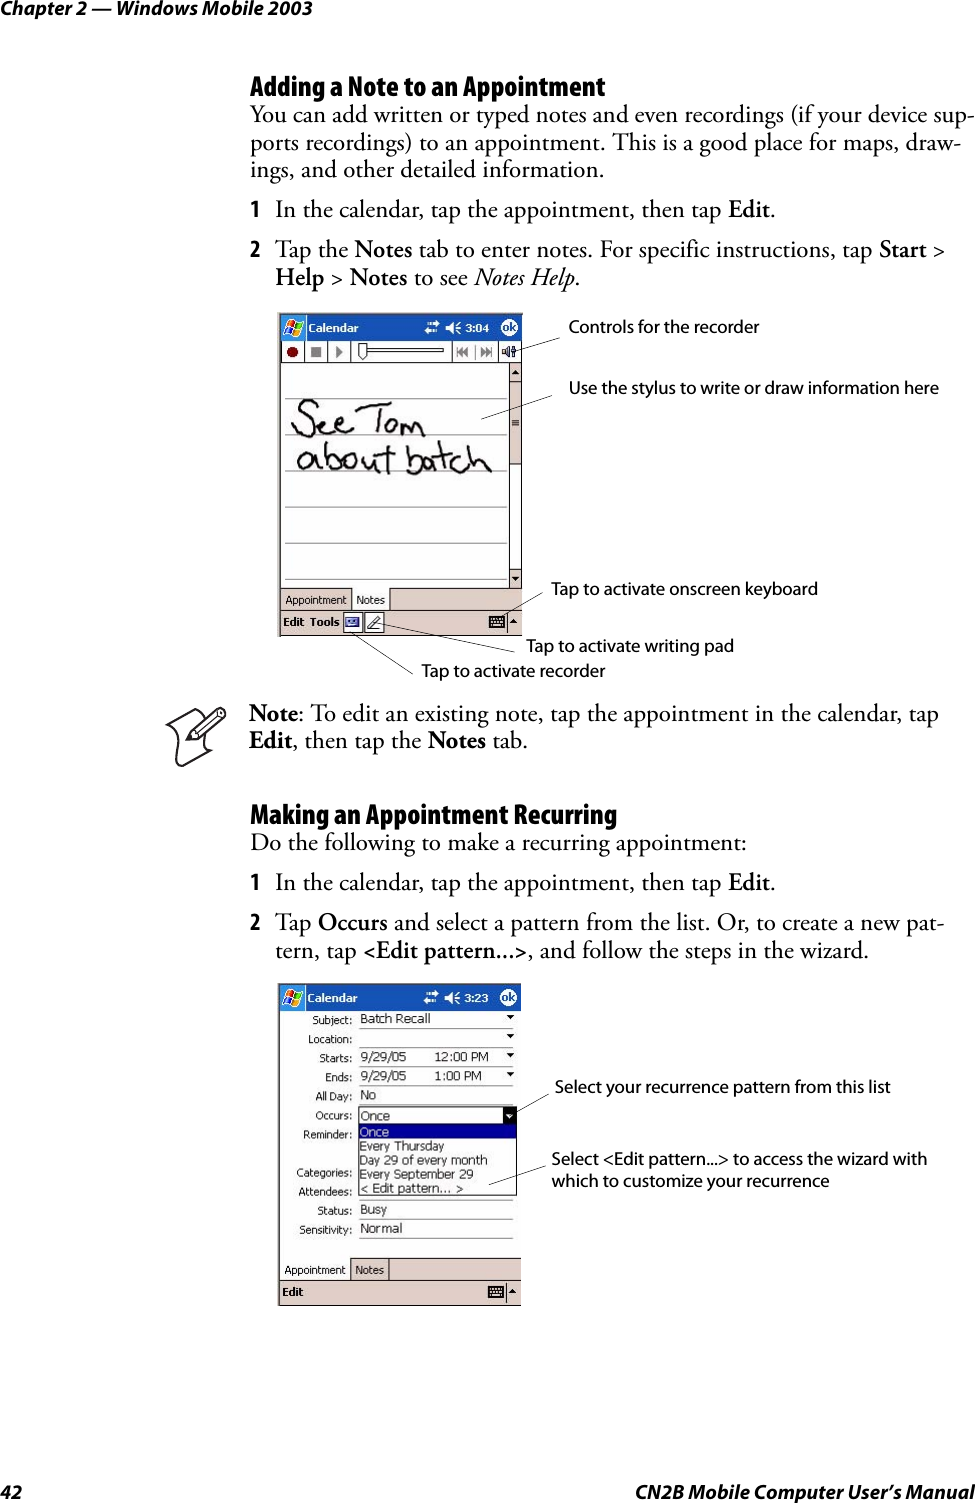
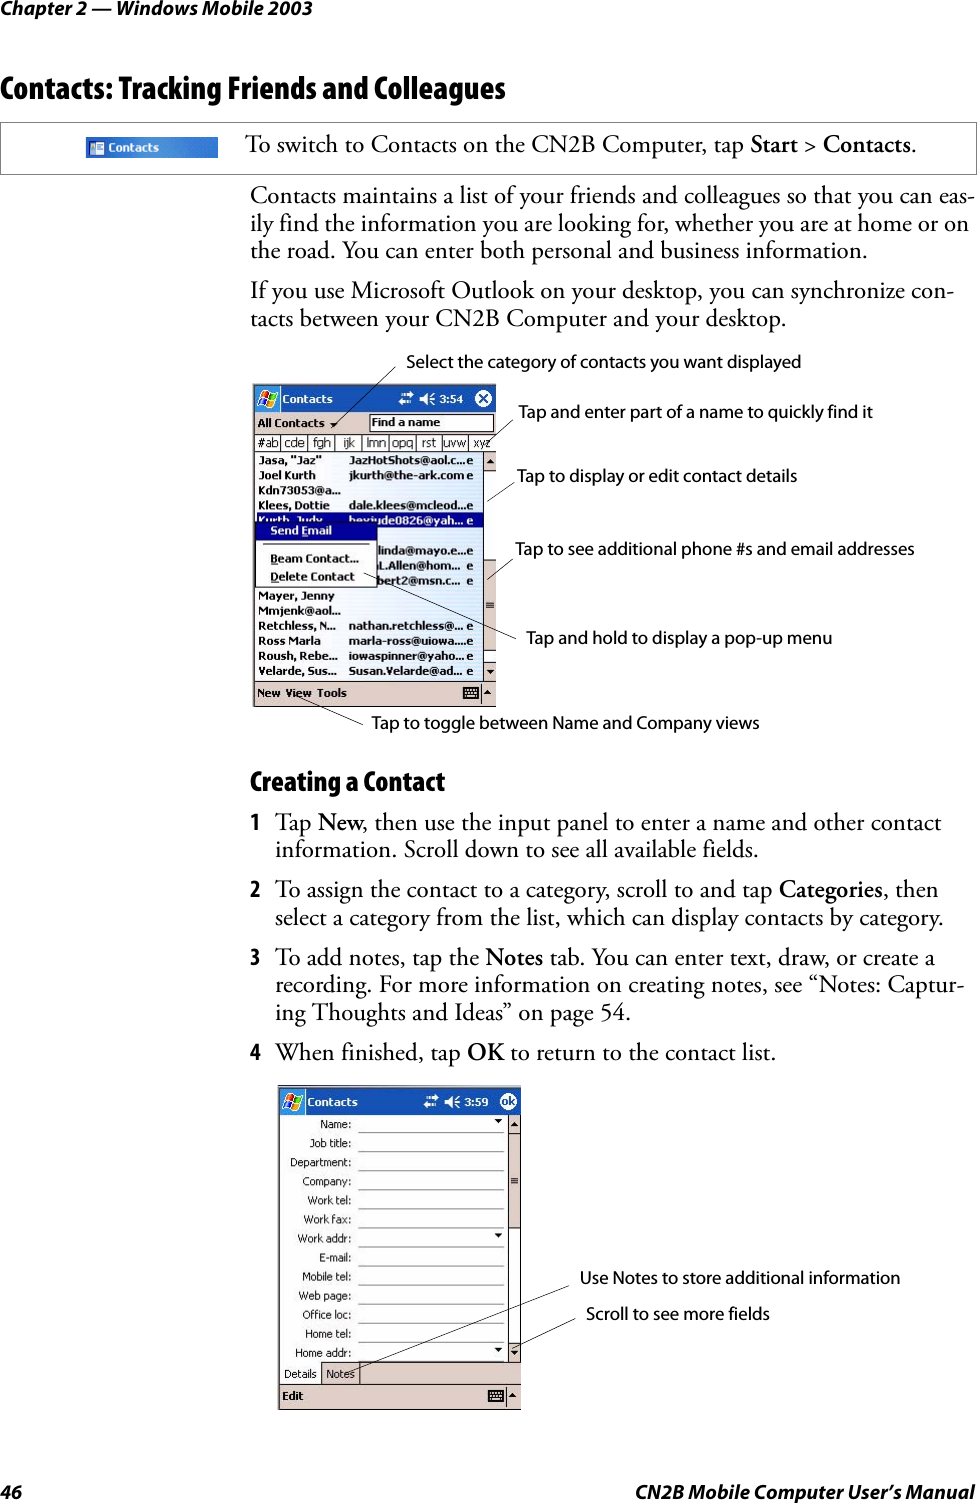
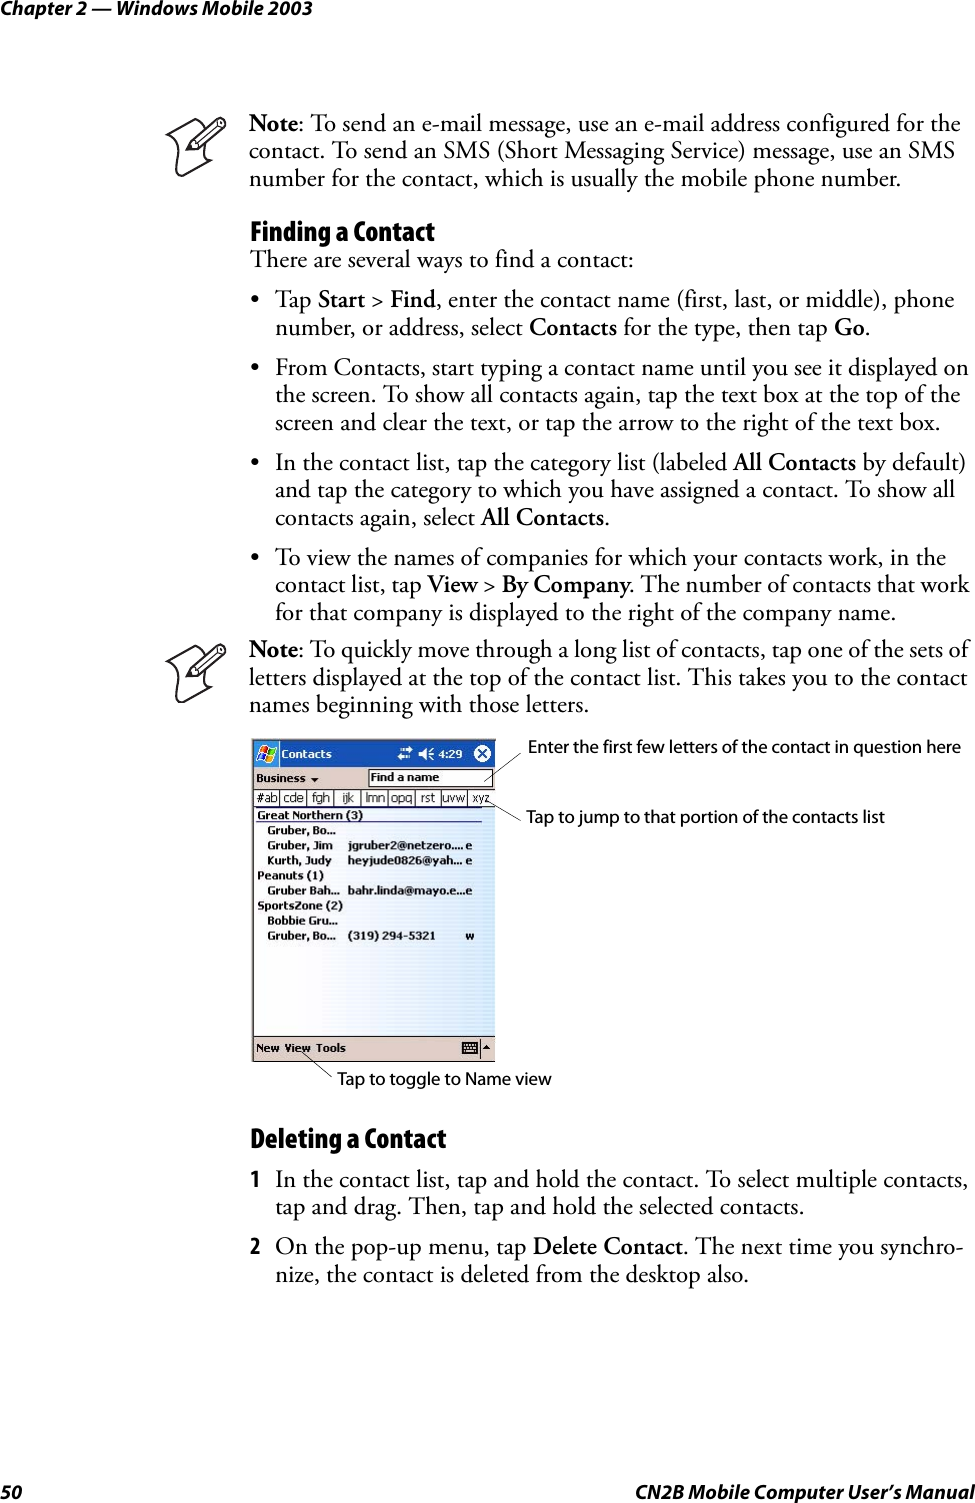
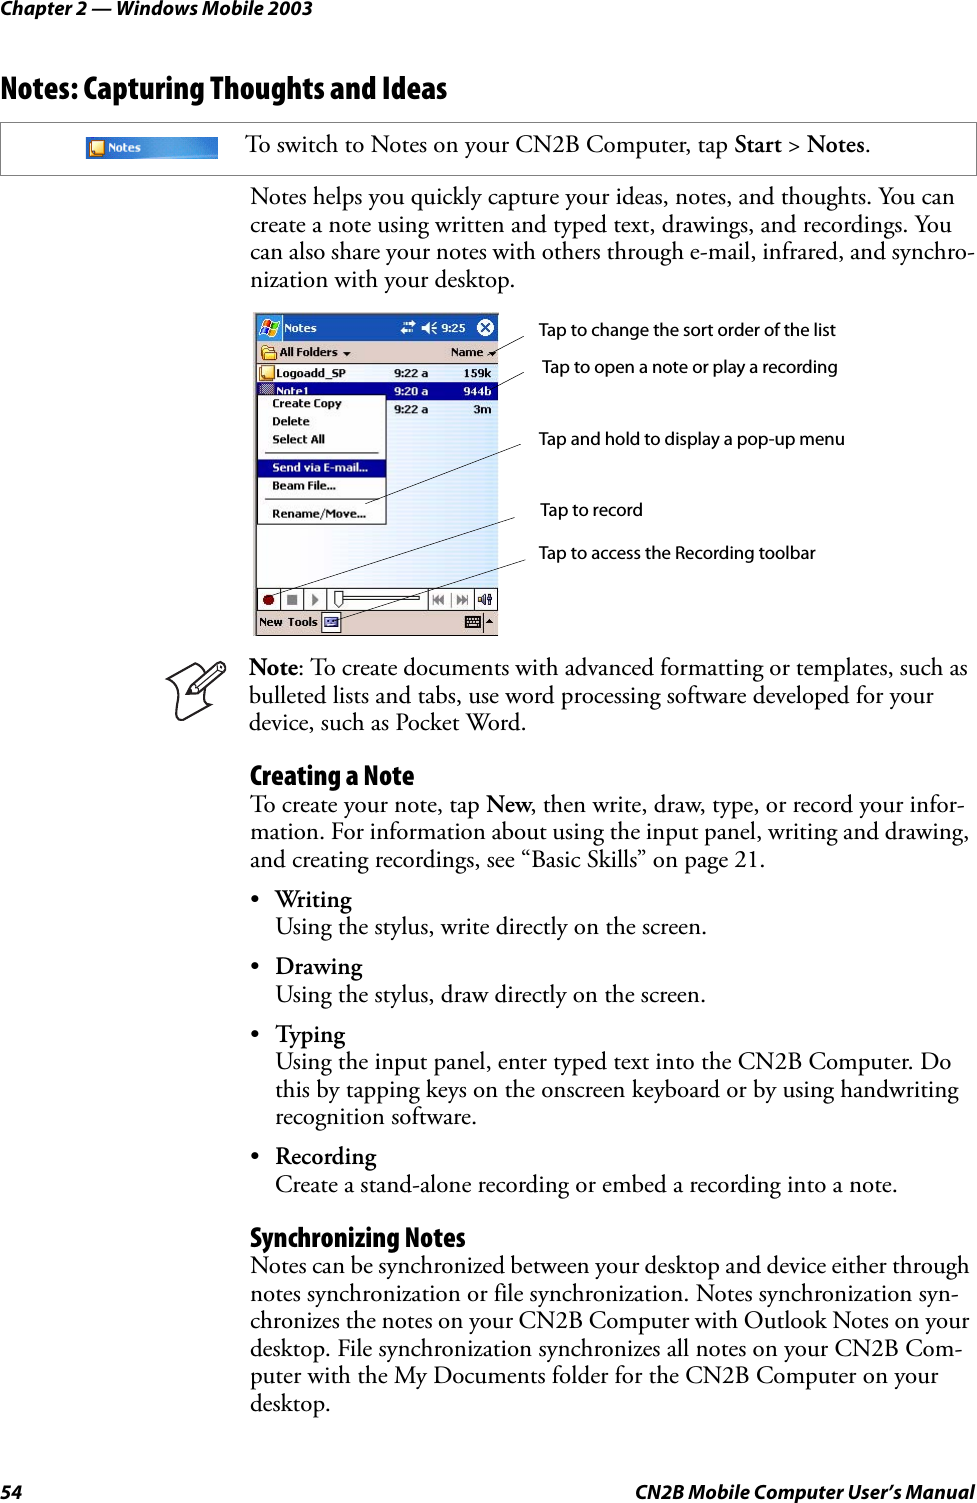
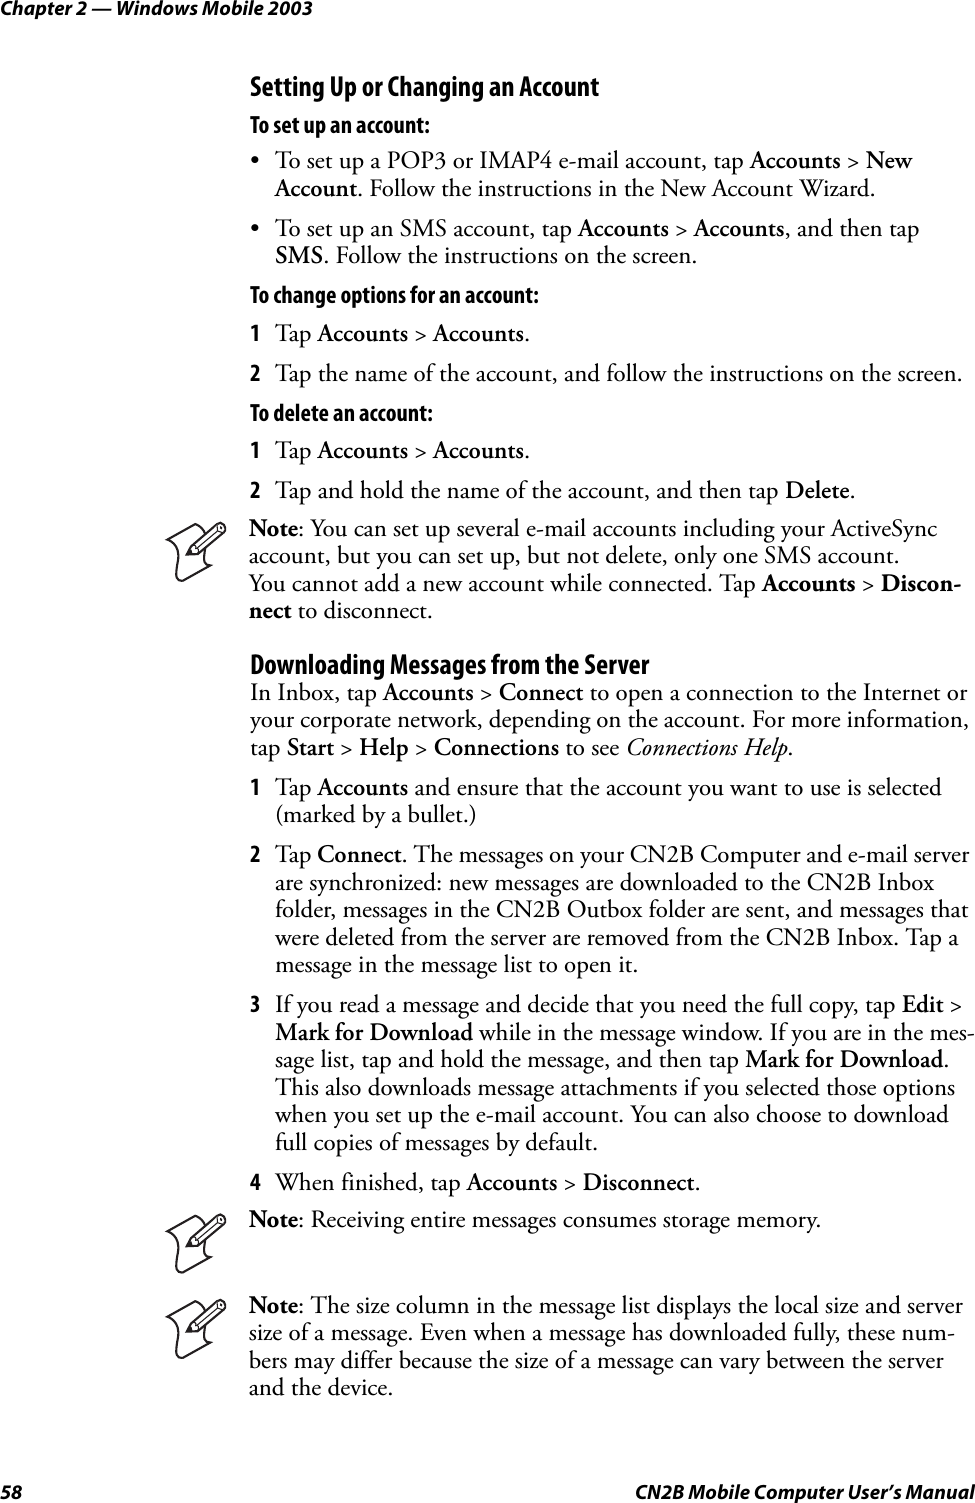
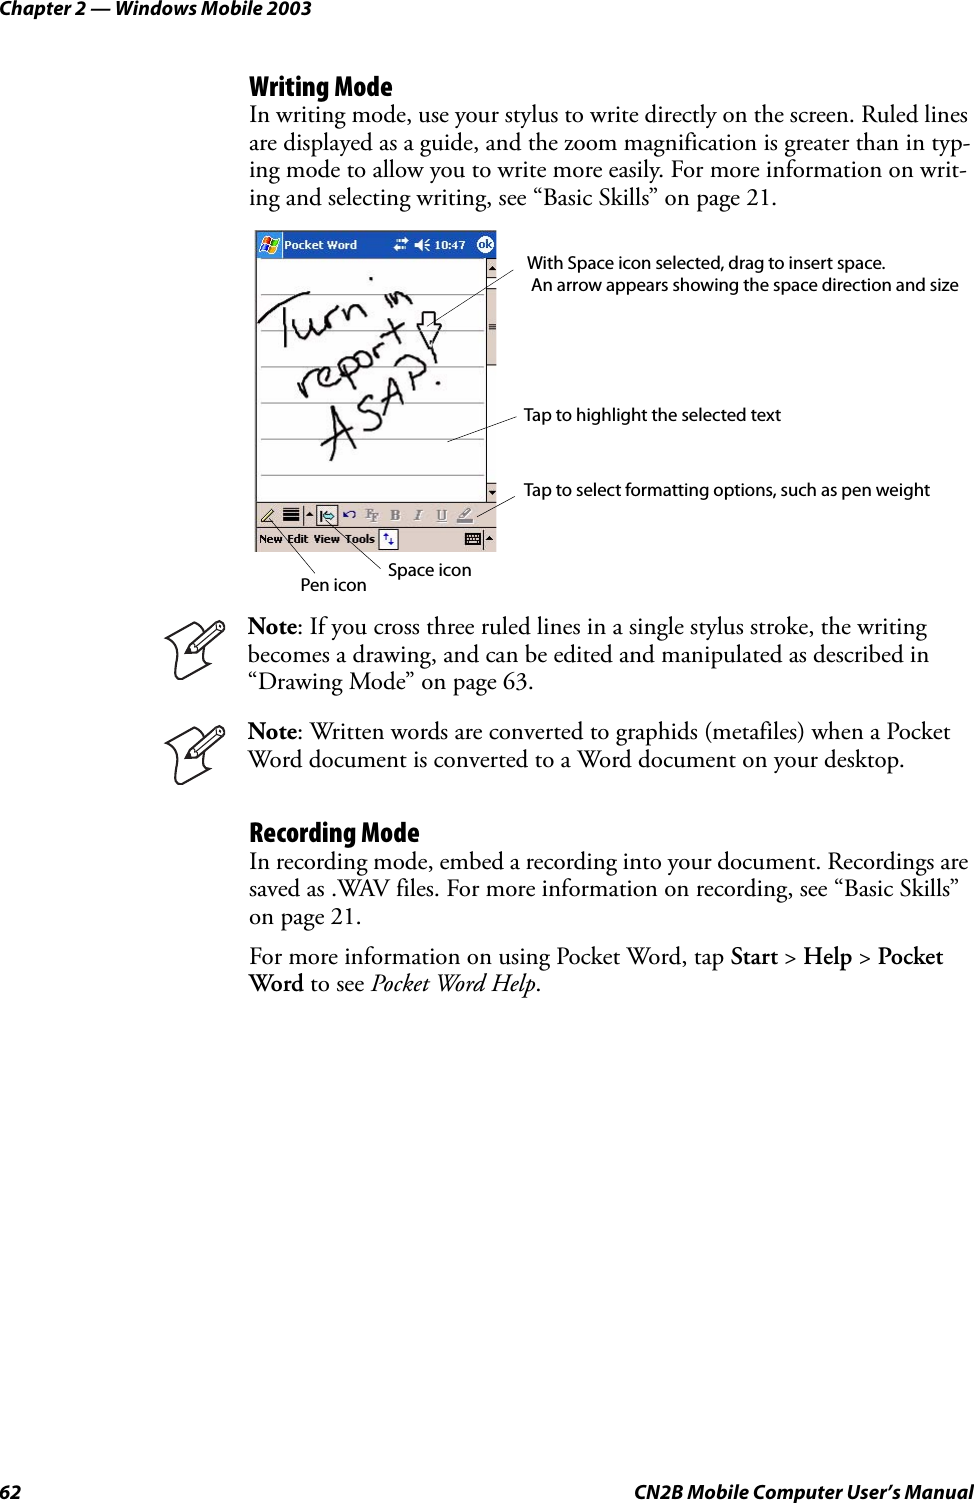
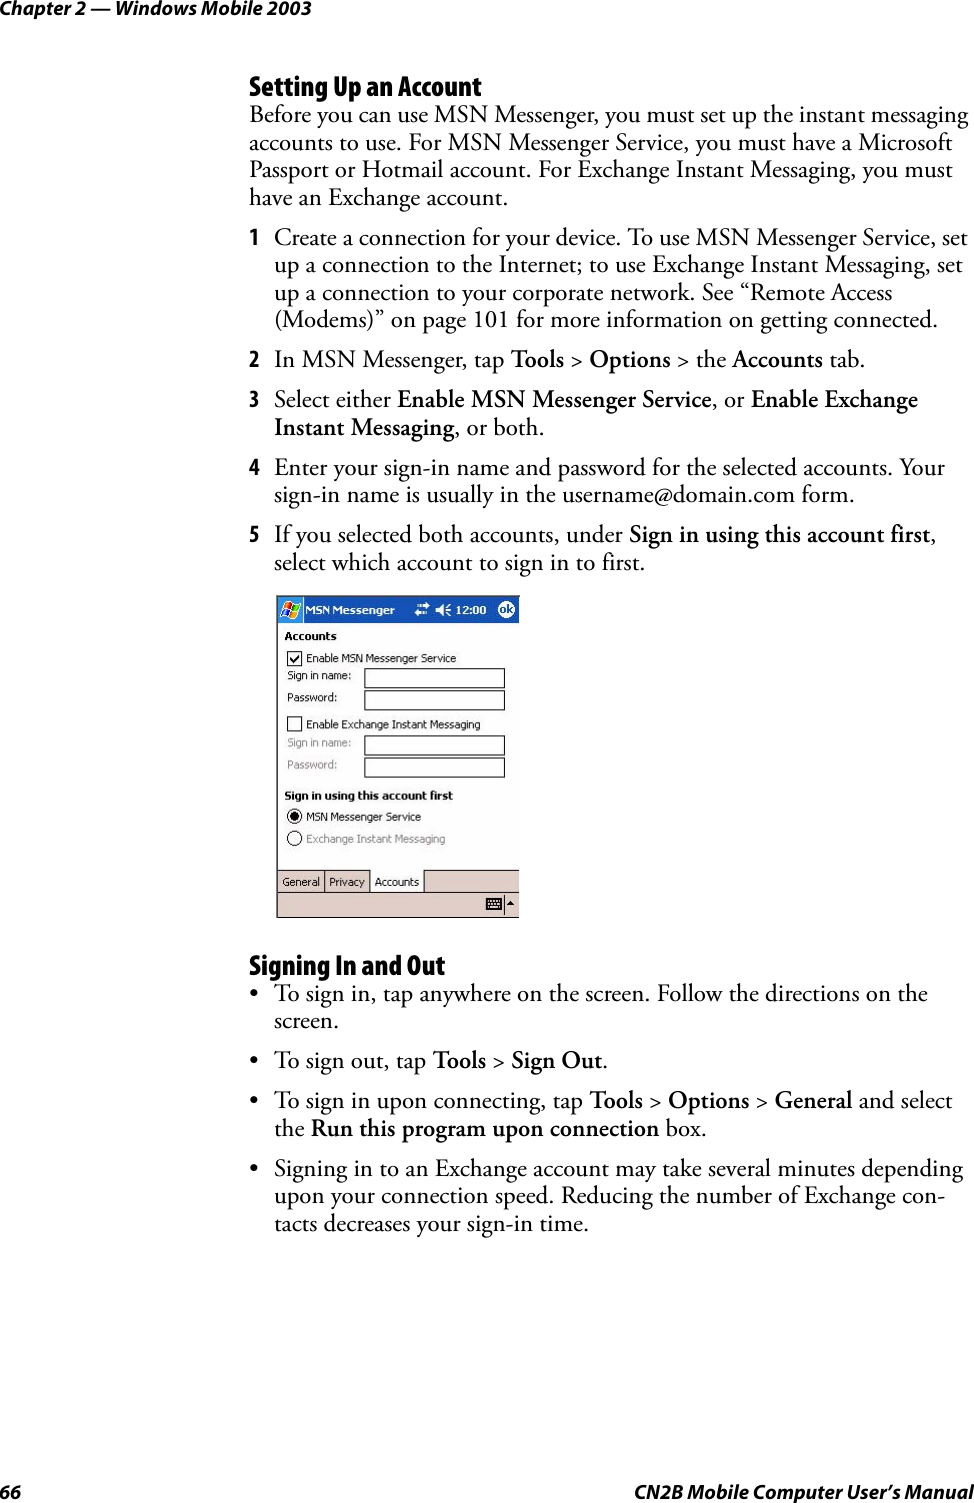
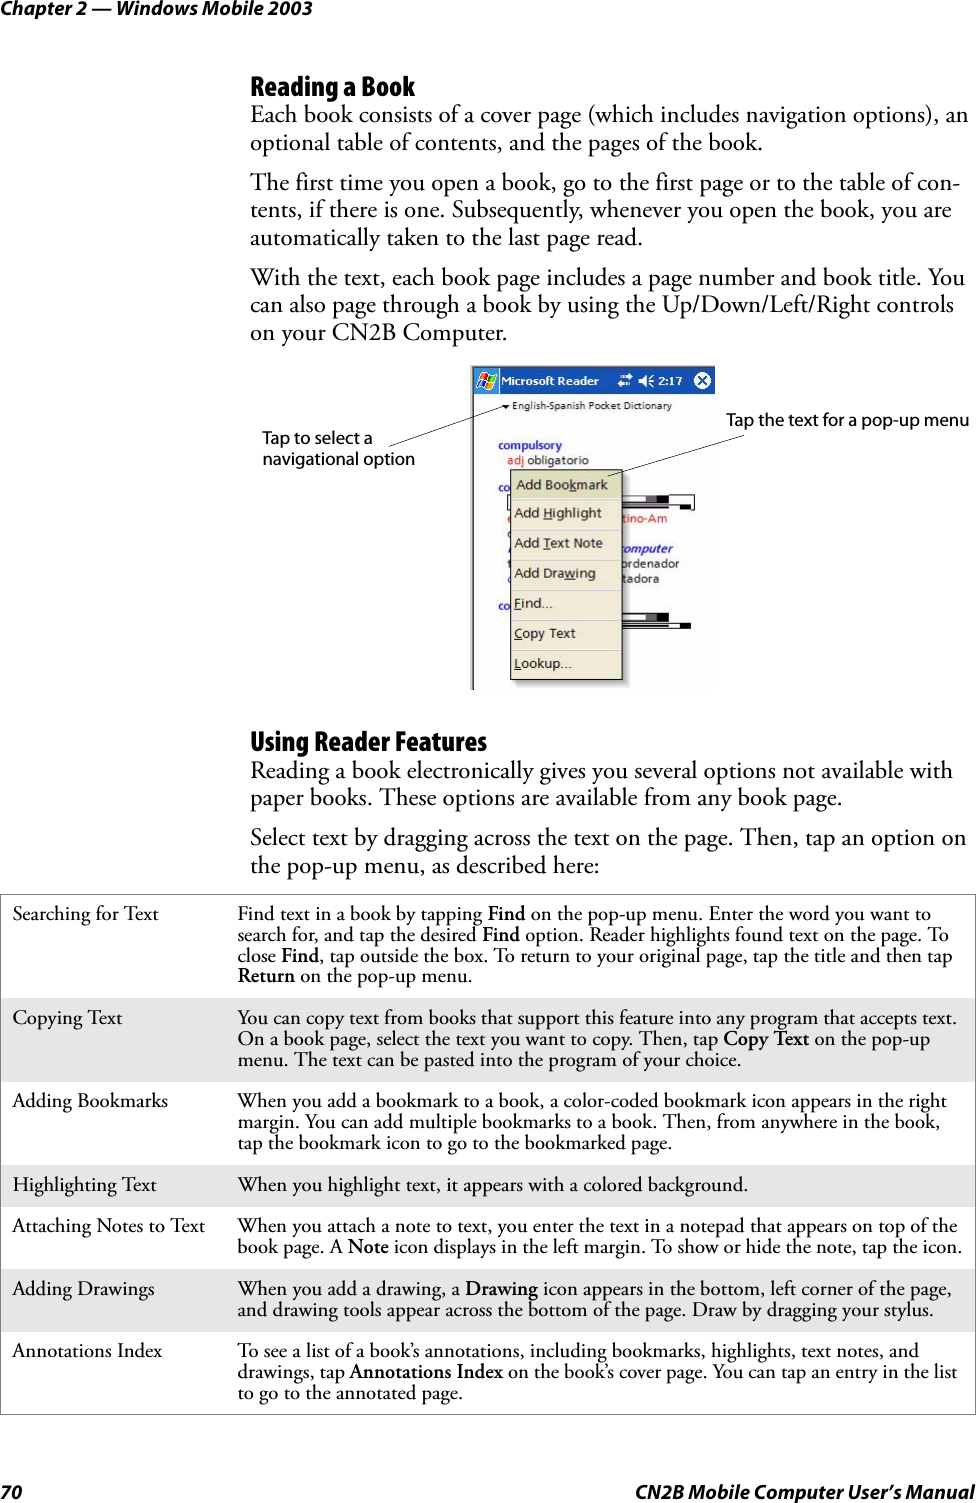
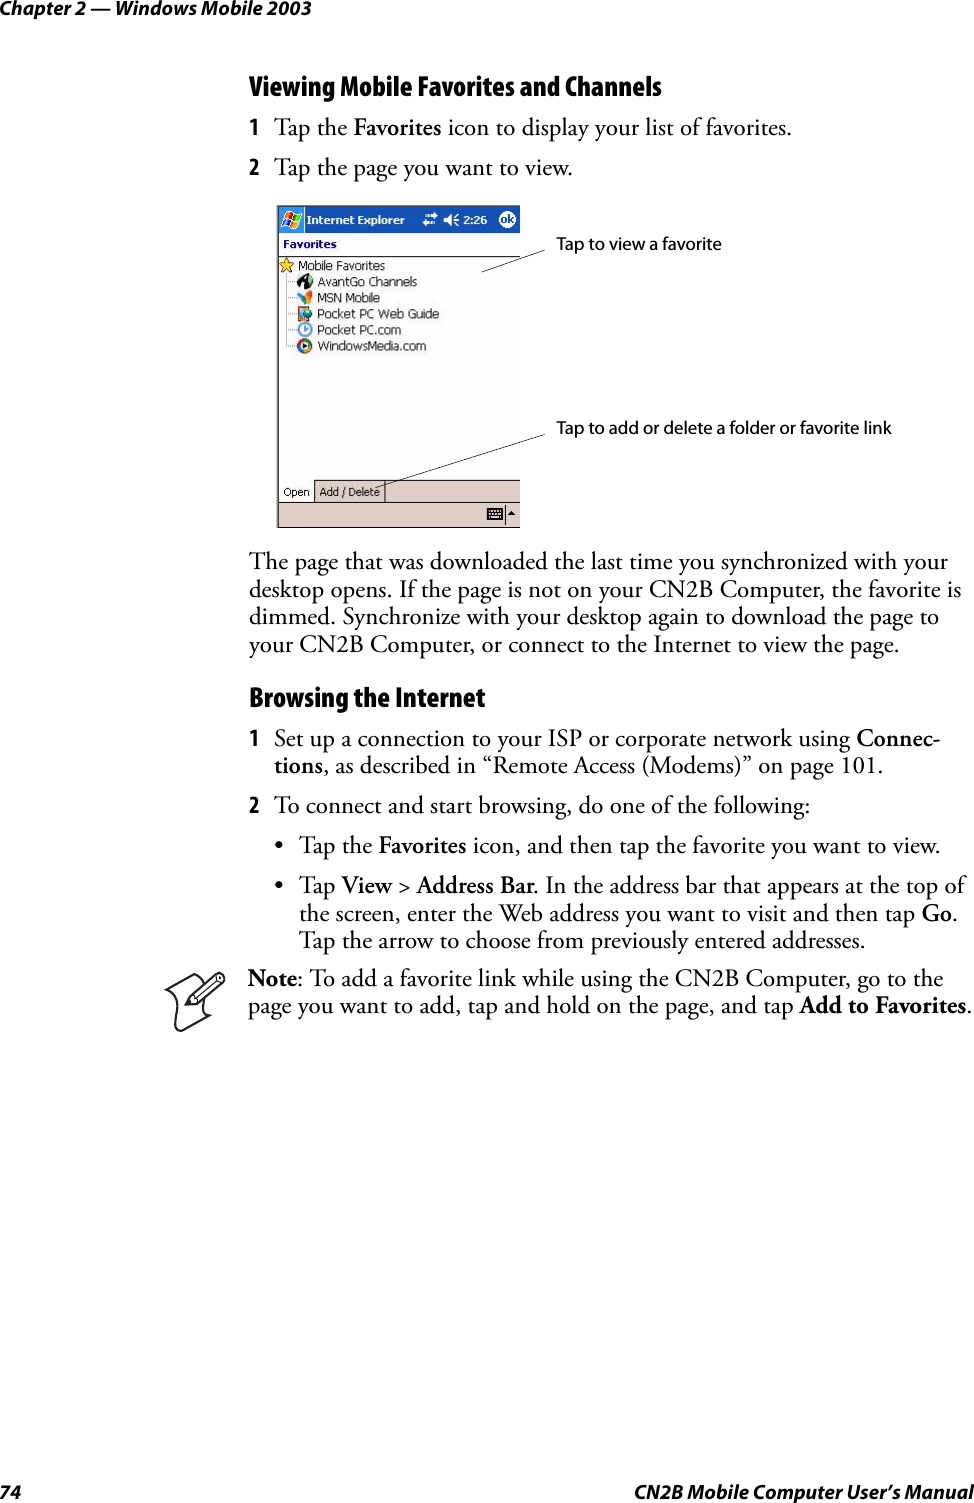
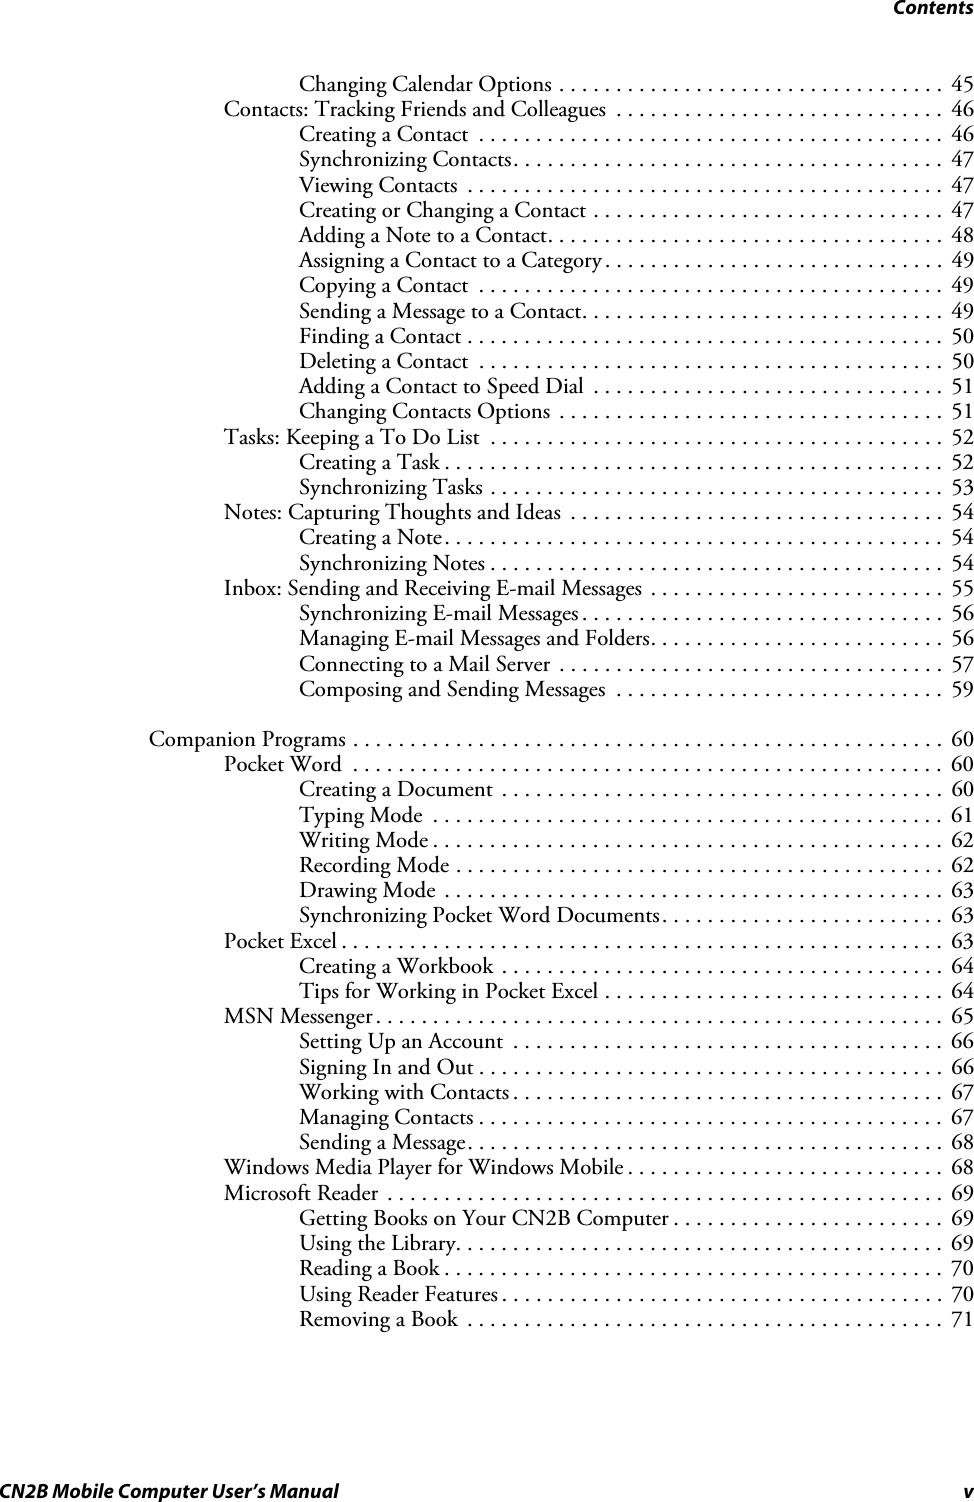
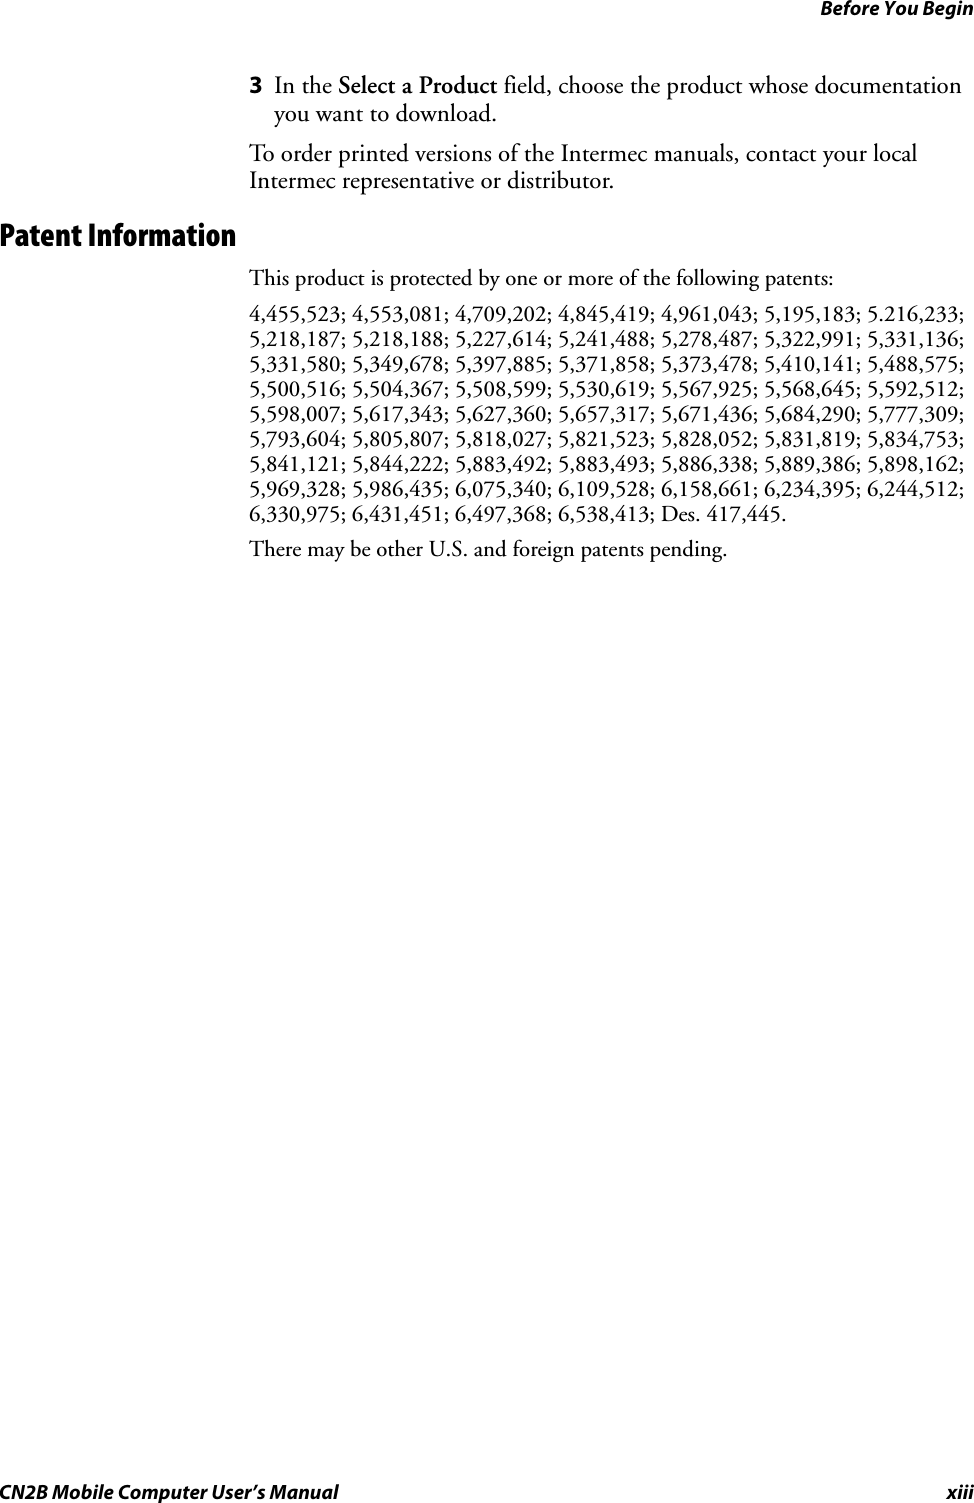
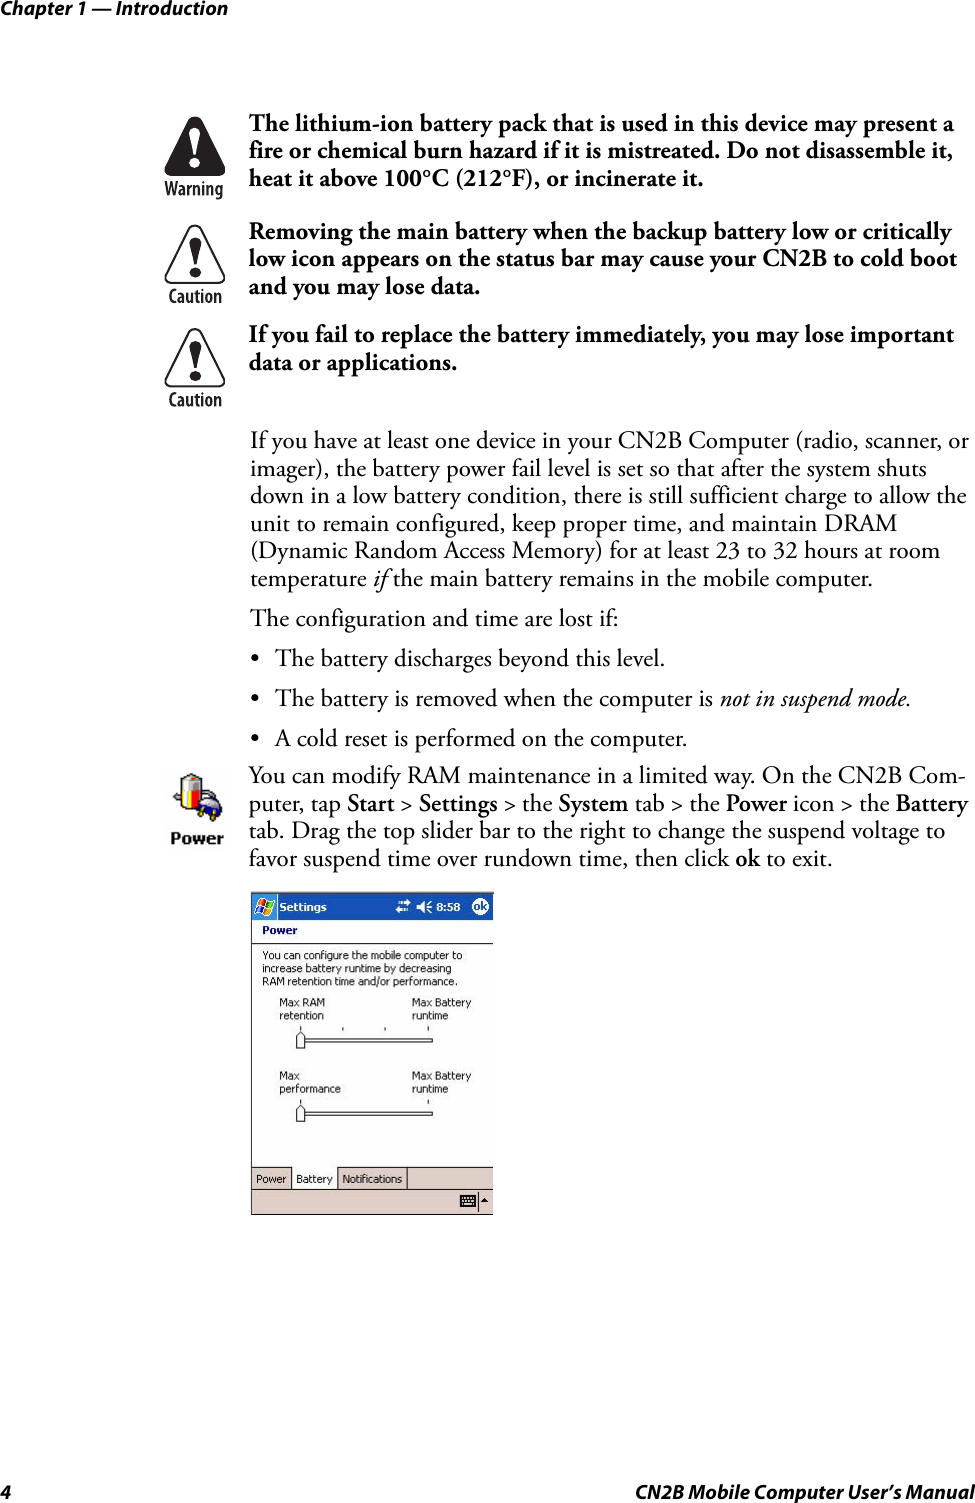
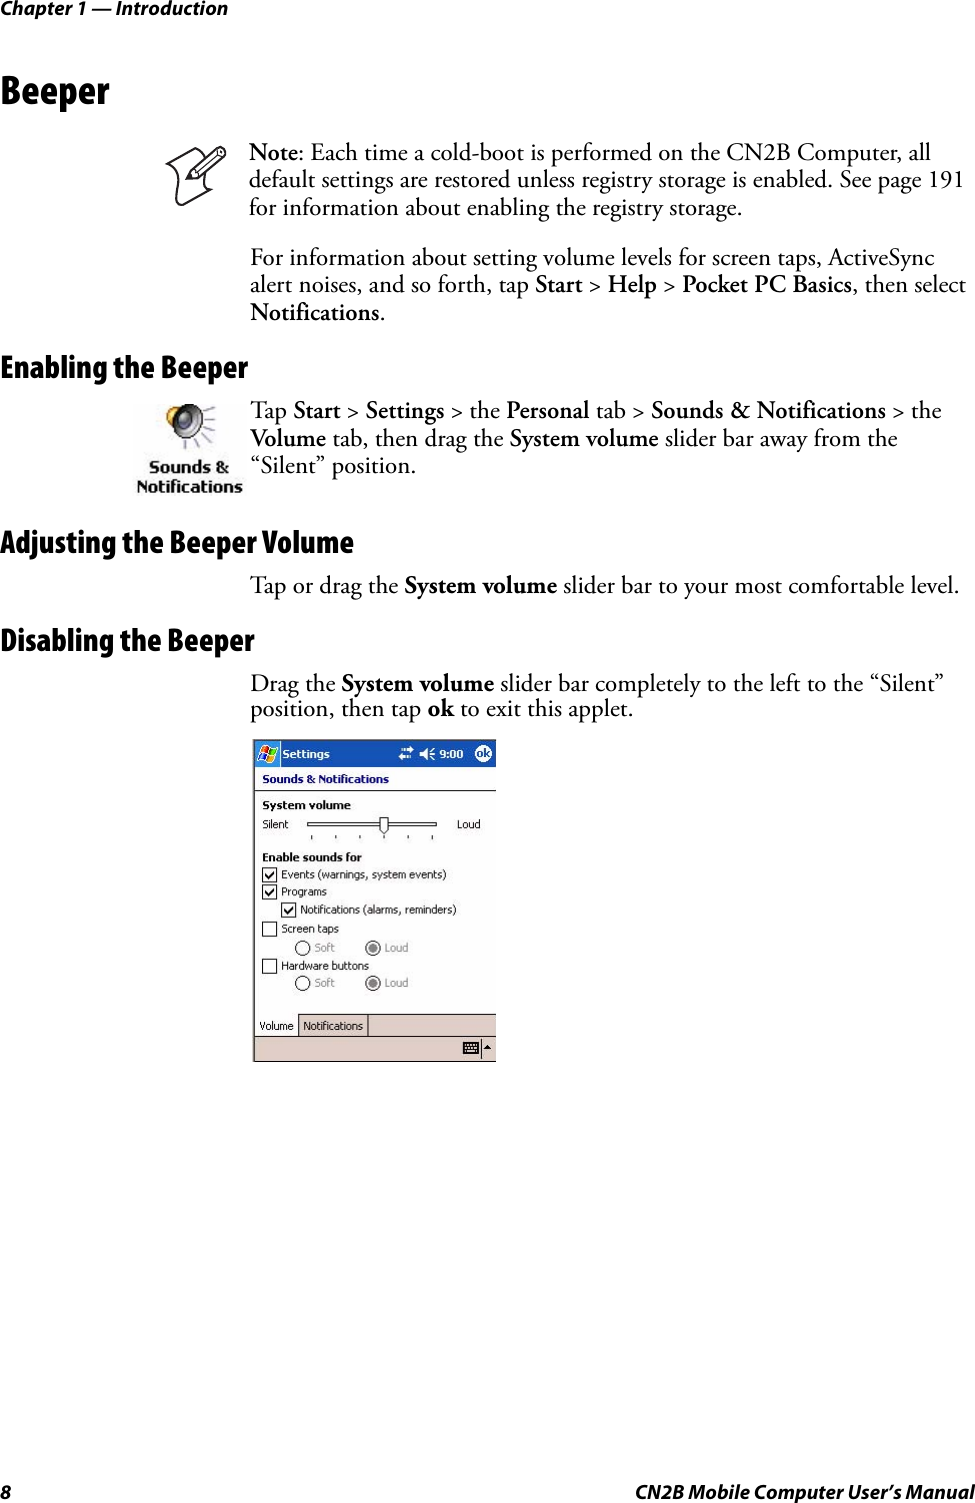
![Chapter 1 — IntroductionCN2B Mobile Computer User’s Manual 11c[Alpha] [2] [2] [2] C[Alpha] [1] [2] [2] [2]d[Alpha] [3] D[Alpha] [1] [3]e[Alpha] [3] [3] E[Alpha] [1] [3] [3]f[Alpha] [3] [3] [3] F[Alpha] [1] [3] [3] [3]g[Alpha] [4] G[Alpha] [1] [4]h[Alpha] [4] [4] H[Alpha] [1] [4] [4]i[Alpha] [4] [4] [4] I[Alpha] [1] [4] [4] [4]j[Alpha] [5] J[Alpha] [1] [5]k[Alpha] [5] [5] K[Alpha] [1] [5] [5]l[Alpha] [5] [5] [5] L[Alpha] [1] [5] [5] [5]m[Alpha] [6] M[Alpha] [1] [6]n[Alpha] [6] [6] N[Alpha] [1] [6] [6]o[Alpha] [6] [6] [6] O[Alpha] [1] [6] [6] [6]p[Alpha] [7] P[Alpha] [1] [7]q[Alpha] [7] [7] Q[Alpha] [1] [7] [7]r[Alpha] [7] [7] [7] R[Alpha] [1] [7] [7] [7]s[Alpha] [7] [7] [7] [7] S[Alpha] [1] [7] [7] [7] [7]t[Alpha] [8] T[Alpha] [1] [8]u[Alpha] [8] [8] U[Alpha] [1] [8] [8]v[Alpha] [8] [8] [8] V[Alpha] [1] [8] [8] [8]w[Alpha] [9] W[Alpha] [1] [9]x[Alpha] [9] [9] X[Alpha] [1] [9] [9]y[Alpha] [9] [9] [9] Y[Alpha] [1] [9] [9] [9]z[Alpha] [9] [9] [9] [9] Z[Alpha] [1] [9] [9] [9] [9]To Enter Press the Keys To Enter Press the Keys](https://usermanual.wiki/Intermec-Technologies/2610CF.User-Manual-1-of-3/User-Guide-616311-Page-25.png)