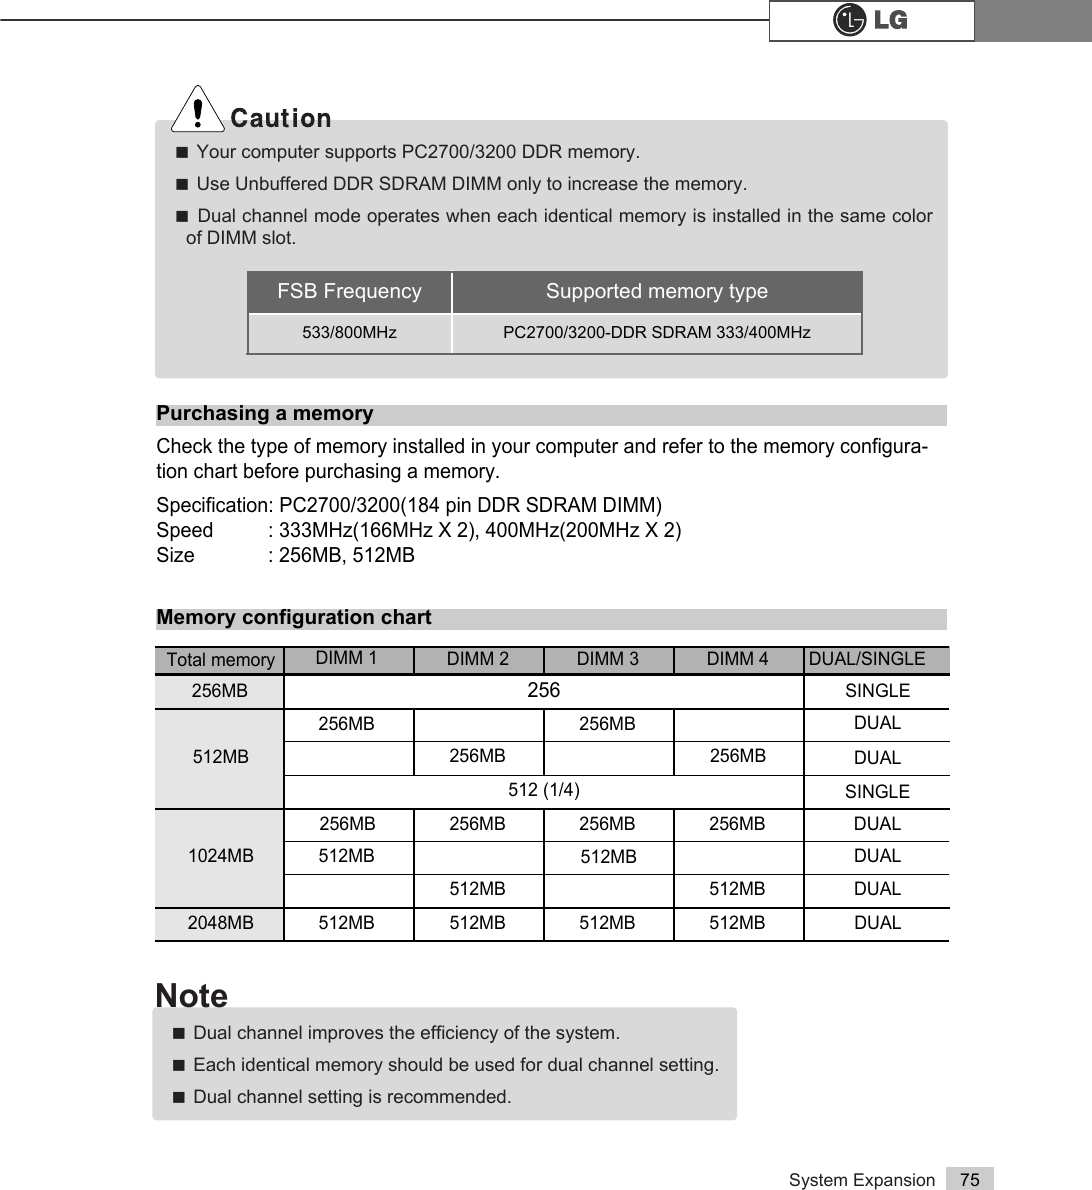
LG Electronics USA DT-EG PERSONAL COMPUTER User Manual EGEM
LG Electronics USA PERSONAL COMPUTER EGEM
UserManual.wiki
>
LG Electronics USA
>
DT-EG User Manual
>
USERS MANUAL 4
Contents
1.
USERS MANUAL 1
2.
USERS MANUAL 2
3.
USERS MANUAL 3
4.
USERS MANUAL 4
5.
USERS MANUAL 5
USERS MANUAL 4
Navigation menu
Upload a User Manual
Namespaces
Wiki Guide
HTML
PDF
Info
Views
User Manual
Discussion / Help
Navigation

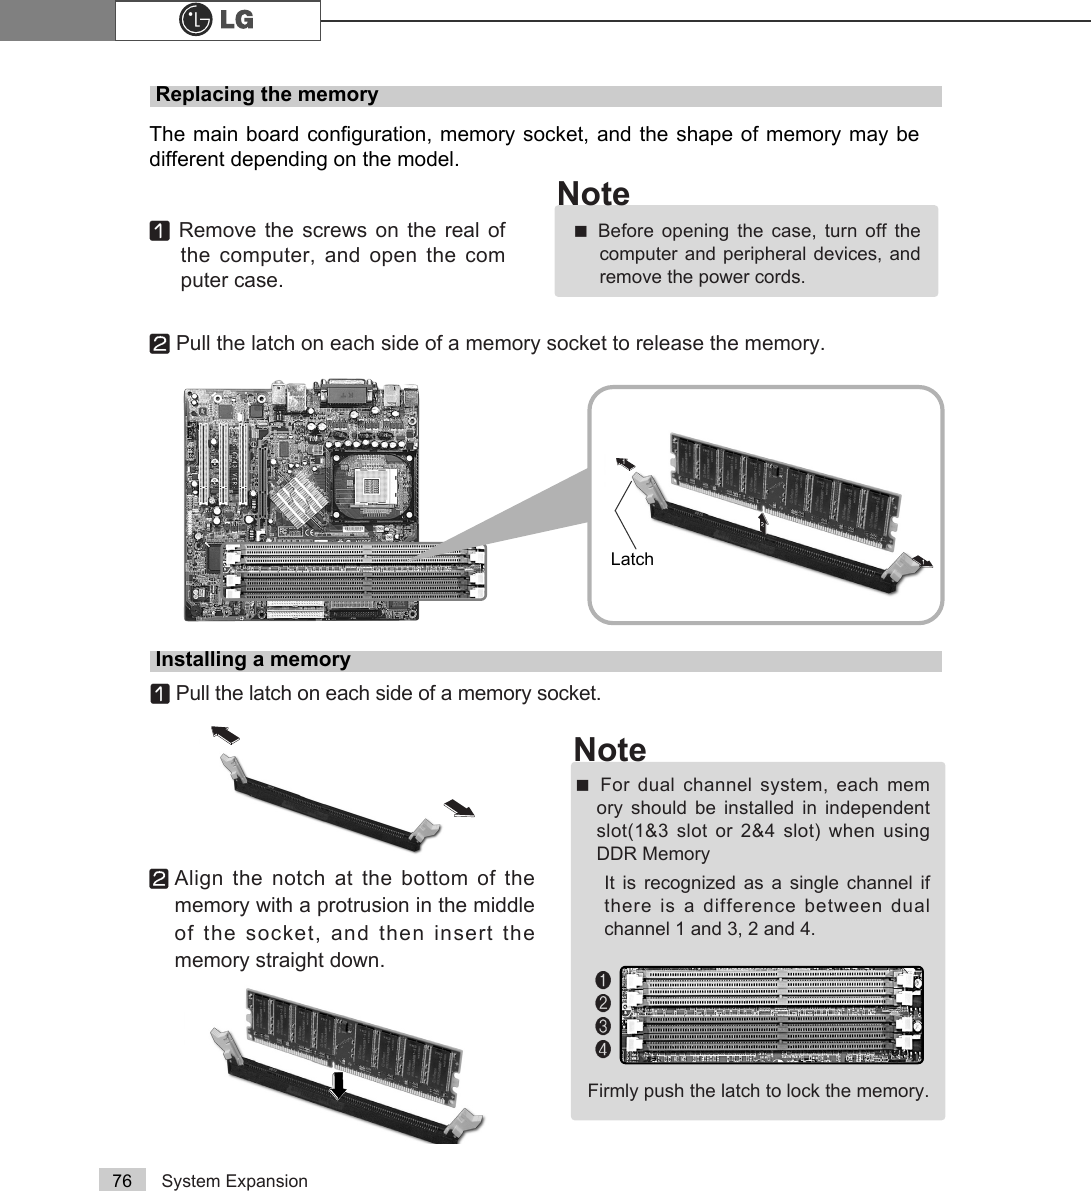
![System Expansion 77Checking the size of the installed memoryThe computer automatically recognizes the newly installed memory; therefore,you do not need to change the system setup. Follow the instruction below tocheck the size of the installed memory.ⓞConnect the power cord and other devices, and turn on the computer and monitor.The following screen appears to inspect the status of the computer.ⓟIf the following screen appears, press [Esc]. POST screen appears.ⓠIf the following screen appears, press [Pause] key to pause the screen. Makesure [Memory Testing : XXXXXX OK] appears.ⓡAfter check the memory, press [Esc]. Windows screen appears.Award Modular BIOS vX.XXXX, An Energy Star AllyCopyright(C) 1984-2004, Award Software, Inc.Build ID : LG XXXX XX.XX XX:XX:XX Main Processor : Intel(R) Pentium(R) X Processor XXXMHzMemory Test : XXXXXX OKPress DEL to enter SETUP XX/XX/XX-XXXX-XXXX-XXXXXXXXX-XX0HPRU\7HVWLQJ;;;;;;2.ãTo stop the logo screen for a moment,press [Delete] key ⎀Advanced BIOSFeatures ⎀Full Screen Logo ShowSelectable, and then select Disable.Note](https://usermanual.wiki/LG-Electronics-USA/DT-EG.USERS-MANUAL-4/User-Guide-501376-Page-12.png)