LG Electronics USA F31GDA Refrigerator User Manual EMISSION TEST REPORT
LG Electronics USA Refrigerator EMISSION TEST REPORT
UserManual.wiki
>
LG Electronics USA
>
F31GDA User Manual
>
User Manual 2
Contents
1.
User Manual 1
2.
User Manual 2
3.
User Manual 3
4.
User Manual 4
User Manual 2
Navigation menu
Upload a User Manual
Namespaces
Wiki Guide
HTML
PDF
Info
Views
User Manual
Discussion / Help
Navigation


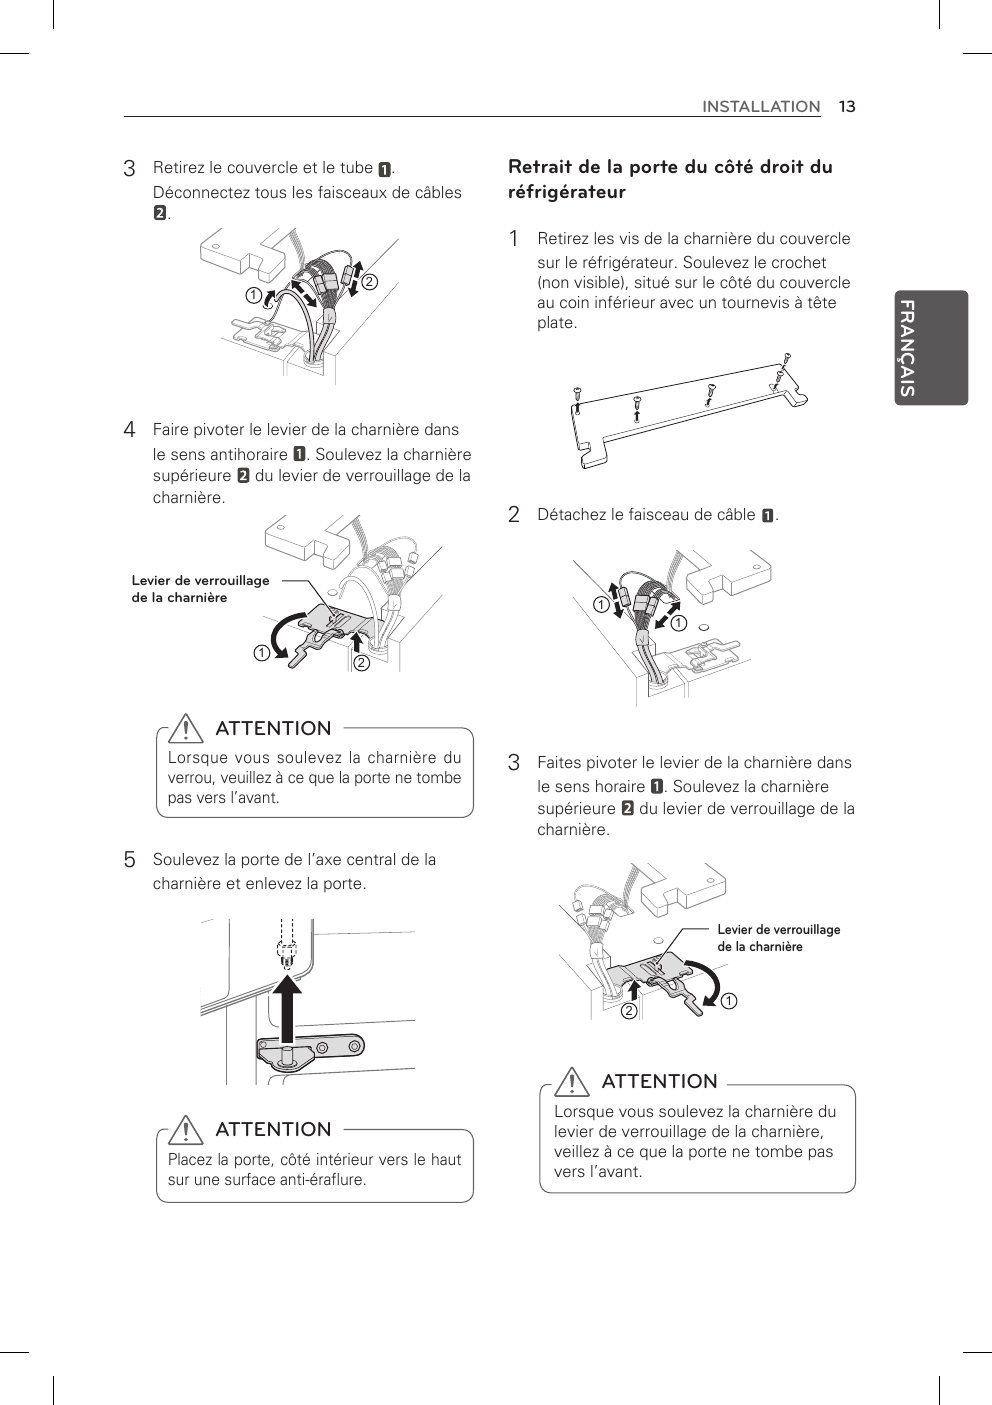

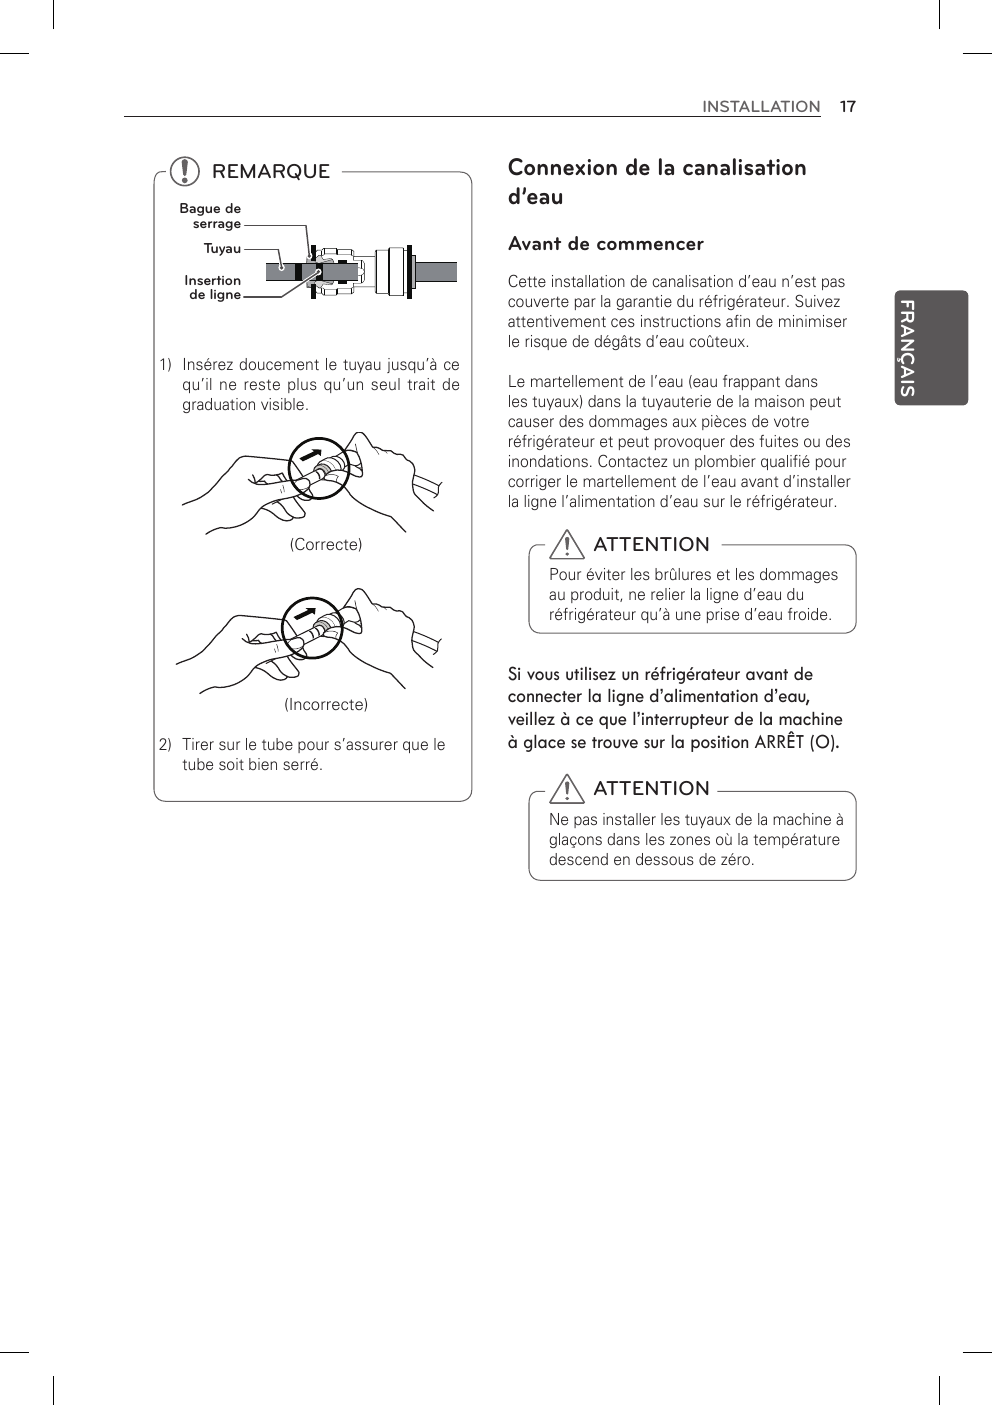
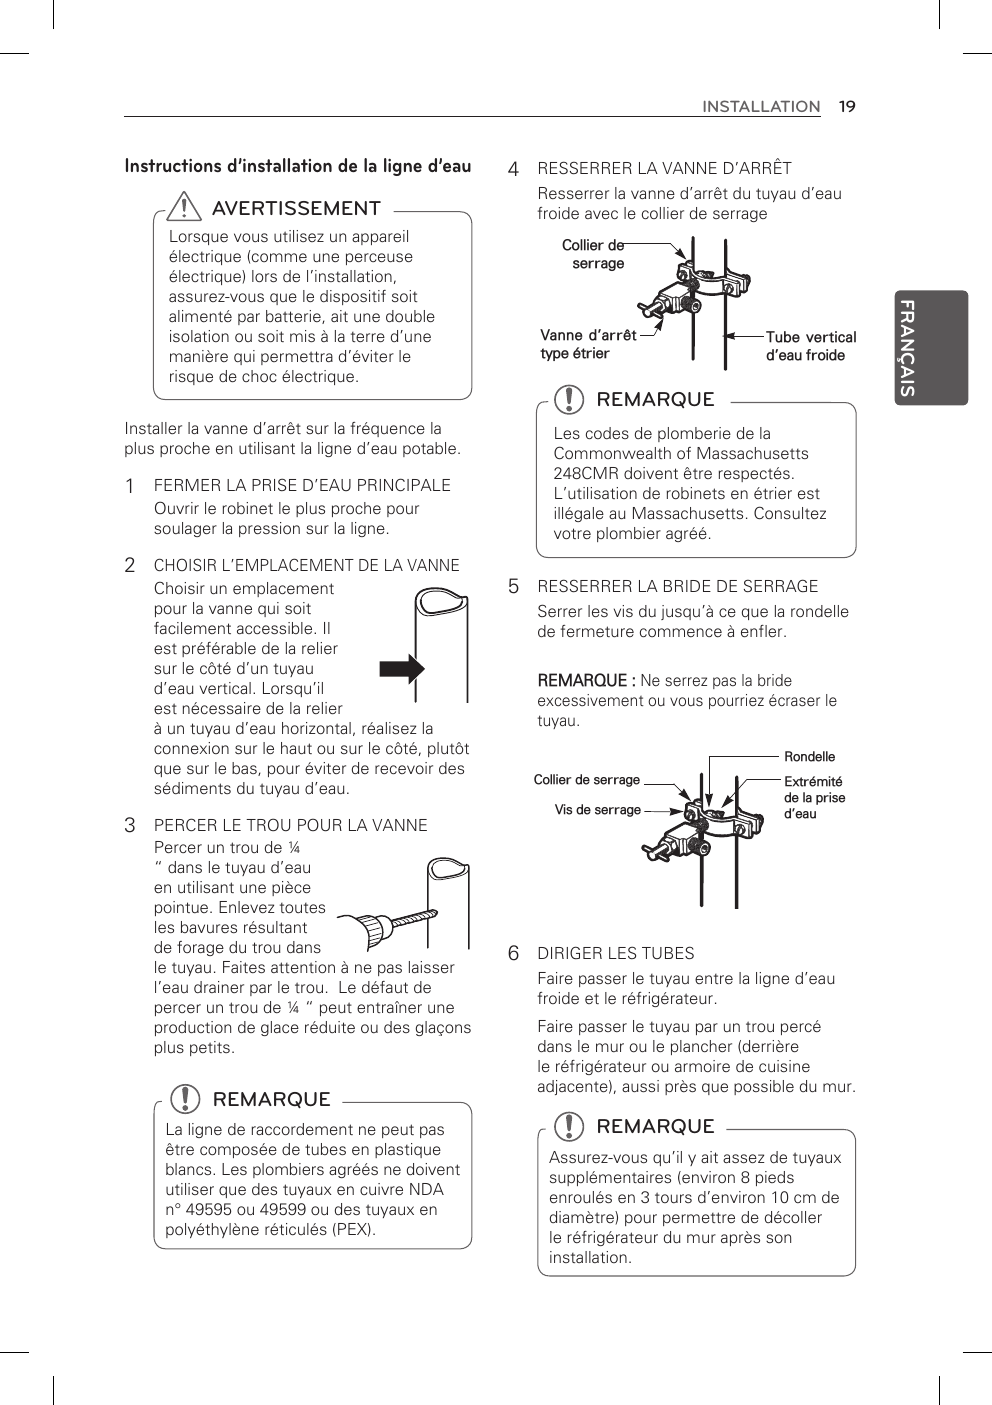
![18 INSTALLATIONFRANÇAIS ATTENTIONPorter des lunettes de protection lors de l’installation pour éviter les blessures.Pression de l’eauLa pression d’eau doit être comprise entre 1,38 et 8,27 bars sur les modèles non équipés d’un filtre à eau et entre 2,76 et 8,27 bars sur les modèles équipés d’un filtre à eau.Si un système de filtration d’eau par osmose inverse est connecté à votre alimentation d’eau froide, cette installation de canalisation d’eau n’est pas couverte par la garantie du réfrigérateur. Respectez attentivement les instructions pour minimiser le risque de dégâts des eaux onéreux.Si un système de filtration d’eau par osmose inverse est connecté à votre alimentation en eau froide, la pression d’eau au niveau du système par osmose inverse doit être comprise au minimum entre 2,76 et 4,14 bars (40~60 psi), soit moins de 2 à 3 secondes pour remplir une tasse de 20 cl.Si la pression d’eau depuis le système par osmose inverse est inférieure à 1,38 bar (20 psi), soit plus de 4 secondes pour remplir une tasse de 20 cl, procédez comme suit.Vérifiez pour voir si le filtre à sédiments dans yle système d’osmose inverse est bloqué. Remplacez le filtre si nécessaire.Laissez le réservoir sur le système par yosmose inverse se remplir de nouveau après une utilisation intense.Si le problème concernant la pression de yl’osmose inverse persiste, appelez un plombier qualifié.Toutes les installations doivent être yconformes aux exigences du code de plomberie local.Ce dont vous aurez besoinTuyaux en cuivre, y ¼ po. diamètre extérieur, pour relier le réfrigérateur à la prise d’eau. Veillez à ce que les deux extrémités des tuyaux soient coupées au carré.Pour déterminer de combien de tuyaux vous yavez besoin : mesurez la distance de la vanne d’eau à l’arrière du réfrigérateur au tuyau d’alimentation d’eau. Ensuite, ajoutez 8 pieds (2,4m). Assurez-vous que vous disposez de suffisamment de tuyaux supplémentaires (environ 8 pieds [2,4 m] enroulés en 3 tours d’environ 10 po. [25 cm] diamètre) pour permettre au réfrigérateur d’être retiré du mur après l’installation.Perceuse électrique. yClef ajustable ou clef de y½“Tournevis à lame plate et ypour vis cruciformes.Deux boulons de ycompression de diamètre extérieur ¼ “ et 2 ferrules (mancheons) pour connecter le tube en cuivre à la vanne d’arrêt et à la vanne d’eau du réfrigérateur. REMARQUEUne vanne d’eau à étrier auto-perceuse ne devrait pas être utilisée. Si votre canalisation en cuivre existante a yun raccord évasé à l’extrémité, vous aurez besoin d’un adaptateur (disponible dans les magasins de fournitures de plomberie) pour connecter la ligne d’eau au réfrigérateur OU BIEN vous pouvez couper la coupe évasée avec un découpeur de tube et puis utiliser un raccord de compression.Connecter yla vanne d’arrêt à la ligne d’eau froide. La vanne d’arrêt doit avoir une prise d’eau avec un diamètre intérieur minimal de 5/32 po. au point de connexion à la LIGNE D’EAU FROIDE. Les vannes d’arrêt à étrier sont comprises dans beaucoup de kits d’approvisionnement d’eau. Avant de l’acheter, assurez-vous qu’une vanne à étrier est conforme aux codes de plomberie locaux.](https://usermanual.wiki/LG-Electronics-USA/F31GDA.User-Manual-2/User-Guide-3045306-Page-55.png)