LG Electronics USA SA565JP LASER PROJECTOR User Manual
LG Electronics USA LASER PROJECTOR
Contents
- 1. User Manual 1
- 2. User Manual 2
- 3. User Manual 3
User Manual 2

32
ENTERTAINMENT
To Use the Wi-Fi
Screen Share Function
With this function, you can use a wire-
less connection such as Wi-Fi direct or
WiDi, etc.
Using SmartShare, you can share a
device's screen through Wi-Fi Screen
Share.
To Connect the Wi-Fi
direct
4
#Press the MENU button.
5
#Select a network using the , ,
and buttons and press the OK
button.
6
#Select Wi-Fi Screen Share using the
, , and buttons, and press
the OK button.
7
#Set Wi-Fi Screen Share to On. (If
you don't want to use this function,
set to Off.)
8
#Enable the Wi-Fi Direct settings on
the device that you want to connect
to.
9
#In the list of devices that can
connect to the laser projector will be
displayed.
:
#Select a device to connect to.
;
Select Yes when the connection
request message appears.
<
If the device that you want to connect
to accepts the request, Wi-Fi direct
will be connected.

33
ENTERTAINMENT
Using WiDi
WiDi refers to Intel's Wireless Display technology.
Wireless Display sends video and audio fi les that can be played back on a notebook
that supports Intel WiDi.
ZlGl#+Zluhohvv#Glvsod|,#Vhwxs
4
#Press the MENU button.
5
#Select a network using the , , and buttons and press the OK button.
6
#Select Wi-Fi Screen Share using the , , and buttons, and press the OK
button.
7
#Set Wi-Fi Screen Share to On.
(If you don't want to use this function, set to Off.)
8
#Run the WiDi( ) program on your notebook.
9
#
After running the WiDi program on your notebook, a list will show all available devices
that were detected. In the list, select the Projector you want and click Connect.
:
#
E
and press the Continue button.
;
The Notebook screen will appear on the projector screen soon. Note that the wireless
connection speed will affect the quality of the video displayed on the notebook.
If the connection is poor, the intel WiDi connection may be lost or quality of the video
may be poor.
* For more information on Intel WiDi, visit http://intel.com/go/widi
* If you press the INPUT button on the remote control or select an input item while
watching WiDi, the WiDi connection will end.
34
SmartShare
SmartShare
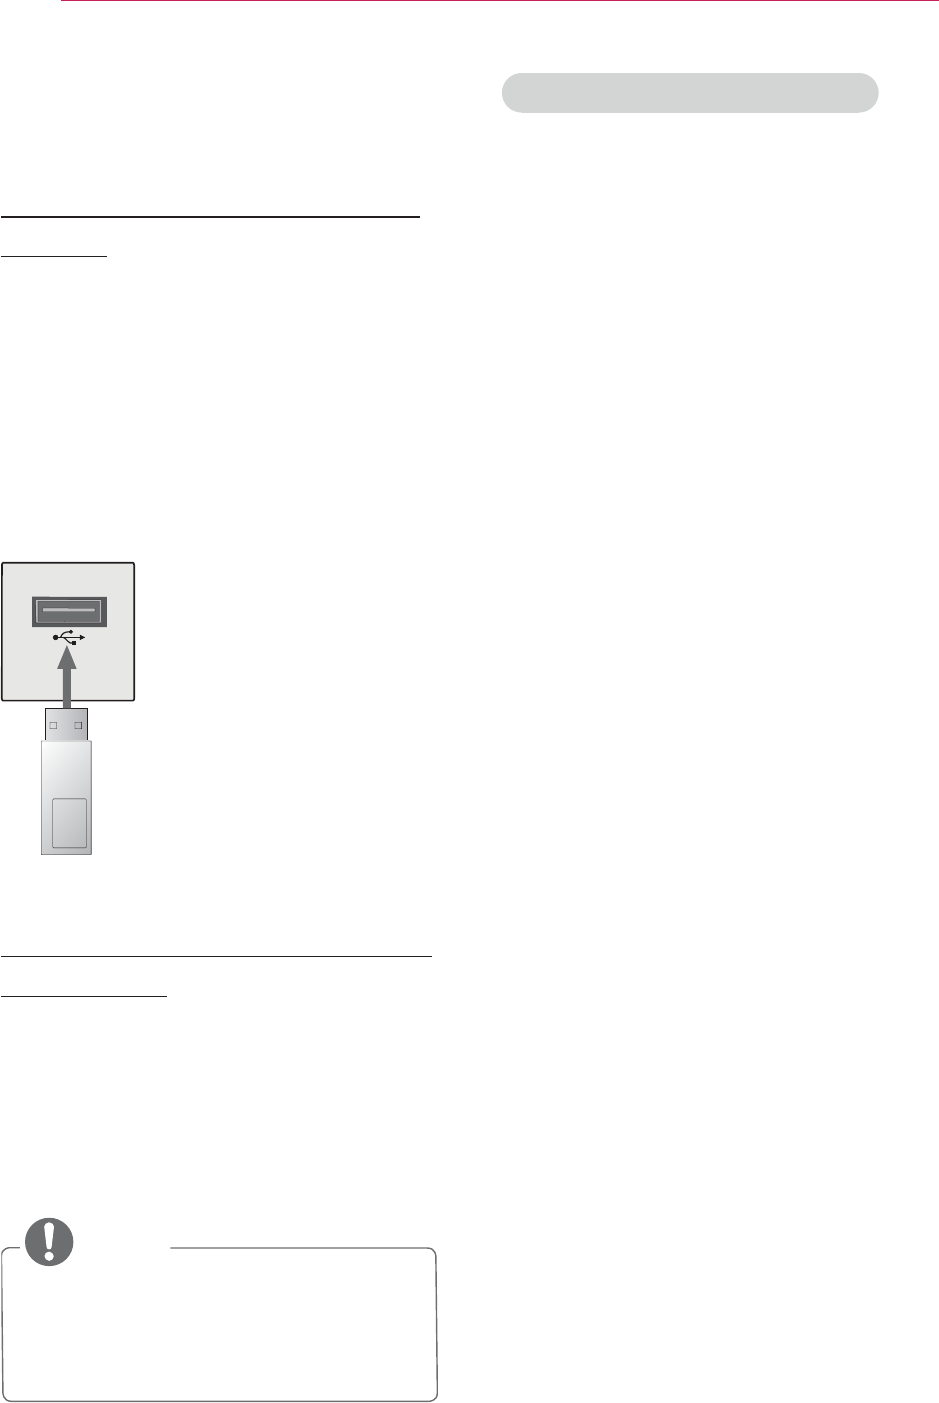
Connecting a USB Storage
Device
Connect a USB storage device
port of the projector to view multimedia
content.
You cannot write or delete data from the
USB storage device.
Connect a USB memory stick as shown
below.
USB Memory
Stick
To disconnect the USB stor-
age device
1
Press the Q.MENU button.
2
Use the or button to move to
USB Device and press the OK but-
ton.
3
Remove the USB device.
NOTE
y After the USB storage device is
disconnected, it cannot be read.
Remove the USB storage device
and connect it again.
Tips for Using a USB Device
y A USB storage device installed
using
an automatic recognition program or
its own driver might not be recogniz-
able.
y Some USB devices may not be sup-
ported or will not work properly.
y Please use only a USB storage de-
vice formatted as a FAT32 or NTFS
file system provided by Windows.
y
USB hard disk with rated voltage of
or less.
y It is recommended to use a USB
hub or hard disk drive with power
supplied. (If
the power supplied is
not enough, the USB storage device
may not be detected properly.)
y It is recommended to use a USB
memory stick which is 32 GB or less
or less.
y If a
the power saving function does not
work, turn the hard drive off and on
again to
make it work properly. See
the owner's manual of the USB hard
drive for more information.
y The data of a USB device may be
damaged, so it is recommended to
backup any important files. Users are
responsible for data management.
The manufacturer bears no responsi-
bility.

35
SmartShare
Supported Files for SmartShare™
y
y
*.smi, *.srt, *.sub (MicroDVD, Sub-
y Supported internal subtitle formats:
XSUB (subtitles from DivX6 are sup-
ported)
Connecting DLNA
Digital Living Network Alliance (DLNA)
allows you to enjoy videos, music and
photos saved on your projector through
a home network.
Connecting a DLNA-Certified
Mobile Device
y The projector and mobile device must be
connected via the same network
.
1
Check if Wi-Fi is enabled on your
mobile device
.
2
Install and run an app that allows you
3
Choose to share on your mobile
device.
4
photo) to play.
5
Select the video, music or photo to
play on the projector.
6
Click the Add icon to open the
Browse Folder window.
7
select the projector model.
the product label.)
8

36
SmartShare
Connecting DLNA DMR
(Digital Media Renderer)
y If the PC's operating system is Win-
certified device (e.g. mobile phone)
is connected via a network, you
can play music / videos / photos on
projector without installing a separate
program.
1
Cprojector and PC on the
network.
2
T
“Remote Playback” Windows 7 or
To play on your mobile device, see its
owner's manual.
3
Even when multiple projectors are
through only one projector. The play-
back rate may vary depending on the
network connection.
Connecting DLNA DMP
(Digital Media Player)
y Music, video or photo files on your
PC where SmartShare PC Software
is installed can be played through the
projector via a home network.
1
Con the projector and PC on the
sam
e network.
The
DLNA service is
available only when the projector and
all the devices are connected to a
single router.
2
Install SmartShare PC Software on
the PC from the website. Before
etc.
3
The sever should be running in order
pro-
jector.
NOTE
y For how to use the SmartShare PC
software, refer to the software help.

37
SmartShare
In case of a DLNA malfunction
y Check your network settings when
the
DLNA option does not work properly.
y
router is used, the video does not
play properly.
y When playing a video in DLNA mode,
the Multi Audio and Closed Caption
features are not supported.
y If more than one projector is connect-
ed to a single server in DLNA mode,
the content may not play depending
on server performance.
y Subtitles are only supported on some
DMC devices.
y The DLNA function may not work
properly depending on the network
environment.
y The DLNA function may not be support-
ed for a router that does not support
multi-cast. For more information, refer
to the user guide that came with your
router or contact to the manufacturer.
y Even for the file format supported by
the projector, the supported file format
may differ depending on the DLNA
server environment.
y If there are too many folders or files in
a folder, it may not work properly.
y The information on the file imported
from the DLNA server may not be
displayed correctly.
y When viewing video subtitles on a
DLNA server, we recommend that you
use SmartShare PC Software.
y When a subtitle file is added later,
disable the shared folder and then
enable it again.
y The DRM file and document file in the
DLNA server are not played.
38
SmartShare
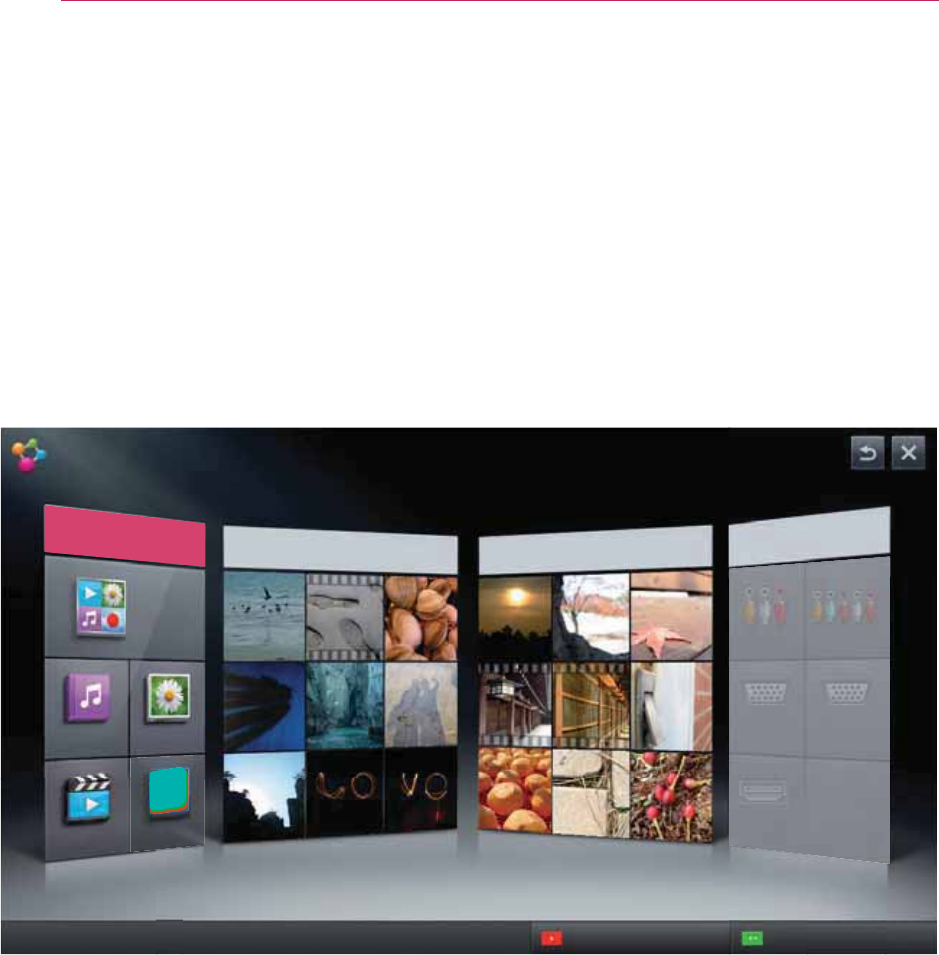
Using SmartShare™
1
Press the USB button on the remote control.
You can watch the photo, music, video and document on the projector by connecting
the devices connected via USB are displayed.)
VpduwVkduh
Frqwhqwv#W|sh
Uhfhqwo|#Zdwfkhg
Qhzo|#Dgghg
Olqnhg#Ghylfh
Frqqhfwlqj#jxlghVhwwlqjv
\rx#fdq#klgh#vshflilf#ghylfhv*#frqwhqwv#dw#Vhwwlqjv#A#Sulydf|1
Doo
YLGHRV
PXVLF
SKRWRV
Iloh#Ylhzhu
DY
UJE0SF4
KGPL
Frpsrqhqw
UJE0SF5

39
SmartShare
Watching Videos
* In Movie List, you can watch movies
stored on the connected USB device.
Tips for Playing Videos
y Some subtitles created by a user may
not work.
y A video file and its subtitle file must
be located in the same folder. A video
file name and its subtitle file name
must be identical in order to display
the subtitle properly.
y Streaming files which include GMC
(Global Motion Compensation) or
Qpel (Quarterpel Motion Estimation)
is not supported.
y
is supported.
y The file sizes that can be played may
be different depending on the encod-
ing environment.
y Video files created by some encoders
may not be played back.
y Video files in formats other than
the ones specified here may not be
played back.
y Videos stored on a USB device that
does not support high-speed playback
may not play properly.
y The DTS is supported only for
playback of USB video file.

40
SmartShare
Supported Video Codecs
Extension Codec
.asf
.wmv
Video
Audio WMA Standard, WMA 9 Professional
.avi
Video
Audio
Dolby Digital Plus, LPCM, ADPCM, DTS
.mp4
.m4v
.mov
Video
Audio AAC
.mkv
Video
Audio
.ts
.trp
.tp
Video
Audio
Dolby Digital, Dolby Digital Plus, AAC
.vob
Video
Audio
.mpg
.mpeg
.dat
Video
Audio
41
SmartShare
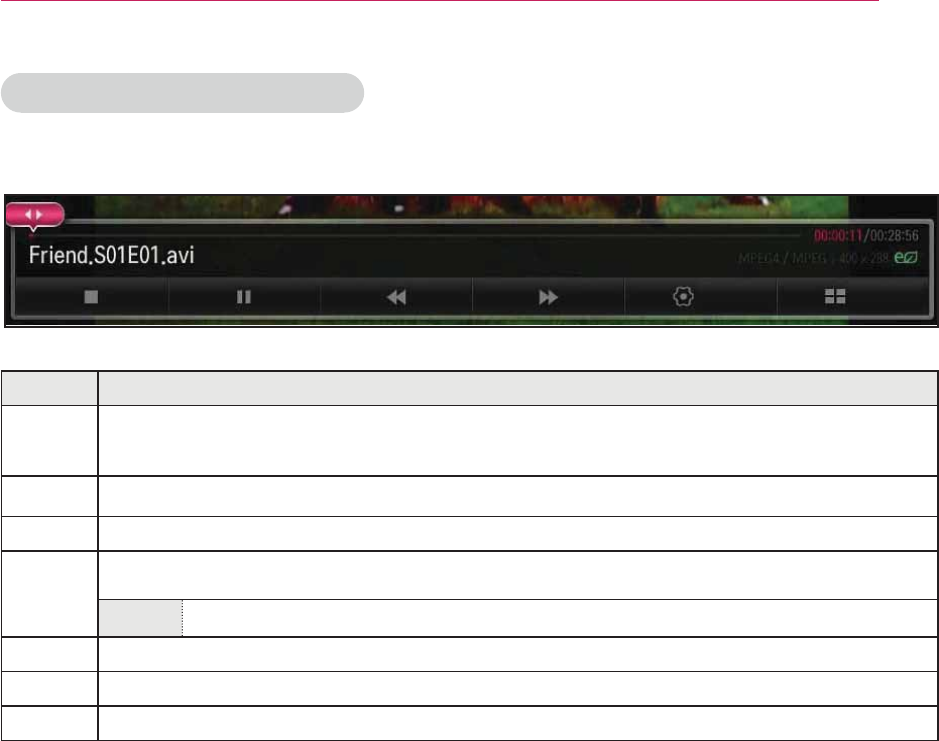
Controlling Video Playback
You can control playback using the following buttons.
Item Description
◀▶ Shows the current playing position. Use the 䠘 or 䠚 button to move forward
or backward.
ᰧStops playing and returns to Movie List.
ᰦResumes normal playback.
ᰨ
Pauses the media player.
ᰨᰩ
Displays in slow motion.
ᰞWhenever this button is pressed, the playback speed is changed.
2SWLRQ Sets the option.
/LVW Stops the playback and returns to the list.
List
Option List

42
SmartShare
Viewing Photos
You can view photos stored on a connected device.
Photo File
File Format Item Profile
2D
(jpeg, jpg, jpe)
Supported format
SOF2: Progressive
Size
Min.
43
SmartShare
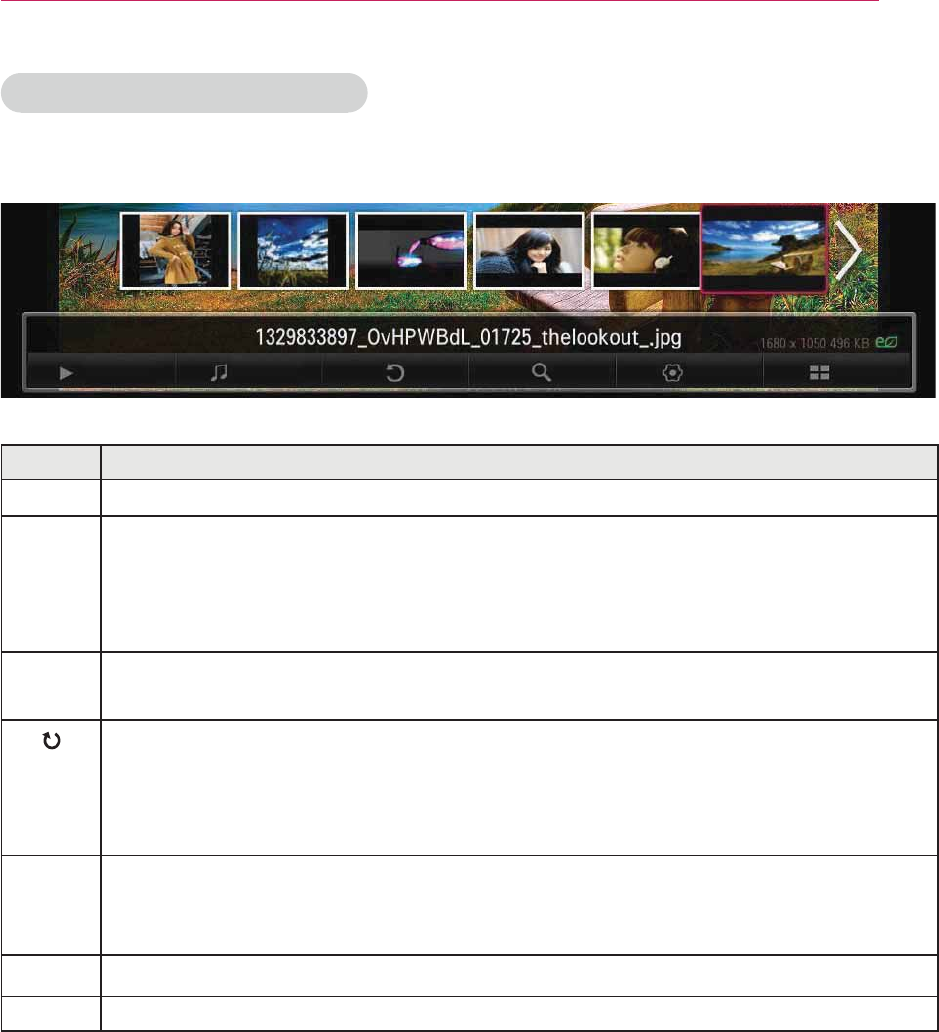
Controlling Photo Playback
You can control playback using the following buttons.
Option ListSlideshow BGM
Item Description
䠘,䠚
6OLGH
VKRZ
If no picture is selected, all photos in the current folder are displayed in a
slide show. If some photos are selected, those photos are displayed in a
slide show.
y Set Slide Speed in the OptionSet Photo View. menu.
%*0 You can listen to music while viewing full-size photos.
y Set BGM in the OptionSet Photo View. menu.
Rotates photos.
y
y Photos cannot be rotated if their width is greater than the height of the
Enlarges or reduces the photo.
Use the Up/Down/Left/Right buttons to select a page and press the OK
button.
Option A setting popup window will appear.
List Stops the playback and returns to the list.
44
SmartShare
Listening to Music
Audio File
File Format Item Profile
MP3
Bit rate
Sample freq.
Support
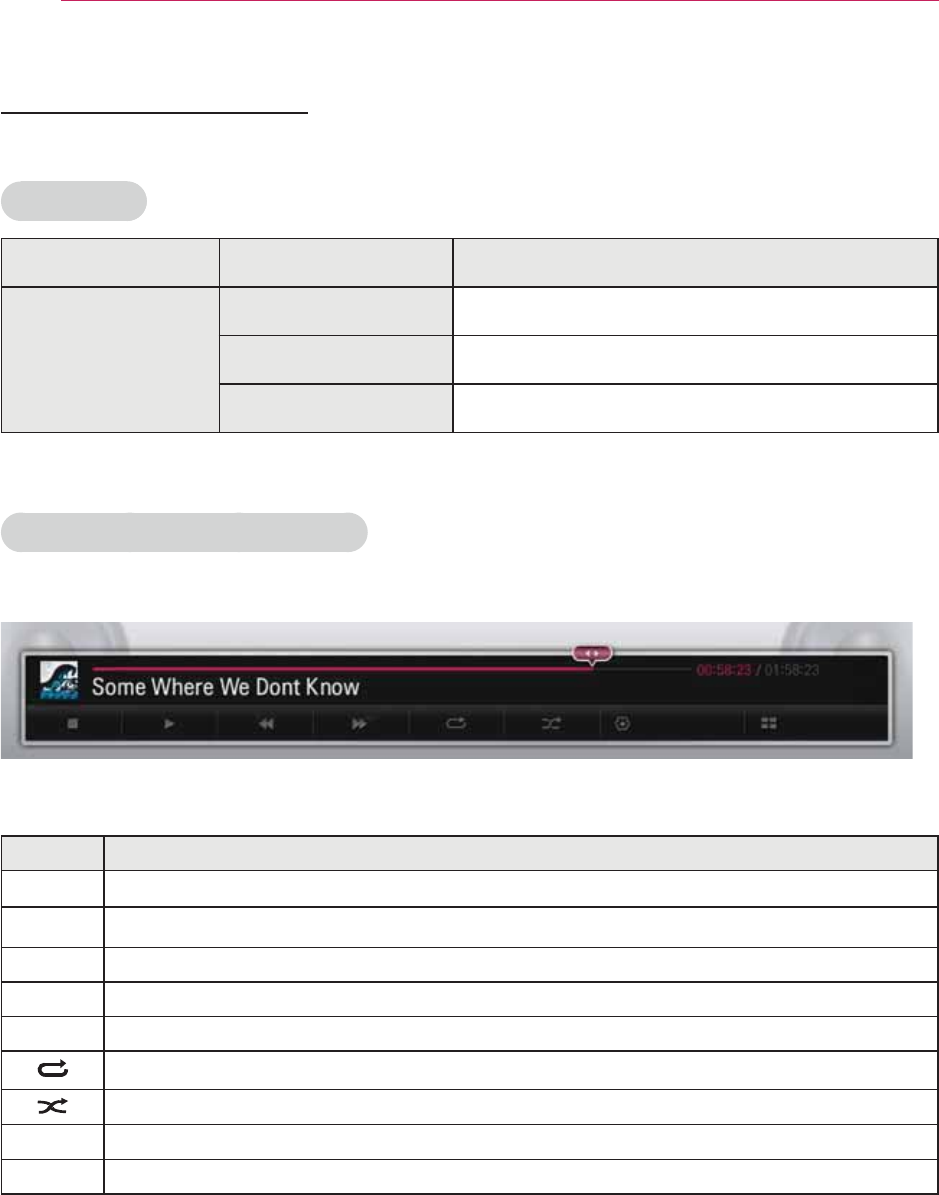
Controlling Music Playback
You can control playback using the following buttons.
Item Description
◀▶ Changes the playing position.
ᰧStops playing.
ᰦResumes normal playback.
ᰨPauses the media player.
ᰞ
Sets the repeat playback.
Sets the random playback.
Option Sets Option for the music list.
List Returns to a list.
Option List
ᰚ
45
SmartShare
Viewing Files
Supported File Formats
y File Viewer realigns a document, so it may look different from what is displayed on a PC.
y For documents that include images, the resolution may look lower during the realign-
ing process.
y If the document is large or has many pages, it may take longer to load the document.
y Unsupported fonts may be replaced by other fonts.
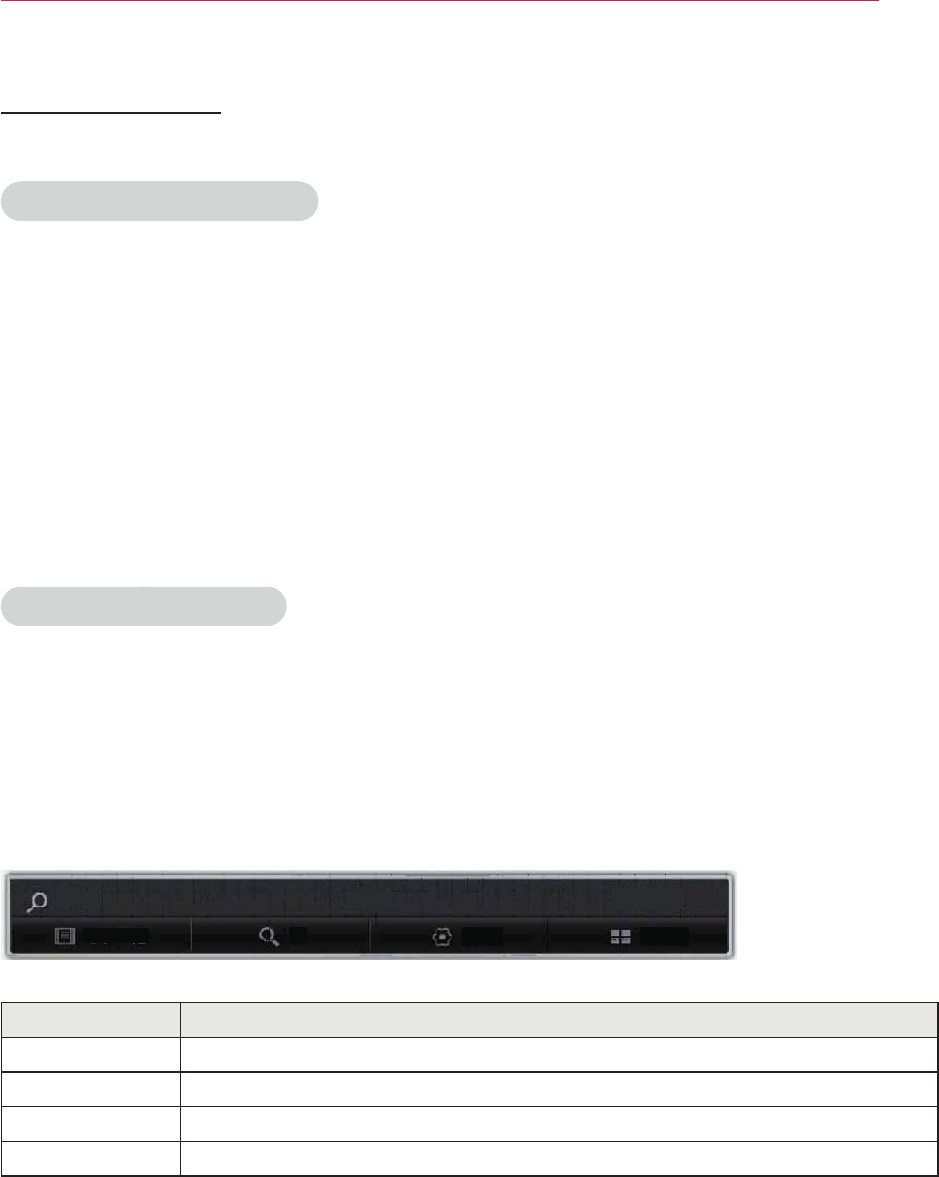
Browsing File Viewer
You can control playback using the following buttons.
y Press the Go Page button to move to the previous
y Press the volume button to zoom in or zoom out.
OK button.
2. Press the Up/Down/Left/Right buttons to move to Go Page or Zoom.
ᰚ
Go Page Zoom Option List
[125%] 11.pptx 1/2 31 KB
Item Description
Go Page Moves to the page you want.
Zoom Enlarges or reduces the photo.
Option Sets Option for File Viewer.
List Returns to a list.

46
SmartShare
Using Magical Mirroring
The magical mirroring feature is used to wirelessly transmit and project the screen of a network-
connected laptop (PC) to a projector. To use this feature, the MirrorOp Sender, an application for
PC, should be installed in the user's laptop (PC).
Please install this PC program using the Magical Mirroring program CD provided with this
product.
Installing Magical Mirroring
1
Select the Magical Mirroring software on the main window of the provided CD to
start the installation.
2
After the installation is complete, the program starts checking the user PC perfor-
mance.
3
The user PC screen may blink or resolution may be changed automatically during
the performance check.
4
W
System Requirements
CPU
Display Adaptor nVIDIA or ATI graphic card with 64MB VRAM or above
Operating System Windows Vista(32 bit/64 bit), Windows 7(32 bit/64 bit),
WiFi
47
SmartShare
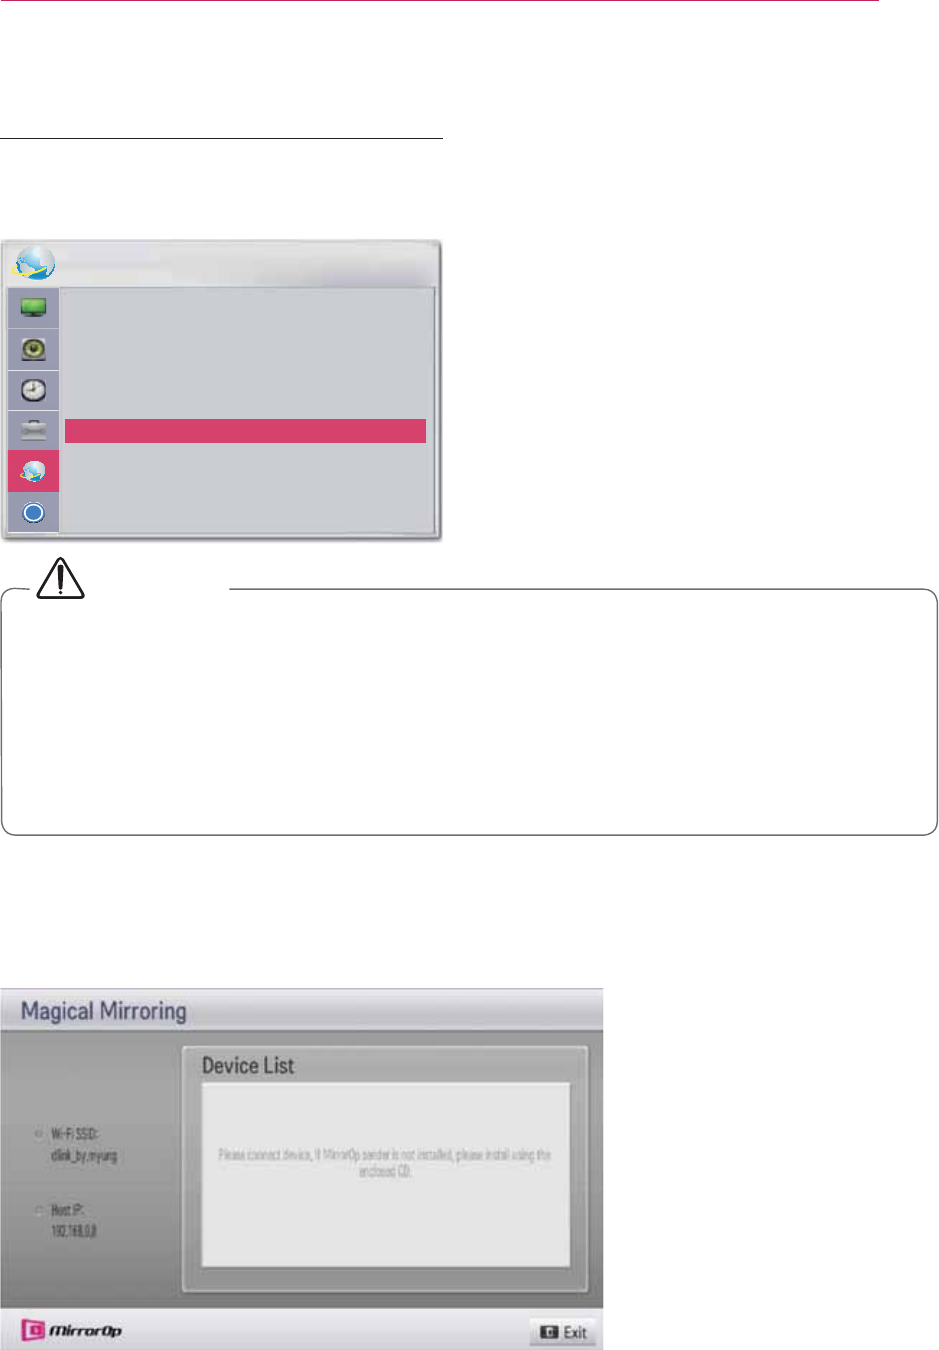
Running Magical Mirroring
1
Select Magical Mirroring from the Settings.
Ͱ
1(7:25.
ؒ 1HWZRUN&RQQHFWLRQ
ؒ 1HWZRUN6WDWXV
ؒ :L)L6FUHHQ6KDUH
ؒ 6PDUW6KDUH6HWWLQJ
ؒ 0DJLFDO0LUURULQJ
ؒ H=1HW0DQDJHU
CAUTION
y Magical Mirroring is available only when a network is connected.
y When Magical Mirroring is running, only the following buttons are available on the
y
screen resolution.
y A video and audio may not play properly at a high resolution.
2
a standby screen as follows.
48
SmartShare
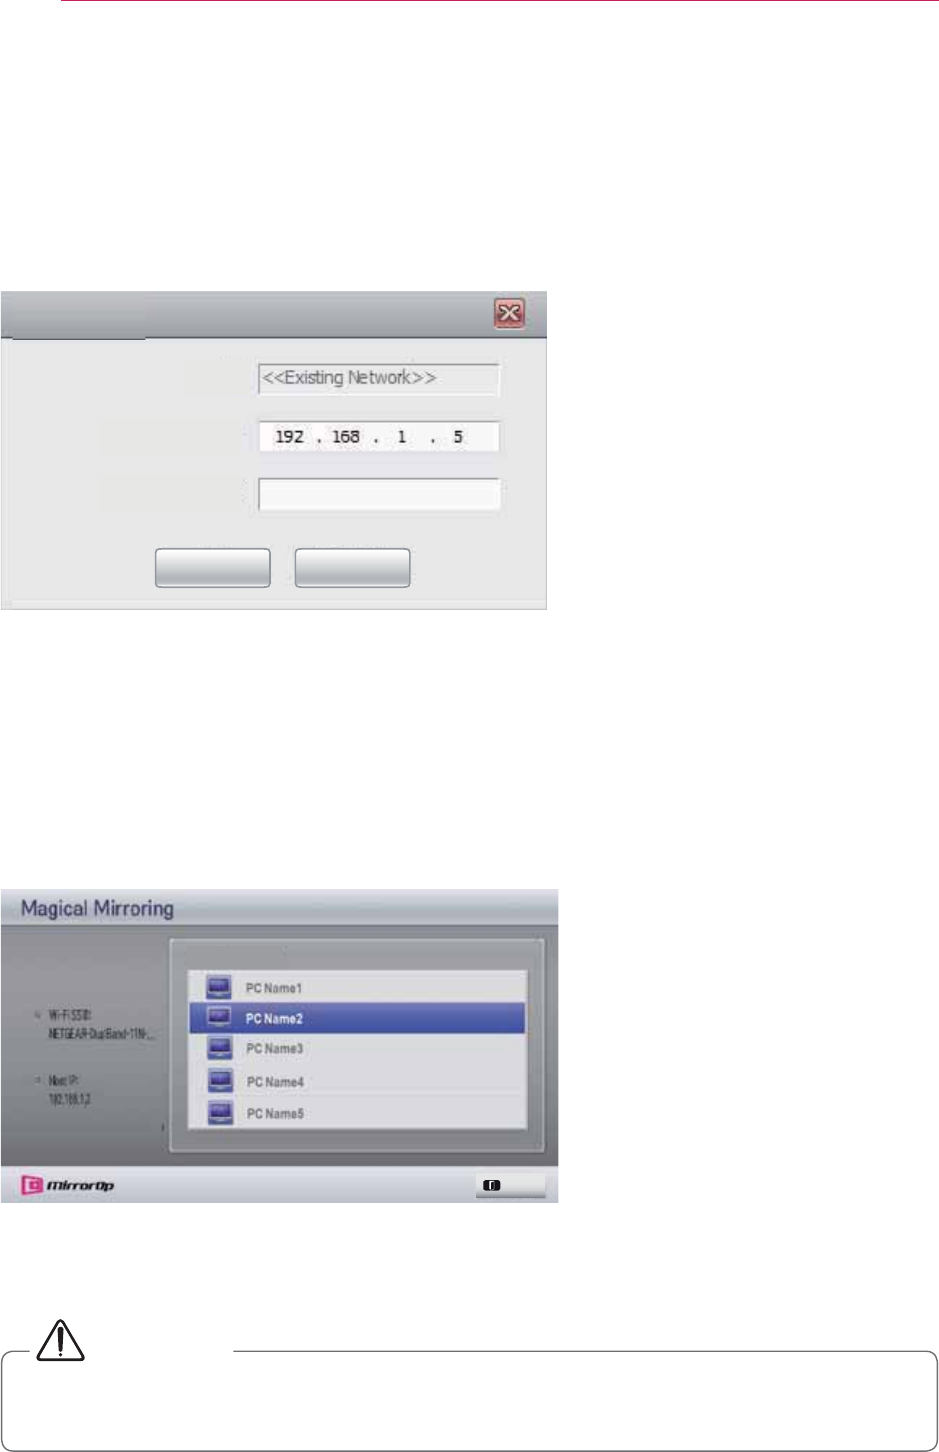
3
T
same as the host IP of the Magical Mirroring and press Connect.
Txlfn#Frqqhfw
VVLG
Krvw#LS
Xvhu#Qdph
Frqqhfw##########Uhvfdq
<PC Screen>
4
When the MirrorOp Sender is connected properly, the connected PC is displayed
under Magical Mirroring Device List as shown below. Then, the PC's screen is
projected.
Exit
Device List
If the MirrorOp Sender is not connected, check whether the PC and the projector
are connected to the same wireless router.
CAUTION
y While running Magical Mirroring, the video or audio transmitted from the PC may
be interrupted due to PC performance or wireless network status.
49
SmartShare
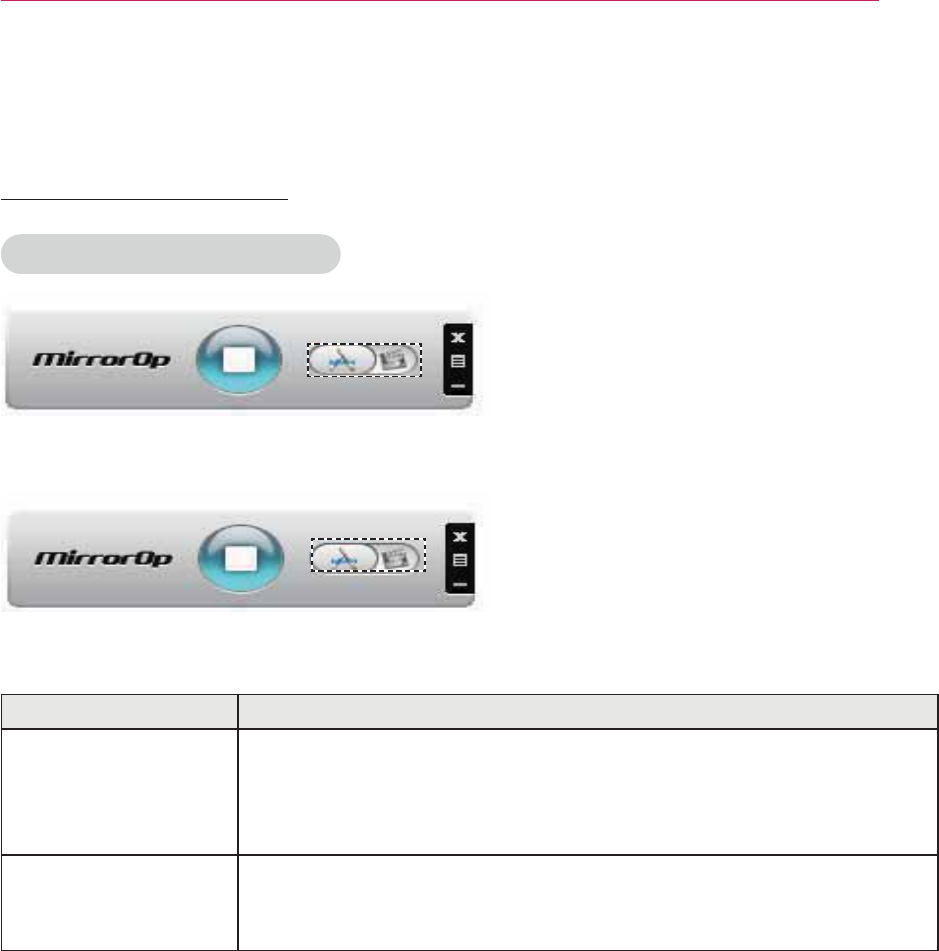
MirrorOp Sender
Changing MirrorOp Mode
ᯘMove the button to this position to change the transfer mode to application mode.
ᯘMove the button to this position to change the transfer mode to movie mode.
Mode Description
Application Mode When MirrorOp is set to this mode, the software will transfer images
with greater quality. When you run applications such as games, you
can set to this mode. This mode requires large bandwidth, so we sug-
gest you to use the wired network when using this mode.
Movie Mode This mode is only for movies. When you play a movie on your PC,
you can change to this mode. In this mode, the mouse and other ap-
plications do not work in real time.
50
SmartShare
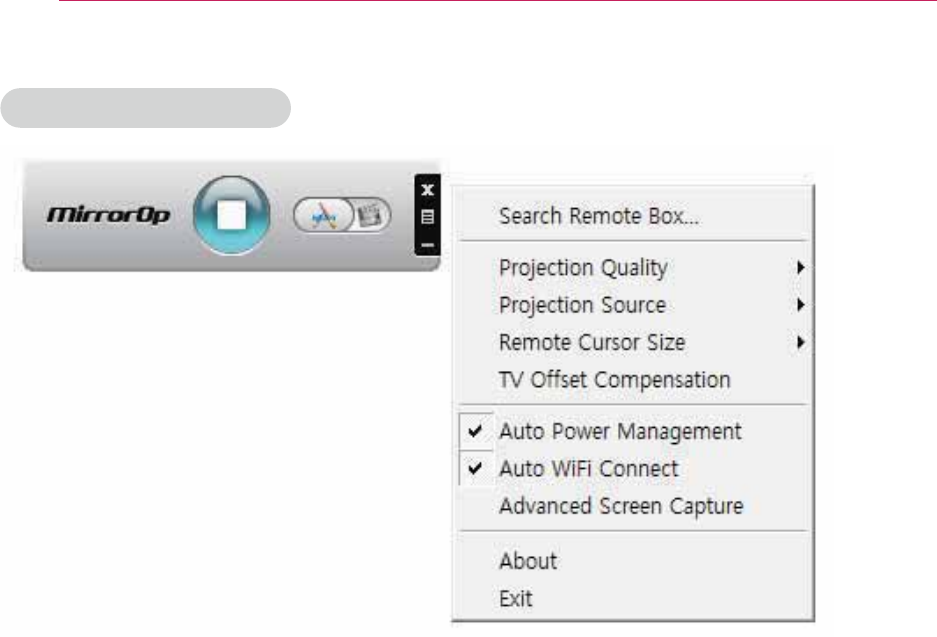
Configuring MirrorOp
- Search Remote Box
y Select this option to search devices available on the connected network.
- Projection Quality
y Select this option to change the projected image quality.#Li#wkh#qhwzrun#frqqhfwlrq#
lv#jrrg/#vhohfw#wkh#%Ehvw%>#li#qrw/#%Qrupdo%1
- Projection source
y Select this option to set the screen to show through the projector. The default value
- Remote Cusor Size
y Select this option to adjust the size of the mouse cursor. +4{/#5{/#6{,
51
SmartShare
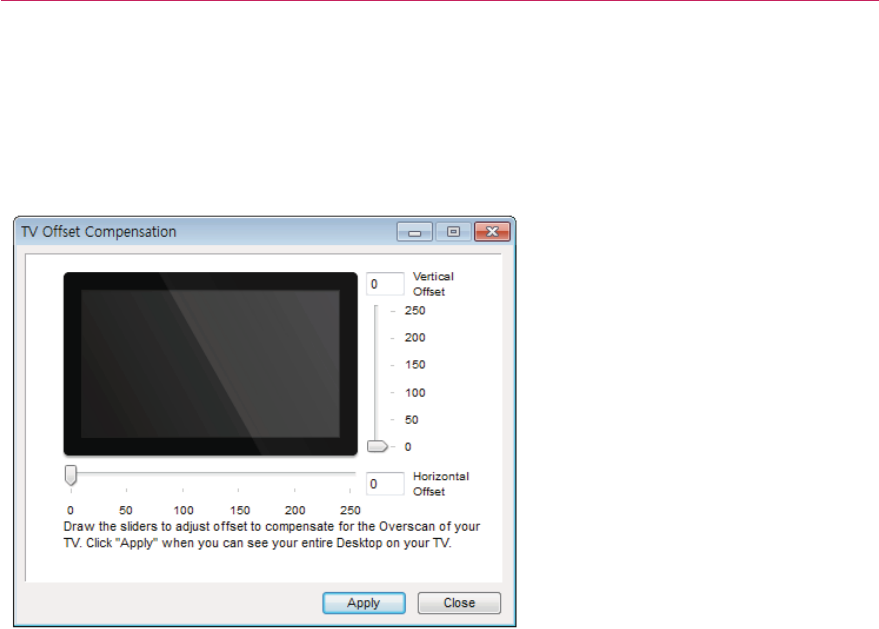
- TV Offset Compensation
y Select this option to adjust the screen size projected by the projector.
Adjust the
horizontal/vertical offset and click the Apply button.
- Auto Power Management
y Select this option when running the MirrorOp application on a laptop.
When you choose this option, a Wi-Fi network will provided at an optimum level.
- Auto WiFi Connect
y When you choose this option, you MirrorOp will automatically connect to the
server and log in.
- Advanced Screen Capture
y Different PCs have different video output designs. When this option is not
using a special media player. When you play a movie on your pc, and cannot
see the picture on the projector, make sure to choose this option.
52
CUSTOMIZING SETTINGS
CUSTOMIZING SETTINGS
SETUP Menu
1
Press the MENU button.
2
Use the , , or button to select the desired item and press the OK button.
3
Use the , , or button to set up the desired item and press the OK button.
4
Press the EXIT button when completed.
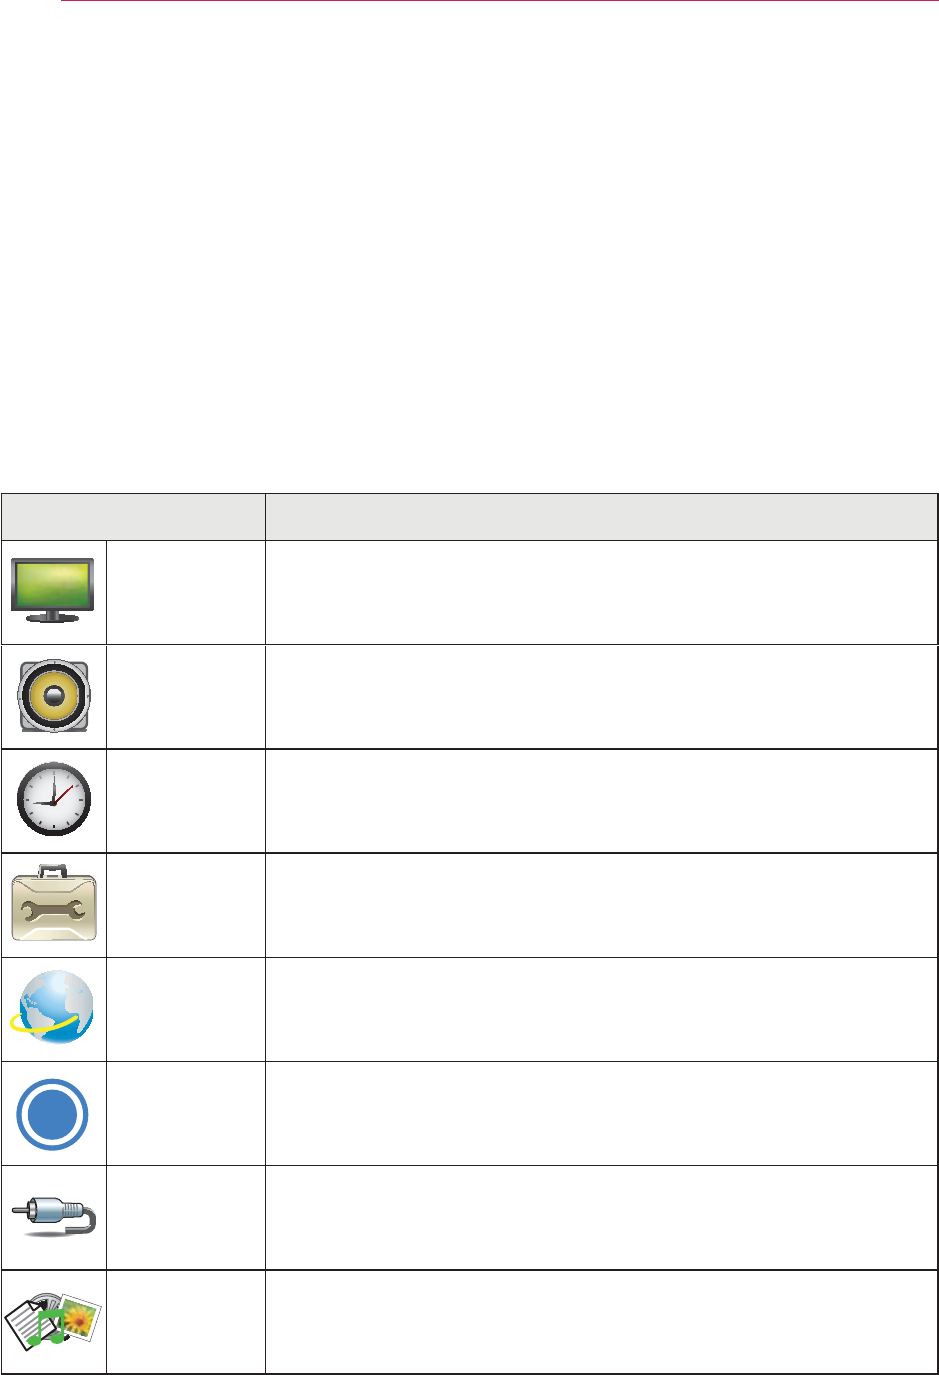
Menu Description
PICTURE Adjusts the image quality for optimal viewing.
AUDIO Adjusts the sound quality and volume level.
TIME Sets time-related settings.
OPTION Customizes the general settings.
Sets the network.
Ͱ
SUPPORT Shows the projector information.
INPUT Lets you select the desired input.
SMART
Allows you to view photo, music, video and document files
on the projector by connecting to a USB or home network
(DLNA).
53
CUSTOMIZING SETTINGS
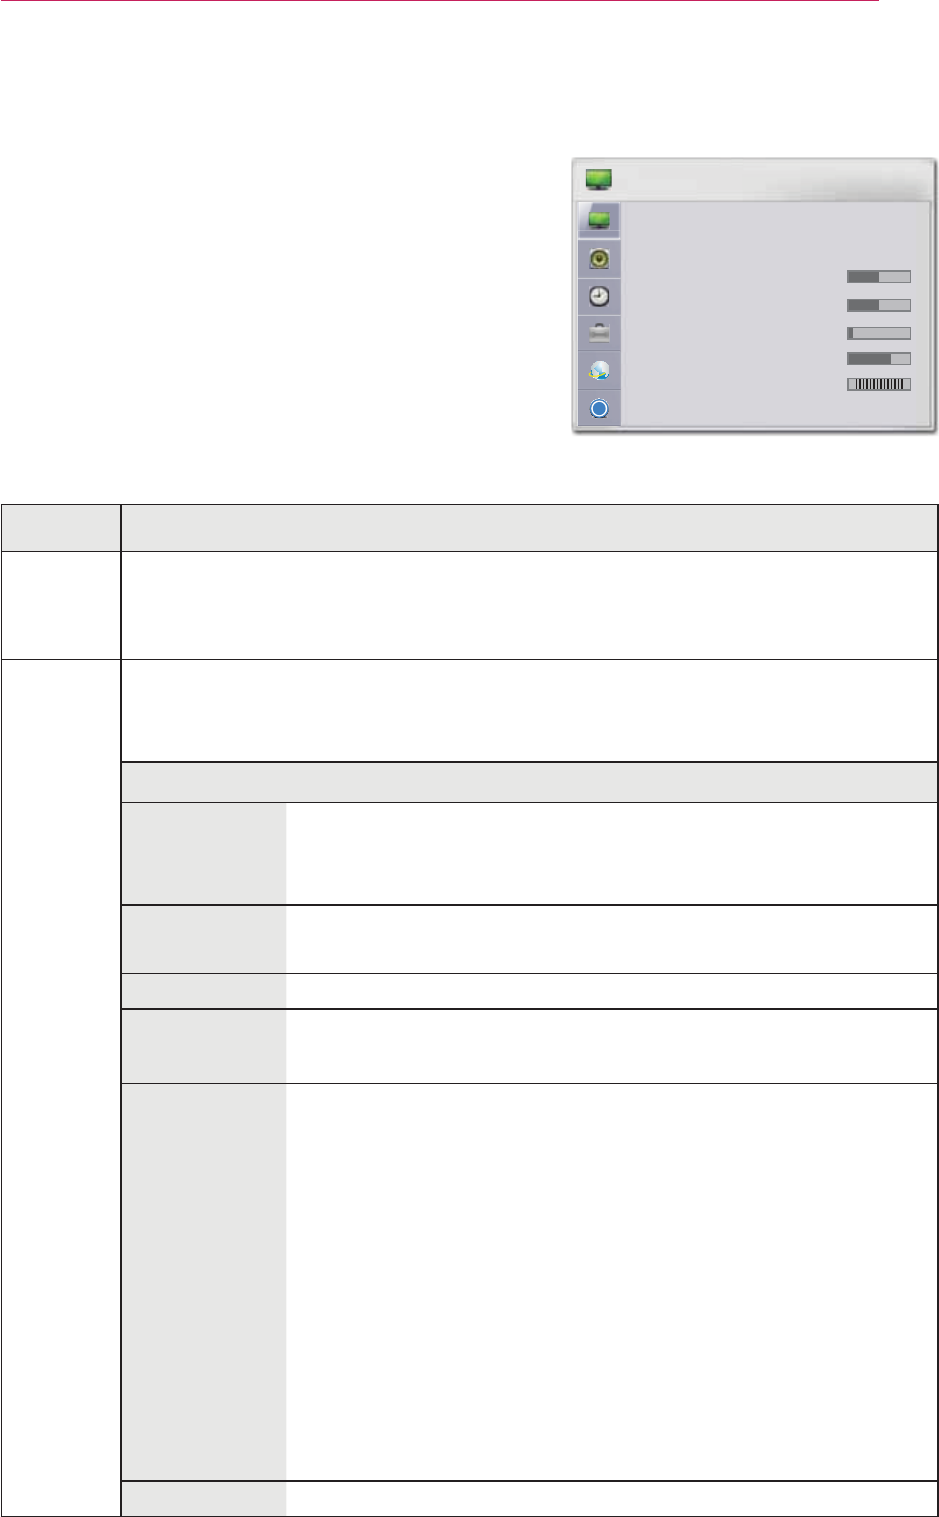
PICTURE Settings
1
Press the MENU button.
2
Use the or button to select PICTURE and
press the OK button.
3
Use the , , or button to set up the de-
sired item and press the OK button.
- To return to the previous menu, press the ᰳ
button.
The available picture settings are described as follows.
Item Description
Energy
Saving
Adjusts the brightness.
y If the temperature around the projector is high, mode changing is limited
to protect the internal system.
Picture
Mode
Selects one of the preset images or customizes options in each mode for
the best screen performance.
You can also customize advanced options for each mode.
Mode
Vivid
Displays a crystal clear picture by enhancing contrast,
brightness, and sharpness.
Standard Displays the picture with normal contrast, brightness and
sharpness.
Cinema Optimizes the image for a movie.
Game Optimizes the image for playing games on fast-moving
screens.
Black Mode Provides optimized picture quality on a dark-colored screen
or a chalkboard by removing the input image's colors and
reversing the contrast.
*
picture mode is automatically reset to the default value.
*
You cannot control the picture settings when the picture mode
is set to the black mode.
Expert1/2 Adjusts the detailed image settings.
Ͱ
3,&785(
ؒ ᰚ(QHUJ\6DYLQJ0D[LPXP
ؒ 3LFWXUH0RGH 6WDQGDUG
ؒ &RQWUDVW
ؒ %ULJKWQHVV
ؒ 6KDUSQHVV
ؒ &RORU
ؒ 7LQW * 5

54
CUSTOMIZING SETTINGS
Item Description
Contrast Increases or decreases the gradient of the video signal.
Bright-
ness
Adjusts the base level of the video signal to make the image brighter or
darker.
Sharp-
ness
Adjusts the level of sharpness in the edge between the light and dark
areas of the picture. The lower the level is, the softer the image looks.
Color Adjusts the intensity of all colors.
Tint Adjusts the balance between red and green levels.
Ad-
vanced
Control
Customizes the advanced settings.
Picture
Option Sets optional settings.
Picture
Reset Restores each mode's options to the factory default.
Aspect
Ratio Resizes the picture.
Screen
(RGB-
PC)
Adjusts the picture quality in RGB-PC input.
Item
Resolution Available
resolutions
!" Provides optimized picture quality by automatically calibrat-
ing mismatched horizontal width and shaky picture caused
and various PC graphic signals.
y You can also use the AUTO button on the remote control.
Position Moves the image up/down/left/right.
Size Changes the screen size.
Phase Makes the picture look clear by removing horizontal noise.
Reset
Restores all the settings to the factory default.
55
CUSTOMIZING SETTINGS
Advanced Control
Item Description
Dynamic
Contrast
Adjusts the contrast to keep it at the best level for the brightness of
the screen.
Dynamic
Color Adjusts screen colors so that they look natural.
Clear White Makes the white area of the screen look brighter and whiter.
Preferred
Color
Skin Color
Adjusts
the skin color in the picture to your preference.
Grass Color
mountain.
Sky Color Adjusts only the color of the sky.
Super Reso-
lution
Improves blurry and unclear parts in the picture to make the picture
more vivid.
Color Tem-
perature
Adjusts the overall color of the picture.
You can select Warm, Cool or Medium.
Gamma Sets a gradation curve between video input and output signal.
Color Gamut Selects the range of colors to display.
y Standard: Displays the original colors of an input signal regard-
less of the display features.
y Wide: Makes use of the display's rich colors.
* Available options may differ depending on input signal or video mode, etc.
Picture Option
Item Description
Noise
Reduction Removes noises in the picture.
MPEG
Noise
Reduction
Reduces the noise produced while creating digital video signals.
Black Level Compensates the brightness and contrast of a screen to balance with
the black level of the video input.
Real Cinema
Provides optimal picture quality for watching a movie.
TruMotion Makes the picture look smooth by compensating it.
Mode
Smooth The De-Judder value is set to 3.
Clear The De-Judder value is set to 7.
User y You can set this function manually.
De-Judder: Adjusts the juddering on a screen.
y
56
CUSTOMIZING SETTINGS
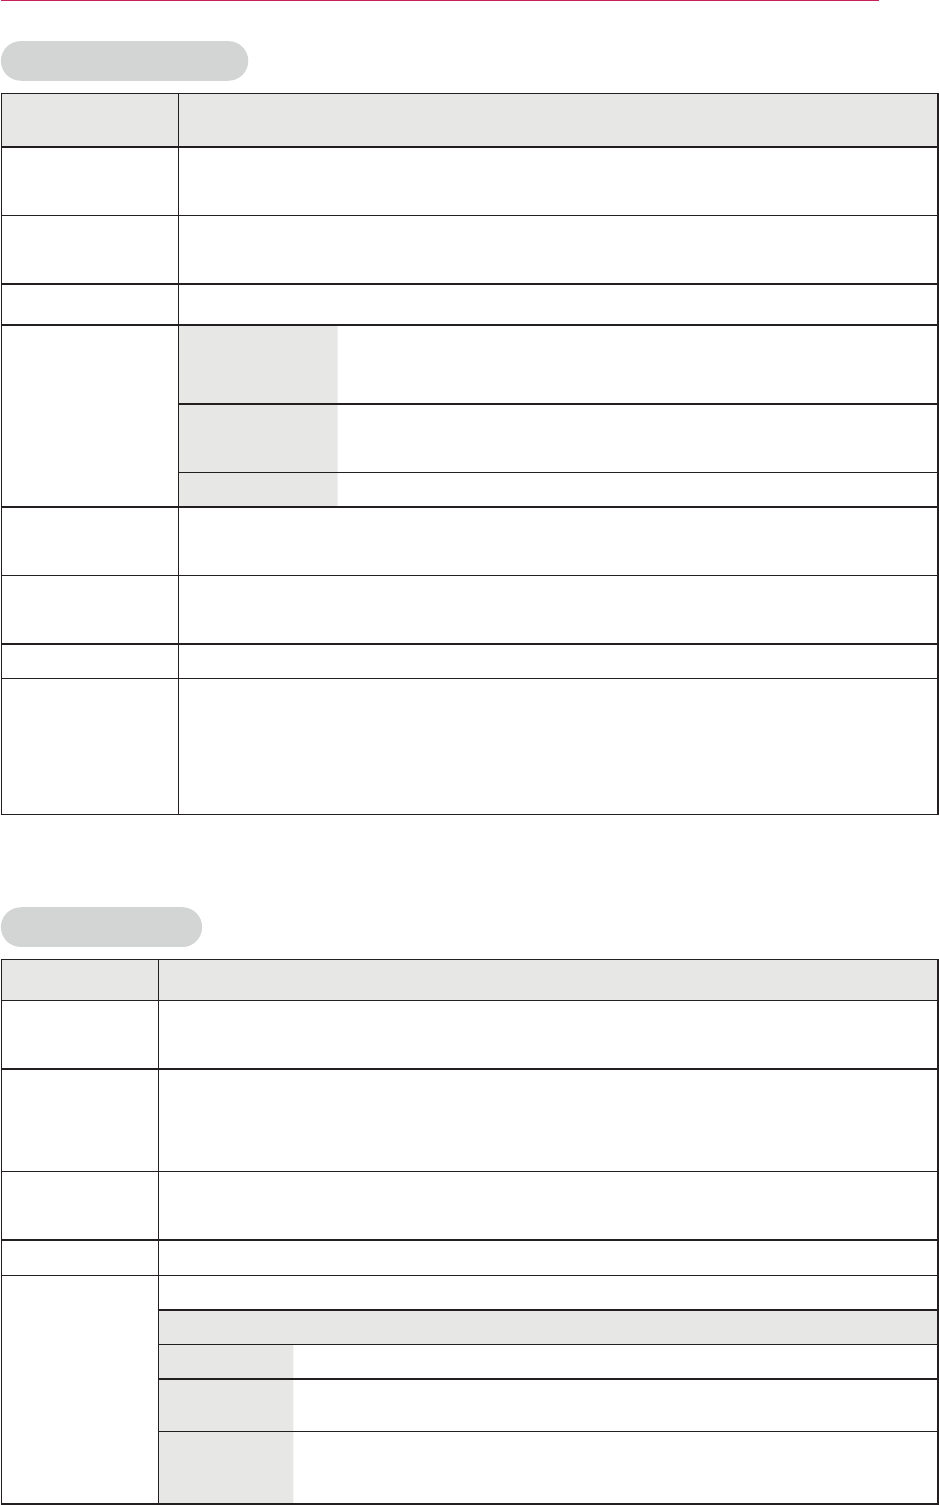
AUDIO Settings
1
Press the MENU button.
2
Use the or button to select AUDIO and
press the OK button.
3
Use the , , or button to set up the de-
sired item and press the OK button.
- To return to the previous menu, press the ᰳ
button.
The available audio settings are described as follows.
Item Description
Sound Mode Sets the sound mode.
User EQ Allows you to adjust the treble and bass sound.
* It is activated when "User Setting" is selected in Sound Mode.
Volume Mode Sets the projector volume.
Virtual
Surround Provides realistic stereo sound.
Clear Voice II Makes the voice from the projector crisp and clear.
AV Sync.
Allows you to manually adjust picture and audio when they are not
synced.
Sound
Setting
Balances the sound.
Mic Setting
Allows you to connect and use a microphone.
* When using a microphone, it is normal to only hear sound from the
microphone.
* You can adjust the microphone volume using the volume key.
Ͱ
$8',2
ؒ 6RXQG0RGH 6WDQGDUG
ؒ 8VHU(4
ؒ 9ROXPH0RGH
ؒ 9LUWXDO6XUURXQG2II
ؒ &OHDU9RLFH,, 2IIᰕ
ؒ $96\QF 2II
ؒ 6RXQG6HWWLQJ
57
CUSTOMIZING SETTINGS
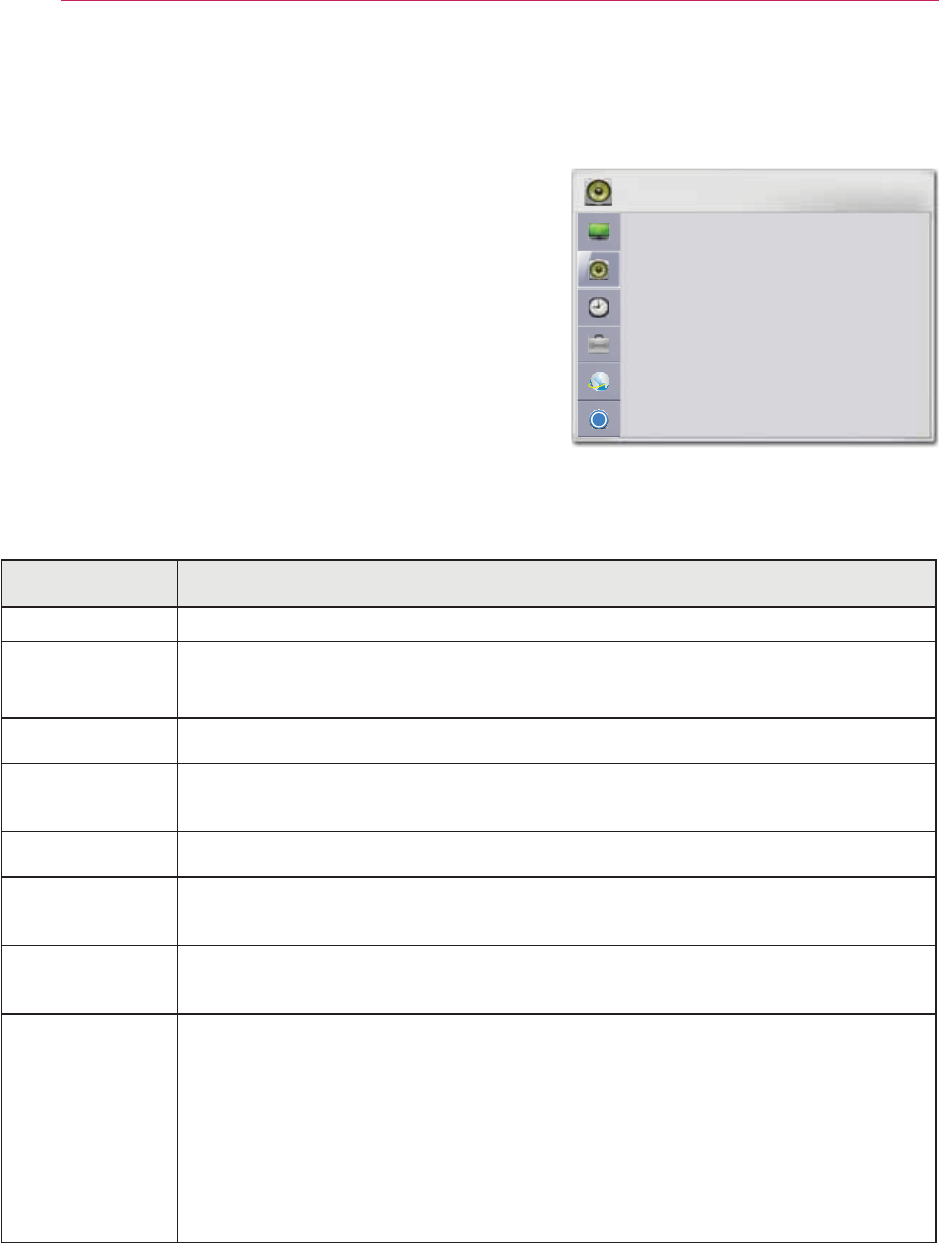
TIME Settings
1
Press the MENU button.
2
Use the or button to select TIME and press
the OK button.
3
Use the , , or button to set up the de-
sired item and press the OK button.
- To return to the previous menu, press the ᰳ
button.
The available time settings are described as follows.
Item Description
Sleep Timer The projector is turned off at the preset time.
Auto Off If there is no signal, the projector automatically turns off after the
preset time has elapsed.
Automatic
Standby
Turns off the projector automatically if there is no input for the given
time.
Presentation
Timer
Time Alarm
* If you set the time to 5 minutes, the time is dis- If you set the time to 5 minutes, the time is dis-If you set the time to 5 minutes, the time is dis-
displayed at a 5 minute interval. If the remaining
minute interval.
increments.
Time Keeper
on the screen.
*
minutes, in increments of 5 minutes.
Ͱ
7,0(
ؒ 6OHHS7LPHU 2II
ؒ $XWR2II PLQ
ؒ $XWRPDWLF6WDQGE\ 2II
ؒ 3UHVHQWDWLRQ7LPHU
58
CUSTOMIZING SETTINGS
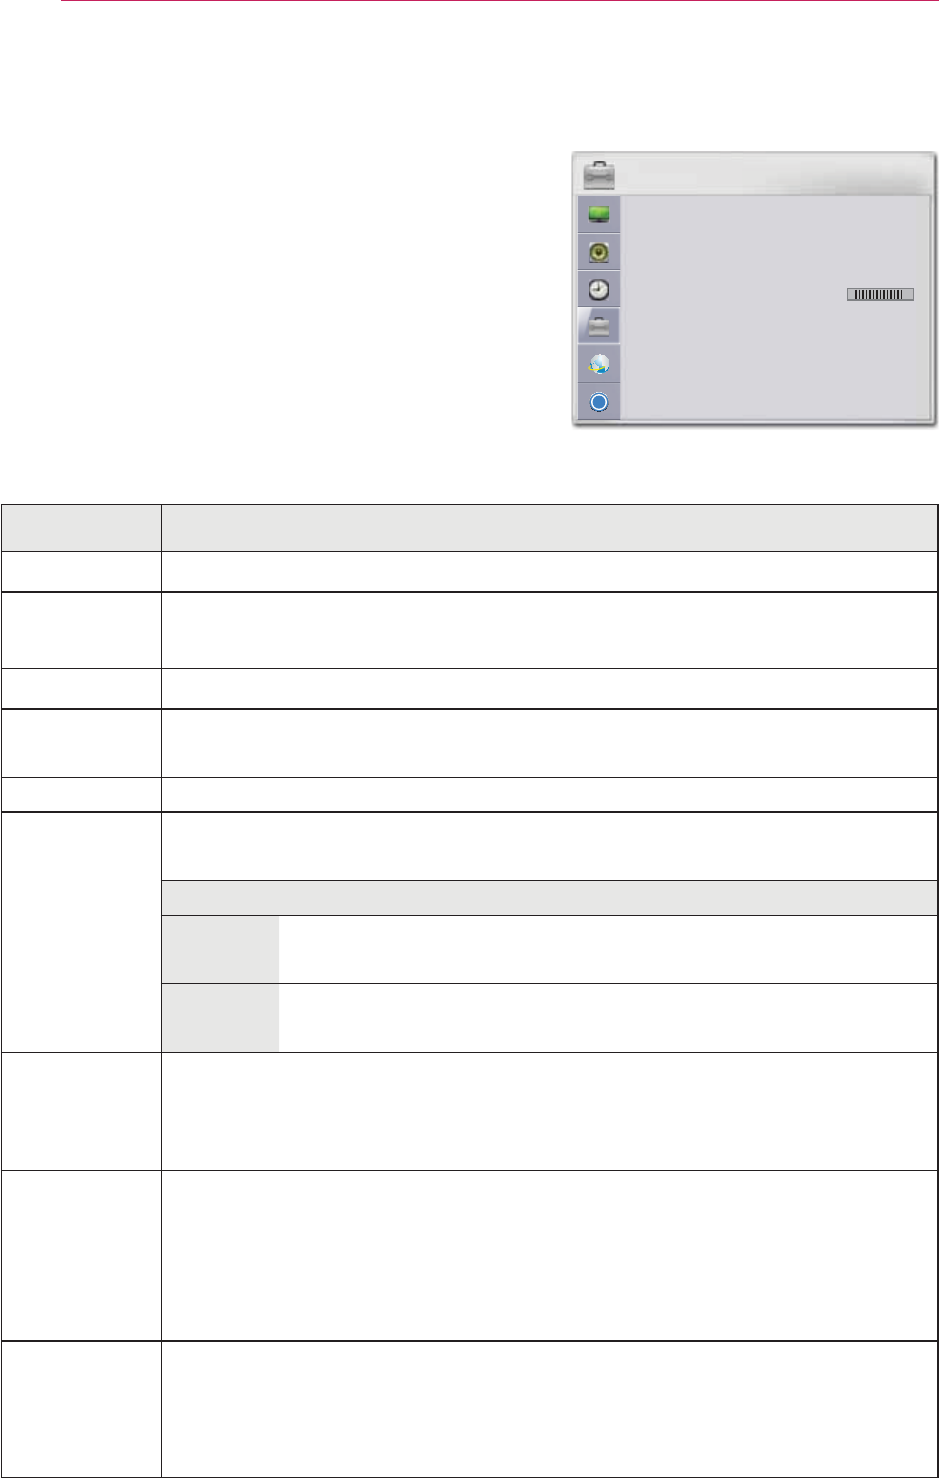
OPTION Settings
1
Press the MENU button.
2
Use the or button to select OPTION and
press the OK button.
3
Use the , , or button to set up the de-
sired item and press the OK button.
- To return to the previous menu, press the ᰳ
button.
The available option settings are described below.
Item Description
Language Selects the desired language.
Set ID Sets the unique number of a projector when it is being remotely
controlled by PC.
PJT Mode
Keystone Compensates for the trapezoidal image shape created when projecting
an image from an angle not perpendicular to the screen.
Blank Image Selects the background for blank image.
Auto Power
Makes the projector turn on automatically when the power cord is
connected.
Item
On When the power cord is connected to the projector, it turns
on automatically.
Off When the power cord is connected to the projector, it goes
into standby mode.
Lqwhudfwlyh
Sets the Interactive mode. (For SA565)
* The aspect ratio is changed to Full when the Interactive function is
used.
High
Altitude
option on.
When High Altitude is not enabled, the projector may overheat or its
protection function may be activated. If this happens, turn the projector
off and then on again after waiting for several minutes.
Monitor Out
You can select one of the two RGB inputs connected as an output
of the RGB OUT port.
When "Auto" is selected, the current input you are watching is dis-
Ͱ
237,21
ؒ /DQJXDJH
ؒ 6HW,'
ؒ 3-70RGH )URQW
ؒ .H\6WRQH
ؒ %ODQN,PDJH %OXH
ؒ $XWR3RZHU 2II
ؒ +LJK$OWLWXGH 2II
59
CUSTOMIZING SETTINGS
Item Description
Auto Input
Search
Automatically searches for and displays the input signal type when it is
Component).
Balloon Help
Enables/disables the balloon help.
Initial
Setting Resets all projector settings to the factory default.
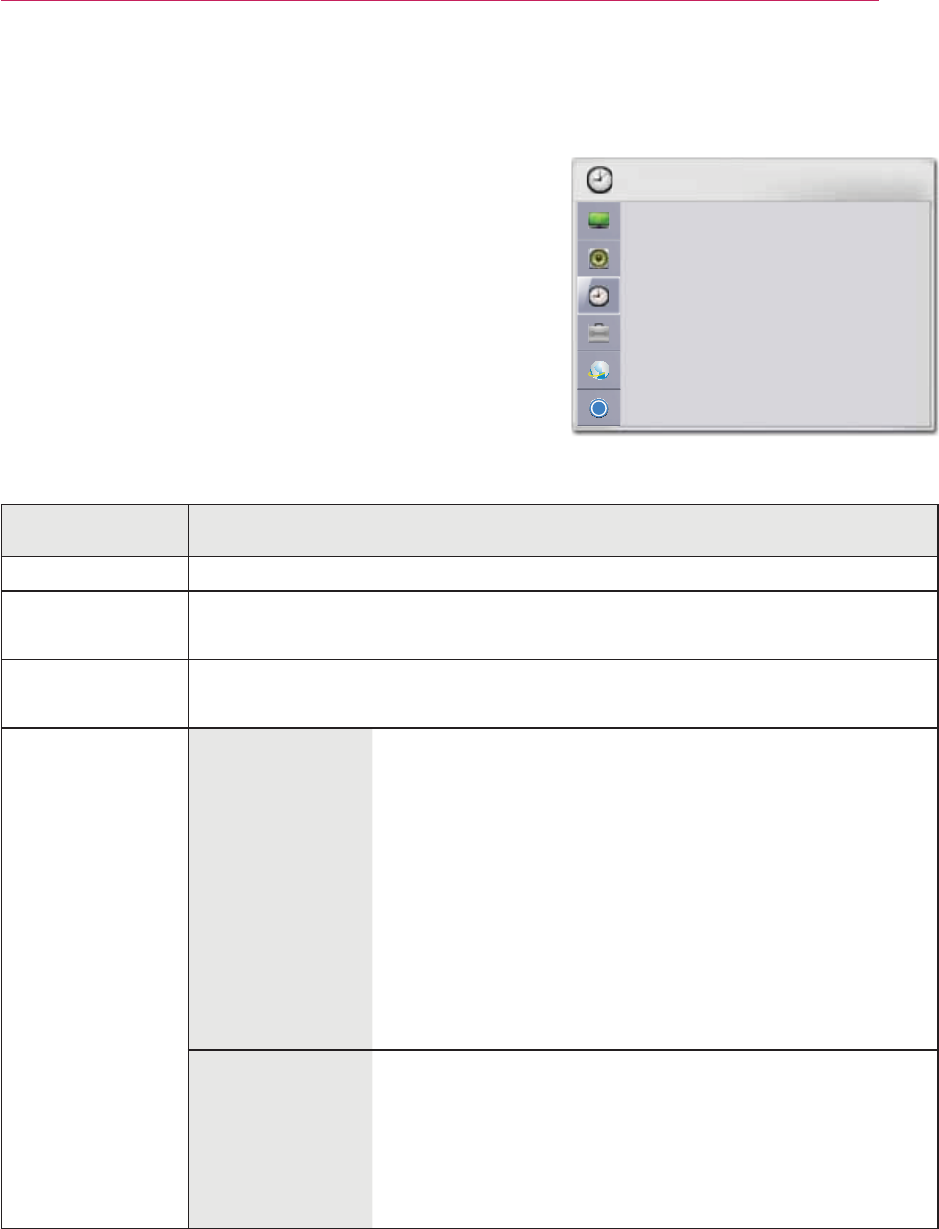
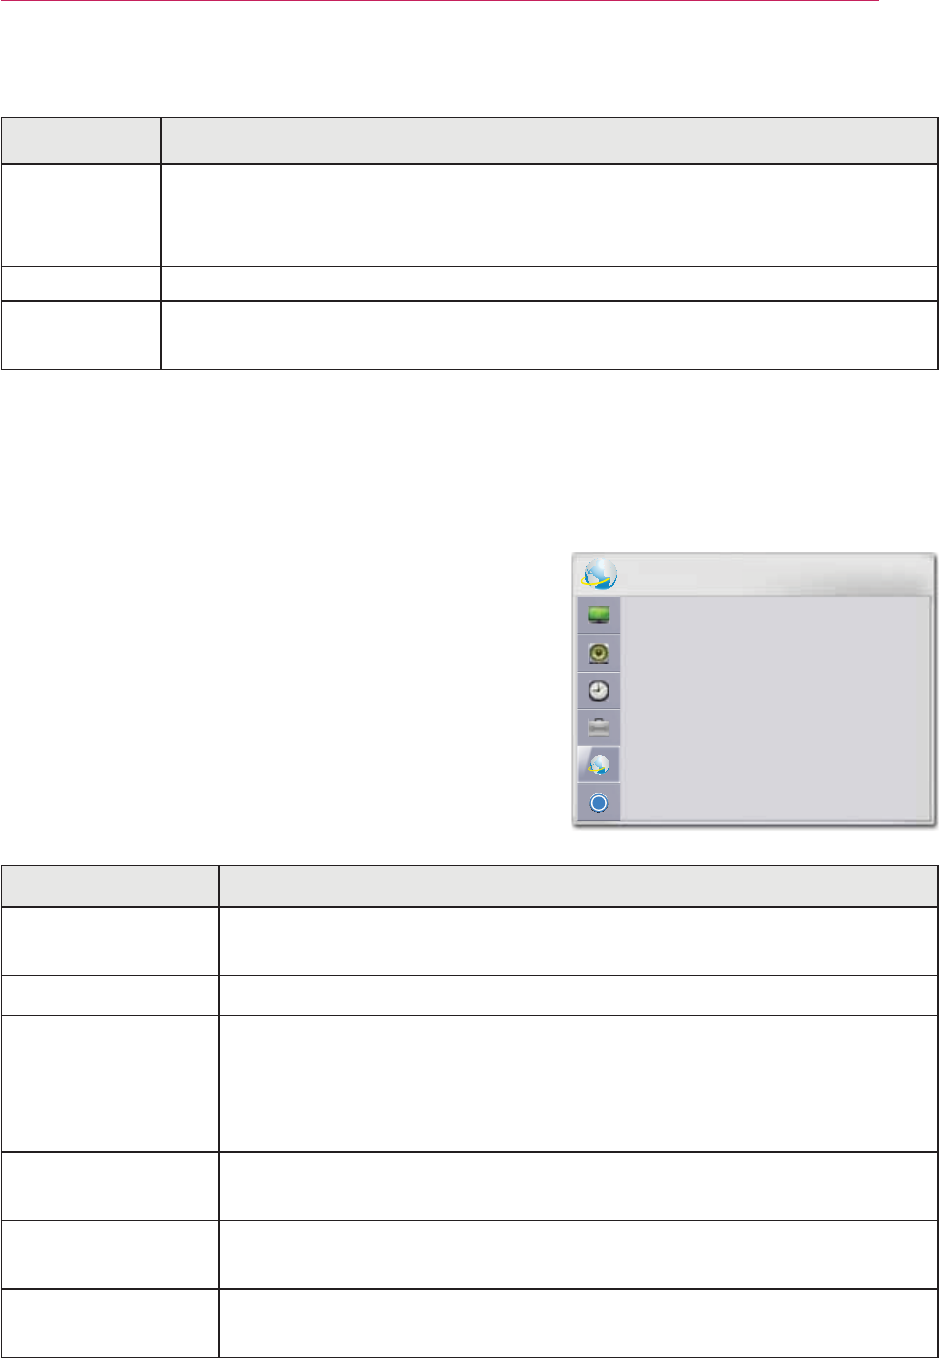
NETWORK Settings
1
Press the MENU button.
2
Use the or button to select NETWORK and
press the OK button.
3
Use the , , or button to set up the de-
sired item and press the OK button.
- To return to the previous menu, press the ᰳ
button.
The available network settings are described below.
Item Description
Network
Connection Connects a wireless network.
Network Status Displays the connection status of the wireless network.
Wi-Fi Screen
Share
Wi-Fi Screen Share supports wireless connection technology,
of the devices connected by the Wi-Fi Screen Share on the
SmartShare.
Smart Share
Setting Changes the settings for SmartShare.
Magical Mirroring Transmits wirelessly and projects the screen of a network-con-
nected laptop (PC) to a projector.
eZ-Net Manager Allows you to control one or more projectors in an easier way
through a local area network.
Ͱ
1(7:25.
ؒ 1HWZRUN&RQQHFWLRQ
ؒ 1HWZRUN6WDWXV
ؒ :L)L6FUHHQ6KDUH
ؒ 6PDUW6KDUH6HWWLQJ
ؒ 0DJLFDO0LUURULQJ
ؒ H=1HW0DQDJHU

60
CUSTOMIZING SETTINGS
SUPPORT
1
Press the MENU button.
2
Use the or button to select SUPPORT and
press the OK button.
3
Use the , , or button to set up the de-
sired item and press the OK button.
- To return to the previous menu, press the ᰳ
button.
The available support settings are described below.
Item Description
Software Update Updates to the latest software.
Product/Service
Info. Shows the product/service information.
Self Diagnosis
Troubleshoots functional problems that can arise while using
the product.
Ͱ
Ͱ
6833257
ؒ 6RIWZDUH8SGDWH
ؒ 3URGXFW6HUYLFH,QIR
ؒ 6HOI'LDJQRVLV
61
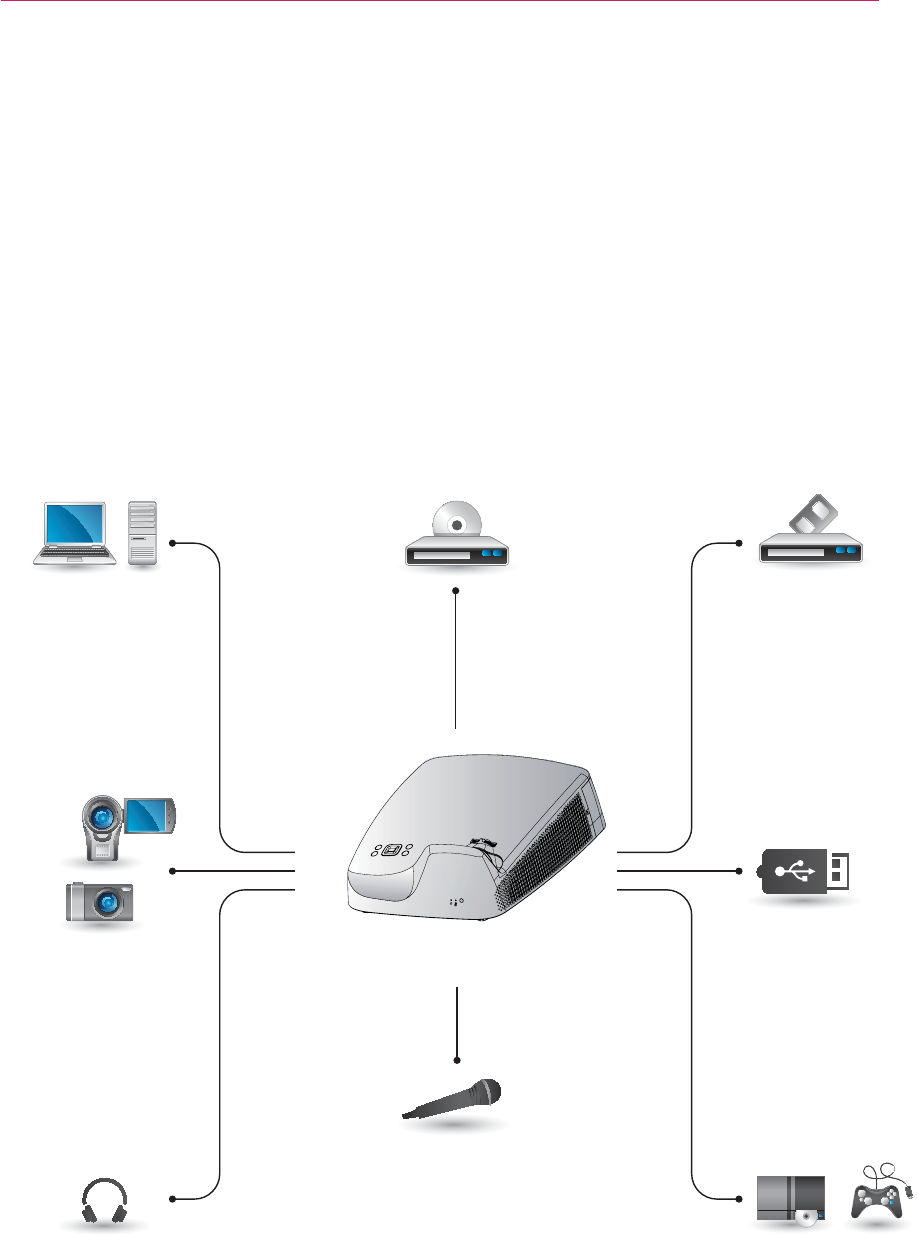
CONNECTING DEVICES
CONNECTING DEVICES
Computer/Notebook VideoDVD
Digital Device
USB
Headphones Game Console
Microphone
y The ports on the back of the projector are designed for the ceiling installation, so
their label is printed upside down for your convenience.
y The picture may be different from the actual product.
62
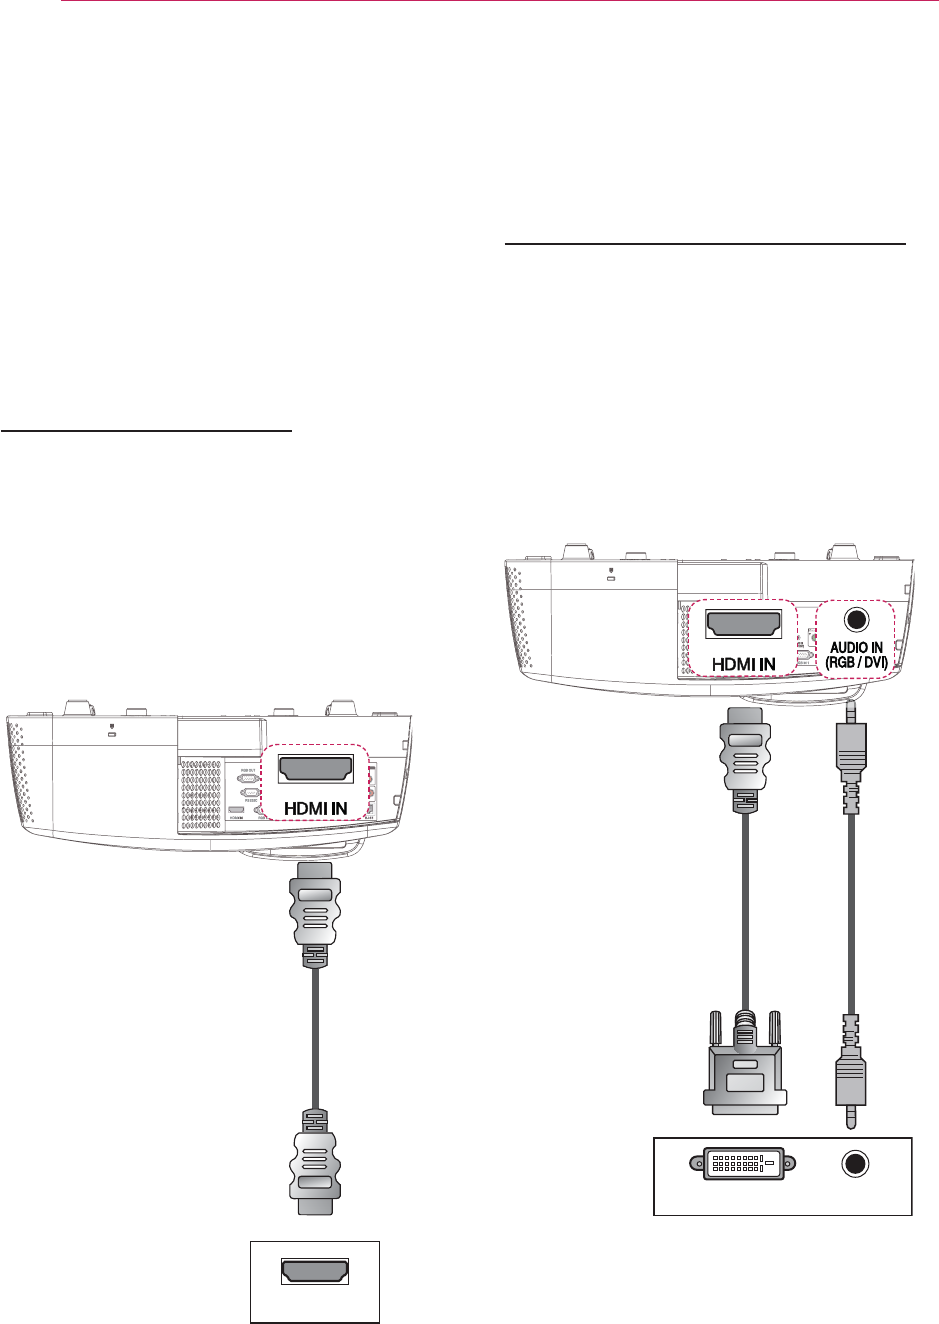
CONNECTING DEVICES
Connecting to HD
Receiver, DVD, or VCR
Player
player to the projector and select an ap-
propriate input mode.
HDMI Connection
high quality picture and sound
. Connect
output port.
Press the INPUT button on the remote
control to select HDMI.
+'0,
HDMI to DVI Connection
the DVI OUT port. To output audio,
use an audio cable for connection.
Press the INPUT button on the remote
control to select HDMI.
DVI OUT AUDIO OUT
* Optional
* Optional
(Video)
* Optional
(Audio)
63
CONNECTING DEVICES
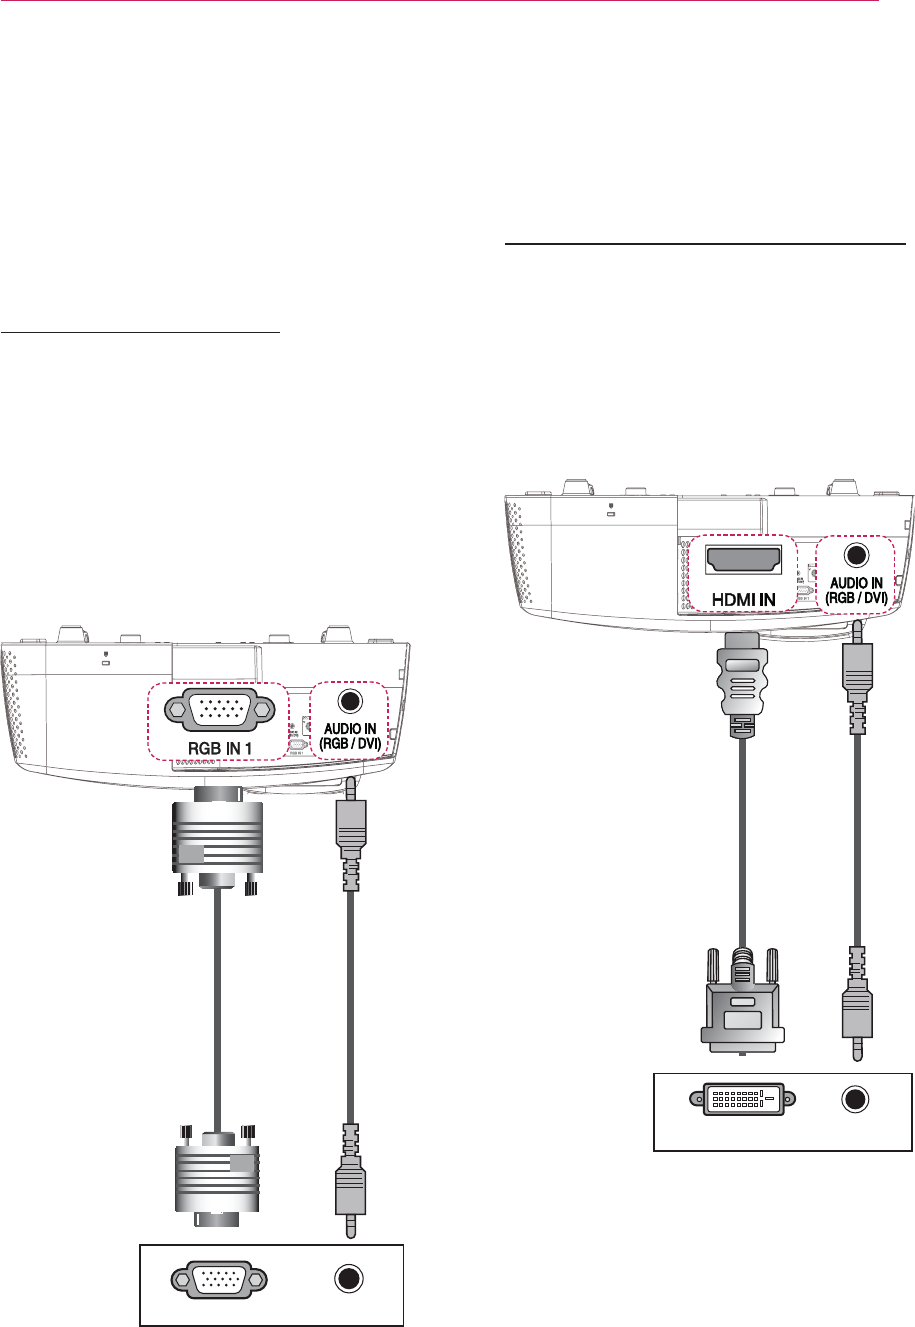
PC Connection
PC will automatically detect the projector
and requires no driver installation.
RGB Connection
Connect the PC output and the PC video
input port of the projector with the RGB
cable.
RGB IN 2 port to the RGB out port.
To output the audio, connect the PC to
the projector
using an audio cable.
AUDIO OUTRGB OUT (PC)
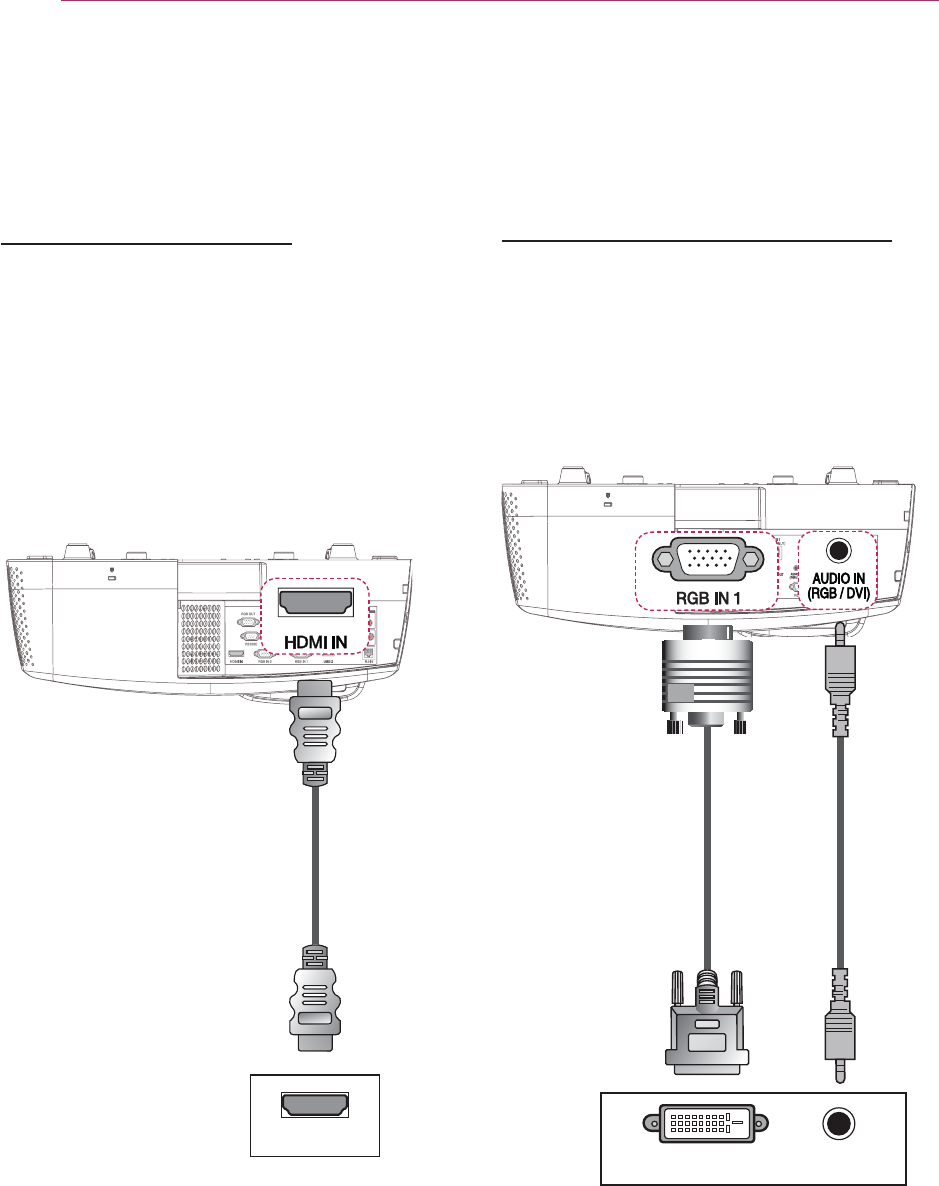
HDMI to DVI Connection
the DVI OUT port.
To output audio,
use an audio cable to connect the PC
to the projector.
DVI OUT AUDIO OUT
* Accessories
(Video)
* Optional
(Audio)
* Optional
(Video)
* Optional
(Audio)
64
CONNECTING DEVICES
HDMI Connection
high quality picture and sound
. Connect
output port.
Press the INPUT button on the remote
control to select HDMI.
+'0,
RGB to DVI Connection
RGB IN 2 port to the DVI OUT port.
To output the audio, connect the PC to
the projector
using an audio cable.
DVI OUT AUDIO OUT
* Optional
(Video)
* Optional
(Audio)
65
CONNECTING DEVICES
Connecting to
External Devices
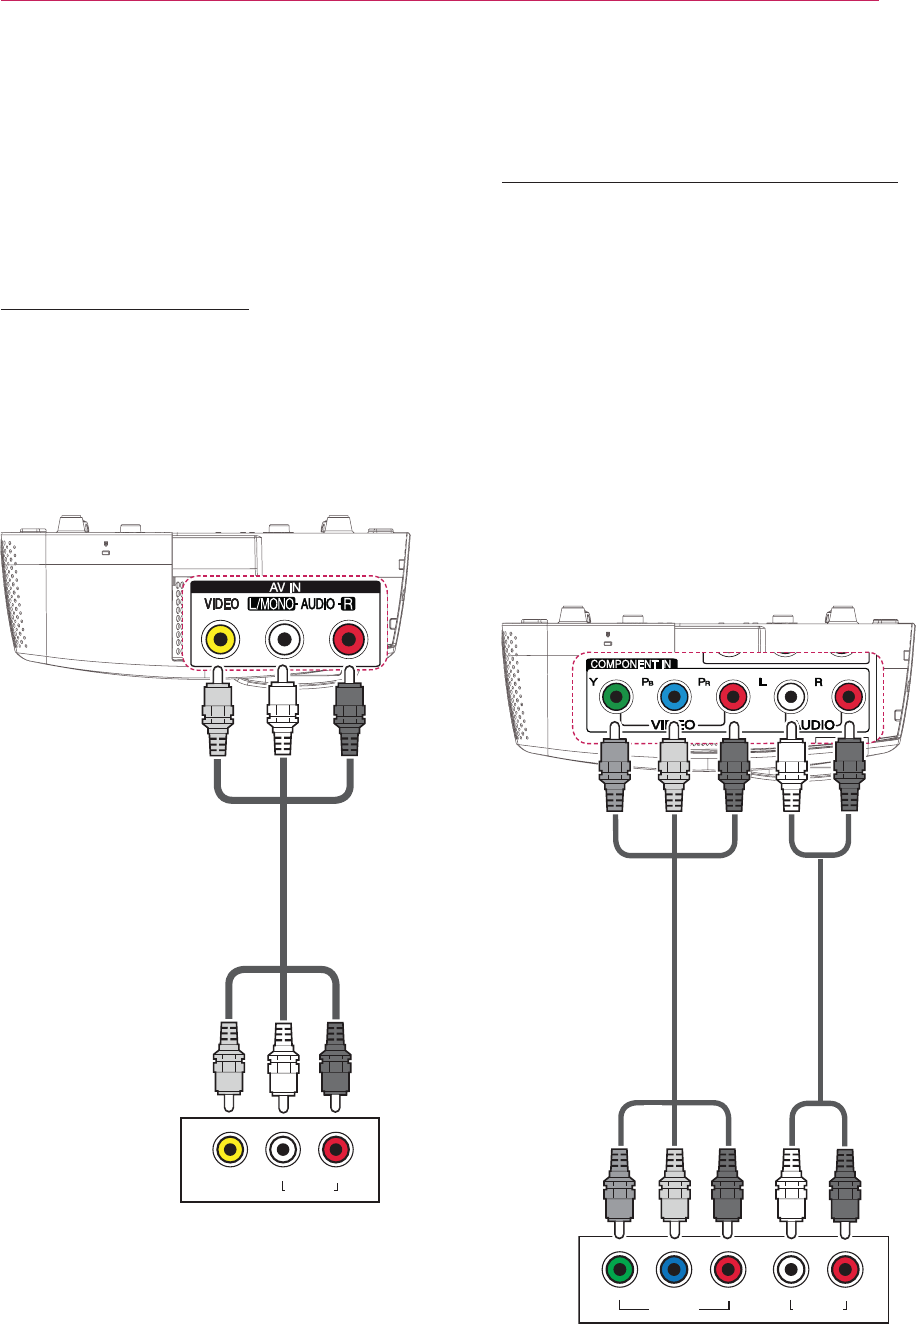
AV Connection
device and the AV INPUT ports of the
projector. Press the INPUT button
to select the AV.
$9287
/HIW 5LJKW
$8',2287
YELLOW
WHITE
RED
YELLOW
WHITE
RED
Component Connection
You can enjoy vivid images when you
component port to the COMPONENT IN
port of the projector. Press the INPUT
button on the remote control to select
Component.
The output jack Y, P
B
or P
R
of
the DVD player may be marked as Y,
B-Y, R-Y/Y,
Cb, Cr/Y, Pb or Pr depending
on the model.
$9287
/HIW<3
%355LJKW
$8',2287
GREEN
BLUE
RED
WHITE
RED
GREEN
BLUE
RED
WHITE
RED
* Optional
(Video)
* Optional
(Audio)
66
CONNECTING DEVICES
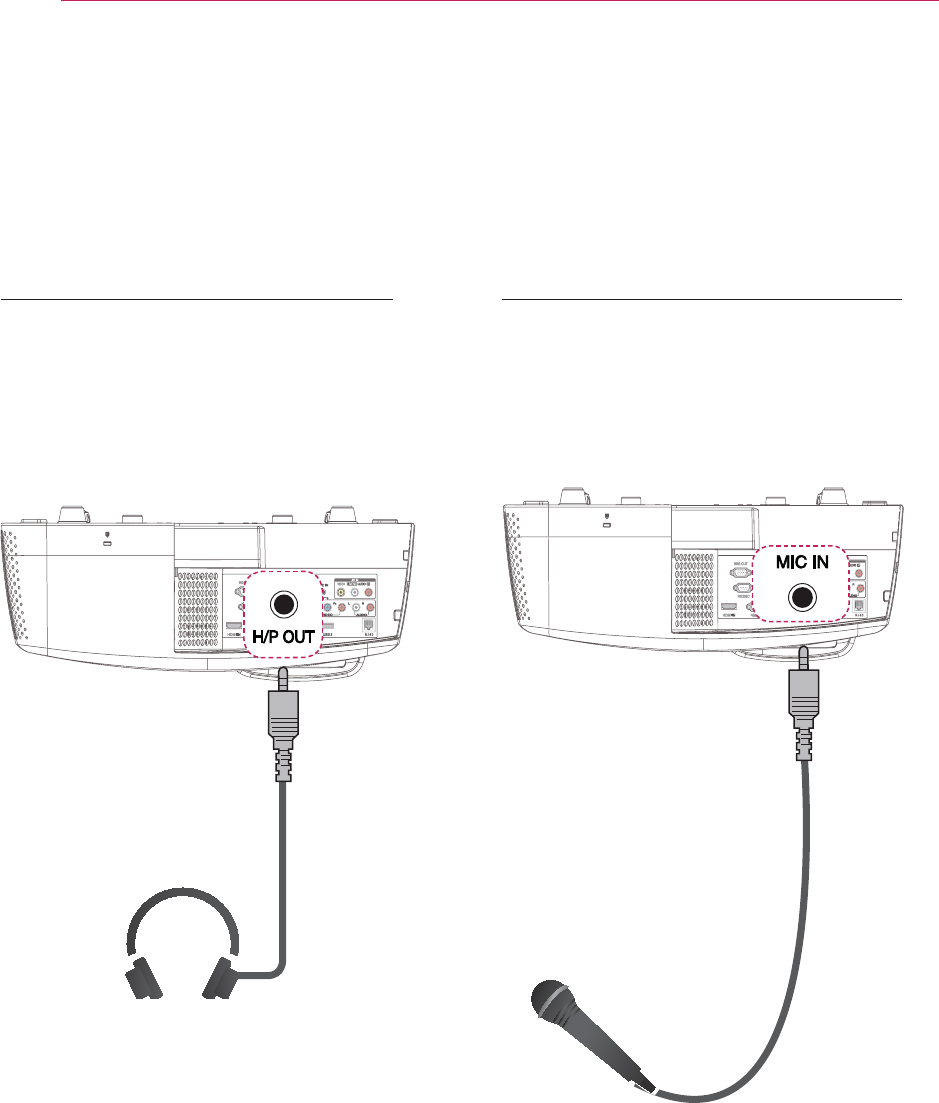
Connecting to
Headphones
Headphone Connection
You can listen to the audio through a
headphone.
* Optional
Connecting to a
Microphone
Microphone Connection
You can connect a microphone to the
MIC IN port of the projector.
* Optional

67
CONNECTING DEVICES
Connecting to a Laptop
You can connect the projector to a lap-
top to use various functions.
RGB Connection
You can connect your laptop to the RGB
port of the projector.
HDMI Connection
* Optional
* Accessories

68
CONNECTING DEVICES
switching the output. For more infor-
similar sections of the owner's manual of
your computer.
Brand Switching Output
NEC [Fn]+[F3]
Panasonic [Fn]+[F3]
Toshiba [Fn]+[F5]
IBM [Fn]+[F7]
Sony [Fn]+[F7]
Fujitsu
LG [Fn]+[F7]
Samsung [Fn]+[F4]
Macintosh Adjust the control panel to
enable mirroring after start-up.