LG Electronics USA Z47LC6DFUN LCD TV User Manual Zenith US
LG Electronics USA LCD TV Zenith US
Contents
- 1. Users Manual 1
- 2. Users Manual 2
- 3. Users Manual 3
- 4. Users Manual 4
Users Manual 3
47
PICTURE CONTROL
ADVANCED - BLACK (DARKNESS) LEVEL
Adjusting the contrast and the brightness of the screen
using the black level of the screen.
This feature operates only in AV 1, AV 2, HDMI1, HDMI2 or
HDMI3 mode.
Screen
Picture Mode
Color Temperature
DB
Advanced
Aspect Ratio
Picture Reset
Cinema 3:2 Mode
Black Level
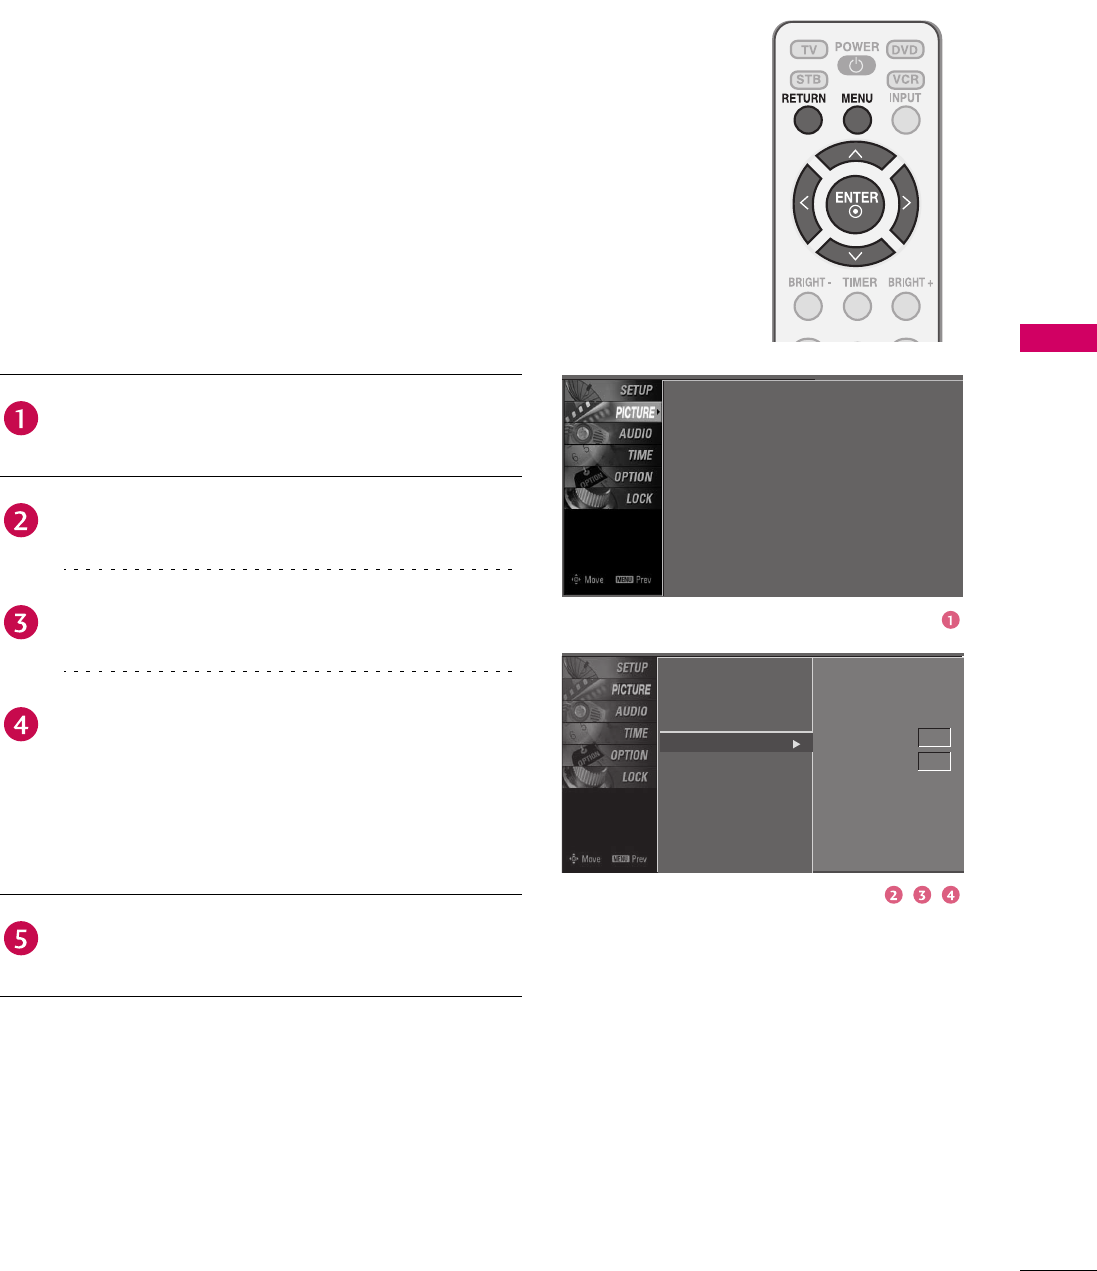
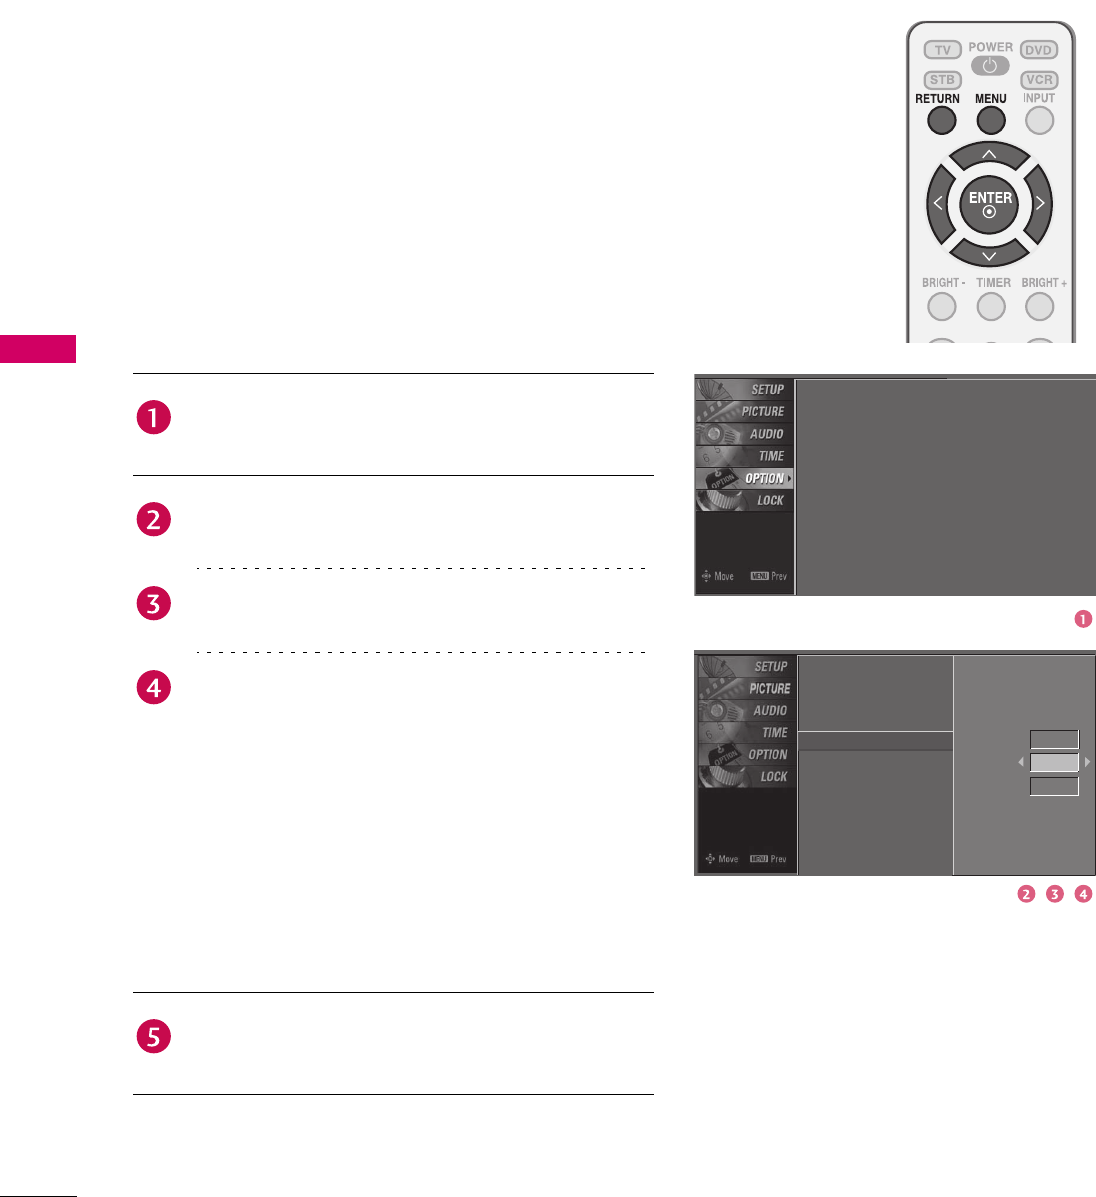
Press the MENU button and then use 1 or 2 button
to select the PICTURE menu.
Press the 4 button and then use 1 or 2 button to
select Advanced.
Press the 4 button and then use 1 or 2 button to
select Black Level.
Use 3 or 4 button to select Low or High.
Low
The screen gets darker.
High
The screen gets brighter.
Press RETURN button to return to TV viewing or
press MENU button to return to the previous menu.
Screen
Picture Mode
Color Temperature
DB
Advanced
Aspect Ratio
Picture Reset
: User1
: Cool
: 16:9
Off
Low
48
PICTURE CONTROL
PICTURE CONTROL
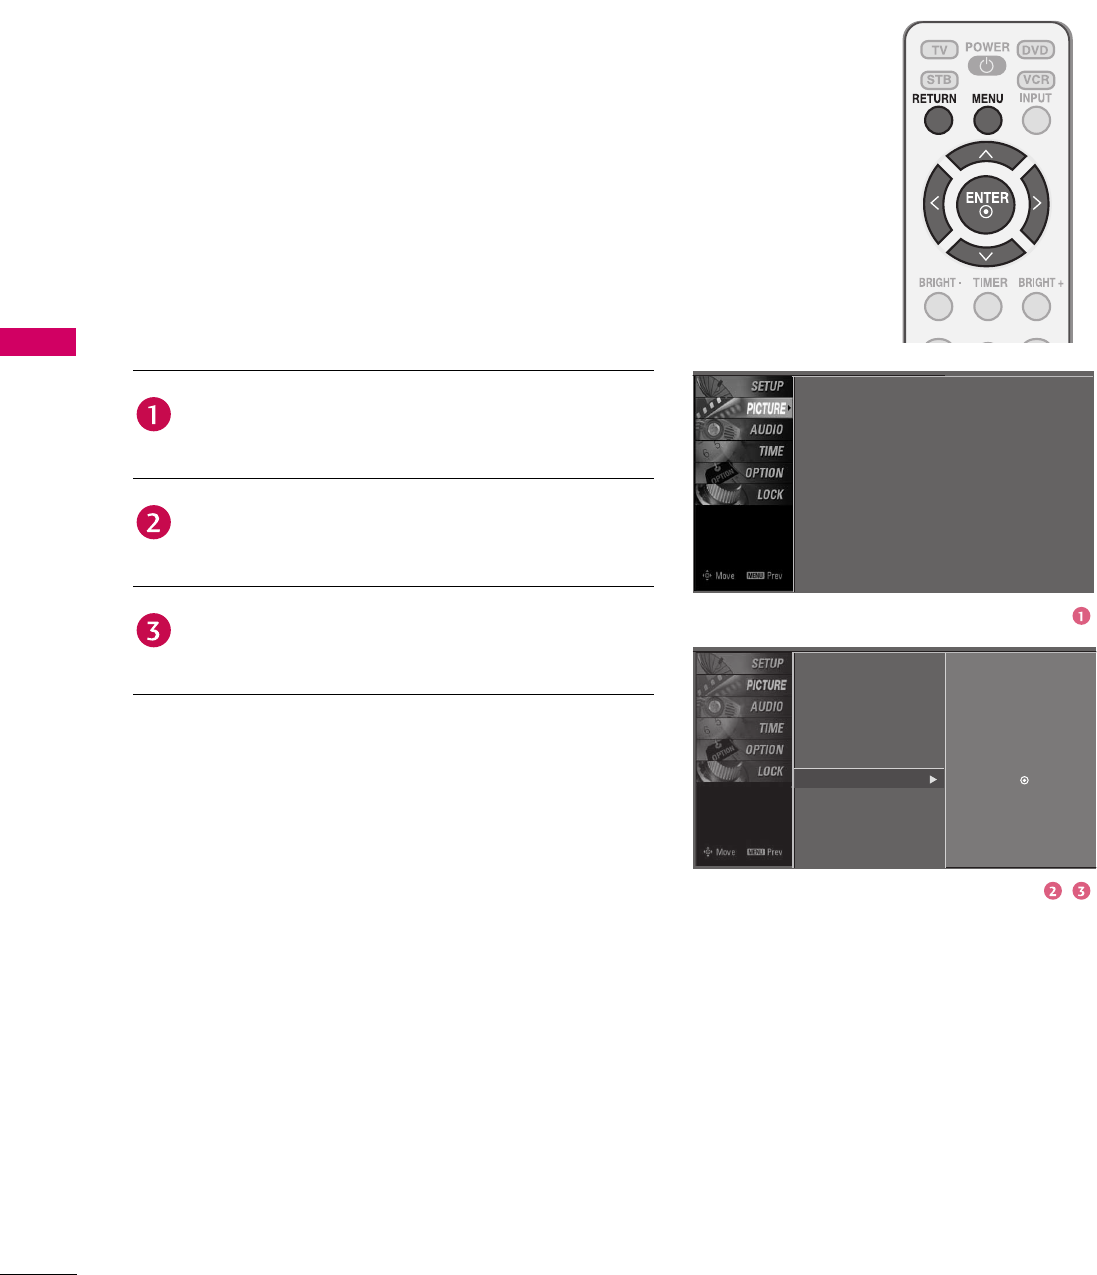
PICTURE RESET
Use to quickly reset all the Picture menu options to their
original factory preset values.
Screen
Picture Mode
Color Temperature
DB
Advanced
Aspect Ratio
Picture Reset
Screen
Picture Mode
Color Temperature
DB
Advanced
Aspect Ratio
Picture Reset
: User1
: Cool
: 16:9
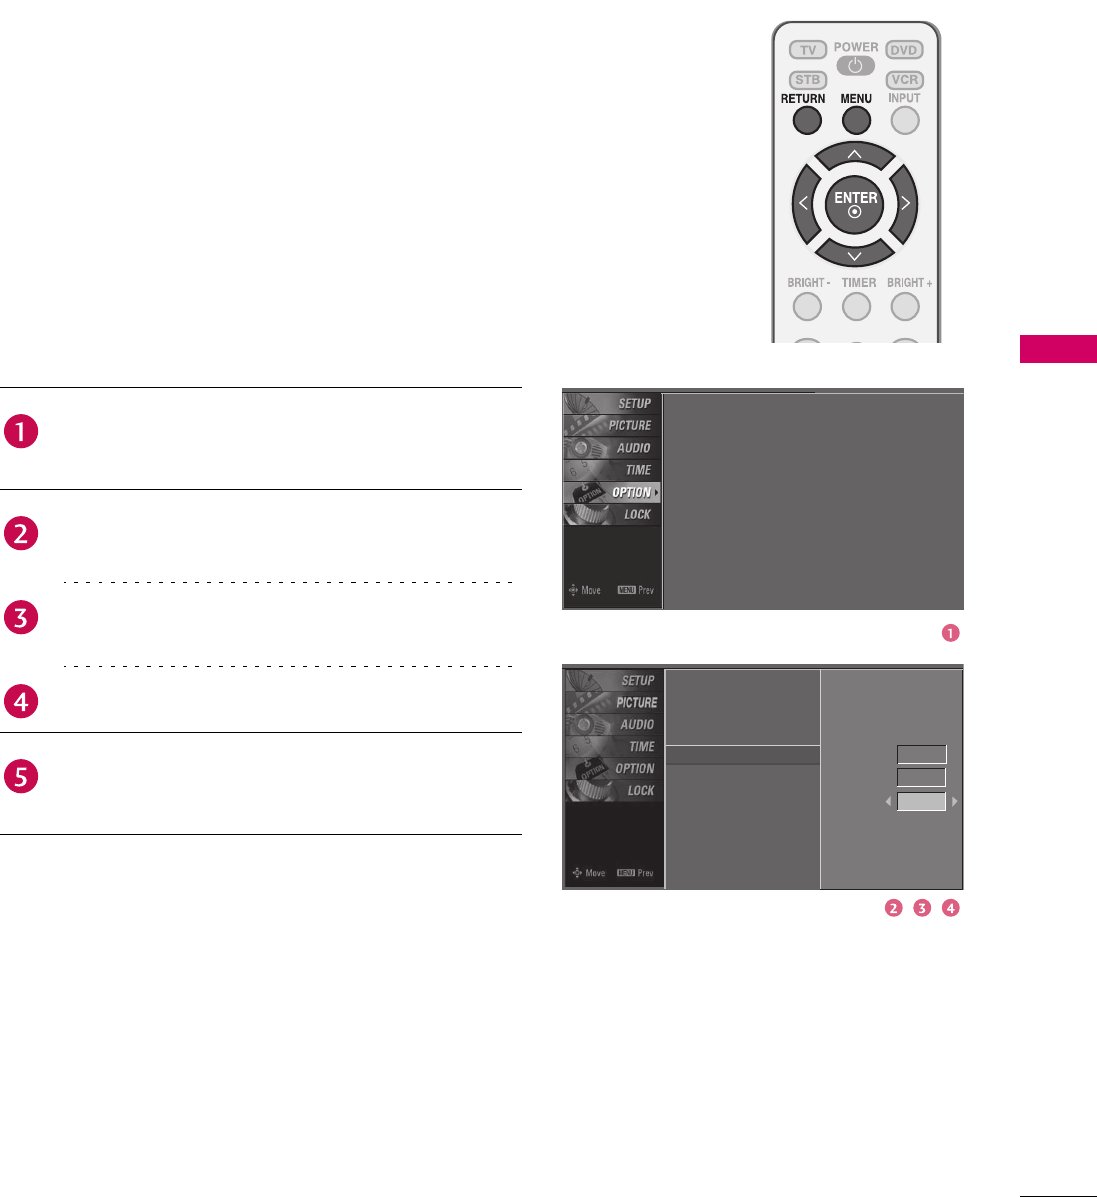
Press the MENU button and then use 1 or 2 button
to select the PICTURE menu.
Press the 4 button and then use 1 or 2 button to
select Picture Reset.
Press the 4 button to reset the PICTURE menu
options to original values.
Selection (X or ) resets to
the factory settings(defaults).
49
SOUND & LANGUAGE CONTROL
SOUND & LANGUAGE CONTROL
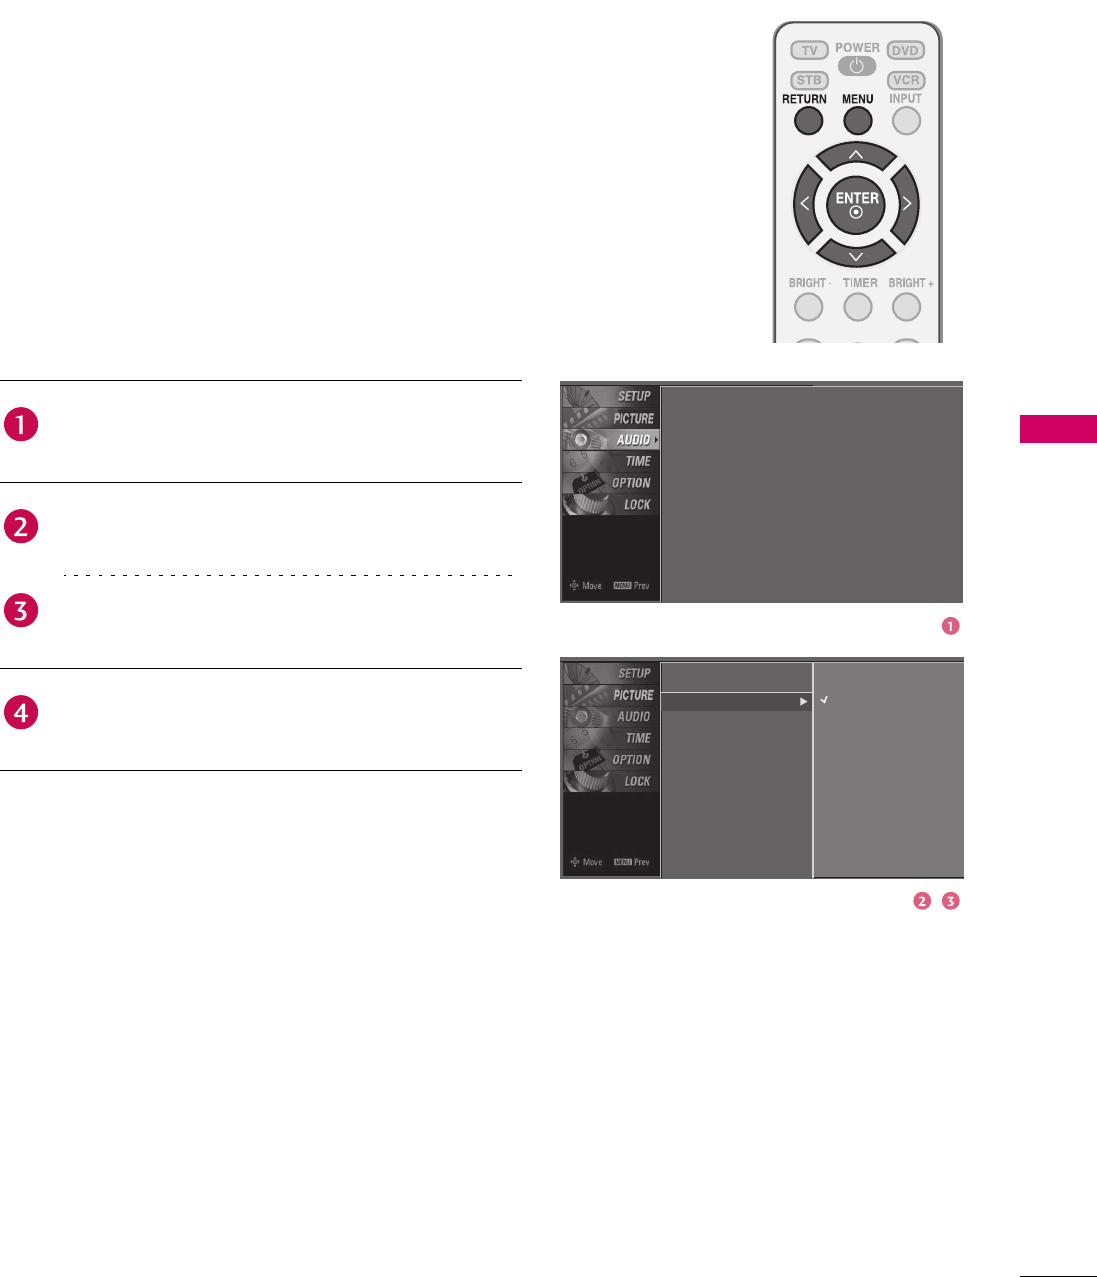
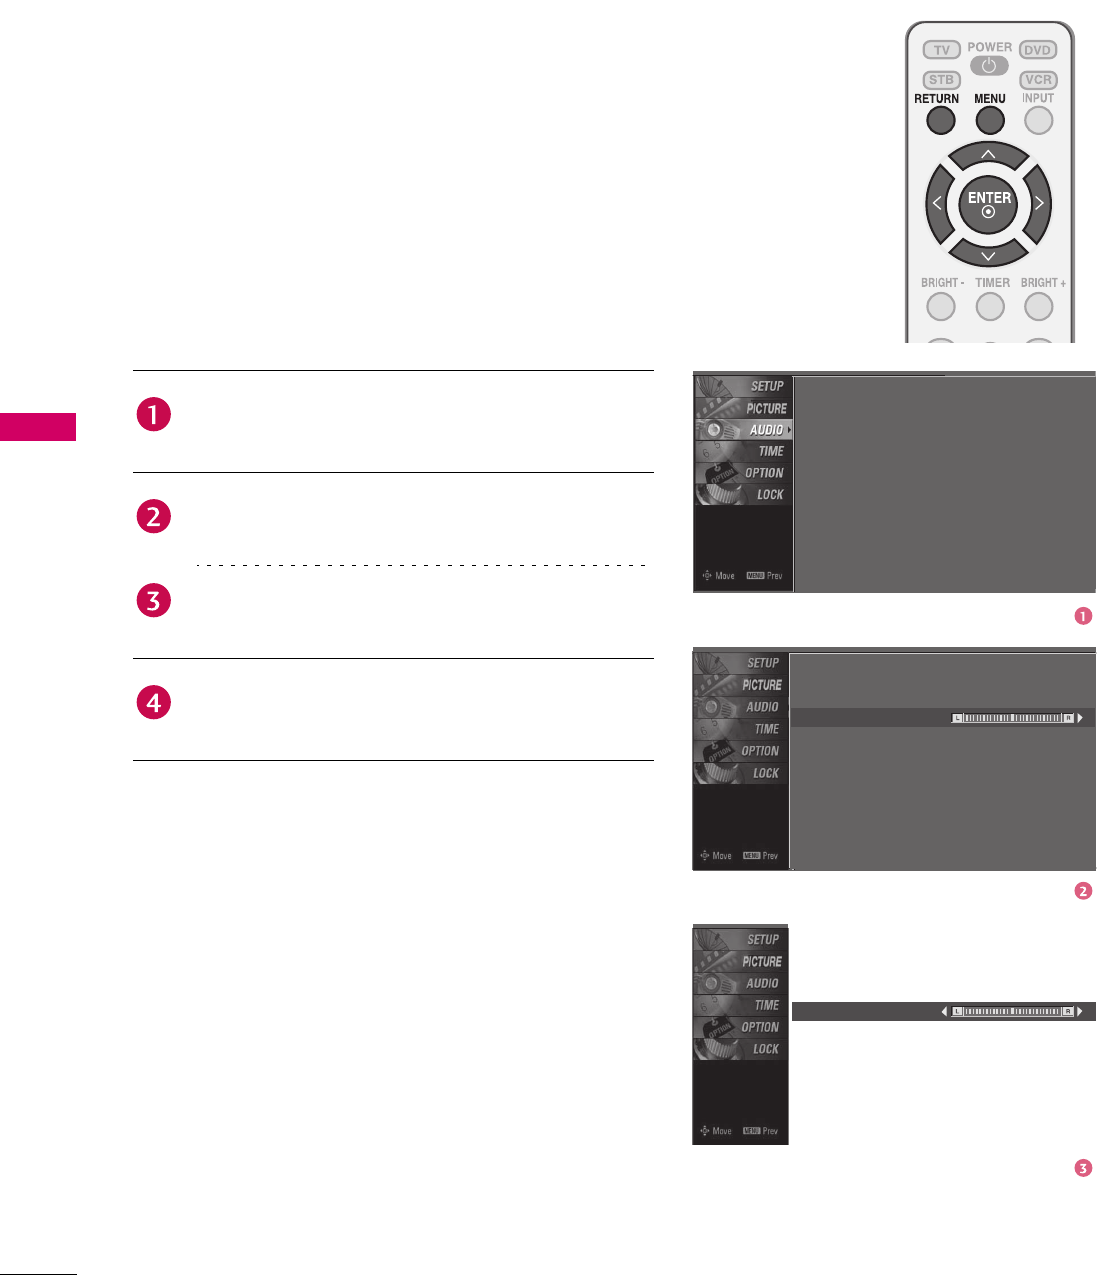
AUTO VOLUME LEVELER (AUTO VOLUME)
Auto Volume makes sure that the volume level remains
consistent whether you are watching a commercial or a
regular TV program.
Sound Mode
Auto Volume
Balance
TV Speaker
Off
On
Press the MENU button and then use 1 or 2 button
to select the AUDIO menu.
Press the 4 button and then use 1 or 2 button to
select Auto Volume.
Press the 4 button and then use 1 or 2 button to
select On or Off.
Press RETURN button to return to TV viewing or
press MENU button to return to the previous menu.
Sound Mode
Auto Volume
Balance
TV Speaker
: Standard
: On
: 0
: On

50
SOUND & LANGUAGE CONTROL
SOUND & LANGUAGE CONTROL
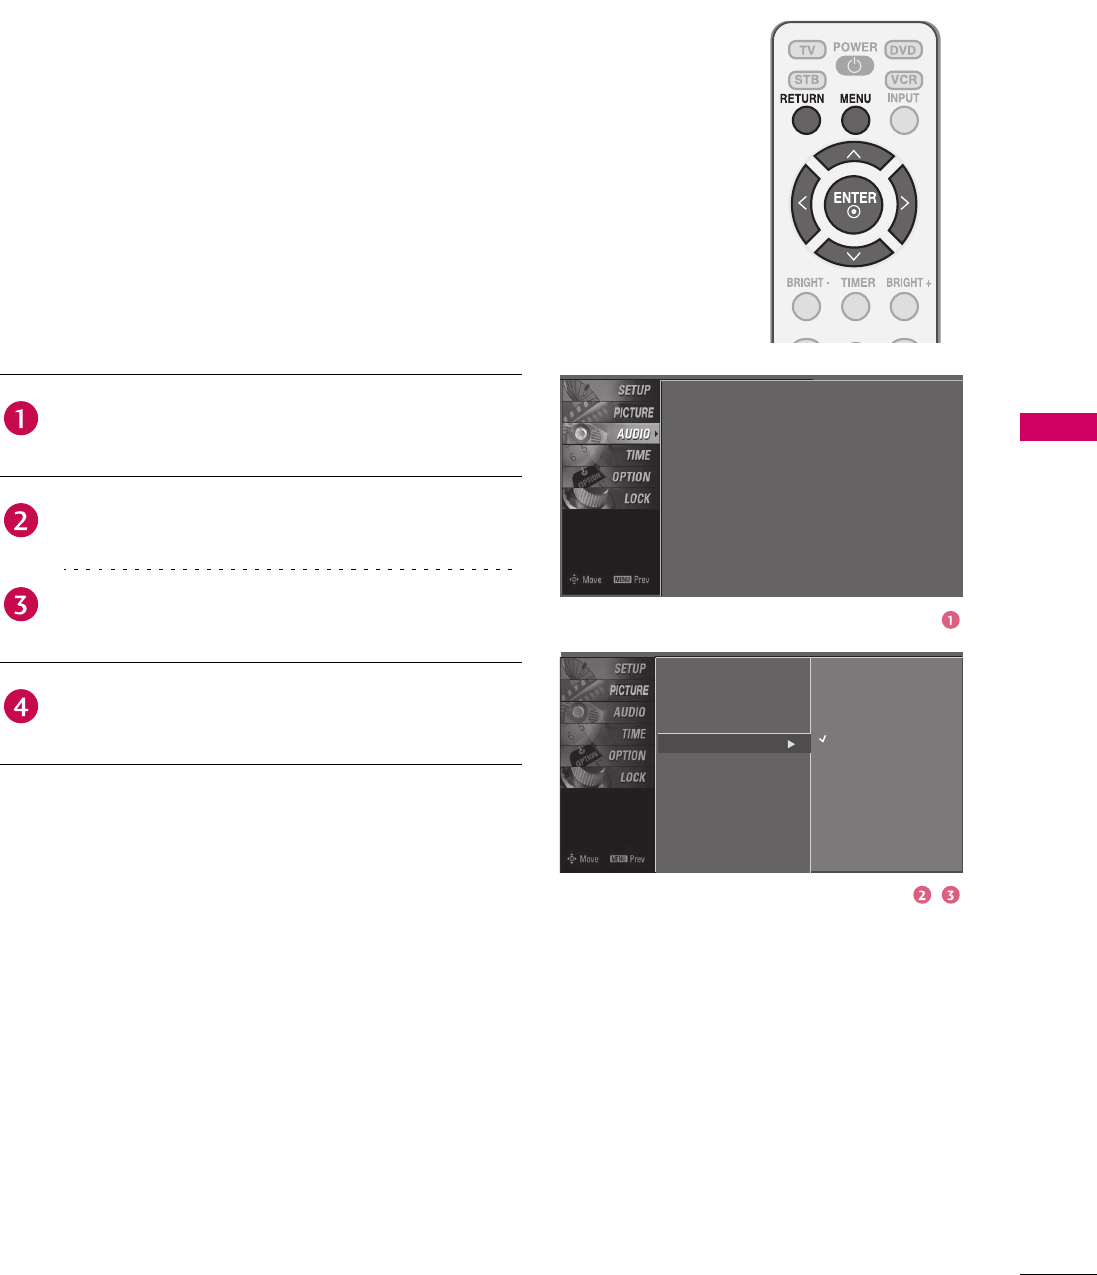
PRESET SOUND SETTINGS (SOUND MODE)
Sound Mode lets you enjoy the best sound without any
special adjustment because the TV sets the appropriate
sound options based on the program content.
Standard, Music, Movie, and Sports are preset for good
sound quality at the factory and are not adjustable.
You can also adjust Sound Mode in the AUDIO menu.
Press the SOUND button repeatedly to select the
appropriate sound setup as below:
Standard, Music, Movie, Sports, and User (your own
settings).
Press RETURN button to return to TV viewing.
Sound Mode
Auto Volume
Balance
TV Speaker
: Standard
: On
: 0
: On
Sound Mode
Auto Volume
Balance
TV Speaker
Standard
Music
Movie
Sports
User
51
SOUND & LANGUAGE CONTROL
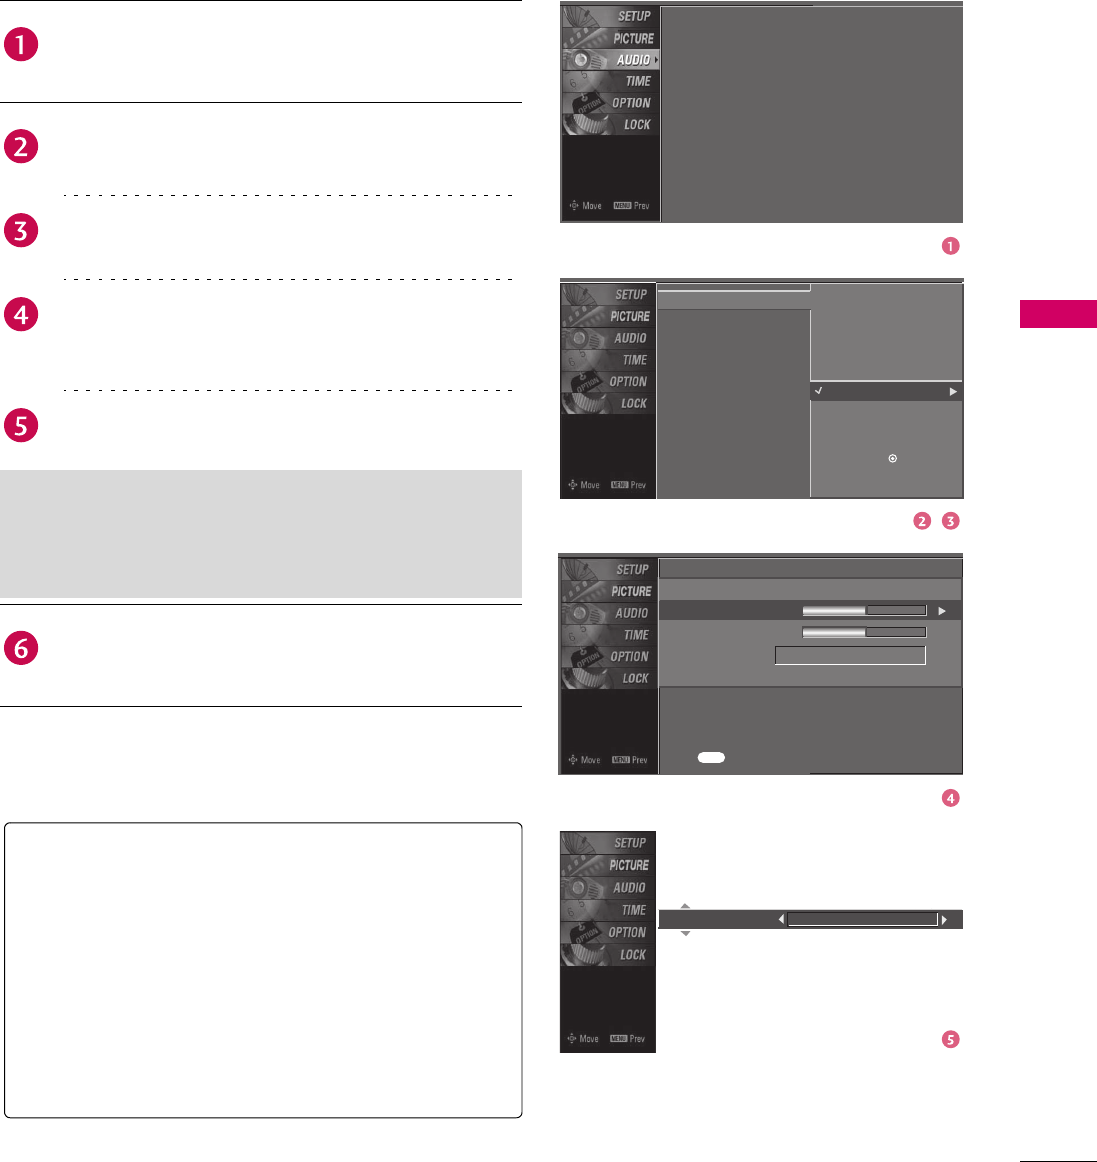
SOUND SETTING ADJUSTMENT - USER MODE
Adjust the sound to suit your taste and room situations.
Press the MENU button and then use 1 or 2 button
to select the AUDIO menu.
Press the 4 button and then use 1 or 2 button to
select Sound Mode.
Press the 4 button and then use 1 or 2 button to
select User.
Press the 4 button and then use 1 or 2 button to
select the desired sound option (Treble, Bass, or
Front Surround).
Press the 4 button and then use 3 or 4 button to
make appropriate adjustments.
Press RETURN button to return to TV viewing or
press MENU button to return to the previous menu.
Selecting the Front Surround
Press the 4 button and then use 3 or 4 button to
select Off, 3D EchoSound System or SRS (Sound
Retrieval System) TruSurround XT.
User
Treble
Bass
Front Surround
50
50
Off
Press
MENU
to confirm.
Front Surround 3D EchoSound System
SRS TruSurround XT
Takes advantage of any multi-channel format without
needing to add extra speakers or equipment. Dialog
clarity, bass enrichment, and the addition of stereo audio
enhancement produces an immersive sound experience
from standard stereo material.
3D EchoSound System
Creates a stunning simulated stereo effect from any mono
sound and a realistic three-dimensional sound with a very
wide and deep sound stage.
Sound Mode
Auto Volume
Balance
TV Speaker
: Standard
: On
: 0
: On
Sound Mode
Auto Volume
Balance
TV Speaker
Standard
Music
Movie
Sports
User
Selection (X or ) leads you
to the detailed setting screen.
52
SOUND & LANGUAGE CONTROL
SOUND & LANGUAGE CONTROL
BALANCE
Adjust the left/right sound of speaker to suit your taste and
room situations.
Sound Mode
Auto Volume
Balance
TV Speaker
Press the MENU button and then use 1 or 2 button
to select the AUDIO menu.
Press the 4 button and then use 1 or 2 button to
select Balance.
Press the 4 button and then use 3 or 4 button to
make appropriate adjustments.
Press RETURN button to return to TV viewing or
press MENU button to return to the previous menu.
Sound Mode
Auto Volume
Balance
TV Speaker
: Standard
: On
: 0
: On
Balance 0
0
53
SOUND & LANGUAGE CONTROL
TV SPEAKERS ON/OFF SETUP
Turn the TV speakers off if using external audio equipment.
Sound Mode
Auto Volume
Balance
TV Speaker Off
On
Press the MENU button and then use 1 or 2 button
to select the AUDIO menu.
Press the 4 button and then use 1 or 2 button to
select TV Speaker.
Press the 4 button and then use 1 or 2 button to
select On or Off.
Press RETURN button to return to TV viewing or
press MENU button to return to the previous menu.
Sound Mode
Auto Volume
Balance
TV Speaker
: Standard
: On
: 0
: On
54
SOUND & LANGUAGE CONTROL
SOUND & LANGUAGE CONTROL
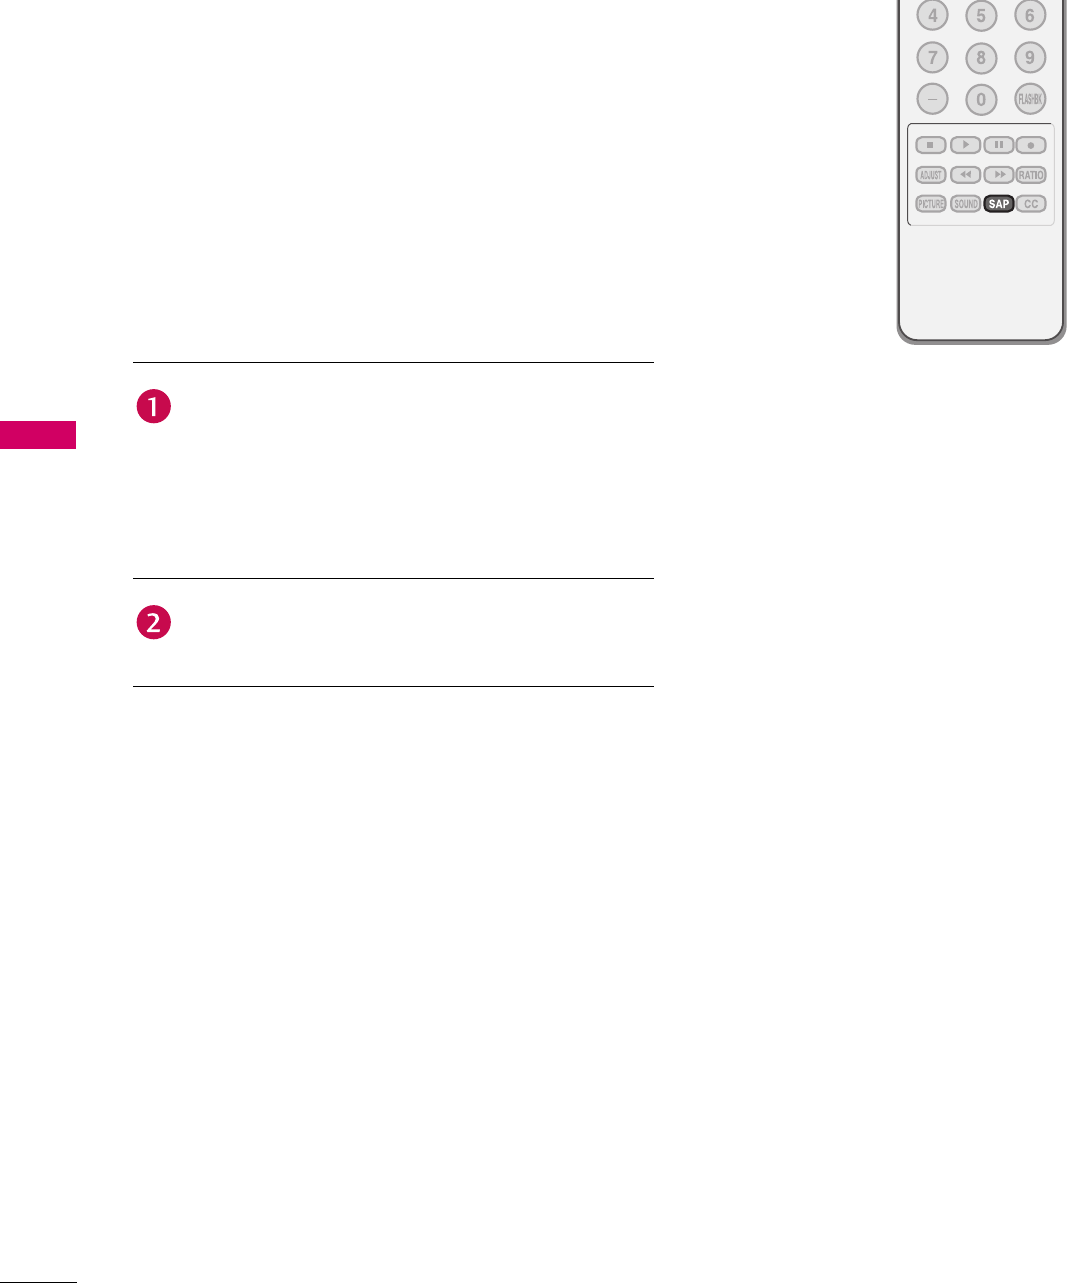
STEREO/SAP BROADCASTS SETUP
For Analog only: This TV can receive MTS stereo programs
and any SAP (Secondary Audio Program) that accompanies
the stereo program if the station transmits an additional
sound signal. Mono sound is automatically used if the
broadcast is only in Mono.
Use the SAP button to select your desired MTS mode
in analog signal. Each time you press the SAP button,
Mono, Stereo, or SAP appear in turn.
If other languages available on the digital signal,
select them with the SAP button.
Press RETURN button to save and return to TV
viewing.

55
SOUND & LANGUAGE CONTROL
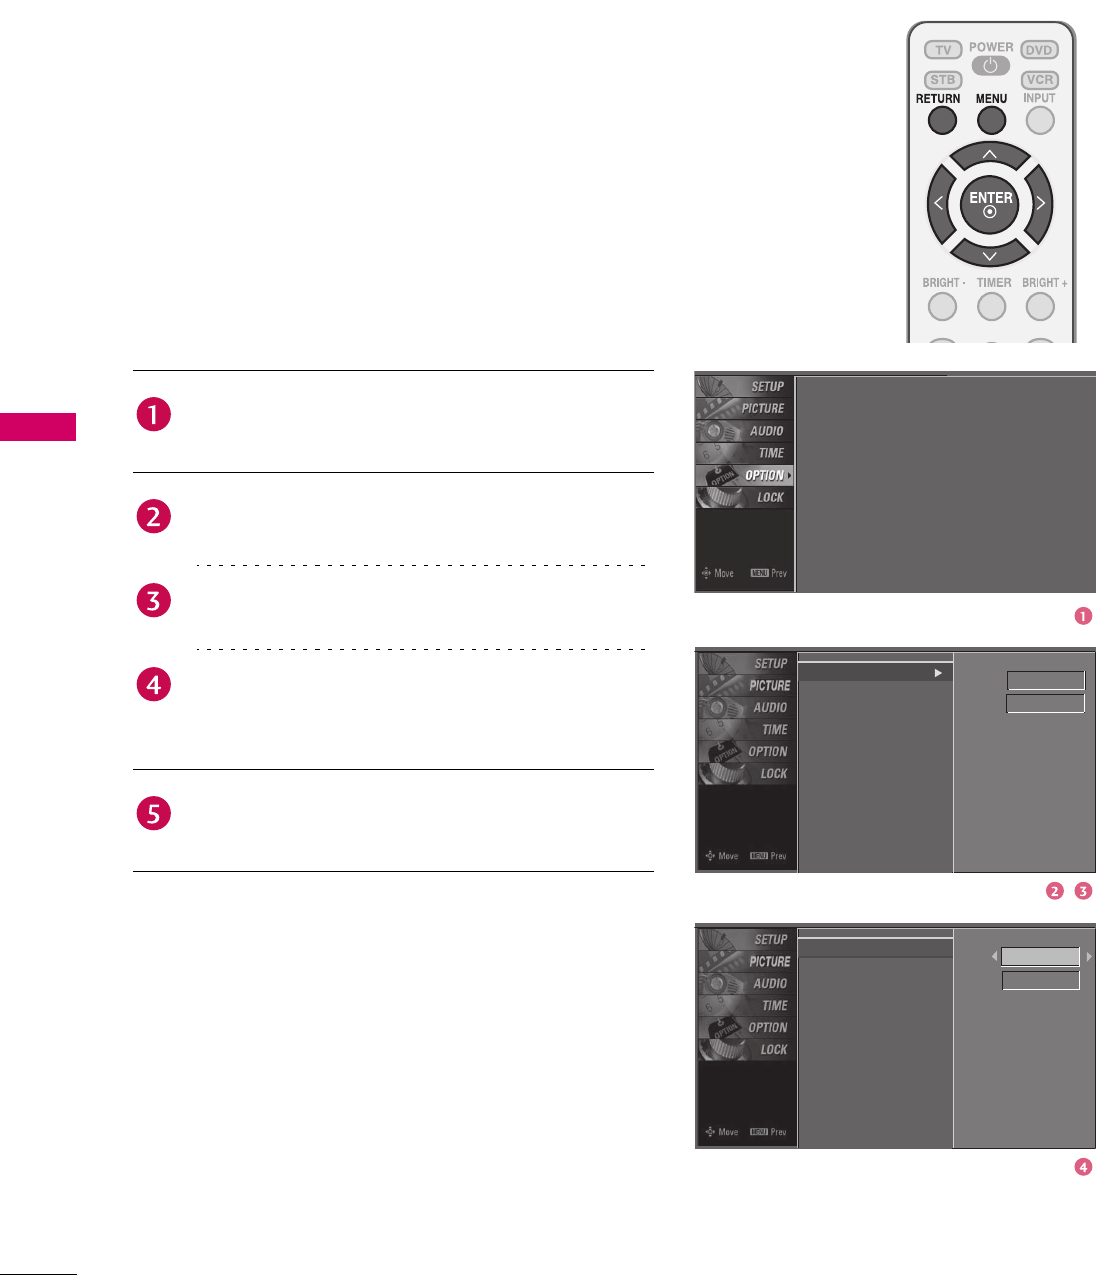
AUDIO LANGUAGE
Other languages may be available if a digital signal is
provided by the broadcasting station.
This feature operates only in DTV/CADTV mode.
Language
Input Label
Key Lock
Caption
Set ID
Menu
Audio
English
English
Language
Input Label
Key Lock
Caption
Set ID
Menu
Audio
Language
Input Label
Key Lock
Caption
Set ID
: English
: Off
: Off
: Off
: Orbiter
: Off
: 1
English
English
Press the MENU button and then use 1 or 2 button
to select the OPTION menu.
Press the 4 button and then use 1 or 2 button to
select Language.
Press the 4 button and then use 1 or 2 button to
select Audio.
Use 3 or 4 button to select: English, Spanish, or
French.
Press RETURN button to return to TV viewing or
press MENU button to return to the previous menu.
56
SOUND & LANGUAGE CONTROL
SOUND & LANGUAGE CONTROL
ON-SCREEN MENUS LANGUAGE SELECTION
The menus can be shown on the screen in the selected
language. First select your language.
Press the MENU button and then use 1 or 2 button
to select the OPTION menu.
Press the 4 button and then use 1 or 2 button to
select Language.
Press the 4 button and then use 1 or 2 button to
select Menu.
Use 3 or 4 button to select your desired language.
From this point on, the on-screen menus will be shown
in the selected language.
Press RETURN button to return to TV viewing or
press MENU button to return to the previous menu.
Menu
Audio
English
English
Menu
Audio
English
English
Language
Input Label
Key Lock
Caption
Set ID
: English
: Off
: Off
: 1
Language
Input Label
Key Lock
Caption
Set ID
Language
Input Label
Key Lock
Caption
Set ID

57
SOUND & LANGUAGE CONTROL
CAPTION MODE
Caption must be provided to help people with hearing loss
watch TV.
You can also adjust Caption in the OPTION menu.
Use the CC button to select Caption On or Off.
When selecting Off, Sub-menus for Analog, Digital,
and Digital Option become disabled.
Press RETURN button to return to TV viewing.
Language
Input Label
Key Lock
Caption
Set ID
: English
: Off
: Off
: 1
Language
Input Label
Key Lock
Caption
Set ID
Mode
Analog
Digital
Digital Option
On
Text1
Service3
58
SOUND & LANGUAGE CONTROL
SOUND & LANGUAGE CONTROL
Analog Broadcasting System Captions
Caption must be provided to help people with hearing loss
watch TV. Select a caption mode for displaying captioning
information if provided on a program. Analog caption
displays information at any position on the screen and is
usually the program's dialog. Caption/Text, if provided by
the broadcaster, would be available for both digital and
analog channels on the Antenna/Cable. This TV is
programmed to memorize the caption/text mode which was
last set when you turned the power off. This function is only
available when Caption Mode is set On.
Press the MENU button and then use 1 or 2 button
to select the OPTION menu.
Press the 4 button and then use 1 or 2 button to
select Caption.
Press the 4 button and then use 1 or 2 button to
select Analog.
Use 3 or 4 button to select CC1, CC2, CC3, CC4,
Tex t 1 , Tex t 2 , Tex t 3 or Te x t 4.
CAPTION
The term for the words that scroll across the
bottom of the TV screen; usually the audio portion
of the program provided for the hearing impaired.
TEXT
The term for the words that appear in a large black
frame and almost cover the entire screen; usually
messages provided by the broadcaster.
Press RETURN button to return to TV viewing or
press MENU button to return to the previous menu.
Language
Input Label
Key Lock
Caption
Set ID
: English
: Off
: Off
: 1
Language
Input Label
Key Lock
Caption
Set ID
Mode
Analog
Digital
Digital Option
On
Text1
Service3
59
SOUND & LANGUAGE CONTROL
Digital Broadcasting System Captions
Choose the language you want the DTV/CADTV Captions
to appear in.
Other Languages can be chosen for digital sources only if
they are included on the program.
This function in only available when Caption Mode is set
On.
Language
Input Label
Key Lock
Caption
Set ID
: English
: Off
: Off
: 1
Language
Input Label
Key Lock
Caption
Set ID
Mode
Analog
Digital
Digital Option
On
Text1
Service3
Press the MENU button and then use 1 or 2 button
to select the OPTION menu.
Press the 4 button and then use 1 or 2 button to
select Caption.
Press the 4 button and then use 1 or 2 button to
select Digital.
Use 3 or 4 button to select Service1 ~ Service6.
Press RETURN button to return to TV viewing or
press MENU button to return to the previous menu.
60
SOUND & LANGUAGE CONTROL
SOUND & LANGUAGE CONTROL
Language
Input Label
Key Lock
Caption
Set ID
Mode
Analog
Digital
Digital Option
Selection (X or ) ) leads you
to the Caption Option screen.
Language
Input Label
Key Lock
Caption
Set ID
Mode
Analog
Digital
Digital Option
On
Text1
Service3
Language
Input Label
Key Lock
Caption
Set ID
: English
: Off
: Off
: 1
Caption Option
Customize the DTV/CADTV captions that appear on your
screen.
This function in only available when Caption Mode is set
On.
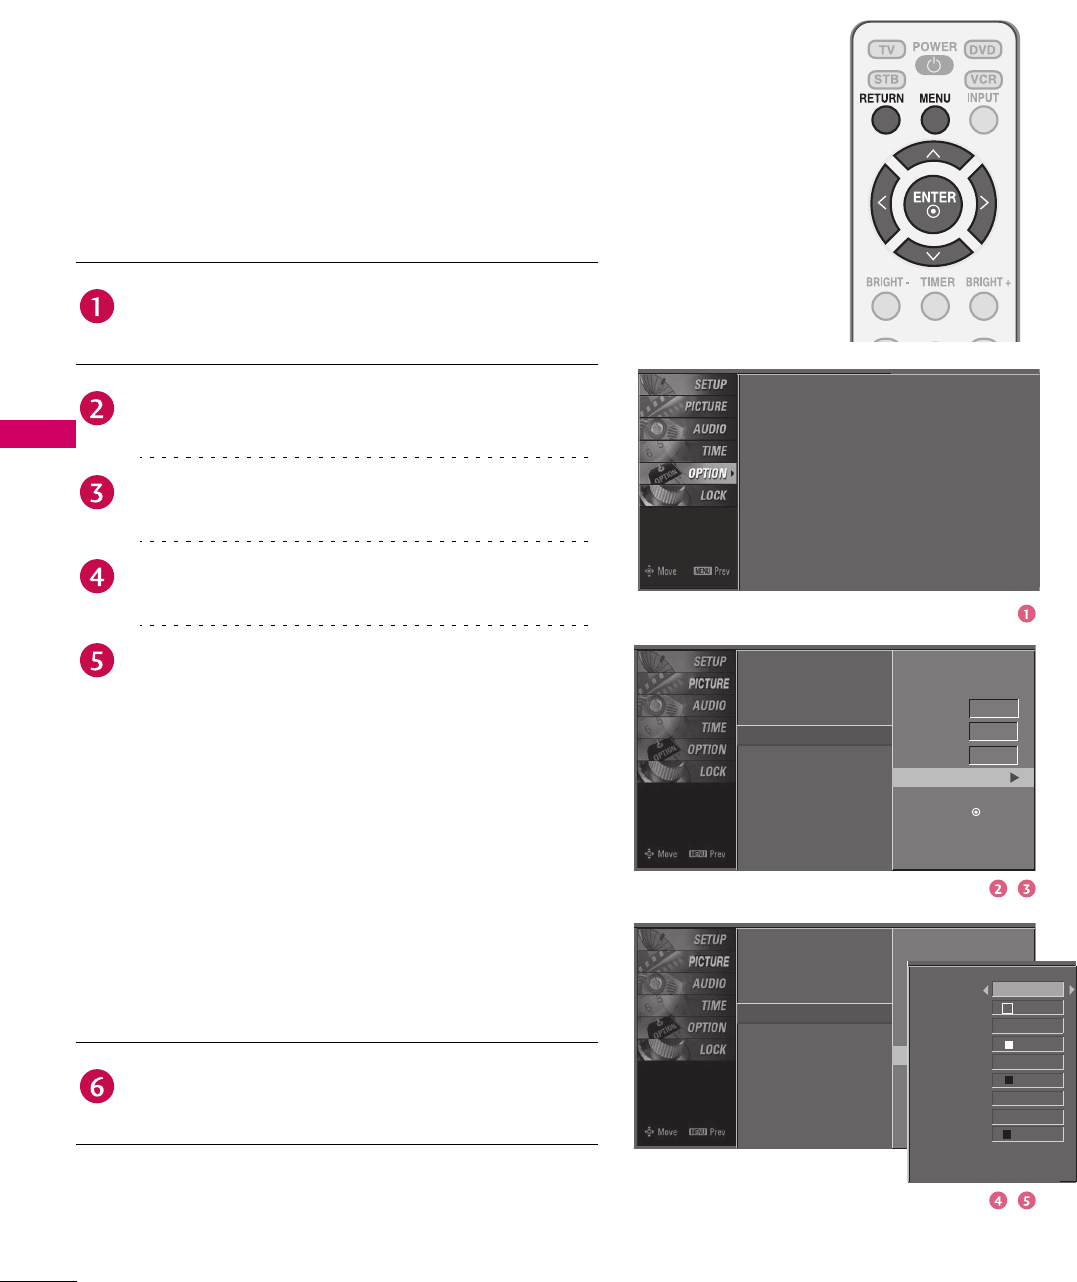
Press the MENU button and then use 1 or 2 button
to select the OPTION menu.
Press the 4 button and then use 1 or 2 button to
select Caption.
Press the 4 button and then use 1 or 2 button to
select Digital Option.
Press the 4 button and then use 3 or 4 button to
select Custom.
Use 1 or 2 button to customize the Style, Font, etc.,
to your preference.
A preview icon is provided at the bottom of the screen,
use it to see the caption language.
Size: Set the word size.
Font: Select a typeface for the text.
Tex t Co l o r : Choose a color for the text.
Text Opacity: Specify the opacity for the text color.
Bg (Background) Color: Select a background color.
Bg (Background) Opacity: Select the opacity for
the background color.
Edge Type: Select an edge type.
Edge Color: Select a color for the edges.
Press RETURN button to return to TV viewing or
press MENU button to return to the previous menu.
Selection (X or ) ) leads
you to the Caption Option
screen.
Style
Size
Font
Text Color
Text Opacity
Bg Color
Bg Opacity
Edge Type
Edge Color
Custom
Standard
Font 0
White
Solid
Black
Solild
None
Black

61
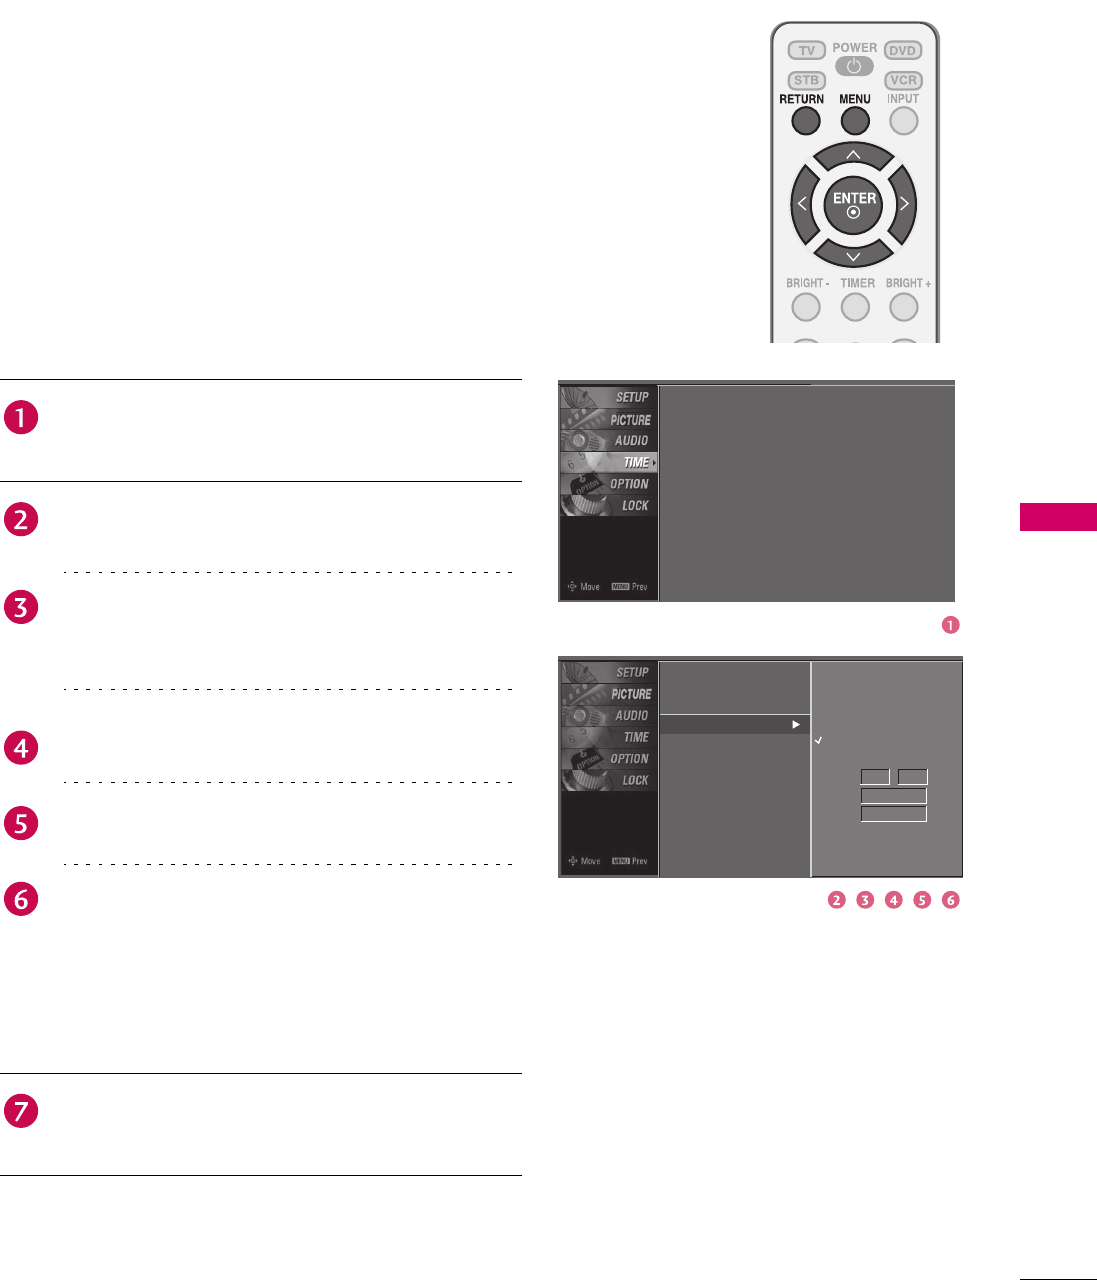
TIME SETTING
TIME SETTING
CLOCK SETTING
Auto Clock Setup
The time is set automatically from a digital channel signal.
The digital channel signal includes information for the
current time provided by the broadcasting station.
Set the clock manually if the current time is set incorrectly
by the auto clock function.
Clock
Off Time
On Time
Sleep Time
Auto Sleep
Year
Date
Time
Time Zone
Daylight
Saving
Auto
Eastern
Auto
Clock
Off Time
On Time
Sleep Time
Auto Sleep
Year
Press the MENU button and then use 1 or 2 button
to select the TIME menu.
Press the 4 button and then use 1 or 2 button to
select Clock.
Press the 4 button and then use 1 or 2 button to
select Auto.
Press the 4 button and then use 1 or 2 button to
select your viewing area time zone:
USA: Eastern, Central, Mountain, Pacific, Alaska or
Hawaii.
Canada: Eastern, Central, Mountain, Pacific, New
F. l a n d or Atlantic.
Press the 4 button and then use 1 or 2 button to
select Auto, Off, On, depending on whether or not
your viewing area observes Daylight Saving time.
Press RETURN button to return to TV viewing or
press MENU button to return to the previous menu.
Clock
Off Time
On Time
Sleep Time
Auto Sleep
: Oct 19, 2006, 03:44 AM
: Off
: Off
: Off
: Off
Date
Time
Time Zone
Daylight
Saving
Auto
Eastern
Auto
62
TIME SETTING
TIME SETTING
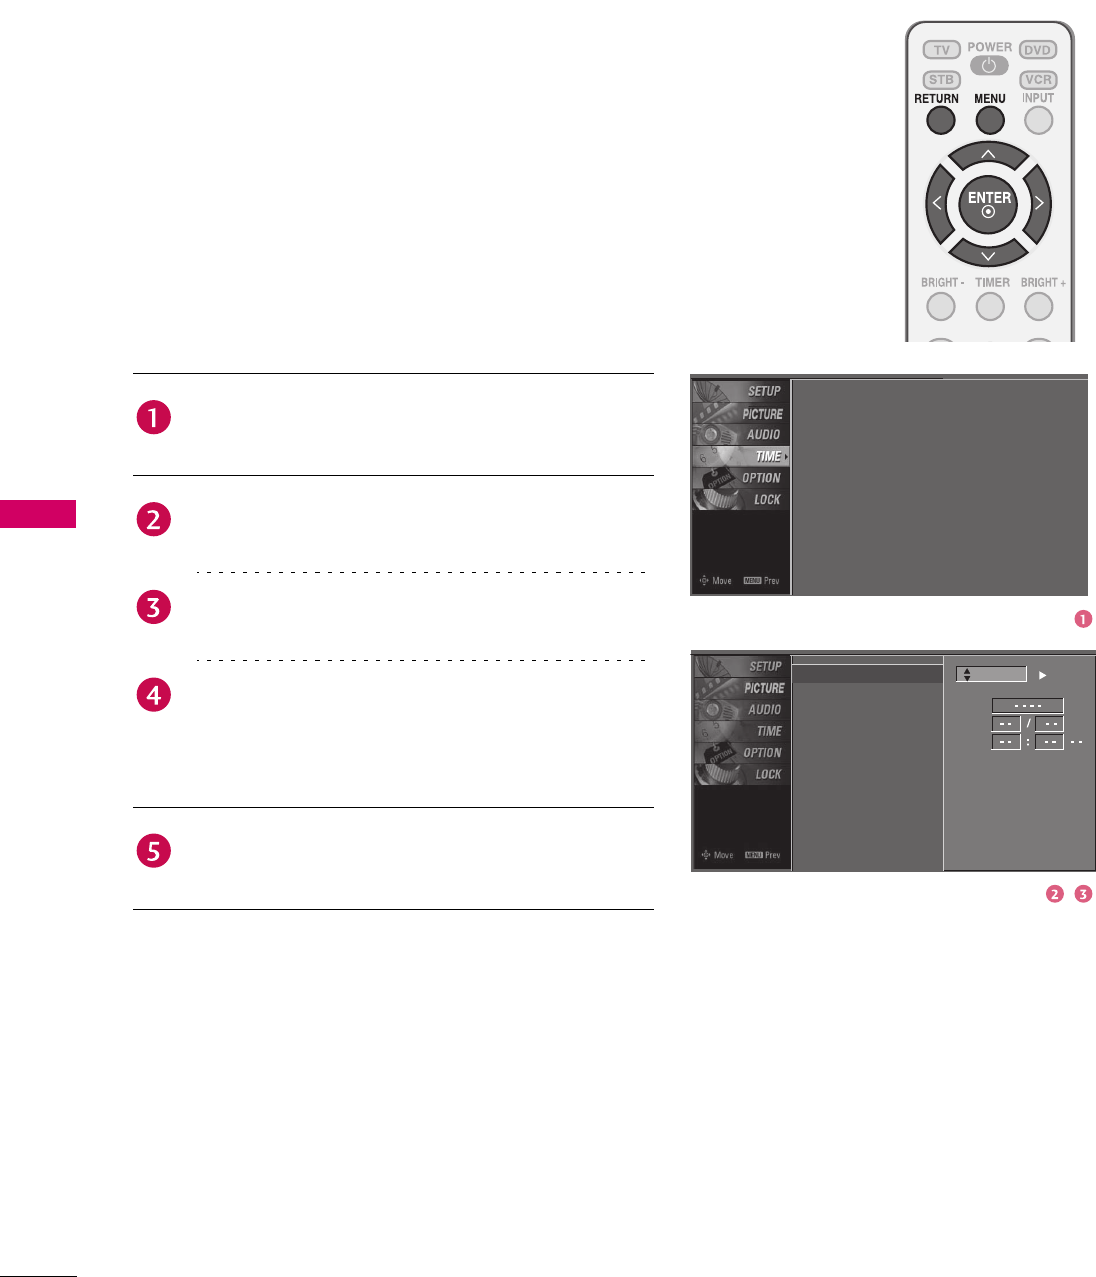
Manual Clock Setup
If the current time setting is wrong, reset the clock manually.
Press the MENU button and then use 1 or 2 button
to select the TIME menu.
Press the 4 button and then use 1 or 2 button to
select Clock.
Press the 4 button and then use 1 or 2 button to
select Manual.
Press the 4 button and then use 3 or 4 button to
select either the year, date, or time option. Once
selected, use 1 or 2 button to set the year, date, and
time options.
Press RETURN button to return to TV viewing or
press MENU button to return to the previous menu.
Clock
Off Time
On Time
Sleep Time
Auto Sleep
Year
Clock
Off Time
On Time
Sleep Time
Auto Sleep
: Oct 19, 2006, 03:44 AM
: Off
: Off
: Off
: Off
Date
Time
Manual
63
TIME SETTING
AUTO ON/OFF TIMER SETTING
This function operates only if the current time has been set.
The Off Time function overrides the On Time function if
they are both set to the same time.
The TV must be in standby mode for the On Time to work.
If you do not press any button within 2 hours after the TV
turns on with the On Time function, the TV will
automatically revert to standby mode.
Press the MENU button and then use 1 or 2 button
to select the TIME menu.
Press the 4 button and then use 1 or 2 button to
select Off Time or On Time.
Press the 4 button and then use 1 or 2 button to
select On.
To cancel the On/Off Time function, select Off.
Press the 4 button and then use 1 or 2 button to
select the hour.
Press the 4 button and then use 1 or 2 button to
select the minutes.
Only On Time
Press the 4 button and then use 1 or 2 button to
select the channel at turn-on.
Press the 4 button and then use 1 or 2 button to
the sound level at turn-on.
Press RETURN button to return to TV viewing or
press MENU button to return to the previous menu.
Clock
Off Time
On Time
Sleep Time
Auto Sleep Time
Clock
Off Time
On Time
Sleep Time
Auto Sleep
: Oct 19, 2006, 03:44 AM
: Off
: Off
: Off
: Off
Ch.
Vol.
Off
On
630:AM
TV 2-0
17
64
TIME SETTING
TIME SETTING
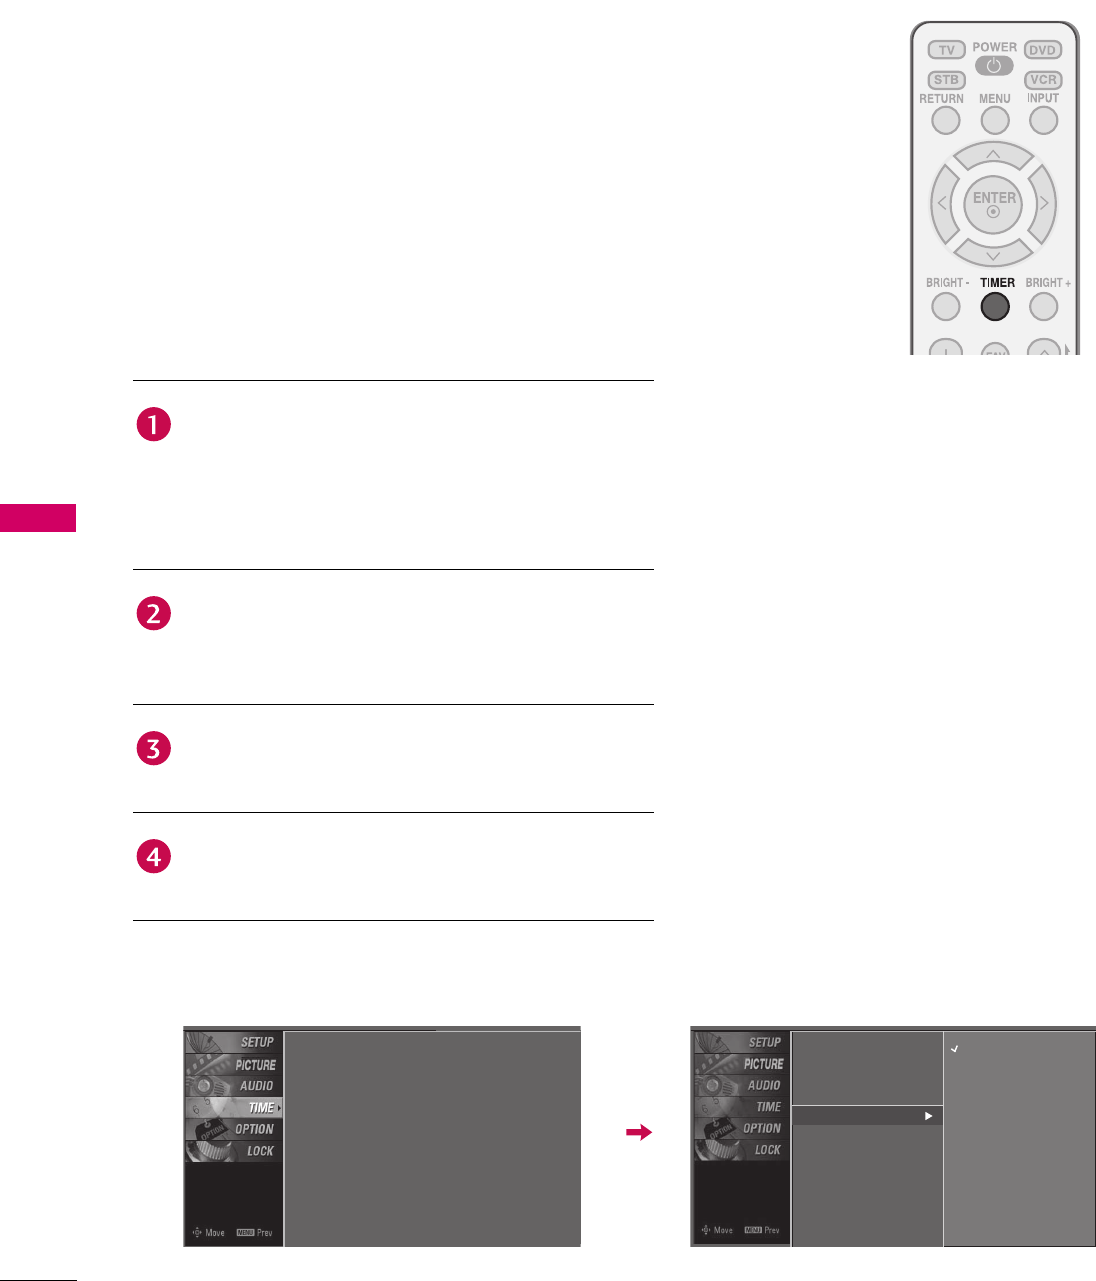
SLEEP TIMER SETTING
The Sleep Time turns the TV off at the preset time.
Note that this setting is cleared when the TV is turned off.
You can also set up the Sleep Time in the TIME menu.
Press the TIMER button repeatedly to select the
number of minutes. First the Off option appears on
the screen, followed by the following sleep time
options: 10, 20, 30, 60, 90, 120, 180, and 240
minutes.
When the number of minutes you want is displayed on
the screen, press the ENTER button. The timer begins
to count down from the number of minutes selected.
To check the remaining minutes before the TV turns
off, press the TIMER button once.
To cancel the Sleep Time, press the TIMER button
repeatedly to select Off.
Clock
Off Time
On Time
Sleep Time
Auto Sleep
: Oct 19, 2006, 03:44 AM
: Off
: Off
: Off
: Off
Clock
Off Time
On Time
Sleep Time
Auto Sleep
Off
10 min
20 min
30 min
60 min
90 min
120 min
180 min
240 min

65
TIME SETTING
AUTO SHUT-OFF SETTING
TV will be automatically turned off, in case of no signal for
10 m i n u t e s .
Press the MENU button and then use 1 or 2 button
to select the TIME menu.
Press the 4 button and then use 1 or 2 button to
select Auto Sleep.
Press the 4 button and then use 1 or 2 button to
select On or Off.
Press RETURN button to return to TV viewing or
press MENU button to return to the previous menu.
Clock
Off Time
On Time
Sleep Time
Auto Sleep
Clock
Off Time
On Time
Sleep Time
Auto Sleep
: Oct 19, 2006, 03:44 AM
: Off
: Off
: Off
: Off
Off
On
TV will be automatically turned
off, in case of No Signal for 10
minutes.

66
PARENTAL CONTROL / RATINGS
PARENTAL CONTROL / RATINGS
Parental Control can be used to block specific channels, ratings and other viewing sources.
The Parental Control Function (V-Chip) is used to block program viewing based on the ratings sent by the
broadcasting station. The default setting is to allow all programs to be viewed.
Viewing can be blocked by choosing the type of the program and the categories. It is also possible to block all
program viewing for a time period. To use this function, the following must be done:
1. Set ratings and categories to be blocked.
2. Specify a password.
3. Enable the lock.
V-Chip rating and categories
Rating guidelines are provided by broadcasting stations. Most television programs and television movies can be
blocked by TV Rating and/or Individual Categories. Movies that have been shown at the theaters or direct-to-video
movies use the Movie Rating System (MPAA) only.
Ratings for Television programs including made-for-TV movies:
SET PASSWORD & LOCK SYSTEM
Setting up Your Password
Set up blocking schemes to block specific channels, ratings,
and external viewing sources.
A password is required to gain access to this menu.
TV-G (General audience)
TV-PG (Parental guidance suggested)
TV-14 (Parents strongly cautioned)
TV-MA (Mature audience only)
TV-Y (All children)
TV-Y7 (Children 7 years older)
Press the MENU button and then use 1 or 2 button to
select the LOCK menu. Then, press the 4 button.
Enter the password as requested.
The TV is set up with the initial password
“0-0-0-0”.
Lock System : Off
Set Password
Block Channel
Movie Rating
TV Rating-Children
Lock System : Off
Set Password
Block Channel
TV Rating-English
TV Rating-French
TV Rating-General
Downloadable Rating
Input Block
Downloadable Rating
Input Block
For USA For Canada