Motorola Mobility T6EY1 GSM Transceiver with WLAN and Bluetooth User Manual Exhibit 8A Users Manual
Motorola Mobility LLC GSM Transceiver with WLAN and Bluetooth Exhibit 8A Users Manual
Contents
Exhibit 8A Users Manual

APPLICANT: MOTOROLA, INC. FCC ID: IHDT6EY1
INSTRUCTION MANUAL
A preliminary draft copy of the Users Manual follows in four parts (Exhibit 8A through Exhibit 8D):
EXHIBIT 8A

DoCoMo W-CDMA and GSM/GPRS Systems
Thank you for purchasing FOMA M1000 handset.
Both before and during use of your FOMA M1000 handset, be sure to thoroughly read this
manual and those supplied together with the individual devices such as the battery pack to
ensure correct use of your FOMA M1000 handset. For more information, you may also contact
us at the numbers shown in "Contact Information" on the back cover.
Treated with care, your FOMA M1000 handset will be your able partner.
Before Using Your FOMA Handset
• Because your FOMA handset uses radio waves, it may not function in locations where it is
difficult for radio waves to penetrate, such as tunnels, underground passages and some
buildings, in areas where radio wave signals are weak, or when outside the service area. Even
when you are high up in a tall building or condominium and nothing blocks your view outside,
your FOMA handset may not be able to receive or transmit signals. Also, communication may
be interrupted even when the signal meter on your FOMA handset indicates there is a strong
signal and you are not moving (traveling).
• Use your FOMA handset in a way that does not disturb others in public spaces, crowded
locations or quiet places.
• Because your FOMA handset uses radio waves to communicate, there is a possibility that third
parties may attempt to listen in on your calls. The W-CDMA and GSM/GPRS systems
automatically support a confidential communication function for all calls so even if someone
should somehow be able to tap a call, the signals are modified so that the eavesdropping party
will hear only noise.
• Your FOMA handset encodes voice communication as digital data. When you are operating
your FOMA handset while moving to a location subject to weaker radio wave signals, the
transmitted digital data may not be correctly decoded and as a result the decoded voice may
differ somewhat from the actual voice.
• Maintain a separate record of the data you register in your FOMA handset. If the data should
be erased, DoCoMo assumes no responsibility for the loss of any data.
Using this Operation Manual
Information of interest may be found in the following ways:
• Refer to the Contents
Select to look at intended applications. 3P2
• Refer to the Index
Select to look at terms or application names of the Index. 3P000
• Refer to title pages and indexes
Select to look at application names or titles.
• Refer to the title page
Select to look at titles.
• Refer to features
Select to look at FOMA handset features and operations. 3P4, P6
* Be sure to read "Safety Instructions" on P8 before using your FOMA handset.
• In the FOMA M1000 Operation Manual text, FOMA M1000 is referred to as FOMA handset.
• Reprinting all or part of this manual without approval by DoCoMo is prohibited.
• Information contained in this manual is subject to change without prior notice.
00M1000EN.book 0 ページ 2004年11月24日 水曜日 午前7時56分
1
Quick Reference Manual 3 P000
How to Use this Manual
In this manual, operations of your FOMA handset are explained in the structure as shown below:
Description of Instructions
In this manual, instructions are given as touch operations using a stylus. Touch operations are
described in the manner as follows:
<Example>: Tap $$ y $$ in the Application Selector bar, and tap the data in the Image
screen
• If operation of any of the FOMA handset keys is required, the operation is described using key symbols.
3P32
<Example>: Press 9 to select an image
• If more than one operation is available, the simpler one is described.
• For how to select an application from the menu, see "Selecting the Menu". 3P43
Overseas Use
For how to use your FOMA handset outside Japan, see "Overseas Use". 3P505
NOTE
• Illustrations of screens contained in this manual are for the purpose of simplifying description and may differ
from the actual views.
Title/application
name
Shows the title or
application name.
Index
Shows the chapter
title/title or application
name.
Default settings
Function description
Supplementary
description of
function
Operation
description
Provides the operation
numbers and
instructions.
Screen
Shows the screen
displayed in the
process of or after an
operation.
Supplementary
description of
operation
NOTE
Gives necessary
information, notes, and
supplementary
explanation.
00M1000EN.book 1 ページ 2004年11月24日 水曜日 午前7時56分
Contents
2
M1000 Format1 (PANTONE362U)
Contents/Safety Instructions
Before Using Your FOMA Handset . . . . . . . . . . . . . . . . . . . . . . . . . . . . Back of the cover
Using this Operation Manual . . . . . . . . . . . . . . . . . . . . . . . . . . . . . . . . . Back of the cover
How to Use this Manual. . . . . . . . . . . . . . . . . . . . . . . . . . . . . . . . . . . . . . . . . . . . . . . . . .1
FOMA M1000 Features . . . . . . . . . . . . . . . . . . . . . . . . . . . . . . . . . . . . . . . . . . . . . . . . . .5
Making Full Use of FOMA M1000 . . . . . . . . . . . . . . . . . . . . . . . . . . . . . . . . . . . . . . . . . .7
Safety Instructions (ALWAYS FOLLOW THESE DIRECTIONS) . . . . . . . . . . . . . . . . . . .9
Handling and Care. . . . . . . . . . . . . . . . . . . . . . . . . . . . . . . . . . . . . . . . . . . . . . . . . . . . .23
Intellectual Property Issues . . . . . . . . . . . . . . . . . . . . . . . . . . . . . . . . . . . . . . . . . . . . . .28
Checking Purchased Product . . . . . . . . . . . . . . . . . . . . . . . . . . . . . . . . . . . . . . . . . . . .30
•Names of Parts and Functions
•The Stylus
•Operating the Touch Screen
•Viewing the Display
•Selecting the Menu
•Entering Text •Help Function
•Using the UIM
•Inserting/Removing the Battery Pack
•Charging the Battery Pack
•Battery Status •Power ON/OFF
•Initialization •Language Selection
•Date and time setup •Caller ID
•Phone Number Display
•Making a Voice Call •Redial •186/184
•WORLD CALL •In-Car Handsfree
•Answering a Voice Call
•Answered Call History
•Earpiece Volume •Drive Mode
•Missed Calls
etc.
•Making a Video Call
•Answering a Video Call
•Setting an Outgoing Image
•Setting Images Display during a Video Call
etc.
•Contact registration •Contact search
•Contact modification •Contact deletion
•Setting Owner Information
•Copying/Moving Contact Information
•Sending Contact Information
etc.
•Tone Settings •Adjust Volume
•Vibrator •Keypad Tones
•Audible Timer •Manner Mode
•Home Screen
•Adjusting the Screen Brightness
•Clock Settings
etc.
•Security Codes Used for FOMA handset
•Handset Security Code •Setting PIN
•About Lock Functions •All Lock
•Self Mode •Reject Call •Fixed Dialling
•Call Setting w/o ID
•Ringless Timer Setting •Reject Unknown
•About Other Safety Settings
etc.
•Before Using Camera
•Taking Still Pictures
Before Using the Handset . . . 31
Making/Answering Calls. . . . 65
Making/Answering Video
Calls . . . . . . . . . . . . . . . . . 83
Contact List . . . . . . . . . . . . 95
Tone/Screen/Light
Settings . . . . . . . . . . . . . . 119
Safety Settings . . . . . . . . 139
Camera . . . . . . . . . . . . . . 155
00M1000EN.book 2 ページ 2004年11月24日 水曜日 午前7時56分

3
M1000 Format1 (PANTONE362U)
Contents/Safety Instructions
•Recording Video Clips
•Changing Shot Settings
•Changing the Camera Settings
•About the Internet •Setting up the Internet
•Opening Web Pages
•Viewing Web Pages Information
•Finding Text in Web Pages
•Opening Web Pages from History
•Saving Web Pages Information
•Downloading Data from Web Pages
•Using Phone To/Mail To/Web To Functions
•Using Certificates
etc.
•Email
•About Short Message Services (SMS)
•Viewing Messaging Account List
•Composing and Sending Email
•Attaching Files
•Saving Unfinished Emails for Sending Later
•Replying to Emails •Forwarding Emails
•Managing Sender Email Addresses and
Phone Numbers
•Searching Emails •Setting Messaging
etc.
•Application •Installing an Application
•Launching an Application
•Uninstalling an Application
•Displaying a Stored Image
•Editing an Image
•Playing a Stored Video
•Playing a Stored Music
•Displaying Word, Excel and PDF Files
•Using the TransFlash Memory Card
•Managing Files
•Using the Voice Recorder
•Multiaccess •Alarm time
•Calendar/Schedule
•To do •View duration •Calculator
•Entering Notes
•Earphone/microphone with switch
•Reset settings •Installing an Application
etc.
•Voice Mail Service
•Call Waiting Service
•Call Forwarding Service
•Nuisance Call Blocking Service
•Caller ID Display Request Service
•Dual Network Service
•English Announcement Service
•Service Dailling
•Selecting Action on Receiving Incoming
Calls during Call
•Action on Receiving Incoming Calls during
Call
•Remote Operations
•Added Service (Register USSD)
•About Bluetooth •Before Using Bluetooth
•Using Bluetooth
•Wireless LAN
•Setting up Wireless LAN
•Searching Available Access Points
•VPN •VPN Connection
•Checking Connection Settings
•Data Communication from FOMA Handsets
•Before Using Data Communication
•FOMA PC Setup Software
•Setting up Data Communication
•Executing the Set Connection
Internet. . . . . . . . . . . . . . . 169
Messaging . . . . . . . . . . . . 206
Application . . . . . . . . . . . . 249
Displaying/Editing/Managing
Data . . . . . . . . . . . . . . . . . 255
Other Convenient
Functions . . . . . . . . . . . . 293
Network Services . . . . . . 343
Bluetooth . . . . . . . . . . . . 355
Using Wireless LAN . . . . 367
Movian VPN . . . . . . . . . . 377
Using Data
Communication . . . . . . . 389
00M1000EN.book 3 ページ 2004年11月24日 水曜日 午前7時56分

4
M1000 Format1 (PANTONE362U)
Contents/Safety Instructions
•W-TCP Setting •Setting up APN
•Setting up Dial-up Networking
•AT Commands
etc.
•Character lnput •Direct Input Method
•Save Phrases •Character copy
•Save word
•Using Electronic Dictionary
•Setting the Detail of Character Entry
•Indirect input method
•"WORLD WING" International Roaming
Service
•Services Available Outside Japan
•Before Use
•Making Calls
•Answering Calls
•Switching Networks
•Setting Operations in Roaming
•Menu List
•List of Symbols and Special Characters
•Combination of Functions during
Multiaccess
•Desktop Suite and SyncML
•Troubleshooting
•Warranty and After-sales Service
•Scan Function
etc.
•Index •Quik Manual
Entering Characters . . . . 441
Oversea Use. . . . . . . . . . 481
Appendix . . . . . . . . . . . . . 495
Index/Quick Manual. . . . . 521
00M1000EN.book 4 ページ 2004年11月24日 水曜日 午前7時56分
5
Contents/Safety Instructions
FOMA
M
1000
F
eatures
FOMA (Freedom of Mobile multimedia Access) is the name of a service provided
by DoCoMo based on the W-CDMA system, which is specified as one of the global
standards of the third-generation mobile communication system (IMT-2000).
1Dual systems
FOMA M1000 supports dual systems (W-CDMA, GSM/GPRS), which allows use of your
FOMA handset for phone and data communications in foreign countries that have adopted
the GSM/GPRS system, in addition to use within the FOMA network provided by DoCoMo.
3P60
* Using your FOMA handset overseas requires a subscription to "WORLD WING", DoCoMo's
international roaming service.
1UIM
A UIM saves information including your phone number and can store contact data, etc. If you
have more than one FOMA handset, you can attach the UIM to different handset to use for
different purposes such as business and private. 3P49
1Touch screen
Simply touching the display (touch screen) with the Stylus allows easy and quick operation of
your FOMA handset. You can also write and draw freehand in the same manner as drawing
on paper with a pencil. 3P37
1Internet connection
The integrated web browser "Opera" allows web pages of large view sizes to be displayed on
your FOMA handset without any change to the layout. SSR (Small Screen Rendering) allows
you to view web pages without the need for horizontal scrolling. 3P179
1Virus scanning function
The virus scanning function prevents your
FOMA handset from being infected by
malicious files (computer viruses, etc.)
through the use of the Internet or
incoming emails. 3P540
1Wireless LAN function
The Internet or email can be used via
wireless LAN in your office, etc. 3P389
1Twin stereo speakers
Music in MP3 files, etc. can be played in
powerful sounds with the stereo speakers.
1Large screen display
The big 2.9-inch TFT LCD provides vivid
views of web pages browsed or video
clips shot with your handset.
1Bluetooth function
Wireless connection with
Bluetooth-enabled devices allows data
communication and handsfree telephone
communication. Contact data or files can
be exchanged between Bluetooth-enabled
devices. 3P377
00M1000EN.book 5 ページ 2004年11月24日 水曜日 午前7時56分

6
Contents/Safety Instructions
1Multiaccess function
With the Multiaccess function, which
makes voice calls and packet
communication available at the same
time, you can communicate by voice calls
while being connected to the Internet or
send emails during voice call
conversations. 3P316
1TransFlash memory card
TransFlash memory card, which is the
world's smallest detachable memory
card, can be used to store data such as
images shot with your FOMA handset and
contact information, or to copy data saved
from other devices such as PCs into the
memory card to your FOMA handset.
3P297
1Application addition
function
Installation of applications for Symbian
OS or Java applications allows more
convenient use of your FOMA handset.
3P268, P362
1Document viewer
function
PC document files such as Word, Excel,
PowerPoint and PDF files can be taken
from attachments to emails or memory
cards into your FOMA handset to view.
3P289
1Data synchronization
function
Data such as contact information stored
in your FOMA handset can be
synchronized with data in a PC, etc.
connected with the provided USB cable
for making a backup by using the Desktop
Suite or SyncML. 3P526
1VPN (Virtual Private
Network) function
Safe and secured connection from your
FOMA handset to intranet (company
network, etc.) is available by using a
virtual security network (VPN) via the
Internet. 3P399
1Free draw input function
The integrated Decuma Japanese, a free
draw input application that supports
Japanese, allows characters written in the
input area with the stylus to be
recognized for inputting. Using the
function in combination with text input
prediction allows you to smoothly input
sentences containing mixtures of kanji,
hiragana, and alphanumeric characters.
3P478
1Voicemail Service
(charged)
2A separate subscription required. 3P366
1Call Waiting Service
(charged)
2A separate subscription required. 3P368
1Call Forwarding Service
(non-charged)
2A separate subscription required. 3P370
1Dual Network Service
(charged)
2A separate subscription required. 3P373
1Short Message Service
(SMS) (non-charged)
2No separate subscription required.
3P261
tWhole Range of Network Services
00M1000EN.book 6 ページ 2004年11月24日 水曜日 午前7時56分
7
Contents/Safety Instructions
Making Full Use of FOMA M1000
FOMA M1000 communication functions
FOMA M1000 access functions
Overseas use
Bringing your FOMA handset with you when you travel to a country
where W-CDMA or GSM/GPRS system is adopted allows you to use the
phone number you use in Japan to make/answer calls and exchange
data. If the receiver of your call uses a handset that supports video calls,
international videophone communication is available.
3
P505
Connection via wireless LAN
Wireless connection to the Internet or
intranet (company network, etc.) is available,
which allows you to use the Internet or
email. 3P389
Connection via Bluetooth
Wireless connection to Bluetooth-enabled PCs, etc. is
available for data communication. Connecting to Bluetooth-
enabled handsfree devices or headsets allows you to talk
without holding your FOMA handset in your hand.
3
P377
Videophone communication while looking at the other party's face
You can talk with the party at the other end of the line while looking at each other's
faces. You can switch between two cameras according to the purpose to send your
own image by using the front camera or the image such as a landscape you want
to show to the other party by using the rear camera. You can choose to disable the
cameras if you do not want to send images to the other party.
3
P85
00M1000EN.book 7 ページ 2004年11月24日 水曜日 午前7時56分
8
Contents/Safety Instructions
Voicenote
The voice memo function can be used to record conversations in meetings,
etc. If a situation suddenly comes up where you want to record a conversation,
simply pressing one key allows you to start recording.
3
P312
Still image/video/music player function
Various files downloaded into your FOMA handset or TransFlash memory cards
from the Internet, etc. or still images and video clips shot with the camera can be
viewed/played. Detailed information is available while files are being viewed/played
with the respective players. Management and editing of files such as renaming and
deletion of files is possible.
3
P274, P280, P285
Key arrangement convenient for playing games
The navigation key and two other keys
can be used to play games as if with a
dedicated portable game console.
3P33
Videomail
Video clips shot with the camera or downloaded
from the Internet can be attached to outgoing
emails. -3P240
Versatile information management with the PIM function
The versatile PIM function (contact list, schedule, To do) is provided,
which allows the management of contacts, personal scheduling and To
do list just with a FOMA handset. 3P97, P322, P336
Digital still/video camera
You can switch between two cameras on the front
and back sides according to the situation to take still
and video pictures. The rear camera is capable of
shooting high-quality still images of recording pixel
count of 1.23 million (effective pixel count: 1.31
million) and digital zooming of up to 4x.
3
P163
Data viewing with document viewer function
You can view PC document files such as Word,
Excel, PowerPoint and PDF files attached to
incoming emails with your FOMA handset while
you are not home. 3P289
00M1000EN.book 8 ページ 2004年11月24日 水曜日 午前7時56分
9
Contents/Safety Instructions
Safety Instructions (ALWAYS FOLLOW THESE DIRECTIONS)
2Before using your FOMA handset, please read the following Safety Instructions, and be sure to
follow them in order to ensure safe usage.
2These precautions are intended to protect you and others around you. Read and follow them
carefully to avoid injury, damage to the product or damage to property.
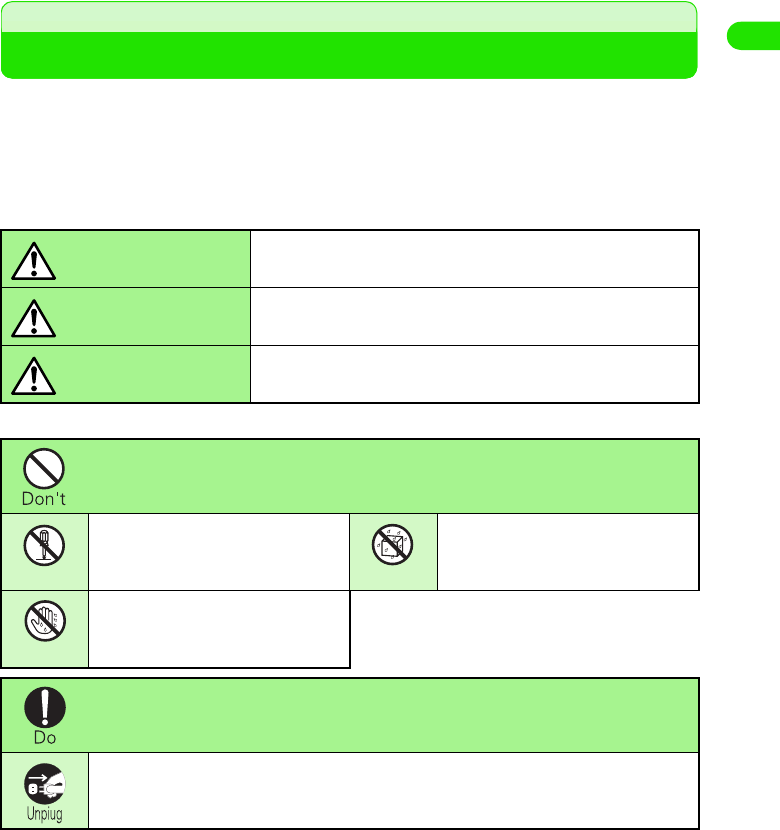
1The following signs differentiate between the levels of danger that can occur if the
product is not used within the specified guidelines:
1The following symbols indicate special warnings regarding product usage.
1Precautions contain the description below;
Handling Instructions for the FOMA handset, Battery Pack, AC Adapter, Desktop Holder and
Bluetooth Headset . . . . . . . . . . . . . . . . . . . . . . . . . . . . . . . . . . . . . . . . . . . . . . . . . . . . . . . . . . . . .10
FOMA Handset. . . . . . . . . . . . . . . . . . . . . . . . . . . . . . . . . . . . . . . . . . . . . . . . . . . . . . . . . . . . . . . .11
Battery Pack . . . . . . . . . . . . . . . . . . . . . . . . . . . . . . . . . . . . . . . . . . . . . . . . . . . . . . . . . . . . . . . . . .13
Stylus . . . . . . . . . . . . . . . . . . . . . . . . . . . . . . . . . . . . . . . . . . . . . . . . . . . . . . . . . . . . . . . . . . . . . . .15
AC Adapter and Desktop Holder . . . . . . . . . . . . . . . . . . . . . . . . . . . . . . . . . . . . . . . . . . . . . . . . . .16
UIM . . . . . . . . . . . . . . . . . . . . . . . . . . . . . . . . . . . . . . . . . . . . . . . . . . . . . . . . . . . . . . . . . . . . . . . . .17
TransFlash Memory Cards and TransFlash Memory Card Adapters . . . . . . . . . . . . . . . . . . . . . . .18
Bluetooth Headset . . . . . . . . . . . . . . . . . . . . . . . . . . . . . . . . . . . . . . . . . . . . . . . . . . . . . . . . . . . . .19
Handset near Electronic Medical Equipment . . . . . . . . . . . . . . . . . . . . . . . . . . . . . . . . . . . . . . . . .22
This sign denotes that there can be an immediate danger
of death or serious injury as a result of improper use.
This sign denotes that death or serious injury may result
from improper use.
This sign denotes that bodily injury or damage to
property may result from improper use.
Indicates improper usage
Indicates not to disassemle the
device.
Indicates not to use the device
near water, and not get it wet.
Indicates not to handle the
device with wet hands.
Indicates an instruction that must be obeyed at all times.
Indicates that equipment should be unplugged from electrical sockets.
DANGER
WARNING
CAUTION
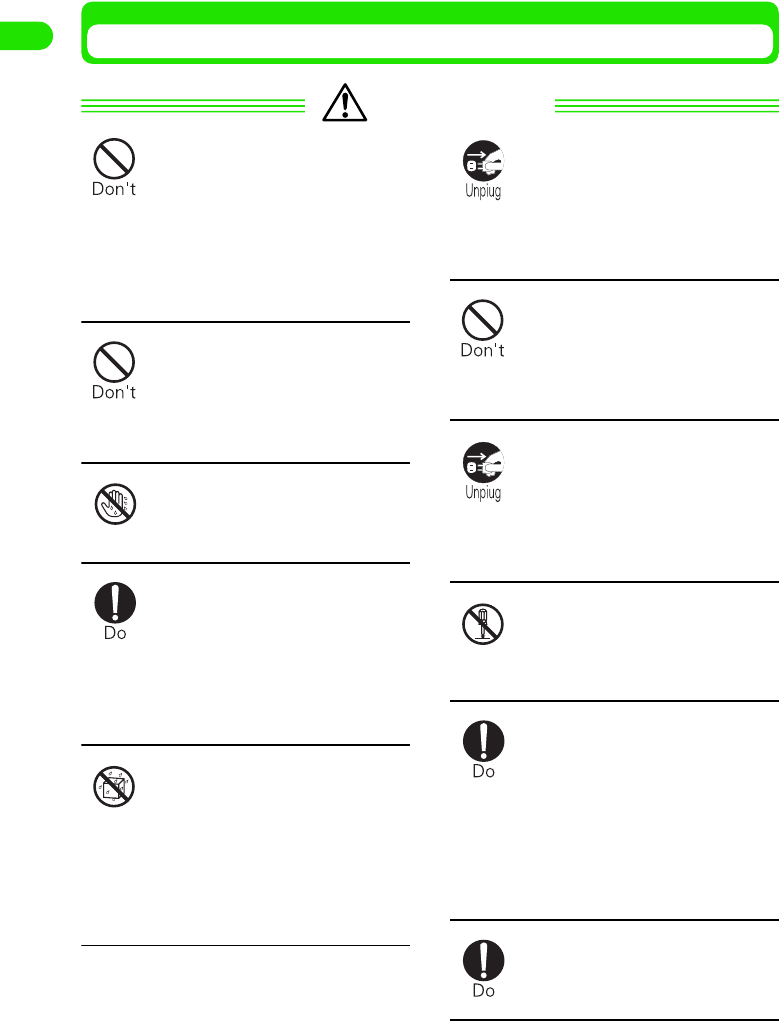
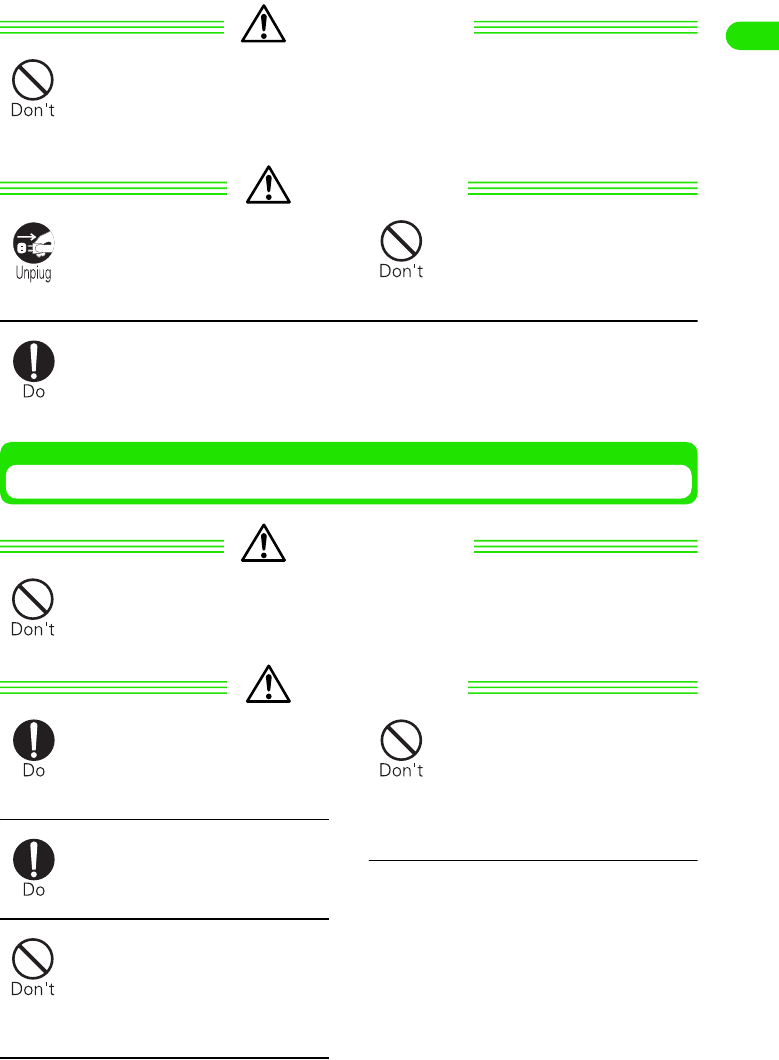
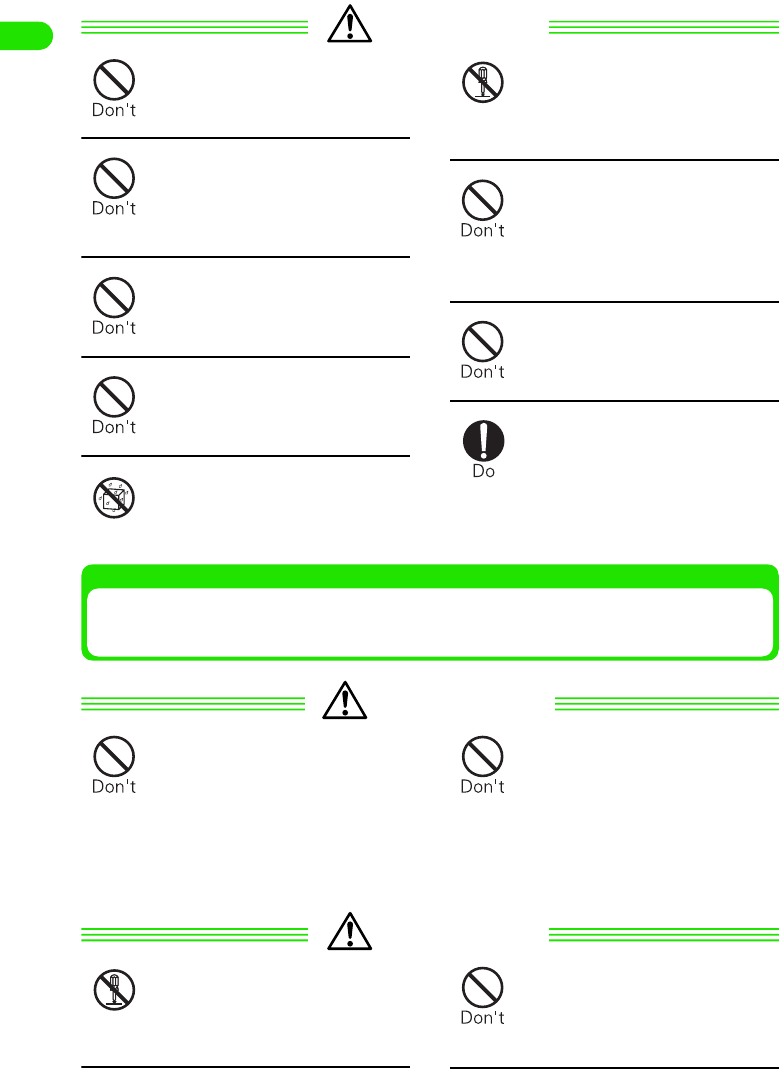
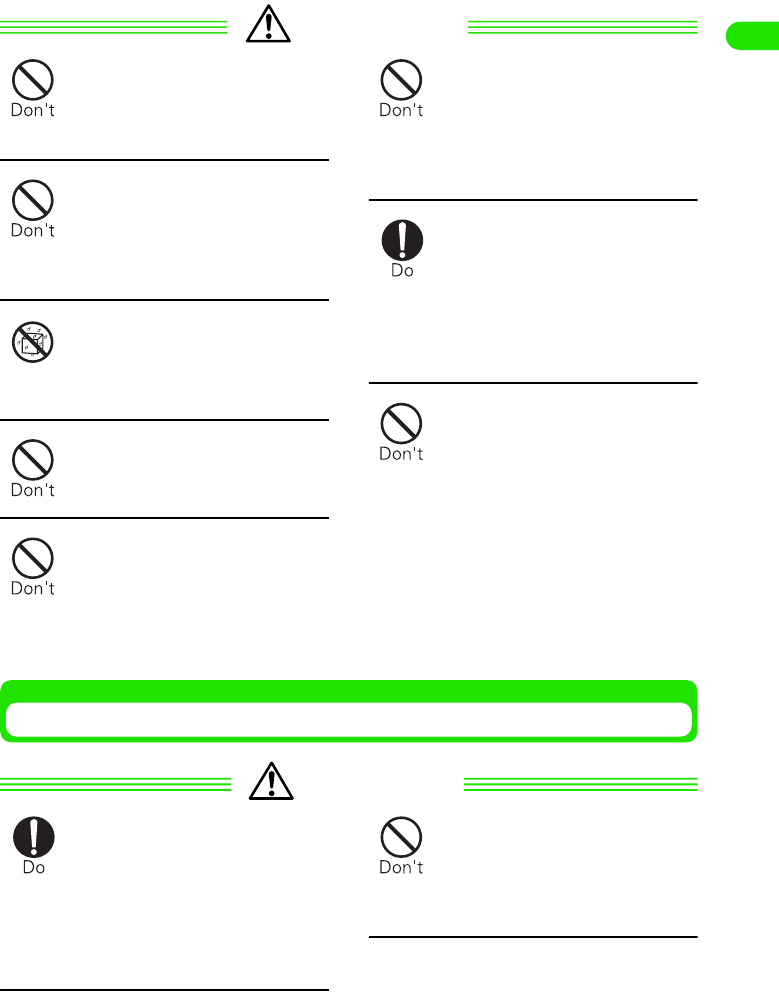
No disassembly
No liquids
No wet hands
00M1000EN.book 9 ページ 2004年11月24日 水曜日 午前7時56分
10
Contents/Safety Instructions
Handling Instructions for the FOMA handset, Battery Pack,
AC Adapter, Desktop Holder and Bluetooth Headset
DANGER
Use equipment specified by DoCoMo Group companies with your FOMA
handset.
2Use of equipment not specified by DoCoMo Group can cause the FOMA handset and
Battery pack to leak, heat, burst or catch fire.
AC adopter MXX Desktop holder MXX Battery pack MXX
Bluetooth headset MXX AC adapter for Bluetooth headset MXX
* Contact our sales office for information on other compatible products.
WARNING
Do not use the equipment in an
environment liable to cause it
to explode or catch fire, such
as a gas station.
2Explosions or fire may result if
the equipment is used in areas
where dust or flammable gases
such as propane or gasoline
vapors are generated.
Do not throw device or subject
to physical shock.
2May cause Battery pack to leak,
heat, burst or ignite. May cause
equipment to malfunction or
catch fire.
Do not put the Battery pack,
FOMA handset, Bluetooth
headset, AC adapter or
Desktop holder in microwave
ovens or other heating
appliances or high-pressure
containers.
2May cause Battery pack to leak,
heat, burst or ignite. May cause
FOMA handset, Bluetooth
headset or adapter to heat,
smoke, ignite, or for circuits to be
damaged.
CAUTION
Store equipment out of reach
of small children.
2Can be accidentally swallowed or
cause injuries.
Children using the device
should be instructed in proper
operation by an adult. Do not
allow them to use device
without adult supervision.
2May cause injuries.
Do not use or leave device in
hot areas, or in areas exposed
to direct sunlight, such as
inside a vehicle.
2May cause the Battery pack to
leak, heat, burst or ignite, or may
cause equipment to deform or
malfunction. Parts of the case
may grow hot, causing burns or
injuries.
00M1000EN.book 10 ページ 2004年11月24日 水曜日 午前7時56分
11
Contents/Safety Instructions
CAUTION
Do not store in extremely
humid, dusty or hot areas.
2Malfunction may result.
Do not leave device on
unstable or sloping surfaces.
2Malfunction or injuries may
result.
FOMA Handset
WARNING
Turn the FOMA handset off in areas where use is prohibited, such as in
airplanes and hospitals.
2Use in these areas can cause medical and other electrical or electronic equipment to
malfunction or fail. If automatic power-on function has been enabled, cancel this
setting before turning the power off.
When using the handset in a medical facility, be sure to observe the regulations of the
facility.
Prohibited conduct, such as using the handset in an airplane, may lead to punishment
of user according to law.
Turn the FOMA handset off near high-precision electronic control equipment
or electronic equipment using low-power signals.
2Using the handset near this type of equipment can cause the equipment to fail or
malfunction.
* Examples of electronic equipment to avoid:
Hearing aids, implanted pacemakers or defibrillators, other electrical medical
equipment, fire alarms, automatic doors, other automatic control equipment.
Users wearing implanted pacemakers or defibrillators or other electrical medical
equipment should check with the manufacturer or sales outlet about the effect of
radio frequencies on the equipment.
When using near medical
electrical equipment, do not
keep the handset in chest
pocket or inside pocket.
2Using your FOMA handset near
medical electronic equipment
could cause equipment failure.
Do not use or leave Battery
pack near flames, stoves or
other hot areas.
2Heating, ignition or malfunction
may result.
Do not disassemble or remodel
the handset.
2Fire, injury, electric shock or
malfunction may result.
When you talking with the
speakerphone function
activated, always keep FOMA
handset away from your ear.
2May cause hearing loss.
No disassembly
00M1000EN.book 11 ページ 2004年11月24日 水曜日 午前7時56分
12
Contents/Safety Instructions
WARNING
If you have a weak heart, be
careful when setting the
incoming call vibration or ring
volume setting.
2Could affect heart function.
Do not use the handset while
operating a vehicle.
2Driving while using the handset
is dangerous and can cause an
accident. First park the car in a
safe place before using your
FOMA handset, or use it in Drive
Mode.
Due to a revision in the Road
Traffic Law, from November 1,
2004 you can now be penalized
for the use of mobile phones
while driving.
Do not place the FOMA
handset over an air bag safety
device, or in an air bag
deployment area.
2If the airbag inflates, your FOMA
handset can strike you or other
people, causing bodily harm and
other damage.
CAUTION
If lightning strikes while using
the handset outside, turn the
power off immediately, and
move to a safe location.
2May be subject to lightning strike
and could cause electric shock.
Do not swing your FOMA
handset around by its strap.
2Your FOMA handset can strike
you or other people, causing
bodily harm and other damage.
Handsets can give some users skin problems such as itching, allergic
reactions or rashes. If you develop skin problems, stop using the handset
immediately, and see a doctor.
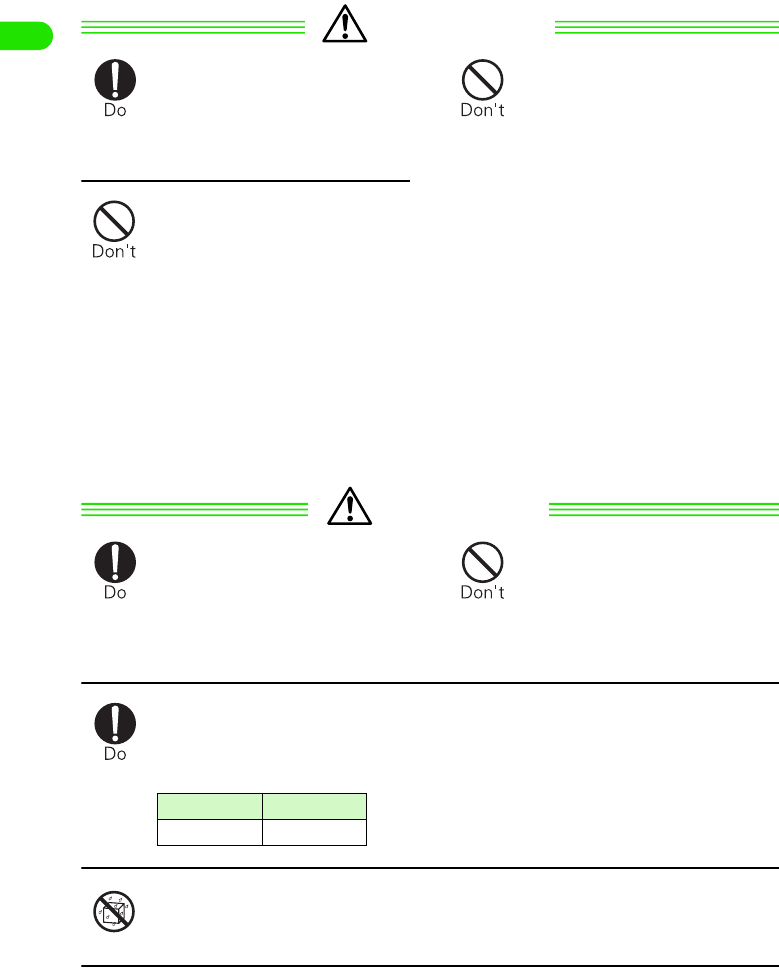
2The following parts contain metal materials.
Do not let FOMA handset get wet.
2Contact with water, pet urine or other liquids can cause heating, injuries or electric
shock. Take care not to use the handset in areas where it could get wet.
Place of use Material
No liquids
00M1000EN.book 12 ページ 2004年11月24日 水曜日 午前7時56分
13
Contents/Safety Instructions
CAUTION
Do not put liquids such as
water, other liquids, pieces of
metal or flammable materials
inside FOMA handset, UIM
holder, or TransFlash memory
card holder.
2May cause fire, equipment failure
or electric shock.
In rare cases, using the
handset in some vehicle
models can cause the vehicle's
electronic equipment to
malfunction or fail.
2In this case, do not use the
FOMA handset because it may
hamper safe driving.
Do not place magnetic disks or
cards with magnetic stripes
near the handset or place
inside and fold the handset.
2Data stored on media such as
cash cards, credit cards,
telephone cards and floppy disks
may be erased if the storage
medium is placed near the
handset.
Be careful when inserting/
removing TransFlash memory
card.
2Can cause harm to hand or
fingers.
Be careful of broken glass
when the display or camera
lens is accidentally broken.
2Glass display and camera lens
surfaces include a plastic cover
panel to keep glass from
breaking into pieces. However,
touching sharp edges may cause
injury.
Battery Pack
1Check that the battery type matches the type displayed on the Battery pack label.
DANGER
If Battery pack liquid contacts
eyes, immediately wash the
eyes with clean water and see
a doctor right away. Do not rub
the eyes.
2Battery fluid in the eyes may
cause blindness.
Do not throw Battery pack into
contact with open flames.
2May cause the Battery pack to
leak, heat, burst or ignite.
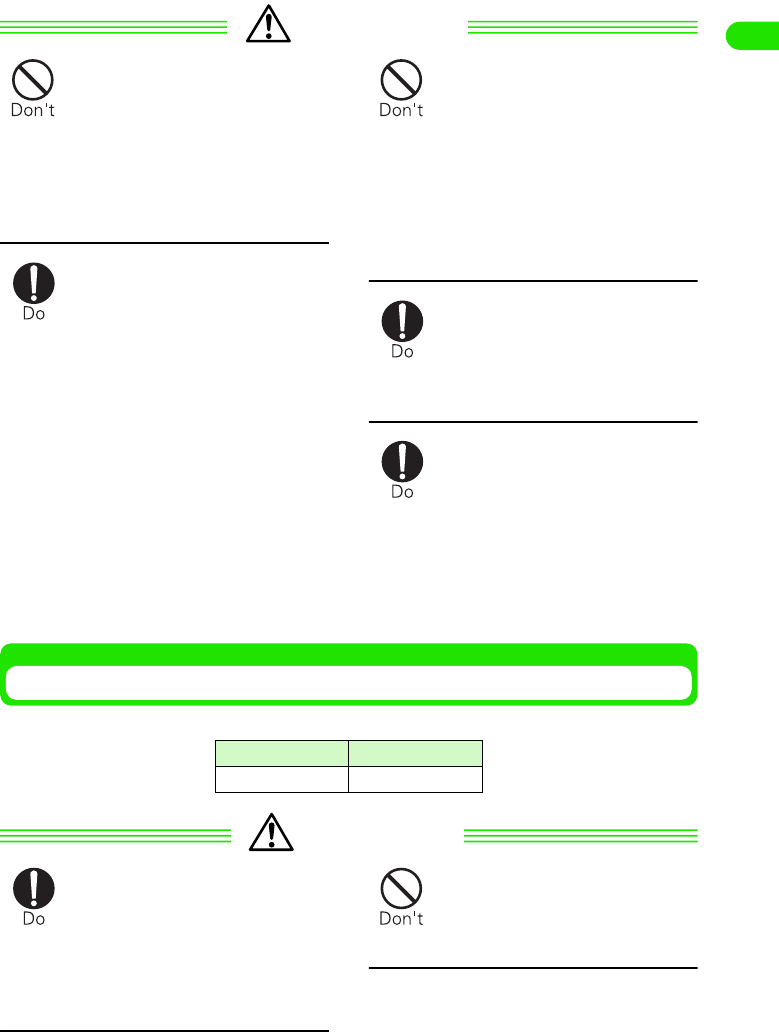
Display Battery type
Lithium ion Lithium ion battery
00M1000EN.book 13 ページ 2004年11月24日 水曜日 午前7時56分
14
Contents/Safety Instructions
DANGER
Do not connect the Battery
pack terminals to wire or other
metal objects. Do not carry or
store Battery pack together
with a necklace or other metal
object.
2May cause Battery pack to leak,
heat, burst or ignite.
Do not pierce Battery pack with
a nail, hit with a hammer or
step on it.
2May cause Battery pack to leak,
heat, burst or ignite.
Do not try to force Battery pack
onto FOMA handset or Battery
pack charger if you are having
trouble connecting it. Always
connect it after confirming that
it is correctly oriented.
2May cause Battery pack to leak,
heat, burst or ignite.
Do not use or leave Battery
pack near flames, stoves or
other hot areas.
2May cause Battery pack to leak,
heat, burst or ignite.
Do not let Battery pack get wet.
2Contact with water or other
liquids can cause heating,
malfunctions, electric shock or
injuries. Take care not to use the
handset in areas where it could
get wet.
Do not disassemble or remodel
the Battery pack, and do not
solder items directly onto it.
2May cause Battery pack to leak,
heat, burst or ignite.
WARNING
If Battery pack fluid contacts
skin or clothes, immediately
flush the contacted area
thoroughly with clean water.
2Battery pack fluid may damage
the skin.
If Battery pack does not reach
full charge after being charged
for the specified time, stop
charging it.
2Exceeding the specified charging
time may cause Battery pack to
leak, heat, burst or ignite.
If Battery pack starts giving off
a strange smell, overheats,
becomes discolored or
deformed during use, charging
or in storage, immediately
disconnect it from the FOMA
handset or Battery pack
charger.
2Continued use may cause
Battery pack to leak, heat, burst
or ignite.
If Battery pack leaks or gives
off a strange smell,
immediately remove it from the
vicinity of open flames.
2The vapors from leaking Battery
pack fluid may ignite or explode.
No liquids
No disassembly
00M1000EN.book 14 ページ 2004年11月24日 水曜日 午前7時56分
15
Contents/Safety Instructions
WARNING
Do not use or leave device in hot areas, or in areas of strong direct sunlight
such as inside a vehicle.
2May cause leaks, heating or deterioration in performance and service life.
CAUTION
Do not discard old Battery pack together with other garbage.
2Ignition or environmental destruction results. Tape the terminals of old Battery packs
to insulate them, and then bring them to a DoCoMo sales outlet. If your local
municipality has a battery recycling program, dispose of them as insstructed.
Stylus
WARNING
Store device out of reach of
small children.
2Stylus can be accidentally
swallowed or cause injuries.
Never point a stylus at another
person.
2Can cause irreparable damage if
poked into the eyes.
Do not use stylus with other
equipment.
2May cause equipment damage
or failure.
When using a stylus with a
FOMA handset, use only a
stylus recommended by a NTT
DoCoMo Group company.
2Damaged or murky displays may
result when using a stylus other
than those recommended.
Stylus MXX
Be careful when inserting/
removing stylus.
2Can cause harm to hand or
fingers.
00M1000EN.book 15 ページ 2004年11月24日 水曜日 午前7時56分
16
Contents/Safety Instructions
AC Adapter and Desktop Holder
WARNING
Do not short-circuit charger
terminal while it is connected
to an outlet. Do not touch
charger terminal with a part of
your body such as your hand
or finger.
2Fire, malfunction, electric shock,
or injuries may result.
Do not use the AC adapter,
Desktop holder or Battery pack
charger in bathrooms or highly
humid areas.
2Electric shock may result.
Do not touch AC adapter cord
or wall outlet with wet hands.
2Electric shock may result.
When connecting AC adapter
to an electrical outlet, do not
touch it to metal objects such
as metal straps. Be sure to
firmly connect to outlet.
2Could cause electric shock, short
circuit or fire.
Do not let AC adapter, Desktop
holder or Bluetooth headset
get wet.
2Contact with water or other
liquids can cause heating,
electric shock or malfunction.
Take care not to use the handset
in areas where it could get wet.
Always remove electrical plug
from wall outlet when not
using the AC adapter for an
extended period.
2Electric shock, fire or malfunction
may result.
Do not use AC adapter
electrical cord or power cable if
it gets damaged.
2Electric shock, heat or fire may
result.
Immediately remove AC
adapter plug from the wall
outlet if water or other fluids
enter the adapter.
2Electric shock, smoke or fire may
result.
Do not disassemble or remodel
AC adapter.
2Electric shock, fire, or
malfunction may result.
Only use with specified power
source and voltage.
2Usage with incorrect voltage may
result in fire or failure.
AC adapter
: 100V-240VAC
AC adapter for Bluetooth
Headset
: 100V-240VAC
Wipe off any dust that
accumulates on the plug.
2Fire may result.
No wet hands
No liquids
No disassembly
00M1000EN.book 16 ページ 2004年11月24日 水曜日 午前7時56分
17
Contents/Safety Instructions
WARNING
Place Desktop holder on a stable surface during charging. Do not cover or
wrap Desktop holder with a cloth or blanket.
2May cause the FOMA handset to become unseated from Desktop holder. Heating can
result in fire or failure.
CAUTION
Always remove AC adapter
plug from wall outlet when
cleaning device.
2Electric shock may result.
Do not place heavy objects on
the AC adapter cord or power
cable.
2Electric shock or fire may result.
When you disconnect AC adapter from wall outlet, do not pull AC adapter
cord or power cable. Instead, hold plug and pull out to disconnect.
2Pulling on cords can damage them, possibly leading to electric shock or fire.
UIM
WARNING
Do not put UIM into microwave ovens, other heating appliances or high-
pressure containers.
2May cause melting, heating, smoking, loss of data or malfunction.
CAUTION
Store the UIM out of reach of
small children.
2Can be swallowed and cause
serious injury.
Be careful when removing the
UIM (IC portion).
2Hands or fingers may be injured.
Do not bring UIM into contact
with open flames or heat it.
2May cause melting, heating,
smoke, loss of data or
malfunction.
Do not use or leave UIM near
flames, stoves or other hot
areas.
2May cause melting, heating,
smoke, loss of data or
malfunction.
00M1000EN.book 17 ページ 2004年11月24日 水曜日 午前7時56分
18
Contents/Safety Instructions
CAUTION
Do not scratch ICs.
2Malfunction may result.
Be careful not to touch or
short-circuit ICs accidentally.
2Data loss or malfunction may
result.
Do not drop UIM or subject to
physical shock.
2Malfunction may result.
Do not bend UIM or place
heavy objects on it.
2Malfunction may result.
Do not let UIM get wet.
2Contact with water or other
liquids can cause malfunctions.
Do not disassemble or remodel
UIM or place heavy objects on
it.
2Malfunction may result.
When storing UIM, do not place
in direct sunlight or in
environments of high
temperature or high humidity.
2Malfunction may result.
Do not store UIM in extremely
dusty areas.
2Malfunction may result.
Only use UIM with devices
specified by NTT DoCoMo.
2Use with other devices may
cause data loss or malfunction.
Contact a DoCoMo sales outlet
for the list of specified devices.
TransFlash Memory Cards and TransFlash Memory
Card Adapters
WARNING
Do not put the card and
adapter in microwave ovens or
other heating appliances or
high-pressure containers.
2May cause melting, heating,
smoking, loss of data or
malfunction.
Store the card and adapter out
of reach of small children.
2The card or adapter can be
accidentally swallowed or cause
injuries.
* Call a doctor immediately if
there is cause to suspect that
a child has swallowed a part.
CAUTION
Do not disassemble or remodel
card or adapter.
2Data loss or malfunction may
result.
Do not bend the card or
adapter, or place heavy objects
on them.
2Malfunction may result.
No liquids
No disassembly
No disassembly
00M1000EN.book 18 ページ 2004年11月24日 水曜日 午前7時56分
19
Contents/Safety Instructions
CAUTION
Do not drop the card and
adapter or subject them to
shocks.
2Malfunction may result.
Take care not to touch or short-
circuit metal terminals
accidentally.
2Data loss or malfunction may
result.
Do not let card or adapter get
wet.
2Contact with water or other
liquids can cause malfunctions.
Do not scratch metal terminals.
2Malfunction may result.
Do not bring card or adapter
into contact with open flames
or heat them.
2May cause melting, heating,
smoking, loss of data or
malfunction.
Do not use or leave card or
adapter near flames, stoves or
other hot areas.
2May cause melting, heating,
smoking, loss of data or
malfunction.
Children using card or adapter
should be instructed in proper
operation by an adult. Do not
allow children to use card or
adapter without adult
supervision.
2May cause injuries.
Do not use or keep card or
adapter in the following places:
• Inside the car, under hot sunlight,
or other places subject to high
temperature
• Areas exposed to direct sunlight
• High humidity environments
• Areas where corrosive gas, etc.
is generated
• Highly dusty environment
2Malfunction may result.
Bluetooth Headset
DANGER
Use only specified AC adapter
when recharging this device.
2Otherwise liquid leak, heating,
explosion or ignition may result.
Bluetooth headset AC adapter
XX
* For other compatible products,
call our contact.
Do not pierce Battery pack with
nails, hit with a hammer or step
on it.
2May cause built-in battery to
leak, heat, burst or ignite.
No liquids
00M1000EN.book 19 ページ 2004年11月24日 水曜日 午前7時56分
20
Contents/Safety Instructions
DANGER
Avoid using this device or
leaving it near high
temperatures such as fire or
stove.
2Liquid leakage, heating, ignition,
short circuit or other problems
may result.
Do not disassemble or remodel
headset, or replace the built-in
battery.
2Fire, injury, electrical shock, short
circuit or other problems may
result.
Do not bring Battery pack into
contact with open flames.
2May cause built-in battery to
leak, heat, burst or ignite.
WARNING
Do not use Bluetooth headset
in the event of an offensive
odor being generated, or in
cases of heating,
discoloration, deformation or
other anomalous situation.
2Liquid leakage, heating,
explosion or ignition of the built-in
battery may result if usage is
continued.
Do not use headset while
driving.
2Safe driving no longer is possible
and a traffic accident may occur.
Use headset only after car is
parked in a safe place.
Be sure to maintain volume at
appropriate levels while
walking.
2Excessively high volume levels
will prevent external sounds from
being heard, which can lead to
traffic accidents at railroad
crossings or crosswalks.
People with heart trouble
should take special care when
setting the volume level of the
Bluetooth headset.
2Otherwise the heart may be
adversely affected.
If full charge is not reached after being charged for the recommended time,
stop charging.
2Liquid leakage, heating, explosion or ignition may result if continued.
Turn Bluetooth headset off near high-precision electronic control equipment
or electronic equipment using low-power signals.
2Malfunction of the electronic apparatus may result.
* Examples of such electronic apparatus
Hearing aids, implantable heart pacemakers and implantable defibrillation
equipment, other medical electrical devices, fire alarms, automatic doors, other
automatic controllers.
When using an implantable heart pacemaker, implantable defibrillation equipment,
or other medical electrical devices, consult the manufacturer or distributor of the
device to understand the effects of radio waves on device operation.
No disassembly
00M1000EN.book 20 ページ 2004年11月24日 水曜日 午前7時56分
21
Contents/Safety Instructions
WARNING
Turn Bluetooth headset off in areas where use of such devices is prohibited,
such as in aircraft or hospitals.
2Use of device may adversely affect electronic devices and medical electrical devices.
In case automatic power-on is enabled for your headset, disable the setting and then
turn it off. For use in a medical facility, follow instructions from the medical institution.
2Any violation of prohibitions such as use of this device in aircraft may subject user to
punishment according to applicable laws and regulations.
CAUTION
If you hear a lightening while
using this device outdoors,
turn off this device and escape
to a safe place.
2Otherwise a lightening strike or
an electric shock may result.
Do not dispose of device with
general garbage.
2Ignition or environmental
destruction will result. If device
becomes unnecessary, bring it to
a DoCoMo shop, or follow the
instructions of your local waste
reclamation bureau.
s
Depending on physical predisposition or condition, itching, irritation or
eczema may result. In the event of such abnormal effects, stop using device
and consult a doctor.
2This device uses metals in the following parts:
Keep Bluetooth headset away
from water.
2Contact with water or other
liquids can cause heating,
injuries or electric shock. Do not
use the handset in areas where it
could get wet.
Avoid raising the volume of the
Bluetooth headset too high.
2Damage to your hearing may
result.
Minimize volume levels of
FOMA handset and Bluetooth
headset before listening to
voice with this handset.
2Otherwise, sudden loud sounds
may damage your hearing.
Part Material
No liquids
00M1000EN.book 21 ページ 2004年11月24日 水曜日 午前7時56分
22
Contents/Safety Instructions
Handset near Electronic Medical Equipment
1The following precautions are based on the guidelines drawn up during the
Electromagnetic Compatibility Conference, Japan, regarding the protection of electronic
medical equipment from radio waves emitted by mobile phone units.
WARNING
Turn FOMA handset and
Bluetooth headset off when in
crowded trains or other public
places where pacemaker or
defibrillator wearers could be
nearby.
2Signals from the FOMA handset
may affect the operation of
implanted pacemakers or
defibrillators.
Be sure to adhere to the
following rules inside medical
facilities:
2Do not bring FOMA handset or
Bluetooth headset into operating
rooms (ORs), intensive care units
(ICUs) or coronary care units
(CCUs).
2Turn FOMA handset and
Bluetooth headset off in hospital
wards.
2Turn FOMA handset and
Bluetooth headset off in hospital
lobbies and corridors if electrical
medical devices could be nearby.
2If medical facility has specific
zones where use or possession
of mobile devices is prohibited,
follow those rules.
2If automatic power-on is enabled,
disable this setting before turning
the power off.
Wearers of implanted
pacemakers or defibrillators
must carry and use FOMA
handset and Bluetooth headset
at least 22 cm away from
implanted device.
2Signals from FOMA handset may
affect the operation of implanted
pacemakers or defibrillators.
When electrical medical
devices other than implanted
pacemakers or defibrillators
are in use outside of medical
facilities (such as in home care
settings), check with the
device manufacturer to
determine how the device is
affected by electrical signals.
2Signals from FOMA handset may
affect the operation of implanted
pacemakers or defibrillators, and
other devices.
00M1000EN.book 22 ページ 2004年11月24日 水曜日 午前7時56分

23
Contents/Safety Instructions
Handling and Care
General Usage Guidelines
1Keep FOMA handset away from water.
• FOMA handset, Battery pack, and AC adapter are not waterproof. Do not use FOMA handset in bathrooms
or other high-humidity areas, or in the rain. When carrying FOMA handset in a pocket near your body, sweat
may corrode the inner components, causing malfunction. Note that malfunctions deemed to be caused by
water are not covered by the warranty, and may be impossible to repair. Since these malfunctions are not
under warranty, when repair is possible, it will be done at the user's expense.
• If your FOMA handset gets wet or moist, immediately turn off the power. After removing Battery pack, contact
the sales representative for repair as soon as possible. Note, however, that the FOMA handset may not be
repairable, depending on its condition.
1Clean FOMA handset with a soft, dry cloth.
• To make the color LC display easy to read, some FOMA handset models use a special coating on the display.
When cleaning FOMA handset, rubbing it roughly with a dry cloth can scratch the display. Take care when
handling the unit, and use a soft, dry cloth for cleaning (such as a cloth for eyeglasses). Drops of water or dirt
left on the display can cause stains or remove the coating.
• If FOMA handset is wiped with alcohol, paint thinner, benzine or detergent, the printing may disappear or color
may fade.
1Clean jack occasionally with a dry cotton swab.
• If jack is dirty, electrical contact may grow poor, data communications errors may occur when using the
Desktop holder, or the power may shut off. A dirty jack can also result in poor charging, so clean it with a dry
cloth or cotton swab.
1Do not place FOMA handset near air conditioner outlets.
• Rapid changes in humidity can cause condensation, leading to internal corrosion and malfunction.
1Do not place FOMA handset where excessive force will be applied to it.
• If FOMA handset is inserted into a full bag, or placed in a pocket and sat on, its LC display or internal PCBs
may be damaged or malfunction. Such damage is not covered by warranty.
1Please carefully read pages X to Y and Z to W of the manual for care and handling
information regarding the Battery pack and AC Adapter.
FOMA handset
1Avoid temperature extremes.
• Use FOMA handset in an ambient temperature range of between X and Y degrees Celsius, and in a humidity
range of between Z% and W%.
1FOMA handset may affect fixed telephones, televisions or radios in use nearby. Use as far
as possible from such appliances.
1Maintain a separate record of data you register in your FOMA handset.
• NTT DoCoMo assumes no responsibility for accidentally erased data.
1Do not place FOMA handset on surfaces where potentially damaging objects are placed.
• The Rear-camera may be damaged. If display is open with the panel facing out, it can be damaged.
1Do not sit down while FOMA handset is in the back pocket of your pants. Also, do not
place it at the bottom of a full bag, or where it will encounter excessive force.
• Malfunction or damage may result.
1It is normal for FOMA handset to grow warm during use or charging. You can continue to
use it while warm.
00M1000EN.book 23 ページ 2004年11月24日 水曜日 午前7時56分

24
Contents/Safety Instructions
1In normal use, please keep the earphone/mic jacks capped, and the external connection
jack covered.
Battery pack
1The Battery pack is a consumable part.
• Replace Battery pack when operation time of FOMA handset on a full charge has grown extremely short
(amount of time will vary depending on type of use). Purchase a new Battery pack of the specified type.
1Charge Battery pack in an environment that is within the acceptable ambient temperature
range (X to Y degrees Celsius)
1Always charge FOMA handset before using it for the first time, or after extended disuse.
1Operation time provided by Battery pack will depend on operating environment, and on
remaining Battery pack performance level.
1Do not discard old Battery pack with general household garbage.
• Tape the terminals of old Battery packs to insulate, and then bring into our sales outlet. If your local
municipality has a battery recycling program, dispose of as instructed.
AC Adapter
1Do not charge Battery pack in the following areas:
• Where the ambient temperature is less than XX degrees Celsius or more than XX degrees Celsius.
• In environment with excessive humidity, dust or vibrations.
• Near fixed telephones, televisions or radios.
1It is normal for the adapter to become warm during charging. You can continue charging
with a warm adapter.
1When using an electrical outlet equipped with a mechanism that prevents unplugging,
follow the handling instructions for that outlet.
UIM
1Do not use excessive force to remove the card's IC.
1Do not put excessive force on the card when inserting it into the handset.
1It is normal for the UIM to become warm during use. You can continue using a warm card.
1Note that NTT DoCoMo will not be responsible for malfunctions occurring as the result of
inserting and using a UIM with unrecommended IC card reader/writer.
1Always keep UIM ICs clean.
1Clean UIM with a soft, dry cloth.
1Maintain a separate record of the data you register on the UIM.
• Under no circumstance shall NTT DoCoMo be held liable for any loss or damage to the data stored in the UIM.
1To protect the environment, please bring the old UIM to a DoCoMo sales outlet.
1Avoid extreme temperature.
Display (Touch Panel)
1Do not paste on protective sheets or seals.
• Functionality may be degraded, or display may be damaged.
1Do not rub or push the display surface with hard tool.
• The display may be destroyed.
00M1000EN.book 24 ページ 2004年11月24日 水曜日 午前7時56分

25
Contents/Safety Instructions
1If display is being operated as a touch panel, always use the attached stylus.
• Operation with sharply pointed tools such as nails, pens, pins, etc. may damage the display.
Stylus
1Stylus (touch panel pens) are consumables.
• If a stylus is lost or damaged, you can order a new one for the appropriate model. For detailed information,
contact a DoCoMo sales office.
1If stylus can no longer be smoothly slid across screen, or display response slows down,
use a soft, dry cloth (such as a glass wipe) to wipe the display surface. Handling and care
3 P23
Wireless LANs
1Do not place FOMA handset near magnetic devices such as electric appliances,
audiovisual or office automation equipment, or in places where a large amount of
electromagnetic waves are emitted.
• Under the influence of strong magnetic or electrical fields noise may become louder, or calls may become
unavailable. (In particular, microwave oven usage can adversely affect the handset.)
• If FOMA handset is positioned near televisions or radios, the handset may cause reception to fail, or television
images may be distorted.
• If you are near a broadcasting or radio station and getting a lot of noise, try moving the FOMA handset. If the
signals from the station are too strong, the handset may not work.
1The wireless LAN function of the FOMA handset transmits at 2.4GHz. Please note the
following warnings.
• Before using the handset, check that wireless stations, specified low-power radio stations and amateur radio
stations are not being used.
• If the handset causes harmful radio interference to a microwave tracking systems, immediately change the
frequency or stop emission of radio waves to avoid the radio interference.
1If multiple wireless LAN access points exist that use the same channel, the wireless LAN
may not be searched correctly.
Bluetooth
Bluetooth is a technology that connects Bluetooth-compatible devices such as mobile phones
and PCs wirelessly. 3 P377
1Passkey
A password that prevents unauthorized use of a Bluetooth device. Usually, you can set a passkey
by choosing up to 16 alphanumeric characters. However, on some devices passkeys are preset
and cannot be changed. To enable authorized access, you can enter the same designated
passkey in both your FOMA handset and the target Bluetooth device, or you can enter the
designated passkey in your FOMA handset alone.
For better security, it is recommended that passkeys be set using as many digits as possible (up
to 16 characters), and that you do not create a passkey using your name, birthday, or other
information that is easy to guess.
1For better connection, keep the following points in mind:
• The distance between your handset and another Bluetooth device must be about 10 meters or less, and
within a direct line of sight. The maximum distance under which connections are possible may shorten
depending on the environment (i.e. blocked by a wall or furniture) or building structure. This distance also will
shorten if there is an obstruction between the FOMA handset and other Bluetooth devices. In particular, if
there is an intervening wall or floor of reinforced concrete between Bluetooth devices, they may be unable to
connect with each other. Note that the abovementioned connection distance is not guaranteed.
00M1000EN.book 25 ページ 2004年11月24日 水曜日 午前7時56分

26
Contents/Safety Instructions
• During connection, keep Bluetooth devices more than 2 meters away from other electrical devices, such as
home electric appliances, audiovisual devices, office automation devices, digital cordless telephones, and
facsimile machines. In particular, when using a microwave oven, be sure to keep Bluetooth devices more
than 3m away from it to prevent interference. Normal connections may fail to be established when electric
devices are powered on. Also, Bluetooth devices may cause noise or reception failure on televisions or radios
(television images may be degraded on certain UHF or satellite broadcasting channels).
• If there is a broadcast station or radio near a Bluetooth device to which you want to connect, your FOMA
handset may be unable to connect with the Bluetooth device. In such a situation, move the Bluetooth device
to another location from which connection is possible.
1Radio interference with wireless LANs
Bluetooth devices use the same frequency band (2.4 GHz) as do wireless LANs (IEEE 802.11b/
g). Therefore, if a Bluetooth device is used near a wireless LAN device, radio interference may
cause the communication to slow down, generate noise or completely fail. If this occurs, take the
following measures:
• Keep your FOMA handset and the Bluetooth device to which you wish to connect wirelessly, 10 meters or
more away from the wireless LAN device.
• When it is impossible to separate the devices by more than 10m, power down the wireless LAN or Bluetooth
device.
1With regard to Bluetooth communication security, while FOMA handsets support
Bluetooth standard security provisions. However, some settings have inadequate
security, so be careful when using Bluetooth for communications.
1Please note that NTT DoCoMo is not responsible even in the case that information may
leak from Bluetooth communications.
1With FOMA handsets, you can use the services compatible with the following version and
profiles:
*1: All Bluetooth-compatible devices including FOMA handsets and headset devices are compliant with the
Bluetooth Specification defined by the Bluetooth SIG, and have been authorized by the Bluetooth SIG.
However, depending on the characteristics or specifications of the device, methods of operation may
differ, or data exchange after connection may not be possible.
*2: The profiles are the standardized Bluetooth connection procedures for each product feature.
1When replacing the battery in a Bluetooth headset, send or bring the Bluetooth headset to
NTT DoCoMo Customer Support.
• For safety, do not disassemble the Bluetooth headset by yourself.
Supported Bluetooth version Bluetooth Specification Ver. 1.1 *1
Supported Bluetooth profiles *2 • Generic Object Exchange Profile
• Object Push Profile
• Serial Port Profile
• Dial-up Networking Profile
• Headset Profile
• Service Discovery Application Profile
• Hands-Free Profile
00M1000EN.book 26 ページ 2004年11月24日 水曜日 午前7時56分
27
Contents/Safety Instructions
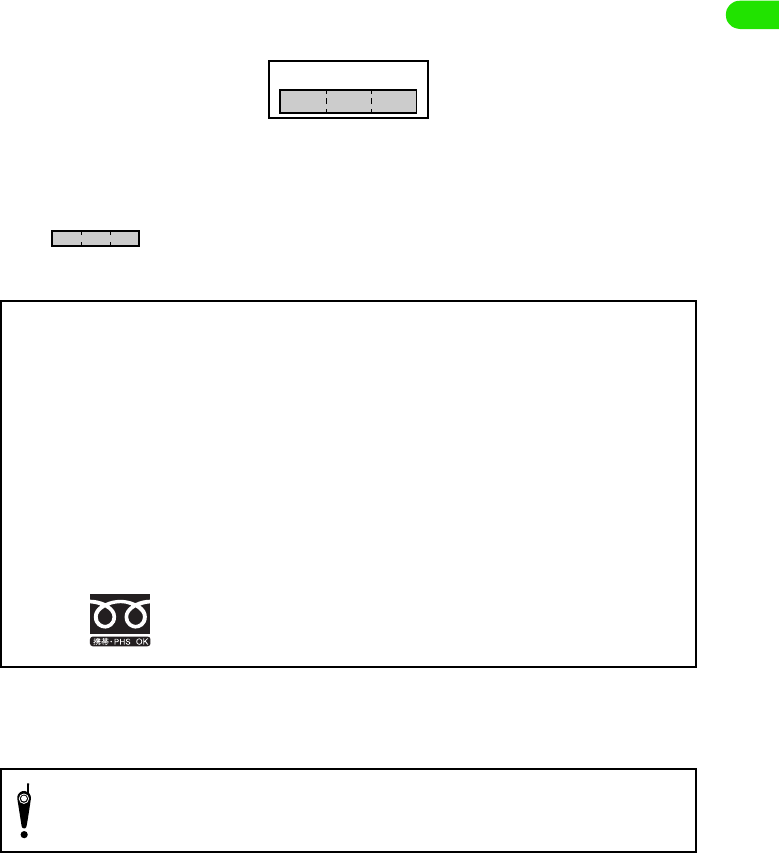
1Frequency band
The frequency band used by your FOMA handset is indicated in a label on the entry for the
Battery pack of the FOMA handset. Following is an explanation of how to read the label.
Camera Handling
When using the FOMA handset if you seriously annoy others, you may be liable for
prosecution under applicable laws or regulation (such as Public Nuisance Laws).
(1) 2.4 : Indicates radio device that uses the 2,400 MHz band.
(2) FH : Indicates device uses the FH-SS modulation.
(3) 1 : Indicates device is assumed to interfere with other devices within 10m.
(4) : Indicates device fully uses the bandwidth between 2,400.0MHz and 2,483.5MHz,
and that it cannot be set to avoid the frequencies used by microwave tracking
systems.
2.4FH1
(4)
(1) (2) (3)
* Can be called from DoCoMo mobile phones or FOMA handsets, and PHSs.
Precautions for using Bluetooth devices
The frequency band used by this product is also used by microwave ovens and other
industrial, scientific, and medical devices, licensed private radio stations such as those for
mobile identification in factory production lines, specified low power radio stations that do not
require any licenses, and amateur radio stations. Hereafter, these are called Other Radio
Stations.
1. Before using this product, make sure that there are no Other Radio Stations operating nearby.
2. If radio interference occurs between this product and Other Radio Stations, immediately
move this product to another place or stop radio wave emission from this product to avoid
radio interference.
3. For other points you are concerned about, or if a trouble occurs, contact us on:
Inquiries: 0120-005-250 (in English)
Please be considerate of other people's privacy when taking and sending pictures using
camera-equipped mobile phones.
00M1000EN.book 27 ページ 2004年11月24日 水曜日 午前7時56分
28
Contents/Safety Instructions
Intellectual Property Issues
About Copyright and Ownership of Likenesses
You may not without permission of the copyright owner duplicate, modify, transmit over public
communication lines, etc. any document, image, music, software, or other content owned by a
third party that you have used this product to photograph or download from an Internet
homepage, etc., except for private uses such as duplication and indexing that are allowed by
copyright law. With regard to performance, recital, exhibition, etc., please take care as even if for
private use, photography and audio recording are restricted.
In addition, please refrain from using this product to photograph another person without their
permission, post such photographed likeness of another person on an Internet homepage
without their permission, or otherwise publish it to an unknown number of people, as there is a
danger that the subject's right to ownership of their own likeness may be violated.
Trademarks
• The "FOMA" and "i-mode" logos, and the following are trademarks or registered brand names of NTT
DoCoMo: "FOMA", "mova", "Freedom Of Mobile multimedia Access", "i-mode", "i-Appli", "i-Appli DX", "i-
Melody", "mopera", "business mopera", "mopera access", "WORLD CALL", "Drive Mode", "Quickcast",
"Multiaccess", "i-Shot", "i-Area", "i-Motion", "i-Motion Mail", "chaku-Motion", "deco-Mail", "i-Anime", "Dual
Network", "M-stage V Live", "musea", "FirstPass", "i-Appli Search".
• Java and all trademarks/logos related to Java in the U.S. and elsewhere, are the trademarks of U.S. based
Sun Microsystems, Inc. or its registered brand name.
• "Catch Phone" is a registered brand name of the Nippon Telegraph and Telephone Corp.
• Bluetooth and the Bluetooth logo are trademarks of Bluetooth SIG, INC., and used under license to NTT
DoCoMo.
• Opera is a trademark of Opera Software ASA.
• MovianVPN is a trademark of Lerticom.
• Microsoft, MS, and Windows are in the U.S. and other countries registered brand names of U.S. based
Microsoft Corporation.
• Windows XP is an abbreviation of "Microsoft® Windows® XP Professional operating system", or of
"Microsoft® Windows® XP Home Edition operating system".
• Windows 2000 Professional is an abbreviation of "Microsoft® Windows® 2000 Professional operating
system".
• Windows Me is an abbreviation of "Microsoft® Windows® Millenium Edition operating system".
• Windows 98 is an abbreviation of "Microsoft® Windows® 98 operating system".
• Windows 98SE is an abbreviation of "Microsoft® Windows® 98 operating system SECOND EDITION".
• The above brand names may be written side-by-side in the following manner: Windows XP, 2000
Professional, Me, 98SE, 98.
• Windows 98 and Windows 98SE are referred to together as Windows 98.
• Other company names or product names mentioned in this work are the trademarks or registered brand
names of their respective owners.
• $$ The Document Viewer was created by Picsel Powered.
Picsel, PicselPowered and the Picsel cube logo are trademarks or registered trademarks of Picsel
Technologies Ltd and/or its affiliates.
00M1000EN.book 28 ページ 2004年11月24日 水曜日 午前7時56分

29
Contents/Safety Instructions
Other Notices
• Modules developed by the Independent JPEG Group are included in part of this product's software.
• This product is licensed based on the MPEG-4 Visual Patent Portfolio License. Only personal and non-
commercial use in the following situations is allowed:
- When recording moving images meeting the MPEG-4 Visual standard (hereafter, "MPEG-4 Video").
- When playing MPEG-4 Video recorded by a user for personal and non-commercial use.
- When playing MPEG-4 Video provided by a provider that has been licensed by MPEG-LA.
• Licensed by QUALCOMM Incorporated under one or more of the following United States Patents and/or their
counterparts in other nations;
4,901,307 5,600,754 5,267,261 5,506,865 5,710,784
5,504,773 5,416,797 5,568,483 5,228,054 5,778,338
5,109,390 5,490,165 5,414,796 5,544,196
5,535,239 5,101,501 5,659,569 5,337,338
5,267,262 5,511,073 5,056,109 5,657,420
00M1000EN.book 29 ページ 2004年11月24日 水曜日 午前7時56分
30
Contents/Safety Instructions
Checking Purchased Product
1Purchased product
Other optional items 3 P526
FOMA M1000
(includes Warranty, stylus,
rear cover XXX)
* A quick manual is
displayed on P000.
FOMA M1000
Operation Manual
(this manual)
TransFlash Memory
Card (32MB)
(with soft case)
FOMA M1000 CD-ROM
[Illustration of
CD-ROM to be
inserted here]
[Illustration of
TransFlash Memory
Card to be inserted
here]
[Illustration of
Operation Manual to
be inserted here]
[Illustration of main
unit to be inserted
here]
AC Adapter XXX
(with warranty)
[Illustration of AC
Adapter to be
inserted here]
Desktop Holder XXX
[Illustration of
Desktop Holder to be
inserted here]
Battery pack XXX
[Illustration of
Battery pack to be
inserted here]
00M1000EN.book 30 ページ 2004年11月24日 水曜日 午前7時56分

31
Before Using the Handset
Names of Parts and Functions. . . . . . . . . . . . . . . . . . . . . . . . . . . . . . . . . . . . . . 32
The Stylus . . . . . . . . . . . . . . . . . . . . . . . . . . . . . . . . . . . . . . . . . . . . . . . . . . . . . . 36
Operating the Touch Screen . . . . . . . . . . . . . . . . . . . . . . . . . . . . . . . . . . . . . . . 37
Viewing the Display. . . . . . . . . . . . . . . . . . . . . . . . . . . . . . . . . . . . . . . . . . . . . . . 38
Selecting the Menu . . . . . . . . . . . . . . . . . . . . . . . . . . . . . . . . . . . . . . . . . . . . . . . 44
Entering Text . . . . . . . . . . . . . . . . . . . . . . . . . . . . . . . . . . . . . . . . . . . . . . . . . . . . 47
When Forgetting a Function <Help Function> . . . . . . . . . . . . . . . . . . . . . . . . . 48
Using the UIM . . . . . . . . . . . . . . . . . . . . . . . . . . . . . . . . . . . . . . . . . . . . . . . . . . . 49
Inserting/Removing the Battery Pack . . . . . . . . . . . . . . . . . . . . . . . . . . . . . . . . 51
Charging the Battery Pack . . . . . . . . . . . . . . . . . . . . . . . . . . . . . . . . . . . . . . . . . 54
Checking the Battery Status <Battery Status>. . . . . . . . . . . . . . . . . . . . . . . . . 55
Turning the Power On/Off <Power ON/OFF>. . . . . . . . . . . . . . . . . . . . . . . . . . . 57
Setting Up the Handset for the First Time <Initialization>. . . . . . . . . . . . . . . . 58
Switching Languages Displayed on Screen <Language Selection> . . . . . . . 59
Adjusting the Date and Time <Date and time setup> . . . . . . . . . . . . . . . . . . . 60
Transmission Mode. . . . . . . . . . . . . . . . . . . . . . . . . . . . . . . . . . . . . . . . . . . . . . . 61
Notifying Your Phone Number to the other party <Caller ID>. . . . . . . . . . . . . 62
Verifying Your Own Phone Number <Phone Number Display> . . . . . . . . . . . 63
00M1000EN.book 31 ページ 2004年11月24日 水曜日 午前7時56分
32
Before Using the Handset
Names of Parts and Functions
Size (mm) : Height XXX × Width XX × Thickness XX
Weight (g) : Approx. XXX (*When Battery pack is inserted)
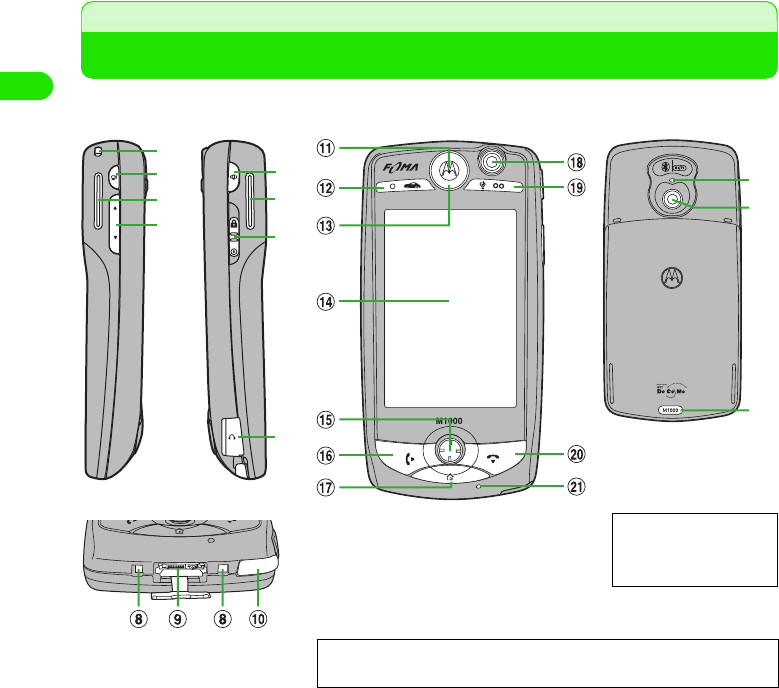
aStrap Fixing Hole
Place to install the strap
bm Camera/Shutter Key
This key is used to launch the camera,
and to capture still images/videos P34
cSpeaker
You can hear ring tunes, alarm tones, and
keypad tones from here. You can also
hear the voice of the other party when the
speakerphone feature is used. P67,
P87
dud Volume/Zoom Key
This is used to adjust volumes, and
enlarge/reduce image/video being
captured. P34
es Speakerphone/Voice Record Key
This is used to set/release the
speakerphone feature while calling, and
to launch the voice recorder. P34
fp Power/Lock Switch
This is used to turn on/off the power, and
to set/release the All Lock feature.
P34, P57
gEar/Microphone Interface
This is used to connect the Ear/
Microphone with power switch (sold
separately) P359
hRecharging Interface P54
iExternal Interface
This allows connection to the AC adapter
or to a USB cable (bundled accessory).
jStylus/Stylus Holder
Remove the Stylus from the Stylus holder
when operating the FOMA handset.
P36
b
a
c
d
e
c
f
g
TM YM
v
x
w
Left Side
View
Right Side
View
Front View Rear View
Bottom Surface
Connecting the
Ear/Microphone
Illustration
00M1000EN.book 32 ページ 2004年11月24日 水曜日 午前7時56分

33
Before Using the Handset
Navigation Key
The following operations can be performed using the navigation key
7
• Moving the cursor, selecting an item, scrolling a screen
• Displaying the Brightness/Contrast/Zoom setup screen while making a video call or using the camera
• Moving a character or cursor up and down while controlling a game, etc.
6
• Selecting an item, soft key or menu
• Switching tabs
• Changing settings in video calls/camera brightness/contrast/zoom setup screens
• Moving the cursor or character from side to side while playing a game, etc.
ikjl
• Moving the cursor to the upper left/upper right/lower left/lower right directions in the image thumbnail
display screen
• Moving the character/cursor to the upper left/upper right/lower left/lower right directions to play games
kEarpiece
The voice on the other line can be heard
from here.
la Application A/Drive Mode Key
This is used to display the menu from the
menu bar, or to set/release the drive
mode. This is also used to control game
applications. P79
mStatus LED
The status of the FOMA handset such as
receipt of calls and emails, network
connection status, battery charge status,
etc. are notified with the illumination/
flashing of this light. P34
nDisplay (Touch screen) P37, P38
o0 Navigation Key
This is used to control games or to select/
confirm functions, etc. described
below
pc Start Key
This is used to make/receive calls or to
display redial numbers. P66, P69, P76
qh Home Key
This is used to revert to the Home screen.
This also launches a preset application by
holding down for 3 seconds or longer, or
displays the Tap Position Tuning screen of
the touch screen by holding down for 10
seconds or longer. P45, P57, P134
rFront Camera
This is used to send your video image
when making a video call, or to capture a
still image/video of yourself. P85,
P274, P280
sb Application B/Manner Mode Key
This is used to set up/release manner
mode. This is also used for controlling
applications such as games. P128
te End Key
This is used to hang up a call or to display
the number input screen.
uMouthpiece/Microphone
This is used to send your voice to the
handset on the other end when calling.
This is also used to record voice data
while capturing video.
• If you block the mouthpiece, your voice
may not be sent/recorded while calling
or capturing video.
vCamera Lamp
This will emit a red illumination when
capturing still images/videos.
wRear Camera
This is used when sending videos of
scenery, etc via video call, or capturing
still images/videos of scenery, etc.
P85, P274, P280
xRear Cover Lock P52
00M1000EN.book 33 ページ 2004年11月24日 水曜日 午前7時56分
34
Before Using the Handset
Sidekey Operations
On either side of the FOMA handset, you can find 3 sidekeys and 1 switch. Various operations
can be performed by pressing/sliding each key. The following operations can be performed using
the sidekeys and switch. The operation status of the FOMA handset is also described below.
• Most operations using the sidekeys are disabled when the FOMA handset is locked. 3 P153
*1: Operation can be performed when FOMA handset is locked.
*2: Recording starts when pressed for 1+ second (s), and records while pressed.
*3: Setup completes when the handset pin number is changed 3 P147
Status LED
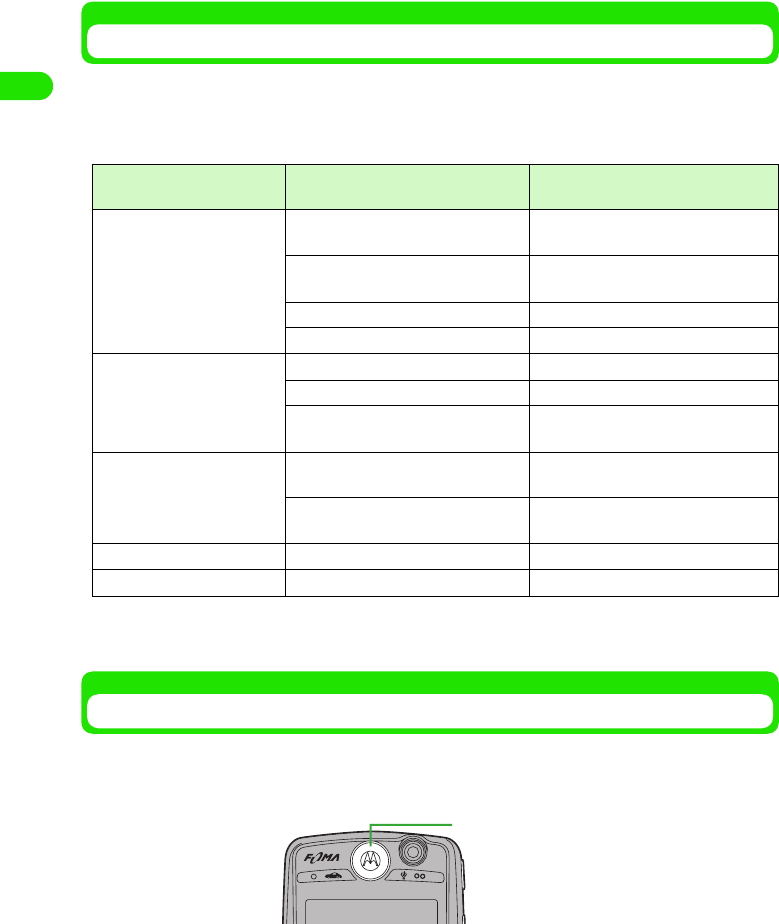
You can find the status LED in the upper section of the front surface of the FOMA handset. The
status LED notifies the status of the FOMA handset with motions of the light. The status and
various motions of the status LED are described below.
• The status light illuminates/flashes when the status LED setting is turned ON. 3 P136
• When conflicting status occured simultaneously, motion of the light reacts to the status with higher priority.
Side key/switch Performing Operations Operation Status of
the FOMA handset
m Camera/Shutter Key Activating the Camera Displaying the screen other than the
still image/video capture screen
Start capturing still image/video Displaying the still image/video capture
screen
Canceling video capture Capturing video
Storing the still image/video Capture of still image/video completed
ud Volume/Zoom Key Controlling the receive volume*1 Talking
Cancel ring tone Receiving call
Enlarge/reduce captured image Displaying the still image/video capture
screen
s Speakerphone/voice
record key
Launching/releasing the
speakerphone function*1
Talking
Recording/canceling voice memo
using the voice recorder
Other than talking*2
r Power/lock switch(Up) Setting up All lock *3
p Power/lock switch(Down) Power ON/OFF -
Status LED
00M1000EN.book 34 ページ 2004年11月24日 水曜日 午前7時56分
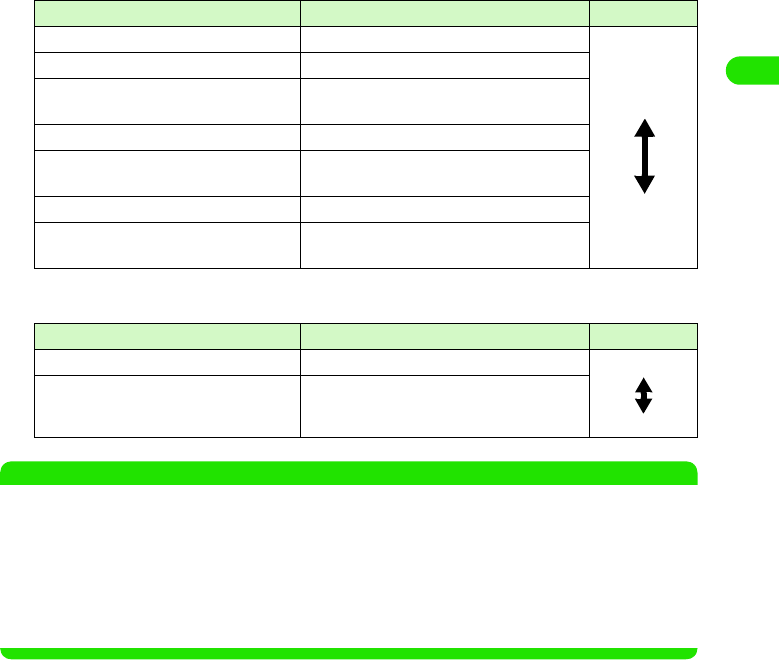
35
Before Using the Handset
1When power of FOMA handset is ON*
*: Motions are similar when FOMA handset is switched ON and charged.
1When FOMA handset is switched OFF
NOTE
• When Battery pack level drops while using the FOMA handset, a pattern notifying low voltage (light goes off
for 4 seconds after each illumination/flashing pattern) is added.
• When Drive Mode is in effect, the status LED does not illuminate/flash.
• The status LED illuminates when capturing still image or video. The status LED flashes when using the self
timer. 3 P274, P280
• When status LED function is turned off, all motions are canceled except for the flashing that notifies data
processing within the FOMA handset. Either the orange and green lights alternately flash or the green light
slowly flashes when data is processed within the FOMA handset. 3 P40
Motion (illumination/flashing patterns) Status Priority
Red and green flash alternately Receiving voice call or video call
Fast flashing of green light Within the service area.
Fast alternate flashing of green and red
lights
Within the service area, and new email or
short message (SMS) received.
Slow flashing of red light Outside the service area.
Fast flashing of red light Outside service area, and new email or short
message (SMS) received.
Fast flashing of orange light Roaming service in use.
Fast alternate flashing of orange and red
lights
Roaming service in use, and new email or
short message (SMS) received.
Motion (illumination/flashing patterns) Status Priority
Red illumination FOMA handset is charged via an AC adapter.
Green illumination Charge for FOMA handset is completed via
an AC adapter.
High
Low
Hi
g
h
Low
00M1000EN.book 35 ページ 2004年11月24日 水曜日 午前7時56分
36
Before Using the Handset
The Stylus
The Stylus is a pointing device used to directly tap the display (touch screen). To operate the
FOMA handset, the Stylus is used by taking out the pen from the Stylus holder located on the
lower right spot of the front side of the FOMA handset.
Removing/Affixing the Stylus
The Stylus can be stretched, and retracted when affixed to the FOMA handset.
• Hold the FOMA handset to remove/affix the Stylus.
aPinch the protruding portion of the Stylus using your fingers,
and pull out the pen from the FOMA handset and stretch
• To affix the Stylus, retract it before inserting it back in the Stylus holder.
NOTE
• Do not forcibly overstretch the Stylus. The pen may not retract thereafter.
• Pay attention to the direction of the Stylus when affixing it to Stylus holder of the FOMA handset.
• Always affix the Stylus to the Stylus holder to avoid misplacing the pen.
• Always use the accompanying Stylus to operate the touch screen. Using a sharp edged pen may cause the
touch screen to be damaged.
• Pay attention not to damage the tip of the Stylus. Using a damaged Stylus may cause the touch screen to
be damaged.
Illustration
00M1000EN.book 36 ページ 2004年11月24日 水曜日 午前7時56分
37
Before Using the Handset
Operating the Touch Screen
The FOMA handset display is a touch screen. You can operate the FOMA handset by directly
tapping the displayed icons and functions using the Stylus.
• Functions can also be selected using the navigation key. 3 P33
Tapping the Touch Screen
Using the Stylus to lightly touch the touch screen once and release is called "tapping".
You can launch an application or select a function by tapping the position of the displayed icon or
function.
Pointing the Touch Screen
Using the Stylus to touch and hold down a spot on the touch screen is called "pointing".
You can point $$ in the telephone number entry screen, and delete all entered digits, or scroll by
pointing the up/down arrow on the scroll bar.
Illustration
Illustration
00M1000EN.book 37 ページ 2004年11月24日 水曜日 午前7時56分
38
Before Using the Handset
Dragging the Touch Screen
Sliding the Stylus on the touch screen is called "dragging".
You can handwrite/draw text or illustrations, or scroll the screen by dragging the scroll bar up and
down.
NOTE
• Do not operate the touch screen with your fingernails or with any sharp edged object such as a pen or pin.
• Adjust the tap position of the touch screen if the position to tap with the Stylus is misaligned. 3 P134
Viewing the Display
The display consists of the following components, and displays necessary information in each
screen.
• The make up of components vary with each screen.
NOTE
• The display is manufactured employing highly advanced technologies. Non-illuminating dots or continuously
illuminating dots may, however, exist on the display. Be acknowledged that this is by no means a failure.
Illustration
Menu bar 3 P39
Home screen
Display area 3 P40
Application Selector bar 3 P39
Status bar 3 P40
00M1000EN.book 38 ページ 2004年11月24日 水曜日 午前7時56分
39
Before Using the Handset
Application Selector Bar
The Application Selector bar displays 6 icons. You can launch an application by tapping the
corresponding icon. The bar is always displayed allowing you to easily switch between
applications.
• You can modify all applications except Application launcher. 3 P345
Menu Bar
The Menu bar is displayed underneath the Application Selector bar in each application screen.
You can tap the item displayed on the Menu bar to display items to be registered or set up. Folder
options are displayed on the right side of the Menu bar when applications enabling the use of
folders are displayed. 3 P303
Item Description Reference
a$$ Home Displays Home screen. P57
b$$ Handset Displays Phone number entry screen. Dialing and network services can be
set up. P66
c$$ Browse Launches the browser. P193
d$$ Email Displays Email account selection screen P234
e$$ Contacts Displays Contact list. P107
f$$ Application
Launcher
Launches the Application from Menu list. P345
Menu bar
00M1000EN.book 39 ページ 2004年11月24日 水曜日 午前7時56分
40
Before Using the Handset
Display Area
The screens of each application are displayed in the display area, and can be operated here.
According to the conditions set up, the following items are displayed while the Home screen is
displayed.
NOTE
• You can modify the Home screen wallpaper. 3 P132
• You can set the calendar or time on the Home screen to be displayed/hidden. 3 P133
• You can change the icons registered with the shortcut key. 3 P345
aWallpaper : Displays still image
bCalendar : Displays calendar for current month, and displays schedule registration
screen when tapped. 3 P324
cTime : Current time is displayed, and date and time setup screen is displayed when
tapped. 3 P59
fMessage
area
: Displays notifications of newly received emails, voice mail messages, and
registration status of schedules and To Do list 3 P42
eShortcut key: Displays 3 icons, and applications registered with the corresponding icons
are launched when tapped.
00M1000EN.book 40 ページ 2004年11月24日 水曜日 午前7時56分
41
Before Using the Handset
Status Bar
The status bar displays the icon that shows the state of the FOMA handset. The bar is always
displayed on screen allowing you to check the state of your FOMA handset.
aDisplays the current time. Displays the current date for approximately 3 seconds
when tapped.
bDisplays the keyboard when tapped while the cursor is positioned in the text entry
field. 3 P468, P495
cDisplays the current settings of the alert mode. When set to drive mode or manner
mode, the corresponding states are displayed. 3 P79, P125, P126, P128
Displays the setup screens of alert mode, drive mode or manner mode when tapped.
dDisplays the current state of Bluetooth. Displays the ON/OFF setup screen of
Bluetooth when tapped. 3 P377
eDisplays the connection status/radio signal level of Wireless LAN. 3 P389
fDisplays state of handset while talking. Displays state of voice mail recorded or
video mail received while in idle state. 3 P67, P252, P368
$$ : Setting up voice mode
$$ : Setting up vibrator mode
$$ : Setting up silent mode
$$ : Setting up manner mode*
$$ : Setting up drive mode*
*: The manner mode icon is displayed while setting up manner mode. The drive mode icon is
given priority and displayed when both the manner mode and drive mode are set
simultaneously.
$$(White) : Bluetooth is ON
$$(Gray) : Bluetooth is OFF
$$(Green) : Bluetooth connected
$$ : Wireless LAN is OFF
$$~$$ : Signal level good ~ signal level poor
$$ : Talking on voice/video call
$$ : Talking on voice/video call in mute mode
$$ : New message received in voice mail
$$ : New video mail received
00M1000EN.book 41 ページ 2004年11月24日 水曜日 午前7時56分

42
Before Using the Handset
gDisplays the state of newly received emails. Displays the Receive box when
tapped. 3 P252
hDisplays the network status. Displays the setup screen of self mode when tapped.
3 P155
iDisplays signal reception level.
jDisplays remaining battery level. Displays remaining battery level checking
screen when tapped. 3 P56
1Power saving mode
When the FOMA handset is left in idle state for a given period of time, the screen backlight
turns off in order to save battery power. When left in idle state for a further extended period of
time, the display of the screen turns off, and switches to power saving mode.
At time of purchase, the backlight is set to turn off after approximately 30 seconds, and the
screen display to turn off after approximately 1 minute and then to switch to power saving
mode.
Tap screen or press key on handset to recover from power saving mode.
• You can change the power saving settings. 3 P136
$$(White) : New email received from a sender registered in the Contact list via a
mobile phone
$$(Orange) : New email received from an unregistered sender in the Contact list via
a mobile phone
$$(White) : New email received
$$(White) : Short message (SMS) received from a sender whose address is
identical to a phone number registered in the Contact list
$$(Orange) : Short message (SMS) received from a sender whose address is not
registered in the Contact list
$$ : The number of short messages (SMS) on your UIM has reached the
maximum capacity
$$(Green) : Voice communication is enabled
$$(Orange) : Voice communication using roaming is enabled
$$(Green)*: Transmission of voice and still images is enabled
$$(Orange)*: Transmission of voice and still images using roaming is enabled
$$(Green)*: Transmission of voice and images is enabled
$$(Orange)*: Transmission of voice and images using roaming is enabled
$$ : Setting self mode
$$(Red) : Only emergency calling is enabled
$$(Gray) : Outside the service area
*: Connected when a point ($$) is displayed in the middle of the circle. Data transmission in
progress when the point is flashing.
$$$$$$ : Signal reception level good ⇔ signal reception level poor
$$ : Outside the service area
$$$$$$$$(White)*: Battery full ⇔ battery needs recharging
$$ : Battery charge in progress
$$ : Cannot charge non-FOMA compliant Battery pack
*: The icon turns orange when video call is in use.
00M1000EN.book 42 ページ 2004年11月24日 水曜日 午前7時56分
43
Before Using the Handset
1About message area
In the message area of the Home screen, information such as number of new emails received
or schedules registered are displayed. Details of each can be checked by tapping the item.
* Items as per default setting. Items to display can be changed.3P130
Item Description Reference
aNumber of new emails
received
Displays number of new emails received. Displays Inbox
when tapped. P252
bNumber of new voice
mails recorded
Displays number of messages recorded in voice mail
service. Connects to network and plays the message when
tapped.
P368
cNumber of new short
messages (SMS) received
Displays number of new short messages (SMS) received.
Displays Inbox when tapped. P252
dNumber of scheduled
events registered
Displays number of scheduled events registered for the
day. Displays calendar when tapped. P322
eNumber of tasks
registered in To Do list
Displays number of active tasks in To Do list. Displays To
Do list screen when tapped. P336
00M1000EN.book 43 ページ 2004年11月24日 水曜日 午前7時56分
44
Before Using the Handset
Selecting the Menu
Tap $$ (Application launcher) on Application Selector bar to display the application menu list. Tap
relevant icons and items until you get to the target screen from the menu list.
<Example: when displaying video capturing screen>
aTap $$ on the Application Selector bar
• You can change the display on your screen. 3 P137
bTap $$ to scroll screen y Tap $$
NOTE
• Menu list 3 P520
• When an icon or item is tapped by mistake, tap $$ again to perform the operation from Menu list again.
1Launching an Application
To launch an application, you can either select an application from the application launcher
menu list, press a key, or tap a shortcut key, etc.
In this manual, operational procedures are explained using the easiest or the most
appropriate procedures at the time of purchase.
Vertical arrow
Icon display List display
00M1000EN.book 44 ページ 2004年11月24日 水曜日 午前7時56分
45
Before Using the Handset
1Scrolling a screen
A scroll bar or arrow for scrolling the screen is displayed enabling you to display out of range
portions of screens with tabs or list screens. If you need to select items mentioned in the
operational descriptions but not displayed on screen, tap/drag the screen and scroll the entire
screen to continue the operation.
Selecting a Function from a Shortcut
On the FOMA handset, besides tapping icons or items from the Menu list to launch an
application, you can also use shortcuts to launch an application with a single tap of a screen or a
single push of a key.
• Shortcut operations can be performed in the following manners.
- Tapping an icon other than $$ on the Application Selector bar
- Tapping the Shortcut key on the Home screen
- Pressing the Home key for 3+ seconds
NOTE
• You can change applications registered with any shortcut key or home key on the home screen or icon except
the $$ icon on the Application Selector bar. 3 P131, P343
Example of a scroll bar Example of an arrow
00M1000EN.book 45 ページ 2004年11月24日 水曜日 午前7時56分
46
Before Using the Handset
Selecting a Function from a Menu Bar
You can activate registration and setup screens by tapping an item on the Menu bar and then
tapping an item in the menu.
With some applications, menus are displayed and various operations can be performed by
tapping an area other than the Menu bar.
• Items displayed varies with each screen.
<Example: when displaying the wallpaper setup screen in the Home screen>
aTap $$ on the Application Selector bar
bTap Home on the Menu bar
cTap Wallpaper setup from the menu
Displays the Wallpaper setup screen. Perform wallpaper modification from the setup
screen.
• How to operate 3 P132
Menu bar
08BEF01_1col_EN.fm 46 ページ 2004年11月24日 水曜日 午前9時12分
47
Entering Text
To enter text on your FOMA handset, tap the characters on the keyboard displayed on the
screen. This section explains how to display the keyboard and how to enter basic text.
For more information on Inputting Text, refer to Text Input. 3 P465
• The default text input option is set to Japanese kana keyboard at time of purchase. 3 P467
<Example: when inputting "太郎" to register the name to Contacts>
aTap $$ on the Application Selector bar, and tap Phone y New on
the Menu bar
bTap Name and tap $$ on the Status bar
cTap [ た] y [ ろ] y [う]
Displays the conversion options of the entered text.
• Tap [カナ], [英数 ], [ 記号 ] to convert the character type.
3 P467
Keyboard icon
Japanese kana keyboard
00M1000EN.book 47 ページ 2004年11月24日 水曜日 午前7時56分
48
Before Using the Handset
dSelect " 太郎 " from the conversion options and tap
Entered text is converted.
• Drag the scroll bar and display when you have multiple conversion options.
• When conversion assistant function is turned ON, the projected text string options
following the converted characters are displayed. 3 P491
NOTE
• You can change the input method. 3 P467
Help Function
When Forgetting a Function
On your FOMA handset, you can find applications and functions that possess a help feature to
display descriptive methods of various actions and operations.
• The following applications and functions can display Help.
- Notepad edit screen
- Document viewer list/display screen
- Freehand text entry screen
aTap Edit y Help on the Menu bar in each application screen
As viewed on a
Document viewer
• Tap $$ to display Help on the Freehand text entry screen.
00M1000EN.book 48 ページ 2004年11月24日 水曜日 午前7時56分
49
Before Using the Handset
Using the UIM
The UIM is an IC card that stores customer information such as your telephone number.
By inserting it in the FOMA handset, you can utilize voice calls, video calls, email communication,
packet transmission, etc.
If you possess multiple FOMA handsets, you can swap the UIM between handsets to meet
varying purposes.
• You can store Contacts and Short messages (SMS).
• For more information about the UIM, refer to the UIM manual.
Inserting/Removing the UIM
• Turn off the power of your FOMA handset before inserting/removing the UIM.
• Do not touch or damage the IC portion when inserting/removing the UIM.
• The UIM may break if you apply excessive force on the card while inserting.
• Take cautions to avoid misplacing the UIM after removal.
How to Insert
aTake off the rear cover by sliding it
towards the direction of the arrow while
applying pressure on the rear cover
lock
• Remove the Battery pack if it is
attached. 3 P52
bSlide the cover of the UIM tray towards
the direction of Arrow 1, and lift
towards the direction of Arrow 2
cPlace the UIM on the UIM tray with the
IC side facing down
dClose the cover of the UIM tray. Slide it
towards the direction of the arrow and
lock
Rear cover lock
Illustration
UIM tray
Illustration
Illustration
Illustration
00M1000EN.book 49 ページ 2004年11月24日 水曜日 午前7時56分
50
Before Using the Handset
How to Remove
The UIM PIN number
You can set up 2 PIN numbers "PIN1 code" and "PIN2 code" to the UIM. 3 P147
Both are set to "0000" at time of purchase but they can be changed later. 3 P150
UIM Action Limitation Function
The UIM action limitation function protects your data/files.
• When data/files are downloaded from websites, or when email attachments are accessed while the UIM is
inserted to your FOMA handset, the UIM action limitation function is automatically set up to such data/files.
• You cannot display or play data/files set up with the UIM action limitation function when no UIM is inserted or
when a UIM different from the one used to initially obtain data/files is inserted.
• The following data/files are subject to being protected by the action limitation function.
- Images/melodies/Java applications downloaded from websites.
- Saved websites
- Downloaded dictionaries
- Email attachments
NOTE
• Home screens or ring tones set up with data/files that have been set up with the UIM action limitation function
will be reverted to default setting when the original UIM is removed or replaced by a separate UIM. To recover
the setting, reinsert the UIM used to obtain the data/file.
• The UIM action limitation function is not set up to data/files obtained via the TransFlash memory card/
Bluetooth, or images captured with the FOMA handset.
eAttach the Battery pack and rear cover
• How to attach 3 P52
aRemove the rear cover and the Battery
pack
• How to remove 3 P52
bOpen the cover of the UIM tray and
remove the UIM
• How to open the cover of the UIM tray
3 P49
Illustration
Illustration
00M1000EN.book 50 ページ 2004年11月24日 水曜日 午前7時56分
51
Before Using the Handset
Functional Differences in UIMs
Functions vary between the 2 types of UIMs available: the green type and the blue type. Pay
close attention when using each of the functions described below.
1WORLD WING
WORLD WING is a FOMA International Roaming Service from DoCoMo made available for
use by inserting the UIM (Green) to GSM phones deploying this service or to FOMA handsets
compatible with the GSM standard allowing overseas use with the same phone number used
domestically. 3 P505
You need to apply in order to use WORLD WING. For more information, contact "General
Inquiries Service" listed in the reverse side of this manual.
Inserting/Removing the Battery Pack
You can insert the Battery pack to your FOMA handset.
• Turn the FOMA handset power off when changing the Battery pack.
How to Insert
Function UIM (Green) UIM (Blue) Reference
Maximum digits allowed to
register to UIM contact list
26 digits maximum 20 digits maximum P106
User authentication
procedure to use FirstPass
Available for use Not available for use –
Use of WORLD WING Available for use Not available for use P505
Service Dial "DoCoMo Support Outlet",
"DoCoMo General Services
Desk" available for use
Not available for use
P374
aTake off the rear cover by sliding it
towards the direction of the arrow while
applying pressure on the rear cover
lock
bInsert the Battery pack underneath the
protruding portion, and attach it by
pushing it towards the direction of the
arrow
Rear cover lock
Illustration Illustration
00M1000EN.book 51 ページ 2004年11月24日 水曜日 午前7時56分
52
Before Using the Handset
How to Remove
NOTE
• Forcing the Battery pack onto the handset may cause the FOMA handset to break if the UIM is not properly
attached.
• Forcing the Battery pack onto the handset may cause the interface of the FOMA handset to break.
cFit in the 4 hooks located in the rear
cover to the corresponding holes on
the FOMA handset, and attach by
sliding it towards the direction of the
arrow
aTake off the rear cover by sliding it
towards the direction of the arrow while
applying pressure on the rear cover
lock
bHold the hooks on both ends of the
Battery pack, and remove by lifting it
towards the direction of the arrow
Illustration
Illustration
Rear cover lock
Illustration
00M1000EN.book 52 ページ 2004年11月24日 水曜日 午前7時56分
53
Before Using the Handset
Effectively Using the Battery Pack
Always use a FOMA designated Battery pack in order to get the most out of your FOMA handset.
1Life of Battery Pack
• The Battery pack is an expendable item. No matter how you charge it, the operation time per use gradually
decreases. The life of the Battery pack will have expired when the operation time per use is approximately
halved compared to the original operation time (The normal life of the Battery pack is approximately 1 year,
however, it is generally shorter depending on the frequency of use).
1Avoid charging for long hours (a few days) without turning the power off.
• When the FOMA handset is turned on and neglected for long hours while being charged, the Battery pack
continues to supply power to the FOMA handset after charging is complete. The FOMA handset can hence
be used for a shorter period of time compared to use immediately after charging is complete, causing the
battery alarm to set off momentarily. Properly charge the battery when this happens. Take out the FOMA
handset from the AC adapter (or the Desktop holder) and set it again when recharging.
1Estimated battery usage duration
The battery usage duration varies depending on the usage environment and the degradation
of the battery.
• Continuous call duration is an estimated call duration in a location where radio waves can be transmitted
normally.
• Continuous standby duration is an estimated standby duration in a location where radio waves can be
transmitted normally. The standby duration can be halved depending on charge level of battery, function
settings, surrounding environments such as temperature, radio wave conditions of location (out of range,
weak signals), etc. The call (or data transmission)/standby time is shortened when connecting to the
Internet. The call (or data transmission)/standby time is also shortened when composing emails or
launching Java applications.
• Continuous standby duration during motionless state is an estimated standby duration in a motionless
location where radio waves can be transmitted normally.
• Continuous standby duration in motion is an estimated standby duration in a location where radio waves
can be transmitted normally and a combination of "Motionless" "In motion" "Out of range" states take turn.
• The call (or data transmission)/standby time is shortened when the multiaccess function is enabled or
when the camera is used.
1Estimated charge time of Battery pack
• The estimated charge time is the period of time needed to charge the FOMA handset while turned off and
when Battery pack is empty. The charge time is longer when charged with the FOMA handset turned on.
Continuous standby duration Motionless: Approx. 200 hours
In motion: Approx. 110 hours
Continuous call duration Voice call: Approx. 120 minutes
Video call: Approx. XXX minutes
AC adapter XXX Approx. XXX minutes
In order to conserve the environment, please take the old batteries to NTT
DoCoMo or to a reseller, recycle cooperative.
00M1000EN.book 53 ページ 2004年11月24日 水曜日 午前7時56分
54
Before Using the Handset
Charging the Battery Pack
At the time of purchase, your Battery pack is not charged sufficiently. Always charge using the
accompanying AC adapter.
• The Battery pack cannot be charged on its own. Always insert the Battery pack to the FOMA handset before
charging.
• When charged with the FOMA handset turned on, you can make or receive calls. This, however, extends the
charge time.
• Even when the FOMA handset is turned off, a corresponding screen notifying the battery charge is displayed
on the display.
• When charging is complete, an alarm is set off notifying the completion of battery charge.
Using the AC adapter to charge
aOpen the interface cap of the external interface on your FOMA handset
bPlug in the connector of the AC adapter to the external interface of your FOMA handset
cPlug the power plug of the AC adapter to the outlet
The charge start tone is sounded and the charge is started.
• While charging, the icon on the status bar is changed to $$. When charging is complete, the
icon on the status bar is reverted to $$.
• When charged with the power turned off, a red status LED illuminates. When charging is
complete, a charge end tone is sounded and a green status LED illuminates. 3 P34
dWhen charging is complete, unplug the AC adapter from the outlet and detach the
connector from the FOMA handset by pressing the release button
eClose the interface cap of the external interface on your FOMA handset
Illustration
00M1000EN.book 54 ページ 2004年11月24日 水曜日 午前7時56分
55
Before Using the Handset
Using the Desktop Holder to Charge
By combining the AC adapter with the Desktop holder, you can charge without opening the
terminal cap of the FOMA handset.
• For more information, refer to the Desktop holder manual.
aConnect the AC adapter connector to the Desktop holder
bPlug the AC adapter to the outlet
cAttach the FOMA handset to the Desktop holder
The charge start tone is sounded and charging begins.
• While charging, the icon on the status bar changes to $$. When charging is complete, the
charge end tone is sounded and the status bar icon is reverted to $$.
• When charged with the power turned off, a red status LED illuminates. When charging is
complete, a charge end tone is sounded and a green status LED illuminates. 3 P34
dWhen charging is complete, detach the FOMA handset from the Desktop holder.
Battery Status
Checking the Battery Status
An icon showing the battery status is always displayed on the status bar.
• Use the battery level sign as the battery status indicator.
$$ :Full
$$ : Falling
$$ :Low
$$ :Empty
Charging recommended.
Illustration
00M1000EN.book 55 ページ 2004年11月24日 水曜日 午前7時56分
56
Before Using the Handset
Using the Screen to Check
The battery level can be displayed in text and checked.
aTap $$ on the status bar
When Battery Runs Out
NOTE
• You will be notified via vibration when the alert mode is set to Vibrate. The out-of-battery alarm is not set off
when set to Silent.
High :Full
Medium: Falling
Low :Low
None :Empty
Charging recommended.
The battery level warning screen is displayed and the out-of-
battery alarm is set off.
• Tap [Continue] to close the battery level warning screen.
00M1000EN.book 56 ページ 2004年11月24日 水曜日 午前7時56分
57
Before Using the Handset
Power ON/OFF
Turning the Power On/Off
• Perform initialization when using for the first time. 3 P58
• Hold the FOMA handset when turning the power on/off.
Turning the Power On
aSlide p down for 1+ second(s)
Turning the Power Off
aSlide p down for 1+ second(s)
Illuminates status LED and displays launch screen after sounding
the start tone.
Displays Home screen when the UIM is verified.
• Move to an appropriate location when the icon ($$) indicating
the signal level is not displayed. Insert the correct FOMA card
when the network status icon is either $$ red or $$ gray. 3 P41
• Displays PIN1 code entry screen when setup is configured to
enter PIN1 code. 3 P150
Displays end screen and turns the power off after sounding the
end tone.
Home screen
00M1000EN.book 57 ページ 2004年11月24日 水曜日 午前7時56分
58
Before Using the Handset
Initialization
Setting Up the Handset for the First Time
When turning the FOMA handset on for the first time, the initialization screen is displayed. In the
initialization screen, you can adjust the tapping position and sensing position of the touch screen
as well as set up the date and time.
aTurning the power of your FOMA handset on
bTap [Restart]
cAdjusting the tap position of touch screen
dSet up date and time
• How to set up 3 P59
• How to turn power on 3 P57
Restarts the FOMA handset to automatically perform language
setup, and displays the tap position adjust screen on the touch
screen.
• How to adjust 3 P134
00M1000EN.book 58 ページ 2004年11月24日 水曜日 午前7時56分
59
Before Using the Handset
Language Selection
Switching Languages Displayed on Screen
You can change the screen language into one of preinstalled languages in your FOMA handset.
• English and Japanese are installed in your FOMA handset by default. You can set other languages by
installing the language data compatible with the FOMA handset.
aTap $$ y $$ on the Application Selector bar, and tap “一般 ”
(General) tab y Language Selection tab on the Control panel
screen
bTap “ 言語選択 ” (Select language) and select the language
cTap [Done]
dTap [はい] (Yes) on the Restart handset screen
Your FOMA handset restarts with the selected language set.
• Tap [No] to cancel the language setting.
De
f
ault sett
i
ng Japanese
00M1000EN.book 59 ページ 2004年11月24日 水曜日 午前7時56分
60
Before Using the Handset
Date and time setup
Adjusting the Date and Time
You can set up the date and time.
• When turning the FOMA handset on for the first time, the initialization screen is displayed. In the initialization
screen, you can set up the date and time. 3 P58
aTap $$ y $$ on the Application Selector bar, and tap General tab
y Date and time on the Control panel screen
bTap Date field
cTap Year $$ y $$ and select year to set up
• You can also tap $$$$ on either side of the year to switch the year.
dTap month and select month to set up
• You can also tap $$$$ on either side of the month to switch the month.
eTap date to set up
Ye a r
Month
Date
00M1000EN.book 60 ページ 2004年11月24日 水曜日 午前7時56分
61
Before Using the Handset
fTap Time field to set up time
gTap $$
hTap [Done]
Date and time are set up.
1When setting Summer time zones
You can select the zones to change to Summertime
Transmission Mode
You can switch between transmission modes within the following networks by utilizing the dual
system of your FOMA handset.
Your FOMA handset is also compatible with the Wireless LAN. You can connect to the Internet
via the Wireless LAN.
• You can only use Wireless LAN when the UIM is not attached.
• Switch between networks if you are not selected to be in the desired network. 3 P515
• Wireless LAN needs to be set up in advance. 3 P392
aTap $$ y $$ on the Application Selector bar, and tap General tab y Date and time on the
Control Panel screen. Tap [Summer time] on the Date and time screen
Europe: All countries in Europe are set to Summer time
Northern zone
: All countries in the northern hemisphere are set to
Summer time.
Southern zone
: All countries in the southern hemisphere are set to
Summer time.
bTap $$ on the zone to set up Summer time, and tap [Done]
W-CDMA mode : Available for domestic use within the FOMA network, or in some parts of Asia.
GSM mode : Available for use in Europe or Asia by utilizing the International Roaming
service
Tap to enlarge size of digit.
Tap to switch between (am) and (pm).
Tap to reduce size of digit.
00M1000EN.book 61 ページ 2004年11月24日 水曜日 午前7時56分

62
Before Using the Handset
• You need to apply to WORLD WING (DoCoMo International Roaming Service) when using the FOMA
handset overseas. For more information, contact a General Inquiries outlet listed in the back side of this
manual.
Caller ID
Notifying Your Phone Number to the other party
You can choose to display your phone number (Caller ID) to the handset of the other party when
calling.
• You can use this feature only when the handset of the other party is a digital terminal and capable of
displaying Caller ID.
• Caller ID is your personal information. Pay attention when notifying your Caller ID to others.
• You cannot display Caller ID information when outside the service area or out of range.
aTap $$ on the Application Selector bar, and tap Phone y Caller ID
on the Menu bar
bTap Always Hide/Always Display and input network authentication
number from the network authentication number screen y tap
[Done]
Displays a message notifying that your Caller ID has been set to display.
• Network authentication number 3 P146
cTap [Done]
NOTE
• You can also choose to display or hide your Caller ID for each call that you make. 3 P71
• When you hear a guidance requesting you to send your Caller ID while making a call, set up to display your
Caller ID and then call again.
Always Hide : Your Caller ID is hidden.
Always Display
: Your Caller ID is displayed.
00M1000EN.book 62 ページ 2004年11月24日 水曜日 午前7時56分
63
Before Using the Handset
Verify Setup
aTap $$ on the Application Selector bar, and tap Phone y Caller ID
y Check status on the Menu bar
bTap [Done]
Phone Number Display
Verifying Your Own Phone Number
You can display and verify the phone number of your FOMA handset.
aTap $$ on the Application Selector bar, and tap Phone y My Line
on the Menu bar
bTap [Done]
Displays setup details.
Displays the phone number.
00M1000EN.book 63 ページ 2004年11月24日 水曜日 午前7時56分

00M1000EN.book 64 ページ 2004年11月24日 水曜日 午前7時56分

65
Making/Answering Calls
Making a Voice Call . . . . . . . . . . . . . . . . . . . . . . . . . . . . . . . . . . . . . . . . . . . . . . . 66
Redialing Phone Numbers You Have Dialed <Redial>. . . . . . . . . . . . . . . . . . . 68
Showing/Hiding Caller ID per Call <186/184> . . . . . . . . . . . . . . . . . . . . . . . . . . 70
Sending Tone Signals (DTMF) Quickly <Pause/Wait> . . . . . . . . . . . . . . . . . . . 72
Using International Calls <WORLD CALL>. . . . . . . . . . . . . . . . . . . . . . . . . . . . 73
Talking without Holding the Handset while Driving <In-Car Handsfree>. . . . 74
Setting In-Car Handsfree Operation Features . . . . . . . . . . . . . . . . . . . . . . . . . 74
Answering a Voice Call . . . . . . . . . . . . . . . . . . . . . . . . . . . . . . . . . . . . . . . . . . . . 75
Using Answered Call History <Answered Call History> . . . . . . . . . . . . . . . . . 77
Adjusting Earpiece Volume during a Call <Earpiece Volume> . . . . . . . . . . . . 77
Rejecting Incoming Calls while Driving <Drive Mode> . . . . . . . . . . . . . . . . . . 78
Checking Missed Calls <Missed Calls> . . . . . . . . . . . . . . . . . . . . . . . . . . . . . . 79
1Making Voice Calls
1Answering Voice Calls
1When You Are Unable to Answer Calls
00M1000EN.book 65 ページ 2004年11月24日 水曜日 午前7時56分

66
Making/Answering Calls
Making a Voice Call
You can make a voice call with your FOMA handset.
• You cannot make calls to internal phones and other phones that do not support the entry of area codes from
your FOMA handset.
aTap $$ in the Application Selector bar
bEnter the phone number including the area code
Tap the key on the phone number entry screen to vibrate your FOMA handset.
• You can enter a pause ([P]), wait ([W]), [+], [#] and [*]. 3P73
1To make calls to a fixed line
Area code - city code - subscriber number
• Always include the area code even when you are dialing within the same area.
1To make calls to a mobile phone
090-XXXX-XXXX
080-XXXX-XXXX
1To make calls to a PHS
070-XXXX-XXXX
cTap [$$]
The following operations can be performed.
[0]~[9], [4], [#]
: Enter a phone number.
[$$] : Deletes from the last digit entered. Pointing for 1+
seconds deletes all the digits entered.
[History] : Displays Redial/Answered call history. 3P69, P78,
P81
You will hear the dial tone and then the call tone.
1If you hear the busy tone
The other party is busy. Press e and wait a while before
dialing again.
1If you hear a message that your call cannot be connected
The other party's mobile phone or PHS is turned off or in an
area with no radio waves. Press e and wait a while before
dialing again.
1If you hear a message requesting your Caller ID
Press e to turn Set caller ID on and then dial again. 3P62
Phone number entry screen
00M1000EN.book 66 ページ 2004年11月24日 水曜日 午前7時56分
67
Making/Answering Calls
dStart talking
ePress e to end the call
The call ends.
1Menu Bar
From the Menu bar on the Phone number entry/Talking screen, tap Phone or Settings to
display the following items:
* : Not displayed while displaying the Talking screen.
• Some items cannot be performed depending on operations.
NOTE
• Pressing e in idle state also displays the Phone number entry screen.
• If a voice call fails, tap [$$ Retry] to redial the call.
• If the caller is stored as a contact, the caller's name and still picture (if included when you added the contact)
is displayed on the Talking screen. Tap [$$] to display the caller's contact information.
• When you end a call, [$$ Redial] is displayed on the screen. Tap [$$] to redial the call.
• You can make calls with a Bluetooth headset.
• You can change the design of the Phone number entry screen. 3P139
• You can set your FOMA handset not to display Call Duration on the Talking screen. 3P135
• You can sound the Audible timer to inform yourself the call duration lapsed. 3P128
Displays Call Duration.
The following operations can be performed.
[Mute]/[Unmute]
: Tap to switch between Mute/Unmute. When Mute
is set, the person on the other end cannot hear
your voice, but you can hear the other person's
voice.
[$$]/[$$] : Tap to set/cancel Touch screen Lock. When
Touch screen Lock is set, you can tap [$$] only.
[Hold]/[Resume]
: Tap to set/cancel On-hold. While a call is on hold,
you cannot set/cancel Mute.
[$$ Keypad] : Displays the phone number entry screen.
s: Press to set/cancel Speakerphone.
Phone
My line(s) . . . . . . . . . . . . . . . . . . . . . P63
Voicemail . . . . . . . . . . . . . . . . . . . . P366
Caller ID . . . . . . . . . . . . . . . . . . P62, P71
Nuisance Calls . . . . . . . . . . . . . . . . P371
Additional Service. . . . . . . . . . . . . . P376
Copy number . . . . . . . . . . . . . . . . . P482
Add to Contacts* . . . . . . . . . . . . . . . P99
Paste* . . . . . . . . . . . . . . . . . . . . . . P483
Settings
Call control . . . P70, P156, P368, P370,
P372, P375
Call tracking . . . . . . . . P128, P135, P347
Display . . . . . . . . . .P68, P71, P95, P139
Guidance . . . . . . . . . . . . . . . . . . . . P374
Network . . . . . . . . . . . . . . . . P373, P515
Roaming. . . . . . . . . . . . . . . . . . . . . P516
Security . . . . . . . . . . . . . . . . P150, P158
Tones . . . . . . . . . . . . . P122, P127, P160
Talking screen
00M1000EN.book 67 ページ 2004年11月24日 水曜日 午前7時56分
68
Making/Answering Calls
Auto-Locking the Touch Screen before Talking
You can set your phone to automatically lock the touch screen when the Talking screen is
displayed so that the touch screen does not unintentionally operate during a call.
aOn the Phone number entry screen, tap Settings y Show on the
Menu bar
bTap $$ of Auto touch screen lock
• Tap $$ again to cancel Auto touch screen lock.
cTap [Done]
Auto touch screen lock is set.
Redial
Redialing Phone Numbers You Have Dialed
Your FOMA handset stores a history of dialed phone numbers to enable you to check or redial
from Redial call list. You can also check dialed phone numbers and names if you have stored the
callers as contacts.
• Up to 100 phone numbers including the numbers in Answered and Missed calls can be stored.
• If the date and time are set in Set date and time, the date and time of redial will also be stored. 3P59
aPress c in idle state, and tap the Call history tab in the Call
history screen
• How to operate 3P66
$$ : Shows that you have made a video call.
[$$ Keypad]
: Displays the phone number entry screen. 3P66
Date and time you have dialed
00M1000EN.book 68 ページ 2004年11月24日 水曜日 午前7時56分
69
Making/Answering Calls
bTap the number to redial
cTap Voice Dial/Video Call
A call is made in the selected mode.
NOTE
• In Step 2, press 7 to select a number then press c to redial in the same mode as the selected redial call
mode (voice call/video call). To change the call mode, press 7 to select a number, and then press 5. On
the Phone number entry screen, select the call mode and make a call. 3P72
• If a voice call fails (busy or not answered), tap [$$ Retry] to redial.
• Press c twice in idle state to redial the last call dialed (Quick Redial).
• When the phone numbers stored in Redial exceed 100, the oldest number is automatically deleted.
• You can set your FOMA handset not to display the date and time of redial. 3P71
Clearing Call History
You can use this function to delete the entire redial history.
• This also deletes the calls in Answered and Missed call history.
aPress c in idle state, and tap Phone y Clear call history on the
Menu bar in the Call history screen
The entire history is deleted.
Automatic Redial
Using Automatic Redial
You can set your FOMA handset to automatically redial failed voice calls (busy or not answered).
aTap $$ in the Application Selector bar and tap Settings y Call
control in the Menu bar, and then tap the Basic tab in the Call
control screen
bTap $$ of Auto Redial
• Tap $$ again to cancel Auto Redial.
The following operations can be performed.
Voice Dial : Makes a voice call.
Video Call : Makes a video call.
Details : Displays the details of a redial.
Send text message
: Composes and sends an SMS (Short Message
Service) message. 3P261
Add to Contacts
: Stores a phone number to Contacts. 3P99
Go to Contact : If the number is stored as a contact, you can
display the contact information.
D
e
f
au
l
t sett
i
ng Automatic Redial: $$ (OFF)
00M1000EN.book 69 ページ 2004年11月24日 水曜日 午前7時56分
70
Making/Answering Calls
cTap [Done]
Auto Redial is set.
Showing Date and Time Data of Call History
You can use this function to display the date and time of calls you have dialed when you view
Redial.
You can display one or the other of the date and time.
• This also displays the date and time of calls in Answered and Missed call history in a similar manner.
aTap $$ in the Application Selector bar, and tap Settings y Show on
the Menu bar
bTap $$ of the item to display
cTap [Done]
The date and/or time will be displayed.
186/184
Showing/Hiding Caller ID per Call
You can select to notify or hide your phone number (Caller ID) to the other party for each
call.
• This function works when the intended party's phone is a digital handset and able to display the Caller ID.
• Your phone number is valuable information, so take extra care when notifying your number.
• To notify your Caller ID, use any of the following:
D
e
f
au
l
t sett
i
ng Show time: $$(ON) Show date: $$ (ON)
Show time: Shows the time you have dialed.
Show date: Shows the date you have dialed.
• Tap $$ again to cancel the settings.
Operation Reference
Select this option from the Menu before dialing P72
Prefix 186/184 to a phone number before dialing P72
Set this function in advance by using the network services P62
00M1000EN.book 70 ページ 2004年11月24日 水曜日 午前7時56分

71
Making/Answering Calls
Prefixing 186/184 to a Phone Number
You can select to notify or hide your Caller ID to the other party by prefixing a specific number to
the phone number to call.
1To show the Caller ID
Enter 186 + the other party's phone number, and tap [$$]
• Tap [$$] to make a video call.
1To hide the Caller ID
Enter 184 + the other party's phone number, and tap [$$]
• Tap [$$] to make a video call.
NOTE
• Instead of "186/184", entering "*31#/#31#" also shows/hides the Caller ID.
• When you hear a message requesting your Caller ID upon dialing, set your FOMA handset to show your
Caller ID and redial.
Showing/Hiding Caller ID when Dialing
Enter the phone number first, and then set your FOMA handset to show/hide your Caller ID. You
can also set this option by displaying a phone number from Redial, Answered or Contacts.
aTap $$ in the Application Selector bar, and enter a phone number
bOn the Menu bar, tap Phone y Caller ID y Hide Next/Show Next
cTap [$$]
A call is made.
• Tap [$$] to make a video call.
Hide Next : Hides your Caller ID.
Show Next : Shows your Caller ID.
00M1000EN.book 71 ページ 2004年11月24日 水曜日 午前7時56分
72
Making/Answering Calls
Pause/Wait
Sending Tone Signals (DTMF) Quickly
By suffixing "P" or "W" and digits to a phone number, you can send subsequent numbers [P] or
[W] as tone signals (DTMF).
aTap $$ in the Application Selector bar, and enter a phone number
and tone signals
bTap [$$]
A call is made to the entered phone number.
1When "P" is inserted
1When "W" is inserted
• Point [*] to insert "P".
• Point [#] to insert "W".
When the call is connected, the screen shown on the left is
displayed.
When the call is connected and after a lapse of 3 seconds, the
tone signals following [P] are sent automatically.
• Tap [Cancel] to stop sending the tone signals.
When the call is connected, the screen shown on the left is
displayed.
Tap [Continue] to send the tone signals.
• Tap [Cancel] to stop sending the tone signals.
00M1000EN.book 72 ページ 2004年11月24日 水曜日 午前7時56分
73
Making/Answering Calls
NOTE
• To send tone signals during a call, tap [## Keypad] to display the Phone number entry screen and tap the
numbers to send. The numbers you have tapped are sent directly as tone signals. Tap [## Active] to return
to the Talking screen.
• Some devices on the recipient side cannot receive tone signals.
• You can also send tone signals during a video call. 3P89
WORLD CALL
Using International Calls
DoCoMo International Call Service "WORLD CALL"
This international call service is available for DoCoMo mobile phones.
1How to make calls
Enter 009130 + 010 + Country code + Area code + phone number, and then tap [$$]
* You can store the procedure above in Contacts of your FOMA handset.
* When the area code begins with "0", omit it when dialing. (However, include "0" to call fixed lines in Italy.)
• You can call approximately 220 countries and regions.
• The "WORLD CALL" charges are added to your monthly FOMA bill.
• No subscription/monthly fees are needed.
* You need not to subscribe this service if you are signed up for the FOMA service.
• Changes in international call dialing procedure
"MY LINE" service is not applicable to mobile phone communications, including WORLD CALL
service. Along with the introduction of "MY LINE" service, the dialing procedure for international
communications using a mobile phone has been changed. Consequently, note that the previous
dialing procedure (without the prefix "010") can no longer be used.
• For more information, please contact "General contact" on the back of this manual.
* When using international carriers other than DoCoMo, please contact each of the carriers.
• If you are using a specific foreign 3G mobile phone*1, International Video Call is available by dialing in the
video call mode after following the dialing procedure described above* 2.
*1 : As of XX, 2004, you can connect to Hutchison 3G UK (Great Britain) or Hutchison 3G HK (Hong
Kong).
*2 : You may not be able to connect, or you may see distorted images sent from the intended party on
your FOMA handset depending on the connected end of the international video call line.
*1/2 : For details, visit the DoCoMo website.
00M1000EN.book 73 ページ 2004年11月24日 水曜日 午前7時56分
74
Making/Answering Calls
In-Car Handsfree
Talking without Holding the Handset while Driving
By connecting a commercially available in-car handsfree device to your FOMA, you can make or
answer calls without holding the handset.
To operate in-car handsfree devices, see the operation manual for each devices.
• When making or answering video calls by using an in-car handsfree device, images cannot be sent to the
intended party.
Setting In-Car Handsfree Operation Features
You can set how your FOMA handset functions when In-Car Handsfree feature is ON such
as launching the Auto answer or Power saving mode.
aTap $$ y $$ in the Application Selector bar, and tap the Handset
tab y Car settings tab on the Control panel screen
bTap Auto answer and select the option
• Tap OFF not to automatically answer calls.
cTap Power-Off time and select the option
• Tap Continuous not to activate Power saving mode.
dTap Charge time and select the option
• Tap Full charge to fully charge the battery.
eTap $$ of Backlight on
• Tap $$ again to cancel the illumination of backlight.
fTap [Done]
• Car settings are set.
De
f
ault sett
i
ng Auto answer: OFF Power-Off time: 15 minutes Charge time: OFF Backlight on:## (ON)
The following settings can be configured.
Auto answer: Selects duration to automatically answer calls.
Power-Off time
: Selects duration to activate Power saving mode.
Charge time : Selects the charge time.
Backlight on: Sets the FOMA handset to always illuminate the
backlight.
00M1000EN.book 74 ページ 2004年11月24日 水曜日 午前7時56分
75
Making/Answering Calls
Answering a Voice Call
You can answer a call with your FOMA handset.
aReceive a call
bTap [Answer]
cPress e to end the call
The call ends.
NOTE
• You can automatically forward incoming calls to the Voice Mail Center during a call. 3P375
• You can answer a call with a Bluetooth headset.
The FOMA handset rings and the Status LED blinks.
• You can set your FOMA handset to vibrate instead of playing a
ring tone. 3P126
The call is connected.
• If you tap [Reject], the incoming call is disconnected.
• You can perform the same operations as Step 4 in "Making a
Voice Call".
•Press u/d to stop the ring tone.
00M1000EN.book 75 ページ 2004年11月24日 水曜日 午前7時56分
76
Making/Answering Calls
Displaying Incoming Calls
Display for incoming calls varies depending on the dialing settings of the caller or your FOMA
handset's settings.
1When the other party's Caller ID is sent
1When the other party's Caller ID is not sent
NOTE
• If you subscribe to and set up the Call Waiting Service, you will hear beeps (call waiting ring tone) when
another call is received during a call. In this situation, you can switch to the other call by any of the following:
- Put your current call on hold and take the incoming call.
- Reject the incoming call.
• Incoming video calls during a voice call are rejected and recorded in Answered call history.
• You cannot make calls from internal phones and other phones that do not support the entry of area codes
to FOMA handsets.
The caller's phone number appears on the display. If you have
stored the caller as a contact, the caller's name and still picture
(if included when you added the contact) are also displayed.
The reason for hiding Caller ID is displayed on the display.
3P159
00M1000EN.book 76 ページ 2004年11月24日 水曜日 午前7時56分
77
Making/Answering Calls
Answered Call History
Using Answered Call History
The FOMA handset records information on received calls in Answered. You can check the
callers' phone numbers and names if you have stored the callers as contacts.
• Up to 100 phone numbers including the numbers in Redial and Missed can be stored.
• If the date and time are set in Set date and time, the date and time of Answered will also be stored. 3P59
aPress c in idle state, and tap the Answered tab in the Call
history screen
NOTE
• As with Redial, you can also make calls, send messages as well as store callers as contacts from Answered.
3P69
• When the phone numbers stored in Answered exceed 100, the oldest number is automatically deleted.
• Clearing Call History 3P70
Earpiece Volume
Adjusting Earpiece Volume during a Call
You can adjust the earpiece volume to any of 8 levels.
• You cannot adjust the volume in idle state.
aPress u or d during talking
•Press u to raise the volume.
•Press d to lower the volume.
•Press u/d continuosly to change the volume by multiple levels.
$$ : Shows that you have received a video call.
[$$ Keypad] : Displays the phone number entry screen. 3P66
• If the caller has sent the Caller ID, the phone
number is displayed. If you have stored the
caller as a contact, the caller's name is also
displayed.
Received date
00M1000EN.book 77 ページ 2004年11月24日 水曜日 午前7時56分
78
Making/Answering Calls
Drive Mode
Rejecting Incoming Calls while Driving
Drive Mode is an automatic answering service to encourage safe driving.
When Drive Mode is ON, callers will hear a message that you are unable to answer calls while
driving, and be disconnected.
• You can set/cancel Drive Mode only in idle state.
• You can set/cancel Drive Mode even when you are in out of the service area.
• You can make calls even during Drive Mode.
aPress a for 1+ seconds during the Home screen is displayed
Drive Mode is set.
• $$ is displayed on the Status bar.
1To cancel Drive Mode
Press a for 1+ seconds during the Home screen is displayed.
Drive Mode is canceled.
1Incoming calls during Drive Mode
The FOMA handset does not ring while incoming voice/video calls are received. Incoming
calls are recorded in Answered and the Missed call screen is displayed. 3P82
Callers will hear a message that you are unable to answer while driving, and be disconnected.
However when the power is off or when you are in out of the service area, callers will hear the
out of service area message instead of Drive mode guidance.
1Relationship between incoming calls during Drive Mode and network services
Network Service Response to Incoming Voice Calls Response to Incoming Video Calls
Voice Mail Service Plays the drive mode guidance to the
caller, and forwards to the Voice Mail
Center.
If you set the voicemail ringing time to
"0 sec.", no message is played.
The Drive Mode message is
displayed on the caller's phone and
the call is disconnected.
Call Forwarding Service Plays the drive mode guidance to the
caller, and forwards the call to the
forwarding number.
If you set the Call Forwarding ringing
time to "0 sec.", no message is
played.
Forwards the call to the forwarding
number.
However, you cannot forward
incoming video calls to a forwarding
destination incompatible with the 3G-
324M standard. 3P86
Nuisance Call Blocking
Service
Plays the guidance to the caller that
the call cannot be accepted when a
call is received from a phone number
stored in the Call Reject List.
The Drive Mode message is
displayed on the caller's phone, and
the call is and disconnected.
Caller ID Display Request
Service
Plays the guidance requesting the
Caller ID to be sent if the caller sends
no Caller ID, and the call is
disconnected.
The Drive Mode message is
displayed on the caller's phone, and
the call is disconnected.
00M1000EN.book 78 ページ 2004年11月24日 水曜日 午前7時56分
79
Making/Answering Calls
NOTE
• To set Drive Mode from screens other than the Home screen, tap $$ on the Status bar to display the Alert
Mode screen. Tap $$ y [OK] on the Drive Mode tab.
Missed Calls
Checking Missed Calls
The FOMA handset records information on missed calls in Missed. You can check the callers'
phone numbers and names if you have stored the callers as contacts.
• Up to 100 phone numbers including the numbers in Redial and Answered can be stored.
• If the date and time are set in Set date and time, the date and time of missed calls will also be stored. 3P59
aPress c in idle state, and tap the Missed tab in the Call history
screen
NOTE
• As with Redial, you can also make calls, send messages as well as store callers as contacts from Missed.
3P69
• When the phone numbers stored in Missed exceed 100, the oldest number is automatically deleted.
• Clearing Call History 3P70
$$ : Shows that you have received a video call.
[$$ Keypad] : The phone number entry screen is displayed.
3P66
• If the caller has sent the Caller ID, the phone
number of the caller is displayed. If you have
stored the caller as a contact, the caller's name
is also displayed.
Received date and time
00M1000EN.book 79 ページ 2004年11月24日 水曜日 午前7時56分
80
Making/Answering Calls
Missed Calls while in Idle State
When you were unable to answer an incoming call, the Missed call screen is displayed.
From the Missed call screen, you can easily make a call to the caller and can display the Missed
call history.
Showing Missed Calls Received when Ringless Incoming Call Time is Set
When the ringless incoming call time is set, you can set your FOMA handset to display missed
calls with no arrival call act in Missed.
• You can set this function only when the ringless incoming call time is set. 3P160
aTap $$ in the Application Selector bar, and tap Settings y Tones on
the Menu bar
The following operations can be performed.
[Call] : Makes a voice call to the caller.
[Video call] : Makes a video call to the caller.
[Yes] : Displays the Missed call history.
[No] : Closes the Missed call screen.
• If the caller has sent the Caller ID, the phone number is displayed. If you have stored the
caller as a contact, the caller's name is also displayed.
D
e
f
au
l
t sett
i
ng Ringless missed call display: $$ (OFF)
Voice call Video call Multiple missed calls
00M1000EN.book 80 ページ 2004年11月24日 水曜日 午前7時56分

81
Making/Answering Calls
bTap $$ of Ringless missed call display
• Tap $$ again to cancel the settings.
cTap [Done]
Ringless missed call display is set.
00M1000EN.book 81 ページ 2004年11月24日 水曜日 午前7時56分

00M1000EN.book 82 ページ 2004年11月24日 水曜日 午前7時56分

83
Making/Answering Video
Calls
About Video Calls . . . . . . . . . . . . . . . . . . . . . . . . . . . . . . . . . . . . . . . . . . . . . . . . 84
Making a Video Call. . . . . . . . . . . . . . . . . . . . . . . . . . . . . . . . . . . . . . . . . . . . . . . 84
Answering a Video Call. . . . . . . . . . . . . . . . . . . . . . . . . . . . . . . . . . . . . . . . . . . . 87
Setting an Outgoing Image. . . . . . . . . . . . . . . . . . . . . . . . . . . . . . . . . . . . . . . . . 89
Setting Images Displayed during a Video Call . . . . . . . . . . . . . . . . . . . . . . . . . 92
Changing Video Call Settings . . . . . . . . . . . . . . . . . . . . . . . . . . . . . . . . . . . . . . 93
00M1000EN.book 83 ページ 2004年11月24日 水曜日 午前7時56分
84
Making/Answering Video Calls
About Video Calls
The video call function is available between handsets supporting DoCoMo video calls. The
camera function enables you to talk while viewing each other on display or sending an image of
the surrounding scenery.
• DoCoMo video phones conform to 3G-324M*1, which is the international standard specified by 3GPP*2. You
cannot connect your FOMA handset to phones that are employing different specifications.
*1: 3G-324M
The international standard for the third-generation mobile video phones.
*2: 3GPP (3rd Generation Partnership Project)
The regional standards organization for developing common technological specifications for the
third-generation mobile telecommunication system (IMT-2000).
Display during Video Calls
Making a Video Call
You can make a video call with your FOMA handset.
• To view each other while talking, use the speakerphone function or earphone/microphone set with a switch.
3 P87, P358
• You can make international video calls by using the DoCoMo's international call service "WORLD CALL".
3 P74
aTap $$ in the Application Selector bar
Displays the phone number entry screen.
Indication Icon Description
aMain window – Displays the remote camera image.
bChild window – Displays the local camera image.
cOther party's
phone number/
name –
Displays the phone number if the
other party has sent the Caller ID. If
you have stored the caller as a
contact, the other party's name is also
displayed.
dDuration – Displays Call duration. 3 P135
eSpeakerphone $$ Displays Settings for the
speakerphone. 3 P87
fMute $$ Displays Settings for Mute. 3 P87
gCamera image $$ Displays Settings for the camera
image. 3 P91
hSwitch cameras $$ Switches between the Front-Camera
and Rear-Camera. 3 P91
iKeypad –Displays the phone number entry
screen. 3 P66
jKeypad for
DTMF $$ Displays the DTMF entry screen.
3 P89
abcdefghij
00M1000EN.book 84 ページ 2004年11月24日 水曜日 午前7時56分
85
Making/Answering Video Calls
bEnter the phone number including the area code
cTap [$$]
• Digital communication charges are billed when Connecting is displayed.
dStart talking
ePress e to end the call
The call ends.
1Menu Bar
From the Menu bar on the Phone number entry/Video call talking screen, tap Phone or Settings
to display the following items:
* Not shown while displaying the Talking screen.
• Some items cannot be performed depending on the operations.
The following operations can be performed.
[$$]/[$$]
: Every tapping swithes Mute and Unmute. When Mute is
set, the person on the other end cannot hear your voice,
but you can hear the other person's voice.
[$$]/[$$]
: Tap to send/cancel the camera image. 3 P91
[$$] : Tap to switch between the Front/Rear camera. 3 P91
[$$ Keypad]
: Displays the phone number entry screen.
[$$] : Displays the DTMF entry screen. 3 P89
s: Every pressing sets/cancels Speakerphone.
Phone
My line . . . . . . . . . . . . . . . . . . . . . . . P63
Voicemail . . . . . . . . . . . . . . . . . . . . P366
Caller ID . . . . . . . . . . . . . . . . . . P62, P71
Nuisance Calls . . . . . . . . . . . . . . . . P371
Additional Service. . . . . . . . . . . . . . P376
Copy number . . . . . . . . . . . . . . . . . P482
Add to Contacts . . . . . . . . . . . . . . . . P99
Paste . . . . . . . . . . . . . . . . . . . . . . . P483
Settings
Call control . . . . P70, P156, P368, P370,
P372, P375
Call tracking . . . . . . . . P128, P135, P347
Show . . . . . . . . . . .P68, P71, P95, P139
Guidance . . . . . . . . . . . . . . . . . . . . P374
Network . . . . . . . . . . . . . . . . P373, P515
Roaming. . . . . . . . . . . . . . . . . . . . . P516
Security . . . . . . . . . . . . . . . . P150, P158
Tones . . . . . . . . . . . . . P122, P127, P160
Mirroring off . . . . . . . . . . . . . . . . . . . P94
Video call engaged screen
Video call talking
screen
00M1000EN.book 85 ページ 2004年11月24日 水曜日 午前7時56分
86
Making/Answering Video Calls
NOTE
• When you make a video call by setting Camera off, you will still be charged for a video call.
• If a video call fails, the following messages are displayed on the display. However, depending on the other
party's phone model and subscription to network services the displayed message may not correspond to the
actual conditions.
• Video calls fail when you dial to phones that do not support the video call function, are in area with no radio
wave, or are switched off. If you make a video call to phones that do not support the video call function, the
call will be cut off and a "Connection Failed" message is displayed. Tap [$$ Voice] to redial as a voice call.
However, this redialing may not work if you call an ISDN synchronous 64K or PIAFS access point or an ISDN
video phone incompatible with 3G-324M (as of XX, 2004), or if you dial a wrong number. Note that you may
be charged for the call.
• If you dial 110, 119, or 118 using the video call function, the call will automatically be connected as a voice
call.
• During a video call, you cannot make another voice/video call.
• During a video call, incoming call/video calls are rejected, and the Missed call screen is displayed when the
call ends.
• If you receive an SMS/email message during a video call, the FOMA handset rings and displays an icon ($$
etc.) on the Status bar. Tap the icon to check the message while talking. However, you cannot receive a
message sent via data communication. 3 P316
• When talking with the speakerphone, always keep the FOMA handset away from your ear.
Sending Tone Signals (DTMF)
You can send tone signals (DTMF) during a video call.
aTap [$$] during talking
bTap the numbers to send
The numbers you tapped are sent as tone signals.
• Tap [$$] to close the DTMF entry screen.
Message Reason
The number you have dialed is not in service. Check
the number and try again.
You have dialed a phone number not in use.
The number you have dialed is busy. The line is currently engaged.
The number you have dialed is in area with no radio
wave or the phone may be switched off.
The number you have dialed is in an area with no
radio wave or the power may be turned off.
Connection failed. Reasons other than the above.
Displays the DTMF entry screen.
00M1000EN.book 86 ページ 2004年11月24日 水曜日 午前7時56分
87
Making/Answering Video Calls
NOTE
• Some devices on the recipient side cannot receive tone signals.
Redialing Failed Video Calls as Voice Calls
If a video call fails due to a lack of video call compatibility at the recipient side, you can redial as
a voice call.
aThe video call is disconnected
bTap [$$ Voice]
The FOMA handset redials as a voice call.
• Tap [Cancel] to stop redialing.
Answering a Video Call
You can receive an incoming video call.
aA video call is received
The FOMA handset rings and the Status LED flashes.
• You can set your FOMA handset to vibrate instead of playing a
ring tone. 3 P126
The connection failed
screen
00M1000EN.book 87 ページ 2004年11月24日 水曜日 午前7時56分
88
Making/Answering Video Calls
bTap [Answer]
cPress e to end the call
The call ends.
NOTE
• The Voice Mail Service does not take incoming video calls. Incoming video calls are received on your
handset, even when the Voice Mail Service has been set. 3 P366
• Even if the Call Forwarding Service is set, incoming video calls cannot be forwarded to phones incompatible
with the 3G-324M standard. Check the specifications of the device at the forwarding destination before
setting up the forwarding settings. 3 P370
• If a video call is received from a phone number stored in the Nuisance Calls Blocking Service, the call is
disconnected without playing the incoming call reject message .3 P371
• The Caller ID Display Request Service does not cover video calls. The FOMA handset does not play the
Caller ID request message to incoming video calls with no Caller ID. 3 P372
• When a video call is received while an earphone/microphone set with a switch is connected, you can answer
the call by pressing the earphone switch with the camera image turned OFF. 3 P358
• During a video call, incoming call/video calls are rejected and are not stored in answered call history.
• If you receive an SMS/email message during a video call, the FOMA handset rings and displays an icon ($$
etc.) on the Status bar. Tap the icon to check the message while talking. However, you cannot receive a
message sent via data communication. 3 P316
• When talking with the speakerphone function, always keep the FOMA handset away from your ear.
The call is connected.
• Tap [Privacy] to prevent from sending your image to the other
party.
• Tap [Reject] to reject the incoming call.
• During talking, you can perform the same operations as Step 4
in "Making a Video Call".
00M1000EN.book 88 ページ 2004年11月24日 水曜日 午前7時56分
89
Making/Answering Video Calls
Setting an Outgoing Image
You can change the settings for an outgoing image during a video call.
• The modified settings are reverted to the default settings when the video call ends.
Turning the Camera Image ON/OFF
During a video call, you can set your FOMA handset to send or not to send the camera image.
aTap [$$] during talking
NOTE
• You can receive video calls with the camera image turned OFF. 3 P90
Switching Cameras
You can switch between the Front-Camera and Rear-Camera during talking.
aTap [$$] during talking
D
e
f
au
l
t sett
i
ng ON
The camera image is turned OFF.
• Tap [$$] to turn the camera image ON.
De
f
ault sett
i
ng Front camera
The image of the Rear-Camera is sent.
• Tap [$$] again to send the image of the Front-Camera.
00M1000EN.book 89 ページ 2004年11月24日 水曜日 午前7時56分
90
Making/Answering Video Calls
NOTE
• You can set the default camera for video calls in advance. 3 P95
• While using the Rear-Camera, you can zoom the camera image. 3 Below
• While using the Front-Camera, you can turn Mirroring ON. 3 P94
Zooming the Camera Image
You can enlarge the outgoing camera image during a video call.
• You can control zooming in 3 levels.
• This function is available only when using the Rear-Camera.
aPress 7 during talking
bTap $$ or $$
• Tap $$ to raise the zoom magnification.
• Tap $$ to lower the zoom magnification.
NOTE
• The zoom magnification is retained until the call ends. Even if you switch cameras, the zoom magnification
is retained.
• Press 5 to switch the setting screens in order from Zoom 3
Brightness 3 Contrast. Press 5 to reverse the order.
00M1000EN.book 90 ページ 2004年11月24日 水曜日 午前7時56分
91
Making/Answering Video Calls
Adjusting the Camera Image Brightness
You can adjust the brightness of the outgoing camera image during a video call.
• You can adjust in 5 levels.
aPress 7 during talking
bTap $$ or $$
• Tap $$ to darken the camera image.
• Tap $$ to brighten the camera image.
Adjusting the Camera Image Contrast
You can adjust the contrast of the outgoing camera image during a video call.
• You can adjust in 5 levels.
aPress 7 during talking
bTap $$ or $$
• Tap $$ to sharpen the contrast.
• Tap $$ to blur the contrast.
•Press 4 to switch the setting screens in order from Zoom 3
Brightness 3 Contrast. Press 5 to reverse the order.
•Press 4 to switch the setting screens in order from Zoom 3
Brightness 3 Contrast. Press 5 to reverse the order.
00M1000EN.book 91 ページ 2004年11月24日 水曜日 午前7時56分
92
Making/Answering Video Calls
Setting Images Displayed during a Video Call
You can change the settings for images displayed on the FOMA handset during a video call.
• The modified settings are reverted to default settings when the video call ends.
Changing Image Display
You can switch the screens between the main window (incoming image) and the child window
(outgoing image) during a call.
aTap the child window during talking
Turning Mirroring OFF
You can cancel the mirroring of the Front-Camera image.
• This function is available only when using the Front-Camera.
aTap Settings y Mirroring OFF on the Menu bar during talking
Mirroring is canceled.
• To set the mirroring, Tap Settings y Mirroring ON on the Menu bar.
D
e
f
au
l
t sett
i
ng Main window: Other party's image Child window: Your image
The screens switch.
• Tap the child window to switch the screens.
De
f
ault sett
i
ng Mirroring ON
00M1000EN.book 92 ページ 2004年11月24日 水曜日 午前7時56分
93
Making/Answering Video Calls
Changing Video Call Settings
You can change the video call settings in idle state.
Setting Default Camera for Video Calls
You can select either the Front-Camera or the Rear-Camera as the default camera when making/
answering video calls.
aTap $$ in the Application Selector bar, and tap Settings y Show on
the Menu bar
bTap $$ of Default camera for video call
• Tap $$ of Front to use the Front-Camera.
• Tap $$ of Rear to use the Rear-Camera.
cTap [Done]
The default camera is set.
NOTE
• Regardless of the settings of this function, you can switch between the Front-Camera and Rear-Camera
during talking. 3 P91
D
e
f
au
l
t sett
i
ng Default camera for video calls: Front-Camera
00M1000EN.book 93 ページ 2004年11月24日 水曜日 午前7時56分

00M1000EN.book 94 ページ 2004年11月24日 水曜日 午前7時56分

95
Contact List
Contact Lists Supported by FOMA Handset. . . . . . . . . . . . . . . . . . . . . . . . . . . 96
Storing Entries in FOMA Handset Contact List <Contact registration> . . . . 97
Storing Entries in UIM Contact List <UIM contact registration>. . . . . . . . . . 103
Storing Phone Numbers from Redial or Dialled List . . . . . . . . . . . . . . . . . . . 105
Using Contact List to Make Calls <Contact search> . . . . . . . . . . . . . . . . . . . 106
Making Changes to Contacts <Contact modification> . . . . . . . . . . . . . . . . . 110
Deleting Contacts <Contact deletion> . . . . . . . . . . . . . . . . . . . . . . . . . . . . . . 112
Setting Owner Information . . . . . . . . . . . . . . . . . . . . . . . . . . . . . . . . . . . . . . . . 113
Copying/Moving Contact Information . . . . . . . . . . . . . . . . . . . . . . . . . . . . . . . 114
Sending Contact Information . . . . . . . . . . . . . . . . . . . . . . . . . . . . . . . . . . . . . . 116
Listing Phone Numbers . . . . . . . . . . . . . . . . . . . . . . . . . . . . . . . . . . . . . . . . . . 118
00M1000EN.book 95 ページ 2004年11月24日 水曜日 午前7時56分
96
Contact List
Contact Lists Supported by FOMA Handset
Two types of FOMA contact lists are available: FOMA handset contact list stored in the handset
and UIM contact list stored in UIM. Information can be stored in each type of contact list as
shown below.
• Information stored in the UIM contact list is also available when the UIM is inserted to another FOMA handset.
*1: Items that can be stored for a single contact.
*2: The maximum number of entries depends on the available FOMA handset memory.
*3: The number of items that can be stored for one contact with the default setting. The number of items
depends on the change of type or addition of fields.3P101, P112
NOTE
• It is recommended that you back up the information stored in the contact list by writing it down or using the
TransFlash memory card. PC users can use the accompanying USB cable or Bluetooth to connect the
FOMA handset with the PC to store information using the Desktop Suite or SyncML. 3 P526
Please be informed that DoCoMo will not be responsible for any loss of information stored in the contact list,
etc.
• When you switch to a new model, data saved in your FOMA handset may or may not be copied to the new
model at DoCoMo information desk depending on the specification of the new model.
Item
FOMA handset (Handset) contact list
UIM contact list
Number of entries Depends on the memory available*2 Up to 50
Items stored *1
Name First and last names stored separately First and last names stored together
Furigana First and last names stored separately First and last names stored together
Job title ○–
Phone number 3 *3 1
Phone number type ○–
Email address 3 *3 1
Email address type ○–
URL 1 *3 –
Ring tone settings ○–
Birthday ○–
Company information Company name, address, etc. can be
stored
–
Personal information Address, etc. can be stored –
Remarks ○–
Still image ○–
11PHA_1col_EN.fm 96 ページ 2004年11月24日 水曜日 午前9時12分
97
Contact List
Contact registration
Storing Entries in FOMA Handset Contact List
Follow the steps below to store entries in the FOMA handset contact list.
• Items to enter or the order of entry can be left to the user's option as required. Entries can be stored in the
contact list at any time of the process by entering the necessary information and tapping $$. However, either
the last or the first name must be entered to save any information in the contact list.
• On how to enter characters, see "Text input". 3 P466
Enter name (last and first names) and furigana 3 P100
Enter URL 3 P101
Enter email address and type 3 P101
Enter phone number and type 3 P101
Enter job title 3 P100
Assign ring tone 3 P102
Assign a still image 3 P103
Enter remarks 3 P103
Enter company and personal information 3 P102
Enter the birthday 3 P102
00M1000EN.book 97 ページ 2004年11月24日 水曜日 午前7時56分
98
Contact List
Enter Name (Last and First Names) and Furigana
Enter the last and first names and their furigana of the contact to store in the list
aTap $$ in the Application Selector bar
bTap Contact list y New on the Menu bar
cTap First name y Enter the first name y Check the furigana of the
first name
• Up to 16 double-byte or 32 single-byte characters can be entered for the first and last
names combined.
• When the first name has been entered, the Furigana field is automatically populated with
a corresponding furigana. Tap Furigana to make any necessary correction.
• Up to 32 single-byte characters can be entered for the furigana of the first and last names
combined.
dTap Last name y Enter the last name y Check the furigana of the
last name
• Up to 16 double-byte or 32 single-byte characters can be entered for the first and last
names combined.
• When the last name has been entered, the Furigana field is automatically populated with
a corresponding furigana. Tap Furigana to make any necessary correction.
• Up to 32 single-byte characters can be entered for the furigana of the first and last names
combined.
• To specify a destination folder, tap All in the Menu bar and
select the folder. When the folder has been selected, the
contact data can be stored in the folder. 3 P303
Contact list screen
Edit screen
00M1000EN.book 98 ページ 2004年11月24日 水曜日 午前7時56分

99
Contact List
Enter Job Title
Enter the job title, job description, etc. of the contact to store in the list.
eTap Job title y Enter the job title
• Up to 127 double- or single-byte characters can be entered.
Enter Phone Number and Type
fTap $$ in the Phone field and select the type of the phone number
• The type can be changed to Email or Web to enter an email address or URL.
gTap Phone y Enter the phone number
To store more addresses, repeat Steps 6 and 7.
• Up to 26 digits can be entered.
• Enter the phone number including the area code.
• Pause ("P"), Wait ("W"), "+", "#" and "*" can be entered. 3 P73
• Phone number fields can be added. 3 P112
• A phone number can be specified as the preferred phone number. 3 P112
Enter Email Address and Type
hTap $$ in the Email field and select the type of email
• The type can be changed to Phone or Web to enter a phone number or URL.
iTap Email y Enter the email address
To store more addresses, repeat Steps 8 and 9.
• Up to 50 single-byte alphanumeric characters and symbols in total can be entered.
• Be sure to store full email addresses correctly including the domain names.
• Email address fields can be added. 3 P112
Enter URL
You can store URLs related to the contact such as company and personal website URLs.
jTap Web y Enter the URL
• Up to 256 single-byte alphanumeric characters and symbols in total can be entered.
• The type can be changed to Phone or Email by tapping $$ to enter a phone number or
email address.
• URL fields can be added. 3 P112
Phone : No type is specified.
Phone (m) : Enter the mobile phone number.
Phone (w) : Enter the company phone number.
Phone (h) : Enter the home phone number.
VideoPhone : Enter the phone number for video calls.
Email (m) : enter the mobile phone email address.
Email (w) : enter the company email address.
Email (h) : enter the home email address.
00M1000EN.book 99 ページ 2004年11月24日 水曜日 午前7時56分
100
Contact List
Assign Ring Tone
You can assign ring tones to play when calls or emails arrive from stored contacts. This allows
you to find out who the callers or senders are without checking the display.
kTap Ring tone and select a ring tone
• Tap $$ to play the selected tone, allowing you to check the tone. The ring tone does not
play when the Manner or Drive Mode is active.
Enter the Birthday
lTap $$ in the Birthday field
mEnter the birthday
• How to operate 3 P59
Enter Company and Personal Information
You can enter information on the contact such as the company name, address and home
address. Separate fields are provided, allowing you to enter company and home information
separately.
nTap the relevant field y Enter the information
• For any of the items, up to 127 double- or single-byte characters can be entered.
Company : Enter the company name.
Postcode : Enter the company or home postcode.
Region : Enter the name of the region where the company or home is located.
City : Enter the name of the city where the company or home is located.
Address : Enter the company or home street address.
Building : Enter the name of the building where the company or home is located.
P.O.B. : Enter the company or home Post Office Box.
Country : Enter the name of the country where the company or home is located.
00M1000EN.book 100 ページ 2004年11月24日 水曜日 午前7時56分
101
Contact List
Enter Remarks
Remarks related to the contact can be entered. Remarks can be marked as Private. Private
remarks are not included when you send contact information as an attachment to an email, or
synchronize contact details with your PC.
oTap the $$ tab y Enter remarks
pTap $$ in Private
The remarks are marked as Private.
Assign a Still Image
A still image of a stored contact can be set to appear on the Incoming screen when a call arrives
from the contact.
qTap the $$ tab
00M1000EN.book 101 ページ 2004年11月24日 水曜日 午前7時56分

102
Contact List
rAssign a still image
1To select from stored still images
aTap $$
bTap a still image y Tap [Select]
The assigned still image is displayed.
• You can also select a folder by tapping Folder.
1To use the camera to take a still image to assign
aTap $$
The still image capture screen is displayed.
bTake a picture
The assigned still image is displayed.
• How to operate 3 P169
1To replace/recapture/delete the assigned still image
aTap the specified still image
bTap the intended operation
• Tap Replace picture to display the Select still image screen.
• Tap Take picture to display the still image capturing screen.
• Tap Delete image to return to the Image unassigned screen.
sTap $$
The contact is stored.
Replace picture : Select from stored still images to replace
with the assigned image.
Take picture : Recapture a still image.
Delete image : Delete the still image.
00M1000EN.book 102 ページ 2004年11月24日 水曜日 午前7時56分
103
Contact List
UIM contact registration
Storing Entries in UIM Contact List
Follow the steps below to store entries in the FOMA handset UIM contact list.
• Items to enter and the order of entry operations can be changed as required. Entries can be stored in the
contact list at any time of the process by entering the necessary information and tapping $$. However, the
name must be entered to save any information in the contact list.
NOTE
• On how to enter characters, see "Text input". 3 P466
Enter Name and Furigana
Enter the name and furigana of the contact to store in the list.
aTap $$ in the Application Selector bar, and tap All y UIM on the
Menu bar
The UIM contact list screen is displayed.
• If a folder other than All has been previously displayed, the contact list stored in that
folder is displayed. 3 P303
bTap Contact list y New on the Menu bar
cTap First name y Enter the name y Check the furigana of the
name
Enter name and furigana 3 see below
Enter email address 3 P106
Enter phone number 3 P106
00M1000EN.book 103 ページ 2004年11月24日 水曜日 午前7時56分

104
Contact List
• Up to 10 double-byte characters or 21 single-byte alphanumeric characters can be
entered for a name.
• When the name has been entered, the Furigana field is automatically populated with a
corresponding furigana. Tap Furigana to make any necessary correction.
• Up to 12 double-byte characters or 25 single-byte alphanumeric characters can be
entered for a furigana.
Enter Phone Number
Only one phone number can be stored per contact.
dTap Phone y Enter the phone number
• Up to 26 digits can be entered when a UIM (green) is used, and up to 20 digits can be
entered when a UIM (blue) is used. 3 P51
• Enter the phone number including the area code.
• Pause ("P"), "+", "#" and "4" can be entered. 3 P73
Enter Email Address
Only one email address can be stored per contact.
eTap Email y Enter the email address
• Up to 50 single-byte alphanumeric characters and symbols in total can be entered.
• Be sure to store full email addresses correctly including the domain names.
1Menu bar
For the FOMA handset (Handset) contact list as well as the UIM contact list, tap Contacts or
Edit on the Menu bar in the Edit screen to display the following items:
• Some items may not be available depending on the operation.
• The Menu bar on the Details screen shows similar items.
Contacts
New . . . . . . . . . . . . . . . . . . . P100, P105
Search . . . . . . . . . . . . . . . . . . . . . . P108
Send as vCard . . . . . . . . . . . . . . . . P117
Send as Text . . . . . . . . . . . . . . . . . P118
Set as owner card . . . . . . . . . . . . . P114
Delete contact . . . . . . . . . . . . . . . . P113
Edit
Edit contact . . . . . . . . . . . . . . . . . . .P111
Copy contact to UIM . . . . . . . . . . . .P115
Copy contact . . . . . . . . . . . . . . . . . .P117
Cut . . . . . . . . . . . . . . . . . . . . . . . . . .P482
Paste . . . . . . . . . . . . . . . . . . . . . . . .P483
Add field. . . . . . . . . . . . . . . . . . . . . .P112
Preferred phone number . . . . . . . . .P112
Zoom . . . . . . . . . . . . . . . . . . . . . . . .P141
Preferences . . . . . . . . . . . . . . . . . . .P119
00M1000EN.book 104 ページ 2004年11月24日 水曜日 午前7時56分
105
Contact List
Storing Phone Numbers from Redial or Dialled List
Phone numbers recorded on the Redial, Dialled or Missed calls list can be stored in the contact
list. Phone numbers being entered on the Enter phone number screen or email addresses of
incoming emails can also be stored in the contact list.
<Example: To store from the Redial list>
aPress c while in idle state
• Displaying the Enter phone number screen 3 P66
• Displaying the Answered list 3 P78
• Displaying the Missed calls list 3 P81
• Displaying emails 3 P252
bTap the contact to store
cTap Add to Contacts
dStore in the contact list
• How to operate 3 P99, P105
• On the Enter phone number screen, enter the phone number,
and tap Phone y Add to Contacts on the Menu bar.
• For an email, open the Email details screen, tap the email
address y Tap Add to Contacts
00M1000EN.book 105 ページ 2004年11月24日 水曜日 午前7時56分
106
Contact List
Contact search
Using Contact List to Make Calls
Finding a Contact Based on the First Syllable
Find the intended contact data based on the syllable set that contains the first syllables of the last
names stored in the contact list.
aTap $$ in the Application Selector bar
bTap the tab of the intended syllable set
The cursor moves to the contact data that contain the syllables in the tapped set as their
first syllables of the last names.
cTap the intended contact data
The contact data details screen is displayed. 3 P109
• Pressing c makes a voice call to the first phone number stored.
• To dial another number stored, select a number from the details screen. 3 P109
Searching by Entering a Keyword
Simply entering a name, phone number, address, etc. stored in the contact list as a keyword
allows you to find the intended data from the list.
aTap Contact list y Find on the Menu bar in the contact list screen
When a folder has been selected, the list of contact data stored in the folder
is displayed. 3 P303
• How to operate 3 P100
00M1000EN.book 106 ページ 2004年11月24日 水曜日 午前7時56分

107
Contact List
bTap the keyword field y Enter a keyword
• Up to 30 double- or single-byte characters can be entered.
• For a keyword, only part of a text string of an item stored in the contact data can be
entered to search the contact.
• Tap $$ to display up to 5 keywords previously entered, from which you can make a
selection.
cTap in all fields in Where?/$$ in in Names & Company y [Find]
dTap the intended contact data
The contact data details screen is displayed. 3 P109
• Pressing c makes a voice call to the first phone number stored.
• To dial another number stored, select the number from the details screen. 3 P109
• Tap $$ in in all fields to search all item fields stored in the
contact list.
• Tap $$ in in Names & Company to search the name and
company fields in the contact list.
00M1000EN.book 107 ページ 2004年11月24日 水曜日 午前7時56分
108
Contact List
Verifying Contact Information
Information stored as contact data can be displayed for selecting phone numbers to make calls
or sending emails. If a URL is stored, the corresponding Web page can be displayed.
aTap the contact data to display on the contact list screen
• How to operate 3 P100
• Contact data stored in the UIM contact list are marked with $$
1FOMA handset (Handset) contact list details
Item/Icon Description
aName The first and last names are displayed. Displays the Edit screen, allowing
you to make corrections as required when tapped. 3 P100
bFurigana The furigana of the first and last names are displayed.
cJob title The job title is displayed.
d$$/$$ Indicates the type (land-line phone/mobile phone) of phone number.
Makes a voice call when tapped.
ePhone number and type The phone number is displayed together with its type. Displays the Enter
phone number screen populated with the selected phone number when
tapped. 3 P66
f$$ Displays the Compose short message (SMS) screen with the selected
phone number entered as the destination address when tapped. 3 P261
g$$ Makes a video call to the selected phone number when tapped.
h$$ Displays the Create email screen with the selected email address
entered as the destination address when tapped. 3 P235
Information screen Information screen
(continued)
Remarks screen Still image screen
00M1000EN.book 108 ページ 2004年11月24日 水曜日 午前7時56分
109
Contact List
1UIM contact list details screen
iEmail address and type The email address is displayed together with its type. Displays the
Compose email screen with the selected email address entered as the
destination address when tapped. 3 P235
jRing tone Displays the ring tone to play when a call or email is received.
kBirthday The birthday is displayed.
lCompany/personal
information
The company/personal information is displayed.
mRemarks Displays remarks.
nStill image Displays the still image when a call is received.
Item/Icon Description
aName The first and last names are displayed.
bFurigana The furigana of the first and last names are displayed.
c$$/$$ Indicates the type (land-line phone/mobile phone) of phone number.
Makes a voice call when tapped.
dPhone number The phone number is displayed. Displays the Enter phone number
screen populated with the selected phone number when tapped. 3 P66
e$$ Displays the Create short message (SMS) screen with the selected
phone number entered as the destination address when tapped. 3 P261
f$$ Displays the Compose email screen with the selected email address
entered as the destination address when tapped. 3 P235
gEmail address The email address is displayed. Displays the Compose email screen with
the selected email address entered as the destination address when
tapped. 3 P235
Item/Icon Description
00M1000EN.book 109 ページ 2004年11月24日 水曜日 午前7時56分
110
Contact List
1Menu bar
Tap Contacts or Edit on the Menu Bar in the contact list screen to display the following items:
*: While the UIM folder is displayed, Copy All to Unfiled/Move All to Unfiled is displayed. 3 P116
• Some items may not be available depending on the operation.
• The Menu bar items on the details screen are identical to those on the Edit screen. 3 P106
NOTE
• The items displayed on the contact data details screen correspond to the information stored.
Contact modification
Making Changes to Contacts
Changes can be made to the contact data stored.
aTap the contact data to correct on the contact list screen
• How to operate 3 P100
bTap Edit y Edit contact on the Menu bar
• The Edit screen is displayed.
cTap the item to correct y Correct the information as required
• Correct the items in the same way as storing. 3 P99, P105
• Tap $$ to store the contact data and return to the contact list screen.
Contacts
New . . . . . . . . . . . . . . . . . . . P100, P105
Find . . . . . . . . . . . . . . . . . . . . . . . . P108
Delete All . . . . . . . . . . . . . . . . . . . . P113
Copy All to UIM * . . . . . . . . . . . . . . P116
Move All to UIM * . . . . . . . . . . . . . . P116
Send this folder . . . . . . . . . . . . . . . P118
Send owner card . . . . . . . . . . . . . . P114
View owner card. . . . . . . . . . . . . . . P114
Edit
Edit
Undo delete . . . . . . . . . . . . . . . . . . .P113
Paste contact. . . . . . . . . . . . . . . . . .P117
Zoom . . . . . . . . . . . . . . . . . . . . . . . .P141
Preferences . . . . . . . . . . . . . . . . . . .P119
00M1000EN.book 110 ページ 2004年11月24日 水曜日 午前7時56分
111
Contact List
Adding Phone Number/Email Address/URL Fields
If all of the phone number, email address or URL fields have been used and you need more, new
fields can be added.
aTap Edit y Add field on the Menu bar in the Edit screen
bTap New field and select the type y Tap [Add]
A field is added on the Edit screen. The added field is populated with "(new field)".
Specifying a Phone Number as the Preferred Phone Number
Specify the phone number displayed on the contact list screen (preferred number). Once the
preferred phone number has been specified, a call can be made to that number simply by
displaying the contact list or contact data details screen and pressing c.
• No preferred number can be specified if no phone number is entered.
• You can set the preferred phone number to display on the contact list screen. 3 P119
aTap Edit y Preferred phone number on the Menu bar in the Edit
screen
bTap Preferred phone number and select the phone number y Tap
[Done]
The preferred number is specified.
• How to operate 3 P100
• How to operate 3 P100
00M1000EN.book 111 ページ 2004年11月24日 水曜日 午前7時56分

112
Contact List
Contact deletion
Deleting Contacts
You can delete contact data stored in the contact list. Contact data in a folder can be deleted
collectively.
Deleting a single contact data
Delete contact data by first displaying the data.
aTap the contact data to delete on the contact list screen, and tap
Contact list y Delete contact on the Menu bar in the Edit screen
Deletes the selected contact data.
• How to operate 3 P100
Deleting All Data Stored in a Folder
You can collectively delete all contact data stored in a folder.
aTap All on the Menu bar in the contact list screen y tap the folder
containing the contact data to delete
The contact data list in the selected folder is displayed.
• How to operate 3 P100
• If a folder other than All has been previously displayed, the contact list stored in that
folder is displayed. 3 P303
bTap Contact list y Delete all on the Menu bar
The Confirm delete all screen is displayed.
cTap [Yes]
All contact data in the selected folder are deleted.
• Tap [No] to cancel deletion.
Restoring Deleted Contact Data
Deleted contact data can be restored.
• Collectively deleted contact data in a folder cannot be restored.
aDelete contact data
• How to operate 3 see above
bTap Edit y Undo delete on the Menu bar in the contact list screen
Restores the deleted contact data and displays them on the contact list screen.
00M1000EN.book 112 ページ 2004年11月24日 水曜日 午前7時56分
113
Contact List
Setting Owner Information
Specifying the contact data containing your personal information as the "owner information"
allows you to provide the other party with your information when you exchange contact
information.
• The owner information can be set to always accompany emails you send. 3 P260
aTap the contact data to specify as the owner information on the
contact list screen, and tap Contacts y Set as owner card on the
Menu bar in the details screen
The selected contact data are specified as the owner information.
• How to operate 3 P100
Displaying Owner Information
Check the contact data specified as the owner information.
aTap Contacts y View owner card on the Menu bar in the contact list
Displays the details screen for the contact data specified as the owner information.
• How to operate 3 P100
Sending Owner Information
You can send the contact data specified as the owner information via email or Bluetooth.
aTap Contacts y Send owner card on the Menu bar in the contact list
screen
• How to operate 3 P100
bTap Send as and select the sending method on the Send as screen
y Tap [Done]
cCompose and send an email
• How to operate 3 P235, P261
Email : Attach the owner information to an email to send the
information. Go to Step 3.
Text message : Insert the owner information in an SMS message to send the
information. Go to Step 3.
Bluetooth : Send the owner information via Bluetooth. 3 P384
00M1000EN.book 113 ページ 2004年11月24日 水曜日 午前7時56分
114
Contact List
Copying/Moving Contact Information
You can copy/move contact data stored in the contact list to a UIM or another folder.
You can also copy/move contact data stored in a UIM to the FOMA handset.
Copying from FOMA Handset to UIM
You can copy the contact data being displayed to a UIM.
• Only one phone number and one email address per contact data can be copied to the UIM contact list.
aTap the contact data to send on the contact list screen, and tap
Edit y Copy contact to UIM on the Menu bar in the details screen
bTap Select name and select the name to copy
cTap Select furigana and select the furigana to copy
dTap Select phone number and select the phone number to copy
• If no phone number is stored, Select phone number is not available for selection.
eTap Select email address and select the email address to copy
• If no email address is stored, Select email address is not available for selection.
fTap [Done]
• Copies contact data to the UIM contact list.
• How to operate 3 P100
00M1000EN.book 114 ページ 2004年11月24日 水曜日 午前7時56分

115
Contact List
Copying/Moving from Folder to UIM
All contact data in a folder can be copied/moved to the UIM contact list.
aTap All y the folder containing the contact data to send on the
Menu bar in the contact list screen
• How to operate 3 P100
• If a folder other than All has been previously displayed, the contact list stored in that
folder is displayed. 3 P303
bTap Contacts y Copy All to UIM/Move All to UIM on the Menu bar
cTap [Yes]
The contact data in the folder are copied/moved to the UIM contact list.
Copying/Moving from UIM Contact List to Unfiled Folder
You can copy/move all contact data in a UIM contact to the Unfiled folder of the FOMA handset
(Handset) contact list.
aTap All y UIM on the Menu bar in the contact list screen
• How to operate 3 P100
• If a folder other than All has been previously displayed, the contact list stored in that
folder is displayed. 3 P303
bTap Contacts y Copy All to Unfiled/Move All to Unfiled on the Menu
bar
cTap [Yes]
The contact data in the UIM contact list are copied/moved to the Unfiled folder of the FOMA
handset (Handset) contact list.
Copy All to UIM : Copies to the UIM contact list.
Move All to UIM : Moves to the UIM contact list.
Copy All to Unfiled : Copies to the unified folder of the FOMA handset (Handset)
contact list.
Move All to Unfiled : Moves to the unified folder of the FOMA handset (Handset)
contact list.
00M1000EN.book 115 ページ 2004年11月24日 水曜日 午前7時56分
116
Contact List
Copying Contact Data to Another Folder
Contact data can be copied to another folder.
aTap the contact data to copy on the contact list screen, and tap
Edit y Copy contact on the Menu bar in the details screen
• How to operate 3 P100
bTap All y destination folder on the Menu bar in the contact list
screen
• How to operate 3 P100
• If a folder other than All has been previously displayed, the contact list stored in that
folder is displayed. 3 P303
cTap Edit y Paste contact on the Menu bar
The contact is copied.
Sending Contact Information
Contact data can be sent via email or Bluetooth.
Sending Contact Information as vCard
Contact data can be sent as a file in the vCard (electronic directory) format via email or
Bluetooth.
aTap the contact data to send on the contact list screen, and tap
Contacts y Send as vCard on the Menu bar in the details screen
• How to operate 3 P100
bTap Send as on the Send as screen, and select the sending
method y Tap [Done]
cCompose and send an email
How to operate 3 P235, P261
Email : Attach the contact information to an email to send the
information. Go to Step 3.
Text message : Insert the contact information to an SMS message to send the
information. Go to Step 3.
Bluetooth : Send the contact information via Bluetooth. 3 P384
00M1000EN.book 116 ページ 2004年11月24日 水曜日 午前7時56分

117
Contact List
Sending Contact Information as Text
You can insert contact data to an email message and send as text.
aTap the contact data to send on the details screen, tap Contacts y
Send as Text on the Menu bar in the contact list screen
• How to operate 3 P100
bTap the item to insert as text y [Done]
• Tap $$ in Select all to select all items.
cTap Send as on the Send as screen and select the sending method
y Tap [Done]
dCompose and send an email
• How to operate 3 P235, P261
Sending Contact Information in Folder
All contact data in a folder can be sent.
aTap All y The folder containing the contact data to send on the
Menu bar in the contact list screen
• How to operate 3 P100
• If a folder other than All has been previously displayed, the contact list stored in that
folder is displayed. 3 P303
bTap Contacts y Send this folder on the Menu bar
cTap Send as on the Send as screen, and select the sending
method y Tap [Done]
dCompose and send an email
• How to operate 3 P235, P261
Email : Insert the contact information as text to an email message to
send the information. Go to Step 4.
Text message : Insert the contact information as text to an SMS message to send
the information. Go to Step 4.
Email : Attach the contact information to an email to send the
information. Go to Step 4.
Text message : Insert the contact information to an SMS message. Go to Step 4.
Bluetooth : Send the contact information via Bluetooth. 3 P384
00M1000EN.book 117 ページ 2004年11月24日 水曜日 午前7時56分
118
Contact List
Listing Phone Numbers
You can set the phone numbers specified as the preferred numbers in the contact data to display
in the contact list.
aTap Edit y Preferences on the Menu bar in the contact list screen
bTap $$ in Show preferred phone number
You can set the preferred numbers to be displayed.
• Tap $$ again to reset the display of preferred phone numbers.
cTap [Done]
You are reverted to the contact list.
NOTE
• The first phone number is displayed when contact data possesses no preferred phone number.
• How to operate 3 P100
00M1000EN.book 118 ページ 2004年11月24日 水曜日 午前7時56分