Motorola Mobility T6EY1 GSM Transceiver with WLAN and Bluetooth User Manual Exhibit 8C Users Manual
Motorola Mobility LLC GSM Transceiver with WLAN and Bluetooth Exhibit 8C Users Manual
Contents
Exhibit 8C Users Manual

APPLICANT: MOTOROLA, INC. FCC ID: IHDT6EY1
INSTRUCTION MANUAL
A preliminary draft copy of the Users Manual follows in four parts (Exhibit 8A through Exhibit 8D):
EXHIBIT 8C

255
Displaying/Editing/
Managing Data
Displaying a Stored Image . . . . . . . . . . . . . . . . . . . . . . . . . . . . . . . . . . . . . . . . 256
Editing an Image . . . . . . . . . . . . . . . . . . . . . . . . . . . . . . . . . . . . . . . . . . . . . . . . 260
Playing a Stored Video . . . . . . . . . . . . . . . . . . . . . . . . . . . . . . . . . . . . . . . . . . . 262
Playing a Stored Music. . . . . . . . . . . . . . . . . . . . . . . . . . . . . . . . . . . . . . . . . . . 266
Displaying Word, Excel and PDF Files . . . . . . . . . . . . . . . . . . . . . . . . . . . . . . 270
TransFlash Memory Card . . . . . . . . . . . . . . . . . . . . . . . . . . . . . . . . . . . . . . . . . 277
Using the TransFlash Memory Card . . . . . . . . . . . . . . . . . . . . . . . . . . . . . . . . 281
Managing Files . . . . . . . . . . . . . . . . . . . . . . . . . . . . . . . . . . . . . . . . . . . . . . . . . 282
Using the Voice Recorder. . . . . . . . . . . . . . . . . . . . . . . . . . . . . . . . . . . . . . . . . 290
1Utilizing a Still Image
1Utilizing a Video Clip
1Utilizing Music
1Utilizing the Document Viewer
1Utilizing the TransFlash Memory Card
1Managing Data
1Utilizing the Voice Recorder
00M1000EN.book 255 ページ 2004年11月24日 水曜日 午前7時56分

256
Displaying/Editing/Managing Data
Displaying a Stored Image
You can display a captured still image (3 P169), a downloaded still image (3 P203), an image
received via email (3 P250), or an image saved in the TransFlash memory card (3 P303).
• Displays the following files.
aTap $$ y $$ on the Application Selector bar
bTap the image to be displayed
1Operations from the Menu bar in the image list screen
Tap Pictures and Settings on the Menu bar to display the following items:
• Some functions cannot be performed depending on the operation.
JPEG (.jpg, .jpeg, .jfif, .jpe, .pipeg, .pip) GIF (including animation GIF) bitmap (.bmp)
w-bitmap (.XXX) png (.png)
$$ : Launches camera when tapped.
• The display can be modified to a list display. 3 P275
$$ : The camera is launched when tapped.
$$ $$ : The preceding image/subsequent image can be
displayed when tapped.
File name, saved date and time
Pictures
View Slide show . . . . . . . . . . . . . . . P276
Image infor . . . . . . . . . . . . . . . . . . . P275
Settings
Slide show interval. . . . . . . . . . . . . .P276
List/Thumbnail . . . . . . . . . . . . . . . . .P275
Sort by name . . . . . . . . . . . . . . . . . .P309
Sort by date . . . . . . . . . . . . . . . . . . .P309
Sort by size . . . . . . . . . . . . . . . . . . .P309
00M1000EN.book 256 ページ 2004年11月24日 水曜日 午前7時56分

257
Displaying/Editing/Managing Data
1Operations from the Menu bar in the image display screen
Tap Pictures and Edit on the Menu bar to display the following items:
• Some functions cannot be performed depending on the operation.
NOTE
• When an image exceeding the display size 1280 x 1280 (dots), an incompatible file format ($$) or a corrupted
file ($$) is tapped, the image cannot be displayed and instead, a message is displayed.
Modifying the Display Method of the Image List Screen
]
aTap Settings y List on the Menu bar in the image list screen
• Tap Settings y Thumbnail on the Menu bar in the image list screen when displaying
thumbnails.
Displaying Image Information
This operation displays the information of the displayed image.
Pictures
Send as. . . . . . . . . . . . . . . . . . . . . . P310
Delete . . . . . . . . . . . . . . . . . . . . . . . P308
Image info . . . . . . . . . . . . . . . . . . . . P275
Rename . . . . . . . . . . . . . . . . . . . . . P304
Fit to screen . . . . . . . . . . . . . . . . . . P277
Actual size view . . . . . . . . . . . . . . . P277
Edit
Show title/Hide title. . . . . . . . . . . . . P277
Rotate. . . . . . . . . . . . . . . . . . . . . . . P278
Add frame. . . . . . . . . . . . . . . . . . . . P279
Free draw . . . . . . . . . . . . . . . . . . . . P279
Add stamp . . . . . . . . . . . . . . . . . . . P280
De
f
ault sett
i
ng Thumbnail
Thumbnail Display List Display
00M1000EN.book 257 ページ 2004年11月24日 水曜日 午前7時56分

258
Displaying/Editing/Managing Data
aSelect the image to display the image information from the
image list screen with the 9 button and tap Pictures y Image info
on the Menu bar
Viewing a Slide show
Displays images in the folder from the selected file.
aSelect the image to start the slide show from the image list
screen with the 7 button y tap Pictures y View Slide show on the
Menu bar
Slide show launches.
• When the slide show is played in Automatic mode, the slides are automatically switched
at intervals set in Slideshow Intervals.
• When the slide show is played in Manual mode, the slides are switched by pressing the
6 button.
• When an any area on the screen is tapped, the slide show is canceled and reverted back
to the list screen.
NOTE
• Images that cannot be displayed such as animation GIF files are skipped when the slide show is played.
Setting up the Playback Method and Intervals of the Slide show
Setting up the playback method (Automatic/Manual), and playback intervals when automatically
playing the slide show.
File name : Displays file name.
Type : Displays file format.
Size : Displays file size.
Dimensions : Displays display size.
Date : Displays saved date.
Time : Displays saved time.
D
e
f
au
l
t sett
i
ng Auto: $$ Manual: $$ Interval: 3 seconds
00M1000EN.book 258 ページ 2004年11月24日 水曜日 午前7時56分

259
Displaying/Editing/Managing Data
aTap Settings y Slide show interval on the Menu bar in the image list
screen, and then tap [Done] upon completing the setup
procedure
NOTE
• Text entry method 3 P466
Modifying the Display Size of Images
The display size of the displayed image is modified.
aTap Picture y Fit to screen/Actuall size view on the Menu bar in the
image display screen
NOTE
• A similar operation can be performed by tapping any area within the screen.
Displaying the Image Title
Displays Title in the Image Display Screen
aTap Edit y Show title on the Menu bar in the image display screen
• Tap Edit y Hide title on the Menu bar to hide the title
$$ Auto : Select when playing by automatically switching
screens.
$$ Manual : Select when manually playing and switching
screens.
$$ Intervals : Select intervals of slides when viewing the slide
show in automatic mode.
Fit to screen : Image is enlarged/reduced to fit the display area of the screen and
displayed.
Actual size view: Displays image in full size.
To view an image larger than the display area of the screen, drag the
stylus to the direction of the hidden area.
00M1000EN.book 259 ページ 2004年11月24日 水曜日 午前7時56分
260
Displaying/Editing/Managing Data
Editing an Image
You can freely edit the displayed image by overlapping frames and stamps, etc.
The edited image is saved in the same folder as the source image.
* Excluding cases where the source image is a JPEG file and Rotated.
• Images exceeding the display size 1280 x 1280 (dots) cannot be edited.
1Edited Image File
The edited image file is saved in the following respective manners depending on the file
format of the source image file or the editing method.
NOTE
• When images exceeding the display size 204 x 155 (dots) are edited and saved, they are saved after being
reduced (excluding Rotate) to the display size 204 x 155 (dots).
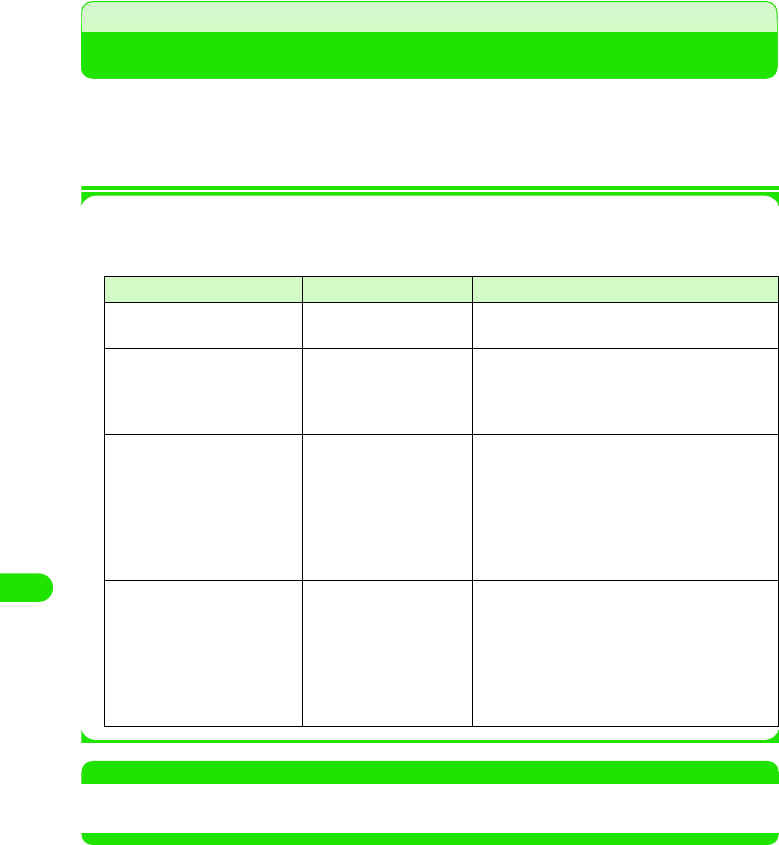
Source Image File Format Editing Method Edited Image File
JPEG Rotate The edited file is saved over the source image
file.
Other Methods The edited file is saved as a new image file.
•An EDTX extension (X is a digit between 0
and 100) is suffixed to the source image file
name.
Other than JPEG Rotate The edited file is saved as a new image file
(JPEG file).
• The new file name is "original name".jpg.
When an identical file name already exists,
however, a ROTX extension (X is a digit
between 0 and 100) is suffixed to the file
name.
Other Methods The edited file is saved as a new image file
(JPEG file).
• The new file name is "original name".jpg.
When an identical file name already exists,
however, an EDTX extension (X is a digit
between 0 and 100) is suffixed to the file
name.
00M1000EN.book 260 ページ 2004年11月24日 水曜日 午前7時56分
261
Displaying/Editing/Managing Data
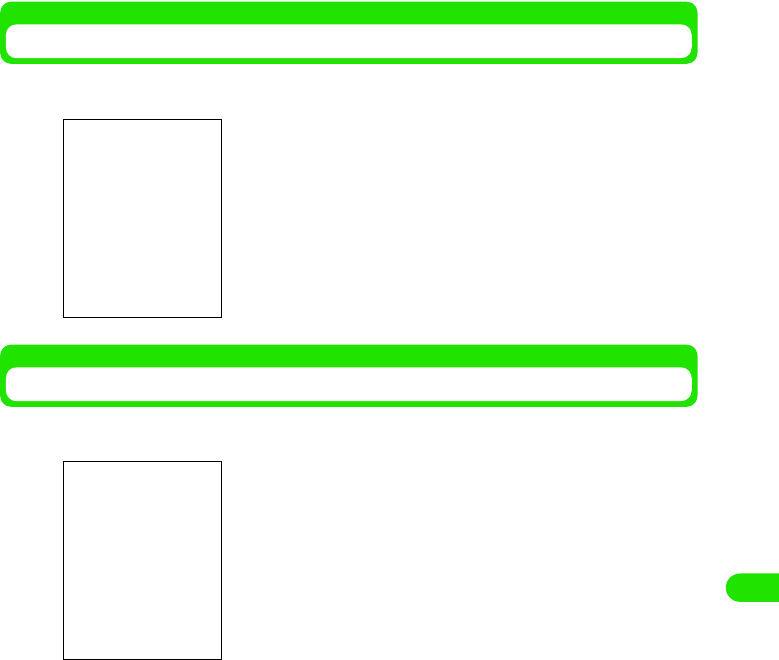
Rotating an Image
aTap Edit y Rotate on the Menu bar in the image display screen
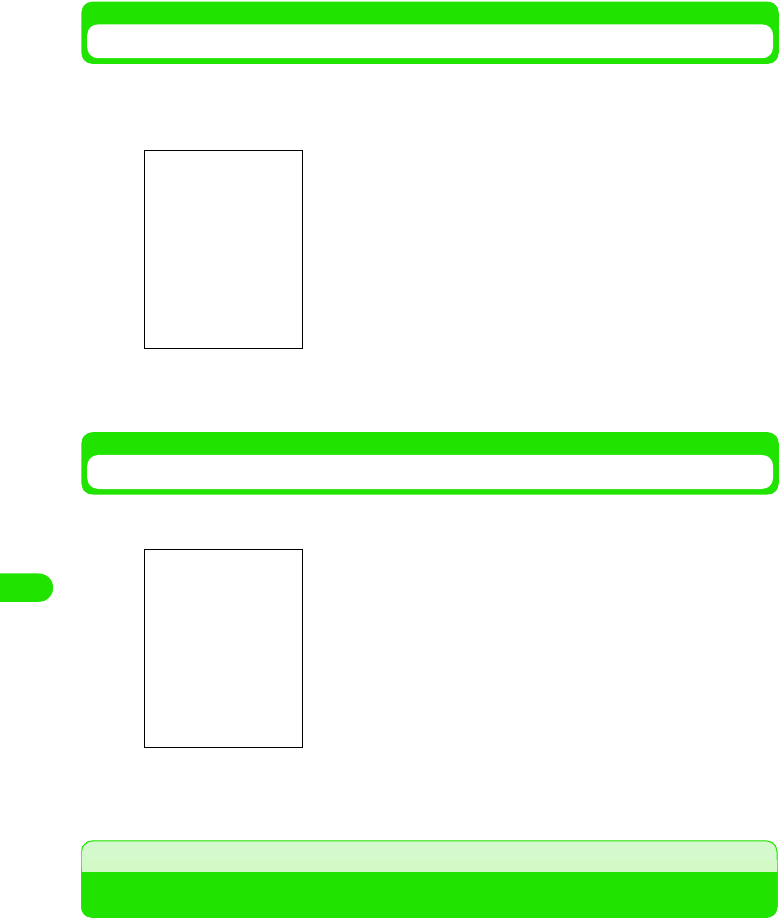
Overlapping Frames
aTap Edit y Add frame on the Menu bar in the image display screen
bTap the frame to overlap y tap [Done]
The screen is rotated 90 degrees to the right.
• Tap [Cancel] to cancel the operation.
The frame can be selected.
00M1000EN.book 261 ページ 2004年11月24日 水曜日 午前7時56分
262
Displaying/Editing/Managing Data
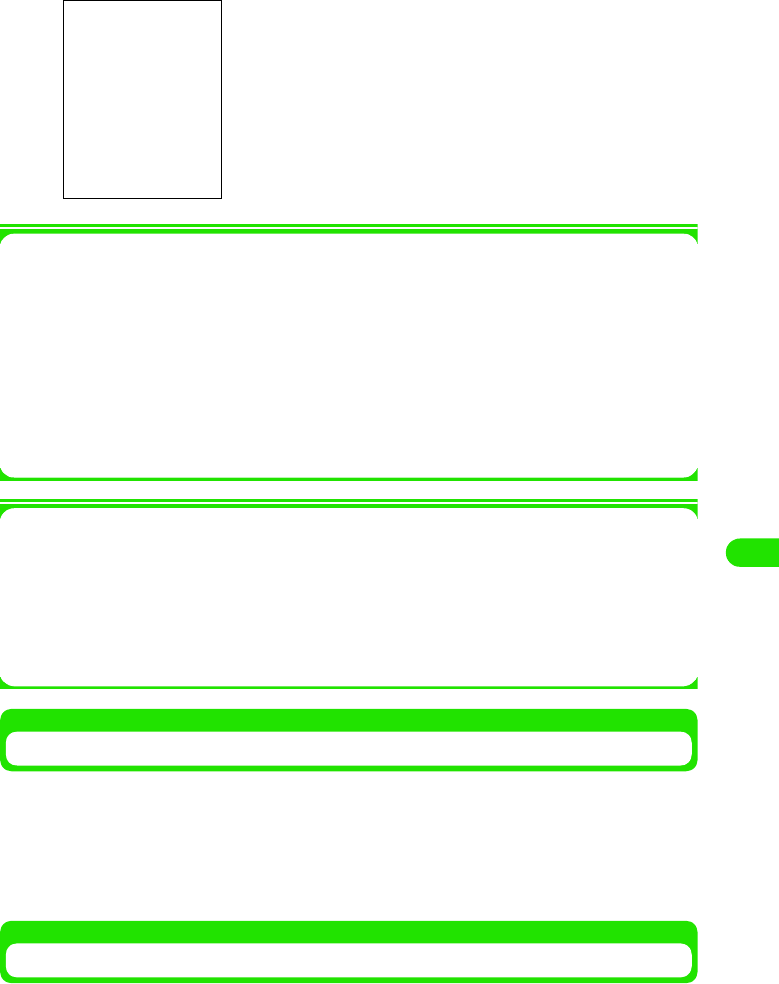
Decorating an Image by Hand
You can decorate an image using the stylus pen.
aTap Edit y Free draw on the Menu bar in the image display screen
bUse the stylus to decorate an image y tap [Done]
Pasting a Marker Stamp
aTap Edit y Add stamp on the Menu bar in the image display screen
bTap the stamp to be pasted y tap [Done]
Playing a Stored Video
Displays captured video (3 P170), a downloaded video (3P203), a video received via email (3
P250), or a video saved in the TransFlash memory card (3 P303).
• Video formats that can be played 3 P283
• Tap [Undo] to undone a previous decoration can be undone by.
• Tap [Cancel] to cancel saving.
The freehand color can be selected.
• Tap [Undo] to undone a previous stamp.
• Tap [Cancel] to cancel saving.
You can select the stamp.
00M1000EN.book 262 ページ 2004年11月24日 水曜日 午前7時56分

263
Displaying/Editing/Managing Data
aTap $$ y $$ on the Application Selector bar
bTap the video to be played
1Operations from the Menu bar in the video list screen
Tap Video or Edit on the Menu bar to display the following items:
• Some functions cannot be performed depending on the operation.
1Operations from the Menu bar in the image display screen
Tap Video or Edit on the Menu bar to display the following items:
• Some functions cannot be performed depending on the operation.
$$ : The camera is launched when tapped.
Playback bar
: Displays current playback position.
Playback volume display
: Displays playback volume in 8 levels.
$$/$$ : Plays or pauses video when tapped.
$$ : Cancels playback when tapped.
$$ : Launches camera when tapped.
$$/$$ : Controls volume when tapped.
$$ : Returns to video list.
Video
Find. . . . . . . . . . . . . . . . . . . . . . . . . P282
Edit
Sort by title . . . . . . . . . . . . . . . . . . . P309
Sort by date . . . . . . . . . . . . . . . . . . P309
Sort by size . . . . . . . . . . . . . . . . . . P309
Sort by type . . . . . . . . . . . . . . . . . . P309
Video
Send as. . . . . . . . . . . . . . . . . . . . . . P310
Rename . . . . . . . . . . . . . . . . . . . . . P304
Clip info. . . . . . . . . . . . . . . . . . . . . . P284
Delete . . . . . . . . . . . . . . . . . . . . . . . P308
Edit
Copy . . . . . . . . . . . . . . . . . . . . . . . . P305
Full screen . . . . . . . . . . . . . . . . . . . P309
00M1000EN.book 263 ページ 2004年11月24日 水曜日 午前7時56分

264
Displaying/Editing/Managing Data
1Specifications of video playback
Repeating a Video Playback
aTap Video y Repeat on the Menu bar in the video playback screen
Searching a Video
aTap Video y Find on the Menu bar in the video list screen
bEnter the text to search y tap [Find]
cTap video to play
File Format 3GPP, MP4, WMV, ASF
Encoding Format Video MPEG4/H.263/WMV
Voice AMR/AAC/WMAv8
Display Size XXX x XXX (dots) or less
Extensions .3gp, .mp4, .wmv, .asf
• Tap [Cancel] to cancel the operation.
00M1000EN.book 264 ページ 2004年11月24日 水曜日 午前7時56分

265
Displaying/Editing/Managing Data
Modifying the Video Quality
aTap Edit y Preferences on the Menu bar in the video list screen,
and then tap the Video Quality window in the user setup screen
bSelect Video Quality y Tap [Done]
Modifying the Display Size of the Video
You can modify the display size of the video during playback.
• This operation cannot be performed when video is stopped.
aTap Edit y Full screen on the Menu bar in the video playback
screen
De
f
ault sett
i
ng High
High : Best quality mode.
Medium : Standard quality.
Low : Low quality; image is grainy.
• Reverts to the original display by tapping any area within the
screen.
00M1000EN.book 265 ページ 2004年11月24日 水曜日 午前7時56分

266
Displaying/Editing/Managing Data
Displaying the Video Information
Displays the video information.
aTap Video y Clip info on the Menu bar in the video playback screen
y tap [Done] after confirmation
Playing a Stored Music
Downloaded music is played back.
• The following audio file formats can be played back.
aTap $$y$$ on the Application Selector bar
Title : Displays title.
Author : Displays information of the author of the file.
Performer : Displays performers.
Copyright : Displays copyright information of the file.
Size : Displays file size.
Created Date and Time
: Displays created date and time of the file.
Description : Displays file description.
MP3 (.mp3) MIDI (.smf) WAV (.wav)
AMR ( ) 3GA ( ) AU ( )
XMF ( ) MMA ( ) WMA (.wma)
$$/$$ : Controls the volume when tapped.
$$ : Switches screen to the audio playback screen when
tapped.
$$ : Switches screen to the audio playlist screen when
tapped.
00M1000EN.book 266 ページ 2004年11月24日 水曜日 午前7時56分
267
Displaying/Editing/Managing Data
bTap the music to be played
1Operations from the Menu bar in the audio playlist screen
Tap Music or Edit on the Menu bar to display the following items:
• Some functions cannot be performed depending on the operation.
]
1Operations from the Menu bar in the audio playback screen
Tap Music or Edit on the Menu bar to display following items:
• Some functions cannot be performed depending on the operation.
Playing Music on Repeat/at Random
The same audio track can be played repeatedly or multiple audio tracks can be played randomly.
aTap Music y Repeat/Shuffle on the Menu bar in the audio playback
screen
• To cancel Repeat/Shuffle, tap Music y Repeat/Shuffle again.
Playing Music in Order of Preference
The audio tracks can be played in order of preference. The audio tracks are played from the top
of the playlist down to the bottom.
Playback bar : Displays current playback position.
Playback Volume Display
: Displays playback volume in 8 levels.
$$/$$ : Plays or cancels audio track when tapped.
$$ : Stops audio track when tapped.
$$ : Rewinds audio track when tapped.
$$ : Fast forwards audio track when tapped.
Music
Find. . . . . . . . . . . . . . . . . . . . . . . . . P287
Repeat . . . . . . . . . . . . . . . . . . . . . . P286
Edit
Sort by name . . . . . . . . . . . . . . . . . P309
Sort by date . . . . . . . . . . . . . . . . . . P309
Sort by size . . . . . . . . . . . . . . . . . . P309
Sort by type . . . . . . . . . . . . . . . . . . P309
Zoom . . . . . . . . . . . . . . . . . . . . . . . P141
Preferences . . . . . . . . . . . . . . . . . . P288
Music
Find. . . . . . . . . . . . . . . . . . . . . . . . . P287
Repeat . . . . . . . . . . . . . . . . . . . . . Below
Shuffle. . . . . . . . . . . . . . . . . . . . . . Below
Edit
Edit playlist . . . . . . . . . . . . . . . . . . .Below
Zoom . . . . . . . . . . . . . . . . . . . . . . . P141
Preferences . . . . . . . . . . . . . . . . . . P288
00M1000EN.book 267 ページ 2004年11月24日 水曜日 午前7時56分

268
Displaying/Editing/Managing Data
aTap Music y Edit y Edit playlist on the Menu bar in the audio
playback screen
bSelect the song to be moved using 7 y $$ to the desired
position or tap $$ y tap [Done]
• To move the song further up or further down, repeat the operation up to tapping [Done].
Searching Music
Enter text and search from the stored music archive.
aTap Music y Find on the Menu bar in the audio playback screen
bEnter the text to be searched y tap [Find]
cTap the music to be played
$$ : Moves up the order of the selected audio track in the
playlist.
$$ : Moves down the order of the selected audio track in the
playlist.
• Tap [Cancel] to cancel the operation.
• Tap [Cancel] to cancel the operation.
00M1000EN.book 268 ページ 2004年11月24日 水曜日 午前7時56分
269
Displaying/Editing/Managing Data
Displaying Audio Information
The audio track information is displayed while playing back.
aTap the song for which the information is displayed in the audio
playlist screen y tap $$ after confirmation
1Operations from the Menu bar in the audio information screen
Tap Music or Edit on the Menu bar to display the following items:
Some functions cannot be performed depending on the operation.
Displaying Music by Selecting the Audio File Type
Displays audio of the supported file type by selecting the audio file type.
aTap Edit y Preferences on the Menu bar in the audio playlist screen
bSelect $$ of the file type to display and then tap [Done]
Title : Displays title.
Artist : Displays artist name.
Album : Displayed album name.
Author : Displays author.
Elapsed Time/Recorded Time
: Displays elapsed time/recorded time.
Size (KB) : Displays file size.
Filename : Displays file name.
Copyright : Displays copyright information.
Music
Rename . . . . . . . . . . . . . . . . . . . . . P304
Send as. . . . . . . . . . . . . . . . . . . . . . P310
Repeat . . . . . . . . . . . . . . . . . . . . . . P286
Delete . . . . . . . . . . . . . . . . . . . . . . . P308
Edit
Copy . . . . . . . . . . . . . . . . . . . . . . . . P305
• Tap [Cancel] to cancel the operation.
00M1000EN.book 269 ページ 2004年11月24日 水曜日 午前7時56分

270
Displaying/Editing/Managing Data
Displaying Word, Excel and PDF Files
You can display Word, Excel and image files, etc.
• You can display the following file formats.
aTap $$ y $$ on the Application Selector bar
bTap the file to display
1To close a document file
Tap Document y Close on the Menu bar in the document file list screen
Microsoft Word (.doc) Microsoft Excel (.xls) Microsoft Power Point (.ppt)
PDF (.pdf) HTML (.html) Mhtml (.mht)
JPEG (.jpg, .jpeg) PNG (.png) GIF (.gif)
BMP (.bmp) Wmf (.wmf) Plain Text (.txt)
Zip (.zip)
Drag towards the desired direction.
Tap the icon to perform various operations. 3 P290 to P292
Displayed vertically
00M1000EN.book 270 ページ 2004年11月24日 水曜日 午前7時56分

271
Displaying/Editing/Managing Data
1Operations from the Menu bar in the document file list screen
Tap Documents or Edit on the Menu bar to display the following items:
• Some functions cannot be performed depending on the operation.
1Operations from the Menu bar in the document file display screen
Tap Documents or Edit on the Menu bar to display the following items:
• Some functions cannot be performed depending on the operation.
1About Help
Displays a simple operation manual file of the document viewer when Edit y Help on the
Menu bar are tapped in the document file list screen/display screen.
NOTE
• To view a file, it may take some time depending on the file size. Also, the entire content of the file may not
be displayed.
• Content unique to PC's may not be displayed depending on the file content.
• Some font types may not be displayed correctly. Fonts that can be displayed on the handsets are dissimilar
to those that can be displayed on PC's.
Enlarging/Reducing the Screen
aTap $$/$$
• Repeat this operation when further enlarging or further reducing.
Fitting to Screen and Displaying
aTap $$ in the document file display screen
• If $$ is selected, then the screen does not toggle when tapped.
Documents
History . . . . . . . . . . . . . . . . . . . . . . P294
Bookmarks . . . . . . . . . . . . . . . . . . . P293
Close. . . . . . . . . . . . . . . . . . . . . . . . P289
Edit
View as Icons . . . . . . . . . . . . . . . . . P292
View as List . . . . . . . . . . . . . . . . . . P292
Sort by Name . . . . . . . . . . . . . . . . . P309
Sort by Date . . . . . . . . . . . . . . . . . . P309
Preferences . . . . . . . . . . . . . . . . . . P295
Help . . . . . . . . . . . . . . . . . . . . See below
Document
Send as. . . . . . . . . . . . . . . . . . . . . . P310
Delete . . . . . . . . . . . . . . . . . . . . . . . P308
Rename . . . . . . . . . . . . . . . . . . . . . P304
History . . . . . . . . . . . . . . . . . . . . . . P294
Bookmarks . . . . . . . . . . . . . . . . . . . P293
Add Bookmark . . . . . . . . . . . . . . . . P293
Edit
Priority . . . . . . . . . . . . . . . . . . . . . . P295
Help . . . . . . . . . . . . . . . . . . . . See below
00M1000EN.book 271 ページ 2004年11月24日 水曜日 午前7時56分
272
Displaying/Editing/Managing Data
Fitting to Screen Width and Displaying
aTap $$ in the document file display screen
• If $$ is selected, then the screen does not toggle when tapped.
Resizing the Displayed Portion to the Size of the Screen
aTap $$ in the document file display screen
Switching to Full Screen Display
aTap $$ in the document file display screen
Switching between Vertical Display/Horizontal Display
aTap $$ in the document file display screen
• Tap $$ again to revert back to the original screen.
• Tap $$ again to revert back to the original screen.
00M1000EN.book 272 ページ 2004年11月24日 水曜日 午前7時56分

273
Displaying/Editing/Managing Data
Displaying Popup Screen
aTap $$ in the document file display screen
You can verify the displayed portion using the full screen display.
To Scroll, drag the screen.
Displays the preceding/subsequent page of the current file when tapped.
Displays the first/last page of the current file when tapped.
• Tap $$ one more time to hide the popup menu.
Modifying the Display Method of the Document File List Screen
aTap Edit y View as Icons/View as List on the Menu bar in the
document file list screen
Using the Bookmark
You can register frequently used document files for quick displaying.
Adding to Bookmark
• You can register up to XXX bookmarks.
D
e
f
au
l
t sett
i
ng XXX
List View Icon View
00M1000EN.book 273 ページ 2004年11月24日 水曜日 午前7時56分
274
Displaying/Editing/Managing Data
aTap Documents y Add Bookmark on the Menu bar in the document
file display screen
bEnter bookmark name y tap [Add]
Displaying from Bookmark
aTap Documents y Bookmarks on the Menu bar in the document file
display screen
bTap the bookmark to display
Deleting a Bookmark
aTap $$ of the bookmark to delete in the bookmark list screen
$$ switches to $$.
bTap Documents y Delete on the Menu bar
Modifying the Bookmark Name
aTap $$ of bookmark name to be modified in the bookmark list
screen
$$ switches to $$.
bTap Documents y Rename on the Menu bar, and then enter the new
name from the modify bookmark name screen y tap OK
• Tap [Cancel] to cancel the operation.
00M1000EN.book 274 ページ 2004年11月24日 水曜日 午前7時56分

275
Displaying/Editing/Managing Data
• You can enter up to XX characters of text in either single or double byte characters.
• Tap [Cancel] to cancel the operation.
Modifying the Display Order in the Bookmark List Screen
aTap Edit y Sort Order on the Menu bar in the bookmark list
screen
NOTE
• The files are sorted in the following order when Sort by Name is selected.
Kanji (JIS Code order) 3 Hiragana 3 Katakana*1 3 Single byte Katakana 3 Double byte
Alphabet*2 3 Single byte Alphabet*2 3 Double byte Numerals 3 Single byte Numerals 3
Symbols (JIS Code order)
Displaying Document Files from History
Documents and files are displayed from history.
aTap Documents y History from the Menu bar in the document file
list screen
bTap the file to display
Setting up the Preferences of the Document Viewer
You can set preferences for the document files.
aTap Edit y Preferences on the Menu bar in the file list screen
To perform the following setups, tap the relevant tabs as necessary.
De
f
ault sett
i
ng Sorted by XXX
Sort by Name : Sort files by alphabetical order of file names.
Sort by Date : Sort files by date saved in reverse chronological order.
*1: When Hiragana and Katakana are intermingled, alphabetical order is given priority (e.g. あアいイ).
*2: When lower case and upper case characters are intermingled, the lower case is given priority as well
as alphabetical order (e.g. aAbB).
• Tap [Clear] to clear history.
00M1000EN.book 275 ページ 2004年11月24日 水曜日 午前7時56分

276
Displaying/Editing/Managing Data
1Preferences Tab
1Files Tab
1About Tab
bSetup each function y tap [OK]
Setup is saved.
• Tap [Cancel] to cancel saving.
Page flick : Set up to allow or disallow scrolling in the
document file display screen using a stylus.
Shows $$ when allowed, and shows $$ when
disallowed.
Show picture : Set up to allow or disallow displaying of images
in the document file display screen.
Shows $$ when allowed, and shows $$ when
disallowed.
Reflow text : You can switch and display the file content
display between S, M, and L depending on the
file type displayed.
Keep for : Set up number of days to save history.
• Any number between 0 and 30 can be used
for setup.
Clear history : Clear history by selecting Ye s . Store history for
the number of days specified in Keep for by
selecting No.
You can place a $$ to select the file types to be supported by the
document viewer.
Displays version information of the document viewer.
00M1000EN.book 276 ページ 2004年11月24日 水曜日 午前7時56分

277
Displaying/Editing/Managing Data
TransFlash Memory Card
You can mount the TransFlash memory card to the FOMA handset and use it as an external
memory. The TransFlash memory card is one of the most compact, light, detachable external
memory media with a large memory capacity. It can be used with SD memory compatible PC's
and printers when the accompanying conversion adaptor is used together.
• You can purchase the TransFlash memory card and the TransFlash memory card adaptor from home electric
appliance stores. The M1000 supports TransFlash memory cards up to XX bytes. (As of XXX 2005)
Cautions When Using the TransFlash Memory Card
Installation/Removal of the TransFlash Memory Card
• Do not install or remove the TransFlash memory card while the power of the FOMA handset is switched on.
* Perform after removing the battery pack or the rear cover of the battery pack. 3 P52
• TransFlash memory cards formatted with other devices such
as PC's may not function properly. Always use the M1000 to
format the memory cards.
• The TransFlash memory card may become deformed from
accidents and failures. It is advised to keep a backup of
important data. NTT DoCoMo does not assume responsibility
for any damages caused by the loss or alteration of data.
• Do not shut off the power of the FOMA handset while reading
or writing data.
• Do not place labels or stickers on the handset. The thickness
of such material is enough to be a possible cause of electrical
contact failure or data corruption.
• Place the memory card inside the accompanying case when
carrying or storing.
• Do not touch the metal terminal by hands or metal objects.
• Do not subject to high impact, bend, drop or wet the memory
card.
• Refrain from use or storage in the following areas.
- Inside the car or other locations subject to high temperature
- Locations exposed to direct sunlight
- High humidity locations or locations with corrosive material
- Locations under the influence of substantial static electricity or
electrical noise
00M1000EN.book 277 ページ 2004年11月24日 水曜日 午前7時56分
278
Displaying/Editing/Managing Data
Installation
Removal
NOTE
• Check the correct direction of the TransFlash memory card, and close the cover after firmly installing it. The
card may get damaged.
aSlide the cover of the TransFlash memory card in the direction
of Arrow a and lift it towards the direction of Arrow b
bInstall the TransFlash memory card
cBring down the cover of the TransFlash memory card in the
direction of Arrow a and slide it towards the direction of
Arrow b
aPerform the same operation as Step 1 of Installation
bRemove the TransFlash memory card
cPerform the same operation as Step 3 of Installation
00M1000EN.book 278 ページ 2004年11月24日 水曜日 午前7時56分

279
Displaying/Editing/Managing Data
Mounting the TransFlash Memory Card to the Adapter
Mount the TransFlash memory card to the TransFlash memory card adapter when using it with a
PC that supports SD memory cards.
• Check the correct direction to insert when using the card. An incorrect use of the card may cause the device
to be damaged.
NOTE
• Writing and formatting cannot be performed when the write-protect switch of the TransFlash memory card
adapter is set to the LOCK side.
Folder Structure of the TransFlash Memory Card
1When displaying it on a FOMA handset
1When displaying it on a PC
When writing a file on to the TransFlash memory card from a FOMA handset, the following
folder is created within the TransFlash memory card and saved inside the folder. The
following folder structure needs to be created when saving a file from a PC to the TransFlash
memory card.
aInsert the TransFlash memory card firmly to the
TransFlash memory card adapter
• Pull the memory card in the reverse direction when removing.
You can display the file content of the TransFlash memory card
using the memory manager. 3 P310
00M1000EN.book 279 ページ 2004年11月24日 水曜日 午前7時56分

280
Displaying/Editing/Managing Data
Number of Files That Can Be Saved on the TransFlash Memory Card
The maximum number of files that can be saved or added to a single folder (on a 32MB
TransFlash memory card) is described below.
• The number of files that can be saved varies depending on the capacity of the TransFlash memory card.
• Although you can verify the remaining memory capacity using the memory manager (3 P310), the displayed
memory capacity is lower than the actual memory capacity shown on the TransFlash memory card.
Folder Name Maximum Number of
Files
Maximum Number of Files That Can Be Saved to a
Single Folder
Audio XXXX files XXXX files
Video XXXX files XXXX files
Image XXXX files XXXX files
Document XXXX files XXXX files
Other XXXX files XXXX files
Media file
audio folder...................................
unfiled folder.........................
folder for saving audio track files
folder for saving audio track files saved on the
FOMA handset
document folder...........................
unfiled folder..........................
folder for saving document files
folder for saving document files saved on the
FOMA handset
image folder..................................
unfiled folder..........................
folder for saving image files
folder for saving image files saved on the
FOMA handset
other folder...................................
unfiled folder.........................
folder for saving XXX files
folder for saving XXX files saved on the FOMA
handset
video folder...................................
unfiled folder......................... folder for saving video files saved on the
FOMA handset
folder for saving video files
00M1000EN.book 280 ページ 2004年11月24日 水曜日 午前7時56分
281
Displaying/Editing/Managing Data
Using the TransFlash Memory Card
You can save image, video, audio track and document data inside the FOMA handset to the
TransFlash memory card, and save data in the TransFlash memory to the FOMA handset. You
can also browse inside the TransFlash memory card from the FOMA handset.
1The following operations can be performed on the TransFlash memory card. Refer to
reference pages for operation method.
• Previewing files in the TransFlash memory card 3 P303
• Modifying file names in the TransFlash memory card 3 P304
• Copying/moving files between the FOMA handset and the TransFlash memory card 3 P305 , P307
• Deleting files in the TransFlash memory card 3 P308
Formatting the TransFlash Memory Card
You need to format (initialize) the TransFlash memory card using the FOMA handset when using
it for the first time. The memory card may not function normally when formatted using other
devices such as a PC.
aTap $$ y $$ y Memory Card on the Application Selector bar
bTap [Format] y [Yes]
cTap the [Name] section, and then input name y tap [Done]
• To modify the name, tap [Modify Name], and proceed to Step 3.
• You can enter up to XX (single-byte or double-byte) characters.
• Tap [No] when not formatting.
Once formatted, all content in the TransFlash memory card is erased.
00M1000EN.book 281 ページ 2004年11月24日 水曜日 午前7時56分
282
Displaying/Editing/Managing Data
Managing Files
You can manage image/video/audio track/document files, and organize files by managing and
deleting files/folders in the TransFlash memory card.
Displaying Files by Folder Structure
You can display by switching between folders from image list screen (3 P274)/video playlist
screen (3 P280)/audio playlist screen (3 P285).
You can display a list view of the TransFlash memory card from this operation.
aTap All* on the Menu bar from the list view
bTap the folder name to display
Creating/Organizing/Deleting Folders
You can create/organize/delete folders from image list screen (3 P274)/Video playlist screen (3
P280)/Audio Track screen (3 P285).
You can also create/organize/delete folders in the TransFlash memory card with this operation.
This operation is performed after displaying the list view of files in the TransFlash memory card.
aTap All* y Organize Folders on the Menu bar in the list view screen
* Displays a previously selected folder name.
* A previously selected folder name is displayed.
1When deleting a folder
Tap folder to delete y tap [Delete]
All : Displays all files of the same format.
Internal memory
: Displays folders in the FOMA handset.
Memory card
: Displays folders in the TransFlash memory card.
Organize Folders
: Delets or creates folders.
00M1000EN.book 282 ページ 2004年11月24日 水曜日 午前7時56分
283
Displaying/Editing/Managing Data
bTap Add
cTap the Name section, enter name y tap the Location section, and
then select the location to create the folder y tap [Done]
Modifying a File Name
You can modify a file name from the image display screen (3 P274)/video playback screen (3
P280)/audio track details screen (3 P288)/document file display screen (3 P289).
You can also modify file names in the TransFlash memory card with this operation. Perform this
operation after displaying the files in the TransFlash memory card.
aTap Image/Video/Audio Track/Document y Modify Name on the Menu
bar in display file name to modify/playback screen
bTap Modify file name y [Done]
NOTE
• Text entry method 3 P466
Copying a File to Another Folder
1FOMA handset 3 copy to TransFlash memory card
Display the source file to copy in the FOMA handset and select a folder in the TransFlash
memory card as the copy (save) destination.
Name : Enter folder name to create.
Location : Select location to create folder (FOMA handset/
TransFlash memory card).
• Tap [Cancel] to cancel the operation.
• Displays previous file name.
• You can enter up to XX (one byte or two byte) characters.
• Tap [Cancel] to cancel the operation.
00M1000EN.book 283 ページ 2004年11月24日 水曜日 午前7時56分

284
Displaying/Editing/Managing Data
1TransFlash memory card 3 copy to FOMA handset
Display the source file to copy in the TransFlash memory card and select a folder in the FOMA
handset as the copy (save) destination.
Copying a Single File
You can copy a file to another folder from Video playback screen (3 P280)/Audio Track Details
screen (3 P288).
• You cannot perform this operation when playing a video clip or audio track.
aTap Edit y Copy on the Menu bar in the playback screen of the file
to be copied
bTap the Folder section and select the destination folder to copy y
tap [Save]
NOTE
• The memory manager is used when copying image files or document files 3 P306
Selecting a File using the Memory Manager and Copying to Another Folder
aTap $$ y $$ on the Application Selector bar, and tap Memory
Manager on the control panel screen, and tap File in the memory
manager screen
bTap Location, and select the location where the source file to copy
is saved
• Tap [Cancel] to cancel the operation.
Location : Select the location of the source file (on the FOMA
handset/TransFlash memory card).
Type : Selects file type of the source file to copy.
File : Selects source file to copy.
00M1000EN.book 284 ページ 2004年11月24日 水曜日 午前7時56分

285
Displaying/Editing/Managing Data
cTap Type, and select the file type of the source file to copy
dIn the File field, tap $$ on the source file to copy y tap [Copy]
eTap the Folder section, and select the destination folder to copy
y tap Copy
Moving a File to Another Folder
1Moving from FOMA handset 3 TransFlash memory card
You can select a folder in TransFlash memory card as the destination folder while displaying
the source file on the FOMA handset.
1Moving from TransFlash memory card 3 FOMA handset
You can select a folder in the FOMA handset as the destination folder while displaying the
source file on the TransFlash memory card.
Moving a Single File
You can move a file inside a folder from the image display screen (3 P274)/video playback
screen (3 P280) audio playback screen (3 P285) to another folder.
aTap All* on the Menu bar in the display/playback screen of the file
to be moved y the destination folder y and tap $$
Moving All Files in Source Folder
You can move all files inside a folder from the image list screen (3 P274)/video playlist screen
(3 P280) audio playlist screen (3 P285) between the FOMA handset and the TransFlash
memory card.
Folder : Selects the destination folder to copy (on the FOMA
handset/TransFlash memory card)
• Tap [Cancel] to cancel the operation.
*: Displays a previously selected folder name.
00M1000EN.book 285 ページ 2004年11月24日 水曜日 午前7時56分

286
Displaying/Editing/Managing Data
aTap All* y Edit Folders in the list screen
bTap the source folder y tap Edit
cTap the To field and enter a file name y tap the Location field, and
select the destination location y tap [Done]
Deleting a File
You can delete a file. With this operation, you can delete files in the TransFlash memory card.
You need to display subject files in the TransFlash memory card to perform this operation.
Deleting a Single File
You can delete a file from the image list screen (3 P274)/video playback screen (3 P280)/audio
track details screen (3 P288)/document file display screen (3 P289).
aTap Image/Video/Audio Track/Document y Delete on the Menu bar in
the display/playback screen of the subject file to delete, and tap
[Yes] in the confirm delete screen
• Tap [No] to cancel the operation.
*: Displays a previously selected folder name.
To : Enters the folder name to create in the destination.
Location : Selects the destination (in the FOMA handset/
TransFlash memory card).
00M1000EN.book 286 ページ 2004年11月24日 水曜日 午前7時56分

287
Displaying/Editing/Managing Data
Deleting by Selecting Files using the Memory Manager
aTap $$ y $$ on the Application Selector bar , and tap Memory
Manager in the control screen, and tap [File] in the Memory
Manager screen
bTap Location, and select the location storing the file to delete
cTap File and select the file type of the file to delete
dTap $$ of the file to delete in the File field and y tap [Delete], and
tap [Yes] in the delete confirmation screen
Sort Files
You can sort files in the image list screen (3 P274)/video playlist screen (3 P280)/audio playlist
screen (3 P285)/document file list screen (3 P289).
aTap Settings/Edit on the Menu bar in the list screen y Sort Method
1When operating in an image list screen
1When operating in the video playlist/audio playlist/document file list screen
NOTE
• You can sort files in the following order when using Sort by Name or Sort by Title.
Location : Selects the location storing the file to delete (in the
FOMA handset/TransFlash memory card).
Type : Selects the file type to delete.
File : Selects the file to delete.
De
f
ault sett
i
ng Sorted by XXX
Sort by Name : Sort by file name in alphabetical order.
Sort by Date : Sort by date saved in reverse chronological order.
Sort by Size : Sort by descending order of file size.
Sort by Title : Sort by title name in alphabetical order.
Sort by Date : Sort by date saved in reverse chronological order.
Sort by Size : Sort by descending order of file size.
Sort by Type : Sort by file type in order from XXX.
00M1000EN.book 287 ページ 2004年11月24日 水曜日 午前7時56分

288
Displaying/Editing/Managing Data
• Kanji (JIS Code order) 3 Hiragana 3 Katakana*1 3 Single byte Katakana 3 Double byte Alphabet*2 3
Single byte Alphabet*2 3 Double byte Numerals 3 Single byte Numerals 3 Symbols (JIS Code order)
Sending Files
You can send files from the image display screen (3 P274)/video playback screen (3 P280)/
audio playback screen (3 P285)/document file display screen (3 P289).
aTap Image/Video/Audio Track/Document on the Menu bar in the
display/playback screen of the file to send y Send As
bTap Send As section, and select send format y tap [Done]
NOTE
• Composing an email 3 P235
• Bluetooth communication 3 P381
Checking the Memory Capacity
You can check the memory capacity of the FOMA handset by application.
aTap $$ y $$ on the Application Selector bar, and tap Memory
Manager in the control panel screen.
*1: When Hiragana and Katakana are intermingled, alphabetical order is given priority (e.g.:あアいイ ).
*2: When lower case and upper case characters are intermingled, the lower case is given priority as well
as alphabetical order (e.g.:aAbB).
Email : Displays compose email screen with the image file
attached.
Bluetooth : Sends with Bluetooth.
• Tap [Cancel] to cancel the operation.
Displays available memory in the FOMA handset
00M1000EN.book 288 ページ 2004年11月24日 水曜日 午前7時56分
289
Displaying/Editing/Managing Data
When Memory is Full or a Maximum Amount of Stored Data is Reached
When the number of files or the memory reaches maximum capacity, delete old files, and save
new files.
When Memory is Low on the FOMA Handset
aDisplays confirmation screen
bTap Ye s
1When there is excess data in the FOMA handset
Tap Yes in Step 2 to display the screen on the left.
cTap Uninstall, and uninstall the application, or tap the application
to free up memory, and delete data
• Uninstall method 3 P270
Yes : Deletes excess data. When more excess data is found,
the screen on the left is displayed.
No : Keeps excess data. When more excess data is found,
the screen on the left is displayed.
Yes to All : Deletes all excess data.
No to All : Keeps all excess data.
00M1000EN.book 289 ページ 2004年11月24日 水曜日 午前7時56分

290
Displaying/Editing/Managing Data
• Delete method 3 P308
When Memory to Store Data is Insufficient while Copying/Moving Files
Using the Voice Recorder
You can readily record voice memos on the FOMA handset using this function. Recording
and playing can be conducted with a simple operation.
Voice Memo Screen
When there is insufficient memory to store in the copy
destination, the screen on the left is displayed.
Tap Yes to display screen preceding the confirmation screen.
Launch relevant applications to delete unnecessary files.
• Checking the memory capacity of the FOMA handset 3 P310
• Uninstall method 3 P270
• Delete method 3 P308
Icon name Icon Description
aVoice Memos/All
Memos –Displays the number of Voice Memos/All Memos.
bRecord $$ Starts recording when tapped.
cPlay/Pause $$/$$ Starts/pauses playback when tapped.
dStop $$ Stops recording/playback when tapped.
eCue $$$$ Cues voice memo when tapped.
fVolume $$ Controls playback volume by tapping and sliding.
gRecord Date – Displays recorded date of the voice memo.
hSize – Displays file size of the voice memo.
00M1000EN.book 290 ページ 2004年11月24日 水曜日 午前7時56分

291
Displaying/Editing/Managing Data
Recording Voice
You can record up to XX minutes. You can either choose to automatically record at the end of the
memory, or overwrite an existing voice memo.
aTap $$ y $$ on the Application Selector bar
bTap New y tap $$
cTap $$
Recording is stopped.
1When overwriting to an existing voice memo
Tap $$/$$, and select voice memo to overwrite y tap $$
• You cannot tap $$/$$ when there is only one existing voice memo.
Playing Back a Voice Memo
You can immediately play back and check a recorded voice memo.
aTap $$/$$ in the voice memo screen, and select voice memo to
play y tap $$
Quick Launching the Voice Recorder
You can record a new voice memo with a simple button operation. It is convenient when you need
to record a voice memo quickly.
• You cannot tap $$/$$ when there is only one existing voice
memo.
You can control the playback volume by tapping and sliding.
Displays $$ when tapped and paused.
Tap $$ to play the memo.
00M1000EN.book 291 ページ 2004年11月24日 水曜日 午前7時56分

292
Displaying/Editing/Managing Data
aHold down s
Displays the voice memo screen, and the voice memo is recorded at the end of the memory.
bRelease s
Cancels recording.
Sending the Voice Memo
You can send the recorded voice memo as an email attachment.
aTap $$/$$ in the voice memo screen, and select the voice memo
to send
bTap Voice Recorder y Send Method on the Menu bar
cTap the Send Format section y select the format to send y tap
[Done]
• Tap [Cancel] to cancel sending.
NOTE
• Email Compose 3 P235
• Bluetooth communication 3 P381
Deleting a Voice Memo
You can delete a recorded voice memo.
aTap $$/$$ in the Voice Memo screen, and select the voice memo
to delete y tap [Delete], and tap [Yes] in the delete confirmation
screen
• Tap [No] to cancel the operation.
Email : Send as an email attachment.
Bluetooth : Send with Bluetooth
• Tap [Cancel] to cancel the operation.
00M1000EN.book 292 ページ 2004年11月24日 水曜日 午前7時56分

293
Other Convenient Functions
About Multiaccess <Multiaccess>. . . . . . . . . . . . . . . . . . . . . . . . . . . . . . . . . . 294
Notification by an Alarm at the Specified Time <Alarm time> . . . . . . . . . . . 297
Registering a Schedule <Calendar/Schedule> . . . . . . . . . . . . . . . . . . . . . . . . 300
Registering To Do List <To do> . . . . . . . . . . . . . . . . . . . . . . . . . . . . . . . . . . . . 315
Quick Execution of Frequently Used Functions. . . . . . . . . . . . . . . . . . . . . . . 324
Changing Groups on the Control Panel . . . . . . . . . . . . . . . . . . . . . . . . . . . . . 325
Checking Duration <View duration> . . . . . . . . . . . . . . . . . . . . . . . . . . . . . . . . 326
Checking Information on Amount of Data at Packet Communication . . . . . 327
Displaying Information on the FOMA Handset. . . . . . . . . . . . . . . . . . . . . . . . 330
Using as a Calculator <Calculator>. . . . . . . . . . . . . . . . . . . . . . . . . . . . . . . . . 330
Entering Notes. . . . . . . . . . . . . . . . . . . . . . . . . . . . . . . . . . . . . . . . . . . . . . . . . . 331
Displaying Time around the World . . . . . . . . . . . . . . . . . . . . . . . . . . . . . . . . . 337
How to Use an Earphone/Microphone with Switch
<Earphone/microphone with switch> . . . . . . . . . . . . . . . . . . . . . . . . . . . . . . . 338
Putting the Settings of Various Functions Back to Default
<Reset settings> . . . . . . . . . . . . . . . . . . . . . . . . . . . . . . . . . . . . . . . . . . . . . . . . 340
Installing an Application. . . . . . . . . . . . . . . . . . . . . . . . . . . . . . . . . . . . . . . . . . 341
19OTH01_1col_EN.fm 293 ページ 2004年11月24日 水曜日 午前9時24分

294
Other Convenient Functions
Multiaccess
About Multiaccess
Multiaccess is a function to simultaneously carry out multiple communications, allowing you to
receive messaging during a voice call and to receive a voice call while starting the browser.
Communications That can be Used Simultaneously
The following 3 communications can be carried out simultaneously:
*: CSD (Circuit Switched Data) is a data communication method by a circuit switch in GSM.
NOTE
• About combination of multiaccess 3 P525
• During a multiaccess, you will be charged for each communication.
Receiving Messaging during a Call
You can receive messaging during voice/video call and check it without interrupting the call.
• You cannot receive any messaging in CSD
aReceive messaging during a call
Communication Number of communications
Voice call One of left
Data communication by CSD*
Packet communication One of left
Wireless LAN
SMS One
$$ will be displayed in the status bar, and a ring tone will sound.
19OTH01_1col_EN.fm 294 ページ 2004年11月24日 水曜日 午前9時24分

295
Other Convenient Functions
bTap $$ in the Status bar
cTap $$ in the Application Selector bar
Goes back to the Calling screen.
Connecting to the Internet during a Call
You can connect to the Internet during a voice/video call and view homepage, etc. without
interrupting the call.
• You cannot connect to the internet in CSD.
aTap $$ in the Application Selector bar during a call
bTap $$ in the Application Selector bar
Goes back to the Calling screen without being disconnected from the Internet.
You can check messaging.
19OTH01_1col_EN.fm 295 ページ 2004年11月24日 水曜日 午前9時24分

296
Other Convenient Functions
Receiving a Call while Connected to the Internet
You can receive a voice/video call while connected to the Internet.
• If you are connected to the internet in CSD, you cannot receive any call.
aReceive an incoming call while connected to the Internet
bTap [Answer]
cTap $$ in the Application Selector bar
Goes back to the Internet screen without interrupting the call.
The Incoming call screen is displayed, and a ring tone sounds.
Answer the call.
• Tap [Reject] to reject the call.
19OTH01_1col_EN.fm 296 ページ 2004年11月24日 水曜日 午前9時24分

297
Other Convenient Functions
Alarm time
Notification by an Alarm at the Specified Time
You can use the FOMA handset as an alarm.
• You can set up to 3 alarms.
aTap $$ y $$ in the Application Selector bar
bTap the alarm slot you want to register
cTap the Time column to set the alarm time
• How to operate 3 P59
dTap the When column to select an Alarm Action
• If you have tapped Once/Every week, go to Step 5.
• If you have tapped Next 24 hours/Every day/Working days, go to Step 6.
eTap the Day of the week column to select a day of the week
fTap the Alarm sound column to select an alarm sound
Time : Sets the alarm time
Operation setup
Once : An alarm will sound only once at the specified
time on the specified day of the week.
Next 24
hours
: An alarm will sound only once at the specified
time.
Every day : An alarm will sound at the specified time every
day.
Working days: An alarm will sound at the specified time on
working days (week days).
Every week : An alarm will sound at the specified time on the
specified day every week.
Day : Set a day of the week to sound an alarm.
Displayed only if Operation setting is set to Once
or Every week.
Alarm sound : Sets an alarm sound.
Message : Sets a message to be displayed when an alarm
goes off.
Date/time screen
Alarm slot
19OTH01_1col_EN.fm 297 ページ 2004年11月24日 水曜日 午前9時24分
298
Other Convenient Functions
• Tap $$ to play the selected alarm sound to confirm it.
gTap the Message column to type a message
• You can enter up to 128 characters either in two or one byte letters.
• Tap $$ to display the previously entered message, allowing you to select it.
hTap [Done]
The alarm is registered
• To sound an alarm at the specified time, you need to set it up. 3 See below
NOTE
• You can set up working days. 3 See below
Setting Working Days
Setting working days (week days) makes an alarm sound only on working days.
aTap $$ y $$ in the Application Selector bar, and tap the General
tab y Date and time on the Control Panel screen, and then tap
Working days on the Date and Time screen
bTap $$ of the day of the week to be set up as a working day y
[Done]
A working day is set up.
Setting up/Canceling the Registered Alarm
Setting up/canceling the registered alarm enables/disables alarm operation.
aTap $$ y $$ in the Application Selector bar
Set working days
19OTH01_1col_EN.fm 298 ページ 2004年11月24日 水曜日 午前9時24分

299
Other Convenient Functions
bTap $$ for the alarm slot to be set up
At the Time Set up
An alarm is set up
• Tap $$ to cancel the alarm.
An alarm sounds as set up, and the Alarm screen appears.
The following operations can be performed:
[Snooze] : The alarm stops and then goes off again after 5
minutes
[Open] : The Date and Time screen appears
[Silent] : The alarm stops
[Complete] : The alarm stops, and the Alarm screen is closed
19OTH01_1col_EN.fm 299 ページ 2004年11月24日 水曜日 午前9時24分

300
Other Convenient Functions
Calendar/Schedule
Registering a Schedule
You can register a schedule on the calendar. You can check the registered schedule on the
calendar and be notified with an alarm at the specified time on the specified date.
Displaying the Calendar
The calendar screen can be displayed by day, week and month and switched from each screen.
aTap $$ y $$ in the Application Selector bar
bTap $$/$$
Switches displays.
1 Day View screen
The Schedule screen for that day is displayed.
You can display the View Date screen to select a day to be displayed.
Switch days of the week.
Switch to display by week or month.
Weekly View screen
You can display the Date Setup screen to
select a week and a month to be displayed.
Switch to 1 day View
Switch displays by week/month
Monthly View screen
19OTH01_1col_EN.fm 300 ページ 2004年11月24日 水曜日 午前9時24分

301
Other Convenient Functions
1Menu bar
Tap Calendar and Edit on the Menu bar on the Calendar screen to display the following items:
*: Not displayed while the Weekly/Monthly View screen is displayed
• Some items may not be able to be executed depending on the operation.
NOTE
• You can switch displays by day, week and month 3 P333
• You can switch methods to display a day of the week 3 P334
Calendar
New. . . . . . . . . . . . . . . . . . . . . See below
Search . . . . . . . . . . . . . . . . . . . . . . P335
Send this folder. . . . . . . . . . . . . . . . P330
Delete item . . . . . . . . . . . . . . . . . . . P332
Edit
Undo delete* . . . . . . . . . . . . . . . . . P332
Paste item* . . . . . . . . . . . . . . . . . . . P331
Zoom*. . . . . . . . . . . . . . . . . . . . . . . P141
User settings . . . . . . . . . . . . . . . . . P333
19OTH01_1col_EN.fm 301 ページ 2004年11月24日 水曜日 午前9時24分
302
Other Convenient Functions
Registering a Schedule
You can register a schedule and set it up to be notified with an alarm sound at a specified time on
a specified date.
There are following 3 types of schedule:
aTap $$ y $$ in the Application Selector bar, and then tap Calendar
y New on the Calendar screen
bTap the Title entry field y Enter the title
• You can enter up to 200 characters in either single- or double-byte letters.
cTap the Type column to select a type of schedule
dSet up the date or start date/end date
1If the type is Appointment or Reminder
Tap the Date column to set up the date
• How to operate 3 P59
Appointment schedule Normal schedule. Start time and End time are to be set up
Notification schedule A schedule for which the start time alone is to be set up
All day schedule A schedule across the date line. The Start date and the End date are to be set up
Enter a title, etc. for the schedule to be displayed on the Daily
View screen, etc.
Type : Select a type of schedule from Appointment,
Notification and All day.
Date/Start date, End date
: Set up the date of the schedule. The Date entry
field is displayed if the type is Appointment or
Notification. The Start Date/End Date fields are
displayed if the type is All day.
Time : The Start Time/End Time entry fields are
displayed if the type is Appointment. The
Notification Time entry filed is displayed if the
type is Notification. No Time entry field is
displayed if the type is All day.
Location : Enter a place.
Alarm : Set up an alarm. Set up the date and time for the
alarm only if it is set up.
Repeat : Set up if the schedule is to be repeated. Can be
set up only if the type is Appointment or
Notification.
Private : Set the schedule to Private. The contents of the
schedule will not be sent when sending mails
with the schedule attached and synchronizing
data with a PC.
$$ Tab : Enter notes.
19OTH01_1col_EN.fm 302 ページ 2004年11月24日 水曜日 午前9時24分

303
Other Convenient Functions
1If the type is All day event
Tap the Start Date column/End Date column to set up the Start/End date
• How to operate 3 P59
eSet up a time
1If the type is Appointment
Tap the Time column/until column to set up the start/end time
• How to operate 3 P59
1If the type is Reminder
Tap the Time column to set up the notification time
• How to operate 3 P59
fTap the Loction column to enter the place
• You can enter up to 20 characters in either two or one byte letters.
• Tap $$ to display the one previously entered, allowing you to select it.
gTap $$ in the Alarm column
A field to enter the date and time when an alarm is to sound under the Alarm column.
• Tap $$ to cancel the alarm.
• To set up an all day schedule, go to Step 8.
1To set up an alarm date and time
Tap the Time/Date entry field to set up the alarm date and time
• How to operate 3 P59
• It cannot be set to a date and a time after the scheduled start time or date.
hTap the Repeat column
None : Repeat is not be set up.
Daily : The event is repeated every specified number
of days under Interval.
Weekly : The event is repeated on the specified day of
every specified number of weeks under
Interval.
Monthly by date : The event is repeated on the same date every
specified number of months in Interval.
Monthly by day : The event is repeated on the same day of the
same week every specified number of
months under Interval.
Yearly by date : The event is repeated on the same date in the
same month every specified number of years
in Interval.
Yearly by day : The event is repeated on the same day of the
same week in the same month every
specified number of years in Interval.
Interval : The event is set to be repeated by how many
days/weeks/years.
Forever : Set to be repeated without any due date.
Due date : Set up the due date for repeat.
Cannot be set up if set to permanent.
19OTH01_1col_EN.fm 303 ページ 2004年11月24日 水曜日 午前9時24分

304
Other Convenient Functions
iTap $$ of the action to be set up
• Tap $$ of Week ly to select [Select days].
1To set up a day of the week
aTap [Select days]
bTap $$ of the day to be set up y [Done]
1To set up the interval
Tap $$/$$ in the Interval column to set up the interval to repeat
• You can directly enter it in the Interval column.
1To set it to permanent
Tap the Forever column
1To set up a due date
Tap the Until column to appoint the date
• How to operate 3 P59
jTap $$ in the Private column
• Tap $$ to cancel Private.
kTap $$
lEnter notes
• You can enter up to 1024 characters in either single- or double-byte letters.
mTap $$
The schedule is registered.
Notes Entry screen
19OTH01_1col_EN.fm 304 ページ 2004年11月24日 水曜日 午前9時24分

305
Other Convenient Functions
1About items on the menu bar
Tap Calendar and Edit on the Menu bar on the Schedule Registration screen to display the
following items:
• Some items may not be able to be executed depending on the operation.
• The items on the Menu bar on the Schedule Details screen are the same as those on the Schedule
Registration screen. 3 P328
NOTE
• If registered without entering a title of the schedule, the schedule type (Appointment/Reminder/All day event)
will automatically entered into the title.
• Tapping the time on the 1 Day View screen also displays the Schedule Registration screen.
• You can set up the Start Time/End Time, etc. that are automatically displayed on the Schedule Registration
screen in advance. 3 P333
• You can set up the alarm time that is automatically displayed if an alarm is set in advance. 3 P334
• You can change the alarm sound. 3 P334
Checking/Updating the Schedule
Select a schedule set up from the Calendar screen to display the Details screen. You can update
and register the contents on the Details screen to reregister.
aTap $$ y $$ in the Application Selector bar
Calendar
New. . . . . . . . . . . . . . . . . . . . . . . . . P323
Find. . . . . . . . . . . . . . . . . . . . . . . . . P335
Send as. . . . . . . . . . . . . . . . . . . . . . P329
Move to To do . . . . . . . . . . . . . . . . . P330
Remove entry . . . . . . . . . . . . . . . . . P331
Edit
Undo delete . . . . . . . . . . . . . . . . . . P332
Cut entry. . . . . . . . . . . . . . . . . . . . . P331
Copy entry . . . . . . . . . . . . . . . . . . . P331
Cut text . . . . . . . . . . . . . . . . . . . . . . P482
Copy text . . . . . . . . . . . . . . . . . . . . P482
Paste text . . . . . . . . . . . . . . . . . . . . P483
Preferences . . . . . . . . . . . . . . . . . . P333
1 Day View screen Weekly View screen Monthly View screen
abcd def def
19OTH01_1col_EN.fm 305 ページ 2004年11月24日 水曜日 午前9時24分
306
Other Convenient Functions
bTap the schedule to check
cUpdate the contents and tap $$
The updated schedule is registered.
• How to operate 3 P323
1When a repeating schedule is updated
Item/icon Description
aTitle Displays the contents of the schedule.
b$$ An alarm has been set up in the schedule.
c$$ Notes have been registered in the schedule.
d$$ A notification schedule has been set up.
eAll day schedule An all day schedule has been set up.
fAppointment schedule An appointment schedule has been set up.
• Tap the schedule on the 1 Day View screen to display the
Details screen for the schedule.
• Tap the schedule on the Weekly View screen to display the
Schedule Details screen. However, if the Notification schedule
and the All day schedule have been set to the same date,
tapping the schedule displays the Schedule Selector screen at
the bottom of the screen. Tapping the schedule you want to
display displays the Schedule Detail screen.
• Tap the date on the schedule you want to check on the Monthly
View screen to display the 1 day View screen. Tap the
schedule to display the Schedule Detail screen.
• How to display the calendar 3 P322
Tap $$ to display the screen on the left. Tap $$ of the item to be
changed.
Only this one : Changes only the edited schedule
All repeats : Changes all the repeating schedules
All previous : Changes all of the previous repeating schedules
All future : Changes all of the future repeating schedules
Details screen
19OTH01_1col_EN.fm 306 ページ 2004年11月24日 水曜日 午前9時24分
307
Other Convenient Functions
At the Scheduled Alarm Time
NOTE
• If no alarm has been set, no operation is performed to notify you of the scheduled event (e.g. displaying a
screen) at the scheduled time.
Sending Registration Contents
You can send a schedule as a file in the vCalendar (electronic scheduler) format by messaging or
via Bluetooth. You can also send an entire folder containing schedules as well as one schedule at
a time.
Sending a Schedule
Send a schedule
aTap Calendar y Send as on the Menu bar on the Detail screen for
the schedule to be sent
• How to operate 3 P328
bTap the Send as column on the Sending Format screen to select a
sending method y Tap [Done]
cCreate and send an email
• How to operate 3 P235, P261
An alarm sounds as set up, and the Alarm screen appears.
The following operations can be performed:
[Snooze] : The alarm stops and then goes off again in 5
minutes.
[Open] : The Schedule Detail screen appears.
[Silent] : Stops the alarm sound.
[Done] : Stops the alarm sound and closes the Alarm
screen.
Email : Send an email with a schedule attached. Go to Step 3.
Text message : Insert a schedule into a message of Short Message Service (SMS) to
send. Go to Step3.
Bluetooth : Send a schedule via Bluetooth 3 P384
19OTH01_1col_EN.fm 307 ページ 2004年11月24日 水曜日 午前9時24分

308
Other Convenient Functions
Sending Schedules in a Folder
You can send all the schedules in a folder.
aTap All y a folder to send on the Menu bar on the Calendar
screen
• How to operate 3 P322
• If any folder other than All is displayed last time, the Calendar screen registered in that
folder will be displayed. 3 P303
bTap Calendar y Send this folder on the Menu bar
cTap the Send as column on the Sending Format screen to select a
sending method y Tap [Done]
dCreate and send an email
• How to operate 3 P235, P261
Moving the Registered contents to the To Do List
You can move the schedule to the To do list.
aTap Calendar y Move to To do on the Menu bar on the Detail screen
for the schedule to be sent
bTap [Yes]
The schedule is moved to the To do list.
• Tap [No] to cancel the operation to move.
Email : Send an Email with a schedule attached. Go to Step 4.
Text message : Insert a schedule into a message of Short Message Service (SMS) to
send. Go to Step 4.
Bluetooth : Send a schedule via Bluetooth. 3 P384
• How to operate 3 P328
19OTH01_1col_EN.fm 308 ページ 2004年11月24日 水曜日 午前9時24分

309
Other Convenient Functions
Copying/Cutting a Schedule
You can copy/cut the registered schedule and paste it onto another date.
aTap Edit y Cut entry/Copy entry in order on the Menu bar on the
Detail screen for the schedule to copy/cut
• How to operate 3 P328
bDisplay the 1 Day View screen for the day onto which you want
paste it y Tap Edit y Paste entry on the Menu bar
The schedule copied/cut is pasted.
• How to operate 3 P328
Deleting Registered Contents
The registered schedule on the calendar is deleted. You can also select a range to collectively
delete schedules.
Deleting a Single Schedule
Display the schedule to delete
aTap Calendar y Delete entry on the Menu bar on the Detail screen
for the schedule to be deleted
The selected schedule is deleted.
• How to operate 3 P328
1To delete a repeating schedule
Tap $$ to display the screen on the left. Tap $$ for the item to
change.
Only this one: Only the edited schedule is deleted.
All repeats : All the repeated schedules are deleted.
All previous : All the previous repeated schedules are deleted.
All future : All the future repeated schedules are deleted.
19OTH01_1col_EN.fm 309 ページ 2004年11月24日 水曜日 午前9時24分

310
Other Convenient Functions
Deleting Schedules Collectively
Collectively deletes a selected range of schedules.
aTap Calendar y Delete entry on the Menu bar on the Calendar
screen
bTap the Removal range column to select a range to delete
cTap [Done]
The schedule is deleted.
• Tap [Cancel] to cancel the deletion.
NOTE
• If you select anything other than Entire calendar to delete schedules, repeated schedules are not deleted.
Undoing Deleting Schedules
You can recover deleted schedules.
• Any schedules collectively deleted cannot be recovered.
• Any repeated schedules deleted cannot be recovered.
aDelete a schedule
• How to operate 3 P331
bTap Edit y Undo delete on the Menu bar on the 1 Day View screen
The schedule deleted is recovered and displayed on the Calendar screen.
Range to delete
Entire calendar
: All the schedules are deleted.
From today: Today's schedule and later ones are deleted.
Until today : Today's schedule and earlier ones are deleted.
This week : This week's schedules are deleted.
Last week : The last week's schedules are deleted.
This month: This month's schedules are deleted.
Last month: The last month's schedules are deleted.
This year : This year's schedules are deleted.
Last year : The last year's schedules are deleted.
• How to operate 3 P322
19OTH01_1col_EN.fm 310 ページ 2004年11月24日 水曜日 午前9時24分
311
Other Convenient Functions
Setting up a Schedule Display Method
Set up a displaying method for the 1 Day View and Weekly View screens for a calendar.
• Time, or others displayed on the Schedule Registration screen are also to be set up here.
aTap Edit y Preferneces on the Menu bar on the Calendar screen
bTap the column you want to set up to enter time
• How to operate 3 P59
cTap [Done]
The schedule displaying method is set up.
• Tap [Cancel] to cancel the display method setup.
De
f
ault sett
i
ng View hours in day from: 9:00 To: 17:00 Standard time intervals: 01:00
Standard entry length: 01:00 View hours in week from: 9:00 To: 17:00
View hours in day from
: Set up start time displayed on the 1 Day View
screen.
To : Set up end time displayed on the 1 Day View
screen.
Standard time intervals
: Set up intervals to display time for 1 Day/weekly
View.
Standard entry length
: Set up time intervals for Appointment Schedule.
View hours in week from.
: Set up start time displayed on the Weekly View
screen.
To : Set up end time displayed on the Weekly View
screen.
• How to operate 3 P322
19OTH01_1col_EN.fm 311 ページ 2004年11月24日 水曜日 午前9時24分

312
Other Convenient Functions
Setting up the Display and Sound for an alarm
Set up the time display and sound for an alarm
aTap Edit y Preferences on the Menu bar on the Calendar screen,
and then tap the Alarm tab on the User Settings screen
bTap Alarm precedes an event by column to set up time
• To make it the same as the event start time, set it to "00:00".
• How to operate 3 P59
cTap the Alarm sound column to select an alarm sound
• Tap $$ to play the selected alarm sound to check.
dTap [Done]
The alarm time display and sound are set up.
• Tap [Cancel] to cancel the alarm setup.
De
f
ault sett
i
ng Alarm precedes an event by: 00:10 Alarm sound: Wind_Chimes
Alarm precedes an event by
: Set up how many minutes ahead of the
event start time the alarm is to be displayed
at registration.
Alarm sound : Set up an alarm sound.
• How to operate 3 P322
19OTH01_1col_EN.fm 312 ページ 2004年11月24日 水曜日 午前9時24分

313
Other Convenient Functions
Setting up the Day of the Week View for a Calendar
You can change arrangements of the day display view on the Calendar screen by setting up the
first day of the week.
aTap $$ y $$ in the Application Selector bar, and tap the General
tab y Time & date on the Control Panel screen, and then tap the
Workdays tab on the Date and Time screen
bTap the First day of week column to select a day of the week
The first day of the week is set up.
Searching for Registered Contents
You can search for a desired event just by entering the title, place, notes, etc. of the event
registered as keywords.
aTap Calendar y Find on the Menu bar on the Calendar screen
bTap the keyword entry field to enter a keyword
• You can enter up to 30 characters in either two or one byte letters.
• To be searched even if you enter a partial string of an item registered on the schedule
data as a keyword.
cTap the Where? column to select what is to be searched
Keyword entry column
Where?
Everywhere: Searches all the schedules.
Future : Searches the schedules for today and later.
Past : Searches the schedules for today and earlier.
• How to operate 3 P322
19OTH01_1col_EN.fm 313 ページ 2004年11月24日 水曜日 午前9時24分

314
Other Convenient Functions
dTap [Find]
eTap the desired schedule
The Detail screen for the schedule is displayed. 3 P328
• Tap [Cancel] to cancel the search.
A list of schedules containing the keyword is displayed.
19OTH01_1col_EN.fm 314 ページ 2004年11月24日 水曜日 午前9時24分

315
Other Convenient Functions
To d o
Registering To Do List
You can register a To do, etc. on the To do list and set it up to be notified with an alarm sound at
a specified time.
aTap $$ y $$ in the Application Selector bar, and then tap To do y
New on the Menu bar on the To do List screen
bTap the title entry field y Enter a title
• You can enter up to 200 characters in either two or one byte letters.
cTap the Priority column to select a priority
• You can set up 1 through 9. 1 has the highest priority.
dTap $$ in the Due date column
The entry field for a deadline is displayed under the Due date column.
• Tap $$ to cancel the deadline.
1To set up a deadline
Tap the date entry field to set up a deadline.
• How to operate 3 P59
eTap $$ in the Alarm column
The entry field for the date and time on when an alarm will sound is displayed underneath
the Alarm column.
• Tap $$ to cancel the alarm.
1To set up the date and time for an alarm
Tap the date and time entry field to set up the alarm date and time.
• How to operate 3 P59
• You cannot set the alarm to a date and a time on or later than the date and time set in
the due date.
fTap $$ in the Private column
• Tap $$ to cancel the Private setting.
Enter a title, etc. to be displayed on the To do List screen.
Completed: : Switches incomplete/complete by tapping a To
do after registering it.
Priority: : Set up a priority of a To do.
Due date: : Set up the due date. Set up the date and time for
the deadline only when it is set up.
Alarm: : Set up the alarm date and time only if (an alarm
is) set up.
Private: : Set a To do to private. When you send an Email
with a To do attached and synchronize data with
a PC, the contents of the To do will not be sent.
$$Tab: : Enter notes.
Todo registration
screen
19OTH01_1col_EN.fm 315 ページ 2004年11月24日 水曜日 午前9時24分

316
Other Convenient Functions
gTap $$
hEnter notes
• You can enter up to 1024 characters either in two or one byte letters.
iTap $$
The To do is registered.
1About items on the Menu bar
Tap To do and Edit on the Menu bar on the To do Registration screen to display the following
items:
Some item may not be able to be executed depending on the operation.
To do
New . . . . . . . . . . . . . . . . . . . . . . . . P326
Find . . . . . . . . . . . . . . . . . . . . . . . . P344
Send as . . . . . . . . . . . . . . . . . . . . . P339
Move to Calendar. . . . . . . . . . . . . . P341
Delete To do. . . . . . . . . . . . . . . . . . P342
Edit
Undo delete . . . . . . . . . . . . . . . . . . .P342
Cut entry . . . . . . . . . . . . . . . . . . . . .P341
Copy entry . . . . . . . . . . . . . . . . . . . .P341
Cut text . . . . . . . . . . . . . . . . . . . . . .P482
Copy text . . . . . . . . . . . . . . . . . . . . .P482
Paste text. . . . . . . . . . . . . . . . . . . . .P483
Preferences . . . . . . . . . . . . . . . . . . .P343
Notes entry screen
19OTH01_1col_EN.fm 316 ページ 2004年11月24日 水曜日 午前9時24分
317
Other Convenient Functions
Checking/Updating To Do List
Select a To do set up on the To do list screen to display the detail screen. You can update and
reregister the contents on the Detail screen.
aTap $$ y $$ in the Application Selector bar
• The priority, title and deadline of an incomplete To do whose deadline has been passed are displayed in red.
• A completed To do is displayed below incomplete ones regardless the date and priority. You can also set it up
not to display completed things to do. 3 P343
• You can set up not to display the deadline. 3 P343
bTap the To do you want to check
cUpdate the contents and tap $$
The updated To do is registered.
• How to operate 3 P336
Item/icon Description
a$$ Switches incomplete/complete for the To do.
bPriority The priority of the To do is displayed.
cTitle The To do is displayed.
d$$ An alarm has been set in the schedule.
e$$ Notes have been created in the schedule.
fDue date The deadline of the To do is displayed.
To do list screen
Detail screen
19OTH01_1col_EN.fm 317 ページ 2004年11月24日 水曜日 午前9時24分
318
Other Convenient Functions
1About items on the Menu bar
Tap To do and Edit on the Menu bar on the To do list screen to display the following items:
Some items may not be able to be executed depending on the operation.
• The items on the Menu bar on the Detail screen are the same as those on the To do Registration screen.
3 P337
At the Alarm Time for To Do
NOTE
• If no alarm has been set, no action is performed to notify you of the To Do at the deadline (e.g. Screen
display).
To do
New . . . . . . . . . . . . . . . . . . . . . . . . P326
Find . . . . . . . . . . . . . . . . . . . . . . . . P344
Send this folder . . . . . . . . . . . . . . . P340
Delete completed . . . . . . . . . . . . . . P342
Edit
Undo delete . . . . . . . . . . . . . . . . . . .P342
Paste entry . . . . . . . . . . . . . . . . . . .P341
Sort on priority . . . . . . . . . . . . . . . . .P343
Sort on date. . . . . . . . . . . . . . . . . . .P343
Zoom . . . . . . . . . . . . . . . . . . . . . . . .P141
Preferences . . . . . . . . . . . . . . . . . . .P343
An alarm sounds as set up, and the Alarm screen appears.
The following operations can be performed:
[Snooze]: : The alarm stops, and then goes off again in 5
minutes.
[Open]: : The Detail screen appears.
[Silent]: : Stops the alarm sound.
[Complete]: : Stops the alarm sound and closes the Alarm
screen.
19OTH01_1col_EN.fm 318 ページ 2004年11月24日 水曜日 午前9時24分

319
Other Convenient Functions
Sending To Do List
You can send To do as a file in the vCalendar (electronic scheduler) format by messaging or via
Bluetooth. You can send a folder containing To do as well as one To do at one time.
Sending a To Do
Sends a To do.
aTap To do y Send as on the Menu bar on the Detail screen for the
To do you want to send
• How to operate 3 P338
bTap the Send as column on the Sending Format screen to select a
sending method y Tap [Done]
cCreate and send an email
• How to operate 3 P235, P261
Sending To Do in a Folder
You can send all the To do in a folder.
aTap All on the Menu bar y a folder to be sent on the To do list
screen
• How to operate 3 P338
• If a folder other than All was displayed last time, the To do list screen registered in the
folder is displayed. 3 P303
bTap To do y Send this folder on the Menu bar in order
cTap the Send as column on the Sending Format screen to select a
sending method y Tap [Done]
dCreate and send an email
• How to operate 3 P235, P261
Email : Send an Email with a To do attached. Go to Step 3.
Text message : Insert a To do into a message of Short Message (SMS) to send. Go to
Step 3.
Bluetooth : Send a To do via Bluetooth. 3 P384
Email : Send an Email with a To do attached. Go to Step 4.
Text message : Insert a To do into a message of Short Message Service (SMS) to send.
Go to Step 4.
Bluetooth : Send a To do via Bluetooth. 3 P384
19OTH01_1col_EN.fm 319 ページ 2004年11月24日 水曜日 午前9時24分
320
Other Convenient Functions
Moving Registered contents to the Calendar
You can move To do to the calendar.
aTap To d o y Move to calendar on the Menu bar on the Detail screen
for the To do you want to send
bTap [Yes]
The To do is moved to the calendar.
• Tap [No] to cancel the operation to move.
Copying/Cutting a To Do
Copy/cut a To do registered and paste it as a new To do.
aTap Edit y Cut entry/Copy entry y $$ on the Menu bar on the Detail
screen for the To do you want to copy or cut
• How to operate 3 P338
bTap Edit y Paste entry on the Menu bar on the To do list screen
The To do copied or cut is pasted.
• How to operate 3 P338
Deleting the To Do List
To do registered on the To do list are deleted. You can also collectively delete completed To do.
\• How to operate 3 P338
19OTH01_1col_EN.fm 320 ページ 2004年11月24日 水曜日 午前9時24分

321
Other Convenient Functions
Deleting a To Do
Display the To do to delete.
aTap To do y Delete To do on the Menu bar on the Detail screen for
the To do you want to delete
The selected To do is deleted.
• How to operate 3 P338
Deleting completed To Do Collectively
A selected range of To do are collectively deleted.
aTap To do y Deleted completed on the Menu bar on the To do list
screen
bTap $$ of Current folder/All folders
cTap [Yes]
The To do is deleted.
• Tap [No] to cancel the operation to delete.
Recovering Deleted To do
You can recover deleted To do.
• Not recovered if completed To do have been collectively deleted.
aDelete a To do
• How to operate
3
See above
bTap Edit y Undo delete on the Menu bar on the To do list screen
The deleted To do is recovered and displayed on the To do list screen.
• How to operate 3 P338
Current folder : Completed To do in the currently displayed
folder are deleted.
All folders : Completed To do in all the folders are deleted.
• How to operate 3 P338
19OTH01_1col_EN.fm 321 ページ 2004年11月24日 水曜日 午前9時24分

322
Other Convenient Functions
Sorting the To Do List
Switches methods to display To do on the To do list screen between by priority and by date.
aTap Edit y $$ of Sort on priority/Sort on date on the Menu bar on the
To do list screen
Switches To do displaying methods.
• •How to operate 3 P338
Setting up the To Do List Display Method and Sound
Set up the view and alarm sound, etc. on the To do list screen.
aTap Edit y Prefernces on the Menu bar on the To do list screen
bTap $$ in the Display due dates column
• Tap $$ to set it up not to display the due date on the To do list screen.
cTap $$ in the Display completed column
• Tap $$ to set it up not to display completed To do on the To do list screen.
dTap the Alarm sound column to select an alarm sound
• Tap $$ to play the selected alarm sound so that you can check it.
eTap [Done]
D
e
f
au
l
t sett
i
ng Display due dates: ON
Display completed: ON Alarm sound: Door_Bell
Display due dates
: Set up whether to display the due date on the To
do list screen.
Display completed
: Set up whether to display completed To do on the
To do list screen.
Alarm sound : Set up an alarm sound
• How to operate 3 P338
Sort on priority Sort on date
19OTH01_1col_EN.fm 322 ページ 2004年11月24日 水曜日 午前9時24分

323
Other Convenient Functions
The To do list display method and alarm sound are set up.
Searching To Do List
You can search for a desired To do by just entering contents, texts, etc. registered on the To do
list.
aTap To do y Find on the Menu bar on the To do list screen
bTap the keyword entry field to enter a keyword
• You can enter up to 30 characters in either two or one byte letters.
• Searched if part of a string in the contents registered for a To do is entered.
cTap the Where? column to select an item to search for
dTap [Find]
eTap a desired To do
The Detail screen appears. 3 P338
• Tap [Cancel] to cancel the search.
Where?
All folders : Searches all the folders.
Current folder
: Searches the currently displayed folder.
• How to operate 3 P338
Keyword entry field
All folders : Searches all the folders.
Current folder : Searches the currently displayed folder.
A list of To do containing the keyword is displayed.
19OTH01_1col_EN.fm 323 ページ 2004年11月24日 水曜日 午前9時24分
324
Other Convenient Functions
Quick Execution of Frequently Used Functions
If you have set up a frequently used application in the Application Selector bar and the home key,
it can be quickly started.
Registering a Function on the Application Selector Bar
Display a different application in the Application Selector bar.
aTap $$ in the Application Selector bar, and then tap View y
Settings on the Menu bar
bTap the icon you want to change
cTap the Application setup column to select a function to be
registered
dTap [Done]
The application is registered in the Application Selector bar.
The currently registered application is displayed.
Application setup
: Set up a function to be registered.
19OTH01_1col_EN.fm 324 ページ 2004年11月24日 水曜日 午前9時24分

325
Other Convenient Functions
Registering a Function on the Home Key
Pressing down the home key for about 3 seconds starts the application registered. You can
register a different application on the home key.
aTap $$ y $$ in the Application Selector bar, and then tap Handset
tab y Shortcut key on the Control Panel screen
bSelect an application to be registered
cTap [Done]
The function is registered on the home key.
Changing Groups on the Control Panel
Items on the Control Panel have been pre-registered in 3 groups and are displayed on the
Handset, Connections or General tab. You can register a different group for each item.
aTap $$ y $$ in the Application Selector bar, and then tap Control
panel y Set Groups on the Menu bar on the Control Panel screen
Application : A list of applications that can be registered is
displayed.
The items on the Control Panel are displayed.
The groups of the items are displayed.
19OTH01_1col_EN.fm 325 ページ 2004年11月24日 水曜日 午前9時24分
326
Other Convenient Functions
bTap an item to be changed
cTap the Group column to select a group
dTap [Done]
Changes groups.
View duration
Checking Duration
Check duration for the last voice/video call and lifetime. You can also reset duration.
aTap $$ in the Application Selector bar, and tap Settings y Call
tracking on the Menu bar, and then tap Timers on the Call Tracking
screen
Dialogue : The current group name is displayed.
Group : Set up a group.
Last call : Duration for the last call you made is displayed.
Outgoing : Total outgoing call duration is displayed.
Incoming : Total incoming call duration is displayed.
All calls : Total duration from the reset to now is displayed.
Lifetime : Total duration up to now is displayed. Cannot be
reset.
View Duration screen
19OTH01_1col_EN.fm 326 ページ 2004年11月24日 水曜日 午前9時24分
327
Other Convenient Functions
Resetting Duration
Reset duration
• All types of duration other than lifetime are reset.
aTap [Reset] on the View Duration screen
• How to operate 3 See above
bTap [Yes] on the Call Timer screen
Duration is reset.
• Tap [No] to cancel the reset.
Checking Information on Amount of Data at Packet Communication
You can check the number of incoming/outgoing bytes at packet communication using the byte
counter. All the packet communications using the FOMA handset (including packets used with
the handset connected to a PC, etc.) are included.
aTap $$ y $$ in the Application Selector bar, and then tap the
Connections tab y Byte Counter on the Control panel screen
1To view Total
Displays the number of incoming/outgoing bytes for packet communication between the last
time number of bytes was reset and the Total tab is displayed.
aTap the Total tab
bAfter checking it, tap [Done]
Sent : Number of outgoing packets
Received : Number of incoming packets
Sum : Total number of packets
• Tap [Refresh] to refresh the value.
• After tapping [Reset], tap [Yes] on the Reset Confirmation
screen to reset the value.
19OTH01_1col_EN.fm 327 ページ 2004年11月24日 水曜日 午前9時24分

328
Other Convenient Functions
1To view Current
Displays the number of incoming/outgoing bytes for packet communication between the
time the current connection was made and the time the Current tab is displayed.
aTap the Current tab
bAfter checking it, tap [Done]
1To view Last time
Display the number of incoming/outgoing bytes for packet communication from the last
connection to the last disconnection.
aTap the Current tab
bAfter checking it, tap [Done]
Sent : Number of outgoing packets
Received : Number of incoming packets
Sum : Total number of packets
• Tap [Refresh] to refresh the value
Sent : Number of outgoing packets
Received : Number of incoming packets
Sum : Total number of packets
19OTH01_1col_EN.fm 328 ページ 2004年11月24日 水曜日 午前9時24分

329
Other Convenient Functions
Setting up the Byte Counter
Set up settings for the byte counter.
aTap [Settings] on the Byte Counter Display screen
De
f
ault sett
i
ng Byte Counter: $$ Warning display threshold: $$ Warning alarm threshold: $$
Threshold values: XXX (K bytes)
Byte Counter : Check when using the byte counter.
$$ is to use, and $$ is not to use.
Warning display
threshold
: Set up whether to display the Warning
screen if the number of incoming/outgoing
packet bytes exceeds the Threshold values.
$$ is to display, and $$ is not to display.
Warning alarm
threshold
: Set up whether to sound an alarm if the
number of incoming/outgoing packet bytes
exceeds the Threshold values.
$$ is to sound, and $$ is not to sound.
Threshold values
(in Kilobytes)
: Set up a threshold to be used for Warning
display threshold and Warning alarm
threshold.
19OTH01_1col_EN.fm 329 ページ 2004年11月24日 水曜日 午前9時24分

330
Other Convenient Functions
Displaying Information on the FOMA Handset
You can check hardware and software information for the FOMA handset.
aTap $$ y $$ in the Application Selector bar, and then tap the
Handset tab y Handset Information on the Control Panel screen
Calculator
Using as a Calculator
You can display the Calculator screen to use it for calculation. You can make calculations using
the memory and calculate percentage using %.
• Up to 12 digits can be displayed.
aTap $$ y $$ in the Application Selector bar
bCalculate
Machine : The name of the handset is displayed.
RAM : The memory space is displayed.
Version : The version of the supporting processor is
displayed.
Baseband : The version of the base band processor is
displayed.
Flex : The configuration data name of the base band
processor is displayed.
AP config : The configuration data name of the supporting
processor is displayed.
The following operations can be performed:
[0] ~ [9] : Enter a number.
[.] : Enters a decimal separator.
[+/-] : Every time you tap it, the number entered
switches signs between + and -.
[<-] : Deletes a number entered. Pointing deletes all
numbers entered.
[C] : Cancels the calculation.
[X][÷][+][-] : Performs four rules of arithmetic calculation.
[=] : Executes a calculation.
[√]: Displays the square root of the number
displayed.
[%] : Calculates the percentage of the number
displayed.
[m+] : Adds the number entered to the number stored in
the memory.
[m-] : Subtracts the number entered from the number
stored in the memory.
[mr] : Displays the number stored in the memory.
Calculator screen
19OTH01_1col_EN.fm 330 ページ 2004年11月24日 水曜日 午前9時24分
331
Other Convenient Functions
• Tap [C] to clear the calculation results.
• Tap [mr] twice to clear the number stored in the memory.
Entering Notes
You can use the FOMA handset as a note pad to register texts, handwritten illustrations, etc.
aTap $$ y $$ in the Application Selector bar, and then tap Notes y
New on the Menu bar on the Notes screen
bEnter texts
1To cancel the last operation
Tap Edit y Revert on the Menu bar
All texts are deleted.
1To select all texts entered
Tap Edit y Select all on the Menu bar
All texts are selected.
cTap $$
The text is registered in the Notes.
The following operations can be performed:
$$ : Dragging the text to specify the range and tapping it
makes the text bold. Tap it again to undo it.
$$ : Tapping a line you want to itemize and tapping after
moving the cursor itemizes the selected line with a
space inserted on top of it. Tap it again to undo it.
Text Notes
Registration screen.
19OTH01_1col_EN.fm 331 ページ 2004年11月24日 水曜日 午前9時24分

332
Other Convenient Functions
1About items on the menu bar
Tap Notes and Edit on the Menu bar on the Text Note Registration screen to display the
following items:
• Some items may not be able to be executed depending on the operation.
NOTE
• If a string of the text entered is recognized as a telephone number, an Email address or a URL, the string is
underlined and colored. Taping it allows you to perform operations such as making a voice/video call,
sending an Email and a short message (SMS), connecting to the Internet and registering it in contact.
Entering Handwritten Notes and Illustrations
Enter handwritten texts and illustrations and register them in the Notes.
aTap $$ y $$ in the Application Selector bar, and tap Notes y New
on the Menu bar on the Notes screen, and then tap the $$ tab on
the Text Note Registration screen
Notes
New . . . . . . . . . . . . . . . . . . . . See above
Send as . . . . . . . . . . . . . . . . . . . . . P356
Deleting note . . . . . . . . . . . . . . . . . P357
Edit
Revert . . . . . . . . . . . . . . . . . . See above
Cut . . . . . . . . . . . . . . . . . . . . . . . . . .P482
Copy . . . . . . . . . . . . . . . . . . . . . . . .P482
Paste . . . . . . . . . . . . . . . . . . . . . . . .P483
Select all . . . . . . . . . . . . . . . . See above
Zoom . . . . . . . . . . . . . . . . . . . . . . . .P141
The following operations can be performed:
$$ : You can change the color of the line.
$$ : You can change the thickness of the line.
$$ : You can clear the line.
Handwritten Note
Registration screen
19OTH01_1col_EN.fm 332 ページ 2004年11月24日 水曜日 午前9時24分

333
Other Convenient Functions
bEnter texts and illustrations
1To cancel the last operation
Tap Edit y Undo on the Menu bar
The screen reverts to the original state.
1To redo the operation
Tap Edit y Redo on the Menu bar
Redoes the cancelled operation.
1To cut a text/illustration
Tap Edit y Cut on the Menu bar
Cuts the entire text/illustration entered in the handwriting entry area.
1To copy a text/illustration
Tap Edit y Copy on the Menu bar
Copies the entire text/illustration entered in the handwriting entry area.
1To past the text/illustration
Tap Edit y Paste on the Menu bar
Pastes the text/illustration cut/copied.
1To clear all texts/illustrations
Tap Edit y Clear sketch on the Menu bar
Clears the entire text/illustration entered.
cTap $$
The handwritten note is registered in the Notes.
1About items on the Menu Bar
Tap Notes and Edit on the Menu bar on the Handwritten Note Registration screen to display
the following items:
• Some items may not be able to be executed depending on the operation.
You can draw characters and illustrations by dragging it.
Notes
New. . . . . . . . . . . . . . . . . . . . . . . . . P352
Send as. . . . . . . . . . . . . . . . . . . . . . P356
Delete note . . . . . . . . . . . . . . . . . . . P357
Edit
Undo. . . . . . . . . . . . . . . . . . . . . . . . P352
Redo. . . . . . . . . . . . . . . . . . . . . . . . P352
Cut . . . . . . . . . . . . . . . . . . . . . . . . . P352
Copy . . . . . . . . . . . . . . . . . . . . . . . . P352
Paste . . . . . . . . . . . . . . . . . . . See above
Clear sketch . . . . . . . . . . . . . . See above
Zoom . . . . . . . . . . . . . . . . . . . . . . . P141
19OTH01_1col_EN.fm 333 ページ 2004年11月24日 水曜日 午前9時24分
334
Other Convenient Functions
Checking/Updating Notes
Select notes registered on the Notes screen to display the Details screen. You can also update
the contents on the Details screen to reregister.
aTap $$ y $$ in the Application Selector bar
bTap the notes you want to check
cUpdate the contents and tap $$
The updated notes are registered.
• How to operate 3 P351
• Tap Edit 3 Revert on the Menu bar while updating the text notes to put it back to the
original text notes registered.
Item/icon Description
aTitle of text notes The head of the text notes is displayed.
bTitle of handwritten notes If handwritten notes alone are registered, Sketch and the registration date
and time are displayed.
c$$ Handwritten notes are registered.
Notes screen
Details screen
19OTH01_1col_EN.fm 334 ページ 2004年11月24日 水曜日 午前9時24分

335
Other Convenient Functions
1About items on the Menu Bar
Tap Notes and Edit on the Menu bar on the Notes screen to display the following items:
• Some items may not be able to be executed depending on the operation.
• The items on the Menu bar on the Details screen are the same as those on the Text Note/Handwritten
Note Registration screen. 3 P351, P352
Copying/Cutting Contents of Notes
Copy/cut text or handwritten registered notes and paste them as new notes.
aTap the notes you want to cut/copy on the Notes screen
• How to operate 3 P354
• To cut/copy handwritten notes, go to Step 3.
bSpecify a range to cut/copy on the Details screen of the notes
Drag it to specify the range.
cTap Edit y Cut/Copy y $$ on the Menu bar
dTap Edit y Paste on the Menu bar on the Notes screen
The note copied/cut is pasted.
Sending Notes
You can send notes registered by messaging or via Bluetooth.
aTap Notes y Send as on the Menu bar on the Details screen for the
notes to be sent
• How to operate 3 P354
bTap the Send as column on the Send as screen to select a
sending method y Tap [Done]
cCreate and send an email
• How to operate 3 P235, P261
Notes
New. . . . . . . . . . . . . . . . . . . . . . . . . P351
Find. . . . . . . . . . . . . . . . . . . . . . . . . P356
Edit
Undo delete . . . . . . . . . . . . . . . . . . P357
Paste . . . . . . . . . . . . . . . . . . . . . . . P355
Zoom . . . . . . . . . . . . . . . . . . . . . . . P141
Email : Send an Email with notes attached. Go to Step 3.
Text message
: Insert notes into a message of Short Message Service (SMS) to send. Go to
Step 3.
Bluetooth : Send notes via Bluetooth. 3 P384
19OTH01_1col_EN.fm 335 ページ 2004年11月24日 水曜日 午前9時24分
336
Other Convenient Functions
Searching for Notes
You can search for desired notes just by entering contents registered in the note as keywords.
aTap Notes y Find on the Menu bar on the Notes screen
bTap the Keyword entry field to enter a keyword
• You can enter up to 30 characters either in single- or double-byte.
• Just entering part of a string of the contents registered in the notes carries out a search.
cTap [Find]
dTap a desired note
The Details screen is displayed. 3 P354
• Tap [Cancel] to cancel the search.
Deleting Notes
Select notes registered to delete.
aTap Notes y Delete Note on the Menu bar on the Details screen for
the note you want to delete
The selected note is deleted.
• How to operate 3 P354
A list of notes containing the keyword is displayed.
• How to operate 3 P354
Keyword entry field
19OTH01_1col_EN.fm 336 ページ 2004年11月24日 水曜日 午前9時24分
337
Other Convenient Functions
Recovering Deleted Notes
You can recover deleted notes.
aDelete notes
• How to operate 3 See above
bTap Edit y Undo delete on the Menu bar on the Notes screen
The deleted note is recovered and displayed on the Notes screen.
• How to operate 3 P354
Displaying Time around the World
You can check time in the current country and other countries on the Date and Time screen. You
can change the current country and other countries.
aTap $$ y $$ on the Application Selector bar
bTap the current city display, and then tap Other
cTap the column you want to set up to select a country/city
dTap [Done]
The current and other countries/cities are set up, and it goes back to the Date and Time
screen.
The name of the city registered in the Current City is displayed.
Tapping it allows you to register a different country and a different
city.
The date, time and day of the week in the current country are
displayed. Tap to set up the date and time. 3 P59
The names of the cities registered in Other Cities and time are
displayed. Tap to change contry and city.
Current country
: Set up the current country.
Current city : Set up the city of the selected country.
Other country : Set up other countries.
Other city : Set up the cities of other countries.
• Tap the current city display to display the previously selected
cities to select.
• Tap the other city display to display the screen on the left.
19OTH01_1col_EN.fm 337 ページ 2004年11月24日 水曜日 午前9時24分

338
Other Convenient Functions
Earphone/microphone with switch
How to Use an Earphone/Microphone with Switch
Connecting an earphone/microphone with switch (optional) to the earphone microphone handset
makes you hear the other party's voice. you can also make or answer a call just by pressing the
switch.
• Do not put the cord of an earphone/microphone with switch around the FOMA handset. Otherwise the
antenna may malfunction to decrease the reception level of radio wave.
• Insert the plug of an earphone/microphone with switch firmly into the FOMA handset. If not inserted firmly
enough, no sound may be heard.
Connecting an Earphone/Microphone with Switch
Connect an earphone/microphone with switch to the FOMA handset.
aOpen the cover of the earphone microphone handset and insert
the connecting plug of an earphone/microphone with switch into
it
Making a Call Using the Switch
Make a call using the earphone/microphone with switch.
aEnter a telephone number
• How to operate 3 P66
• You can display the telephone number from the contacts and call history. 3 P69, P78,
P81, P107
bPress the switch of the earphone/microphone with switch for 1+
seconds
A short beep sounds, and the call is connected.
cIf you finish talking, press the switch for 1+ seconds
A short double beep sounds, and the call is disconnected.
Illutration
19OTH01_1col_EN.fm 338 ページ 2004年11月24日 水曜日 午前9時24分

339
Other Convenient Functions
Using the Switch to Answer the Phone
Answer the phone using the earphone/microphone with switch.
aWhen a call is received, press the switch of the earphone/
microphone with switch
A short beep sounds, and the call is connected.
bIf you finish talking, press the switch for 1+ seconds
A short double beep sounds, and the call is disconnected.
Answering Another Call during a Call
If you subscribe to and set up the call waiting service, a signal tone sounds if another call is
received during a call. You can answer the call and talk to another person.
aReceive a call during a call
A signal tone is heard during a call.
bPress the switch of the earphone/microphone with switch for 1+
seconds
Put the call on hold and answer another call.
• Every time you press the switch for 1+ seconds, you can talk to a different person.
NOTE
• You cannot answer a videophone call during a call.
• For a call using the call waiting service, you cannot hang up the call using an earphone/microphone with
switch.
19OTH01_1col_EN.fm 339 ページ 2004年11月24日 水曜日 午前9時24分

340
Other Convenient Functions
Reset settings
Putting the Settings of Various Functions Back to Default
Put the settings of various functions back to default.
• The security code or password changed cannot be put back to default.
aTap $$ y $$ in the Application Selector bar, and then tap the
Handset tab y Master Clear/Master Reset on the Control panel
screen
bTap $$ on Master Reset, enter the session number on the Session
number screen y tap [Continue]
•
cTap [Yes]
The settings revert to default.
• Tap [No] to cancel the reset.
• Session number 3 P146
19OTH01_1col_EN.fm 340 ページ 2004年11月24日 水曜日 午前9時24分

341
Other Convenient Functions
Collective data deletion
Deleting Registered Data Collectively
Puts the settings of various functions to default and clears the data you have registered (contact
data, etc.) and duration.
• Data registered on a UIM are not deleted.
• Lifetime is not deleted.
aTap $$ y $$ in the Application Selector bar, and then the tap
Handset y Master Clear/Master Reset on the Control panel screen
bTap $$ of Master Clear on the Clear/Reset Master screen, and then
enter the session number on the Session number entry screen
y Tap [Done]
cTap [Yes]
The settings revert to default, and the registered data are deleted.
• Tap [No] to cancel the reset and data deletion.
Installing an Application
You can install an application on the FOMA handset.
aTap $$ in the Application Selector bar, and then tap Launcher
y Install on the Menu bar
Installable software is displayed with its original stored location.
bTap the software to be installed y [Install]
The name, version and developer are displayed.
cTap [Install]
Installation starts.
• Tap [Cancel] to cancel the installation.
• Tap [Details] to display the detail information about the software.
dTap [Done]
The installation is completed.
19OTH01_1col_EN.fm 341 ページ 2004年11月24日 水曜日 午前9時24分

342
Other Convenient Functions
Uninstalling an Application
You can uninstall an application that is no longer needed.
aTap $$ in the Application Selector bar, and then tap Launcher
y Uninstall on the Menu bar
Uninstallable Applications are displayed with their memory space.
bTap the application to be uninstalled y Tap Uninstall
The application icon, name, version and developer are displayed.
cTap [Yes]
Uninstallation starts.
• Tap [No] to cancel the uninstallation.
dTap [Done]
The uninstallation is completed.
Total memory : The total memory space for the handset is
displayed.
Memory in use : Currently used memory space is displayed.
Available memory: Currently unused memory space is
displayed.
19OTH01_1col_EN.fm 342 ページ 2004年11月24日 水曜日 午前9時24分

343
Network Services
Network Services Available. . . . . . . . . . . . . . . . . . . . . . . . . . . . . . . . . . . . . . . 344
Using Voice Mail Service . . . . . . . . . . . . . . . . . . . . . . . . . . . . . . . . . . . . . . . . . 344
Using Call Waiting Service . . . . . . . . . . . . . . . . . . . . . . . . . . . . . . . . . . . . . . . 346
Using Call Forwarding Service . . . . . . . . . . . . . . . . . . . . . . . . . . . . . . . . . . . . 348
Using Nuisance Call Blocking Service. . . . . . . . . . . . . . . . . . . . . . . . . . . . . . 350
Using Caller ID Display Request Service. . . . . . . . . . . . . . . . . . . . . . . . . . . . 350
Using Dual Network Service . . . . . . . . . . . . . . . . . . . . . . . . . . . . . . . . . . . . . . 351
Using English Announcement Service . . . . . . . . . . . . . . . . . . . . . . . . . . . . . 351
Using Service Dialling . . . . . . . . . . . . . . . . . . . . . . . . . . . . . . . . . . . . . . . . . . . 352
Selecting How to Handle Incoming Calls during Call
<Selecting Action on Receiving Incoming Calls during Call>. . . . . . . . . . . 353
Enabling/Disabling Action on Receiving Incoming Calls during Call
<Action on Receiving Incoming Calls during Call> . . . . . . . . . . . . . . . . . . . 353
Setting Remote Operations <Remote Operations> . . . . . . . . . . . . . . . . . . . 353
Registering and Using Services <Added Service (Register USSD)> . . . . . 354
00M1000EN.book 343 ページ 2004年11月24日 水曜日 午前7時56分

344
Network Services
Network Services Available
The following network services are available
on your FOMA handset.
1Using Network Services
For subscriptions or inquiries regarding
network services, contact "General
Contact" on the back cover this manual.
For detailed information, operations and
precautions on each service, refer to
"Network Service Operations Guide".
Using Voice Mail Service
When your handset is out of range or
switched off, the Voice Mail Service will
automatically respond to the call, and receive
a message.
You can hear the stored message from
anywhere within the FOMA service area.
• Voice Mail Service is a paid subscription service.
Monthly charge will apply.
• You can hear voice messages from anywhere in
Japan.
1Voice Mail Service
• Up to 20 voice messages (approx. 3 minutes
per message) can be recorded.
• Voice messages are stored in Voice Mail
Service Center for up to 72 hours.
• It also provides a function that simply
announces that you cannot answer the call.
• Even if you have enabled Voice Mail Service,
you can answer the call while the handset is
ringing. The handset ceases to ring when the
call is diverted to Voice Mail Service Center.
Ringing time can be changed. 3 P367
• If voice messages are stored in Voice Mail
Service Center, the number of voice
messages stored is displayed in the Message
area in the Home screen, and $$ is displayed
on the Status bar. Missed Call List shows that
you had incoming calls.
• Even if you also subscribe to Call Forwarding
Service, you cannot use the two services at
the same time. When you have enabled Call
Forwarding Service, Voice Mail Service is
automatically disabled. However, if you have
disabled Call Forwarding Service, Voice Mail
Service will not be automatically enabled.
• You can use tap operations to divert an
incoming call to Voice Mail Service Center.
You can also divert a second incoming call to
Voice Mail Service Center during a call.
• If Remote Operation has been enabled, you
can use a touch-tone landline or a payphone
to perform remote operations on Voice Mail
Service. 3 P375
• If you have enabled Caller ID Display Request
Service along with Voice Mail Service, Voice
Mail Service will not be activated and the
caller ID display request guidance is provided
Service
Name
Monthly
Charge
Subscribe Reference
Voice Mail
Service
Charged Required P366
Call Waiting
Service
Charged Required P368
Call
Forwarding
Service
Free Required
P370
Nuisance
Call
Blocking
Service
Charged Required
P371
Caller ID
Display
Request
Service
Free Not
required P372
Dual
Network
Service
Charged Required
P373
English
Announcement
Service
Free Not
required P374
International
Roaming
Service
Free Required
P506
Caller ID
Notification
Service
Free Not
required P62
Drive Mode Free Required P79
Short
Message
Service
(SMS)
Free Required
P225
00M1000EN.book 344 ページ 2004年11月24日 水曜日 午前7時56分

345
Network Services
instead when an incoming call with no caller
ID is received.
• Even if Voice Mail Service is enabled, an
incoming video call is not diverted to Voice
Mail Service Center. The video call is
received by the FOMA handset.
• When your handset is in an area with no radio
wave or out of the service area, you cannot
access this service.
Basic flow of Voice Mail Service
You can follow the procedures below to use
Voice Mail Service.
Voice Mail Service Charges
To use Voice Mail Service, call charges apply
for playing back voice messages along with
monthly charges.
Enabling Voice Mail Service
aTap $$ on the Application Selector
bar, and then tap Phone y Voicemail
y Activate on the Menu bar
bTap $$ in Voicemail Ringing time
• If you do not set up the ringing time,
proceed to Step 4.
cTap the Seconds field y Enter ringing
time y Tap [Done]
• The ringing time must be within the range
of 0 to 120 seconds.
dTap [Yes] in the confirmation screen
Voice Mail Service is enabled.
• Tap [No] in the confirmation screen to
cancel the setting and return to the
Phone number entry screen.
NOTE
• You can also set up or change the ringing time
independently. 3 See below
Modifying the Ringing Tme
You can modify the ringing time from when an
incoming call is received until the call is
diverted to Voice Mail Service Center.
aTap $$ on the Application Selector
bar, and then tap Phone y Voicemail
y Edit voicemail ringing time on the
Menu bar
bEnter the ringing time in the Ringing
time entry screen y Tap [Done]
Ringing time is changed.
• The ringing time must be within the range
of 0 to 120 seconds.
NOTE
• If the ringing time you set is shorter than the
ringless time set up, an incoming call is diverted
to Voice Mail Service Center without ringing your
handset.
Step 1 : Enable Voice Mail Service
Step 2 : Callers store voice messages*
*: When you are in a hurry to
record your voice message,
and you want to skip Voice
Mail Service's response
message, tap # while the
response message is playing.
Step 3 : Play back messages
Voicemail ringing time
: Select to set up the ringing time.
Seconds: Enter the ringing time.
00M1000EN.book 345 ページ 2004年11月24日 水曜日 午前7時56分

346
Network Services
Disabling Voice Mail Service
aTap $$ on the Application Selector
bar, and tap Phone y Vo ic e m a il y
Deactivate on the Menu bar, and then
tap [Yes] in the confirmation screen
Voice Mail Service is disabled.
• Tap [No] in the confirmation screen to
cancel the setting.
Listening to Voice Messages
When voice messages are recorded, the
number of voice messages stored is
displayed in the Messages area in the Home
screen, and $$ is displayed on the Status bar.
aTap the Number of recorded
messages in the Messages area
Plays back voice messages.
NOTE
• To replay voice messages you have already
listened to, tap $$ on the Application Selector
bar, and then tap Phone y Voicemail y Play
messages y [Yes] on the Menu bar.
Checking for New Voice Messages
You can inquire Voice Mail Service Center for
new voice messages.
aTap $$ on the Application Selector
bar, and then tap Phone y Vo i c e m a il
y Check messages on the Menu bar
Makes an inquiry to Voice Mail Service
Center.
bTap [Done] in the Check messages
screen
Ends the inquiry.
• If you have new voice messages, the
number of voice messages is displayed
in the Messages area in the Home
screen, and $$ is displayed on the Status
bar.
Checking Voice Mail Settings
Checks the current Voice Mail settings.
aTap $$ on the Application Selector
bar, and then tap Phone y Vo i c e ma i l
y Status on the Menu bar
Displays the current settings.
bTap [Done] in the Voicemail screen
Status check is ended.
Setting up Voice Mail Service with
Voice Guidance
aTap $$ on the Application Selector
bar, tap Phone y Voi c e ma i l y Check
settings on the Menu bar, and then
tap [Yes] in the confirmation screen
Connects to Voice Mail Service Center.
bSet up Voice Mail Service by
following voice guidance
Sets up Voice Mail Service.
Using Call Waiting Service
When you receive an incoming call during a
call, Call Waiting Service allows you to put the
active call on hold and answer the incoming
call. This service also allows you to put the
active call on hold to make another call.
• Call Waiting Service is a paid subscription service.
Monthly charge will apply.
• When an incoming call is received during a call,
you will hear the beep tone.
1Call Waiting Service
• If you have enabled Caller ID Display Request
Service along with Call Waiting Service, the
Call Waiting Service will not be activated and
the caller ID display request guidance is
provided instead when an incoming call with
no caller ID is received.
00M1000EN.book 346 ページ 2004年11月24日 水曜日 午前7時56分

347
Network Services
• If you have enabled Call Waiting Service,
disable the Set Arrival Act. If Set Arrival Act is
enabled, according to its setting incoming
calls will be diverted to Voice Mail Service
Center.
• Call Waiting Service is not activated in the
following situations:
- When dialing 104, 110, 117, 118 or 119
- When dialing or calling another party
- When you are subscribed and connected to
Voice Mail Service Center playing back
voice messages, etc.
- When dialing a 4-digit number to set up
various network services such as 1411
(enabling Voice Mail Service) and 1420
(disabling Call Forwarding Service)
- During a video call (an incoming call is
stored in Missed Call List)
- When a video call is received during a voice
call (the call is stored in Missed Call List)
• The caller is being charged during a call on
hold.
• You cannot make a video call during a call.
• When your handset is out of the service area
or out of range, you cannot access this
service.
Enabling/Disabling Call Waiting
Service
Call Waiting Service is enabled.
aTap $$ in the Application Selector
bar, and then tap Settings y Call
control on the Menu bar
bTap $$ in the Call Waiting field of the
Call Control screen
Enables Call Waiting Service.
• Tap $$ again to disable Call Waiting
Service.
Putting the Active Call on Hold to
Answer an Incoming Call
You can put the active call on hold to answer
an incoming call.
aWhen the Incoming call screen is
displayed during a call, tap
[Answer]
Puts the active call on hold. You can answer
the incoming call.
• Tap [Reject] to reject the incoming call.
• During Call Waiting Service, the first
caller is displayed in the upper half and
the second caller in the lower half of the
screen.
• Tap [$$Switch] to switch between callers.
$$ indicates the caller you have put on
hold. $$ indicates the caller you are now
talking with.
bPress e when you finish talking
with the other party
Ends the active call and reactivates the call
on hold.
Ending the Active Call to Answer an
Incoming Call
End the active call to answer an incoming call.
aWhen the Incoming call screen is
displayed during a call, tap $$ in
Drop Active on Answer y [Answer]
Ends the active call. You can answer the
incoming call.
• Tap [Reject] to reject the incoming call.
Putting the Active Call on Hold to Make
Another Call
Put the active call on hold to make another
call.
aTap [$$Keypad] during a call
00M1000EN.book 347 ページ 2004年11月24日 水曜日 午前7時56分

348
Network Services
bEnter a phone number in the Phone
number entry screen y Tap [$$]
Puts the active call on hold to take the other
call.
• You can dial to stored phone numbers by
tapping [History] in the Phone number
entry screen and displaying Dialed List,
Answered List or Missed Call List.
cPress e when you finish talking
with one of the parties
Ends the active call and reactivates the call
on hold.
Using Call Forwarding
Service
You can automatically forward incoming calls
to your FOMA handset to a pre-registered
phone number.
• Call Forwarding Service is an optional
subscription service. Monthly charges will not
apply.
• Only 1 phone number can be set up as a
forwarding destination.
• Even if Call Forwarding Service has been
enabled, you can answer calls as long as the
handset rings. The handset ceases to ring
when the call is diverted to Voice Mail Service
Center. The time period in which the handset
ring (ringing time) can be changed. 3 P371
• Even if you also subscribe to Voice Mail
Service, you cannot use the two services at
the same time. When you have enabled Voice
Mail Service, Call Forwarding Service is
automatically disabled. However, if you have
disabled Voice Mail Service, Call Forwarding
Service will not be automatically enabled.
• If Remote Operation has been enabled, you
can use a touch-tone landline or a payphone
to perform remote operations on Call
Forwarding Service. 3 P375
• If you have enabled Caller ID Display Request
Service along with Call Forwarding Service,
Call Forwarding Service is not activated and
the caller ID display request guidance is
provided instead when an incoming call with
no caller ID is received.
• A video call is not forwarded even if Call
Forwarding Service has been enabled unless
a 3G - 324M compliant, video call-enabled
phone is specified as the forwarding
destination. Check the specifications of the
destination when enabling Call Forwarding
Service. The video caller will not hear the
guidance indicating that call forwarding is in
progress.
• When your handset is out of the service area
or out of range, you cannot access this
service.
Basic Flow of Call Forwarding Service
You can follow the procedures below to use
Call Forwarding Service.
Call Forwarding Service charges
Call Forwarding Service charges are
calculated as follows.
* If a Call Forwarding Service subscriber forwards a
call from his/her handset, the subscriber is
charged for the call from forwarding source to
destination.
Step 1 :Register a forwarding destination
number
Step 2 :Enable Call Forwarding Service
Step 3 :A call arrives at your FOMA
handset
Step 4 :Automatically forwards the call to
the destination after the specified
ringing time elapses
No monthly charge Call charges
Caller
⇔⇔
Forwarding
destination
Callers
are
charged
Call
Forwarding
Service
subscriber
Call
Forwarding
Service
subscribers
are
charged
+
00M1000EN.book 348 ページ 2004年11月24日 水曜日 午前7時56分

349
Network Services
* There is no call charge for registering the
forwarding destination, enabling and disabling
Call Forwarding Service, and setting the ring time.
Enable Call Forwarding Service
aTap $$ in the Application Selector
bar, and tap Setting y Call control on
the Menu bar, and then tap the
Forwarding tab in the Call Control
screen
bTap $$ in the Forwarding field in the
Call Control screen
• If a forwarding destination number has
been already set up, the confirmation
screen appears. Tap [Yes] to enable Call
Forwarding Service.
cEnter a phone number in the Enter
forwarding number screen y Tap
[Activate service?]
Enables Call Forwarding Service.
NOTE
• You can also set up or change the forwarding
destination number or ringing time
independently. 3 See below
Changing the Forwarding Destination
Number
aTap $$ on the Application Selector
bar, and tap Setting y Call control on
the Menu bar, and then tap the
Forwarding tab in the Call Control
screen
bTap the Number field in the Call
Control screen to enter a phone
number in the Enter forwarding
number screen y Tap [Done]
1To select a forwarding destination
number from Contacts
aTap [$$]
bTap and select a desired forwarding
destination number
Modifying the Ringing Time
aTap $$ on the Application Selector
bar, and tap Setting y Call control on
the Menu bar, and then tap the
Forwarding tab in the Call Control
screen
bTap the Ringing time field in the Call
Control screen to enter the ringing
time in the Ringing time entry
screen y Tap [Done]
Sets the ringing time.
Disabling Call Forwarding Service
aTap $$ on the Application Selector
bar, and tap Setting y Call control on
the Menu bar, and then tap the
Forwarding tab in the Call Control
screen
bTap $$ in the Forwarding field in the
Call Control screen, and then tap
[Yes] in the confirmation screen
Disables Call Forwarding Service.
NOTE
• You cannot specify toll free numbers or 3-digit
numbers such as 110 as the forwarding
destination.
• When your handset is out of range or switched
off, an incoming call is automatically forwarded
without ringing your handset. In this case, Call
Forwarding Service subscriber is charged for the
call from forwarding source to destination.
• NTT DoCoMo may suspend Call Forwarding
Service on behalf of subscribers upon owners of
forwarding destinations request and we deem it
necessary.
• Note that designating a PBX, beeper*, or FAX as
forwarding destination may cause
misunderstandings by callers.
• If the ringing time you set is shorter than the
ringless time, an incoming call is forwarded to
the forwarding destination without ringing your
handset.
*: From January 2001 onwards, NTT DoCoMo
beeper name has been changed to
"QUICKCAST".
00M1000EN.book 349 ページ 2004年11月24日 水曜日 午前7時56分

350
Network Services
Using Nuisance Call
Blocking Service
You can bar incoming calls to your handset by
registering phone numbers from which you do
not want to receive calls.
• Nuisance Call Blocking Service is a paid
subscription service. Monthly charge will apply.
• You can register up to 30 phone numbers.
Registering Phone Numbers
Register the phone number of the last call as
barred number.
• Phone numbers that were not answered or you
dialed cannot be registered.
aTap $$ on the Application Selector
bar, and then tap Phone y Nuisance
Calls y Block Last on the Menu bar
bTap [Yes] in the confirmation screen
Registers the phone number.
Register Specified Phone Numbers
aTap $$ on the stand-by display, dial
"144" y tap [$$]
bRegister phone numbers by
following the voice guidance
cWhen completed, press e
Registers specified phone numbers.
NOTE
• When your handset is out of the service area or
out of range, you cannot access this service.
• If you have enabled other network services,
including Voice Mail Service, Call Forwarding
Service, Call Waiting Service, Caller ID Display
Request Service or Drive Mode, along with
Incoming Call Barring Service, other network
services are not activated. When an incoming
call from a registered number is received, the
call block guidance is provided.
• When an incoming call from a registered number
is received, neither the action on receiving
incoming calls take place nor the call is recorded
in the Missed Call list.
• When an incoming call is a video call, the video
call is discarded without providing the call block
guidance.
• Phone numbers with no caller ID can be
registered.
• International phone numbers may not be
registered.
• You cannot check or inquire registered numbers.
We recommend that you take a note of them.
Deleting registered phone numbers
You can delete registered phone numbers
one-by-one, beginning with the most recently
registered one. You can also delete all phone
number at a time.
aTap $$ on the Application Selector
bar, and then tap Setting y Nuisance
Calls y Delete items/Clear List on the
Menu bar
bTap [Yes] in the confirmation screen
Deletes registered phone number(s).
Using Caller ID Display
Request Service
When an incoming call with no Caller ID is
received, voice guidance is provided
requesting the caller to show caller ID.
• You do not need to subscribe to Caller ID Display
Request Service. No monthly charge will apply.
• Caller ID Display Request Service is applied only
to incoming voice calls.
• This service is activated only when the reason for
not notifying caller ID is set to "Hide Caller ID". If
the reason is "Caller ID Not Available" or
"Payphone*", this service is not activated.
*: If a caller prefixes "184" to a phone number
when making a call at a payphone, this
service is activated.
• The caller is charged for responding to the voice
guidance requesting the caller ID.
Delete items : Deletes the phone number
you registered last.
Clear List : Deletes all the registered
phone numbers.
00M1000EN.book 350 ページ 2004年11月24日 水曜日 午前7時56分

351
Network Services
aTap $$ on the Application Selector
bar, and then tap Setting y Call
control on the Menu bar
bTap $$ in the Caller ID Request field of
the Call Control screen, and then
tap [Yes] in the confirmation screen
Enables Caller ID Display Request Service.
• Tap $$, and then tap [Yes] in the
confirmation screen to disable Caller ID
Display Request Service.
NOTE
• When your handset is out of the service area or
out of range, you cannot access this service.
• If you have enabled other network services,
including Voice Mail Service, Call Forwarding
Service, Call Waiting Service, or Drive Mode,
along with Caller ID Display Request Service,
other network services are not activated. When
an incoming call with no caller ID is received, the
caller ID display request guidance is provided to
the caller. If Incoming Call Barring Service is
enabled at the same time, the call block
guidance is provided.
• If you have enabled the Action on Receiving
Incoming calls According to Reason for Not
Notifying Caller ID, along with Caller ID Display
Request Service, the action is not activated.
When an incoming call that does not notify caller
ID has arrived, the caller ID display request
guidance is provided to the caller.
Using Dual Network
Service
Dual Network Service allows you to use the
phone number of your FOMA handset to work
with mova. When your handset is out of
FOMA service area, you can switch to mova
to make or answer calls.
• You cannot use FOMA and mova at the same
time.
• You need to subscribe to Dual Network service.
Monthly charge will apply.
Switching to FOMA Handset
You can switch from mova to FOMA.
aTap $$ on the Application Selector
bar, and then tap Setting y Network
on the Menu bar
bTap [Activate] in the Dual network
field in the Network screen, and
then enter a network password in
the Network password entry screen
Switches to FOMA.
• Network password 3 P146
Checking the Current Setting
You can check which network, FOMA or
mova, you are using.
aTap $$ on the Application Selector
bar, and then tap Setting y Network
on the Menu bar
bTap [Check Status] in the Dual
network field in the Network screen
Displays the network you are using.
NOTE
• When your handset is out of the service area or
out of range, you cannot access this service.
• You cannot use a FOMA handset to switch from
FOMA to mova. Switching must be performed
from mova.
Using English
Announcement Service
You can set the language used for the
guidance you hear when making a call, or for
a caller to hear the response in "Japanese" or
"English".
• You do not need to subscribe to English
Announcement Service. No monthly charge will
apply.
• When a caller uses a DoCoMo's moblie phone
with the guidance language set to English in order
to make a call to a DoCoMo's mobile phone with
the guidance language set to English, the caller's
voice guidance settings for outgoing calls takes
precedence over called party's voice guidance
settings for incoming calls when the voice
guidance is provided.
00M1000EN.book 351 ページ 2004年11月24日 水曜日 午前7時56分

352
Network Services
aTap $$ on the Application Selector
bar, and then tap Setting y Guidance
on the Menu bar
bTap the Outgoing field to select a
language y Tap [Yes] in the
confirmation screen
cTap the Incoming field to select a
language y Tap [Yes] in the
confirmation screen
dTap [Done]
Sets the language used for voice guidance.
NOTE
• When your handset is out of the service area or
out of range, you cannot access this service.
• English Announcement Service is not available
for video calls.
Using Service Dialling
Call DoCoMo Help Desk or DoCoMo
Information Desk.
• You do not need to subscribe to Service Dialling.
No monthly charge will apply.
• Screen display or the numbers you dial may vary,
depending on your UIM.
Making Inquiries about Failures
aTap $$ on the Application Selector
bar, and tap Phone y My lines on the
Menu bar, and then tap the Service
number tab in the My lines screen
bTap DoCoMo Help Desk y [Call] in the
My lines screen
Calls DoCoMo Help Desk.
Call DoCoMo Information Desk
aTap $$ on the Application Selector
bar, and tap Phone y My Lines on the
Menu bar, and then tap the Service
number tab in the My lines screen
bTap DoCoMo Information Desk y [Call]
in the My lines screen
Calls DoCoMo Information Desk.
NOTE
• When your handset is out of the service area or
out of range, you cannot access this service.
Outgoing calls
Japanese : Sets the voice guidance
you hear when making
a call to Japanese.
English : Sets the voice guidance
you hear when making
a call to English.
Incoming calls
Japanese : Sets the voice guidance
a caller party hears
when you receive the
call to Japanese.
Japanese+
English
: Sets the voice guidance
a caller party hears
when you receive the
call to Japanese 3
English.
English+
Japanese
: Sets the voice guidance
a caller party hears
when you receive the
call English 3
Japanese.
00M1000EN.book 352 ページ 2004年11月24日 水曜日 午前7時56分

353
Network Services
Selecting Action on Receiving Incoming Calls during Call
Selecting How to Handle
Incoming Calls during Call
You can choose to automatically divert an
incoming call received during a voice call or
during 64K data communication to Voice Mail
Service Center.
• This feature is available only when you subscribe
to Voice Mail Service.
• You must enable the Action on Receiving
Incoming Calls during Call before you can activate
it. 3 P371
aTap $$ on the Application Selector
bar y Setting y Call control on the
Menu bar, and then tap the
Forwarding tab in the Call Control
screen
bTap $$ in the Fwd to voicemail when
busy field of the Call Control screen,
and then tap [Yes] in the
confirmation screen
Selects the Action on Receiving Incoming
Calls during Call.
• Tap $$, and then tap [Yes] in the
confirmation screen to deselect the
action.
NOTE
• Even if Voice Mail Service has been disabled,
Voice Mail Service is automatically enabled
when you have enabled this feature.
• When an video call or 64K data communication
call arrives during a voice call or during 64K data
communication, the incoming call is rejected.
Action on Receiving Incoming Calls during Call
Enabling/Disabling Action on
Receiving Incoming Calls during Call
You can enable/disable the Action on
Receiving Incoming Calls during Call.
aTap $$ on the Application Selector
bar, and then tap Setting y Call
control on the Menu bar
bTap $$ in the Set Arrival Act field of
the Call Control screen, and then
tap [Yes] in the confirmation screen
Enables the Action on Receiving Incoming
Calls during Call.
• Tap $$, and then tap [Yes] in the
confirmation screen to disable the action.
NOTE
• When your handset is out of the service area or
out of range, you cannot access this service.
Remote Operations
Setting Remote Operations
When you subscribe to Voice Mail Service or
Call Forwarding Service, you can choose
whether you perform remote operations on
these services from payphones.
aTap $$ on the Application Selector
bar, and then tap Setting y Roaming
on the Menu bar
bTap $$ in the Remote access control
field in the Roaming screen, and
then tap [Yes] in the confirmation
screen
Enables remote operations.
• Tap $$, and then tap [Yes] in the
confirmation screen to disable remote
operations.
NOTE
• When your handset is out of the service area or
out of range, you cannot access this service.
00M1000EN.book 353 ページ 2004年11月24日 水曜日 午前7時56分

354
Network Services
Added Service (Register USSD)
Registering and Using
Services
When we introduce a new network service,
you can register the new service to your
FOMA handset.
• Up to ten services can be registered.
Registering/Modifying a Service
aTap $$ on the Application Selector
bar, and then tap Phone y Additional
Service on the Menu bar
bTap the number you want to register
or change y [Edit] in the Additional
Service screen
cTap the Name field y Enter a name
• Up to 10 double-byte characters, or 20
single-byte characters can be entered.
dTap the Command field and enter a
Service Code (USSD) in the
Commands entry screen y
[Complete] y Tap [Done]
Registers or changes the service.
• To register other services, repeat Steps 2
to 4.
NOTE
• Register the service names and service codes
(USSD) provided by DoCoMo.
Using Registered Services
• When your handset is out of the service area or
out of range, you cannot access this service.
aTap $$ on the Application Selector
bar, and then tap Phone y Additional
Services on the Menu bar
bTap the number you want to use y
[Transmit] in the Additional Service
screen
Transmits the special number or Service
Code (USSD) of the selected service to the
service center.
Deleting Registered Services
aTap $$ on the Application Selector
bar, and then tap Phone y Additional
Services on the Menu bar
bTap the number you want to delete
y [Clear] in the Additional Service
screen
Deletes the selected service.
Name : Enter a network service
name.
Command : Enter a Service Code
(USSD) used to notify the
service center.
00M1000EN.book 354 ページ 2004年11月24日 水曜日 午前7時56分

355
Bluetooth
About Bluetooth . . . . . . . . . . . . . . . . . . . . . . . . . . . . . . . . . . . . . . . . . . . . . . . . 356
Before Using Bluetooth . . . . . . . . . . . . . . . . . . . . . . . . . . . . . . . . . . . . . . . . . . 358
Using Bluetooth. . . . . . . . . . . . . . . . . . . . . . . . . . . . . . . . . . . . . . . . . . . . . . . . . 362
00M1000EN.book 355 ページ 2004年11月24日 水曜日 午前7時56分

356
Bluetooth
About Bluetooth
A wireless technology that exchanges data between devices such as PCs, headsets and
handsfree devices. You can send/receive data between Bluetooth devices without using a cable.
Services Available with Bluetooth
With a Bluetooth device connected, your FOMA handset allows you to talk or transmit data via
wireless.
Bluetooth Communications
• Bluetooth provides wireless data transfer using the 2.4 GHz band, which is shared by various devices.
Although Bluetooth employs a technique to minimize the interference from other devices in the same band,
the transmission speed/range may be downgraded or even disconnected.
• The transmission speed/range may differ depending on the distance and obstacles between the devices,
radio signal conditions, and Bluetooth devices.
Main Specifications
*1: Varies depending on obstacles between the communication devices and the radio signal conditions.
2Talking Wirelessly
By connecting a Bluetooth headset/
handsfree device to your FOMA
handset, you can talk wirelessly.
2Sending Contacts/Schedule/ToDo
List Entries 3 P384
By converting contacts into vCard
format and Schedule/ToDo list entries
into vCalendar format, you can send
them to other FOMA handsets or
Bluetooth devices.
2Sending Images/Video Clips/Voice
Memos 3 P384
You can send image/video/voice memo
files stored in your phone to other
FOMA handsets or Bluetooth devices.
2Setting Up Dial-Up Connection
3P419, P429
By connecting to a PC via Bluetooth,
you can access to the Internet.
Supporting Bluetooth version Bluetooth standard Ver.1.1 conformity
Output Bluetooth standard
Transmission range *1 Within about 10 meters
Supporting Bluetooth profiles *2 Generic Object Exchange Profile
Object Push Profile
Serial Port Profile
Dialup Networking Profile
Headset Profile
Service Discovery Application Profile
Hands-free Profile
Frequency band 2.4 GHz band (2.402 GHz ~ 2.480 GHz)
00M1000EN.book 356 ページ 2004年11月24日 水曜日 午前7時56分

357
Bluetooth
*2: The specifications of Bluetooth devices according to the usage. It is the standard for Bluetooth.
1Bluetooth Glossary
Passkey
A 1- to 16-digit alphanumerical password set for each device to prevent unauthorized
incoming connection to Bluetooth devices.
Pairing
When two devices establish a Bluetooth connection for the fist time, pairing is carried out.
To add a device, the passkey that other device has set must be entered.
Profile
A communication protocol defined according to the type of data transmitted via Bluetooth.
Finding
Finding other Bluetooth devices within the transmission range.
00M1000EN.book 357 ページ 2004年11月24日 水曜日 午前7時56分
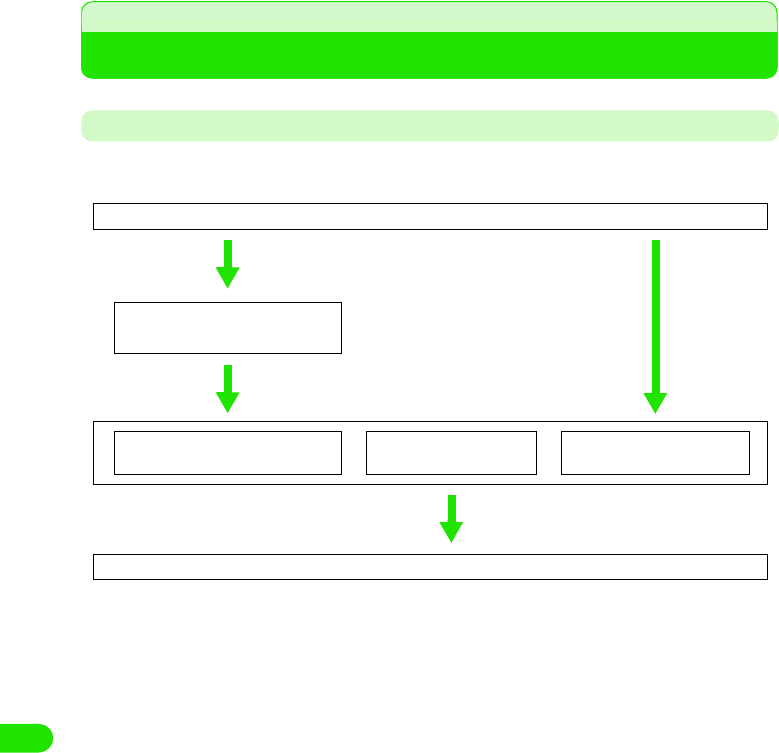
358
Bluetooth
Before Using Bluetooth
Flow for Sending/Receiving Information Using Bluetooth
To connect a Bluetooth device to your FOMA handset, use the following steps:
<First connection> <Second and subsequent connection>
Turning Bluetooth Function ON 3 P382
Adding and Connecting
Bluetooth Devices 3 P382
Making/Answering Calls with
Headset/Handsfree Device*
Sending Information
3 P384
Receiving Information
3 P385
Disabling Bluetooth Function 3 P382
*: For call operations with a headset/handsfree device, see the operation manual for each device.
00M1000EN.book 358 ページ 2004年11月24日 水曜日 午前7時56分

359
Bluetooth
Setting up Connections
Set up the environment for Bluetooth connections.
aTap $$ y $$ in the Application Selector bar, and tap the
Connections tab y Bluetooth on the Control panel screen
bTap the item to set and make the setting
cTap [Done]
Adding and Connecting Bluetooth Devices
When you make Bluetooth connection for the first time, or your desired Bluetooth device does not
appear on the Available devices screen, you can find and add the devices within the
communication range.
aPut the Bluetooth device in standby status
bTap $$ y $$ in the Application Selector bar, and tap the
Connections tab y Bluetooth on the Control panel screen
Bluetooth ON : Turning Bluetooth connection ON/OFF.
$$ is ON, $$ is OFF.
Visible to other devices
No : Makes your M1000 invisible to other
devices.
Yes : Makes your M1000 visible to other devices.
For 10 minutes : Makes your M1000 visible to other devices
for 10 minutes.
Receiving items
Always receive : Always accepts a connection request from
other device.
Ask first : Asks first when receiving a connection
request from other device.
Never receive : Never accepts a connection request from
other device.
Name of my device
: Enter the name of your FOMA handset to be
displayed on other devices.
00M1000EN.book 359 ページ 2004年11月24日 水曜日 午前7時56分

360
Bluetooth
cTap Devices tab
dTap [Add]
eTap the device name, and enter the passkey y tap [Done] on the
Passkey entry screen
The new device is added and connected via Bluetooth.
• Tap [Update] to find again connectable devices.
Accepting Information from Connected Bluetooth Devices
You can set your FOMA handset to accept information from connected other Bluetooth devices.
• Setting Receiving items to Always or Ask first. 3 P382
aTap $$ y $$ in the Application Selector bar, and tap the
Connections tab y Bluetooth on the Control panel screen
bTap $$ of Bluetooth ON to change it into $$
Bluetooth activates.
Bluetooth activates and starts finding the devices. The device
name you can connect to appears after about XX seconds.
Types of connectable devices
$$ : Mobile phone
$$ : Headset
$$ :PC
$$ :PDA
$$ : Other device
00M1000EN.book 360 ページ 2004年11月24日 水曜日 午前7時56分

361
Bluetooth
cEstablish the connection from other device
dTap Passkey:, and enter the passkey y tap [Done]
• Tap [Cancel] to cancel the connection.
00M1000EN.book 361 ページ 2004年11月24日 水曜日 午前7時56分
362
Bluetooth
Using Bluetooth
Sending Information
You can send images/music/contact information stored in your phone to other PCs or FOMA
handsets connected via Bluetooth.
<Example: To send video>
aOn the Video display screen (3 P280), tap Video y Send as on the
Menu bar
bTap Send as, and select Bluetooth y tap [Done]
cSelect the destination device and tap [Send]
The selected file is sent. Make the file reception setting on the receiver.
• Tap [Cancel] to cancel sending.
• Tap [Update] to find again connectable devices.
Receiving Information
You can receive images/music/contact information stored in other Bluetooth device to your
FOMA handset via Bluetooth for displaying, playing back or saving.
<Example: To save a file you received>
Bluetooth activates and the list of connectable devices appears.
00M1000EN.book 362 ページ 2004年11月24日 水曜日 午前7時56分
363
Bluetooth
aSend a file from other Bluetooth device
bTap [Accept]
The name of received file appears.
• Tap [View] to display the received
file.
• Tap [Delete] to delete the file.
00M1000EN.book 363 ページ 2004年11月24日 水曜日 午前7時56分

364
Bluetooth
cTap [Done]
The received file is stored in your FOMA handset and listed in the Short distance reception
list screen.
1Menu bar operations on the Short distance reception list screen
Tap Message or Edit on the Menu bar to display the following items:
• Some items might not be available depending on the operation.
aTypes of receiving files
$$ :Video file
$$ : Picture file
$$ : Music file
$$ : vCard file
$$ : vCalendar file
$$ : Document file
$$ : Other file
bSender name/file name
Unknown files appear in bold.
cReceived
Message
Send as . . . . . . . . . . . . . . . . . . . . . P310
Delete message . . . . . . . . . . . . . . . P259
Disconnect . . . . . . . . . . . . . . . . . . . P195
Edit
Select all . . . . . . . . . . . . . . . . . . . . .P249
Sort by date . . . . . . . . . . . . . . . . . . .P258
Sort by sender . . . . . . . . . . . . . . . . .P258
Zoom . . . . . . . . . . . . . . . . . . . . . . . .P141
00M1000EN.book 364 ページ 2004年11月24日 水曜日 午前7時56分

365
Bluetooth
Setting Details on Available Devices
You can set details on available devices such as changing the device name or showing/hiding the
confirmation screen when receiving a connection request.
aTap $$ y $$ in the Application Selector bar, and tap the
Connections tab y Bluetooth y Devices tab on the Control panel
screen
bTap the device name to set
cTap [Done]
The setting is accepted.
1To delete a device from the available list
On the Step 2 screen, select the device to delete, and tap [Delete] y [Yes].
The list of available Bluetooth devices appears.
Device name
: The stored device names appear. Tap it to change
the name.
Ask connection
: Marks the checkbox with $$ to display the
confirmation screen when receiving a connection
request from other device.
00M1000EN.book 365 ページ 2004年11月24日 水曜日 午前7時56分

00M1000EN.book 366 ページ 2004年11月24日 水曜日 午前7時56分

367
Using Wireless LAN
Wireless LAN . . . . . . . . . . . . . . . . . . . . . . . . . . . . . . . . . . . . . . . . . . . . . . . . . . . 368
Setting up Wireless LAN. . . . . . . . . . . . . . . . . . . . . . . . . . . . . . . . . . . . . . . . . . 369
Searching Available Access Points . . . . . . . . . . . . . . . . . . . . . . . . . . . . . . . . . 375
00M1000EN.book 367 ページ 2004年11月24日 水曜日 午前7時56分

368
Using Wireless LAN
Wireless LAN
Wireless Local Area Network or wireless LAN allows you connect to a network without a cable.
You can view Internet sites or exchange data within the service area.
Operating the Wireless LAN
• The wireless LAN transmits at 2.4GHz frequency band. The band is also used by other wireless devices.
Despite the wireless LAN technologies to minimize the interference, this may cause radio interferences
lowering the speed, reducing the coverage area, or causing connection failure.
• Transmission speed and coverage area may vary depending on the distance between devices, obstacles,
radio wave conditions and/or Wireless LAN devices.
Specifications
*: May vary according to obstacles between devices and radio wave conditions.
Bluetooth Interference with Wireless LAN
Because wireless LAN (IEEE802.11b/g) and Bluetooth devices use the same frequency band
(2.4GHz), interference may be generated causing lower transmission speed, noise or connection
failure when a device with Bluetooth is being used near the FOMA handset.
The following measurements can be taken if any such interference occurs;
• Set the Wireless LAN equipment and the FOMA handset/Bluetooth device more than 10 meters apart.
• If the distance is within 10m, turn the switch off of either the device, wireless LAN or FOMA handset/Bluetooth
handset.
Standard IEEE802.11b
Transmission system DS-SS (Direct Sequence Spread Spectrum)
Transmission Power
Frequency band 2.4GHz
Transmission speed Max. 11Mbps
Range* XX m
00M1000EN.book 368 ページ 2004年11月24日 水曜日 午前7時56分
369
Using Wireless LAN
1Terminology
PPPoe
A protocol to enable PPP function on a LAN.
SSID
Similar to a LAN workgroup name. An SSID identical to that of the access point is needed
for communication.
802.1x
A standard regulating the user authentication method within a LAN. Only authenticated
users are allowed to be connected.
• See P181 for other terminology.
Setting up Wireless LAN
1Preparation
Prepare with the following information obtained from your network administrator.
Username
A username to log in to the LAN
Password
A password to log in to the LAN
SSID
The same digits (SSID) as that of the access point you want to log in to
IP address
Digits to identify the device connected to the Internet (LAN)
Gateway
Address of gateway server
DNS
Address of DNS server
* Set-up items, names and details required to connect may vary. Consult your network administrator for
further details.
aTap $$y$$ on the Application Selector bar, and tap Connections
tab y Internet accounts in the Control panel screen
1To edit an existing setup
Tap the desired account name y Edit
Repeat Step 2 onwards, if necessary
1To delete an existing setup
Tap the desired account name y [Delete], and then tap
[Yes] to confirm on the Delete confirmation screen
00M1000EN.book 369 ページ 2004年11月24日 水曜日 午前7時56分

370
Using Wireless LAN
bTap New
cTap Account Name to input the network connection name y Tap
Bearer to select WLAN y Tap [Advanced]
dTap the desired tab for set up
• Refer to P393 to P397 for each tab setting.
• Refer to P189 for Proxy tab setting.
Account name
: You can input the name of the network
connection.
Bearer
FOMA CSD: Select when using FOMA 64K Data
communication.
GSM CSD : Select when using Data communication within
GSM service area.
PACKET : Select when using FOMA Packet data
connection.
WLAN : Select when using Wireless LAN.
• Tap [cancel] to cancel the operation.
00M1000EN.book 370 ページ 2004年11月24日 水曜日 午前7時56分
371
Using Wireless LAN
WLAN
aTap WLAN in Step 4 on P393 y Tap the desired items for setup y
Tap [Done] after setting
Security
aTap Security in Step 4 on P393 y Tap the desired items for setting
y Tap [Done] after setting
De
f
ault sett
i
ng SSID: - Power-save mode: ON Tx power consumption level: high
SSID : Input the same SSID to that of the access point
you want to connect.
• Up to 32 single-byte alphanumeric
characters can be entered.
Power-save mode
: When no transmission is in progress, set up to
either reduce or maintain its level of power
consumption.
$$ to put the mode on, $$ to put the mode off.
Tx power consumption level
: Set up the transmission power level. The levels
are as follows.
Low 3 20%
Medium-Low 3 40%
Medium 3 60%
Medium-High 3 80%
High 3 100%
D
e
f
au
l
t sett
i
ng Authentication method: Open Data encryption: none 802.1x: $$
Network authentication: none
Authentication method
: Set as same as the designated access point.
Data encryption
: Set data encryption method.
802.1x : Check for 802.1x authentication.
$$ for use, $$ for non-use.
Network authentication
: Set authentication method to establish
connection.
00M1000EN.book 371 ページ 2004年11月24日 水曜日 午前7時56分

372
Using Wireless LAN
1When [Network Key] is tapped
The following screens is displayed for network key setting/change
1When [Property] is tapped
The screen displayed varies depending on the setting in Network authentication. Desired
property can be set/changed, if necessary.
PPPoe
aTap PPPoe tab in Step 4 on P393 y Tap the desired items for
setting y Tap [Done]
De
f
ault sett
i
ng PPPoe: $$ Username:- Password:-
PPPoe : Select when using PPPoe protocol connection.
This requires a username and a password to be
setup.
$$ for connection with PPPoe protocol, $$ for
connection without PPPoe protocol.
Username : Input a username if PPPoe protocol connection is
set.
• Up to 256 single-byte alphanumeric characters
can be entered.
Password : Input a password when using PPPoe protocol
connection. The entered password is masked by
"4".
00M1000EN.book 372 ページ 2004年11月24日 水曜日 午前7時56分
373
Using Wireless LAN
IP/DNS
aTap IP/DNS tab in Step 4 on P393 y Tap the desired item to set
up y Tap [Done] after setting
De
f
ault sett
i
ng Getting IP address automatically: $$ IP address: 0.0.0.0 Subnet mask: 0.0.0.0
Gateway: 0.0.0.0 Getting DNS address automatically: $$
Primary DNS address: 0.0.0.0 Secondary DNS address: 0.0.0.0
Getting IP address automatically
: Select when automatically assigning IP address
from network. IP address, subnet mask and gateway
need to be set up when there are not selected.
$$ for assigning IP address automatically, $$ for
non-assigning.
IP address : Set up IP address.
• Enter 0 to 255 for each block.
Subnet mask
: Setup subnet mask.
• Enter 0 to 255 for each block.
Gateway : Setup gateway address.
• Enter 0 to 255 for each block.
Getting DNS address automatically
: Select when automatically assigning DNS address
from network. Primary DNS and Secondary DNS
need to be set up when there are not selected.
$$ for assigning DNS address automatically, $$ for
non-assigning.
Primary DNS address:
: Setting primary DNS address.
• Enter 0 to 255 for each block.
Secondary DNS address:
: Setting secondary DNS address.
• Enter 0 to 255 for each block.
00M1000EN.book 373 ページ 2004年11月24日 水曜日 午前7時56分

374
Using Wireless LAN
Others
aTap Others tab in Step 4 on P393 y Tap the desired item field to
set up y Tap [Done] after setting
Info
aTap Info tab in Step 4 on P393 y Tap [Done] upon verifying
selection
De
f
ault sett
i
ng PPP compression: $$ Plaintext authentication: $$ Automatic VPN: $$ VPN policy: -
PPP Compression
: Select when PPP compressed connection is used
$$ for compressed connection, $$ for
uncompressed connection.
Plaintext authentication
: Select when authentication is performed without
encryption.
$$ for encryption $$ for non-encrypted connection.
Automatic VPN
: Select when automatically enabling VPN upon
establishment of connection.
$$ for valid, $$ for invalid.
VPN Policy
: Specify the VPN policy to use when automatic VPN
is $$.
Firmware version
: Confirm the firmware version.
MAC address : Confirm MAC (Media Access Control) address.
00M1000EN.book 374 ページ 2004年11月24日 水曜日 午前7時56分

375
Using Wireless LAN
Searching Available Access Points
Available access points can be searched and displayed as a list.
aTap $$ y $$ on Application Selector bar, and tap Connections tab
y WLAN AP Search in Control Panel screen
bTap [Refresh] and tap the desired access point in search result
screen
The previous search results will be displayed from the second
time onwards.
• Tap Details to check the access points details.
00M1000EN.book 375 ページ 2004年11月24日 水曜日 午前7時56分

00M1000EN.book 376 ページ 2004年11月24日 水曜日 午前7時56分

377
Movian VPN
VPN. . . . . . . . . . . . . . . . . . . . . . . . . . . . . . . . . . . . . . . . . . . . . . . . . . . . . . . . . . . 378
VPN Connection . . . . . . . . . . . . . . . . . . . . . . . . . . . . . . . . . . . . . . . . . . . . . . . . 384
Checking Connection Settings . . . . . . . . . . . . . . . . . . . . . . . . . . . . . . . . . . . . 385
00M1000EN.book 377 ページ 2004年11月24日 水曜日 午前7時56分
378
Movian VPN
VPN
VPN (Virtual Private Network) is a virtual dedicated line enabling secure connection to corporate
LAN via Internet from your FOMA handset. Data on VPN can be encrypted to prevent from
unauthorized access and spoofing.
A connection methods (64k Data/Packet/Wireless LAN) are supported from Internet enabled
FOMA handsets for VPN connection.
Illustration
00M1000EN.book 378 ページ 2004年11月24日 水曜日 午前7時56分

379
Movian VPN
Setting up VPN
Necessary setup procedures are performed for using VPN. The movianVPN applications are
used for setting up.
aTap $$ y $$ on the Application Selector bar y Tap movianVPN
bTap movianVPN y New Policy on the Menu bar
cTap the desired tab for setting
• See P403 to P405 to configure each tab setting.
1Menu bar
Tap movianVPN, Tools or About on the Menu bar to display the following items:
movianVPN
New Policy . . . . . . . . . . . . . . . . . . . . . . . . . . . . . . . . . . . . . . . . . . . . . . . . . . . . . . . . . . P400
Edit Policy . . . . . . . . . . . . . . . . . . . . . . . . . . . . . . . . . . . . . . . . . . . . . . . . . . . . . . . . . . . P400
Delet e Policy . . . . . . . . . . . . . . . . . . . . . . . . . . . . . . . . . . . . . . . . . . . . . . . . . . . . . . . . P406
Import Policy . . . . . . . . . . . . . . . . . . . . . . . . . . . . . . . . . . . . . . . . . . . . . . . . . . . . . . . . . P405
Tools
Ping. . . . . . . . . . . . . . . . . . . . . . . . . . . . . . . . . . . . . . . . . . . . . . . . . . . . . . . . . . . . . . . . P406
IKE log . . . . . . . . . . . . . . . . . . . . . . . . . . . . . . . . . . . . . . . . . . . . . . . . . . . . . . . . . . . . . P408
IPSec policy . . . . . . . . . . . . . . . . . . . . . . . . . . . . . . . . . . . . . . . . . . . . . . . . . . . . . . . . . P408
IPSec status . . . . . . . . . . . . . . . . . . . . . . . . . . . . . . . . . . . . . . . . . . . . . . . . . . . . . . . . . P409
IPSec packet statistic . . . . . . . . . . . . . . . . . . . . . . . . . . . . . . . . . . . . . . . . . . . . . . . . . . P410
Preferences . . . . . . . . . . . . . . . . . . . . . . . . . . . . . . . . . . . . . . . . . . . . . . . . . . . . . . . . . P410
About
1To edit registered policies
Tap the policy, and tap movianVPN y Edit Policy on the Menu
bar
Proceed to Step 3 as required.
00M1000EN.book 379 ページ 2004年11月24日 水曜日 午前7時56分
380
Movian VPN
movianVPN . . . . . . . . . . . . . . . . . . . . . . . . . . . . . . . . . . . . . . . . . . . . . . . . . . . . . . . . . .P402
License. . . . . . . . . . . . . . . . . . . . . . . . . . . . . . . . . . . . . . . . . . . . . . . . . . . . . . . . . . . . . .P402
Some items cannot be performed depending on the operation.
1About movianVPN
MovianVPN details can be viewed with the following operations.
Tap About y movianVPN on the Menu bar in the movianVPN Basic screen
1movianVPN license
MovianVPN license operation can be viewed.
Tap About y License in the movianVPN Basic screen
00M1000EN.book 380 ページ 2004年11月24日 水曜日 午前7時56分

381
Movian VPN
General
Contact your network administrator to obtain information necessary for setup.
aTap General tab in Step3 on P401 y Tap the desired input field and
enter the setting y Tap $$ after setting
• The screen is just an example. Displayed items vary depending
on the setting.
Policy Name
: Specify the Policy Name.
• Up to 30 single byte alphanumeric characters can
be entered.
Gateway Type
: Set up Gateway Server type for VPN connection.
Gateway Address
: Enter an address for Gateway Server.
• Up to 30 alphanumeric characters can be
entered.
Using Split Tunnel
: Select to use Tunnel connection. Entry of Subnet
Address and Subnet Mask are required in the Network
tab when selected.
$$ to use, $$ non-use.
DNS Search
: Select to search DNS Server.
$$ to search, $$ not to search.
Perfect Forward Secrecy
: Select to connect using Perfect Forward Secrecy.
$$ to use, $$ non-use.
Using Extended Authentification
: Select to connect using Extended Authentification.
$$ to use, $$ non-use.
SecurID : Set up available when Nortel Contivity Series is
selected in Gateway Type, and Extended
authentication is set to $$.
00M1000EN.book 381 ページ 2004年11月24日 水曜日 午前7時56分
382
Movian VPN
Account
Contact your network administrator for the following information.
aTap Account in Step3 on P401 y Tap the desired input field and
enter setting y Tap $$ after setting
• The screen is just an example. Displayed items vary depending
on the setting.
Username : Set Username.
• Up to 30 single byte alphanumeric
characters can be entered.
Group Name* : Set Group Name.
• Up to 30 single byte alphanumeric
characters can be entered.
User Password (Group Password*)
: Set User (Group) Password.
• Up to 40 single byte alphanumeric
characters can be entered.
IKE Group : Select data encryption group for VPN
connection.
IKE Encryption : Set data encryption for VPN connection.
IKE Hash : Select hash algorithm used for data
encryption.
IPSec Suite : Select data encryption setting.
SA Life time : Drag $$ to the right and left.
Set Security Association Life time.
• Life time can be set between 1 to 8 hours
by the hour.
• When Security Association becomes
disabled it logs off automatically, and log
in is required again.
*: Displays when Extended Authentication is set to $$ in the General tab.
00M1000EN.book 382 ページ 2004年11月24日 水曜日 午前7時56分

383
Movian VPN
Network
Contact your network administrator for the required information;
• Setup is enabled only when DNS Search is set to $$ or Using Split Tunnel is set to $$ in the General tab.
aTap the Network tab in Step3 on P401 y Tap the desired input field
and enter setting y Tap $$ after setting
Importing Policy
The policy can be imported when the Import Policy file (File name vpolimp.sis) is pre-installed for
this function.
• On how to install the Import Policy file 3 P268
aTap movianVPN y Import Policy on the Menu bar in movian VPN
Basic screen y Tap [Yes] on the import confirm screen
• Tap [No] to cancel the import.
Deleting Policies
aTap the policy you wish to delete in movianVPN Basic screen y
Tap movianVPN y Delete Policy on the Menu bar y Tap [Yes] on the
delete confirm screen
• Tap [No] to cancel the deletion.
• The screen is just an example. Displayed items vary depending
on the setting.
Primary DNS : Enter an address for DNS server.
• You can input digits (0 to 255) between
delimiters.
Secondary DNS : Enter an IP address for Secondary DNS
Server
• You can input digits (0 to 255) between
delimiters.
Subnet Address* : Enter a Subnet Address.
• You can input digits (0 to 255) between
delimiters.
Subnet Mask* : Enter the Subnet Mask.
• You can input digits (0 to 255) between
delimiters.
*: Displays if the Using Split Tunnel is set to $$ in the General tab.
00M1000EN.book 383 ページ 2004年11月24日 水曜日 午前7時56分

384
Movian VPN
Checking the Configured Connection
You can check responses from the connected destination with the configured setup.
aTap the policy to check the connection in the movianVPN Home
screen y Tap Tool y Ping on the Menu bar
bTap Host and enter the Domain Name or IP address of the server
that you wish to connect to
1When Timeout or Unknown Host are displayed
Check common settings for VPN connection (64K Data Connection 3 P185, Packet
Connection 3 P185, Wireless LAN 3 P392)
VPN Connection
VPN connection with configured policy.
Host : Enter Domain Name or IP address that you wish to
connect to.
• You can input up to 40 single byte alphanumeric
characters or (0~255) in each of the
XXX.XXX.XXX.XXX format.
Success : <Time> : Displays if it succeeds.
Timeout : <Time>
Displays if no response from server.
Unknown Host : <Host Name>
Displays if Host cannot be found.
VPN connection requires appropriate settings of VPN setup (3p400), 64K Data
connection (3P185), Packet Connection (3P185) and Wireless LAN (3P392).
00M1000EN.book 384 ページ 2004年11月24日 水曜日 午前7時56分

385
Movian VPN
aTap [login] in movianVPN Basic screen
1When it is not connected to the Internet
Displays following message. See "Connect to the Internet to view a website" (3 P193).
1When it prompts authentication
Displays following message. Enter Username and Reply (Password) provided by your network
administrator. Then tap [Done].
Checking Connection Settings
IKE Log
Displays the latest information (IKE Protocol transaction information) between the user and VPN
Gateway Server. The information is deleted if logged in again.
1To Disconnect VPN connection
Tap [Logout]
00M1000EN.book 385 ページ 2004年11月24日 水曜日 午前7時56分
386
Movian VPN
aTap Tools y IKE log on the Menu bar in movianVPN Basic screen
y Tap [Done] after confirmation
IPSec Policy
Displays the latest information (Encrypted IP Subnet address) between the user and VPN
Gateway Server.
aTap Tools y IPSec Policy on the Menu bar in movianVPN Basic
screen y Tap [Done] after confirmation
Data is encrypted
Data is not encrypted
00M1000EN.book 386 ページ 2004年11月24日 水曜日 午前7時56分

387
Movian VPN
IPSec Status
Displays status of VPN connection or the information of users and VPN Gateway Server.
aTap Tool s y IPSec Status on the Menu bar in movianVPN Basic
screen y Tap [Done] after confirmation
IPSec Packet Statistics
Displays number of packets when encrypted connection is used in VPN connection. Note that it
is not valid once it is disconnected.
Gateway IP Address : Displays IP address of VPN Gateway
Server.
Your public IP Address
: Displays your IP address supplied by
the Internet service provider.
Your private IP Address
: Displays an IP address in the VPN
network connection.
NAT Port : Displays whether the network address
transport (NAT) is valid.
Split Tunneling : Displays whether Split Tunneling is
valid.
Encryption Suite : Displays the type of encryption for the
connection.
Primary DNS : Displays address for DNS Server.
Secondary DNS : Displays address for Secondary DNS
Server.
SA Life time : Displays security association life time.
00M1000EN.book 387 ページ 2004年11月24日 水曜日 午前7時56分
388
Movian VPN
aTap Tools y IPSec Packet Statistics on the Menu bar in movianVPN
Basic screen y Tap Done [Done] after confirmation
Setting Number of Retry and Timeout
You can set the number of retry and timeout duration.
aTap Tools y IP Packet Statistics on the Menu bar in movianVPN
Basic screen
bTap the desired input field and enter settings y Tap [Done]
Tx encrypted : Displays number of encrypted packets
sent.
Tx bypassed : Displays number of sent packets that
bypassed the encryption.
Tx dropped : Displays number of dropped packets
sent.
Tx error : Displays number of failed packet sent.
Rx decrypted : Displays number of decrypted packets
received.
Rx bypassed : Displays number of received packets
that bypassed the decryption.
Rx dropped : Displays number of dropped receiving
packets.
Rx error : Displays number of packets failed to
receive.
• Tap Clear to set all values to "0".
D
e
f
au
l
t sett
i
ng Socket connection retry:2 Socket Timeout:4seconds
Socket connection retry
: Set maximum number of retry between
1 to 5 time(s).
Socket Timeout : Set the session timeout (duration to
determine the connection failure)
between 1 to 8 second(s).
• Tap [Cancel] to discontinue configuration.
00M1000EN.book 388 ページ 2004年11月24日 水曜日 午前7時56分
Exhibit 8C Users Manual

APPLICANT: MOTOROLA, INC. FCC ID: IHDT6EY1
INSTRUCTION MANUAL
A preliminary draft copy of the Users Manual follows in four parts (Exhibit 8A through Exhibit 8D):
EXHIBIT 8C

255
Displaying/Editing/
Managing Data
Displaying a Stored Image . . . . . . . . . . . . . . . . . . . . . . . . . . . . . . . . . . . . . . . . 256
Editing an Image . . . . . . . . . . . . . . . . . . . . . . . . . . . . . . . . . . . . . . . . . . . . . . . . 260
Playing a Stored Video . . . . . . . . . . . . . . . . . . . . . . . . . . . . . . . . . . . . . . . . . . . 262
Playing a Stored Music. . . . . . . . . . . . . . . . . . . . . . . . . . . . . . . . . . . . . . . . . . . 266
Displaying Word, Excel and PDF Files . . . . . . . . . . . . . . . . . . . . . . . . . . . . . . 270
TransFlash Memory Card . . . . . . . . . . . . . . . . . . . . . . . . . . . . . . . . . . . . . . . . . 277
Using the TransFlash Memory Card . . . . . . . . . . . . . . . . . . . . . . . . . . . . . . . . 281
Managing Files . . . . . . . . . . . . . . . . . . . . . . . . . . . . . . . . . . . . . . . . . . . . . . . . . 282
Using the Voice Recorder. . . . . . . . . . . . . . . . . . . . . . . . . . . . . . . . . . . . . . . . . 290
1Utilizing a Still Image
1Utilizing a Video Clip
1Utilizing Music
1Utilizing the Document Viewer
1Utilizing the TransFlash Memory Card
1Managing Data
1Utilizing the Voice Recorder
00M1000EN.book 255 ページ 2004年11月24日 水曜日 午前7時56分

256
Displaying/Editing/Managing Data
Displaying a Stored Image
You can display a captured still image (3 P169), a downloaded still image (3 P203), an image
received via email (3 P250), or an image saved in the TransFlash memory card (3 P303).
• Displays the following files.
aTap $$ y $$ on the Application Selector bar
bTap the image to be displayed
1Operations from the Menu bar in the image list screen
Tap Pictures and Settings on the Menu bar to display the following items:
• Some functions cannot be performed depending on the operation.
JPEG (.jpg, .jpeg, .jfif, .jpe, .pipeg, .pip) GIF (including animation GIF) bitmap (.bmp)
w-bitmap (.XXX) png (.png)
$$ : Launches camera when tapped.
• The display can be modified to a list display. 3 P275
$$ : The camera is launched when tapped.
$$ $$ : The preceding image/subsequent image can be
displayed when tapped.
File name, saved date and time
Pictures
View Slide show . . . . . . . . . . . . . . . P276
Image infor . . . . . . . . . . . . . . . . . . . P275
Settings
Slide show interval. . . . . . . . . . . . . .P276
List/Thumbnail . . . . . . . . . . . . . . . . .P275
Sort by name . . . . . . . . . . . . . . . . . .P309
Sort by date . . . . . . . . . . . . . . . . . . .P309
Sort by size . . . . . . . . . . . . . . . . . . .P309
00M1000EN.book 256 ページ 2004年11月24日 水曜日 午前7時56分

257
Displaying/Editing/Managing Data
1Operations from the Menu bar in the image display screen
Tap Pictures and Edit on the Menu bar to display the following items:
• Some functions cannot be performed depending on the operation.
NOTE
• When an image exceeding the display size 1280 x 1280 (dots), an incompatible file format ($$) or a corrupted
file ($$) is tapped, the image cannot be displayed and instead, a message is displayed.
Modifying the Display Method of the Image List Screen
]
aTap Settings y List on the Menu bar in the image list screen
• Tap Settings y Thumbnail on the Menu bar in the image list screen when displaying
thumbnails.
Displaying Image Information
This operation displays the information of the displayed image.
Pictures
Send as. . . . . . . . . . . . . . . . . . . . . . P310
Delete . . . . . . . . . . . . . . . . . . . . . . . P308
Image info . . . . . . . . . . . . . . . . . . . . P275
Rename . . . . . . . . . . . . . . . . . . . . . P304
Fit to screen . . . . . . . . . . . . . . . . . . P277
Actual size view . . . . . . . . . . . . . . . P277
Edit
Show title/Hide title. . . . . . . . . . . . . P277
Rotate. . . . . . . . . . . . . . . . . . . . . . . P278
Add frame. . . . . . . . . . . . . . . . . . . . P279
Free draw . . . . . . . . . . . . . . . . . . . . P279
Add stamp . . . . . . . . . . . . . . . . . . . P280
De
f
ault sett
i
ng Thumbnail
Thumbnail Display List Display
00M1000EN.book 257 ページ 2004年11月24日 水曜日 午前7時56分
258
Displaying/Editing/Managing Data
aSelect the image to display the image information from the
image list screen with the 9 button and tap Pictures y Image info
on the Menu bar
Viewing a Slide show
Displays images in the folder from the selected file.
aSelect the image to start the slide show from the image list
screen with the 7 button y tap Pictures y View Slide show on the
Menu bar
Slide show launches.
• When the slide show is played in Automatic mode, the slides are automatically switched
at intervals set in Slideshow Intervals.
• When the slide show is played in Manual mode, the slides are switched by pressing the
6 button.
• When an any area on the screen is tapped, the slide show is canceled and reverted back
to the list screen.
NOTE
• Images that cannot be displayed such as animation GIF files are skipped when the slide show is played.
Setting up the Playback Method and Intervals of the Slide show
Setting up the playback method (Automatic/Manual), and playback intervals when automatically
playing the slide show.
File name : Displays file name.
Type : Displays file format.
Size : Displays file size.
Dimensions : Displays display size.
Date : Displays saved date.
Time : Displays saved time.
D
e
f
au
l
t sett
i
ng Auto: $$ Manual: $$ Interval: 3 seconds
00M1000EN.book 258 ページ 2004年11月24日 水曜日 午前7時56分

259
Displaying/Editing/Managing Data
aTap Settings y Slide show interval on the Menu bar in the image list
screen, and then tap [Done] upon completing the setup
procedure
NOTE
• Text entry method 3 P466
Modifying the Display Size of Images
The display size of the displayed image is modified.
aTap Picture y Fit to screen/Actuall size view on the Menu bar in the
image display screen
NOTE
• A similar operation can be performed by tapping any area within the screen.
Displaying the Image Title
Displays Title in the Image Display Screen
aTap Edit y Show title on the Menu bar in the image display screen
• Tap Edit y Hide title on the Menu bar to hide the title
$$ Auto : Select when playing by automatically switching
screens.
$$ Manual : Select when manually playing and switching
screens.
$$ Intervals : Select intervals of slides when viewing the slide
show in automatic mode.
Fit to screen : Image is enlarged/reduced to fit the display area of the screen and
displayed.
Actual size view: Displays image in full size.
To view an image larger than the display area of the screen, drag the
stylus to the direction of the hidden area.
00M1000EN.book 259 ページ 2004年11月24日 水曜日 午前7時56分

260
Displaying/Editing/Managing Data
Editing an Image
You can freely edit the displayed image by overlapping frames and stamps, etc.
The edited image is saved in the same folder as the source image.
* Excluding cases where the source image is a JPEG file and Rotated.
• Images exceeding the display size 1280 x 1280 (dots) cannot be edited.
1Edited Image File
The edited image file is saved in the following respective manners depending on the file
format of the source image file or the editing method.
NOTE
• When images exceeding the display size 204 x 155 (dots) are edited and saved, they are saved after being
reduced (excluding Rotate) to the display size 204 x 155 (dots).
Source Image File Format Editing Method Edited Image File
JPEG Rotate The edited file is saved over the source image
file.
Other Methods The edited file is saved as a new image file.
•An EDTX extension (X is a digit between 0
and 100) is suffixed to the source image file
name.
Other than JPEG Rotate The edited file is saved as a new image file
(JPEG file).
• The new file name is "original name".jpg.
When an identical file name already exists,
however, a ROTX extension (X is a digit
between 0 and 100) is suffixed to the file
name.
Other Methods The edited file is saved as a new image file
(JPEG file).
• The new file name is "original name".jpg.
When an identical file name already exists,
however, an EDTX extension (X is a digit
between 0 and 100) is suffixed to the file
name.
00M1000EN.book 260 ページ 2004年11月24日 水曜日 午前7時56分

261
Displaying/Editing/Managing Data
Rotating an Image
aTap Edit y Rotate on the Menu bar in the image display screen
Overlapping Frames
aTap Edit y Add frame on the Menu bar in the image display screen
bTap the frame to overlap y tap [Done]
The screen is rotated 90 degrees to the right.
• Tap [Cancel] to cancel the operation.
The frame can be selected.
00M1000EN.book 261 ページ 2004年11月24日 水曜日 午前7時56分

262
Displaying/Editing/Managing Data
Decorating an Image by Hand
You can decorate an image using the stylus pen.
aTap Edit y Free draw on the Menu bar in the image display screen
bUse the stylus to decorate an image y tap [Done]
Pasting a Marker Stamp
aTap Edit y Add stamp on the Menu bar in the image display screen
bTap the stamp to be pasted y tap [Done]
Playing a Stored Video
Displays captured video (3 P170), a downloaded video (3P203), a video received via email (3
P250), or a video saved in the TransFlash memory card (3 P303).
• Video formats that can be played 3 P283
• Tap [Undo] to undone a previous decoration can be undone by.
• Tap [Cancel] to cancel saving.
The freehand color can be selected.
• Tap [Undo] to undone a previous stamp.
• Tap [Cancel] to cancel saving.
You can select the stamp.
00M1000EN.book 262 ページ 2004年11月24日 水曜日 午前7時56分
263
Displaying/Editing/Managing Data
aTap $$ y $$ on the Application Selector bar
bTap the video to be played
1Operations from the Menu bar in the video list screen
Tap Video or Edit on the Menu bar to display the following items:
• Some functions cannot be performed depending on the operation.
1Operations from the Menu bar in the image display screen
Tap Video or Edit on the Menu bar to display the following items:
• Some functions cannot be performed depending on the operation.
$$ : The camera is launched when tapped.
Playback bar
: Displays current playback position.
Playback volume display
: Displays playback volume in 8 levels.
$$/$$ : Plays or pauses video when tapped.
$$ : Cancels playback when tapped.
$$ : Launches camera when tapped.
$$/$$ : Controls volume when tapped.
$$ : Returns to video list.
Video
Find. . . . . . . . . . . . . . . . . . . . . . . . . P282
Edit
Sort by title . . . . . . . . . . . . . . . . . . . P309
Sort by date . . . . . . . . . . . . . . . . . . P309
Sort by size . . . . . . . . . . . . . . . . . . P309
Sort by type . . . . . . . . . . . . . . . . . . P309
Video
Send as. . . . . . . . . . . . . . . . . . . . . . P310
Rename . . . . . . . . . . . . . . . . . . . . . P304
Clip info. . . . . . . . . . . . . . . . . . . . . . P284
Delete . . . . . . . . . . . . . . . . . . . . . . . P308
Edit
Copy . . . . . . . . . . . . . . . . . . . . . . . . P305
Full screen . . . . . . . . . . . . . . . . . . . P309
00M1000EN.book 263 ページ 2004年11月24日 水曜日 午前7時56分
264
Displaying/Editing/Managing Data
1Specifications of video playback
Repeating a Video Playback
aTap Video y Repeat on the Menu bar in the video playback screen
Searching a Video
aTap Video y Find on the Menu bar in the video list screen
bEnter the text to search y tap [Find]
cTap video to play
File Format 3GPP, MP4, WMV, ASF
Encoding Format Video MPEG4/H.263/WMV
Voice AMR/AAC/WMAv8
Display Size XXX x XXX (dots) or less
Extensions .3gp, .mp4, .wmv, .asf
• Tap [Cancel] to cancel the operation.
00M1000EN.book 264 ページ 2004年11月24日 水曜日 午前7時56分

265
Displaying/Editing/Managing Data
Modifying the Video Quality
aTap Edit y Preferences on the Menu bar in the video list screen,
and then tap the Video Quality window in the user setup screen
bSelect Video Quality y Tap [Done]
Modifying the Display Size of the Video
You can modify the display size of the video during playback.
• This operation cannot be performed when video is stopped.
aTap Edit y Full screen on the Menu bar in the video playback
screen
De
f
ault sett
i
ng High
High : Best quality mode.
Medium : Standard quality.
Low : Low quality; image is grainy.
• Reverts to the original display by tapping any area within the
screen.
00M1000EN.book 265 ページ 2004年11月24日 水曜日 午前7時56分

266
Displaying/Editing/Managing Data
Displaying the Video Information
Displays the video information.
aTap Video y Clip info on the Menu bar in the video playback screen
y tap [Done] after confirmation
Playing a Stored Music
Downloaded music is played back.
• The following audio file formats can be played back.
aTap $$y$$ on the Application Selector bar
Title : Displays title.
Author : Displays information of the author of the file.
Performer : Displays performers.
Copyright : Displays copyright information of the file.
Size : Displays file size.
Created Date and Time
: Displays created date and time of the file.
Description : Displays file description.
MP3 (.mp3) MIDI (.smf) WAV (.wav)
AMR ( ) 3GA ( ) AU ( )
XMF ( ) MMA ( ) WMA (.wma)
$$/$$ : Controls the volume when tapped.
$$ : Switches screen to the audio playback screen when
tapped.
$$ : Switches screen to the audio playlist screen when
tapped.
00M1000EN.book 266 ページ 2004年11月24日 水曜日 午前7時56分

267
Displaying/Editing/Managing Data
bTap the music to be played
1Operations from the Menu bar in the audio playlist screen
Tap Music or Edit on the Menu bar to display the following items:
• Some functions cannot be performed depending on the operation.
]
1Operations from the Menu bar in the audio playback screen
Tap Music or Edit on the Menu bar to display following items:
• Some functions cannot be performed depending on the operation.
Playing Music on Repeat/at Random
The same audio track can be played repeatedly or multiple audio tracks can be played randomly.
aTap Music y Repeat/Shuffle on the Menu bar in the audio playback
screen
• To cancel Repeat/Shuffle, tap Music y Repeat/Shuffle again.
Playing Music in Order of Preference
The audio tracks can be played in order of preference. The audio tracks are played from the top
of the playlist down to the bottom.
Playback bar : Displays current playback position.
Playback Volume Display
: Displays playback volume in 8 levels.
$$/$$ : Plays or cancels audio track when tapped.
$$ : Stops audio track when tapped.
$$ : Rewinds audio track when tapped.
$$ : Fast forwards audio track when tapped.
Music
Find. . . . . . . . . . . . . . . . . . . . . . . . . P287
Repeat . . . . . . . . . . . . . . . . . . . . . . P286
Edit
Sort by name . . . . . . . . . . . . . . . . . P309
Sort by date . . . . . . . . . . . . . . . . . . P309
Sort by size . . . . . . . . . . . . . . . . . . P309
Sort by type . . . . . . . . . . . . . . . . . . P309
Zoom . . . . . . . . . . . . . . . . . . . . . . . P141
Preferences . . . . . . . . . . . . . . . . . . P288
Music
Find. . . . . . . . . . . . . . . . . . . . . . . . . P287
Repeat . . . . . . . . . . . . . . . . . . . . . Below
Shuffle. . . . . . . . . . . . . . . . . . . . . . Below
Edit
Edit playlist . . . . . . . . . . . . . . . . . . .Below
Zoom . . . . . . . . . . . . . . . . . . . . . . . P141
Preferences . . . . . . . . . . . . . . . . . . P288
00M1000EN.book 267 ページ 2004年11月24日 水曜日 午前7時56分
268
Displaying/Editing/Managing Data
aTap Music y Edit y Edit playlist on the Menu bar in the audio
playback screen
bSelect the song to be moved using 7 y $$ to the desired
position or tap $$ y tap [Done]
• To move the song further up or further down, repeat the operation up to tapping [Done].
Searching Music
Enter text and search from the stored music archive.
aTap Music y Find on the Menu bar in the audio playback screen
bEnter the text to be searched y tap [Find]
cTap the music to be played
$$ : Moves up the order of the selected audio track in the
playlist.
$$ : Moves down the order of the selected audio track in the
playlist.
• Tap [Cancel] to cancel the operation.
• Tap [Cancel] to cancel the operation.
00M1000EN.book 268 ページ 2004年11月24日 水曜日 午前7時56分

269
Displaying/Editing/Managing Data
Displaying Audio Information
The audio track information is displayed while playing back.
aTap the song for which the information is displayed in the audio
playlist screen y tap $$ after confirmation
1Operations from the Menu bar in the audio information screen
Tap Music or Edit on the Menu bar to display the following items:
Some functions cannot be performed depending on the operation.
Displaying Music by Selecting the Audio File Type
Displays audio of the supported file type by selecting the audio file type.
aTap Edit y Preferences on the Menu bar in the audio playlist screen
bSelect $$ of the file type to display and then tap [Done]
Title : Displays title.
Artist : Displays artist name.
Album : Displayed album name.
Author : Displays author.
Elapsed Time/Recorded Time
: Displays elapsed time/recorded time.
Size (KB) : Displays file size.
Filename : Displays file name.
Copyright : Displays copyright information.
Music
Rename . . . . . . . . . . . . . . . . . . . . . P304
Send as. . . . . . . . . . . . . . . . . . . . . . P310
Repeat . . . . . . . . . . . . . . . . . . . . . . P286
Delete . . . . . . . . . . . . . . . . . . . . . . . P308
Edit
Copy . . . . . . . . . . . . . . . . . . . . . . . . P305
• Tap [Cancel] to cancel the operation.
00M1000EN.book 269 ページ 2004年11月24日 水曜日 午前7時56分
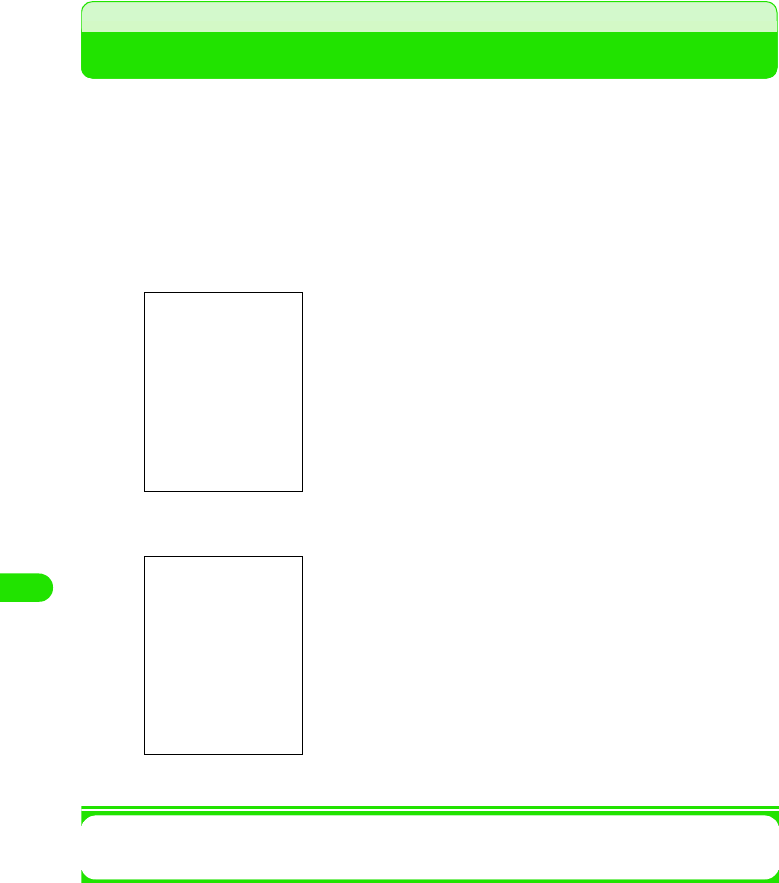
270
Displaying/Editing/Managing Data
Displaying Word, Excel and PDF Files
You can display Word, Excel and image files, etc.
• You can display the following file formats.
aTap $$ y $$ on the Application Selector bar
bTap the file to display
1To close a document file
Tap Document y Close on the Menu bar in the document file list screen
Microsoft Word (.doc) Microsoft Excel (.xls) Microsoft Power Point (.ppt)
PDF (.pdf) HTML (.html) Mhtml (.mht)
JPEG (.jpg, .jpeg) PNG (.png) GIF (.gif)
BMP (.bmp) Wmf (.wmf) Plain Text (.txt)
Zip (.zip)
Drag towards the desired direction.
Tap the icon to perform various operations. 3 P290 to P292
Displayed vertically
00M1000EN.book 270 ページ 2004年11月24日 水曜日 午前7時56分

271
Displaying/Editing/Managing Data
1Operations from the Menu bar in the document file list screen
Tap Documents or Edit on the Menu bar to display the following items:
• Some functions cannot be performed depending on the operation.
1Operations from the Menu bar in the document file display screen
Tap Documents or Edit on the Menu bar to display the following items:
• Some functions cannot be performed depending on the operation.
1About Help
Displays a simple operation manual file of the document viewer when Edit y Help on the
Menu bar are tapped in the document file list screen/display screen.
NOTE
• To view a file, it may take some time depending on the file size. Also, the entire content of the file may not
be displayed.
• Content unique to PC's may not be displayed depending on the file content.
• Some font types may not be displayed correctly. Fonts that can be displayed on the handsets are dissimilar
to those that can be displayed on PC's.
Enlarging/Reducing the Screen
aTap $$/$$
• Repeat this operation when further enlarging or further reducing.
Fitting to Screen and Displaying
aTap $$ in the document file display screen
• If $$ is selected, then the screen does not toggle when tapped.
Documents
History . . . . . . . . . . . . . . . . . . . . . . P294
Bookmarks . . . . . . . . . . . . . . . . . . . P293
Close. . . . . . . . . . . . . . . . . . . . . . . . P289
Edit
View as Icons . . . . . . . . . . . . . . . . . P292
View as List . . . . . . . . . . . . . . . . . . P292
Sort by Name . . . . . . . . . . . . . . . . . P309
Sort by Date . . . . . . . . . . . . . . . . . . P309
Preferences . . . . . . . . . . . . . . . . . . P295
Help . . . . . . . . . . . . . . . . . . . . See below
Document
Send as. . . . . . . . . . . . . . . . . . . . . . P310
Delete . . . . . . . . . . . . . . . . . . . . . . . P308
Rename . . . . . . . . . . . . . . . . . . . . . P304
History . . . . . . . . . . . . . . . . . . . . . . P294
Bookmarks . . . . . . . . . . . . . . . . . . . P293
Add Bookmark . . . . . . . . . . . . . . . . P293
Edit
Priority . . . . . . . . . . . . . . . . . . . . . . P295
Help . . . . . . . . . . . . . . . . . . . . See below
00M1000EN.book 271 ページ 2004年11月24日 水曜日 午前7時56分

272
Displaying/Editing/Managing Data
Fitting to Screen Width and Displaying
aTap $$ in the document file display screen
• If $$ is selected, then the screen does not toggle when tapped.
Resizing the Displayed Portion to the Size of the Screen
aTap $$ in the document file display screen
Switching to Full Screen Display
aTap $$ in the document file display screen
Switching between Vertical Display/Horizontal Display
aTap $$ in the document file display screen
• Tap $$ again to revert back to the original screen.
• Tap $$ again to revert back to the original screen.
00M1000EN.book 272 ページ 2004年11月24日 水曜日 午前7時56分
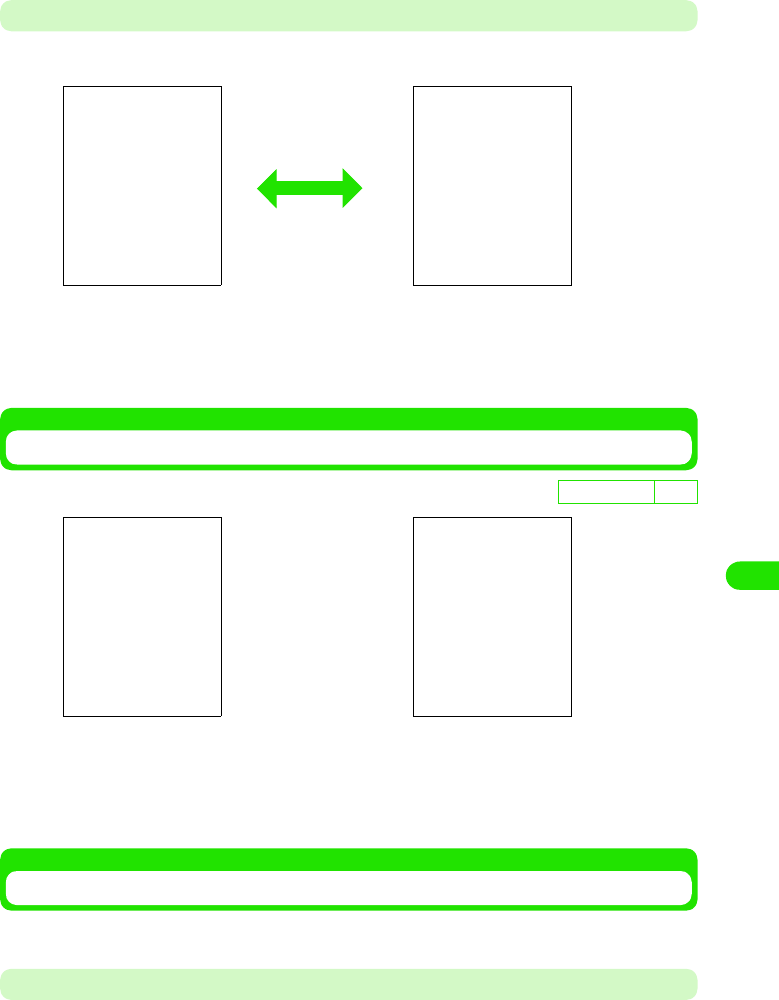
273
Displaying/Editing/Managing Data
Displaying Popup Screen
aTap $$ in the document file display screen
You can verify the displayed portion using the full screen display.
To Scroll, drag the screen.
Displays the preceding/subsequent page of the current file when tapped.
Displays the first/last page of the current file when tapped.
• Tap $$ one more time to hide the popup menu.
Modifying the Display Method of the Document File List Screen
aTap Edit y View as Icons/View as List on the Menu bar in the
document file list screen
Using the Bookmark
You can register frequently used document files for quick displaying.
Adding to Bookmark
• You can register up to XXX bookmarks.
D
e
f
au
l
t sett
i
ng XXX
List View Icon View
00M1000EN.book 273 ページ 2004年11月24日 水曜日 午前7時56分

274
Displaying/Editing/Managing Data
aTap Documents y Add Bookmark on the Menu bar in the document
file display screen
bEnter bookmark name y tap [Add]
Displaying from Bookmark
aTap Documents y Bookmarks on the Menu bar in the document file
display screen
bTap the bookmark to display
Deleting a Bookmark
aTap $$ of the bookmark to delete in the bookmark list screen
$$ switches to $$.
bTap Documents y Delete on the Menu bar
Modifying the Bookmark Name
aTap $$ of bookmark name to be modified in the bookmark list
screen
$$ switches to $$.
bTap Documents y Rename on the Menu bar, and then enter the new
name from the modify bookmark name screen y tap OK
• Tap [Cancel] to cancel the operation.
00M1000EN.book 274 ページ 2004年11月24日 水曜日 午前7時56分
275
Displaying/Editing/Managing Data
• You can enter up to XX characters of text in either single or double byte characters.
• Tap [Cancel] to cancel the operation.
Modifying the Display Order in the Bookmark List Screen
aTap Edit y Sort Order on the Menu bar in the bookmark list
screen
NOTE
• The files are sorted in the following order when Sort by Name is selected.
Kanji (JIS Code order) 3 Hiragana 3 Katakana*1 3 Single byte Katakana 3 Double byte
Alphabet*2 3 Single byte Alphabet*2 3 Double byte Numerals 3 Single byte Numerals 3
Symbols (JIS Code order)
Displaying Document Files from History
Documents and files are displayed from history.
aTap Documents y History from the Menu bar in the document file
list screen
bTap the file to display
Setting up the Preferences of the Document Viewer
You can set preferences for the document files.
aTap Edit y Preferences on the Menu bar in the file list screen
To perform the following setups, tap the relevant tabs as necessary.
De
f
ault sett
i
ng Sorted by XXX
Sort by Name : Sort files by alphabetical order of file names.
Sort by Date : Sort files by date saved in reverse chronological order.
*1: When Hiragana and Katakana are intermingled, alphabetical order is given priority (e.g. あアいイ).
*2: When lower case and upper case characters are intermingled, the lower case is given priority as well
as alphabetical order (e.g. aAbB).
• Tap [Clear] to clear history.
00M1000EN.book 275 ページ 2004年11月24日 水曜日 午前7時56分

276
Displaying/Editing/Managing Data
1Preferences Tab
1Files Tab
1About Tab
bSetup each function y tap [OK]
Setup is saved.
• Tap [Cancel] to cancel saving.
Page flick : Set up to allow or disallow scrolling in the
document file display screen using a stylus.
Shows $$ when allowed, and shows $$ when
disallowed.
Show picture : Set up to allow or disallow displaying of images
in the document file display screen.
Shows $$ when allowed, and shows $$ when
disallowed.
Reflow text : You can switch and display the file content
display between S, M, and L depending on the
file type displayed.
Keep for : Set up number of days to save history.
• Any number between 0 and 30 can be used
for setup.
Clear history : Clear history by selecting Ye s . Store history for
the number of days specified in Keep for by
selecting No.
You can place a $$ to select the file types to be supported by the
document viewer.
Displays version information of the document viewer.
00M1000EN.book 276 ページ 2004年11月24日 水曜日 午前7時56分

277
Displaying/Editing/Managing Data
TransFlash Memory Card
You can mount the TransFlash memory card to the FOMA handset and use it as an external
memory. The TransFlash memory card is one of the most compact, light, detachable external
memory media with a large memory capacity. It can be used with SD memory compatible PC's
and printers when the accompanying conversion adaptor is used together.
• You can purchase the TransFlash memory card and the TransFlash memory card adaptor from home electric
appliance stores. The M1000 supports TransFlash memory cards up to XX bytes. (As of XXX 2005)
Cautions When Using the TransFlash Memory Card
Installation/Removal of the TransFlash Memory Card
• Do not install or remove the TransFlash memory card while the power of the FOMA handset is switched on.
* Perform after removing the battery pack or the rear cover of the battery pack. 3 P52
• TransFlash memory cards formatted with other devices such
as PC's may not function properly. Always use the M1000 to
format the memory cards.
• The TransFlash memory card may become deformed from
accidents and failures. It is advised to keep a backup of
important data. NTT DoCoMo does not assume responsibility
for any damages caused by the loss or alteration of data.
• Do not shut off the power of the FOMA handset while reading
or writing data.
• Do not place labels or stickers on the handset. The thickness
of such material is enough to be a possible cause of electrical
contact failure or data corruption.
• Place the memory card inside the accompanying case when
carrying or storing.
• Do not touch the metal terminal by hands or metal objects.
• Do not subject to high impact, bend, drop or wet the memory
card.
• Refrain from use or storage in the following areas.
- Inside the car or other locations subject to high temperature
- Locations exposed to direct sunlight
- High humidity locations or locations with corrosive material
- Locations under the influence of substantial static electricity or
electrical noise
00M1000EN.book 277 ページ 2004年11月24日 水曜日 午前7時56分

278
Displaying/Editing/Managing Data
Installation
Removal
NOTE
• Check the correct direction of the TransFlash memory card, and close the cover after firmly installing it. The
card may get damaged.
aSlide the cover of the TransFlash memory card in the direction
of Arrow a and lift it towards the direction of Arrow b
bInstall the TransFlash memory card
cBring down the cover of the TransFlash memory card in the
direction of Arrow a and slide it towards the direction of
Arrow b
aPerform the same operation as Step 1 of Installation
bRemove the TransFlash memory card
cPerform the same operation as Step 3 of Installation
00M1000EN.book 278 ページ 2004年11月24日 水曜日 午前7時56分

279
Displaying/Editing/Managing Data
Mounting the TransFlash Memory Card to the Adapter
Mount the TransFlash memory card to the TransFlash memory card adapter when using it with a
PC that supports SD memory cards.
• Check the correct direction to insert when using the card. An incorrect use of the card may cause the device
to be damaged.
NOTE
• Writing and formatting cannot be performed when the write-protect switch of the TransFlash memory card
adapter is set to the LOCK side.
Folder Structure of the TransFlash Memory Card
1When displaying it on a FOMA handset
1When displaying it on a PC
When writing a file on to the TransFlash memory card from a FOMA handset, the following
folder is created within the TransFlash memory card and saved inside the folder. The
following folder structure needs to be created when saving a file from a PC to the TransFlash
memory card.
aInsert the TransFlash memory card firmly to the
TransFlash memory card adapter
• Pull the memory card in the reverse direction when removing.
You can display the file content of the TransFlash memory card
using the memory manager. 3 P310
00M1000EN.book 279 ページ 2004年11月24日 水曜日 午前7時56分
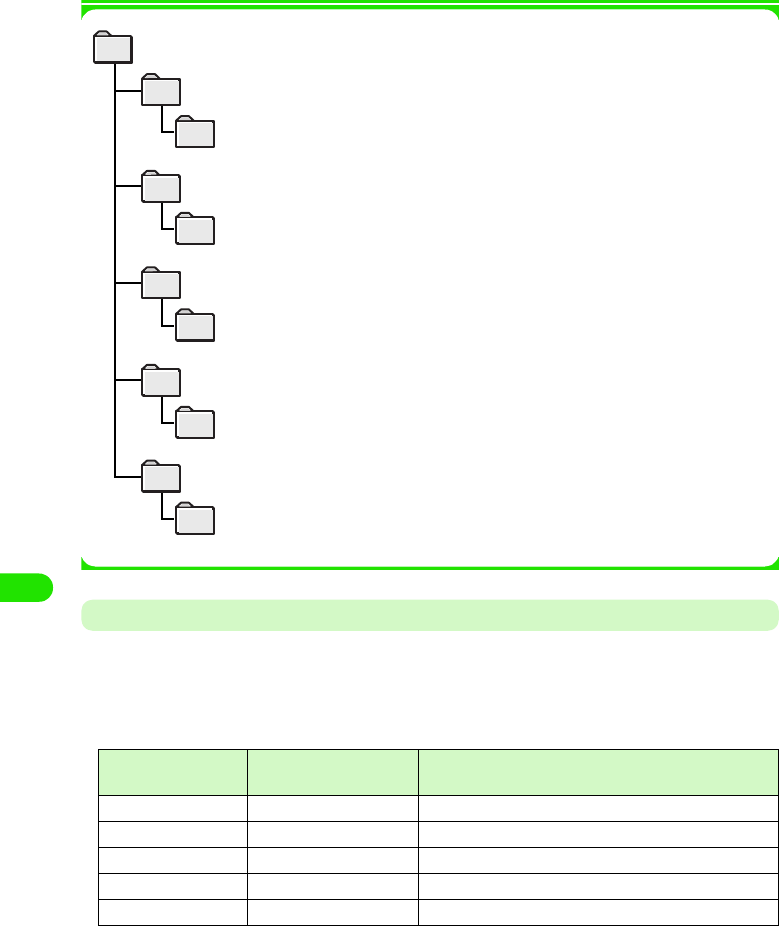
280
Displaying/Editing/Managing Data
Number of Files That Can Be Saved on the TransFlash Memory Card
The maximum number of files that can be saved or added to a single folder (on a 32MB
TransFlash memory card) is described below.
• The number of files that can be saved varies depending on the capacity of the TransFlash memory card.
• Although you can verify the remaining memory capacity using the memory manager (3 P310), the displayed
memory capacity is lower than the actual memory capacity shown on the TransFlash memory card.
Folder Name Maximum Number of
Files
Maximum Number of Files That Can Be Saved to a
Single Folder
Audio XXXX files XXXX files
Video XXXX files XXXX files
Image XXXX files XXXX files
Document XXXX files XXXX files
Other XXXX files XXXX files
Media file
audio folder...................................
unfiled folder.........................
folder for saving audio track files
folder for saving audio track files saved on the
FOMA handset
document folder...........................
unfiled folder..........................
folder for saving document files
folder for saving document files saved on the
FOMA handset
image folder..................................
unfiled folder..........................
folder for saving image files
folder for saving image files saved on the
FOMA handset
other folder...................................
unfiled folder.........................
folder for saving XXX files
folder for saving XXX files saved on the FOMA
handset
video folder...................................
unfiled folder......................... folder for saving video files saved on the
FOMA handset
folder for saving video files
00M1000EN.book 280 ページ 2004年11月24日 水曜日 午前7時56分

281
Displaying/Editing/Managing Data
Using the TransFlash Memory Card
You can save image, video, audio track and document data inside the FOMA handset to the
TransFlash memory card, and save data in the TransFlash memory to the FOMA handset. You
can also browse inside the TransFlash memory card from the FOMA handset.
1The following operations can be performed on the TransFlash memory card. Refer to
reference pages for operation method.
• Previewing files in the TransFlash memory card 3 P303
• Modifying file names in the TransFlash memory card 3 P304
• Copying/moving files between the FOMA handset and the TransFlash memory card 3 P305 , P307
• Deleting files in the TransFlash memory card 3 P308
Formatting the TransFlash Memory Card
You need to format (initialize) the TransFlash memory card using the FOMA handset when using
it for the first time. The memory card may not function normally when formatted using other
devices such as a PC.
aTap $$ y $$ y Memory Card on the Application Selector bar
bTap [Format] y [Yes]
cTap the [Name] section, and then input name y tap [Done]
• To modify the name, tap [Modify Name], and proceed to Step 3.
• You can enter up to XX (single-byte or double-byte) characters.
• Tap [No] when not formatting.
Once formatted, all content in the TransFlash memory card is erased.
00M1000EN.book 281 ページ 2004年11月24日 水曜日 午前7時56分

282
Displaying/Editing/Managing Data
Managing Files
You can manage image/video/audio track/document files, and organize files by managing and
deleting files/folders in the TransFlash memory card.
Displaying Files by Folder Structure
You can display by switching between folders from image list screen (3 P274)/video playlist
screen (3 P280)/audio playlist screen (3 P285).
You can display a list view of the TransFlash memory card from this operation.
aTap All* on the Menu bar from the list view
bTap the folder name to display
Creating/Organizing/Deleting Folders
You can create/organize/delete folders from image list screen (3 P274)/Video playlist screen (3
P280)/Audio Track screen (3 P285).
You can also create/organize/delete folders in the TransFlash memory card with this operation.
This operation is performed after displaying the list view of files in the TransFlash memory card.
aTap All* y Organize Folders on the Menu bar in the list view screen
* Displays a previously selected folder name.
* A previously selected folder name is displayed.
1When deleting a folder
Tap folder to delete y tap [Delete]
All : Displays all files of the same format.
Internal memory
: Displays folders in the FOMA handset.
Memory card
: Displays folders in the TransFlash memory card.
Organize Folders
: Delets or creates folders.
00M1000EN.book 282 ページ 2004年11月24日 水曜日 午前7時56分

283
Displaying/Editing/Managing Data
bTap Add
cTap the Name section, enter name y tap the Location section, and
then select the location to create the folder y tap [Done]
Modifying a File Name
You can modify a file name from the image display screen (3 P274)/video playback screen (3
P280)/audio track details screen (3 P288)/document file display screen (3 P289).
You can also modify file names in the TransFlash memory card with this operation. Perform this
operation after displaying the files in the TransFlash memory card.
aTap Image/Video/Audio Track/Document y Modify Name on the Menu
bar in display file name to modify/playback screen
bTap Modify file name y [Done]
NOTE
• Text entry method 3 P466
Copying a File to Another Folder
1FOMA handset 3 copy to TransFlash memory card
Display the source file to copy in the FOMA handset and select a folder in the TransFlash
memory card as the copy (save) destination.
Name : Enter folder name to create.
Location : Select location to create folder (FOMA handset/
TransFlash memory card).
• Tap [Cancel] to cancel the operation.
• Displays previous file name.
• You can enter up to XX (one byte or two byte) characters.
• Tap [Cancel] to cancel the operation.
00M1000EN.book 283 ページ 2004年11月24日 水曜日 午前7時56分
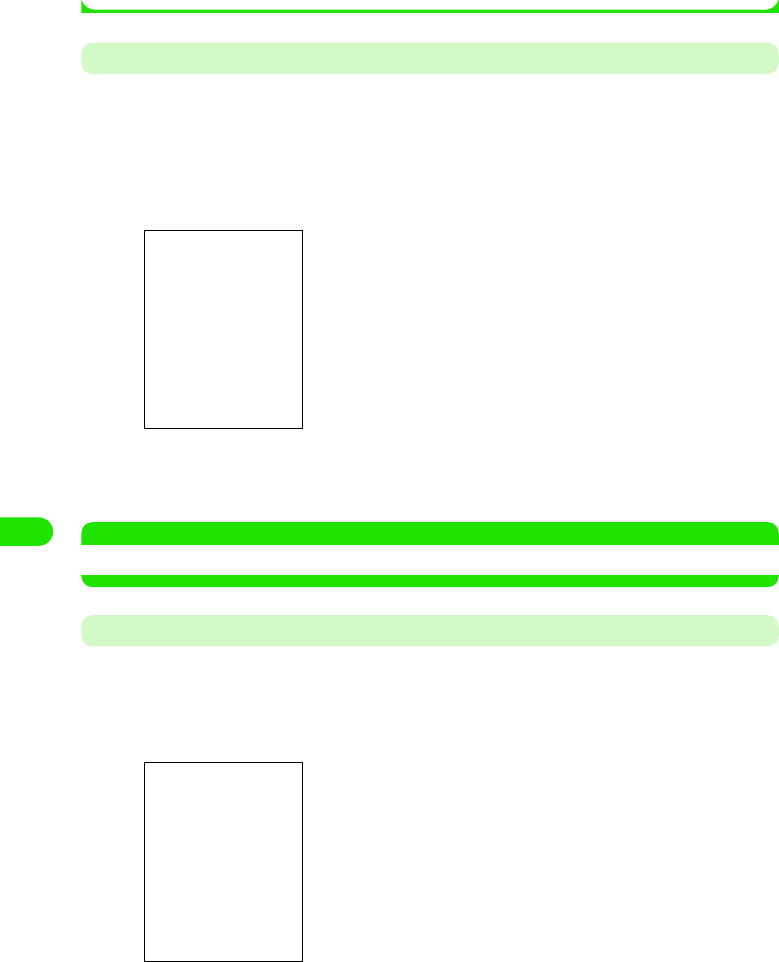
284
Displaying/Editing/Managing Data
1TransFlash memory card 3 copy to FOMA handset
Display the source file to copy in the TransFlash memory card and select a folder in the FOMA
handset as the copy (save) destination.
Copying a Single File
You can copy a file to another folder from Video playback screen (3 P280)/Audio Track Details
screen (3 P288).
• You cannot perform this operation when playing a video clip or audio track.
aTap Edit y Copy on the Menu bar in the playback screen of the file
to be copied
bTap the Folder section and select the destination folder to copy y
tap [Save]
NOTE
• The memory manager is used when copying image files or document files 3 P306
Selecting a File using the Memory Manager and Copying to Another Folder
aTap $$ y $$ on the Application Selector bar, and tap Memory
Manager on the control panel screen, and tap File in the memory
manager screen
bTap Location, and select the location where the source file to copy
is saved
• Tap [Cancel] to cancel the operation.
Location : Select the location of the source file (on the FOMA
handset/TransFlash memory card).
Type : Selects file type of the source file to copy.
File : Selects source file to copy.
00M1000EN.book 284 ページ 2004年11月24日 水曜日 午前7時56分

285
Displaying/Editing/Managing Data
cTap Type, and select the file type of the source file to copy
dIn the File field, tap $$ on the source file to copy y tap [Copy]
eTap the Folder section, and select the destination folder to copy
y tap Copy
Moving a File to Another Folder
1Moving from FOMA handset 3 TransFlash memory card
You can select a folder in TransFlash memory card as the destination folder while displaying
the source file on the FOMA handset.
1Moving from TransFlash memory card 3 FOMA handset
You can select a folder in the FOMA handset as the destination folder while displaying the
source file on the TransFlash memory card.
Moving a Single File
You can move a file inside a folder from the image display screen (3 P274)/video playback
screen (3 P280) audio playback screen (3 P285) to another folder.
aTap All* on the Menu bar in the display/playback screen of the file
to be moved y the destination folder y and tap $$
Moving All Files in Source Folder
You can move all files inside a folder from the image list screen (3 P274)/video playlist screen
(3 P280) audio playlist screen (3 P285) between the FOMA handset and the TransFlash
memory card.
Folder : Selects the destination folder to copy (on the FOMA
handset/TransFlash memory card)
• Tap [Cancel] to cancel the operation.
*: Displays a previously selected folder name.
00M1000EN.book 285 ページ 2004年11月24日 水曜日 午前7時56分

286
Displaying/Editing/Managing Data
aTap All* y Edit Folders in the list screen
bTap the source folder y tap Edit
cTap the To field and enter a file name y tap the Location field, and
select the destination location y tap [Done]
Deleting a File
You can delete a file. With this operation, you can delete files in the TransFlash memory card.
You need to display subject files in the TransFlash memory card to perform this operation.
Deleting a Single File
You can delete a file from the image list screen (3 P274)/video playback screen (3 P280)/audio
track details screen (3 P288)/document file display screen (3 P289).
aTap Image/Video/Audio Track/Document y Delete on the Menu bar in
the display/playback screen of the subject file to delete, and tap
[Yes] in the confirm delete screen
• Tap [No] to cancel the operation.
*: Displays a previously selected folder name.
To : Enters the folder name to create in the destination.
Location : Selects the destination (in the FOMA handset/
TransFlash memory card).
00M1000EN.book 286 ページ 2004年11月24日 水曜日 午前7時56分
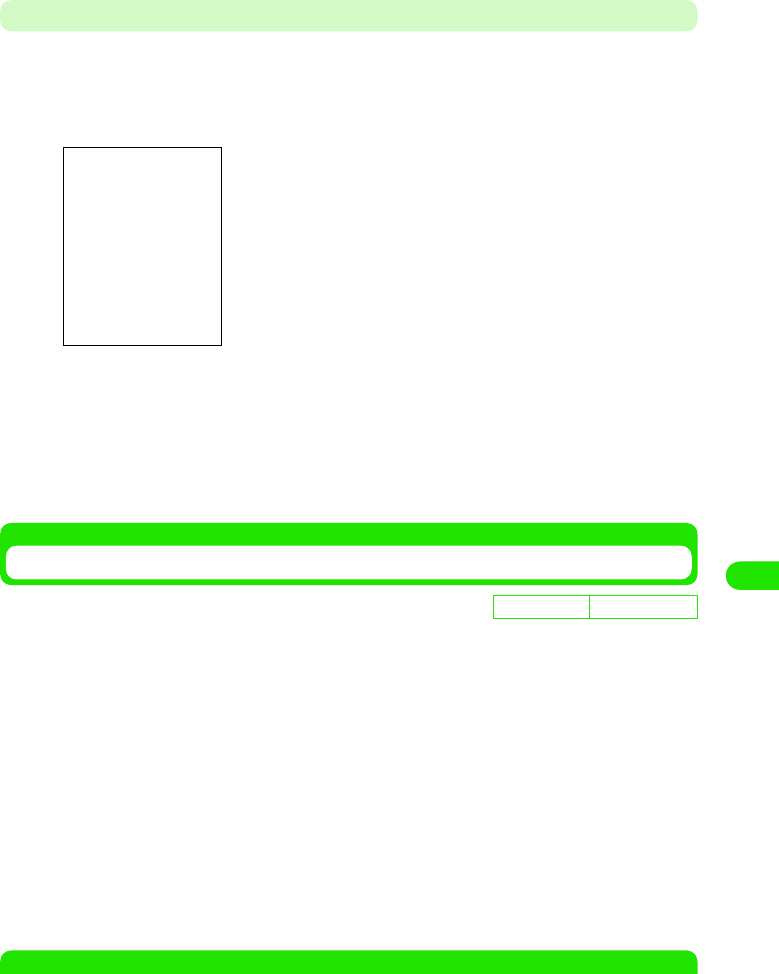
287
Displaying/Editing/Managing Data
Deleting by Selecting Files using the Memory Manager
aTap $$ y $$ on the Application Selector bar , and tap Memory
Manager in the control screen, and tap [File] in the Memory
Manager screen
bTap Location, and select the location storing the file to delete
cTap File and select the file type of the file to delete
dTap $$ of the file to delete in the File field and y tap [Delete], and
tap [Yes] in the delete confirmation screen
Sort Files
You can sort files in the image list screen (3 P274)/video playlist screen (3 P280)/audio playlist
screen (3 P285)/document file list screen (3 P289).
aTap Settings/Edit on the Menu bar in the list screen y Sort Method
1When operating in an image list screen
1When operating in the video playlist/audio playlist/document file list screen
NOTE
• You can sort files in the following order when using Sort by Name or Sort by Title.
Location : Selects the location storing the file to delete (in the
FOMA handset/TransFlash memory card).
Type : Selects the file type to delete.
File : Selects the file to delete.
De
f
ault sett
i
ng Sorted by XXX
Sort by Name : Sort by file name in alphabetical order.
Sort by Date : Sort by date saved in reverse chronological order.
Sort by Size : Sort by descending order of file size.
Sort by Title : Sort by title name in alphabetical order.
Sort by Date : Sort by date saved in reverse chronological order.
Sort by Size : Sort by descending order of file size.
Sort by Type : Sort by file type in order from XXX.
00M1000EN.book 287 ページ 2004年11月24日 水曜日 午前7時56分
288
Displaying/Editing/Managing Data
• Kanji (JIS Code order) 3 Hiragana 3 Katakana*1 3 Single byte Katakana 3 Double byte Alphabet*2 3
Single byte Alphabet*2 3 Double byte Numerals 3 Single byte Numerals 3 Symbols (JIS Code order)
Sending Files
You can send files from the image display screen (3 P274)/video playback screen (3 P280)/
audio playback screen (3 P285)/document file display screen (3 P289).
aTap Image/Video/Audio Track/Document on the Menu bar in the
display/playback screen of the file to send y Send As
bTap Send As section, and select send format y tap [Done]
NOTE
• Composing an email 3 P235
• Bluetooth communication 3 P381
Checking the Memory Capacity
You can check the memory capacity of the FOMA handset by application.
aTap $$ y $$ on the Application Selector bar, and tap Memory
Manager in the control panel screen.
*1: When Hiragana and Katakana are intermingled, alphabetical order is given priority (e.g.:あアいイ ).
*2: When lower case and upper case characters are intermingled, the lower case is given priority as well
as alphabetical order (e.g.:aAbB).
Email : Displays compose email screen with the image file
attached.
Bluetooth : Sends with Bluetooth.
• Tap [Cancel] to cancel the operation.
Displays available memory in the FOMA handset
00M1000EN.book 288 ページ 2004年11月24日 水曜日 午前7時56分

289
Displaying/Editing/Managing Data
When Memory is Full or a Maximum Amount of Stored Data is Reached
When the number of files or the memory reaches maximum capacity, delete old files, and save
new files.
When Memory is Low on the FOMA Handset
aDisplays confirmation screen
bTap Ye s
1When there is excess data in the FOMA handset
Tap Yes in Step 2 to display the screen on the left.
cTap Uninstall, and uninstall the application, or tap the application
to free up memory, and delete data
• Uninstall method 3 P270
Yes : Deletes excess data. When more excess data is found,
the screen on the left is displayed.
No : Keeps excess data. When more excess data is found,
the screen on the left is displayed.
Yes to All : Deletes all excess data.
No to All : Keeps all excess data.
00M1000EN.book 289 ページ 2004年11月24日 水曜日 午前7時56分

290
Displaying/Editing/Managing Data
• Delete method 3 P308
When Memory to Store Data is Insufficient while Copying/Moving Files
Using the Voice Recorder
You can readily record voice memos on the FOMA handset using this function. Recording
and playing can be conducted with a simple operation.
Voice Memo Screen
When there is insufficient memory to store in the copy
destination, the screen on the left is displayed.
Tap Yes to display screen preceding the confirmation screen.
Launch relevant applications to delete unnecessary files.
• Checking the memory capacity of the FOMA handset 3 P310
• Uninstall method 3 P270
• Delete method 3 P308
Icon name Icon Description
aVoice Memos/All
Memos –Displays the number of Voice Memos/All Memos.
bRecord $$ Starts recording when tapped.
cPlay/Pause $$/$$ Starts/pauses playback when tapped.
dStop $$ Stops recording/playback when tapped.
eCue $$$$ Cues voice memo when tapped.
fVolume $$ Controls playback volume by tapping and sliding.
gRecord Date – Displays recorded date of the voice memo.
hSize – Displays file size of the voice memo.
00M1000EN.book 290 ページ 2004年11月24日 水曜日 午前7時56分
291
Displaying/Editing/Managing Data
Recording Voice
You can record up to XX minutes. You can either choose to automatically record at the end of the
memory, or overwrite an existing voice memo.
aTap $$ y $$ on the Application Selector bar
bTap New y tap $$
cTap $$
Recording is stopped.
1When overwriting to an existing voice memo
Tap $$/$$, and select voice memo to overwrite y tap $$
• You cannot tap $$/$$ when there is only one existing voice memo.
Playing Back a Voice Memo
You can immediately play back and check a recorded voice memo.
aTap $$/$$ in the voice memo screen, and select voice memo to
play y tap $$
Quick Launching the Voice Recorder
You can record a new voice memo with a simple button operation. It is convenient when you need
to record a voice memo quickly.
• You cannot tap $$/$$ when there is only one existing voice
memo.
You can control the playback volume by tapping and sliding.
Displays $$ when tapped and paused.
Tap $$ to play the memo.
00M1000EN.book 291 ページ 2004年11月24日 水曜日 午前7時56分

292
Displaying/Editing/Managing Data
aHold down s
Displays the voice memo screen, and the voice memo is recorded at the end of the memory.
bRelease s
Cancels recording.
Sending the Voice Memo
You can send the recorded voice memo as an email attachment.
aTap $$/$$ in the voice memo screen, and select the voice memo
to send
bTap Voice Recorder y Send Method on the Menu bar
cTap the Send Format section y select the format to send y tap
[Done]
• Tap [Cancel] to cancel sending.
NOTE
• Email Compose 3 P235
• Bluetooth communication 3 P381
Deleting a Voice Memo
You can delete a recorded voice memo.
aTap $$/$$ in the Voice Memo screen, and select the voice memo
to delete y tap [Delete], and tap [Yes] in the delete confirmation
screen
• Tap [No] to cancel the operation.
Email : Send as an email attachment.
Bluetooth : Send with Bluetooth
• Tap [Cancel] to cancel the operation.
00M1000EN.book 292 ページ 2004年11月24日 水曜日 午前7時56分

293
Other Convenient Functions
About Multiaccess <Multiaccess>. . . . . . . . . . . . . . . . . . . . . . . . . . . . . . . . . . 294
Notification by an Alarm at the Specified Time <Alarm time> . . . . . . . . . . . 297
Registering a Schedule <Calendar/Schedule> . . . . . . . . . . . . . . . . . . . . . . . . 300
Registering To Do List <To do> . . . . . . . . . . . . . . . . . . . . . . . . . . . . . . . . . . . . 315
Quick Execution of Frequently Used Functions. . . . . . . . . . . . . . . . . . . . . . . 324
Changing Groups on the Control Panel . . . . . . . . . . . . . . . . . . . . . . . . . . . . . 325
Checking Duration <View duration> . . . . . . . . . . . . . . . . . . . . . . . . . . . . . . . . 326
Checking Information on Amount of Data at Packet Communication . . . . . 327
Displaying Information on the FOMA Handset. . . . . . . . . . . . . . . . . . . . . . . . 330
Using as a Calculator <Calculator>. . . . . . . . . . . . . . . . . . . . . . . . . . . . . . . . . 330
Entering Notes. . . . . . . . . . . . . . . . . . . . . . . . . . . . . . . . . . . . . . . . . . . . . . . . . . 331
Displaying Time around the World . . . . . . . . . . . . . . . . . . . . . . . . . . . . . . . . . 337
How to Use an Earphone/Microphone with Switch
<Earphone/microphone with switch> . . . . . . . . . . . . . . . . . . . . . . . . . . . . . . . 338
Putting the Settings of Various Functions Back to Default
<Reset settings> . . . . . . . . . . . . . . . . . . . . . . . . . . . . . . . . . . . . . . . . . . . . . . . . 340
Installing an Application. . . . . . . . . . . . . . . . . . . . . . . . . . . . . . . . . . . . . . . . . . 341
19OTH01_1col_EN.fm 293 ページ 2004年11月24日 水曜日 午前9時24分
294
Other Convenient Functions
Multiaccess
About Multiaccess
Multiaccess is a function to simultaneously carry out multiple communications, allowing you to
receive messaging during a voice call and to receive a voice call while starting the browser.
Communications That can be Used Simultaneously
The following 3 communications can be carried out simultaneously:
*: CSD (Circuit Switched Data) is a data communication method by a circuit switch in GSM.
NOTE
• About combination of multiaccess 3 P525
• During a multiaccess, you will be charged for each communication.
Receiving Messaging during a Call
You can receive messaging during voice/video call and check it without interrupting the call.
• You cannot receive any messaging in CSD
aReceive messaging during a call
Communication Number of communications
Voice call One of left
Data communication by CSD*
Packet communication One of left
Wireless LAN
SMS One
$$ will be displayed in the status bar, and a ring tone will sound.
19OTH01_1col_EN.fm 294 ページ 2004年11月24日 水曜日 午前9時24分

295
Other Convenient Functions
bTap $$ in the Status bar
cTap $$ in the Application Selector bar
Goes back to the Calling screen.
Connecting to the Internet during a Call
You can connect to the Internet during a voice/video call and view homepage, etc. without
interrupting the call.
• You cannot connect to the internet in CSD.
aTap $$ in the Application Selector bar during a call
bTap $$ in the Application Selector bar
Goes back to the Calling screen without being disconnected from the Internet.
You can check messaging.
19OTH01_1col_EN.fm 295 ページ 2004年11月24日 水曜日 午前9時24分

296
Other Convenient Functions
Receiving a Call while Connected to the Internet
You can receive a voice/video call while connected to the Internet.
• If you are connected to the internet in CSD, you cannot receive any call.
aReceive an incoming call while connected to the Internet
bTap [Answer]
cTap $$ in the Application Selector bar
Goes back to the Internet screen without interrupting the call.
The Incoming call screen is displayed, and a ring tone sounds.
Answer the call.
• Tap [Reject] to reject the call.
19OTH01_1col_EN.fm 296 ページ 2004年11月24日 水曜日 午前9時24分
297
Other Convenient Functions
Alarm time
Notification by an Alarm at the Specified Time
You can use the FOMA handset as an alarm.
• You can set up to 3 alarms.
aTap $$ y $$ in the Application Selector bar
bTap the alarm slot you want to register
cTap the Time column to set the alarm time
• How to operate 3 P59
dTap the When column to select an Alarm Action
• If you have tapped Once/Every week, go to Step 5.
• If you have tapped Next 24 hours/Every day/Working days, go to Step 6.
eTap the Day of the week column to select a day of the week
fTap the Alarm sound column to select an alarm sound
Time : Sets the alarm time
Operation setup
Once : An alarm will sound only once at the specified
time on the specified day of the week.
Next 24
hours
: An alarm will sound only once at the specified
time.
Every day : An alarm will sound at the specified time every
day.
Working days: An alarm will sound at the specified time on
working days (week days).
Every week : An alarm will sound at the specified time on the
specified day every week.
Day : Set a day of the week to sound an alarm.
Displayed only if Operation setting is set to Once
or Every week.
Alarm sound : Sets an alarm sound.
Message : Sets a message to be displayed when an alarm
goes off.
Date/time screen
Alarm slot
19OTH01_1col_EN.fm 297 ページ 2004年11月24日 水曜日 午前9時24分

298
Other Convenient Functions
• Tap $$ to play the selected alarm sound to confirm it.
gTap the Message column to type a message
• You can enter up to 128 characters either in two or one byte letters.
• Tap $$ to display the previously entered message, allowing you to select it.
hTap [Done]
The alarm is registered
• To sound an alarm at the specified time, you need to set it up. 3 See below
NOTE
• You can set up working days. 3 See below
Setting Working Days
Setting working days (week days) makes an alarm sound only on working days.
aTap $$ y $$ in the Application Selector bar, and tap the General
tab y Date and time on the Control Panel screen, and then tap
Working days on the Date and Time screen
bTap $$ of the day of the week to be set up as a working day y
[Done]
A working day is set up.
Setting up/Canceling the Registered Alarm
Setting up/canceling the registered alarm enables/disables alarm operation.
aTap $$ y $$ in the Application Selector bar
Set working days
19OTH01_1col_EN.fm 298 ページ 2004年11月24日 水曜日 午前9時24分

299
Other Convenient Functions
bTap $$ for the alarm slot to be set up
At the Time Set up
An alarm is set up
• Tap $$ to cancel the alarm.
An alarm sounds as set up, and the Alarm screen appears.
The following operations can be performed:
[Snooze] : The alarm stops and then goes off again after 5
minutes
[Open] : The Date and Time screen appears
[Silent] : The alarm stops
[Complete] : The alarm stops, and the Alarm screen is closed
19OTH01_1col_EN.fm 299 ページ 2004年11月24日 水曜日 午前9時24分

300
Other Convenient Functions
Calendar/Schedule
Registering a Schedule
You can register a schedule on the calendar. You can check the registered schedule on the
calendar and be notified with an alarm at the specified time on the specified date.
Displaying the Calendar
The calendar screen can be displayed by day, week and month and switched from each screen.
aTap $$ y $$ in the Application Selector bar
bTap $$/$$
Switches displays.
1 Day View screen
The Schedule screen for that day is displayed.
You can display the View Date screen to select a day to be displayed.
Switch days of the week.
Switch to display by week or month.
Weekly View screen
You can display the Date Setup screen to
select a week and a month to be displayed.
Switch to 1 day View
Switch displays by week/month
Monthly View screen
19OTH01_1col_EN.fm 300 ページ 2004年11月24日 水曜日 午前9時24分

301
Other Convenient Functions
1Menu bar
Tap Calendar and Edit on the Menu bar on the Calendar screen to display the following items:
*: Not displayed while the Weekly/Monthly View screen is displayed
• Some items may not be able to be executed depending on the operation.
NOTE
• You can switch displays by day, week and month 3 P333
• You can switch methods to display a day of the week 3 P334
Calendar
New. . . . . . . . . . . . . . . . . . . . . See below
Search . . . . . . . . . . . . . . . . . . . . . . P335
Send this folder. . . . . . . . . . . . . . . . P330
Delete item . . . . . . . . . . . . . . . . . . . P332
Edit
Undo delete* . . . . . . . . . . . . . . . . . P332
Paste item* . . . . . . . . . . . . . . . . . . . P331
Zoom*. . . . . . . . . . . . . . . . . . . . . . . P141
User settings . . . . . . . . . . . . . . . . . P333
19OTH01_1col_EN.fm 301 ページ 2004年11月24日 水曜日 午前9時24分

302
Other Convenient Functions
Registering a Schedule
You can register a schedule and set it up to be notified with an alarm sound at a specified time on
a specified date.
There are following 3 types of schedule:
aTap $$ y $$ in the Application Selector bar, and then tap Calendar
y New on the Calendar screen
bTap the Title entry field y Enter the title
• You can enter up to 200 characters in either single- or double-byte letters.
cTap the Type column to select a type of schedule
dSet up the date or start date/end date
1If the type is Appointment or Reminder
Tap the Date column to set up the date
• How to operate 3 P59
Appointment schedule Normal schedule. Start time and End time are to be set up
Notification schedule A schedule for which the start time alone is to be set up
All day schedule A schedule across the date line. The Start date and the End date are to be set up
Enter a title, etc. for the schedule to be displayed on the Daily
View screen, etc.
Type : Select a type of schedule from Appointment,
Notification and All day.
Date/Start date, End date
: Set up the date of the schedule. The Date entry
field is displayed if the type is Appointment or
Notification. The Start Date/End Date fields are
displayed if the type is All day.
Time : The Start Time/End Time entry fields are
displayed if the type is Appointment. The
Notification Time entry filed is displayed if the
type is Notification. No Time entry field is
displayed if the type is All day.
Location : Enter a place.
Alarm : Set up an alarm. Set up the date and time for the
alarm only if it is set up.
Repeat : Set up if the schedule is to be repeated. Can be
set up only if the type is Appointment or
Notification.
Private : Set the schedule to Private. The contents of the
schedule will not be sent when sending mails
with the schedule attached and synchronizing
data with a PC.
$$ Tab : Enter notes.
19OTH01_1col_EN.fm 302 ページ 2004年11月24日 水曜日 午前9時24分

303
Other Convenient Functions
1If the type is All day event
Tap the Start Date column/End Date column to set up the Start/End date
• How to operate 3 P59
eSet up a time
1If the type is Appointment
Tap the Time column/until column to set up the start/end time
• How to operate 3 P59
1If the type is Reminder
Tap the Time column to set up the notification time
• How to operate 3 P59
fTap the Loction column to enter the place
• You can enter up to 20 characters in either two or one byte letters.
• Tap $$ to display the one previously entered, allowing you to select it.
gTap $$ in the Alarm column
A field to enter the date and time when an alarm is to sound under the Alarm column.
• Tap $$ to cancel the alarm.
• To set up an all day schedule, go to Step 8.
1To set up an alarm date and time
Tap the Time/Date entry field to set up the alarm date and time
• How to operate 3 P59
• It cannot be set to a date and a time after the scheduled start time or date.
hTap the Repeat column
None : Repeat is not be set up.
Daily : The event is repeated every specified number
of days under Interval.
Weekly : The event is repeated on the specified day of
every specified number of weeks under
Interval.
Monthly by date : The event is repeated on the same date every
specified number of months in Interval.
Monthly by day : The event is repeated on the same day of the
same week every specified number of
months under Interval.
Yearly by date : The event is repeated on the same date in the
same month every specified number of years
in Interval.
Yearly by day : The event is repeated on the same day of the
same week in the same month every
specified number of years in Interval.
Interval : The event is set to be repeated by how many
days/weeks/years.
Forever : Set to be repeated without any due date.
Due date : Set up the due date for repeat.
Cannot be set up if set to permanent.
19OTH01_1col_EN.fm 303 ページ 2004年11月24日 水曜日 午前9時24分

304
Other Convenient Functions
iTap $$ of the action to be set up
• Tap $$ of Week ly to select [Select days].
1To set up a day of the week
aTap [Select days]
bTap $$ of the day to be set up y [Done]
1To set up the interval
Tap $$/$$ in the Interval column to set up the interval to repeat
• You can directly enter it in the Interval column.
1To set it to permanent
Tap the Forever column
1To set up a due date
Tap the Until column to appoint the date
• How to operate 3 P59
jTap $$ in the Private column
• Tap $$ to cancel Private.
kTap $$
lEnter notes
• You can enter up to 1024 characters in either single- or double-byte letters.
mTap $$
The schedule is registered.
Notes Entry screen
19OTH01_1col_EN.fm 304 ページ 2004年11月24日 水曜日 午前9時24分
305
Other Convenient Functions
1About items on the menu bar
Tap Calendar and Edit on the Menu bar on the Schedule Registration screen to display the
following items:
• Some items may not be able to be executed depending on the operation.
• The items on the Menu bar on the Schedule Details screen are the same as those on the Schedule
Registration screen. 3 P328
NOTE
• If registered without entering a title of the schedule, the schedule type (Appointment/Reminder/All day event)
will automatically entered into the title.
• Tapping the time on the 1 Day View screen also displays the Schedule Registration screen.
• You can set up the Start Time/End Time, etc. that are automatically displayed on the Schedule Registration
screen in advance. 3 P333
• You can set up the alarm time that is automatically displayed if an alarm is set in advance. 3 P334
• You can change the alarm sound. 3 P334
Checking/Updating the Schedule
Select a schedule set up from the Calendar screen to display the Details screen. You can update
and register the contents on the Details screen to reregister.
aTap $$ y $$ in the Application Selector bar
Calendar
New. . . . . . . . . . . . . . . . . . . . . . . . . P323
Find. . . . . . . . . . . . . . . . . . . . . . . . . P335
Send as. . . . . . . . . . . . . . . . . . . . . . P329
Move to To do . . . . . . . . . . . . . . . . . P330
Remove entry . . . . . . . . . . . . . . . . . P331
Edit
Undo delete . . . . . . . . . . . . . . . . . . P332
Cut entry. . . . . . . . . . . . . . . . . . . . . P331
Copy entry . . . . . . . . . . . . . . . . . . . P331
Cut text . . . . . . . . . . . . . . . . . . . . . . P482
Copy text . . . . . . . . . . . . . . . . . . . . P482
Paste text . . . . . . . . . . . . . . . . . . . . P483
Preferences . . . . . . . . . . . . . . . . . . P333
1 Day View screen Weekly View screen Monthly View screen
abcd def def
19OTH01_1col_EN.fm 305 ページ 2004年11月24日 水曜日 午前9時24分

306
Other Convenient Functions
bTap the schedule to check
cUpdate the contents and tap $$
The updated schedule is registered.
• How to operate 3 P323
1When a repeating schedule is updated
Item/icon Description
aTitle Displays the contents of the schedule.
b$$ An alarm has been set up in the schedule.
c$$ Notes have been registered in the schedule.
d$$ A notification schedule has been set up.
eAll day schedule An all day schedule has been set up.
fAppointment schedule An appointment schedule has been set up.
• Tap the schedule on the 1 Day View screen to display the
Details screen for the schedule.
• Tap the schedule on the Weekly View screen to display the
Schedule Details screen. However, if the Notification schedule
and the All day schedule have been set to the same date,
tapping the schedule displays the Schedule Selector screen at
the bottom of the screen. Tapping the schedule you want to
display displays the Schedule Detail screen.
• Tap the date on the schedule you want to check on the Monthly
View screen to display the 1 day View screen. Tap the
schedule to display the Schedule Detail screen.
• How to display the calendar 3 P322
Tap $$ to display the screen on the left. Tap $$ of the item to be
changed.
Only this one : Changes only the edited schedule
All repeats : Changes all the repeating schedules
All previous : Changes all of the previous repeating schedules
All future : Changes all of the future repeating schedules
Details screen
19OTH01_1col_EN.fm 306 ページ 2004年11月24日 水曜日 午前9時24分

307
Other Convenient Functions
At the Scheduled Alarm Time
NOTE
• If no alarm has been set, no operation is performed to notify you of the scheduled event (e.g. displaying a
screen) at the scheduled time.
Sending Registration Contents
You can send a schedule as a file in the vCalendar (electronic scheduler) format by messaging or
via Bluetooth. You can also send an entire folder containing schedules as well as one schedule at
a time.
Sending a Schedule
Send a schedule
aTap Calendar y Send as on the Menu bar on the Detail screen for
the schedule to be sent
• How to operate 3 P328
bTap the Send as column on the Sending Format screen to select a
sending method y Tap [Done]
cCreate and send an email
• How to operate 3 P235, P261
An alarm sounds as set up, and the Alarm screen appears.
The following operations can be performed:
[Snooze] : The alarm stops and then goes off again in 5
minutes.
[Open] : The Schedule Detail screen appears.
[Silent] : Stops the alarm sound.
[Done] : Stops the alarm sound and closes the Alarm
screen.
Email : Send an email with a schedule attached. Go to Step 3.
Text message : Insert a schedule into a message of Short Message Service (SMS) to
send. Go to Step3.
Bluetooth : Send a schedule via Bluetooth 3 P384
19OTH01_1col_EN.fm 307 ページ 2004年11月24日 水曜日 午前9時24分

308
Other Convenient Functions
Sending Schedules in a Folder
You can send all the schedules in a folder.
aTap All y a folder to send on the Menu bar on the Calendar
screen
• How to operate 3 P322
• If any folder other than All is displayed last time, the Calendar screen registered in that
folder will be displayed. 3 P303
bTap Calendar y Send this folder on the Menu bar
cTap the Send as column on the Sending Format screen to select a
sending method y Tap [Done]
dCreate and send an email
• How to operate 3 P235, P261
Moving the Registered contents to the To Do List
You can move the schedule to the To do list.
aTap Calendar y Move to To do on the Menu bar on the Detail screen
for the schedule to be sent
bTap [Yes]
The schedule is moved to the To do list.
• Tap [No] to cancel the operation to move.
Email : Send an Email with a schedule attached. Go to Step 4.
Text message : Insert a schedule into a message of Short Message Service (SMS) to
send. Go to Step 4.
Bluetooth : Send a schedule via Bluetooth. 3 P384
• How to operate 3 P328
19OTH01_1col_EN.fm 308 ページ 2004年11月24日 水曜日 午前9時24分

309
Other Convenient Functions
Copying/Cutting a Schedule
You can copy/cut the registered schedule and paste it onto another date.
aTap Edit y Cut entry/Copy entry in order on the Menu bar on the
Detail screen for the schedule to copy/cut
• How to operate 3 P328
bDisplay the 1 Day View screen for the day onto which you want
paste it y Tap Edit y Paste entry on the Menu bar
The schedule copied/cut is pasted.
• How to operate 3 P328
Deleting Registered Contents
The registered schedule on the calendar is deleted. You can also select a range to collectively
delete schedules.
Deleting a Single Schedule
Display the schedule to delete
aTap Calendar y Delete entry on the Menu bar on the Detail screen
for the schedule to be deleted
The selected schedule is deleted.
• How to operate 3 P328
1To delete a repeating schedule
Tap $$ to display the screen on the left. Tap $$ for the item to
change.
Only this one: Only the edited schedule is deleted.
All repeats : All the repeated schedules are deleted.
All previous : All the previous repeated schedules are deleted.
All future : All the future repeated schedules are deleted.
19OTH01_1col_EN.fm 309 ページ 2004年11月24日 水曜日 午前9時24分

310
Other Convenient Functions
Deleting Schedules Collectively
Collectively deletes a selected range of schedules.
aTap Calendar y Delete entry on the Menu bar on the Calendar
screen
bTap the Removal range column to select a range to delete
cTap [Done]
The schedule is deleted.
• Tap [Cancel] to cancel the deletion.
NOTE
• If you select anything other than Entire calendar to delete schedules, repeated schedules are not deleted.
Undoing Deleting Schedules
You can recover deleted schedules.
• Any schedules collectively deleted cannot be recovered.
• Any repeated schedules deleted cannot be recovered.
aDelete a schedule
• How to operate 3 P331
bTap Edit y Undo delete on the Menu bar on the 1 Day View screen
The schedule deleted is recovered and displayed on the Calendar screen.
Range to delete
Entire calendar
: All the schedules are deleted.
From today: Today's schedule and later ones are deleted.
Until today : Today's schedule and earlier ones are deleted.
This week : This week's schedules are deleted.
Last week : The last week's schedules are deleted.
This month: This month's schedules are deleted.
Last month: The last month's schedules are deleted.
This year : This year's schedules are deleted.
Last year : The last year's schedules are deleted.
• How to operate 3 P322
19OTH01_1col_EN.fm 310 ページ 2004年11月24日 水曜日 午前9時24分

311
Other Convenient Functions
Setting up a Schedule Display Method
Set up a displaying method for the 1 Day View and Weekly View screens for a calendar.
• Time, or others displayed on the Schedule Registration screen are also to be set up here.
aTap Edit y Preferneces on the Menu bar on the Calendar screen
bTap the column you want to set up to enter time
• How to operate 3 P59
cTap [Done]
The schedule displaying method is set up.
• Tap [Cancel] to cancel the display method setup.
De
f
ault sett
i
ng View hours in day from: 9:00 To: 17:00 Standard time intervals: 01:00
Standard entry length: 01:00 View hours in week from: 9:00 To: 17:00
View hours in day from
: Set up start time displayed on the 1 Day View
screen.
To : Set up end time displayed on the 1 Day View
screen.
Standard time intervals
: Set up intervals to display time for 1 Day/weekly
View.
Standard entry length
: Set up time intervals for Appointment Schedule.
View hours in week from.
: Set up start time displayed on the Weekly View
screen.
To : Set up end time displayed on the Weekly View
screen.
• How to operate 3 P322
19OTH01_1col_EN.fm 311 ページ 2004年11月24日 水曜日 午前9時24分
312
Other Convenient Functions
Setting up the Display and Sound for an alarm
Set up the time display and sound for an alarm
aTap Edit y Preferences on the Menu bar on the Calendar screen,
and then tap the Alarm tab on the User Settings screen
bTap Alarm precedes an event by column to set up time
• To make it the same as the event start time, set it to "00:00".
• How to operate 3 P59
cTap the Alarm sound column to select an alarm sound
• Tap $$ to play the selected alarm sound to check.
dTap [Done]
The alarm time display and sound are set up.
• Tap [Cancel] to cancel the alarm setup.
De
f
ault sett
i
ng Alarm precedes an event by: 00:10 Alarm sound: Wind_Chimes
Alarm precedes an event by
: Set up how many minutes ahead of the
event start time the alarm is to be displayed
at registration.
Alarm sound : Set up an alarm sound.
• How to operate 3 P322
19OTH01_1col_EN.fm 312 ページ 2004年11月24日 水曜日 午前9時24分

313
Other Convenient Functions
Setting up the Day of the Week View for a Calendar
You can change arrangements of the day display view on the Calendar screen by setting up the
first day of the week.
aTap $$ y $$ in the Application Selector bar, and tap the General
tab y Time & date on the Control Panel screen, and then tap the
Workdays tab on the Date and Time screen
bTap the First day of week column to select a day of the week
The first day of the week is set up.
Searching for Registered Contents
You can search for a desired event just by entering the title, place, notes, etc. of the event
registered as keywords.
aTap Calendar y Find on the Menu bar on the Calendar screen
bTap the keyword entry field to enter a keyword
• You can enter up to 30 characters in either two or one byte letters.
• To be searched even if you enter a partial string of an item registered on the schedule
data as a keyword.
cTap the Where? column to select what is to be searched
Keyword entry column
Where?
Everywhere: Searches all the schedules.
Future : Searches the schedules for today and later.
Past : Searches the schedules for today and earlier.
• How to operate 3 P322
19OTH01_1col_EN.fm 313 ページ 2004年11月24日 水曜日 午前9時24分

314
Other Convenient Functions
dTap [Find]
eTap the desired schedule
The Detail screen for the schedule is displayed. 3 P328
• Tap [Cancel] to cancel the search.
A list of schedules containing the keyword is displayed.
19OTH01_1col_EN.fm 314 ページ 2004年11月24日 水曜日 午前9時24分
315
Other Convenient Functions
To d o
Registering To Do List
You can register a To do, etc. on the To do list and set it up to be notified with an alarm sound at
a specified time.
aTap $$ y $$ in the Application Selector bar, and then tap To do y
New on the Menu bar on the To do List screen
bTap the title entry field y Enter a title
• You can enter up to 200 characters in either two or one byte letters.
cTap the Priority column to select a priority
• You can set up 1 through 9. 1 has the highest priority.
dTap $$ in the Due date column
The entry field for a deadline is displayed under the Due date column.
• Tap $$ to cancel the deadline.
1To set up a deadline
Tap the date entry field to set up a deadline.
• How to operate 3 P59
eTap $$ in the Alarm column
The entry field for the date and time on when an alarm will sound is displayed underneath
the Alarm column.
• Tap $$ to cancel the alarm.
1To set up the date and time for an alarm
Tap the date and time entry field to set up the alarm date and time.
• How to operate 3 P59
• You cannot set the alarm to a date and a time on or later than the date and time set in
the due date.
fTap $$ in the Private column
• Tap $$ to cancel the Private setting.
Enter a title, etc. to be displayed on the To do List screen.
Completed: : Switches incomplete/complete by tapping a To
do after registering it.
Priority: : Set up a priority of a To do.
Due date: : Set up the due date. Set up the date and time for
the deadline only when it is set up.
Alarm: : Set up the alarm date and time only if (an alarm
is) set up.
Private: : Set a To do to private. When you send an Email
with a To do attached and synchronize data with
a PC, the contents of the To do will not be sent.
$$Tab: : Enter notes.
Todo registration
screen
19OTH01_1col_EN.fm 315 ページ 2004年11月24日 水曜日 午前9時24分

316
Other Convenient Functions
gTap $$
hEnter notes
• You can enter up to 1024 characters either in two or one byte letters.
iTap $$
The To do is registered.
1About items on the Menu bar
Tap To do and Edit on the Menu bar on the To do Registration screen to display the following
items:
Some item may not be able to be executed depending on the operation.
To do
New . . . . . . . . . . . . . . . . . . . . . . . . P326
Find . . . . . . . . . . . . . . . . . . . . . . . . P344
Send as . . . . . . . . . . . . . . . . . . . . . P339
Move to Calendar. . . . . . . . . . . . . . P341
Delete To do. . . . . . . . . . . . . . . . . . P342
Edit
Undo delete . . . . . . . . . . . . . . . . . . .P342
Cut entry . . . . . . . . . . . . . . . . . . . . .P341
Copy entry . . . . . . . . . . . . . . . . . . . .P341
Cut text . . . . . . . . . . . . . . . . . . . . . .P482
Copy text . . . . . . . . . . . . . . . . . . . . .P482
Paste text. . . . . . . . . . . . . . . . . . . . .P483
Preferences . . . . . . . . . . . . . . . . . . .P343
Notes entry screen
19OTH01_1col_EN.fm 316 ページ 2004年11月24日 水曜日 午前9時24分

317
Other Convenient Functions
Checking/Updating To Do List
Select a To do set up on the To do list screen to display the detail screen. You can update and
reregister the contents on the Detail screen.
aTap $$ y $$ in the Application Selector bar
• The priority, title and deadline of an incomplete To do whose deadline has been passed are displayed in red.
• A completed To do is displayed below incomplete ones regardless the date and priority. You can also set it up
not to display completed things to do. 3 P343
• You can set up not to display the deadline. 3 P343
bTap the To do you want to check
cUpdate the contents and tap $$
The updated To do is registered.
• How to operate 3 P336
Item/icon Description
a$$ Switches incomplete/complete for the To do.
bPriority The priority of the To do is displayed.
cTitle The To do is displayed.
d$$ An alarm has been set in the schedule.
e$$ Notes have been created in the schedule.
fDue date The deadline of the To do is displayed.
To do list screen
Detail screen
19OTH01_1col_EN.fm 317 ページ 2004年11月24日 水曜日 午前9時24分

318
Other Convenient Functions
1About items on the Menu bar
Tap To do and Edit on the Menu bar on the To do list screen to display the following items:
Some items may not be able to be executed depending on the operation.
• The items on the Menu bar on the Detail screen are the same as those on the To do Registration screen.
3 P337
At the Alarm Time for To Do
NOTE
• If no alarm has been set, no action is performed to notify you of the To Do at the deadline (e.g. Screen
display).
To do
New . . . . . . . . . . . . . . . . . . . . . . . . P326
Find . . . . . . . . . . . . . . . . . . . . . . . . P344
Send this folder . . . . . . . . . . . . . . . P340
Delete completed . . . . . . . . . . . . . . P342
Edit
Undo delete . . . . . . . . . . . . . . . . . . .P342
Paste entry . . . . . . . . . . . . . . . . . . .P341
Sort on priority . . . . . . . . . . . . . . . . .P343
Sort on date. . . . . . . . . . . . . . . . . . .P343
Zoom . . . . . . . . . . . . . . . . . . . . . . . .P141
Preferences . . . . . . . . . . . . . . . . . . .P343
An alarm sounds as set up, and the Alarm screen appears.
The following operations can be performed:
[Snooze]: : The alarm stops, and then goes off again in 5
minutes.
[Open]: : The Detail screen appears.
[Silent]: : Stops the alarm sound.
[Complete]: : Stops the alarm sound and closes the Alarm
screen.
19OTH01_1col_EN.fm 318 ページ 2004年11月24日 水曜日 午前9時24分

319
Other Convenient Functions
Sending To Do List
You can send To do as a file in the vCalendar (electronic scheduler) format by messaging or via
Bluetooth. You can send a folder containing To do as well as one To do at one time.
Sending a To Do
Sends a To do.
aTap To do y Send as on the Menu bar on the Detail screen for the
To do you want to send
• How to operate 3 P338
bTap the Send as column on the Sending Format screen to select a
sending method y Tap [Done]
cCreate and send an email
• How to operate 3 P235, P261
Sending To Do in a Folder
You can send all the To do in a folder.
aTap All on the Menu bar y a folder to be sent on the To do list
screen
• How to operate 3 P338
• If a folder other than All was displayed last time, the To do list screen registered in the
folder is displayed. 3 P303
bTap To do y Send this folder on the Menu bar in order
cTap the Send as column on the Sending Format screen to select a
sending method y Tap [Done]
dCreate and send an email
• How to operate 3 P235, P261
Email : Send an Email with a To do attached. Go to Step 3.
Text message : Insert a To do into a message of Short Message (SMS) to send. Go to
Step 3.
Bluetooth : Send a To do via Bluetooth. 3 P384
Email : Send an Email with a To do attached. Go to Step 4.
Text message : Insert a To do into a message of Short Message Service (SMS) to send.
Go to Step 4.
Bluetooth : Send a To do via Bluetooth. 3 P384
19OTH01_1col_EN.fm 319 ページ 2004年11月24日 水曜日 午前9時24分

320
Other Convenient Functions
Moving Registered contents to the Calendar
You can move To do to the calendar.
aTap To d o y Move to calendar on the Menu bar on the Detail screen
for the To do you want to send
bTap [Yes]
The To do is moved to the calendar.
• Tap [No] to cancel the operation to move.
Copying/Cutting a To Do
Copy/cut a To do registered and paste it as a new To do.
aTap Edit y Cut entry/Copy entry y $$ on the Menu bar on the Detail
screen for the To do you want to copy or cut
• How to operate 3 P338
bTap Edit y Paste entry on the Menu bar on the To do list screen
The To do copied or cut is pasted.
• How to operate 3 P338
Deleting the To Do List
To do registered on the To do list are deleted. You can also collectively delete completed To do.
\• How to operate 3 P338
19OTH01_1col_EN.fm 320 ページ 2004年11月24日 水曜日 午前9時24分

321
Other Convenient Functions
Deleting a To Do
Display the To do to delete.
aTap To do y Delete To do on the Menu bar on the Detail screen for
the To do you want to delete
The selected To do is deleted.
• How to operate 3 P338
Deleting completed To Do Collectively
A selected range of To do are collectively deleted.
aTap To do y Deleted completed on the Menu bar on the To do list
screen
bTap $$ of Current folder/All folders
cTap [Yes]
The To do is deleted.
• Tap [No] to cancel the operation to delete.
Recovering Deleted To do
You can recover deleted To do.
• Not recovered if completed To do have been collectively deleted.
aDelete a To do
• How to operate
3
See above
bTap Edit y Undo delete on the Menu bar on the To do list screen
The deleted To do is recovered and displayed on the To do list screen.
• How to operate 3 P338
Current folder : Completed To do in the currently displayed
folder are deleted.
All folders : Completed To do in all the folders are deleted.
• How to operate 3 P338
19OTH01_1col_EN.fm 321 ページ 2004年11月24日 水曜日 午前9時24分
322
Other Convenient Functions
Sorting the To Do List
Switches methods to display To do on the To do list screen between by priority and by date.
aTap Edit y $$ of Sort on priority/Sort on date on the Menu bar on the
To do list screen
Switches To do displaying methods.
• •How to operate 3 P338
Setting up the To Do List Display Method and Sound
Set up the view and alarm sound, etc. on the To do list screen.
aTap Edit y Prefernces on the Menu bar on the To do list screen
bTap $$ in the Display due dates column
• Tap $$ to set it up not to display the due date on the To do list screen.
cTap $$ in the Display completed column
• Tap $$ to set it up not to display completed To do on the To do list screen.
dTap the Alarm sound column to select an alarm sound
• Tap $$ to play the selected alarm sound so that you can check it.
eTap [Done]
D
e
f
au
l
t sett
i
ng Display due dates: ON
Display completed: ON Alarm sound: Door_Bell
Display due dates
: Set up whether to display the due date on the To
do list screen.
Display completed
: Set up whether to display completed To do on the
To do list screen.
Alarm sound : Set up an alarm sound
• How to operate 3 P338
Sort on priority Sort on date
19OTH01_1col_EN.fm 322 ページ 2004年11月24日 水曜日 午前9時24分
323
Other Convenient Functions
The To do list display method and alarm sound are set up.
Searching To Do List
You can search for a desired To do by just entering contents, texts, etc. registered on the To do
list.
aTap To do y Find on the Menu bar on the To do list screen
bTap the keyword entry field to enter a keyword
• You can enter up to 30 characters in either two or one byte letters.
• Searched if part of a string in the contents registered for a To do is entered.
cTap the Where? column to select an item to search for
dTap [Find]
eTap a desired To do
The Detail screen appears. 3 P338
• Tap [Cancel] to cancel the search.
Where?
All folders : Searches all the folders.
Current folder
: Searches the currently displayed folder.
• How to operate 3 P338
Keyword entry field
All folders : Searches all the folders.
Current folder : Searches the currently displayed folder.
A list of To do containing the keyword is displayed.
19OTH01_1col_EN.fm 323 ページ 2004年11月24日 水曜日 午前9時24分

324
Other Convenient Functions
Quick Execution of Frequently Used Functions
If you have set up a frequently used application in the Application Selector bar and the home key,
it can be quickly started.
Registering a Function on the Application Selector Bar
Display a different application in the Application Selector bar.
aTap $$ in the Application Selector bar, and then tap View y
Settings on the Menu bar
bTap the icon you want to change
cTap the Application setup column to select a function to be
registered
dTap [Done]
The application is registered in the Application Selector bar.
The currently registered application is displayed.
Application setup
: Set up a function to be registered.
19OTH01_1col_EN.fm 324 ページ 2004年11月24日 水曜日 午前9時24分
325
Other Convenient Functions
Registering a Function on the Home Key
Pressing down the home key for about 3 seconds starts the application registered. You can
register a different application on the home key.
aTap $$ y $$ in the Application Selector bar, and then tap Handset
tab y Shortcut key on the Control Panel screen
bSelect an application to be registered
cTap [Done]
The function is registered on the home key.
Changing Groups on the Control Panel
Items on the Control Panel have been pre-registered in 3 groups and are displayed on the
Handset, Connections or General tab. You can register a different group for each item.
aTap $$ y $$ in the Application Selector bar, and then tap Control
panel y Set Groups on the Menu bar on the Control Panel screen
Application : A list of applications that can be registered is
displayed.
The items on the Control Panel are displayed.
The groups of the items are displayed.
19OTH01_1col_EN.fm 325 ページ 2004年11月24日 水曜日 午前9時24分

326
Other Convenient Functions
bTap an item to be changed
cTap the Group column to select a group
dTap [Done]
Changes groups.
View duration
Checking Duration
Check duration for the last voice/video call and lifetime. You can also reset duration.
aTap $$ in the Application Selector bar, and tap Settings y Call
tracking on the Menu bar, and then tap Timers on the Call Tracking
screen
Dialogue : The current group name is displayed.
Group : Set up a group.
Last call : Duration for the last call you made is displayed.
Outgoing : Total outgoing call duration is displayed.
Incoming : Total incoming call duration is displayed.
All calls : Total duration from the reset to now is displayed.
Lifetime : Total duration up to now is displayed. Cannot be
reset.
View Duration screen
19OTH01_1col_EN.fm 326 ページ 2004年11月24日 水曜日 午前9時24分

327
Other Convenient Functions
Resetting Duration
Reset duration
• All types of duration other than lifetime are reset.
aTap [Reset] on the View Duration screen
• How to operate 3 See above
bTap [Yes] on the Call Timer screen
Duration is reset.
• Tap [No] to cancel the reset.
Checking Information on Amount of Data at Packet Communication
You can check the number of incoming/outgoing bytes at packet communication using the byte
counter. All the packet communications using the FOMA handset (including packets used with
the handset connected to a PC, etc.) are included.
aTap $$ y $$ in the Application Selector bar, and then tap the
Connections tab y Byte Counter on the Control panel screen
1To view Total
Displays the number of incoming/outgoing bytes for packet communication between the last
time number of bytes was reset and the Total tab is displayed.
aTap the Total tab
bAfter checking it, tap [Done]
Sent : Number of outgoing packets
Received : Number of incoming packets
Sum : Total number of packets
• Tap [Refresh] to refresh the value.
• After tapping [Reset], tap [Yes] on the Reset Confirmation
screen to reset the value.
19OTH01_1col_EN.fm 327 ページ 2004年11月24日 水曜日 午前9時24分

328
Other Convenient Functions
1To view Current
Displays the number of incoming/outgoing bytes for packet communication between the
time the current connection was made and the time the Current tab is displayed.
aTap the Current tab
bAfter checking it, tap [Done]
1To view Last time
Display the number of incoming/outgoing bytes for packet communication from the last
connection to the last disconnection.
aTap the Current tab
bAfter checking it, tap [Done]
Sent : Number of outgoing packets
Received : Number of incoming packets
Sum : Total number of packets
• Tap [Refresh] to refresh the value
Sent : Number of outgoing packets
Received : Number of incoming packets
Sum : Total number of packets
19OTH01_1col_EN.fm 328 ページ 2004年11月24日 水曜日 午前9時24分
329
Other Convenient Functions
Setting up the Byte Counter
Set up settings for the byte counter.
aTap [Settings] on the Byte Counter Display screen
De
f
ault sett
i
ng Byte Counter: $$ Warning display threshold: $$ Warning alarm threshold: $$
Threshold values: XXX (K bytes)
Byte Counter : Check when using the byte counter.
$$ is to use, and $$ is not to use.
Warning display
threshold
: Set up whether to display the Warning
screen if the number of incoming/outgoing
packet bytes exceeds the Threshold values.
$$ is to display, and $$ is not to display.
Warning alarm
threshold
: Set up whether to sound an alarm if the
number of incoming/outgoing packet bytes
exceeds the Threshold values.
$$ is to sound, and $$ is not to sound.
Threshold values
(in Kilobytes)
: Set up a threshold to be used for Warning
display threshold and Warning alarm
threshold.
19OTH01_1col_EN.fm 329 ページ 2004年11月24日 水曜日 午前9時24分

330
Other Convenient Functions
Displaying Information on the FOMA Handset
You can check hardware and software information for the FOMA handset.
aTap $$ y $$ in the Application Selector bar, and then tap the
Handset tab y Handset Information on the Control Panel screen
Calculator
Using as a Calculator
You can display the Calculator screen to use it for calculation. You can make calculations using
the memory and calculate percentage using %.
• Up to 12 digits can be displayed.
aTap $$ y $$ in the Application Selector bar
bCalculate
Machine : The name of the handset is displayed.
RAM : The memory space is displayed.
Version : The version of the supporting processor is
displayed.
Baseband : The version of the base band processor is
displayed.
Flex : The configuration data name of the base band
processor is displayed.
AP config : The configuration data name of the supporting
processor is displayed.
The following operations can be performed:
[0] ~ [9] : Enter a number.
[.] : Enters a decimal separator.
[+/-] : Every time you tap it, the number entered
switches signs between + and -.
[<-] : Deletes a number entered. Pointing deletes all
numbers entered.
[C] : Cancels the calculation.
[X][÷][+][-] : Performs four rules of arithmetic calculation.
[=] : Executes a calculation.
[√]: Displays the square root of the number
displayed.
[%] : Calculates the percentage of the number
displayed.
[m+] : Adds the number entered to the number stored in
the memory.
[m-] : Subtracts the number entered from the number
stored in the memory.
[mr] : Displays the number stored in the memory.
Calculator screen
19OTH01_1col_EN.fm 330 ページ 2004年11月24日 水曜日 午前9時24分

331
Other Convenient Functions
• Tap [C] to clear the calculation results.
• Tap [mr] twice to clear the number stored in the memory.
Entering Notes
You can use the FOMA handset as a note pad to register texts, handwritten illustrations, etc.
aTap $$ y $$ in the Application Selector bar, and then tap Notes y
New on the Menu bar on the Notes screen
bEnter texts
1To cancel the last operation
Tap Edit y Revert on the Menu bar
All texts are deleted.
1To select all texts entered
Tap Edit y Select all on the Menu bar
All texts are selected.
cTap $$
The text is registered in the Notes.
The following operations can be performed:
$$ : Dragging the text to specify the range and tapping it
makes the text bold. Tap it again to undo it.
$$ : Tapping a line you want to itemize and tapping after
moving the cursor itemizes the selected line with a
space inserted on top of it. Tap it again to undo it.
Text Notes
Registration screen.
19OTH01_1col_EN.fm 331 ページ 2004年11月24日 水曜日 午前9時24分

332
Other Convenient Functions
1About items on the menu bar
Tap Notes and Edit on the Menu bar on the Text Note Registration screen to display the
following items:
• Some items may not be able to be executed depending on the operation.
NOTE
• If a string of the text entered is recognized as a telephone number, an Email address or a URL, the string is
underlined and colored. Taping it allows you to perform operations such as making a voice/video call,
sending an Email and a short message (SMS), connecting to the Internet and registering it in contact.
Entering Handwritten Notes and Illustrations
Enter handwritten texts and illustrations and register them in the Notes.
aTap $$ y $$ in the Application Selector bar, and tap Notes y New
on the Menu bar on the Notes screen, and then tap the $$ tab on
the Text Note Registration screen
Notes
New . . . . . . . . . . . . . . . . . . . . See above
Send as . . . . . . . . . . . . . . . . . . . . . P356
Deleting note . . . . . . . . . . . . . . . . . P357
Edit
Revert . . . . . . . . . . . . . . . . . . See above
Cut . . . . . . . . . . . . . . . . . . . . . . . . . .P482
Copy . . . . . . . . . . . . . . . . . . . . . . . .P482
Paste . . . . . . . . . . . . . . . . . . . . . . . .P483
Select all . . . . . . . . . . . . . . . . See above
Zoom . . . . . . . . . . . . . . . . . . . . . . . .P141
The following operations can be performed:
$$ : You can change the color of the line.
$$ : You can change the thickness of the line.
$$ : You can clear the line.
Handwritten Note
Registration screen
19OTH01_1col_EN.fm 332 ページ 2004年11月24日 水曜日 午前9時24分

333
Other Convenient Functions
bEnter texts and illustrations
1To cancel the last operation
Tap Edit y Undo on the Menu bar
The screen reverts to the original state.
1To redo the operation
Tap Edit y Redo on the Menu bar
Redoes the cancelled operation.
1To cut a text/illustration
Tap Edit y Cut on the Menu bar
Cuts the entire text/illustration entered in the handwriting entry area.
1To copy a text/illustration
Tap Edit y Copy on the Menu bar
Copies the entire text/illustration entered in the handwriting entry area.
1To past the text/illustration
Tap Edit y Paste on the Menu bar
Pastes the text/illustration cut/copied.
1To clear all texts/illustrations
Tap Edit y Clear sketch on the Menu bar
Clears the entire text/illustration entered.
cTap $$
The handwritten note is registered in the Notes.
1About items on the Menu Bar
Tap Notes and Edit on the Menu bar on the Handwritten Note Registration screen to display
the following items:
• Some items may not be able to be executed depending on the operation.
You can draw characters and illustrations by dragging it.
Notes
New. . . . . . . . . . . . . . . . . . . . . . . . . P352
Send as. . . . . . . . . . . . . . . . . . . . . . P356
Delete note . . . . . . . . . . . . . . . . . . . P357
Edit
Undo. . . . . . . . . . . . . . . . . . . . . . . . P352
Redo. . . . . . . . . . . . . . . . . . . . . . . . P352
Cut . . . . . . . . . . . . . . . . . . . . . . . . . P352
Copy . . . . . . . . . . . . . . . . . . . . . . . . P352
Paste . . . . . . . . . . . . . . . . . . . See above
Clear sketch . . . . . . . . . . . . . . See above
Zoom . . . . . . . . . . . . . . . . . . . . . . . P141
19OTH01_1col_EN.fm 333 ページ 2004年11月24日 水曜日 午前9時24分

334
Other Convenient Functions
Checking/Updating Notes
Select notes registered on the Notes screen to display the Details screen. You can also update
the contents on the Details screen to reregister.
aTap $$ y $$ in the Application Selector bar
bTap the notes you want to check
cUpdate the contents and tap $$
The updated notes are registered.
• How to operate 3 P351
• Tap Edit 3 Revert on the Menu bar while updating the text notes to put it back to the
original text notes registered.
Item/icon Description
aTitle of text notes The head of the text notes is displayed.
bTitle of handwritten notes If handwritten notes alone are registered, Sketch and the registration date
and time are displayed.
c$$ Handwritten notes are registered.
Notes screen
Details screen
19OTH01_1col_EN.fm 334 ページ 2004年11月24日 水曜日 午前9時24分

335
Other Convenient Functions
1About items on the Menu Bar
Tap Notes and Edit on the Menu bar on the Notes screen to display the following items:
• Some items may not be able to be executed depending on the operation.
• The items on the Menu bar on the Details screen are the same as those on the Text Note/Handwritten
Note Registration screen. 3 P351, P352
Copying/Cutting Contents of Notes
Copy/cut text or handwritten registered notes and paste them as new notes.
aTap the notes you want to cut/copy on the Notes screen
• How to operate 3 P354
• To cut/copy handwritten notes, go to Step 3.
bSpecify a range to cut/copy on the Details screen of the notes
Drag it to specify the range.
cTap Edit y Cut/Copy y $$ on the Menu bar
dTap Edit y Paste on the Menu bar on the Notes screen
The note copied/cut is pasted.
Sending Notes
You can send notes registered by messaging or via Bluetooth.
aTap Notes y Send as on the Menu bar on the Details screen for the
notes to be sent
• How to operate 3 P354
bTap the Send as column on the Send as screen to select a
sending method y Tap [Done]
cCreate and send an email
• How to operate 3 P235, P261
Notes
New. . . . . . . . . . . . . . . . . . . . . . . . . P351
Find. . . . . . . . . . . . . . . . . . . . . . . . . P356
Edit
Undo delete . . . . . . . . . . . . . . . . . . P357
Paste . . . . . . . . . . . . . . . . . . . . . . . P355
Zoom . . . . . . . . . . . . . . . . . . . . . . . P141
Email : Send an Email with notes attached. Go to Step 3.
Text message
: Insert notes into a message of Short Message Service (SMS) to send. Go to
Step 3.
Bluetooth : Send notes via Bluetooth. 3 P384
19OTH01_1col_EN.fm 335 ページ 2004年11月24日 水曜日 午前9時24分

336
Other Convenient Functions
Searching for Notes
You can search for desired notes just by entering contents registered in the note as keywords.
aTap Notes y Find on the Menu bar on the Notes screen
bTap the Keyword entry field to enter a keyword
• You can enter up to 30 characters either in single- or double-byte.
• Just entering part of a string of the contents registered in the notes carries out a search.
cTap [Find]
dTap a desired note
The Details screen is displayed. 3 P354
• Tap [Cancel] to cancel the search.
Deleting Notes
Select notes registered to delete.
aTap Notes y Delete Note on the Menu bar on the Details screen for
the note you want to delete
The selected note is deleted.
• How to operate 3 P354
A list of notes containing the keyword is displayed.
• How to operate 3 P354
Keyword entry field
19OTH01_1col_EN.fm 336 ページ 2004年11月24日 水曜日 午前9時24分

337
Other Convenient Functions
Recovering Deleted Notes
You can recover deleted notes.
aDelete notes
• How to operate 3 See above
bTap Edit y Undo delete on the Menu bar on the Notes screen
The deleted note is recovered and displayed on the Notes screen.
• How to operate 3 P354
Displaying Time around the World
You can check time in the current country and other countries on the Date and Time screen. You
can change the current country and other countries.
aTap $$ y $$ on the Application Selector bar
bTap the current city display, and then tap Other
cTap the column you want to set up to select a country/city
dTap [Done]
The current and other countries/cities are set up, and it goes back to the Date and Time
screen.
The name of the city registered in the Current City is displayed.
Tapping it allows you to register a different country and a different
city.
The date, time and day of the week in the current country are
displayed. Tap to set up the date and time. 3 P59
The names of the cities registered in Other Cities and time are
displayed. Tap to change contry and city.
Current country
: Set up the current country.
Current city : Set up the city of the selected country.
Other country : Set up other countries.
Other city : Set up the cities of other countries.
• Tap the current city display to display the previously selected
cities to select.
• Tap the other city display to display the screen on the left.
19OTH01_1col_EN.fm 337 ページ 2004年11月24日 水曜日 午前9時24分
338
Other Convenient Functions
Earphone/microphone with switch
How to Use an Earphone/Microphone with Switch
Connecting an earphone/microphone with switch (optional) to the earphone microphone handset
makes you hear the other party's voice. you can also make or answer a call just by pressing the
switch.
• Do not put the cord of an earphone/microphone with switch around the FOMA handset. Otherwise the
antenna may malfunction to decrease the reception level of radio wave.
• Insert the plug of an earphone/microphone with switch firmly into the FOMA handset. If not inserted firmly
enough, no sound may be heard.
Connecting an Earphone/Microphone with Switch
Connect an earphone/microphone with switch to the FOMA handset.
aOpen the cover of the earphone microphone handset and insert
the connecting plug of an earphone/microphone with switch into
it
Making a Call Using the Switch
Make a call using the earphone/microphone with switch.
aEnter a telephone number
• How to operate 3 P66
• You can display the telephone number from the contacts and call history. 3 P69, P78,
P81, P107
bPress the switch of the earphone/microphone with switch for 1+
seconds
A short beep sounds, and the call is connected.
cIf you finish talking, press the switch for 1+ seconds
A short double beep sounds, and the call is disconnected.
Illutration
19OTH01_1col_EN.fm 338 ページ 2004年11月24日 水曜日 午前9時24分

339
Other Convenient Functions
Using the Switch to Answer the Phone
Answer the phone using the earphone/microphone with switch.
aWhen a call is received, press the switch of the earphone/
microphone with switch
A short beep sounds, and the call is connected.
bIf you finish talking, press the switch for 1+ seconds
A short double beep sounds, and the call is disconnected.
Answering Another Call during a Call
If you subscribe to and set up the call waiting service, a signal tone sounds if another call is
received during a call. You can answer the call and talk to another person.
aReceive a call during a call
A signal tone is heard during a call.
bPress the switch of the earphone/microphone with switch for 1+
seconds
Put the call on hold and answer another call.
• Every time you press the switch for 1+ seconds, you can talk to a different person.
NOTE
• You cannot answer a videophone call during a call.
• For a call using the call waiting service, you cannot hang up the call using an earphone/microphone with
switch.
19OTH01_1col_EN.fm 339 ページ 2004年11月24日 水曜日 午前9時24分
340
Other Convenient Functions
Reset settings
Putting the Settings of Various Functions Back to Default
Put the settings of various functions back to default.
• The security code or password changed cannot be put back to default.
aTap $$ y $$ in the Application Selector bar, and then tap the
Handset tab y Master Clear/Master Reset on the Control panel
screen
bTap $$ on Master Reset, enter the session number on the Session
number screen y tap [Continue]
•
cTap [Yes]
The settings revert to default.
• Tap [No] to cancel the reset.
• Session number 3 P146
19OTH01_1col_EN.fm 340 ページ 2004年11月24日 水曜日 午前9時24分

341
Other Convenient Functions
Collective data deletion
Deleting Registered Data Collectively
Puts the settings of various functions to default and clears the data you have registered (contact
data, etc.) and duration.
• Data registered on a UIM are not deleted.
• Lifetime is not deleted.
aTap $$ y $$ in the Application Selector bar, and then the tap
Handset y Master Clear/Master Reset on the Control panel screen
bTap $$ of Master Clear on the Clear/Reset Master screen, and then
enter the session number on the Session number entry screen
y Tap [Done]
cTap [Yes]
The settings revert to default, and the registered data are deleted.
• Tap [No] to cancel the reset and data deletion.
Installing an Application
You can install an application on the FOMA handset.
aTap $$ in the Application Selector bar, and then tap Launcher
y Install on the Menu bar
Installable software is displayed with its original stored location.
bTap the software to be installed y [Install]
The name, version and developer are displayed.
cTap [Install]
Installation starts.
• Tap [Cancel] to cancel the installation.
• Tap [Details] to display the detail information about the software.
dTap [Done]
The installation is completed.
19OTH01_1col_EN.fm 341 ページ 2004年11月24日 水曜日 午前9時24分
342
Other Convenient Functions
Uninstalling an Application
You can uninstall an application that is no longer needed.
aTap $$ in the Application Selector bar, and then tap Launcher
y Uninstall on the Menu bar
Uninstallable Applications are displayed with their memory space.
bTap the application to be uninstalled y Tap Uninstall
The application icon, name, version and developer are displayed.
cTap [Yes]
Uninstallation starts.
• Tap [No] to cancel the uninstallation.
dTap [Done]
The uninstallation is completed.
Total memory : The total memory space for the handset is
displayed.
Memory in use : Currently used memory space is displayed.
Available memory: Currently unused memory space is
displayed.
19OTH01_1col_EN.fm 342 ページ 2004年11月24日 水曜日 午前9時24分

343
Network Services
Network Services Available. . . . . . . . . . . . . . . . . . . . . . . . . . . . . . . . . . . . . . . 344
Using Voice Mail Service . . . . . . . . . . . . . . . . . . . . . . . . . . . . . . . . . . . . . . . . . 344
Using Call Waiting Service . . . . . . . . . . . . . . . . . . . . . . . . . . . . . . . . . . . . . . . 346
Using Call Forwarding Service . . . . . . . . . . . . . . . . . . . . . . . . . . . . . . . . . . . . 348
Using Nuisance Call Blocking Service. . . . . . . . . . . . . . . . . . . . . . . . . . . . . . 350
Using Caller ID Display Request Service. . . . . . . . . . . . . . . . . . . . . . . . . . . . 350
Using Dual Network Service . . . . . . . . . . . . . . . . . . . . . . . . . . . . . . . . . . . . . . 351
Using English Announcement Service . . . . . . . . . . . . . . . . . . . . . . . . . . . . . 351
Using Service Dialling . . . . . . . . . . . . . . . . . . . . . . . . . . . . . . . . . . . . . . . . . . . 352
Selecting How to Handle Incoming Calls during Call
<Selecting Action on Receiving Incoming Calls during Call>. . . . . . . . . . . 353
Enabling/Disabling Action on Receiving Incoming Calls during Call
<Action on Receiving Incoming Calls during Call> . . . . . . . . . . . . . . . . . . . 353
Setting Remote Operations <Remote Operations> . . . . . . . . . . . . . . . . . . . 353
Registering and Using Services <Added Service (Register USSD)> . . . . . 354
00M1000EN.book 343 ページ 2004年11月24日 水曜日 午前7時56分
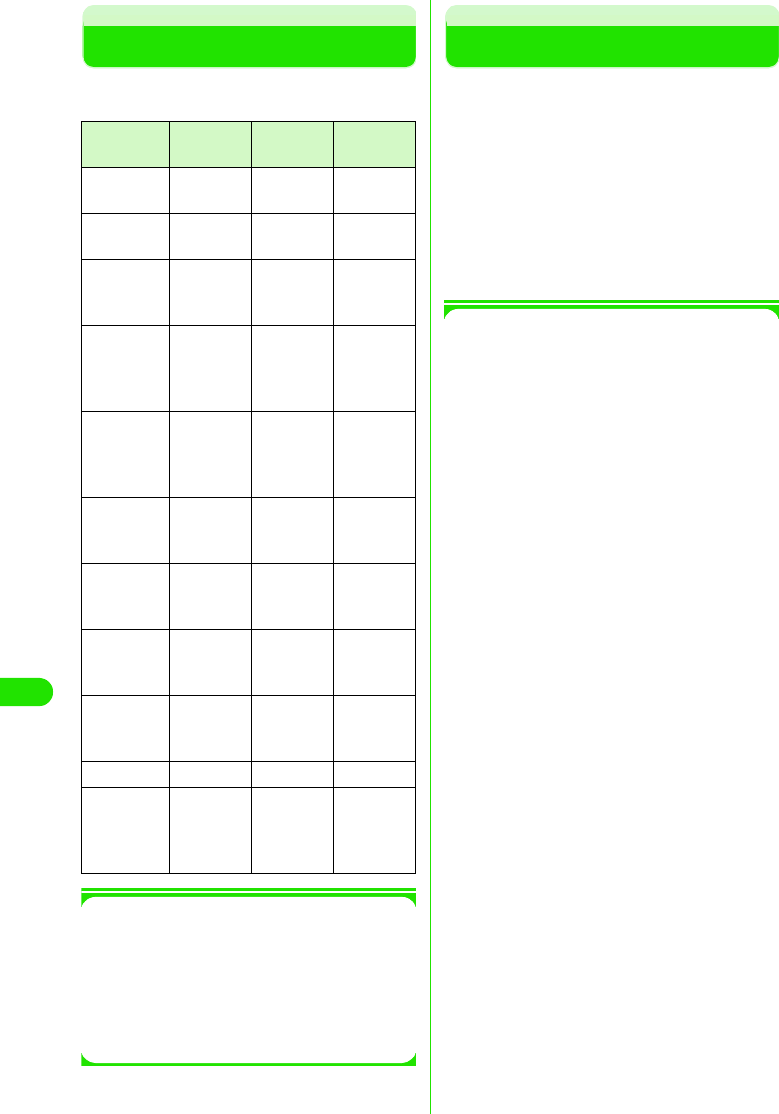
344
Network Services
Network Services Available
The following network services are available
on your FOMA handset.
1Using Network Services
For subscriptions or inquiries regarding
network services, contact "General
Contact" on the back cover this manual.
For detailed information, operations and
precautions on each service, refer to
"Network Service Operations Guide".
Using Voice Mail Service
When your handset is out of range or
switched off, the Voice Mail Service will
automatically respond to the call, and receive
a message.
You can hear the stored message from
anywhere within the FOMA service area.
• Voice Mail Service is a paid subscription service.
Monthly charge will apply.
• You can hear voice messages from anywhere in
Japan.
1Voice Mail Service
• Up to 20 voice messages (approx. 3 minutes
per message) can be recorded.
• Voice messages are stored in Voice Mail
Service Center for up to 72 hours.
• It also provides a function that simply
announces that you cannot answer the call.
• Even if you have enabled Voice Mail Service,
you can answer the call while the handset is
ringing. The handset ceases to ring when the
call is diverted to Voice Mail Service Center.
Ringing time can be changed. 3 P367
• If voice messages are stored in Voice Mail
Service Center, the number of voice
messages stored is displayed in the Message
area in the Home screen, and $$ is displayed
on the Status bar. Missed Call List shows that
you had incoming calls.
• Even if you also subscribe to Call Forwarding
Service, you cannot use the two services at
the same time. When you have enabled Call
Forwarding Service, Voice Mail Service is
automatically disabled. However, if you have
disabled Call Forwarding Service, Voice Mail
Service will not be automatically enabled.
• You can use tap operations to divert an
incoming call to Voice Mail Service Center.
You can also divert a second incoming call to
Voice Mail Service Center during a call.
• If Remote Operation has been enabled, you
can use a touch-tone landline or a payphone
to perform remote operations on Voice Mail
Service. 3 P375
• If you have enabled Caller ID Display Request
Service along with Voice Mail Service, Voice
Mail Service will not be activated and the
caller ID display request guidance is provided
Service
Name
Monthly
Charge
Subscribe Reference
Voice Mail
Service
Charged Required P366
Call Waiting
Service
Charged Required P368
Call
Forwarding
Service
Free Required
P370
Nuisance
Call
Blocking
Service
Charged Required
P371
Caller ID
Display
Request
Service
Free Not
required P372
Dual
Network
Service
Charged Required
P373
English
Announcement
Service
Free Not
required P374
International
Roaming
Service
Free Required
P506
Caller ID
Notification
Service
Free Not
required P62
Drive Mode Free Required P79
Short
Message
Service
(SMS)
Free Required
P225
00M1000EN.book 344 ページ 2004年11月24日 水曜日 午前7時56分
345
Network Services
instead when an incoming call with no caller
ID is received.
• Even if Voice Mail Service is enabled, an
incoming video call is not diverted to Voice
Mail Service Center. The video call is
received by the FOMA handset.
• When your handset is in an area with no radio
wave or out of the service area, you cannot
access this service.
Basic flow of Voice Mail Service
You can follow the procedures below to use
Voice Mail Service.
Voice Mail Service Charges
To use Voice Mail Service, call charges apply
for playing back voice messages along with
monthly charges.
Enabling Voice Mail Service
aTap $$ on the Application Selector
bar, and then tap Phone y Voicemail
y Activate on the Menu bar
bTap $$ in Voicemail Ringing time
• If you do not set up the ringing time,
proceed to Step 4.
cTap the Seconds field y Enter ringing
time y Tap [Done]
• The ringing time must be within the range
of 0 to 120 seconds.
dTap [Yes] in the confirmation screen
Voice Mail Service is enabled.
• Tap [No] in the confirmation screen to
cancel the setting and return to the
Phone number entry screen.
NOTE
• You can also set up or change the ringing time
independently. 3 See below
Modifying the Ringing Tme
You can modify the ringing time from when an
incoming call is received until the call is
diverted to Voice Mail Service Center.
aTap $$ on the Application Selector
bar, and then tap Phone y Voicemail
y Edit voicemail ringing time on the
Menu bar
bEnter the ringing time in the Ringing
time entry screen y Tap [Done]
Ringing time is changed.
• The ringing time must be within the range
of 0 to 120 seconds.
NOTE
• If the ringing time you set is shorter than the
ringless time set up, an incoming call is diverted
to Voice Mail Service Center without ringing your
handset.
Step 1 : Enable Voice Mail Service
Step 2 : Callers store voice messages*
*: When you are in a hurry to
record your voice message,
and you want to skip Voice
Mail Service's response
message, tap # while the
response message is playing.
Step 3 : Play back messages
Voicemail ringing time
: Select to set up the ringing time.
Seconds: Enter the ringing time.
00M1000EN.book 345 ページ 2004年11月24日 水曜日 午前7時56分

346
Network Services
Disabling Voice Mail Service
aTap $$ on the Application Selector
bar, and tap Phone y Vo ic e m a il y
Deactivate on the Menu bar, and then
tap [Yes] in the confirmation screen
Voice Mail Service is disabled.
• Tap [No] in the confirmation screen to
cancel the setting.
Listening to Voice Messages
When voice messages are recorded, the
number of voice messages stored is
displayed in the Messages area in the Home
screen, and $$ is displayed on the Status bar.
aTap the Number of recorded
messages in the Messages area
Plays back voice messages.
NOTE
• To replay voice messages you have already
listened to, tap $$ on the Application Selector
bar, and then tap Phone y Voicemail y Play
messages y [Yes] on the Menu bar.
Checking for New Voice Messages
You can inquire Voice Mail Service Center for
new voice messages.
aTap $$ on the Application Selector
bar, and then tap Phone y Vo i c e m a il
y Check messages on the Menu bar
Makes an inquiry to Voice Mail Service
Center.
bTap [Done] in the Check messages
screen
Ends the inquiry.
• If you have new voice messages, the
number of voice messages is displayed
in the Messages area in the Home
screen, and $$ is displayed on the Status
bar.
Checking Voice Mail Settings
Checks the current Voice Mail settings.
aTap $$ on the Application Selector
bar, and then tap Phone y Vo i c e ma i l
y Status on the Menu bar
Displays the current settings.
bTap [Done] in the Voicemail screen
Status check is ended.
Setting up Voice Mail Service with
Voice Guidance
aTap $$ on the Application Selector
bar, tap Phone y Voi c e ma i l y Check
settings on the Menu bar, and then
tap [Yes] in the confirmation screen
Connects to Voice Mail Service Center.
bSet up Voice Mail Service by
following voice guidance
Sets up Voice Mail Service.
Using Call Waiting Service
When you receive an incoming call during a
call, Call Waiting Service allows you to put the
active call on hold and answer the incoming
call. This service also allows you to put the
active call on hold to make another call.
• Call Waiting Service is a paid subscription service.
Monthly charge will apply.
• When an incoming call is received during a call,
you will hear the beep tone.
1Call Waiting Service
• If you have enabled Caller ID Display Request
Service along with Call Waiting Service, the
Call Waiting Service will not be activated and
the caller ID display request guidance is
provided instead when an incoming call with
no caller ID is received.
00M1000EN.book 346 ページ 2004年11月24日 水曜日 午前7時56分

347
Network Services
• If you have enabled Call Waiting Service,
disable the Set Arrival Act. If Set Arrival Act is
enabled, according to its setting incoming
calls will be diverted to Voice Mail Service
Center.
• Call Waiting Service is not activated in the
following situations:
- When dialing 104, 110, 117, 118 or 119
- When dialing or calling another party
- When you are subscribed and connected to
Voice Mail Service Center playing back
voice messages, etc.
- When dialing a 4-digit number to set up
various network services such as 1411
(enabling Voice Mail Service) and 1420
(disabling Call Forwarding Service)
- During a video call (an incoming call is
stored in Missed Call List)
- When a video call is received during a voice
call (the call is stored in Missed Call List)
• The caller is being charged during a call on
hold.
• You cannot make a video call during a call.
• When your handset is out of the service area
or out of range, you cannot access this
service.
Enabling/Disabling Call Waiting
Service
Call Waiting Service is enabled.
aTap $$ in the Application Selector
bar, and then tap Settings y Call
control on the Menu bar
bTap $$ in the Call Waiting field of the
Call Control screen
Enables Call Waiting Service.
• Tap $$ again to disable Call Waiting
Service.
Putting the Active Call on Hold to
Answer an Incoming Call
You can put the active call on hold to answer
an incoming call.
aWhen the Incoming call screen is
displayed during a call, tap
[Answer]
Puts the active call on hold. You can answer
the incoming call.
• Tap [Reject] to reject the incoming call.
• During Call Waiting Service, the first
caller is displayed in the upper half and
the second caller in the lower half of the
screen.
• Tap [$$Switch] to switch between callers.
$$ indicates the caller you have put on
hold. $$ indicates the caller you are now
talking with.
bPress e when you finish talking
with the other party
Ends the active call and reactivates the call
on hold.
Ending the Active Call to Answer an
Incoming Call
End the active call to answer an incoming call.
aWhen the Incoming call screen is
displayed during a call, tap $$ in
Drop Active on Answer y [Answer]
Ends the active call. You can answer the
incoming call.
• Tap [Reject] to reject the incoming call.
Putting the Active Call on Hold to Make
Another Call
Put the active call on hold to make another
call.
aTap [$$Keypad] during a call
00M1000EN.book 347 ページ 2004年11月24日 水曜日 午前7時56分
348
Network Services
bEnter a phone number in the Phone
number entry screen y Tap [$$]
Puts the active call on hold to take the other
call.
• You can dial to stored phone numbers by
tapping [History] in the Phone number
entry screen and displaying Dialed List,
Answered List or Missed Call List.
cPress e when you finish talking
with one of the parties
Ends the active call and reactivates the call
on hold.
Using Call Forwarding
Service
You can automatically forward incoming calls
to your FOMA handset to a pre-registered
phone number.
• Call Forwarding Service is an optional
subscription service. Monthly charges will not
apply.
• Only 1 phone number can be set up as a
forwarding destination.
• Even if Call Forwarding Service has been
enabled, you can answer calls as long as the
handset rings. The handset ceases to ring
when the call is diverted to Voice Mail Service
Center. The time period in which the handset
ring (ringing time) can be changed. 3 P371
• Even if you also subscribe to Voice Mail
Service, you cannot use the two services at
the same time. When you have enabled Voice
Mail Service, Call Forwarding Service is
automatically disabled. However, if you have
disabled Voice Mail Service, Call Forwarding
Service will not be automatically enabled.
• If Remote Operation has been enabled, you
can use a touch-tone landline or a payphone
to perform remote operations on Call
Forwarding Service. 3 P375
• If you have enabled Caller ID Display Request
Service along with Call Forwarding Service,
Call Forwarding Service is not activated and
the caller ID display request guidance is
provided instead when an incoming call with
no caller ID is received.
• A video call is not forwarded even if Call
Forwarding Service has been enabled unless
a 3G - 324M compliant, video call-enabled
phone is specified as the forwarding
destination. Check the specifications of the
destination when enabling Call Forwarding
Service. The video caller will not hear the
guidance indicating that call forwarding is in
progress.
• When your handset is out of the service area
or out of range, you cannot access this
service.
Basic Flow of Call Forwarding Service
You can follow the procedures below to use
Call Forwarding Service.
Call Forwarding Service charges
Call Forwarding Service charges are
calculated as follows.
* If a Call Forwarding Service subscriber forwards a
call from his/her handset, the subscriber is
charged for the call from forwarding source to
destination.
Step 1 :Register a forwarding destination
number
Step 2 :Enable Call Forwarding Service
Step 3 :A call arrives at your FOMA
handset
Step 4 :Automatically forwards the call to
the destination after the specified
ringing time elapses
No monthly charge Call charges
Caller
⇔⇔
Forwarding
destination
Callers
are
charged
Call
Forwarding
Service
subscriber
Call
Forwarding
Service
subscribers
are
charged
+
00M1000EN.book 348 ページ 2004年11月24日 水曜日 午前7時56分

349
Network Services
* There is no call charge for registering the
forwarding destination, enabling and disabling
Call Forwarding Service, and setting the ring time.
Enable Call Forwarding Service
aTap $$ in the Application Selector
bar, and tap Setting y Call control on
the Menu bar, and then tap the
Forwarding tab in the Call Control
screen
bTap $$ in the Forwarding field in the
Call Control screen
• If a forwarding destination number has
been already set up, the confirmation
screen appears. Tap [Yes] to enable Call
Forwarding Service.
cEnter a phone number in the Enter
forwarding number screen y Tap
[Activate service?]
Enables Call Forwarding Service.
NOTE
• You can also set up or change the forwarding
destination number or ringing time
independently. 3 See below
Changing the Forwarding Destination
Number
aTap $$ on the Application Selector
bar, and tap Setting y Call control on
the Menu bar, and then tap the
Forwarding tab in the Call Control
screen
bTap the Number field in the Call
Control screen to enter a phone
number in the Enter forwarding
number screen y Tap [Done]
1To select a forwarding destination
number from Contacts
aTap [$$]
bTap and select a desired forwarding
destination number
Modifying the Ringing Time
aTap $$ on the Application Selector
bar, and tap Setting y Call control on
the Menu bar, and then tap the
Forwarding tab in the Call Control
screen
bTap the Ringing time field in the Call
Control screen to enter the ringing
time in the Ringing time entry
screen y Tap [Done]
Sets the ringing time.
Disabling Call Forwarding Service
aTap $$ on the Application Selector
bar, and tap Setting y Call control on
the Menu bar, and then tap the
Forwarding tab in the Call Control
screen
bTap $$ in the Forwarding field in the
Call Control screen, and then tap
[Yes] in the confirmation screen
Disables Call Forwarding Service.
NOTE
• You cannot specify toll free numbers or 3-digit
numbers such as 110 as the forwarding
destination.
• When your handset is out of range or switched
off, an incoming call is automatically forwarded
without ringing your handset. In this case, Call
Forwarding Service subscriber is charged for the
call from forwarding source to destination.
• NTT DoCoMo may suspend Call Forwarding
Service on behalf of subscribers upon owners of
forwarding destinations request and we deem it
necessary.
• Note that designating a PBX, beeper*, or FAX as
forwarding destination may cause
misunderstandings by callers.
• If the ringing time you set is shorter than the
ringless time, an incoming call is forwarded to
the forwarding destination without ringing your
handset.
*: From January 2001 onwards, NTT DoCoMo
beeper name has been changed to
"QUICKCAST".
00M1000EN.book 349 ページ 2004年11月24日 水曜日 午前7時56分

350
Network Services
Using Nuisance Call
Blocking Service
You can bar incoming calls to your handset by
registering phone numbers from which you do
not want to receive calls.
• Nuisance Call Blocking Service is a paid
subscription service. Monthly charge will apply.
• You can register up to 30 phone numbers.
Registering Phone Numbers
Register the phone number of the last call as
barred number.
• Phone numbers that were not answered or you
dialed cannot be registered.
aTap $$ on the Application Selector
bar, and then tap Phone y Nuisance
Calls y Block Last on the Menu bar
bTap [Yes] in the confirmation screen
Registers the phone number.
Register Specified Phone Numbers
aTap $$ on the stand-by display, dial
"144" y tap [$$]
bRegister phone numbers by
following the voice guidance
cWhen completed, press e
Registers specified phone numbers.
NOTE
• When your handset is out of the service area or
out of range, you cannot access this service.
• If you have enabled other network services,
including Voice Mail Service, Call Forwarding
Service, Call Waiting Service, Caller ID Display
Request Service or Drive Mode, along with
Incoming Call Barring Service, other network
services are not activated. When an incoming
call from a registered number is received, the
call block guidance is provided.
• When an incoming call from a registered number
is received, neither the action on receiving
incoming calls take place nor the call is recorded
in the Missed Call list.
• When an incoming call is a video call, the video
call is discarded without providing the call block
guidance.
• Phone numbers with no caller ID can be
registered.
• International phone numbers may not be
registered.
• You cannot check or inquire registered numbers.
We recommend that you take a note of them.
Deleting registered phone numbers
You can delete registered phone numbers
one-by-one, beginning with the most recently
registered one. You can also delete all phone
number at a time.
aTap $$ on the Application Selector
bar, and then tap Setting y Nuisance
Calls y Delete items/Clear List on the
Menu bar
bTap [Yes] in the confirmation screen
Deletes registered phone number(s).
Using Caller ID Display
Request Service
When an incoming call with no Caller ID is
received, voice guidance is provided
requesting the caller to show caller ID.
• You do not need to subscribe to Caller ID Display
Request Service. No monthly charge will apply.
• Caller ID Display Request Service is applied only
to incoming voice calls.
• This service is activated only when the reason for
not notifying caller ID is set to "Hide Caller ID". If
the reason is "Caller ID Not Available" or
"Payphone*", this service is not activated.
*: If a caller prefixes "184" to a phone number
when making a call at a payphone, this
service is activated.
• The caller is charged for responding to the voice
guidance requesting the caller ID.
Delete items : Deletes the phone number
you registered last.
Clear List : Deletes all the registered
phone numbers.
00M1000EN.book 350 ページ 2004年11月24日 水曜日 午前7時56分

351
Network Services
aTap $$ on the Application Selector
bar, and then tap Setting y Call
control on the Menu bar
bTap $$ in the Caller ID Request field of
the Call Control screen, and then
tap [Yes] in the confirmation screen
Enables Caller ID Display Request Service.
• Tap $$, and then tap [Yes] in the
confirmation screen to disable Caller ID
Display Request Service.
NOTE
• When your handset is out of the service area or
out of range, you cannot access this service.
• If you have enabled other network services,
including Voice Mail Service, Call Forwarding
Service, Call Waiting Service, or Drive Mode,
along with Caller ID Display Request Service,
other network services are not activated. When
an incoming call with no caller ID is received, the
caller ID display request guidance is provided to
the caller. If Incoming Call Barring Service is
enabled at the same time, the call block
guidance is provided.
• If you have enabled the Action on Receiving
Incoming calls According to Reason for Not
Notifying Caller ID, along with Caller ID Display
Request Service, the action is not activated.
When an incoming call that does not notify caller
ID has arrived, the caller ID display request
guidance is provided to the caller.
Using Dual Network
Service
Dual Network Service allows you to use the
phone number of your FOMA handset to work
with mova. When your handset is out of
FOMA service area, you can switch to mova
to make or answer calls.
• You cannot use FOMA and mova at the same
time.
• You need to subscribe to Dual Network service.
Monthly charge will apply.
Switching to FOMA Handset
You can switch from mova to FOMA.
aTap $$ on the Application Selector
bar, and then tap Setting y Network
on the Menu bar
bTap [Activate] in the Dual network
field in the Network screen, and
then enter a network password in
the Network password entry screen
Switches to FOMA.
• Network password 3 P146
Checking the Current Setting
You can check which network, FOMA or
mova, you are using.
aTap $$ on the Application Selector
bar, and then tap Setting y Network
on the Menu bar
bTap [Check Status] in the Dual
network field in the Network screen
Displays the network you are using.
NOTE
• When your handset is out of the service area or
out of range, you cannot access this service.
• You cannot use a FOMA handset to switch from
FOMA to mova. Switching must be performed
from mova.
Using English
Announcement Service
You can set the language used for the
guidance you hear when making a call, or for
a caller to hear the response in "Japanese" or
"English".
• You do not need to subscribe to English
Announcement Service. No monthly charge will
apply.
• When a caller uses a DoCoMo's moblie phone
with the guidance language set to English in order
to make a call to a DoCoMo's mobile phone with
the guidance language set to English, the caller's
voice guidance settings for outgoing calls takes
precedence over called party's voice guidance
settings for incoming calls when the voice
guidance is provided.
00M1000EN.book 351 ページ 2004年11月24日 水曜日 午前7時56分

352
Network Services
aTap $$ on the Application Selector
bar, and then tap Setting y Guidance
on the Menu bar
bTap the Outgoing field to select a
language y Tap [Yes] in the
confirmation screen
cTap the Incoming field to select a
language y Tap [Yes] in the
confirmation screen
dTap [Done]
Sets the language used for voice guidance.
NOTE
• When your handset is out of the service area or
out of range, you cannot access this service.
• English Announcement Service is not available
for video calls.
Using Service Dialling
Call DoCoMo Help Desk or DoCoMo
Information Desk.
• You do not need to subscribe to Service Dialling.
No monthly charge will apply.
• Screen display or the numbers you dial may vary,
depending on your UIM.
Making Inquiries about Failures
aTap $$ on the Application Selector
bar, and tap Phone y My lines on the
Menu bar, and then tap the Service
number tab in the My lines screen
bTap DoCoMo Help Desk y [Call] in the
My lines screen
Calls DoCoMo Help Desk.
Call DoCoMo Information Desk
aTap $$ on the Application Selector
bar, and tap Phone y My Lines on the
Menu bar, and then tap the Service
number tab in the My lines screen
bTap DoCoMo Information Desk y [Call]
in the My lines screen
Calls DoCoMo Information Desk.
NOTE
• When your handset is out of the service area or
out of range, you cannot access this service.
Outgoing calls
Japanese : Sets the voice guidance
you hear when making
a call to Japanese.
English : Sets the voice guidance
you hear when making
a call to English.
Incoming calls
Japanese : Sets the voice guidance
a caller party hears
when you receive the
call to Japanese.
Japanese+
English
: Sets the voice guidance
a caller party hears
when you receive the
call to Japanese 3
English.
English+
Japanese
: Sets the voice guidance
a caller party hears
when you receive the
call English 3
Japanese.
00M1000EN.book 352 ページ 2004年11月24日 水曜日 午前7時56分

353
Network Services
Selecting Action on Receiving Incoming Calls during Call
Selecting How to Handle
Incoming Calls during Call
You can choose to automatically divert an
incoming call received during a voice call or
during 64K data communication to Voice Mail
Service Center.
• This feature is available only when you subscribe
to Voice Mail Service.
• You must enable the Action on Receiving
Incoming Calls during Call before you can activate
it. 3 P371
aTap $$ on the Application Selector
bar y Setting y Call control on the
Menu bar, and then tap the
Forwarding tab in the Call Control
screen
bTap $$ in the Fwd to voicemail when
busy field of the Call Control screen,
and then tap [Yes] in the
confirmation screen
Selects the Action on Receiving Incoming
Calls during Call.
• Tap $$, and then tap [Yes] in the
confirmation screen to deselect the
action.
NOTE
• Even if Voice Mail Service has been disabled,
Voice Mail Service is automatically enabled
when you have enabled this feature.
• When an video call or 64K data communication
call arrives during a voice call or during 64K data
communication, the incoming call is rejected.
Action on Receiving Incoming Calls during Call
Enabling/Disabling Action on
Receiving Incoming Calls during Call
You can enable/disable the Action on
Receiving Incoming Calls during Call.
aTap $$ on the Application Selector
bar, and then tap Setting y Call
control on the Menu bar
bTap $$ in the Set Arrival Act field of
the Call Control screen, and then
tap [Yes] in the confirmation screen
Enables the Action on Receiving Incoming
Calls during Call.
• Tap $$, and then tap [Yes] in the
confirmation screen to disable the action.
NOTE
• When your handset is out of the service area or
out of range, you cannot access this service.
Remote Operations
Setting Remote Operations
When you subscribe to Voice Mail Service or
Call Forwarding Service, you can choose
whether you perform remote operations on
these services from payphones.
aTap $$ on the Application Selector
bar, and then tap Setting y Roaming
on the Menu bar
bTap $$ in the Remote access control
field in the Roaming screen, and
then tap [Yes] in the confirmation
screen
Enables remote operations.
• Tap $$, and then tap [Yes] in the
confirmation screen to disable remote
operations.
NOTE
• When your handset is out of the service area or
out of range, you cannot access this service.
00M1000EN.book 353 ページ 2004年11月24日 水曜日 午前7時56分
354
Network Services
Added Service (Register USSD)
Registering and Using
Services
When we introduce a new network service,
you can register the new service to your
FOMA handset.
• Up to ten services can be registered.
Registering/Modifying a Service
aTap $$ on the Application Selector
bar, and then tap Phone y Additional
Service on the Menu bar
bTap the number you want to register
or change y [Edit] in the Additional
Service screen
cTap the Name field y Enter a name
• Up to 10 double-byte characters, or 20
single-byte characters can be entered.
dTap the Command field and enter a
Service Code (USSD) in the
Commands entry screen y
[Complete] y Tap [Done]
Registers or changes the service.
• To register other services, repeat Steps 2
to 4.
NOTE
• Register the service names and service codes
(USSD) provided by DoCoMo.
Using Registered Services
• When your handset is out of the service area or
out of range, you cannot access this service.
aTap $$ on the Application Selector
bar, and then tap Phone y Additional
Services on the Menu bar
bTap the number you want to use y
[Transmit] in the Additional Service
screen
Transmits the special number or Service
Code (USSD) of the selected service to the
service center.
Deleting Registered Services
aTap $$ on the Application Selector
bar, and then tap Phone y Additional
Services on the Menu bar
bTap the number you want to delete
y [Clear] in the Additional Service
screen
Deletes the selected service.
Name : Enter a network service
name.
Command : Enter a Service Code
(USSD) used to notify the
service center.
00M1000EN.book 354 ページ 2004年11月24日 水曜日 午前7時56分

355
Bluetooth
About Bluetooth . . . . . . . . . . . . . . . . . . . . . . . . . . . . . . . . . . . . . . . . . . . . . . . . 356
Before Using Bluetooth . . . . . . . . . . . . . . . . . . . . . . . . . . . . . . . . . . . . . . . . . . 358
Using Bluetooth. . . . . . . . . . . . . . . . . . . . . . . . . . . . . . . . . . . . . . . . . . . . . . . . . 362
00M1000EN.book 355 ページ 2004年11月24日 水曜日 午前7時56分
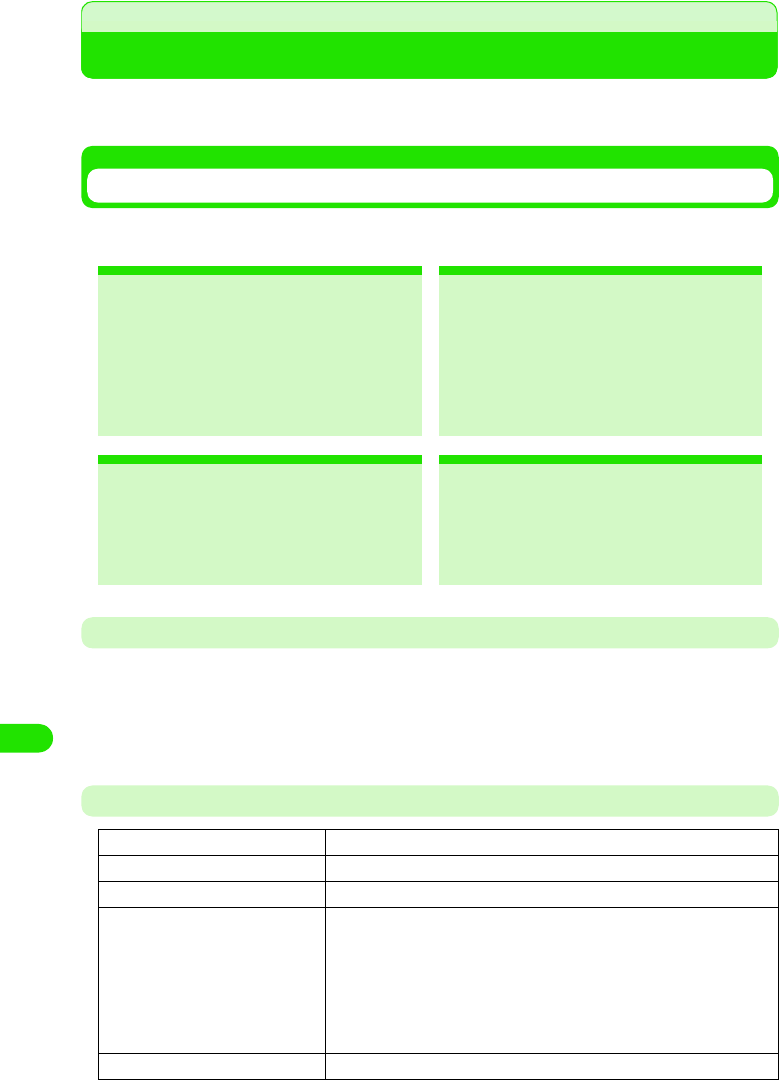
356
Bluetooth
About Bluetooth
A wireless technology that exchanges data between devices such as PCs, headsets and
handsfree devices. You can send/receive data between Bluetooth devices without using a cable.
Services Available with Bluetooth
With a Bluetooth device connected, your FOMA handset allows you to talk or transmit data via
wireless.
Bluetooth Communications
• Bluetooth provides wireless data transfer using the 2.4 GHz band, which is shared by various devices.
Although Bluetooth employs a technique to minimize the interference from other devices in the same band,
the transmission speed/range may be downgraded or even disconnected.
• The transmission speed/range may differ depending on the distance and obstacles between the devices,
radio signal conditions, and Bluetooth devices.
Main Specifications
*1: Varies depending on obstacles between the communication devices and the radio signal conditions.
2Talking Wirelessly
By connecting a Bluetooth headset/
handsfree device to your FOMA
handset, you can talk wirelessly.
2Sending Contacts/Schedule/ToDo
List Entries 3 P384
By converting contacts into vCard
format and Schedule/ToDo list entries
into vCalendar format, you can send
them to other FOMA handsets or
Bluetooth devices.
2Sending Images/Video Clips/Voice
Memos 3 P384
You can send image/video/voice memo
files stored in your phone to other
FOMA handsets or Bluetooth devices.
2Setting Up Dial-Up Connection
3P419, P429
By connecting to a PC via Bluetooth,
you can access to the Internet.
Supporting Bluetooth version Bluetooth standard Ver.1.1 conformity
Output Bluetooth standard
Transmission range *1 Within about 10 meters
Supporting Bluetooth profiles *2 Generic Object Exchange Profile
Object Push Profile
Serial Port Profile
Dialup Networking Profile
Headset Profile
Service Discovery Application Profile
Hands-free Profile
Frequency band 2.4 GHz band (2.402 GHz ~ 2.480 GHz)
00M1000EN.book 356 ページ 2004年11月24日 水曜日 午前7時56分

357
Bluetooth
*2: The specifications of Bluetooth devices according to the usage. It is the standard for Bluetooth.
1Bluetooth Glossary
Passkey
A 1- to 16-digit alphanumerical password set for each device to prevent unauthorized
incoming connection to Bluetooth devices.
Pairing
When two devices establish a Bluetooth connection for the fist time, pairing is carried out.
To add a device, the passkey that other device has set must be entered.
Profile
A communication protocol defined according to the type of data transmitted via Bluetooth.
Finding
Finding other Bluetooth devices within the transmission range.
00M1000EN.book 357 ページ 2004年11月24日 水曜日 午前7時56分

358
Bluetooth
Before Using Bluetooth
Flow for Sending/Receiving Information Using Bluetooth
To connect a Bluetooth device to your FOMA handset, use the following steps:
<First connection> <Second and subsequent connection>
Turning Bluetooth Function ON 3 P382
Adding and Connecting
Bluetooth Devices 3 P382
Making/Answering Calls with
Headset/Handsfree Device*
Sending Information
3 P384
Receiving Information
3 P385
Disabling Bluetooth Function 3 P382
*: For call operations with a headset/handsfree device, see the operation manual for each device.
00M1000EN.book 358 ページ 2004年11月24日 水曜日 午前7時56分

359
Bluetooth
Setting up Connections
Set up the environment for Bluetooth connections.
aTap $$ y $$ in the Application Selector bar, and tap the
Connections tab y Bluetooth on the Control panel screen
bTap the item to set and make the setting
cTap [Done]
Adding and Connecting Bluetooth Devices
When you make Bluetooth connection for the first time, or your desired Bluetooth device does not
appear on the Available devices screen, you can find and add the devices within the
communication range.
aPut the Bluetooth device in standby status
bTap $$ y $$ in the Application Selector bar, and tap the
Connections tab y Bluetooth on the Control panel screen
Bluetooth ON : Turning Bluetooth connection ON/OFF.
$$ is ON, $$ is OFF.
Visible to other devices
No : Makes your M1000 invisible to other
devices.
Yes : Makes your M1000 visible to other devices.
For 10 minutes : Makes your M1000 visible to other devices
for 10 minutes.
Receiving items
Always receive : Always accepts a connection request from
other device.
Ask first : Asks first when receiving a connection
request from other device.
Never receive : Never accepts a connection request from
other device.
Name of my device
: Enter the name of your FOMA handset to be
displayed on other devices.
00M1000EN.book 359 ページ 2004年11月24日 水曜日 午前7時56分
360
Bluetooth
cTap Devices tab
dTap [Add]
eTap the device name, and enter the passkey y tap [Done] on the
Passkey entry screen
The new device is added and connected via Bluetooth.
• Tap [Update] to find again connectable devices.
Accepting Information from Connected Bluetooth Devices
You can set your FOMA handset to accept information from connected other Bluetooth devices.
• Setting Receiving items to Always or Ask first. 3 P382
aTap $$ y $$ in the Application Selector bar, and tap the
Connections tab y Bluetooth on the Control panel screen
bTap $$ of Bluetooth ON to change it into $$
Bluetooth activates.
Bluetooth activates and starts finding the devices. The device
name you can connect to appears after about XX seconds.
Types of connectable devices
$$ : Mobile phone
$$ : Headset
$$ :PC
$$ :PDA
$$ : Other device
00M1000EN.book 360 ページ 2004年11月24日 水曜日 午前7時56分

361
Bluetooth
cEstablish the connection from other device
dTap Passkey:, and enter the passkey y tap [Done]
• Tap [Cancel] to cancel the connection.
00M1000EN.book 361 ページ 2004年11月24日 水曜日 午前7時56分

362
Bluetooth
Using Bluetooth
Sending Information
You can send images/music/contact information stored in your phone to other PCs or FOMA
handsets connected via Bluetooth.
<Example: To send video>
aOn the Video display screen (3 P280), tap Video y Send as on the
Menu bar
bTap Send as, and select Bluetooth y tap [Done]
cSelect the destination device and tap [Send]
The selected file is sent. Make the file reception setting on the receiver.
• Tap [Cancel] to cancel sending.
• Tap [Update] to find again connectable devices.
Receiving Information
You can receive images/music/contact information stored in other Bluetooth device to your
FOMA handset via Bluetooth for displaying, playing back or saving.
<Example: To save a file you received>
Bluetooth activates and the list of connectable devices appears.
00M1000EN.book 362 ページ 2004年11月24日 水曜日 午前7時56分

363
Bluetooth
aSend a file from other Bluetooth device
bTap [Accept]
The name of received file appears.
• Tap [View] to display the received
file.
• Tap [Delete] to delete the file.
00M1000EN.book 363 ページ 2004年11月24日 水曜日 午前7時56分

364
Bluetooth
cTap [Done]
The received file is stored in your FOMA handset and listed in the Short distance reception
list screen.
1Menu bar operations on the Short distance reception list screen
Tap Message or Edit on the Menu bar to display the following items:
• Some items might not be available depending on the operation.
aTypes of receiving files
$$ :Video file
$$ : Picture file
$$ : Music file
$$ : vCard file
$$ : vCalendar file
$$ : Document file
$$ : Other file
bSender name/file name
Unknown files appear in bold.
cReceived
Message
Send as . . . . . . . . . . . . . . . . . . . . . P310
Delete message . . . . . . . . . . . . . . . P259
Disconnect . . . . . . . . . . . . . . . . . . . P195
Edit
Select all . . . . . . . . . . . . . . . . . . . . .P249
Sort by date . . . . . . . . . . . . . . . . . . .P258
Sort by sender . . . . . . . . . . . . . . . . .P258
Zoom . . . . . . . . . . . . . . . . . . . . . . . .P141
00M1000EN.book 364 ページ 2004年11月24日 水曜日 午前7時56分
365
Bluetooth
Setting Details on Available Devices
You can set details on available devices such as changing the device name or showing/hiding the
confirmation screen when receiving a connection request.
aTap $$ y $$ in the Application Selector bar, and tap the
Connections tab y Bluetooth y Devices tab on the Control panel
screen
bTap the device name to set
cTap [Done]
The setting is accepted.
1To delete a device from the available list
On the Step 2 screen, select the device to delete, and tap [Delete] y [Yes].
The list of available Bluetooth devices appears.
Device name
: The stored device names appear. Tap it to change
the name.
Ask connection
: Marks the checkbox with $$ to display the
confirmation screen when receiving a connection
request from other device.
00M1000EN.book 365 ページ 2004年11月24日 水曜日 午前7時56分

00M1000EN.book 366 ページ 2004年11月24日 水曜日 午前7時56分

367
Using Wireless LAN
Wireless LAN . . . . . . . . . . . . . . . . . . . . . . . . . . . . . . . . . . . . . . . . . . . . . . . . . . . 368
Setting up Wireless LAN. . . . . . . . . . . . . . . . . . . . . . . . . . . . . . . . . . . . . . . . . . 369
Searching Available Access Points . . . . . . . . . . . . . . . . . . . . . . . . . . . . . . . . . 375
00M1000EN.book 367 ページ 2004年11月24日 水曜日 午前7時56分

368
Using Wireless LAN
Wireless LAN
Wireless Local Area Network or wireless LAN allows you connect to a network without a cable.
You can view Internet sites or exchange data within the service area.
Operating the Wireless LAN
• The wireless LAN transmits at 2.4GHz frequency band. The band is also used by other wireless devices.
Despite the wireless LAN technologies to minimize the interference, this may cause radio interferences
lowering the speed, reducing the coverage area, or causing connection failure.
• Transmission speed and coverage area may vary depending on the distance between devices, obstacles,
radio wave conditions and/or Wireless LAN devices.
Specifications
*: May vary according to obstacles between devices and radio wave conditions.
Bluetooth Interference with Wireless LAN
Because wireless LAN (IEEE802.11b/g) and Bluetooth devices use the same frequency band
(2.4GHz), interference may be generated causing lower transmission speed, noise or connection
failure when a device with Bluetooth is being used near the FOMA handset.
The following measurements can be taken if any such interference occurs;
• Set the Wireless LAN equipment and the FOMA handset/Bluetooth device more than 10 meters apart.
• If the distance is within 10m, turn the switch off of either the device, wireless LAN or FOMA handset/Bluetooth
handset.
Standard IEEE802.11b
Transmission system DS-SS (Direct Sequence Spread Spectrum)
Transmission Power
Frequency band 2.4GHz
Transmission speed Max. 11Mbps
Range* XX m
00M1000EN.book 368 ページ 2004年11月24日 水曜日 午前7時56分

369
Using Wireless LAN
1Terminology
PPPoe
A protocol to enable PPP function on a LAN.
SSID
Similar to a LAN workgroup name. An SSID identical to that of the access point is needed
for communication.
802.1x
A standard regulating the user authentication method within a LAN. Only authenticated
users are allowed to be connected.
• See P181 for other terminology.
Setting up Wireless LAN
1Preparation
Prepare with the following information obtained from your network administrator.
Username
A username to log in to the LAN
Password
A password to log in to the LAN
SSID
The same digits (SSID) as that of the access point you want to log in to
IP address
Digits to identify the device connected to the Internet (LAN)
Gateway
Address of gateway server
DNS
Address of DNS server
* Set-up items, names and details required to connect may vary. Consult your network administrator for
further details.
aTap $$y$$ on the Application Selector bar, and tap Connections
tab y Internet accounts in the Control panel screen
1To edit an existing setup
Tap the desired account name y Edit
Repeat Step 2 onwards, if necessary
1To delete an existing setup
Tap the desired account name y [Delete], and then tap
[Yes] to confirm on the Delete confirmation screen
00M1000EN.book 369 ページ 2004年11月24日 水曜日 午前7時56分

370
Using Wireless LAN
bTap New
cTap Account Name to input the network connection name y Tap
Bearer to select WLAN y Tap [Advanced]
dTap the desired tab for set up
• Refer to P393 to P397 for each tab setting.
• Refer to P189 for Proxy tab setting.
Account name
: You can input the name of the network
connection.
Bearer
FOMA CSD: Select when using FOMA 64K Data
communication.
GSM CSD : Select when using Data communication within
GSM service area.
PACKET : Select when using FOMA Packet data
connection.
WLAN : Select when using Wireless LAN.
• Tap [cancel] to cancel the operation.
00M1000EN.book 370 ページ 2004年11月24日 水曜日 午前7時56分

371
Using Wireless LAN
WLAN
aTap WLAN in Step 4 on P393 y Tap the desired items for setup y
Tap [Done] after setting
Security
aTap Security in Step 4 on P393 y Tap the desired items for setting
y Tap [Done] after setting
De
f
ault sett
i
ng SSID: - Power-save mode: ON Tx power consumption level: high
SSID : Input the same SSID to that of the access point
you want to connect.
• Up to 32 single-byte alphanumeric
characters can be entered.
Power-save mode
: When no transmission is in progress, set up to
either reduce or maintain its level of power
consumption.
$$ to put the mode on, $$ to put the mode off.
Tx power consumption level
: Set up the transmission power level. The levels
are as follows.
Low 3 20%
Medium-Low 3 40%
Medium 3 60%
Medium-High 3 80%
High 3 100%
D
e
f
au
l
t sett
i
ng Authentication method: Open Data encryption: none 802.1x: $$
Network authentication: none
Authentication method
: Set as same as the designated access point.
Data encryption
: Set data encryption method.
802.1x : Check for 802.1x authentication.
$$ for use, $$ for non-use.
Network authentication
: Set authentication method to establish
connection.
00M1000EN.book 371 ページ 2004年11月24日 水曜日 午前7時56分

372
Using Wireless LAN
1When [Network Key] is tapped
The following screens is displayed for network key setting/change
1When [Property] is tapped
The screen displayed varies depending on the setting in Network authentication. Desired
property can be set/changed, if necessary.
PPPoe
aTap PPPoe tab in Step 4 on P393 y Tap the desired items for
setting y Tap [Done]
De
f
ault sett
i
ng PPPoe: $$ Username:- Password:-
PPPoe : Select when using PPPoe protocol connection.
This requires a username and a password to be
setup.
$$ for connection with PPPoe protocol, $$ for
connection without PPPoe protocol.
Username : Input a username if PPPoe protocol connection is
set.
• Up to 256 single-byte alphanumeric characters
can be entered.
Password : Input a password when using PPPoe protocol
connection. The entered password is masked by
"4".
00M1000EN.book 372 ページ 2004年11月24日 水曜日 午前7時56分

373
Using Wireless LAN
IP/DNS
aTap IP/DNS tab in Step 4 on P393 y Tap the desired item to set
up y Tap [Done] after setting
De
f
ault sett
i
ng Getting IP address automatically: $$ IP address: 0.0.0.0 Subnet mask: 0.0.0.0
Gateway: 0.0.0.0 Getting DNS address automatically: $$
Primary DNS address: 0.0.0.0 Secondary DNS address: 0.0.0.0
Getting IP address automatically
: Select when automatically assigning IP address
from network. IP address, subnet mask and gateway
need to be set up when there are not selected.
$$ for assigning IP address automatically, $$ for
non-assigning.
IP address : Set up IP address.
• Enter 0 to 255 for each block.
Subnet mask
: Setup subnet mask.
• Enter 0 to 255 for each block.
Gateway : Setup gateway address.
• Enter 0 to 255 for each block.
Getting DNS address automatically
: Select when automatically assigning DNS address
from network. Primary DNS and Secondary DNS
need to be set up when there are not selected.
$$ for assigning DNS address automatically, $$ for
non-assigning.
Primary DNS address:
: Setting primary DNS address.
• Enter 0 to 255 for each block.
Secondary DNS address:
: Setting secondary DNS address.
• Enter 0 to 255 for each block.
00M1000EN.book 373 ページ 2004年11月24日 水曜日 午前7時56分
374
Using Wireless LAN
Others
aTap Others tab in Step 4 on P393 y Tap the desired item field to
set up y Tap [Done] after setting
Info
aTap Info tab in Step 4 on P393 y Tap [Done] upon verifying
selection
De
f
ault sett
i
ng PPP compression: $$ Plaintext authentication: $$ Automatic VPN: $$ VPN policy: -
PPP Compression
: Select when PPP compressed connection is used
$$ for compressed connection, $$ for
uncompressed connection.
Plaintext authentication
: Select when authentication is performed without
encryption.
$$ for encryption $$ for non-encrypted connection.
Automatic VPN
: Select when automatically enabling VPN upon
establishment of connection.
$$ for valid, $$ for invalid.
VPN Policy
: Specify the VPN policy to use when automatic VPN
is $$.
Firmware version
: Confirm the firmware version.
MAC address : Confirm MAC (Media Access Control) address.
00M1000EN.book 374 ページ 2004年11月24日 水曜日 午前7時56分

375
Using Wireless LAN
Searching Available Access Points
Available access points can be searched and displayed as a list.
aTap $$ y $$ on Application Selector bar, and tap Connections tab
y WLAN AP Search in Control Panel screen
bTap [Refresh] and tap the desired access point in search result
screen
The previous search results will be displayed from the second
time onwards.
• Tap Details to check the access points details.
00M1000EN.book 375 ページ 2004年11月24日 水曜日 午前7時56分

00M1000EN.book 376 ページ 2004年11月24日 水曜日 午前7時56分

377
Movian VPN
VPN. . . . . . . . . . . . . . . . . . . . . . . . . . . . . . . . . . . . . . . . . . . . . . . . . . . . . . . . . . . 378
VPN Connection . . . . . . . . . . . . . . . . . . . . . . . . . . . . . . . . . . . . . . . . . . . . . . . . 384
Checking Connection Settings . . . . . . . . . . . . . . . . . . . . . . . . . . . . . . . . . . . . 385
00M1000EN.book 377 ページ 2004年11月24日 水曜日 午前7時56分

378
Movian VPN
VPN
VPN (Virtual Private Network) is a virtual dedicated line enabling secure connection to corporate
LAN via Internet from your FOMA handset. Data on VPN can be encrypted to prevent from
unauthorized access and spoofing.
A connection methods (64k Data/Packet/Wireless LAN) are supported from Internet enabled
FOMA handsets for VPN connection.
Illustration
00M1000EN.book 378 ページ 2004年11月24日 水曜日 午前7時56分
379
Movian VPN
Setting up VPN
Necessary setup procedures are performed for using VPN. The movianVPN applications are
used for setting up.
aTap $$ y $$ on the Application Selector bar y Tap movianVPN
bTap movianVPN y New Policy on the Menu bar
cTap the desired tab for setting
• See P403 to P405 to configure each tab setting.
1Menu bar
Tap movianVPN, Tools or About on the Menu bar to display the following items:
movianVPN
New Policy . . . . . . . . . . . . . . . . . . . . . . . . . . . . . . . . . . . . . . . . . . . . . . . . . . . . . . . . . . P400
Edit Policy . . . . . . . . . . . . . . . . . . . . . . . . . . . . . . . . . . . . . . . . . . . . . . . . . . . . . . . . . . . P400
Delet e Policy . . . . . . . . . . . . . . . . . . . . . . . . . . . . . . . . . . . . . . . . . . . . . . . . . . . . . . . . P406
Import Policy . . . . . . . . . . . . . . . . . . . . . . . . . . . . . . . . . . . . . . . . . . . . . . . . . . . . . . . . . P405
Tools
Ping. . . . . . . . . . . . . . . . . . . . . . . . . . . . . . . . . . . . . . . . . . . . . . . . . . . . . . . . . . . . . . . . P406
IKE log . . . . . . . . . . . . . . . . . . . . . . . . . . . . . . . . . . . . . . . . . . . . . . . . . . . . . . . . . . . . . P408
IPSec policy . . . . . . . . . . . . . . . . . . . . . . . . . . . . . . . . . . . . . . . . . . . . . . . . . . . . . . . . . P408
IPSec status . . . . . . . . . . . . . . . . . . . . . . . . . . . . . . . . . . . . . . . . . . . . . . . . . . . . . . . . . P409
IPSec packet statistic . . . . . . . . . . . . . . . . . . . . . . . . . . . . . . . . . . . . . . . . . . . . . . . . . . P410
Preferences . . . . . . . . . . . . . . . . . . . . . . . . . . . . . . . . . . . . . . . . . . . . . . . . . . . . . . . . . P410
About
1To edit registered policies
Tap the policy, and tap movianVPN y Edit Policy on the Menu
bar
Proceed to Step 3 as required.
00M1000EN.book 379 ページ 2004年11月24日 水曜日 午前7時56分

380
Movian VPN
movianVPN . . . . . . . . . . . . . . . . . . . . . . . . . . . . . . . . . . . . . . . . . . . . . . . . . . . . . . . . . .P402
License. . . . . . . . . . . . . . . . . . . . . . . . . . . . . . . . . . . . . . . . . . . . . . . . . . . . . . . . . . . . . .P402
Some items cannot be performed depending on the operation.
1About movianVPN
MovianVPN details can be viewed with the following operations.
Tap About y movianVPN on the Menu bar in the movianVPN Basic screen
1movianVPN license
MovianVPN license operation can be viewed.
Tap About y License in the movianVPN Basic screen
00M1000EN.book 380 ページ 2004年11月24日 水曜日 午前7時56分

381
Movian VPN
General
Contact your network administrator to obtain information necessary for setup.
aTap General tab in Step3 on P401 y Tap the desired input field and
enter the setting y Tap $$ after setting
• The screen is just an example. Displayed items vary depending
on the setting.
Policy Name
: Specify the Policy Name.
• Up to 30 single byte alphanumeric characters can
be entered.
Gateway Type
: Set up Gateway Server type for VPN connection.
Gateway Address
: Enter an address for Gateway Server.
• Up to 30 alphanumeric characters can be
entered.
Using Split Tunnel
: Select to use Tunnel connection. Entry of Subnet
Address and Subnet Mask are required in the Network
tab when selected.
$$ to use, $$ non-use.
DNS Search
: Select to search DNS Server.
$$ to search, $$ not to search.
Perfect Forward Secrecy
: Select to connect using Perfect Forward Secrecy.
$$ to use, $$ non-use.
Using Extended Authentification
: Select to connect using Extended Authentification.
$$ to use, $$ non-use.
SecurID : Set up available when Nortel Contivity Series is
selected in Gateway Type, and Extended
authentication is set to $$.
00M1000EN.book 381 ページ 2004年11月24日 水曜日 午前7時56分

382
Movian VPN
Account
Contact your network administrator for the following information.
aTap Account in Step3 on P401 y Tap the desired input field and
enter setting y Tap $$ after setting
• The screen is just an example. Displayed items vary depending
on the setting.
Username : Set Username.
• Up to 30 single byte alphanumeric
characters can be entered.
Group Name* : Set Group Name.
• Up to 30 single byte alphanumeric
characters can be entered.
User Password (Group Password*)
: Set User (Group) Password.
• Up to 40 single byte alphanumeric
characters can be entered.
IKE Group : Select data encryption group for VPN
connection.
IKE Encryption : Set data encryption for VPN connection.
IKE Hash : Select hash algorithm used for data
encryption.
IPSec Suite : Select data encryption setting.
SA Life time : Drag $$ to the right and left.
Set Security Association Life time.
• Life time can be set between 1 to 8 hours
by the hour.
• When Security Association becomes
disabled it logs off automatically, and log
in is required again.
*: Displays when Extended Authentication is set to $$ in the General tab.
00M1000EN.book 382 ページ 2004年11月24日 水曜日 午前7時56分
383
Movian VPN
Network
Contact your network administrator for the required information;
• Setup is enabled only when DNS Search is set to $$ or Using Split Tunnel is set to $$ in the General tab.
aTap the Network tab in Step3 on P401 y Tap the desired input field
and enter setting y Tap $$ after setting
Importing Policy
The policy can be imported when the Import Policy file (File name vpolimp.sis) is pre-installed for
this function.
• On how to install the Import Policy file 3 P268
aTap movianVPN y Import Policy on the Menu bar in movian VPN
Basic screen y Tap [Yes] on the import confirm screen
• Tap [No] to cancel the import.
Deleting Policies
aTap the policy you wish to delete in movianVPN Basic screen y
Tap movianVPN y Delete Policy on the Menu bar y Tap [Yes] on the
delete confirm screen
• Tap [No] to cancel the deletion.
• The screen is just an example. Displayed items vary depending
on the setting.
Primary DNS : Enter an address for DNS server.
• You can input digits (0 to 255) between
delimiters.
Secondary DNS : Enter an IP address for Secondary DNS
Server
• You can input digits (0 to 255) between
delimiters.
Subnet Address* : Enter a Subnet Address.
• You can input digits (0 to 255) between
delimiters.
Subnet Mask* : Enter the Subnet Mask.
• You can input digits (0 to 255) between
delimiters.
*: Displays if the Using Split Tunnel is set to $$ in the General tab.
00M1000EN.book 383 ページ 2004年11月24日 水曜日 午前7時56分
384
Movian VPN
Checking the Configured Connection
You can check responses from the connected destination with the configured setup.
aTap the policy to check the connection in the movianVPN Home
screen y Tap Tool y Ping on the Menu bar
bTap Host and enter the Domain Name or IP address of the server
that you wish to connect to
1When Timeout or Unknown Host are displayed
Check common settings for VPN connection (64K Data Connection 3 P185, Packet
Connection 3 P185, Wireless LAN 3 P392)
VPN Connection
VPN connection with configured policy.
Host : Enter Domain Name or IP address that you wish to
connect to.
• You can input up to 40 single byte alphanumeric
characters or (0~255) in each of the
XXX.XXX.XXX.XXX format.
Success : <Time> : Displays if it succeeds.
Timeout : <Time>
Displays if no response from server.
Unknown Host : <Host Name>
Displays if Host cannot be found.
VPN connection requires appropriate settings of VPN setup (3p400), 64K Data
connection (3P185), Packet Connection (3P185) and Wireless LAN (3P392).
00M1000EN.book 384 ページ 2004年11月24日 水曜日 午前7時56分
385
Movian VPN
aTap [login] in movianVPN Basic screen
1When it is not connected to the Internet
Displays following message. See "Connect to the Internet to view a website" (3 P193).
1When it prompts authentication
Displays following message. Enter Username and Reply (Password) provided by your network
administrator. Then tap [Done].
Checking Connection Settings
IKE Log
Displays the latest information (IKE Protocol transaction information) between the user and VPN
Gateway Server. The information is deleted if logged in again.
1To Disconnect VPN connection
Tap [Logout]
00M1000EN.book 385 ページ 2004年11月24日 水曜日 午前7時56分

386
Movian VPN
aTap Tools y IKE log on the Menu bar in movianVPN Basic screen
y Tap [Done] after confirmation
IPSec Policy
Displays the latest information (Encrypted IP Subnet address) between the user and VPN
Gateway Server.
aTap Tools y IPSec Policy on the Menu bar in movianVPN Basic
screen y Tap [Done] after confirmation
Data is encrypted
Data is not encrypted
00M1000EN.book 386 ページ 2004年11月24日 水曜日 午前7時56分

387
Movian VPN
IPSec Status
Displays status of VPN connection or the information of users and VPN Gateway Server.
aTap Tool s y IPSec Status on the Menu bar in movianVPN Basic
screen y Tap [Done] after confirmation
IPSec Packet Statistics
Displays number of packets when encrypted connection is used in VPN connection. Note that it
is not valid once it is disconnected.
Gateway IP Address : Displays IP address of VPN Gateway
Server.
Your public IP Address
: Displays your IP address supplied by
the Internet service provider.
Your private IP Address
: Displays an IP address in the VPN
network connection.
NAT Port : Displays whether the network address
transport (NAT) is valid.
Split Tunneling : Displays whether Split Tunneling is
valid.
Encryption Suite : Displays the type of encryption for the
connection.
Primary DNS : Displays address for DNS Server.
Secondary DNS : Displays address for Secondary DNS
Server.
SA Life time : Displays security association life time.
00M1000EN.book 387 ページ 2004年11月24日 水曜日 午前7時56分

388
Movian VPN
aTap Tools y IPSec Packet Statistics on the Menu bar in movianVPN
Basic screen y Tap Done [Done] after confirmation
Setting Number of Retry and Timeout
You can set the number of retry and timeout duration.
aTap Tools y IP Packet Statistics on the Menu bar in movianVPN
Basic screen
bTap the desired input field and enter settings y Tap [Done]
Tx encrypted : Displays number of encrypted packets
sent.
Tx bypassed : Displays number of sent packets that
bypassed the encryption.
Tx dropped : Displays number of dropped packets
sent.
Tx error : Displays number of failed packet sent.
Rx decrypted : Displays number of decrypted packets
received.
Rx bypassed : Displays number of received packets
that bypassed the decryption.
Rx dropped : Displays number of dropped receiving
packets.
Rx error : Displays number of packets failed to
receive.
• Tap Clear to set all values to "0".
D
e
f
au
l
t sett
i
ng Socket connection retry:2 Socket Timeout:4seconds
Socket connection retry
: Set maximum number of retry between
1 to 5 time(s).
Socket Timeout : Set the session timeout (duration to
determine the connection failure)
between 1 to 8 second(s).
• Tap [Cancel] to discontinue configuration.
00M1000EN.book 388 ページ 2004年11月24日 水曜日 午前7時56分