Motorola Mobility T6EY1 GSM Transceiver with WLAN and Bluetooth User Manual Exhibit 8D Users Manual
Motorola Mobility LLC GSM Transceiver with WLAN and Bluetooth Exhibit 8D Users Manual
Contents
Exhibit 8D Users Manual

APPLICANT: MOTOROLA, INC. FCC ID: IHDT6EY1
INSTRUCTION MANUAL
A preliminary draft copy of the Users Manual follows in four parts (Exhibit 8A through Exhibit 8D):
EXHIBIT 8D

389
Using Data Communication
Data Communication from FOMA Handsets . . . . . . . . . . . . . . . . . . . . . . . . . 390
Before Using Data Communication . . . . . . . . . . . . . . . . . . . . . . . . . . . . . . . . 391
Preparing for Data Communication . . . . . . . . . . . . . . . . . . . . . . . . . . . . . . . . 393
Installing Connection Setup File (Drivers) for M1000. . . . . . . . . . . . . . . . . . 393
Checking Connection Setup Files (Drivers) . . . . . . . . . . . . . . . . . . . . . . . . . 394
Uninstalling M1000 Connection Setup Files (Drivers) . . . . . . . . . . . . . . . . . 395
Preparing for Bluetooth Connection . . . . . . . . . . . . . . . . . . . . . . . . . . . . . . . 396
FOMA PC Setup Software . . . . . . . . . . . . . . . . . . . . . . . . . . . . . . . . . . . . . . . . 397
Installing FOMA PC Setup Software. . . . . . . . . . . . . . . . . . . . . . . . . . . . . . . . 398
Setting up Data Communication. . . . . . . . . . . . . . . . . . . . . . . . . . . . . . . . . . . 399
Simple Setting "Packet Data Communication Setting Using Other ISP's" . 402
Executing the Set Connection . . . . . . . . . . . . . . . . . . . . . . . . . . . . . . . . . . . . 406
Uninstalling FOMA PC Setup Software . . . . . . . . . . . . . . . . . . . . . . . . . . . . . 407
W-TCP Setting . . . . . . . . . . . . . . . . . . . . . . . . . . . . . . . . . . . . . . . . . . . . . . . . . 408
Setting up APN. . . . . . . . . . . . . . . . . . . . . . . . . . . . . . . . . . . . . . . . . . . . . . . . . 410
Assigning COM Port . . . . . . . . . . . . . . . . . . . . . . . . . . . . . . . . . . . . . . . . . . . . 412
Displaying Dial-up Networking Type . . . . . . . . . . . . . . . . . . . . . . . . . . . . . . . 412
Setting up Dial-up Networking . . . . . . . . . . . . . . . . . . . . . . . . . . . . . . . . . . . . 413
Setting up Dial-up . . . . . . . . . . . . . . . . . . . . . . . . . . . . . . . . . . . . . . . . . . . . . . 419
Using Dial-up Networking . . . . . . . . . . . . . . . . . . . . . . . . . . . . . . . . . . . . . . . . 428
00M1000EN.book 389 ページ 2004年11月24日 水曜日 午前7時56分
390
Using Data Communication
Data Communication from
FOMA Handsets
You can perform three types of data
communication with your FOMA handset and
your PC; namely, packet communication, 64K
data communication and data transfer PC.
Available Data Communication Types
2Packet communication
Communication charges are based on the
volume of exchanged data.
Suitable when you wish to stay connected to
the network and exchange data on an as
needed basis.
Data can be transmitted with maximum
download speed of 384Kbps, maximum
upload speed of 64Kbps via network
supporting FOMA Packet communication
such as "mopera" (DoCoMo's Internet
provider service). The M1000 can also be
used for data communications overseas by
accessing GPRS access points.
• Performing large volumes of data
communication may result in high
charges.
264K data communication
Communication charges are based on the
duration of time being connected to the
network.
Stable 64K bps data transmission can be
performed via network supporting FOMA
64K data communication such as "mopera"
(DoCoMo's Internet provider service) or
synchronized ISDN 64K access points.
The M1000 can also be used overseas by
accessing CSD data communication
supported access points.
2Data transfer
Data can be transferred free of charge
between a PC and FOMA handset. The
FOMA handset can be connected directly
using the accompanying USB cable or by
connecting the desktop holder to a PC using
the USB cable. To transfer data, install the
Desktop Suite to the PC. 3P527
Connecting the FOMA Handset and PC
To connect your FOMA handset to a PC or
PDA either of the following methods can be
used.
USB Connection
2Connect with the accompanying-USB cable
3P414
• Separately sold FOMA USB cables can
also be used.
2Connect with USB cable for PC via
Desktop holder 3P415
Bluetooth Connection
2Connect via Bluetooth 3P419
• Device registration is required prior to
use. 3P382
Cautions
Internet Service Provider Charges
You will be charged by your Internet Service
Provider (ISP, hereafter) to connect to the
Internet. FOMA Service does not include the
ISP fee and it must be paid to the ISP directly.
Contact your ISP for further details.
"mopera", is DoCoMo's free Internet provider
service that does not require you to register.
Setting up ISP Connection
ISP settings differ between Packet
communication and 64K data communication.
Select appropriate access points for Packet
communication. For 64K data communication,
select an access point which supports FOMA
64K data communication or synchronized
ISDN 64K.
• Connection to DoPa is not supported
• Connection to PHS64K/32K Data Communication
such as PIAFS is not supported.
00M1000EN.book 390 ページ 2004年11月24日 水曜日 午前7時56分
391
Using Data Communication
User Authentication when Accessing the Network
Connection may require authentication (ID
and password). Enter the user ID and
password in Dial-up Network when prompted.
Contact the network administrator or the ISP
to obtain the ID and password, and further
details.
Prerequisites to Packet Connection and
64K Data Communication
Communication using FOMA handsets
requires meeting the following conditions. The
service, however, may be unavailable even if
required conditions are met due to traffic
conditions at base stations or radio wave
conditions.
• PC must support USB cables
• For Bluetooth connection, devices such as PC has
must comply with Bluetooth Ver1.1 Dial-up
Networking Profile standards.
• To be within the FOMA service area
• For Packet communication, the access point must
support FOMA Packet communication
• For 64K data communication, the access point
(the designated network) must support FOMA
64K data communication or 64K synchronized
ISDN.
1Data communication terminologies
APN
Stands for Access Point Name. Identifies
the network to log in (ISP or LAN) for Packet
communication. DoCoMo's Internet
connection service mopera's APN is
"mopera.ne.jp".
Bluetooth ON 3P382
Bluetooth device registration 3P382
cid
Stands for Context Identifier. APN
registration number is registered in FOMA
made up of digits 1 to 10. Up to ten APN's
can be registered.
DNS
Stands for Domain Name System
The system converts an address made up
of digits identified by computers to a 'name'
such as "mopera.ne.jp" for easier
recognition by human.
QoS
Stands for Quality of Service and indicates
quality of network service. Data
transmission speed can be specified on a
FOMA handset.* 3P461
*: The actual data speed may vary by
depending on network conditions.
W-TCP
TCP parameters that optimize TCP/IP
transmission capability during Packet
communication over FOMA network.
Optimization of TCP parameters is
necessary in order to generate the
maximum FOMA communication
capabilities.
Administrator rights on PC
Full access rights to Windows XP and
Windows 2000 systems. All other users do
not have rights to install drivers (connection
setup files).
[
Before Using Data
Communication
PC System Requirements
PC System requirements for data
communication are as follows:
*: Required memory and HDD space may depend
on PC system specifications.
Item Requirement
PC main unit • PC-AT compatible machine with
a CD-ROM drive
• USB Port (Universal Serial Bus
Specification Rev1.1/2.0
compliant)
• Display Resolutions 800 ×600
dots, High Color(65,536Colors)
or higher recommended
OS • Windows 98, Windows Me,
Windows 2000, Windows XP
(Japanese Version)
Memory • Windows 98, Windows Me:32MB
or more*
• Windows 2000:64MB or more*
• Windows XP:128MB or more*
HDD space • 5MB of available space or more*
00M1000EN.book 391 ページ 2004年11月24日 水曜日 午前7時56分
392
Using Data Communication
NOTE
• Data communication may not be enabled
subject to system properties. DoCoMo does not
guarantee proper operations nor respond to
inquiries when used with system requirements
that are not mentioned above.
Connecting PC and FOMA Handsets
Setting up connection with a USB cable is
described in this section.
The FOMA handset can be connected directly
using the accompanying FOMA USB cable or
by connecting the desktop holder using the
PC USB cable.
To Connect Using the Accompanying
FOMA USB Cable
aRemove the cap covering the
external connection interface of the
FOMA handset
bConnect the accompanying USB
connector to a USB port on the PC
cMatch the direction of the external
connector of the accompanying
USB cable with the external
connection interface on the FOMA
handset and insert the connector
straight
Once the connection is established, the
FOMA handset displays "USB cable
connected".
NOTE
• Use the accompanying FOMA USB cable or a
FOMA USB cable sold separately. Do not use
general PC USB cables as the connector
interface does not match the shape of FOMA
external interface.
• Do not apply force to the connector when
inserting. The connectors can only be inserted
in the correct direction and at the correct angle.
When inserted correctly, the connectors can be
inserted smoothly. In case of difficulty in
inserting confirm the orientation of the
connectors.
1Removing the USB cable
Connecting a General PC USB Cable to a
Desktop Holder
The desktop holder enables data
communication by connecting the FOMA
handset to both the PC and the AC adapter.
• Use a general USB cable with connectors that
support USB Rev1.1/2.0 Series A compliant.
Screen
aPull the USB cable out straight while
holding down the release button on
the external connector.
bPull out the USB cable from PC
Screen
00M1000EN.book 392 ページ 2004年11月24日 水曜日 午前7時56分
393
Using Data Communication
aConnect Desktop holder to a PC by
using the PC USB cable
bAttach the FOMA handset to the
desktop holder
See P54 on how to attach/remove.
Preparing for Data
Communication
Preparations for packet communication/64K
data communication by connecting the FOMA
handset with the PC is described in this
section.
*: Connection setup file (drivers) installation is not
necessary if a Bluetooth modem other than that
of FOMA handsets has already been installed.
Go on to set up connection details. See P417 to
check for an installed Bluetooth modem.
1About Connection setup file (drivers)
and FOMA PC setup software
Connection setup file (drivers) and FOMA
PC setup software are included in the
FOMA M1000 CD-ROM.
• M1000 setup file is the driver software for
Packet communication, 64K data
communication or data transfer used for
connecting the FOMA handset with the
accompanying FOMA USB cable to a PC.
M1000 setup file installs necessary drivers to
Windows.
• FOMA PC setup software enables easy setup
of Packet communication, 64K data
communication or Dial up networking.
NOTE
• If "FOMA M1000 USB" is not displayed in
"Uninstall M1000 setup file (drivers) "( 3P418),
the installation has failed. Run uninstallation
(3P418) and try installation again.
• Uninstall driver if PC does not recognize the
FOMA handset for some reason and install it
again.
Installing Connection Setup
File (Drivers) for M1000
• Install all drivers in one attempt when installing the
M1000 setup file. Installation may be unsuccessful
if the accompanying FOMA USB cable is pulled
out, or if [Cancel] is clicked during installation. If
installation is unsuccessful, use uninstall
procedures to delete the M1000 setup file by
following uninstall procedures (3P418), and try
installing again.
• Log in as a user with administrator rights when
installing the M1000 communication set up file to
Windows 2000 or Windows XP. Contact the PC
manufacturer or Microsoft regarding operations
related to administrator rights settings.
Via USB connection Via Bluetooth
connection*
Install connection setup
file (drivers) 3P416
Connect the FOMA
handset with PC
3P419
Install connection setup
file (drivers)*3P416
Set up connection details
To set up using the
FOMA PC setup
software 3P419
To set up without using the
FOMA PC setup software
3P436
Connect 3P429, P451
Disconnect 3P430, P452
Screen
00M1000EN.book 393 ページ 2004年11月24日 水曜日 午前7時56分

394
Using Data Communication
【仕様未定につき、記載省略します。】
Checking Connection
Setup Files (Drivers)
Checking whether the M1000 setup file is
installed properly.
aLaunch the “コントロールパネル ”
(Control Panel) in Windows
1Windows XP
Click “スタート” (Start) y “コントロール
パネル” (Control Panel)
1Windows 2000, Windows Me or
Windows 98
Click “スタート” (Start) y “設定”
(Settings) y “コントロールパネル”
(Control Panel)
bLaunch the “システム” (Systems) in
“コントロールパネル ” (Control
Panel)
1Windows XP
Click “システム” (Systems) in “パフォー
マンスとメンテナンス” (Performance
and Maintenance)
1Windows Me
Click “すべてのコントロールパネルのオ
プションを表示する” (Show all options
in Control Panel) if “システム” (Systems)
icon is not displayed in the “コントロー
ルパネル” (Control Panel).
cLaunch the Device Manager
1Windows XP or Windows 2000
Click “ハードウェア” (Hardware) tab
then click “デバイスマネージャ” (Device
Manager).
1Windows Me or Windows 98
Click “デバイスマネージャ ” (Device
Manager) tab
dCheck installed driver names by
clicking each device
Check whether all drivers are listed under
“ポート(COMとLPT)” (Port(COM and
LPT), “ユニバーサルシリアルバス”(USB)
“コントローラ” (USB Controller) and “モデ
ム” (Modem).
00M1000EN.book 394 ページ 2004年11月24日 水曜日 午前7時56分
395
Using Data Communication
Go to "Using FOMA PC Setup Software"
(3P419) if all driver names are found.
Connecting with USB
*: only for Windows Me/98
Connecting with Bluetooth
NOTE
• Upon verifying above, if the list of driver names
is incomplete, delete the M1000 setup file by
following uninstall procedures, and try installing
again.
Uninstalling M1000 Connection
Setup Files (Drivers)
Follow the procedures below when
uninstalling of drivers is necessary. The
uninstall instructions below are for Windows
XP.
Device name Driver name
Port (COM/LPT) • FOMA M1000
Command Port
• FOMA M1000 OBEX
Port
Modem • FOMA M1000
(Windows XP)
Screen
(Windows 2000)
Screen
(Windows Me, Windows 98)
Screen
Universal Serial Bus
(USB) Controller or USB
(Universal Serial Bus)
Controller
•FOMA M1000
• FOMA M1000
Command*
• FOMA M1000
Modem*
• FOMA M1000 OBEX*
Device name Driver name
Modem To be decided
Device name Driver name
(Windows XP)
Screen
00M1000EN.book 395 ページ 2004年11月24日 水曜日 午前7時56分
396
Using Data Communication
Connecting with USB
【仕様未定につき、記載省略します。】
Connecting with Bluetooth
【仕様未定につき、記載省略します。】
Preparing for Bluetooth
Connection
【仕様未定につき、記載省略します。】
00M1000EN.book 396 ページ 2004年11月24日 水曜日 午前7時56分
397
Using Data Communication
FOMA PC Setup Software
Packet communication or 64K data
communication from FOMA handset to PC
requires various settings. FOMA PC setup
software enables easy configuration simple
operations.
• Packet communication or 64K data
communication can be set up without using FOMA
PC setup software. 3P436
• See P414 for connection between FOMA
handsets and PC
Simple settings
Follow the guidance to set up "Create
FOMA data communication Dial-up
Network" while configuring "W-TCP
settings" etc. automatically.
W-TCP settings
The communication settings in PC are
optimized before using "FOMA Packet
communication".
Optimizing W-TCP settings is required in
order to maximize connection
performance.
Setting up Access Point Names (APN)
Access Point Names for Packet
communication need to be setup.
Unlike 64K data communication, FOMA
Packet communication does not require
use of a telephone number. Register
Access Point Names in FOMA handset
and connect to the network by
designating its registered number (cid) in
the access telephone number field.
"mopera" is pre-registered as
mopera.ne.jp, the first in the cid list by
default. Set up APNs to connect to other
ISP's or LAN's.
NOTE
• If W-TCP setup software or FOMA data
communication setup software not included in
the bundled FOMA M1000 CD-ROM have
already been installed, uninstall them prior to
installing the FOMA PC setup software.
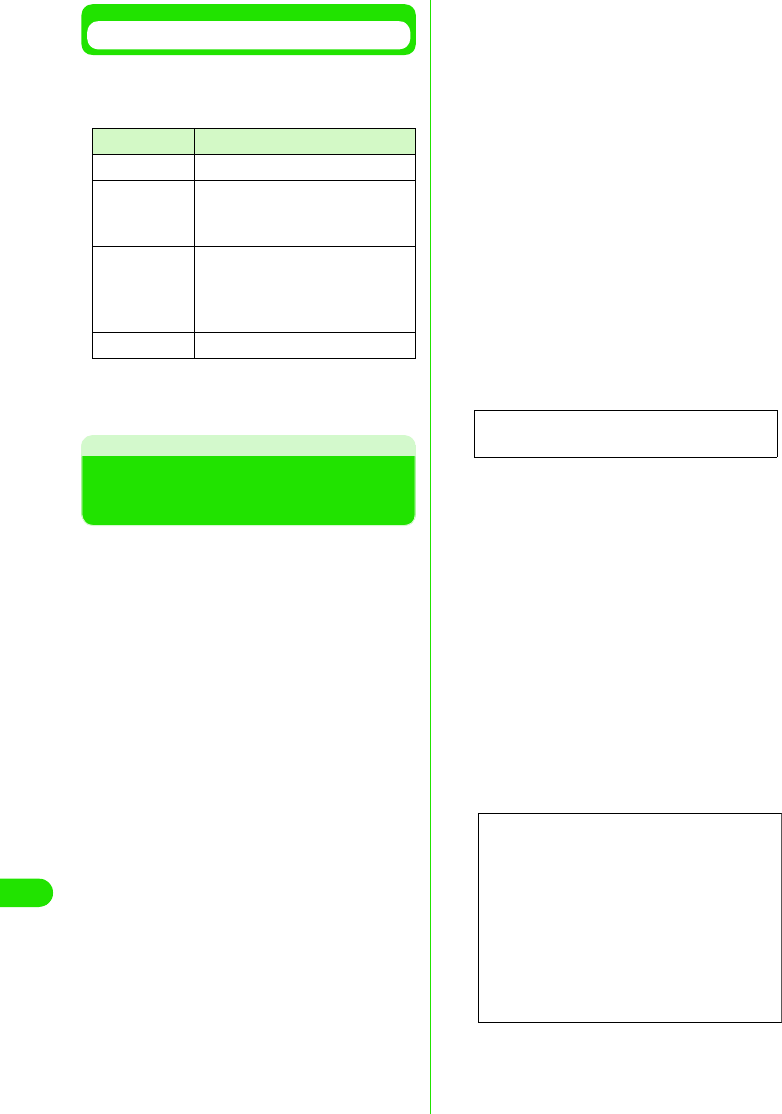
Procedures from Installation of FOMA PC
Setup Software to Internet Connection
Step1: Install software
FOMA PC setup software is installed
• Uninstall "old W-TCP setup software",
"old APN setup software" or older
versions of "FOMA PC setup software"
before installing "FOMA PC setup
software".
"FOMA PC setup software" cannot be
installed if "old W-TCP setup software"
or "old APN setup Software" is installed.
Step2: Prepare before setting up
Preparations are conducted prior to
setting up
• Check that FOMA handset is connected
to the PC and is acknowledged by the
PC.
• See P414 for connecting FOMA handset
with PC.
• If FOMA handset is not properly
acknowledged by PC, various setup and
data communication cannot be done. If
the FOMA handset is not acknowledged
then see P416 to install the connection
setup file.
Step3: Perform various settings
Setup is done according to the
desired type of data communication
• Configuring simple settings
- Packet communication setting using
"mopera" 3P423
- Packet communication setting using
other Internet Service Providers
3P424
- 64K data communication setting using
"mopera" 3P427
- 64K data communication using other
Internet Service Providers 3P428
- See P436 onwards for all other
settings.
Setup 4: Connect
Connection to the Internet is made
• See P429 for connection procedures.
00M1000EN.book 397 ページ 2004年11月24日 水曜日 午前7時56分
398
Using Data Communication
Before Installing
Check the system requirements.
• Use the FOMA PC setup software under the
following system requirements.
*: Required memory and HDD space may vary
depending on the system configuration of the
PC.
Installing FOMA PC Setup
Software
• Log in with the user account with Administrator
rights to install ("FOMA PC setup software") on
Windows XP or Windows 2000. Contact the PC
manufacturer or Microsoft regarding administrator
rights setting.
• Check that no resident program or application is in
use before installation. If any program is in use,
click [キャンセル] (Cancel) to end the program
and start installation again.
a【仕様未定につき、記載省略します。】
b【仕様未定につき、記載省略します。】
If displayed screens show that old “W-TCP
設定ソフト” (W-TCP Setup Software) or
old “APN 設定ソフト” (APN Setup
Software) are installed, refer to P421.
cClick [はい ] (Yes/agree) to agree to
the End User License Agreement
after reading
Installation will be canceled if [いいえ] (No/
disagree)is clicked.
dClick [次へ ] (Next)
Select whether "W-TCP Setup Software"
stays in Task tray or not after setting up.
Selecting the checkbox (Remain in Task
tray) is recommended for the program to
set/release the optimization of "W-TCP
communication".
Select “タスクトレイに常駐する” (Remain
in Task tray) $$ and continue the installation
unless you have any particular problem.
Settings can be changed by clicking on “メ
ニュー ” (Menu) in FOMA PC setup
software and selecting “W-TCP 設定をタス
クトレイに常駐させる” (Set W-TCP
Software in task tray) even if “ タスクトレイ
に常駐する” (Stay in task tray) has been
deselected.
* You are unable to select if “ タスクトレイに常
駐する” (Remain in task tray) has been
selected.
Displays icon in the task tray on the bottom
right (normally) of the PC screen.
eVerify the installation folder and
click [ 次へ ](Next)
Click [参照] (Browse) to make changes,
specify desired installation folder, and click
[次へ] (Next).
If HDD lacks space, you can install to a
different driver. Otherwise, proceed
accordingly.
fVerify the folder name and click [ 次
へ] (Next)
Name the new folder and click [次へ] (Next)
if necessary.
Item Requirement
PC main body • PC-AT Compatible
OS • Windows 98, Windows Me,
Windows 2000, Windows XP
(Japanese Version)
Memory • Windows 98 or Windows Me:
32MB or more*
• Windows 2000: 64MB or more*
• Windows XP: 128MB or more*
HDD Space 5MB or more*
Screen
00M1000EN.book 398 ページ 2004年11月24日 水曜日 午前7時56分
399
Using Data Communication
gClick [ 完了 ] (Done)
"FOMA PC setup software" operation
screen is launched when setup is complete.
Proceed to each setup.
Precautions during Installation of
FOMA PC Setup Software
1If "old W-TCP setup software" is
installed
The following message is displayed.
Delete “旧W-TCP 設定ソフト” (Older
version of W-TCP Setup Software) from
Add/Delete Programs in the Control Panel
1If "Older version of Access Point Name
Setup Software" is installed, the
following message is displayed.
Click [はい] (Yes) to automatically
uninstall the old software followed by
the installation of FOMA PC setup
software.
1If old versions of "FOMA PC setup
software" is installed
The following message is displayed.
Click [ はい] (Yes) to automatically uninstall
the old software followed by the installation
of FOMA PC setup software.
1If "FOMA PC setup software" is already
installed
The Following message is displayed.
Click [はい] (Yes) to automatically uninstall
the previously installed software followed
by the installation of FOMA PC setup
software.
1When [キャンセル] (Cancel) is clicked
during installation
When [キャンセル] (Cancel) or [いいえ]
(No) is clicked during installation, and
when selected to not proceed further,
the following screen is displayed.
Click [継続] (Continue) to proceed with the
installation, and [中止] (Cancel) to
terminate.
Setting up Data
Communication
Settings for Packet communication or 64K
data communication is made.
• Check that FOMA handset is properly connected
to PC before setting up. 3P414
Launch FOMA PC Setup Software
aClick “ スタート ” (Start) y “ プログラ
ム” (Programs) y “FOMA PC 設定ソ
フト ” (FOMA PC Setup Software) y
FOMA PC 設定ソフト (FOMA PC
FOMA PC setup software)
Screen
Screen
Screen
Screen
Screen
00M1000EN.book 399 ページ 2004年11月24日 水曜日 午前7時56分
400
Using Data Communication
1Windows XP
Click “スタート” (Start) y “すべてのプロ
グラム” (All Programs) y “FOMA PC設定
ソフト” (FOMA PC setup software) y
“FOMA PC設定ソフト” (FOMA PC setup
software)
FOMA PC setup software is launched and
the operation screen is displayed.
Packet data communication using "mopera"
3P423
Packet data communication using other
Internet Service Providers 3P424
64K data communication setting using
"mopera" 3P427
64K data communication using other
Internet Service Providers 3P428
Simple Setting "Packet Data
Communication with mopera"
High speed packet data communication with
maximum speed of 384kbps via DoCoMo's
ISP service called "mopera" is set up.
• High speed packet data communication :
Maximum downlink speed 384kbps, Maximum
uplink speed 64kbps (excluding some models).
The charge is based on the volume of exchanged
data. You do not need not to worry about the
duration of connecting time. This service is based
on a best-effort connection where transmission
speed is affected by network traffic and
communication infrastructure.
• Be cautioned that large volume data exchanges
such as browsing web sites with images and
downloading large files using Packet
communication may result in high charges.
aClick [かんたん設定 ] (Simple
Settings)
bSelect “パケット通信 ” (Packet
communication) then Click [ 次へ ]
(Next)
cSelect “mopera 接続 ” (mopera
connection) then Click [ 次へ ] (Next)
See P424 if you wish to use other ISP than
"mopera".
dClick [OK]
Please wait while the FOMA handset
connected to the PC obtains APN setup.
Screen
Screen
Screen
Screen
Screen
00M1000EN.book 400 ページ 2004年11月24日 水曜日 午前7時56分

401
Using Data Communication
eEnter the connection name then
Click [ 次へ ] (Next)
Specify the desired connection name.
Enter a recognizable name in “接続名”
(Connection Name) field.
This field is case sensitive. Enter name
accurately.
Invalid characters: ¥ / : * ? ! | " (single byte
only) cannot be accepted.
fInput username/password then
click [次へ ] (Next)
When “mopera接続” (mopera connection) is
selected, username/password are entry
can be omitted.
Select user when using Windows XP or
Windows 2000.
Enter the username and password
provided by the ISP. Enter accurately. The
fields are case sensitive.
gCheck “最適化を行う ” (Optimize)
then click [ 次へ ] (Next)
"W-TCP Settings" necessary for Packet
communication is optimized. This message
will not be displayed if it is already
optimized.
Reboot PC to validate the change.
hConfirm settings and Click [ 完了 ]
(Done)
A list of all setting information is displayed.
Check that all settings are properly
configured.
A shortcut is created automatically if “デス
クトップにダイヤルアップのショート
カットを作成する ” (Create Dial-up
Networking shortcut on desktop) is
selected.
Click [ 戻る] (Back) to modify setting
information.
Screen
Screen
(Windows XP, Windows 2000)
Screen
(Windows Me, Windows 98)
Screen
00M1000EN.book 401 ページ 2004年11月24日 水曜日 午前7時56分
402
Using Data Communication
iClick [OK]
Reboot PC to validate the changes. Click
[はい] (Yes) if prompted by reboot selection
screen.
Execute the connection 3P429
Simple Setting "Packet Data
Communication Setting Using Other ISP's"
High speed packet data communication with
maximum speed of 384kbps is set up.
• High speed packet data communication :
Maximum downlink speed 384kbps,
Maximum uplink speed 64kbps (excluding some
models). The charge is based on the volume of
exchanged data. You do not need not to worry
about the duration of connecting time. This service
is based on a best-effort connection where
transmission speed is affected by network traffic
and communication infrastructure.
• Be cautioned that large volume data exchanges
such as browsing web sites with images and
downloading large files using Packet
communication may result in high charges.
aClick [かんたん設定 ] (Simple
setting)
bSelect “パケット通信 ” (Packet
communication) then Click [ 次へ ]
(Next).
cSelect “その他” (Others) then Click [
次へ ] (Next)
dClick [OK]
Please wait while the FOMA handset
connected to the PC obtains APN setup.
eSet up Packet communication
After acquiring handset settings, “パケット
通信設定” (Packet communication settings)
screen is displayed.
Specify a name in the APN input field
The field is case sensitive. Enter accurately.
Invalid characters: ¥ / : * ? !<> | " (single
byte only) cannot be accepted
If “発信者番号通知を行う” (display ID
number) is selected, Phone number. will be
notified to the receiver while making a call.
mopera.ne.jp is set by default in the “接続先
(APN)の選択” (Select APN) field.
fSet up APN
mopera.ne.jp is pre-registered by default as
the first cid.
Click [追加] (Add) to display “接続先(APN)
の追加” (Add APN) to specify the desired
APN in the field. The APN must support
FOMA Packet communication. Click [OK].
You are reverted to the “接続先(APN)設定”
(set up APN) screen.
Only single byte alphanumerical
characters, (-) dash, and (.) full stop, can be
entered in the APN field.
Up to 10 cid can be registered.
• Select “PDP-PPP 方式” (PDP-PPP
connection) or “PDP-IP方式 ” (PDP-IP
connection) from “ダイヤルアップ種別”
(Dial-up Networking types) if field “ダイ
ヤルアップの表示” (Display Dial-up
Networking) is set to “全表示” (Display
all) 3P435
Screen
Screen
00M1000EN.book 402 ページ 2004年11月24日 水曜日 午前7時56分

403
Using Data Communication
gConfigure Advanced Settings (TCP/
IP)
Click [詳細情報の設定] (Advanced settings)
in “パケット通信設定” (Packet
communication settings) to display “IP アド
レス” (IP Address) and “ネームサーバー ”
(Name Server) setting screen. Input
necessary information related to ISP and
LAN Dial-up Networking where required.
hSelect APN then click [OK]
Back to Step 5.
The APN list set in Step 6 is displayed in the
“接続先(APN)の選択” (Select APN) dialog.
iVerify connection with designation
(APN) in “接続先 (APN) の選択 ”
(Select APN) menu then click
[次へ ] (Next)
jSet username and password then
click [次へ ] (Next)
In Windows XP or Windows 2000, select
user.
username and password provided by ISP
must be entered correctly. Note that fields
are case sensitive.
kSelect “最適化を行う ” (Optimize)
then click [ 次へ ] (Next)
“W-TCP 設定 ” (W-TCP setting) necessary
for Packet communication is optimized.
This screen is not displayed if already
optimized. (Proceed to step12)
lVerify setting information then click
[完了 ] (Done)
All configured settings are listed. Verify that
there are no errors in the setup information.
A shortcut on desktop will be created
automatically if “デスクトップにダイヤル
アップのショートカットを作成する”
(Create Dial-up Networking shortcut on
desktop) is selected.
Click [ 戻る] (Back) to change settings
mClick [OK]
Reboot PC to validate changes. Click
[はい] (Yes) if prompted by the reboot
selection screen.
Execute the connection 3P429
Screen
(Windows XP, Windows 2000)
Screen
(Windows Me, Windows 98)
Screen
Screen
00M1000EN.book 403 ページ 2004年11月24日 水曜日 午前7時56分
404
Using Data Communication
Simple Settings "64K Data
Communication Setting Using mopera"
64Kbps data communication is set up.
DoCoMo's ISP "mopera" is used.
• Charges are based on the duration of connecting
time
aClick [かんたん設定 ] (Simple
setting)
bSelect “64K データ通信 ” (64K data
communication) then click [ 次へ ]
(Next).
cSelect “mopera 接続 ” (mopera
connection) then click [ 次へ ] (Next)
See P428 to use ISP connection other than
"mopera"
dEnter APN and select modem then
click [次へ ] (Next)
“64K データ通信設定” (64K Data
communication) dialog is displayed.
Specify a name as you wish in “接続名”
(Connection) field.
This field is case sensitive. Enter name
accurately.
Invalid characters: ¥ / : * ? ! < > | " (single
byte only) are not accepted.
Select "FOMA M1000" for modem name.
eSet username and password then
click [ 次へ ] (Next)
User may ignore this step if mopera
connection is selected.
In Windows XP or Windows 2000, select a
user.
Setup information provided by ISP must be
entered correctly. Note that fields are case
sensitive.
Screen
Screen
Screen
Screen
(Windows XP, Windows 2000)
Screen
(Windows Me, Windows 98)
00M1000EN.book 404 ページ 2004年11月24日 水曜日 午前7時56分
405
Using Data Communication
fVerify setup information then click
[完了 ] (Done)
All configured settings are listed. Verify that
there are no errors in the setting
information.
A shortcut on desktop is created
automatically if “デスクトップにダイヤル
アップのショートカットを作成する”
(Create Dial-up Networking shortcut on
desktop) is selected.
Click [ 戻る] (Back) to change settings.
gClick [OK]
Execute the connection 3P429
Simple Setting "64K Data
Communication with Other ISP"
Setting is performed for 64K data
communication at 64Kbps.
• Charges are based on duration of time connected.
aClick [ かんたん設定 ] (Simple
setting)
bSelect “64K データ通信 ” (64K data
communication) then click [ 次へ ]
(Next)
cSelect “その他 ” (Other) then click [
次へ ] (Next)
dEnter Dial-up Networking
information then click [ 次へ ] (Next)
If connecting to another ISP that possesses
synchronized ISDN 64K access points, the
following information need to be registered.
- Connection name (optional)
- Modem selection (FOMA M1000)
- Dial-up phone number
Connection name must be entered. The
field is case sensitive. Enter accurately.
Note that fields are case sensitive.
Invalid characters: ¥ / : * ? ! < > | " (single
byte only)
When using the accompanying FOMA-USB
cable, select "FOMA M1000" (FOMA
M1000) as modem.
Enter the information provided by ISP
correctly. The fields are case sensitive and
accept only single byte characters. The
phone number is notified once connected if
“発信者番号通知を行う” (Display caller ID)
is selected.
eConfiguring Advanced setting
(TCP/IP setting)
Click “詳細情報の設定” (Advanced setting)
to display “IPアドレス” (IP Address) and
“ネームサーバー ” (Name Server) setting
dialog. Input necessary information related
to ISP or LAN Dial-up Networking where
required.
fSet up username and password
then click [ 次へ ] (Next)
In Windows XP or Windows 2000, select a
user.
Screen
Screen
00M1000EN.book 405 ページ 2004年11月24日 水曜日 午前7時56分

406
Using Data Communication
Set username and password information
accurately according to the information
provided by the ISP. The fields are case
sensitive.
gVerify setup information then click
[完了 ] (Done)
A list of all settings is displayed. Check that
all settings are properly configured.
A shortcut is created automatically if “デス
クトップにダイヤルアップのショート
カットを作成する” (Create Dial-up
Networking shortcut on desktop) is
selected.
Click [戻る] (Back) to change settings.
hClick [OK]
Execute the connection 3See right
Executing the Set
Connection
Connection and disconnection using the
settings configured with the FOMA PC Setup
software is described in this section.
• Connection from dial-up icon is valid only for the
FOMA handset used to configure with the icon.
Install connection setup file again if connecting
with another FOMA handset.
aClick connection icon
on the PC
bClick [ダイヤル ] (Dial) and connect
Click “ダイヤル” (Dial) without entering the
“ユーザ名” (Username)and “パスワード”
(Password) if mopera is selected. Enter
“ユーザ名” (Username)and “パスワード”
(Password) and click “ダイヤル” (dial) if
another ISP or dial up connection is
selected.
No need to enter password again if “パス
ワードを保存する” (Save password) is
selected.
cClick [OK] upon verifying
connection
The Following screen is displayed when
connecting the dial up normally.
• The message is not displayed if “接続”
(connection) has been set to hide the
message previously.
Screen
(Windows XP, Windows 2000)
Screen
(Windows Me, Windows 98)
Screen
Screen
00M1000EN.book 406 ページ 2004年11月24日 水曜日 午前7時56分
407
Using Data Communication
Disconnecting
Closing the web browser does not always
guarantee disconnection from the network.
Disconnect the connection by following the
steps below.
aClick dial up icon
in task tray on PC
screen
The connection screen is displayed.
bClick [ 切断 ] (Disconnect)
NOTE
• The displayed data speed on the PC may be
different from the actual speed.
Uninstalling FOMA PC
Setup Software
Before Uninstallation
Undo all changes made for the FOMA
handset settings before uninstalling the
FOMA PC setup software.
aDisable “W-TCP 設定 ” (W-TCP
setting) in task tray
Right click on the “W-TCP アイコン” (W-
TCP icon) in the task tray, and click “常駐さ
せない” (terminate in task tray).
bTerminating active programs
The following messages will be displayed if
uninstallation is attempted while “FOMA PC
設定ソフト ” (FOMA PC Setup software) or
“W-TCP 設定” (W-TCP setting) is running.
Stop uninstalling and close all active
programs.
Uninstalling
aLaunch “ アプリケーションの追加と
削除 ” (Add/Remove Programs) in
Windows
1Windows XP
Click “スタート” (Start) y “コントロール
パネル” (Control Panel) y “プログラムの
追加と削除 ” (Add/Remove Programs)
1Windows Me, Windows 98 or Windows
2000
Click “スタート” (Start) y “設定”
(Settings) y “コントロールパネル”
(Control Panel) y “プログラムの追加と削
除” (Add/Remove Programs)
"アプリケーションの追加と削除のプロパ
ティ ” (Add/Remove Applications
properties) will be displayed in Windows Me
or Windows 98.
Dial up icon
Screen
Right click
Click
Screen
Screen
00M1000EN.book 407 ページ 2004年11月24日 水曜日 午前7時56分
408
Using Data Communication
bSelect “FOMA PC 設定ソフト ”
(FOMA PC Setup software) y click [
変更と削除 ] (Change/Delete)
cVerify the program to delete y click
[はい ] (Yes)
Uninstallation begins.
dClick [OK] Installation of FOMA PC
setup software is completed.
1Disabling “W-TCP 最適化” (Optimizing
W-TCP)
Displays following message if “W-TCP 最
適化” (Optimizing W-TCP) is performed.
Click [はい] (Yes) to uninstall
Optimization of W-TCP is disabled after
PC is rebooted.
W-TCP Setting
W-TCP Roles
“W-TCP設定” (W-TCP Setting) is a "TCP
Parameters setting tool" to optimize TCP/IP
performance for Packet communication in
FOMA network.
Setting this software is required to fully utilize
FOMA handset communication performance.
Setting/Disabling the Optimization.
Windows XP
Each Dial-up Networking can be optimized
separately in Windows XP.
aLaunch the program
1To operate from FOMA PC Setup software
Click [W-TCP 設定] (W-TCP setting) in “マ
ニュアル設定” (Manual setting) after
launching the program
1To operate from task tray
Click W-TCP icon in task tray.
Select “NTT DoCoMo FOMA PC設定ソフト ”
(NTT FOMA PC Setup software)
Click here
Screen
Screen
Screen
Screen
Screen
Screen
Left Click
00M1000EN.book 408 ページ 2004年11月24日 水曜日 午前7時56分
409
Using Data Communication
bConduct the following operations
1When system setting is not optimized
Click [最適化を行う] (Optimize)
"(W-TCP (Dial-up Networking) setting)" is
displayed. Select the desired Dial-up
Networking and click [実行] (Execute) to
optimize system setting or Dial-up
Networking.
System setting is optimized after PC is
rebooted by following the instructions
displayed.
1When system setting is already
optimized
“W-TCP(ダイヤルアップ)設定” (W-TCP
(Dial-up Networking) setting) is displayed.
Perform necessary settings to make
changes.
System setting is optimized after PC is
rebooted by following the instructions
displayed.
1When disabling optimization
aClick [システム設定] (System setting)
in “W-TCP 設定” (W-TCP setting)
bClick [最適化を解除する ] (Disable
optimization)
Optimization is disabled after PC is
rebooted by following the instructions
displayed.
Windows Me, Windows 2000 or Windows
98
aLaunch program
1When operating from FOMA “PC 設定ソ
フト” (FOMA PC Setup software)
Click [W-TCP 設定] (W-TCP setting) in “マ
ニュアル設定” (Manual setting) after
launching program
1When operating from Task tray
Click (W-TCP icon) in task tray.
bConduct the following operations
1If it is not optimized
Click [最適化を行う] (Optimize)
Screen
Screen
Screen
Left Click
00M1000EN.book 409 ページ 2004年11月24日 水曜日 午前7時56分
410
Using Data Communication
Optimization is enabled after PC is
rebooted by following the instructions
displayed.
1If it is already optimized
“現在、最適化されています。” (Already
optimized) message is displayed in “W-TCP
設定” (W-TCP Setting)
Click [最適化を解除する] (Disable
optimization) to disable settings resulting
from transmission with devices other than
the FOMA handset.
Optimization is disabled after PC is
rebooted by following the instructions
displayed.
Setting up APN
APN for Packet communication is set up.
Up to 10 APN numbers can be set up.
Numbers from 1 to 10 can be assigned to the
cid's.
The cid is used to specify connection for
Packet communication.
"mopera" is pre-registered as 1 in the cid list
by default. Other APNs must be assigned a
number from in 2 to 10.
• Check that FOMA handset is properly connected
to PC before setting up 3P414
aClick [接続先 (APN)設定] (APN
Setting) after launching “FOMA PC
設定ソフト ” (FOMA PC Setup
software)
bClick [OK] in FOMA handset setting
screen.
Load registered APN information by
accessing connected FOMA handset
automatically.
• Launching is disabled if FOMA handset
is not connected
cSetting up APN
Screen
Screen
Screen
Screen
00M1000EN.book 410 ページ 2004年11月24日 水曜日 午前7時56分

411
Using Data Communication
Adding/Editing/Deleting APN
1When Adding an APN
Click [追加] (Add) in “接続先(APN)設定”
(APN Setting)
1When Editing registered APN
Select desired APN from list in “接続先
(APN)設定” (APN Setting) yClick [編集]
(Edit)
• You can select from “PDP-PPP 方式”
(PDP-PPP connection)or “PDP-IP方式”
(PDP-IP connection) to add/edit an APN
if “ ダイヤルアップの表示” (Display
Dial-up Networking) is set to “全表示”
(Display all) 3P435
1When Deleting registered APN
Select desired APN from list in “接続先
(APN)設定” (APN Setting) yClick [削除]
(Delete)
• APN Registered in cid 1 cannot be
deleted.
Saving Setting Information info a file
APN setting information registered in FOMA
handset can be backed up, and APN setting
information in edit mode can be saved.
aClick ファイル (File) y “ 名前を付け
て保存 ” (Save as)/“ 上書き保存 ”
(Save) in “ 接続先 (APN)設定” (APN
Setting)
Loading APN Setting Information from File
APN setting saved in PC can be re-edited and
written to FOMA handset.
aClick “ ファイル ” (File) y “ 開く ”
(Open)in “接続先 (APN)設定” (APN
setting)
Writing APN Setting Information to FOMA
Handset
Displayed APN setting can be written to
FOMA handset
aClick FOMA“端末へ設定を書き込む”
(Save in FOMA handset) in “ 接続先
”(APN)設定 (APN setting)
Loading APN Setting in FOMA Handset
APN setting can be retrieved by manually
accessing the FOMA handset
aClick “ファイル” (File) y “FOMA端末
からの設定を取得 ” (Retrieve setting
from FOMA handset) in “ 接続先
(APN)設定” (APN setting)
Creating Dial-up Networking
Dial-up Networking for Packet communication
can be created from an added/edited APN in
“接続先(APN)設定” (APN setting), and be
saved in FOMA handset.
aSelect an added/edited APN in “接続
先(APN)設定” (APN Setting), and
click [ ダイヤルアップ作成 ] (Create
Dial-up Networking)
Write to FOMA handset confirmation
screen is displayed.
bClick [ はい ] (Yes)
“パケット通信用ダイヤルアップの作成”
(Create Dial-up Networking for Packet
communication) is displayed
• Perform Step 5 if mopera is selected as
the APN.
cEnter desired APN name and click
“アカウント・パスワードの設定 ”
(Setting up account /password)
dEnter username and password then
click [OK]
• In Windows XP or Windows 2000, a user
is selected.
•Click [詳細情報の設定] (Advanced
setting) in “パケット通信用ダイヤルアッ
プの作成” (Create Dial-up Networking
for Packet communication) if IP address
and DNS setting are provided by your
ISP. Then click [OK] after registering
required information.
00M1000EN.book 411 ページ 2004年11月24日 水曜日 午前7時56分
412
Using Data Communication
eClick [FOMA 端末へ設定を書き込む ]
(Write settings to FOMA handset)
and perform writing
NOTE
• APN information are stored in FOMA handset.
To connect another FOMA handset set up APN
again.
• If you wish to continue to use the same APN as
that registered in the PC, register the APN to the
same number (cid) in the FOMA handset.
• If the COM port connecting the FOMA handset
is recognized by the PC as greater than COM20
then loading and writing of APN information is
disabled. In these cases, use “ハイパーターミ
ナル” (Hyper Handset) which is accompanied
with Windows. 3P440
Assigning COM Port
The COM port of the PC is assigned to the
FOMA handset to manually perform
connection setting. This COM port can be
changed. Normally, however, set it to “自動設
定(推奨)” (Auto setting (recommended)) .
aClick “メニュー” (Menu) y “ 通信設
定” (Connection setting) after
launching program
Set up screen is displayed.
bSelect “COM ポート指定 ” (Assign
COM port) , and assign COM Port
COM Port number is displayed in COM.
cClick [OK]
Assigned COM Port is set up.
• Use “ハイパーターミナル” (Hyper
terminal) which is accompanied with
Windows to check COM port 3P440
Displaying Dial-up
Networking Type
Select from “PDP-PPP方式 ” (PDP-PPP
connection)or “PDP-IP 方式” (PDP-IP
connection)* from Dial-up Networking type if
“ダイヤルアップの表示” (Display Dial-up
Networking) is set to “ 全表示” (Display all).
Select “PPPのみ表示 (PDP-IP方式のみ表示/
設定可)” (Display only PPP (Display/Set up
only PDP-IP connection)) normally.
*: “PDP-PPP方式” (PDP-PPP connection) is
Packet communication using Point-to-Point
protocol. “PDP-PPP方式 ” (PDP-PPP
connection) is used to connect to mopera
(mopera)etc. Contact your ISP or network
administrator to check connection protocol of
APN.
aClick “メニュー” (Menu) y “ 通信設
定” (Connection setting) after
launching program
Set up screen is displayed.
bSelect “PPP のみ表示 ”(Display only
PPP)/“ 全表示 (Display All)” in “ダイ
ヤルアップの表示 ” (Display Dial-up
Networking)
cClick [OK]
Screen
Screen
00M1000EN.book 412 ページ 2004年11月24日 水曜日 午前7時56分
413
Using Data Communication
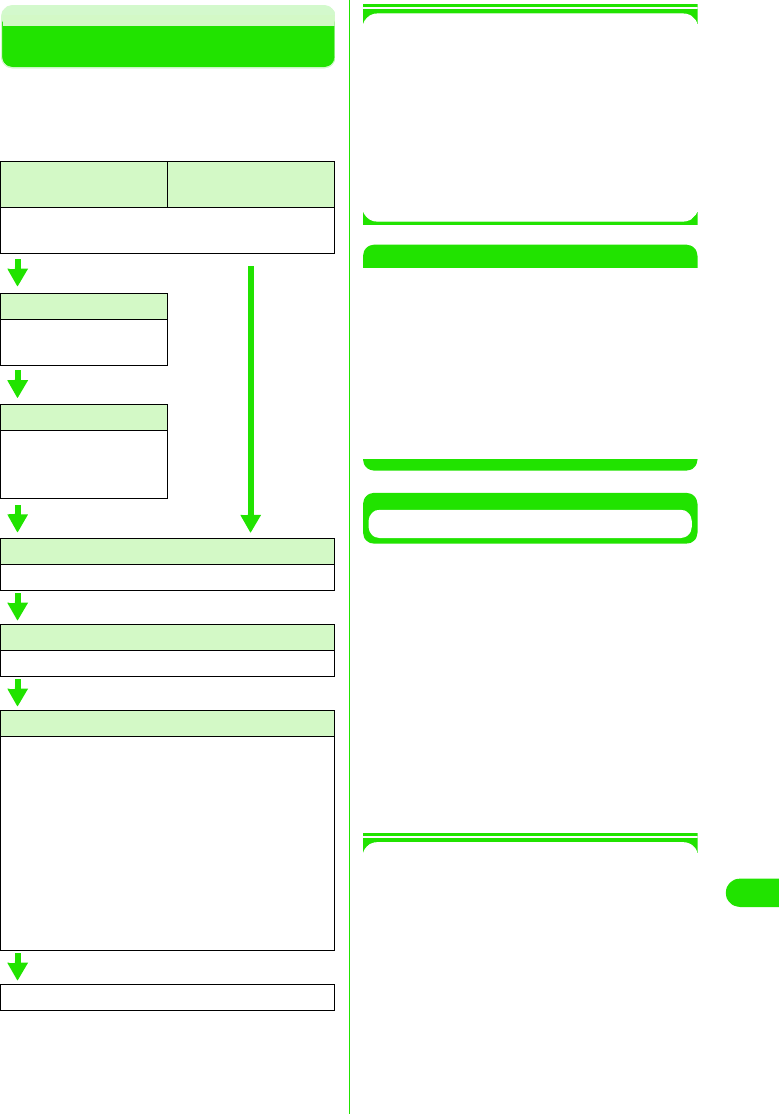
Setting up Dial-up Networking
You can set up Dial-up Networking for Packet
communication/64K data connection without
using FOMA PC setup software. The flow is
explained below.
1AT Commands
AT Commands consist of commands for
controlling modems.
The FOMA handset supports standard AT
commands, some extended commands
and proprietary AT commands.
• Detailed settings of “データ通信” (data
connection) or FOMA handset can be
checked with AT Command entries.
NOTE
•Set *9601 as connection number when using
DoCoMo's ISP "mopera" for 64K data
connection.
•Set “発信者番号の通知/非通知 ” (Caller ID
display ON/OFF) as required. Set to 通知 (ON)
to use "mopera".
•Set “その他の設定” (Other settings) as required.
FOMA is operational with default settings.
• Contact your ISP or network administrator for
further setup details.
Checking COM Port
You are required to specify COM port number
assigned to "FOMA M1000" (modem)
embedded after installation of connection
setup file when setting up the APN.
This section explains about procedures to
verify COM Port number.
The verified COM port is used for APN setting
(3P440).
• There is no need to check modem when if using
DoCoMo's ISP "mopera" APN setup is not
necessary, then. Proceed to “ 発信者番号の通知/
非通知を設定します” (Display/hide caller ID)
(3P442)
1About APN and cid
Unlike 64K data connection, a regular
telephone number is not used for Packet
communication. APN is used instead.
• The (cid) registration number 1 to 10 are
registered in FOMA handsets as part of the
APN when APN numbers are set up.
• APN is managed by cid (registration number
from 1 to 10). Entering (*99***<cid number>#)
connects to the corresponding APN.
• "mopera" is pre-registered to 1 in the cid list
by default as ("mopera.ne.jp"). "mopera" can
Set up Packet
communication
Set up 64K data
connection
How to attach 3P414
Install connection setup file (driver). 3P416
Check COM port
Check COM port.
3P437
Set up APN
Set up APN 3P440
• Set up is not required
with "mopera".
Set up caller ID
Set up to display/hide caller ID. 3P442
Other settings
Perform other settings. (AT Command) 3P453
Set up Dial-up Networking
• Contact your ISP or network administrator for
further setup details.
• Windows XP users
Set up APN 3P438
• Windows 2000 users
Set up APN 3P439
• Windows Me users
Set up APN. 3P439
• Windows 98 users
Set up APN. 3P439
Connect Dial-up Networking 3P451
00M1000EN.book 413 ページ 2004年11月24日 水曜日 午前7時56分
414
Using Data Communication
easily be used by entering the number
(*99***1#). Use cid 2 to 10 to register other
APNs.
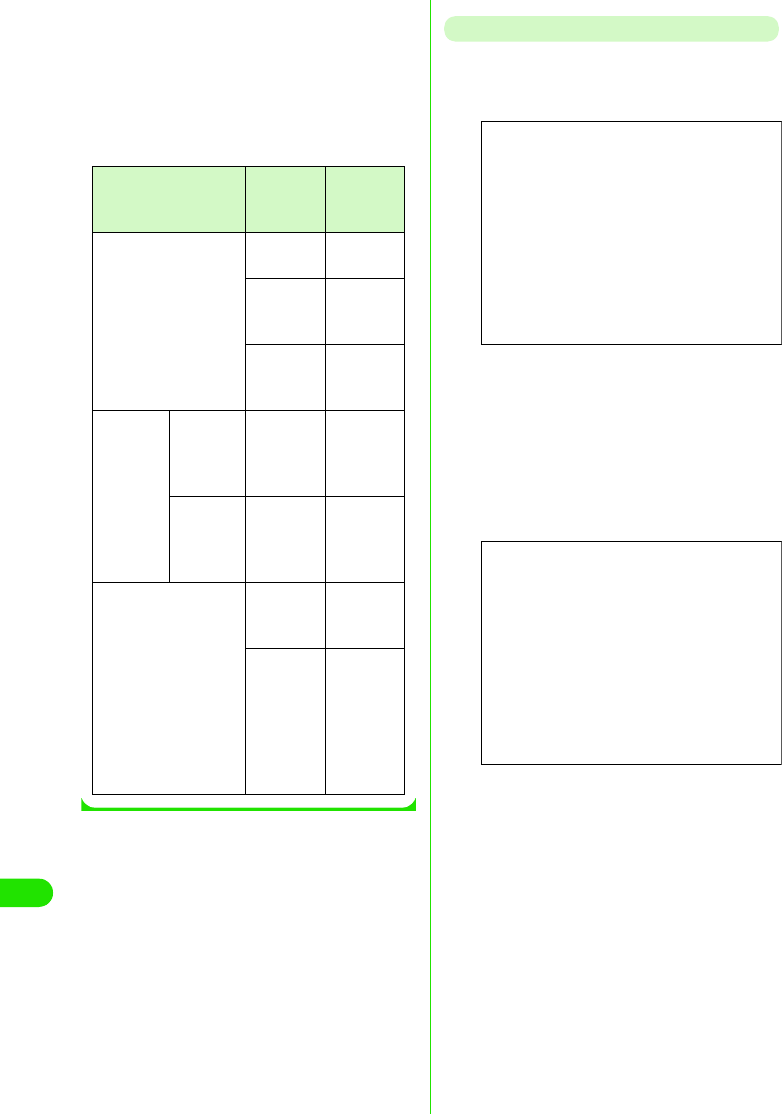
• APNs can be registered like registering
contact information to a mobile phone. The
table below summarizes differences and
similarities when compared to a contact list in
a mobile phone.
Checking COM Port in Windows XP
aClick “スタート ” (Start) y “ コント
ロールパネル ” (Control Panel)
bClick “プリンタとその他のハード
ウェア ” (Printer and other
hardware) in “コントロールパネル ”
(Control Panel) y “ 電話とモデムのオ
プション ” (Telephone and modem
options)
cEnter “ 市外局番/エリアコード ”
(Area code) if “ 所在地情報 ”
(Location information) is displayed,
and click [OK]
dClick “モデム ” (Modem) tab.
Checking COM port in “接続先 ”
(Connection) list of FOMA M1000,
and click [OK]
The verified COM port is used for APN
setup.
Item to compare APN
Setting
Contact
list in
handset
Registration data APN Phone
number
cid Memory
number in
contact list
–
Name of
intended
party
Registration
process
Registrati
on via PC
○(Using
FOMA PC
Setup
software)
○ (Using
dedicated
software)
Registrati
on via
mobile
phone
× (Unable
to
confirmed)
○
How to use Specify cid
and
connect
Search
contact list
and call
–
Enter
phone
number
and dial
from
FOMA
handset
Screen
Screen
00M1000EN.book 414 ページ 2004年11月24日 水曜日 午前7時56分
415
Using Data Communication
• Displayed messages and COM port
numbers may vary depending on your
PC.
Checking COM Port in Windows 2000
aClick “ スタート ” (Start) y “ 設定 ”
(Settings) y “コントロールパネル ”
(Control Panel)
bClick “ 電話とモデムのオプション ”
(Telephone and modem options) in
“コントロールパネル ” (Control
Panel)
cEnter “市外局番 ” (Area code) then
click [OK] if “ 所在地情報 ” (Location
information) is displayed
dClick “ モデム ” (Modem) tab and
check COM port in “ 接続先 ”
(Connection) list of FOMA M1000
(FOMA M1000). Click [OK]
The verified COM port number is used for
APN Setup.
• Displayed message and COM port
number may vary depending on your PC.
Checking COM Port in Windows Me/98
aClick “ スタート ” (Start) y “ 設定 ”
(Settings) y “コントロールパネル ”
(Control Panel)
Screen
Screen
Screen
Screen
Screen
00M1000EN.book 415 ページ 2004年11月24日 水曜日 午前7時56分
416
Using Data Communication
bClick [モデム ] (Modem) in “コント
ロールパネル ” (Control Panel)
If “モデム ” (modem) icon is not displayed,
click “すべてのコントロールパネルのオプ
ションを表示する” (Display all options in
control panel).
cCheck that FOMA M1000 is properly
set up then click “ 検出結果 ” (More
Info on the Diagnostics) tab
dCheck COM port to which FOMA
M1000 is set up and click [OK]
The verified COM port number is used for
APN Setup.
• Displayed message and COM port
number may vary depending on your PC.
Setting up APN
Connection software for AT commands is
required to set up APN.
Setup procedures using Hyperterminal in
Windows is explained in this section.
• APN for Packet communication is set up. Up to 10
APNs with registration number <cid>
1to10(3P437) can be set up.
• "mopera" is pre-registered to 1 in the cid list by
default as "mopera.ne.jp". Registration numbers
2 to 10 are recommended for use with other
APNs.
• The registered cid is used as the connection
number for the APN setting up Dial-up
Networking.
• Inquire your network administrator or ISP
regarding APN's other than mopera.
• AT commands may not be displayed in
Hyperterminal from Step 6 P441 onwards.
• Entering in the following manner:
•ATE1
• Displays AT commands.
<Example: in Windows XP>
aConnect FOMA handset with
accompanying USB cable 3P414
bTurn on FOMA handset and connect
the other end of the USB cable to
PC
Screen
Screen
D
e
f
au
l
t sett
i
ng cid1:mopera.ne.jp cid2~10: never
Screen
00M1000EN.book 416 ページ 2004年11月24日 水曜日 午前7時56分
417
Using Data Communication
cClick “ スタート ” (Start) y “ すべての
プログラム ” (All Programs) y “アク
セサリ ” (Accessories) y “通信 ”
(Communication) y “ハイパーター
ミナル ” (Hyperterminal)
Hyperterminal is launched.
1In Windows Me or Windows 2000
On the PC, click “スタート” (Start) y“プ
ログラム” (Program) y“アクセサリ”
(Accessories) y “通信”
(Communication) y “ハイパーターミナ
ル” (Hyperterminal)
1In Windows98
Click Hypertrm.exe after clicking “ハイ
パーターミナル” (Hyperterminal)
dEnter desired name in 名前 (name)
and click [OK]
Enter name as "sample" here as an
example
eSelect FOMA M1000 in “ 接続方法 ”
(Connection method) then click
[OK]
1When COM port in FOMA M1000 can be
selected
Click [OK] in COM port properties.
• To check COM port number selected in
“接続方法” (Connection method)
(3P437), perform “COMポートを確認す
る” (Check COM Port)
1When COM port in FOMA M1000 cannot
be selected
aClick [キャンセル] (Cancel)
“接続の設定” (Set up connection)
screen is closed.
bClick “ファイル” (File) and select “プ
ロパティ ” (Properties)
cSelect FOMA M1000 in “接続方法”
(Connection method) of “接続の設定”
(Set up connection) tab of “sampleのプ
ロパティ” (Sample properties) screen
dDeselect OFF “国/地域番号と市外局
番を使う” (Use country code and area
code)
eClick [OK]
fEnter APN then press
Enter in the following format
AT+CGDCONT=<cid>,"PPP", "APN"
If a cid is already set up, not that the new
CID overwrites the previous setting.
Screen
<cid> : Enter desired number between
2 to 10
"APN": Enter APN with double quotation
mark
"PPP" : Enter "PPP" as is
Screen
Screen
00M1000EN.book 417 ページ 2004年11月24日 水曜日 午前7時56分
418
Using Data Communication
APN setup is complete if OK is displayed.
Example: When XXX.abc is set up in cid 2
Enter "AT+CGDCONT=2,"PPP","XXX.abc"
$$"
gCheck that if OK is displayed, and
click “ファイル ” (File) y “ ハイパー
ターミナルの終了 ” (End
Hyperterminal)
Hyperterminal is closed.
Saving is not necessary when confirm save
screen is displayed.
1When APN settings are reset with AT
command
• cid=1 is reset to mopera.ne.jp (default value),
and cid=2 to 10 is unregistered.
<Input method>
AT+CGDCONT= (When resetting
all cids)
AT+CGDCONT=<cid> (When
resetting a specific cid)
1When checking APN with AT command
• Display current settings
<Input method>
AT+CGDCONT?
1When nothing is displayed as AT
command is entered
<Input method>
ATE 1
Notifying/Hiding Caller ID
• Caller ID can be turned on or off to enable/disable
notifying Caller ID to the designator during packet
connection. Use caller ID with care. Your caller ID
is valuable information.
• Caller ID can be set up with AT command before
performing Dial-up Networking
• Use *DGPIR command to setup caller ID to notify
or hide, or to reset to “設定なし” (None) (default
value) (3P454)
aLaunch “ハイパーターミナル ”
(Hyperterminal)
bSet up caller ID display during
Packet communication
Enter in the following format
"AT*DGPIR=<n>"
1To Append 184 (hiding caller ID)
automatically when calling or answering
Enter AT*DGPIR=1
1To Append 186 (notifying caller ID)
automatically when calling or answering
Enter AT*DGPIR=2
cClick “ファイル ” (File) y “ハイパー
ターミナルの終了 ” (End
Hyperterminal) if [OK] is displayed
D
e
f
au
l
t sett
i
ng Notify
Screen
Screen
Screen
00M1000EN.book 418 ページ 2004年11月24日 水曜日 午前7時56分
419
Using Data Communication
1Setting up 186(Notify)/184(Hide) in
Dial-up Networking
186/184 can also be appended to a
number in Dial-up Networking.
* When 186/184 are setup in both DGPIR and
Dial-up Networking, the applicable settings
are described in the following table.
NOTE
•Enter AT*DGPIR=0 to reset caller ID setup with
DGPIR command to "Never".
• Set caller ID setting to "Notify" when using
"mopera", DoCoMo's ISP service.
Setting up Dial-up
<Example: Connecting to "mopera" using
<cid>=1>
• Contact your ISP or network administrator to setup
and connect with another ISP.
Setting up Dial-up Connection in
Windows XP
aClick “ スタート ” (Start) y “ すべての
プログラム ” (All Programs) y “ アク
セサリ ” (Accessories) y “通信 ”
(Communications) y “新しい接続 ”
“ウィザード ” (New connection
wizard)
bClick [ 次へ ] (Next) in “新しい接続
ウィザード ” (New connection
wizard)
cSelect “インターネットに接続する ”
(Connecting to the Internet), and
click [ 次へ ] (Next)
Dial-up
Networking
setup (when
cid=1)
*Caller ID
display
setting with
DGPIR
command
Notify/hide
caller ID
*99***1# Never Notify
Hide Hide
Notify Notify
184*99***1# Never Hide (Priority
given to 184
setup in
Dial-up
Networking)
Hide
Notify
186*99***1# Never Notify (Priority
given to 186
setup in
Dial-up
Networking)
Hide
Notify
Screen
Screen
00M1000EN.book 419 ページ 2004年11月24日 水曜日 午前7時56分

420
Using Data Communication
dSelect “接続を手動でセットアップす
る” (Setting up connection
manually) then click [ 次へ ] (Next)
eSelect “ダイヤルアップモデムを使用
して接続する ” (Connection with
dial-up modem) then click [次へ ]
(Next)
f“デバイスの選択 ” (Select device) is
displayed, select “ モデム− FOMA
M1000(COMx)” (Modem-FOMA
M1000 (COMx)) then click [ 次へ]
(Next)
“デバイスの選択” (Select device) is only
displayed when multiple modems are
installed.
(COMx) is COM Port number displayed in
“COMポートの確認” (Checking COM Port)
(3P437)
gEnter desired name in “ISP 名” (ISP
name) then click [次へ ] (Next)
hEnter APN number in “ 電話番号 ”
(Phone number) then click
[次へ ] (Next)
iLeave “ユーザー名” (Username), “パ
スワード ” (Password) and “パス
ワードの確認入力 ” (Confirm
password) blank, and click [次へ ]
(Next)
Entering of username and password is not
required for "mopera"
Enter “ ユーザー名 ” (Username), “パスワー
ド” (Password) and “パスワードの確認入
力” (Confirm password) provided by your
ISP or network administrator if connecting
to another ISP.
Screen
Screen
Screen
Screen
00M1000EN.book 420 ページ 2004年11月24日 水曜日 午前7時56分

421
Using Data Communication
jClick [ 完了 ] (Done)
Displays newly created connection wizard.
kClick “ スタート ” (Start) y “ すべての
プログラム ” (All Programs) y “アク
セサリ ” (Accessories) y “通信 ”
(Communication) y “ネットワーク
接続 ” (Network connection)
lSelect icon of newly created dial up,
and click “ファイル” (File) y “ プロパ
ティ” (Properties)
mCheck setting in “ 全般 ” (General)
tab
Verify that “モデム−FOMA M1000”
(Modem-FOMA M1000) in “接続の方法”
(Connection method) is selected if 2 or
more modems are connected to your PC.
Select if it is deselected.
Verify that “ ダイヤル情報を使う” (Use dial
up information) is not selected. Deselect
OFF if selected.
nClick “ ネットワーク ” (Network) tab
and perform each setup.
Select PPP:Windows 95/98/NT4/2000,
Internet in “呼び出すダイヤルアップサー
バーの種類 ” (Dial up server)
Select “インターネットプロトコル(TCP/
IP)” (Internet protocol(TCP/IP)) in “この接
続は次の項目を使用します” (Use following
items in this connection)
• Settings to cannot be changed in “QoSパ
ケットスケジューラ” (QoS Packet
Scheduler)
oClick [ 設定 ] (Setting)
Screen
Screen
Screen
Screen
Screen
00M1000EN.book 421 ページ 2004年11月24日 水曜日 午前7時56分
422
Using Data Communication
pDeselect all checkboxes then click
[OK]
qClick [OK] in “ ネットワーク ”
(Network) tab screen
Setting up Dial-up Networking in
Windows 2000
aClick “スタート ” (Start) y “ プログラ
ム” Program) y “アクセサリ ”
(Accessories) y “通信 ”
(Communication) y “ネットワーク
とダイヤルアップ接続 ” (Network
and dial up connection)
bClick “新しい接続の作成 ” (Create
new connection) icon in “ ネット
ワークとダイヤルアップ接続 ”
(Network and dial up connection)
cEnter “ 市外局番 ” (Area code) then
click [OK] if “ 所在地情報 ” (Location
information) is displayed
“所在地情報” (Location information) is
displayed when launching “新しい接続の作
成” (Create new connection) for the first
time in Step2.
From the second launch onwards, this is
not displayed. “ネットワークの接続ウィ
ザード” (Network connection wizard) is
displayed instead. Proceed to Step5 when
displayed.
dClick [OK] in “ 電話とモデムのオプ
ション ” (Telephone and modem
option)
eClick [次へ ] (Next) in “ネットワーク
の接続ウィザード ” (Network
connection wizard)
fSelect “インターネットにダイヤル
アップ接続する ” (Dial up
connection to the Internet) then
click [ 次へ ] (Next)
Screen
Screen
Screen
Screen
00M1000EN.book 422 ページ 2004年11月24日 水曜日 午前7時56分

423
Using Data Communication
gSelect “インターネット接続を手動で
設定するか、またはローカルエリア
ネットワーク (LAN) を使って接続し
ます ” (Connect to the Internet
manually or via Local Area
Network(LAN)) then click [次へ ]
(Next)
hSelect “電話回線とモデムを使ってイ
ンターネットに接続します ”
(Connect to the Internet with
telephone line and modem) then
click [次へ ] (Next)
iVerify that FOMA M1000 is displayed
in “インターネットへの接続に使うモ
デムを選択する ” (Select modem for
Internet connection) then click
[次へ ] (Next)
Select FOMA M1000 if FOMA M1000 is not
displayed.
• The following message is not displayed if
modems other than FOMA M1000 are
not installed.
jEnter APN number in “電話番号 ”
(Telephone number) then click [ 詳細
設定 ] (Advanced setting)
Deselect “市外局番とダイヤル情報を使う”
(Use area code and dial up information).
kSet each settings in “ 接続 ”
(Connection) tab then click “ アドレ
ス” (Address) tab as shown
Enter the information provided by your ISP
in “ 接続の種類” (Connection type) and “ロ
グオンの手続き” (Log on process)
Screen
Screen
Screen
Screen
Screen
00M1000EN.book 423 ページ 2004年11月24日 水曜日 午前7時56分

424
Using Data Communication
l Click “アドレス” (Address) tab, and
set IP address or DNS (Domain
Name Service) as shown the click
[OK]
Enter the information such as “IPアドレス”
(IP address) or “ISPによるDNSアドレスの
自動割り当て” (DNS(Domain Name
Service) address auto-assigned by ISP)
provided by your ISP or network
administrator in order to connect to an ISP
other than "mopera".
mClick [次へ ] (Next) in “インターネッ
トアカウントの接続情報 ” (Internet
accounts set up information)
nLeave “ユーザー名” (Username) and
“パスワード” (Password) blank then
click [次へ ] (Next)
Username and password confirmation
screens are continuously displayed. Click
[OK] in each screen
Username and password are not required
for "mopera".
Enter “ユーザー名” (Username) and “ パス
ワード” (Password) provided by your ISP or
network administrator in order to connect to
an ISP other than "mopera".
oEnter the desired name in “ 接続名 ”
(Connection) then click [次へ] (Next)
pSelect “いいえ ” (No) then click
[次へ ] (Next)
qDeselect “今すぐインターネットに接
続するにはここを選び [ 完了 ] をク
リックしてください ” (Select here
and click [Done] to connect to the
Internet now) then click [完了 ]
(Done)
Screen
Screen
Screen
Screen
Screen
00M1000EN.book 424 ページ 2004年11月24日 水曜日 午前7時56分
425
Using Data Communication
rSelect newly created dial up icon,
then click “ ファイル ” (File) y “ プロ
パティ” (Properties)
sCheck settings in “ 全般 ” (General)
tab
Check if “モデム”−FOMA M1000 (Modem-
FOMA M1000) in “接続の方法” (Connection
method) is selected when 2 or more
modems are connected to PC. Select if it is
deselected.
Verify that “ダイヤル情報を使う” (Use for
dial up information) is deselected. Deselect
if it is selected.
tClick “ ネットワーク ” (Network) tab,
and perform each setup
Select PPP:FWindows 95/98/NT4/2000,
Internet in “呼び出すダイヤルアップサー
バーの種類” (Dial up server).
Select only “インターネットプロトコル
(TCP/IP)” (Internet Protocol (TCP/IP)) for
component.
uClick [ 設定 ] (Setting)
vDeselect all settings, then click [OK]
wClick [OK] in “ ネットワーク ”
(Network) tab
Setting up Dial-up Networking in
Windows Me/Windows 98
aClick “ スタート ” (Start) y “ プログラ
ム” (Program) y “アクセサリ ”
(Accessories) y “通信 ”
(Communication) y “ダイヤルアッ
プネットワーク ” (Dial-up
Networking)
bClick [ 次へ ] (Next) in “ダイヤルアッ
プネットワークへようこそ ”
(Welcome to Dial-up Networking)
This message is displayed when launching
Dial-up Networking for the first time. Click
[次へ] (Next) to proceed to Step 4.
From the second time onwards, this is not
displayed. “ダイヤルアップネットワー
ク”(Dial-up Networking) in Step 3 is
displayed instead.
Screen
Screen
Screen
Screen
00M1000EN.book 425 ページ 2004年11月24日 水曜日 午前7時56分

426
Using Data Communication
cClick “新しい接続 ” (New
connection) icon in “ダイヤルアップ
ネットワーク ” (Dial-up Networking)
dEnter desired name in “接続名 ”
(Connection name) then click [次へ]
(Next)
Verify that FOMA M1000 is displayed in “モ
デムの選択” (Select modem).
•Select FOMA M1000 if FOMA M1000 is
not displayed.
eEnter APN number in “ 電話番号 ”
(Telephone number), then click [次
へ] (Next)
Leave 市外局番 (Area code) blank.
fCheck connection name (Desired)
then click [ 完了 ] (Done)
gClick スタート (Start) y “ プログラ
ム” (Program) y “アクセサリ ”
(Accessories) y “通信 ”
(Communication) y “ダイヤルアッ
プネットワーク ” (Dial-up
Networking)
Screen
Screen
Screen
Screen
Screen
00M1000EN.book 426 ページ 2004年11月24日 水曜日 午前7時56分
427
Using Data Communication
hSelect newly created Dial-up
Networking icon then click “ ファイ
ル” (File) y “プロパティ”
(Properties)
iSelect “電話番号 ” (Phone number)
and “接続方法 ” (Connection
method) in “ 全般 ” (General) tab.
Deselect “市外局番とダイヤルのプロ
パティを使う ” (Use properties in
area code and dial)
Verify that FOMA M1000 is displayed in “接
続方法 ” (Connection method)
• Select FOMA M1000 if FOMA M1000 is
not displayed
jClick “ ネットワーク ” (Network) tab
and perform various settings.
Select “PPP:インターネット,Windows 2000/
NT,Windows Me” (PPP:Internet, Windows
2000/NT, Windows Me) in “ダイヤルアップ
サーバーの 種類” (Dial up server)
Select only “ インターネットプロトコ
ル”(TCP/IP) (Internet protocol (TCP/IP)) for
component.
1In Windows 98
Click “サーバーの種類” (Server type) tab
and perform various settings.
Select “PPP:インターネット, Windows NT
Server, Windows 98” (PPP:Internet,
Windows NT Server, Windows 98) in “ダイ
ヤルアップサーバーの種類” (Dial up
server).
Select only “インターネットプロトコ
ル”(TCP/IP) (Internet protocol (TCP/IP)) for
component.
kClick “ セキュリティ” (Security) tab,
and click [OK] without entering
Username and password
Entering of Username and password is not
required for "mopera".
Enter “ユーザー名” (Username) and “ パス
ワード” (Password) provided by your ISP or
network administrator for other ISP in order
to connect to an ISP other than "mopera".
1In Windows 98
Click [OK]
Screen
Screen
Screen
Screen
00M1000EN.book 427 ページ 2004年11月24日 水曜日 午前7時56分
428
Using Data Communication
Using Dial-up Networking
Using Dial-up Networking for Packet
communication and 64K data connection
without the use of FOMA PC setup software
is explained in this section.
• Check that your FOMA handset is properly
connected to your PC before connecting.
Check connection between FOMA handset and
PC prior to establishing Bluetooth connection
<Example: in Windows XP>
aClick “スタート ” (Start) y “ すべての
プログラム ” (All programs) y “アク
セサリ ” (Accessories) y “通信 ”
(Communication) y “ネットワーク
接続 ” (Network connection)
bClick connection icon
Select Dial-up Networking icon of ISP
name setup in Step7 of P444, then click
“ネットワークタスク” (Network task) y “ こ
の接続を開始する” (Start connection), or
click the connection icon.
cCheck setting and click [ダイヤル ]
(Dial)
Dial-up network is completed when a
connection in progress message is
displayed followed by a connection
established message.
• Check each setting and click [接続]
(Connect) when using an OS other than
Windows XP.
• Entering of a “ユーザー名” (Username)
and “パスワード” (Password) is not
required to connect to "mopera".
• Check setting if a message notifying the
completion of connection is not
displayed.
Disconnecting
Disconnecting may not be completed by
closing the Internet browser. Disconnect by
performing the following procedures.
aClick Dial-up
Networking icon in
task tray
Connection screen is
displayed.
bClick [切断 ] (Disconnect)
NOTE
• Transmission speed displayed on the PC may
vary from the actual transmission speed.
Screen
Screen
Dial-up
Networking icon
Screen
00M1000EN.book 428 ページ 2004年11月24日 水曜日 午前7時56分
429
Using Data Communication
AT Commands
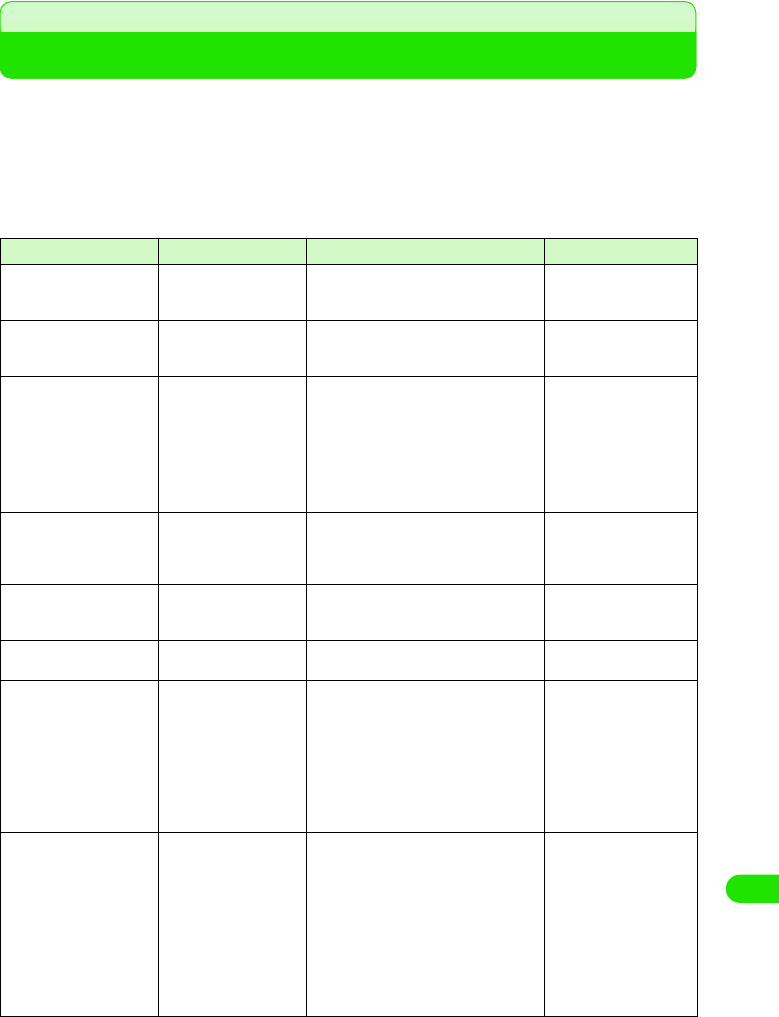
AT Commands are commands for setting FOMA handset functions from a PC.
• AT Command input format.
[&F] : Reset to factory default.
[&W] : Register setting. Called settings by ATZ Command.
[AT] : Can be used in FOMA M1000 Command Port.
[M] : Can be used with FOMA M1000 (Modem).
AT Command Overview Parameters/Description Command Examples
AT % V
[M]
Displays versions of
FOMA handset.
-AT%V
Ver1.00
OK
AT &C n
[&F] [&W] [AT] [M]
Set the operating
conditions of the circuit
CD for DTE.
n=0 : Always keeps line CD signal ON
n=1 : Line CD signals vary according to
line connection status (default)
AT & C 1
OK
AT &D n
[&F] [&W] [AT] [M]
Set the operation
performed when circuit
ER signal received from
DTE is switched from ON
to OFF.
n=0 : Ignore status (assumed to be ON)
n=1 : Online command mode is set
when status changes from ON to
OFF
n=2 : Line is disconnected and OFF
LINE mode (default) is enabled
when status changes from ON to
OFF
AT & D 1
OK
AT &F n
[AT] [M]
Reset to factory default. If
the command is entered
during communication,
the handset is reset.
Only n=0 can be set (skippable) -
AT&S n
[&F] [&W] [M]
Set how to control the
data set ready signal to
be output to DTE.
n=0 : Always ON (default)
n=1 : DR signal ON at time of line
connection
AT&S0
OK
AT &W n
[AT] [M]
Register current settings. Only n=0 can be set (skippable) -
AT *DGANSM=n
[M]
Set the reject/permit
setting mode for incoming
Packet communication.
The setting is only valid
for Packet communication
received immediately
after the command is
entered.
n=0 : Turn OFF reject (AT*DGARL)/
permit setting for incoming Packet
communication (default)
n=1 : Turn ON reject setting for incoming
Packet communication
n=2 : Turn ON permit setting for
incoming Packet communication
AT *DGANSM?
: Display currently settings
AT * D G A N S M = 0
OK
AT * D G A N S M ?
*DGANSM:0
OK
AT*DGAPL=n [,cid]
[M]
Set up APN to permit
incoming Packet
communication from APN
settings. Use <cid>
parameters defined by
AT+CGDCONT.
n=0 : Add APN defined by <cid> to list of
APNs permitted for incoming
Packet communication
n=1 : Delete APN defined by <cid> from
list of APNs permitted for incoming
connection
If <cid> parameter is omitted, all the <cids>
are added to/deleted from the list.
AT *DGAPL?
: Display permit incoming Packet
communication
AT*DGAPL =0,1
OK
AT *DGAPL?
*DGAPL:1
OK
AT *DGAPL =1
OK
AT *DGAPL?
OK
00M1000EN.book 429 ページ 2004年11月24日 水曜日 午前7時56分
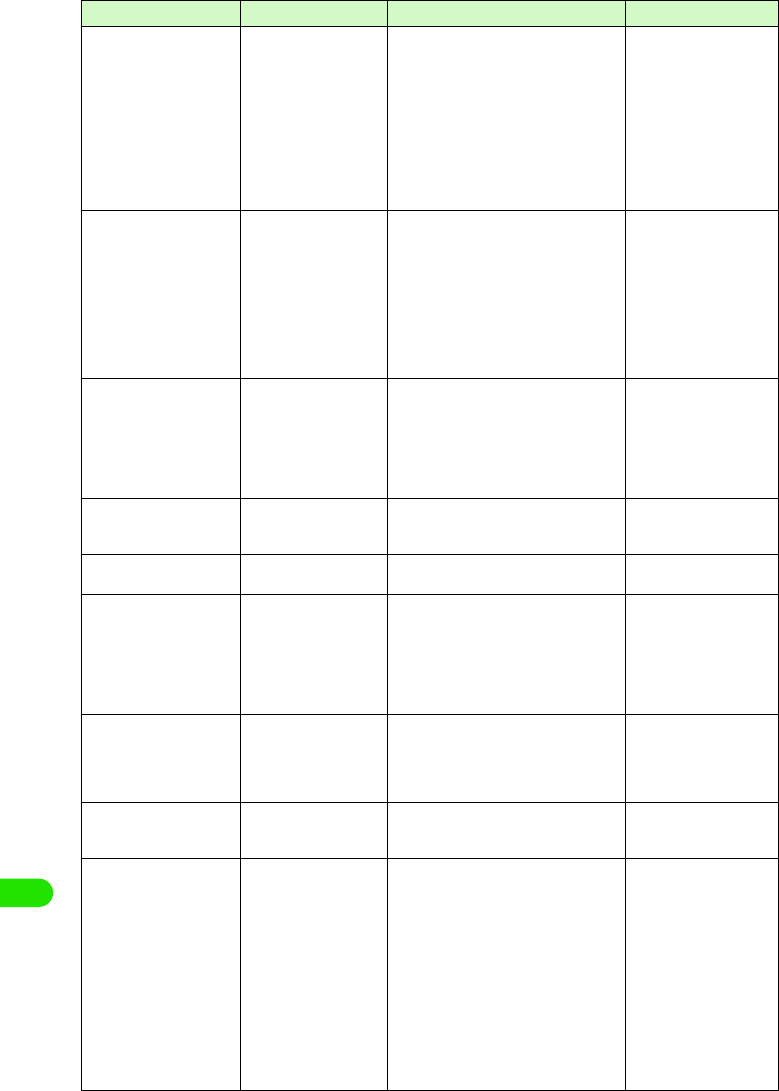
430
Using Data Communication
AT * DG A R L= n [ ,c i d ]
[M]
Set APN to refuse
incoming connection.
APN setting uses <cid>
parameters defined by
+CGDCONT.
n=0 : Add APN defined by <cid> to list of
APNs refused for incoming
connection
n=1 : Delete APN defined by <cid> to list
of APNs refused for incoming
connection
If <cid> parameter is omitted, all <cids> are
added to/deleted from the list.
AT *DGARL?
: Display refused incoming
connection
AT *DGARL =0,1
OK
AT *DGARL?
*DGARL:1
OK
AT *DGARL =1
OK
AT *DGARL?
OK
AT *DGPIR=n
[M]
The setting for notify or
hide made by this
command is valid when a
connection is sent or
received. The Dial-up
Networking settings can
also be used to append
186(ON) or 184(OFF) to
the dial-up connection.
3 P442
n=0 : Connecting to APN directly
(default)
n=1 : Send 184 to APN (always OFF)
n=2 : Send 186 to APN (always ON)
AT *DGPIR?
: Display current setting
AT *DGPIR =0
OK
AT *DGPIR?
*DGPIR:0
OK
+++
[M]
Switch FOMA handset's
mode from online data
mode to online command
status without
disconnecting when
escape sequence
executed.
- (Online Data Mode)
+++ (Unable to see the
display)
OK
AT+CE ER
[M]
Disconnection reason
display.
<report>
See Disconnection reason list 3 P460
AT + C E E R
+CEER:36
OK
AT+CGDCONT
[M]
Set APN when sending
Packet communication.
3 P461 3 P461
AT+CGEQMIN
[M]
Register criteria value for
determining if QoS
(Quality of Service) sent
from network when PPP
Packet communication is
established, is acceptable
or not.
AT+CGEQMIN=[Parameters] 3 P461
AT+CGEQMIN=?
: Display all lists of settings
AT+CGEQMIN?
: Display current settings
3 P461
AT +C G E QR E Q
[M]
Set QoS (Quality of
Service) to request for the
network when PPP
Packet communication is
established.
AT+CGEQREQ= [Parameters] 3 P462
AT+CGEQREQ=?
: Display all lists of settings
AT+CGEQREQ?
: Display current settings
3 P462
AT+CG M R
[AT] [M]
Display FOMA handset's
version.
-AT+CGMR
12345XXXXXXXXXXX
OK
AT+CGREG=n
[&F] [&W] [AT] [M]
Set whether to report
network service
registration status. Upon
receiving the status
report, "Within service
area" or "Outside service
area" will be displayed.
n=0 : OFF (default)
n=1 : ON (Report the status when it is
shifted between within service
area and Outside service area)
AT + C G R E G ?
: Display current setting
+CGREG:< n>,<stat>
n : Parameter
stat :
0 Outside service area
1 Within service area
4 Unknown
5 Outside service area
(Roaming)
AT + C G R E G = 1
OK
(Set to report status)
AT + C G R E G ?
+CGREG:1,0
OK
(Outside service area)
(Move from Outside
service area to Within
service area)
+CGREG:1
AT Command Overview Parameters/Description Command Examples
00M1000EN.book 430 ページ 2004年11月24日 水曜日 午前7時56分
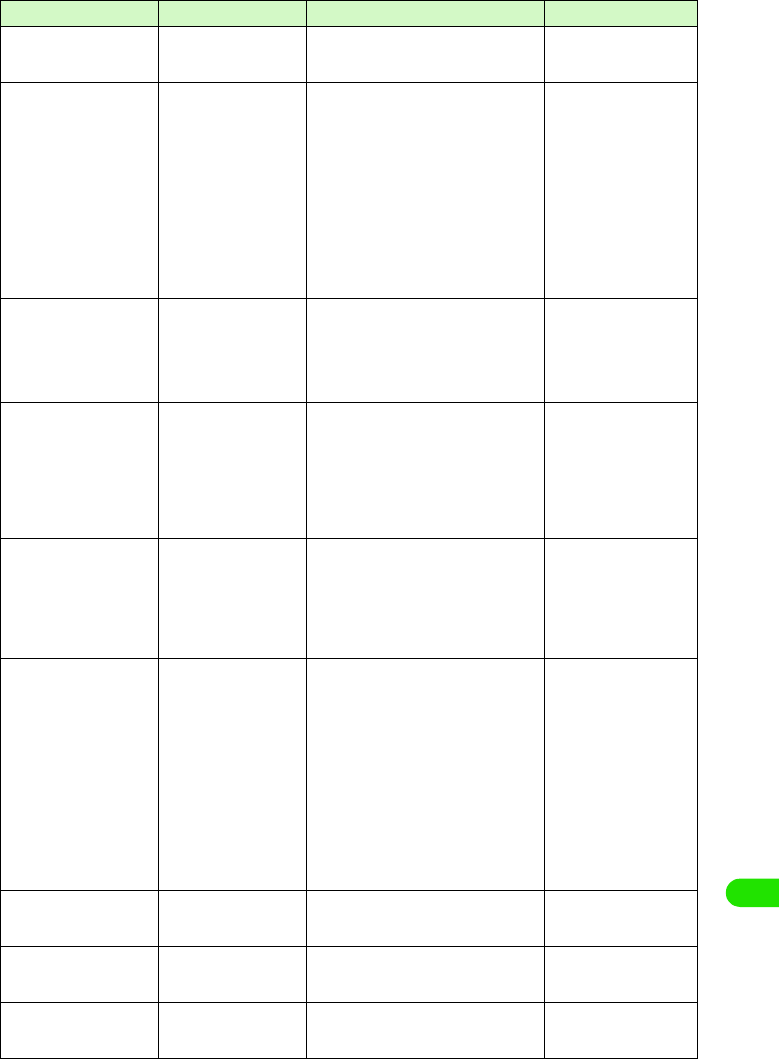
431
Using Data Communication
AT + C G S N
[AT] [M]
Display FOMA handset's
serial number.
-AT+CGSN
12345XXXXXXXXXX
OK
AT+CMEE=n
[&F] [&W] [M]
Set if any error report in
FOMA handset
n=0 : Display ERROR and not result
code (default)
n=1 : +CME ERROR:<err> Use result
code and display reason as
number
n=2 : +CME ERROR:<err>User result
code and display reason as
characters
AT+ C MEE?
: Display current settings
The right hand side is the
command examples when errors
in FOMA handset or connection.
AT + C M E E = 0
OK
AT+CNUM
ERROR
AT + C M E E = 1
OK
AT+CNUM
+CME ERROR:10
AT + C M E E = 2
OK
AT+CNUM
+CME ERROR:SIM
not inserted
AT+CNUM
[M]
Display FOMA handset's
own number.
number: Telephone number
type : 129 or 145
129 : International access code does
not include +
145 : International access code
includes +
AT+CNUM
+CNUM:,"+8190XXXXXX
XX",145
OK
AT+CR=n
[&F] [&W] [M]
Display bearer types
before displaying
CONNECT result code
during line connection.
n=0 : Do not display (default)
n=1 : Display
<serv> : Display only "GPRS" for
Packet communication
(Display "SYNC", "AV32K",
"AV64K" for data connection)
AT+CR?
: Display current settings
AT+CR =1
OK
ATD *99 ***1#
+CR:GPRS
CONNECT
AT+CRC=n
[&F] [&W] [M]
Set to use extend result
code for incoming
connection.
n=0 : Do not use (default)
n=1 : Use +CRING.<type>+CRING
Form for +CRING is as follows
+CRING
: GPRS "PPP",,, "<APN>"
AT+CRC?
: Display current setting.
AT+CRC=0
OK
AT+CRC?
+CRC:0
OK
AT+CREG=n
[&F] [&W] [AT] [M]
Set to display network
information indicating
"Within service area" or
"Outside service area".
• OS dependant
n=0 : Not notifying (default)
n=1 : Notifying (when switching "Within
service area" and "Outside service
area")
AT+CREG?
: Display current settings
+CREG
: < n>,<stat>
n : set value
stat :
0 Outside service area
1 Within service area
4 Unknown
5 Within service area (Roaming)
AT+CREG=1
OK
(Set to notify)
AT+CREG?
+CREG:1,0
OK
(Outside service area)
(Move from "Outside
service area" to "Within
service area")
+CREG:1
AT + G M I
[M]
Display FOMA handset's
manufacturer.
-AT+GMI
Motorola
OK
AT + G M M
[M]
Display FOMA handset's
product name.
-AT+GMM
FOMA M1000
OK
AT + G M R
[M]
Display FOMA handset's
version.
-AT+GMR
Ver1.00
OK
AT Command Overview Parameters/Description Command Examples
00M1000EN.book 431 ページ 2004年11月24日 水曜日 午前7時56分
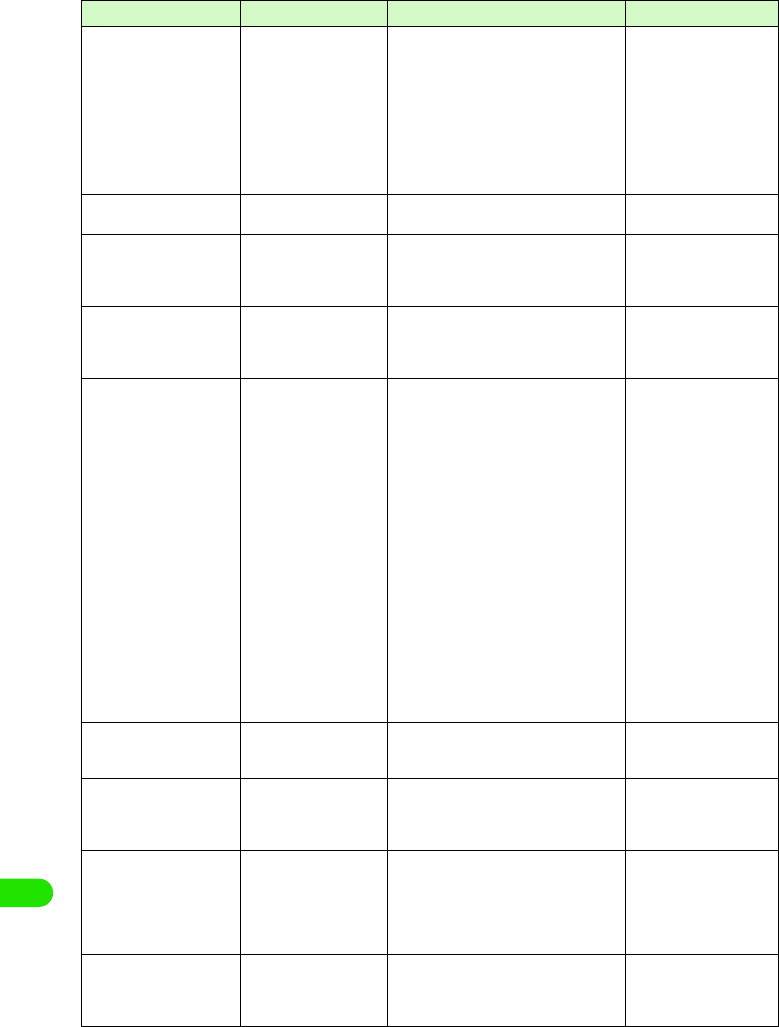
432
Using Data Communication
AT+IFC=n,m
[&F] [&W][AT] [M]
Set to control local flow n : DCE by DTE
m : DTE by DCE
Each set value for n,m
0 : No flow control
1 : Perform XON/XOFF flow control
2 : Perform RS/CS (RTS/CTS) flow
control
Default: n,m=2.2
AT + I F C ?
: Display current settings
AT+IFC=2,2
OK
AT+WS46=n
[&F] [&W] [M]
Set wireless network for
FOMA handset.
n=22 : W-CDMA (WidebandCDMA) only
(default)
AT+WS46=22
OK
ATA
[M]
Perform the receiving
process while receiving
Packet communication or
64K data connection.
-RING
ATA
CONNECT
A/
[AT] [M]
Execute the previously
executed command. No
carriage return is
necessary.
-A/
OK
ATD
[M]
Perform automatic call
process based on
parameters and dial-up
parameters to FOMA
handset.
ATD*99***<cid># : Packet
communication
<cid>1 to 10 : APNs set in +CGDCONT
Set AT+CBST=116,1,0
ATD<phone number> : 64K data
connection
Set AT+CBST=131,1,0
ATD< phone number > : AV32K
connection
Set AT+CBST=134,1,0
ATD< phone number > : AV64K
connection
<Packet communication>
ATD*99***1#
CONNECT
<64K connection>
AT+CBST=116,1,0
OK
ATD090XXXXXXXX
CONNECT
<AV32K connection>
AT+CBST=131,1,0
OK
ATD090XXXXXXXX
CONNECT
<AV64K connection>
AT+CBST=134,1,0
OK
ATD090XXXXXXXX
CONNECT
ATE n
[&F] [&W] [AT] [M]
Sets the presence of
echo for DTE in
command mode.
n=0 : Echo "OFF"
n=1 : Echo "ON"(default)
AT E 1
OK
ATH n
[M]
Performs onhook action
to FOMA handset.
n=0 : Disconnect line (can be skipped) (packet communication)
+++
AT H
NO CARRIER
ATI n
[AT] [M]
Display the confirmation
code.
n=0 : Display "NTT DoCoMo"
n=1 : Display product name (same as
+GMM)
n=2 : Display version in PPP Packet
communication (same as +GMR)
AT I 0
NTT DoCoMo
OK
AT I 1
FOMA M1000
OK
ATO n
[M]
Return from online
command mode to offline
data mode during
connection.
n=0 : Return from online command
mode to offline data mode (can be
skipped)
ATO
CONNECT
AT Command Overview Parameters/Description Command Examples
00M1000EN.book 432 ページ 2004年11月24日 水曜日 午前7時56分
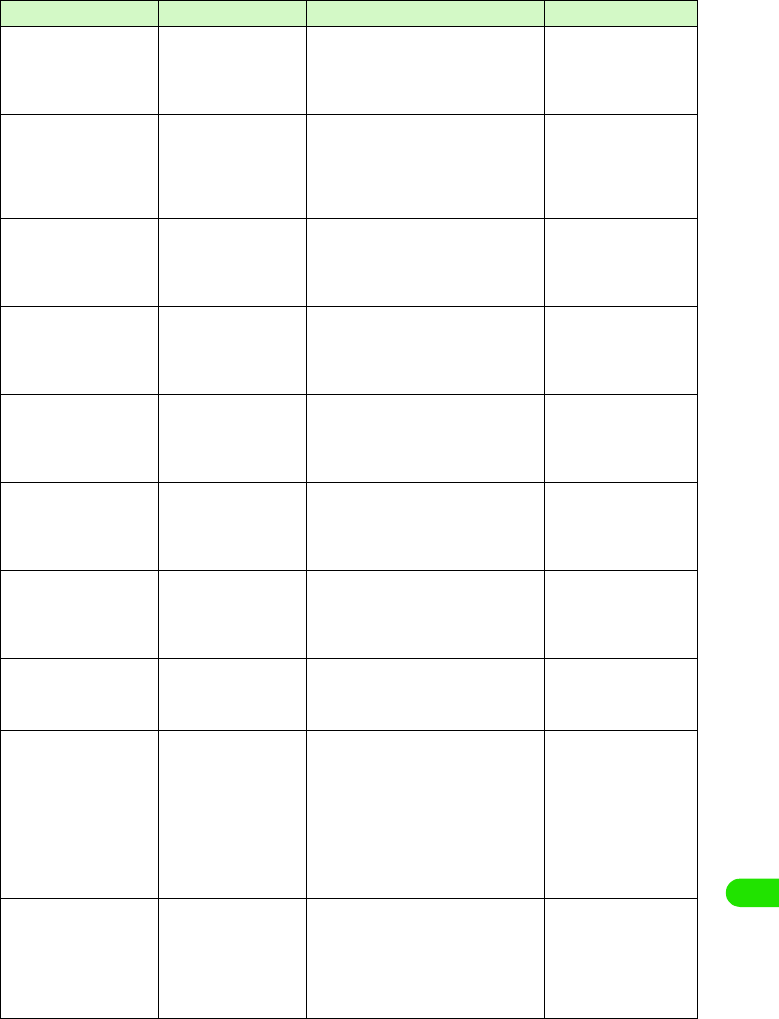
433
Using Data Communication
AT Q n
[&F] [&W] [AT] [M]
Set up to display/hide
result code to DTE.
n=0 : Display result code (default)
n=1 : Does not display result code
AT Q 0
OK
AT Q 1
(OK is not displayed this
time)
AT S 0 = n
[&F] [&W] [M]
Set number of rings until
FOMA handset receives
connection automatically.
n=0 : Do not receive automatically
(default)
n=1- 255
: Receive automatically with
specified number of rings.
ATS0? : Display current setting
AT S 0 = 0
OK
AT S 0 ?
000
OK
AT S 2 = n
[&F] [M]
Set escape character. n=43 : Default
n=127 : Disabled
ATS2? : Display current settings
AT S 2 = 4 3
OK
AT S 2 ?
043
OK
AT S 3 = n
[&F] [M]
Set carriage return
character.
n=13 : Default (Only n=13. Can be
set)
ATS3? : Display current settings
AT S 3 = 1 3
OK
AT S 3 ?
013
OK
AT S 4 = n
[&F] [M]
Set Line Feed (LF)
character.
n=10 : Default (Only n=10. Can be
set)
ATS4? : Display current settings
AT S 4 = 1 0
OK
AT S 4 ?
010
OK
AT S 5 = n
[&F] [M]
Set Back Space (BS)
character.
n=8 : Default (Only n=8. Can be set)
ATS5? : Display current settings
AT S 5 = 8
OK
AT S 5 ?
008
OK
AT S 7 = n
[&F] [&W] [M]
Set waiting time till end of
connection.
n=1 to 120 (default: n=60)(second)
Setting 121 to 255 is regarded as 120
ATS7? : Display current settings
AT S 7 = 6 0
OK
AT S 7 ?
060
OK
AT V n
[&F] [&W] [AT] [M]
Set all result code to be
displayed in either
numerals or alphabet
characters.
n=0 : Send back a result code in
numerals
n=1 : Send back a result code in
alphabet characters (default)
AT V 1
OK
AT X n
[&F] [&W]
Set whether to show
speed display in the
CONNECT display for the
connection.
Also detect busy tone or
dial tone.
n=0 : No dial tone detected, no busy
tone detect, no speed display
n=1 : No dial tone detected, no busy
tone detected, speed display
n=2 : Detect dial tone, no busy tone
detected, speed display
n=3 : No dial tone detected, detect dial
tone, speed display
n=4 : Detect dial tone, detect dial tone,
speed display (default)
AT X 1
OK
AT Z
[AT] [M]
Reset to the status of
nonvolatile memory.
Disconnect the line if this
command is entered
during connection.
- (Off line command mode)
AT Z
NO CARRIER
(On line command mode)
AT Z
OK
AT Command Overview Parameters/Description Command Examples
00M1000EN.book 433 ページ 2004年11月24日 水曜日 午前7時56分

434
Using Data Communication
AT¥S
[M]
Display current set of
commands and S register
setting.
-AT¥S
E1 Q0 V1 X4 &
C1&D2&S0¥V0
S000=000
S002=043
S003=013
S004=010
S005=008
S006=005
S007=060
S008=003
S010=001
S030=000
S103=001
S104=001
OK
AT¥V n
[&F] [&W] [M]
Select type of response
code when connected.
n=0 : Do no use expanded result code
(default)
n=1 : Use expanded result code
AT ¥ V 0
OK
AT+CP IN
[AT][M]
Enter PIN in FOMA
handset.
Format : AT+CPIN="<pin>",
"<newpin>"
This command is to enter
PIN1, PIN2 or PIN unlock
number in FOMA handset
based on result code replied
by AT+CPIN?
PIN cannot possibly be
entered with this command
depending on result code
when AT+CPIN? is entered
even if PIN or PIN unlock code
is required.
Do not use this command in
order to change PIN. <pin>
and <newpin> must be
surrounded with " " .
Result of AT+CPIN?
+CPIN:READY:PIN1 code
PIN2
PIN1 unlock code, Unable to
input PIN2 unlock code
+CPIN:SIM PIN: Waiting to
enter PIN1
+CPIN:SIM PIN2: Waiting to
enter PIN2
+CPIN:SIM PUK: Locking
PIN1 (Possible to enter PIN1
unlock code)
+CPIN:SIM PUK2: Locking
PIN2 (Possible to enter PIN2
unlock code)
The right is the example of
PIN"1234" "and "12345678".
(+CPIN:READY is ready to
respond when +CPIN? is
entered) AT+CPIN="1234"
ERROR
(+CPIN:READY is ready to
respond when +CPIN? is
entered)
AT+CPIN="12345678","12
34"
ERROR
(+CPIN:SIM PIN is ready
to respond when +CPIN?
is entered)
AT+CPIN="1234"
OK
(+CPIN:SIM PIN2 is ready
to respond when +CPIN?
is entered)
AT+CPIN="1234"
OK
(+CPIN:SIM PUK is ready
to respond when +CPIN?
is entered: PIN locked)
AT+CPIN="12345678","12
34"
OK
(+CPIN:SIM PUK2 is
ready to respond when
+CPIN? is entered: PIN
locked)
AT+CPIN="12345678","12
34"
OK
AT + C P I N ?
+CPIN:READY
OK
AT + C P I N = ?
OK
AT Command Overview Parameters/Description Command Examples
00M1000EN.book 434 ページ 2004年11月24日 水曜日 午前7時56分

435
Using Data Communication
AT + C L I P = n
[&F][&W][M]
Display sender's caller ID
when 64K data
connection is received.
n=0 : No output result (default)
n=1 : Output result
Result : +CLIP (n,m)
m=0 : Network setting that does not
notify caller ID
m=1 : Network setting that notifies
caller ID
m=2 : Unknown
AT + C L I P = 0
OK
AT + C L I P = ?
+CLIP:(0,1)
OK
(+CLIP=1 Output result)
RING
+CLIP:
"090XXXXXXXX",177,
"123",136
AT + C L I R = n
[M]
Set to notify phone
number when sending
64K data connection.
n=0 : Use setting written in service
agreement
n=1 : Do not send Caller ID
n=2 : Send Caller ID (default)
Result : +CLIR(n, m)
m=0 : CLIR is not operating (always
notify)
m=1 : CLIR is operating (always does
not notify)
m=2 : Unknown
m=3 : CLIR Temporary mode (default;
does not notify)
m=4 : CLIR Temporary mode (default:
notify)
AT + C L I R = 0
OK
AT + C L I R ?
+CLIR:0,1
OK
AT + C L I R = ?
+CLIR:(0-2)
OK
ATS30=n
[&F][M]
Disconnect handset if no
data is received or sent.
n=0 : Inactive timer off (default)
n=0 to 255
AT S 3 0 = 0
OK
AT S 3 0 ?
000
OK
AT S 3 0 = ?
ERROR
ATS103=n
[&F][M]
Set to append and send
received sub address.
n=0 : *
n=1 : / (default)
n=2 : ¥ (yen symbol or backslash)
AT S 1 0 3 = 0
OK
AT S 1 0 3 ?
000
OK
AT S 1 0 3 = ?
ERROR
ATS104=n
[&F][M]
Set to append and send
outgoing sub address.
n=0 : #
n=1 : % (default)
n=2 : &
AT S 1 0 4 = 0
OK
AT S 1 0 4 ?
000
OK
AT S 1 0 4 = ?
ERROR
AT * D A N T E
[M]
Display reception level
with a number.
n=0 : Reception level 0
n=1 : Reception level 1
n=2 : Reception level 2
n=3 : Reception level 3
AT * DA N T E
*DANTE:3
OK
AT * DA N T E = ?
*DANTE:(0-3)
OK
AT Command Overview Parameters/Description Command Examples
00M1000EN.book 435 ページ 2004年11月24日 水曜日 午前7時56分
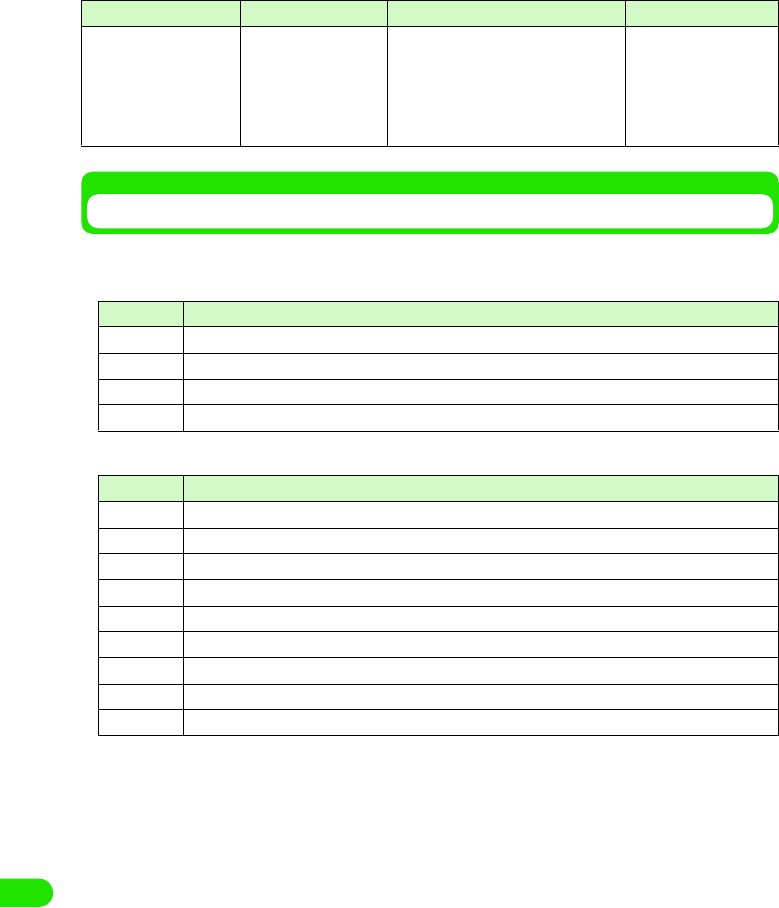
436
Using Data Communication
Lists of Disconnected Reasons
Disconnected reasons for requested contents are as follows:
1Packet communication
164K Data connection
AT*DRPW
[M]
Display an index for
reception power of the
radio signal.
-AT*DRPW
*DRPW:0
OK
AT*DRPW=?
*DRPW:(0-75)
OK
Value Reason
27 APN is not present or incorrect.
30 Disconnected from network.
33 Requested service option is not subscribed.
36 Connection is disconnected properly.
Value Reason
1 Specified number does not exist.
16 Connection is disconnected properly.
17 Unable to communicate because remote device is busy.
18 Call was made, but no response within the specified time.
19 Unable to communicate because remote device is busy calling.
21 Remote device rejected a call.
63 Network service and option are not valid.
65 Unavailable processing speed was specified.
88 You made a call to or received a call from a handset with different handset properties.
AT Command Overview Parameters/Description Command Examples
00M1000EN.book 436 ページ 2004年11月24日 水曜日 午前7時56分

437
Using Data Communication
Additional AT Commands Descriptions
1Invalid AT command
The following commands will not generate
errors but will not act as commands.
• AT (Enter only AT)
• ATT (Tone setting)
• ATP (Pulse setting)
• ATS6 (Specify duration of pause till
dialing commences)
• ATS8 (Specify duration of comma till
dialing commences)
• ATS10 (Set delay time for automatic
disconnection)
1Command name +CGDCONT[M]
•Overview
Set APN when sending packet
connection.
Although this command is a setup
command, it does not get stored to the
status of nonvolatile memory by &W,
and does not get reset by &F and &Z.
•Form
+CGDCONT=[<cid>[,"PPP"[ ,"<APN>"]
] ]
• Parameter descriptions
Set APN when sending Packet
communication. See examples in
command operation lists
• Operation without parameter
• Command examples
Registered APN named abc (cid=3)
AT+CGDCONT=3,"PPP","abc"
OK
1Command name:+CGEQMIN=[Parameter]
[M]
•Overview
Register criteria value to determine if
QoS sent from network when PPP
Packet communication established is
permitted.
4 ways to set up as stated in command
examples.
Although this command is a setup
command, it does not get stored to the
status of nonvolatile memory by &W,
and does not get reset by &F and &Z.
•Form
+CGEQMIN=[<cid>[,,<Maximum
bitrate UL>[ ,<Maximum bitrate DL>] ] ]
• Parameter description
• Operation without parameter
• Command examples
<cid>* : 1 to 10
<APN>* : Optional
*: <cid> is the number used to control the
destination (APN) for the Packet
communication to be registered in
FOMA handset.
1~10 can be registered. <cid>=1 is set
as mopera.ne.jp as default but
overwrittable.
<APN>is optional connection name that
indicates each destination.
+CGDCONT= : Set default value
for all <cid>
+CGDCONT=<cid>
: Set specified
<cid> as default
+CGDCONT=? : Display list of
values that can be
configured
+CGDCONT? : Display current
settings
<cid>* : 1 to 10
<Maximum bitrate UL>*
: None (default) or 64
<Maximum bitrate DL>*
: None (default) or 384
*: <cid> is the number used to control the
destination (APN) for the Packet
communication to be registered in
FOMA handset. 1 to 10 can be
registered.
In <Maximum bitrate UL> and
<Maximum bitrate DL>, the minimum
connection speed [in kbps] is set for
both upload and download traffic
between FOMA handset and the base
station. If the parameter is set to None
(default), all speeds are permissible. If
64 and 384 are set, any connection at a
speed except the above limit is not
permitted, and the Packet
communication will not be connected.
+CGEQMIN= : Set default value for
all <cid>
+CGEQMIN=<cid>
: Set specified <cid>
as default value
00M1000EN.book 437 ページ 2004年11月24日 水曜日 午前7時56分
438
Using Data Communication
4 ways to set up as states in command
examples. Set (1) as states value for
each <cid>s
1Command name:
:+CGEQREQ=[Parameter] [M]
•Overview
Sets up QoS to request to the network
when PPP Packet communication is
established.
This set up is also set up as the default
value in one of the patterns stated in
the following command execution
example.
Although this command is a setup
command, it does not get stored to the
status of nonvolatile memory by &W,
and does not get reset by &F and &Z.
•Form
+CGEQREQ=[<cid>]
• Parameter Description
<cid>*:1 to 10
• Operation without parameter
• Command examples
Only 1 way to set the command. The
contents are set by default for each cid.
Command used to require 64kbps
upload and 384kbps download
(when<cid>=3)
AT+CGEQREQ=3
OK
1Saving modem port command setting
values
Settings by AT commands are initialized
when FOMA handset is switched ON and
OFF, except APN setting by
AT+CGDCONT (3 P440), QoS settings
by AT+CGEQMIN and AT+CGEQREQ
commands, permit/reject setting mode for
incoming connection set by AT*DGAPL/
AT*DGARL/AT*DGANSM commands or
appending 184 or 186 for packet
connection by AT*DGPIR command.
Commands with [&W] can be saved by
entering
AT& W
after setting. And at the same time, other
settings with [&W] are also saved. These
values can be called by entering
ATZ
even if after FOMA handset was switched
ON and OFF.
(1) Command used to permit all speed
both upload and download
(when<cid>=2)
AT+CGEQMIN=2
OK
(2) Command used to permit only
64kbps upload and 384kbps
download (when<cid>=3)
AT+CGEQMIN=3,,64,384
OK
(3) Command used to permit 64kbps
upload and all speed download
(when<cid>=4)
AT+CGEQMIN=4,,64
OK
(4) Command used to permit all speed
upload and only 384kbps download
(when<cid>=5)
AT+CGEQMIN=5,,,384
OK
*: <cid> is the number used to control the
destination (APN) for the Packet
communication to be registered in FOMA
handset. 1 to 10 can be registered to
FOMA handset.
+CGEQREQ= : Set default value for
all <cid>s.
+CGEQREQ=<cid>
: Set specified <cid>
as default.
00M1000EN.book 438 ページ 2004年11月24日 水曜日 午前7時56分
439
Using Data Communication
Result Codes
1Result codes for data connection
1Extended result codes
1Connection protocol result code
NOTE
• When ATVn command (3 P457) is set to n=1, the result code is displayed in the alphanumeric display format
(default). When the command is set to n=0, the result code is displayed in the numerical display format.
• To retain compatibility with a modem connected via conventional RS-232C, connection speed is displayed
but it differs from the actual connection speed because FOMA handset is connected to the PC with a USB
cable.
• When "RESTRICTION" message is displayed, (No.100), the network is busy. Please try later.
No. Text display Description
0 OK Operation performed properly.
1 CONNECT Connected to their party.
2 RING Incoming call.
3 NO CARRIER Line disconnected.
4 ERROR Unable to accept command.
5 NO DIALTONE Unable to detect dial tone.
6 BUSY Detect busy tone.
7 NO ANSWER Completed connection. Timeout.
100 RESTRICTION Network restriction in place.
101 DELAYED Redial call restricted.
No. Text display Description
5 CONNECT 1200 Connected at 1200bps between FOMA handset and PC.
10 CONNECT 2400 Connected at 2400bps between FOMA handset and PC.
11 CONNECT 4800 Connected at 4800bps between FOMA handset and PC.
13 CONNECT 7200 Connected at 7200bps between FOMA handset and PC.
12 CONNECT 9600 Connected at 9600bps between FOMA handset and PC.
15 CONNECT 14400 Connected at 14,400bps between FOMA handset and PC.
16 CONNECT 19200 Connected at 19,200bps between FOMA handset and PC.
17 CONNECT 38400 Connected at 38,400bps between FOMA handset and PC.
18 CONNECT 57600 Connected at 57,600bps between FOMA handset and PC.
19 CONNECT 115200 Connected at 115,200bps between FOMA handset and PC.
20 CONNECT 230400 Connected at 230,400bps between FOMA handset and PC.
21 CONNECT 460800 Connected at 460,800bps between FOMA handset and PC.
No. Text display Description
1 PPPoverUD Connect via PPPoverUD(BC=UDI, +CBST=116,1,0)
2 AV32K AV (video-phone) connect via [32K]
3 AV64K AV (video-phone) connect via [64K]
5 PACKET Connect with PACKET
00M1000EN.book 439 ページ 2004年11月24日 水曜日 午前7時56分
440
Using Data Communication
Examples of Result Codes
1When ATX0 is set
• Regardless of the settings of AT¥Vn
command ( 3 P459), only CONNECT is
displayed upon completion of
connection.
1When ATX1 is set
• When ATX1, AT¥V0 is set (default)
• Upon completion of connection, result
code is displayed in the following format:
CONNECT <speed between FOMA
handset - PC>
• When ATX1, AT¥V1 is set*
• The code is displayed upon completion
of connection in the following format:
CONNECT <speed of FOMA handset -
PC>PACKET <destination APN>/
<upload maximum speed (between
FOMA handset 3 radio base station)>/
<download maximum speed (between
FOMA handset ← radial base station)>
Maximum 64kbps for sending and
maximum 384kbps for receiving
connection to mopera.ne.jp is displayed
as follows.
Text display example
: ATD*99***1#
CONNECT
Number display example
: ATD*99***1#
1
Text display example
: ATD*99***1#
CONNECT 460800
Number display example
: ATD*99***1# 1 21
Text display example
: ATD*99***1#
CONNECT 460800
PACKET mopera.ne.jp /
64/ 384
Number display example
: ATD*99***1#
1 21 5
*: When ATX1 and AT¥V1 are set at the
same time, it is likely that dial-up
connection will fail. Only use of AT¥V0
is recommended.
00M1000EN.book 440 ページ 2004年11月24日 水曜日 午前7時56分

441
Entering Characters
Character Input . . . . . . . . . . . . . . . . . . . . . . . . . . . . . . . . . . . . . . . . . . . . . . . . . 442
Entering Characters with Direct Input <Direct Input Method> . . . . . . . . . . . 444
Editing/Registering Fixed Phrases <Save Phrases> . . . . . . . . . . . . . . . . . . . 456
Copying/Cutting and Pasting Characters <Character copy> . . . . . . . . . . . . 458
Registering Frequently Used Words <Save word>. . . . . . . . . . . . . . . . . . . . . 460
Using Electronic Dictionary . . . . . . . . . . . . . . . . . . . . . . . . . . . . . . . . . . . . . . . 462
Setting the Detail of Character Entry. . . . . . . . . . . . . . . . . . . . . . . . . . . . . . . . 466
Entering Characters with Indirect Input Method
<Indirect input method> . . . . . . . . . . . . . . . . . . . . . . . . . . . . . . . . . . . . . . . . . . 470
00M1000EN.book 441 ページ 2004年11月24日 水曜日 午前7時56分
442
Entering Characters
Character Input
With FOMA handset, a character is entered by tapping a target character at a keyboard displayed
on the touch screen with the Stylus. Also, by switching the input method, a character can be
entered by a free draw. Since character input is needed in various situations of FOMA handset
operation, such as registering contacts, creating messages, and creating notes, it would be
convenient if you memorize the procedure beforehand.
Displaying Character Entry Screen
Tap the character input field where a character needs to be entered, and tap $$ on the Status bar
to display the character entry screen. Enter a target character by switching the input mode.
• Input mode 3 P467
• Input method 3 P466
• Switching input method 3 P467
Input Method
There are following methods to enter characters with FOMA handset. Choose an input method
that suites you.
Input method Description Reference
Direct input
method
50-character kana
syllabary keyboard
(Kana Keyboard)
From the keyboard arranged in the order of 50-
character kana syllabary, you can enter a character by
tapping a target character.
P469
Qwerty keyboard From the keyboard arranged in alphabetical order, you
can enter a character by tapping a target character. P471
Handwriting A character is entered by writing a character on the
free draw input area, using the Stylus. P478
Indirect input
method
Multi Tap From the keyboard with two or more characters
assigned to one key, a character is entered by tapping
a key multiple times to switch the characters.
P496
Two Tap From the keyboard with two or more characters
assigned to one key, a character is entered by Two
Tap operations
P500
In case of 50-character kana
syllabary keyboard
00M1000EN.book 442 ページ 2004年11月24日 水曜日 午前7時56分
443
Entering Characters
Switching Input Method
The input method used at the time of entering a character can be changed.
aTap $$ y $$ on the Application Selector bar, tap "Handset" tab y
Text input and on the Control panel screen, tap [Advanced] on
Text input setup screen, and tap Input method on Preferences
screen
bTap $$ of input method you are setting y [Close] y [Done]
Input method is changed.
Input Mode
There are following input modes to enter a character. Entering text with a mixture of hiragana,
kanji, katakana, alphabet and numeric characters are performed by switching the input mode.
To switch the input mode, tap the keyboard for each input method, or tap the key to switch the
input mode in the free draw input screen.
De
f
ault sett
i
ng Kana keyboard
• Tap $$ $$ at the tab display area to switch the tab display
between left and right.
Input mode Key display Description
Hiragana/kanji [Hiragana]/[Kanji]/[Hira]/"あ /ア " Hiragana, kanji, and double-byte
katakana can be entered.
Katakana [Kata]/[Single-byte Kana] Double-byte/single-byte katakana
can be entered.
Alphabet [Abc]/[Abc]/[Eng]/" 英数 " Double-byte/single-byte alphabet
character can be entered.
Numeric [Num]/[Eng]/[Abc]/[Abc]/" 英数" Double-byte/single-byte numeric
character can be entered.
Symbol [Mark] Double-byte/single-byte symbols,
special characters or fixed phrases
can be selected.
00M1000EN.book 443 ページ 2004年11月24日 水曜日 午前7時56分
444
Entering Characters
NOTE
• To switch the input mode, tap the corresponding key in the character input screen for each input method.
• When the character input screen is displayed, there are input modes that cannot be switched, depending on
the application running or what is to be entered.
Direct Input Method
Entering Characters with Direct Input
With FOMA handset, there are three direct input methods: "50-character kana syllabary
keyboard", "Qwerty keyboard" and "free draw input". By setting the input method in advance,
each input screen can be displayed at the time of a character input. 3 P492
50-character Kana Syllabary Keyboard
When the input method is set to Kana keyboard following keyboards will be displayed by tapping
$$ on the Status bar in the situation of entering characters.
Item Description
aInput method switch key A menu is displayed, and input method can be switched.
bNumber of characters The number of confirmed characters/maximum number available for
character input are displayed.
cMove key The keyboard is moved to the upper part/lower part of the touch screen.
dDictionary key A dictionary search is performed.
Hiragana/kanji input mode Katakana input mode
Alphabet/numeric input mode Numeric input mode
00M1000EN.book 444 ページ 2004年11月24日 水曜日 午前7時56分
445
Entering Characters
• To switch the input mode, tap either [Hira]/[Alphabet]/[Kana]/[Numeric] key from each input mode keyboard.
• Tap [Symbol] to display the screen that switches between symbols, fixed phrases and dictionary. 3 P472
• List of symbols and special characters 3 P521
• List of fixed phrases 3 P522
Kana keyboard
Entering Characters Using Kana Keyboard
With a kana keyboard, characters that can be entered are displayed on the keyboard. Tap a
target character directly to input, and if necessary, switch the input mode by tapping the input
mode key.
<Example: when entering "太郎" in Name of a contact>
aTap Name filed in a contact y tap $$ on the Status bar
• How to operate 3 P99
• When an input mode is other than hiragana/kanji mode, tap [Hira].
bTap [ た] y [ ろ] y [う]
cFrom the conversion candidates, tap [ 太郎 ]
Input of "太郎 " is set.
• When there are more than one candidate, display them by dragging the scroll bar.
eInput field switch key When two or more input field (name, family name, address, etc.) exist in one
screen, such as a registration screen for a contact, the input field can be
changed while the free draw input screen is displayed.
fMinimize key Temporarily hides the keyboard.
gEnd key Closes the free draw input screen.
hConvert key Converts input characters.
iLF/CR key Starts a new line.
jSpace key A space is entered.
kClear key Deletes a character entered.
lDouble-byte key Double-byte characters and numbers can be entered.
mcaps/↑key Capital letters and small letters are switched.
nDate key Current date can be entered.
oTime key Current time can be entered.
Item Description
Conversion candidates
00M1000EN.book 445 ページ 2004年11月24日 水曜日 午前7時56分
446
Entering Characters
• When predict conversion function is set to ON, the conversion candidate predicted to
follow the character decided in conversion candidate area is displayed.
• Tap END key to end the entry.
• To continue entering characters, tap a key you are entering.
NOTE
• Following operations are also available:
- Entering a fixed phrase 3 P472
- Entering a symbol 3 P473
- Entering a face mark 3 P474
- Deleting an entered character 3 P476
- Searching a dictionary 3 P475
• The maximum number of characters that can be converted at once is 32 characters.
Qwerty Keyboard
When the input method is set to "Qwerty keyboard", following keyboards will be displayed by
tapping $$ on the Status bar in the situation of entering characters.
Item Description
aInput method switch key A menu is displayed, and input method can be switched.
bNumber of characters The number of confirmed characters/maximum number available for
character input are displayed.
cMove key The keyboard is moved to the upper part/lower part of the touch screen.
dDictionary key A dictionary search is performed.
Hiragana/kanji input mode Alphabet/numeric input mode
Numeric input mode
00M1000EN.book 446 ページ 2004年11月24日 水曜日 午前7時56分
447
Entering Characters
• To switch the input mode, tap either [Kanji]/[Alphabet]/[Numeric] key from each input mode keyboard.
• Tap [Symbol] to display the screen that switches between symbols, fixed phrases and dictionary. 3 P472
• List of symbols and special characters 3 P521
• List of fixed phrases 3 P522
Qwerty keyboard
Entering Characters Using Qwerty Keyboard
With a Qwerty keyboard, characters that can be entered are displayed on the keyboard. Tap
directly on a target character to input, and if necessary, switch the input mode by tapping the
input mode key. However, even if the input mode is switched to kanji, hiragana would not show on
the keyboard. When entering hiragana/kanji from the Qwerty keyboard, use the Roman character
entry method.
• The input method must be set to "Qwerty keyboard" beforehand. 3 P492
<Example: when entering "太郎" in Name of a contact >
aTap Name field in a contact y tap $$ on the Status bar
• How to operate 3 P99
• When an input mode is other than hiragana/kanji mode, tap [Kanji].
bEnter " たろう "
cFrom the conversion candidates, tap [ 太郎 ]
eInput filed switch key When two or more input fields (name, family name, address, etc.) exist in one
screen, such as a registration screen for a contact, the input field can be
changed while the free draw input screen is displayed.
fMinimize key Temporarily hides the keyboard.
gEnd key Closes the free draw input screen.
hConvert key Converts input characters.
iLF/CR key Starts a new line.
jSpace key A space is entered.
kClear key Deletes a character entered.
lDouble-byte key Double-byte characters and numbers can be entered.
mcaps/↑key Capital letters and small letters are switched.
nDate key Current date can be entered. Tapping [caps]/[↑] will switch to Date key, and
current date can be entered.
Item Description
Roman character entry is used.
• To enter "た": tap [t] 3 [a]
• To enter "ろ": tap [r] 3 [o]
• To enter "う": tap [u]
Conversion candidates
00M1000EN.book 447 ページ 2004年11月24日 水曜日 午前7時56分
448
Entering Characters
Input of "太郎" is set.
• When there are more than one candidate, display them by dragging the scroll bar.
• When predict conversion function is set to ON, the conversion candidate predicted to
follow the character decided in conversion candidate area is displayed.
• Tap END key to end the entry.
• To continue entering characters, tap a key you are entering.
NOTE
• Following operations are also available:
- Entering a fixed phrase 3 P472
- Entering a symbol 3 P473
- Entering a face mark 3 P474
- Deleting an entered character 3 P476
- Searching a dictionary 3 P475
• The maximum number of characters that can be converted at once is 32 characters.
• List of Roman character entries 3 P523
Entering a Fixed Phrase
Fixed phrases can be entered by selecting from 5 categories.
• This can be used from all input methods.
aWhile entering characters, tap [Mark]
bTap a category of a phrase you are entering
cTap a fixed phrase to enter
The phrase is entered.
• Tap $$ $$ to scroll up and down the list of fixed phrases.
Category names of fixed phrases
• Selections can be made from the categories of "General",
"Reply", "Business", "Private" and "English".
• Tap [Back] to go back to the screen for switching between
symbols, fixed phrases and dictionary.
00M1000EN.book 448 ページ 2004年11月24日 水曜日 午前7時56分
449
Entering Characters
NOTE
• List of fixed phrases3 P522
Entering a Symbol
Double-byte/single-byte symbols and special characters can be selected for entries.
• This can be used from all input methods.
aWhile entering characters, tap [Mark]
bTap the type of symbols
cTap a symbol to enter
A symbol is entered.
• Tap $$ $$ to scroll up and down the list of symbols.
NOTE
• List of symbols and special characters 3 P521
Entering a Face Mark
A "Face mark" which expresses a face by using symbols and alphabet characters can be
entered.
• This can be used from all input methods.
aWhile entering characters, enter " かお "
Face marks are displayed as for conversion candidates.
Types of symbols
• A type of symbol can be selected from "Mark", "Mark" and
Particular".
• Tap [All] to select from all double-byte/single-byte symbols,
special characters and kanji characters.
• Tap [Back] to go back to the screen for switching between
symbols, fixed phrases and dictionary.
00M1000EN.book 449 ページ 2004年11月24日 水曜日 午前7時56分
450
Entering Characters
• The following face marks are displayed as for conversion candidates.
bTap a face mark to enter
A face mark is entered.
Simple Entry of an Email Address
Strings of fixed form used for email or internet address, such as a domain name (that follows
after @) of an email address, can be entered.
• This can be used from all input methods.
aWhile entering characters, tap [Mark]
bTap [Web] from the screen for switching between symbols, fixed
phrases and dictionary
cTap a string to enter
The string is entered.
• Tap $$ $$ to scroll up and down the list of symbols.
NOTE
• List of fixed phrases3 P522
(-_-) (-.-) (+_+) (*_*)
(-_-;) (..) (._.) (._.)_
(;_;) (>_<) (@_@) (T_T)
(^.^) (^O_O^) (^O^) (^^)
(^^ゞ(^_-) (^_^) (^_^;)
(^o^) (^Ο^) (_) (~_~)
(~_~;) (~o~) )^O^( >^_^<
^/^ ^^; ^_^; _(._.)_
m(_)m
• Tap [Back] to go back to the screen for switching between
symbols, fixed phrases and dictionary.
00M1000EN.book 450 ページ 2004年11月24日 水曜日 午前7時56分
451
Entering Characters
Entering Characters from Dictionary
A lemmatized search can be performed from a dictionary by selecting a string from the entered
text. It is convenient to check the meaning, a declensional kana ending, etc. of the selected
string. Furthermore, the searched contents can also be copied.
• This can be used from all input methods.
Dictionary Search while Entering Characters with Direct Input Method
After setting the character input method to "Kana keyboard", "Qwerty keyboard" or "handwriting",
a dictionary search is performed while entering characters.
aDrag a string for a dictionary search from the entering text
The cursor hits the specified area.
bTap $$
cTap a dictionary search key of a dictionary you are using
A search begins, and related direction words are displayed in direction word display area.
• A dictionary can be selected from "national language", "Japanese-English" or "English-
Japanese".
dTap a target direction word from the direction word display area
The explanation of the selected direction word is displayed in the search result display area.
• Tap [Copy] to copy the contents displayed in the search result display area. Drag a string
in the search result display area, and tap [Copy] to copy the specified string. Tap [Paste]
to paste the copied content in the decided character display area.
• Tap [Back] to end the dictionary search.
Dictionary Search while Entering Characters with Indirect Input Method
After setting the character input method to "Multi Tap" or "Two Tap", a dictionary search is
performed while entering characters.
aDrag a string for a dictionary search from the entering text
The cursor hits the specified area.
Dictionary search screen
Decided character display area
Direction word display area
Search result display area
Dictionary search key
00M1000EN.book 451 ページ 2004年11月24日 水曜日 午前7時56分
452
Entering Characters
bTap [Mark]
cTap [Dictionary] y perform a dictionary search
Subsequent operations are the same as dictionary search for a direct input method.
• How to operate3 P475
Deleting Characters
Entered characters can be deleted one at a time or several at once. Also, a range for deletion can
be specified.
1When deleting one character a time
In the display area, tap the right side of a character you want to delete to bring the
cursor there, and tap [Clear]
1When deleting all characters entered
• Tap the right side of the last character to bring the cursor there, and point [Clear]
for more than one second
The screen for switching between
symbols, fixed phrases and dictionary
00M1000EN.book 452 ページ 2004年11月24日 水曜日 午前7時56分
453
Entering Characters
• Drag on entered characters, and tap [Clear]
1When deleting all characters beyond specified location
Tap the left side of the first character of the string you want to delete to bring the
cursor there, and point [Clear] for more than one second
1When deleting by specifying the area
Drag on the string you are deleting, and tap [Clear]
Entering Characters with Handwriting
With handwriting, a character is entered in the free draw input screen by directly writing on the
touch screen with the Stylus.
• It is necessary to set the input method to "Handwriting" beforehand. 3 P492
00M1000EN.book 453 ページ 2004年11月24日 水曜日 午前7時56分
454
Entering Characters
Handwriting Input Screen
When the input method is set to "free draw input", following input screen will display by tapping
$$ on the Status bar in the situation of entering characters.
• Tap [Mark] to display the screen that switches between symbols, fixed phrases and dictionary. 3 P472
• List of symbols and special characters 3 P521
• List of fixed phrases 3 P522
Entering Characters
The input method for entering characters with handwriting input is explained.
Item Description
aInput method switch key A menu is displayed, and input method can be switched.
bNumber of characters The number of confirmed characters/maximum number available for
character input are displayed.
cMove key The free draw input screen is moved to the upper part/lower part of the touch
screen.
dDictionary key A dictionary search is performed.
eInput field switch key When two or more input fields (name, family name, address, etc.) exist in one
screen, such as a registration screen for a contact, the input field can be
changed with having the free draw input screen displayed.
fMinimize key Temporarily hides the keyboard.
gEnd key Closes the free draw input screen.
hRecognition mode tab Switches the mode which recognizes the type of character entered with free
draw.
iHelp key Displays the help for free draw input.
jMaximize/standard key The size of free draw input area can be switched between enlarged size and
standard size.
kInput area A character is entered with free draw.
lInput area switch key A continuation of the input area current entering is displayed.
mSymbol key A screen that switches between symbols, fixed phrases and dictionary is
displayed.
nConvert key Converts input characters.
oNew-line key A new line is started.
pSpace key A space is entered.
qClear key Deletes a character entered.
00M1000EN.book 454 ページ 2004年11月24日 水曜日 午前7時56分
455
Entering Characters
<Example: when entering "太郎" in Name of a contact>
aTap Name field in a contact y tap $$ on the Status bar
• How to operate 3 P99
bWrite " たろう "in the input area
cFrom the conversion candidates, tap [ 太郎 ]
Input of "太郎" is set.
• When there are more than one candidate, display them by dragging the scroll bar.
• When predict conversion function is set to ON, the conversion candidate predicted to
follow the character decided in conversion candidate area is displayed.
• Tap END key to end the entry.
• To continue entering characters, write a character in the input area.
1When changing the character which has not been recognized correctly
When a character is entered in the input area, the bottom right of the input area displays as
following, and by tapping it will display the candidates for the entered character.
If a target character exists in the candidates, tap the character for a conversion.
If a target character does not exist in the candidates, tap $$ and rewrite the character.
• In the input area and for the candidates, the recognized characters are classified and displayed in the
following colors. When the character type currently displayed is unclear, it can also be judged by its color.
• Hiragana: Pink
• Alphabet: Green
• Kanji: Yellow
• Number: Light-blue
• Katakana: Purple
• Symbol: Orange
Conversion candidates
00M1000EN.book 455 ページ 2004年11月24日 水曜日 午前7時56分
456
Entering Characters
NOTE
• Following operations are also available:
- Entering a fixed phrase 3 P472
- Entering a symbol 3 P473
- Entering a face mark 3 P474
- Deleting an entered character 3 P476
- Searching a dictionary 3 P475
• When a character entered in standard mode could not be recognized correctly, or is hard to recognize, we
recommend you to change the mode that corresponds to the character entered (kana mode or alphanumeric
mode).
• A character would be more easily recognized by writing it large within the frame.
• The maximum number of characters that can be converted at once is 32 characters.
Save Phrases
Editing/Registering Fixed Phrases
By registering frequently used greetings and phrases, they can be entered quickly by just
selecting a fixed phrase.
• When Master Clear is performed, the registered fixed phrases are all deleted, and it will return to the default
state.
Registering a New Fixed Phrase
A fixed phrase is registered.
aTap $$ y $$ on the Application Selector Bar, tap "Handset" tab y
Text input on the Control Panel screen, tap [Advanced] on Text
input setup screen, and tap Edit Template on Preferences screen
bTap the Category and select a category where you are registering
• Selections can be made from the categories of "General", "Reply", "Business", "Private"
"English" and "Internet".
• Maximum of 20 fixed phrases can be registered for each category.
Fixed phrase edit screen
Category: Switches the category of fixed phrases.
00M1000EN.book 456 ページ 2004年11月24日 水曜日 午前7時56分
457
Entering Characters
cTap [Add]
dEnter a phrase y Tap [Settings]
The phrase is registered.
• Regardless of double-byte/single-byte, the maximum number of characters that can be
entered is 32.
Editing the Default Fixed Phrases
A registered fixed phrase is edited.
aDisplay the fixed phrase edit screen
• How to operate 3 P480
bTap the Category and select a category of the fixed phrase you are
making a change
• Selections can be made from the categories of "General", "Reply", "Business", "Private"
"English" and "Internet".
cTap the fixed phrase you are editing y tap [Change]
dEdit the phrase y tap [Settings]
The fixed phrase is edited.
• Up to 32 double-byte/single-byte characters can be entered is 32.
• Tap [Cancel] to stop editing the fixed phrase.
Deleting a Fixed Phrase
Registered fixed phrases can be deleted one at a time.
aDisplay the fixed phrase edit screen
• How to operate 3 P480
bTap the Category and select a category of the fixed phrase you are
deleting
• Selections can be made from the categories of "General", "Reply", "Business", "Private"
"English" and "Internet".
Sentence : Entered the phrase to be registered.
00M1000EN.book 457 ページ 2004年11月24日 水曜日 午前7時56分
458
Entering Characters
cTap the fixed phrase you are deleting y tap [Delete]
dTap [Yes]
The fixed phrase will be deleted.
• Tap [No] to cancel the deletion.
Character copy
Copying/Cutting and Pasting Characters
Characters and numbers such as from notes or messages can be copied or cut, and pasted on
another character input screen.
Copying/Cutting Characters
Specify the range of text to copy/cut in Notes etc., display the screen to paste and paste.
When a copy is performed, the original copied content remains and the same content is pasted
to the pasted location. Moreover, when a cut is performed, the original copied content is lost, and
the copied content is pasted to the pasted location.
aDisplay the screen to perform Copy/Cut
bDrag and specify the range of string to copy/cut
cTap Edit on the Menu bar y tap Copy/Cut
Selected range will be copied/cut.
• Tap Copy to copy the selected range.
• Tap Cut to cut the selected range.
The specified area will be highlighted.
Edit screen of Notes
00M1000EN.book 458 ページ 2004年11月24日 水曜日 午前7時56分
459
Entering Characters
NOTE
• Depending on application, it is not necessary to specify the range to perform a copy/cut. For examples,
calculation result of a calculator and a phone number entered in the phone number entry screen are copied
as the way they are.
• Depending on application, the item names for Copy/Paste displayed on a menu bar may differ, or they may
be displayed at different place than the menu bar.
1Copy/Cut and Paste operations
For screens displayed such as when entering a keyword for a search, a menu can be
displayed from other than a menu bar to perform Copy/Cut and Paste.
Pasting a Character
A content copied/cut is pasted.
aDisplay a screen to paste a copied/cut content
bTap on the place to specify the position to paste
cTap Edit on the Menu bar y tap Paste
A content copied/cut is pasted.
Tap $$ beside the title to display the menu.
Search screen for Notes
Tap
$$
beside the title to display the menu.
The cursor moves to the location where the paste is performed.
00M1000EN.book 459 ページ 2004年11月24日 水曜日 午前7時56分
460
Entering Characters
NOTE
• Depending on application, it is not necessary to specify the range to perform a copy/cut. For examples,
calculation result of a calculator and a phone number entered in the phone number entry screen are copied
as the way they are.
• Depending on application, the item names for Paste displayed on a Menu bar may differ, or they may be
displayed at different place than the Menu bar.
Save word
Registering Frequently Used Words
By registering frequently used names and words in the user dictionary, they can be displayed as
conversion candidates at a character conversion, and can be entered quickly.
• When Master Clear is performed, the registered words are all deleted.
Registering a New Word
A word is registered in the user dictionary.
• Up to 100 words can be registered.
aTap $$ y $$ on the Application Selector bar, tap Handset tab y
Text input on the Control Panel screen, and tap [Advanced] on
Text input setup screen
bTap [Add]
cTap Reading y Enter a reading
Reading : A reading of the word to register is entered.
Word : A word to register is entered.
Word edit screen
00M1000EN.book 460 ページ 2004年11月24日 水曜日 午前7時56分
461
Entering Characters
• Regardless of double-byte/single-byte, the maximum number of characters that can be
entered for the combination of Reading and Word is 11.
dTap Word y Enter a word
• Regardless of double-byte/single-byte, the maximum number of characters that can be
entered for the combination of Reading and Word is 11.
eSap [Settings]
The word is registered.
• Tap [Cancel] to stop registering.
Editing a Registered Word
A word registered in the user dictionary is edited.
aDisplay the word edit screen
• How to operate 3 P484
bTap the word you are editing y tap [Change]
cTap the field you want to edit y edit the Reading/Word
• Regardless of double-byte/single-byte, the maximum number of characters that can be
entered for the combination of Reading and Word is 11.
dTap [Settings]
The word is edited.
Deleting a Registered Word
A word registered in the user dictionary is deleted one at a time.
aDisplay a word edit screen
• How to operate 3 P484
bTap the word you are deleting y tap [Delete]
cTap [Yes]
The word is deleted.
• Tap [No] to cancel the deletion.
00M1000EN.book 461 ページ 2004年11月24日 水曜日 午前7時56分
462
Entering Characters
Using Electronic Dictionary
Settings and registration for the dictionary installed in FOMA handset are performed.
Setting to Perform a Dictionary Search Automatically at a Conversion
You can set it so that when a character entered is converted, conversion candidates are
searched from the dictionary and displayed. Also, the type of dictionary used for the search can
be set.
aTap $$ y $$ at the Application Selector bar, tap Handset tab y Text
input on the Control panel screen, tap [Advanced] on Text input
setup screen, and tap Dictionary search at conversion on
Preferences screen
bTap $$ at the field of Use dictionary search
cTap $$ of the dictionary used for the search
It is set so that a dictionary search is performed at conversion, and the dictionary used for
the search is selected.
Adding a Dictionary
Dictionaries installed to FOMA handset from the attached CD-ROM can be added as the
dictionaries used at a character conversion. Also, setting the priority for a dictionary search and
deleting added dictionaries can be performed.
• Up to 64 dictionaries can be registered.
Use dictionary search
: Sets so that a dictionary search is performed when a
character is converted.
National language dictionary
: National language dictionary is added to the dictionary
used for the search.
Japanese-English dictionary
: Japanese-English dictionary is added to the dictionary
used for the search.
• Tap $$ $$ on the tab display area to switch the tab display
between left and right.
00M1000EN.book 462 ページ 2004年11月24日 水曜日 午前7時56分
463
Entering Characters
aTap $$ y $$ on the Application Selector bar, tap Handset tab y
Text input on the Control panel screen, tap [Advanced] on Text
input setup screen, and tap Additional Dictionary tab on
Preferences screen
bTap in the order from $$ of the dictionary to add y [Add]
cTap [Settings]
The dictionary is added.
Setting the Priority of Dictionary Search
If there are two or more dictionaries added, the priority for dictionary search can be set up.
aTap $$ y $$ on the Application Selector bar, tap Handset tab y
Tex t input from the Control panel screen, tap [Advanced] on Text
input setup screen, and tap Additional Dictionary tab on
Preferences screen
Dictionaries installed are displayed.
• Unless $$ of the dictionary is tapped, the installed dictionary
cannot be used.
00M1000EN.book 463 ページ 2004年11月24日 水曜日 午前7時56分
464
Entering Characters
bTap [Priority]
cTap the dictionary moving the priority y tap [ ▲]/[ ▼]
dTap [Set]
The priority is set.
Deleting an Added Dictionary
A dictionary added for search at conversion is set not to be used.
• A dictionary installed will not be erased.
aTap $$ y $$ on the Application Selector bar, tap Handset tab y
Text input on the Control panel screen, tap [Advanced] on Text
input setup screen, and tap Additional Dictionary tab from
Preferences screen
bTap [Delete] y [Yes]
The dictionary is set not to be used.
Setting the Saving Method of User Dictionary and Learning Dictionary
User dictionary and learning dictionary stored in FOMA handset can be set so that they are
automatically backed up in Trans Flash memory card.
00M1000EN.book 464 ページ 2004年11月24日 水曜日 午前7時56分
465
Entering Characters
aTap $$ y $$ on the Application Selector bar, tap Handset tab y
Text input on the Control panel screen, tap [Advanced] on Text
input setup screen, and tap Save Dictionary tab on Preferences
screen
bTap $$ at the field of Save automatically
cTap $$ of Once a day/When closing keyboard at field of Saving cycle
Returning the Learning Dictionary to the Default State
Learned information stored in the user dictionary can be reset to default state.
aTap $$ y $$ on the Application Selector bar, tap Handset tab y
Text input on the Control panel screen, tap [Advanced] on Text
input setup screen, and tap Learning tab on Preferences screen
bTap [Clear learning information] y [Yes]
The learned information will be deleted.
• Tap [No] to cancel the deletion of the learning information.
Save automatically
: Sets whether or not to save the dictionary
automatically.
Saving cycle
Once a day : Saves when the first character input screen
displayed in a day is closed.
When closing keyboard
: Saves when the character input screen is
closed.
• Tap $$ $$ at the tab display area to switch the tab display
between left and right.
• Tap $$ $$ on the tab display area to switch the tab display
between left and right.
00M1000EN.book 465 ページ 2004年11月24日 水曜日 午前7時56分
466
Entering Characters
1Learning Information
A converted content of a character input by the user is stored in the user dictionary in FOMA
handset, and when the same character is entered and converted again, it will be displayed as
one of the conversion candidates.
Setting the Detail of Character Entry
The settings related to character input, such as the usage of predict conversion function and the
input mode when the character entry screen is activated are set.
Setting the Input System
The input system of FOMA handset can be changed to other input systems.
• Other input systems are not installed in the FOMA handset by default. This operation can be performed only
when other input system is installed.
aTap $$ y $$ on the Application Selector bar, and tap Handset tab
y Text input on the Control panel screen
bTap Primary input method y select an input system
An input system is set.
• Tap [Default] to reset the input system back to the default state.
Setting Alternative Input Method
The alternative input method for the FOMA handset can be changed.
• No other alternative input system is installed in the FOMA handset by default. This operation can be
performed only when another input system is installed.
D
e
f
au
l
t sett
i
ng AWnn Japanese keyboard
D
e
f
au
l
t sett
i
ng None
00M1000EN.book 466 ページ 2004年11月24日 水曜日 午前7時56分
467
Entering Characters
aTap $$ y $$ on the Application Selector bar, tap Handset tab y
Text input on the Control panel screen, and tap Alternative on the
text input setup screen
bTap Alternative input method y select an alternative input system
An alternative input system is selected.
• Tap [Default] to reset the changed alternative input method back to the default state.
Using Predict Conversion Function
Whether to use the predict conversion function or not at the conversion of a character can be set.
aTap $$ y $$ on the Application Selector bar, tap Handset tab y
Text input on the Control panel screen, tap [Advanced] on Text
input setup screen, and tap Predict conversion tab on Preferences
screen
bTap $$ at Use Predict conversion
The Predict conversion function is set.
Setting the Input Mode at the Time of Activation
The input mode displayed when the text input screen is displayed can be set up beforehand.
De
f
ault sett
i
ng Use predict conversion: $$
• Tap $$ $$ on the tab display area to switch the tab display
between left and right.
00M1000EN.book 467 ページ 2004年11月24日 水曜日 午前7時56分
468
Entering Characters
aTap $$ y $$ on the Application Selector bar, tap Handset tab y
Text input from the Control panel screen, tap [Advanced] from
Text input setup screen, and tap Input mode at activation tab from
Preferences screen
bTap $$ of the input mode you are using at At activation
The input mode at activation is set.
Setting the Display Format of Date and Time
The display format of a date and time inputted by tapping a specific key can be set for each input
mode beforehand.
aTap $$ y $$ on the Application Selector bar, tap Handset tab y
Text input on the Control panel screen, tap [Advanced] on Text
input setup screen, and tap Date and time tab on Preferences
screen
Hiragana input: Sets hiragana as the input mode to be always
displayed.
Single-byte alphabet input
: Sets single-byte alphabet as the input mode to
be always displayed.
System setup : Sets so that the input mode corresponding to
the contents of an input may be displayed
automatically.
• Tap $$ $$ at the tab display area to switch the tab display
between left and right.
Hiragana input: Sets the display format of a date and time at
hiragana input mode.
Single-byte kana input
: Sets the display format of a date and time at
single-byte kana input mode.
Double-byte alphabet input
: Sets the display format of a date and time at
double-byte alphabet input mode.
Single-byte alphabet input
: Sets the display format of a date and time at
single-byte alphabet input mode.
• Tap $$ $$ on the tab display area to switch the tab display
between left and right.
00M1000EN.book 468 ページ 2004年11月24日 水曜日 午前7時56分
469
Entering Characters
bTap $$ of the input mode you are setting y [Change]
cTap the field to set, and select a display format
dTap [Set]
The display formats of date and time for the selected input mode are set up.
NOTE
• Input method of Date and Time 3 P468, P470, P496, P500
Setting Details for Handwriting
The recognition speed of a free draw input, the width of the pen, and the color of the pen can be
set up. Also, My symbol that inputs a character string by just entering a simple sign can be set.
Registering My Symbol
A setting can be made for registering strings to be converted just by entering a Symbol, such as a
simple sign or mark.
• Up to 30 symbols can be registered.
aTap $$ y $$ on the Application Selector bar, tap Handset tab y
Tex t input from the Control panel screen, tap [Advanced] on Text
input setup screen, and tap Handwriting tab y [Handwriting
settings] on Preferences screen
bWrite a symbol at the symbol field
Drag and draw a symbol to register within the frame.
Date : Selects the display format for Date.
Time : Selects the display format for Time.
• Tap
$$
to display the help for handwriting.
Symbol field
Registration text field
00M1000EN.book 469 ページ 2004年11月24日 水曜日 午前7時56分
470
Entering Characters
• Tap [Clear] below the symbol field to delete and rewrite the symbol
cTap a registration text column y enter a text
• Tap [Clear] below the registration text field to delete a text.
Setting the Recognition Speed of Free Draw and Width/Color of Characters
The recognition speed of free draw can be set. Also thickness and color of characters entered
with free draw can be set.
aTap $$ y $$ on the Application Selector bar, tap Handset tab y
Text input from the Control panel screen, tap [Advanced] on Text
input setup screen, tap Handwriting tab y [Handwriting settings]
from Preferences screen, and tap Others tab on Decuma Settings
screen
bTap $$ of the speed you are setting at Recognition timeout
• By setting the recognition speed faster, characters entered by free draw with fast drag
operation can be recognized.
cTap $$ of the width you are setting at size
dTap $$ of the color you are setting at Pen color
eTap [Done]
The recognition timeout, width and size/color of the pen are set.
Indirect input method
Entering Characters with Indirect Input Method
FOMA handset has two indirect input methods "Multi Tap" and "Two Tap". By setting up an input
method beforehand, each input screen (keyboard) can be displayed at the time of a character
input. 3 P492
Recognition timeout
: Selects the drag speed that can be recognized.
Pen size : Selects the width of the pen.
Pen color : Selects the color of the pen.
00M1000EN.book 470 ページ 2004年11月24日 水曜日 午前7時56分
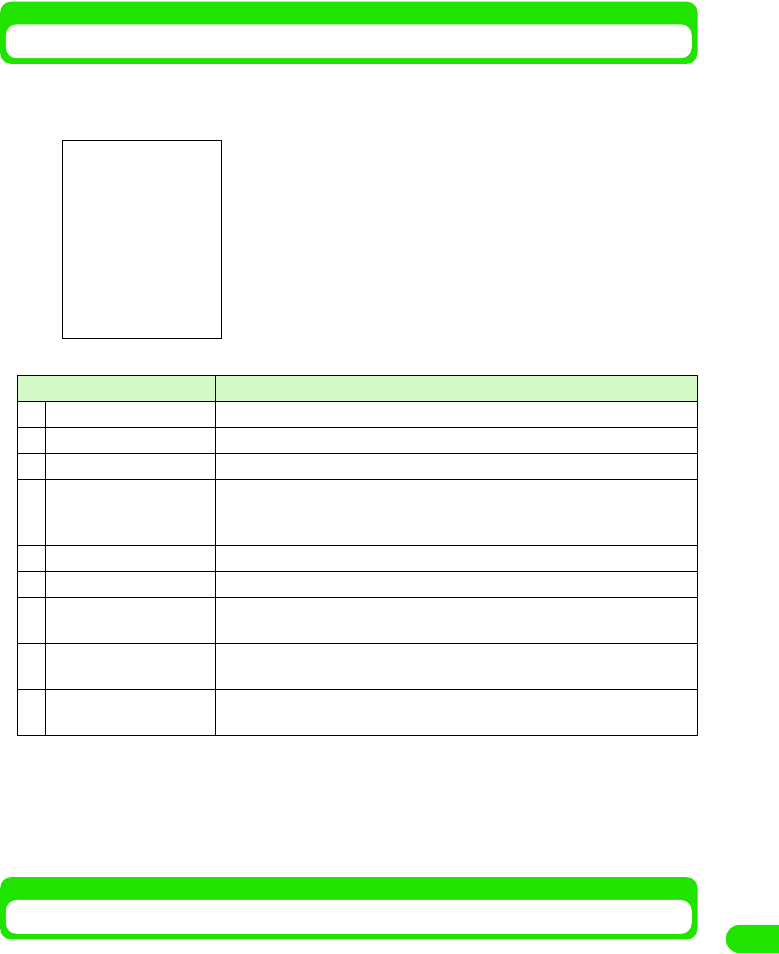
471
Entering Characters
Multi Tap/Two Tap Keyboard
When the input method is set as Multi Tap or Two Tap, following keyboard will display by tapping
$$ on the Status bar when a character is entered. For the procedure for Multi Tap and Two Tap,
please refer to each explanation. 3 P495, P500
• In order to switch an input mode, tap [Character] at the keyboard of each input mode, and from the screen
that switches input mode, tap one of the keys from [kanji]/[Kata]/[Abc]/[Abc]/[Eng]/[Num].
• Tap [Mark] to display the screen that switches between symbols, fixed phrases and dictionary. 3 P472
• List of symbols and special characters 3 P521
• List of fixed phrases 3 P522
Multi Tap
Entering a Character with Multi Tap
With Multi Tap, a keyboard with two or more characters assigned to one key is displayed as a
character input screen. In order to enter a character, tap the key where a character is assigned
multiple times until that character is displayed.
• The input method needs to be set as Multi Tap beforehand. 3 P492
Item Description
aInput method switch key A menu is displayed, and input method can be switched.
bName The name of the character input field is displayed.
cMinimize key Temporarily hides the keyboard.
dInput field switch key When two or more input field (name, family name, address, etc.) exist in one
screen, such as a registration screen for a contact, the input field can be
changed with having the keyboard displayed.
eEnd key Closes the keyboard.
fDisplay area Characters entered/decided are displayed.
gConversion candidate
area
Conversion candidates for characters entered are displayed.
hScroll arrow When conversion candidates cannot all fit in the display, tap the arrow to scroll
up and down to display the rest of the candidates.
iNumber of characters The number of decided characters/maximum available character input is
displayed.
Hiragana input mode
00M1000EN.book 471 ページ 2004年11月24日 水曜日 午前7時56分
472
Entering Characters
Keyboard Display and Character Assignments for Each Input Mode
Following are the keyboard display and character assignments for each input mode. Whenever a
key is tapped where the character entering is assigned, the character on the key changes.
1Input mode: hiragana
1Input mode: single-byte katakana
Keyboard
display
Characters assigned
あ3あ3い3う3え3お3ぁ3ぃ3ぅ3ぇ3ぉ3
か3か3き3く3け3こ3
さ3さ3し3す3せ3そ3
た3た3ち3つ3て3と3っ3
な3な3に3ぬ3ね3の3
は3は3ひ3ふ3へ3ほ3
ま3ま3み3む3め3も3
や3や3ゆ3よ3ゃ3ゅ3ょ3
ら3ら3り3る3れ3ろ3
わ3わ3を3ん3ゎ3
*3 、3 。3 − 3 ? 3 ! 3 & 3 " 3 「 3 」 3 ・ 3( 3 ) 3
# *1, *2 3 (double-byte space) 3 (Date*3) 3 (Time*3) 3
Character Displays the screen that switches the input mode.
Symbol Displays the screen that switches between symbols, fixed phrases and dictionary.
Convert Converts a character entered.
Clear Deletes a character entered.
Keyboard
display
Characters assigned
ア3ア3イ3ウ3エ3オ3ァ3ィ3ゥ3ェ3ォ3
カ3カ3キ3ク3ケ3コ3
サ3サ3シ3ス3セ3ソ3
タ3タ3チ3ツ3テ3ト3ッ3
ナ3ナ3ニ3ヌ3ネ3ノ3
ハ3ハ3ヒ3フ3ヘ3ホ3
マ3マ3ミ3ム3メ3モ3
ヤ3ヤ3ユ3ヨ3ャ3ュ3ョ3
ラ3ラ3リ3ル3レ3ロ3
ワ3ワ3ヲ3ン3
*3 、 3 。 3 - 3 ? 3 ! 3 & 3 " 3 「 3 」 3 ・ 3 ( 3 ) 3
#*2 3 ゙ 3 ゚ 3 (single-byte space) 3 (Date*3) 3 (Time*3) 3
Character Displays the screen that switches the input mode.
Symbol Displays the screen that switches between symbols, fixed phrases and dictionary.
Clear Deletes a character entered.
00M1000EN.book 472 ページ 2004年11月24日 水曜日 午前7時56分
473
Entering Characters
1Input mode: single-byte alphabet
1Input mode: double-byte alphabet
1Input mode: single-byte number
Keyboard
display
Characters assigned
11
2ABC 3a3b3c3A3B3C32 3
3DEF 3d3e3f3D3E3F33 3
4GHI 3g3h3i3G3H3I34 3
5JKL 3j3k3l3J3K3L35 3
6MNO 3m3n3o3M3N3O363
7PQRS 3 P3q3r3s3 P3Q3R3S37 3
8TUV 3t3u3v3T3U3V383
9WXYZ 3w3x3y3z3W3X3Y3Z393
00
*3 . 3 @ 3 _ 3 - 3 / 3 ? 3 ! 3 & 3 ' 3 " 3 : 3 ; 3 ~ 3
#*2 3 (single-byte space) 3 (Date*3) 3 (Time*3) 3 .co.jp 3 .com 3 .net 3 .ne.jp 3 .or.jp 3
http:// 3 www. 3 @docomo.ne.jp 3
Character Displays the screen that switches the input mode.
Symbol Displays the screen that switches between symbols, fixed phrases and dictionary.
Clear Deletes a character entered.
Keyboard
display
Characters assigned
11
2ABC 3a3b3c3A3B3C323
3DEF 3d3e3f3D3E3F333
4GHI 3g3h3i3G3H3I343
5JKL 3j3k3l3J3K3L353
6MNO 3m3n3o3M3N3O363
7PQRS 3 P3q3r3s3 P3Q3R3S373
8TUV 3t3u3v3T3U3V383
9WXYZ 3w3x3z3W3X3Y3Z393
00
*3 . 3 @ 3 _ 3 ― 3 / 3 ? 3 ! 3 & 3 ' 3 " 3 : 3 ; 3 ~ 3
# *2 3 (double-byte space) 3 (Date*3) 3 (Time*3) 3
Character Displays the screen that switches the input mode.
Symbol Displays the screen that switches between symbols, fixed phrases and dictionary.
Clear Deletes a character entered.
Keyboard display Characters assigned
11
22
33
00M1000EN.book 473 ページ 2004年11月24日 水曜日 午前7時56分
474
Entering Characters
*1: Voiced sound and semi-voiced sound can be added (Only the characters that can add them). Each time
you tap, it will switch as: "3 ゛(voiced sound)3 ゜(semi-voiced sound) 3 none 3 ".
*2: Will start a new line by pointing it for more than 1 second,
*3: Date and Time can be entered by set display format. 3 P492
Entering a Character
The method to enter a character with Multi Tap is explained.
<Example: when entering "太郎" in Name of a contact >
aTap in the order by Name in a contact y $$ at the Status bar
• How to operate 3 P99
bEnter " たろう "
cFrom the conversion candidates, tap [太郎 ]
Input of "太郎" is set.
• When predict conversion function is set to ON, the conversion candidate predicted to
follow the character decided in conversion candidate area is displayed.
• Tap END key to end the entry.
44
55
66
77
88
99
00
**
##
Character Displays the screen that switches the input mode.
Symbol Displays the screen that switches between symbols,
fixed phrases and dictionary.
Others 3 (double-byte space) 3 (New-line) 3 : 3 / 3. 3,
3
Clear Deletes a character entered.
• To enter "た":Tap "た" once
• To enter "ろ":Tap "ら" five times
• To enter "う":Tap "あ" three times
Keyboard display Characters assigned
00M1000EN.book 474 ページ 2004年11月24日 水曜日 午前7時56分
475
Entering Characters
• To continue entering characters, tap a key where the character you are entering is
assigned.
• For a character input, please refer to "Keyboard display and character assignments for
each input mode" 3 P496
NOTE
• Following operations are also available:
- Entering a fixed phrase 3 P472
- Entering a symbol 3 P473
- Entering a face mark 3 P474
- Deleting an entered character 3 P476
- Searching a dictionary 3 P475
• The maximum number of characters that can be converted at once is 32 characters.
Determining the Characters Entered with Multi Tap Automatically
You can setup for the cursor to move automatically to the next input position and wait for an input
after each character is entered by multi-taps. When entering a character assigned to the same
key continuously, the operation to tap the right side of the entered character to move the cursor
becomes unnecessary.
aTap $$ y $$ at the Application Selector bar, tap Handset tab y Text
input from the Control Panel screen, tap [Advanced] from Text
input setup screen, and tap Multi Tap tab from Preferences
screen
bTap $$ at the field of Determine automatically
cTap $$ of the speed to set for Determining cycle
Characters entered by Multi Tap are set to be determined automatically.
Two Tap
Entering a Character with Two Tap
With Two Tap, a keyboard with two or more characters assigned to one key is displayed as a
character input screen. In order to enter a character, tap the key where a character to input is
assigned, display the selection screen for the assigned character, and tap the character to input.
• The input method needs to be set as Two Tap beforehand.3 P492
D
e
f
au
l
t sett
i
ng Determine automatically $$:
Determine automatically
: Sets to automatically determine entered characters.
Determining cycle
: Selects the speed to determine.
00M1000EN.book 475 ページ 2004年11月24日 水曜日 午前7時56分
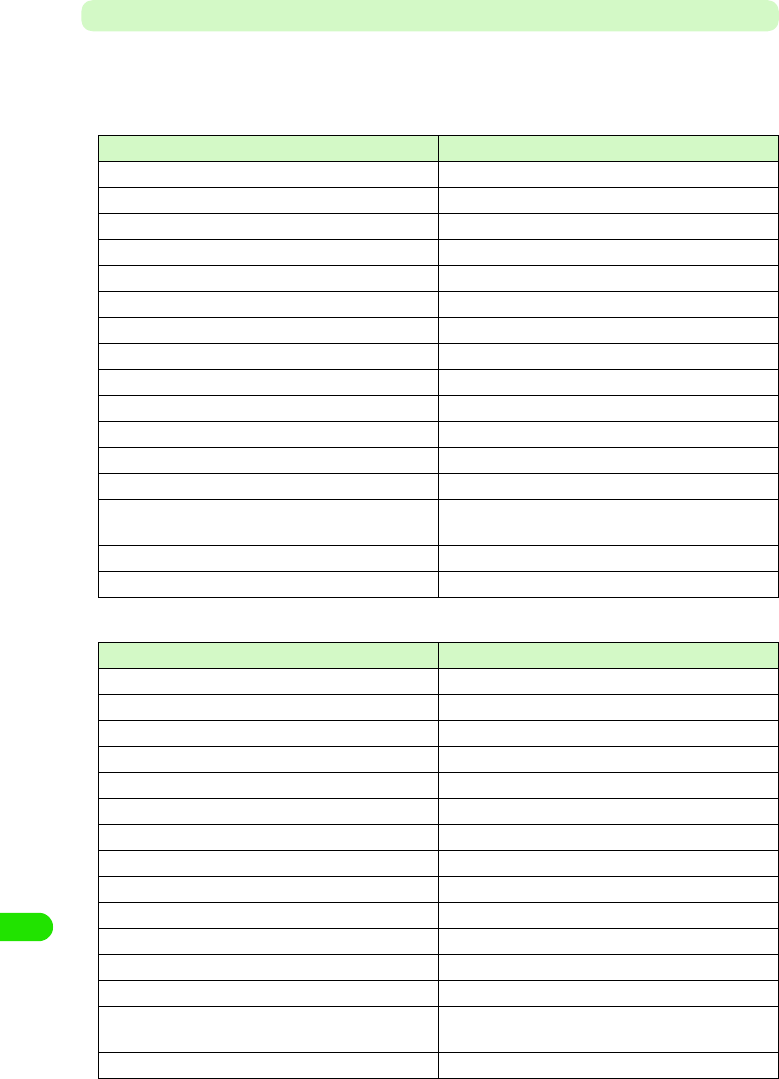
476
Entering Characters
Keyboard Display and Character Assignments for Each Input Mode
Following are the keyboard display and character assignments for each input mode. Tap a key
where the character entering is assigned, and a selection screen for assigned character is
displayed.
1Input mode: hiragana
1Input mode: single-byte katakana
Keyboard display Characters assigned
あ あ い う え お ぁ ぃ ぅ ぇ ぉ ヴ
か か き く け こ が ぎ ぐ げ ご
さ さ し す せ そ ざ じ ず ぜ ぞ
た た ち つ て と だ ぢ づ で ど っ
な な に ぬ ね の
は は ひ ふ へ ほ ば び ぶ べ ぼ ぱ ぴ ぷ ぺ ぽ
ま ま み む め も
や や ゆ よ ゃ ゅ ょ
ら ら り る れ ろ
わ わ を ん ゎ
*、 。 - ? & " 「 」 ・ ( )
# $$(double-byte space) $$(New-line) Date Time
Character Displays the screen that switches the input mode.
Symbol Displays the screen that switches between symbols,
fixed phrases and dictionary.
Convert Converts a character entered.
Clear Deletes a character entered.
Keyboard display Characters assigned
ア ア イ ウ エ オ ァ ィ ゥ ェ ォ ヴ
カ カ キ ク ケ コ ガ ギ グ ゲ ゴ
サ サ シ ス セ ソ ザ ジ ズ ゼ ゾ
タ タ チ ツ テ ト ダ ヂ ヅ デ ド ッ
ナ ナ ニ ヌ ネ ノ
ハ ハ ヒ フ ヘ ホ バ ビ ブ ベ ボ パ ピ プ ペ ポ
マ マ ミ ム メ モ
ヤ ヤ ユ ヨ ャ ュ ョ
ラ ラ リ ル レ ロ
ワワ ヲ ン
* 、 。 - ? ! & " 「 」 ・ ( )
# $$(single-byte space) $$(New-line) Date Time
Character Displays the screen that switches the input mode.
Symbol Displays the screen that switches between symbols,
fixed phrases and dictionary.
Clear Deletes a character entered.
00M1000EN.book 476 ページ 2004年11月24日 水曜日 午前7時56分
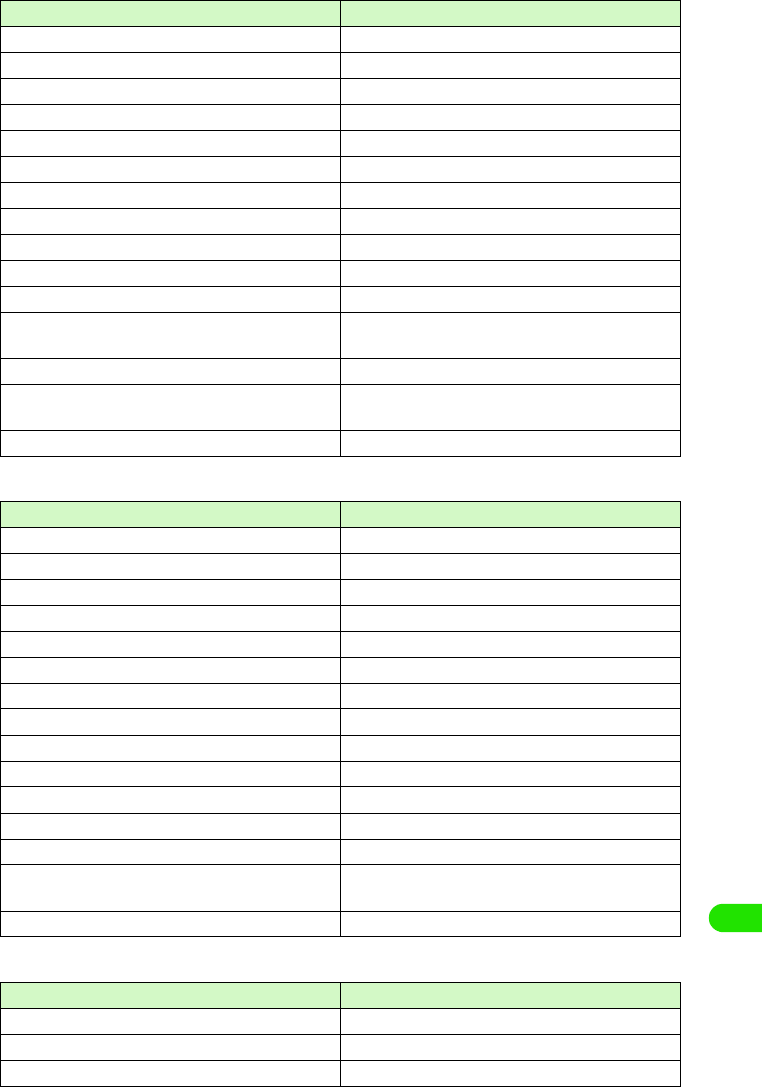
477
Entering Characters
1Input mode: single-byte alphabet
1Input mode: double-byte alphabet
1Input mode: single-byte number
Keyboard display Characters assigned
11
2ABC A B C 2 a b c
3DEF D E F 3 d e f
4GHI G H I 4 g h i
5JKL J K L 5 j k l
6MNO M N O 6 m n o
7PQRS P Q R S 7 p q r s
8TUV T U V 8 t u v
9WXYZ W X Y Z 9 w x y z
00
* . , ? ! - & ' " : ; @ ~ /
# $$(single-byte space) $$(New-line) Date Time .co.jp
.com .net .ne.jp .or.jp http:// www. @docomo.ne.jp
Character Displays the screen that switches the input mode.
Symbol Displays the screen that switches between symbols,
fixed phrases and dictionary.
Clear Deletes a character entered.
Keyboard display Characters assigned
11
2ABC A B C 2 a b c
3DEF D E F 3 d e f
4GHI G H I 4 g h i
5JKL J K L 5 j k l
6MNO M N O 6 m n o
7PQRS P Q R S 7 p q r s
8TUV T U V 8 t u v
9WXYZ W X Y Z 9 w x y z
00
*. , ? ! ― & ' " : ; @ ∼ /
# $$(double-byte space) $$(New-line) Date Time
Character Displays the screen that switches the input mode.
Symbol Displays the screen that switches between symbols,
fixed phrases and dictionary.
Clear Deletes a character entered.
Keyboard display Characters assigned
11
22
33
00M1000EN.book 477 ページ 2004年11月24日 水曜日 午前7時56分
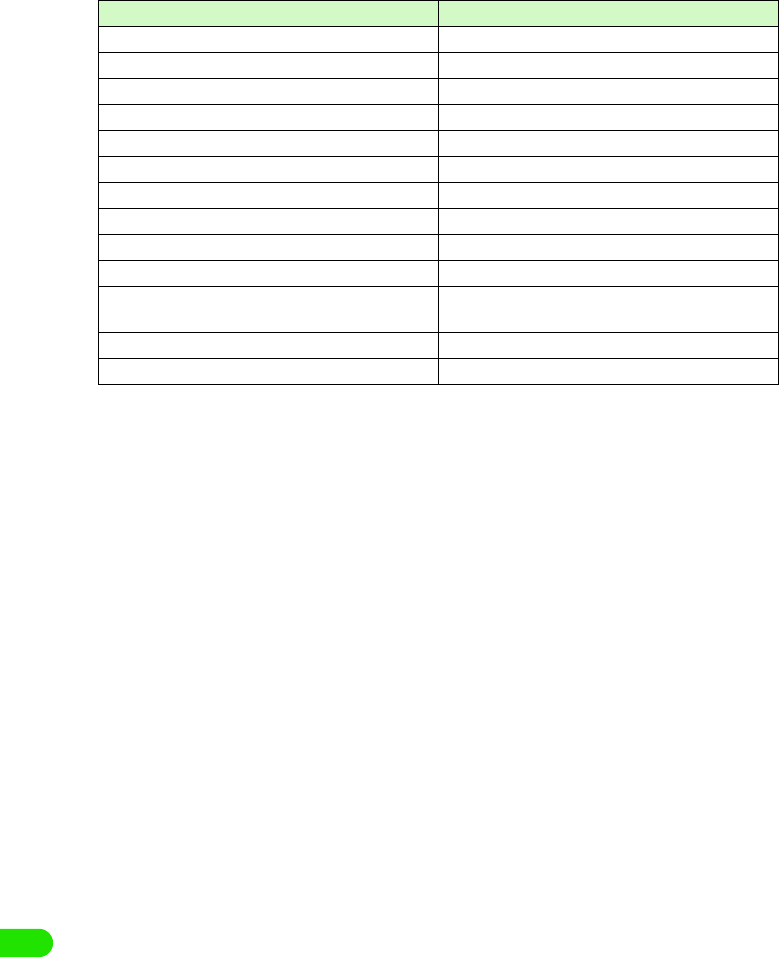
478
Entering Characters
44
55
66
77
88
99
00
**
##
Character Displays the screen that switches the input mode.
Symbol Displays the screen that switches between symbols,
fixed phrases and dictionary.
Others $$(single-byte space) $$(New-line) : / . ,
Clear Deletes a character entered.
Keyboard display Characters assigned
00M1000EN.book 478 ページ 2004年11月24日 水曜日 午前7時56分
479
Entering Characters
Entering a Character
The method to enter a character with Two Tap is explained.
<Example: when entering "太郎" in Name field of a contact>
aTap the Name field in a contact y $$ at the Status bar
• How to operate 3 P99
bTap [ た]
cTap [ た]
"た" is entered. Enter "ろう" the same way.
• To enter "ろ": Tap in the order by [ら] 3 [ろ]
• To enter "う": Tap in the order by [あ] 3[う]
dFrom the conversion candidates, tap [ 太郎 ]
Input of "太郎 " is set.
• When predict conversion function is set to ON, the conversion candidate predicted to
follow the character decided in conversion candidate area is displayed.
• Tap END key to end the entry.
• To continue entering characters, tap a key where the character you are entering is
assigned.
• For a character input, please refer to "Keyboard display and character assignments for
each input mode" 3 P500
NOTE
• Following operations are also available:
- Entering a fixed phrase 3 P472
- Entering a symbol 3 P473
- Entering a face mark 3 P474
- Deleting an entered character 3 P476
- Searching a dictionary 3 P475
• The maximum number of characters that can be converted at once is 32 characters.
A selection screen with the characters assigned to [た] key is
displayed.
00M1000EN.book 479 ページ 2004年11月24日 水曜日 午前7時56分

00M1000EN.book 480 ページ 2004年11月24日 水曜日 午前7時56分

481
Overseas Use
"WORLD WING" International Roaming Service . . . . . . . . . . . . . . . . . . . . . . 482
Services Available Outside Japan . . . . . . . . . . . . . . . . . . . . . . . . . . . . . . . . . . 483
Before Use . . . . . . . . . . . . . . . . . . . . . . . . . . . . . . . . . . . . . . . . . . . . . . . . . . . . . 484
Making Calls . . . . . . . . . . . . . . . . . . . . . . . . . . . . . . . . . . . . . . . . . . . . . . . . . . . 487
Answering Calls . . . . . . . . . . . . . . . . . . . . . . . . . . . . . . . . . . . . . . . . . . . . . . . . 490
Switching Networks . . . . . . . . . . . . . . . . . . . . . . . . . . . . . . . . . . . . . . . . . . . . . 491
Setting Operations in Roaming . . . . . . . . . . . . . . . . . . . . . . . . . . . . . . . . . . . . 491
1International Roaming
1Making/Answering Calls from Overseas
1Settings for Overseas Use
00M1000EN.book 481 ページ 2004年11月24日 水曜日 午前7時56分
482
Overseas Use
"WORLD WING" International Roaming Service
International roaming is a service that makes telephone and other types of communications
available from overseas, which is outside of the FOMA network service area, by using affiliated
operators' networks.
The international roaming service allows subscribers to use their FOMA handsets to make
telephone communication including voice and video calls*2, and email, Short Message Service
(SMS) and packet communication in about 220*1 countries and regions around the world.
*1: As of XX 2004
*2: As of XX 2004, videophone communication is available when you and the other parties are using
DoCoMo (Japan), Hutchison 3G UK (United kingdom.) or Hutchison 3G HK (Hong Kong). For details,
visit the DoCoMo website.
• Use of the international roaming service requires a subscription to "WORLD WING," the international roaming
service provided by DoCoMo. In addition, a UIM (green) made available for WORLD WING must be attached
to the FOMA handset.
• A UIM (blue) must be switched with a UIM (green).
• When you purchase a subscription to WORLD WING at a DoCoMo information desk, the card will be
exchanged free of charge.
• Communication services and functions available depend on the network operator connected to. 3 P507
• The communication system in Overseas networks to be applied are W-CDMA or GSM/GPRS.
• By default, network switching for overseas use automatically takes place. 3 P515
W-CDMA 3GPP (3rd Generation Partnership Project)* is a global standard. A 3G
mobile communication system is compliant to 3GPP.
GSM (Global System for Mobile
Communications)
The 2nd generation mobile communication system in digital mode is
most widely used around the world, especially in Europe and Asia.
GPRS (General Packet Radio
Service)
The 2.5 generation mobile communication system is the communication
method that enables high-speed packet communication through the
GPRS* by utilizing GSM
*: A regional standardization organization founded for the
development of common technology specification relating to the
3G mobile communication system (IMT-2000).
*: Packet communication with transmission speed of up to 115 kbps
is available.
00M1000EN.book 482 ページ 2004年11月24日 水曜日 午前7時56分
483
Overseas Use
Services Available Outside Japan
Services Available
The following services are available outside Japan:
*: Services that may be available depending on the network operator or network used.
Communication Systems and Services Available
Services and functions available differ between networks in Japan and overseas.
Different communication systems and services available are as described below:
Service Description
Voice call The phone number used in Japan can also be used for making and
answering domestic calls in the country of stay and making international
calls to Japan or other countries.
Video call International videophone communication is available with subscribers of
specific overseas 3G mobile operators or FOMA handset users in Japan.
Email The email address used in Japan can also be used for email exchange
from overseas.
Short Message Service (SMS) The recipients' FOMA handset phone numbers can be used to exchange
Short Message Service (SMS) messages between FOMA handset users
from overseas.
Packet communication Packet communication is available from overseas by connecting to PCs,
etc.
Service
Voice call Video call Internet Email
Packet
communication
Short
Message
Service
(SMS)
Communication
system
W-CDMA ○○○○○○
GSM ○××××○
GPRS
○×○○○○
00M1000EN.book 483 ページ 2004年11月24日 水曜日 午前7時56分
484
Overseas Use
Before Use
Make sure of the following before leaving Japan, in the country of stay and after coming back to
Japan.
Before Leaving Japan
To use your FOMA handset outside Japan, make sure of the following before leaving Japan.
1Subscription
A subscription to WORLD WING is required.
• WORLD WING is an optional service that requires a separate subscription. No monthly charges apply.
• A UIM (green) made available for WORLD WING must be attached to the FOMA handset for overseas use.
1Battery charging
Check the power supply voltage available in the country or region of stay and use the FOMA
international AC adapter 01 (separately provided).
• The AC adapter that comes with the handset is for domestic use only (100 VAC). An AC adapter suited to
the voltage available in the place of stay is required.
• Notes on use of AC adapter 3 P24
• Charging the battery 3 P54
1Network services
Network services may not be set/checked depending on the overseas network operator used.
Some network services can be set/checked only in Japan. Whether network service
operations can be performed or not is as described below:
*: May not be set in some service areas.
• For details, see "Network Service Operation Guide".
• To perform voicemail or call forwarding operation from overseas, remote operation must be enabled in
Japan in advance. 3 P516
• Services that can be set may not be available depending on the network operator used or the region.
Name of service Setting operation
Voicemail Service Can be set.*
Call Waiting Service Can be set.
Call Forwarding Service Can be set.*
Nuisance Call Blocking Service Can be set.*
Dual Network Service Cannot be set.
Caller ID Display Request Service Caller IDs may not be sent correctly.*
English Announcement Can be set.*
Caller ID Notification Can be set.*
Drive Mode Can be set but no voice guidance available.
English Announcement Can be set.*
Roaming (roaming guidance) Can be set.*
Roaming (incoming call barring when roaming) Can be set.
00M1000EN.book 484 ページ 2004年11月24日 水曜日 午前7時56分
485
Overseas Use
Viewing Information from Place of Stay
1Display view
An available network is automatically found and set, and available services such as voice or
video call can be checked with icons that indicate the status of the network.
NOTE
• The indications are in green when the handset is in FOMA network service area.
• The indications are in gray when the handset is outside of the area covered by the network.
• The network can be manually selected for use. 3 P515
1Inquiries
For inquiries about lost or stolen handsets, settlement of total charges or failure of handsets
outside Japan, contact DoCoMo at the numbers shown in "For Inquires about Lost or Stolen
Handsets or Settlement of Total Charges" or "About Failure" on the back cover of the manual.
• The contact numbers must be prefixed with the code as shown in "International Phone Code for Universal
Number (Table 1)" or "International Access Code (Table 2)" assigned to the place of stay. 3 P510
The codes to prefix the contact numbers are as shown in the tables below: "International
Phone Code for Universal Number (Table 1)" and "International Access Code (Table 2)."
International Phone Code for Universal Number (Table 1)
Area International
phone code
Area International
phone code
A Argentina 00 L Luxemburg 00
Australia 0011 M Malaysia 00
Austria 00 N New Zealand 00
B Belgium 00 Norway 00
Brazil 0021 P Philippines 00
C Canada 011 S Singapore 001
China 00 South Korea 001
Columbia 009 Spain 00
D Denmark 00 Sweden 00
F France 00 Switzerland 00
G Germany 00 T Taiwan 00
H Hong Kong 001 Thailand 001
Display Description
$$ (Orange) Voice data can be exchanged through roaming.
$$ (Orange) Voice data and still images can be exchanged through
roaming.
$$ (Orange) Voice data and images can be exchanged through
roaming.
00M1000EN.book 485 ページ 2004年11月24日 水曜日 午前7時56分
486
Overseas Use
Major International Access Codes (Table 2)
After Coming Back to Japan
After you come back to Japan, your handset will automatically select to use the FOMA network. If
your handset is set to use manual network selection, you must manually reset the handset to use
the FOMA network.
• The network can be manually selected for use. 3 P515
NOTE
• For overseas use, refer to "International Service Roaming Guide (XXX)" and "Network Service Operation
Guide" together with this manual.
• The Quick Reference Manual useful for referring to operations is provided on P000, which provides a
convenient reference for overseas use of your FOMA handset.
• Charges for overseas use will be added to the bill for monthly services. Be informed that the billing may be
delayed about one month for reasons of overseas network operators.
I Ireland 00 U U.K. 00
Israel 014 U.S.A. 011
Italy 00
Area International
phone code
Area International
phone code
A Australia 0011 M Monaco 00
B Belgium 00 N Netherlands 00
Brazil 00 New Zealand 00
C Canada 011 Norway 00
China 00 P Philippines 00
Czech 00 Poland 00
D Denmark 00 Portugal 00
F Finland 00/990 R Russia 810
France 00 S Singapore 001
G Germany 00 South Korea 001
Greece 00 Spain 00
H Hong Kong 001 Sweden 00
Hungary 00 Switzerland 00
I India 00 T Taiwan 002
Indonesia 001 Thailand 001
Ireland 00 Turkey 00
Italy 00 U U.A.E. 00
L Luxemburg 00 U.K. 00
M Macao 00 U.S.A. 011
Malaysia 00 V Vietnam 00
Area International
phone code
Area International
phone code
00M1000EN.book 486 ページ 2004年11月24日 水曜日 午前7時56分
487
Overseas Use
• If you have any problem about overseas use of your FOMA handset, see "Troubleshooting (for Overseas
Use)". 3 P53
Making Calls
Phone calls from overseas to Japan or to other countries are international calls to Japan, etc. To
make a call, prefix the phone number with "+" and the country code of the destination and enter
the other party's phone number. When entering the phone number, remove "0" at the beginning
of the area code.
aTap $$ in the Application Selector bar
bEnter the other party's phone number
The FOMA handset vibrates every time a key on the Enter phone number screen is tapped.
• Point to [0] for 1+ seconds to enter "+".
• Pause ("P"), Wait ("W"), "#" and "*" can be entered. 3 P73
1To call landline phones
+ Country code - Area code with 0 removed - City code - Number
• If the other party is a landline phone in Italy, "0" is required.
1To call mobile phones
+ Country code - 90 - XXXX - XXXX
+ Country code - 80 - XXXX - XXXX
1To call PHS phones
+ Country code - 70 - XXXX - XXXX
cTap [$$]
• Tap [$$] to make a video call. 3 P86
1If you hear a busy signal
The line is busy. Press e and try again at a later time.
The following operations can be performed:
[0]~[9], [*], [#] : Use these keys to enter the phone number.
[$$] : Deletes a digit in the phone number from the
right. Pointing for 1+ seconds deletes all of the
phone number entered.
00M1000EN.book 487 ページ 2004年11月24日 水曜日 午前7時56分

488
Overseas Use
dTalk on the phone
ePress e when you have finished your call
The line is cleared.
The call duration is displayed.
The following operations can be performed:
[Mute]/[Unmute]
: Tap this to switch between the mute and unmute
settings. When the mute setting is active, the
other party cannot hear your voice but you can
hear the other party's voice.
[$$]/[$$] : Tap this to set/release the touch screen lock.
When the lock is active, all tapping operations
other than $$ are disabled.
[Hold]/[Resume]
: Tap this to place a call on/off hold. The mute/
unmute setting cannot be changed while a call
is on hold.
s: Press to enable/disable the speakerphone
function.
00M1000EN.book 488 ページ 2004年11月24日 水曜日 午前7時56分
489
Overseas Use
Country code
Country codes are as shown below:
Making Calls within Country of Stay
To make a call to a party in the country of stay, enter the other party's phone number and call in
the same way as calls within Japan.
• If the other party is also using international roaming, make a call in the same way as calls from overseas, even
if the other party is in the same country.
NOTE
• Storing phone numbers including the other parties' country codes, etc. in the contact list will simplify the
procedure of making international calls.
• The Enter phone number screen can also be displayed by pressing e in idle state.
• If your call did not get through, tap [$$Retry] on the screen to make another attempt to call the same number.
• The view of the Enter phone number screen fields can be changed. 3 P139
• The handset can be set not to show the call duration on the screen displayed while talking. 3 P135
• An audible timer to notify you of the elapsed call time is available. 3 P128
• The handset can be set not to answer incoming calls during international roaming. 3 P516
• The handset can be set to play to a party who has attempted to call you during international roaming a
message informing the caller that the call is being forwarded overseas 3 P517
• Caller IDs may not be sent correctly.
Country Code Country Code
A Australia 61 M Malaysia 60
Austria 43 Monaco 377
B Belgium 32 N Netherlands 31
Brazil 55 New Zealand 64
C Canada 1 Norway 47
China 86 P Philippines 63
Czech 420 Poland 48
D Denmark 45 Portugal 351
F Finland 358 Russia 7
France 33 S Singapore 65
G Germany 49 South Korea 82
Greece 30 Spain 34
H Hong Kong 852 Sweden 46
Hungary 36 Switzerland 41
I India 91 T Taiwan 886
Indonesia 62 Thailand 66
Ireland 353 Turkey 90
Italy 39 U U.A.E. 971
J Japan 81 U.K. 44
L Luxemburg 352 U.S.A. 1
M Macao 853 V Vietnam 84
00M1000EN.book 489 ページ 2004年11月24日 水曜日 午前7時56分
490
Overseas Use
• Some overseas network operators may charge you for calls that did not get through due to communication
conditions.
• Some overseas network operators may charge you for calls to toll-free numbers.
• When you use international videophone, the image of the other party displayed may be distorted or
connection may not be established depending on the other party's handset. For details, visit the DoCoMo
website.
Answering Calls
Answer incoming phone calls with your FOMA handset when you are outside Japan.
aA call arrives
The ring tone sounds and the status LED flashes.
• The vibrator can be enabled instead of the ring tone. 3 P126
bTap [Answer]
The call is answered.
• If a video call arrives, tap [Answer] to answer the call with the camera image enabled. Tap
[Privacy] to answer the call with the camera image disabled.
• Tap [Reject] to hang up without answering the incoming call.
• Operations during conversation are the same as described in Step 4 of "Making calls."
cPress e when you have finished your call
The line is cleared.
1To access your FOMA handset overseas from Japan
Entering your phone number in the same way as usual domestic calls allows a caller in Japan
to make a call to your handset outside Japan, which you can answer.
Enter "090-XXXX-XXXX" and press the Start key
Or
Enter "080-XXXX-XXXX" and press the Start key
1To access your FOMA handset overseas from countries other than Japan
Regardless of the place of stay, entering your phone number prefixed with "+" and "81"
(country code for Japan) and without the "0" at the beginning of the area code allows a caller
to make a call to your handset, in the same way as overseas calls to Japan.
Enter "+81-90-XXXX-XXXX" and press the Start key
Or
Enter "+81-80-XXXX-XXXX" and press the Start key
NOTE
• In some countries, you may be charged for calls that arrive during international roaming.
• Calls that arrive while the line is busy can be automatically diverted to the Voicemail Service Center. 3 P375
• Calls that arrive during international roaming are forwarded from Japan, regardless of the places of origin.
The callers are charged for calls to Japan and the receivers for international forwarding.
00M1000EN.book 490 ページ 2004年11月24日 水曜日 午前7時56分
491
Overseas Use
Switching Networks
To use your FOMA handset overseas, it is necessary to switch to a network available in
the place of stay. By default, a network available will be automatically found and set. You
can also select a network manually.
• Network switching must take place in a country where you use your FOMA handset.
• Network cannot be switched while Self mode is active.
aTap $$ in the Application Selector bar, and tap Settings y Network
on the Menu bar on the Phone number entry screen
bTap Band and select a frequency band
cTap Registration preference, and tap Auto/Manual
•If Auto has been tapped, the network found will be automatically set.
•If Manual has been tapped, select from the networks found to set the network.
dTap Search frequency and select the frequency of search
eTap [Find new network]
A network is found. If Registration preference is set to Auto, the network found will be
automatically registered.
1If Registration preference is set to Manual
The screen as shown below is displayed after a network has been found.
Tap the network to set, and tap [Register].
The selected network will be registered.
fTap [Done]
Setting Operations in Roaming
Set operations for handling calls that arrive while you are using international roaming
outside Japan.
• For details about network services, see "Network Service Operation Guide".
D
e
f
au
l
t sett
i
ng Band: WCDMA Registration preference: Auto Search frequency: Medium
Band : Select a frequency band suited for the
country of stay.
Registration preference
: Set the network automatically or manually.
Search frequency : Set the frequency of searching for a
network.
Find new network : Starts a search for a new network.
00M1000EN.book 491 ページ 2004年11月24日 水曜日 午前7時56分
492
Overseas Use
Making available Remote Operation of Network Services during Roaming
Set your handset to allow remote operation of Voicemail and Call Forwarding Services from
overseas.
• This operation can be performed only by subscribers of Voicemail or Call Forwarding Service.
aTap $$ in the Application Selector bar, and tap Settings y Roaming
in the Menu bar
bTap $$ in the Remote access control field, and tap [Yes]
Remote access is enabled.
• Tap $$ to disable remote access.
Avoiding Calls Arriving during Roaming
Your handset can be set to restrict incoming calls or data communications during roaming.
aTap $$ in the Application Selector bar, and tap Settings y Roaming
in the Menu bar on the Phone number entry screen
bTap $$ in the Incoming call barring when roaming field, and enter the
network security code on the Enter network security code
screen
Incoming call barring is set.
• Tap $$ to remove incoming call barring when roaming.
NOTE
• The operation cannot be performed outside the service area or in an area with no radio wave.
Enabling Guidance in Roaming
The handset can be set to play to a party who has attempted to call you during international
roaming a message informing the caller that you are in international roaming.
• If the guidance function is not set, a message "Connecting your call. Please hold." is played to the caller.
00M1000EN.book 492 ページ 2004年11月24日 水曜日 午前7時56分

493
Overseas Use
• Even if you have not enabled the guidance, a message in a foreign language may play depending on the
conditions of the overseas network operator. The ringing tone may be different from that in Japan.
aTap $$ in the Application Selector bar, and tap Settings y Roaming
on the Menu bar on the Contact entry screen
bTap $$ in the Roaming Guidance field on the Roaming screen
The guidance function is enabled. To a caller, a message "The receiver is in international
roaming. Please hold while your call is being connected." is played.
• Tap $$ to disable the guidance.
NOTE
• The operation cannot be performed outside the service area or in an area with no radio wave.
00M1000EN.book 493 ページ 2004年11月24日 水曜日 午前7時56分

00M1000EN.book 494 ページ 2004年11月24日 水曜日 午前7時56分

495
Appendix
Menu List . . . . . . . . . . . . . . . . . . . . . . . . . . . . . . . . . . . . . . . . . . . . . . . . . . . . . . 496
List of Symbols and Special Characters. . . . . . . . . . . . . . . . . . . . . . . . . . . . . 497
List of Fixed Phrases . . . . . . . . . . . . . . . . . . . . . . . . . . . . . . . . . . . . . . . . . . . . 498
List of Roman Character Entries . . . . . . . . . . . . . . . . . . . . . . . . . . . . . . . . . . . 499
Combination of Functions during Multiaccess . . . . . . . . . . . . . . . . . . . . . . . 501
Services Available for FOMA Handset . . . . . . . . . . . . . . . . . . . . . . . . . . . . . . 501
Options and Related Devices. . . . . . . . . . . . . . . . . . . . . . . . . . . . . . . . . . . . . . 503
Desktop Suite and SyncML . . . . . . . . . . . . . . . . . . . . . . . . . . . . . . . . . . . . . . . 503
Troubleshooting . . . . . . . . . . . . . . . . . . . . . . . . . . . . . . . . . . . . . . . . . . . . . . . . 510
Error Message List . . . . . . . . . . . . . . . . . . . . . . . . . . . . . . . . . . . . . . . . . . . . . . 511
Warranty and After-sales Service . . . . . . . . . . . . . . . . . . . . . . . . . . . . . . . . . . 515
Protecting the Handset from Data that can Cause Damage . . . . . . . . . . . . . 516
1When Troubled
00M1000EN.book 495 ページ 2004年11月24日 水曜日 午前7時56分
496
Appendix
Menu List
Tap $$ (Application launcher) on Application Selector bar to display.
Application Description Reference
$$ Browse Accesses Internet and a homepage can be
viewed. P193
$$ Calculator A calculator can be used. P350
$$ Calendar Displays a calendar, and schedules can be
registered. P322
$$ Camera Takes still images/videos. P169
$$ Contacts Registration of contacts and searching contacts
are performed. P99
$$ Control panel
Handset tab
Certificate manager Displays User certificates/CA certificates. P220
Text input Details of text input are set up. P467, 480,
484, 486, 490,
499
Sound Sound such as Ringers are set. P126
Shortcut key Sets the menu launched by a home/shortcut key. P345
Password Sets a Security code and a Phone Lock. P147, 154
Master Clear/Master Reset Performs Master Clear/Master Reset. P360
Manner Mode Sets the operation of the Manner Mode. P129
Memory card Formats a memory card, or changes its name. P302
Memory manager Displays application memory. P306, 308,
310
Screen Adjusts brightness and tap location of the screen. P134
Settings for cars Sets the operation for connecting FOMA handset
to a Carkit. P75
Power Sets the operation of the Power save mode and
Status LED. P136
Handset information Displays system information of the FOMA
handset. P350
Connection tab
Bluetooth Sets the detail of Bluetooth. P382
Desktop Suite Sets the connection type of Desktop Suite. P529
Internet account Sets the necessary settings for connecting to an
internet. P183
Messaging accounts Sets messaging accounts. P227
Byte Counter Displays the amount of data transmitted. P348
00M1000EN.book 496 ページ 2004年11月24日 水曜日 午前7時56分
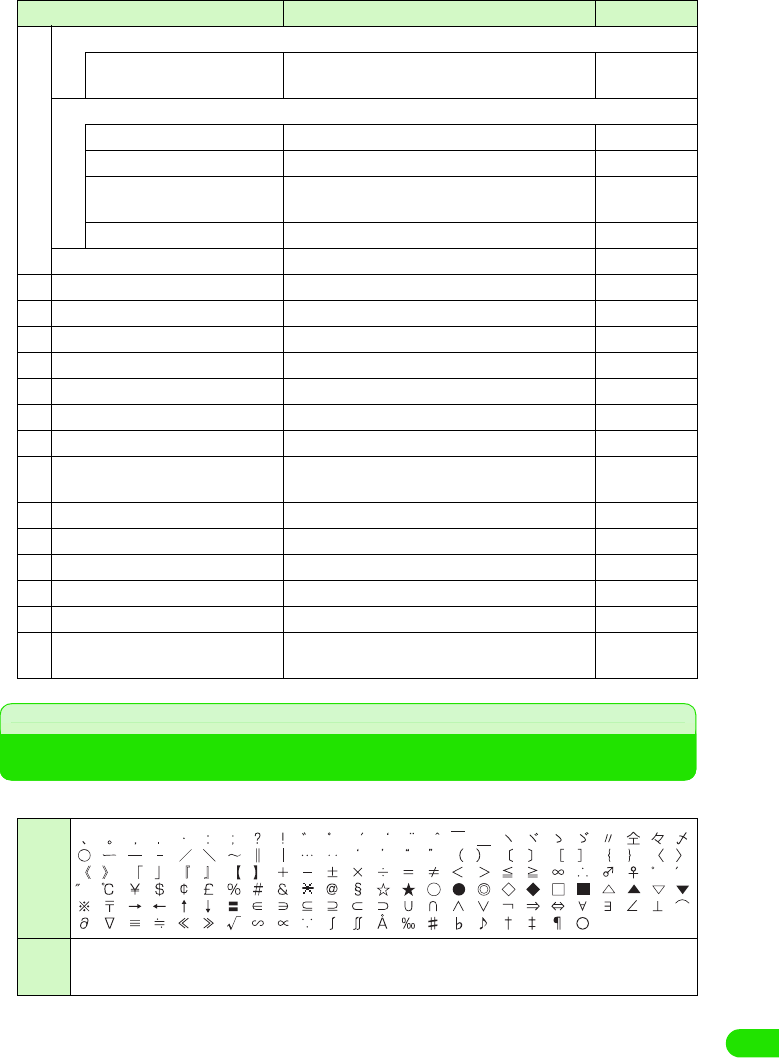
497
Appendix
List of Symbols and Special Characters
• Entering symbols and special characters 3P473
$$ Connection tab
Find Wireless LAN Access
Point
Searches an access point of a wireless LAN. P398
General tab
Select Language Changes the language displayed on the screen. P142
International Sets present country and currency unit. P140
Ringtune Manager Installation of ringtones and Vibrator Setting is
performed. P124, 127
Time & date Sets the date, time and display format. P59
$$ Desktop Suite Synchronizes PC and data. P530
$$ Home Displays the Home screen. P57
$$ Message Sends and receives messages. P234
$$ Music Plays music. P285
$$ Notes Registers texts and Free draw notes. P351
$$ Handset Displays a phone number entry screen. P66
$$ Picsel Viewer Displays various files. P289
$$ Pictures Manages pictures such as still pictures taken. P274
$$ SyncML Synchronizes data with a specific server with
wireless. P530
$$ Time Sets a display of time and alarm. P319, 358
$$ To Do Registers what needs to be done. P336
$$ Video Manages videos taken. P280
$$ Voice Records a speech with the voice recorder. P313
$$ movianVPN Connects with such as intranet, by utilizing VPN. P400
$$ Virus scan Checks for a virus in FOMA handset or Trans
Flash memory card. P540
Double-
byte
Single-
byte
Application Description Reference
! " # $ % & ' ( )
*
+ , ‐ . / : ; < = > ? @ [ ] ¥
^ _ ` { } |
00M1000EN.book 497 ページ 2004年11月24日 水曜日 午前7時56分
498
Appendix
List of Fixed Phrases
• Entering fixed phrases 3 P472
Porticular
Category Fixed phrases
Greeting おはようございます こんにちは
こんばんは おやすみなさい
ありがとうございます すいません
よろしくお願いします お疲れ様です
ご無沙汰しております おめでとう
Reply OK NG
賛成 反対
了解です 問題ありません
今やっています すぐ行きます
もう少し待ってください いつでも大丈夫です
Business 電話ください。 至急、返事ください。
遅れます。 これから帰社します。
会議中です。 出張中です。
直行します。 直帰します。
お世話になっております。 後程ご連絡致します。
Private TELして 遊びに行こうよ
飲みに行かない? 今日、ヒマ?
今どこ? 今何してるの?
もうすぐ着くよ じゃあ、後で!
今日はダメです いいよ!
English Thank you Call me back!
I'm late. Where are you now?
I'll be back soon. Let's meet at
It sounds great! Congratulations!
Good luck! I love you.
00M1000EN.book 498 ページ 2004年11月24日 水曜日 午前7時56分
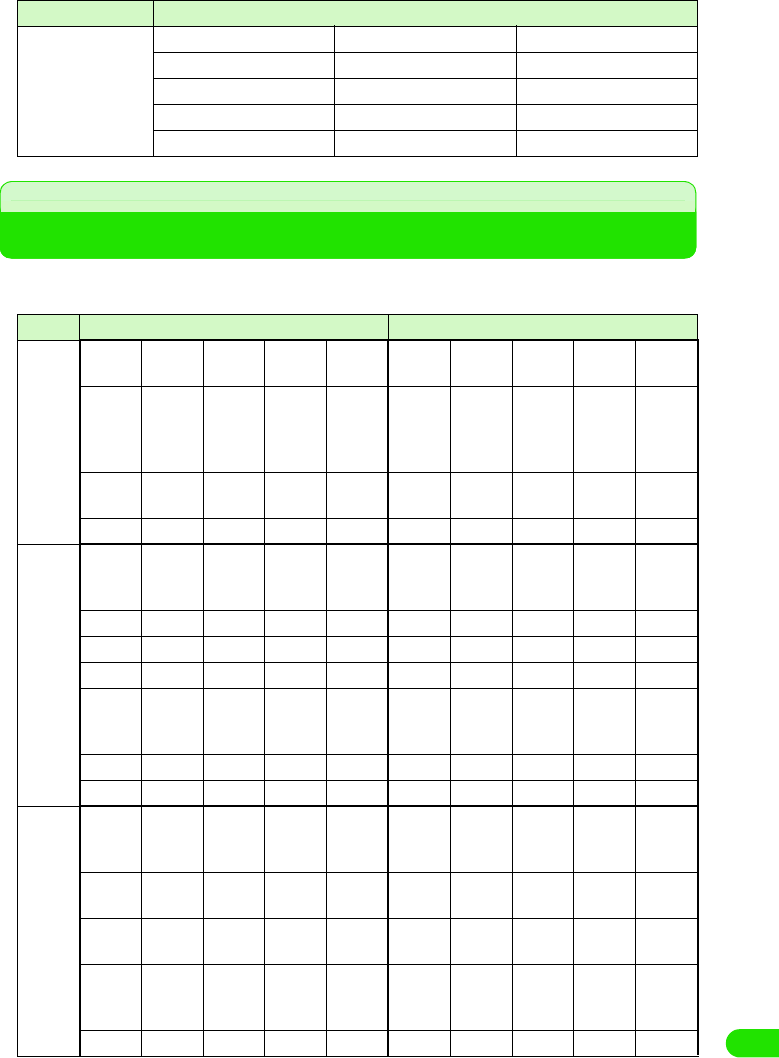
499
Appendix
List of Roman Character Entries
Hiragana/Kanji entry is performed by Roman character input, when the input method is
set to Qwerty Keyboard and input mode is set to kanji mode. 3P471
Internet @docomo.ne.jp .co.jp .ne.jp
.or.jp .ac.jp .com
http:// https:// ftp://
www. .org .net
.jp .html
Line Entering character Keys to tap
あline あいうえおai
yi
u
wu
eo
ぁぃぅぇぉla
xa
li
xi
lyi
xyi
lu
xu
le
xe
lye
xye
lo
xo
うぁ うぃ うぇ うぉ wha whi
wi
whe
we
who
ぃぇ ye
かline かきくけこka
ca
ki ku
cu
qu
ke ko
co
がぎぐげごga gi gu ge go
きゃ きぃ きゅ きぇ きょ kya kyi kyu kye kyo
ぎゃ ぎぃ ぎゅ ぎぇ ぎょ gya gyi gyu gye gyo
くぁ くぃ くぅ くぇ くぉ qwa
qa
kwa
qwi
qi
qyi
qwu qwe
qe
qye
qwo
qo
くゃ くゅ くょ qya qyu qyo
ぐぁ ぐぃ ぐぅ ぐぇ ぐぉ gwa gwi gwu gwe gwo
さline さしすせそsa si
ci
shi
su se
ce
so
ざじずぜぞza zi
ji
zu ze zo
しゃ しい しゅ しぇ しょ sya
sha
syi syu
shu
sye
she
syo
sho
じゃ じぃ じゅ じぇ じょ zya
ja
jya
zyi
jyi
zyu
ju
jyu
zye
je
jye
zyo
jo
jyo
すぁ すぃ すぅ すぇ すぉ swa swi swu swe swo
Category Fixed phrases
00M1000EN.book 499 ページ 2004年11月24日 水曜日 午前7時56分
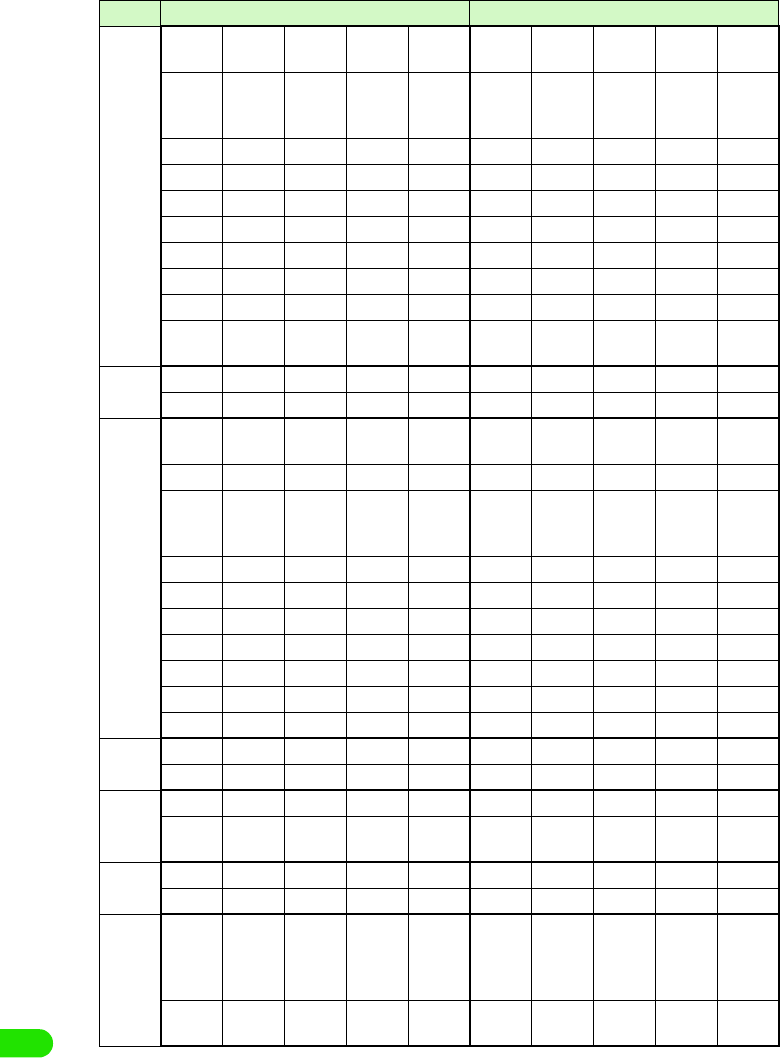
500
Appendix
たline たちつてとta ti
chi
tu
thu
te to
ちゃ ちぃ ちゅ ちぇ ちょ tya
cha
cya
tyi
cyi
tyu
chu
cyu
tye
che
cye
tyo
cho
cyo
つぁ つぃ つぇ つぉ tsa tsi tse tso
てゃ てぃ てゅ てぇ てょ tha thi thu the tho
とぁ とぃ とぅ とぇ とぉ twa twi twu twe two
だぢづでどda di du de do
ぢゃ ぢぃ ぢゅ ぢぇ ぢょ dya dyi dyu dye dyo
でゃ でぃ でゅ でぇ でょ dha dhi dhu dhe dho
どぁ どぃ どぅ どぇ どぉ dwa dwi dwu dwe dwo
っitu
xtu
なline なにぬねのna ni nu ne no
にゃ にぃ にゅ にぇ にょ nya nyi nyu nye nyo
はline はひふへほha hi hu
fu
he ho
ひゃ ひぃ ひゅ ひぇ ひょ hya hyi hyu hye hyo
ふぁ ふぃ ふぅ ふぇ ふぉ fwa
fa
fwi
fi
fyi
fwu fwe
fe
fye
fwo
fo
ふゃ ふゅ ふょ fya fyu fyo
ばびぶべぼba bi bu be bo
びゃ びぃ びゅ びぇ びょ bya byi byu bye byo
ヴぁ ヴぃ ヴ ヴぇ ヴぉ va vi vu ve vo
ヴゃ ヴぃ ヴゅ ヴぇ ヴょ vya vyi vyu vye vyo
ぱぴぷぺぽpa pi pu pe po
ぴゃ ぴぃ ぴゅ ぴぇ ぴょ pya pyi pyu pye pyo
まline まみむめもma mi mu me mo
みゃ みぃ みゅ みぇ みょ mya myi myu mye myo
やline やゆよ
ya yu yo
ゃゅょ
lya
xya
lyu
xyu
lyo
xyo
らline らりるれろra ri ru re ro
りゃ りぃ りゅ りぇ りょ rya ryi ryu rye ryo
わline わをん
wa wo n
nn
n'
xn
ゎiwa
xwa
Line Entering character Keys to tap
00M1000EN.book 500 ページ 2004年11月24日 水曜日 午前7時56分
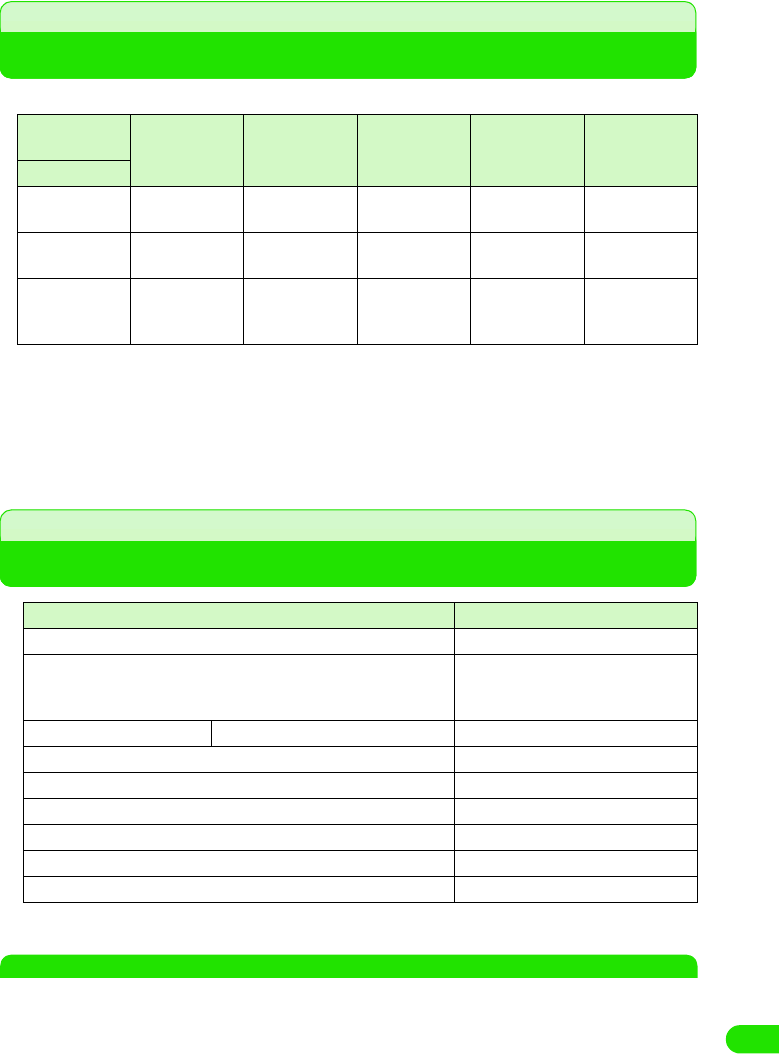
501
Appendix
Combination of Functions during Multiaccess
The available combination of operations for Multiaccess is as shown below:
Services Available for FOMA Handset
NOTE
• If you use the collect call service (106), the call charge is billed to the receiver together with a commission
of 90 yen (94.5 yen with tax included) per call. (as of XX 2004)
• If you use the directory assistance service (104), a service charge of 100 yen (105 yen with tax included) is
billed together with the call charge. Note that this service is available without charge for those visually
impaired or physically disabled in the upper body. For further information, inquire at 116 (NTT sales center)
from a general subscriber phone. (as of XX 2004)
Operation to be
used
Making/
receiving a
voice call
Making/
receiving a
video call
Connecting to
Internet
Sending/
receiving a
message
Sending/
receiving SMS
Current status
While on a voice
call ○×ab○
While on a video
call ××ab○
While
connected to
Internet
cc -○○
○: Available
×: Not available.
–: The combination is functionally not possible.
a: Internet connection not available via CSD in overseas.
b: Not available to send/receive messages via CSD in overseas.
c: A call cannot be made or received during an internet connection via CSD in overseas.
Available service Phone number
Collect call (reversed charge calls) 106 (no area code)
Directory assistance for general subscriber phones and DoCoMo's
mobile phones (charges apply).
(Unlisted phone numbers cannot be given.)
104 (no area code)
Telegrams (charges apply) 8 a.m. - 10 p.m. 115 (no area code)
Time (charges apply) 117 (no area code)
Weather report (charges apply) Area code + 177
Police emergencies 110 (no area code)
Fire and ambulance 119 (no area code)
Marine emergencies and accident reports 118 (no area code)
Message Dial for a disaster (charges apply) 171 (no area code)
00M1000EN.book 501 ページ 2004年11月24日 水曜日 午前7時56分

502
Appendix
• Note that calls to 110, 119 or 118 from the FOMA handset cannot be located. Since the police or fire
department authorities may call you to confirm, inform them that you are calling from a mobile phone, give
your number and detailed information of your whereabouts. To make sure that you are not cut off during the
call, stay in one place when you make the call and do not turn off the phone after the call, but keep it on for
about 10 minutes so that a call can be received.
• Depending on the area you are calling from you may not be connected to the local police or fire department.
Use a public payphone or general subscriber phone if you cannot get in touch with the local authorities.
• Customers who use "Call Forwarding" and "Voice Warp" from a general subscriber phone whose forwarding
destination is a mobile or carphone (mobile phone), may still hear the ring tone even when the mobile phone
is busy, is outside the service area or is turned OFF due to the setting of the general subscriber/mobile
phone.
• You may not be able to call 116 (NTT sales center), Dial Q2, Message Dial and make credit card calls. (Credit
card calls can be made from a general subscriber or a public phone to a FOMA handset.)
00M1000EN.book 502 ページ 2004年11月24日 水曜日 午前7時56分
503
Appendix
Options and Related Devices
Combining the FOMA handset with optional devices supports a wide variety uses from
personal use to business use. Some products are unavailable depending on the region.
For details, contact our sales office. For details about the optional devices, refer to the
instruction manual for each device.
Desktop Suite and SyncML
FOMA handset has two types of software in order to synchronize data.
1Desktop suite
A FOMA handset connected to a personal computer with USB, or via Bluetooth, can transmit
and synchronize data such as Contacts, Calendar, To do list, and messages.
With Desktop suite, installation and transmission of applications and files to a FOMA handset
can be performed in addition to transmission and synchronization of data.
1SyncML
A FOMA handset connected to a personal computer via a wireless LAN, can transmit and
synchronize data such as Contacts, Calendar, and To do list.
Please see the following homepage or the help of Desktop suite/SyncML about details on
such as download method, data which can be transmitted/synchronized, a hardware
requirement, the operation method, and restrictions.
<XXXXXMaker site name> http://www.XXXXXX
Hardware Requirements
Please use in the operational environments shown below.
*: Required memory and hard disk space may vary depending on system environments.
• AC adapter MXX • Desktop holder MXX
• Battery pack MXX • Rear cover MXX
• Carrying case MXX • Stylus MXX
• USB cable MXX • FOMA USB cable
• International FOMA AC adapter 01 • Earphone/microphone with flat switch P01/P02
• Flat type stereo earphone set P01 • Earphone/microphone with switch P001/P002*
• Stereo earphone set P001*
*: Earphone jack converter adapter P001 is needed.
Item Required environment
OS Windows XP, Windows 2000, Windows Me, Windows 98SE
CPU A processor with XX or higher performance is recommended.
Required memory* XXMB or higher
Free hard disk space* XXMB or higher
Display High Color (16bit) or higher is recommended.
00M1000EN.book 503 ページ 2004年11月24日 水曜日 午前7時56分
504
Appendix
Before Using
<Qualification>
Please see the above homepage or the help of Desktop suite/SyncML about details on such as
download method, data which can be transmitted/synchronized, a hardware requirement, the
operation method, and restrictions.
For inquiries on Desktop suite and SyncML
XXXXSupport Center 0120-XXX-XXX
Office hours: Week days from XX:XX to XX:XX a.m. and XX:XX to XX:XX p.m.
(Saturdays, Sundays, public holidays, and predetermined holidays are excluded)
Using Desktop Suite
By using Desktop Suite, following operations can be performed between a personal computer
linked to a FOMA handset.
Installing Desktop Suite PC
aSet the attached CD-ROM to a personal computer
bClick in the order of [スタート ] (Start) menu y “ ファイル名を指定
して実行 ” (Execute by specifying a file name)
cSpecify "The drive name of CD-ROM: \XXX\setup.exe" and click
[OK]
Starting Desktop Suite PC
Please connect a FOMA handset and a personal computer beforehand, after they are powered
on. 3 P416
aSelect in the order of [ スタート ] (Start) menu y “ すべてのプログ
ラム ” (All Programs) ([Programs] for OS other than WindowsXP)
• From here on, please follow the instructions displayed on the
screen.
00M1000EN.book 504 ページ 2004年11月24日 水曜日 午前7時56分
505
Appendix
y "Motorola Desktop Suite", and click on "Motorola Desktop
Suite"
Starting of Desktop Suite PC will display the above screen.
1About detailed operation method of Desktop Suite PC
Please refer to the help file. The display method is as follows:
Select in the order of [スタート] (Start) menu y “すべてのプログラム” (All Programs)
([Programs] for OS other than WindowsXP) y "Motorola Desktop Suite", and click on
"Motorola Desktop Help"
Uninstalling Desktop Suite PC
Uninstalls Desktop Suite PC
• Before uninstalling, please end Desktop Suite PC.
• The display on the screen differs when an OS other than Windows XP is used.
< Example: When uninstalling form Windows XP >
aClick on the icons in the order of [スタート ] (Start) menu y “ コン
トロールパネル ” (Control Panel) y “ プログラムの追加と削除 ”
(Add or Remove Programs)
The “プログラムの追加と削除” (Add or Remove Programs) screen is displayed.
1For Windows 2000 Professional, Me
Click on [スタート] (Start) menu, and select in the order of [設定] (Setting) y “ コント
ロールパネル” (Control Panel) and double click on “アプリケーションの追加と削除”
(Add or Remove Programs)
“アプリケーションの追加と削除” (Add or Remove Programs) screen (for Windows Me,
“アプリケーションの追加と削除のプロパティ ” (Property of Add or Remove
Programs) ) is displayed.
bSelect "Motorola Desktop Suite" and click on “ 変更と削除 ”
(Change or Delete)
• From here on, please follow the instructions displayed on the screen.
Setting the Connection Method of Desktop Suite
The method for connecting to Desktop Suite (USB cable connection/Bluetooth communication) is
set.
00M1000EN.book 505 ページ 2004年11月24日 水曜日 午前7時56分
506
Appendix
aTap $$ y $$ in the Application Selector bar, tap Connect tab from
Control Panel screen y tap Desktop Suite
1Changing the precedence of apparatus when connection method is set to Bluetooth
Tap [Change]
bTap Connection Drop Box, set connection method y tap [Done]
Operating Desktop Suite
Desktop Suite is operated and data is transmitted. The connection starts with the method set at
"Setting the connection method of Desktop Suite" (3 P529)
• When connecting via USB, this operation is performed after connecting a personal computer with a FOMA
handset with an USB cable beforehand. 3 P414
• When connecting via Bluetooth, it is recommended to register the connecting Bluetooth apparatus
beforehand. 3 P382
Display : Tap and select when displaying the Bluetooth
apparatus by types.
Device list : The apparatus by which Bluetooth connection was
made (above the line), and the apparatus being
searched (below the line) are displayed.
• Tap [Update] to start a search for apparatus available for Bluetooth
connection starts.3P383
When the connection
method is USB
When the connection
method is Bluetooth
00M1000EN.book 506 ページ 2004年11月24日 水曜日 午前7時56分
507
Appendix
aTap $$ y $$ in the Application Selector bar
bTap [Connect]
1When disconnecting
Tap [Disconnect]
Synchronizing a Personal Computer with a Data by Using SyncML
Setting up SyncML
Performs a server setup in order to use SyncML.
• Information necessary for the setting will be supplied by the provider of SyncML.
aTap $$ y $$ at the Application Selector bar
bTap in the order from Edit y Settings in the Menu bar
Server address : Enter a server address.
Username : Enter a username.
Password : Enter a password.
When connecting via
USB
When connecting via
Bluetooth
00M1000EN.book 507 ページ 2004年11月24日 水曜日 午前7時56分
508
Appendix
cTap a column to set up, and enter information
1When performing a setting for a transport login
• Please perform this when needed. Information necessary for the setting will be supplied
by the provider of SyncML.
aTap Protocol tab
bTap $$ at Use transport login column
• Tap $$ to disable Transport Login.
cTap the Username column, and enter a user name
dTap the Password column, and enter a password
dTap [Done]
The server is set.
Setting the Task to Synchronize
Sets the task to synchronize by SyncML.
aTap $$ y $$ in the Application Selector bar
Transport protocol
: Transport protocol is displayed.
Use transport login
: Sets enable/disable of transport login.
Username : The user name for transport login is entered. This
can be entered only when transport login is
enabled.
Password : The password for transport login is entered. This
can be entered only when transport login is
enabled.
The task to synchronize is displayed.
00M1000EN.book 508 ページ 2004年11月24日 水曜日 午前7時56分
509
Appendix
bTap a task to set
cTap $$ of Enable task
• Tap $$ to disable the task.
dTap Ta sk n ame column, and enter a task name
• Make a change as needed.
eTap Server database column and enter a path
• Make a change as needed.
fTap [Done]
The task is set.
• Tap [Cancel] to cancel the task setting.
Synchronizing Data
Connects to the SyncML server, and synchronizes the data.
aTap $$ y $$ in the Application Selector bar
Enable task : Sets enable/disable of the task.
Task name : The task name acquired beforehand is
displayed.
Server database
: The path to the server database acquired
beforehand is displayed.
The task to synchronize is displayed.
The tasks with synchronization disabled are displayed 3 P532
00M1000EN.book 509 ページ 2004年11月24日 水曜日 午前7時56分
510
Appendix
bTap [Sync]
cSynchronization
Troubleshooting
Symptom Check
FOMA handset cannot be turned ON (the handset
cannot be used).
• Is the battery connected properly? 3 P52
• Is the battery depleted? 3 P55
• When the mova handset is ON in a dual network
service, the FOMA service is not available. Check
whether or not FOMA handset is ON. Please see
"Network Service Operation Guide" for further
information. 3 P373
A message "UIM selection failed" is displayed when
the FOMA handset is powered on.
• The UIM may not be properly attached or may be
damaged. Check to see if the UIM is properly
attached. 3 P49
Screen does not change when a key is pressed or the
touch screen is tapped while the display is turned off.
• Is All lock set? 3 P153
The display gets dark, and indication disappeared. • Is the handset in power saving mode? 3 P42
"Battery Status: Very Low Recharge Battery" is
displayed, and alarm is heard.
• The battery is almost discharged. Charge the
battery. 3 P54
Calls cannot be made by entering a phone number. • Is Self-mode set? 3 P155
After dialling a number, you hear a busy tone and
cannot establish your call.
• Have you dialed the area code? 3 P66
• Did you hear the dial tone before dialling? 3 P66
• Is "No service" indicated? 3 P41
Mail reception is announced by other than the set ring
tone.
• Is the mail from the partner whom you registered
the ringer tone in the phonebook? 3 P104
The image/melody set in each function does not
display/play, and operates in default setting.
• Is the same UIM as the one acquired the picture or
the melody attached? 3 P50
The progress of synchronization is displayed.
Condition of the task is displayed.
• Tap [Stop] to cancel the performing synchronization.
• Tap SyncML 3 Disconnect on the Menu bar to disconnect the
communication.
00M1000EN.book 510 ページ 2004年11月24日 水曜日 午前7時56分
511
Appendix
Error Message List
The icon indicating the network state shows the
handset is out of network coverage, and you cannot
use the global roaming service.
• You are outside the service area of global roaming
service, or in an area with poor signal strength.
• Please check with "Network Service Operation
Guide" or the homepage of WORLD WING to see
whether the service area or the operator is the one
you can use.
• Please switch to a corresponding network. 3 P515
Neither a Video Call, a short message service (SMS),
nor a packet communication can be used.
• Please check with "Network Service Operation
Guide" or the homepage of WORLD WING to see
whether the service area or the operator is the one
you can use.
• Please switch to a corresponding network. 3 P515
Cannot receive either a voice call or a video call. • Is Incoming call barring when roaming set? 3
P516
After returning from overseas, the icon indicating the
network state remains displaying no service.
• Is the network set for GSM/GPRS system? 3
P515
Displayed Messaget Description Reference
This software cannot be
installed as the installation
file is corrupt
The application was not able to install, since the file is
corrupt.
P362
Application was not able to
install since there is
insufficient memory in the
handset. Please delete an
unnecessary file and try
again
There is insufficient memory for the specified installation.
Delete some files and restart the installation.
P363
Cannot find specified
memory card. Check if the
memory card is properly
inserted
Application was not able to uninstall due to an error. P363
The download was aborted
due to an error
Was not able to download due to an error. P211
Delete or move internal files
to the memory card
A photograph cannot be taken since the memory in the
FOMA handset is full. Please either move to the external
memory, or delete unnecessary picture/video.
P307, 308
Move or delete some files A photograph cannot be taken since the memory in the
FOMA handset is full. Please either move to the external
memory, or delete unnecessary picture/video.
P307, 308
Captured file could not be
stored
The picture/video taken was not able to save due to an error. P169, 170
Folder changed to default
external folder
The specified folder was not correct, so the default external
folder is opened.
P303
Camera could not be
accessed. The application
will close
The camera application is closed due to an error. P169
00M1000EN.book 511 ページ 2004年11月24日 水曜日 午前7時56分
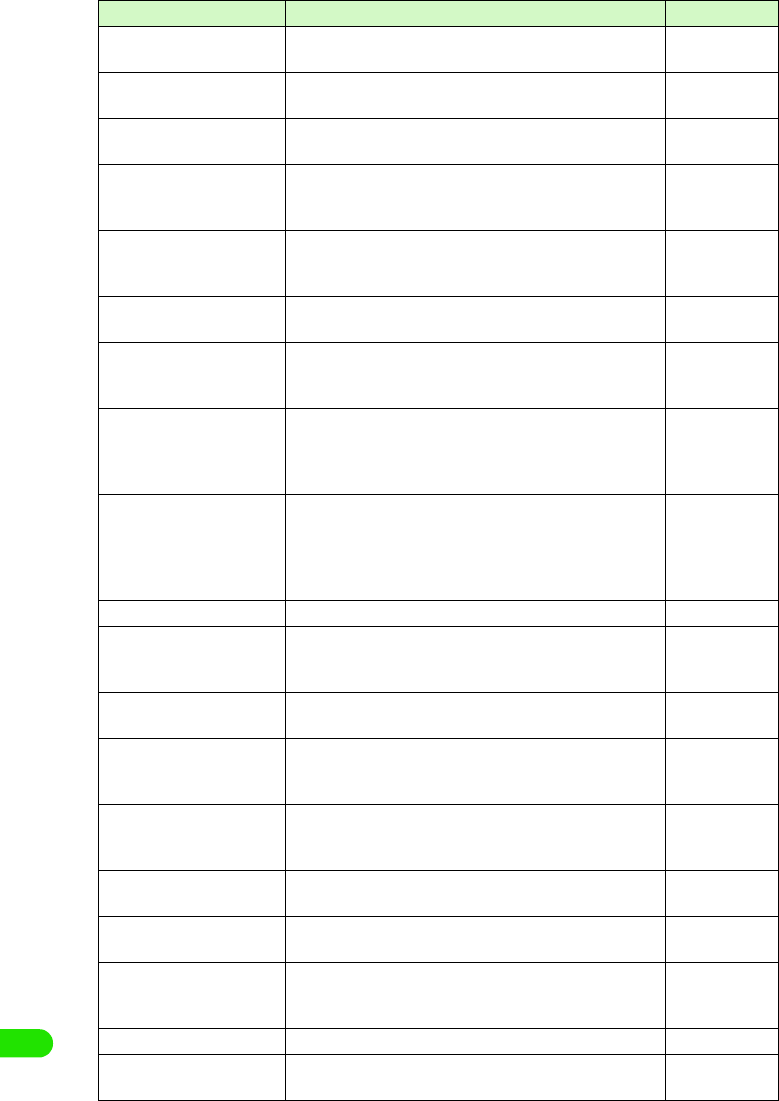
512
Appendix
Not all contacts were
deleted successfully
Certain contacts were not able to delete. P113
Not all contacts were copied
successfully
Certain contacts were not able to copy. P115
Not all contacts were moved
successfully
Certain contacts were not able to move. P115
Contact can't be saved.
Please enter name.
This message displays when you attempt to save a contact
without entering a name. Please try saving again after
entering a name.
P99
Illegal characters. Contact
was updated.
When you attempt to save a contact that includes characters
that cannot be saved to UIM, the data will be changed and
then saved.
P105
USB cable not connected. Since the USB cable is not connected to the FOMA handset,
it cannot connect to a PC.
P414
Failed to connect to PC via
USB. Check the settings on
the PC.
FOMA handset cannot be connected to a PC via USB. P417
Do you want to enable
Bluetooth?
This message is displayed when attempting to connect
FOMA handset with a PC using Bluetooth, and an available
device is not set.
Please tap [Yes], and set the available device.
P382
Your preferred device cannot
be found. Make sure it is
turned on and in-range.
Alternatively change your
preferred device.
This message is displayed when attempting to connect
FOMA handset with a PC using Bluetooth, and an available
device is not set. Please tap [Update], and you can select
another device from the list of available devices.
P382
Check Failed The check on a short message (SMS) failed. P263
A handset is trying to
connect in order to transfer
an entry.
Other handset is trying to connect to the FOMA handset in
order to transmit data. Tap [Accept] to receive the data with
Bluetooth.
P385
The file name already exists This message is displayed when you attempt to change a file
name to the one already exist. Please use other file name.
P304
Enter a name for the track This message displays when you attempt to change a music
file name without entering anything. Please enter a file
name.
P304
This application's file is
damaged and has been
deleted
The dameaged data in notes is deleted. -
TV Phone is not available You are not in an area where a Video Call can be used. You
can make a voice call by tapping [Voice].
P89
Failed to connect Video call cannot be made due to an error. You can make a
voice call by tapping [$$Voice].
P89
Video call cannot be dialed
in an active audio call
This message displays when attempting to make a video call
during a voice call. You can make a voice call by tapping
[$$Voice].
P89
Failed A setup of network service failed due to an error. -
Failure Network failure Failed a network search for setting up a network, due to an
error.
-
Displayed Messaget Description Reference
00M1000EN.book 512 ページ 2004年11月24日 水曜日 午前7時56分
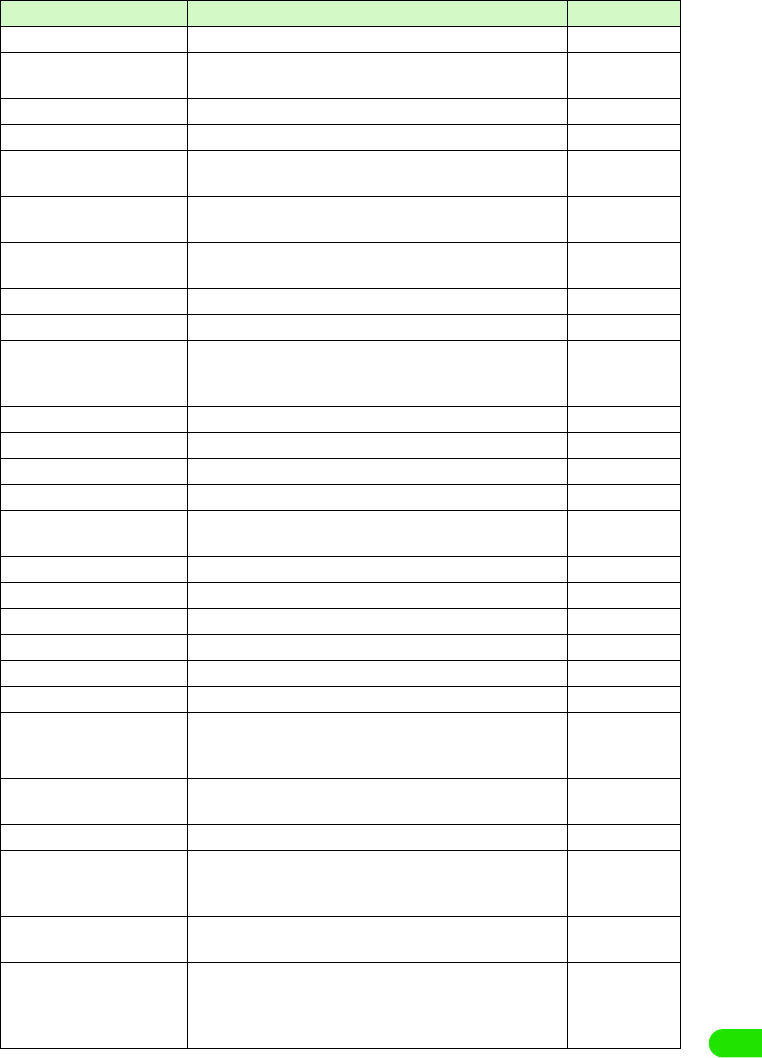
513
Appendix
Failure Other Phone is Busy The other phone is busy when switching Dual Network. P373
Failure Invalid Network
Password
The password for the network is incorrect. P146
Network password incorrect The password for the network is incorrect. P146
Not Subscribed The network service is not subscribed. -
Failure Network already
exists
The network attempted to be registered already exists in the
preferred list.
-
List full Please delete an
entry first
The preferred list is full. -
Failure Emergency only Either network cannot be found, or manual network selection
is cancelled.
-
Failure No Service The network cannot be used, -
Incorrect password PIN is not correct. P147
Incorrect password PIN will
be blocked if next attempt
fails
Reentered PIN is not correct. P147
PIN is blocked PIN is locked. P151
None of UIMs is selected UIM is not selected. -
UIM selection failed An error occurred with the UIM. -
Unknown document file type It is a file not supported. P289
The document is faulty, and
could not be converted
An error occurred with the file. P289
Image could not be loaded Image could not be loaded due to an error. -
Image is too large to operate The image is too large to display or edit. P275
Image could not be moved Image could not be moved due to an error. -
Image could not be renamed Image could not be renamed due to an error. -
Image could not be deleted Image could not be deleted due to an error. -
Unable to play clip. Unable to play clip due to an error. -
Enter a name for the clip. This message displays when you attempt to change a clip
file name without entering anything. Please enter a file
name.
P304
Unable to update pattern
definitions.
Failed to update pattern definitions of virus scan due to an
error.
-
Cannot use pattern scanner. Initialization of virus scan failed due to an error -
The total data amount
exceeds the specified
threshold.
The total packet data sent and received exceeded the
specified threshold.
P349
A certificate must be
selected.
A certificate needs to be selected. P220
Client certificates are not
available. Network
authentication cannot be
configured.
Either a certificate does not exist, or the certificate has
expired, so it cannot be used.
P220
Displayed Messaget Description Reference
00M1000EN.book 513 ページ 2004年11月24日 水曜日 午前7時56分
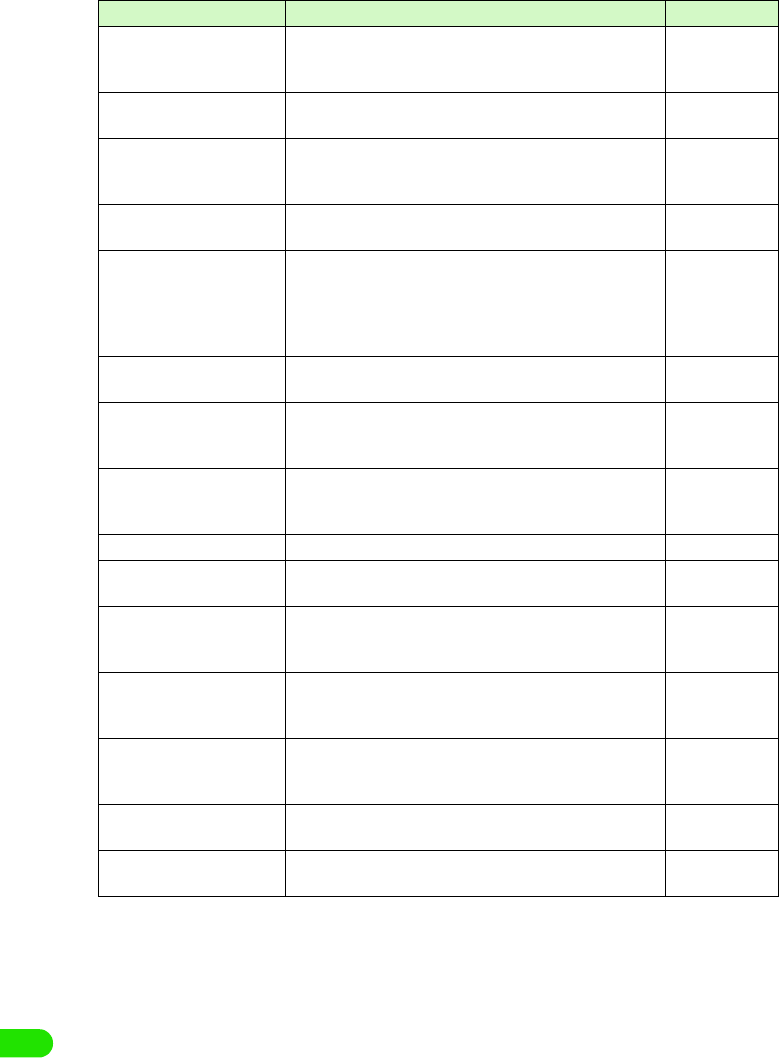
514
Appendix
A problem occurred during
the automatic settings
update
Downloading quickstart failed due to an error. -
Failure Device settings not
reset
Master Reset failed due to an error. -
Failure User data not
cleared Device settings not
reset
Master Clear failed due to an error. -
Bad name It is a name that cannot be registered in TransFlash memory
card.
P302
Switch off light must be less
than or equal to the time to
Power down screen
It will be adjusted
accordingly
The time for Power down screen in power saving mode
cannot be set up shorter than the time for switch off light.
Please reset the time again.
P136
Battery Status: Very Low
Recharge Battery
Low battery. Please charge. P54
You cannot delete the ……
folder because it still has
items in it.
The folder could not be deleted since it has data in it. P303
Your handset is low on
memory. Do you want to
create some space now?
The memory capacity of FOMA handset is insufficient. Tap
[Yes] to display the screen for deleting unnecessary files, or
the memory manager.
P311
Disk is full The memory is full. Delete unnecessary files. P311
This file is damaged and
can't be used.
The file is damaged, so it cannot be used. -
This application's file is
damaged and has been
deleted.
The file is damaged, so it has been deleted. -
Failed to read the user
dictionary. Are you sure you
want to initialize?
Failed to read the user dictionary. Tap [OK] to initialize and
activate.
P484
Failed to read the learning
dictionary. Are you sure you
want to initialize?
Failed to read the learning dictionary. Tap [OK] to initialize
and activate.
P490
Invalid Battery Unable to
Charge Battery
An invalid battery pack is used. Please use an appropriate
battery pack.
P52
No viewer can be found on
your device to open this file.
It is a file type that cannot be supported. Tap [Save] to be
saved in FOMA handset.
P250
Displayed Messaget Description Reference
00M1000EN.book 514 ページ 2004年11月24日 水曜日 午前7時56分

515
Appendix
Warranty and After-sales Service
Warranty
• A written warranty is provided with every FOMA handset; make sure that you receive it. Store the warranty in
a safe place when you have read it and checked that it contains the "shop name/date" you purchased it. If it
does not contain the necessary information, contact the shop where you bought it. The warranty is valid for
a period of one year from the date of purchase.
• This product and all accessories are subject to change, in part or whole, for the sake of improvement without
prior notice.
After-sales Service
When Problems Occur
Before requesting service, read the section "Troubleshooting".
If the problem still persists, contact one of the numbers described in "Contacts" at the back cover
of this manual.
If the Result of Inquiries Indicates that a Repair is Required
Take your FOMA handset to a service center designated by DoCoMo. Be sure to check the
opening hours of the service center. Note that you must present the warranty.
1In the warranty period
• The FOMA handset will be repaired at no charge subject to the conditions of the warranty.
• The warranty must be presented to receive warranty service. The subscriber will be charged for the repair
of items not covered in the warranty or repairs of defects resulting from misuse, accident or neglect even
during the warranty period.
• The subscriber is charged even during the warranty period for the repair of failures caused by the use of
devices or consumable items that are not DoCoMo-specified.
1Repairs may not be possible in the following cases:
• Repair is not possible when corrosion due exposure to moisture, condensation or perspiration is detected
in a moisture seal reaction or test, or if any of the internal boards are damaged or deformed. Since these
conditions are outside the scope of the warranty, a repair, if at all possible, will be charged.
1After expiration of the warranty
• All repairs that are requested are charged.
1Replacement parts
• Replacement parts (parts required to maintain product function) will be kept in stock for at least 6 years
after termination of production. The product can be repaired during this period. Depending on the nature
of the required repair, it may still be possible to repair your phone even after this period, so please contact
one of the numbers described in "Contacts" at the back cover of this manual.
Notes
• Do not modify the FOMA handset, the UIM or its accessories.
00M1000EN.book 515 ページ 2004年11月24日 水曜日 午前7時56分
516
Appendix
- Fire, injury or damage may result.
- In order to prevent interference of radio waves or network breakdown, the FOMA handset and UIM are
manufactured according to technical standards stipulated by law. Do not use FOMA handsets or UIMs that
do not meet these standards.
- If the FOMA handset is modified (part replacement, modification, painting, etc.) it will be repaired only after
the modified parts have been restored to the condition at the time of purchase. However, repair may be
refused depending on the nature of modification.
- Repair of failures or damage caused by modification are charged even during the warranty period.
• Do not remove any inscription stickers attached to the FOMA handset. The inscription stickers certify that the
FOMA handset satisfies specific technical standards. Note that if stickers are removed intentionally or are
reattached in such a way that confirmation of the sticker's contents is impossible, repair or servicing may be
refused because confirmation of whether or not the phone conforms to relevant technical standards cannot
be made.
• The ON/OFF function settings and stored data may be cleared (reset) by failure, repair or handling processes.
Should this happen, set up the functions again.
• Magnetic components are used in the earpiece and speaker of the FOMA handset. Do not allow cash cards
or other devices that are vulnerable to magnetism to come into contact with the phone.
• If the handset becomes wet or moist, turn the power off and remove the battery pack immediately and bring
the handset to our repair office as soon as possible. However, repair may not be possible depending on the
condition of the handset.
Phonebook, Downloaded Data and IC Card Data
• Maintain a separate record of the data you register in your FOMA handset. DoCoMo will not accept any
liability and responsibility whatsoever for changes of information or loss of information.
• Data created, imported or downloaded by the subscriber may be lost or become corrupted when changing
the model or repairing mobile phone or carphone. DoCoMo may, at its option, repair a mobile carphone by
replacing it. In such an event, it will not be possible, to transfer the data (except some data) to the new
handset. DoCoMo will not accept any responsibility.
Scan Function
Protecting the Handset from Data that can Cause Damage
By using the Scan Function, FOMA handset can perform a virus scan in FOMA handset or a
TransFlash memory card. When it is found infected from a result of a virus scan, the virus can be
cleansed immediately.
• The scan cannot be performed when another application is in use.
aTap $$ y $$ on the Application Selector bar
Last Scan : Displays the date of the last scan.
Last Update : Displays the date of the last update of the
pattern file.
00M1000EN.book 516 ページ 2004年11月24日 水曜日 午前7時56分
517
Appendix
bTap [$$Start scanning]
cTap $$ y [OK] of the media you are scanning
dTap [OK]
The scan starts, and the result is displayed when the scan completes.
• Tap [Cancel] to cancel the start of scanning.
• Tap [Cancel] to cancel the scan during a scan.
Updating the Virus Pattern File
Virus scan uses the virus pattern file in order to distinguish viruses. By updating the virus pattern
file, it would make it possible to scan new viruses.
aTap $$ y $$ on the Application Selector bar, and tap [Update]
from the virus scan screen
All media : Scans both FOMA handset and TransFlash
memory card.
Internal memory
: Scans FOMA handset.
Card name : Scans TransFlash memory card.
• When a TransFlash memory card is not attached, the selection
screen for the media would not be displayed. It will skip to
Step 4.
• Tap [Cancel] to cancel the start of scanning.
00M1000EN.book 517 ページ 2004年11月24日 水曜日 午前7時56分
518
Appendix
bTap [OK]
cTap [OK]
The phone ID is transmitted, and the update starts.
• Tap [Cancel] to cancel the transmission of the phone ID.
• Tap [Cancel] y [OK] to cancel the update.
dTap [OK]
The update completes.
NOTE
• When the pattern data is updated, SSL communication is performed to the server (the site of our company).
Please enable the SSL certificate. 3P195
• When the pattern data is updated, the unique information (model, serial number, etc.) of your handset is
automatically transmitted to our server (the server that our company manages for the scanning function). We
do not use the transmitted information for any purposes other than the scanning function.
• Please set the date (year, month, and day) of your FOMA handset correctly.
• In case an update of a virus pattern file fails, please redo the update from the beginning.
• If the virus pattern file in the handset is the latest one, a message is displayed indicating that the pattern file
is the newest.
• Tap [Cancel] to cancel the update.
00M1000EN.book 518 ページ 2004年11月24日 水曜日 午前7時56分
519
Appendix
1Functions and data that can be scanned
1When infected with a virus
If a virus is detected during a scan, the confirmation screen for deleting the virus will be
displayed.
1When the scan completes
When the scan completes, a screen with the result of the scan is displayed.
•
[Si
nce t
h
e spec
ifi
cat
i
on
i
s not
d
ec
id
e
d
yet,
d
eta
il
i
s om
i
tte
d
.
]
• Tap [Delete] or [OK] to delete the detected virus, and to resume the scan.
• Tap [Skip] to resume the scan without deleting the detected virus.
No virus Virus deleted Virus not deleted
00M1000EN.book 519 ページ 2004年11月24日 水曜日 午前7時56分
520
Appendix
Tap [Details] in the result screen shown at virus detection to display details on the scan.
Checking the Version of the Virus Pattern File
The detailed information on virus scan application is displayed, and the version of a virus pattern
file can be checked.
aTap in the sequence of $$ y $$ on the Application Selector bar,
and tap Virus Scan on the Menu bar y About Virus Scan
Application name and the version of the virus pattern file are
displayed.
$$
: The virus has been deleted.
$$ : The virus has not been deleted.
• Select a file name and tap [Details] to notify the infected file, name
of the virus, and the status of the virus (deleted/deleted or not) .
The name of infected file
00M1000EN.book 520 ページ 2004年11月24日 水曜日 午前7時56分

00M1000EN.book 522 ページ 2004年11月24日 水曜日 午前7時56分

About Proper Telephone Etiquette
Do not disturb people around you when using your FOMA handset.
Always turn OFF your FOMA handset in the following situations:
1In a location where use of handsets is prohibited
There are places where you cannot use a handset. Always turn OFF your FOMA handset when:
• In an airplane • In a hospital
* Be aware that patients use electronic medical equipment in many areas in hospitals. Your
FOMA handset must be switched off even in lobbies or waiting rooms.
1While driving
Using your FOMA handset while driving could affect safe driving and cause danger.
* Stop your car in a safe place before using your FOMA handset or use Drive Mode.
1While in a crowded train where there may be a person who uses an implanted cardiac
pacemaker or cardioverter defibrillator near you.
1Use of the handset could adversely affect the operation of an implanted cardiac
pacemaker or cardioverter defibrillator.
1While in public places such as a concert hall, movie theater or art museum
Using your FOMA handset in quiet public places will likely bother other people.
Match the volume of your voice and your FOMA handset's ring tone to
your location
1In a quiet location like a restaurant or hotel lobby, pay attention to the volume of your
voice and ring tones, etc. when using your FOMA handset.
1In town areas, while using your FOMA handset, be sure not to block foot or vehicular
traffic.
Consider privacy
Give consideration to privacy before shooting or sending images with a mobile phone
with a built-in camera.
"Silent" functions designed for public use
Your FOMA handset has a number of useful "silent" functions designed for public use, such
as a setting that instructs your handset not to answer incoming calls and the ability to set the
handset for silent operation.
2Manner Mode
Mutes all sounds your FOMA handset makes, such as keypad sound and ring tones.
3P160
2Drive Mode
Plays a guidance to notify that you cannot answer the call because you are driving a car,
then disconnects the call. This mode ensures your safety while driving because no ring
tone sounds when a call is received. 3P79
2Vibrator
Vibrates when there is an incoming call. 3P155
2Voice message
Allows the caller to leave a message when you cannot answer the phone. 3P81
In addition to the above functions, optional services such as Voice Mail Service and Call
Forwarding Service are also available. 3P483, P488
00M1000EN.book 523 ページ 2004年11月24日 水曜日 午前7時56分
Exhibit 8D Users Manual

APPLICANT: MOTOROLA, INC. FCC ID: IHDT6EY1
INSTRUCTION MANUAL
A preliminary draft copy of the Users Manual follows in four parts (Exhibit 8A through Exhibit 8D):
EXHIBIT 8D

389
Using Data Communication
Data Communication from FOMA Handsets . . . . . . . . . . . . . . . . . . . . . . . . . 390
Before Using Data Communication . . . . . . . . . . . . . . . . . . . . . . . . . . . . . . . . 391
Preparing for Data Communication . . . . . . . . . . . . . . . . . . . . . . . . . . . . . . . . 393
Installing Connection Setup File (Drivers) for M1000. . . . . . . . . . . . . . . . . . 393
Checking Connection Setup Files (Drivers) . . . . . . . . . . . . . . . . . . . . . . . . . 394
Uninstalling M1000 Connection Setup Files (Drivers) . . . . . . . . . . . . . . . . . 395
Preparing for Bluetooth Connection . . . . . . . . . . . . . . . . . . . . . . . . . . . . . . . 396
FOMA PC Setup Software . . . . . . . . . . . . . . . . . . . . . . . . . . . . . . . . . . . . . . . . 397
Installing FOMA PC Setup Software. . . . . . . . . . . . . . . . . . . . . . . . . . . . . . . . 398
Setting up Data Communication. . . . . . . . . . . . . . . . . . . . . . . . . . . . . . . . . . . 399
Simple Setting "Packet Data Communication Setting Using Other ISP's" . 402
Executing the Set Connection . . . . . . . . . . . . . . . . . . . . . . . . . . . . . . . . . . . . 406
Uninstalling FOMA PC Setup Software . . . . . . . . . . . . . . . . . . . . . . . . . . . . . 407
W-TCP Setting . . . . . . . . . . . . . . . . . . . . . . . . . . . . . . . . . . . . . . . . . . . . . . . . . 408
Setting up APN. . . . . . . . . . . . . . . . . . . . . . . . . . . . . . . . . . . . . . . . . . . . . . . . . 410
Assigning COM Port . . . . . . . . . . . . . . . . . . . . . . . . . . . . . . . . . . . . . . . . . . . . 412
Displaying Dial-up Networking Type . . . . . . . . . . . . . . . . . . . . . . . . . . . . . . . 412
Setting up Dial-up Networking . . . . . . . . . . . . . . . . . . . . . . . . . . . . . . . . . . . . 413
Setting up Dial-up . . . . . . . . . . . . . . . . . . . . . . . . . . . . . . . . . . . . . . . . . . . . . . 419
Using Dial-up Networking . . . . . . . . . . . . . . . . . . . . . . . . . . . . . . . . . . . . . . . . 428
00M1000EN.book 389 ページ 2004年11月24日 水曜日 午前7時56分
390
Using Data Communication
Data Communication from
FOMA Handsets
You can perform three types of data
communication with your FOMA handset and
your PC; namely, packet communication, 64K
data communication and data transfer PC.
Available Data Communication Types
2Packet communication
Communication charges are based on the
volume of exchanged data.
Suitable when you wish to stay connected to
the network and exchange data on an as
needed basis.
Data can be transmitted with maximum
download speed of 384Kbps, maximum
upload speed of 64Kbps via network
supporting FOMA Packet communication
such as "mopera" (DoCoMo's Internet
provider service). The M1000 can also be
used for data communications overseas by
accessing GPRS access points.
• Performing large volumes of data
communication may result in high
charges.
264K data communication
Communication charges are based on the
duration of time being connected to the
network.
Stable 64K bps data transmission can be
performed via network supporting FOMA
64K data communication such as "mopera"
(DoCoMo's Internet provider service) or
synchronized ISDN 64K access points.
The M1000 can also be used overseas by
accessing CSD data communication
supported access points.
2Data transfer
Data can be transferred free of charge
between a PC and FOMA handset. The
FOMA handset can be connected directly
using the accompanying USB cable or by
connecting the desktop holder to a PC using
the USB cable. To transfer data, install the
Desktop Suite to the PC. 3P527
Connecting the FOMA Handset and PC
To connect your FOMA handset to a PC or
PDA either of the following methods can be
used.
USB Connection
2Connect with the accompanying-USB cable
3P414
• Separately sold FOMA USB cables can
also be used.
2Connect with USB cable for PC via
Desktop holder 3P415
Bluetooth Connection
2Connect via Bluetooth 3P419
• Device registration is required prior to
use. 3P382
Cautions
Internet Service Provider Charges
You will be charged by your Internet Service
Provider (ISP, hereafter) to connect to the
Internet. FOMA Service does not include the
ISP fee and it must be paid to the ISP directly.
Contact your ISP for further details.
"mopera", is DoCoMo's free Internet provider
service that does not require you to register.
Setting up ISP Connection
ISP settings differ between Packet
communication and 64K data communication.
Select appropriate access points for Packet
communication. For 64K data communication,
select an access point which supports FOMA
64K data communication or synchronized
ISDN 64K.
• Connection to DoPa is not supported
• Connection to PHS64K/32K Data Communication
such as PIAFS is not supported.
00M1000EN.book 390 ページ 2004年11月24日 水曜日 午前7時56分
391
Using Data Communication
User Authentication when Accessing the Network
Connection may require authentication (ID
and password). Enter the user ID and
password in Dial-up Network when prompted.
Contact the network administrator or the ISP
to obtain the ID and password, and further
details.
Prerequisites to Packet Connection and
64K Data Communication
Communication using FOMA handsets
requires meeting the following conditions. The
service, however, may be unavailable even if
required conditions are met due to traffic
conditions at base stations or radio wave
conditions.
• PC must support USB cables
• For Bluetooth connection, devices such as PC has
must comply with Bluetooth Ver1.1 Dial-up
Networking Profile standards.
• To be within the FOMA service area
• For Packet communication, the access point must
support FOMA Packet communication
• For 64K data communication, the access point
(the designated network) must support FOMA
64K data communication or 64K synchronized
ISDN.
1Data communication terminologies
APN
Stands for Access Point Name. Identifies
the network to log in (ISP or LAN) for Packet
communication. DoCoMo's Internet
connection service mopera's APN is
"mopera.ne.jp".
Bluetooth ON 3P382
Bluetooth device registration 3P382
cid
Stands for Context Identifier. APN
registration number is registered in FOMA
made up of digits 1 to 10. Up to ten APN's
can be registered.
DNS
Stands for Domain Name System
The system converts an address made up
of digits identified by computers to a 'name'
such as "mopera.ne.jp" for easier
recognition by human.
QoS
Stands for Quality of Service and indicates
quality of network service. Data
transmission speed can be specified on a
FOMA handset.* 3P461
*: The actual data speed may vary by
depending on network conditions.
W-TCP
TCP parameters that optimize TCP/IP
transmission capability during Packet
communication over FOMA network.
Optimization of TCP parameters is
necessary in order to generate the
maximum FOMA communication
capabilities.
Administrator rights on PC
Full access rights to Windows XP and
Windows 2000 systems. All other users do
not have rights to install drivers (connection
setup files).
[
Before Using Data
Communication
PC System Requirements
PC System requirements for data
communication are as follows:
*: Required memory and HDD space may depend
on PC system specifications.
Item Requirement
PC main unit • PC-AT compatible machine with
a CD-ROM drive
• USB Port (Universal Serial Bus
Specification Rev1.1/2.0
compliant)
• Display Resolutions 800 ×600
dots, High Color(65,536Colors)
or higher recommended
OS • Windows 98, Windows Me,
Windows 2000, Windows XP
(Japanese Version)
Memory • Windows 98, Windows Me:32MB
or more*
• Windows 2000:64MB or more*
• Windows XP:128MB or more*
HDD space • 5MB of available space or more*
00M1000EN.book 391 ページ 2004年11月24日 水曜日 午前7時56分
392
Using Data Communication
NOTE
• Data communication may not be enabled
subject to system properties. DoCoMo does not
guarantee proper operations nor respond to
inquiries when used with system requirements
that are not mentioned above.
Connecting PC and FOMA Handsets
Setting up connection with a USB cable is
described in this section.
The FOMA handset can be connected directly
using the accompanying FOMA USB cable or
by connecting the desktop holder using the
PC USB cable.
To Connect Using the Accompanying
FOMA USB Cable
aRemove the cap covering the
external connection interface of the
FOMA handset
bConnect the accompanying USB
connector to a USB port on the PC
cMatch the direction of the external
connector of the accompanying
USB cable with the external
connection interface on the FOMA
handset and insert the connector
straight
Once the connection is established, the
FOMA handset displays "USB cable
connected".
NOTE
• Use the accompanying FOMA USB cable or a
FOMA USB cable sold separately. Do not use
general PC USB cables as the connector
interface does not match the shape of FOMA
external interface.
• Do not apply force to the connector when
inserting. The connectors can only be inserted
in the correct direction and at the correct angle.
When inserted correctly, the connectors can be
inserted smoothly. In case of difficulty in
inserting confirm the orientation of the
connectors.
1Removing the USB cable
Connecting a General PC USB Cable to a
Desktop Holder
The desktop holder enables data
communication by connecting the FOMA
handset to both the PC and the AC adapter.
• Use a general USB cable with connectors that
support USB Rev1.1/2.0 Series A compliant.
Screen
aPull the USB cable out straight while
holding down the release button on
the external connector.
bPull out the USB cable from PC
Screen
00M1000EN.book 392 ページ 2004年11月24日 水曜日 午前7時56分
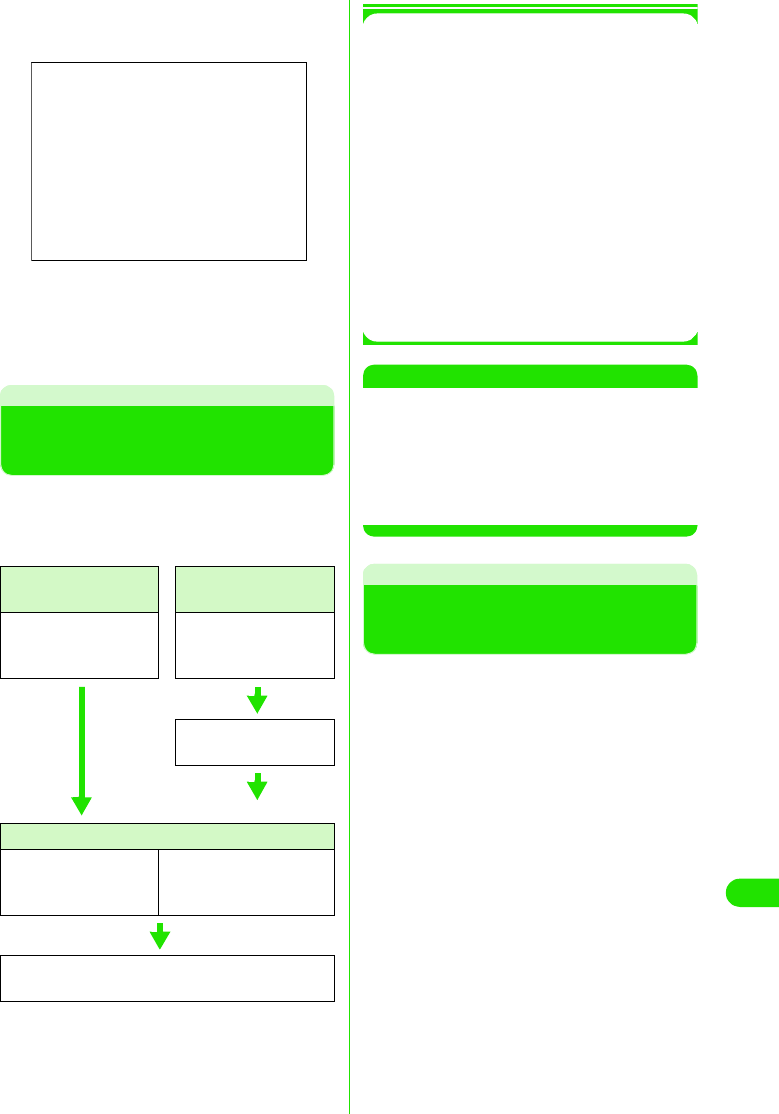
393
Using Data Communication
aConnect Desktop holder to a PC by
using the PC USB cable
bAttach the FOMA handset to the
desktop holder
See P54 on how to attach/remove.
Preparing for Data
Communication
Preparations for packet communication/64K
data communication by connecting the FOMA
handset with the PC is described in this
section.
*: Connection setup file (drivers) installation is not
necessary if a Bluetooth modem other than that
of FOMA handsets has already been installed.
Go on to set up connection details. See P417 to
check for an installed Bluetooth modem.
1About Connection setup file (drivers)
and FOMA PC setup software
Connection setup file (drivers) and FOMA
PC setup software are included in the
FOMA M1000 CD-ROM.
• M1000 setup file is the driver software for
Packet communication, 64K data
communication or data transfer used for
connecting the FOMA handset with the
accompanying FOMA USB cable to a PC.
M1000 setup file installs necessary drivers to
Windows.
• FOMA PC setup software enables easy setup
of Packet communication, 64K data
communication or Dial up networking.
NOTE
• If "FOMA M1000 USB" is not displayed in
"Uninstall M1000 setup file (drivers) "( 3P418),
the installation has failed. Run uninstallation
(3P418) and try installation again.
• Uninstall driver if PC does not recognize the
FOMA handset for some reason and install it
again.
Installing Connection Setup
File (Drivers) for M1000
• Install all drivers in one attempt when installing the
M1000 setup file. Installation may be unsuccessful
if the accompanying FOMA USB cable is pulled
out, or if [Cancel] is clicked during installation. If
installation is unsuccessful, use uninstall
procedures to delete the M1000 setup file by
following uninstall procedures (3P418), and try
installing again.
• Log in as a user with administrator rights when
installing the M1000 communication set up file to
Windows 2000 or Windows XP. Contact the PC
manufacturer or Microsoft regarding operations
related to administrator rights settings.
Via USB connection Via Bluetooth
connection*
Install connection setup
file (drivers) 3P416
Connect the FOMA
handset with PC
3P419
Install connection setup
file (drivers)*3P416
Set up connection details
To set up using the
FOMA PC setup
software 3P419
To set up without using the
FOMA PC setup software
3P436
Connect 3P429, P451
Disconnect 3P430, P452
Screen
00M1000EN.book 393 ページ 2004年11月24日 水曜日 午前7時56分

394
Using Data Communication
【仕様未定につき、記載省略します。】
Checking Connection
Setup Files (Drivers)
Checking whether the M1000 setup file is
installed properly.
aLaunch the “コントロールパネル ”
(Control Panel) in Windows
1Windows XP
Click “スタート” (Start) y “コントロール
パネル” (Control Panel)
1Windows 2000, Windows Me or
Windows 98
Click “スタート” (Start) y “設定”
(Settings) y “コントロールパネル”
(Control Panel)
bLaunch the “システム” (Systems) in
“コントロールパネル ” (Control
Panel)
1Windows XP
Click “システム” (Systems) in “パフォー
マンスとメンテナンス” (Performance
and Maintenance)
1Windows Me
Click “すべてのコントロールパネルのオ
プションを表示する” (Show all options
in Control Panel) if “システム” (Systems)
icon is not displayed in the “コントロー
ルパネル” (Control Panel).
cLaunch the Device Manager
1Windows XP or Windows 2000
Click “ハードウェア” (Hardware) tab
then click “デバイスマネージャ” (Device
Manager).
1Windows Me or Windows 98
Click “デバイスマネージャ ” (Device
Manager) tab
dCheck installed driver names by
clicking each device
Check whether all drivers are listed under
“ポート(COMとLPT)” (Port(COM and
LPT), “ユニバーサルシリアルバス”(USB)
“コントローラ” (USB Controller) and “モデ
ム” (Modem).
00M1000EN.book 394 ページ 2004年11月24日 水曜日 午前7時56分
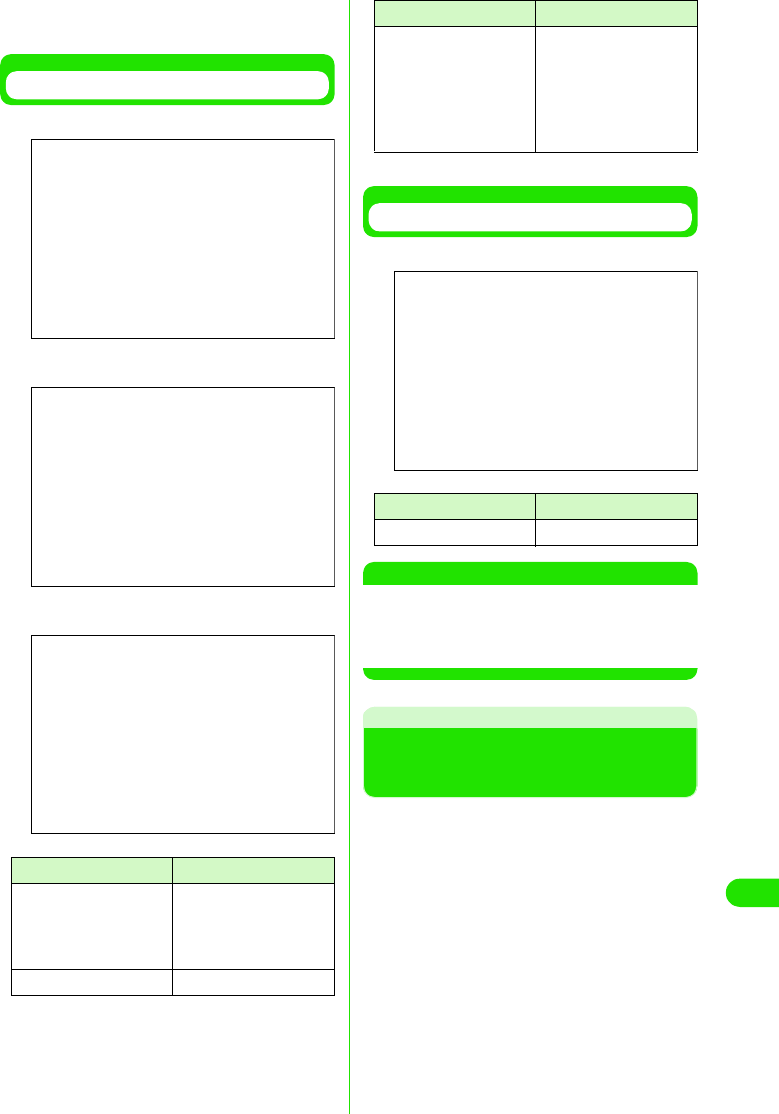
395
Using Data Communication
Go to "Using FOMA PC Setup Software"
(3P419) if all driver names are found.
Connecting with USB
*: only for Windows Me/98
Connecting with Bluetooth
NOTE
• Upon verifying above, if the list of driver names
is incomplete, delete the M1000 setup file by
following uninstall procedures, and try installing
again.
Uninstalling M1000 Connection
Setup Files (Drivers)
Follow the procedures below when
uninstalling of drivers is necessary. The
uninstall instructions below are for Windows
XP.
Device name Driver name
Port (COM/LPT) • FOMA M1000
Command Port
• FOMA M1000 OBEX
Port
Modem • FOMA M1000
(Windows XP)
Screen
(Windows 2000)
Screen
(Windows Me, Windows 98)
Screen
Universal Serial Bus
(USB) Controller or USB
(Universal Serial Bus)
Controller
•FOMA M1000
• FOMA M1000
Command*
• FOMA M1000
Modem*
• FOMA M1000 OBEX*
Device name Driver name
Modem To be decided
Device name Driver name
(Windows XP)
Screen
00M1000EN.book 395 ページ 2004年11月24日 水曜日 午前7時56分
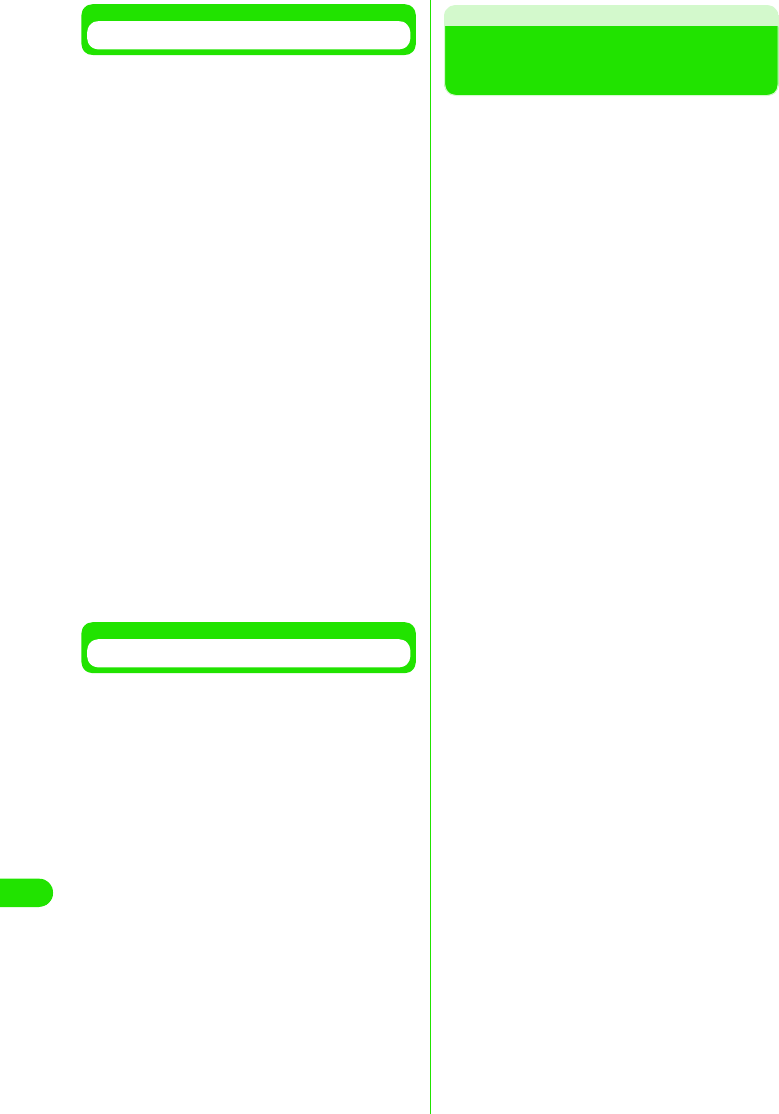
396
Using Data Communication
Connecting with USB
【仕様未定につき、記載省略します。】
Connecting with Bluetooth
【仕様未定につき、記載省略します。】
Preparing for Bluetooth
Connection
【仕様未定につき、記載省略します。】
00M1000EN.book 396 ページ 2004年11月24日 水曜日 午前7時56分
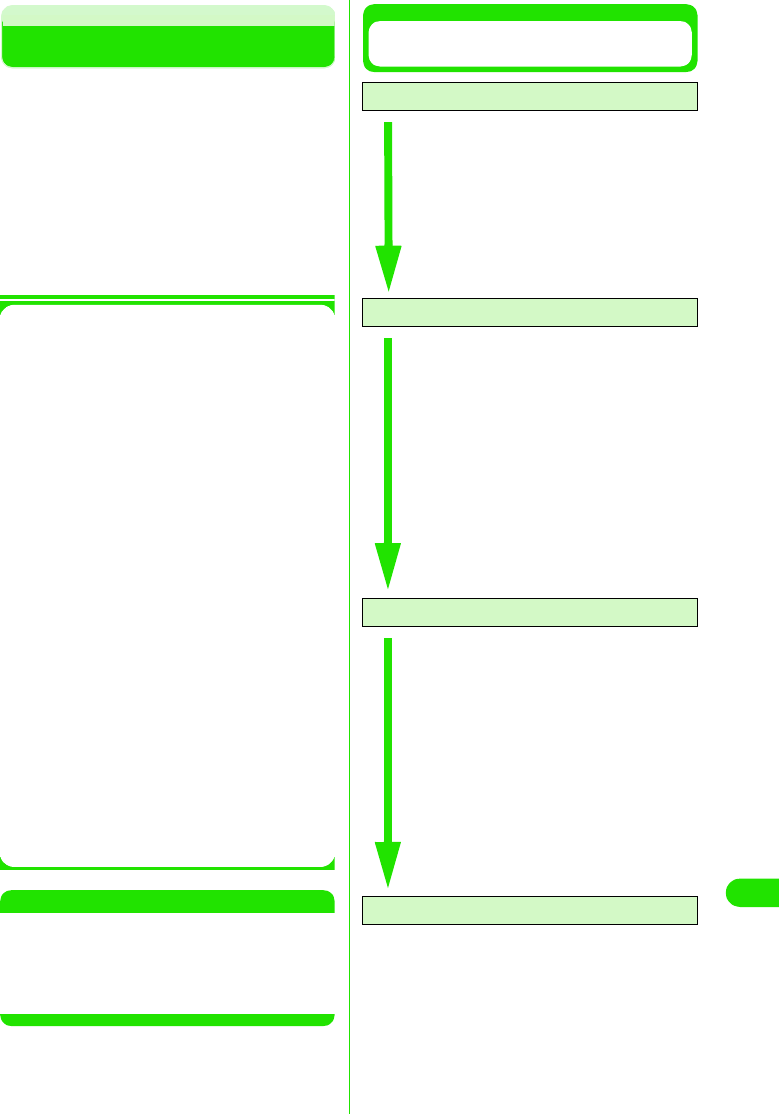
397
Using Data Communication
FOMA PC Setup Software
Packet communication or 64K data
communication from FOMA handset to PC
requires various settings. FOMA PC setup
software enables easy configuration simple
operations.
• Packet communication or 64K data
communication can be set up without using FOMA
PC setup software. 3P436
• See P414 for connection between FOMA
handsets and PC
Simple settings
Follow the guidance to set up "Create
FOMA data communication Dial-up
Network" while configuring "W-TCP
settings" etc. automatically.
W-TCP settings
The communication settings in PC are
optimized before using "FOMA Packet
communication".
Optimizing W-TCP settings is required in
order to maximize connection
performance.
Setting up Access Point Names (APN)
Access Point Names for Packet
communication need to be setup.
Unlike 64K data communication, FOMA
Packet communication does not require
use of a telephone number. Register
Access Point Names in FOMA handset
and connect to the network by
designating its registered number (cid) in
the access telephone number field.
"mopera" is pre-registered as
mopera.ne.jp, the first in the cid list by
default. Set up APNs to connect to other
ISP's or LAN's.
NOTE
• If W-TCP setup software or FOMA data
communication setup software not included in
the bundled FOMA M1000 CD-ROM have
already been installed, uninstall them prior to
installing the FOMA PC setup software.
Procedures from Installation of FOMA PC
Setup Software to Internet Connection
Step1: Install software
FOMA PC setup software is installed
• Uninstall "old W-TCP setup software",
"old APN setup software" or older
versions of "FOMA PC setup software"
before installing "FOMA PC setup
software".
"FOMA PC setup software" cannot be
installed if "old W-TCP setup software"
or "old APN setup Software" is installed.
Step2: Prepare before setting up
Preparations are conducted prior to
setting up
• Check that FOMA handset is connected
to the PC and is acknowledged by the
PC.
• See P414 for connecting FOMA handset
with PC.
• If FOMA handset is not properly
acknowledged by PC, various setup and
data communication cannot be done. If
the FOMA handset is not acknowledged
then see P416 to install the connection
setup file.
Step3: Perform various settings
Setup is done according to the
desired type of data communication
• Configuring simple settings
- Packet communication setting using
"mopera" 3P423
- Packet communication setting using
other Internet Service Providers
3P424
- 64K data communication setting using
"mopera" 3P427
- 64K data communication using other
Internet Service Providers 3P428
- See P436 onwards for all other
settings.
Setup 4: Connect
Connection to the Internet is made
• See P429 for connection procedures.
00M1000EN.book 397 ページ 2004年11月24日 水曜日 午前7時56分
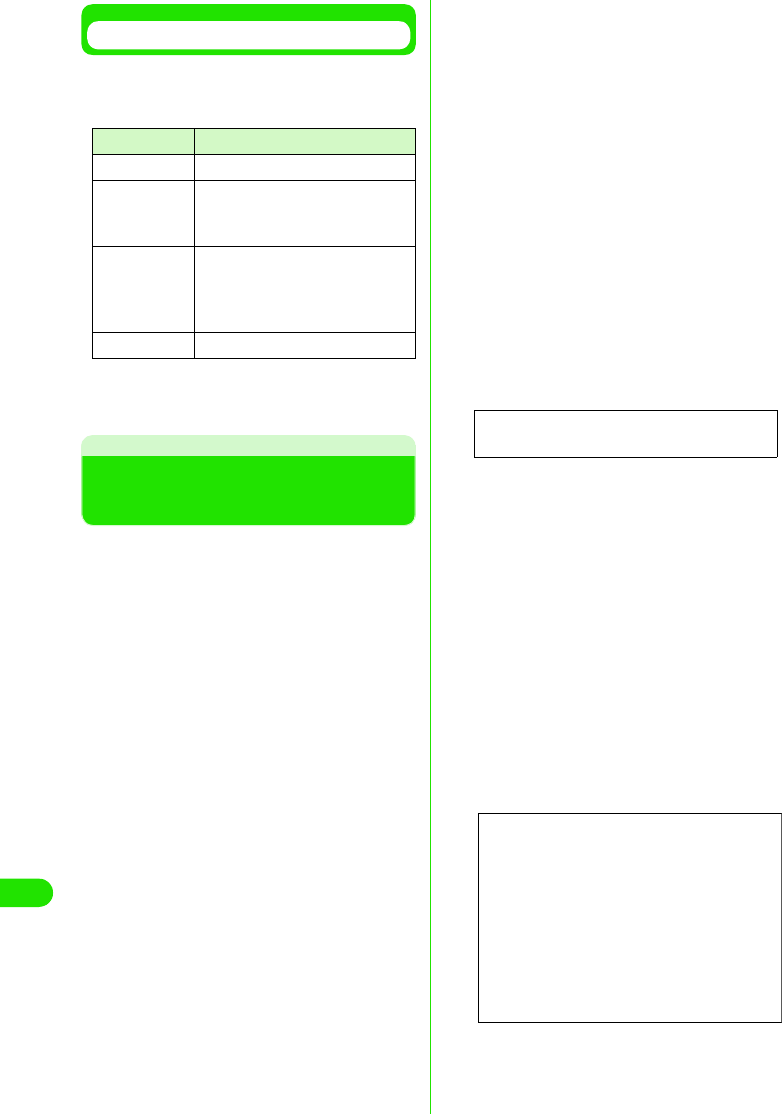
398
Using Data Communication
Before Installing
Check the system requirements.
• Use the FOMA PC setup software under the
following system requirements.
*: Required memory and HDD space may vary
depending on the system configuration of the
PC.
Installing FOMA PC Setup
Software
• Log in with the user account with Administrator
rights to install ("FOMA PC setup software") on
Windows XP or Windows 2000. Contact the PC
manufacturer or Microsoft regarding administrator
rights setting.
• Check that no resident program or application is in
use before installation. If any program is in use,
click [キャンセル] (Cancel) to end the program
and start installation again.
a【仕様未定につき、記載省略します。】
b【仕様未定につき、記載省略します。】
If displayed screens show that old “W-TCP
設定ソフト” (W-TCP Setup Software) or
old “APN 設定ソフト” (APN Setup
Software) are installed, refer to P421.
cClick [はい ] (Yes/agree) to agree to
the End User License Agreement
after reading
Installation will be canceled if [いいえ] (No/
disagree)is clicked.
dClick [次へ ] (Next)
Select whether "W-TCP Setup Software"
stays in Task tray or not after setting up.
Selecting the checkbox (Remain in Task
tray) is recommended for the program to
set/release the optimization of "W-TCP
communication".
Select “タスクトレイに常駐する” (Remain
in Task tray) $$ and continue the installation
unless you have any particular problem.
Settings can be changed by clicking on “メ
ニュー ” (Menu) in FOMA PC setup
software and selecting “W-TCP 設定をタス
クトレイに常駐させる” (Set W-TCP
Software in task tray) even if “ タスクトレイ
に常駐する” (Stay in task tray) has been
deselected.
* You are unable to select if “ タスクトレイに常
駐する” (Remain in task tray) has been
selected.
Displays icon in the task tray on the bottom
right (normally) of the PC screen.
eVerify the installation folder and
click [ 次へ ](Next)
Click [参照] (Browse) to make changes,
specify desired installation folder, and click
[次へ] (Next).
If HDD lacks space, you can install to a
different driver. Otherwise, proceed
accordingly.
fVerify the folder name and click [ 次
へ] (Next)
Name the new folder and click [次へ] (Next)
if necessary.
Item Requirement
PC main body • PC-AT Compatible
OS • Windows 98, Windows Me,
Windows 2000, Windows XP
(Japanese Version)
Memory • Windows 98 or Windows Me:
32MB or more*
• Windows 2000: 64MB or more*
• Windows XP: 128MB or more*
HDD Space 5MB or more*
Screen
00M1000EN.book 398 ページ 2004年11月24日 水曜日 午前7時56分
399
Using Data Communication
gClick [ 完了 ] (Done)
"FOMA PC setup software" operation
screen is launched when setup is complete.
Proceed to each setup.
Precautions during Installation of
FOMA PC Setup Software
1If "old W-TCP setup software" is
installed
The following message is displayed.
Delete “旧W-TCP 設定ソフト” (Older
version of W-TCP Setup Software) from
Add/Delete Programs in the Control Panel
1If "Older version of Access Point Name
Setup Software" is installed, the
following message is displayed.
Click [はい] (Yes) to automatically
uninstall the old software followed by
the installation of FOMA PC setup
software.
1If old versions of "FOMA PC setup
software" is installed
The following message is displayed.
Click [ はい] (Yes) to automatically uninstall
the old software followed by the installation
of FOMA PC setup software.
1If "FOMA PC setup software" is already
installed
The Following message is displayed.
Click [はい] (Yes) to automatically uninstall
the previously installed software followed
by the installation of FOMA PC setup
software.
1When [キャンセル] (Cancel) is clicked
during installation
When [キャンセル] (Cancel) or [いいえ]
(No) is clicked during installation, and
when selected to not proceed further,
the following screen is displayed.
Click [継続] (Continue) to proceed with the
installation, and [中止] (Cancel) to
terminate.
Setting up Data
Communication
Settings for Packet communication or 64K
data communication is made.
• Check that FOMA handset is properly connected
to PC before setting up. 3P414
Launch FOMA PC Setup Software
aClick “ スタート ” (Start) y “ プログラ
ム” (Programs) y “FOMA PC 設定ソ
フト ” (FOMA PC Setup Software) y
FOMA PC 設定ソフト (FOMA PC
FOMA PC setup software)
Screen
Screen
Screen
Screen
Screen
00M1000EN.book 399 ページ 2004年11月24日 水曜日 午前7時56分
400
Using Data Communication
1Windows XP
Click “スタート” (Start) y “すべてのプロ
グラム” (All Programs) y “FOMA PC設定
ソフト” (FOMA PC setup software) y
“FOMA PC設定ソフト” (FOMA PC setup
software)
FOMA PC setup software is launched and
the operation screen is displayed.
Packet data communication using "mopera"
3P423
Packet data communication using other
Internet Service Providers 3P424
64K data communication setting using
"mopera" 3P427
64K data communication using other
Internet Service Providers 3P428
Simple Setting "Packet Data
Communication with mopera"
High speed packet data communication with
maximum speed of 384kbps via DoCoMo's
ISP service called "mopera" is set up.
• High speed packet data communication :
Maximum downlink speed 384kbps, Maximum
uplink speed 64kbps (excluding some models).
The charge is based on the volume of exchanged
data. You do not need not to worry about the
duration of connecting time. This service is based
on a best-effort connection where transmission
speed is affected by network traffic and
communication infrastructure.
• Be cautioned that large volume data exchanges
such as browsing web sites with images and
downloading large files using Packet
communication may result in high charges.
aClick [かんたん設定 ] (Simple
Settings)
bSelect “パケット通信 ” (Packet
communication) then Click [ 次へ ]
(Next)
cSelect “mopera 接続 ” (mopera
connection) then Click [ 次へ ] (Next)
See P424 if you wish to use other ISP than
"mopera".
dClick [OK]
Please wait while the FOMA handset
connected to the PC obtains APN setup.
Screen
Screen
Screen
Screen
Screen
00M1000EN.book 400 ページ 2004年11月24日 水曜日 午前7時56分

401
Using Data Communication
eEnter the connection name then
Click [ 次へ ] (Next)
Specify the desired connection name.
Enter a recognizable name in “接続名”
(Connection Name) field.
This field is case sensitive. Enter name
accurately.
Invalid characters: ¥ / : * ? ! | " (single byte
only) cannot be accepted.
fInput username/password then
click [次へ ] (Next)
When “mopera接続” (mopera connection) is
selected, username/password are entry
can be omitted.
Select user when using Windows XP or
Windows 2000.
Enter the username and password
provided by the ISP. Enter accurately. The
fields are case sensitive.
gCheck “最適化を行う ” (Optimize)
then click [ 次へ ] (Next)
"W-TCP Settings" necessary for Packet
communication is optimized. This message
will not be displayed if it is already
optimized.
Reboot PC to validate the change.
hConfirm settings and Click [ 完了 ]
(Done)
A list of all setting information is displayed.
Check that all settings are properly
configured.
A shortcut is created automatically if “デス
クトップにダイヤルアップのショート
カットを作成する ” (Create Dial-up
Networking shortcut on desktop) is
selected.
Click [ 戻る] (Back) to modify setting
information.
Screen
Screen
(Windows XP, Windows 2000)
Screen
(Windows Me, Windows 98)
Screen
00M1000EN.book 401 ページ 2004年11月24日 水曜日 午前7時56分
402
Using Data Communication
iClick [OK]
Reboot PC to validate the changes. Click
[はい] (Yes) if prompted by reboot selection
screen.
Execute the connection 3P429
Simple Setting "Packet Data
Communication Setting Using Other ISP's"
High speed packet data communication with
maximum speed of 384kbps is set up.
• High speed packet data communication :
Maximum downlink speed 384kbps,
Maximum uplink speed 64kbps (excluding some
models). The charge is based on the volume of
exchanged data. You do not need not to worry
about the duration of connecting time. This service
is based on a best-effort connection where
transmission speed is affected by network traffic
and communication infrastructure.
• Be cautioned that large volume data exchanges
such as browsing web sites with images and
downloading large files using Packet
communication may result in high charges.
aClick [かんたん設定 ] (Simple
setting)
bSelect “パケット通信 ” (Packet
communication) then Click [ 次へ ]
(Next).
cSelect “その他” (Others) then Click [
次へ ] (Next)
dClick [OK]
Please wait while the FOMA handset
connected to the PC obtains APN setup.
eSet up Packet communication
After acquiring handset settings, “パケット
通信設定” (Packet communication settings)
screen is displayed.
Specify a name in the APN input field
The field is case sensitive. Enter accurately.
Invalid characters: ¥ / : * ? !<> | " (single
byte only) cannot be accepted
If “発信者番号通知を行う” (display ID
number) is selected, Phone number. will be
notified to the receiver while making a call.
mopera.ne.jp is set by default in the “接続先
(APN)の選択” (Select APN) field.
fSet up APN
mopera.ne.jp is pre-registered by default as
the first cid.
Click [追加] (Add) to display “接続先(APN)
の追加” (Add APN) to specify the desired
APN in the field. The APN must support
FOMA Packet communication. Click [OK].
You are reverted to the “接続先(APN)設定”
(set up APN) screen.
Only single byte alphanumerical
characters, (-) dash, and (.) full stop, can be
entered in the APN field.
Up to 10 cid can be registered.
• Select “PDP-PPP 方式” (PDP-PPP
connection) or “PDP-IP方式 ” (PDP-IP
connection) from “ダイヤルアップ種別”
(Dial-up Networking types) if field “ダイ
ヤルアップの表示” (Display Dial-up
Networking) is set to “全表示” (Display
all) 3P435
Screen
Screen
00M1000EN.book 402 ページ 2004年11月24日 水曜日 午前7時56分

403
Using Data Communication
gConfigure Advanced Settings (TCP/
IP)
Click [詳細情報の設定] (Advanced settings)
in “パケット通信設定” (Packet
communication settings) to display “IP アド
レス” (IP Address) and “ネームサーバー ”
(Name Server) setting screen. Input
necessary information related to ISP and
LAN Dial-up Networking where required.
hSelect APN then click [OK]
Back to Step 5.
The APN list set in Step 6 is displayed in the
“接続先(APN)の選択” (Select APN) dialog.
iVerify connection with designation
(APN) in “接続先 (APN) の選択 ”
(Select APN) menu then click
[次へ ] (Next)
jSet username and password then
click [次へ ] (Next)
In Windows XP or Windows 2000, select
user.
username and password provided by ISP
must be entered correctly. Note that fields
are case sensitive.
kSelect “最適化を行う ” (Optimize)
then click [ 次へ ] (Next)
“W-TCP 設定 ” (W-TCP setting) necessary
for Packet communication is optimized.
This screen is not displayed if already
optimized. (Proceed to step12)
lVerify setting information then click
[完了 ] (Done)
All configured settings are listed. Verify that
there are no errors in the setup information.
A shortcut on desktop will be created
automatically if “デスクトップにダイヤル
アップのショートカットを作成する”
(Create Dial-up Networking shortcut on
desktop) is selected.
Click [ 戻る] (Back) to change settings
mClick [OK]
Reboot PC to validate changes. Click
[はい] (Yes) if prompted by the reboot
selection screen.
Execute the connection 3P429
Screen
(Windows XP, Windows 2000)
Screen
(Windows Me, Windows 98)
Screen
Screen
00M1000EN.book 403 ページ 2004年11月24日 水曜日 午前7時56分
404
Using Data Communication
Simple Settings "64K Data
Communication Setting Using mopera"
64Kbps data communication is set up.
DoCoMo's ISP "mopera" is used.
• Charges are based on the duration of connecting
time
aClick [かんたん設定 ] (Simple
setting)
bSelect “64K データ通信 ” (64K data
communication) then click [ 次へ ]
(Next).
cSelect “mopera 接続 ” (mopera
connection) then click [ 次へ ] (Next)
See P428 to use ISP connection other than
"mopera"
dEnter APN and select modem then
click [次へ ] (Next)
“64K データ通信設定” (64K Data
communication) dialog is displayed.
Specify a name as you wish in “接続名”
(Connection) field.
This field is case sensitive. Enter name
accurately.
Invalid characters: ¥ / : * ? ! < > | " (single
byte only) are not accepted.
Select "FOMA M1000" for modem name.
eSet username and password then
click [ 次へ ] (Next)
User may ignore this step if mopera
connection is selected.
In Windows XP or Windows 2000, select a
user.
Setup information provided by ISP must be
entered correctly. Note that fields are case
sensitive.
Screen
Screen
Screen
Screen
(Windows XP, Windows 2000)
Screen
(Windows Me, Windows 98)
00M1000EN.book 404 ページ 2004年11月24日 水曜日 午前7時56分
405
Using Data Communication
fVerify setup information then click
[完了 ] (Done)
All configured settings are listed. Verify that
there are no errors in the setting
information.
A shortcut on desktop is created
automatically if “デスクトップにダイヤル
アップのショートカットを作成する”
(Create Dial-up Networking shortcut on
desktop) is selected.
Click [ 戻る] (Back) to change settings.
gClick [OK]
Execute the connection 3P429
Simple Setting "64K Data
Communication with Other ISP"
Setting is performed for 64K data
communication at 64Kbps.
• Charges are based on duration of time connected.
aClick [ かんたん設定 ] (Simple
setting)
bSelect “64K データ通信 ” (64K data
communication) then click [ 次へ ]
(Next)
cSelect “その他 ” (Other) then click [
次へ ] (Next)
dEnter Dial-up Networking
information then click [ 次へ ] (Next)
If connecting to another ISP that possesses
synchronized ISDN 64K access points, the
following information need to be registered.
- Connection name (optional)
- Modem selection (FOMA M1000)
- Dial-up phone number
Connection name must be entered. The
field is case sensitive. Enter accurately.
Note that fields are case sensitive.
Invalid characters: ¥ / : * ? ! < > | " (single
byte only)
When using the accompanying FOMA-USB
cable, select "FOMA M1000" (FOMA
M1000) as modem.
Enter the information provided by ISP
correctly. The fields are case sensitive and
accept only single byte characters. The
phone number is notified once connected if
“発信者番号通知を行う” (Display caller ID)
is selected.
eConfiguring Advanced setting
(TCP/IP setting)
Click “詳細情報の設定” (Advanced setting)
to display “IPアドレス” (IP Address) and
“ネームサーバー ” (Name Server) setting
dialog. Input necessary information related
to ISP or LAN Dial-up Networking where
required.
fSet up username and password
then click [ 次へ ] (Next)
In Windows XP or Windows 2000, select a
user.
Screen
Screen
00M1000EN.book 405 ページ 2004年11月24日 水曜日 午前7時56分

406
Using Data Communication
Set username and password information
accurately according to the information
provided by the ISP. The fields are case
sensitive.
gVerify setup information then click
[完了 ] (Done)
A list of all settings is displayed. Check that
all settings are properly configured.
A shortcut is created automatically if “デス
クトップにダイヤルアップのショート
カットを作成する” (Create Dial-up
Networking shortcut on desktop) is
selected.
Click [戻る] (Back) to change settings.
hClick [OK]
Execute the connection 3See right
Executing the Set
Connection
Connection and disconnection using the
settings configured with the FOMA PC Setup
software is described in this section.
• Connection from dial-up icon is valid only for the
FOMA handset used to configure with the icon.
Install connection setup file again if connecting
with another FOMA handset.
aClick connection icon
on the PC
bClick [ダイヤル ] (Dial) and connect
Click “ダイヤル” (Dial) without entering the
“ユーザ名” (Username)and “パスワード”
(Password) if mopera is selected. Enter
“ユーザ名” (Username)and “パスワード”
(Password) and click “ダイヤル” (dial) if
another ISP or dial up connection is
selected.
No need to enter password again if “パス
ワードを保存する” (Save password) is
selected.
cClick [OK] upon verifying
connection
The Following screen is displayed when
connecting the dial up normally.
• The message is not displayed if “接続”
(connection) has been set to hide the
message previously.
Screen
(Windows XP, Windows 2000)
Screen
(Windows Me, Windows 98)
Screen
Screen
00M1000EN.book 406 ページ 2004年11月24日 水曜日 午前7時56分
407
Using Data Communication
Disconnecting
Closing the web browser does not always
guarantee disconnection from the network.
Disconnect the connection by following the
steps below.
aClick dial up icon
in task tray on PC
screen
The connection screen is displayed.
bClick [ 切断 ] (Disconnect)
NOTE
• The displayed data speed on the PC may be
different from the actual speed.
Uninstalling FOMA PC
Setup Software
Before Uninstallation
Undo all changes made for the FOMA
handset settings before uninstalling the
FOMA PC setup software.
aDisable “W-TCP 設定 ” (W-TCP
setting) in task tray
Right click on the “W-TCP アイコン” (W-
TCP icon) in the task tray, and click “常駐さ
せない” (terminate in task tray).
bTerminating active programs
The following messages will be displayed if
uninstallation is attempted while “FOMA PC
設定ソフト ” (FOMA PC Setup software) or
“W-TCP 設定” (W-TCP setting) is running.
Stop uninstalling and close all active
programs.
Uninstalling
aLaunch “ アプリケーションの追加と
削除 ” (Add/Remove Programs) in
Windows
1Windows XP
Click “スタート” (Start) y “コントロール
パネル” (Control Panel) y “プログラムの
追加と削除 ” (Add/Remove Programs)
1Windows Me, Windows 98 or Windows
2000
Click “スタート” (Start) y “設定”
(Settings) y “コントロールパネル”
(Control Panel) y “プログラムの追加と削
除” (Add/Remove Programs)
"アプリケーションの追加と削除のプロパ
ティ ” (Add/Remove Applications
properties) will be displayed in Windows Me
or Windows 98.
Dial up icon
Screen
Right click
Click
Screen
Screen
00M1000EN.book 407 ページ 2004年11月24日 水曜日 午前7時56分
408
Using Data Communication
bSelect “FOMA PC 設定ソフト ”
(FOMA PC Setup software) y click [
変更と削除 ] (Change/Delete)
cVerify the program to delete y click
[はい ] (Yes)
Uninstallation begins.
dClick [OK] Installation of FOMA PC
setup software is completed.
1Disabling “W-TCP 最適化” (Optimizing
W-TCP)
Displays following message if “W-TCP 最
適化” (Optimizing W-TCP) is performed.
Click [はい] (Yes) to uninstall
Optimization of W-TCP is disabled after
PC is rebooted.
W-TCP Setting
W-TCP Roles
“W-TCP設定” (W-TCP Setting) is a "TCP
Parameters setting tool" to optimize TCP/IP
performance for Packet communication in
FOMA network.
Setting this software is required to fully utilize
FOMA handset communication performance.
Setting/Disabling the Optimization.
Windows XP
Each Dial-up Networking can be optimized
separately in Windows XP.
aLaunch the program
1To operate from FOMA PC Setup software
Click [W-TCP 設定] (W-TCP setting) in “マ
ニュアル設定” (Manual setting) after
launching the program
1To operate from task tray
Click W-TCP icon in task tray.
Select “NTT DoCoMo FOMA PC設定ソフト ”
(NTT FOMA PC Setup software)
Click here
Screen
Screen
Screen
Screen
Screen
Screen
Left Click
00M1000EN.book 408 ページ 2004年11月24日 水曜日 午前7時56分
409
Using Data Communication
bConduct the following operations
1When system setting is not optimized
Click [最適化を行う] (Optimize)
"(W-TCP (Dial-up Networking) setting)" is
displayed. Select the desired Dial-up
Networking and click [実行] (Execute) to
optimize system setting or Dial-up
Networking.
System setting is optimized after PC is
rebooted by following the instructions
displayed.
1When system setting is already
optimized
“W-TCP(ダイヤルアップ)設定” (W-TCP
(Dial-up Networking) setting) is displayed.
Perform necessary settings to make
changes.
System setting is optimized after PC is
rebooted by following the instructions
displayed.
1When disabling optimization
aClick [システム設定] (System setting)
in “W-TCP 設定” (W-TCP setting)
bClick [最適化を解除する ] (Disable
optimization)
Optimization is disabled after PC is
rebooted by following the instructions
displayed.
Windows Me, Windows 2000 or Windows
98
aLaunch program
1When operating from FOMA “PC 設定ソ
フト” (FOMA PC Setup software)
Click [W-TCP 設定] (W-TCP setting) in “マ
ニュアル設定” (Manual setting) after
launching program
1When operating from Task tray
Click (W-TCP icon) in task tray.
bConduct the following operations
1If it is not optimized
Click [最適化を行う] (Optimize)
Screen
Screen
Screen
Left Click
00M1000EN.book 409 ページ 2004年11月24日 水曜日 午前7時56分
410
Using Data Communication
Optimization is enabled after PC is
rebooted by following the instructions
displayed.
1If it is already optimized
“現在、最適化されています。” (Already
optimized) message is displayed in “W-TCP
設定” (W-TCP Setting)
Click [最適化を解除する] (Disable
optimization) to disable settings resulting
from transmission with devices other than
the FOMA handset.
Optimization is disabled after PC is
rebooted by following the instructions
displayed.
Setting up APN
APN for Packet communication is set up.
Up to 10 APN numbers can be set up.
Numbers from 1 to 10 can be assigned to the
cid's.
The cid is used to specify connection for
Packet communication.
"mopera" is pre-registered as 1 in the cid list
by default. Other APNs must be assigned a
number from in 2 to 10.
• Check that FOMA handset is properly connected
to PC before setting up 3P414
aClick [接続先 (APN)設定] (APN
Setting) after launching “FOMA PC
設定ソフト ” (FOMA PC Setup
software)
bClick [OK] in FOMA handset setting
screen.
Load registered APN information by
accessing connected FOMA handset
automatically.
• Launching is disabled if FOMA handset
is not connected
cSetting up APN
Screen
Screen
Screen
Screen
00M1000EN.book 410 ページ 2004年11月24日 水曜日 午前7時56分

411
Using Data Communication
Adding/Editing/Deleting APN
1When Adding an APN
Click [追加] (Add) in “接続先(APN)設定”
(APN Setting)
1When Editing registered APN
Select desired APN from list in “接続先
(APN)設定” (APN Setting) yClick [編集]
(Edit)
• You can select from “PDP-PPP 方式”
(PDP-PPP connection)or “PDP-IP方式”
(PDP-IP connection) to add/edit an APN
if “ ダイヤルアップの表示” (Display
Dial-up Networking) is set to “全表示”
(Display all) 3P435
1When Deleting registered APN
Select desired APN from list in “接続先
(APN)設定” (APN Setting) yClick [削除]
(Delete)
• APN Registered in cid 1 cannot be
deleted.
Saving Setting Information info a file
APN setting information registered in FOMA
handset can be backed up, and APN setting
information in edit mode can be saved.
aClick ファイル (File) y “ 名前を付け
て保存 ” (Save as)/“ 上書き保存 ”
(Save) in “ 接続先 (APN)設定” (APN
Setting)
Loading APN Setting Information from File
APN setting saved in PC can be re-edited and
written to FOMA handset.
aClick “ ファイル ” (File) y “ 開く ”
(Open)in “接続先 (APN)設定” (APN
setting)
Writing APN Setting Information to FOMA
Handset
Displayed APN setting can be written to
FOMA handset
aClick FOMA“端末へ設定を書き込む”
(Save in FOMA handset) in “ 接続先
”(APN)設定 (APN setting)
Loading APN Setting in FOMA Handset
APN setting can be retrieved by manually
accessing the FOMA handset
aClick “ファイル” (File) y “FOMA端末
からの設定を取得 ” (Retrieve setting
from FOMA handset) in “ 接続先
(APN)設定” (APN setting)
Creating Dial-up Networking
Dial-up Networking for Packet communication
can be created from an added/edited APN in
“接続先(APN)設定” (APN setting), and be
saved in FOMA handset.
aSelect an added/edited APN in “接続
先(APN)設定” (APN Setting), and
click [ ダイヤルアップ作成 ] (Create
Dial-up Networking)
Write to FOMA handset confirmation
screen is displayed.
bClick [ はい ] (Yes)
“パケット通信用ダイヤルアップの作成”
(Create Dial-up Networking for Packet
communication) is displayed
• Perform Step 5 if mopera is selected as
the APN.
cEnter desired APN name and click
“アカウント・パスワードの設定 ”
(Setting up account /password)
dEnter username and password then
click [OK]
• In Windows XP or Windows 2000, a user
is selected.
•Click [詳細情報の設定] (Advanced
setting) in “パケット通信用ダイヤルアッ
プの作成” (Create Dial-up Networking
for Packet communication) if IP address
and DNS setting are provided by your
ISP. Then click [OK] after registering
required information.
00M1000EN.book 411 ページ 2004年11月24日 水曜日 午前7時56分
412
Using Data Communication
eClick [FOMA 端末へ設定を書き込む ]
(Write settings to FOMA handset)
and perform writing
NOTE
• APN information are stored in FOMA handset.
To connect another FOMA handset set up APN
again.
• If you wish to continue to use the same APN as
that registered in the PC, register the APN to the
same number (cid) in the FOMA handset.
• If the COM port connecting the FOMA handset
is recognized by the PC as greater than COM20
then loading and writing of APN information is
disabled. In these cases, use “ハイパーターミ
ナル” (Hyper Handset) which is accompanied
with Windows. 3P440
Assigning COM Port
The COM port of the PC is assigned to the
FOMA handset to manually perform
connection setting. This COM port can be
changed. Normally, however, set it to “自動設
定(推奨)” (Auto setting (recommended)) .
aClick “メニュー” (Menu) y “ 通信設
定” (Connection setting) after
launching program
Set up screen is displayed.
bSelect “COM ポート指定 ” (Assign
COM port) , and assign COM Port
COM Port number is displayed in COM.
cClick [OK]
Assigned COM Port is set up.
• Use “ハイパーターミナル” (Hyper
terminal) which is accompanied with
Windows to check COM port 3P440
Displaying Dial-up
Networking Type
Select from “PDP-PPP方式 ” (PDP-PPP
connection)or “PDP-IP 方式” (PDP-IP
connection)* from Dial-up Networking type if
“ダイヤルアップの表示” (Display Dial-up
Networking) is set to “ 全表示” (Display all).
Select “PPPのみ表示 (PDP-IP方式のみ表示/
設定可)” (Display only PPP (Display/Set up
only PDP-IP connection)) normally.
*: “PDP-PPP方式” (PDP-PPP connection) is
Packet communication using Point-to-Point
protocol. “PDP-PPP方式 ” (PDP-PPP
connection) is used to connect to mopera
(mopera)etc. Contact your ISP or network
administrator to check connection protocol of
APN.
aClick “メニュー” (Menu) y “ 通信設
定” (Connection setting) after
launching program
Set up screen is displayed.
bSelect “PPP のみ表示 ”(Display only
PPP)/“ 全表示 (Display All)” in “ダイ
ヤルアップの表示 ” (Display Dial-up
Networking)
cClick [OK]
Screen
Screen
00M1000EN.book 412 ページ 2004年11月24日 水曜日 午前7時56分
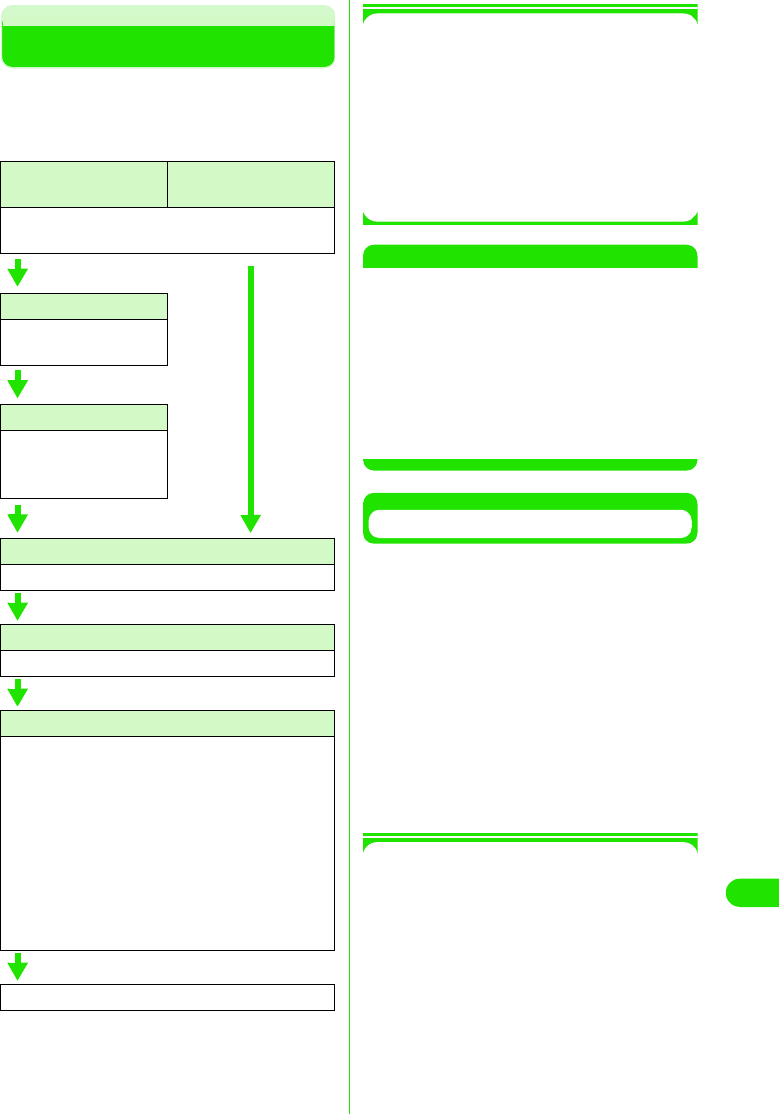
413
Using Data Communication
Setting up Dial-up Networking
You can set up Dial-up Networking for Packet
communication/64K data connection without
using FOMA PC setup software. The flow is
explained below.
1AT Commands
AT Commands consist of commands for
controlling modems.
The FOMA handset supports standard AT
commands, some extended commands
and proprietary AT commands.
• Detailed settings of “データ通信” (data
connection) or FOMA handset can be
checked with AT Command entries.
NOTE
•Set *9601 as connection number when using
DoCoMo's ISP "mopera" for 64K data
connection.
•Set “発信者番号の通知/非通知 ” (Caller ID
display ON/OFF) as required. Set to 通知 (ON)
to use "mopera".
•Set “その他の設定” (Other settings) as required.
FOMA is operational with default settings.
• Contact your ISP or network administrator for
further setup details.
Checking COM Port
You are required to specify COM port number
assigned to "FOMA M1000" (modem)
embedded after installation of connection
setup file when setting up the APN.
This section explains about procedures to
verify COM Port number.
The verified COM port is used for APN setting
(3P440).
• There is no need to check modem when if using
DoCoMo's ISP "mopera" APN setup is not
necessary, then. Proceed to “ 発信者番号の通知/
非通知を設定します” (Display/hide caller ID)
(3P442)
1About APN and cid
Unlike 64K data connection, a regular
telephone number is not used for Packet
communication. APN is used instead.
• The (cid) registration number 1 to 10 are
registered in FOMA handsets as part of the
APN when APN numbers are set up.
• APN is managed by cid (registration number
from 1 to 10). Entering (*99***<cid number>#)
connects to the corresponding APN.
• "mopera" is pre-registered to 1 in the cid list
by default as ("mopera.ne.jp"). "mopera" can
Set up Packet
communication
Set up 64K data
connection
How to attach 3P414
Install connection setup file (driver). 3P416
Check COM port
Check COM port.
3P437
Set up APN
Set up APN 3P440
• Set up is not required
with "mopera".
Set up caller ID
Set up to display/hide caller ID. 3P442
Other settings
Perform other settings. (AT Command) 3P453
Set up Dial-up Networking
• Contact your ISP or network administrator for
further setup details.
• Windows XP users
Set up APN 3P438
• Windows 2000 users
Set up APN 3P439
• Windows Me users
Set up APN. 3P439
• Windows 98 users
Set up APN. 3P439
Connect Dial-up Networking 3P451
00M1000EN.book 413 ページ 2004年11月24日 水曜日 午前7時56分
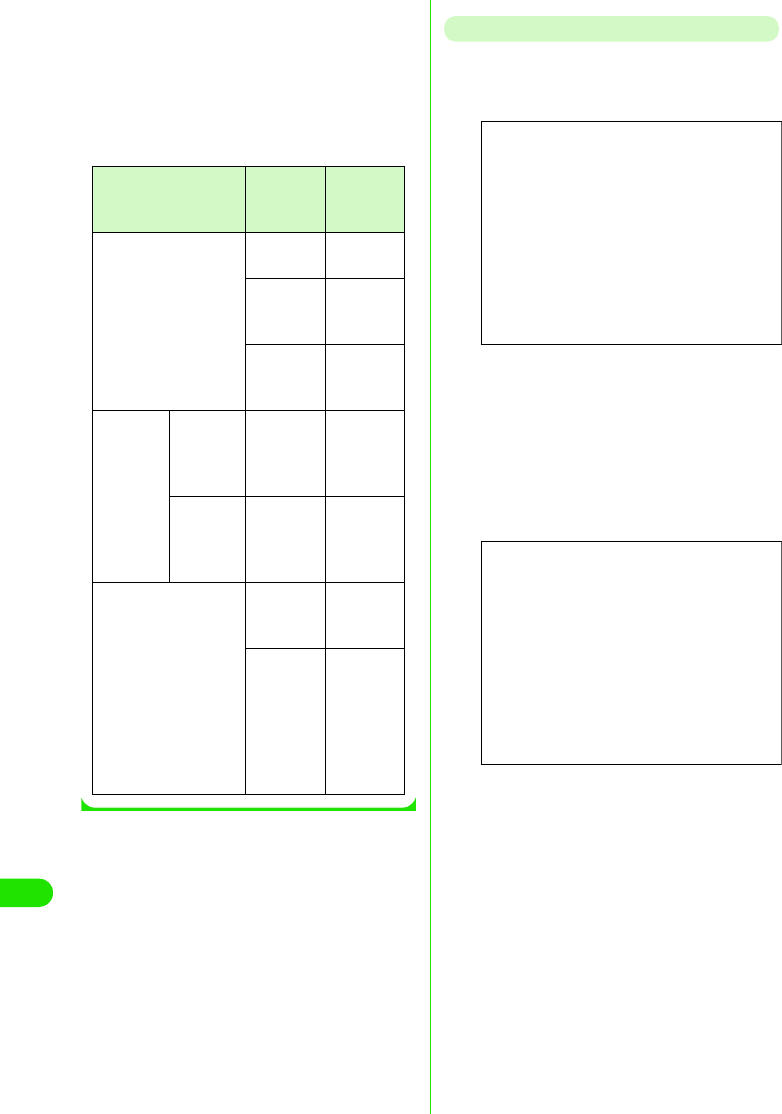
414
Using Data Communication
easily be used by entering the number
(*99***1#). Use cid 2 to 10 to register other
APNs.
• APNs can be registered like registering
contact information to a mobile phone. The
table below summarizes differences and
similarities when compared to a contact list in
a mobile phone.
Checking COM Port in Windows XP
aClick “スタート ” (Start) y “ コント
ロールパネル ” (Control Panel)
bClick “プリンタとその他のハード
ウェア ” (Printer and other
hardware) in “コントロールパネル ”
(Control Panel) y “ 電話とモデムのオ
プション ” (Telephone and modem
options)
cEnter “ 市外局番/エリアコード ”
(Area code) if “ 所在地情報 ”
(Location information) is displayed,
and click [OK]
dClick “モデム ” (Modem) tab.
Checking COM port in “接続先 ”
(Connection) list of FOMA M1000,
and click [OK]
The verified COM port is used for APN
setup.
Item to compare APN
Setting
Contact
list in
handset
Registration data APN Phone
number
cid Memory
number in
contact list
–
Name of
intended
party
Registration
process
Registrati
on via PC
○(Using
FOMA PC
Setup
software)
○ (Using
dedicated
software)
Registrati
on via
mobile
phone
× (Unable
to
confirmed)
○
How to use Specify cid
and
connect
Search
contact list
and call
–
Enter
phone
number
and dial
from
FOMA
handset
Screen
Screen
00M1000EN.book 414 ページ 2004年11月24日 水曜日 午前7時56分
415
Using Data Communication
• Displayed messages and COM port
numbers may vary depending on your
PC.
Checking COM Port in Windows 2000
aClick “ スタート ” (Start) y “ 設定 ”
(Settings) y “コントロールパネル ”
(Control Panel)
bClick “ 電話とモデムのオプション ”
(Telephone and modem options) in
“コントロールパネル ” (Control
Panel)
cEnter “市外局番 ” (Area code) then
click [OK] if “ 所在地情報 ” (Location
information) is displayed
dClick “ モデム ” (Modem) tab and
check COM port in “ 接続先 ”
(Connection) list of FOMA M1000
(FOMA M1000). Click [OK]
The verified COM port number is used for
APN Setup.
• Displayed message and COM port
number may vary depending on your PC.
Checking COM Port in Windows Me/98
aClick “ スタート ” (Start) y “ 設定 ”
(Settings) y “コントロールパネル ”
(Control Panel)
Screen
Screen
Screen
Screen
Screen
00M1000EN.book 415 ページ 2004年11月24日 水曜日 午前7時56分
416
Using Data Communication
bClick [モデム ] (Modem) in “コント
ロールパネル ” (Control Panel)
If “モデム ” (modem) icon is not displayed,
click “すべてのコントロールパネルのオプ
ションを表示する” (Display all options in
control panel).
cCheck that FOMA M1000 is properly
set up then click “ 検出結果 ” (More
Info on the Diagnostics) tab
dCheck COM port to which FOMA
M1000 is set up and click [OK]
The verified COM port number is used for
APN Setup.
• Displayed message and COM port
number may vary depending on your PC.
Setting up APN
Connection software for AT commands is
required to set up APN.
Setup procedures using Hyperterminal in
Windows is explained in this section.
• APN for Packet communication is set up. Up to 10
APNs with registration number <cid>
1to10(3P437) can be set up.
• "mopera" is pre-registered to 1 in the cid list by
default as "mopera.ne.jp". Registration numbers
2 to 10 are recommended for use with other
APNs.
• The registered cid is used as the connection
number for the APN setting up Dial-up
Networking.
• Inquire your network administrator or ISP
regarding APN's other than mopera.
• AT commands may not be displayed in
Hyperterminal from Step 6 P441 onwards.
• Entering in the following manner:
•ATE1
• Displays AT commands.
<Example: in Windows XP>
aConnect FOMA handset with
accompanying USB cable 3P414
bTurn on FOMA handset and connect
the other end of the USB cable to
PC
Screen
Screen
D
e
f
au
l
t sett
i
ng cid1:mopera.ne.jp cid2~10: never
Screen
00M1000EN.book 416 ページ 2004年11月24日 水曜日 午前7時56分
417
Using Data Communication
cClick “ スタート ” (Start) y “ すべての
プログラム ” (All Programs) y “アク
セサリ ” (Accessories) y “通信 ”
(Communication) y “ハイパーター
ミナル ” (Hyperterminal)
Hyperterminal is launched.
1In Windows Me or Windows 2000
On the PC, click “スタート” (Start) y“プ
ログラム” (Program) y“アクセサリ”
(Accessories) y “通信”
(Communication) y “ハイパーターミナ
ル” (Hyperterminal)
1In Windows98
Click Hypertrm.exe after clicking “ハイ
パーターミナル” (Hyperterminal)
dEnter desired name in 名前 (name)
and click [OK]
Enter name as "sample" here as an
example
eSelect FOMA M1000 in “ 接続方法 ”
(Connection method) then click
[OK]
1When COM port in FOMA M1000 can be
selected
Click [OK] in COM port properties.
• To check COM port number selected in
“接続方法” (Connection method)
(3P437), perform “COMポートを確認す
る” (Check COM Port)
1When COM port in FOMA M1000 cannot
be selected
aClick [キャンセル] (Cancel)
“接続の設定” (Set up connection)
screen is closed.
bClick “ファイル” (File) and select “プ
ロパティ ” (Properties)
cSelect FOMA M1000 in “接続方法”
(Connection method) of “接続の設定”
(Set up connection) tab of “sampleのプ
ロパティ” (Sample properties) screen
dDeselect OFF “国/地域番号と市外局
番を使う” (Use country code and area
code)
eClick [OK]
fEnter APN then press
Enter in the following format
AT+CGDCONT=<cid>,"PPP", "APN"
If a cid is already set up, not that the new
CID overwrites the previous setting.
Screen
<cid> : Enter desired number between
2 to 10
"APN": Enter APN with double quotation
mark
"PPP" : Enter "PPP" as is
Screen
Screen
00M1000EN.book 417 ページ 2004年11月24日 水曜日 午前7時56分
418
Using Data Communication
APN setup is complete if OK is displayed.
Example: When XXX.abc is set up in cid 2
Enter "AT+CGDCONT=2,"PPP","XXX.abc"
$$"
gCheck that if OK is displayed, and
click “ファイル ” (File) y “ ハイパー
ターミナルの終了 ” (End
Hyperterminal)
Hyperterminal is closed.
Saving is not necessary when confirm save
screen is displayed.
1When APN settings are reset with AT
command
• cid=1 is reset to mopera.ne.jp (default value),
and cid=2 to 10 is unregistered.
<Input method>
AT+CGDCONT= (When resetting
all cids)
AT+CGDCONT=<cid> (When
resetting a specific cid)
1When checking APN with AT command
• Display current settings
<Input method>
AT+CGDCONT?
1When nothing is displayed as AT
command is entered
<Input method>
ATE 1
Notifying/Hiding Caller ID
• Caller ID can be turned on or off to enable/disable
notifying Caller ID to the designator during packet
connection. Use caller ID with care. Your caller ID
is valuable information.
• Caller ID can be set up with AT command before
performing Dial-up Networking
• Use *DGPIR command to setup caller ID to notify
or hide, or to reset to “設定なし” (None) (default
value) (3P454)
aLaunch “ハイパーターミナル ”
(Hyperterminal)
bSet up caller ID display during
Packet communication
Enter in the following format
"AT*DGPIR=<n>"
1To Append 184 (hiding caller ID)
automatically when calling or answering
Enter AT*DGPIR=1
1To Append 186 (notifying caller ID)
automatically when calling or answering
Enter AT*DGPIR=2
cClick “ファイル ” (File) y “ハイパー
ターミナルの終了 ” (End
Hyperterminal) if [OK] is displayed
D
e
f
au
l
t sett
i
ng Notify
Screen
Screen
Screen
00M1000EN.book 418 ページ 2004年11月24日 水曜日 午前7時56分
419
Using Data Communication
1Setting up 186(Notify)/184(Hide) in
Dial-up Networking
186/184 can also be appended to a
number in Dial-up Networking.
* When 186/184 are setup in both DGPIR and
Dial-up Networking, the applicable settings
are described in the following table.
NOTE
•Enter AT*DGPIR=0 to reset caller ID setup with
DGPIR command to "Never".
• Set caller ID setting to "Notify" when using
"mopera", DoCoMo's ISP service.
Setting up Dial-up
<Example: Connecting to "mopera" using
<cid>=1>
• Contact your ISP or network administrator to setup
and connect with another ISP.
Setting up Dial-up Connection in
Windows XP
aClick “ スタート ” (Start) y “ すべての
プログラム ” (All Programs) y “ アク
セサリ ” (Accessories) y “通信 ”
(Communications) y “新しい接続 ”
“ウィザード ” (New connection
wizard)
bClick [ 次へ ] (Next) in “新しい接続
ウィザード ” (New connection
wizard)
cSelect “インターネットに接続する ”
(Connecting to the Internet), and
click [ 次へ ] (Next)
Dial-up
Networking
setup (when
cid=1)
*Caller ID
display
setting with
DGPIR
command
Notify/hide
caller ID
*99***1# Never Notify
Hide Hide
Notify Notify
184*99***1# Never Hide (Priority
given to 184
setup in
Dial-up
Networking)
Hide
Notify
186*99***1# Never Notify (Priority
given to 186
setup in
Dial-up
Networking)
Hide
Notify
Screen
Screen
00M1000EN.book 419 ページ 2004年11月24日 水曜日 午前7時56分

420
Using Data Communication
dSelect “接続を手動でセットアップす
る” (Setting up connection
manually) then click [ 次へ ] (Next)
eSelect “ダイヤルアップモデムを使用
して接続する ” (Connection with
dial-up modem) then click [次へ ]
(Next)
f“デバイスの選択 ” (Select device) is
displayed, select “ モデム− FOMA
M1000(COMx)” (Modem-FOMA
M1000 (COMx)) then click [ 次へ]
(Next)
“デバイスの選択” (Select device) is only
displayed when multiple modems are
installed.
(COMx) is COM Port number displayed in
“COMポートの確認” (Checking COM Port)
(3P437)
gEnter desired name in “ISP 名” (ISP
name) then click [次へ ] (Next)
hEnter APN number in “ 電話番号 ”
(Phone number) then click
[次へ ] (Next)
iLeave “ユーザー名” (Username), “パ
スワード ” (Password) and “パス
ワードの確認入力 ” (Confirm
password) blank, and click [次へ ]
(Next)
Entering of username and password is not
required for "mopera"
Enter “ ユーザー名 ” (Username), “パスワー
ド” (Password) and “パスワードの確認入
力” (Confirm password) provided by your
ISP or network administrator if connecting
to another ISP.
Screen
Screen
Screen
Screen
00M1000EN.book 420 ページ 2004年11月24日 水曜日 午前7時56分

421
Using Data Communication
jClick [ 完了 ] (Done)
Displays newly created connection wizard.
kClick “ スタート ” (Start) y “ すべての
プログラム ” (All Programs) y “アク
セサリ ” (Accessories) y “通信 ”
(Communication) y “ネットワーク
接続 ” (Network connection)
lSelect icon of newly created dial up,
and click “ファイル” (File) y “ プロパ
ティ” (Properties)
mCheck setting in “ 全般 ” (General)
tab
Verify that “モデム−FOMA M1000”
(Modem-FOMA M1000) in “接続の方法”
(Connection method) is selected if 2 or
more modems are connected to your PC.
Select if it is deselected.
Verify that “ ダイヤル情報を使う” (Use dial
up information) is not selected. Deselect
OFF if selected.
nClick “ ネットワーク ” (Network) tab
and perform each setup.
Select PPP:Windows 95/98/NT4/2000,
Internet in “呼び出すダイヤルアップサー
バーの種類 ” (Dial up server)
Select “インターネットプロトコル(TCP/
IP)” (Internet protocol(TCP/IP)) in “この接
続は次の項目を使用します” (Use following
items in this connection)
• Settings to cannot be changed in “QoSパ
ケットスケジューラ” (QoS Packet
Scheduler)
oClick [ 設定 ] (Setting)
Screen
Screen
Screen
Screen
Screen
00M1000EN.book 421 ページ 2004年11月24日 水曜日 午前7時56分
422
Using Data Communication
pDeselect all checkboxes then click
[OK]
qClick [OK] in “ ネットワーク ”
(Network) tab screen
Setting up Dial-up Networking in
Windows 2000
aClick “スタート ” (Start) y “ プログラ
ム” Program) y “アクセサリ ”
(Accessories) y “通信 ”
(Communication) y “ネットワーク
とダイヤルアップ接続 ” (Network
and dial up connection)
bClick “新しい接続の作成 ” (Create
new connection) icon in “ ネット
ワークとダイヤルアップ接続 ”
(Network and dial up connection)
cEnter “ 市外局番 ” (Area code) then
click [OK] if “ 所在地情報 ” (Location
information) is displayed
“所在地情報” (Location information) is
displayed when launching “新しい接続の作
成” (Create new connection) for the first
time in Step2.
From the second launch onwards, this is
not displayed. “ネットワークの接続ウィ
ザード” (Network connection wizard) is
displayed instead. Proceed to Step5 when
displayed.
dClick [OK] in “ 電話とモデムのオプ
ション ” (Telephone and modem
option)
eClick [次へ ] (Next) in “ネットワーク
の接続ウィザード ” (Network
connection wizard)
fSelect “インターネットにダイヤル
アップ接続する ” (Dial up
connection to the Internet) then
click [ 次へ ] (Next)
Screen
Screen
Screen
Screen
00M1000EN.book 422 ページ 2004年11月24日 水曜日 午前7時56分

423
Using Data Communication
gSelect “インターネット接続を手動で
設定するか、またはローカルエリア
ネットワーク (LAN) を使って接続し
ます ” (Connect to the Internet
manually or via Local Area
Network(LAN)) then click [次へ ]
(Next)
hSelect “電話回線とモデムを使ってイ
ンターネットに接続します ”
(Connect to the Internet with
telephone line and modem) then
click [次へ ] (Next)
iVerify that FOMA M1000 is displayed
in “インターネットへの接続に使うモ
デムを選択する ” (Select modem for
Internet connection) then click
[次へ ] (Next)
Select FOMA M1000 if FOMA M1000 is not
displayed.
• The following message is not displayed if
modems other than FOMA M1000 are
not installed.
jEnter APN number in “電話番号 ”
(Telephone number) then click [ 詳細
設定 ] (Advanced setting)
Deselect “市外局番とダイヤル情報を使う”
(Use area code and dial up information).
kSet each settings in “ 接続 ”
(Connection) tab then click “ アドレ
ス” (Address) tab as shown
Enter the information provided by your ISP
in “ 接続の種類” (Connection type) and “ロ
グオンの手続き” (Log on process)
Screen
Screen
Screen
Screen
Screen
00M1000EN.book 423 ページ 2004年11月24日 水曜日 午前7時56分

424
Using Data Communication
l Click “アドレス” (Address) tab, and
set IP address or DNS (Domain
Name Service) as shown the click
[OK]
Enter the information such as “IPアドレス”
(IP address) or “ISPによるDNSアドレスの
自動割り当て” (DNS(Domain Name
Service) address auto-assigned by ISP)
provided by your ISP or network
administrator in order to connect to an ISP
other than "mopera".
mClick [次へ ] (Next) in “インターネッ
トアカウントの接続情報 ” (Internet
accounts set up information)
nLeave “ユーザー名” (Username) and
“パスワード” (Password) blank then
click [次へ ] (Next)
Username and password confirmation
screens are continuously displayed. Click
[OK] in each screen
Username and password are not required
for "mopera".
Enter “ユーザー名” (Username) and “ パス
ワード” (Password) provided by your ISP or
network administrator in order to connect to
an ISP other than "mopera".
oEnter the desired name in “ 接続名 ”
(Connection) then click [次へ] (Next)
pSelect “いいえ ” (No) then click
[次へ ] (Next)
qDeselect “今すぐインターネットに接
続するにはここを選び [ 完了 ] をク
リックしてください ” (Select here
and click [Done] to connect to the
Internet now) then click [完了 ]
(Done)
Screen
Screen
Screen
Screen
Screen
00M1000EN.book 424 ページ 2004年11月24日 水曜日 午前7時56分
425
Using Data Communication
rSelect newly created dial up icon,
then click “ ファイル ” (File) y “ プロ
パティ” (Properties)
sCheck settings in “ 全般 ” (General)
tab
Check if “モデム”−FOMA M1000 (Modem-
FOMA M1000) in “接続の方法” (Connection
method) is selected when 2 or more
modems are connected to PC. Select if it is
deselected.
Verify that “ダイヤル情報を使う” (Use for
dial up information) is deselected. Deselect
if it is selected.
tClick “ ネットワーク ” (Network) tab,
and perform each setup
Select PPP:FWindows 95/98/NT4/2000,
Internet in “呼び出すダイヤルアップサー
バーの種類” (Dial up server).
Select only “インターネットプロトコル
(TCP/IP)” (Internet Protocol (TCP/IP)) for
component.
uClick [ 設定 ] (Setting)
vDeselect all settings, then click [OK]
wClick [OK] in “ ネットワーク ”
(Network) tab
Setting up Dial-up Networking in
Windows Me/Windows 98
aClick “ スタート ” (Start) y “ プログラ
ム” (Program) y “アクセサリ ”
(Accessories) y “通信 ”
(Communication) y “ダイヤルアッ
プネットワーク ” (Dial-up
Networking)
bClick [ 次へ ] (Next) in “ダイヤルアッ
プネットワークへようこそ ”
(Welcome to Dial-up Networking)
This message is displayed when launching
Dial-up Networking for the first time. Click
[次へ] (Next) to proceed to Step 4.
From the second time onwards, this is not
displayed. “ダイヤルアップネットワー
ク”(Dial-up Networking) in Step 3 is
displayed instead.
Screen
Screen
Screen
Screen
00M1000EN.book 425 ページ 2004年11月24日 水曜日 午前7時56分

426
Using Data Communication
cClick “新しい接続 ” (New
connection) icon in “ダイヤルアップ
ネットワーク ” (Dial-up Networking)
dEnter desired name in “接続名 ”
(Connection name) then click [次へ]
(Next)
Verify that FOMA M1000 is displayed in “モ
デムの選択” (Select modem).
•Select FOMA M1000 if FOMA M1000 is
not displayed.
eEnter APN number in “ 電話番号 ”
(Telephone number), then click [次
へ] (Next)
Leave 市外局番 (Area code) blank.
fCheck connection name (Desired)
then click [ 完了 ] (Done)
gClick スタート (Start) y “ プログラ
ム” (Program) y “アクセサリ ”
(Accessories) y “通信 ”
(Communication) y “ダイヤルアッ
プネットワーク ” (Dial-up
Networking)
Screen
Screen
Screen
Screen
Screen
00M1000EN.book 426 ページ 2004年11月24日 水曜日 午前7時56分
427
Using Data Communication
hSelect newly created Dial-up
Networking icon then click “ ファイ
ル” (File) y “プロパティ”
(Properties)
iSelect “電話番号 ” (Phone number)
and “接続方法 ” (Connection
method) in “ 全般 ” (General) tab.
Deselect “市外局番とダイヤルのプロ
パティを使う ” (Use properties in
area code and dial)
Verify that FOMA M1000 is displayed in “接
続方法 ” (Connection method)
• Select FOMA M1000 if FOMA M1000 is
not displayed
jClick “ ネットワーク ” (Network) tab
and perform various settings.
Select “PPP:インターネット,Windows 2000/
NT,Windows Me” (PPP:Internet, Windows
2000/NT, Windows Me) in “ダイヤルアップ
サーバーの 種類” (Dial up server)
Select only “ インターネットプロトコ
ル”(TCP/IP) (Internet protocol (TCP/IP)) for
component.
1In Windows 98
Click “サーバーの種類” (Server type) tab
and perform various settings.
Select “PPP:インターネット, Windows NT
Server, Windows 98” (PPP:Internet,
Windows NT Server, Windows 98) in “ダイ
ヤルアップサーバーの種類” (Dial up
server).
Select only “インターネットプロトコ
ル”(TCP/IP) (Internet protocol (TCP/IP)) for
component.
kClick “ セキュリティ” (Security) tab,
and click [OK] without entering
Username and password
Entering of Username and password is not
required for "mopera".
Enter “ユーザー名” (Username) and “ パス
ワード” (Password) provided by your ISP or
network administrator for other ISP in order
to connect to an ISP other than "mopera".
1In Windows 98
Click [OK]
Screen
Screen
Screen
Screen
00M1000EN.book 427 ページ 2004年11月24日 水曜日 午前7時56分
428
Using Data Communication
Using Dial-up Networking
Using Dial-up Networking for Packet
communication and 64K data connection
without the use of FOMA PC setup software
is explained in this section.
• Check that your FOMA handset is properly
connected to your PC before connecting.
Check connection between FOMA handset and
PC prior to establishing Bluetooth connection
<Example: in Windows XP>
aClick “スタート ” (Start) y “ すべての
プログラム ” (All programs) y “アク
セサリ ” (Accessories) y “通信 ”
(Communication) y “ネットワーク
接続 ” (Network connection)
bClick connection icon
Select Dial-up Networking icon of ISP
name setup in Step7 of P444, then click
“ネットワークタスク” (Network task) y “ こ
の接続を開始する” (Start connection), or
click the connection icon.
cCheck setting and click [ダイヤル ]
(Dial)
Dial-up network is completed when a
connection in progress message is
displayed followed by a connection
established message.
• Check each setting and click [接続]
(Connect) when using an OS other than
Windows XP.
• Entering of a “ユーザー名” (Username)
and “パスワード” (Password) is not
required to connect to "mopera".
• Check setting if a message notifying the
completion of connection is not
displayed.
Disconnecting
Disconnecting may not be completed by
closing the Internet browser. Disconnect by
performing the following procedures.
aClick Dial-up
Networking icon in
task tray
Connection screen is
displayed.
bClick [切断 ] (Disconnect)
NOTE
• Transmission speed displayed on the PC may
vary from the actual transmission speed.
Screen
Screen
Dial-up
Networking icon
Screen
00M1000EN.book 428 ページ 2004年11月24日 水曜日 午前7時56分
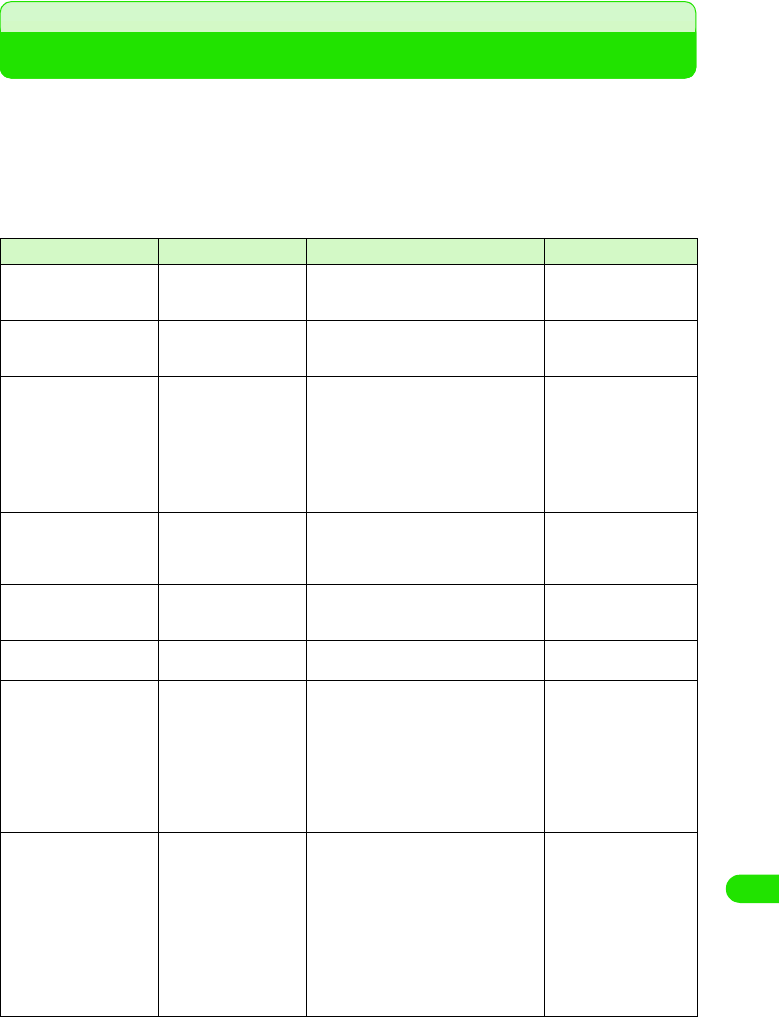
429
Using Data Communication
AT Commands
AT Commands are commands for setting FOMA handset functions from a PC.
• AT Command input format.
[&F] : Reset to factory default.
[&W] : Register setting. Called settings by ATZ Command.
[AT] : Can be used in FOMA M1000 Command Port.
[M] : Can be used with FOMA M1000 (Modem).
AT Command Overview Parameters/Description Command Examples
AT % V
[M]
Displays versions of
FOMA handset.
-AT%V
Ver1.00
OK
AT &C n
[&F] [&W] [AT] [M]
Set the operating
conditions of the circuit
CD for DTE.
n=0 : Always keeps line CD signal ON
n=1 : Line CD signals vary according to
line connection status (default)
AT & C 1
OK
AT &D n
[&F] [&W] [AT] [M]
Set the operation
performed when circuit
ER signal received from
DTE is switched from ON
to OFF.
n=0 : Ignore status (assumed to be ON)
n=1 : Online command mode is set
when status changes from ON to
OFF
n=2 : Line is disconnected and OFF
LINE mode (default) is enabled
when status changes from ON to
OFF
AT & D 1
OK
AT &F n
[AT] [M]
Reset to factory default. If
the command is entered
during communication,
the handset is reset.
Only n=0 can be set (skippable) -
AT&S n
[&F] [&W] [M]
Set how to control the
data set ready signal to
be output to DTE.
n=0 : Always ON (default)
n=1 : DR signal ON at time of line
connection
AT&S0
OK
AT &W n
[AT] [M]
Register current settings. Only n=0 can be set (skippable) -
AT *DGANSM=n
[M]
Set the reject/permit
setting mode for incoming
Packet communication.
The setting is only valid
for Packet communication
received immediately
after the command is
entered.
n=0 : Turn OFF reject (AT*DGARL)/
permit setting for incoming Packet
communication (default)
n=1 : Turn ON reject setting for incoming
Packet communication
n=2 : Turn ON permit setting for
incoming Packet communication
AT *DGANSM?
: Display currently settings
AT * D G A N S M = 0
OK
AT * D G A N S M ?
*DGANSM:0
OK
AT*DGAPL=n [,cid]
[M]
Set up APN to permit
incoming Packet
communication from APN
settings. Use <cid>
parameters defined by
AT+CGDCONT.
n=0 : Add APN defined by <cid> to list of
APNs permitted for incoming
Packet communication
n=1 : Delete APN defined by <cid> from
list of APNs permitted for incoming
connection
If <cid> parameter is omitted, all the <cids>
are added to/deleted from the list.
AT *DGAPL?
: Display permit incoming Packet
communication
AT*DGAPL =0,1
OK
AT *DGAPL?
*DGAPL:1
OK
AT *DGAPL =1
OK
AT *DGAPL?
OK
00M1000EN.book 429 ページ 2004年11月24日 水曜日 午前7時56分
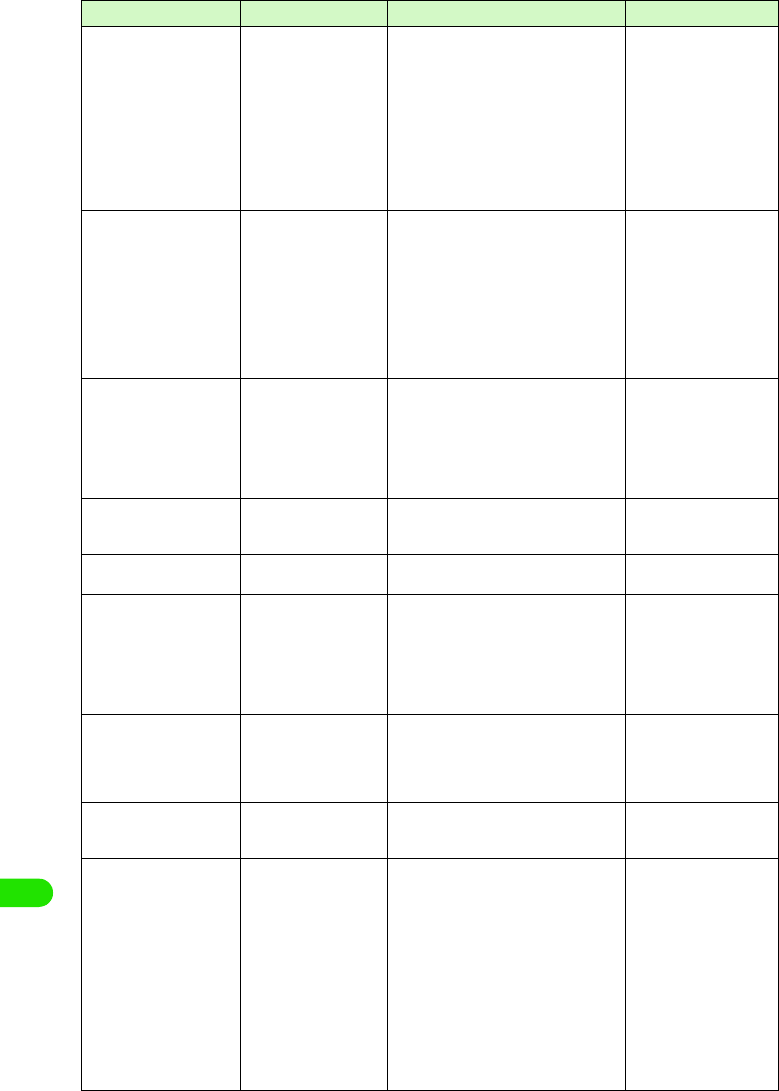
430
Using Data Communication
AT * DG A R L= n [ ,c i d ]
[M]
Set APN to refuse
incoming connection.
APN setting uses <cid>
parameters defined by
+CGDCONT.
n=0 : Add APN defined by <cid> to list of
APNs refused for incoming
connection
n=1 : Delete APN defined by <cid> to list
of APNs refused for incoming
connection
If <cid> parameter is omitted, all <cids> are
added to/deleted from the list.
AT *DGARL?
: Display refused incoming
connection
AT *DGARL =0,1
OK
AT *DGARL?
*DGARL:1
OK
AT *DGARL =1
OK
AT *DGARL?
OK
AT *DGPIR=n
[M]
The setting for notify or
hide made by this
command is valid when a
connection is sent or
received. The Dial-up
Networking settings can
also be used to append
186(ON) or 184(OFF) to
the dial-up connection.
3 P442
n=0 : Connecting to APN directly
(default)
n=1 : Send 184 to APN (always OFF)
n=2 : Send 186 to APN (always ON)
AT *DGPIR?
: Display current setting
AT *DGPIR =0
OK
AT *DGPIR?
*DGPIR:0
OK
+++
[M]
Switch FOMA handset's
mode from online data
mode to online command
status without
disconnecting when
escape sequence
executed.
- (Online Data Mode)
+++ (Unable to see the
display)
OK
AT+CE ER
[M]
Disconnection reason
display.
<report>
See Disconnection reason list 3 P460
AT + C E E R
+CEER:36
OK
AT+CGDCONT
[M]
Set APN when sending
Packet communication.
3 P461 3 P461
AT+CGEQMIN
[M]
Register criteria value for
determining if QoS
(Quality of Service) sent
from network when PPP
Packet communication is
established, is acceptable
or not.
AT+CGEQMIN=[Parameters] 3 P461
AT+CGEQMIN=?
: Display all lists of settings
AT+CGEQMIN?
: Display current settings
3 P461
AT +C G E QR E Q
[M]
Set QoS (Quality of
Service) to request for the
network when PPP
Packet communication is
established.
AT+CGEQREQ= [Parameters] 3 P462
AT+CGEQREQ=?
: Display all lists of settings
AT+CGEQREQ?
: Display current settings
3 P462
AT+CG M R
[AT] [M]
Display FOMA handset's
version.
-AT+CGMR
12345XXXXXXXXXXX
OK
AT+CGREG=n
[&F] [&W] [AT] [M]
Set whether to report
network service
registration status. Upon
receiving the status
report, "Within service
area" or "Outside service
area" will be displayed.
n=0 : OFF (default)
n=1 : ON (Report the status when it is
shifted between within service
area and Outside service area)
AT + C G R E G ?
: Display current setting
+CGREG:< n>,<stat>
n : Parameter
stat :
0 Outside service area
1 Within service area
4 Unknown
5 Outside service area
(Roaming)
AT + C G R E G = 1
OK
(Set to report status)
AT + C G R E G ?
+CGREG:1,0
OK
(Outside service area)
(Move from Outside
service area to Within
service area)
+CGREG:1
AT Command Overview Parameters/Description Command Examples
00M1000EN.book 430 ページ 2004年11月24日 水曜日 午前7時56分
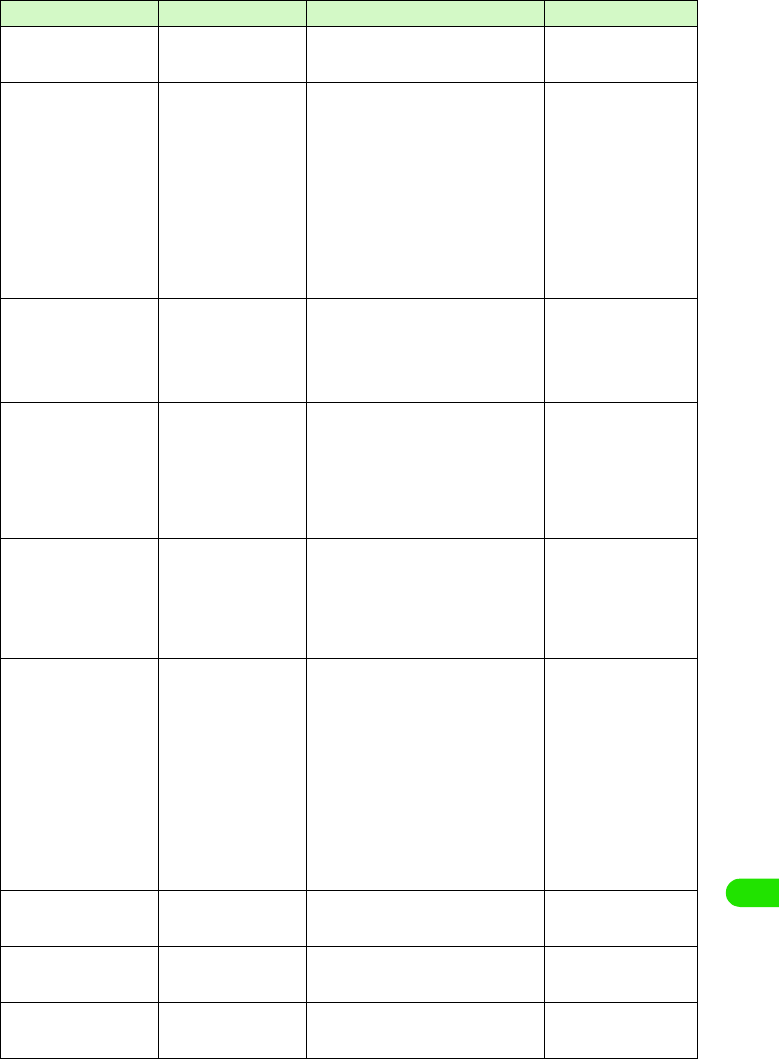
431
Using Data Communication
AT + C G S N
[AT] [M]
Display FOMA handset's
serial number.
-AT+CGSN
12345XXXXXXXXXX
OK
AT+CMEE=n
[&F] [&W] [M]
Set if any error report in
FOMA handset
n=0 : Display ERROR and not result
code (default)
n=1 : +CME ERROR:<err> Use result
code and display reason as
number
n=2 : +CME ERROR:<err>User result
code and display reason as
characters
AT+ C MEE?
: Display current settings
The right hand side is the
command examples when errors
in FOMA handset or connection.
AT + C M E E = 0
OK
AT+CNUM
ERROR
AT + C M E E = 1
OK
AT+CNUM
+CME ERROR:10
AT + C M E E = 2
OK
AT+CNUM
+CME ERROR:SIM
not inserted
AT+CNUM
[M]
Display FOMA handset's
own number.
number: Telephone number
type : 129 or 145
129 : International access code does
not include +
145 : International access code
includes +
AT+CNUM
+CNUM:,"+8190XXXXXX
XX",145
OK
AT+CR=n
[&F] [&W] [M]
Display bearer types
before displaying
CONNECT result code
during line connection.
n=0 : Do not display (default)
n=1 : Display
<serv> : Display only "GPRS" for
Packet communication
(Display "SYNC", "AV32K",
"AV64K" for data connection)
AT+CR?
: Display current settings
AT+CR =1
OK
ATD *99 ***1#
+CR:GPRS
CONNECT
AT+CRC=n
[&F] [&W] [M]
Set to use extend result
code for incoming
connection.
n=0 : Do not use (default)
n=1 : Use +CRING.<type>+CRING
Form for +CRING is as follows
+CRING
: GPRS "PPP",,, "<APN>"
AT+CRC?
: Display current setting.
AT+CRC=0
OK
AT+CRC?
+CRC:0
OK
AT+CREG=n
[&F] [&W] [AT] [M]
Set to display network
information indicating
"Within service area" or
"Outside service area".
• OS dependant
n=0 : Not notifying (default)
n=1 : Notifying (when switching "Within
service area" and "Outside service
area")
AT+CREG?
: Display current settings
+CREG
: < n>,<stat>
n : set value
stat :
0 Outside service area
1 Within service area
4 Unknown
5 Within service area (Roaming)
AT+CREG=1
OK
(Set to notify)
AT+CREG?
+CREG:1,0
OK
(Outside service area)
(Move from "Outside
service area" to "Within
service area")
+CREG:1
AT + G M I
[M]
Display FOMA handset's
manufacturer.
-AT+GMI
Motorola
OK
AT + G M M
[M]
Display FOMA handset's
product name.
-AT+GMM
FOMA M1000
OK
AT + G M R
[M]
Display FOMA handset's
version.
-AT+GMR
Ver1.00
OK
AT Command Overview Parameters/Description Command Examples
00M1000EN.book 431 ページ 2004年11月24日 水曜日 午前7時56分
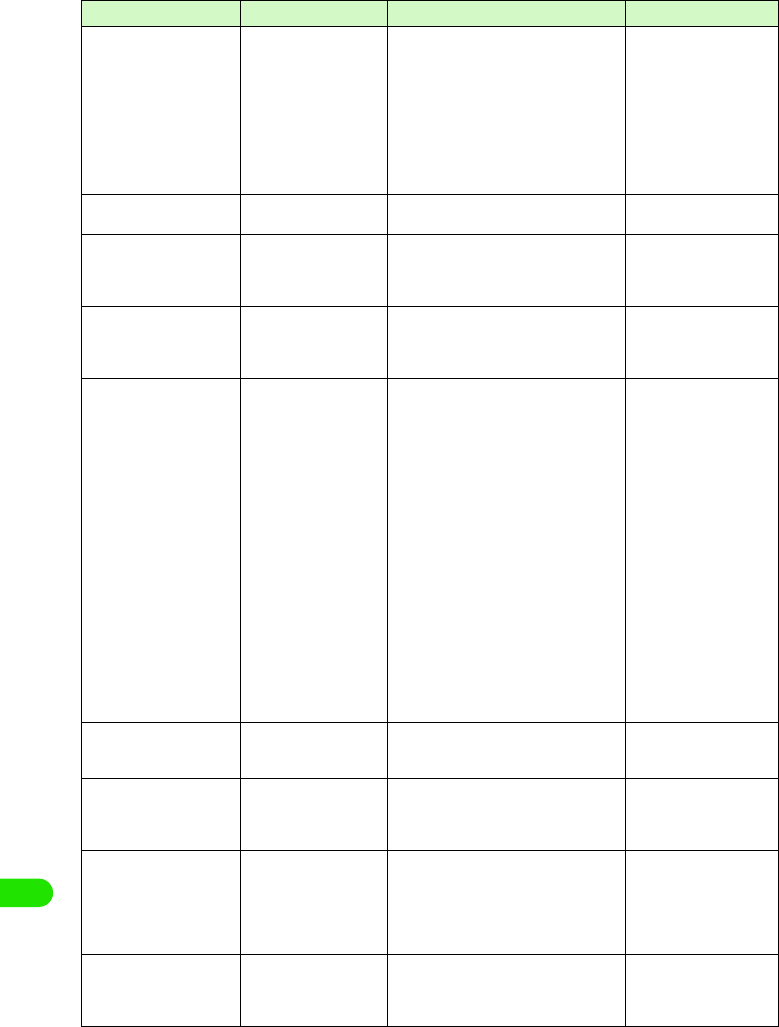
432
Using Data Communication
AT+IFC=n,m
[&F] [&W][AT] [M]
Set to control local flow n : DCE by DTE
m : DTE by DCE
Each set value for n,m
0 : No flow control
1 : Perform XON/XOFF flow control
2 : Perform RS/CS (RTS/CTS) flow
control
Default: n,m=2.2
AT + I F C ?
: Display current settings
AT+IFC=2,2
OK
AT+WS46=n
[&F] [&W] [M]
Set wireless network for
FOMA handset.
n=22 : W-CDMA (WidebandCDMA) only
(default)
AT+WS46=22
OK
ATA
[M]
Perform the receiving
process while receiving
Packet communication or
64K data connection.
-RING
ATA
CONNECT
A/
[AT] [M]
Execute the previously
executed command. No
carriage return is
necessary.
-A/
OK
ATD
[M]
Perform automatic call
process based on
parameters and dial-up
parameters to FOMA
handset.
ATD*99***<cid># : Packet
communication
<cid>1 to 10 : APNs set in +CGDCONT
Set AT+CBST=116,1,0
ATD<phone number> : 64K data
connection
Set AT+CBST=131,1,0
ATD< phone number > : AV32K
connection
Set AT+CBST=134,1,0
ATD< phone number > : AV64K
connection
<Packet communication>
ATD*99***1#
CONNECT
<64K connection>
AT+CBST=116,1,0
OK
ATD090XXXXXXXX
CONNECT
<AV32K connection>
AT+CBST=131,1,0
OK
ATD090XXXXXXXX
CONNECT
<AV64K connection>
AT+CBST=134,1,0
OK
ATD090XXXXXXXX
CONNECT
ATE n
[&F] [&W] [AT] [M]
Sets the presence of
echo for DTE in
command mode.
n=0 : Echo "OFF"
n=1 : Echo "ON"(default)
AT E 1
OK
ATH n
[M]
Performs onhook action
to FOMA handset.
n=0 : Disconnect line (can be skipped) (packet communication)
+++
AT H
NO CARRIER
ATI n
[AT] [M]
Display the confirmation
code.
n=0 : Display "NTT DoCoMo"
n=1 : Display product name (same as
+GMM)
n=2 : Display version in PPP Packet
communication (same as +GMR)
AT I 0
NTT DoCoMo
OK
AT I 1
FOMA M1000
OK
ATO n
[M]
Return from online
command mode to offline
data mode during
connection.
n=0 : Return from online command
mode to offline data mode (can be
skipped)
ATO
CONNECT
AT Command Overview Parameters/Description Command Examples
00M1000EN.book 432 ページ 2004年11月24日 水曜日 午前7時56分
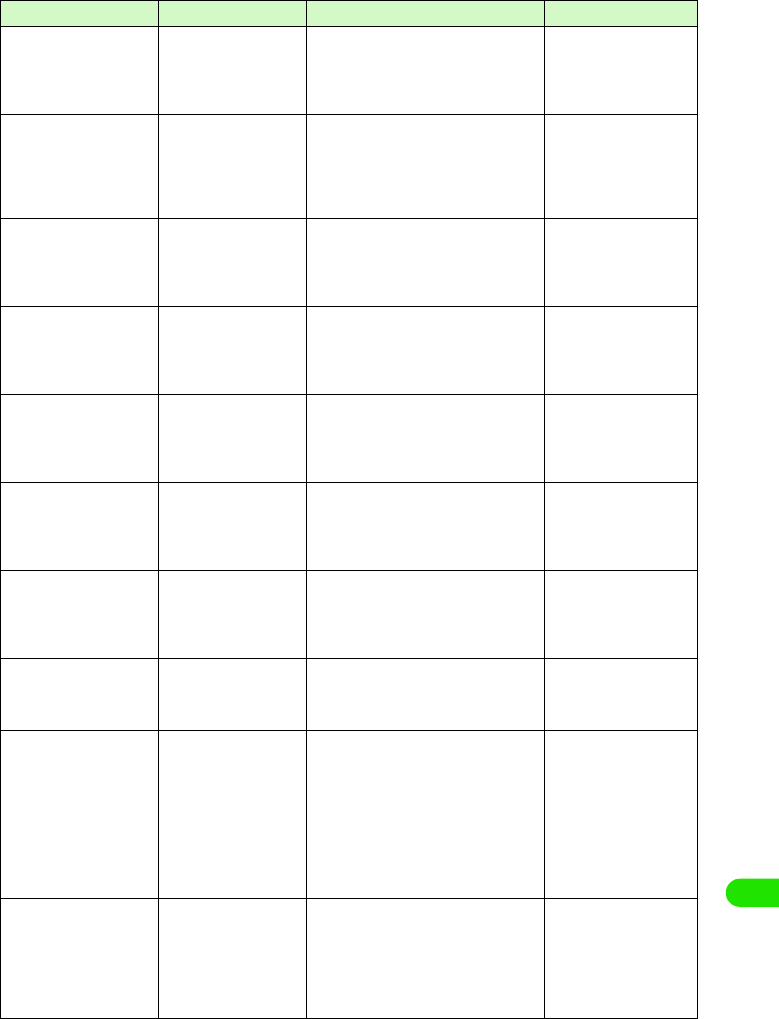
433
Using Data Communication
AT Q n
[&F] [&W] [AT] [M]
Set up to display/hide
result code to DTE.
n=0 : Display result code (default)
n=1 : Does not display result code
AT Q 0
OK
AT Q 1
(OK is not displayed this
time)
AT S 0 = n
[&F] [&W] [M]
Set number of rings until
FOMA handset receives
connection automatically.
n=0 : Do not receive automatically
(default)
n=1- 255
: Receive automatically with
specified number of rings.
ATS0? : Display current setting
AT S 0 = 0
OK
AT S 0 ?
000
OK
AT S 2 = n
[&F] [M]
Set escape character. n=43 : Default
n=127 : Disabled
ATS2? : Display current settings
AT S 2 = 4 3
OK
AT S 2 ?
043
OK
AT S 3 = n
[&F] [M]
Set carriage return
character.
n=13 : Default (Only n=13. Can be
set)
ATS3? : Display current settings
AT S 3 = 1 3
OK
AT S 3 ?
013
OK
AT S 4 = n
[&F] [M]
Set Line Feed (LF)
character.
n=10 : Default (Only n=10. Can be
set)
ATS4? : Display current settings
AT S 4 = 1 0
OK
AT S 4 ?
010
OK
AT S 5 = n
[&F] [M]
Set Back Space (BS)
character.
n=8 : Default (Only n=8. Can be set)
ATS5? : Display current settings
AT S 5 = 8
OK
AT S 5 ?
008
OK
AT S 7 = n
[&F] [&W] [M]
Set waiting time till end of
connection.
n=1 to 120 (default: n=60)(second)
Setting 121 to 255 is regarded as 120
ATS7? : Display current settings
AT S 7 = 6 0
OK
AT S 7 ?
060
OK
AT V n
[&F] [&W] [AT] [M]
Set all result code to be
displayed in either
numerals or alphabet
characters.
n=0 : Send back a result code in
numerals
n=1 : Send back a result code in
alphabet characters (default)
AT V 1
OK
AT X n
[&F] [&W]
Set whether to show
speed display in the
CONNECT display for the
connection.
Also detect busy tone or
dial tone.
n=0 : No dial tone detected, no busy
tone detect, no speed display
n=1 : No dial tone detected, no busy
tone detected, speed display
n=2 : Detect dial tone, no busy tone
detected, speed display
n=3 : No dial tone detected, detect dial
tone, speed display
n=4 : Detect dial tone, detect dial tone,
speed display (default)
AT X 1
OK
AT Z
[AT] [M]
Reset to the status of
nonvolatile memory.
Disconnect the line if this
command is entered
during connection.
- (Off line command mode)
AT Z
NO CARRIER
(On line command mode)
AT Z
OK
AT Command Overview Parameters/Description Command Examples
00M1000EN.book 433 ページ 2004年11月24日 水曜日 午前7時56分

434
Using Data Communication
AT¥S
[M]
Display current set of
commands and S register
setting.
-AT¥S
E1 Q0 V1 X4 &
C1&D2&S0¥V0
S000=000
S002=043
S003=013
S004=010
S005=008
S006=005
S007=060
S008=003
S010=001
S030=000
S103=001
S104=001
OK
AT¥V n
[&F] [&W] [M]
Select type of response
code when connected.
n=0 : Do no use expanded result code
(default)
n=1 : Use expanded result code
AT ¥ V 0
OK
AT+CP IN
[AT][M]
Enter PIN in FOMA
handset.
Format : AT+CPIN="<pin>",
"<newpin>"
This command is to enter
PIN1, PIN2 or PIN unlock
number in FOMA handset
based on result code replied
by AT+CPIN?
PIN cannot possibly be
entered with this command
depending on result code
when AT+CPIN? is entered
even if PIN or PIN unlock code
is required.
Do not use this command in
order to change PIN. <pin>
and <newpin> must be
surrounded with " " .
Result of AT+CPIN?
+CPIN:READY:PIN1 code
PIN2
PIN1 unlock code, Unable to
input PIN2 unlock code
+CPIN:SIM PIN: Waiting to
enter PIN1
+CPIN:SIM PIN2: Waiting to
enter PIN2
+CPIN:SIM PUK: Locking
PIN1 (Possible to enter PIN1
unlock code)
+CPIN:SIM PUK2: Locking
PIN2 (Possible to enter PIN2
unlock code)
The right is the example of
PIN"1234" "and "12345678".
(+CPIN:READY is ready to
respond when +CPIN? is
entered) AT+CPIN="1234"
ERROR
(+CPIN:READY is ready to
respond when +CPIN? is
entered)
AT+CPIN="12345678","12
34"
ERROR
(+CPIN:SIM PIN is ready
to respond when +CPIN?
is entered)
AT+CPIN="1234"
OK
(+CPIN:SIM PIN2 is ready
to respond when +CPIN?
is entered)
AT+CPIN="1234"
OK
(+CPIN:SIM PUK is ready
to respond when +CPIN?
is entered: PIN locked)
AT+CPIN="12345678","12
34"
OK
(+CPIN:SIM PUK2 is
ready to respond when
+CPIN? is entered: PIN
locked)
AT+CPIN="12345678","12
34"
OK
AT + C P I N ?
+CPIN:READY
OK
AT + C P I N = ?
OK
AT Command Overview Parameters/Description Command Examples
00M1000EN.book 434 ページ 2004年11月24日 水曜日 午前7時56分

435
Using Data Communication
AT + C L I P = n
[&F][&W][M]
Display sender's caller ID
when 64K data
connection is received.
n=0 : No output result (default)
n=1 : Output result
Result : +CLIP (n,m)
m=0 : Network setting that does not
notify caller ID
m=1 : Network setting that notifies
caller ID
m=2 : Unknown
AT + C L I P = 0
OK
AT + C L I P = ?
+CLIP:(0,1)
OK
(+CLIP=1 Output result)
RING
+CLIP:
"090XXXXXXXX",177,
"123",136
AT + C L I R = n
[M]
Set to notify phone
number when sending
64K data connection.
n=0 : Use setting written in service
agreement
n=1 : Do not send Caller ID
n=2 : Send Caller ID (default)
Result : +CLIR(n, m)
m=0 : CLIR is not operating (always
notify)
m=1 : CLIR is operating (always does
not notify)
m=2 : Unknown
m=3 : CLIR Temporary mode (default;
does not notify)
m=4 : CLIR Temporary mode (default:
notify)
AT + C L I R = 0
OK
AT + C L I R ?
+CLIR:0,1
OK
AT + C L I R = ?
+CLIR:(0-2)
OK
ATS30=n
[&F][M]
Disconnect handset if no
data is received or sent.
n=0 : Inactive timer off (default)
n=0 to 255
AT S 3 0 = 0
OK
AT S 3 0 ?
000
OK
AT S 3 0 = ?
ERROR
ATS103=n
[&F][M]
Set to append and send
received sub address.
n=0 : *
n=1 : / (default)
n=2 : ¥ (yen symbol or backslash)
AT S 1 0 3 = 0
OK
AT S 1 0 3 ?
000
OK
AT S 1 0 3 = ?
ERROR
ATS104=n
[&F][M]
Set to append and send
outgoing sub address.
n=0 : #
n=1 : % (default)
n=2 : &
AT S 1 0 4 = 0
OK
AT S 1 0 4 ?
000
OK
AT S 1 0 4 = ?
ERROR
AT * D A N T E
[M]
Display reception level
with a number.
n=0 : Reception level 0
n=1 : Reception level 1
n=2 : Reception level 2
n=3 : Reception level 3
AT * DA N T E
*DANTE:3
OK
AT * DA N T E = ?
*DANTE:(0-3)
OK
AT Command Overview Parameters/Description Command Examples
00M1000EN.book 435 ページ 2004年11月24日 水曜日 午前7時56分
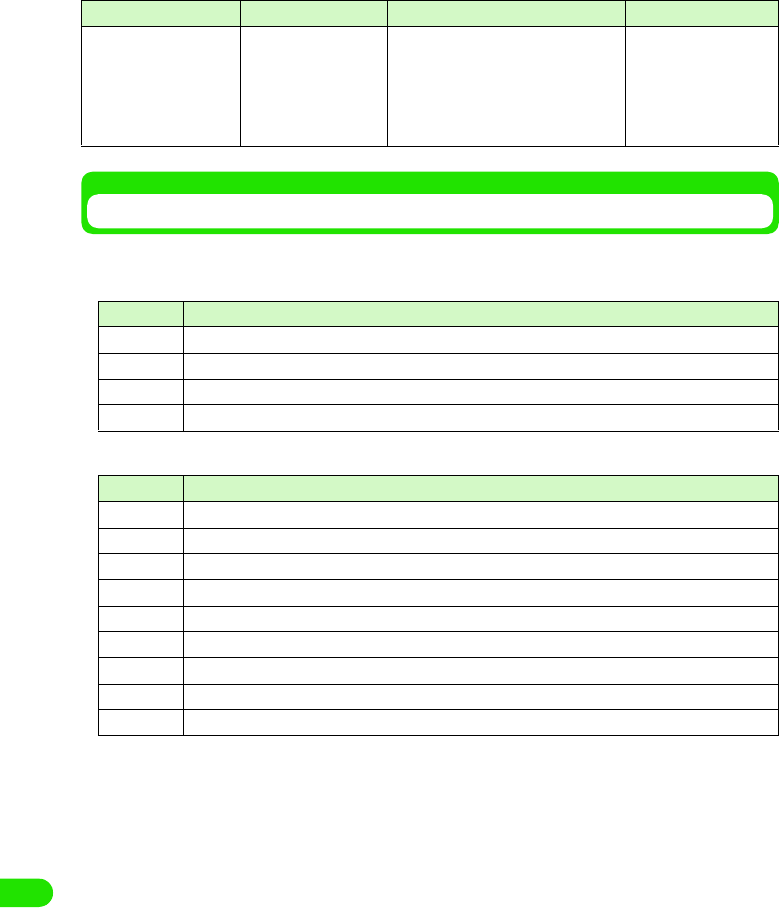
436
Using Data Communication
Lists of Disconnected Reasons
Disconnected reasons for requested contents are as follows:
1Packet communication
164K Data connection
AT*DRPW
[M]
Display an index for
reception power of the
radio signal.
-AT*DRPW
*DRPW:0
OK
AT*DRPW=?
*DRPW:(0-75)
OK
Value Reason
27 APN is not present or incorrect.
30 Disconnected from network.
33 Requested service option is not subscribed.
36 Connection is disconnected properly.
Value Reason
1 Specified number does not exist.
16 Connection is disconnected properly.
17 Unable to communicate because remote device is busy.
18 Call was made, but no response within the specified time.
19 Unable to communicate because remote device is busy calling.
21 Remote device rejected a call.
63 Network service and option are not valid.
65 Unavailable processing speed was specified.
88 You made a call to or received a call from a handset with different handset properties.
AT Command Overview Parameters/Description Command Examples
00M1000EN.book 436 ページ 2004年11月24日 水曜日 午前7時56分

437
Using Data Communication
Additional AT Commands Descriptions
1Invalid AT command
The following commands will not generate
errors but will not act as commands.
• AT (Enter only AT)
• ATT (Tone setting)
• ATP (Pulse setting)
• ATS6 (Specify duration of pause till
dialing commences)
• ATS8 (Specify duration of comma till
dialing commences)
• ATS10 (Set delay time for automatic
disconnection)
1Command name +CGDCONT[M]
•Overview
Set APN when sending packet
connection.
Although this command is a setup
command, it does not get stored to the
status of nonvolatile memory by &W,
and does not get reset by &F and &Z.
•Form
+CGDCONT=[<cid>[,"PPP"[ ,"<APN>"]
] ]
• Parameter descriptions
Set APN when sending Packet
communication. See examples in
command operation lists
• Operation without parameter
• Command examples
Registered APN named abc (cid=3)
AT+CGDCONT=3,"PPP","abc"
OK
1Command name:+CGEQMIN=[Parameter]
[M]
•Overview
Register criteria value to determine if
QoS sent from network when PPP
Packet communication established is
permitted.
4 ways to set up as stated in command
examples.
Although this command is a setup
command, it does not get stored to the
status of nonvolatile memory by &W,
and does not get reset by &F and &Z.
•Form
+CGEQMIN=[<cid>[,,<Maximum
bitrate UL>[ ,<Maximum bitrate DL>] ] ]
• Parameter description
• Operation without parameter
• Command examples
<cid>* : 1 to 10
<APN>* : Optional
*: <cid> is the number used to control the
destination (APN) for the Packet
communication to be registered in
FOMA handset.
1~10 can be registered. <cid>=1 is set
as mopera.ne.jp as default but
overwrittable.
<APN>is optional connection name that
indicates each destination.
+CGDCONT= : Set default value
for all <cid>
+CGDCONT=<cid>
: Set specified
<cid> as default
+CGDCONT=? : Display list of
values that can be
configured
+CGDCONT? : Display current
settings
<cid>* : 1 to 10
<Maximum bitrate UL>*
: None (default) or 64
<Maximum bitrate DL>*
: None (default) or 384
*: <cid> is the number used to control the
destination (APN) for the Packet
communication to be registered in
FOMA handset. 1 to 10 can be
registered.
In <Maximum bitrate UL> and
<Maximum bitrate DL>, the minimum
connection speed [in kbps] is set for
both upload and download traffic
between FOMA handset and the base
station. If the parameter is set to None
(default), all speeds are permissible. If
64 and 384 are set, any connection at a
speed except the above limit is not
permitted, and the Packet
communication will not be connected.
+CGEQMIN= : Set default value for
all <cid>
+CGEQMIN=<cid>
: Set specified <cid>
as default value
00M1000EN.book 437 ページ 2004年11月24日 水曜日 午前7時56分
438
Using Data Communication
4 ways to set up as states in command
examples. Set (1) as states value for
each <cid>s
1Command name:
:+CGEQREQ=[Parameter] [M]
•Overview
Sets up QoS to request to the network
when PPP Packet communication is
established.
This set up is also set up as the default
value in one of the patterns stated in
the following command execution
example.
Although this command is a setup
command, it does not get stored to the
status of nonvolatile memory by &W,
and does not get reset by &F and &Z.
•Form
+CGEQREQ=[<cid>]
• Parameter Description
<cid>*:1 to 10
• Operation without parameter
• Command examples
Only 1 way to set the command. The
contents are set by default for each cid.
Command used to require 64kbps
upload and 384kbps download
(when<cid>=3)
AT+CGEQREQ=3
OK
1Saving modem port command setting
values
Settings by AT commands are initialized
when FOMA handset is switched ON and
OFF, except APN setting by
AT+CGDCONT (3 P440), QoS settings
by AT+CGEQMIN and AT+CGEQREQ
commands, permit/reject setting mode for
incoming connection set by AT*DGAPL/
AT*DGARL/AT*DGANSM commands or
appending 184 or 186 for packet
connection by AT*DGPIR command.
Commands with [&W] can be saved by
entering
AT& W
after setting. And at the same time, other
settings with [&W] are also saved. These
values can be called by entering
ATZ
even if after FOMA handset was switched
ON and OFF.
(1) Command used to permit all speed
both upload and download
(when<cid>=2)
AT+CGEQMIN=2
OK
(2) Command used to permit only
64kbps upload and 384kbps
download (when<cid>=3)
AT+CGEQMIN=3,,64,384
OK
(3) Command used to permit 64kbps
upload and all speed download
(when<cid>=4)
AT+CGEQMIN=4,,64
OK
(4) Command used to permit all speed
upload and only 384kbps download
(when<cid>=5)
AT+CGEQMIN=5,,,384
OK
*: <cid> is the number used to control the
destination (APN) for the Packet
communication to be registered in FOMA
handset. 1 to 10 can be registered to
FOMA handset.
+CGEQREQ= : Set default value for
all <cid>s.
+CGEQREQ=<cid>
: Set specified <cid>
as default.
00M1000EN.book 438 ページ 2004年11月24日 水曜日 午前7時56分
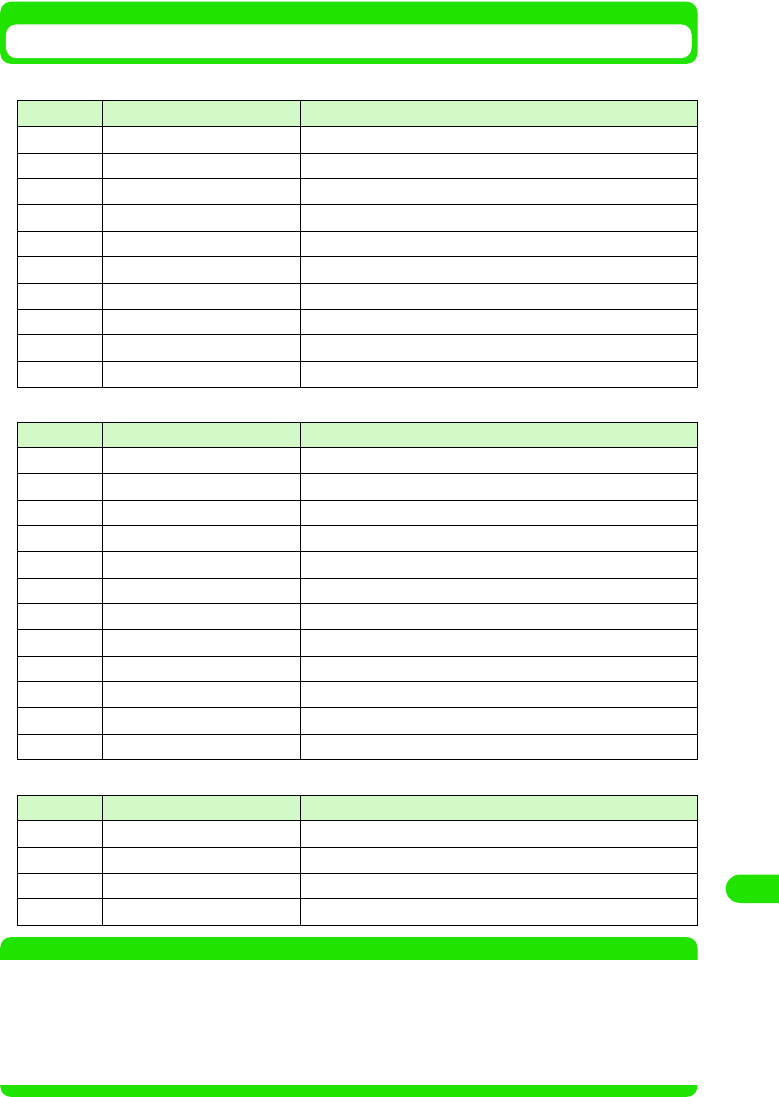
439
Using Data Communication
Result Codes
1Result codes for data connection
1Extended result codes
1Connection protocol result code
NOTE
• When ATVn command (3 P457) is set to n=1, the result code is displayed in the alphanumeric display format
(default). When the command is set to n=0, the result code is displayed in the numerical display format.
• To retain compatibility with a modem connected via conventional RS-232C, connection speed is displayed
but it differs from the actual connection speed because FOMA handset is connected to the PC with a USB
cable.
• When "RESTRICTION" message is displayed, (No.100), the network is busy. Please try later.
No. Text display Description
0 OK Operation performed properly.
1 CONNECT Connected to their party.
2 RING Incoming call.
3 NO CARRIER Line disconnected.
4 ERROR Unable to accept command.
5 NO DIALTONE Unable to detect dial tone.
6 BUSY Detect busy tone.
7 NO ANSWER Completed connection. Timeout.
100 RESTRICTION Network restriction in place.
101 DELAYED Redial call restricted.
No. Text display Description
5 CONNECT 1200 Connected at 1200bps between FOMA handset and PC.
10 CONNECT 2400 Connected at 2400bps between FOMA handset and PC.
11 CONNECT 4800 Connected at 4800bps between FOMA handset and PC.
13 CONNECT 7200 Connected at 7200bps between FOMA handset and PC.
12 CONNECT 9600 Connected at 9600bps between FOMA handset and PC.
15 CONNECT 14400 Connected at 14,400bps between FOMA handset and PC.
16 CONNECT 19200 Connected at 19,200bps between FOMA handset and PC.
17 CONNECT 38400 Connected at 38,400bps between FOMA handset and PC.
18 CONNECT 57600 Connected at 57,600bps between FOMA handset and PC.
19 CONNECT 115200 Connected at 115,200bps between FOMA handset and PC.
20 CONNECT 230400 Connected at 230,400bps between FOMA handset and PC.
21 CONNECT 460800 Connected at 460,800bps between FOMA handset and PC.
No. Text display Description
1 PPPoverUD Connect via PPPoverUD(BC=UDI, +CBST=116,1,0)
2 AV32K AV (video-phone) connect via [32K]
3 AV64K AV (video-phone) connect via [64K]
5 PACKET Connect with PACKET
00M1000EN.book 439 ページ 2004年11月24日 水曜日 午前7時56分
440
Using Data Communication
Examples of Result Codes
1When ATX0 is set
• Regardless of the settings of AT¥Vn
command ( 3 P459), only CONNECT is
displayed upon completion of
connection.
1When ATX1 is set
• When ATX1, AT¥V0 is set (default)
• Upon completion of connection, result
code is displayed in the following format:
CONNECT <speed between FOMA
handset - PC>
• When ATX1, AT¥V1 is set*
• The code is displayed upon completion
of connection in the following format:
CONNECT <speed of FOMA handset -
PC>PACKET <destination APN>/
<upload maximum speed (between
FOMA handset 3 radio base station)>/
<download maximum speed (between
FOMA handset ← radial base station)>
Maximum 64kbps for sending and
maximum 384kbps for receiving
connection to mopera.ne.jp is displayed
as follows.
Text display example
: ATD*99***1#
CONNECT
Number display example
: ATD*99***1#
1
Text display example
: ATD*99***1#
CONNECT 460800
Number display example
: ATD*99***1# 1 21
Text display example
: ATD*99***1#
CONNECT 460800
PACKET mopera.ne.jp /
64/ 384
Number display example
: ATD*99***1#
1 21 5
*: When ATX1 and AT¥V1 are set at the
same time, it is likely that dial-up
connection will fail. Only use of AT¥V0
is recommended.
00M1000EN.book 440 ページ 2004年11月24日 水曜日 午前7時56分

441
Entering Characters
Character Input . . . . . . . . . . . . . . . . . . . . . . . . . . . . . . . . . . . . . . . . . . . . . . . . . 442
Entering Characters with Direct Input <Direct Input Method> . . . . . . . . . . . 444
Editing/Registering Fixed Phrases <Save Phrases> . . . . . . . . . . . . . . . . . . . 456
Copying/Cutting and Pasting Characters <Character copy> . . . . . . . . . . . . 458
Registering Frequently Used Words <Save word>. . . . . . . . . . . . . . . . . . . . . 460
Using Electronic Dictionary . . . . . . . . . . . . . . . . . . . . . . . . . . . . . . . . . . . . . . . 462
Setting the Detail of Character Entry. . . . . . . . . . . . . . . . . . . . . . . . . . . . . . . . 466
Entering Characters with Indirect Input Method
<Indirect input method> . . . . . . . . . . . . . . . . . . . . . . . . . . . . . . . . . . . . . . . . . . 470
00M1000EN.book 441 ページ 2004年11月24日 水曜日 午前7時56分
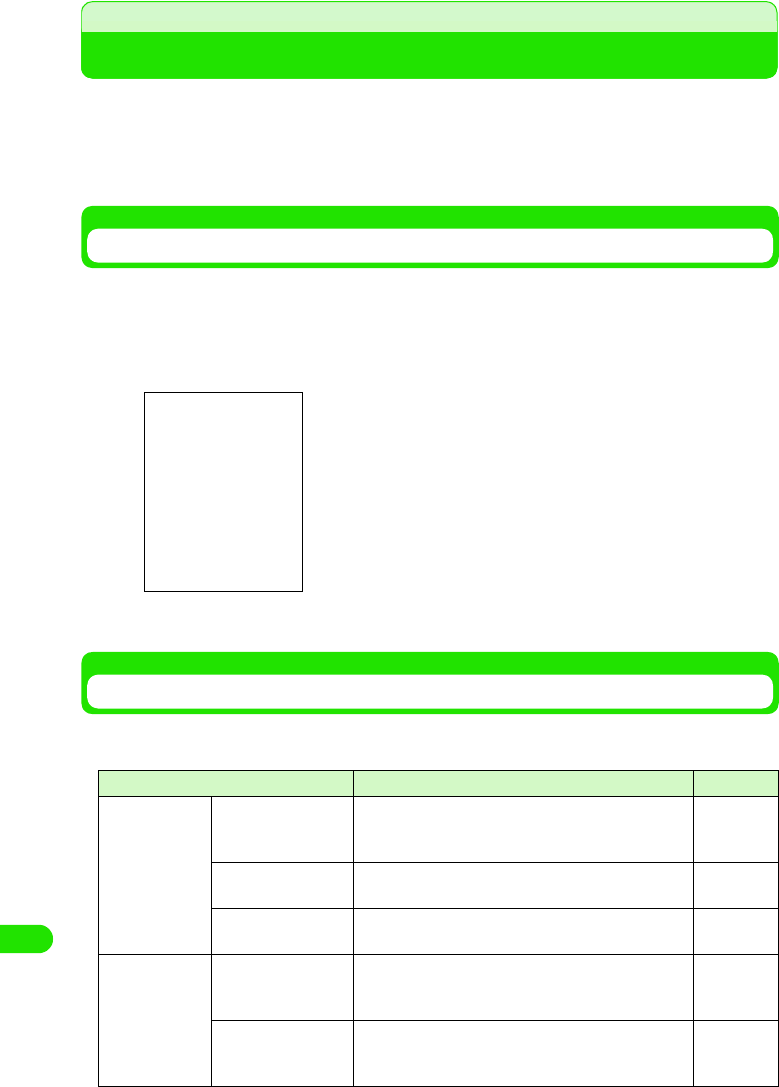
442
Entering Characters
Character Input
With FOMA handset, a character is entered by tapping a target character at a keyboard displayed
on the touch screen with the Stylus. Also, by switching the input method, a character can be
entered by a free draw. Since character input is needed in various situations of FOMA handset
operation, such as registering contacts, creating messages, and creating notes, it would be
convenient if you memorize the procedure beforehand.
Displaying Character Entry Screen
Tap the character input field where a character needs to be entered, and tap $$ on the Status bar
to display the character entry screen. Enter a target character by switching the input mode.
• Input mode 3 P467
• Input method 3 P466
• Switching input method 3 P467
Input Method
There are following methods to enter characters with FOMA handset. Choose an input method
that suites you.
Input method Description Reference
Direct input
method
50-character kana
syllabary keyboard
(Kana Keyboard)
From the keyboard arranged in the order of 50-
character kana syllabary, you can enter a character by
tapping a target character.
P469
Qwerty keyboard From the keyboard arranged in alphabetical order, you
can enter a character by tapping a target character. P471
Handwriting A character is entered by writing a character on the
free draw input area, using the Stylus. P478
Indirect input
method
Multi Tap From the keyboard with two or more characters
assigned to one key, a character is entered by tapping
a key multiple times to switch the characters.
P496
Two Tap From the keyboard with two or more characters
assigned to one key, a character is entered by Two
Tap operations
P500
In case of 50-character kana
syllabary keyboard
00M1000EN.book 442 ページ 2004年11月24日 水曜日 午前7時56分
443
Entering Characters
Switching Input Method
The input method used at the time of entering a character can be changed.
aTap $$ y $$ on the Application Selector bar, tap "Handset" tab y
Text input and on the Control panel screen, tap [Advanced] on
Text input setup screen, and tap Input method on Preferences
screen
bTap $$ of input method you are setting y [Close] y [Done]
Input method is changed.
Input Mode
There are following input modes to enter a character. Entering text with a mixture of hiragana,
kanji, katakana, alphabet and numeric characters are performed by switching the input mode.
To switch the input mode, tap the keyboard for each input method, or tap the key to switch the
input mode in the free draw input screen.
De
f
ault sett
i
ng Kana keyboard
• Tap $$ $$ at the tab display area to switch the tab display
between left and right.
Input mode Key display Description
Hiragana/kanji [Hiragana]/[Kanji]/[Hira]/"あ /ア " Hiragana, kanji, and double-byte
katakana can be entered.
Katakana [Kata]/[Single-byte Kana] Double-byte/single-byte katakana
can be entered.
Alphabet [Abc]/[Abc]/[Eng]/" 英数 " Double-byte/single-byte alphabet
character can be entered.
Numeric [Num]/[Eng]/[Abc]/[Abc]/" 英数" Double-byte/single-byte numeric
character can be entered.
Symbol [Mark] Double-byte/single-byte symbols,
special characters or fixed phrases
can be selected.
00M1000EN.book 443 ページ 2004年11月24日 水曜日 午前7時56分
444
Entering Characters
NOTE
• To switch the input mode, tap the corresponding key in the character input screen for each input method.
• When the character input screen is displayed, there are input modes that cannot be switched, depending on
the application running or what is to be entered.
Direct Input Method
Entering Characters with Direct Input
With FOMA handset, there are three direct input methods: "50-character kana syllabary
keyboard", "Qwerty keyboard" and "free draw input". By setting the input method in advance,
each input screen can be displayed at the time of a character input. 3 P492
50-character Kana Syllabary Keyboard
When the input method is set to Kana keyboard following keyboards will be displayed by tapping
$$ on the Status bar in the situation of entering characters.
Item Description
aInput method switch key A menu is displayed, and input method can be switched.
bNumber of characters The number of confirmed characters/maximum number available for
character input are displayed.
cMove key The keyboard is moved to the upper part/lower part of the touch screen.
dDictionary key A dictionary search is performed.
Hiragana/kanji input mode Katakana input mode
Alphabet/numeric input mode Numeric input mode
00M1000EN.book 444 ページ 2004年11月24日 水曜日 午前7時56分
445
Entering Characters
• To switch the input mode, tap either [Hira]/[Alphabet]/[Kana]/[Numeric] key from each input mode keyboard.
• Tap [Symbol] to display the screen that switches between symbols, fixed phrases and dictionary. 3 P472
• List of symbols and special characters 3 P521
• List of fixed phrases 3 P522
Kana keyboard
Entering Characters Using Kana Keyboard
With a kana keyboard, characters that can be entered are displayed on the keyboard. Tap a
target character directly to input, and if necessary, switch the input mode by tapping the input
mode key.
<Example: when entering "太郎" in Name of a contact>
aTap Name filed in a contact y tap $$ on the Status bar
• How to operate 3 P99
• When an input mode is other than hiragana/kanji mode, tap [Hira].
bTap [ た] y [ ろ] y [う]
cFrom the conversion candidates, tap [ 太郎 ]
Input of "太郎 " is set.
• When there are more than one candidate, display them by dragging the scroll bar.
eInput field switch key When two or more input field (name, family name, address, etc.) exist in one
screen, such as a registration screen for a contact, the input field can be
changed while the free draw input screen is displayed.
fMinimize key Temporarily hides the keyboard.
gEnd key Closes the free draw input screen.
hConvert key Converts input characters.
iLF/CR key Starts a new line.
jSpace key A space is entered.
kClear key Deletes a character entered.
lDouble-byte key Double-byte characters and numbers can be entered.
mcaps/↑key Capital letters and small letters are switched.
nDate key Current date can be entered.
oTime key Current time can be entered.
Item Description
Conversion candidates
00M1000EN.book 445 ページ 2004年11月24日 水曜日 午前7時56分
446
Entering Characters
• When predict conversion function is set to ON, the conversion candidate predicted to
follow the character decided in conversion candidate area is displayed.
• Tap END key to end the entry.
• To continue entering characters, tap a key you are entering.
NOTE
• Following operations are also available:
- Entering a fixed phrase 3 P472
- Entering a symbol 3 P473
- Entering a face mark 3 P474
- Deleting an entered character 3 P476
- Searching a dictionary 3 P475
• The maximum number of characters that can be converted at once is 32 characters.
Qwerty Keyboard
When the input method is set to "Qwerty keyboard", following keyboards will be displayed by
tapping $$ on the Status bar in the situation of entering characters.
Item Description
aInput method switch key A menu is displayed, and input method can be switched.
bNumber of characters The number of confirmed characters/maximum number available for
character input are displayed.
cMove key The keyboard is moved to the upper part/lower part of the touch screen.
dDictionary key A dictionary search is performed.
Hiragana/kanji input mode Alphabet/numeric input mode
Numeric input mode
00M1000EN.book 446 ページ 2004年11月24日 水曜日 午前7時56分
447
Entering Characters
• To switch the input mode, tap either [Kanji]/[Alphabet]/[Numeric] key from each input mode keyboard.
• Tap [Symbol] to display the screen that switches between symbols, fixed phrases and dictionary. 3 P472
• List of symbols and special characters 3 P521
• List of fixed phrases 3 P522
Qwerty keyboard
Entering Characters Using Qwerty Keyboard
With a Qwerty keyboard, characters that can be entered are displayed on the keyboard. Tap
directly on a target character to input, and if necessary, switch the input mode by tapping the
input mode key. However, even if the input mode is switched to kanji, hiragana would not show on
the keyboard. When entering hiragana/kanji from the Qwerty keyboard, use the Roman character
entry method.
• The input method must be set to "Qwerty keyboard" beforehand. 3 P492
<Example: when entering "太郎" in Name of a contact >
aTap Name field in a contact y tap $$ on the Status bar
• How to operate 3 P99
• When an input mode is other than hiragana/kanji mode, tap [Kanji].
bEnter " たろう "
cFrom the conversion candidates, tap [ 太郎 ]
eInput filed switch key When two or more input fields (name, family name, address, etc.) exist in one
screen, such as a registration screen for a contact, the input field can be
changed while the free draw input screen is displayed.
fMinimize key Temporarily hides the keyboard.
gEnd key Closes the free draw input screen.
hConvert key Converts input characters.
iLF/CR key Starts a new line.
jSpace key A space is entered.
kClear key Deletes a character entered.
lDouble-byte key Double-byte characters and numbers can be entered.
mcaps/↑key Capital letters and small letters are switched.
nDate key Current date can be entered. Tapping [caps]/[↑] will switch to Date key, and
current date can be entered.
Item Description
Roman character entry is used.
• To enter "た": tap [t] 3 [a]
• To enter "ろ": tap [r] 3 [o]
• To enter "う": tap [u]
Conversion candidates
00M1000EN.book 447 ページ 2004年11月24日 水曜日 午前7時56分
448
Entering Characters
Input of "太郎" is set.
• When there are more than one candidate, display them by dragging the scroll bar.
• When predict conversion function is set to ON, the conversion candidate predicted to
follow the character decided in conversion candidate area is displayed.
• Tap END key to end the entry.
• To continue entering characters, tap a key you are entering.
NOTE
• Following operations are also available:
- Entering a fixed phrase 3 P472
- Entering a symbol 3 P473
- Entering a face mark 3 P474
- Deleting an entered character 3 P476
- Searching a dictionary 3 P475
• The maximum number of characters that can be converted at once is 32 characters.
• List of Roman character entries 3 P523
Entering a Fixed Phrase
Fixed phrases can be entered by selecting from 5 categories.
• This can be used from all input methods.
aWhile entering characters, tap [Mark]
bTap a category of a phrase you are entering
cTap a fixed phrase to enter
The phrase is entered.
• Tap $$ $$ to scroll up and down the list of fixed phrases.
Category names of fixed phrases
• Selections can be made from the categories of "General",
"Reply", "Business", "Private" and "English".
• Tap [Back] to go back to the screen for switching between
symbols, fixed phrases and dictionary.
00M1000EN.book 448 ページ 2004年11月24日 水曜日 午前7時56分
449
Entering Characters
NOTE
• List of fixed phrases3 P522
Entering a Symbol
Double-byte/single-byte symbols and special characters can be selected for entries.
• This can be used from all input methods.
aWhile entering characters, tap [Mark]
bTap the type of symbols
cTap a symbol to enter
A symbol is entered.
• Tap $$ $$ to scroll up and down the list of symbols.
NOTE
• List of symbols and special characters 3 P521
Entering a Face Mark
A "Face mark" which expresses a face by using symbols and alphabet characters can be
entered.
• This can be used from all input methods.
aWhile entering characters, enter " かお "
Face marks are displayed as for conversion candidates.
Types of symbols
• A type of symbol can be selected from "Mark", "Mark" and
Particular".
• Tap [All] to select from all double-byte/single-byte symbols,
special characters and kanji characters.
• Tap [Back] to go back to the screen for switching between
symbols, fixed phrases and dictionary.
00M1000EN.book 449 ページ 2004年11月24日 水曜日 午前7時56分
450
Entering Characters
• The following face marks are displayed as for conversion candidates.
bTap a face mark to enter
A face mark is entered.
Simple Entry of an Email Address
Strings of fixed form used for email or internet address, such as a domain name (that follows
after @) of an email address, can be entered.
• This can be used from all input methods.
aWhile entering characters, tap [Mark]
bTap [Web] from the screen for switching between symbols, fixed
phrases and dictionary
cTap a string to enter
The string is entered.
• Tap $$ $$ to scroll up and down the list of symbols.
NOTE
• List of fixed phrases3 P522
(-_-) (-.-) (+_+) (*_*)
(-_-;) (..) (._.) (._.)_
(;_;) (>_<) (@_@) (T_T)
(^.^) (^O_O^) (^O^) (^^)
(^^ゞ(^_-) (^_^) (^_^;)
(^o^) (^Ο^) (_) (~_~)
(~_~;) (~o~) )^O^( >^_^<
^/^ ^^; ^_^; _(._.)_
m(_)m
• Tap [Back] to go back to the screen for switching between
symbols, fixed phrases and dictionary.
00M1000EN.book 450 ページ 2004年11月24日 水曜日 午前7時56分
451
Entering Characters
Entering Characters from Dictionary
A lemmatized search can be performed from a dictionary by selecting a string from the entered
text. It is convenient to check the meaning, a declensional kana ending, etc. of the selected
string. Furthermore, the searched contents can also be copied.
• This can be used from all input methods.
Dictionary Search while Entering Characters with Direct Input Method
After setting the character input method to "Kana keyboard", "Qwerty keyboard" or "handwriting",
a dictionary search is performed while entering characters.
aDrag a string for a dictionary search from the entering text
The cursor hits the specified area.
bTap $$
cTap a dictionary search key of a dictionary you are using
A search begins, and related direction words are displayed in direction word display area.
• A dictionary can be selected from "national language", "Japanese-English" or "English-
Japanese".
dTap a target direction word from the direction word display area
The explanation of the selected direction word is displayed in the search result display area.
• Tap [Copy] to copy the contents displayed in the search result display area. Drag a string
in the search result display area, and tap [Copy] to copy the specified string. Tap [Paste]
to paste the copied content in the decided character display area.
• Tap [Back] to end the dictionary search.
Dictionary Search while Entering Characters with Indirect Input Method
After setting the character input method to "Multi Tap" or "Two Tap", a dictionary search is
performed while entering characters.
aDrag a string for a dictionary search from the entering text
The cursor hits the specified area.
Dictionary search screen
Decided character display area
Direction word display area
Search result display area
Dictionary search key
00M1000EN.book 451 ページ 2004年11月24日 水曜日 午前7時56分
452
Entering Characters
bTap [Mark]
cTap [Dictionary] y perform a dictionary search
Subsequent operations are the same as dictionary search for a direct input method.
• How to operate3 P475
Deleting Characters
Entered characters can be deleted one at a time or several at once. Also, a range for deletion can
be specified.
1When deleting one character a time
In the display area, tap the right side of a character you want to delete to bring the
cursor there, and tap [Clear]
1When deleting all characters entered
• Tap the right side of the last character to bring the cursor there, and point [Clear]
for more than one second
The screen for switching between
symbols, fixed phrases and dictionary
00M1000EN.book 452 ページ 2004年11月24日 水曜日 午前7時56分
453
Entering Characters
• Drag on entered characters, and tap [Clear]
1When deleting all characters beyond specified location
Tap the left side of the first character of the string you want to delete to bring the
cursor there, and point [Clear] for more than one second
1When deleting by specifying the area
Drag on the string you are deleting, and tap [Clear]
Entering Characters with Handwriting
With handwriting, a character is entered in the free draw input screen by directly writing on the
touch screen with the Stylus.
• It is necessary to set the input method to "Handwriting" beforehand. 3 P492
00M1000EN.book 453 ページ 2004年11月24日 水曜日 午前7時56分
454
Entering Characters
Handwriting Input Screen
When the input method is set to "free draw input", following input screen will display by tapping
$$ on the Status bar in the situation of entering characters.
• Tap [Mark] to display the screen that switches between symbols, fixed phrases and dictionary. 3 P472
• List of symbols and special characters 3 P521
• List of fixed phrases 3 P522
Entering Characters
The input method for entering characters with handwriting input is explained.
Item Description
aInput method switch key A menu is displayed, and input method can be switched.
bNumber of characters The number of confirmed characters/maximum number available for
character input are displayed.
cMove key The free draw input screen is moved to the upper part/lower part of the touch
screen.
dDictionary key A dictionary search is performed.
eInput field switch key When two or more input fields (name, family name, address, etc.) exist in one
screen, such as a registration screen for a contact, the input field can be
changed with having the free draw input screen displayed.
fMinimize key Temporarily hides the keyboard.
gEnd key Closes the free draw input screen.
hRecognition mode tab Switches the mode which recognizes the type of character entered with free
draw.
iHelp key Displays the help for free draw input.
jMaximize/standard key The size of free draw input area can be switched between enlarged size and
standard size.
kInput area A character is entered with free draw.
lInput area switch key A continuation of the input area current entering is displayed.
mSymbol key A screen that switches between symbols, fixed phrases and dictionary is
displayed.
nConvert key Converts input characters.
oNew-line key A new line is started.
pSpace key A space is entered.
qClear key Deletes a character entered.
00M1000EN.book 454 ページ 2004年11月24日 水曜日 午前7時56分
455
Entering Characters
<Example: when entering "太郎" in Name of a contact>
aTap Name field in a contact y tap $$ on the Status bar
• How to operate 3 P99
bWrite " たろう "in the input area
cFrom the conversion candidates, tap [ 太郎 ]
Input of "太郎" is set.
• When there are more than one candidate, display them by dragging the scroll bar.
• When predict conversion function is set to ON, the conversion candidate predicted to
follow the character decided in conversion candidate area is displayed.
• Tap END key to end the entry.
• To continue entering characters, write a character in the input area.
1When changing the character which has not been recognized correctly
When a character is entered in the input area, the bottom right of the input area displays as
following, and by tapping it will display the candidates for the entered character.
If a target character exists in the candidates, tap the character for a conversion.
If a target character does not exist in the candidates, tap $$ and rewrite the character.
• In the input area and for the candidates, the recognized characters are classified and displayed in the
following colors. When the character type currently displayed is unclear, it can also be judged by its color.
• Hiragana: Pink
• Alphabet: Green
• Kanji: Yellow
• Number: Light-blue
• Katakana: Purple
• Symbol: Orange
Conversion candidates
00M1000EN.book 455 ページ 2004年11月24日 水曜日 午前7時56分
456
Entering Characters
NOTE
• Following operations are also available:
- Entering a fixed phrase 3 P472
- Entering a symbol 3 P473
- Entering a face mark 3 P474
- Deleting an entered character 3 P476
- Searching a dictionary 3 P475
• When a character entered in standard mode could not be recognized correctly, or is hard to recognize, we
recommend you to change the mode that corresponds to the character entered (kana mode or alphanumeric
mode).
• A character would be more easily recognized by writing it large within the frame.
• The maximum number of characters that can be converted at once is 32 characters.
Save Phrases
Editing/Registering Fixed Phrases
By registering frequently used greetings and phrases, they can be entered quickly by just
selecting a fixed phrase.
• When Master Clear is performed, the registered fixed phrases are all deleted, and it will return to the default
state.
Registering a New Fixed Phrase
A fixed phrase is registered.
aTap $$ y $$ on the Application Selector Bar, tap "Handset" tab y
Text input on the Control Panel screen, tap [Advanced] on Text
input setup screen, and tap Edit Template on Preferences screen
bTap the Category and select a category where you are registering
• Selections can be made from the categories of "General", "Reply", "Business", "Private"
"English" and "Internet".
• Maximum of 20 fixed phrases can be registered for each category.
Fixed phrase edit screen
Category: Switches the category of fixed phrases.
00M1000EN.book 456 ページ 2004年11月24日 水曜日 午前7時56分
457
Entering Characters
cTap [Add]
dEnter a phrase y Tap [Settings]
The phrase is registered.
• Regardless of double-byte/single-byte, the maximum number of characters that can be
entered is 32.
Editing the Default Fixed Phrases
A registered fixed phrase is edited.
aDisplay the fixed phrase edit screen
• How to operate 3 P480
bTap the Category and select a category of the fixed phrase you are
making a change
• Selections can be made from the categories of "General", "Reply", "Business", "Private"
"English" and "Internet".
cTap the fixed phrase you are editing y tap [Change]
dEdit the phrase y tap [Settings]
The fixed phrase is edited.
• Up to 32 double-byte/single-byte characters can be entered is 32.
• Tap [Cancel] to stop editing the fixed phrase.
Deleting a Fixed Phrase
Registered fixed phrases can be deleted one at a time.
aDisplay the fixed phrase edit screen
• How to operate 3 P480
bTap the Category and select a category of the fixed phrase you are
deleting
• Selections can be made from the categories of "General", "Reply", "Business", "Private"
"English" and "Internet".
Sentence : Entered the phrase to be registered.
00M1000EN.book 457 ページ 2004年11月24日 水曜日 午前7時56分
458
Entering Characters
cTap the fixed phrase you are deleting y tap [Delete]
dTap [Yes]
The fixed phrase will be deleted.
• Tap [No] to cancel the deletion.
Character copy
Copying/Cutting and Pasting Characters
Characters and numbers such as from notes or messages can be copied or cut, and pasted on
another character input screen.
Copying/Cutting Characters
Specify the range of text to copy/cut in Notes etc., display the screen to paste and paste.
When a copy is performed, the original copied content remains and the same content is pasted
to the pasted location. Moreover, when a cut is performed, the original copied content is lost, and
the copied content is pasted to the pasted location.
aDisplay the screen to perform Copy/Cut
bDrag and specify the range of string to copy/cut
cTap Edit on the Menu bar y tap Copy/Cut
Selected range will be copied/cut.
• Tap Copy to copy the selected range.
• Tap Cut to cut the selected range.
The specified area will be highlighted.
Edit screen of Notes
00M1000EN.book 458 ページ 2004年11月24日 水曜日 午前7時56分
459
Entering Characters
NOTE
• Depending on application, it is not necessary to specify the range to perform a copy/cut. For examples,
calculation result of a calculator and a phone number entered in the phone number entry screen are copied
as the way they are.
• Depending on application, the item names for Copy/Paste displayed on a menu bar may differ, or they may
be displayed at different place than the menu bar.
1Copy/Cut and Paste operations
For screens displayed such as when entering a keyword for a search, a menu can be
displayed from other than a menu bar to perform Copy/Cut and Paste.
Pasting a Character
A content copied/cut is pasted.
aDisplay a screen to paste a copied/cut content
bTap on the place to specify the position to paste
cTap Edit on the Menu bar y tap Paste
A content copied/cut is pasted.
Tap $$ beside the title to display the menu.
Search screen for Notes
Tap
$$
beside the title to display the menu.
The cursor moves to the location where the paste is performed.
00M1000EN.book 459 ページ 2004年11月24日 水曜日 午前7時56分
460
Entering Characters
NOTE
• Depending on application, it is not necessary to specify the range to perform a copy/cut. For examples,
calculation result of a calculator and a phone number entered in the phone number entry screen are copied
as the way they are.
• Depending on application, the item names for Paste displayed on a Menu bar may differ, or they may be
displayed at different place than the Menu bar.
Save word
Registering Frequently Used Words
By registering frequently used names and words in the user dictionary, they can be displayed as
conversion candidates at a character conversion, and can be entered quickly.
• When Master Clear is performed, the registered words are all deleted.
Registering a New Word
A word is registered in the user dictionary.
• Up to 100 words can be registered.
aTap $$ y $$ on the Application Selector bar, tap Handset tab y
Text input on the Control Panel screen, and tap [Advanced] on
Text input setup screen
bTap [Add]
cTap Reading y Enter a reading
Reading : A reading of the word to register is entered.
Word : A word to register is entered.
Word edit screen
00M1000EN.book 460 ページ 2004年11月24日 水曜日 午前7時56分
461
Entering Characters
• Regardless of double-byte/single-byte, the maximum number of characters that can be
entered for the combination of Reading and Word is 11.
dTap Word y Enter a word
• Regardless of double-byte/single-byte, the maximum number of characters that can be
entered for the combination of Reading and Word is 11.
eSap [Settings]
The word is registered.
• Tap [Cancel] to stop registering.
Editing a Registered Word
A word registered in the user dictionary is edited.
aDisplay the word edit screen
• How to operate 3 P484
bTap the word you are editing y tap [Change]
cTap the field you want to edit y edit the Reading/Word
• Regardless of double-byte/single-byte, the maximum number of characters that can be
entered for the combination of Reading and Word is 11.
dTap [Settings]
The word is edited.
Deleting a Registered Word
A word registered in the user dictionary is deleted one at a time.
aDisplay a word edit screen
• How to operate 3 P484
bTap the word you are deleting y tap [Delete]
cTap [Yes]
The word is deleted.
• Tap [No] to cancel the deletion.
00M1000EN.book 461 ページ 2004年11月24日 水曜日 午前7時56分
462
Entering Characters
Using Electronic Dictionary
Settings and registration for the dictionary installed in FOMA handset are performed.
Setting to Perform a Dictionary Search Automatically at a Conversion
You can set it so that when a character entered is converted, conversion candidates are
searched from the dictionary and displayed. Also, the type of dictionary used for the search can
be set.
aTap $$ y $$ at the Application Selector bar, tap Handset tab y Text
input on the Control panel screen, tap [Advanced] on Text input
setup screen, and tap Dictionary search at conversion on
Preferences screen
bTap $$ at the field of Use dictionary search
cTap $$ of the dictionary used for the search
It is set so that a dictionary search is performed at conversion, and the dictionary used for
the search is selected.
Adding a Dictionary
Dictionaries installed to FOMA handset from the attached CD-ROM can be added as the
dictionaries used at a character conversion. Also, setting the priority for a dictionary search and
deleting added dictionaries can be performed.
• Up to 64 dictionaries can be registered.
Use dictionary search
: Sets so that a dictionary search is performed when a
character is converted.
National language dictionary
: National language dictionary is added to the dictionary
used for the search.
Japanese-English dictionary
: Japanese-English dictionary is added to the dictionary
used for the search.
• Tap $$ $$ on the tab display area to switch the tab display
between left and right.
00M1000EN.book 462 ページ 2004年11月24日 水曜日 午前7時56分
463
Entering Characters
aTap $$ y $$ on the Application Selector bar, tap Handset tab y
Text input on the Control panel screen, tap [Advanced] on Text
input setup screen, and tap Additional Dictionary tab on
Preferences screen
bTap in the order from $$ of the dictionary to add y [Add]
cTap [Settings]
The dictionary is added.
Setting the Priority of Dictionary Search
If there are two or more dictionaries added, the priority for dictionary search can be set up.
aTap $$ y $$ on the Application Selector bar, tap Handset tab y
Tex t input from the Control panel screen, tap [Advanced] on Text
input setup screen, and tap Additional Dictionary tab on
Preferences screen
Dictionaries installed are displayed.
• Unless $$ of the dictionary is tapped, the installed dictionary
cannot be used.
00M1000EN.book 463 ページ 2004年11月24日 水曜日 午前7時56分
464
Entering Characters
bTap [Priority]
cTap the dictionary moving the priority y tap [ ▲]/[ ▼]
dTap [Set]
The priority is set.
Deleting an Added Dictionary
A dictionary added for search at conversion is set not to be used.
• A dictionary installed will not be erased.
aTap $$ y $$ on the Application Selector bar, tap Handset tab y
Text input on the Control panel screen, tap [Advanced] on Text
input setup screen, and tap Additional Dictionary tab from
Preferences screen
bTap [Delete] y [Yes]
The dictionary is set not to be used.
Setting the Saving Method of User Dictionary and Learning Dictionary
User dictionary and learning dictionary stored in FOMA handset can be set so that they are
automatically backed up in Trans Flash memory card.
00M1000EN.book 464 ページ 2004年11月24日 水曜日 午前7時56分
465
Entering Characters
aTap $$ y $$ on the Application Selector bar, tap Handset tab y
Text input on the Control panel screen, tap [Advanced] on Text
input setup screen, and tap Save Dictionary tab on Preferences
screen
bTap $$ at the field of Save automatically
cTap $$ of Once a day/When closing keyboard at field of Saving cycle
Returning the Learning Dictionary to the Default State
Learned information stored in the user dictionary can be reset to default state.
aTap $$ y $$ on the Application Selector bar, tap Handset tab y
Text input on the Control panel screen, tap [Advanced] on Text
input setup screen, and tap Learning tab on Preferences screen
bTap [Clear learning information] y [Yes]
The learned information will be deleted.
• Tap [No] to cancel the deletion of the learning information.
Save automatically
: Sets whether or not to save the dictionary
automatically.
Saving cycle
Once a day : Saves when the first character input screen
displayed in a day is closed.
When closing keyboard
: Saves when the character input screen is
closed.
• Tap $$ $$ at the tab display area to switch the tab display
between left and right.
• Tap $$ $$ on the tab display area to switch the tab display
between left and right.
00M1000EN.book 465 ページ 2004年11月24日 水曜日 午前7時56分
466
Entering Characters
1Learning Information
A converted content of a character input by the user is stored in the user dictionary in FOMA
handset, and when the same character is entered and converted again, it will be displayed as
one of the conversion candidates.
Setting the Detail of Character Entry
The settings related to character input, such as the usage of predict conversion function and the
input mode when the character entry screen is activated are set.
Setting the Input System
The input system of FOMA handset can be changed to other input systems.
• Other input systems are not installed in the FOMA handset by default. This operation can be performed only
when other input system is installed.
aTap $$ y $$ on the Application Selector bar, and tap Handset tab
y Text input on the Control panel screen
bTap Primary input method y select an input system
An input system is set.
• Tap [Default] to reset the input system back to the default state.
Setting Alternative Input Method
The alternative input method for the FOMA handset can be changed.
• No other alternative input system is installed in the FOMA handset by default. This operation can be
performed only when another input system is installed.
D
e
f
au
l
t sett
i
ng AWnn Japanese keyboard
D
e
f
au
l
t sett
i
ng None
00M1000EN.book 466 ページ 2004年11月24日 水曜日 午前7時56分
467
Entering Characters
aTap $$ y $$ on the Application Selector bar, tap Handset tab y
Text input on the Control panel screen, and tap Alternative on the
text input setup screen
bTap Alternative input method y select an alternative input system
An alternative input system is selected.
• Tap [Default] to reset the changed alternative input method back to the default state.
Using Predict Conversion Function
Whether to use the predict conversion function or not at the conversion of a character can be set.
aTap $$ y $$ on the Application Selector bar, tap Handset tab y
Text input on the Control panel screen, tap [Advanced] on Text
input setup screen, and tap Predict conversion tab on Preferences
screen
bTap $$ at Use Predict conversion
The Predict conversion function is set.
Setting the Input Mode at the Time of Activation
The input mode displayed when the text input screen is displayed can be set up beforehand.
De
f
ault sett
i
ng Use predict conversion: $$
• Tap $$ $$ on the tab display area to switch the tab display
between left and right.
00M1000EN.book 467 ページ 2004年11月24日 水曜日 午前7時56分
468
Entering Characters
aTap $$ y $$ on the Application Selector bar, tap Handset tab y
Text input from the Control panel screen, tap [Advanced] from
Text input setup screen, and tap Input mode at activation tab from
Preferences screen
bTap $$ of the input mode you are using at At activation
The input mode at activation is set.
Setting the Display Format of Date and Time
The display format of a date and time inputted by tapping a specific key can be set for each input
mode beforehand.
aTap $$ y $$ on the Application Selector bar, tap Handset tab y
Text input on the Control panel screen, tap [Advanced] on Text
input setup screen, and tap Date and time tab on Preferences
screen
Hiragana input: Sets hiragana as the input mode to be always
displayed.
Single-byte alphabet input
: Sets single-byte alphabet as the input mode to
be always displayed.
System setup : Sets so that the input mode corresponding to
the contents of an input may be displayed
automatically.
• Tap $$ $$ at the tab display area to switch the tab display
between left and right.
Hiragana input: Sets the display format of a date and time at
hiragana input mode.
Single-byte kana input
: Sets the display format of a date and time at
single-byte kana input mode.
Double-byte alphabet input
: Sets the display format of a date and time at
double-byte alphabet input mode.
Single-byte alphabet input
: Sets the display format of a date and time at
single-byte alphabet input mode.
• Tap $$ $$ on the tab display area to switch the tab display
between left and right.
00M1000EN.book 468 ページ 2004年11月24日 水曜日 午前7時56分
469
Entering Characters
bTap $$ of the input mode you are setting y [Change]
cTap the field to set, and select a display format
dTap [Set]
The display formats of date and time for the selected input mode are set up.
NOTE
• Input method of Date and Time 3 P468, P470, P496, P500
Setting Details for Handwriting
The recognition speed of a free draw input, the width of the pen, and the color of the pen can be
set up. Also, My symbol that inputs a character string by just entering a simple sign can be set.
Registering My Symbol
A setting can be made for registering strings to be converted just by entering a Symbol, such as a
simple sign or mark.
• Up to 30 symbols can be registered.
aTap $$ y $$ on the Application Selector bar, tap Handset tab y
Tex t input from the Control panel screen, tap [Advanced] on Text
input setup screen, and tap Handwriting tab y [Handwriting
settings] on Preferences screen
bWrite a symbol at the symbol field
Drag and draw a symbol to register within the frame.
Date : Selects the display format for Date.
Time : Selects the display format for Time.
• Tap
$$
to display the help for handwriting.
Symbol field
Registration text field
00M1000EN.book 469 ページ 2004年11月24日 水曜日 午前7時56分
470
Entering Characters
• Tap [Clear] below the symbol field to delete and rewrite the symbol
cTap a registration text column y enter a text
• Tap [Clear] below the registration text field to delete a text.
Setting the Recognition Speed of Free Draw and Width/Color of Characters
The recognition speed of free draw can be set. Also thickness and color of characters entered
with free draw can be set.
aTap $$ y $$ on the Application Selector bar, tap Handset tab y
Text input from the Control panel screen, tap [Advanced] on Text
input setup screen, tap Handwriting tab y [Handwriting settings]
from Preferences screen, and tap Others tab on Decuma Settings
screen
bTap $$ of the speed you are setting at Recognition timeout
• By setting the recognition speed faster, characters entered by free draw with fast drag
operation can be recognized.
cTap $$ of the width you are setting at size
dTap $$ of the color you are setting at Pen color
eTap [Done]
The recognition timeout, width and size/color of the pen are set.
Indirect input method
Entering Characters with Indirect Input Method
FOMA handset has two indirect input methods "Multi Tap" and "Two Tap". By setting up an input
method beforehand, each input screen (keyboard) can be displayed at the time of a character
input. 3 P492
Recognition timeout
: Selects the drag speed that can be recognized.
Pen size : Selects the width of the pen.
Pen color : Selects the color of the pen.
00M1000EN.book 470 ページ 2004年11月24日 水曜日 午前7時56分
471
Entering Characters
Multi Tap/Two Tap Keyboard
When the input method is set as Multi Tap or Two Tap, following keyboard will display by tapping
$$ on the Status bar when a character is entered. For the procedure for Multi Tap and Two Tap,
please refer to each explanation. 3 P495, P500
• In order to switch an input mode, tap [Character] at the keyboard of each input mode, and from the screen
that switches input mode, tap one of the keys from [kanji]/[Kata]/[Abc]/[Abc]/[Eng]/[Num].
• Tap [Mark] to display the screen that switches between symbols, fixed phrases and dictionary. 3 P472
• List of symbols and special characters 3 P521
• List of fixed phrases 3 P522
Multi Tap
Entering a Character with Multi Tap
With Multi Tap, a keyboard with two or more characters assigned to one key is displayed as a
character input screen. In order to enter a character, tap the key where a character is assigned
multiple times until that character is displayed.
• The input method needs to be set as Multi Tap beforehand. 3 P492
Item Description
aInput method switch key A menu is displayed, and input method can be switched.
bName The name of the character input field is displayed.
cMinimize key Temporarily hides the keyboard.
dInput field switch key When two or more input field (name, family name, address, etc.) exist in one
screen, such as a registration screen for a contact, the input field can be
changed with having the keyboard displayed.
eEnd key Closes the keyboard.
fDisplay area Characters entered/decided are displayed.
gConversion candidate
area
Conversion candidates for characters entered are displayed.
hScroll arrow When conversion candidates cannot all fit in the display, tap the arrow to scroll
up and down to display the rest of the candidates.
iNumber of characters The number of decided characters/maximum available character input is
displayed.
Hiragana input mode
00M1000EN.book 471 ページ 2004年11月24日 水曜日 午前7時56分
472
Entering Characters
Keyboard Display and Character Assignments for Each Input Mode
Following are the keyboard display and character assignments for each input mode. Whenever a
key is tapped where the character entering is assigned, the character on the key changes.
1Input mode: hiragana
1Input mode: single-byte katakana
Keyboard
display
Characters assigned
あ3あ3い3う3え3お3ぁ3ぃ3ぅ3ぇ3ぉ3
か3か3き3く3け3こ3
さ3さ3し3す3せ3そ3
た3た3ち3つ3て3と3っ3
な3な3に3ぬ3ね3の3
は3は3ひ3ふ3へ3ほ3
ま3ま3み3む3め3も3
や3や3ゆ3よ3ゃ3ゅ3ょ3
ら3ら3り3る3れ3ろ3
わ3わ3を3ん3ゎ3
*3 、3 。3 − 3 ? 3 ! 3 & 3 " 3 「 3 」 3 ・ 3( 3 ) 3
# *1, *2 3 (double-byte space) 3 (Date*3) 3 (Time*3) 3
Character Displays the screen that switches the input mode.
Symbol Displays the screen that switches between symbols, fixed phrases and dictionary.
Convert Converts a character entered.
Clear Deletes a character entered.
Keyboard
display
Characters assigned
ア3ア3イ3ウ3エ3オ3ァ3ィ3ゥ3ェ3ォ3
カ3カ3キ3ク3ケ3コ3
サ3サ3シ3ス3セ3ソ3
タ3タ3チ3ツ3テ3ト3ッ3
ナ3ナ3ニ3ヌ3ネ3ノ3
ハ3ハ3ヒ3フ3ヘ3ホ3
マ3マ3ミ3ム3メ3モ3
ヤ3ヤ3ユ3ヨ3ャ3ュ3ョ3
ラ3ラ3リ3ル3レ3ロ3
ワ3ワ3ヲ3ン3
*3 、 3 。 3 - 3 ? 3 ! 3 & 3 " 3 「 3 」 3 ・ 3 ( 3 ) 3
#*2 3 ゙ 3 ゚ 3 (single-byte space) 3 (Date*3) 3 (Time*3) 3
Character Displays the screen that switches the input mode.
Symbol Displays the screen that switches between symbols, fixed phrases and dictionary.
Clear Deletes a character entered.
00M1000EN.book 472 ページ 2004年11月24日 水曜日 午前7時56分
473
Entering Characters
1Input mode: single-byte alphabet
1Input mode: double-byte alphabet
1Input mode: single-byte number
Keyboard
display
Characters assigned
11
2ABC 3a3b3c3A3B3C32 3
3DEF 3d3e3f3D3E3F33 3
4GHI 3g3h3i3G3H3I34 3
5JKL 3j3k3l3J3K3L35 3
6MNO 3m3n3o3M3N3O363
7PQRS 3 P3q3r3s3 P3Q3R3S37 3
8TUV 3t3u3v3T3U3V383
9WXYZ 3w3x3y3z3W3X3Y3Z393
00
*3 . 3 @ 3 _ 3 - 3 / 3 ? 3 ! 3 & 3 ' 3 " 3 : 3 ; 3 ~ 3
#*2 3 (single-byte space) 3 (Date*3) 3 (Time*3) 3 .co.jp 3 .com 3 .net 3 .ne.jp 3 .or.jp 3
http:// 3 www. 3 @docomo.ne.jp 3
Character Displays the screen that switches the input mode.
Symbol Displays the screen that switches between symbols, fixed phrases and dictionary.
Clear Deletes a character entered.
Keyboard
display
Characters assigned
11
2ABC 3a3b3c3A3B3C323
3DEF 3d3e3f3D3E3F333
4GHI 3g3h3i3G3H3I343
5JKL 3j3k3l3J3K3L353
6MNO 3m3n3o3M3N3O363
7PQRS 3 P3q3r3s3 P3Q3R3S373
8TUV 3t3u3v3T3U3V383
9WXYZ 3w3x3z3W3X3Y3Z393
00
*3 . 3 @ 3 _ 3 ― 3 / 3 ? 3 ! 3 & 3 ' 3 " 3 : 3 ; 3 ~ 3
# *2 3 (double-byte space) 3 (Date*3) 3 (Time*3) 3
Character Displays the screen that switches the input mode.
Symbol Displays the screen that switches between symbols, fixed phrases and dictionary.
Clear Deletes a character entered.
Keyboard display Characters assigned
11
22
33
00M1000EN.book 473 ページ 2004年11月24日 水曜日 午前7時56分
474
Entering Characters
*1: Voiced sound and semi-voiced sound can be added (Only the characters that can add them). Each time
you tap, it will switch as: "3 ゛(voiced sound)3 ゜(semi-voiced sound) 3 none 3 ".
*2: Will start a new line by pointing it for more than 1 second,
*3: Date and Time can be entered by set display format. 3 P492
Entering a Character
The method to enter a character with Multi Tap is explained.
<Example: when entering "太郎" in Name of a contact >
aTap in the order by Name in a contact y $$ at the Status bar
• How to operate 3 P99
bEnter " たろう "
cFrom the conversion candidates, tap [太郎 ]
Input of "太郎" is set.
• When predict conversion function is set to ON, the conversion candidate predicted to
follow the character decided in conversion candidate area is displayed.
• Tap END key to end the entry.
44
55
66
77
88
99
00
**
##
Character Displays the screen that switches the input mode.
Symbol Displays the screen that switches between symbols,
fixed phrases and dictionary.
Others 3 (double-byte space) 3 (New-line) 3 : 3 / 3. 3,
3
Clear Deletes a character entered.
• To enter "た":Tap "た" once
• To enter "ろ":Tap "ら" five times
• To enter "う":Tap "あ" three times
Keyboard display Characters assigned
00M1000EN.book 474 ページ 2004年11月24日 水曜日 午前7時56分
475
Entering Characters
• To continue entering characters, tap a key where the character you are entering is
assigned.
• For a character input, please refer to "Keyboard display and character assignments for
each input mode" 3 P496
NOTE
• Following operations are also available:
- Entering a fixed phrase 3 P472
- Entering a symbol 3 P473
- Entering a face mark 3 P474
- Deleting an entered character 3 P476
- Searching a dictionary 3 P475
• The maximum number of characters that can be converted at once is 32 characters.
Determining the Characters Entered with Multi Tap Automatically
You can setup for the cursor to move automatically to the next input position and wait for an input
after each character is entered by multi-taps. When entering a character assigned to the same
key continuously, the operation to tap the right side of the entered character to move the cursor
becomes unnecessary.
aTap $$ y $$ at the Application Selector bar, tap Handset tab y Text
input from the Control Panel screen, tap [Advanced] from Text
input setup screen, and tap Multi Tap tab from Preferences
screen
bTap $$ at the field of Determine automatically
cTap $$ of the speed to set for Determining cycle
Characters entered by Multi Tap are set to be determined automatically.
Two Tap
Entering a Character with Two Tap
With Two Tap, a keyboard with two or more characters assigned to one key is displayed as a
character input screen. In order to enter a character, tap the key where a character to input is
assigned, display the selection screen for the assigned character, and tap the character to input.
• The input method needs to be set as Two Tap beforehand.3 P492
D
e
f
au
l
t sett
i
ng Determine automatically $$:
Determine automatically
: Sets to automatically determine entered characters.
Determining cycle
: Selects the speed to determine.
00M1000EN.book 475 ページ 2004年11月24日 水曜日 午前7時56分
476
Entering Characters
Keyboard Display and Character Assignments for Each Input Mode
Following are the keyboard display and character assignments for each input mode. Tap a key
where the character entering is assigned, and a selection screen for assigned character is
displayed.
1Input mode: hiragana
1Input mode: single-byte katakana
Keyboard display Characters assigned
あ あ い う え お ぁ ぃ ぅ ぇ ぉ ヴ
か か き く け こ が ぎ ぐ げ ご
さ さ し す せ そ ざ じ ず ぜ ぞ
た た ち つ て と だ ぢ づ で ど っ
な な に ぬ ね の
は は ひ ふ へ ほ ば び ぶ べ ぼ ぱ ぴ ぷ ぺ ぽ
ま ま み む め も
や や ゆ よ ゃ ゅ ょ
ら ら り る れ ろ
わ わ を ん ゎ
*、 。 - ? & " 「 」 ・ ( )
# $$(double-byte space) $$(New-line) Date Time
Character Displays the screen that switches the input mode.
Symbol Displays the screen that switches between symbols,
fixed phrases and dictionary.
Convert Converts a character entered.
Clear Deletes a character entered.
Keyboard display Characters assigned
ア ア イ ウ エ オ ァ ィ ゥ ェ ォ ヴ
カ カ キ ク ケ コ ガ ギ グ ゲ ゴ
サ サ シ ス セ ソ ザ ジ ズ ゼ ゾ
タ タ チ ツ テ ト ダ ヂ ヅ デ ド ッ
ナ ナ ニ ヌ ネ ノ
ハ ハ ヒ フ ヘ ホ バ ビ ブ ベ ボ パ ピ プ ペ ポ
マ マ ミ ム メ モ
ヤ ヤ ユ ヨ ャ ュ ョ
ラ ラ リ ル レ ロ
ワワ ヲ ン
* 、 。 - ? ! & " 「 」 ・ ( )
# $$(single-byte space) $$(New-line) Date Time
Character Displays the screen that switches the input mode.
Symbol Displays the screen that switches between symbols,
fixed phrases and dictionary.
Clear Deletes a character entered.
00M1000EN.book 476 ページ 2004年11月24日 水曜日 午前7時56分
477
Entering Characters
1Input mode: single-byte alphabet
1Input mode: double-byte alphabet
1Input mode: single-byte number
Keyboard display Characters assigned
11
2ABC A B C 2 a b c
3DEF D E F 3 d e f
4GHI G H I 4 g h i
5JKL J K L 5 j k l
6MNO M N O 6 m n o
7PQRS P Q R S 7 p q r s
8TUV T U V 8 t u v
9WXYZ W X Y Z 9 w x y z
00
* . , ? ! - & ' " : ; @ ~ /
# $$(single-byte space) $$(New-line) Date Time .co.jp
.com .net .ne.jp .or.jp http:// www. @docomo.ne.jp
Character Displays the screen that switches the input mode.
Symbol Displays the screen that switches between symbols,
fixed phrases and dictionary.
Clear Deletes a character entered.
Keyboard display Characters assigned
11
2ABC A B C 2 a b c
3DEF D E F 3 d e f
4GHI G H I 4 g h i
5JKL J K L 5 j k l
6MNO M N O 6 m n o
7PQRS P Q R S 7 p q r s
8TUV T U V 8 t u v
9WXYZ W X Y Z 9 w x y z
00
*. , ? ! ― & ' " : ; @ ∼ /
# $$(double-byte space) $$(New-line) Date Time
Character Displays the screen that switches the input mode.
Symbol Displays the screen that switches between symbols,
fixed phrases and dictionary.
Clear Deletes a character entered.
Keyboard display Characters assigned
11
22
33
00M1000EN.book 477 ページ 2004年11月24日 水曜日 午前7時56分
478
Entering Characters
44
55
66
77
88
99
00
**
##
Character Displays the screen that switches the input mode.
Symbol Displays the screen that switches between symbols,
fixed phrases and dictionary.
Others $$(single-byte space) $$(New-line) : / . ,
Clear Deletes a character entered.
Keyboard display Characters assigned
00M1000EN.book 478 ページ 2004年11月24日 水曜日 午前7時56分
479
Entering Characters
Entering a Character
The method to enter a character with Two Tap is explained.
<Example: when entering "太郎" in Name field of a contact>
aTap the Name field in a contact y $$ at the Status bar
• How to operate 3 P99
bTap [ た]
cTap [ た]
"た" is entered. Enter "ろう" the same way.
• To enter "ろ": Tap in the order by [ら] 3 [ろ]
• To enter "う": Tap in the order by [あ] 3[う]
dFrom the conversion candidates, tap [ 太郎 ]
Input of "太郎 " is set.
• When predict conversion function is set to ON, the conversion candidate predicted to
follow the character decided in conversion candidate area is displayed.
• Tap END key to end the entry.
• To continue entering characters, tap a key where the character you are entering is
assigned.
• For a character input, please refer to "Keyboard display and character assignments for
each input mode" 3 P500
NOTE
• Following operations are also available:
- Entering a fixed phrase 3 P472
- Entering a symbol 3 P473
- Entering a face mark 3 P474
- Deleting an entered character 3 P476
- Searching a dictionary 3 P475
• The maximum number of characters that can be converted at once is 32 characters.
A selection screen with the characters assigned to [た] key is
displayed.
00M1000EN.book 479 ページ 2004年11月24日 水曜日 午前7時56分

00M1000EN.book 480 ページ 2004年11月24日 水曜日 午前7時56分

481
Overseas Use
"WORLD WING" International Roaming Service . . . . . . . . . . . . . . . . . . . . . . 482
Services Available Outside Japan . . . . . . . . . . . . . . . . . . . . . . . . . . . . . . . . . . 483
Before Use . . . . . . . . . . . . . . . . . . . . . . . . . . . . . . . . . . . . . . . . . . . . . . . . . . . . . 484
Making Calls . . . . . . . . . . . . . . . . . . . . . . . . . . . . . . . . . . . . . . . . . . . . . . . . . . . 487
Answering Calls . . . . . . . . . . . . . . . . . . . . . . . . . . . . . . . . . . . . . . . . . . . . . . . . 490
Switching Networks . . . . . . . . . . . . . . . . . . . . . . . . . . . . . . . . . . . . . . . . . . . . . 491
Setting Operations in Roaming . . . . . . . . . . . . . . . . . . . . . . . . . . . . . . . . . . . . 491
1International Roaming
1Making/Answering Calls from Overseas
1Settings for Overseas Use
00M1000EN.book 481 ページ 2004年11月24日 水曜日 午前7時56分
482
Overseas Use
"WORLD WING" International Roaming Service
International roaming is a service that makes telephone and other types of communications
available from overseas, which is outside of the FOMA network service area, by using affiliated
operators' networks.
The international roaming service allows subscribers to use their FOMA handsets to make
telephone communication including voice and video calls*2, and email, Short Message Service
(SMS) and packet communication in about 220*1 countries and regions around the world.
*1: As of XX 2004
*2: As of XX 2004, videophone communication is available when you and the other parties are using
DoCoMo (Japan), Hutchison 3G UK (United kingdom.) or Hutchison 3G HK (Hong Kong). For details,
visit the DoCoMo website.
• Use of the international roaming service requires a subscription to "WORLD WING," the international roaming
service provided by DoCoMo. In addition, a UIM (green) made available for WORLD WING must be attached
to the FOMA handset.
• A UIM (blue) must be switched with a UIM (green).
• When you purchase a subscription to WORLD WING at a DoCoMo information desk, the card will be
exchanged free of charge.
• Communication services and functions available depend on the network operator connected to. 3 P507
• The communication system in Overseas networks to be applied are W-CDMA or GSM/GPRS.
• By default, network switching for overseas use automatically takes place. 3 P515
W-CDMA 3GPP (3rd Generation Partnership Project)* is a global standard. A 3G
mobile communication system is compliant to 3GPP.
GSM (Global System for Mobile
Communications)
The 2nd generation mobile communication system in digital mode is
most widely used around the world, especially in Europe and Asia.
GPRS (General Packet Radio
Service)
The 2.5 generation mobile communication system is the communication
method that enables high-speed packet communication through the
GPRS* by utilizing GSM
*: A regional standardization organization founded for the
development of common technology specification relating to the
3G mobile communication system (IMT-2000).
*: Packet communication with transmission speed of up to 115 kbps
is available.
00M1000EN.book 482 ページ 2004年11月24日 水曜日 午前7時56分
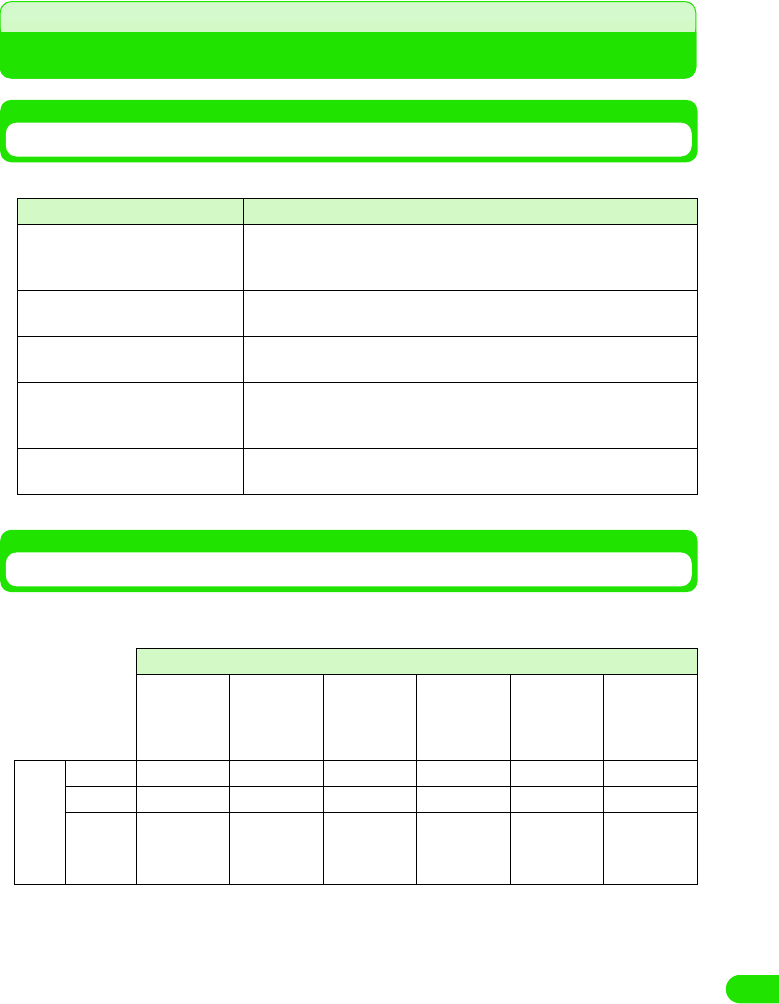
483
Overseas Use
Services Available Outside Japan
Services Available
The following services are available outside Japan:
*: Services that may be available depending on the network operator or network used.
Communication Systems and Services Available
Services and functions available differ between networks in Japan and overseas.
Different communication systems and services available are as described below:
Service Description
Voice call The phone number used in Japan can also be used for making and
answering domestic calls in the country of stay and making international
calls to Japan or other countries.
Video call International videophone communication is available with subscribers of
specific overseas 3G mobile operators or FOMA handset users in Japan.
Email The email address used in Japan can also be used for email exchange
from overseas.
Short Message Service (SMS) The recipients' FOMA handset phone numbers can be used to exchange
Short Message Service (SMS) messages between FOMA handset users
from overseas.
Packet communication Packet communication is available from overseas by connecting to PCs,
etc.
Service
Voice call Video call Internet Email
Packet
communication
Short
Message
Service
(SMS)
Communication
system
W-CDMA ○○○○○○
GSM ○××××○
GPRS
○×○○○○
00M1000EN.book 483 ページ 2004年11月24日 水曜日 午前7時56分
484
Overseas Use
Before Use
Make sure of the following before leaving Japan, in the country of stay and after coming back to
Japan.
Before Leaving Japan
To use your FOMA handset outside Japan, make sure of the following before leaving Japan.
1Subscription
A subscription to WORLD WING is required.
• WORLD WING is an optional service that requires a separate subscription. No monthly charges apply.
• A UIM (green) made available for WORLD WING must be attached to the FOMA handset for overseas use.
1Battery charging
Check the power supply voltage available in the country or region of stay and use the FOMA
international AC adapter 01 (separately provided).
• The AC adapter that comes with the handset is for domestic use only (100 VAC). An AC adapter suited to
the voltage available in the place of stay is required.
• Notes on use of AC adapter 3 P24
• Charging the battery 3 P54
1Network services
Network services may not be set/checked depending on the overseas network operator used.
Some network services can be set/checked only in Japan. Whether network service
operations can be performed or not is as described below:
*: May not be set in some service areas.
• For details, see "Network Service Operation Guide".
• To perform voicemail or call forwarding operation from overseas, remote operation must be enabled in
Japan in advance. 3 P516
• Services that can be set may not be available depending on the network operator used or the region.
Name of service Setting operation
Voicemail Service Can be set.*
Call Waiting Service Can be set.
Call Forwarding Service Can be set.*
Nuisance Call Blocking Service Can be set.*
Dual Network Service Cannot be set.
Caller ID Display Request Service Caller IDs may not be sent correctly.*
English Announcement Can be set.*
Caller ID Notification Can be set.*
Drive Mode Can be set but no voice guidance available.
English Announcement Can be set.*
Roaming (roaming guidance) Can be set.*
Roaming (incoming call barring when roaming) Can be set.
00M1000EN.book 484 ページ 2004年11月24日 水曜日 午前7時56分
485
Overseas Use
Viewing Information from Place of Stay
1Display view
An available network is automatically found and set, and available services such as voice or
video call can be checked with icons that indicate the status of the network.
NOTE
• The indications are in green when the handset is in FOMA network service area.
• The indications are in gray when the handset is outside of the area covered by the network.
• The network can be manually selected for use. 3 P515
1Inquiries
For inquiries about lost or stolen handsets, settlement of total charges or failure of handsets
outside Japan, contact DoCoMo at the numbers shown in "For Inquires about Lost or Stolen
Handsets or Settlement of Total Charges" or "About Failure" on the back cover of the manual.
• The contact numbers must be prefixed with the code as shown in "International Phone Code for Universal
Number (Table 1)" or "International Access Code (Table 2)" assigned to the place of stay. 3 P510
The codes to prefix the contact numbers are as shown in the tables below: "International
Phone Code for Universal Number (Table 1)" and "International Access Code (Table 2)."
International Phone Code for Universal Number (Table 1)
Area International
phone code
Area International
phone code
A Argentina 00 L Luxemburg 00
Australia 0011 M Malaysia 00
Austria 00 N New Zealand 00
B Belgium 00 Norway 00
Brazil 0021 P Philippines 00
C Canada 011 S Singapore 001
China 00 South Korea 001
Columbia 009 Spain 00
D Denmark 00 Sweden 00
F France 00 Switzerland 00
G Germany 00 T Taiwan 00
H Hong Kong 001 Thailand 001
Display Description
$$ (Orange) Voice data can be exchanged through roaming.
$$ (Orange) Voice data and still images can be exchanged through
roaming.
$$ (Orange) Voice data and images can be exchanged through
roaming.
00M1000EN.book 485 ページ 2004年11月24日 水曜日 午前7時56分
486
Overseas Use
Major International Access Codes (Table 2)
After Coming Back to Japan
After you come back to Japan, your handset will automatically select to use the FOMA network. If
your handset is set to use manual network selection, you must manually reset the handset to use
the FOMA network.
• The network can be manually selected for use. 3 P515
NOTE
• For overseas use, refer to "International Service Roaming Guide (XXX)" and "Network Service Operation
Guide" together with this manual.
• The Quick Reference Manual useful for referring to operations is provided on P000, which provides a
convenient reference for overseas use of your FOMA handset.
• Charges for overseas use will be added to the bill for monthly services. Be informed that the billing may be
delayed about one month for reasons of overseas network operators.
I Ireland 00 U U.K. 00
Israel 014 U.S.A. 011
Italy 00
Area International
phone code
Area International
phone code
A Australia 0011 M Monaco 00
B Belgium 00 N Netherlands 00
Brazil 00 New Zealand 00
C Canada 011 Norway 00
China 00 P Philippines 00
Czech 00 Poland 00
D Denmark 00 Portugal 00
F Finland 00/990 R Russia 810
France 00 S Singapore 001
G Germany 00 South Korea 001
Greece 00 Spain 00
H Hong Kong 001 Sweden 00
Hungary 00 Switzerland 00
I India 00 T Taiwan 002
Indonesia 001 Thailand 001
Ireland 00 Turkey 00
Italy 00 U U.A.E. 00
L Luxemburg 00 U.K. 00
M Macao 00 U.S.A. 011
Malaysia 00 V Vietnam 00
Area International
phone code
Area International
phone code
00M1000EN.book 486 ページ 2004年11月24日 水曜日 午前7時56分
487
Overseas Use
• If you have any problem about overseas use of your FOMA handset, see "Troubleshooting (for Overseas
Use)". 3 P53
Making Calls
Phone calls from overseas to Japan or to other countries are international calls to Japan, etc. To
make a call, prefix the phone number with "+" and the country code of the destination and enter
the other party's phone number. When entering the phone number, remove "0" at the beginning
of the area code.
aTap $$ in the Application Selector bar
bEnter the other party's phone number
The FOMA handset vibrates every time a key on the Enter phone number screen is tapped.
• Point to [0] for 1+ seconds to enter "+".
• Pause ("P"), Wait ("W"), "#" and "*" can be entered. 3 P73
1To call landline phones
+ Country code - Area code with 0 removed - City code - Number
• If the other party is a landline phone in Italy, "0" is required.
1To call mobile phones
+ Country code - 90 - XXXX - XXXX
+ Country code - 80 - XXXX - XXXX
1To call PHS phones
+ Country code - 70 - XXXX - XXXX
cTap [$$]
• Tap [$$] to make a video call. 3 P86
1If you hear a busy signal
The line is busy. Press e and try again at a later time.
The following operations can be performed:
[0]~[9], [*], [#] : Use these keys to enter the phone number.
[$$] : Deletes a digit in the phone number from the
right. Pointing for 1+ seconds deletes all of the
phone number entered.
00M1000EN.book 487 ページ 2004年11月24日 水曜日 午前7時56分

488
Overseas Use
dTalk on the phone
ePress e when you have finished your call
The line is cleared.
The call duration is displayed.
The following operations can be performed:
[Mute]/[Unmute]
: Tap this to switch between the mute and unmute
settings. When the mute setting is active, the
other party cannot hear your voice but you can
hear the other party's voice.
[$$]/[$$] : Tap this to set/release the touch screen lock.
When the lock is active, all tapping operations
other than $$ are disabled.
[Hold]/[Resume]
: Tap this to place a call on/off hold. The mute/
unmute setting cannot be changed while a call
is on hold.
s: Press to enable/disable the speakerphone
function.
00M1000EN.book 488 ページ 2004年11月24日 水曜日 午前7時56分
489
Overseas Use
Country code
Country codes are as shown below:
Making Calls within Country of Stay
To make a call to a party in the country of stay, enter the other party's phone number and call in
the same way as calls within Japan.
• If the other party is also using international roaming, make a call in the same way as calls from overseas, even
if the other party is in the same country.
NOTE
• Storing phone numbers including the other parties' country codes, etc. in the contact list will simplify the
procedure of making international calls.
• The Enter phone number screen can also be displayed by pressing e in idle state.
• If your call did not get through, tap [$$Retry] on the screen to make another attempt to call the same number.
• The view of the Enter phone number screen fields can be changed. 3 P139
• The handset can be set not to show the call duration on the screen displayed while talking. 3 P135
• An audible timer to notify you of the elapsed call time is available. 3 P128
• The handset can be set not to answer incoming calls during international roaming. 3 P516
• The handset can be set to play to a party who has attempted to call you during international roaming a
message informing the caller that the call is being forwarded overseas 3 P517
• Caller IDs may not be sent correctly.
Country Code Country Code
A Australia 61 M Malaysia 60
Austria 43 Monaco 377
B Belgium 32 N Netherlands 31
Brazil 55 New Zealand 64
C Canada 1 Norway 47
China 86 P Philippines 63
Czech 420 Poland 48
D Denmark 45 Portugal 351
F Finland 358 Russia 7
France 33 S Singapore 65
G Germany 49 South Korea 82
Greece 30 Spain 34
H Hong Kong 852 Sweden 46
Hungary 36 Switzerland 41
I India 91 T Taiwan 886
Indonesia 62 Thailand 66
Ireland 353 Turkey 90
Italy 39 U U.A.E. 971
J Japan 81 U.K. 44
L Luxemburg 352 U.S.A. 1
M Macao 853 V Vietnam 84
00M1000EN.book 489 ページ 2004年11月24日 水曜日 午前7時56分
490
Overseas Use
• Some overseas network operators may charge you for calls that did not get through due to communication
conditions.
• Some overseas network operators may charge you for calls to toll-free numbers.
• When you use international videophone, the image of the other party displayed may be distorted or
connection may not be established depending on the other party's handset. For details, visit the DoCoMo
website.
Answering Calls
Answer incoming phone calls with your FOMA handset when you are outside Japan.
aA call arrives
The ring tone sounds and the status LED flashes.
• The vibrator can be enabled instead of the ring tone. 3 P126
bTap [Answer]
The call is answered.
• If a video call arrives, tap [Answer] to answer the call with the camera image enabled. Tap
[Privacy] to answer the call with the camera image disabled.
• Tap [Reject] to hang up without answering the incoming call.
• Operations during conversation are the same as described in Step 4 of "Making calls."
cPress e when you have finished your call
The line is cleared.
1To access your FOMA handset overseas from Japan
Entering your phone number in the same way as usual domestic calls allows a caller in Japan
to make a call to your handset outside Japan, which you can answer.
Enter "090-XXXX-XXXX" and press the Start key
Or
Enter "080-XXXX-XXXX" and press the Start key
1To access your FOMA handset overseas from countries other than Japan
Regardless of the place of stay, entering your phone number prefixed with "+" and "81"
(country code for Japan) and without the "0" at the beginning of the area code allows a caller
to make a call to your handset, in the same way as overseas calls to Japan.
Enter "+81-90-XXXX-XXXX" and press the Start key
Or
Enter "+81-80-XXXX-XXXX" and press the Start key
NOTE
• In some countries, you may be charged for calls that arrive during international roaming.
• Calls that arrive while the line is busy can be automatically diverted to the Voicemail Service Center. 3 P375
• Calls that arrive during international roaming are forwarded from Japan, regardless of the places of origin.
The callers are charged for calls to Japan and the receivers for international forwarding.
00M1000EN.book 490 ページ 2004年11月24日 水曜日 午前7時56分
491
Overseas Use
Switching Networks
To use your FOMA handset overseas, it is necessary to switch to a network available in
the place of stay. By default, a network available will be automatically found and set. You
can also select a network manually.
• Network switching must take place in a country where you use your FOMA handset.
• Network cannot be switched while Self mode is active.
aTap $$ in the Application Selector bar, and tap Settings y Network
on the Menu bar on the Phone number entry screen
bTap Band and select a frequency band
cTap Registration preference, and tap Auto/Manual
•If Auto has been tapped, the network found will be automatically set.
•If Manual has been tapped, select from the networks found to set the network.
dTap Search frequency and select the frequency of search
eTap [Find new network]
A network is found. If Registration preference is set to Auto, the network found will be
automatically registered.
1If Registration preference is set to Manual
The screen as shown below is displayed after a network has been found.
Tap the network to set, and tap [Register].
The selected network will be registered.
fTap [Done]
Setting Operations in Roaming
Set operations for handling calls that arrive while you are using international roaming
outside Japan.
• For details about network services, see "Network Service Operation Guide".
D
e
f
au
l
t sett
i
ng Band: WCDMA Registration preference: Auto Search frequency: Medium
Band : Select a frequency band suited for the
country of stay.
Registration preference
: Set the network automatically or manually.
Search frequency : Set the frequency of searching for a
network.
Find new network : Starts a search for a new network.
00M1000EN.book 491 ページ 2004年11月24日 水曜日 午前7時56分
492
Overseas Use
Making available Remote Operation of Network Services during Roaming
Set your handset to allow remote operation of Voicemail and Call Forwarding Services from
overseas.
• This operation can be performed only by subscribers of Voicemail or Call Forwarding Service.
aTap $$ in the Application Selector bar, and tap Settings y Roaming
in the Menu bar
bTap $$ in the Remote access control field, and tap [Yes]
Remote access is enabled.
• Tap $$ to disable remote access.
Avoiding Calls Arriving during Roaming
Your handset can be set to restrict incoming calls or data communications during roaming.
aTap $$ in the Application Selector bar, and tap Settings y Roaming
in the Menu bar on the Phone number entry screen
bTap $$ in the Incoming call barring when roaming field, and enter the
network security code on the Enter network security code
screen
Incoming call barring is set.
• Tap $$ to remove incoming call barring when roaming.
NOTE
• The operation cannot be performed outside the service area or in an area with no radio wave.
Enabling Guidance in Roaming
The handset can be set to play to a party who has attempted to call you during international
roaming a message informing the caller that you are in international roaming.
• If the guidance function is not set, a message "Connecting your call. Please hold." is played to the caller.
00M1000EN.book 492 ページ 2004年11月24日 水曜日 午前7時56分

493
Overseas Use
• Even if you have not enabled the guidance, a message in a foreign language may play depending on the
conditions of the overseas network operator. The ringing tone may be different from that in Japan.
aTap $$ in the Application Selector bar, and tap Settings y Roaming
on the Menu bar on the Contact entry screen
bTap $$ in the Roaming Guidance field on the Roaming screen
The guidance function is enabled. To a caller, a message "The receiver is in international
roaming. Please hold while your call is being connected." is played.
• Tap $$ to disable the guidance.
NOTE
• The operation cannot be performed outside the service area or in an area with no radio wave.
00M1000EN.book 493 ページ 2004年11月24日 水曜日 午前7時56分

00M1000EN.book 494 ページ 2004年11月24日 水曜日 午前7時56分

495
Appendix
Menu List . . . . . . . . . . . . . . . . . . . . . . . . . . . . . . . . . . . . . . . . . . . . . . . . . . . . . . 496
List of Symbols and Special Characters. . . . . . . . . . . . . . . . . . . . . . . . . . . . . 497
List of Fixed Phrases . . . . . . . . . . . . . . . . . . . . . . . . . . . . . . . . . . . . . . . . . . . . 498
List of Roman Character Entries . . . . . . . . . . . . . . . . . . . . . . . . . . . . . . . . . . . 499
Combination of Functions during Multiaccess . . . . . . . . . . . . . . . . . . . . . . . 501
Services Available for FOMA Handset . . . . . . . . . . . . . . . . . . . . . . . . . . . . . . 501
Options and Related Devices. . . . . . . . . . . . . . . . . . . . . . . . . . . . . . . . . . . . . . 503
Desktop Suite and SyncML . . . . . . . . . . . . . . . . . . . . . . . . . . . . . . . . . . . . . . . 503
Troubleshooting . . . . . . . . . . . . . . . . . . . . . . . . . . . . . . . . . . . . . . . . . . . . . . . . 510
Error Message List . . . . . . . . . . . . . . . . . . . . . . . . . . . . . . . . . . . . . . . . . . . . . . 511
Warranty and After-sales Service . . . . . . . . . . . . . . . . . . . . . . . . . . . . . . . . . . 515
Protecting the Handset from Data that can Cause Damage . . . . . . . . . . . . . 516
1When Troubled
00M1000EN.book 495 ページ 2004年11月24日 水曜日 午前7時56分
496
Appendix
Menu List
Tap $$ (Application launcher) on Application Selector bar to display.
Application Description Reference
$$ Browse Accesses Internet and a homepage can be
viewed. P193
$$ Calculator A calculator can be used. P350
$$ Calendar Displays a calendar, and schedules can be
registered. P322
$$ Camera Takes still images/videos. P169
$$ Contacts Registration of contacts and searching contacts
are performed. P99
$$ Control panel
Handset tab
Certificate manager Displays User certificates/CA certificates. P220
Text input Details of text input are set up. P467, 480,
484, 486, 490,
499
Sound Sound such as Ringers are set. P126
Shortcut key Sets the menu launched by a home/shortcut key. P345
Password Sets a Security code and a Phone Lock. P147, 154
Master Clear/Master Reset Performs Master Clear/Master Reset. P360
Manner Mode Sets the operation of the Manner Mode. P129
Memory card Formats a memory card, or changes its name. P302
Memory manager Displays application memory. P306, 308,
310
Screen Adjusts brightness and tap location of the screen. P134
Settings for cars Sets the operation for connecting FOMA handset
to a Carkit. P75
Power Sets the operation of the Power save mode and
Status LED. P136
Handset information Displays system information of the FOMA
handset. P350
Connection tab
Bluetooth Sets the detail of Bluetooth. P382
Desktop Suite Sets the connection type of Desktop Suite. P529
Internet account Sets the necessary settings for connecting to an
internet. P183
Messaging accounts Sets messaging accounts. P227
Byte Counter Displays the amount of data transmitted. P348
00M1000EN.book 496 ページ 2004年11月24日 水曜日 午前7時56分
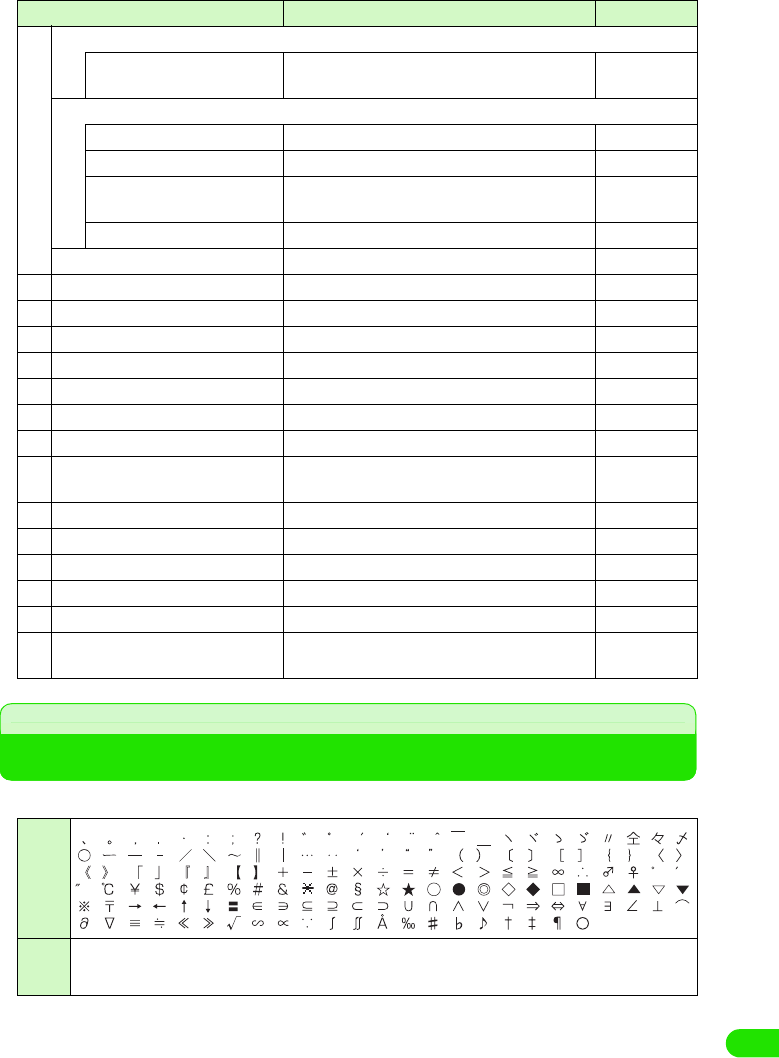
497
Appendix
List of Symbols and Special Characters
• Entering symbols and special characters 3P473
$$ Connection tab
Find Wireless LAN Access
Point
Searches an access point of a wireless LAN. P398
General tab
Select Language Changes the language displayed on the screen. P142
International Sets present country and currency unit. P140
Ringtune Manager Installation of ringtones and Vibrator Setting is
performed. P124, 127
Time & date Sets the date, time and display format. P59
$$ Desktop Suite Synchronizes PC and data. P530
$$ Home Displays the Home screen. P57
$$ Message Sends and receives messages. P234
$$ Music Plays music. P285
$$ Notes Registers texts and Free draw notes. P351
$$ Handset Displays a phone number entry screen. P66
$$ Picsel Viewer Displays various files. P289
$$ Pictures Manages pictures such as still pictures taken. P274
$$ SyncML Synchronizes data with a specific server with
wireless. P530
$$ Time Sets a display of time and alarm. P319, 358
$$ To Do Registers what needs to be done. P336
$$ Video Manages videos taken. P280
$$ Voice Records a speech with the voice recorder. P313
$$ movianVPN Connects with such as intranet, by utilizing VPN. P400
$$ Virus scan Checks for a virus in FOMA handset or Trans
Flash memory card. P540
Double-
byte
Single-
byte
Application Description Reference
! " # $ % & ' ( )
*
+ , ‐ . / : ; < = > ? @ [ ] ¥
^ _ ` { } |
00M1000EN.book 497 ページ 2004年11月24日 水曜日 午前7時56分
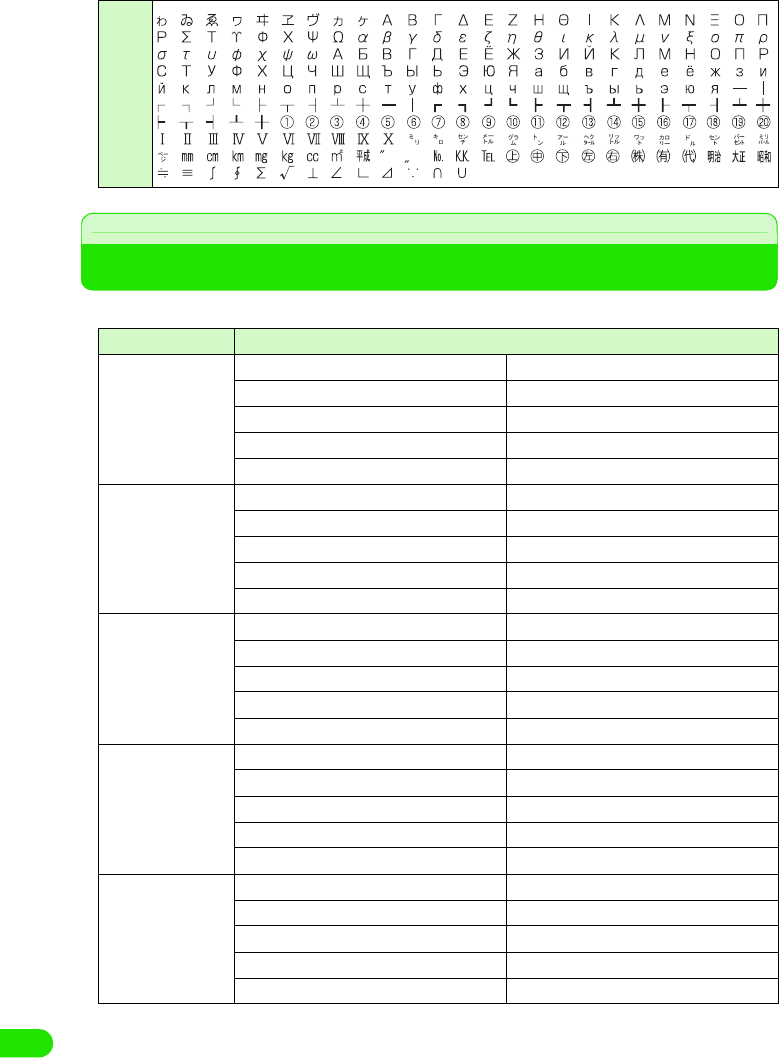
498
Appendix
List of Fixed Phrases
• Entering fixed phrases 3 P472
Porticular
Category Fixed phrases
Greeting おはようございます こんにちは
こんばんは おやすみなさい
ありがとうございます すいません
よろしくお願いします お疲れ様です
ご無沙汰しております おめでとう
Reply OK NG
賛成 反対
了解です 問題ありません
今やっています すぐ行きます
もう少し待ってください いつでも大丈夫です
Business 電話ください。 至急、返事ください。
遅れます。 これから帰社します。
会議中です。 出張中です。
直行します。 直帰します。
お世話になっております。 後程ご連絡致します。
Private TELして 遊びに行こうよ
飲みに行かない? 今日、ヒマ?
今どこ? 今何してるの?
もうすぐ着くよ じゃあ、後で!
今日はダメです いいよ!
English Thank you Call me back!
I'm late. Where are you now?
I'll be back soon. Let's meet at
It sounds great! Congratulations!
Good luck! I love you.
00M1000EN.book 498 ページ 2004年11月24日 水曜日 午前7時56分
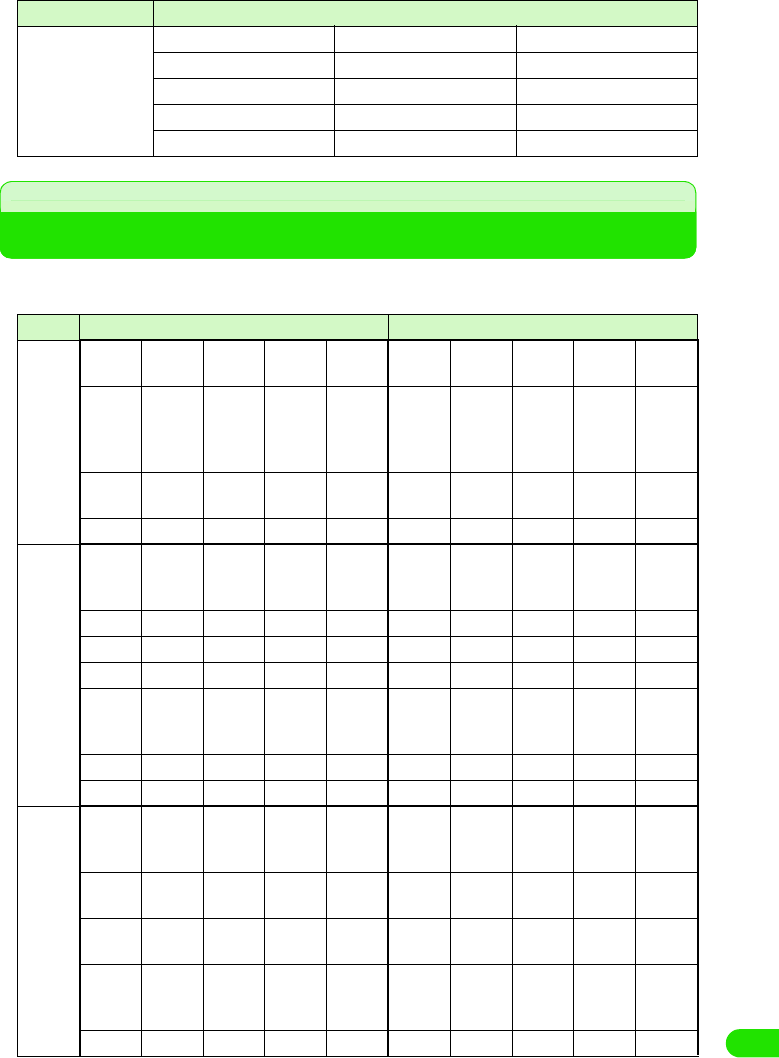
499
Appendix
List of Roman Character Entries
Hiragana/Kanji entry is performed by Roman character input, when the input method is
set to Qwerty Keyboard and input mode is set to kanji mode. 3P471
Internet @docomo.ne.jp .co.jp .ne.jp
.or.jp .ac.jp .com
http:// https:// ftp://
www. .org .net
.jp .html
Line Entering character Keys to tap
あline あいうえおai
yi
u
wu
eo
ぁぃぅぇぉla
xa
li
xi
lyi
xyi
lu
xu
le
xe
lye
xye
lo
xo
うぁ うぃ うぇ うぉ wha whi
wi
whe
we
who
ぃぇ ye
かline かきくけこka
ca
ki ku
cu
qu
ke ko
co
がぎぐげごga gi gu ge go
きゃ きぃ きゅ きぇ きょ kya kyi kyu kye kyo
ぎゃ ぎぃ ぎゅ ぎぇ ぎょ gya gyi gyu gye gyo
くぁ くぃ くぅ くぇ くぉ qwa
qa
kwa
qwi
qi
qyi
qwu qwe
qe
qye
qwo
qo
くゃ くゅ くょ qya qyu qyo
ぐぁ ぐぃ ぐぅ ぐぇ ぐぉ gwa gwi gwu gwe gwo
さline さしすせそsa si
ci
shi
su se
ce
so
ざじずぜぞza zi
ji
zu ze zo
しゃ しい しゅ しぇ しょ sya
sha
syi syu
shu
sye
she
syo
sho
じゃ じぃ じゅ じぇ じょ zya
ja
jya
zyi
jyi
zyu
ju
jyu
zye
je
jye
zyo
jo
jyo
すぁ すぃ すぅ すぇ すぉ swa swi swu swe swo
Category Fixed phrases
00M1000EN.book 499 ページ 2004年11月24日 水曜日 午前7時56分
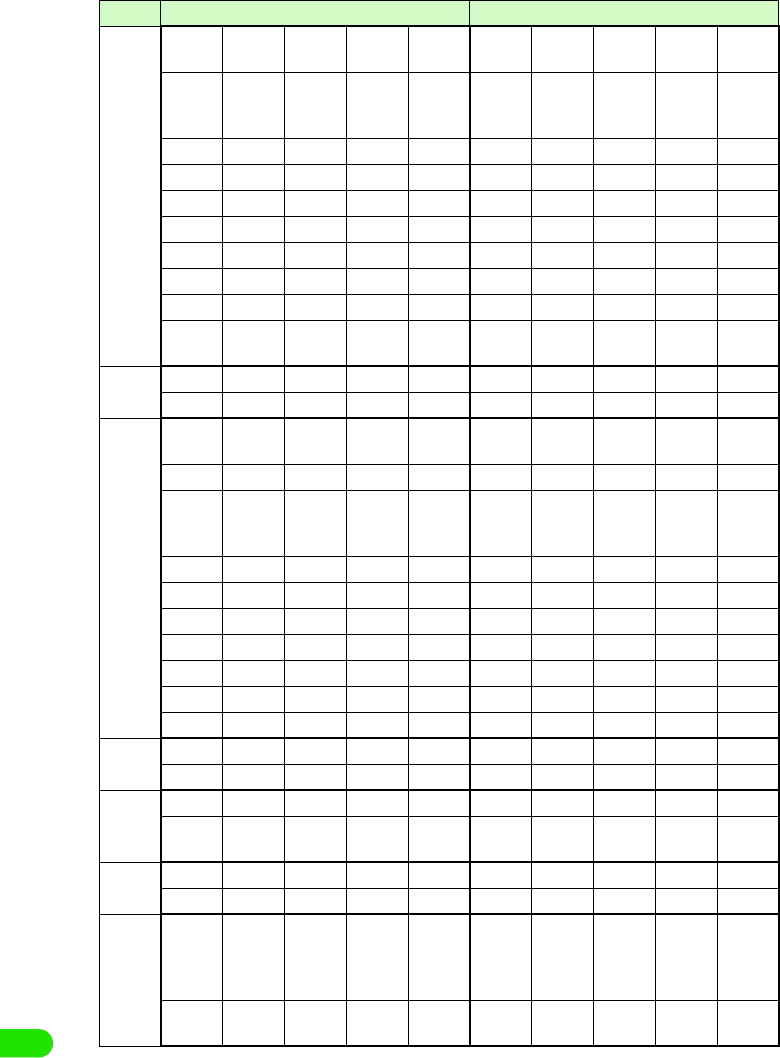
500
Appendix
たline たちつてとta ti
chi
tu
thu
te to
ちゃ ちぃ ちゅ ちぇ ちょ tya
cha
cya
tyi
cyi
tyu
chu
cyu
tye
che
cye
tyo
cho
cyo
つぁ つぃ つぇ つぉ tsa tsi tse tso
てゃ てぃ てゅ てぇ てょ tha thi thu the tho
とぁ とぃ とぅ とぇ とぉ twa twi twu twe two
だぢづでどda di du de do
ぢゃ ぢぃ ぢゅ ぢぇ ぢょ dya dyi dyu dye dyo
でゃ でぃ でゅ でぇ でょ dha dhi dhu dhe dho
どぁ どぃ どぅ どぇ どぉ dwa dwi dwu dwe dwo
っitu
xtu
なline なにぬねのna ni nu ne no
にゃ にぃ にゅ にぇ にょ nya nyi nyu nye nyo
はline はひふへほha hi hu
fu
he ho
ひゃ ひぃ ひゅ ひぇ ひょ hya hyi hyu hye hyo
ふぁ ふぃ ふぅ ふぇ ふぉ fwa
fa
fwi
fi
fyi
fwu fwe
fe
fye
fwo
fo
ふゃ ふゅ ふょ fya fyu fyo
ばびぶべぼba bi bu be bo
びゃ びぃ びゅ びぇ びょ bya byi byu bye byo
ヴぁ ヴぃ ヴ ヴぇ ヴぉ va vi vu ve vo
ヴゃ ヴぃ ヴゅ ヴぇ ヴょ vya vyi vyu vye vyo
ぱぴぷぺぽpa pi pu pe po
ぴゃ ぴぃ ぴゅ ぴぇ ぴょ pya pyi pyu pye pyo
まline まみむめもma mi mu me mo
みゃ みぃ みゅ みぇ みょ mya myi myu mye myo
やline やゆよ
ya yu yo
ゃゅょ
lya
xya
lyu
xyu
lyo
xyo
らline らりるれろra ri ru re ro
りゃ りぃ りゅ りぇ りょ rya ryi ryu rye ryo
わline わをん
wa wo n
nn
n'
xn
ゎiwa
xwa
Line Entering character Keys to tap
00M1000EN.book 500 ページ 2004年11月24日 水曜日 午前7時56分
501
Appendix
Combination of Functions during Multiaccess
The available combination of operations for Multiaccess is as shown below:
Services Available for FOMA Handset
NOTE
• If you use the collect call service (106), the call charge is billed to the receiver together with a commission
of 90 yen (94.5 yen with tax included) per call. (as of XX 2004)
• If you use the directory assistance service (104), a service charge of 100 yen (105 yen with tax included) is
billed together with the call charge. Note that this service is available without charge for those visually
impaired or physically disabled in the upper body. For further information, inquire at 116 (NTT sales center)
from a general subscriber phone. (as of XX 2004)
Operation to be
used
Making/
receiving a
voice call
Making/
receiving a
video call
Connecting to
Internet
Sending/
receiving a
message
Sending/
receiving SMS
Current status
While on a voice
call ○×ab○
While on a video
call ××ab○
While
connected to
Internet
cc -○○
○: Available
×: Not available.
–: The combination is functionally not possible.
a: Internet connection not available via CSD in overseas.
b: Not available to send/receive messages via CSD in overseas.
c: A call cannot be made or received during an internet connection via CSD in overseas.
Available service Phone number
Collect call (reversed charge calls) 106 (no area code)
Directory assistance for general subscriber phones and DoCoMo's
mobile phones (charges apply).
(Unlisted phone numbers cannot be given.)
104 (no area code)
Telegrams (charges apply) 8 a.m. - 10 p.m. 115 (no area code)
Time (charges apply) 117 (no area code)
Weather report (charges apply) Area code + 177
Police emergencies 110 (no area code)
Fire and ambulance 119 (no area code)
Marine emergencies and accident reports 118 (no area code)
Message Dial for a disaster (charges apply) 171 (no area code)
00M1000EN.book 501 ページ 2004年11月24日 水曜日 午前7時56分

502
Appendix
• Note that calls to 110, 119 or 118 from the FOMA handset cannot be located. Since the police or fire
department authorities may call you to confirm, inform them that you are calling from a mobile phone, give
your number and detailed information of your whereabouts. To make sure that you are not cut off during the
call, stay in one place when you make the call and do not turn off the phone after the call, but keep it on for
about 10 minutes so that a call can be received.
• Depending on the area you are calling from you may not be connected to the local police or fire department.
Use a public payphone or general subscriber phone if you cannot get in touch with the local authorities.
• Customers who use "Call Forwarding" and "Voice Warp" from a general subscriber phone whose forwarding
destination is a mobile or carphone (mobile phone), may still hear the ring tone even when the mobile phone
is busy, is outside the service area or is turned OFF due to the setting of the general subscriber/mobile
phone.
• You may not be able to call 116 (NTT sales center), Dial Q2, Message Dial and make credit card calls. (Credit
card calls can be made from a general subscriber or a public phone to a FOMA handset.)
00M1000EN.book 502 ページ 2004年11月24日 水曜日 午前7時56分
503
Appendix
Options and Related Devices
Combining the FOMA handset with optional devices supports a wide variety uses from
personal use to business use. Some products are unavailable depending on the region.
For details, contact our sales office. For details about the optional devices, refer to the
instruction manual for each device.
Desktop Suite and SyncML
FOMA handset has two types of software in order to synchronize data.
1Desktop suite
A FOMA handset connected to a personal computer with USB, or via Bluetooth, can transmit
and synchronize data such as Contacts, Calendar, To do list, and messages.
With Desktop suite, installation and transmission of applications and files to a FOMA handset
can be performed in addition to transmission and synchronization of data.
1SyncML
A FOMA handset connected to a personal computer via a wireless LAN, can transmit and
synchronize data such as Contacts, Calendar, and To do list.
Please see the following homepage or the help of Desktop suite/SyncML about details on
such as download method, data which can be transmitted/synchronized, a hardware
requirement, the operation method, and restrictions.
<XXXXXMaker site name> http://www.XXXXXX
Hardware Requirements
Please use in the operational environments shown below.
*: Required memory and hard disk space may vary depending on system environments.
• AC adapter MXX • Desktop holder MXX
• Battery pack MXX • Rear cover MXX
• Carrying case MXX • Stylus MXX
• USB cable MXX • FOMA USB cable
• International FOMA AC adapter 01 • Earphone/microphone with flat switch P01/P02
• Flat type stereo earphone set P01 • Earphone/microphone with switch P001/P002*
• Stereo earphone set P001*
*: Earphone jack converter adapter P001 is needed.
Item Required environment
OS Windows XP, Windows 2000, Windows Me, Windows 98SE
CPU A processor with XX or higher performance is recommended.
Required memory* XXMB or higher
Free hard disk space* XXMB or higher
Display High Color (16bit) or higher is recommended.
00M1000EN.book 503 ページ 2004年11月24日 水曜日 午前7時56分
504
Appendix
Before Using
<Qualification>
Please see the above homepage or the help of Desktop suite/SyncML about details on such as
download method, data which can be transmitted/synchronized, a hardware requirement, the
operation method, and restrictions.
For inquiries on Desktop suite and SyncML
XXXXSupport Center 0120-XXX-XXX
Office hours: Week days from XX:XX to XX:XX a.m. and XX:XX to XX:XX p.m.
(Saturdays, Sundays, public holidays, and predetermined holidays are excluded)
Using Desktop Suite
By using Desktop Suite, following operations can be performed between a personal computer
linked to a FOMA handset.
Installing Desktop Suite PC
aSet the attached CD-ROM to a personal computer
bClick in the order of [スタート ] (Start) menu y “ ファイル名を指定
して実行 ” (Execute by specifying a file name)
cSpecify "The drive name of CD-ROM: \XXX\setup.exe" and click
[OK]
Starting Desktop Suite PC
Please connect a FOMA handset and a personal computer beforehand, after they are powered
on. 3 P416
aSelect in the order of [ スタート ] (Start) menu y “ すべてのプログ
ラム ” (All Programs) ([Programs] for OS other than WindowsXP)
• From here on, please follow the instructions displayed on the
screen.
00M1000EN.book 504 ページ 2004年11月24日 水曜日 午前7時56分
505
Appendix
y "Motorola Desktop Suite", and click on "Motorola Desktop
Suite"
Starting of Desktop Suite PC will display the above screen.
1About detailed operation method of Desktop Suite PC
Please refer to the help file. The display method is as follows:
Select in the order of [スタート] (Start) menu y “すべてのプログラム” (All Programs)
([Programs] for OS other than WindowsXP) y "Motorola Desktop Suite", and click on
"Motorola Desktop Help"
Uninstalling Desktop Suite PC
Uninstalls Desktop Suite PC
• Before uninstalling, please end Desktop Suite PC.
• The display on the screen differs when an OS other than Windows XP is used.
< Example: When uninstalling form Windows XP >
aClick on the icons in the order of [スタート ] (Start) menu y “ コン
トロールパネル ” (Control Panel) y “ プログラムの追加と削除 ”
(Add or Remove Programs)
The “プログラムの追加と削除” (Add or Remove Programs) screen is displayed.
1For Windows 2000 Professional, Me
Click on [スタート] (Start) menu, and select in the order of [設定] (Setting) y “ コント
ロールパネル” (Control Panel) and double click on “アプリケーションの追加と削除”
(Add or Remove Programs)
“アプリケーションの追加と削除” (Add or Remove Programs) screen (for Windows Me,
“アプリケーションの追加と削除のプロパティ ” (Property of Add or Remove
Programs) ) is displayed.
bSelect "Motorola Desktop Suite" and click on “ 変更と削除 ”
(Change or Delete)
• From here on, please follow the instructions displayed on the screen.
Setting the Connection Method of Desktop Suite
The method for connecting to Desktop Suite (USB cable connection/Bluetooth communication) is
set.
00M1000EN.book 505 ページ 2004年11月24日 水曜日 午前7時56分
506
Appendix
aTap $$ y $$ in the Application Selector bar, tap Connect tab from
Control Panel screen y tap Desktop Suite
1Changing the precedence of apparatus when connection method is set to Bluetooth
Tap [Change]
bTap Connection Drop Box, set connection method y tap [Done]
Operating Desktop Suite
Desktop Suite is operated and data is transmitted. The connection starts with the method set at
"Setting the connection method of Desktop Suite" (3 P529)
• When connecting via USB, this operation is performed after connecting a personal computer with a FOMA
handset with an USB cable beforehand. 3 P414
• When connecting via Bluetooth, it is recommended to register the connecting Bluetooth apparatus
beforehand. 3 P382
Display : Tap and select when displaying the Bluetooth
apparatus by types.
Device list : The apparatus by which Bluetooth connection was
made (above the line), and the apparatus being
searched (below the line) are displayed.
• Tap [Update] to start a search for apparatus available for Bluetooth
connection starts.3P383
When the connection
method is USB
When the connection
method is Bluetooth
00M1000EN.book 506 ページ 2004年11月24日 水曜日 午前7時56分
507
Appendix
aTap $$ y $$ in the Application Selector bar
bTap [Connect]
1When disconnecting
Tap [Disconnect]
Synchronizing a Personal Computer with a Data by Using SyncML
Setting up SyncML
Performs a server setup in order to use SyncML.
• Information necessary for the setting will be supplied by the provider of SyncML.
aTap $$ y $$ at the Application Selector bar
bTap in the order from Edit y Settings in the Menu bar
Server address : Enter a server address.
Username : Enter a username.
Password : Enter a password.
When connecting via
USB
When connecting via
Bluetooth
00M1000EN.book 507 ページ 2004年11月24日 水曜日 午前7時56分
508
Appendix
cTap a column to set up, and enter information
1When performing a setting for a transport login
• Please perform this when needed. Information necessary for the setting will be supplied
by the provider of SyncML.
aTap Protocol tab
bTap $$ at Use transport login column
• Tap $$ to disable Transport Login.
cTap the Username column, and enter a user name
dTap the Password column, and enter a password
dTap [Done]
The server is set.
Setting the Task to Synchronize
Sets the task to synchronize by SyncML.
aTap $$ y $$ in the Application Selector bar
Transport protocol
: Transport protocol is displayed.
Use transport login
: Sets enable/disable of transport login.
Username : The user name for transport login is entered. This
can be entered only when transport login is
enabled.
Password : The password for transport login is entered. This
can be entered only when transport login is
enabled.
The task to synchronize is displayed.
00M1000EN.book 508 ページ 2004年11月24日 水曜日 午前7時56分
509
Appendix
bTap a task to set
cTap $$ of Enable task
• Tap $$ to disable the task.
dTap Ta sk n ame column, and enter a task name
• Make a change as needed.
eTap Server database column and enter a path
• Make a change as needed.
fTap [Done]
The task is set.
• Tap [Cancel] to cancel the task setting.
Synchronizing Data
Connects to the SyncML server, and synchronizes the data.
aTap $$ y $$ in the Application Selector bar
Enable task : Sets enable/disable of the task.
Task name : The task name acquired beforehand is
displayed.
Server database
: The path to the server database acquired
beforehand is displayed.
The task to synchronize is displayed.
The tasks with synchronization disabled are displayed 3 P532
00M1000EN.book 509 ページ 2004年11月24日 水曜日 午前7時56分
510
Appendix
bTap [Sync]
cSynchronization
Troubleshooting
Symptom Check
FOMA handset cannot be turned ON (the handset
cannot be used).
• Is the battery connected properly? 3 P52
• Is the battery depleted? 3 P55
• When the mova handset is ON in a dual network
service, the FOMA service is not available. Check
whether or not FOMA handset is ON. Please see
"Network Service Operation Guide" for further
information. 3 P373
A message "UIM selection failed" is displayed when
the FOMA handset is powered on.
• The UIM may not be properly attached or may be
damaged. Check to see if the UIM is properly
attached. 3 P49
Screen does not change when a key is pressed or the
touch screen is tapped while the display is turned off.
• Is All lock set? 3 P153
The display gets dark, and indication disappeared. • Is the handset in power saving mode? 3 P42
"Battery Status: Very Low Recharge Battery" is
displayed, and alarm is heard.
• The battery is almost discharged. Charge the
battery. 3 P54
Calls cannot be made by entering a phone number. • Is Self-mode set? 3 P155
After dialling a number, you hear a busy tone and
cannot establish your call.
• Have you dialed the area code? 3 P66
• Did you hear the dial tone before dialling? 3 P66
• Is "No service" indicated? 3 P41
Mail reception is announced by other than the set ring
tone.
• Is the mail from the partner whom you registered
the ringer tone in the phonebook? 3 P104
The image/melody set in each function does not
display/play, and operates in default setting.
• Is the same UIM as the one acquired the picture or
the melody attached? 3 P50
The progress of synchronization is displayed.
Condition of the task is displayed.
• Tap [Stop] to cancel the performing synchronization.
• Tap SyncML 3 Disconnect on the Menu bar to disconnect the
communication.
00M1000EN.book 510 ページ 2004年11月24日 水曜日 午前7時56分
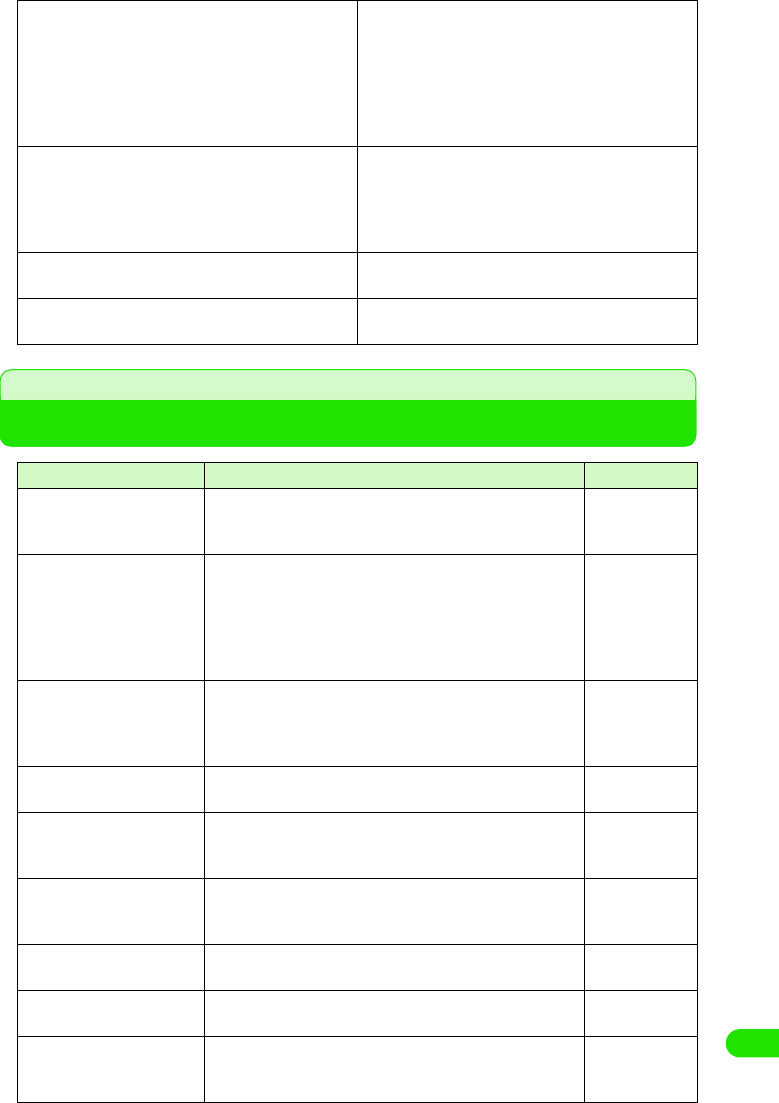
511
Appendix
Error Message List
The icon indicating the network state shows the
handset is out of network coverage, and you cannot
use the global roaming service.
• You are outside the service area of global roaming
service, or in an area with poor signal strength.
• Please check with "Network Service Operation
Guide" or the homepage of WORLD WING to see
whether the service area or the operator is the one
you can use.
• Please switch to a corresponding network. 3 P515
Neither a Video Call, a short message service (SMS),
nor a packet communication can be used.
• Please check with "Network Service Operation
Guide" or the homepage of WORLD WING to see
whether the service area or the operator is the one
you can use.
• Please switch to a corresponding network. 3 P515
Cannot receive either a voice call or a video call. • Is Incoming call barring when roaming set? 3
P516
After returning from overseas, the icon indicating the
network state remains displaying no service.
• Is the network set for GSM/GPRS system? 3
P515
Displayed Messaget Description Reference
This software cannot be
installed as the installation
file is corrupt
The application was not able to install, since the file is
corrupt.
P362
Application was not able to
install since there is
insufficient memory in the
handset. Please delete an
unnecessary file and try
again
There is insufficient memory for the specified installation.
Delete some files and restart the installation.
P363
Cannot find specified
memory card. Check if the
memory card is properly
inserted
Application was not able to uninstall due to an error. P363
The download was aborted
due to an error
Was not able to download due to an error. P211
Delete or move internal files
to the memory card
A photograph cannot be taken since the memory in the
FOMA handset is full. Please either move to the external
memory, or delete unnecessary picture/video.
P307, 308
Move or delete some files A photograph cannot be taken since the memory in the
FOMA handset is full. Please either move to the external
memory, or delete unnecessary picture/video.
P307, 308
Captured file could not be
stored
The picture/video taken was not able to save due to an error. P169, 170
Folder changed to default
external folder
The specified folder was not correct, so the default external
folder is opened.
P303
Camera could not be
accessed. The application
will close
The camera application is closed due to an error. P169
00M1000EN.book 511 ページ 2004年11月24日 水曜日 午前7時56分
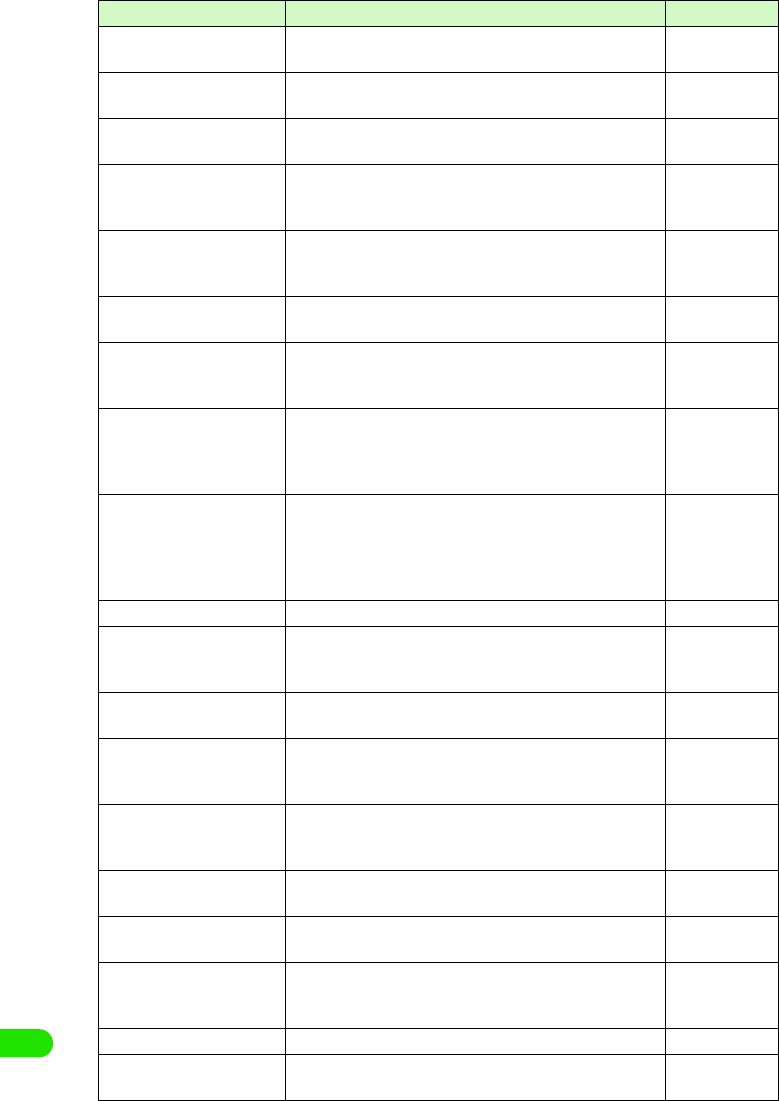
512
Appendix
Not all contacts were
deleted successfully
Certain contacts were not able to delete. P113
Not all contacts were copied
successfully
Certain contacts were not able to copy. P115
Not all contacts were moved
successfully
Certain contacts were not able to move. P115
Contact can't be saved.
Please enter name.
This message displays when you attempt to save a contact
without entering a name. Please try saving again after
entering a name.
P99
Illegal characters. Contact
was updated.
When you attempt to save a contact that includes characters
that cannot be saved to UIM, the data will be changed and
then saved.
P105
USB cable not connected. Since the USB cable is not connected to the FOMA handset,
it cannot connect to a PC.
P414
Failed to connect to PC via
USB. Check the settings on
the PC.
FOMA handset cannot be connected to a PC via USB. P417
Do you want to enable
Bluetooth?
This message is displayed when attempting to connect
FOMA handset with a PC using Bluetooth, and an available
device is not set.
Please tap [Yes], and set the available device.
P382
Your preferred device cannot
be found. Make sure it is
turned on and in-range.
Alternatively change your
preferred device.
This message is displayed when attempting to connect
FOMA handset with a PC using Bluetooth, and an available
device is not set. Please tap [Update], and you can select
another device from the list of available devices.
P382
Check Failed The check on a short message (SMS) failed. P263
A handset is trying to
connect in order to transfer
an entry.
Other handset is trying to connect to the FOMA handset in
order to transmit data. Tap [Accept] to receive the data with
Bluetooth.
P385
The file name already exists This message is displayed when you attempt to change a file
name to the one already exist. Please use other file name.
P304
Enter a name for the track This message displays when you attempt to change a music
file name without entering anything. Please enter a file
name.
P304
This application's file is
damaged and has been
deleted
The dameaged data in notes is deleted. -
TV Phone is not available You are not in an area where a Video Call can be used. You
can make a voice call by tapping [Voice].
P89
Failed to connect Video call cannot be made due to an error. You can make a
voice call by tapping [$$Voice].
P89
Video call cannot be dialed
in an active audio call
This message displays when attempting to make a video call
during a voice call. You can make a voice call by tapping
[$$Voice].
P89
Failed A setup of network service failed due to an error. -
Failure Network failure Failed a network search for setting up a network, due to an
error.
-
Displayed Messaget Description Reference
00M1000EN.book 512 ページ 2004年11月24日 水曜日 午前7時56分
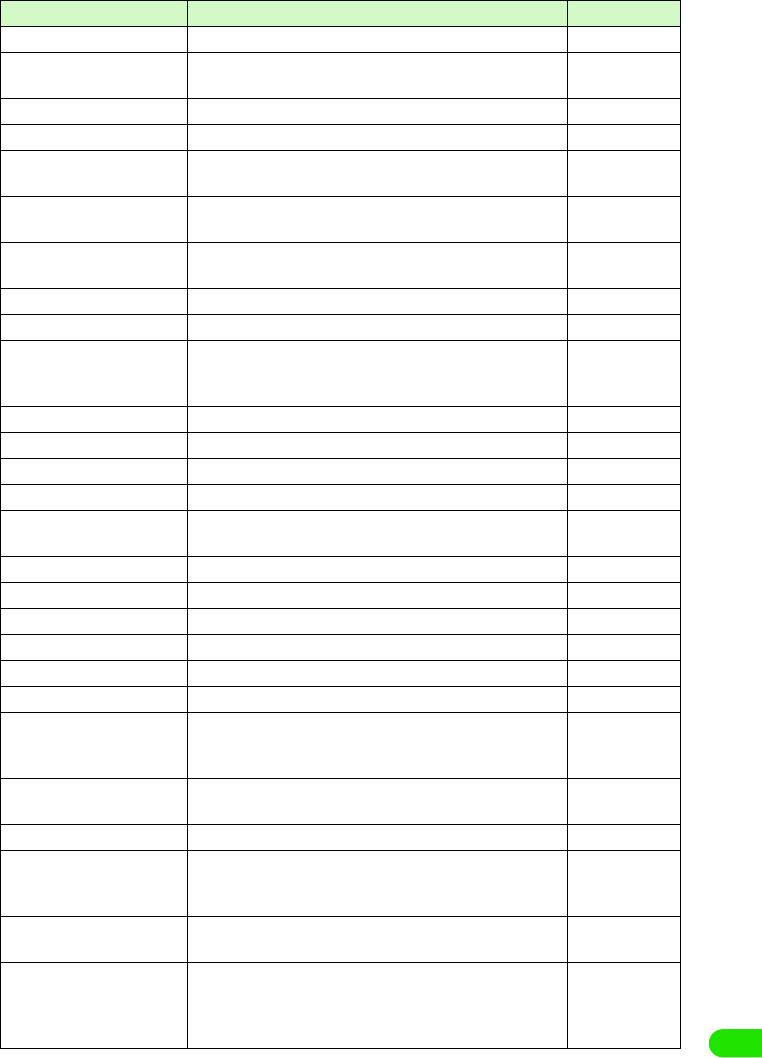
513
Appendix
Failure Other Phone is Busy The other phone is busy when switching Dual Network. P373
Failure Invalid Network
Password
The password for the network is incorrect. P146
Network password incorrect The password for the network is incorrect. P146
Not Subscribed The network service is not subscribed. -
Failure Network already
exists
The network attempted to be registered already exists in the
preferred list.
-
List full Please delete an
entry first
The preferred list is full. -
Failure Emergency only Either network cannot be found, or manual network selection
is cancelled.
-
Failure No Service The network cannot be used, -
Incorrect password PIN is not correct. P147
Incorrect password PIN will
be blocked if next attempt
fails
Reentered PIN is not correct. P147
PIN is blocked PIN is locked. P151
None of UIMs is selected UIM is not selected. -
UIM selection failed An error occurred with the UIM. -
Unknown document file type It is a file not supported. P289
The document is faulty, and
could not be converted
An error occurred with the file. P289
Image could not be loaded Image could not be loaded due to an error. -
Image is too large to operate The image is too large to display or edit. P275
Image could not be moved Image could not be moved due to an error. -
Image could not be renamed Image could not be renamed due to an error. -
Image could not be deleted Image could not be deleted due to an error. -
Unable to play clip. Unable to play clip due to an error. -
Enter a name for the clip. This message displays when you attempt to change a clip
file name without entering anything. Please enter a file
name.
P304
Unable to update pattern
definitions.
Failed to update pattern definitions of virus scan due to an
error.
-
Cannot use pattern scanner. Initialization of virus scan failed due to an error -
The total data amount
exceeds the specified
threshold.
The total packet data sent and received exceeded the
specified threshold.
P349
A certificate must be
selected.
A certificate needs to be selected. P220
Client certificates are not
available. Network
authentication cannot be
configured.
Either a certificate does not exist, or the certificate has
expired, so it cannot be used.
P220
Displayed Messaget Description Reference
00M1000EN.book 513 ページ 2004年11月24日 水曜日 午前7時56分
514
Appendix
A problem occurred during
the automatic settings
update
Downloading quickstart failed due to an error. -
Failure Device settings not
reset
Master Reset failed due to an error. -
Failure User data not
cleared Device settings not
reset
Master Clear failed due to an error. -
Bad name It is a name that cannot be registered in TransFlash memory
card.
P302
Switch off light must be less
than or equal to the time to
Power down screen
It will be adjusted
accordingly
The time for Power down screen in power saving mode
cannot be set up shorter than the time for switch off light.
Please reset the time again.
P136
Battery Status: Very Low
Recharge Battery
Low battery. Please charge. P54
You cannot delete the ……
folder because it still has
items in it.
The folder could not be deleted since it has data in it. P303
Your handset is low on
memory. Do you want to
create some space now?
The memory capacity of FOMA handset is insufficient. Tap
[Yes] to display the screen for deleting unnecessary files, or
the memory manager.
P311
Disk is full The memory is full. Delete unnecessary files. P311
This file is damaged and
can't be used.
The file is damaged, so it cannot be used. -
This application's file is
damaged and has been
deleted.
The file is damaged, so it has been deleted. -
Failed to read the user
dictionary. Are you sure you
want to initialize?
Failed to read the user dictionary. Tap [OK] to initialize and
activate.
P484
Failed to read the learning
dictionary. Are you sure you
want to initialize?
Failed to read the learning dictionary. Tap [OK] to initialize
and activate.
P490
Invalid Battery Unable to
Charge Battery
An invalid battery pack is used. Please use an appropriate
battery pack.
P52
No viewer can be found on
your device to open this file.
It is a file type that cannot be supported. Tap [Save] to be
saved in FOMA handset.
P250
Displayed Messaget Description Reference
00M1000EN.book 514 ページ 2004年11月24日 水曜日 午前7時56分

515
Appendix
Warranty and After-sales Service
Warranty
• A written warranty is provided with every FOMA handset; make sure that you receive it. Store the warranty in
a safe place when you have read it and checked that it contains the "shop name/date" you purchased it. If it
does not contain the necessary information, contact the shop where you bought it. The warranty is valid for
a period of one year from the date of purchase.
• This product and all accessories are subject to change, in part or whole, for the sake of improvement without
prior notice.
After-sales Service
When Problems Occur
Before requesting service, read the section "Troubleshooting".
If the problem still persists, contact one of the numbers described in "Contacts" at the back cover
of this manual.
If the Result of Inquiries Indicates that a Repair is Required
Take your FOMA handset to a service center designated by DoCoMo. Be sure to check the
opening hours of the service center. Note that you must present the warranty.
1In the warranty period
• The FOMA handset will be repaired at no charge subject to the conditions of the warranty.
• The warranty must be presented to receive warranty service. The subscriber will be charged for the repair
of items not covered in the warranty or repairs of defects resulting from misuse, accident or neglect even
during the warranty period.
• The subscriber is charged even during the warranty period for the repair of failures caused by the use of
devices or consumable items that are not DoCoMo-specified.
1Repairs may not be possible in the following cases:
• Repair is not possible when corrosion due exposure to moisture, condensation or perspiration is detected
in a moisture seal reaction or test, or if any of the internal boards are damaged or deformed. Since these
conditions are outside the scope of the warranty, a repair, if at all possible, will be charged.
1After expiration of the warranty
• All repairs that are requested are charged.
1Replacement parts
• Replacement parts (parts required to maintain product function) will be kept in stock for at least 6 years
after termination of production. The product can be repaired during this period. Depending on the nature
of the required repair, it may still be possible to repair your phone even after this period, so please contact
one of the numbers described in "Contacts" at the back cover of this manual.
Notes
• Do not modify the FOMA handset, the UIM or its accessories.
00M1000EN.book 515 ページ 2004年11月24日 水曜日 午前7時56分
516
Appendix
- Fire, injury or damage may result.
- In order to prevent interference of radio waves or network breakdown, the FOMA handset and UIM are
manufactured according to technical standards stipulated by law. Do not use FOMA handsets or UIMs that
do not meet these standards.
- If the FOMA handset is modified (part replacement, modification, painting, etc.) it will be repaired only after
the modified parts have been restored to the condition at the time of purchase. However, repair may be
refused depending on the nature of modification.
- Repair of failures or damage caused by modification are charged even during the warranty period.
• Do not remove any inscription stickers attached to the FOMA handset. The inscription stickers certify that the
FOMA handset satisfies specific technical standards. Note that if stickers are removed intentionally or are
reattached in such a way that confirmation of the sticker's contents is impossible, repair or servicing may be
refused because confirmation of whether or not the phone conforms to relevant technical standards cannot
be made.
• The ON/OFF function settings and stored data may be cleared (reset) by failure, repair or handling processes.
Should this happen, set up the functions again.
• Magnetic components are used in the earpiece and speaker of the FOMA handset. Do not allow cash cards
or other devices that are vulnerable to magnetism to come into contact with the phone.
• If the handset becomes wet or moist, turn the power off and remove the battery pack immediately and bring
the handset to our repair office as soon as possible. However, repair may not be possible depending on the
condition of the handset.
Phonebook, Downloaded Data and IC Card Data
• Maintain a separate record of the data you register in your FOMA handset. DoCoMo will not accept any
liability and responsibility whatsoever for changes of information or loss of information.
• Data created, imported or downloaded by the subscriber may be lost or become corrupted when changing
the model or repairing mobile phone or carphone. DoCoMo may, at its option, repair a mobile carphone by
replacing it. In such an event, it will not be possible, to transfer the data (except some data) to the new
handset. DoCoMo will not accept any responsibility.
Scan Function
Protecting the Handset from Data that can Cause Damage
By using the Scan Function, FOMA handset can perform a virus scan in FOMA handset or a
TransFlash memory card. When it is found infected from a result of a virus scan, the virus can be
cleansed immediately.
• The scan cannot be performed when another application is in use.
aTap $$ y $$ on the Application Selector bar
Last Scan : Displays the date of the last scan.
Last Update : Displays the date of the last update of the
pattern file.
00M1000EN.book 516 ページ 2004年11月24日 水曜日 午前7時56分
517
Appendix
bTap [$$Start scanning]
cTap $$ y [OK] of the media you are scanning
dTap [OK]
The scan starts, and the result is displayed when the scan completes.
• Tap [Cancel] to cancel the start of scanning.
• Tap [Cancel] to cancel the scan during a scan.
Updating the Virus Pattern File
Virus scan uses the virus pattern file in order to distinguish viruses. By updating the virus pattern
file, it would make it possible to scan new viruses.
aTap $$ y $$ on the Application Selector bar, and tap [Update]
from the virus scan screen
All media : Scans both FOMA handset and TransFlash
memory card.
Internal memory
: Scans FOMA handset.
Card name : Scans TransFlash memory card.
• When a TransFlash memory card is not attached, the selection
screen for the media would not be displayed. It will skip to
Step 4.
• Tap [Cancel] to cancel the start of scanning.
00M1000EN.book 517 ページ 2004年11月24日 水曜日 午前7時56分
518
Appendix
bTap [OK]
cTap [OK]
The phone ID is transmitted, and the update starts.
• Tap [Cancel] to cancel the transmission of the phone ID.
• Tap [Cancel] y [OK] to cancel the update.
dTap [OK]
The update completes.
NOTE
• When the pattern data is updated, SSL communication is performed to the server (the site of our company).
Please enable the SSL certificate. 3P195
• When the pattern data is updated, the unique information (model, serial number, etc.) of your handset is
automatically transmitted to our server (the server that our company manages for the scanning function). We
do not use the transmitted information for any purposes other than the scanning function.
• Please set the date (year, month, and day) of your FOMA handset correctly.
• In case an update of a virus pattern file fails, please redo the update from the beginning.
• If the virus pattern file in the handset is the latest one, a message is displayed indicating that the pattern file
is the newest.
• Tap [Cancel] to cancel the update.
00M1000EN.book 518 ページ 2004年11月24日 水曜日 午前7時56分
519
Appendix
1Functions and data that can be scanned
1When infected with a virus
If a virus is detected during a scan, the confirmation screen for deleting the virus will be
displayed.
1When the scan completes
When the scan completes, a screen with the result of the scan is displayed.
•
[Si
nce t
h
e spec
ifi
cat
i
on
i
s not
d
ec
id
e
d
yet,
d
eta
il
i
s om
i
tte
d
.
]
• Tap [Delete] or [OK] to delete the detected virus, and to resume the scan.
• Tap [Skip] to resume the scan without deleting the detected virus.
No virus Virus deleted Virus not deleted
00M1000EN.book 519 ページ 2004年11月24日 水曜日 午前7時56分
520
Appendix
Tap [Details] in the result screen shown at virus detection to display details on the scan.
Checking the Version of the Virus Pattern File
The detailed information on virus scan application is displayed, and the version of a virus pattern
file can be checked.
aTap in the sequence of $$ y $$ on the Application Selector bar,
and tap Virus Scan on the Menu bar y About Virus Scan
Application name and the version of the virus pattern file are
displayed.
$$
: The virus has been deleted.
$$ : The virus has not been deleted.
• Select a file name and tap [Details] to notify the infected file, name
of the virus, and the status of the virus (deleted/deleted or not) .
The name of infected file
00M1000EN.book 520 ページ 2004年11月24日 水曜日 午前7時56分

00M1000EN.book 522 ページ 2004年11月24日 水曜日 午前7時56分

About Proper Telephone Etiquette
Do not disturb people around you when using your FOMA handset.
Always turn OFF your FOMA handset in the following situations:
1In a location where use of handsets is prohibited
There are places where you cannot use a handset. Always turn OFF your FOMA handset when:
• In an airplane • In a hospital
* Be aware that patients use electronic medical equipment in many areas in hospitals. Your
FOMA handset must be switched off even in lobbies or waiting rooms.
1While driving
Using your FOMA handset while driving could affect safe driving and cause danger.
* Stop your car in a safe place before using your FOMA handset or use Drive Mode.
1While in a crowded train where there may be a person who uses an implanted cardiac
pacemaker or cardioverter defibrillator near you.
1Use of the handset could adversely affect the operation of an implanted cardiac
pacemaker or cardioverter defibrillator.
1While in public places such as a concert hall, movie theater or art museum
Using your FOMA handset in quiet public places will likely bother other people.
Match the volume of your voice and your FOMA handset's ring tone to
your location
1In a quiet location like a restaurant or hotel lobby, pay attention to the volume of your
voice and ring tones, etc. when using your FOMA handset.
1In town areas, while using your FOMA handset, be sure not to block foot or vehicular
traffic.
Consider privacy
Give consideration to privacy before shooting or sending images with a mobile phone
with a built-in camera.
"Silent" functions designed for public use
Your FOMA handset has a number of useful "silent" functions designed for public use, such
as a setting that instructs your handset not to answer incoming calls and the ability to set the
handset for silent operation.
2Manner Mode
Mutes all sounds your FOMA handset makes, such as keypad sound and ring tones.
3P160
2Drive Mode
Plays a guidance to notify that you cannot answer the call because you are driving a car,
then disconnects the call. This mode ensures your safety while driving because no ring
tone sounds when a call is received. 3P79
2Vibrator
Vibrates when there is an incoming call. 3P155
2Voice message
Allows the caller to leave a message when you cannot answer the phone. 3P81
In addition to the above functions, optional services such as Voice Mail Service and Call
Forwarding Service are also available. 3P483, P488
00M1000EN.book 523 ページ 2004年11月24日 水曜日 午前7時56分