Nikon 3143EB Wireless LAN Module User Manual Q7115 25 UM EN
Nikon Corporation Wireless LAN Module Q7115 25 UM EN
UserManual.wiki
>
Nikon
>
3143EB User Manual
>
User Manual 2 fo 4
Contents
1.
Installation Manual
2.
User Manual Part 1 of 2
3.
User Manual Part 2 of 2
4.
User Manual 1 fo 4
5.
User Manual 2 fo 4
6.
User Manual 3 fo 4
7.
User Manual 4 fo 4
User Manual 2 fo 4
Navigation menu
Upload a User Manual
Namespaces
Wiki Guide
HTML
PDF
Info
Views
User Manual
Discussion / Help
Navigation


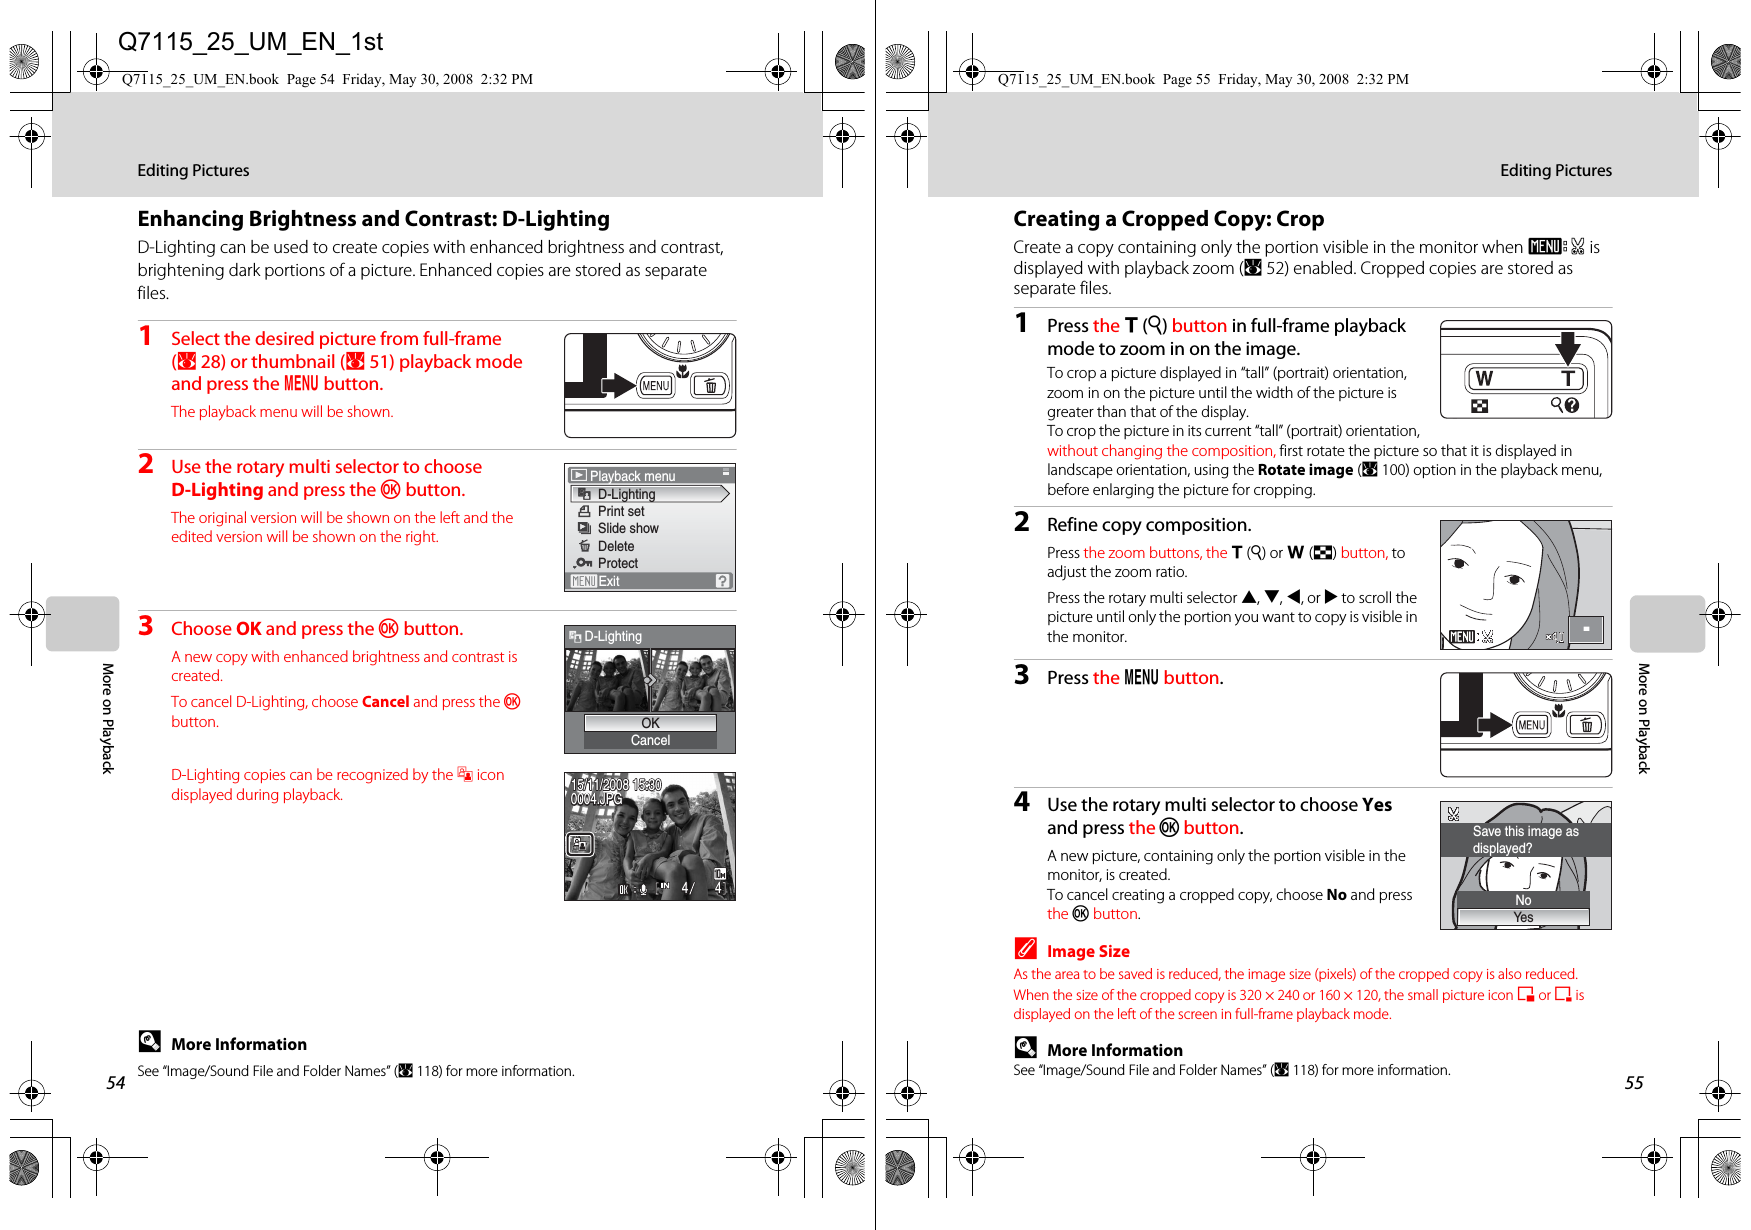


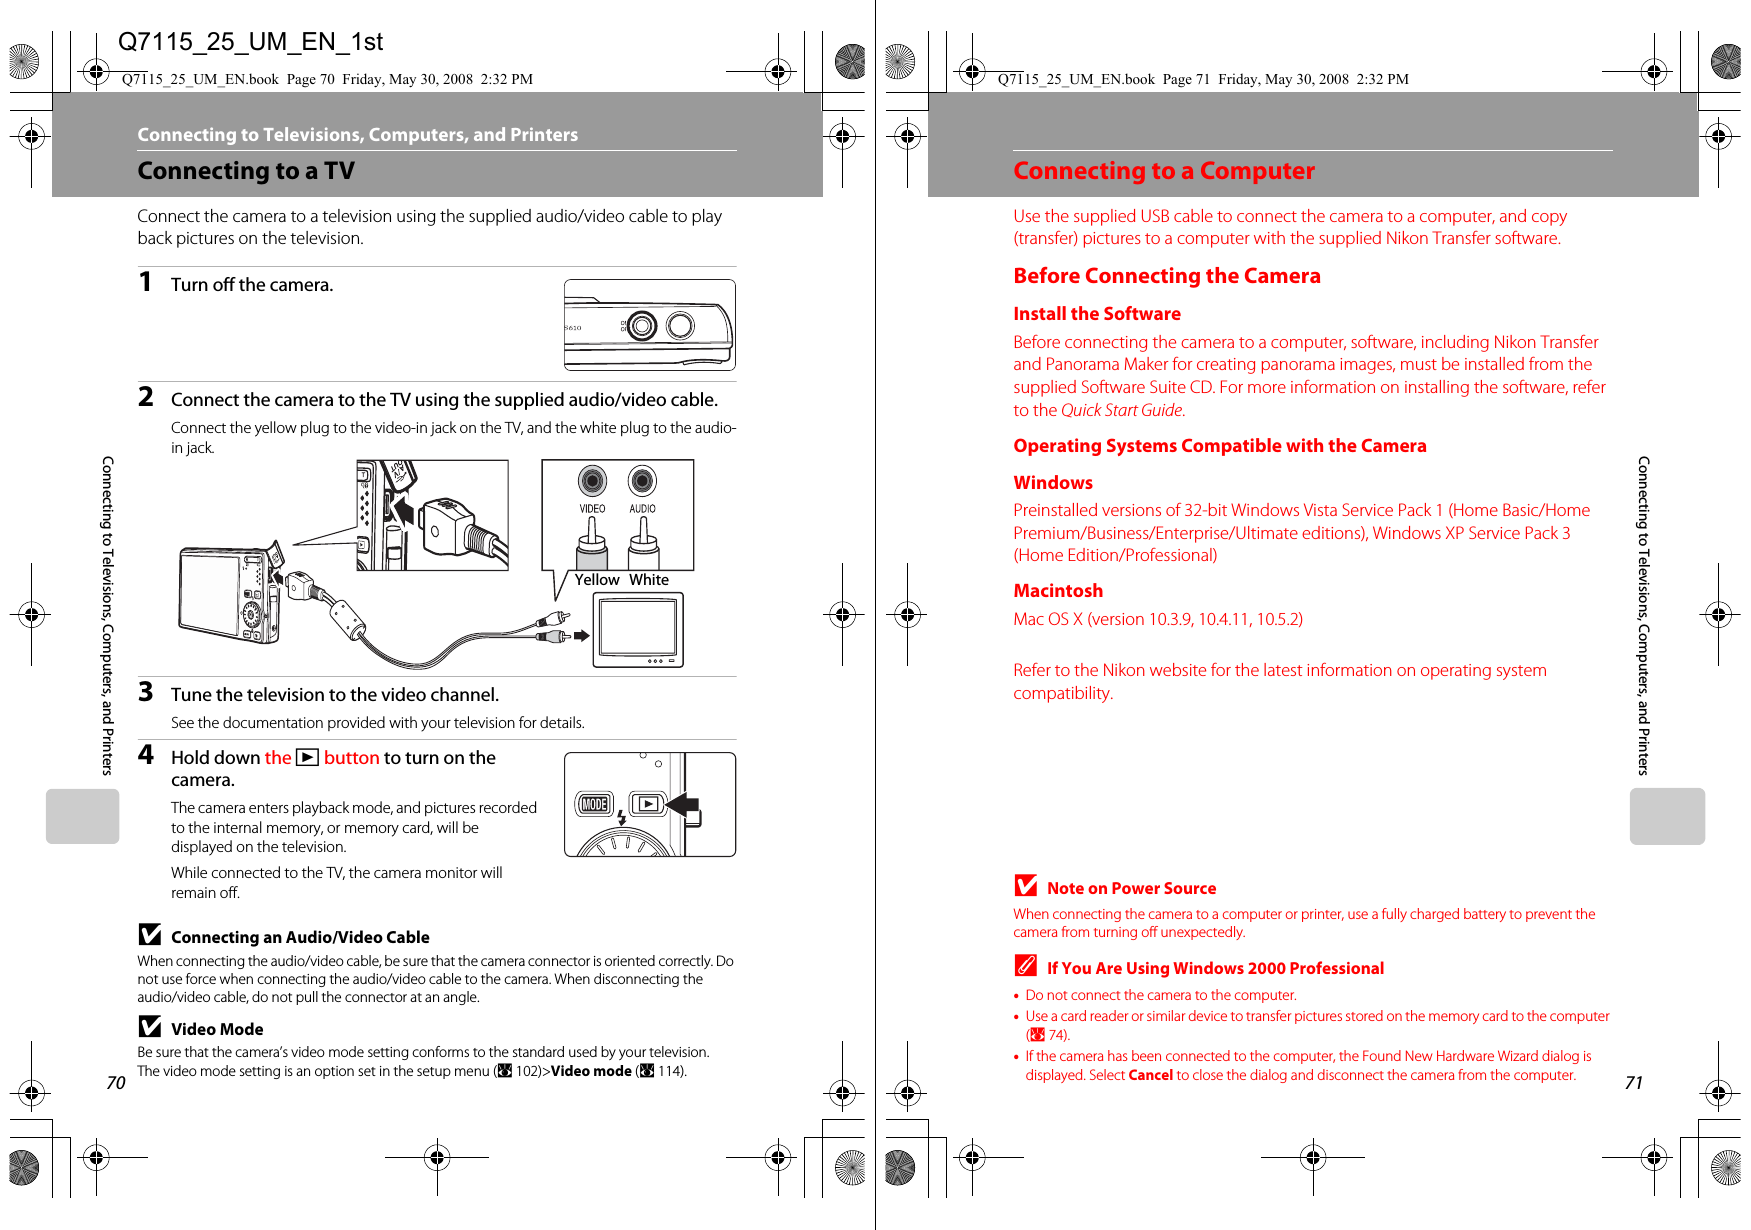
![76Connecting to a PrinterConnecting to Televisions, Computers, and PrintersConnecting the Camera and Printer1Turn off the camera.2Turn on the printer.Check printer settings.3Connect the camera to the printer using the supplied USB cable.4Turn on the camera.When connected correctly, the PictBridge start-up screen 1 will be displayed in the camera monitor. Then the print selection screen will be displayed 2.BConnecting the USB CableWhen connecting the USB cable, be sure that the connectors are oriented correctly. Do not use force when connecting the USB cable. When disconnecting the USB cable, do not pull the connector at an angle.Print selection15/112008NO. 1 [ 57]12Q7115_25_UM_EN.book Page 76 Friday, May 30, 2008 2:32 PM77Connecting to a PrinterConnecting to Televisions, Computers, and PrintersPrinting Pictures One at a TimeAfter connecting the camera to the printer correctly (A76), print pictures by following the procedure below.1Use the rotary multi selector to choose the desired picture and press the k button.Press the f (h) button to display 12 thumbnails, and the g (i) button to switch back to full-frame playback.2Choose Copies and press the k button.3Choose the number of copies (up to nine) and press the k button.4Choose Paper size and press the k button.5Choose the desired paper size and press the k button.To specify paper size using printer settings, choose Default in the paper size menu.Print selection15/112008NO. 1 [ 57]PictBridgeCopiesPaper sizeStart printExit4CopiesExitPictBridgeStart printCopiesPaper sizeExitPaper sizeDefault3.5 × 5 in.5 × 7 in.4 × 6 in.100 × 150mmExitQ7115_25_UM_EN.book Page 77 Friday, May 30, 2008 2:32 PMQ7115_25_UM_EN_1st](https://usermanual.wiki/Nikon/3143EB.User-Manual-2-fo-4/User-Guide-979163-Page-25.png)