Nikon 3143EB Wireless LAN Module User Manual Q7115 25 UM EN
Nikon Corporation Wireless LAN Module Q7115 25 UM EN
Nikon >
Contents
User Manual 2 fo 4
28
Basic Photography and Playback: Auto Mode
Step 4 Viewing and Deleting Pictures
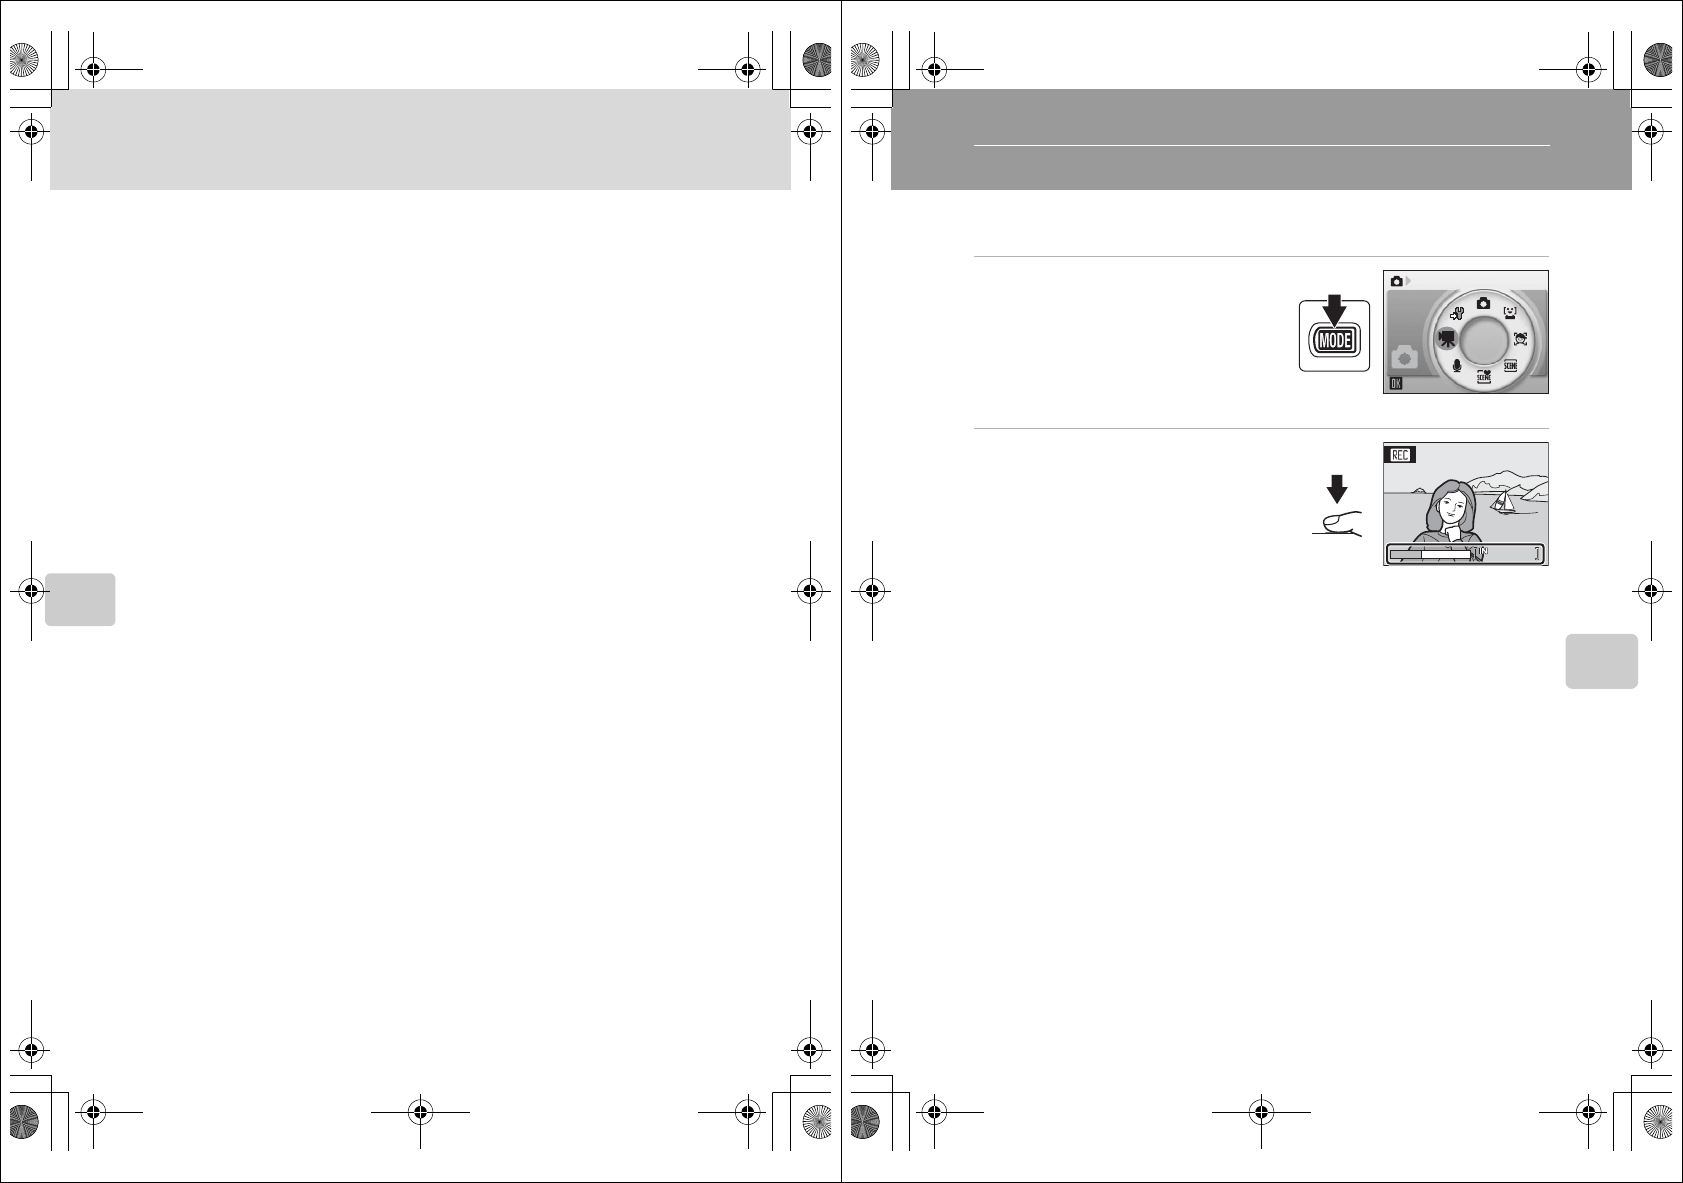
Viewing Pictures (Playback Mode)
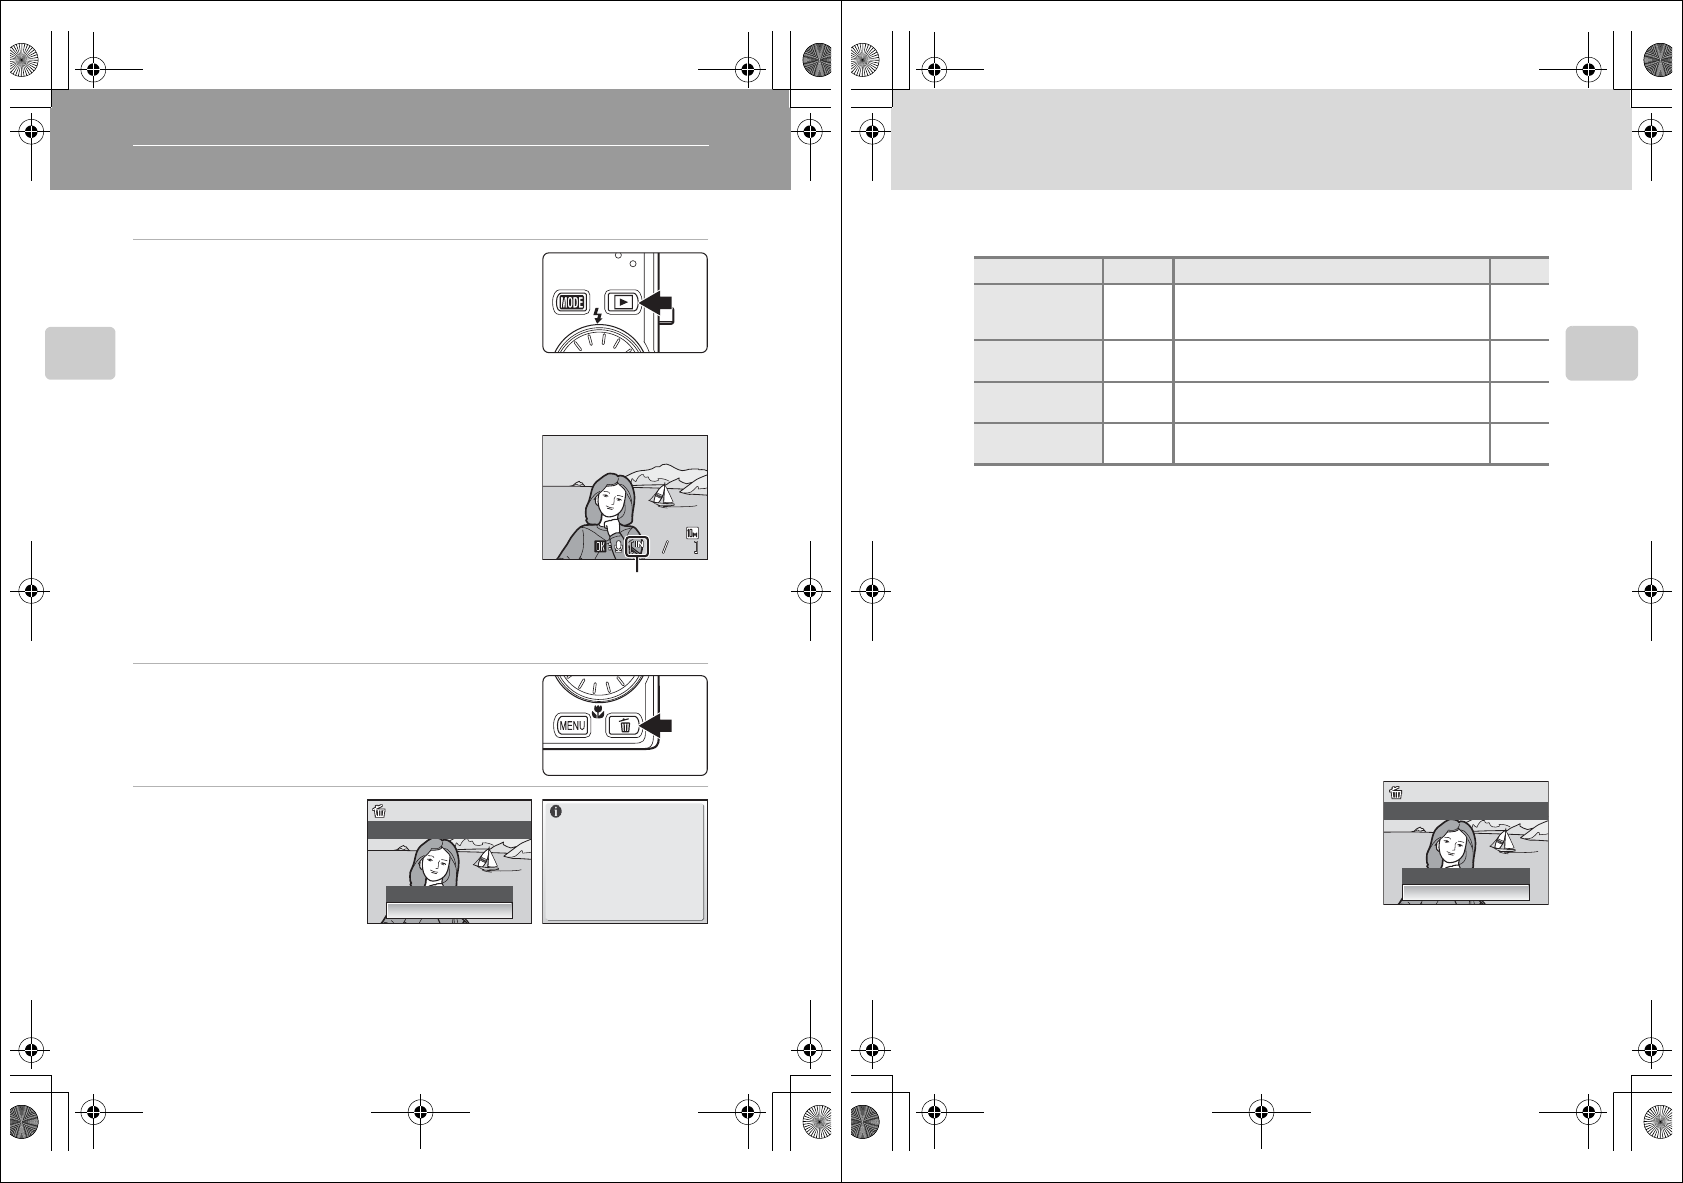
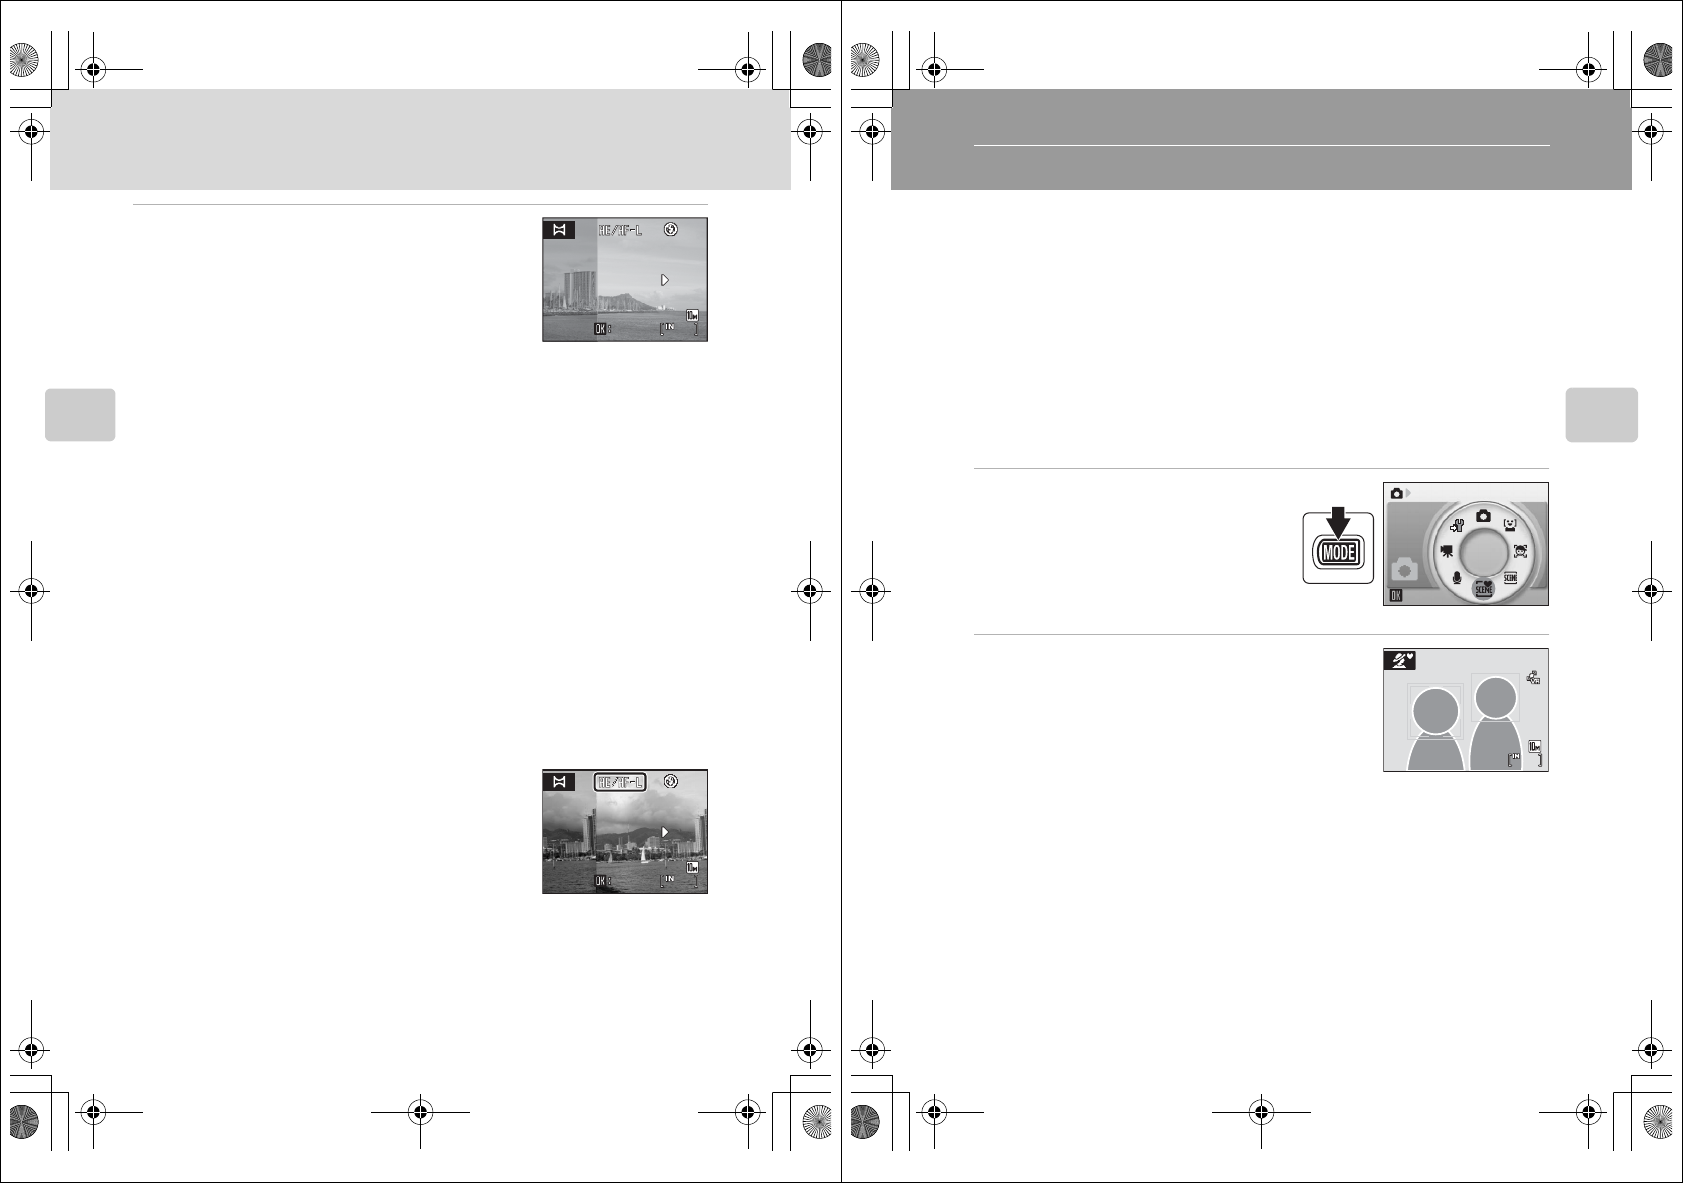
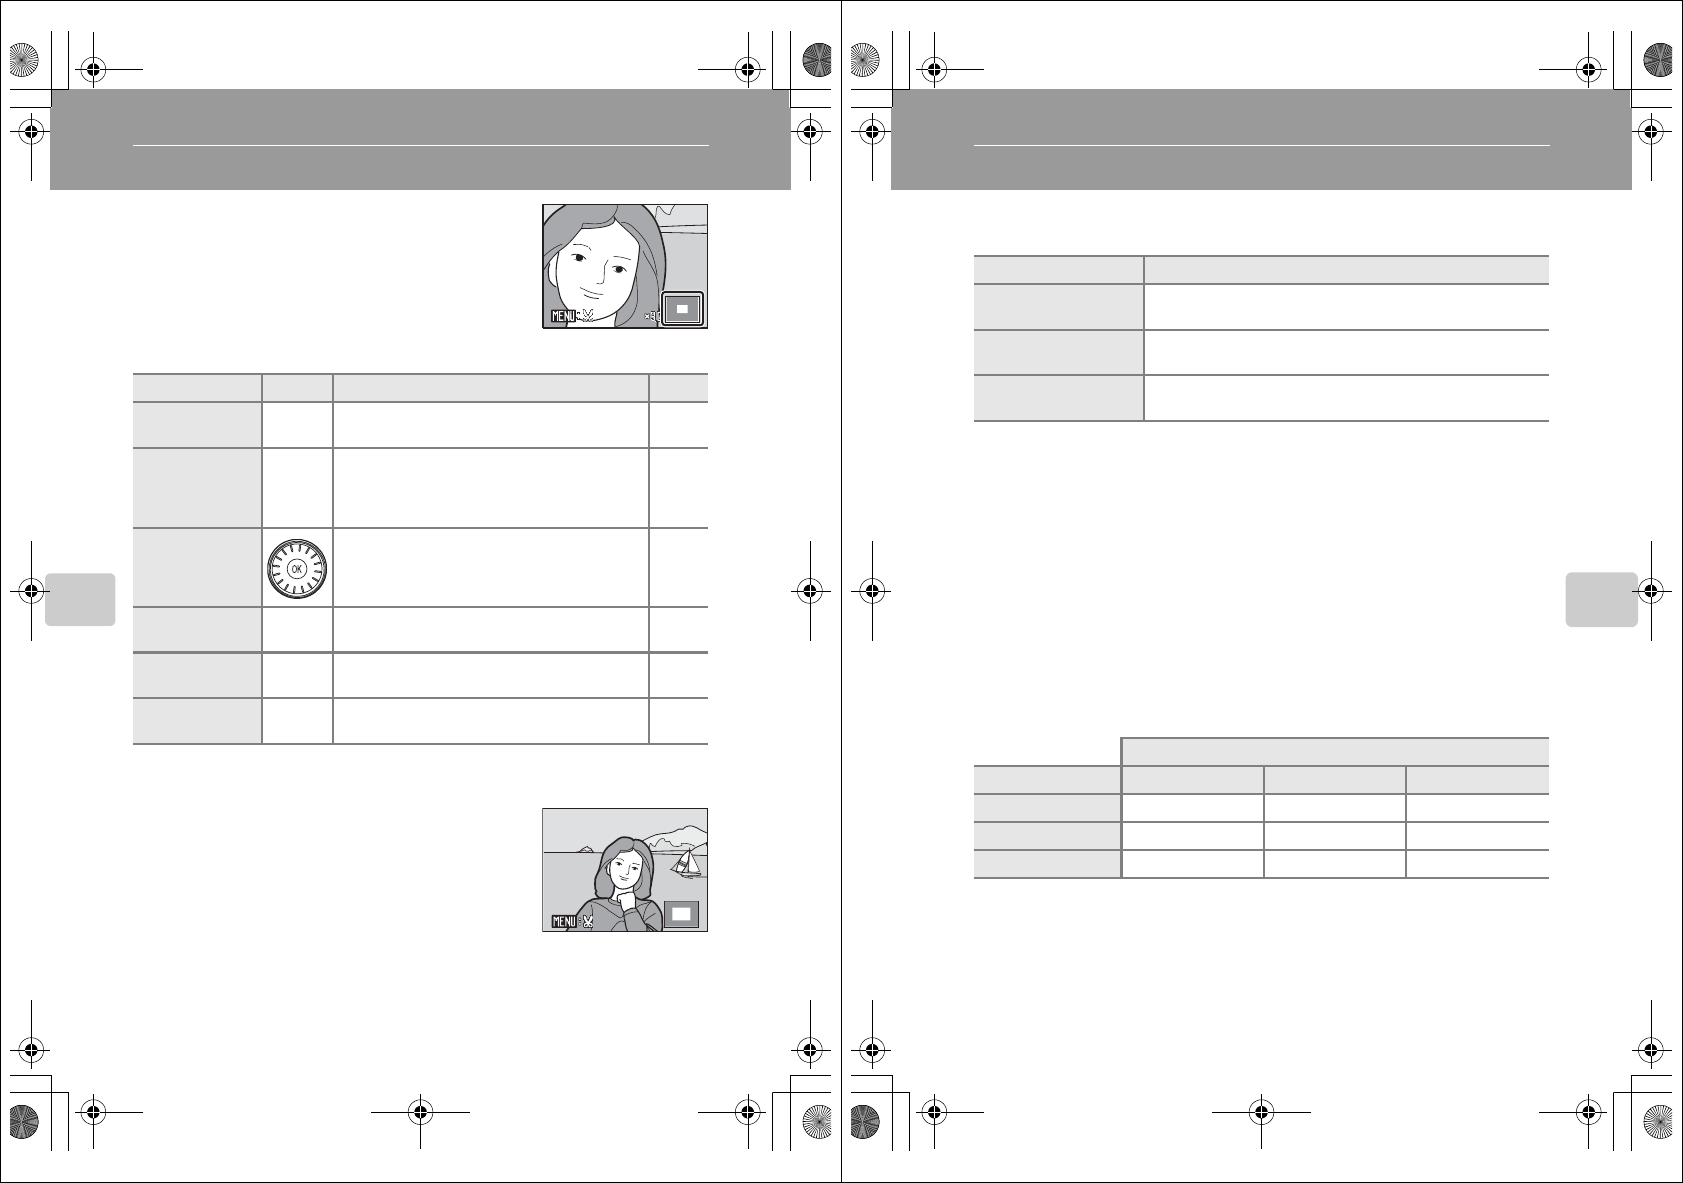
Press the c button.
The last picture taken will be displayed in full-frame playback
mode.
Rotate the rotary multi selector, or press H, I, J, or K, to
view additional pictures (A9).
Pictures may be displayed briefly at low resolution while being
read from the memory card or internal memory.
Press the c button to switch to shooting mode.
When C is displayed, pictures stored in the internal memory
will be displayed. When memory card is inserted, C is not
displayed and pictures stored on the memory card will be
displayed.
Deleting Pictures
1Press the l button to delete the picture
currently displayed in the monitor.
2Use the rotary multi
selector to select Yes
and press the k
button.
To exit without deleting the
picture, select No and press
the k button.
15/11/2008 15:30
15/11/2008 15:30
0004.JPG
0004.JPG
0004.JPG
44
44
15/11/2008 15:30
Internal memory
indicator
No
Ye s
Erase 1 image?
Done
Q7115_25_UM_EN.book Page 28 Friday, May 30, 2008 2:32 PM
29
Step 4 Viewing and Deleting Pictures
Basic Photography and Playback: Auto Mode
COptions Available in Playback Mode
The following options are available in full-frame playback mode.
CPressing the c Button to Turn On the Camera
•When the camera is off, holding down the c button will turn the camera on in playback mode.
The lens will not extend.
•If the camera is turned off in voice recording mode (A65) or sound file playback mode (A67),
pressing the c button will turn the camera on in sound file playback mode.
CViewing Pictures
•Pictures stored in the internal memory can only be viewed if no memory card is inserted.
•When pictures in which a face was detected during shooting (A93) are displayed in full-frame
playback, the pictures may be automatically rotated for playback display, depending upon the
orientation of the detected face.
•When the monitor has turned off in standby mode to save power, press the power switch or the
shutter-release button to reactivate it (A113).
CDeleting the Last Picture Taken
In shooting mode, press the l button to delete the last picture
taken.
DDeleting Multiple Pictures
Multiple pictures can be deleted by selecting Delete (A99) from the playback menu (A96) or the
list by mode menu (A60).
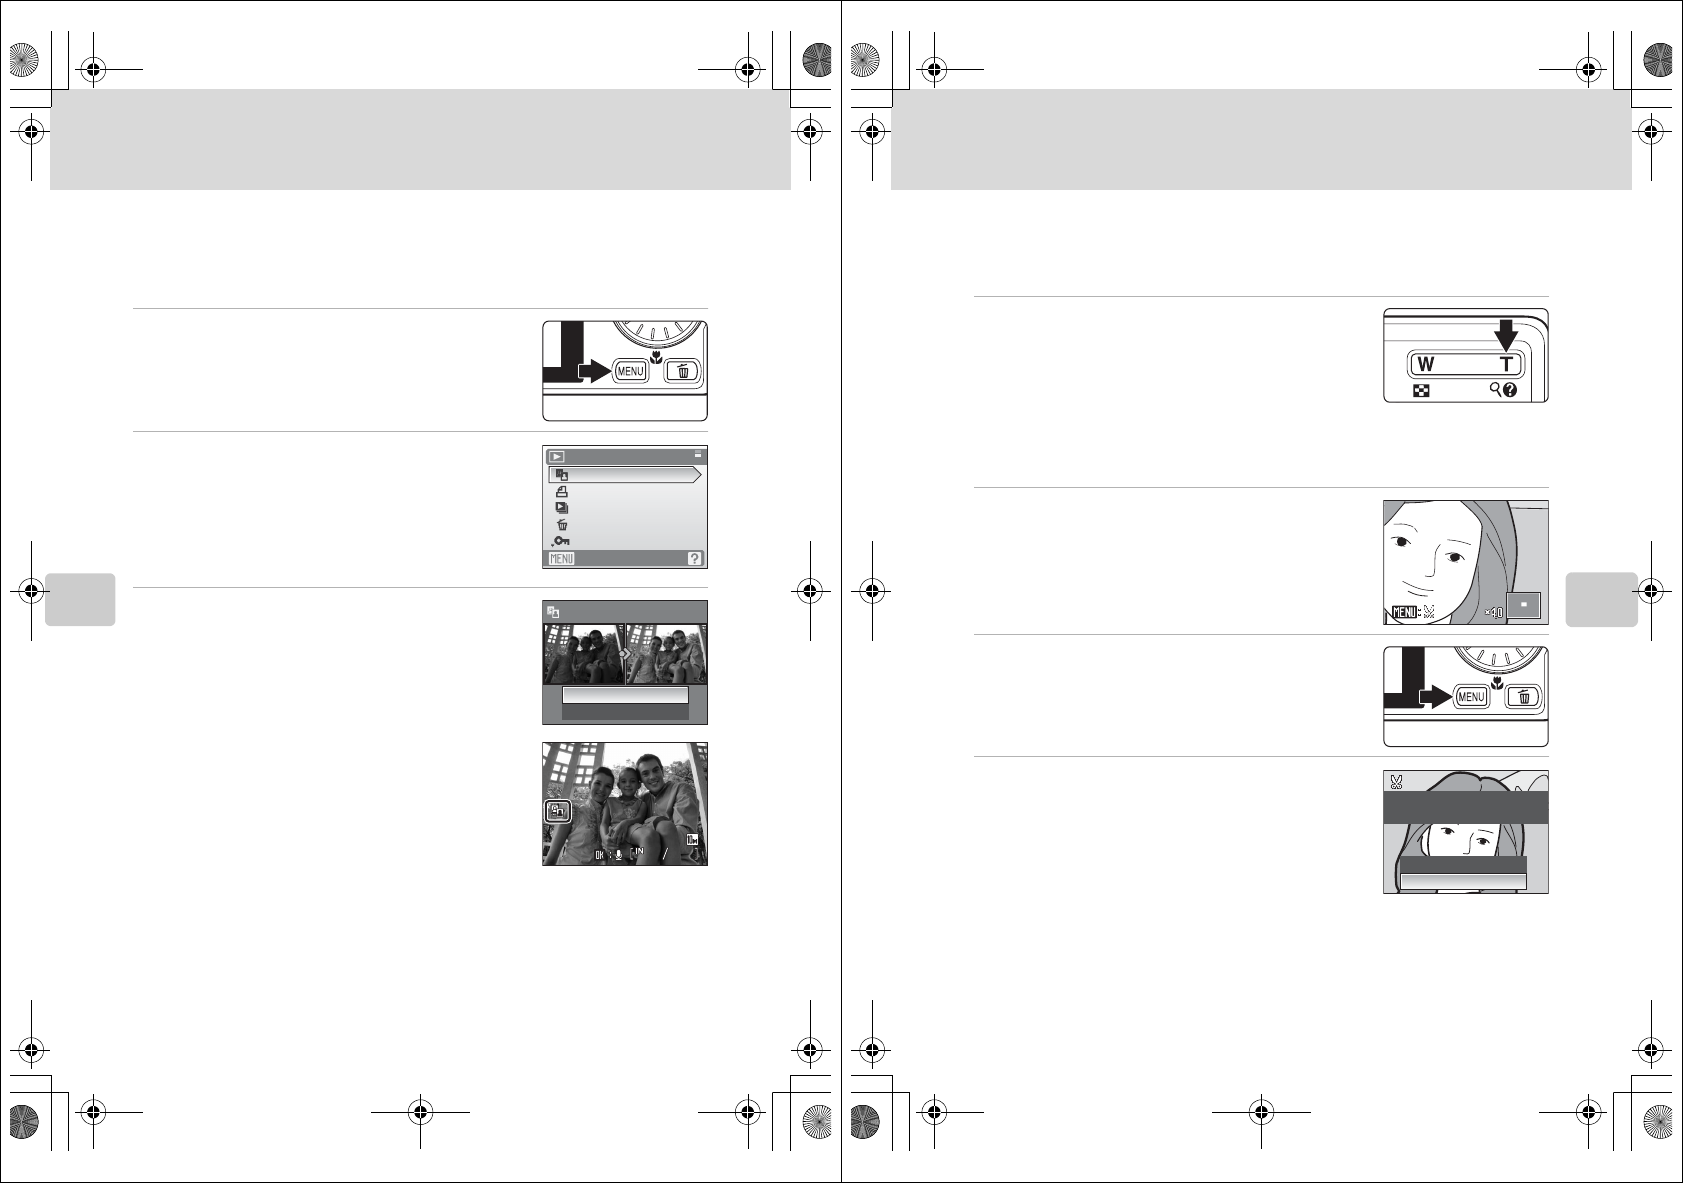
Option Use Description A
Playback zoom g (i)
Press the g (i) button to enlarge view of picture
currently displayed, up to about 10×. Press the k
button to return to full-frame playback mode.
52
View thumbnails f (h)Press the f (h) button to display 9, 16, or 25
picture thumbnails. 51
Record/play voice
memo kPress the k button to record or play back voice
memos up to 20 seconds in length. 57
Switch to shooting
mode cPress the c button to switch to the shooting mode
selected in the shooting-mode selection menu. 28
No
Ye s
Erase 1 image?
Q7115_25_UM_EN.book Page 29 Friday, May 30, 2008 2:32 PM
Q7115_25_UM_EN_1st
30
Basic Photography and Playback: Auto Mode
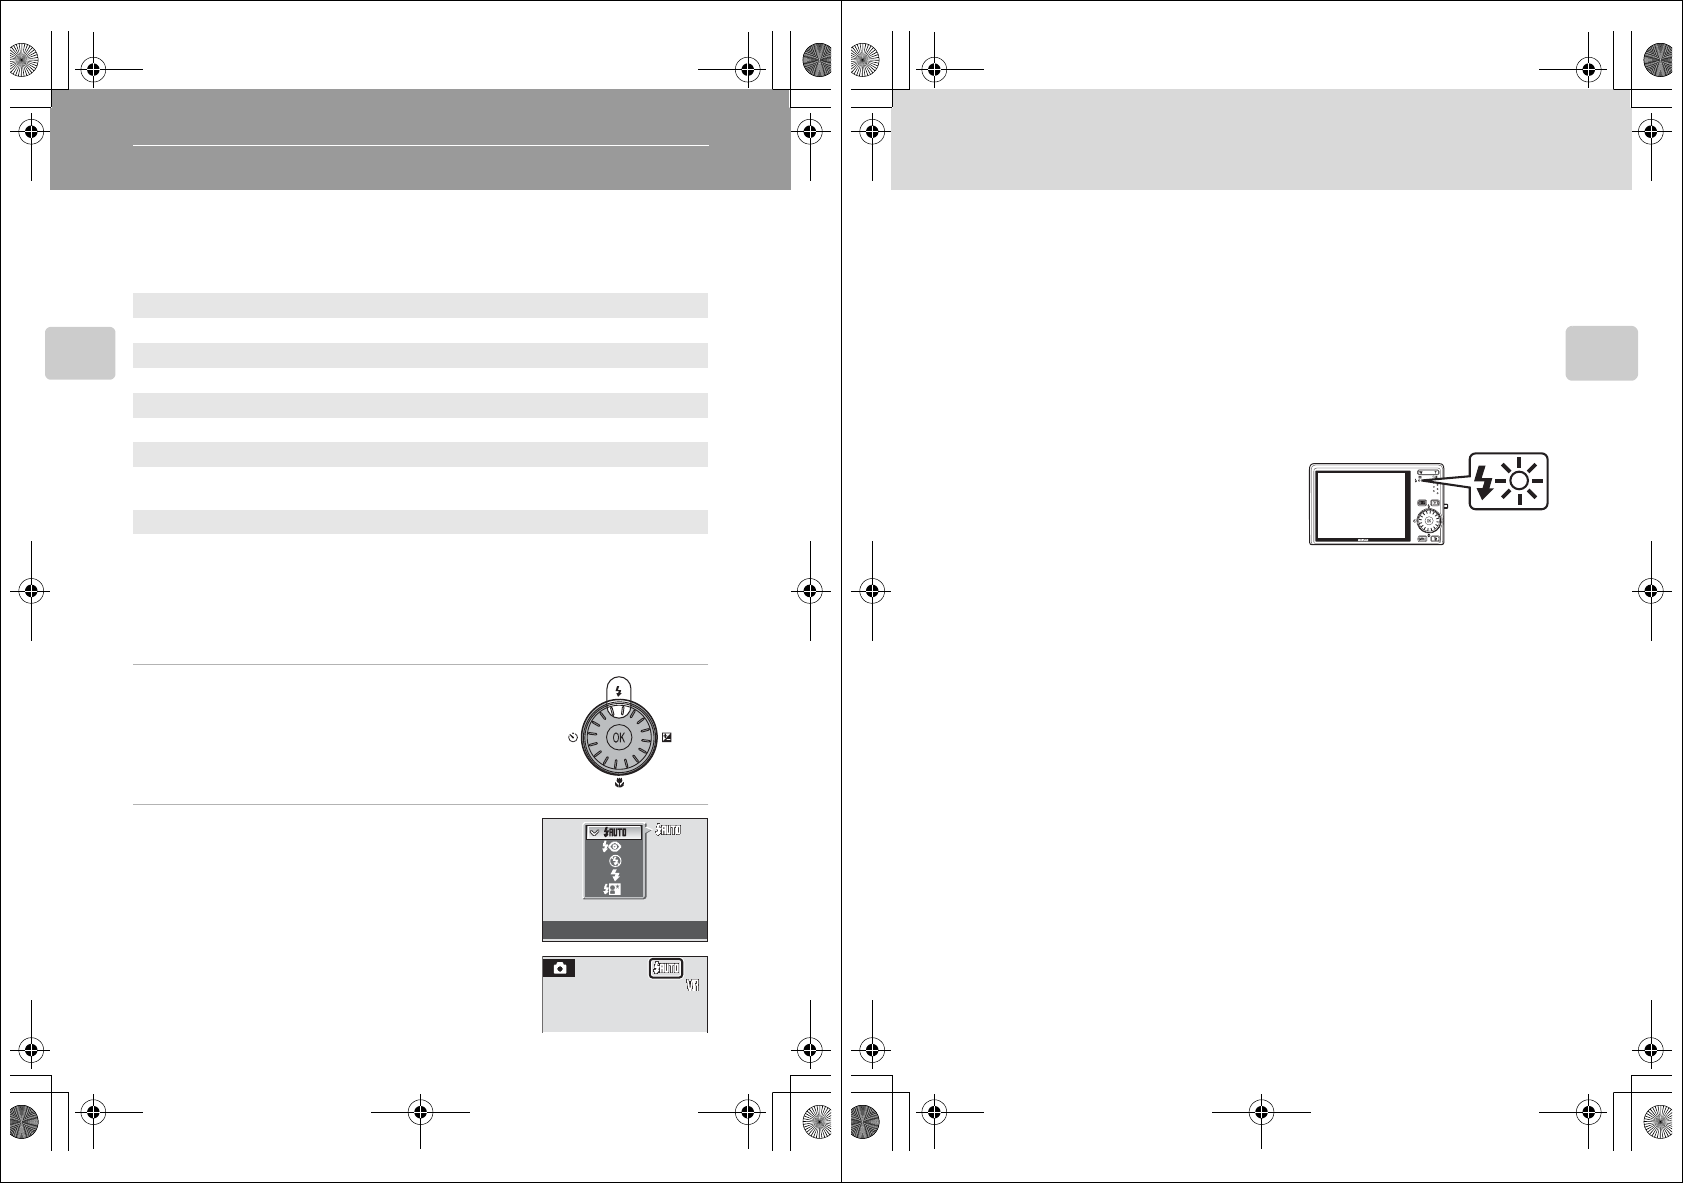
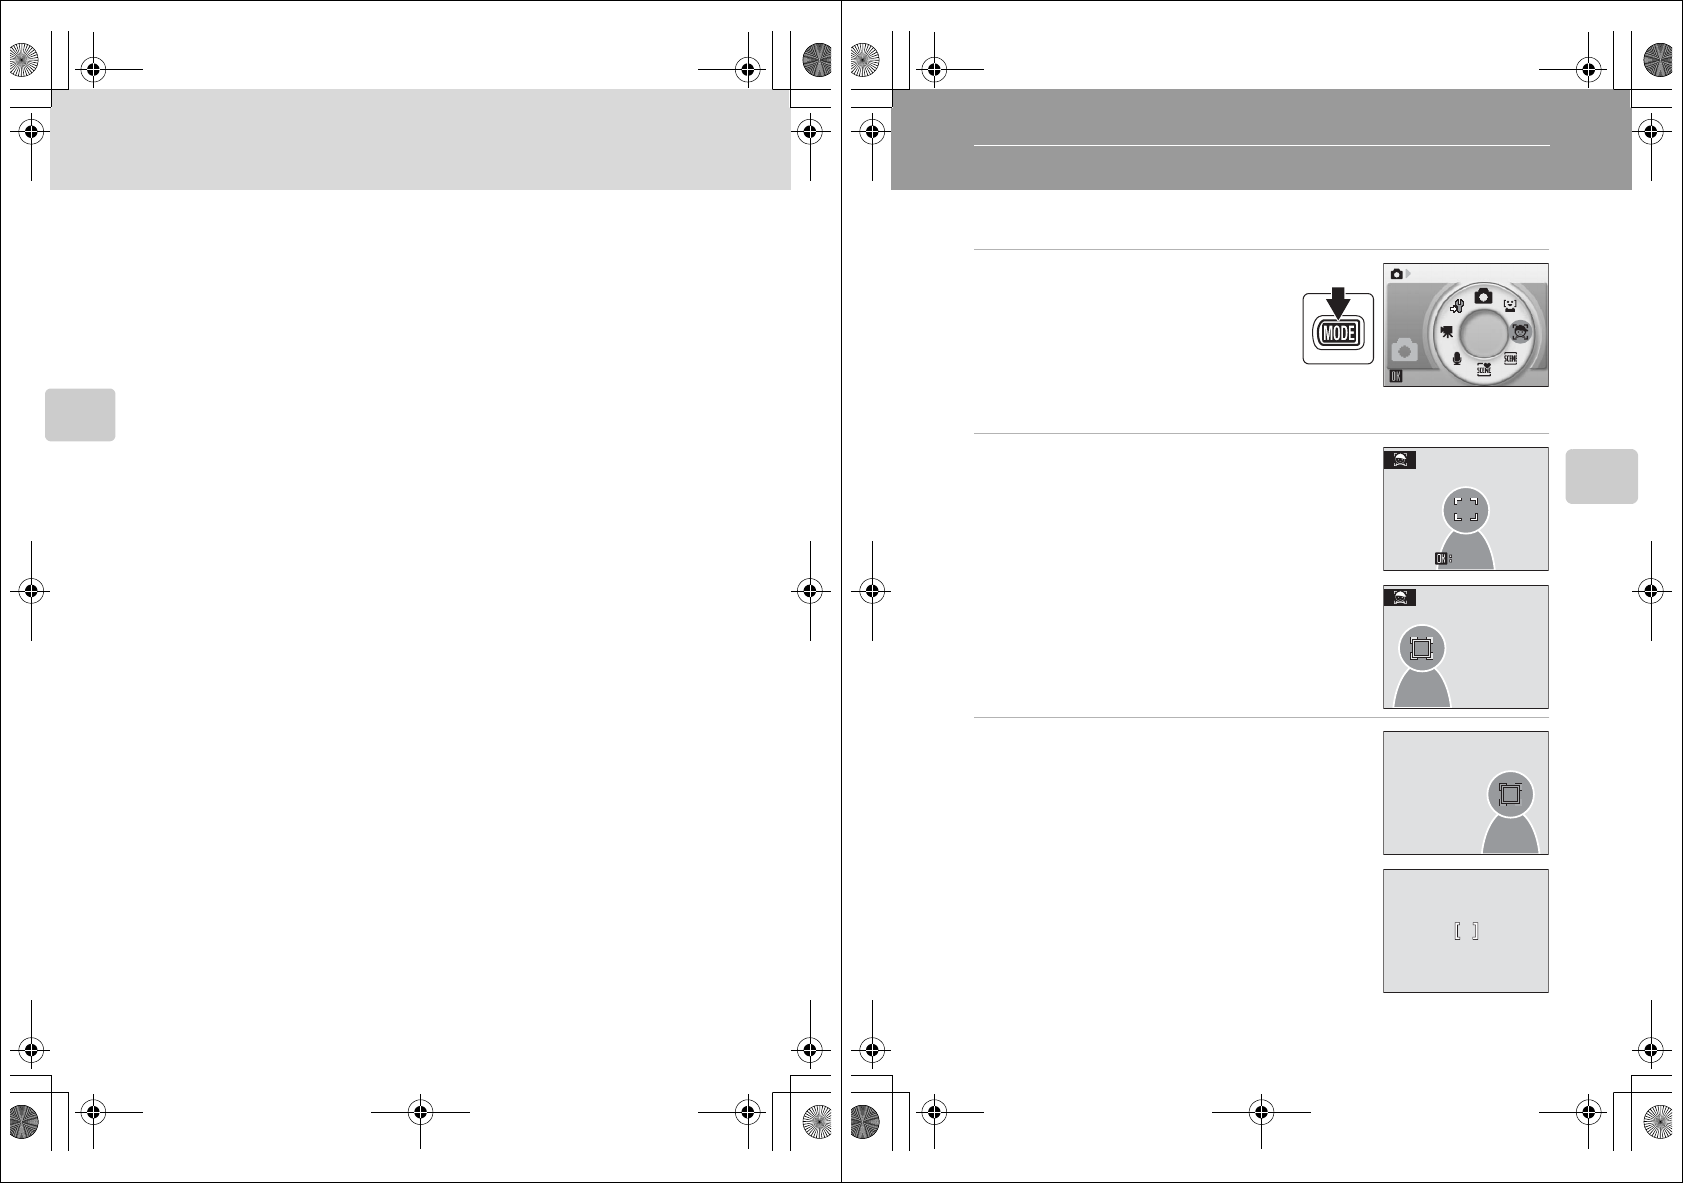
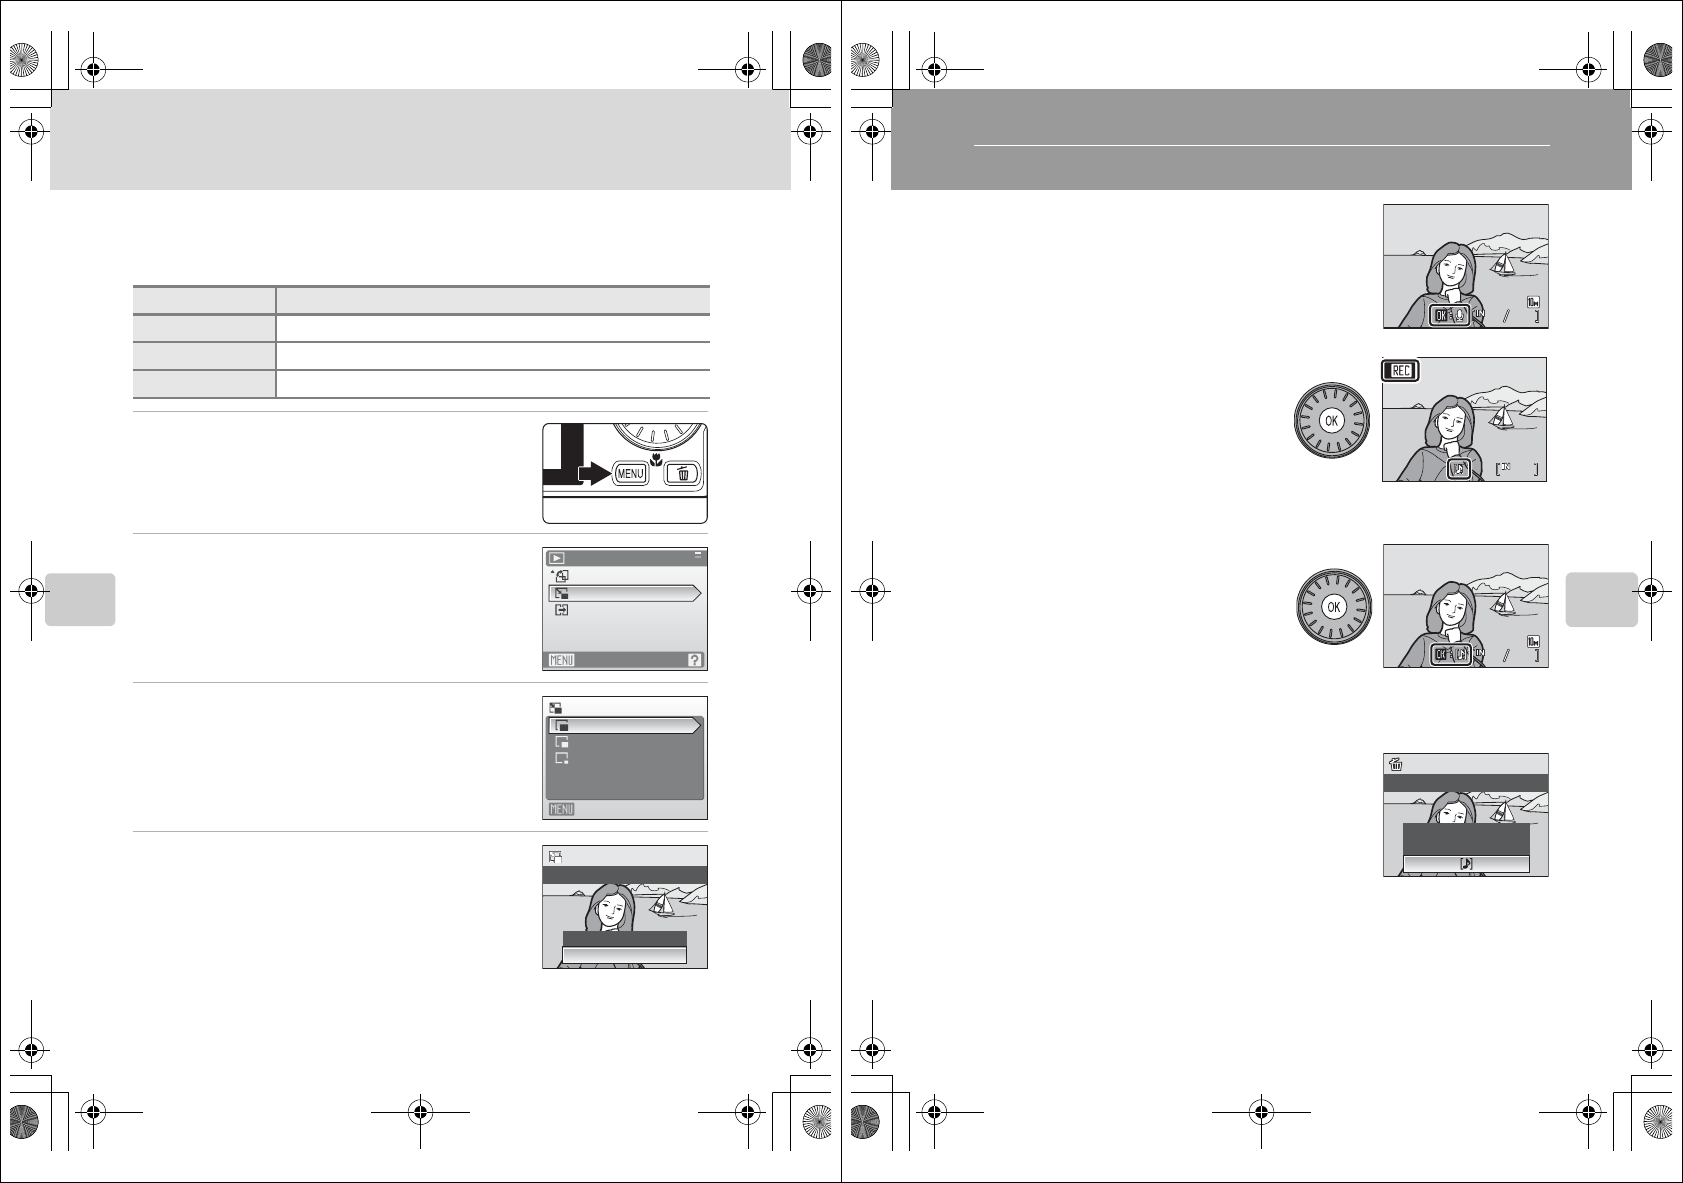
Using the Flash
The flash has a range of about #–#m (#in. –#ft.) when the camera is zoomed out
all the way. With maximum optical zoom applied, the range is about #–#m (#in. –
#ft.) (when ISO sensitivity is set to Auto). The following flash modes are
available.
Setting the Flash Mode
1Press X (flash mode).
The flash mode menu is displayed.
2Use the rotary multi selector to choose the
desired flash mode and press the k button.
The icon for the selected flash mode is displayed at the
top of the monitor.
D will disappear after a few seconds, regardless of the
Photo info option (A108).
If a setting is not applied by pressing the k button
within a few seconds, the selection will be cancelled.
UAuto
Flash fires automatically when lighting is poor.
VAuto with red-eye reduction
Reduces “red-eye” in portraits (A31).
WOff
Flash will not fire even when lighting is poor.
XFill flash
Flash fires when a picture is taken. Use to “fill-in” (illuminate) shadows and backlit
subjects.
YSlow sync
U (auto) is combined with slow shutter speed.
Flash illuminates main subject; slow shutter speeds are used to capture
background at night or under dim light.
Flash mode
26
Q7115_25_UM_EN.book Page 30 Friday, May 30, 2008 2:32 PM
31
Using the Flash
Basic Photography and Playback: Auto Mode
BShooting When Lighting is Poor and the Flash is Disabled (W)
•Use of a tripod is recommended to stabilize the camera during shooting and avoid the effects of
camera shake. Turn vibration reduction (A110) off when using a tripod.
•The E indicator is displayed when the camera automatically increases sensitivity. Pictures taken
when E is displayed may be slightly mottled.
•When E is displayed and higher sensitivity is applied, noise reduction may be automatically
applied as pictures taken are recorded; results in increased recording times.
BNote on Using the Flash
When using the flash at a wide-angle zoom position, reflections from dust particles in the air may
appear as bright spots in pictures. To reduce these reflections, set the flash mode to W (Off) or zoom
in on the subject.
CThe Flash Lamp
The flash lamp indicates flash status when the shutter-
release button is pressed halfway.
•On: Flash will fire when picture is taken.
•Blinks: Flash charging. Wait a few seconds and try
again.
•Off: Flash will not fire when picture is taken.
If the battery is low, the monitor display will turn off, and remain off, until the flash is fully charged.
CThe Flash Mode Setting
The default flash mode setting varies with shooting mode.
•A (auto) mode: U Auto
•C (scene): varies with the selected scene mode (A36)
•x (scene auto selector): U Auto. The camera selects the flash mode depending upon the
selected scene mode it has automatically selected (A45).
•s (active child): W Off
•a (smile): U Auto
The flash mode setting applied in A (auto) mode is stored in the camera’s memory even after the
camera is turned off, and reapplied the next time A (auto) mode is selected.
CRed-Eye Reduction
This camera uses advanced red-eye reduction (“In-Camera Red-Eye Fix”). The flash fires repeatedly at
low intensity before the main flash, reducing red-eye. The camera then analyzes the picture; if red-
eye is detected, the affected area will be processed to further reduce red-eye before the picture is
saved. Note that because there is a slight lag between the shutter-release button being pressed and
the picture being shot, this mode is not recommended when a quick shutter response is required.
The time before the next picture can be shot also increases slightly. Advanced red-eye reduction
may not produce the desired results in all situations. In extremely rare instances, areas not subject to
red-eye may be affected by advanced red-eye reduction processing; in these cases, choose another
mode and try again.
Q7115_25_UM_EN.book Page 31 Friday, May 30, 2008 2:32 PM
Q7115_25_UM_EN_1st
32
Basic Photography and Playback: Auto Mode
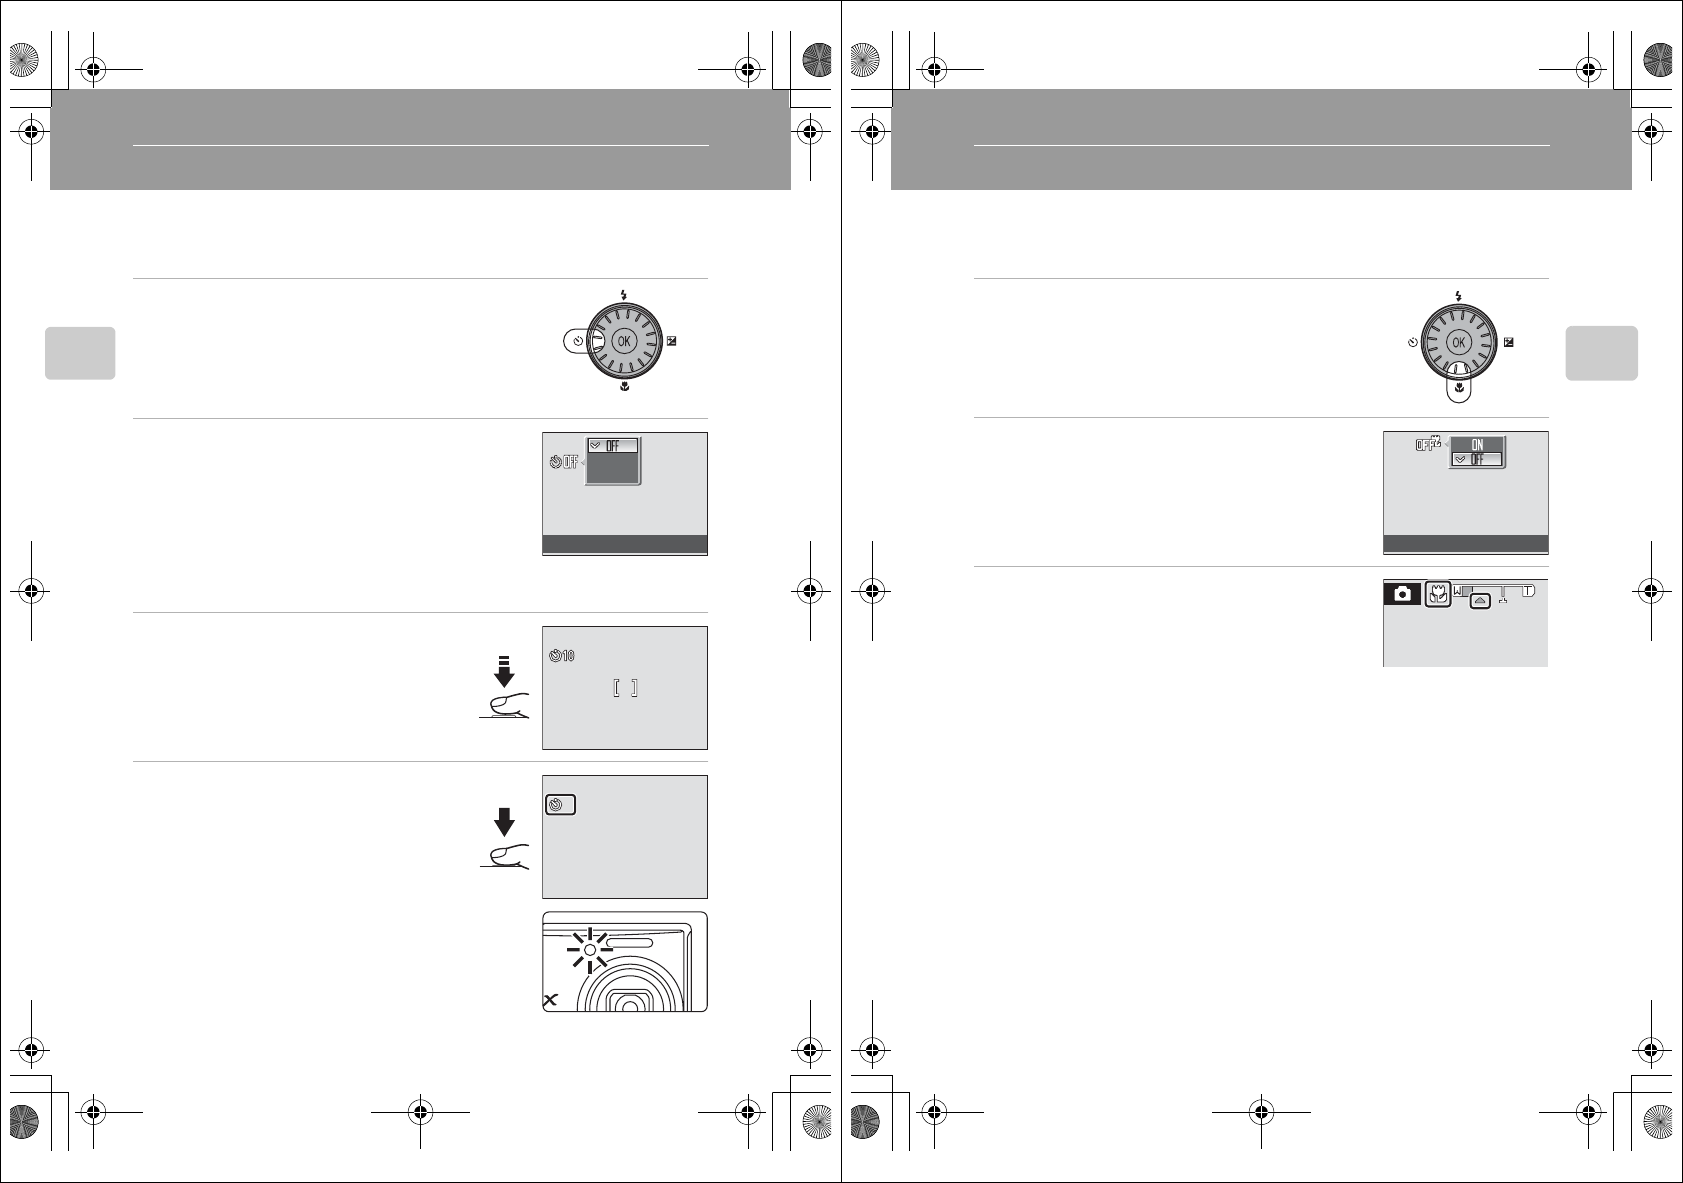
Taking Pictures with the Self-Timer
The camera is equipped with a ten-second and two-second timer for self-portraits.
When using the self-timer, use of a tripod is recommended. Turn vibration
reduction (A110) off when using a tripod.
1Press n (self-timer).
The self-timer menu is displayed.
2Use the rotary multi selector to choose 10s or
2s and press the k button.
10s (ten seconds): suited for important occasions (such
as weddings)
2s (two seconds): suited for preventing camera shake
The mode selected for self-timer is displayed.
If a setting is not applied by pressing the k button within a few seconds, the selection
will be cancelled.
3Frame the picture and press the
shutter-release button halfway.
Focus and exposure will be set.
4Press the shutter-release button the
rest of the way down.
The self-timer starts and the number of seconds
remaining until the shutter is released is
displayed in the monitor. The self-timer lamp
will blink. The lamp stops blinking one second
before the picture is taken and remains lit until
the shutter is released.
When the shutter is released, the self-timer
turns off.
To stop the timer before a picture is taken, press
the shutter-release button again.
2s
10s
Self-timer
F2.7
F2.7
1/60
1/60
1/60 F2.7
F2.7
F2.7
1/60
1/60
1/60 F2.7
9
9
Q7115_25_UM_EN.book Page 32 Friday, May 30, 2008 2:32 PM
33
Basic Photography and Playback: Auto Mode
Macro Mode
Macro mode is used for taking pictures of objects as close as 3cm (1.1 in.). Note
that the flash may be unable to light entire subject at distances of less than 50 cm
(1ft. 7.6 in.).
1Press p (macro mode).
The macro mode menu is displayed.
2Use the rotary multi selector to choose ON
and press the k button.
The macro mode icon (F) is displayed.
If a setting is not applied by pressing the k button
within a few seconds, the selection will be cancelled.
3Press the g (i) button or the f (h) button
to frame the picture.
The camera can focus at a distance of 3 cm (1.1 in.) at the
zoom position at which F and the zoom indicator glow
green (the zoom indicator is before G).
CMacro Mode
•If macro mode is turned on in scene modes indicated below, Autofocus mode (A94) will be
automatically set to Full-time AF.
-Close-up (the macro mode setting is fixed at On)
- Beach/snow
-Museum
-Copy
- Panorama assist
•In Full-time AF, the camera automatically focuses continuously until focus and exposure are
locked by pressing the shutter-release button halfway.
CThe Macro Mode Setting
The macro mode setting applied in A (auto) mode is stored in the camera’s memory even after the
camera is turned off, and reapplied the next time A (auto) mode is selected.
Macro mode
Q7115_25_UM_EN.book Page 33 Friday, May 30, 2008 2:32 PM
Q7115_25_UM_EN_1st
34
Basic Photography and Playback: Auto Mode
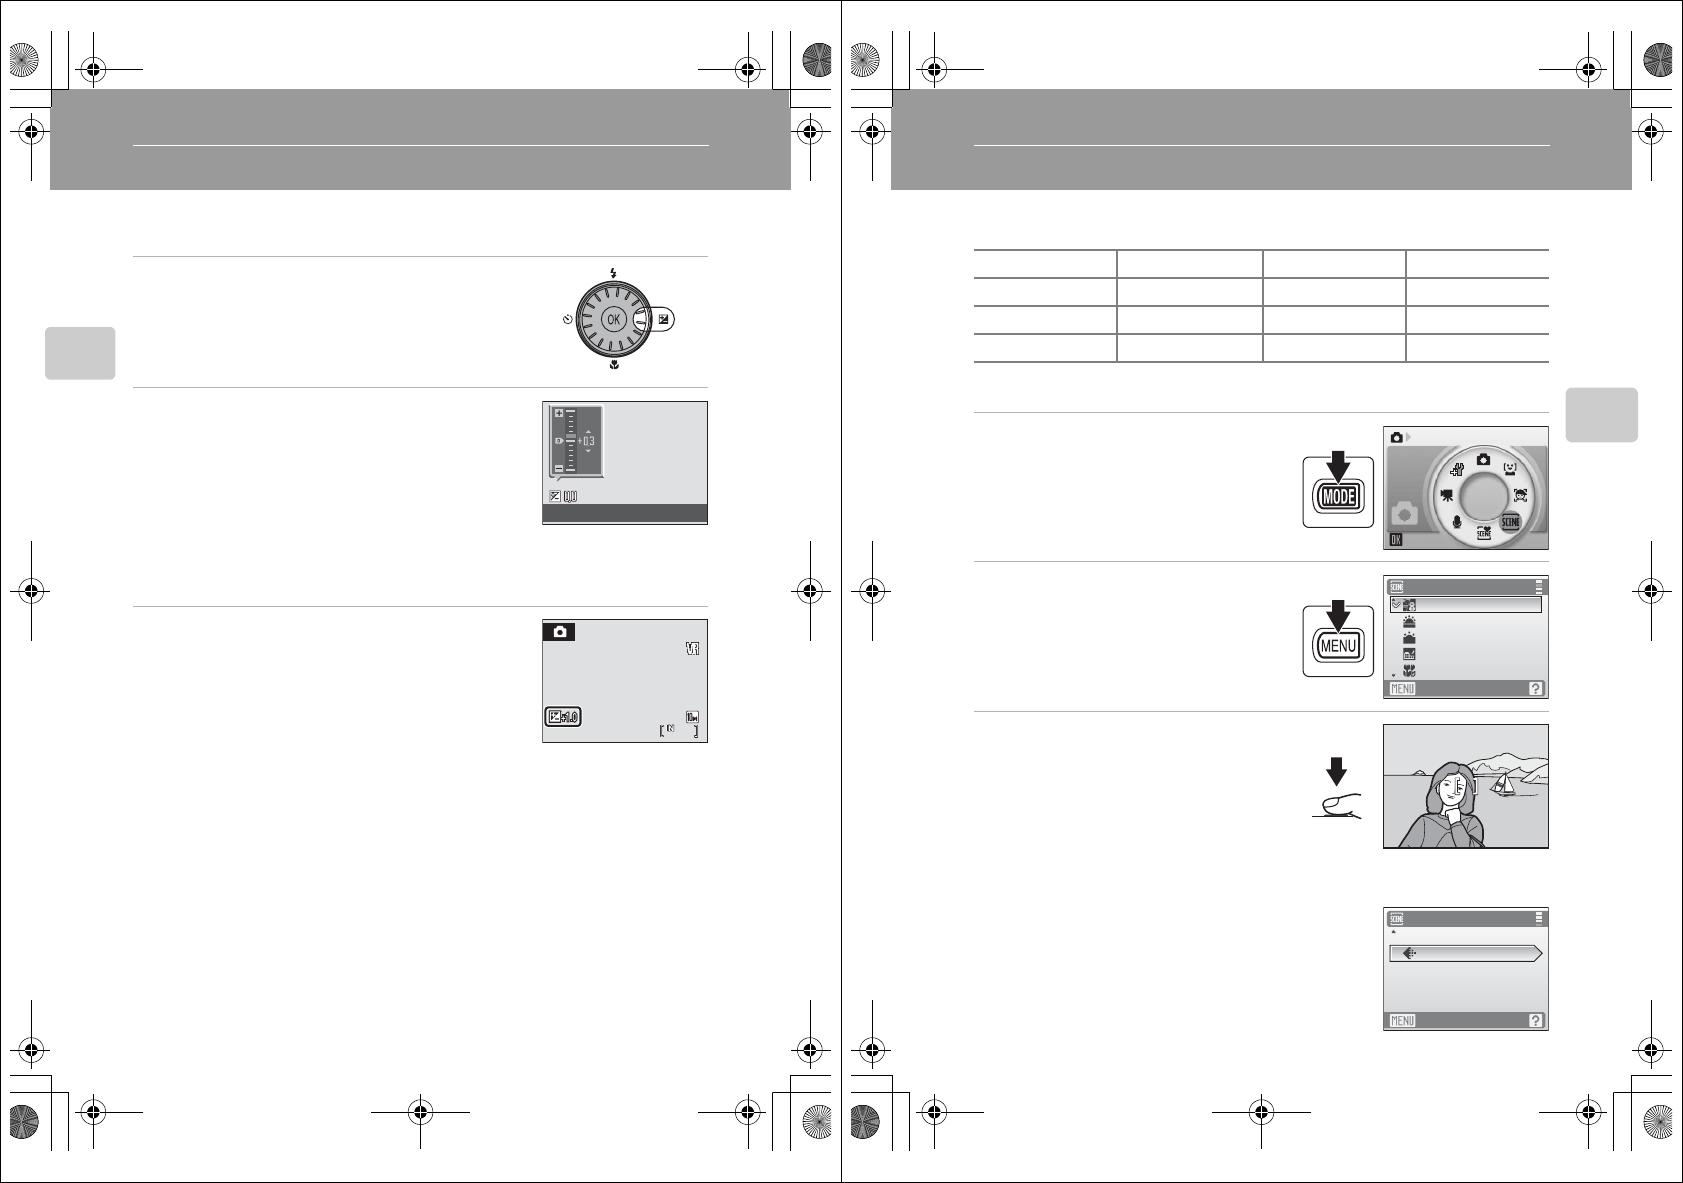
Exposure Compensation
Exposure compensation is used to alter exposure from the value suggested by the
camera to make pictures brighter or darker.
1Press o (exposure compensation).
The exposure compensation guide is displayed.
2Use the rotary multi selector to adjust
exposure and press the k button.
•When the subject is too dark: adjust the exposure
compensation to “+” side.
•When the subject is too bright: adjust the exposure
compensation to “–” side.
•Exposure compensation can be set to values between
–2.0 and +2.0 EV.
•If a setting is not applied by pressing the k button within a few seconds, the
selection will be cancelled.
3The setting is applied.
The value is displayed with the H icon in the monitor.
CExposure Compensation Value
The exposure compensation value applied in A (auto) mode is stored in the camera’s memory even
after another shooting mode is selected or the camera is turned off, and reapplied the next time A
(auto) mode is selected.
DUsing Exposure Compensation
The camera tends to lower exposure when the frame is dominated by brightly lit objects and to
increase exposure when the frame is mostly dark. Positive compensation may therefore be required
to capture the brilliancy of very bright objects that fill the frame (for example, sunlit expanses of
water, sand, or snow) or when the background is much brighter than the main subject. Negative
compensation may be called for when large areas of the frame contain very dark objects (for
example, a swath of dark green leaves) or when the background is much darker than the main
subject.
Exposure compensation
16
16
16
Q7115_25_UM_EN.book Page 34 Friday, May 30, 2008 2:32 PM
35
Shooting Suited for the Scene
Shooting Suited for the Scene
Shooting in Scene Mode
Camera settings are automatically optimized for the selected subject type. The
following scene modes are available.
Setting the Scene Mode
1Enter scene mode by pressing the
e button in shooting mode,
selecting C (use the rotary multi
selector), and then pressing the k
button.
2Press the d button to display the
scene menu screen, and choose the
desired scene and press the k
button.
3Frame the subject and take the
picture.
CImage Mode
Image mode (A84) can be set in the scene menu. Changes made
to the image mode setting apply to all shooting modes (except
those available from the movie menu).
b Portrait f Party/indoor j Night landscape m Fireworks show
c Landscape g Beach/snow k Close-up n Copy
d Sports h Sunset u Food o Backlight
e Night portrait i Dusk/dawn l Museum p Panorama assist
Scene
Scene menu
Exit
Beach/snow
Sunset
Dusk/dawn
Night landscape
Close-up
F2.7
F2.7
1/60
1/60
1/60 F2.7
p
Scene menu
Panorama assist
Image mode
Exit
Q7115_25_UM_EN.book Page 35 Friday, May 30, 2008 2:32 PM
Q7115_25_UM_EN_1st
36
Shooting in Scene Mode
Shooting Suited for the Scene
Features
* Other settings can be selected.
* Other settings can be selected.
* Other settings can be selected.
Q: Pictures taken in scene modes utilizing Q may be processed to reduce noise and
therefore take longer to record.
CIcons Used for Descriptions
The following icons are used for descriptions in this section: X, flash mode (A30); n, self-timer
(A32); p, macro mode (A33); o, exposure compensation (A34).
b Portrait
Use this mode for portraits in which the main subject stands
out clearly. Portrait subjects exhibit smooth, natural-looking
skin tones.
•The camera detects and focuses on a face looking toward
the camera (Shooting with Face Priority➝ A93).
•If the camera detects multiple faces, the camera focuses on
the face closest to the camera.
•If no face is recognized, the camera will focus on the subject in center of frame.
•Digital zoom is not available.
XV*nOff* pOff o0.0*
c Landscape
Use this mode for vivid landscapes and cityscapes.
•Camera focuses at infinity. When the shutter-release button
is pressed halfway, the focus area or focus indicator (A6)
always lights green; however, focus may not be set for near
subjects, while the camera focuses at infinity.
•The AF-assist illuminator does not light, regardless of the AF
assist setting (A111).
XWnOff* pOff o0.0*
d Sports
Use this mode for dynamic action shots that freeze the action
in a single shot and record motion in a series of pictures.
•The camera focuses continuously until focus is locked by
pressing the shutter-release button halfway.
•While the shutter-release button is held down, pictures are
taken at rate of up to about #frames per second (fps) when image mode is set to i
Normal (3648). Shooting ends when the shutter-release button is released, or ten shots
have been taken with the shutter-release button held down.
•The maximum frame rate with continuous shooting may vary depending upon the
current image mode setting and the memory card used.
•The AF-assist illuminator does not light, regardless of the AF assist setting (A111).
XWnOff pOff o0.0*
Q
Q
Q7115_25_UM_EN.book Page 36 Friday, May 30, 2008 2:32 PM
37
Shooting in Scene Mode
Shooting Suited for the Scene
1Fill flash with slow sync and red-eye reduction.
2Other settings can be selected.
1Fill flash with slow sync and red-eye reduction. Other settings can be selected.
2Other settings can be selected.
* Other settings can be selected.
O: For those scene modes with O, use of a tripod is recommended. Set Vibration
reduction (A110) to Off when using a tripod.
Q: Pictures taken in scene modes utilizing Q may be processed to reduce noise and
therefore take longer to record.
e Night portrait
Use this mode to achieve a natural balance between the main
subject and background lighting in portraits taken at night.
•The camera detects and focuses on a face looking toward
the camera (Shooting with Face Priority➝ A93).
•If the camera detects multiple faces, the camera focuses on
the face closest to the camera.
•If no face is recognized, the camera will focus on the subject in center of frame.
•Digital zoom is not available.
XV
1nOff2pOff o0.02
f Party/indoor
Captures the effects of candlelight and other indoor
background lighting.
•Camera focuses on subject in center of frame.
•Hold the camera steadily as pictures are easily affected by
camera shake. When shooting under low lighting, use of a
tripod is recommended. Set Vibration reduction (A110)
to Off when using a tripod.
XV
1nOff2pOff o0.02
g Beach/snow
Captures the brightness of such subjects as snowfields,
beaches, or sunlit expanses of water.
•Camera focuses on subject in center of frame.
XU*nOff* pOff* o0.0*
OQ
Q
Q
Q7115_25_UM_EN.book Page 37 Friday, May 30, 2008 2:32 PM
Q7115_25_UM_EN_1st
38
Shooting in Scene Mode
Shooting Suited for the Scene
* Other settings can be selected.
* Other settings can be selected.
* Other settings can be selected.
O: For those scene modes with O, use of a tripod is recommended. Set Vibration
reduction (A110) to Off when using a tripod.
Q: Pictures taken in scene modes utilizing Q may be processed to reduce noise and
therefore take longer to record.
h Sunset
Preserves the deep hues seen in sunsets and sunrises.
•Camera focuses at infinity. When the shutter-release button
is pressed halfway, the focus area or focus indicator (A6)
always lights green; however, focus may not be set for near
subjects, while the camera focuses at infinity.
•The AF-assist illuminator does not light, regardless of the AF
assist setting (A111).
XWnOff* pOff o0.0*
i Dusk/dawn
Preserves the colors seen in the weak natural light before
sunrise or after sunset.
•Camera focuses at infinity. When the shutter-release button
is pressed halfway, the focus area or focus indicator (A6)
always lights green; however, focus may not be set for near
subjects, while the camera focuses at infinity.
•The AF-assist illuminator does not light, regardless of the AF assist setting (A111).
XWnOff* pOff o0.0*
j Night landscape
Slow shutter speeds are used to produce stunning night
landscapes.
•Camera focuses at infinity. When the shutter-release button
is pressed halfway, the focus area or focus indicator (A6)
always lights green; however, focus may not be set for near
subjects, while the camera focuses at infinity.
•The AF-assist illuminator does not light, regardless of the AF assist setting (A111).
XWnOff* pOff o0.0*
OQ
OQ
OQ
Q7115_25_UM_EN.book Page 38 Friday, May 30, 2008 2:32 PM
39
Shooting in Scene Mode
Shooting Suited for the Scene
* Other settings can be selected. Note that when shooting with the flash, the flash may be
unable to light entire subject at distances of less than 50 cm (1ft. 7.6 in.)
* Other settings can be selected.
* Other settings can be selected.
O: For those scene modes with O, use of a tripod is recommended. Set Vibration
reduction (A110) to Off when using a tripod.
k Close-up
Photograph flowers, insects, and other small objects at close
range.
•Macro mode (A33) will be turned on and the camera
automatically zooms to the position at the closest distance at
which the camera can focus.
•The camera can focus at distances as close as 3cm (1.1 in.)
at the wide-angle zoom position at which F glows green
(the zoom indicator is before G). The closest distance at which the camera can focus
varies depending upon zoom position.
•AF area mode is set to Manual (A91). When the k button is pressed, camera focuses
on subject in active focus area.
•The camera focuses continuously until focus is locked by pressing the shutter-release
button halfway.
•As pictures are easily affected by camera shake, check the Vibration reduction (A110)
and Motion detection (A111) settings and hold the camera steadily.
XW*nOff* pOn o0.0*
u Food
Use when shooting cuisines. See “Taking Pictures in Food
Mode” (A41) for details.
•AF area mode is set to Manual (A91). When the k
button is pressed, camera focuses on subject in active focus
area.
mWnOff* pOn o0.0*
l Museum
Use indoors where flash photography is prohibited (for
example, in museums and art galleries) or in other settings in
which you do not want to use the flash.
•Camera focuses on subject in center of frame.
•BSS (Best Shot Selector) (A89) is used when shooting.
•As pictures are easily affected by camera shake, check the
Vibration reduction (A110) and Motion detection
(A111) settings and hold the camera steadily.
•The AF-assist illuminator does not light, regardless of the AF assist setting (A111).
XWnOff* pOff* o0.0*
Q
Q
Q7115_25_UM_EN.book Page 39 Friday, May 30, 2008 2:32 PM
Q7115_25_UM_EN_1st
40
Shooting in Scene Mode
Shooting Suited for the Scene
* Other settings can be selected.
* Other settings can be selected.
O: For those scene modes with O, use of a tripod is recommended. Set Vibration
reduction (A110) to Off when using a tripod.
Q: Pictures taken in scene modes utilizing Q may be processed to reduce noise and
therefore take longer to record.
m Fireworks show
Slow shutter speeds are used to capture the expanding burst
of light from a firework.
•Camera focuses at infinity. When the shutter-release button
is pressed halfway, the focus indicator (A26) glows green;
however, focus may not be set for near subjects, while the
camera focuses at infinity.
•Motion detection (A111) is set to Off.
•The AF-assist illuminator does not light, regardless of the AF assist setting (A111).
XWnOff pOff o0.0
n Copy
Provides clear pictures of text or drawings on a white board or
in print.
•Camera focuses on subject in center of frame.
•Use macro mode (A33) to focus at short ranges.
•Colored text and drawings may not show up well.
XW*nOff* pOff* o0.0*
o Backlight
Use when light is coming from behind your subject, throwing
features or details in shadow. The flash fires automatically to
“fill in” (illuminate) shadows.
•Camera focuses on subject in center of frame.
XXnOff* pOff o0.0*
O
Q
04_SceneMode.fm Page 40 Monday, June 2, 2008 9:54 AM
41
Shooting in Scene Mode
Shooting Suited for the Scene
* Other settings can be selected.
Taking Pictures in Food Mode
Use this mode to take pictures of food.
1Use the rotary multi selector to choose
u Food in the scene menu and press the k
button (A35).
Macro mode (A33) will be turned on and the camera
automatically zooms to the position at the closest
distance at which the camera can focus.
2Press the rotary multi selector H or I to
choose white balance.
•Press H to increase the amount of red, or I to increase
the amount of blue.
p Panorama assist
Use when taking a series of pictures that will later be joined to form a single panorama using
the supplied Panorama Maker software. See “Taking Pictures for a Panorama” (A43) for
details.
mW*nOff* pOff* o0.0*
Q
Scene menu
Exit
Food
Museum
Fireworks show
Copy
Backlight
9
9
04_SceneMode.fm Page 41 Monday, June 2, 2008 9:54 AM
Q7115_25_UM_EN_1st
42
Shooting in Scene Mode
Shooting Suited for the Scene
3Frame the picture.
•The camera can focus at distances as close as 3 cm (1.1
in.) at the wide-angle zoom position at which F and
the zoom indicator glow green (the zoom indicator is
before G). The closest distance at which the camera
can focus varies depending upon zoom position.
•As pictures are easily affected by camera shake, check
the Vibration reduction (A110) setting and hold
the camera steadily.
•AF area mode is set to Manual (A91). Press the k button to move the focus area.
Press the rotary multi selector H, I, J, or K to select a focus area and press the k
button again to activate the selected focus area.
•Self-timer (A32) and exposure compensation (A34)
settings can be adjusted while the focus area is locked.
4Press the shutter-release button to take the
picture.
•Focus is locked when the shutter-release button is
pressed halfway, and a picture is taken when the
shutter-release button is pressed the rest of the way
down.
•When the camera is unable to focus, the focus area
blinks red. Change the composition and press the shutter-release button halfway
again.
BNotes on Food Mode
•Flash mode is disabled. Macro mode setting (A33) is fixed at Off.
•The AF-assist illuminator does not light, regardless of the AF assist setting (A111).
CWhite Balance Setting in Food Mode
•Increasing the amount of red or blue will decrease illumination effects.
•Changing white balance in food mode will not affect white balance in the shooting menu (A86).
•The white balance setting applied in food mode is stored in the camera’s memory even after the
camera is turned off, and reapplied the next time food mode is selected.
9
9
F2.8
F2.8
1/60
1/60
F2.81/60
Q7115_25_UM_EN.book Page 42 Friday, May 30, 2008 2:32 PM
43
Shooting in Scene Mode
Shooting Suited for the Scene
Taking Pictures for a Panorama
The camera focuses on the subject in the center of frame. Use a tripod for best
results. Set Vibration reduction (A110) to Off when using a tripod to stabilize
the camera during shooting.
1Use the rotary multi selector to choose p
Panorama assist in the scene menu and
press the k button (A35).
•The (I) icon is displayed to show the direction in which
pictures will be joined.
2Use the rotary multi selector to choose the
direction and press the k button.
•Select how pictures will be joined together in the
completed panorama; right (I), left (J), up (K) or
down (L).
•The yellow panorama direction icon (II) will move to
the direction pressed and press the k button to
choose the direction. A white panorama direction icon (I) will be displayed in the
chosen direction.
•Apply flash mode (A30), self-timer (A32), macro mode (A33) and exposure
compensation (A34) settings with this step, if necessary.
•Press the k button to reselect the direction.
3Shoot the first picture.
•The picture taken will be displayed in 1/3 of
the monitor.
4Shoot the second picture.
•Compose the next picture so that it overlaps
the first picture.
•Repeat until you have taken the necessary
number of pictures to complete the scene.
Scene menu
Panorama assist
Image mode
Exit
9
9
F2.8
F2.8
1/60
1/60
F2.81/60
8
8
Exit
Exit
Exit
Q7115_25_UM_EN.book Page 43 Friday, May 30, 2008 2:32 PM
Q7115_25_UM_EN_1st
44
Shooting in Scene Mode
Shooting Suited for the Scene
5Press the k button when shooting is
completed.
The camera returns to step 2.
BPanorama Assist
Flash mode, self-timer, macro mode and exposure compensation settings cannot be adjusted after
the first picture is taken. Pictures cannot be deleted, nor can zoom or image mode setting (A84) be
adjusted until the series is finalized.
The panorama series is terminated if the camera enters standby mode with the auto off function
(A113) during shooting. Setting the time allowed to elapse before the auto off function is enabled
to a longer setting is recommended.
DThe R Indicator
R is displayed to indicate that white balance, exposure, and
focus have been locked at the values set with the first shot. All
pictures taken in a panorama series have the same focus, exposure,
and white-balance settings.
DPanorama Maker
Install Panorama Maker from the supplied Software Suite CD-ROM. Transfer pictures to a computer
(A71) and use Panorama Maker (A74) to join them in a single panorama.
DMore Information
See “Image/Sound File and Folder Names” (A118) for more information.
5
5
5
Exit
Exit
Exit
8
8
Exit
Exit
Exit
Q7115_25_UM_EN.book Page 44 Friday, May 30, 2008 2:32 PM
45
Shooting Suited for the Scene
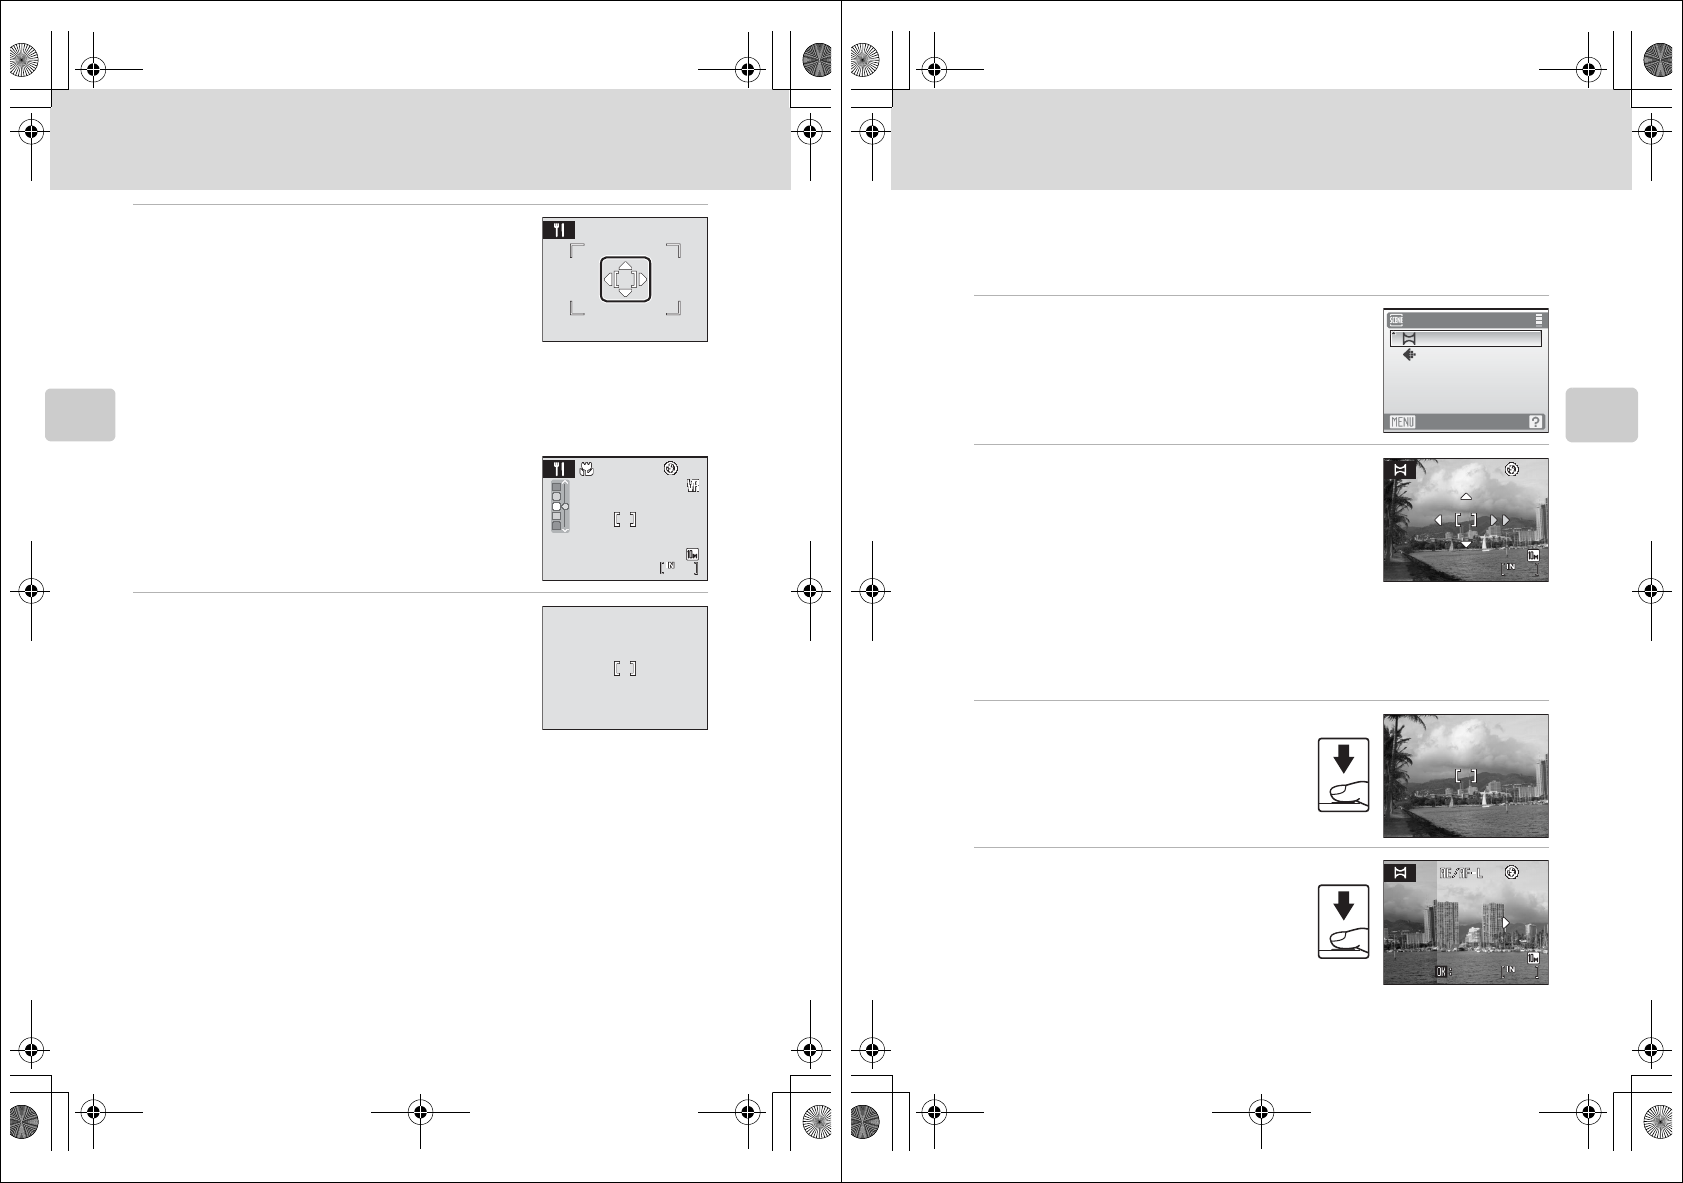
Shooting in the Scene Mode Selected by the Camera (Scene Auto Selector)
By simply framing a picture, the camera automatically selects the optimum scene
mode for simpler shooting.
When the camera is aimed at a subject in x scene auto selector mode, the
camera automatically selects one of the following scene modes:
For more information regarding details of these scene modes, see the reference
pages indicated above.
Taking Pictures in Scene Auto Selector Mode
1Enter scene auto selector mode by
pressing the e button in
shooting mode, selecting x (use
the rotary multi selector), and then
pressing the k button.
The camera enters scene auto selector
mode.
2Frame the subject and take the picture.
When the camera automatically selects a scene mode,
the shooting mode icon changes to that for the scene
mode currently enabled.
Press the shutter-release button halfway to set focus and exposure.
Press the shutter-release button the rest of the way down to take the picture.
BNotes on Scene Auto Selector Mode
Depending upon shooting conditions, the camera may not select the desired scene mode. Should
this occur, switch to A (auto) mode (A22) or select the desired scene mode manually (A35).
•Auto (A22) •Portrait (A36) •Landscape (A36)
•Night portrait (A37) •Night landscape (A38) •Close-up (A39)
•Backlight (A40)
d: Auto g: Night landscape
e: Portrait i: Close-up
f: Landscape j: Backlight
h: Night portrait
Scene auto selector
10
10
10
Q7115_25_UM_EN.book Page 45 Friday, May 30, 2008 2:32 PM
Q7115_25_UM_EN_1st
46
Shooting in the Scene Mode Selected by the Camera (Scene Auto Selector)
Shooting Suited for the Scene
CFlash Mode in Scene Auto Selector Mode
U (Auto) (default setting) and W (Off) flash mode settings can be applied (A30).
•When U (Auto) is applied, the camera automatically selects the optimum flash mode setting
for the scene mode it has selected.
•When W (Off) is applied, the flash does not fire, regardless of shooting conditions.
CFunctions Restricted in Scene Auto Selector Mode
•When the d button is pressed in scene auto selector mode, only the Image mode menu is
displayed. Changes made to the image mode setting in this mode apply to all shooting modes
(except those available from the movie menu).
•Digital zoom is not available.
•Macro mode (A33) is disabled.
•The AF area mode setting (A91) is set to Auto in i (Close-up) mode.
Q7115_25_UM_EN.book Page 46 Friday, May 30, 2008 2:32 PM
47
Focusing on a Moving Subject in Active Child Mode
Focusing on a Moving Subject in Active Child Mode
Active Child Mode
Use this mode to shoot moving subjects. Once the subject has been selected, the
focus area will automatically follow the subject.
1Enter active child mode by pressing
the e button in shooting mode,
selecting s (use the rotary multi
selector), and then pressing the k
button.
•A white border is displayed in the center of
the monitor.
•Flash mode (A30) is set to W (Off).
2Select a subject.
•Frame the subject in the center of the border and press
the k button.
- The subject is selected and will be framed by a yellow
double border.
- When the camera is unable to focus on the subject,
the single border will glow red. Change the
composition and try again.
•Once the selected subject is not visible on the monitor,
the double border will disappear and the selection will
be cancelled. Select the subject again.
3Press the shutter-release button halfway.
•The camera focuses on the subject framed by the
double border. The double border will glow green and
focus will be locked.
•When the camera is unable to focus, the double border
will blink. Press the shutter-release button halfway
again and focus.
Active child
Start
Start
Start
F2.7
F2.7
1/60
1/60
1/60 F2.7
F2.7
F2.7
1/60
1/60
1/60 F2.7
Q7115_25_UM_EN.book Page 47 Friday, May 30, 2008 2:32 PM
Q7115_25_UM_EN_1st
48
Active Child Mode
Focusing on a Moving Subject in Active Child Mode
4Press the shutter-release button the rest of the
way down.
•The picture will be recorded to the memory card or
internal memory.
BActive Child Mode
•Flash mode and exposure compensation settings cannot be adjusted after selecting the subject. If
any setting is adjusted after selection of the subject, the selection of the subject will be cancelled.
Deleting pictures, adjusting zoom or image mode settings (A84) will also cancel the selection of
the subject.
•In some situations, such as when the subject is moving rapidly, the camera may be unable to track
the selected subject.
•If the shutter-release button is pressed while the double border is not displayed, the camera
focuses on the subject at the center of the frame.
•In some rare cases shooting subjects with which autofocus may not perform as expected (A27),
the subject may not be in focus despite the fact that the double border glows green. Should this
occur, switch to A (auto) mode and set AF area mode to Manual or Center, refocus on another
subject positioned at the same distance from the camera as the actual portrait subject, and use
focus lock (A92).
COptions Available in Active Child Mode
•Digital zoom is not available.
•Flash mode (A30) and exposure compensation (A34) settings can be adjusted.
•When the d button is pressed in active child mode, only the Image mode menu (A84) is
displayed. Changes made to the image mode setting in this mode apply to all shooting modes
(except those available from the movie menu).
Q7115_25_UM_EN.book Page 48 Friday, May 30, 2008 2:32 PM
49
Automatic Shooting of a Smiling Face
Automatic Shooting of a Smiling Face
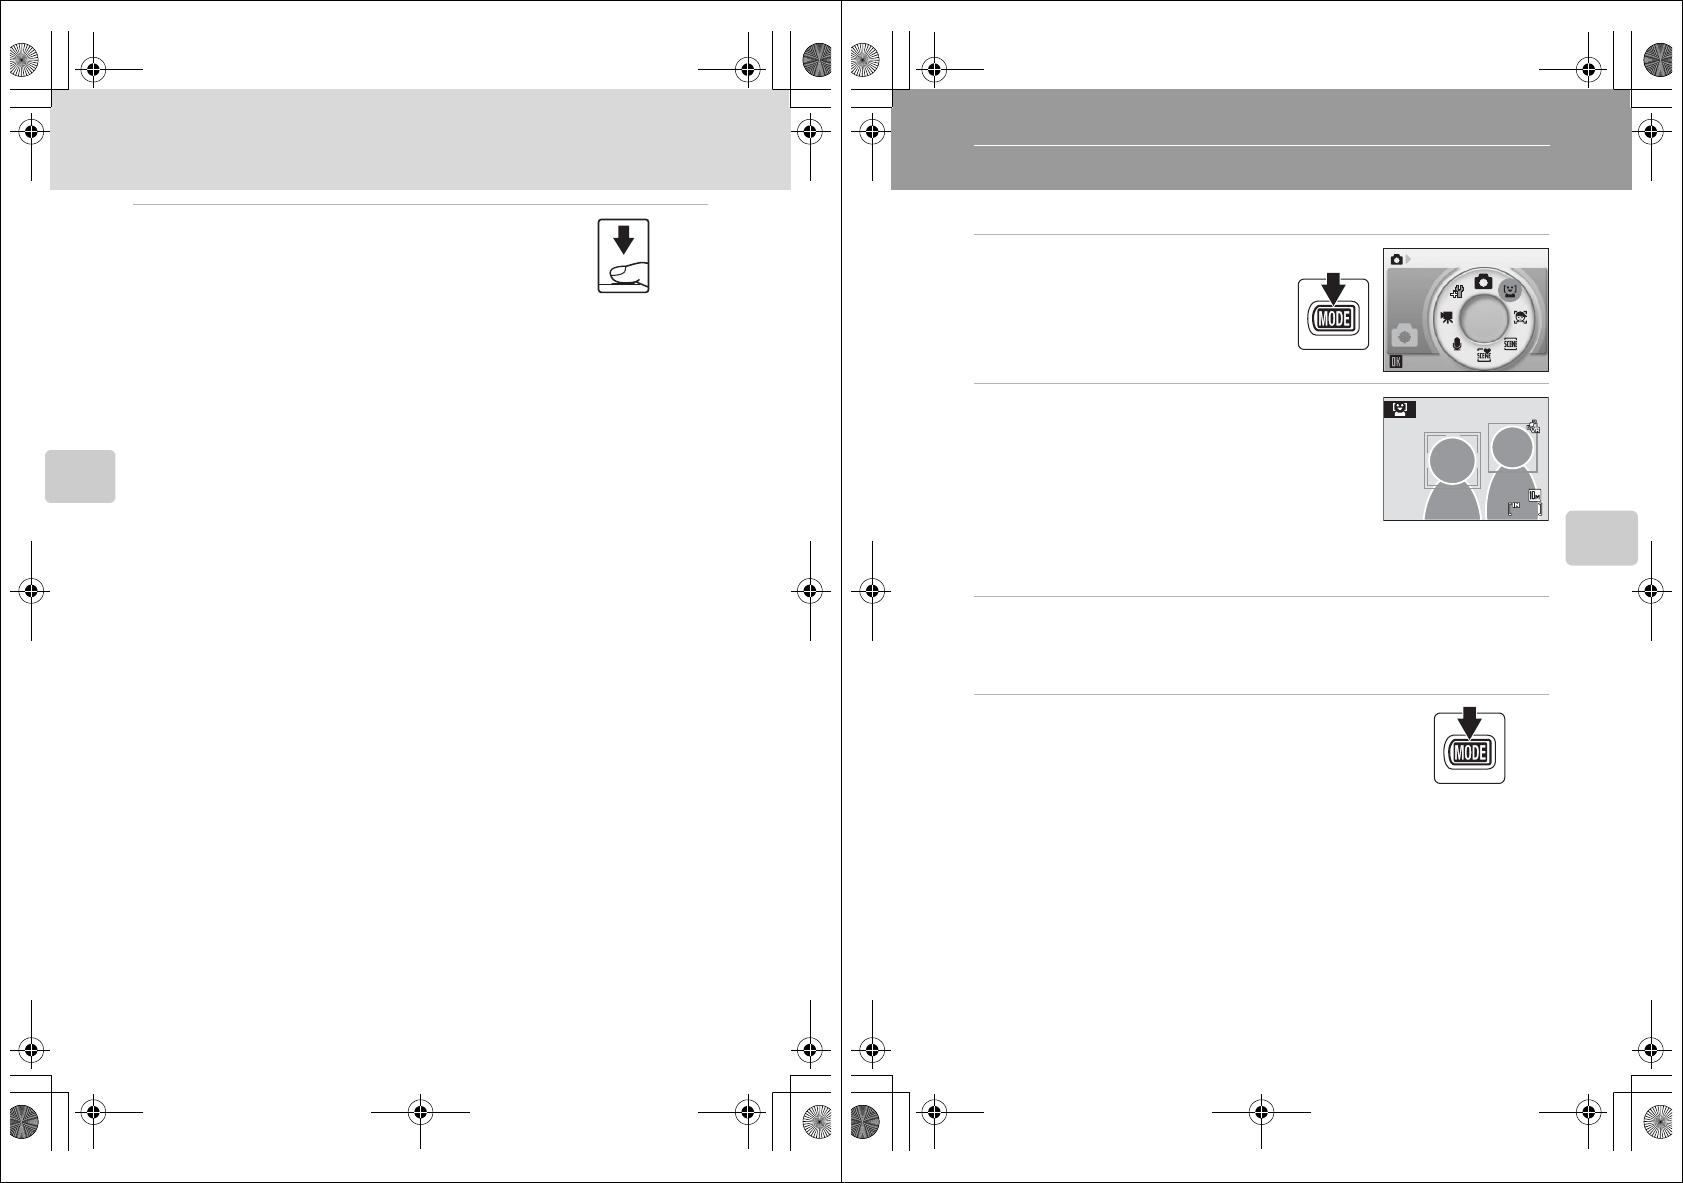
Shooting in Smile Mode
The camera detects a smiling face to shoot the face automatically.
1Enter smile mode by pressing the
e button in shooting mode,
selecting a (use the rotary multi
selector), and then pressing the k
button.
2Frame a picture.
•Point the camera at the subject.
•When the camera detects a face looking toward the
camera, the focus area containing the face will be
displayed with a yellow double border. The camera
focuses on the face framed by the double border. The
double border will glow green and focus will be
locked.
•When the camera detects more than one face, the closest face is framed by a double
border and the others by single borders. Up to three faces can be detected.
3The shutter is automatically released.
•If the camera detects that the face framed by the double border is smiling, the shutter
is automatically released.
•The camera will continue to release the shutter whenever it detects a smiling face.
4Exit smile mode by pressing the e button.
•Switch to another shooting mode.
•The camera will stop shooting if the internal memory or
memory card becomes full.
CSmile Mode
The auto off function (A113) will be activated and the camera will turn off if no operations are
performed in any of the following situations in smile mode.
•The camera is unable to detect one or more faces.
•The camera has detected one or more faces, but is unable to detect a smiling face.
Smile
10
10
10
Q7115_25_UM_EN.book Page 49 Friday, May 30, 2008 2:32 PM
Q7115_25_UM_EN_1st
50
Shooting in Smile Mode
Automatic Shooting of a Smiling Face
CFace Priority and Smiling Face Detection Features
When the camera is pointed at a face looking toward the camera in smile mode, the face is
automatically recognized and the smiling face of the recognized one is detected.
•In some shooting conditions, Face priority will not take effect and smiling face cannot be detected.
•See “Shooting with Face Priority” (A93) for more information about Face Priority.
COperation of the Shutter-Release Button
Press the shutter-release button to take pictures.
•When Face priority takes effect, the focus is locked to the recognized face and the shutter-release
button is released.
•If no face is detected, the camera focuses on the subject in center of frame.
•When the shutter-release button is pressed halfway and then released with the face-priority
function enabled, the camera will detect the face again.
COptions Available in Smile Mode
•Flash mode (A30) and exposure compensation (A34) settings can be adjusted.
•Digital zoom is not available.
•When the d button is pressed in smile mode, only the Image mode menu (A84) is displayed.
Changes made to the image mode setting in this mode apply to all shooting modes (except those
available from the movie menu).
Q7115_25_UM_EN.book Page 50 Friday, May 30, 2008 2:32 PM
51
More on Playback
More on Playback
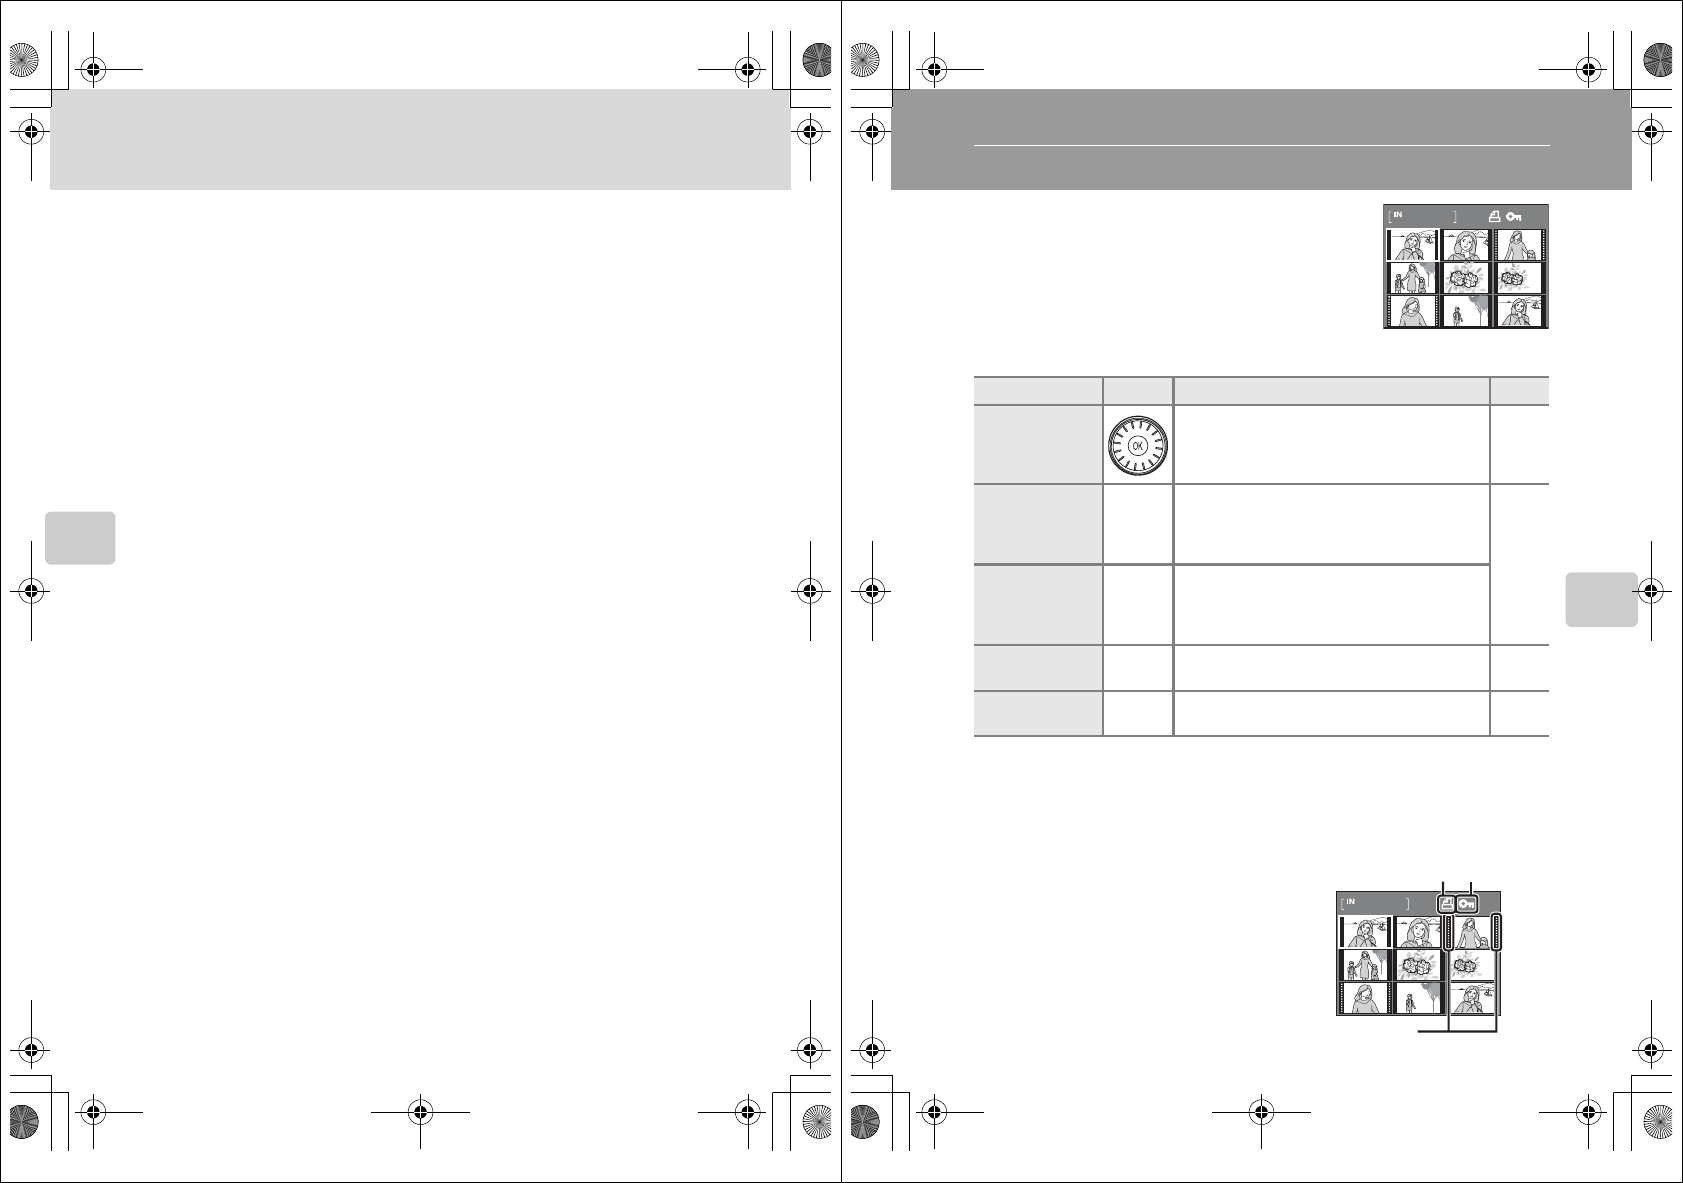
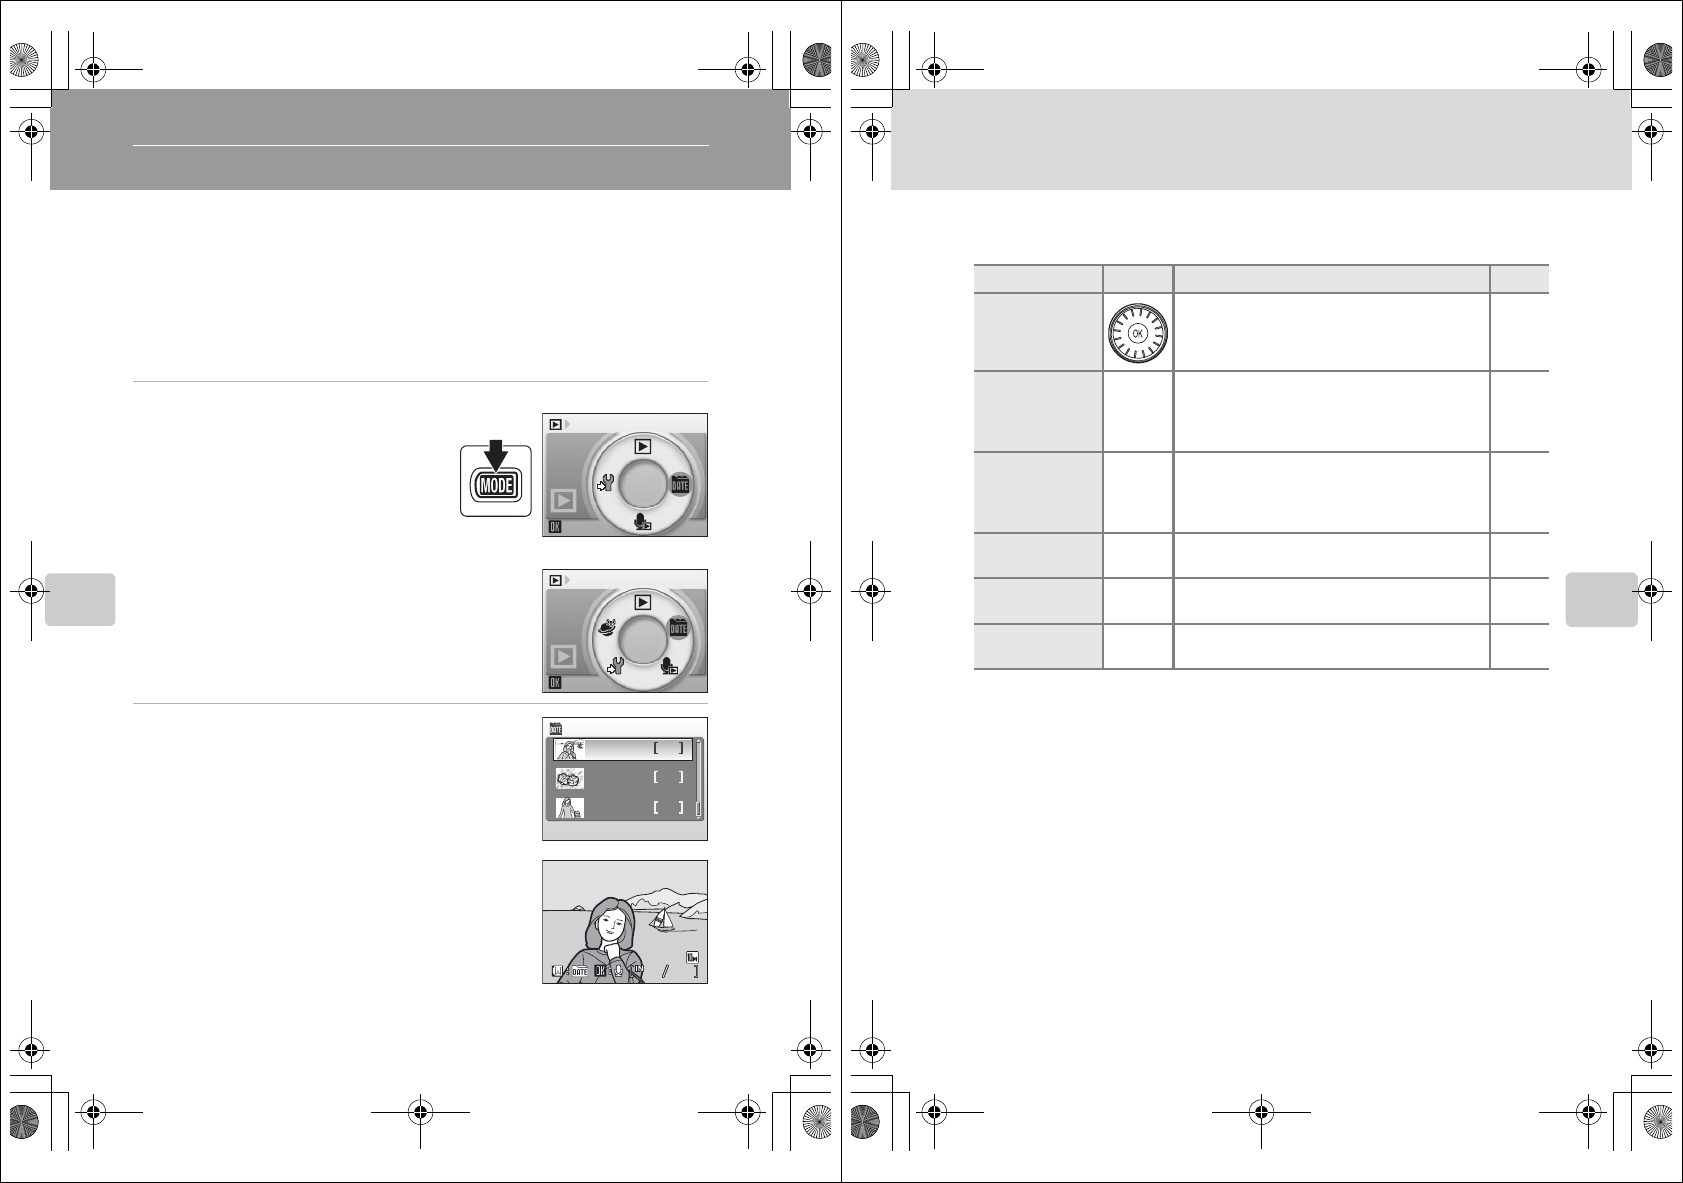
Viewing Multiple Pictures: Thumbnail Playback
Press the f (h) button in full-frame playback mode
(A28) to display pictures in “contact sheets” of
thumbnail images.
The following operations can be performed while thumbnails are displayed.
CThumbnail Playback Mode Display
When print set (A81) and protected pictures (A99) are
selected in thumbnail playback mode, the icon shown at
right is displayed with them. Movies are displayed as film
frames in all thumbnail playback modes.
To Use Description A
Choose pictures Rotate the rotary multi selector, or press J, K, H,
or I, to choose pictures. 9
Increase number
of picture
thumbnails
displayed
f (h)Press the f (h) button to increase number of
picture thumbnails displayed: 9 ➝ 16 ➝ 25
–
Decrease number
of picture
thumbnails
displayed
g (i)Press the g (i) button to decrease number of
picture thumbnails displayed: 25 ➝ 16 ➝ 9
Return to full-
frame playback kPress the k button.28
Switch to
shooting mode cPress the c button to return to the last shooting
mode selected. 28
1/ 10
1/ 10
Protect iconPrint set icon
Film frames
Q7115_25_UM_EN.book Page 51 Friday, May 30, 2008 2:32 PM
Q7115_25_UM_EN_1st
52
More on Playback
Taking a Closer Look: Playback Zoom
Pressing the g(i) button during full-frame playback
mode (A28) zooms the current picture, with the
center of the picture displayed in the monitor.
The guide at lower right shows which portion of the
picture is enlarged.
The following operations can be performed while pictures are zoomed in.
Pictures Taken Using the Face-Priority Function
When zooming in (playback zoom) on a picture taken
using the face-priority function, the picture will be
enlarged with the face detected with shooting at the
center of the monitor.
•If more than one face was detected, the picture will
be enlarged with the face on which focus was
acquired at the center of the monitor. Press the
rotary multi selector H, I, J, or K to display other faces that were detected.
•When the g (i) or f (h) button is pressed to adjust the zoom ratio, the
center of the picture (normal playback zoom display), rather than the face, is
displayed at the center of the monitor.
To Use Description A
Zoom in g (i)Zoom increases each time the g (i) button is
pressed, to a maximum of 10×. –
Zoom out f (h)
Zoom decreases each time the f (h) button is
pressed. When the magnification ratio reaches
1×, the display returns to full-frame playback
mode.
–
Move the display
area
Press the rotary multi selector H, I, J, or K to
move the display area to other areas of the
picture.
9
Return to full-
frame playback kPress the k button.28
Crop picture dPress the d button to crop current picture to
contain only the portion visible in the monitor. 55
Switch to
shooting mode cPress the c button to return to the last shooting
mode selected. 28
×
2.0
2.0
×
2.0
Q7115_25_UM_EN.book Page 52 Friday, May 30, 2008 2:32 PM
53
More on Playback
Editing Pictures
Use this camera to edit pictures in-camera and store them as separate files
(A118).
CPicture Editing
•Pictures taken at an image mode setting of l 16:9 (3584) or m 16:9 (1920) (A84) cannot be
edited.
•This camera’s editing functions cannot be available for pictures taken with another make or model
of camera.
•If a copy created using this camera is viewed on another make or model of camera, the picture
may not be displayed or may not be transferred to a computer.
•Editing functions are not available when there is not enough free space in the internal memory or
on the memory card.
CRestrictions on Picture Editing (w: available, –: not available)
•Pictures cannot be edited twice with the same editing function.
•The D-Lighting should be done first while the restricted use of combination exists.
DOriginal Pictures and Edited Copies
•Copies created with editing functions are not deleted if the original pictures are deleted. The
original pictures are not deleted if copies created with editing functions are deleted.
•Edited copies are stored with the same recording date and time as the original.
•Edited copies are not marked for printing (A81) or protecting (A99) as the original.
Editing function Description
D-Lighting (A54) Create a copy of the current picture with enhanced brightness
and contrast, brightening dark portions of the picture.
Crop (A55) Enlarge the image or refine the composition and create a copy
containing only the portion visible in the monitor.
Small picture (A56) Create a small copy of pictures suitable for use on web pages or
as e-mail attachments.
2nd editing
1st editing D-Lighting Crop Small picture
D-Lighting –ww
Crop –––
Small picture –––
Q7115_25_UM_EN.book Page 53 Friday, May 30, 2008 2:32 PM
Q7115_25_UM_EN_1st
54
Editing Pictures
More on Playback
Enhancing Brightness and Contrast: D-Lighting
D-Lighting can be used to create copies with enhanced brightness and contrast,
brightening dark portions of a picture. Enhanced copies are stored as separate
files.
1Select the desired picture from full-frame
(A28) or thumbnail (A51) playback mode
and press the d button.
The playback menu will be shown.
2Use the rotary multi selector to choose
D-Lighting and press the k button.
The original version will be shown on the left and the
edited version will be shown on the right.
3Choose OK and press the k button.
A new copy with enhanced brightness and contrast is
created.
To cancel D-Lighting, choose Cancel and press the k
button.
D-Lighting copies can be recognized by the c icon
displayed during playback.
DMore Information
See “Image/Sound File and Folder Names” (A118) for more information.
Playback menu
Exit
D-Lighting
Print set
Slide show
Delete
Protect
D-Lighting
OK
Cancel
15/11/2008 15:30
15/11/2008 15:30
0004.JPG
0004.JPG
44
4
0004.JPG
15/11/2008 15:30
4
Q7115_25_UM_EN.book Page 54 Friday, May 30, 2008 2:32 PM
55
Editing Pictures
More on Playback
Creating a Cropped Copy: Crop
Create a copy containing only the portion visible in the monitor when u is
displayed with playback zoom (A52) enabled. Cropped copies are stored as
separate files.
1Press the g (i) button in full-frame playback
mode to zoom in on the image.
To crop a picture displayed in “tall” (portrait) orientation,
zoom in on the picture until the width of the picture is
greater than that of the display.
To crop the picture in its current “tall” (portrait) orientation,
without changing the composition, first rotate the picture so that it is displayed in
landscape orientation, using the Rotate image (A100) option in the playback menu,
before enlarging the picture for cropping.
2Refine copy composition.
Press the zoom buttons, the g (i) or f (h) button, to
adjust the zoom ratio.
Press the rotary multi selector H, I, J, or K to scroll the
picture until only the portion you want to copy is visible in
the monitor.
3Press the d button.
4Use the rotary multi selector to choose Yes
and press the k button.
A new picture, containing only the portion visible in the
monitor, is created.
To cancel creating a cropped copy, choose No and press
the k button.
CImage Size
As the area to be saved is reduced, the image size (pixels) of the cropped copy is also reduced.
When the size of the cropped copy is 320 × 240 or 160 × 120, the small picture icon l or m is
displayed on the left of the screen in full-frame playback mode.
DMore Information
See “Image/Sound File and Folder Names” (A118) for more information.
Save this image as
displayed?
No
Ye s
Q7115_25_UM_EN.book Page 55 Friday, May 30, 2008 2:32 PM
Q7115_25_UM_EN_1st
56
Editing Pictures
More on Playback
Resizing Pictures: Small Picture
Create a small copy of the current picture. Small copies are stored as JPEG files with
a compression ratio of 1:16. The following sizes are available.
1Select the desired picture from full-frame
(A28) or thumbnail (A51) playback mode
and press the d button.
The playback menu is displayed.
2Use the rotary multi selector to choose Small
pic. and press the k button.
To cancel creating a small copy and return to shooting
mode, press the d button.
3Choose the desired copy size and press the k
button.
4Choose Yes and press the k button.
A new, smaller copy is created.
To cancel creating a small copy, choose No and press the
k button.
DMore Information
See “Image/Sound File and Folder Names” (A118) for more information.
Option Description
l 640×480 Suited to television playback.
m 320×240 Suited to display on web pages.
n 160×120 Suitable for e-mail attachments.
Playback menu
Exit
Small pic.
Rotate image
Copy
Small pic.
320
×
240
Exit
640
×
480
160
×
120
Ye s
No
Create small picture file?
Q7115_25_UM_EN.book Page 56 Friday, May 30, 2008 2:32 PM
57
More on Playback
Voice Memos: Recording and Playback
Use the camera’s built-in microphone to record voice
memos for pictures marked with n in full-frame
playback mode (A28).
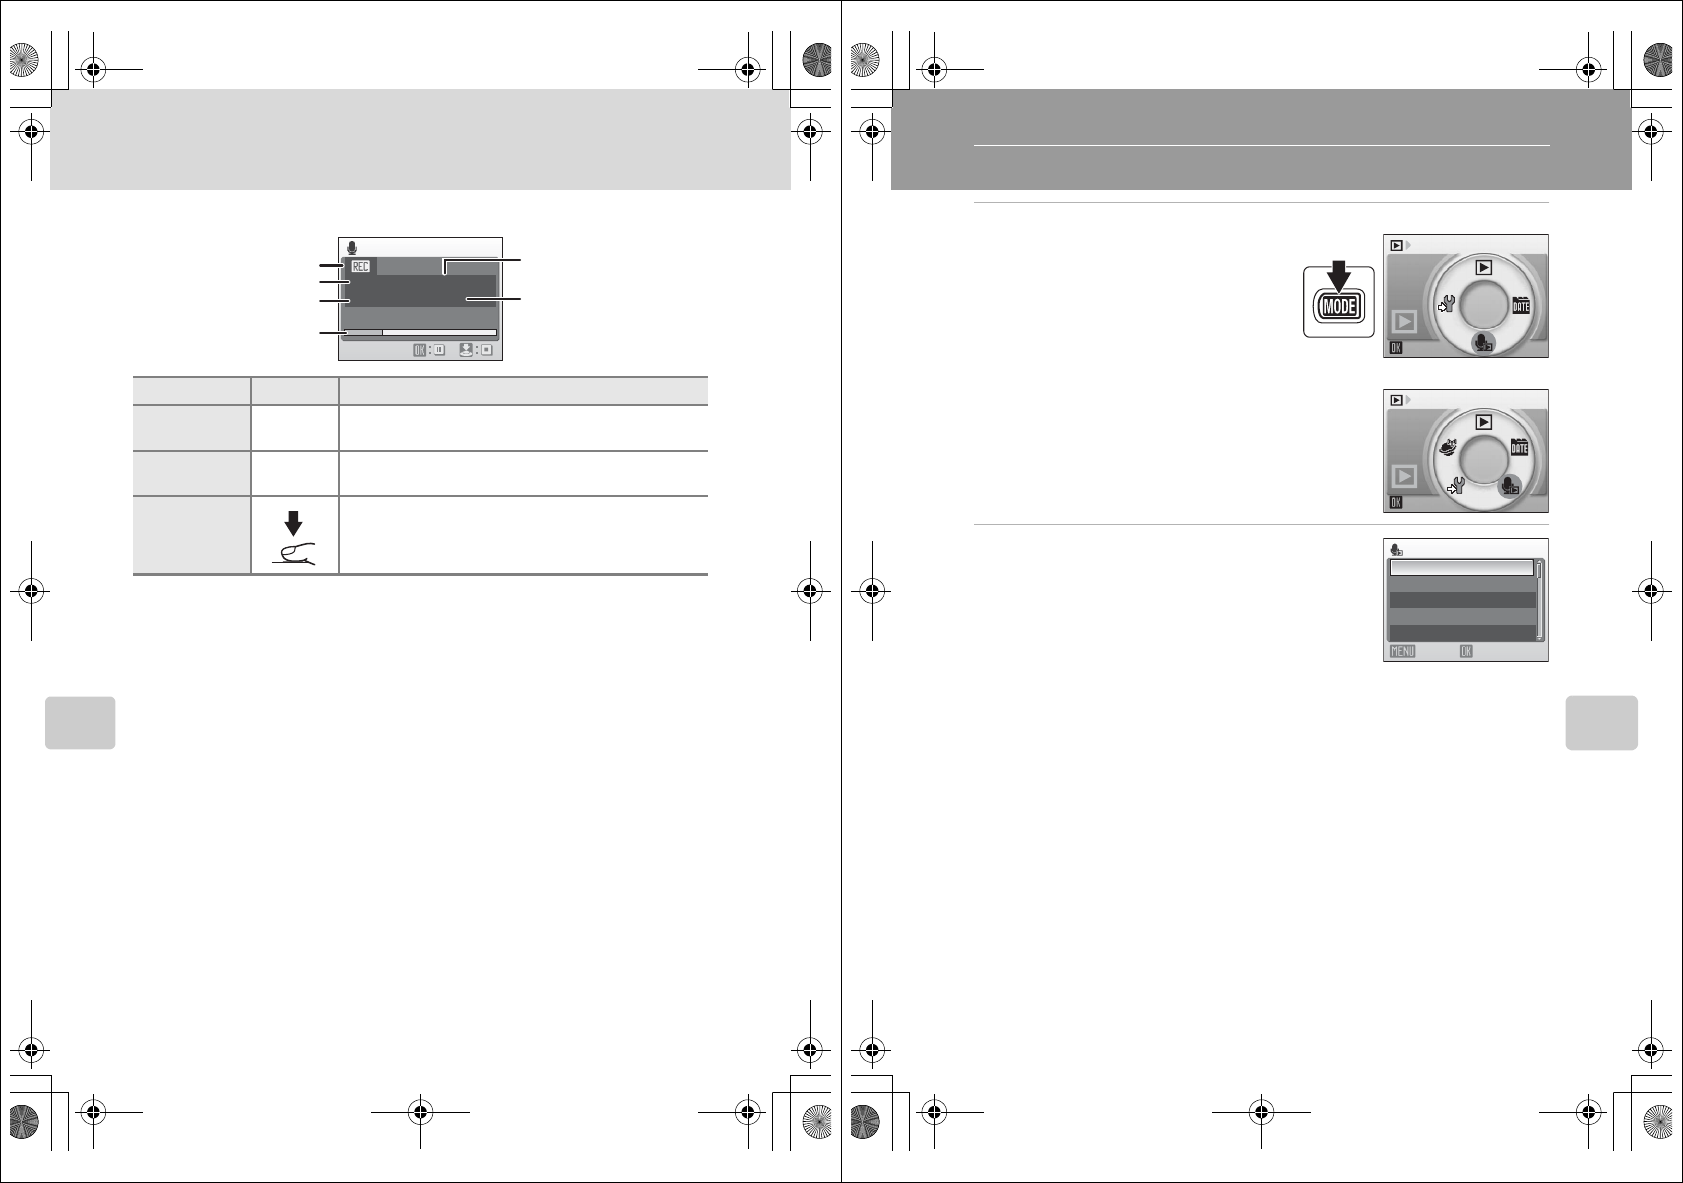
Recording Voice Memos
A voice memo, up to 20 seconds in length,
will be recorded while the k button is hold
down.
•Do not touch the built-in microphone
during recording.
•During recording, o and p blink in the
monitor display.
Playing Voice Memos
Press the k button while a picture with a
voice memo attached is displayed in full-
frame playback mode to play voice memo.
Playback ends when the voice memo ends
or the k button is pressed again.
•Pictures with voice memos can be
recognized by the q icon.
•Use the zoom buttons, the g or f button, to adjust playback volume.
Deleting Voice Memos
Select a picture with a voice memo attached and press
the l button. Use the rotary multi selector to choose
w and press the k button. Only the voice memo will
be deleted.
BVoice Memos
•When a picture with a voice memo attached is deleted, both the
picture and its voice memo are deleted.
•If a voice memo already exists for the current picture, a new voice memo cannot be recorded. To
modify the existing voice memo, delete only the existing voice memo and then record a new
voice memo.
•This camera cannot be used to attach voice memos to pictures taken with another make or model
of camera.
DMore Information
See “Image/Sound File and Folder Names” (A118) for more information.
0004.JPG
0004.JPG
44
15/11/2008 15:30
15/11/2008 15:30
0004.JPG
44
15/11/2008 15:30
17s
17s
17s
15/11/2008 15:30
15/11/2008 15:30
0004.JPG
0004.JPG
0004.JPG
44
44
15/11/2008 15:30
Erase 1 image?
No
Ye s
Q7115_25_UM_EN.book Page 57 Friday, May 30, 2008 2:32 PM
Q7115_25_UM_EN_1st
58
More on Playback
Viewing Pictures by Date
In list by date mode, pictures taken on a specified date can be displayed. In full-
frame playback mode, just as with playback mode, picture display can be
enlarged, pictures can be edited, voice memos can be recorded or played back,
and movies can be played back. When the d button is pressed, the list by date
menu is displayed, and all pictures taken on a specified date can be selected for
deletion, printing, and protection.
Selecting a Date in List by Date Mode
1Enter list by date mode by pressing
the e button in playback mode,
selecting C (use the rotary multi
selector), and then pressing the k
button.
Dates for which pictures exist will be listed.
2Choose the desired date and press the k
button.
Camera lists up to 29 dates. If pictures exist for more than
29 dates, all pictures recorded earlier than most recent 29
dates will be listed together as Others.
The first picture for that date will be displayed full-frame
playback mode.
Press the f button in full-frame playback mode to return
to the date list.
List by date
List by date
COOLPIX S610
COOLPIX S610c
3
2
56
List by date
20/11/2008
15/11/2008
Others
15/11/2008 15:30
15/11/2008 15:30
0004.JPG
0004.JPG
31
31
0004.JPG
15/11/2008 15:30
31
31
Q7115_25_UM_EN.book Page 58 Friday, May 30, 2008 2:32 PM
59
Viewing Pictures by Date
More on Playback
Using List by Date Mode
The following operations are possible from the date selection screen.
BNotes on List by Date Mode
•Only the most recent 9,000 pictures can be displayed in list by date mode.
•Pictures taken with no date stamp are not listed in this mode.
To Use Description A
Select date Rotate the rotary multi selector, or press H or I,
to select a date. 9
Switch to full-
frame playback k
Press the k button to display the first picture
taken on the selected date.
Press the f button in full-frame playback to
return to the date selection screen.
29
Delete picture l
Press the l button after selecting a date, and a
confirmation dialog will be displayed. Choose
Yes and press the k button to delete all pictures
taken on the selected date.
28
View list by date
menu dPress the d button to display the list by date
menu. 60
View playback
mode menu ePress the e button to display the playback-
mode selection menu. 8
Switch to
shooting mode cPress the c button to return to the last shooting
mode selected. 28
Q7115_25_UM_EN.book Page 59 Friday, May 30, 2008 2:32 PM
Q7115_25_UM_EN_1st
60
Viewing Pictures by Date
More on Playback
List by Date Menus
Press the d button in list by date mode to display the following menus for only
the pictures taken on the specified date.
D-Lighting* A54
Print set A81
Slide show A98
Delete A99
Protect A99
Rotate image* A100
Small picture* A56
* During full-frame playback mode only
When the d button is pressed in the date selection screen (A58), options can
be applied to all pictures taken on the same date, or all pictures taken on the same
date can be deleted. To apply options to individual pictures, or to select individual
pictures for deletion, display a picture full-frame and press the d button.
BPrint Set
When print marking already exists for pictures taken on dates other than that specified, a
confirmation dialog Save print marking for other dates? will be displayed. Select Yes to add the
new print marking to the existing marking. Select No to remove the existing print marking and leave
only the new marking.
Q7115_25_UM_EN.book Page 60 Friday, May 30, 2008 2:32 PM
61
Movies
Movies
Recording Movies
To shoot movies with sound recorded via the built-in microphone, select shooting
mode and follow the steps below.
1Enter movie mode by pressing the
e button in shooting mode,
selecting D (use the rotary multi
selector), and then pressing the k
button.
Exposure count display shows maximum
total length of movie that can be recorded.
2Press the shutter-release button all
the way down to start recording.
The camera focuses on the subject in center
of frame.
A progress bar at the bottom of the monitor
shows the amount of recording time
remaining.
To end recording, press the shutter-release button all the way down a second time.
Recording stops automatically when the internal memory or memory card becomes full,
recording time reaches 30 minutes, or movie file size reaches 2 GB.
BShooting Movies
•Flash mode (A30), self-timer (A32), and exposure compensation (A34) cannot be applied or
changed. Macro mode (A33) is available.
•Macro mode setting cannot be applied or changed while movies are being recorded. Apply or
change setting as necessary before movie recording begins.
•Optical zoom cannot be adjusted once movie recording begins. Digital zoom cannot be applied
before movie recording begins. However, digital zoom (up to 2×) can be applied while movies are
being recorded.
BNotes on Recording Movies
When the last frame of a movie is displayed in the monitor as a still picture, the movie is being
recorded. Do not open the battery-chamber/memory card slot cover while movies are being
recorded. Turning the camera off or removing the memory card while movies are being recorded
could result in loss of data or in damage to the camera or card.
DChanging Movie Settings
Movie options and autofocus mode settings can be changed in the movie menu (A62).
Movie
12s
12s
12s
Q7115_25_UM_EN.book Page 61 Friday, May 30, 2008 2:32 PM
Q7115_25_UM_EN_1st
62
Movies
The Movie Menu
Movie options and Autofocus mode (A63) settings can be changed in the
movie menu.
Press the d button in movie mode to display the movie menu and use the
rotary multi selector to modify and apply settings.
D Selecting Movie Options
The movie menu offers the options shown below.
CMovie Options and Maximum Movie Length
* All figures are approximate. The maximum recording time may vary with make of memory card.
This camera can record movies up to 30 minutes in length or a file size of up to 2 GB. The amount
of recording time remaining (up to 30 minutes or 2 GB) is displayed during recording.
DMore Information
See “Image/Sound File and Folder Names” (A118) for more information.
Option Image size and frame rate
I TV movie 640
(default setting)
Image size: 640 × 480 pixels
Frame rate: 30 frames per second
S Small size 320 Image size: 320 × 240 pixels
Frame rate: 30 frames per second
Option Internal memory (approx. # MB) Memory card (# MB)
I TV movie 640
(default setting) # s Approx. # m # s
S Small size 320 # m # s Approx. # m
Q7115_25_UM_EN.book Page 62 Friday, May 30, 2008 2:32 PM
63
The Movie Menu
Movies
I Autofocus Mode
Choose how the camera focuses in movie mode.
Option Description
A Single AF
(default setting)
Camera focuses when shutter-release button is pressed halfway
and locks at this position during shooting.
B Full-time AF
Camera focuses continuously until focus is acquired and locked.
To prevent sound of camera focusing from interfering with
recording, use of Single AF is recommended.
Q7115_25_UM_EN.book Page 63 Friday, May 30, 2008 2:32 PM
Q7115_25_UM_EN_1st

64
Movies
Movie Playback
In full-frame playback mode (A28), movies are
recognized by the movie mode icons. To play a movie,
display it in full-frame playback mode and press the k
button.
Use the zoom buttons, the g or f button, to adjust
playback volume.
Playback controls appear at the top of the monitor.
Press the rotary multi selector J or K to choose a
control, then press the k button to perform the
selected operation. The following operations are
available.
Deleting Movie Files
Press the l button when displayed in full-frame
playback mode (A28) or when selected in thumbnail
(A51) playback mode. A confirmation dialog is
displayed. Select Yes and press the k button to delete
the movie, or select No to exit without deleting the
movie.
To Select Description
Rewind KRewind movie. Playback resumes when the k button is
released.
Advance LAdvance movie. Playback resumes when the k button is
released.
Pause O
Pause playback.
The following operations can be performed while playback is
paused.
MRewind movie by one frame. Rewind continues while the
k button is pressed.
NAdvance movie by one frame. Advance continues while
the k button is pressed.
PResume playback.
End QEnd playback and return to full-frame playback.
0010.AVI
0010.AVI
15/11/2008 15:30
15/11/2008 15:30
10s
10s
10s
0010.AVI
15/11/2008 15:30
4s
4s
4s
Volume indicator
Pausing
During playback
Erase 1 image?
No
Ye s
Q7115_25_UM_EN.book Page 64 Friday, May 30, 2008 2:32 PM
65
Voice Recordings
Voice Recordings
Making Voice Recordings
Audio voice recordings can be recorded over the built-in microphone and played
back over the built-in speaker.
1Enter voice recording mode by
pressing the e button in
shooting mode
, selecting E (use the
rotary multi selector), and then
pressing the k button.
The length of recording that can be made will
be displayed.
2Press the shutter-release button all the way
down to start recording.
The indicator lamp lights during recording.
If no operations are performed for about 30 seconds after
voice recording begins, the camera’s auto off function is
enabled and the monitor turns off.
See “Operations During Recording” (A66) for more
information.
3Press the shutter-release button all the way down a second time to
end recording.
Recording will end automatically if the internal memory or memory card becomes full,
or after 120 minutes of recording on the memory card.
DMore Information
See “Image/Sound File and Folder Names” (A118) for more information.
Voice recording
00:05:00
001 17:30
15/11/2008
Voice recording
Max. rec. time
Q7115_25_UM_EN.book Page 65 Friday, May 30, 2008 2:32 PM
Q7115_25_UM_EN_1st
66
Making Voice Recordings
Voice Recordings
Operations During Recording
BVoice Recordings
The files transferred to a computer can be played back using QuickTime or any other WAV-
compatible audio player.
DMore Information
See “Image/Sound File and Folder Names” (A118) for more information.
To Press Description
Reactivate the
monitor cIf the monitor has turned off, press the c button to
reactivate.
Pause/resume
recording kPress once to pause recording; indicator lamp will blink.
End recording Press the shutter-release button all the way down a
second time to end recording.
00
:
01
:
00/00
:
04:00
001 17
:
3015/11/2008
Voice recording
Recording indicator
File number
Length of recording
Progress indicator
Date of recording
Time remaining
Q7115_25_UM_EN.book Page 66 Friday, May 30, 2008 2:32 PM
67
Voice Recordings
Playing Voice Recordings
1Enter sound file playback mode by
pressing the e button in
playback mode
, selecting E (use the
rotary multi selector), and then
pressing the k button.
Voice recordings can also be played back by
pressing the c button in voice recording
mode (A65) to display the sound file
selection screen.
2Choose the desired sound file and press the
k button.
The selected sound file will be played back.
Sound file playback
Sound file playback
COOLPIX S610
COOLPIX S610c
003
004
002
001 15/11/2008 17:30
15/11/2008 18:30
26/11/2008 13:00
29/11/2008 16:40
03/12/2008 08:00
005
Select sound file
Copy Play
Q7115_25_UM_EN.book Page 67 Friday, May 30, 2008 2:32 PM
Q7115_25_UM_EN_1st
68
Playing Voice Recordings
Voice Recordings
Operations During Playback
Use the zoom buttons, the g or f button, to adjust playback volume.
Playback controls appear at the top of the monitor. Press the rotary multi selector
J or K to choose a control, then press the k button to perform the selected
operation. The following operations are available.
Deleting Sound Files
Press
the l button
during playback or after selecting a
sound file from the sound file selection screen. A
confirmation dialog is displayed. To delete the file, select
Yes
and press
the k button
. To exit without deleting
the sound file, select
No
.
To Press Description
Rewind KRewind voice recording. Playback resumes when the k button is
released.
Advance LAdvance voice recording. Playback resumes when the k button is
released.
Pause
O
P
Pause playback.
Resume playback that has been paused.
End QEnd playback and return to the sound file selection screen.
00
:
00
:
05
/
00
:
00:20
001 15/11/2008 17
:
30
Sound file playback
Control icons
File number
Playback time
Progress indicator
Date and time of recording
Length of recording
Volume
Delete
File will be deleted. OK?
Ye s
No
Q7115_25_UM_EN.book Page 68 Friday, May 30, 2008 2:32 PM
69
Voice Recordings
Copying Voice Recordings
Copy voice recordings between the internal memory and a memory card. This
option is available only when a memory card is inserted.
1Display the sound file selection screen shown
in step 2 on page 67 and press the d
button.
2Use the rotary multi selector to choose the
option and press the k button.
q: Copy recordings from internal memory to
memory card
r: Copy recordings from memory card to internal
memory
3Choose the copy option and press the k
button.
Selected files: Proceed to step 4
Copy all files: Proceed to step 5
4Choose the desired file.
Press the rotary multi selector K to select the file (y).
Press the rotary multi selector K again to cancel the
selection.
•Multiple files can be selected.
•Press the k button to finalize file selection.
5When a confirmation dialog is displayed, choose Yes and press the k
button.
Copying starts.
BVoice Recordings
This camera may be unable to play or copy sound files created with another make or model of
camera.
CNo sound file. Message
If there are no sound files stored on the memory card when E is selected (A67, step1), the
message, No sound file., will be displayed. Press the d button to display the copy sound files
screen, and copy the sound files stored in the camera’s internal memory to the memory card.
Copy sound files
Exit
Camera to card
Copy all files
Exit
Selected files
003
004
002
001
005
15/11/2008 17:30
15/11/2008 18:30
26/11/2008 13:00
29/11/2008 16:40
03/12/2008 08:00
Select sound files
Exit Select
Q7115_25_UM_EN.book Page 69 Friday, May 30, 2008 2:32 PM
Q7115_25_UM_EN_1st

70
Connecting to Televisions, Computers, and Printers
Connecting to Televisions, Computers, and Printers
Connecting to a TV
Connect the camera to a television using the supplied audio/video cable to play
back pictures on the television.
1Turn off the camera.
2Connect the camera to the TV using the supplied audio/video cable.
Connect the yellow plug to the video-in jack on the TV, and the white plug to the audio-
in jack.
3Tune the television to the video channel.
See the documentation provided with your television for details.
4Hold down the c button to turn on the
camera.
The camera enters playback mode, and pictures recorded
to the internal memory, or memory card, will be
displayed on the television.
While connected to the TV, the camera monitor will
remain off.
BConnecting an Audio/Video Cable
When connecting the audio/video cable, be sure that the camera connector is oriented correctly. Do
not use force when connecting the audio/video cable to the camera. When disconnecting the
audio/video cable, do not pull the connector at an angle.
BVideo Mode
Be sure that the camera’s video mode setting conforms to the standard used by your television.
The video mode setting is an option set in the setup menu (A102)>Video mode (A114).
WhiteYellow
Q7115_25_UM_EN.book Page 70 Friday, May 30, 2008 2:32 PM
71
Connecting to Televisions, Computers, and Printers
Connecting to a Computer
Use the supplied USB cable to connect the camera to a computer, and copy
(transfer) pictures to a computer with the supplied Nikon Transfer software.
Before Connecting the Camera
Install the Software
Before connecting the camera to a computer, software, including Nikon Transfer
and Panorama Maker for creating panorama images, must be installed from the
supplied Software Suite CD. For more information on installing the software, refer
to the Quick Start Guide.
Operating Systems Compatible with the Camera
Windows
Preinstalled versions of 32-bit Windows Vista Service Pack 1 (Home Basic/Home
Premium/Business/Enterprise/Ultimate editions), Windows XP Service Pack 3
(Home Edition/Professional)
Macintosh
Mac OS X (version 10.3.9, 10.4.11, 10.5.2)
Refer to the Nikon website for the latest information on operating system
compatibility.
BNote on Power Source
When connecting the camera to a computer or printer, use a fully charged battery to prevent the
camera from turning off unexpectedly.
CIf You Are Using Windows 2000 Professional
•Do not connect the camera to the computer.
•Use a card reader or similar device to transfer pictures stored on the memory card to the computer
(A74).
•If the camera has been connected to the computer, the Found New Hardware Wizard dialog is
displayed. Select Cancel to close the dialog and disconnect the camera from the computer.
Q7115_25_UM_EN.book Page 71 Friday, May 30, 2008 2:32 PM
Q7115_25_UM_EN_1st

72
Connecting to a Computer
Connecting to Televisions, Computers, and Printers
Transferring Pictures from a Camera to a Computer
1Start the computer to which Nikon Transfer was installed.
2Turn off the camera.
3Connect the camera to the computer using the supplied USB cable.
4Turn on the camera.
The power-on lamp will light.
Windows Vista
When the AutoPlay dialog is displayed, click Copy
pictures to a folder on my computer using Nikon
Transfer. Nikon Transfer will start. To bypass this dialog in the future, check Always do
this for this device:.
Windows XP
When the AutoPlay dialog is displayed, select Nikon Transfer Copy pictures to a
folder on my computer, and click OK. Nikon Transfer will start. To bypass this dialog in
the future, check Always use this program for this action..
Mac OS X
Nikon Transfer will start automatically if Yes was selected in the Auto-Launch setting
dialog when Nikon Transfer was first installed.
BConnecting the USB Cable
•When connecting the USB cable, be sure that the connectors are oriented correctly. Do not use
force when connecting the USB cable. When disconnecting the USB cable, do not pull the
connector at an angle.
•Connection may not be recognized when the camera is connected to a computer via a USB hub.
Q7115_25_UM_EN.book Page 72 Friday, May 30, 2008 2:32 PM
73
Connecting to a Computer
Connecting to Televisions, Computers, and Printers
5Transfer pictures when Nikon Transfer has finished loading.
Click Start Transfer in Nikon Transfer. At the default setting, all pictures are transferred
to the computer.
.
At the Nikon Transfer default setting, the folder to which pictures are transferred is
automatically opened when transfer is complete.
If ViewNX has been installed, ViewNX will start automatically and transferred pictures can
be viewed.
For more information on using Nikon Transfer, refer to help information contained in
Nikon Transfer.
6Disconnect the camera when transfer is complete.
Turn the camera off and disconnect the USB cable.
Start Transfer button
S610 or S610c is
displayed.
Q7115_25_UM_EN.book Page 73 Friday, May 30, 2008 2:32 PM
Q7115_25_UM_EN_1st

74
Connecting to a Computer
Connecting to Televisions, Computers, and Printers
DUsing a Card Reader
The pictures stored on the memory card inserted into a card reader or similar device can also be
transferred to the computer using Nikon Transfer.
•If the memory card has a capacity greater than 2 GB, or is SDHC-compliant, the intended device
must support these features of the memory card.
•At the Nikon Transfer default settings, Nikon Transfer will start automatically when a memory card
is inserted into the card reader or similar device. See step 5 of “Transferring Pictures from a Camera
to a Computer“ (A73).
•To transfer pictures stored in the camera’s internal memory to the computer, the pictures must
first be copied to a memory card using the camera (A69, 101).
DUsing Standard OS Operations to Open Image/Sound Files
•Navigate to the folder on the computer’s hard disk to which pictures were saved and open a
picture in the viewer supplied with your operating system.
•Sound files copied to the computer can be played back using QuickTime or any other WAV-
compatible audio player.
DPanorama Creation with Panorama Maker
•Use a series of pictures taken using the Panorama assist option in scene mode (A43) to create
a single panorama photo with Panorama Maker.
•Panorama Maker can be installed to a computer using the supplied Software Suite CD. After
installation is complete, follow the procedure described below to start Panorama Maker.
Windows
Open All Programs (Programs under Windows 2000) from the Start menu>ArcSoft
Panorama Maker 4>Panorama Maker 4.
Macintosh
Open Applications by selecting Applications from the Go menu, and double-click the
Panorama Maker 4 icon.
•For more information on using Panorama Maker, refer to the on-screen instructions and help
information contained in Panorama Maker.
DImage File Names and Folder Names
See, “Image/Sound File and Folder Names” (A118) for more information.
Q7115_25_UM_EN.book Page 74 Friday, May 30, 2008 2:32 PM
75
Connecting to Televisions, Computers, and Printers
Connecting to a Printer
Users of PictBridge-compatible (A134) printers can connect the camera directly
to the printer and print pictures without using a computer.
BNote on Power Source
When connecting the camera to a printer, use a fully charged battery to prevent the camera from
turning off unexpectedly.
DPrinting Pictures
In addition to printing pictures transferred to a computer from your personal printer and printing
over a direct camera-to-printer connection, the following options are also available for printing
pictures:
•Insert a memory card into a DPOF-compatible printer’s card slot
•Take a memory card to a digital photo lab
For printing using these methods, specify the pictures and the number of prints each using your
camera’s print set menu (A81).
Take pictures
Select pictures for printing
using Print set option
(A81).
Connect to printer (A76)
Print pictures one at a
time (A77) Print multiple pictures (A78)
Turn camera off and disconnect USB cable
Q7115_25_UM_EN.book Page 75 Friday, May 30, 2008 2:32 PM
Q7115_25_UM_EN_1st
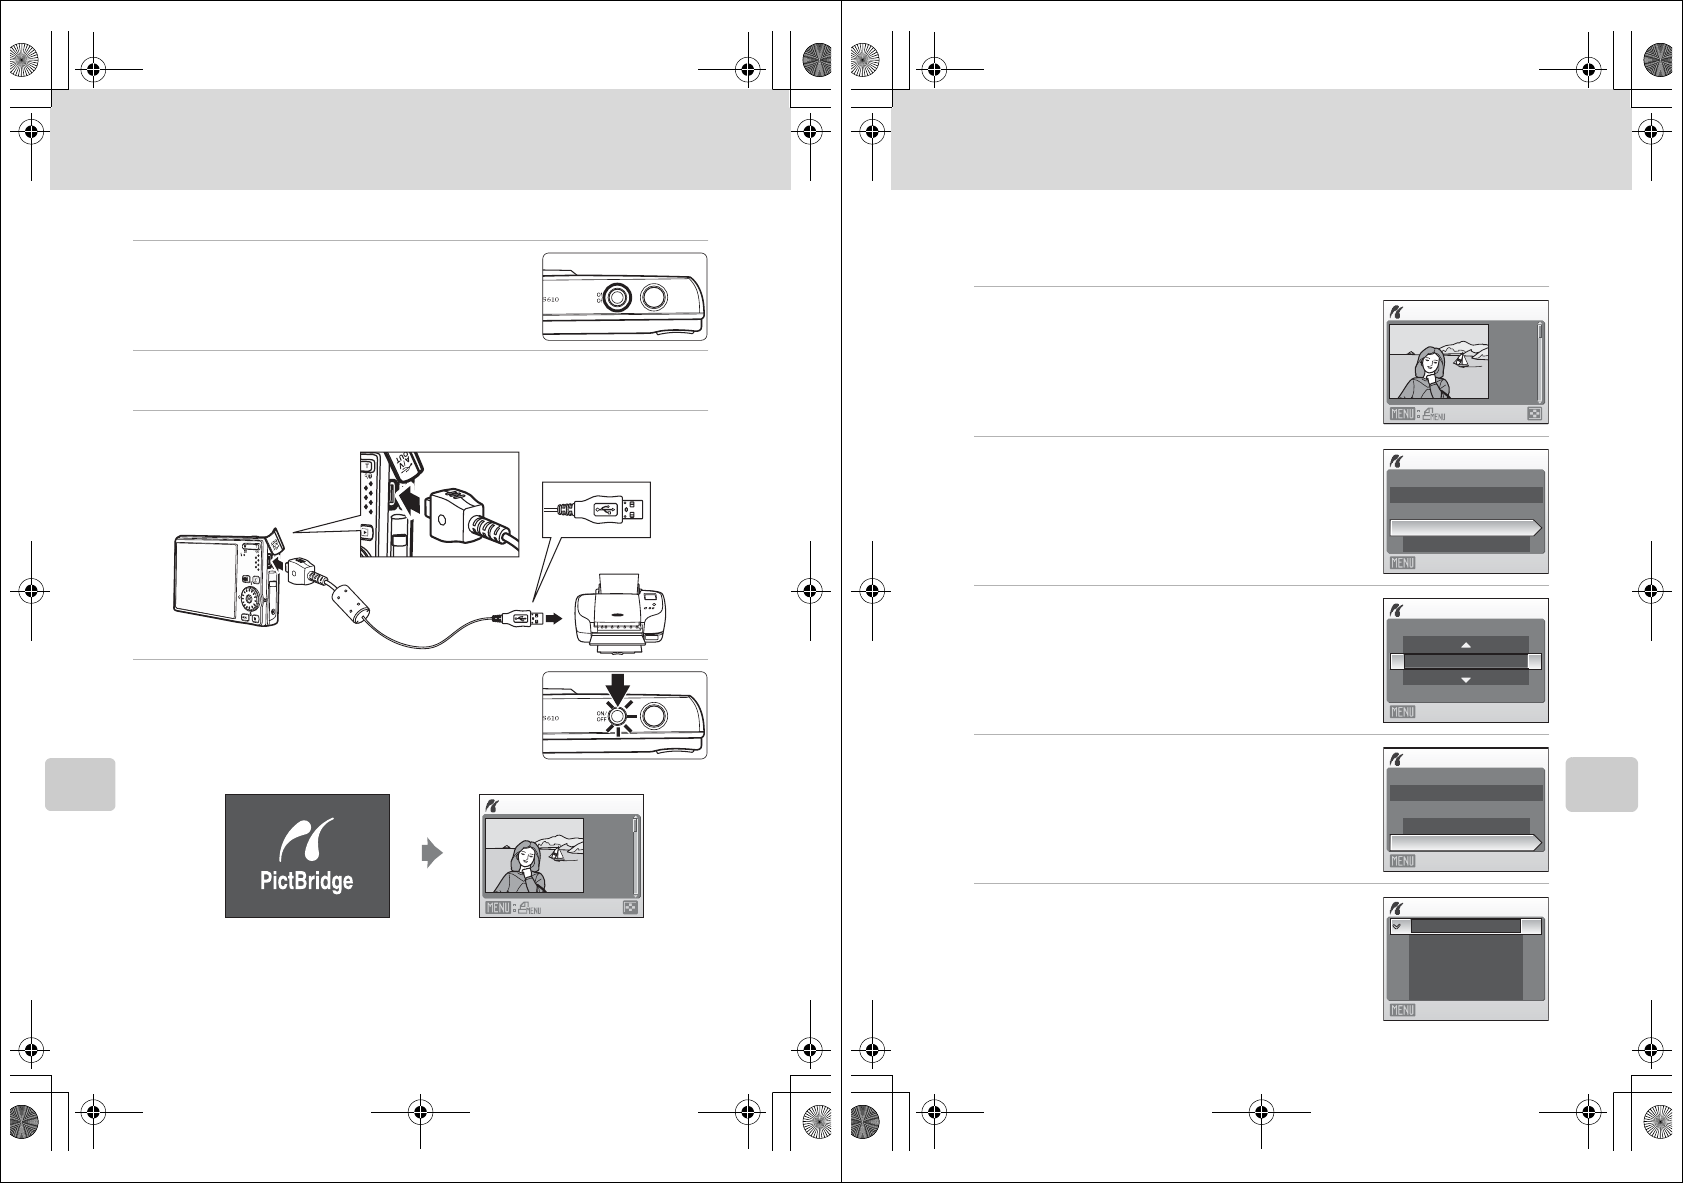
76
Connecting to a Printer
Connecting to Televisions, Computers, and Printers
Connecting the Camera and Printer
1Turn off the camera.
2Turn on the printer.
Check printer settings.
3Connect the camera to the printer using the supplied USB cable.
4Turn on the camera.
When connected correctly, the PictBridge start-up screen
1 will be displayed in the camera monitor. Then the
print selection screen will be displayed 2.
BConnecting the USB Cable
When connecting the USB cable, be sure that the connectors are oriented correctly. Do not use force
when connecting the USB cable. When disconnecting the USB cable, do not pull the connector at an
angle.
Print selection
15/11
2008
NO. 1
[ 57]
12
Q7115_25_UM_EN.book Page 76 Friday, May 30, 2008 2:32 PM
77
Connecting to a Printer
Connecting to Televisions, Computers, and Printers
Printing Pictures One at a Time
After connecting the camera to the printer correctly (A76), print pictures by
following the procedure below.
1Use the rotary multi selector to choose the
desired picture and press the k button.
Press the f (h) button to display 12 thumbnails, and the
g (i) button to switch back to full-frame playback.
2Choose Copies and press the k button.
3Choose the number of copies (up to nine) and
press the k button.
4Choose Paper size and press the k button.
5Choose the desired paper size and press the
k button.
To specify paper size using printer settings, choose
Default in the paper size menu.
Print selection
15/11
2008
NO. 1
[ 57]
PictBridge
Copies
Paper size
Start print
Exit
4
Copies
Exit
PictBridge
Start print
Copies
Paper size
Exit
Paper size
Default
3.5 × 5 in.
5 × 7 in.
4 × 6 in.
100 × 150mm
Exit
Q7115_25_UM_EN.book Page 77 Friday, May 30, 2008 2:32 PM
Q7115_25_UM_EN_1st
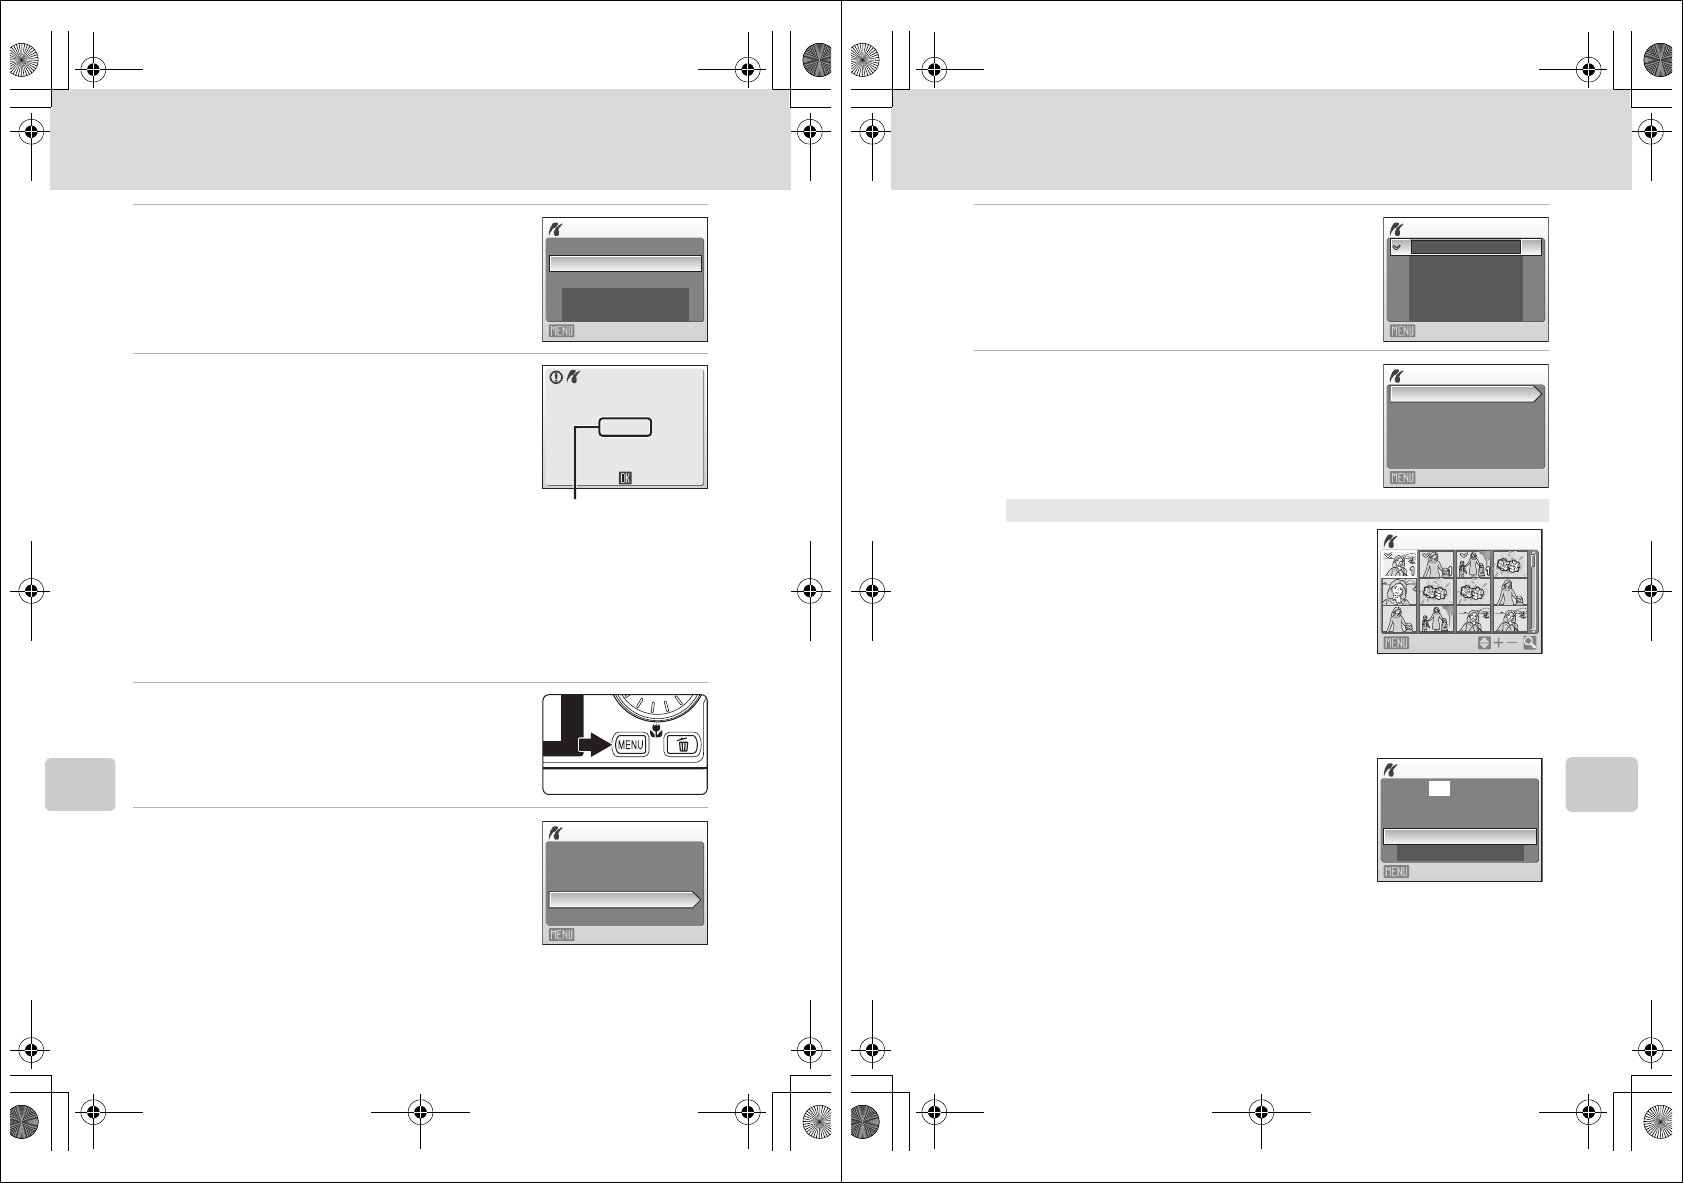
78
Connecting to a Printer
Connecting to Televisions, Computers, and Printers
6Choose Start print and press the k button.
7Printing starts.
Monitor display returns to that shown in step 1 when
printing is complete.
To cancel before all copies have been printed, press the
k button.
Printing Multiple Pictures
After connecting the camera to the printer correctly (A76), print pictures by
following the procedure below.
1When the print selection screen is displayed,
press the d button.
The print menu is displayed.
2Use the rotary multi selector to choose Paper
size and press the k button.
To exit the print menu, press the d button.
PictBridge
Start print
Copies
Paper size
Exit
002/004
Cancel
Printing
Current print/
total number of prints
Print menu
Print all images
Print selection
Paper size
DPOF printing
Exit
Q7115_25_UM_EN.book Page 78 Friday, May 30, 2008 2:32 PM
79
Connecting to a Printer
Connecting to Televisions, Computers, and Printers
3Choose the desired paper size and press the
k button.
To specify paper size using printer settings, choose
Default in the paper size menu.
4Choose Print selection, Print all images or
DPOF printing and press the k button.
Print selection
Choose the pictures (up to 99) and number of
copies (up to nine) of each.
Rotate the rotary multi selector, or press J or K,
to select pictures, and press H or I to set the
number of copies for each.
Pictures selected for printing can be recognized
by the check mark (y) and the numeral
indicating the number of copies to be printed. A
check mark is not displayed with pictures for
which no copies have been specified and these pictures will not be printed.
Press the g (i) button to switch to full-frame playback.
Press the f (h) button to switch back to thumbnail display.
Press the k button when setting is complete.
To print, choose Start print from the menu
displayed and shown at right, and press the k
button.
Choose Cancel and press the k button to
return to the print menu.
Paper size
Default
3.5 × 5 in.
5 × 7 in.
4 × 6 in.
100 × 150mm
Exit
Print menu
Print all images
Print selection
Paper size
DPOF printing
Exit
Print selection 10
Back
010 prints
Cancel
Exit
Start print
Print selection
Q7115_25_UM_EN.book Page 79 Friday, May 30, 2008 2:32 PM
Q7115_25_UM_EN_1st
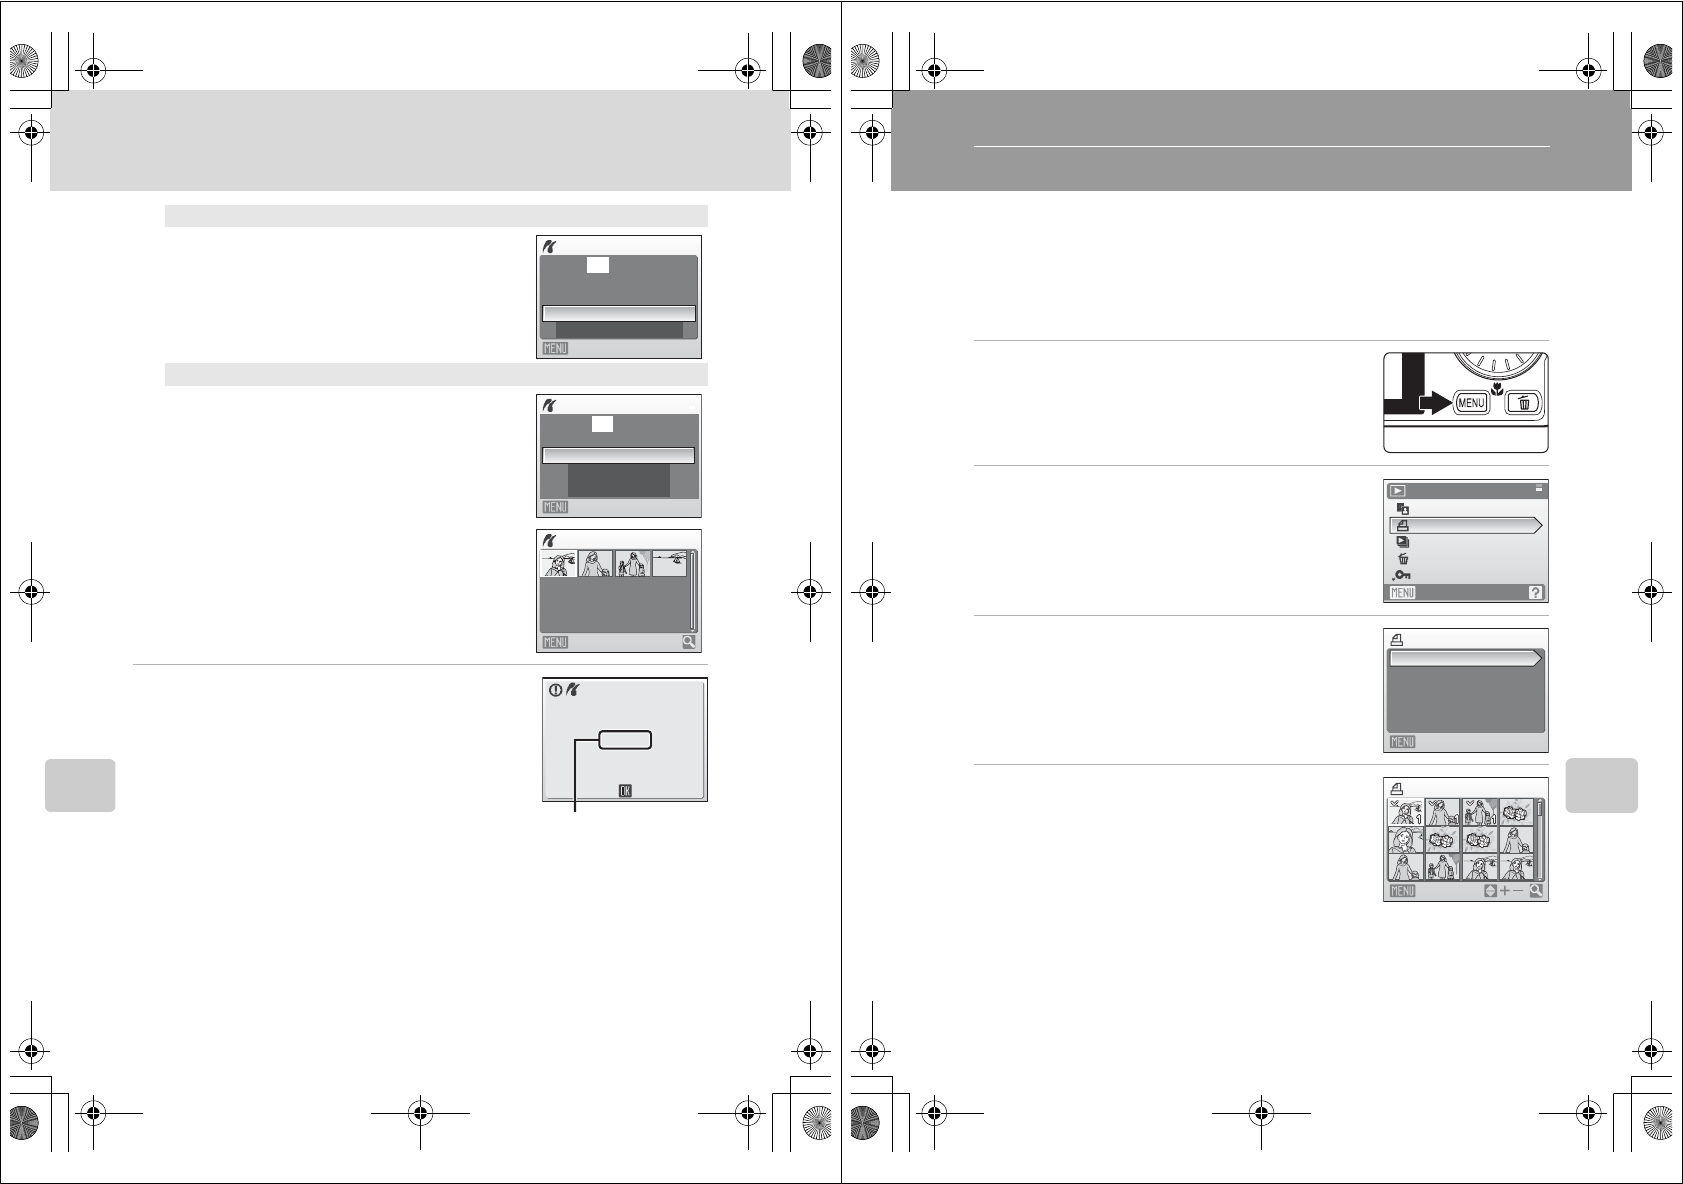
80
Connecting to a Printer
Connecting to Televisions, Computers, and Printers
5Printing starts.
Monitor display returns to the print menu (step 2) when
printing is complete.
To cancel before all copies have been printed, press the
k button.
CPaper Size
The camera supports the following paper sizes: Default (the default paper size for the current
printer), 3.5 × 5 in., 5 × 7 in., 100 × 150mm, 4 × 6 in., 8 × 10 in., Letter, A3, and A4. Only sizes
supported by the current printer will be displayed.
Print all images
All pictures stored in the internal memory, or on
the memory card, are printed one at a time.
To print, choose Start print from the menu
displayed and shown at right, and press the k
button.
Choose Cancel and press the k button to
return to the print menu.
DPOF printing
Print pictures for which a print order was
created in Print set (A81).
To print, choose Start print from the menu
displayed and shown at right, and press the k
button.
Choose Cancel and press the k button to
return to the print menu.
To view the current print order, choose View
images and press the k button. To print
pictures, press the k button again.
018 prints
Cancel
Exit
Start print
Print all images
DPOF printing
Cancel
View images
010 prints
Start print
Exit
10View images
Back
002/010
Cancel
Printing
Current print/
total number of prints
10_ConnectTV.fm Page 80 Monday, June 2, 2008 9:55 AM
81
Connecting to Televisions, Computers, and Printers
Creating a DPOF Print Order: Print Set
The Print set option in the playback menu is used to create digital “print orders”
for printing on DPOF-compatible devices (A134).
When the camera is connected to a PictBridge-compatible printer, pictures can be
printed from the printer according to the DPOF print order you have created for
pictures on the memory card. If the memory card is removed from the camera, you
can create the DPOF print order for pictures in the internal memory and print
pictures according to the DPOF print order.
1Press the d button in playback mode.
The playback menu is displayed.
2Use the rotary multi selector to choose Print
set and press the k button.
3Choose Select images and press the k
button.
4Choose the pictures (up to 99) and number of
copies (up to nine) of each.
Rotate the rotary multi selector, or press J or K, to select
pictures, and press H or I to set the number of copies
for each.
Pictures selected for printing can be recognized by the
check mark (y) icon and the numeral indicating the
number of copies to be printed. A check mark is not
displayed with pictures for which no copies have been specified and these pictures will
not be printed.
Press the g (i) button to switch to full-frame playback.
Press the f (h) button to switch back to thumbnail display.
Press the k button when setting is complete.
Playback menu
D-Lighting
Print set
Slide show
Delete
Protect
Exit
Print set
Delete print set
Exit
Select images
Print selection
Back
10_ConnectTV.fm Page 81 Monday, June 2, 2008 9:55 AM
Q7115_25_UM_EN_1st
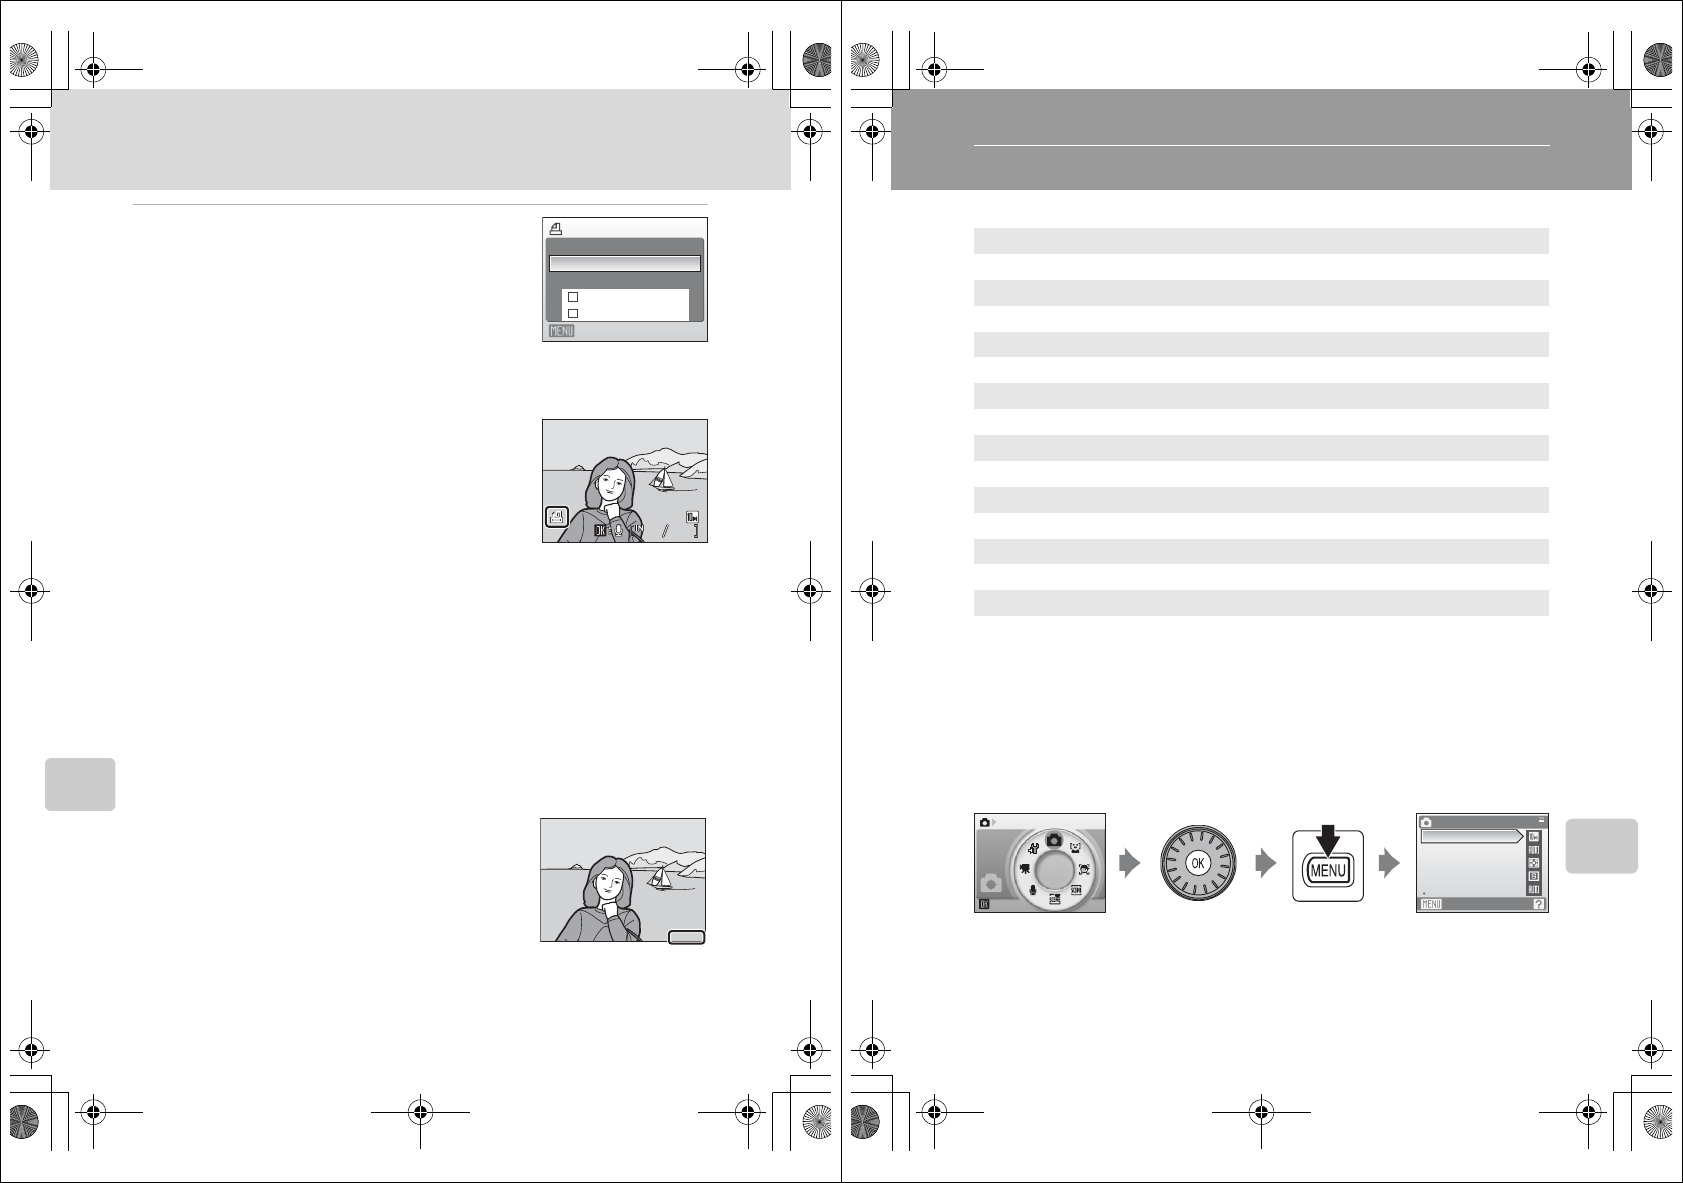
82
Creating a DPOF Print Order: Print Set
Connecting to Televisions, Computers, and Printers
5Choose whether or not to also print shooting
date and photo information.
Choose Date and press the k button to print date of
recording on all pictures in the print order.
Choose Info and press the k button to print photo
information (shutter speed and aperture) on all pictures in
the print order.
Choose Done and press the k button to complete the print order and exit.
Pictures selected for printing are recognized by the w
icon displayed with playback.
BNotes on Printing Shooting Date and Photo Information
When the Date and Info options are enabled in the Print set menu, shooting date and photo
information are printed on pictures when a DPOF-compatible (A134) printer which supports
printing of shooting date and photo information is used.
•Photo information cannot be printed when the camera is connected directly to a printer, via the
supplied USB cable, for DPOF printing (A80).
•Date and Info are reset each time the print set menu is displayed.
CDeleting All Print Orders
Choose Delete print set in step 3 and press the k button. Print orders for all pictures will be
deleted.
CNote on the Print Set Date Option
The date and time printed on pictures with DPOF printing when
Date in the print set menu is enabled, are those recorded with the
picture as it was taken. Date and time printed using this option are
not affected when the camera’s date and time setting are changed
from the setup menu after pictures are recorded.
DDate Imprint
When date and time of recording are imprinted on pictures using the Date Imprint option (A109)
in the setup menu, pictures with the date and time imprinted on them can be printed from printers
that do not support printing of the date and time on pictures. Only the Date Imprint date and time
on pictures will be printed, even if Print set is enabled with Date selected in the print set screen.
Print set
Exit
Info
Date
Done
15/11/2008 15:30
15/11/2008 15:30
0004.JPG
0004.JPG
0004.JPG
4
44
4
4
15/11/2008 15:30
15.11.2008
15.11.2008
15.11.2008
Q7115_25_UM_EN.book Page 82 Friday, May 30, 2008 2:32 PM
83
Shooting, Playback, and Setup Menus
Shooting, Playback, and Setup Menus
Shooting Options: The Shooting Menu
The shooting menu of A (auto) mode contains the following options.
*The Image mode setting is also available from other shooting menus (except the movie
menu).
Displaying the Shooting Menu
Enter A (auto) mode by pressing the e button in shooting mode and then
selecting A (auto). Press the d button to display the shooting menu.
•Use the rotary multi selector to choose and apply settings (A9).
•To return to the shooting mode from the shooting menu, press the d button.
BFunctions that Cannot Be Applied Simultaneously
Some functions cannot be enabled in conjunction with others (A95).
AImage mode* A84
Choose image size and quality.
BWhite balance A86
Match white balance to the light source.
GMetering A88
Choose how the camera meters exposure.
CContinuous A89
Change settings for Continuous or BSS (best shot selector).
EISO sensitivity A90
Control camera’s sensitivity to light.
FColor options A90
Apply color effects to pictures as they are recorded.
GAF area mode A91
Choose where the camera focuses.
IAutofocus mode A94
Choose how the camera focuses.
Shooting menu
Exit
Image mode
White balance
Continuous
Metering
ISO sensitivity
Shooting
Q7115_25_UM_EN.book Page 83 Friday, May 30, 2008 2:32 PM
Q7115_25_UM_EN_1st
84
Shooting Options: The Shooting Menu
Shooting, Playback, and Setup Menus
A Image Mode
Choose an image mode, which is the combination of image size and image quality
(compression), according to how you plan to use the picture and the capacity of
the internal memory or memory card. The larger the image, the larger the size at
which it can be printed or displayed without becoming noticeably “grainy,”
limiting the number of pictures that can be recorded.
The icon for the current setting is displayed in the monitor in shooting and
playback modes (A6, 7).
CImage Mode
Changes made to the image mode setting apply to all shooting modes (except those available from
the movie menu).
Option Size (pixels) Description
hHigh (3648P)3,648 × 2,736
Highest quality, suitable for enlargements or
high-quality prints. The compression ratio is
approximately 1:4.
iNormal (3648)
(default setting) 3,648 × 2,736
Best choice in most situations. The compression
ratio is approximately 1:8.KNormal (3072) 3,072 × 2,304
LNormal (2592) 2,592 × 1,944
MNormal (2048) 2,048 × 1,536 Smaller size allows more pictures to be stored.
The compression ratio is approximately 1:8.
NPC screen (1024) 1,024 × 768 Suited to display on computer monitor. The
compression ratio is approximately 1:8.
OTV screen (640) 640 × 480
Suited to full-screen display on a television or
distribution by e-mail or the web. The
compression ratio is approximately 1:8.
l16:9 (3584) 3,584 × 2,016 Pictures with an aspect ratio of 16:9 can be taken.
16:9 (1920) is suited display on high-definition
televisions (HDTV).
16:9 (3584) is a larger image, suited to printing
at larger sizes.
The compression ratio for both image sizes is
approximately 1:8.
m16:9 (1920) 1,920 × 1,080
Q7115_25_UM_EN.book Page 84 Friday, May 30, 2008 2:32 PM
85
Shooting Options: The Shooting Menu
Shooting, Playback, and Setup Menus
CThe Number of Exposures Remaining
The following table lists the approximate number of pictures that can be stored in internal memory
and on a 256 MB memory card. Note that the number of pictures that can be stored will differ
depending on the composition of the picture (due to JPEG compression). In addition, this number
may differ depending on the make of memory card, even if the capacity for the memory card is the
same.
1If the number of exposures remaining is 10,000 or more, the number of exposure
remaining display shows 9999.
2Print size at an output resolution of 300 dpi. Print sizes are calculated by dividing the
number of pixels by printer resolution (dpi) and multiplying by 2.54 cm (1 in.). However, at
the same image size, pictures printed at higher resolutions will print smaller than the size
indicated, and those printed at lower resolutions will print larger than the size indicated.
Setting Internal memory
(approx. ## MB)
Memory card1
(256 MB) Print size2 (cm/in.)
hHigh (3648P)## 50 31 × 23/12.2 × 9
iNormal (3648) ## 90 31 × 23/12.2 × 9
KNormal (3072) ## 120 26 × 19.5/10.2 × 7.6
LNormal (2592) ## 170 22 × 16.5/8.6 × 6.4
MNormal (2048) ## 270 17 × 13/6.7 × 5.1
NPC screen (1024) ## 850 9 × 7/3.5 × 2.7
OTV screen (640) ## 1700 5 × 4/1.9 × 1.5
l16:9 (3584) 30 120 30.5 × 17/12 × 6.6
m16:9 (1920) ## 425 16 × 9/6.3 × 3.5
Q7115_25_UM_EN.book Page 85 Friday, May 30, 2008 2:32 PM
Q7115_25_UM_EN_1st
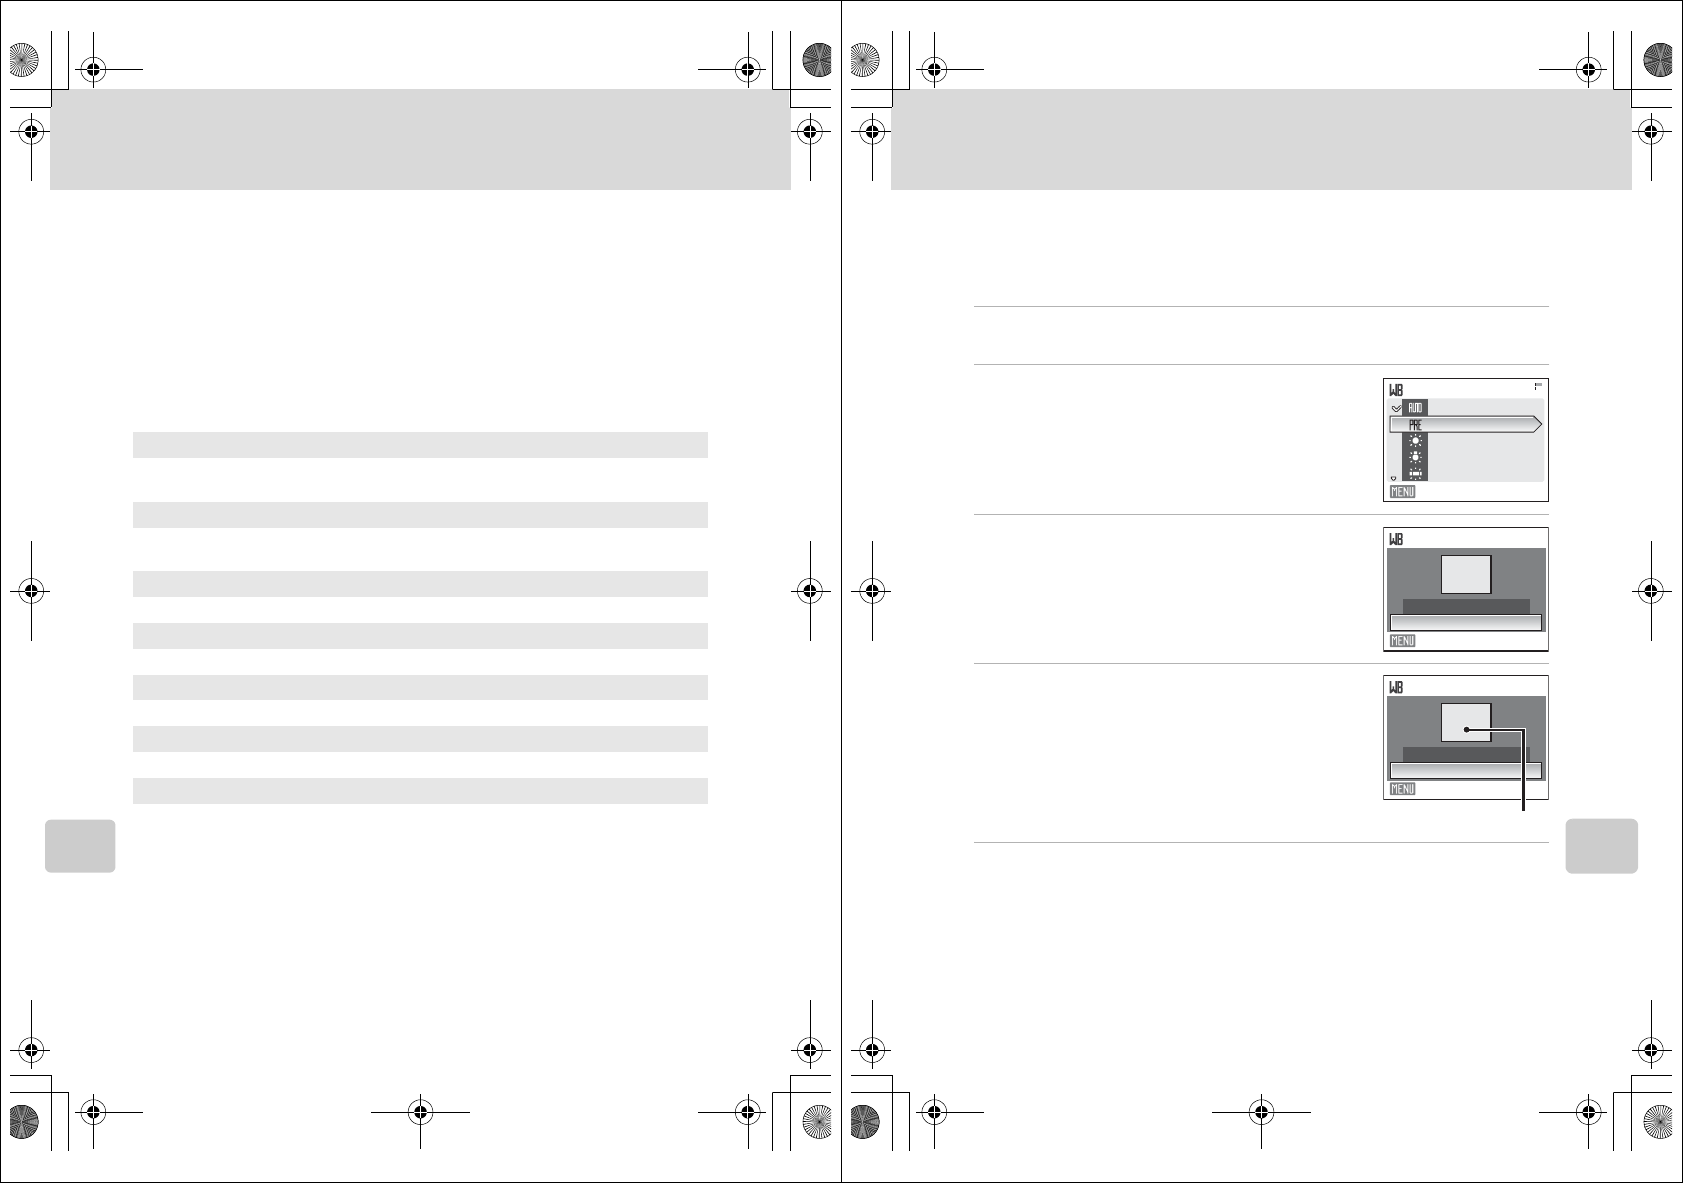
86
Shooting Options: The Shooting Menu
Shooting, Playback, and Setup Menus
B White Balance
The color of light reflected from an object varies with the color of the light source.
The human brain is able to adapt to changes in the color of the light source, with
the result that white objects appear white whether seen in the shade, direct
sunlight, or under incandescent lighting. Digital cameras can mimic this
adjustment by processing images according to the color of the light source. This is
known as “white balance.” For natural coloration, choose a white balance setting
that matches the light source before shooting. Although the default setting, Auto,
can be used under most types of lighting, you can apply the white balance setting
suited to a particular light source to achieve more accurate results.
The effects of the selected option can be previewed in the monitor. At settings
other than Auto, the icon for the current setting is displayed in the monitor (A6).
BFlash Mode
At white-balance settings other than Auto or Flash, turn the flash off (W) (A30).
aAuto (default setting)
White balance automatically adjusted to suit lighting conditions. Best choice in
most situations.
bPreset manual
Neutral-colored object used as reference to set white balance under unusual
lighting conditions, see “Preset Manual” (A87) for details.
cDaylight
White balance adjusted for direct sunlight.
dIncandescent
Use under incandescent lighting.
eFluorescent
Use under most types of fluorescent lighting.
fCloudy
Use when shooting under overcast skies.
gFlash
Use with the flash.
Q7115_25_UM_EN.book Page 86 Friday, May 30, 2008 2:32 PM
87
Shooting Options: The Shooting Menu
Shooting, Playback, and Setup Menus
Preset Manual
Preset manual is used with mixed lighting or to compensate for light sources with
a strong color cast (for example, to make pictures taken under a lamp with a red
shade look as though they had been taken under white light).
1Place a white or gray reference object under the lighting that will be
used during shooting.
2Use the rotary multi selector to choose
bPreset manual in the white balance menu,
and press the k button.
The camera zooms in.
3Choose Measure.
To apply the most recently measured value for preset
manual, choose Cancel and press the k button.
4Frame the reference object.
5Press the k button to measure the white balance value.
The shutter is released and the new white-balance value is set.
No pictures are recorded.
CNote on Preset Manual
Regardless of the flash mode selected, the flash will not fire when the k button is pressed in step 5.
Therefore, the camera cannot measure a value for preset manual for when the flash is used.
White balance
Exit
Auto
Auto
Daylight
Daylight
Auto
Daylight
Incandescent
Incandescent
Fluorescent
Fluorescent
Preset manual
Incandescent
Fluorescent
Preset manual
Exit
Measure
Cancel
Preset manual
Exit
Measure
Cancel
Reference object frame
Q7115_25_UM_EN.book Page 87 Friday, May 30, 2008 2:32 PM
Q7115_25_UM_EN_1st