Nikon 3143EB Wireless LAN Module User Manual Q7115 25 UM EN
Nikon Corporation Wireless LAN Module Q7115 25 UM EN
Nikon >
Contents
User Manual 3 fo 4
88
Shooting Options: The Shooting Menu
Shooting, Playback, and Setup Menus
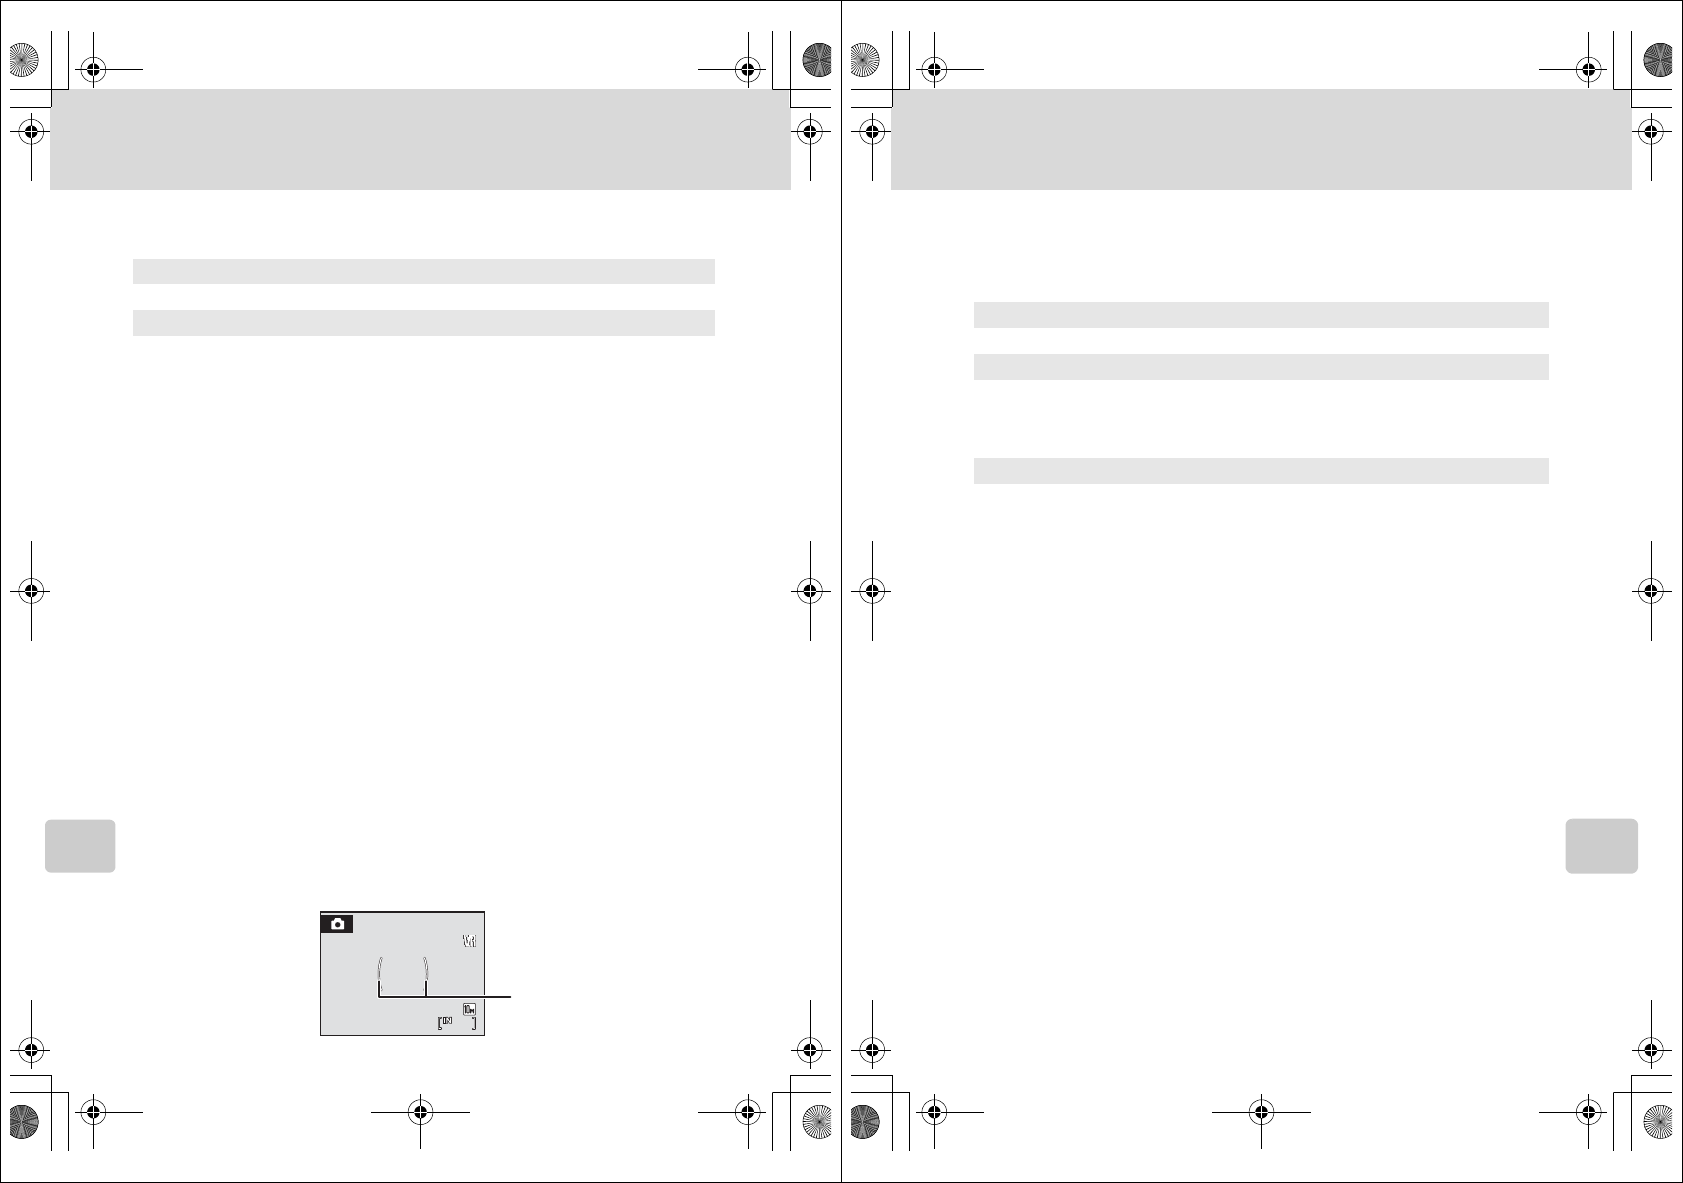
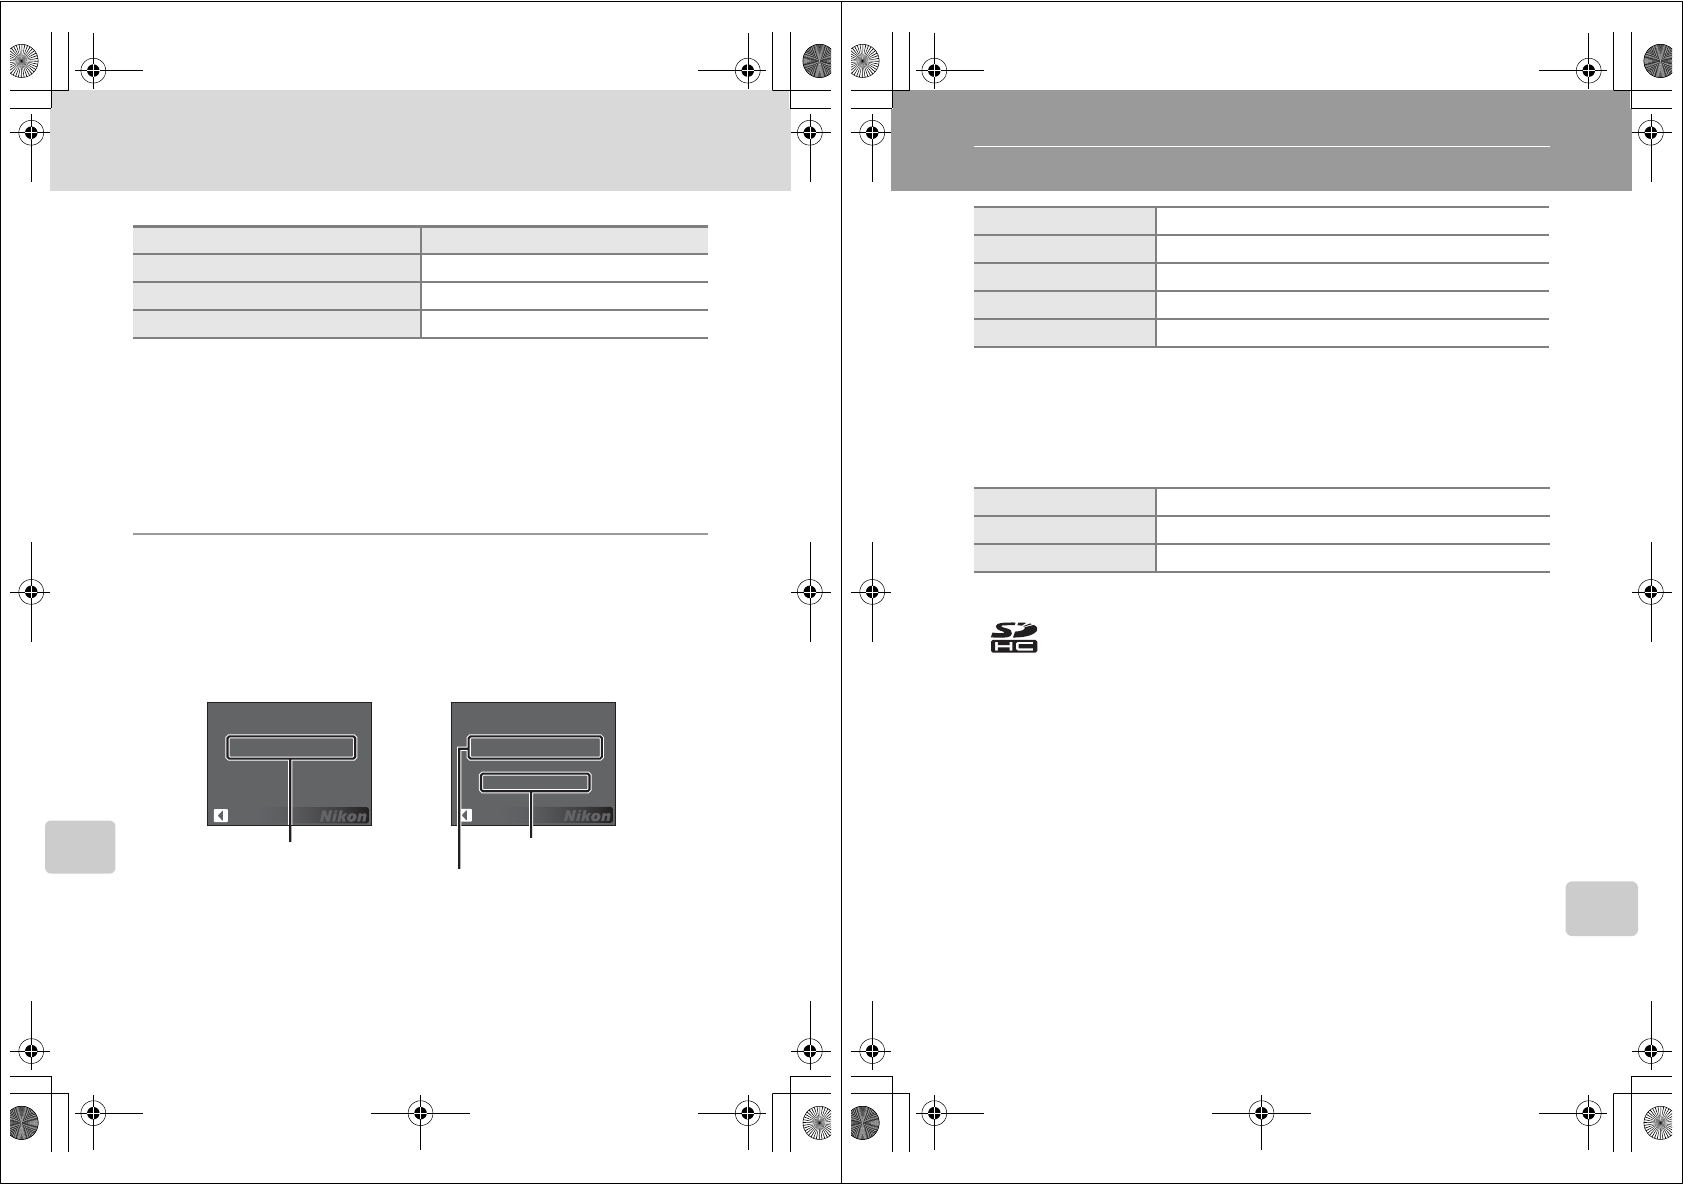
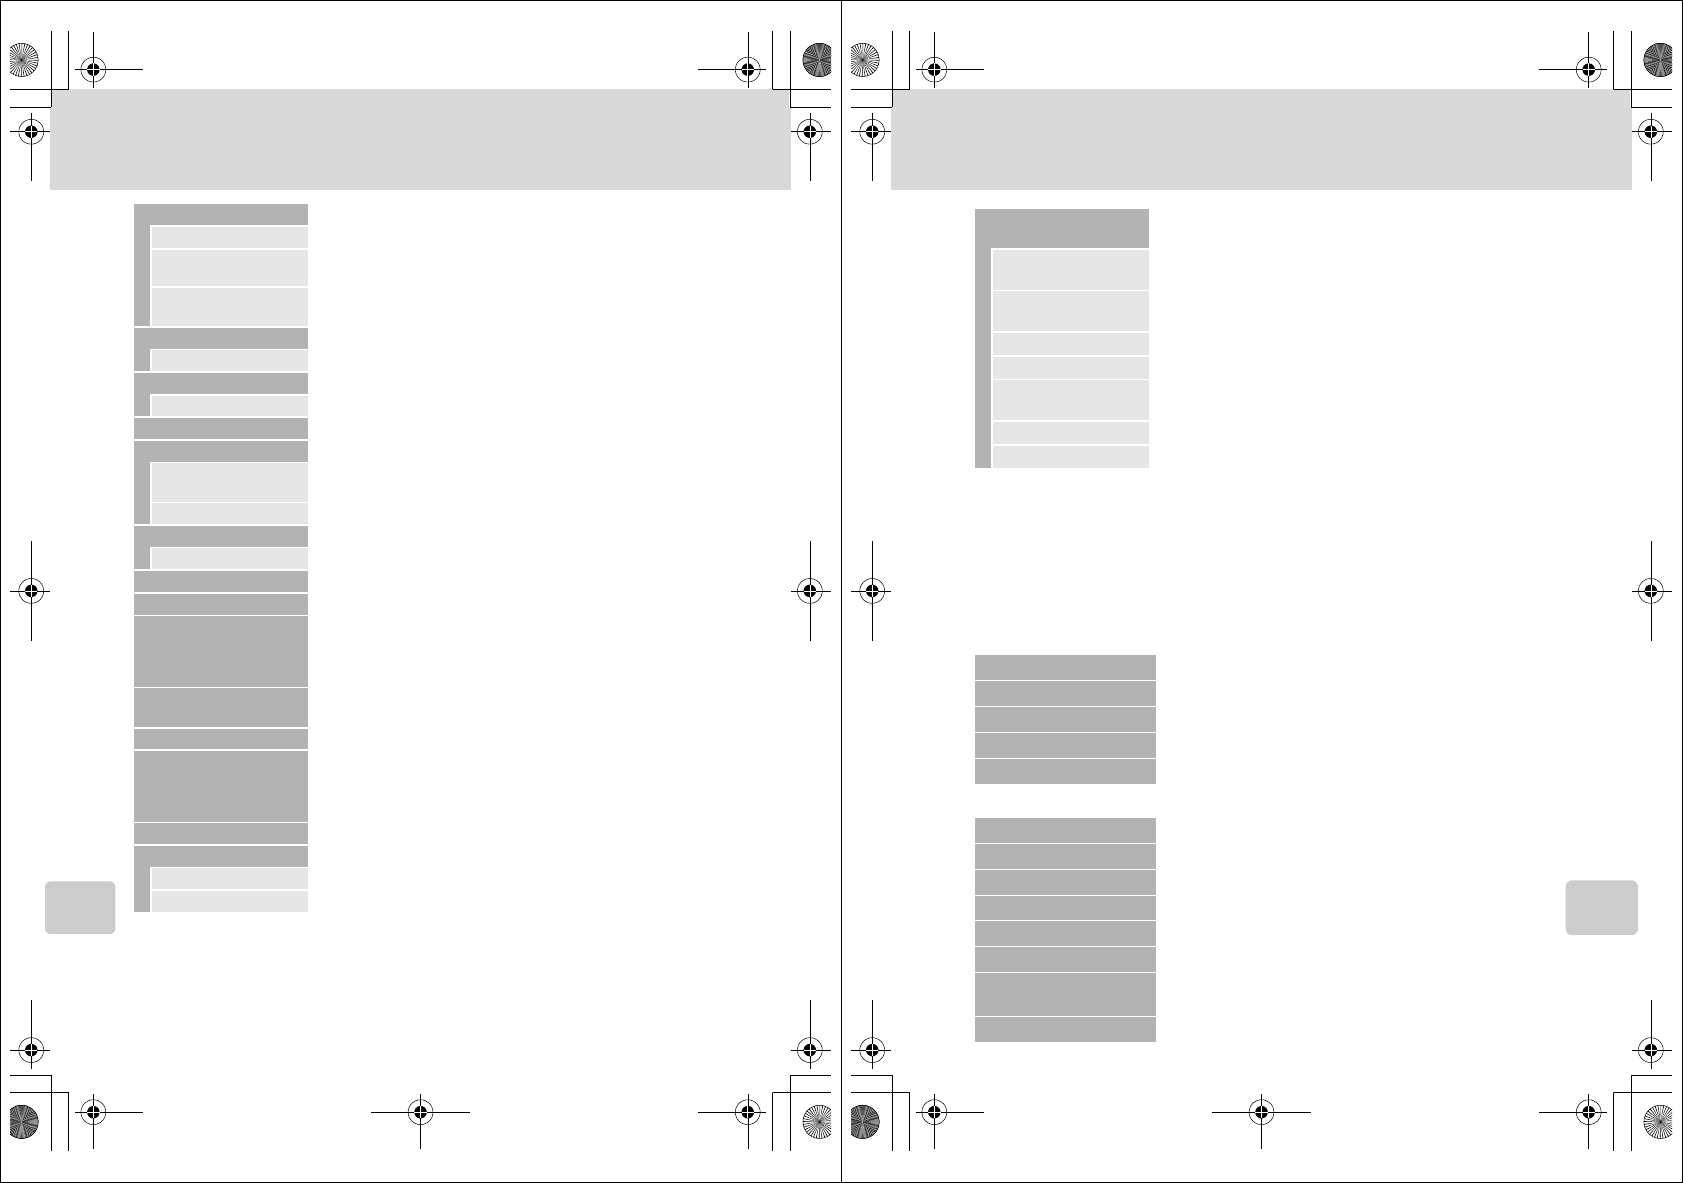
G Metering
Choose how the camera meters exposure.
BNote on Metering
When digital zoom is in effect, Metering is set to Center-weighted, and the metered area is not
displayed in the monitor.
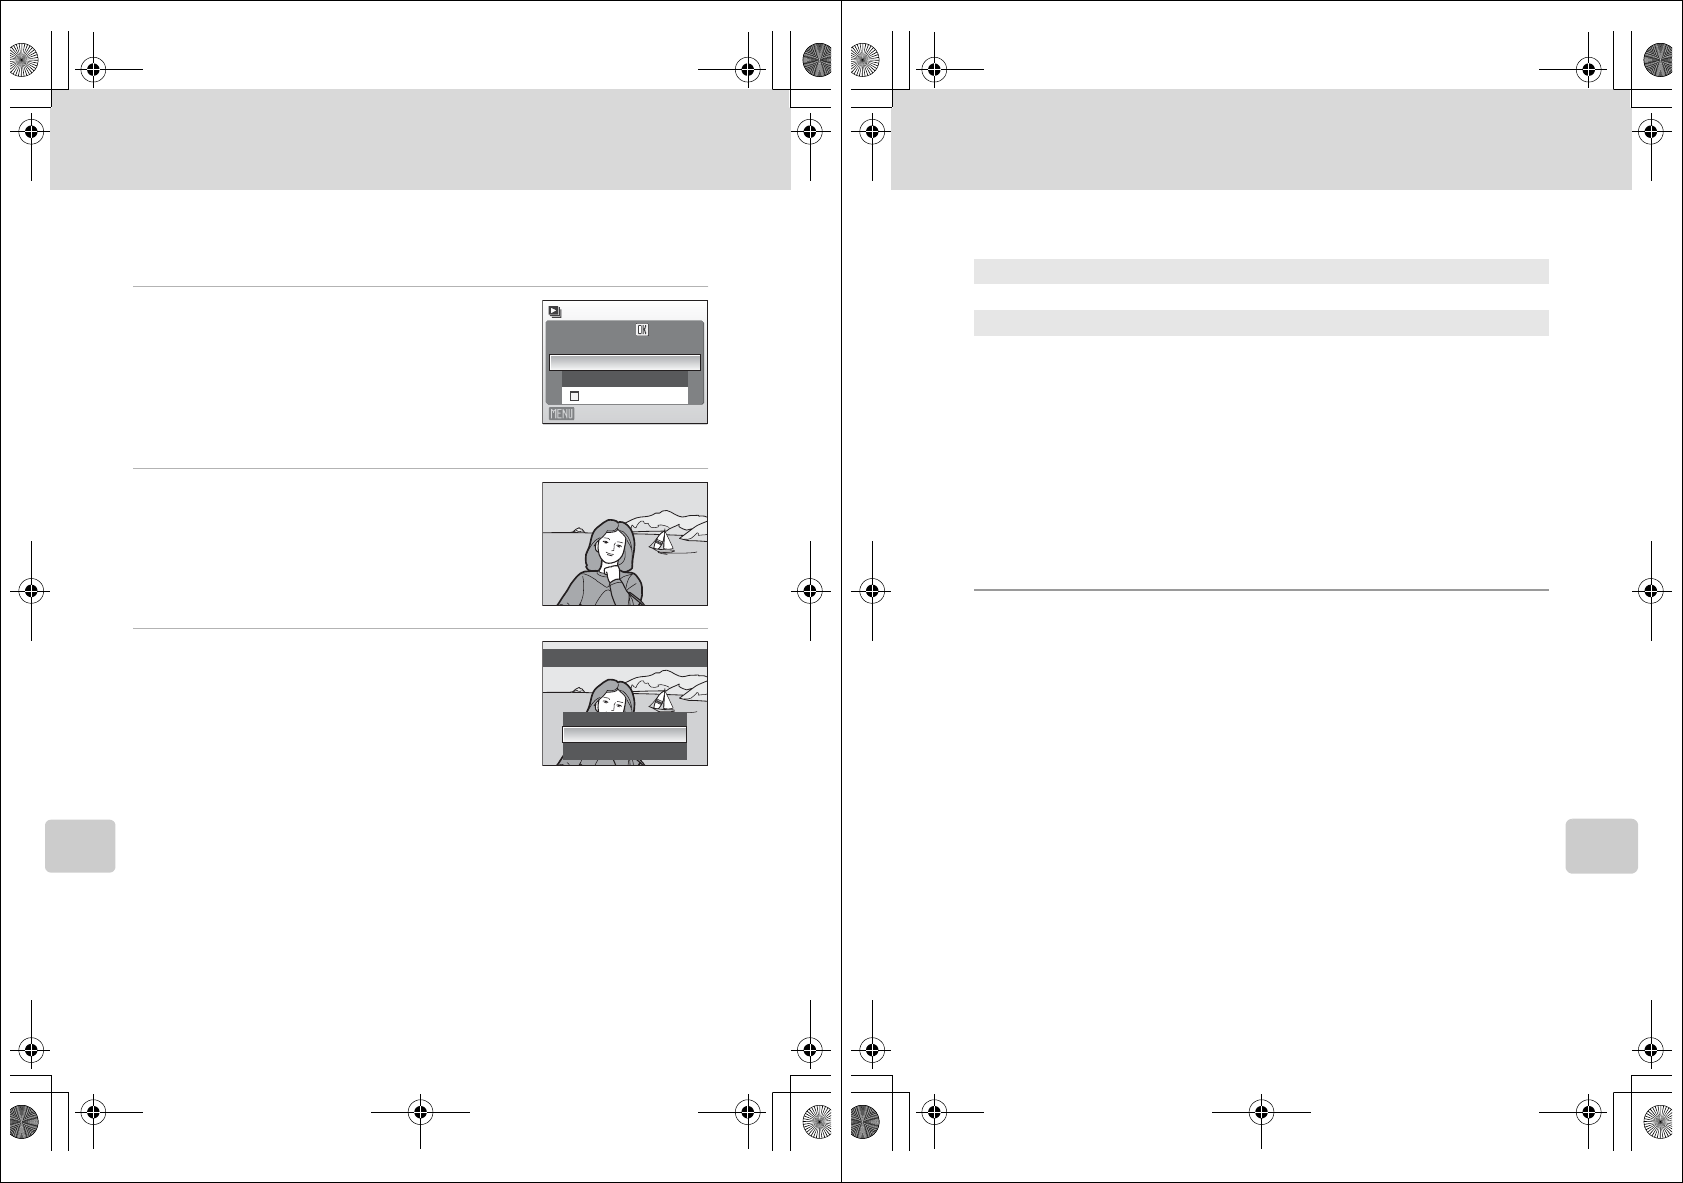
DMetering Area
The active metering area is displayed in the monitor when Center-weighted is selected.
GMatrix (default setting)
Camera sets exposure for entire frame. Recommended in most situations.
qCenter-weighted
Camera meters entire frame but assigns greatest weight to subject in center of
frame. Classic meter for portraits; preserves background details while letting lighting
conditions at center of frame determine exposure. Can be used with focus lock
(A92) to meter off-center subjects.
16
16
16
Active metering area
Q7115_25_UM_EN.book Page 88 Friday, May 30, 2008 2:32 PM
89
Shooting Options: The Shooting Menu
Shooting, Playback, and Setup Menus
C Continuous
Change settings to Continuous or Best Shot Selector (BSS). Flash will be switched
off when Continuous or BSS is selected. Focus, exposure, and white balance are
fixed at the values for the first picture in each series.
At settings other than Single, the indicator for the current setting is displayed in
the monitor (A6).
BNote on Continuous Shooting
The maximum frame rate with continuous shooting may vary, depending upon the current image
mode setting and the memory card used.
BNote on Best Shot Selector
BSS may not produce the desired results if the subject moves or the composition changes while the
shutter-release button is pressed all the way down.
USingle (default setting)
One picture is taken each time shutter-release button is pressed.
VContinuous
While the shutter-release button is held down, pictures are taken at rate of up to
about ## frames per second (fps) when image mode is set to i Normal (3648).
Shooting ends when the shutter-release button is released, or ten shots have been
taken with the shutter-release button held down.
jBSS
BSS is recommended for shooting under low lighting without the flash, with the
camera zoomed in, or in other situations in which camera shake is likely to blur
pictures.
The camera takes up to ten pictures while the shutter-release button is held down.
The sharpest picture (picture with the most detail) in the series is automatically
selected and saved.
Q7115_25_UM_EN.book Page 89 Friday, May 30, 2008 2:32 PM
Q7115_25_UM_EN_1st
90
Shooting Options: The Shooting Menu
Shooting, Playback, and Setup Menus
E ISO Sensitivity
Sensitivity is a measure of how quickly the camera reacts to light. The higher the
sensitivity, the less light needed to make an exposure. Although a high ISO rating
is suited for taking pictures of subjects in action or in poor lighting, high sensitivity
is often associated with “noise” -randomly spaced, brightly colored pixels
concentrated in dark parts of the image.
At settings other than Auto, the current setting is displayed in the monitor (A6).
If Auto is selected and the sensitivity is raised above an ISO 100, the E icon will
be displayed (A31).
F Color Options
Make colors more vivid or record pictures in monochrome.
The effects of the selected option can be previewed in the monitor. At settings
other than Standard color, the icon for the current setting is displayed in the
monitor (A6). Monitor color tones also change depending upon the setting.
Auto (default setting)
Sensitivity is ISO 100 under normal conditions; when lighting is poor, the camera
compensates by raising sensitivity to a maximum of ISO 1600#.
100, 200, 400, 800, 1600, 3200#
Sensitivity will be locked at the specified value.
nStandard color (default setting)
Use for pictures exhibiting natural color.
oVivid color
Use to achieve a vivid, “photoprint” effect.
pBlack-and-white
Record pictures in black-and-white.
qSepia
Record pictures in sepia tones.
rCyanotype
Record pictures in cyan-blue monochrome.
uPastel
Change to a pastel shade.
Q7115_25_UM_EN.book Page 90 Friday, May 30, 2008 2:32 PM
91
Shooting Options: The Shooting Menu
Shooting, Playback, and Setup Menus
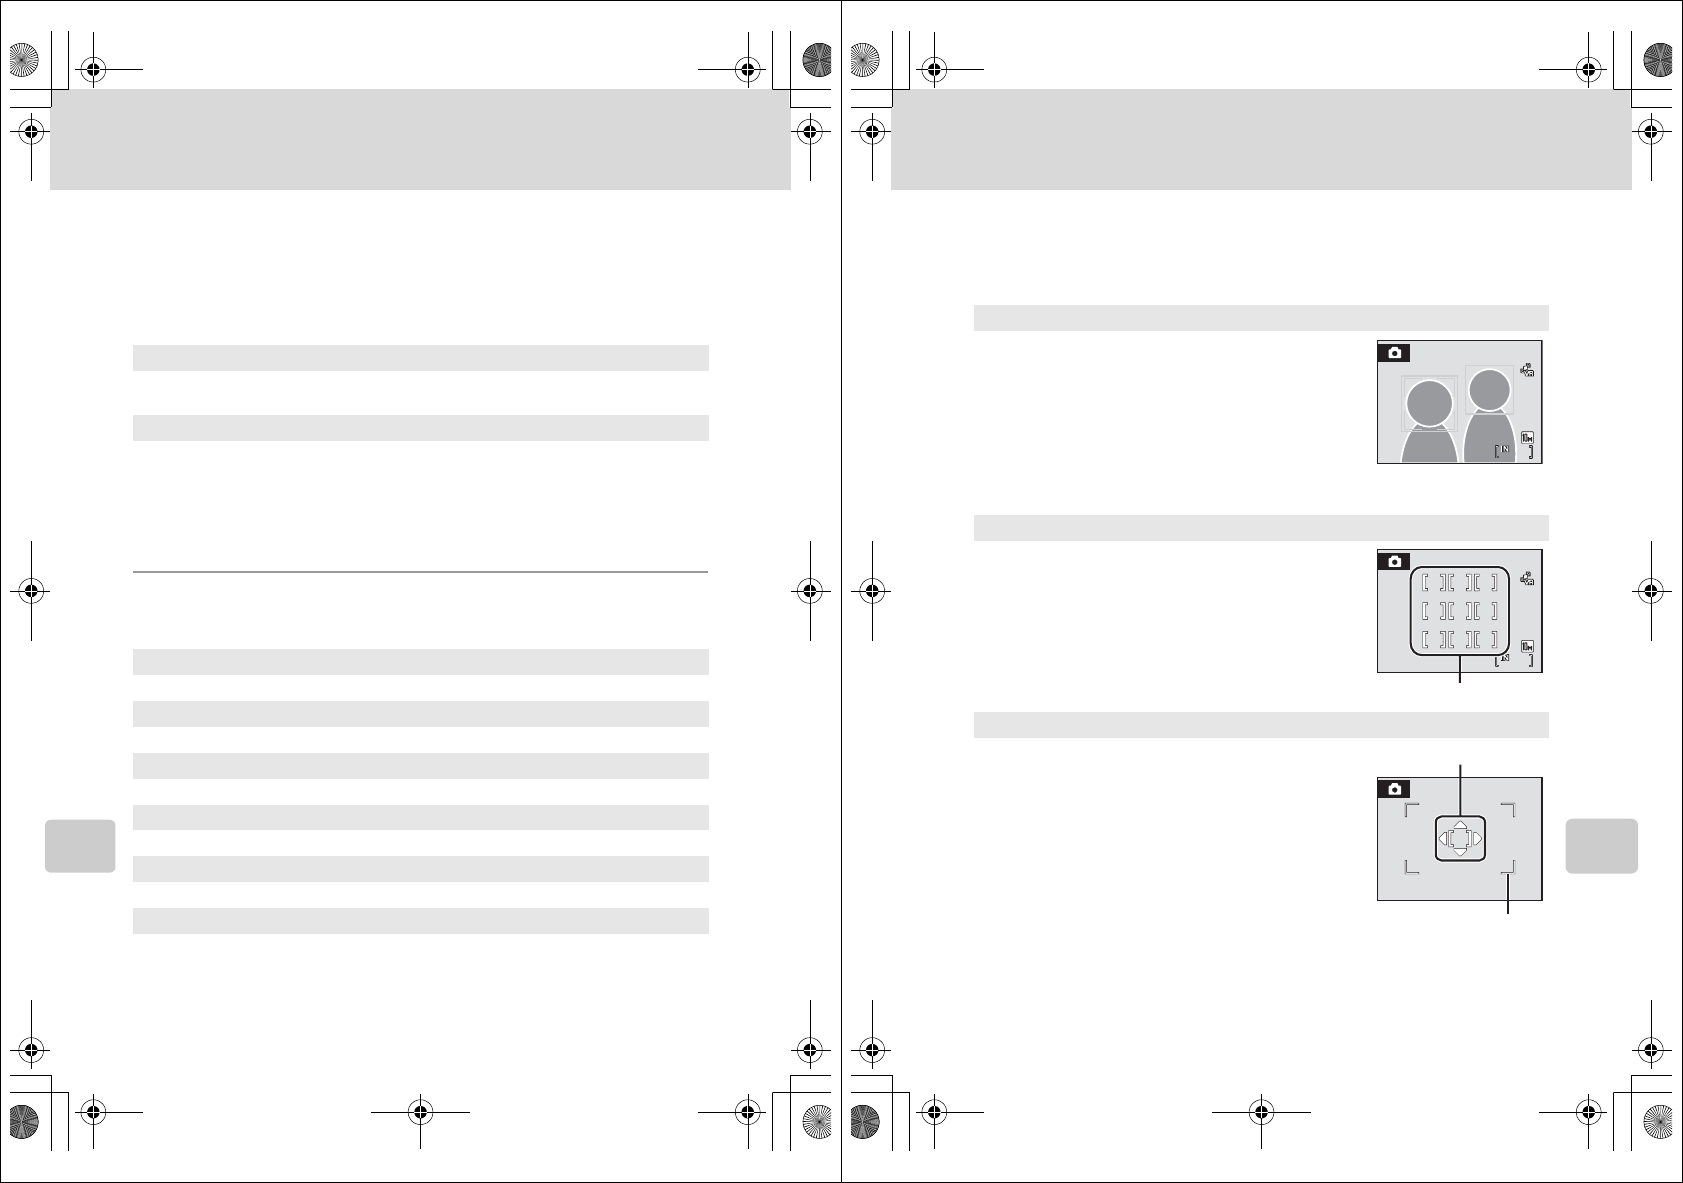
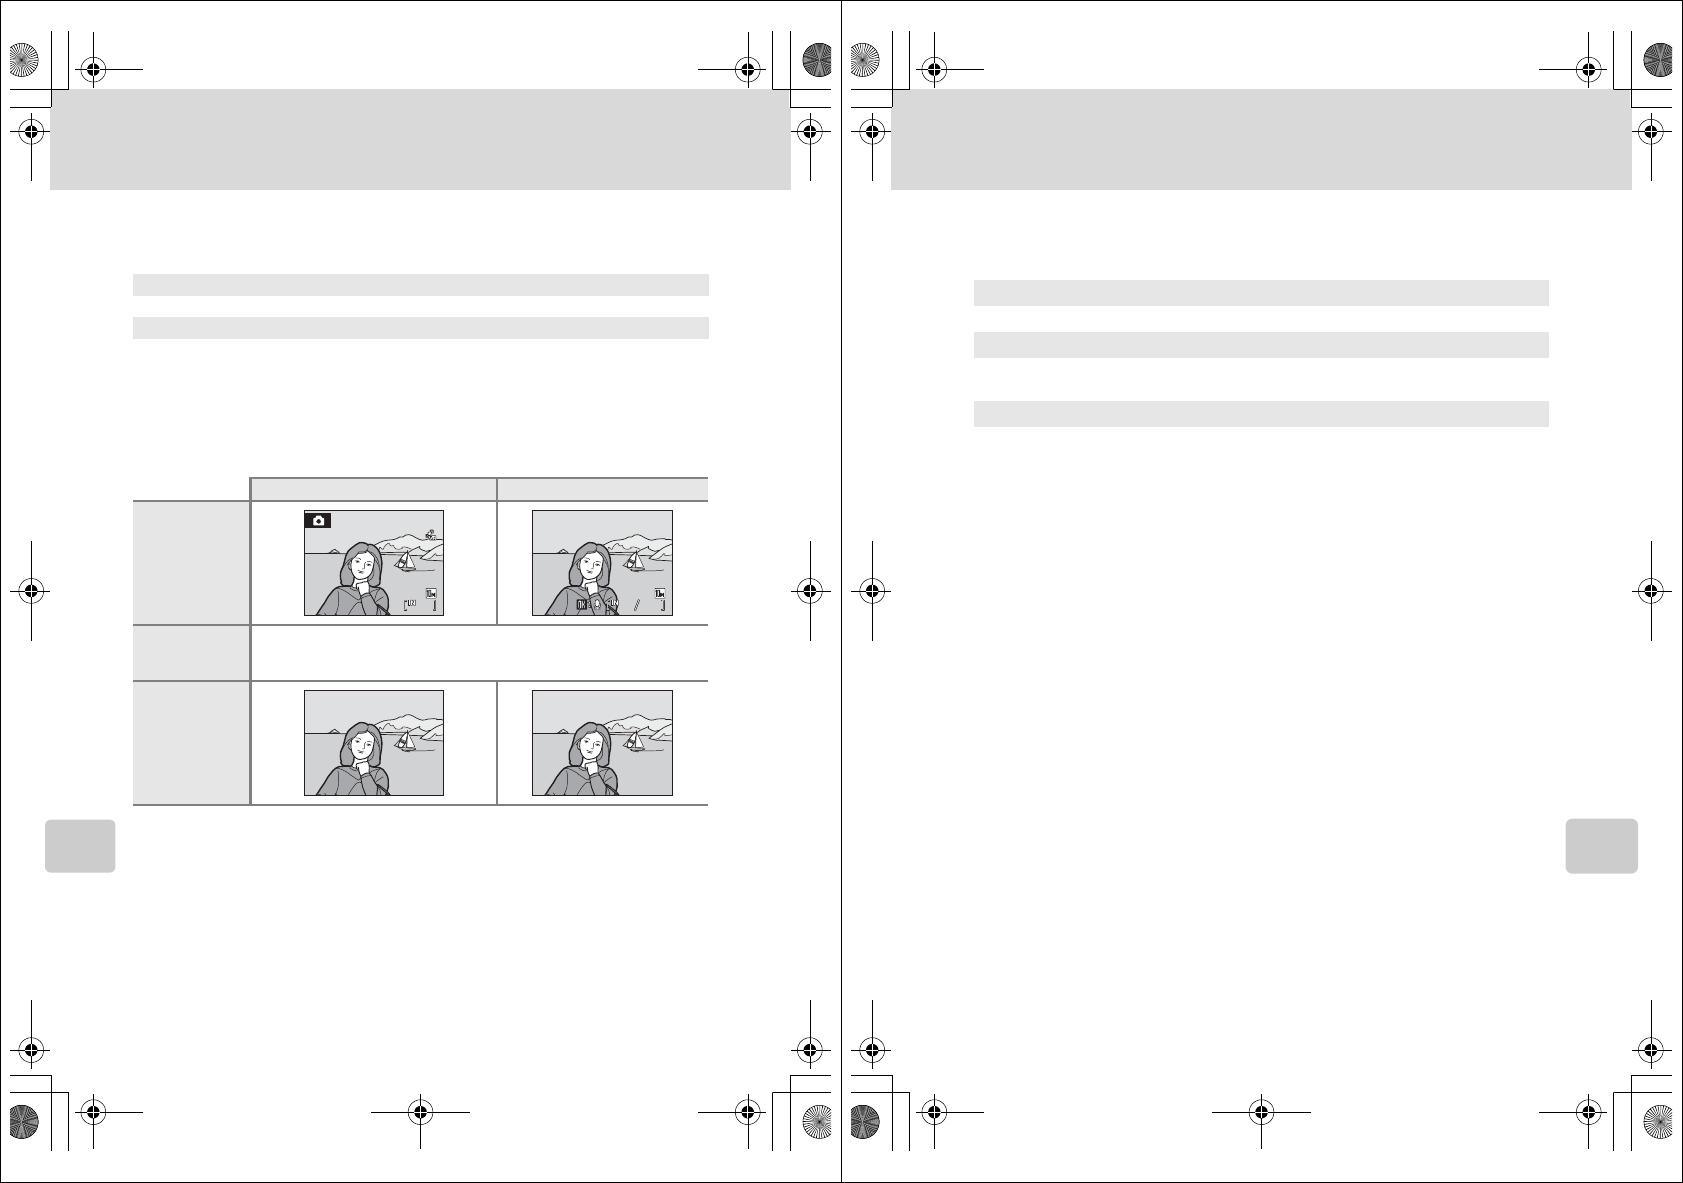
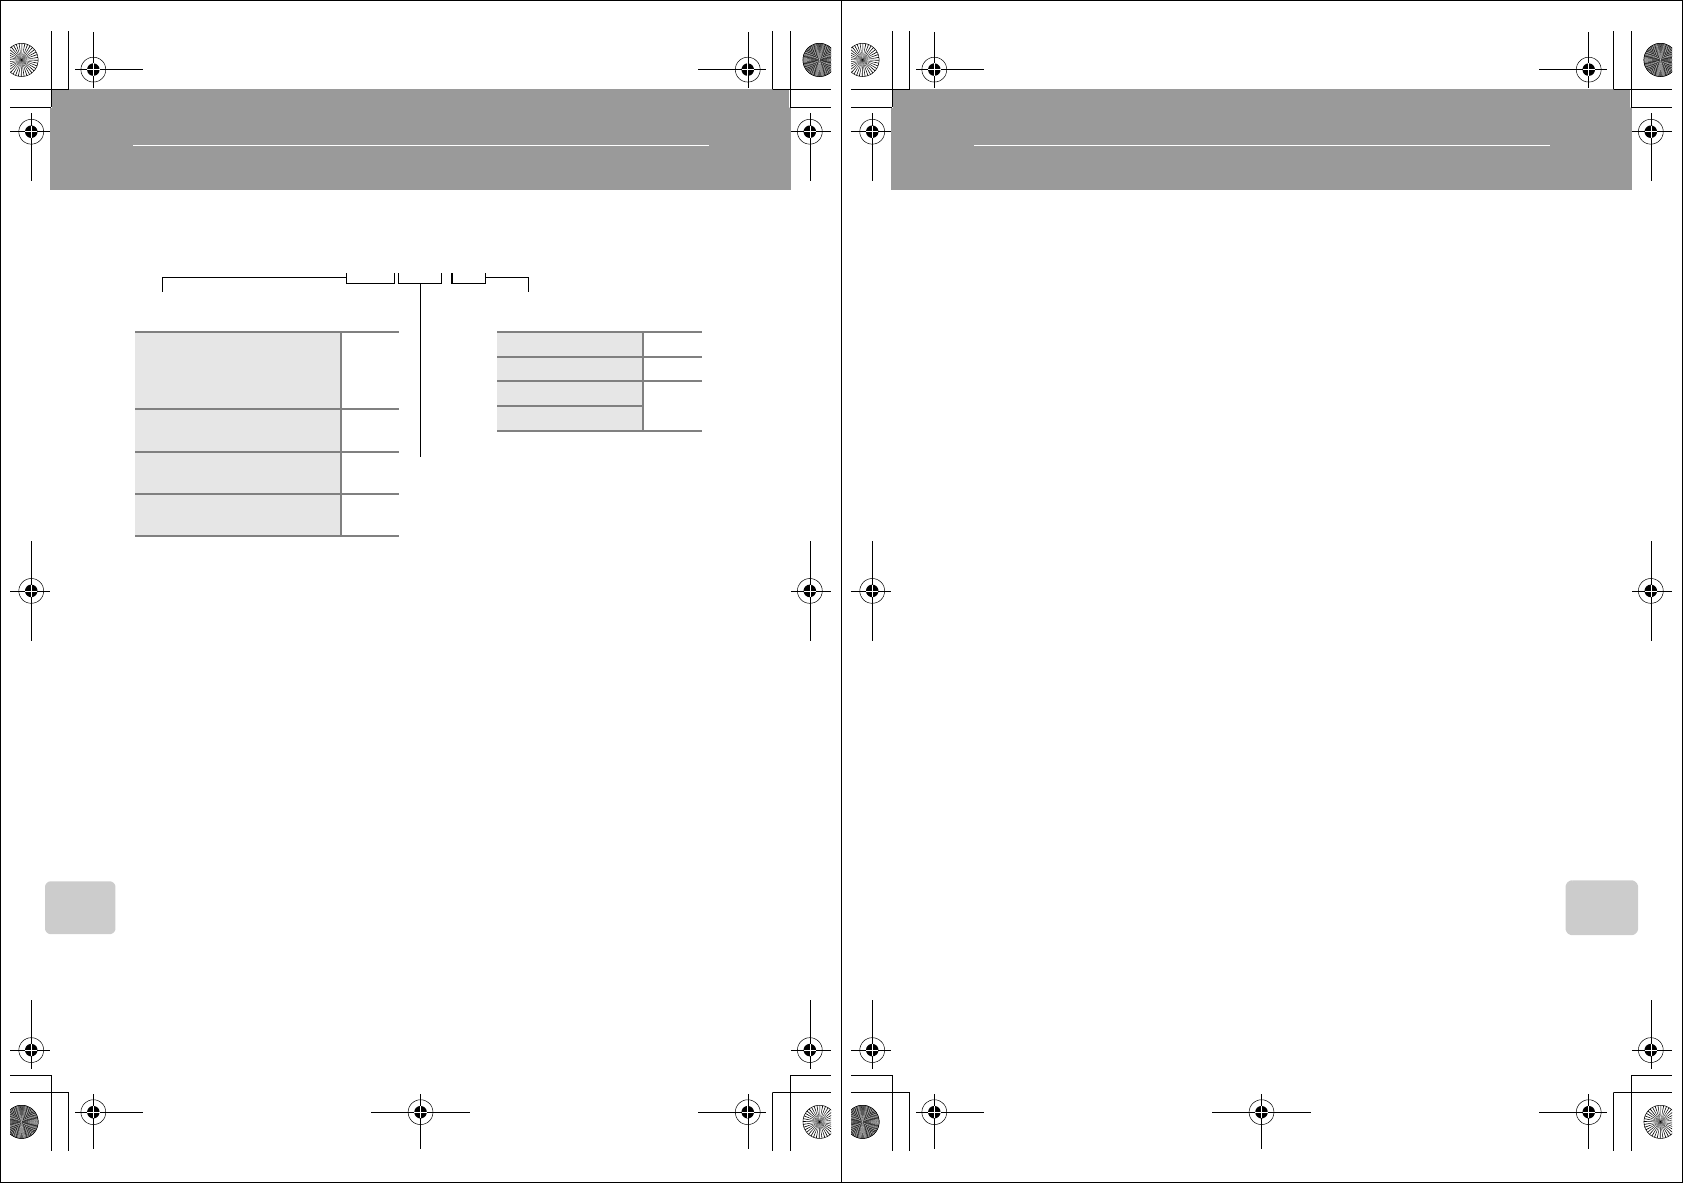
G AF Area Mode
Use this option to determine where the camera focuses.
When digital zoom is in effect, the camera will focus on the subject in the center
focus area regardless of the applied AF area mode option.
zFace priority
The camera automatically detects and focuses on a
face looking toward the camera (Shooting with Face
Priority ➝A93). If the camera detects multiple
faces, the camera focuses on the face closest to the
camera.
When shooting pictures of subjects other than
people, or framing a subject with which no face is
recognized, AF area mode will be set to Auto. The
camera chooses the focus area (one of nine)
containing the subject closest to the camera and focuses on the subject.
wAuto (default setting)
Camera automatically selects the focus area (one of
nine) containing the subject closest to the camera.
Press the shutter-release button halfway to activate
the focus area. When the shutter-release button is
pressed halfway, the focus area selected by the
camera will be displayed in the monitor.
xManual
This option is suited to situations in which the
intended subject is relatively still and not positioned
in the center of the frame.
Press the rotary multi selector H, I, J or K to
select one of 99 focus areas displayed in the
monitor’s focus-area selection screen, and shoot.
To end focus-area selection and adjust the flash
mode, macro mode, self-timer and exposure
compensation settings, press the k button. To
return to the focus-area selection screen, press the
k button.
16
16
16
16
16
16
Focus areas
AF area
Selectable focus areas
Q7115_25_UM_EN.book Page 91 Friday, May 30, 2008 2:32 PM
Q7115_25_UM_EN_1st
92
Shooting Options: The Shooting Menu
Shooting, Playback, and Setup Menus
DFocus Lock
To focus on off-center subjects when Center is selected for AF area mode, use focus lock as
described below.
1Position the subject in the center of the frame.
2Press the shutter-release button halfway.
•Confirm that the focus area indicator is green.
3Continue holding down the shutter-release button halfway
and recompose the picture.
•Be sure that the distance between the camera and the
subject does not change.
4Press the shutter-release button the rest of the way down to
shoot.
DMore Information
See “Autofocus” (A27) for more information.
yCenter
Camera focuses on subject in center of frame.
Center focus area is always used.
16
16
16
AF area
16
16
16
F2.7
F2.7
1/60
1/60
1/60 F2.7
F2.7
F2.7
1/60
1/60
1/60 F2.7
11_Menus.fm Page 92 Monday, June 2, 2008 9:56 AM
93
Shooting Options: The Shooting Menu
Shooting, Playback, and Setup Menus
Shooting with Face Priority
The face-priority function is activated when Face priority is selected for AF area
mode (A91), when shooting in Portrait (A36) or Night portrait (A37) scene
mode, when the camera selects Portrait or Night portrait scene mode in scene
auto selector mode (A45), or when shooting in smile mode (A49).
The camera automatically detects and focuses on a face looking toward the
camera.
1Frame a picture.
When the camera detects a face looking toward the
camera, that face will be framed by a yellow double
border.
When the camera detects more than one face, operation varies, depending upon the
shooting mode, as follows.
2Press the shutter-release button halfway.
The camera focuses on the face framed by the double
border. The double border will glow green and focus will
be locked.
When the camera is unable to focus, the double border
will blink. Press the shutter-release button halfway again
and focus.
Press the shutter-release button the rest of the way down
to take the picture.
You don’t need to press the shutter-release button halfway in smile mode. If the camera
detects the smiling face, the shutter is automatically released (A49).
Shooting mode Faces framed by
a double border
The number of faces
to be recognized
A (auto) mode
(Face priority)The face closest to the camera
* The other faces are framed by
a single border.
Up to 12
Scene mode: Portrait,
Night portrait
Smile mode
The face at the center of the
frame
* The other faces are framed by
a single border.
Up to 3
10
10
10
F5.61/250
1/250 F5.6
11_Menus.fm Page 93 Monday, June 2, 2008 9:56 AM
Q7115_25_UM_EN_1st

94
Shooting Options: The Shooting Menu
Shooting, Playback, and Setup Menus
BNotes on Face Priority
•When Face priority is selected for AF area mode, the setting will automatically switch to Auto if
no face is detected when the shutter-release button is pressed halfway.
•If no face is detected when the shutter-release button is pressed halfway in Portrait or Night
portrait scene mode, or smile mode, the camera will focus on the subject in the center focus area.
•The camera may be unable to detect faces in the following situations:
- When faces are partially hidden by sunglasses or other obstructions
- When faces take up too much or too little of the frame
- When the subject is not looking directly at the camera
•The camera’s ability to detect faces depends on a variety of factors, including whether or not the
subject is facing the camera.
•In some rare cases shooting subjects with which autofocus may not perform as expected (A27),
the subject may not be in focus despite the fact that the double border glows green. Should this
occur, switch to A (auto) mode and set AF area mode to Manual or Center, refocus on another
subject positioned at the same distance from the camera as the actual portrait subject, and use
focus lock (A92).
•When pictures in which a face was detected during shooting are played back, the pictures will be
automatically rotated for playback display, according to the orientation of the face detected.
I Autofocus Mode
Choose how the camera focuses.
BNotes on Autofocus Mode
Autofocus mode will be automatically fixed at Single AF when Face priority is selected for AF
area mode (A91).
ASingle AF (default setting)
Camera focuses when the shutter-release button is pressed halfway.
BFull-time AF
Camera adjusts focus continuously until the shutter-release button is pressed
halfway. Use with moving subjects.
Q7115_25_UM_EN.book Page 94 Friday, May 30, 2008 2:32 PM
95
Shooting Options: The Shooting Menu
Shooting, Playback, and Setup Menus
Functions that Cannot Be Applied Simultaneously
Restrictions apply to the following settings in A (auto) mode.
Flash mode
Flash mode is automatically set to W (Off) and cannot be adjusted when
Continuous or BSS is selected for the Continuous setting. Selecting Single for
Continuous restores the last flash mode setting applied.
Self-timer
If self-timer is on, only one picture will be taken when the shutter is released,
regardless of settings selected for the Continuous setting. The last Continuous
setting applied is restored when picture is taken or self-timer is turned off.
White balance and Color options
White balance is automatically set to Auto and cannot be adjusted when Black-
and-white, Sepia, or Cyanotype is selected for Color options.
Selecting Standard color, Vivid color, or Pastel restores the last White balance
setting applied.
Autofocus mode
Autofocus mode is automatically set to Single AF and cannot be adjusted when
Face priority is selected for AF area mode.
The last autofocus mode setting applied is restored when any setting other than
Face priority is selected for AF area mode.
Q7115_25_UM_EN.book Page 95 Friday, May 30, 2008 2:32 PM
Q7115_25_UM_EN_1st
96
Shooting, Playback, and Setup Menus
Playback Options: The Playback Menu
The playback menu contains the following options.
Displaying the Playback Menu
Enter the playback mode by pressing the c button.
Display the playback menu by pressing the d button.
•Use the rotary multi selector to choose and apply settings. (A9)
•To exit the playback menu, press the d button.
ID-Lighting A54
Enhances brightness and contrast in dark portions of pictures.
aPrint set A81
Select pictures to print and the number of copies for each.
bSlide show A98
View pictures stored in the internal memory or on a memory card in an
automatic slide show.
cDelete A99
Delete all or selected pictures.
dProtect A99
Protect selected pictures from accidental deletion.
fRotate image A100
Change the orientation of an existing picture.
gSmall pic. A56
Create a small copy of the current picture.
hCopy A101
Copy files between memory card and internal memory.
Playback menu
D-Lighting
Print set
Slide show
Delete
Protect
Exit
Q7115_25_UM_EN.book Page 96 Friday, May 30, 2008 2:32 PM
97
Playback Options: The Playback Menu
Shooting, Playback, and Setup Menus
Selecting Pictures
The picture selection screen, as shown at right, will be
displayed with the following menus:
•Playback menu:Print set (A81)
Delete>Erase selected images
(A99)
Protect (A99)
Rotate image (A100)
Copy>Selected images (A101)
•Setup menu:Welcome screen (A104)
Follow the procedure described below to select pictures.
1Rotate the rotary multi selector, or press J or
K, to choose the desired picture.
Only one picture can be selected for Rotate image and
Welcome screen. Proceed to step 3.
Press the g (i) button to switch to full-frame playback.
Press the f (h) button to switch back to thumbnail
display.
2Press H or I to select ON or OFF (or the
number of copies).
When ON is selected, a check mark (y) is displayed in the
current picture. Repeat steps 1 and 2 to select additional
pictures.
3Press the k button to finalize picture selection.
Back
ON/OFF
Erase selected images
ON/OFF
Back
Erase selected images
ON/OFF
Back
Erase selected images
Q7115_25_UM_EN.book Page 97 Friday, May 30, 2008 2:32 PM
Q7115_25_UM_EN_1st
98
Playback Options: The Playback Menu
Shooting, Playback, and Setup Menus
b Slide Show
Play back pictures, stored in the internal memory or on a memory card, one by one
in an automated “slide show”.
1Use the rotary multi selector to choose Start
and press the k button.
To change the interval between pictures, choose Frame
intvl, select the desired interval time, and press the k
button before choosing Start.
To repeat the slide show automatically, enable Loop and
press the k button before choosing Start. The check
mark (w) will be added to the loop option when enabled.
2The slide show begins.
While the slide show is in progress, the following
operations can be performed:
•Press the rotary multi selector K to view pictures in the
order recorded, or J to view pictures in reverse order.
Press and hold K to fast forward, or J to rewind.
•Press the k button to pause the slide show.
3Choose End or Restart.
When the slide show ends or is paused, choose End and
press the k button to return to the playback menu, or
choose Restart to play the slide show again.
BNotes on Slide Show
•Movies are not included in slide shows.
•Slide shows play for a maximum of 30 minutes, even when Loop is selected (A113).
Slide show
Exit
Loop
Frame intvl
Start
Pause:
Frame intvl
Restart
End
Pause
Q7115_25_UM_EN.book Page 98 Friday, May 30, 2008 2:32 PM
99
Playback Options: The Playback Menu
Shooting, Playback, and Setup Menus
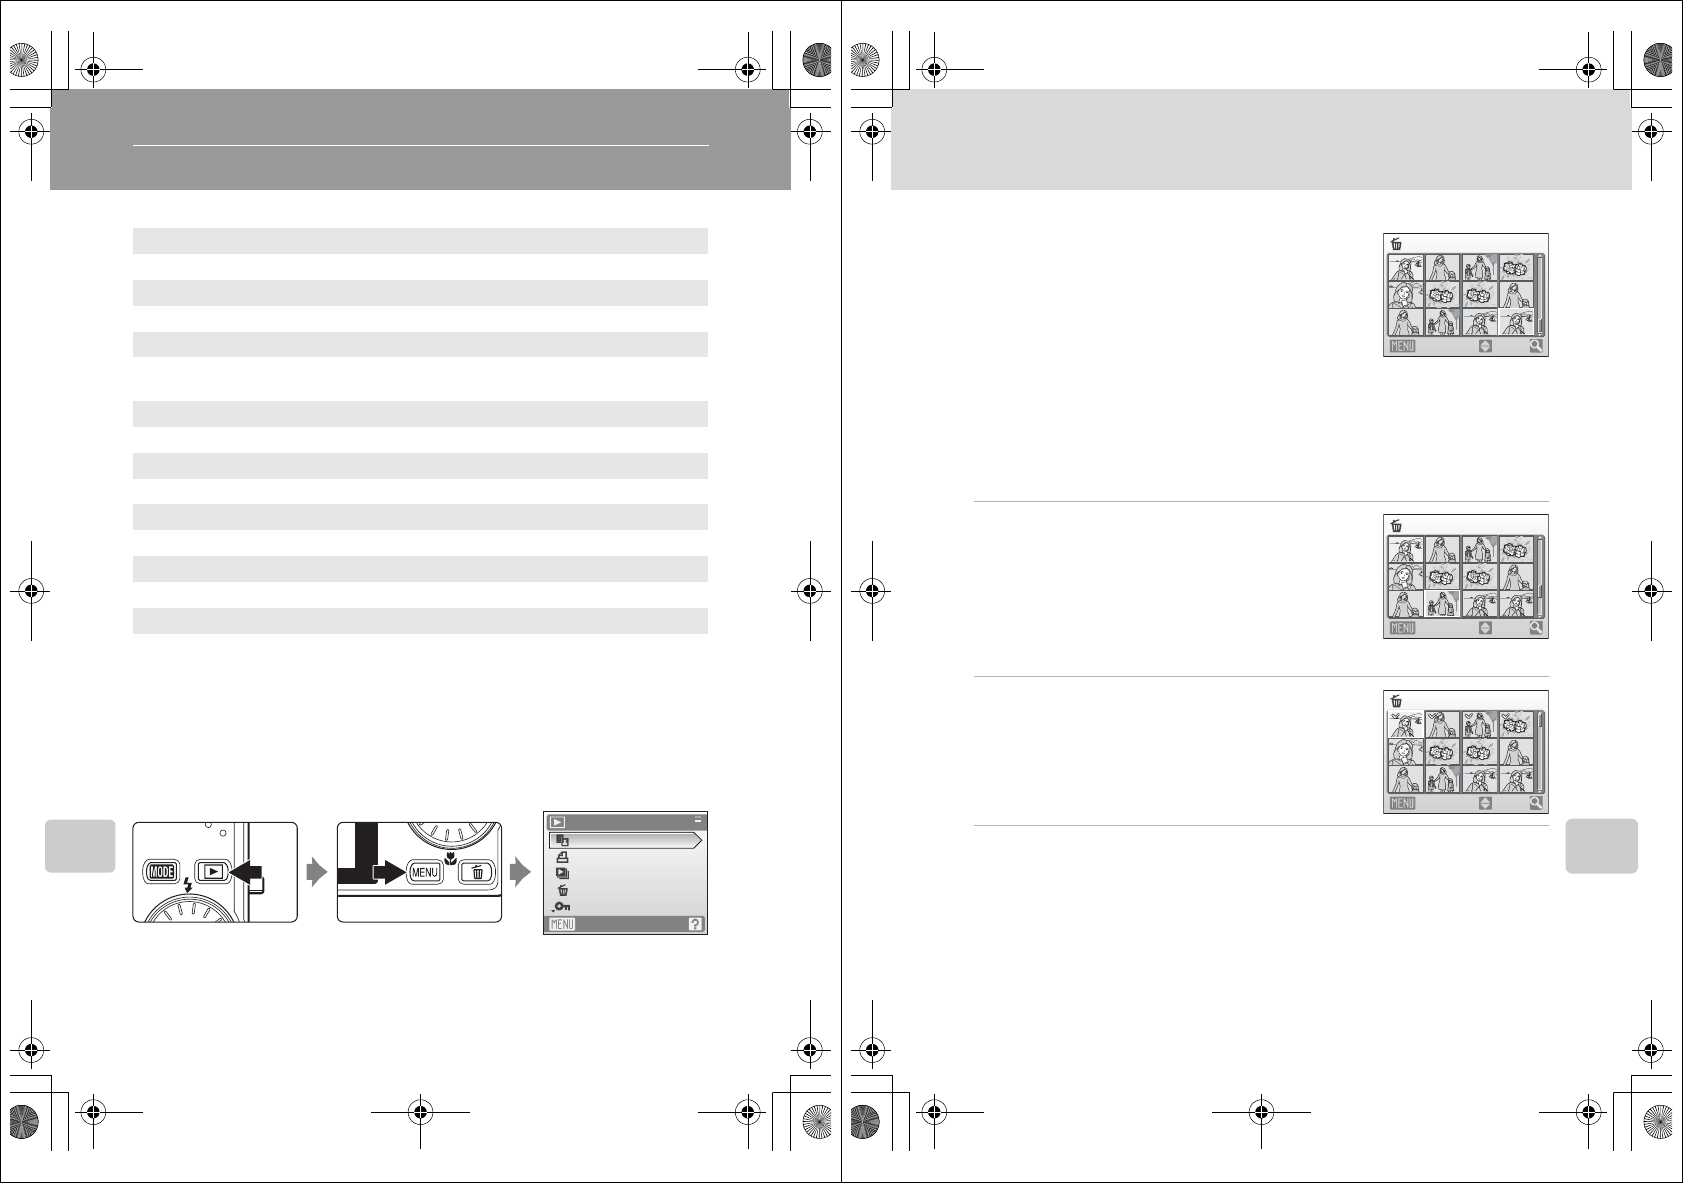
c Delete
Delete selected pictures or all pictures.
CNotes on Deletion
•Once deleted, pictures cannot be recovered. Transfer important images to a computer before
deletion.
•Pictures marked with the s icon are protected and cannot be deleted.
CDeleting Picture Bank Images (For Users of the COOLPIX S610c)
Select the Picture Bank images option (## of the Wireless LAN Connection Guide) from the Delete
item in list by date menu to delete only those pictures, taken on the specified date, that have already
been uploaded to the my Picturetown server.
d Protect
Protect selected pictures from accidental deletion (Selecting Pictures ➝ A97).
Note, however, that formatting the camera’s internal memory or the memory card
will permanently erase protected files (A113).
Protected pictures are recognized by the s icon (A7, 51) in playback mode.
Erase selected images
Delete selected pictures (A97).
Erase all images
Delete all pictures.
Q7115_25_UM_EN.book Page 99 Friday, May 30, 2008 2:32 PM
Q7115_25_UM_EN_1st
100
Playback Options: The Playback Menu
Shooting, Playback, and Setup Menus
f Rotate Image
Change the orientation of pictures played back in the camera’s monitor after
shooting.
Pictures can be rotated 90° clockwise or counterclockwise. Pictures that were
recorded in the portrait (vertical) orientation can be rotated up to 180° in either
direction. Select a picture in the picture selection screen (A97), and press the k
button to display the Rotate image screen.
Press the rotary multi selector J or K to rotate the picture 90°.
Press the k button to set the orientation displayed, and save the orientation data
with the picture.
Rotate image
Back Rotate
Rotate image
Back Rotate
Rotate image
Back Rotate
Rotate 90° counterclockwise Rotate 90° clockwise
Q7115_25_UM_EN.book Page 100 Friday, May 30, 2008 2:32 PM
101
Playback Options: The Playback Menu
Shooting, Playback, and Setup Menus
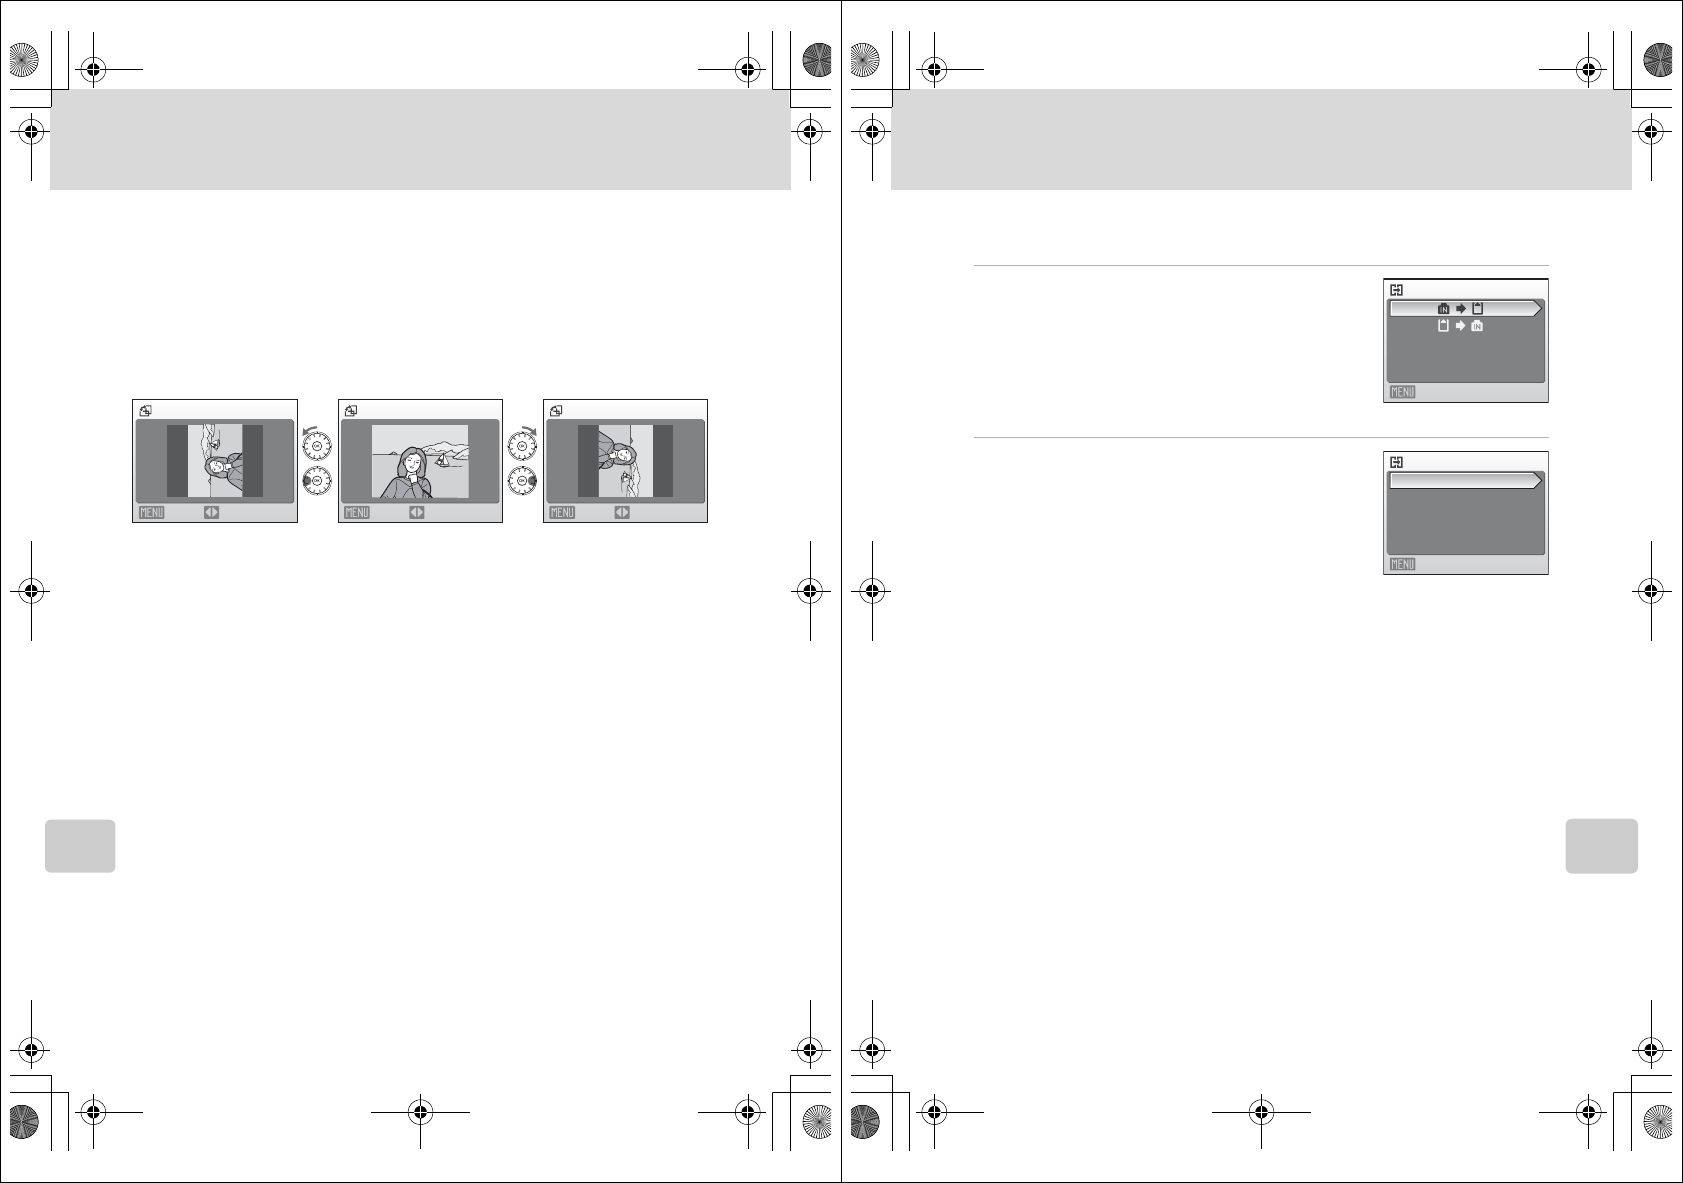
h Copy
Copy pictures between the internal memory and a memory card.
1Use the rotary multi selector to select an
option from the copy screen and press the k
button.
q: Copy pictures from internal memory to memory
card.
r: Copy pictures from memory card to internal
memory.
2Select a copy option and press the k button.
Selected images: Copy pictures selected from the
picture selection screen (A97).
All images: Copy all pictures.
BNotes on Copying Pictures
•JPEG-, AVI-, and WAV-format files can be copied. Files recorded in any other format cannot be
copied.
•If voice memos (A57) are attached to pictures selected for copying, voice memos are copied
with the pictures.
•Sound files recorded in voice recording mode (A65) can be copied using the Copy sound files
option (A69) in audio playback mode.
•Pictures recorded with another make or model of camera or that have been modified on a
computer cannot be copied.
•Edited copies have the same protection marking (A99) as the original, but are not marked for
printing (A81).
CMemory contains no images. Message
If there are no pictures stored on the memory card when playback mode is applied, the message,
Memory contains no images., will be displayed. Press the d button to display the copy option
screen, and copy the pictures stored in the camera’s internal memory to the memory card.
DMore Information
See “Image/Sound File and Folder Names” (A118) for more information.
Copy
Exit
Camera to card
All images
Exit
Selected images
Q7115_25_UM_EN.book Page 101 Friday, May 30, 2008 2:32 PM
Q7115_25_UM_EN_1st
102
Shooting, Playback, and Setup Menus
Basic Camera Setup: The Setup Menu
The setup menu contains the following options.
aMenus A103
Choose how menus are displayed.
cWelcome screen A104
Select screen displayed when camera is turned on.
dDate A105
Set camera clock and choose home and destination time zones.
eMonitor settings A108
Adjust monitor brightness and choose display style.
fDate imprint A109
Imprint date or date counter on pictures.
gVibration reduction A110
Choose whether or not vibration reduction is enabled.
U Motion detection A111
Increase the shutter speed and adjust the motion detection settings for shooting.
hAF assist A111
Enable or disable AF assist illumination.
u Digital zoom A112
Enable or disable digital zoom.
iSound settings A112
Adjust sound settings.
kAuto off A113
Set time before camera enters standby mode.
l/mFormat memory/Format card A113
Format internal memory or memory card.
nLanguage A114
Choose language used for camera monitor display.
oVideo mode A114
Adjust settings necessary for connection to TV.
pReset all A114
Restore camera settings to default values.
qWireless settings (COOLPIX S610c only)
Adjust settings for wireless LAN features. See the Wireless LAN Connection Guide for
more information.
rFirmware version A116
Display camera firmware version.
Q7115_25_UM_EN.book Page 102 Friday, May 30, 2008 2:32 PM
103
Basic Camera Setup: The Setup Menu
Shooting, Playback, and Setup Menus
Displaying the Setup Menu
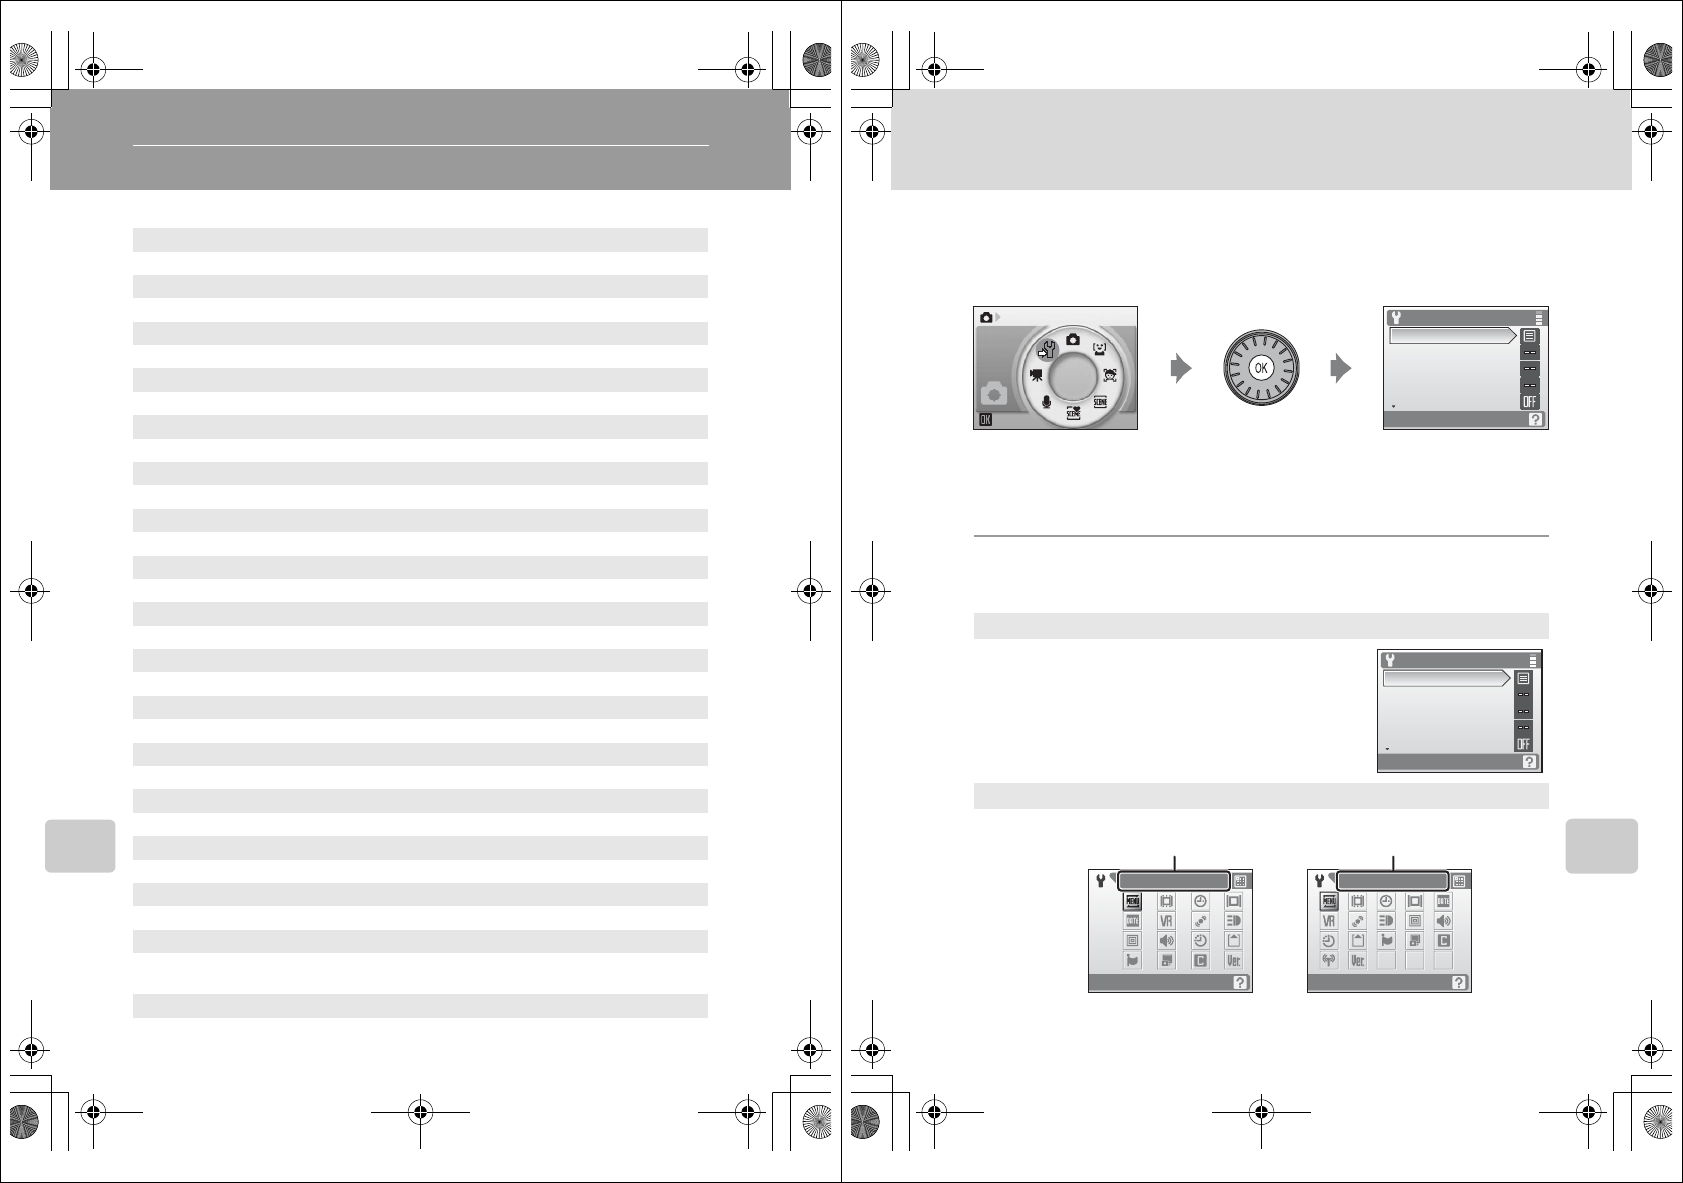
First, display the shooting-mode or playback-mode selection menu by pressing
the e button. Then select F (use the rotary multi selector), press the k
button.
•Use the rotary multi selector to choose and apply settings. (A9)
•To exit the setup menu, press the e button and choose any mode other
than setup mode.
a Menus
Select a format for menu display.
Text (default setting)
Menus are displayed in list format.
Icons
All menu items can be displayed in a single page.
Set up
Menus
Welcome screen
Date
Monitor settings
Date imprint
Set up
Date imprint
Set up
Menus
Welcome screen
Date
Monitor settings
Menus
Menu names
COOLPIX S610
Menus
Menu names
COOLPIX S610c
Q7115_25_UM_EN.book Page 103 Friday, May 30, 2008 2:32 PM
Q7115_25_UM_EN_1st
104
Basic Camera Setup: The Setup Menu
Shooting, Playback, and Setup Menus
c Welcome Screen
You can select the welcome screen to be displayed when the camera is turned on.
None (default setting)
Welcome screen is not displayed.
COOLPIX
Displays a welcome screen.
Select an image
Select a picture in the internal memory or on the memory card for the welcome
screen. Choose a picture in the picture selection screen (A97), and press the k
button.
As the selected image is stored in the camera, the image will appear in the welcome
screen even if the original picture is deleted.
Pictures taken at an image mode setting (A84) of l 16:9 (3584) or m 16:9
(1920), and copies created at a size of 320 × 240 or smaller using the crop (A55) or
small picture (A56) function, cannot be used.
11_Menus.fm Page 104 Monday, June 2, 2008 9:56 AM
105
Basic Camera Setup: The Setup Menu
Shooting, Playback, and Setup Menus
d Date
Set the camera clock and choose home and travel destination time zones.
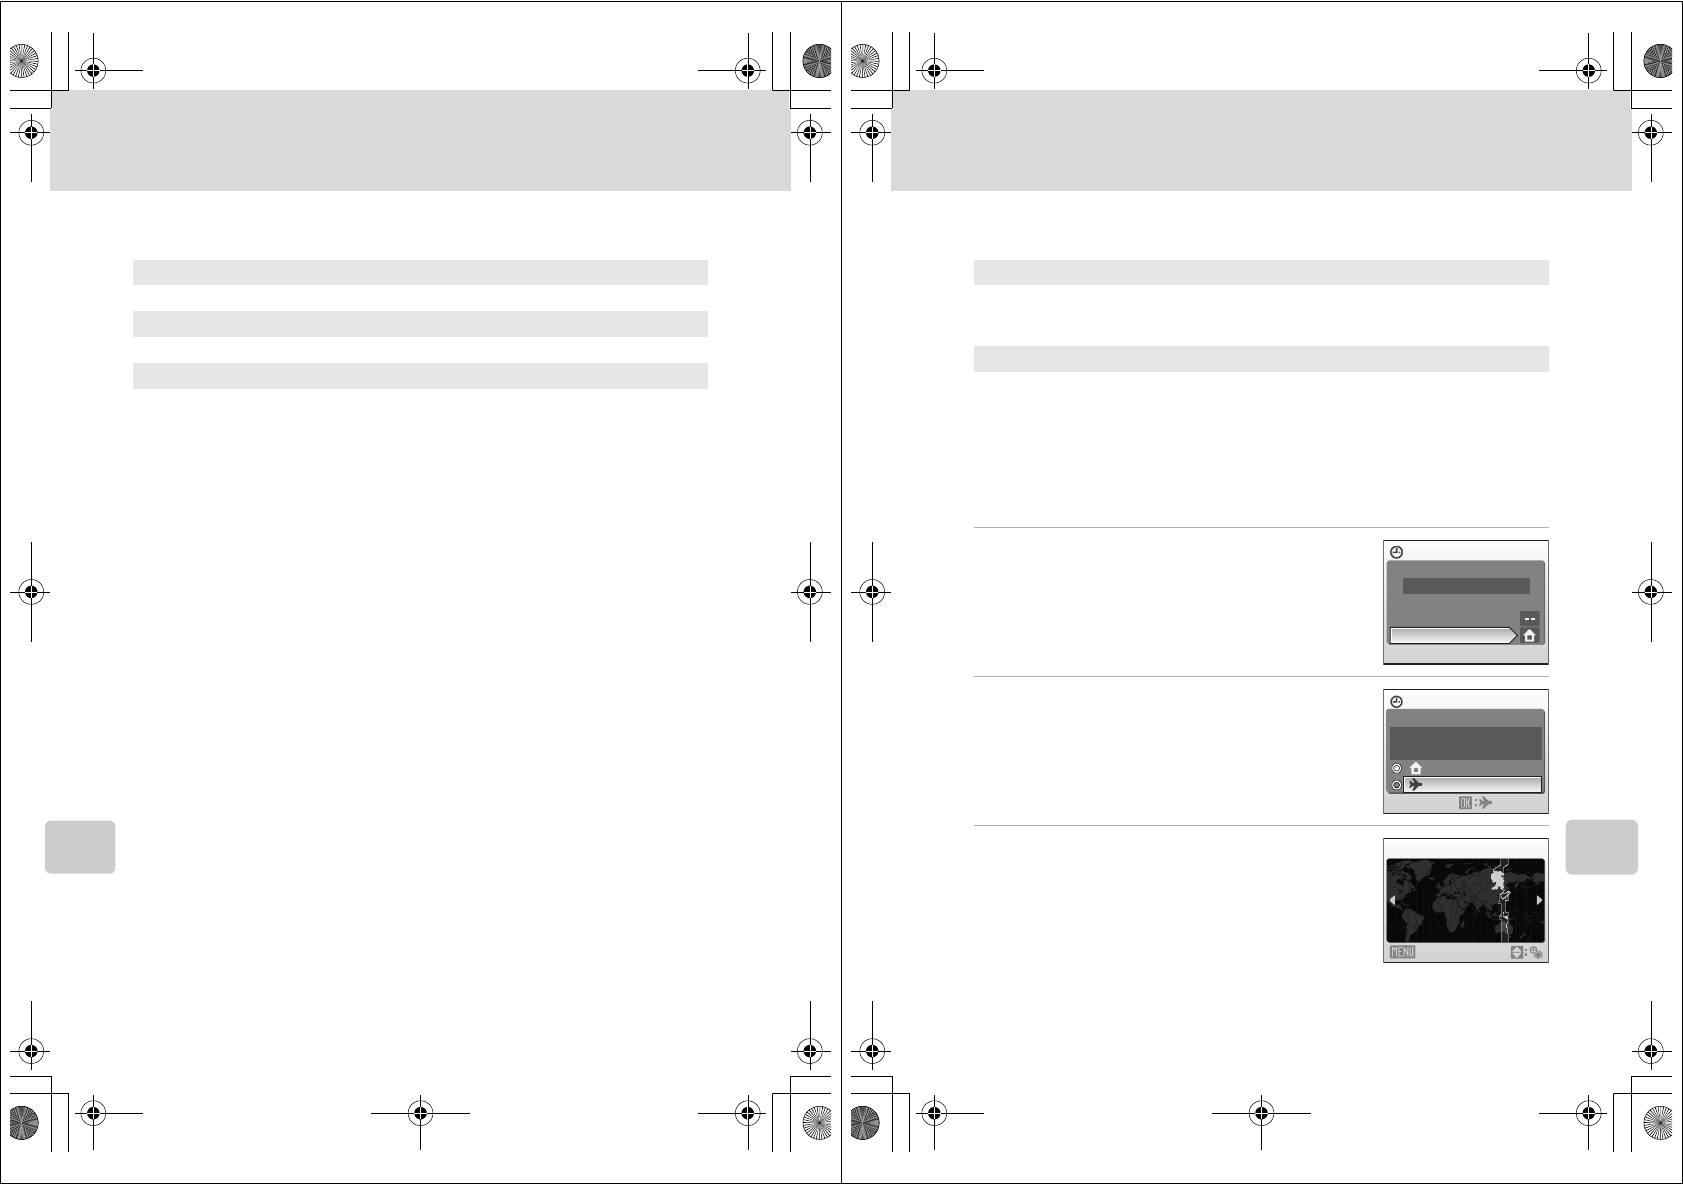
Setting Travel Destination Time Zone
1Use the rotary multi selector to choose Time
zone and press the k button.
The time zone menu is displayed.
2Choose x Travel destination and press the
k button.
The date and time displayed on the monitor changes
according to the region currently selected.
3Press K.
The time zone selection screen is displayed.
Date
Set camera clock to current date and time.
See step 5 and 6 of the section, “Setting Display Language, Date, and Time”
(A19) for more information.
Time zone
w (home time zone) can be specified and daylight saving enabled or disabled from
Time zone options. When x (destination time zone) is selected, the time
difference (A107) is automatically calculated and the date and time in the selected
region are recorded. Useful when travelling.
15:30
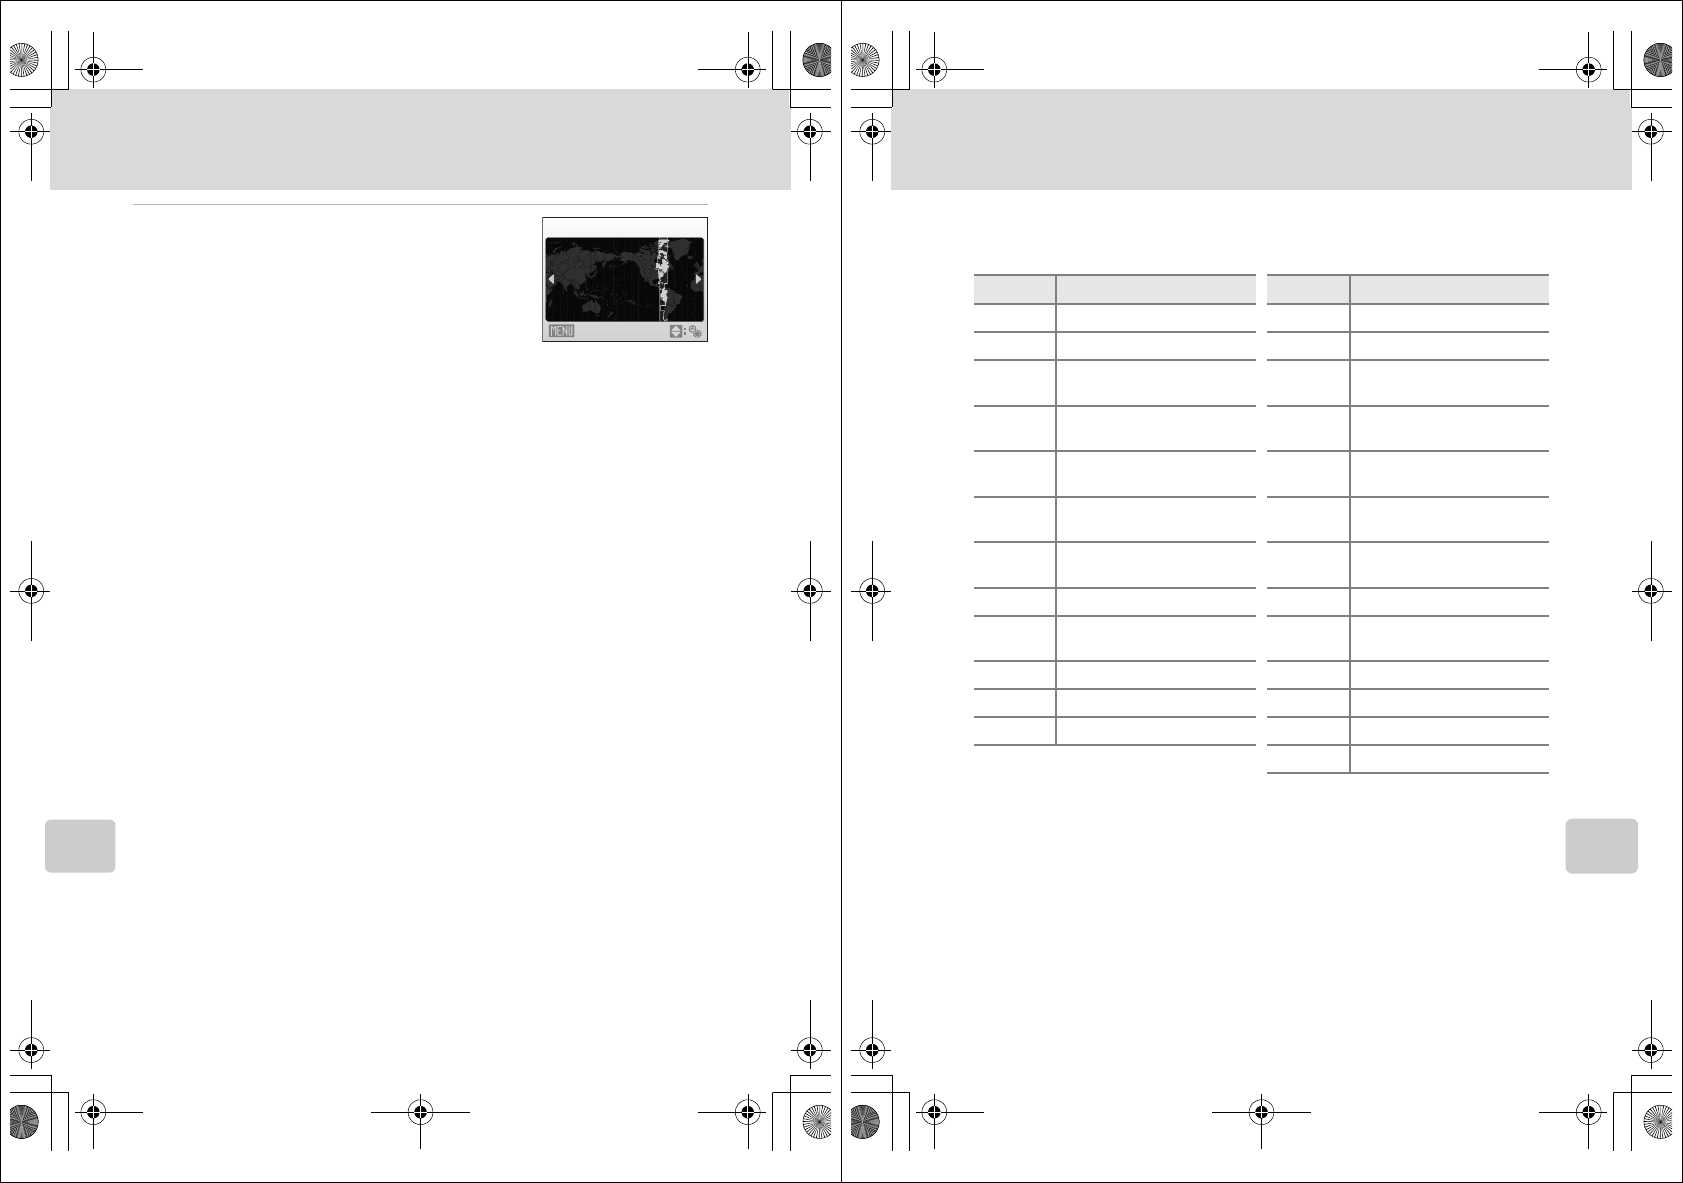
Date
15/11/2008
Date
Time zone
Time zone
Home time zone
London,Casablanca
Travel destination
15/11/2008 15:30
Back
To k y o
Seoul
x
0:30 00:00
11_Menus.fm Page 105 Monday, June 2, 2008 9:56 AM
Q7115_25_UM_EN_1st
106
Basic Camera Setup: The Setup Menu
Shooting, Playback, and Setup Menus
4Press J or K to choose the travel destination
time zone.
If daylight saving time is in effect, press H to display W at
the top of the monitor. The daylight saving time option is
enabled and the time is advanced one hour.
To turn off the daylight saving time option, press I.
Press the k button to choose the travel destination time
zone.
While the travel destination time zone is selected, the Z icon will be displayed in the
monitor when the camera is in shooting mode.
BThe Clock Battery
The clock battery charges when the main battery is installed or an AC adapter (available separately
from Nikon) is connected, and can provide several days of backup power after about 10 hours of
charging.
Cw (Home Time Zone)
•To switch to the home time zone, choose w Home time zone in step 2 and press the k button.
•To change the home time zone, choose w Home time zone in step 2 and perform step 3 and 4,
to set the home time zone.
CDaylight Saving Time
When daylight saving time starts or ends, turn the daylight saving time option on or off from the
time zone selection screen displayed in step 4.
x
Back
EST:
New York
Toronto
Lima
10:30 㧙14:00
Q7115_25_UM_EN.book Page 106 Friday, May 30, 2008 2:32 PM
107
Basic Camera Setup: The Setup Menu
Shooting, Playback, and Setup Menus
CTime Zones (A18)
The camera supports the time zones listed below. For time differences not listed below, set the
camera clock to local time.
UTC +/– Location UTC +/– Location
–11 Midway, Samoa +1 Madrid, Paris, Berlin
–10 Hawaii, Tahiti +2 Athens, Helsinki, Ankara
–9 Alaska, Anchorage +3 Moscow, Nairobi, Riyadh,
Kuwait, Manama
–8 PST (PDT): Los Angeles,
Seattle, Vancouver +4 Abu Dhabi, Dubai
–7 MST (MDT): Denver, Phoenix,
La Paz +5 Islamabad, Karachi
–6 CST (CDT): Chicago, Houston,
Mexico City +5.5 New Delhi
–5 EST (EDT): New York, Toronto,
Lima +6 Colombo, Dhaka
–4 Caracas, Manaus +7 Bangkok, Jakarta
–3 Buenos Aires, São Paulo +8 Beijing, Hong Kong,
Singapore
–2 Fernando de Noronha +9 Tokyo, Seoul
–1 Azores +10 Sydney, Guam
±0 London, Casablanca +11 New Caledonia
+12 Auckland, Fiji
Q7115_25_UM_EN.book Page 107 Friday, May 30, 2008 2:32 PM
Q7115_25_UM_EN_1st
108
Basic Camera Setup: The Setup Menu
Shooting, Playback, and Setup Menus
e Monitor Settings
Choose whether or not to display information in the monitor, and set the monitor
brightness.
Photo Info
The following display options are available.
See “The Monitor” (A6) for information on indicators in the monitor.
Photo info
Choose information displayed in monitor during shooting and playback mode.
Brightness
Choose from five settings for monitor brightness. The default setting is 3.
When monitor brightness boost (
A23
) is activated, the monitor brightness is set to
5
and cannot be changed.
Shooting mode Playback mode
Show info
Auto info
(default setting)
The current settings or operation guide is displayed for five seconds as in
Show info above. After a few seconds, display will be the same as Hide
info.
Hide info
16
16
16
16
16
15/11/2008 15:30
15/11/2008 15:30
0004.JPG
0004.JPG
44
44
0004.JPG
15/11/2008 15:30
Q7115_25_UM_EN.book Page 108 Friday, May 30, 2008 2:32 PM
109
Basic Camera Setup: The Setup Menu
Shooting, Playback, and Setup Menus
C Date Imprint
Date and time of recording can be imprinted on pictures. This information can be
printed even from printers that do not support printing of date and time (A82).
At settings other than Off, the icon for the current setting is displayed in the
monitor (A6).
BDate Imprint
•Imprinted dates form a permanent part of image data and cannot be deleted.
•Dates imprinted at an image mode setting (A84) of O TV screen (640) may be difficult to read.
Choose N PC screen (1024) or larger when using date imprint.
•The date is recorded using the format selected in the setup menu’s Date item (A18, 105).
•The date is not imprinted on movies or on pictures taken in Panorama assist scene mode
(A41).
CDate Imprint and Print Set
When printing from DPOF-compatible printers which support printing of shooting date and photo
information, the date and information can be printed on pictures without date and time imprinted
on them, using options in the Print set menu (A81).
Off (default setting)
Date and time are not imprinted on pictures.
Date
Date is imprinted on the bottom right corner of pictures taken while this option is in
effect.
Date and time
Date and time are imprinted on the bottom right corner of pictures taken while this
option is in effect.
Q7115_25_UM_EN.book Page 109 Friday, May 30, 2008 2:32 PM
Q7115_25_UM_EN_1st

110
Basic Camera Setup: The Setup Menu
Shooting, Playback, and Setup Menus
g Vibration Reduction
Vibration reduction effectively corrects blur, caused by slight hand movement
known as camera shake, that commonly occurs when shooting with zoom applied
or at slow shutter speeds. Vibration reduction can be used in all shooting modes.
Set Vibration reduction to Off when using a tripod to stabilize the camera
during shooting.
When vibration reduction is enabled, the current setting is displayed during
shooting (when Off is selected, an icon for the current setting is not displayed)
(A6, 23).
BNotes on Vibration Reduction
•Vibration reduction may take a few seconds to activate after the power is turned on, or the camera
enters shooting mode from playback mode. Wait until the display stabilizes before shooting.
•Due to characteristics of the vibration reduction function, images displayed in the camera’s
monitor immediately after shooting may appear blurry.
•Vibration reduction may be unable to completely eliminate the effects of camera shake in some
situations.
•VR stands for vibration reduction.
On (default setting)
Vibration reduction is enabled when taking pictures and recording movies. Camera
detects and factors out panning movements when reducing camera shake. When
camera is panned horizontally, for example, vibration reduction reduces only
vertical shake. If camera is panned vertically, vibration reduction affects only
horizontal shake.
Off
Vibration reduction is not enabled.
Q7115_25_UM_EN.book Page 110 Friday, May 30, 2008 2:32 PM
111
Basic Camera Setup: The Setup Menu
Shooting, Playback, and Setup Menus
U Motion Detection
Enable motion detection which automatically increases the shutter speed in
shooting still pictures to reduce the camera shake and subject movement.
When motion detection is enabled, the current setting is displayed in the monitor
during shooting (when Off is selected, an icon for the current setting is not
displayed) (A6, 23).
BNotes on Motion Detection
•Motion detection does not function if the flash fires, or if the subject is moving or is too dark.
•Motion detection may be unable to completely reduce the camera shake and subject movement
in some situations.
•The pictures taken may become somewhat grainy.
h AF Assist
Enable or disable AF-assist illumination.
CNotes on AF-Assist Illumination
AF-assist illumination is disabled in the Landscape, Sports, Night portrait, Sunset, Dusk/dawn,
Museum, and Fireworks show scene modes.
Auto (default setting)
When camera detects the movement of the subject or camera shake, the shutter
speed will be increased for reducing the shake.
When the shooting mode is set to the Fireworks show (A40) scene mode, the
motion detection is set to Off.
Off
Motion detection is not enabled.
Auto (default setting)
AF-assist illumination will be used to assist the focus operation when the subject is
poorly lit. The illuminator has a range of about # m (# ft.) at the maximum wide-
angle position and about # m (# ft. # in.) at the maximum telescopic position. Note
that for some scene modes, AF-assist illumination turns off automatically (A36).
Off
Disable this function. The camera may be unable to focus if lighting is poor.
Q7115_25_UM_EN.book Page 111 Friday, May 30, 2008 2:32 PM
Q7115_25_UM_EN_1st
112
Basic Camera Setup: The Setup Menu
Shooting, Playback, and Setup Menus
u Digital Zoom
Enable or disable digital zoom.
BNotes on Digital Zoom
•When digital zoom is in effect, AF area mode is set to Center (A91).
•Digital zoom cannot be used in the following situations.
-When Portrait or Night portrait is selected in scene mode
- When scene auto selector mode is selected
- When active child mode is selected
- When smile mode is selected
- Before movie recording begins (however, digital zoom of up to 2× can be applied while movies
are being recorded).
•When digital zoom is in effect, Metering is set to Center-weighted.
i Sound Settings
Adjust the following sound settings.
On (default setting)
When the camera is zoomed in to the maximum optical zoom position, holding
down the g (i) button triggers digital zoom (A25).
Off
Digital zoom will not be activated (except when shooting a movie).
Button sound
Turn button sound On (default setting) or Off. When On (default setting) is
selected, beep will sound once when operations are completed successfully, twice
when the camera acquires focus on the subject, and three times when error is
detected. Start-up sound will also play when the camera is turned on.
Shutter sound
Choose shutter sound from On (default setting) or Off.
Q7115_25_UM_EN.book Page 112 Friday, May 30, 2008 2:32 PM
113
Basic Camera Setup: The Setup Menu
Shooting, Playback, and Setup Menus
k Auto Off
If no operations are performed for the selected length of time, the monitor will
turn off and the camera enters standby mode (A15) to reduce drain on the
batteries. The power-on lamp blinks in standby mode. If no operations are
performed for another three minutes, the camera will turn off automatically.
Choose the time allowed to elapse before the camera enters standby mode if no
operations are performed from 30 s, 1 min (default setting), 5 min, and 30 min.
CCanceling Standby Mode
Cancel standby mode and reactivate the monitor by pressing the power switch or the shutter-
release button.
CNotes on Auto Off
Regardless of the option selected, the monitor will remain on as follows.
•When 30 s or 1 min is selected for Auto off and menus are displayed: three minutes
•During slide show playback: up to 30 minutes
•When no smiling face is detected in smile mode: five minutes (30 minutes when Auto off is set to
30 min)
•When the AC adapter is connected: 30 minutes
l
Format Memory/
m
Format Card
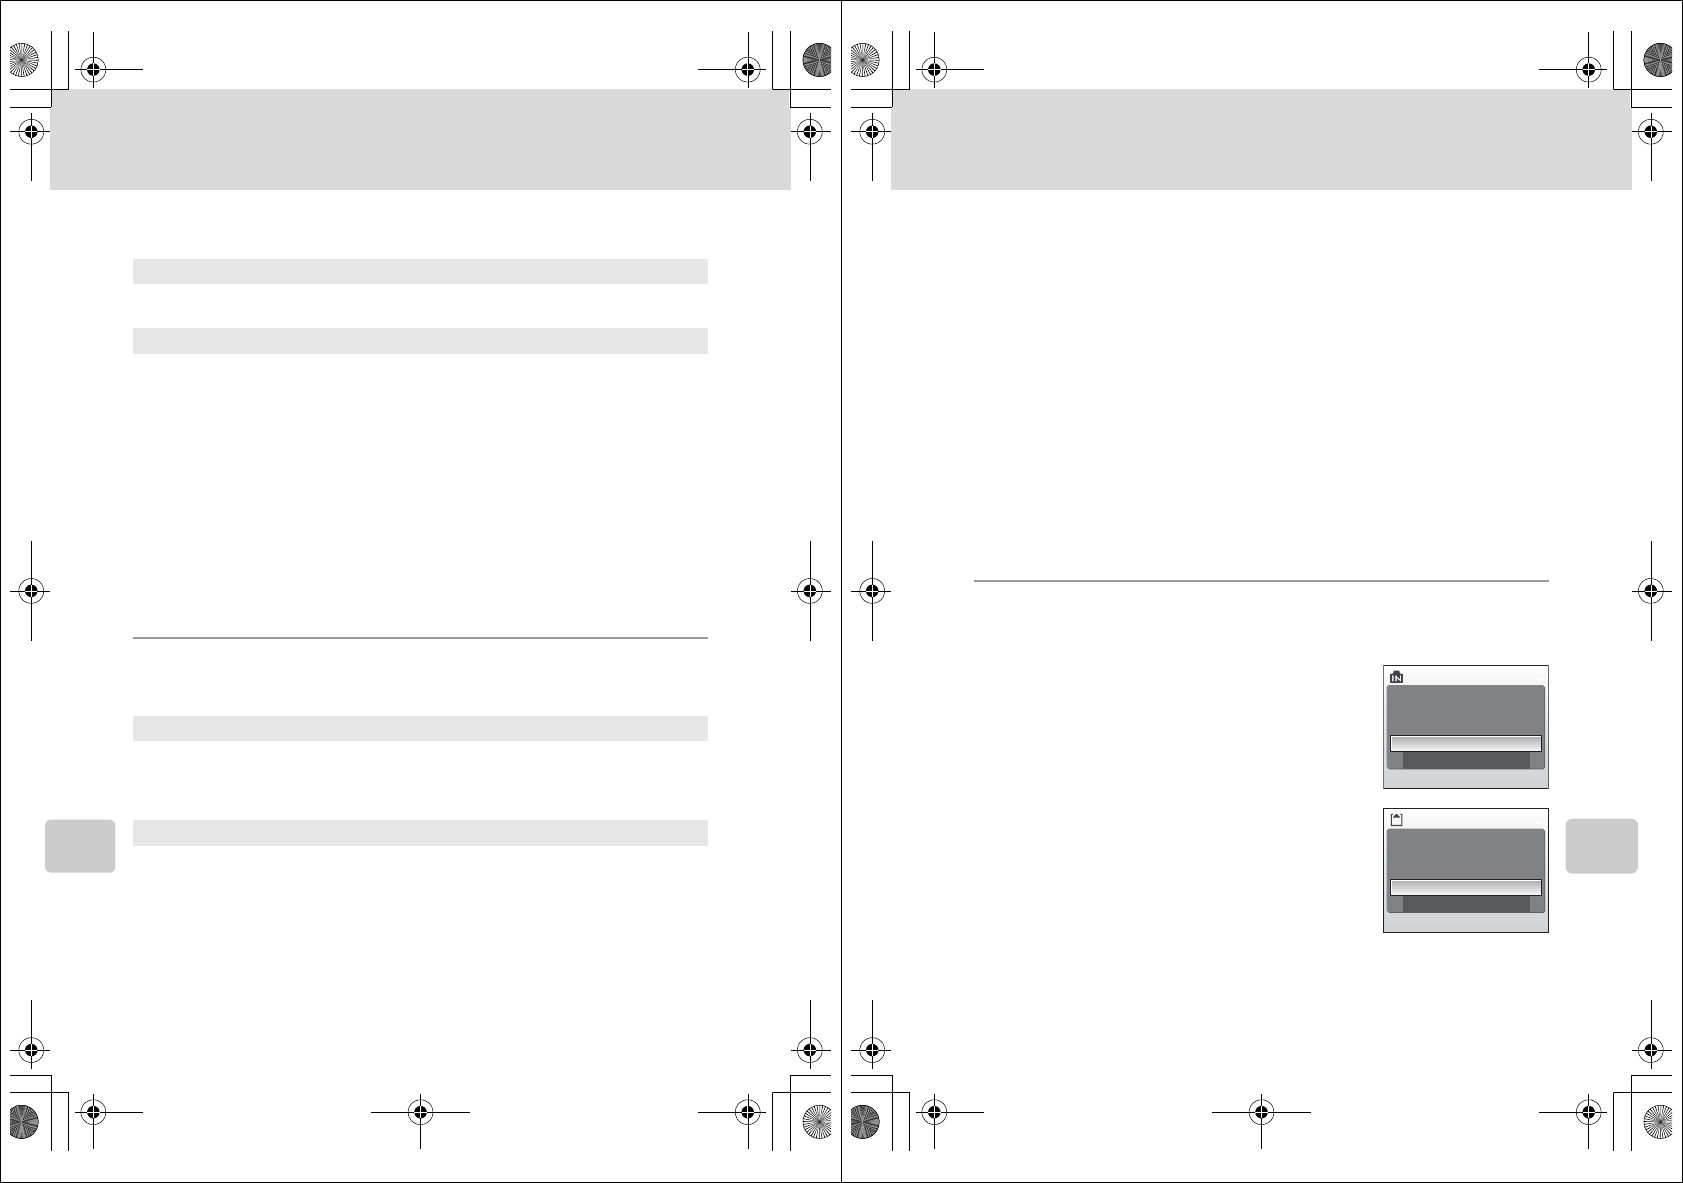
Use this option to format the internal memory or a memory card.
Formatting the Internal Memory
To format the internal memory, remove the memory
card from the camera.
The Format memory option appears in the setup
menu.
Formatting a Memory Card
When the memory card is inserted in the camera, the
Format card option appears in the setup menu.
BFormatting Internal Memory and Memory Cards
•Formatting the internal memory or memory cards permanently
deletes all data. Be sure to transfer important pictures to a
computer before formatting.
•Do not turn the camera off, disconnect the AC adapter, or open the battery-chamber/memory
card slot cover during formatting.
•The first time you insert the memory cards used in other devices into this camera, be sure to
format them with this camera.
Format memory
All images will
be deleted! OK?
Format
No
Format card
All images will
be deleted! OK?
Format
No
Q7115_25_UM_EN.book Page 113 Friday, May 30, 2008 2:32 PM
Q7115_25_UM_EN_1st
114
Basic Camera Setup: The Setup Menu
Shooting, Playback, and Setup Menus
n Language
Choose one of 24 languages for display of camera menus and messages.
o Video Mode
Adjust settings for connection to TV.
Choose from NTSC and PAL.
p Reset All
When Reset is selected, the camera’s settings will be restored to their default
values.
Pop-up menu
Czech Polish
Danish Portuguese
German Russian
(default setting) Finnish
Spanish Swedish
Greek Turkish
French Arabic
Indonesian Simplified Chinese
Italian Traditional Chinese
Hungarian Japanese
Dutch Korean
Norwegian Thai
Option Default value
Flash mode (A30) Auto
Self-timer (A32) Off
Macro mode (A33) Off
Exposure compensation (A34) 0.0
11_Menus.fm Page 114 Monday, June 2, 2008 9:57 AM
115
Basic Camera Setup: The Setup Menu
Shooting, Playback, and Setup Menus
Scene mode
Movie menu
Shooting menu
Setup menu
Option Default value
Scene mode (A35) Portrait
White balance in Food mode (A41) Center
Option Default value
Movie options (A62) TV movie 640
Autofocus mode (A63) Single AF
Option Default value
Image mode (A84) iNormal (3648)
White balance (A86) Auto
Metering (A88) Matrix
Continuous (A89) Single
ISO sensitivity (A90) Auto
Color options (A90) Standard color
AF area mode (A91) Auto
Autofocus mode (A94) Single AF
Option Default value
Menus (A103) Text
Welcome screen (A104) None
Photo info (A108) Auto info
Brightness (A108) 3
Date imprint (A109) Off
Vibration reduction (A110) On
Motion detection (A111) Auto
AF assist (A111) Auto
Digital zoom (A112) On
Button sound (A112) On
Shutter sound (A112) On
Auto off (A113) 1 min
11_Menus.fm Page 115 Monday, June 2, 2008 9:57 AM
Q7115_25_UM_EN_1st
116
Basic Camera Setup: The Setup Menu
Shooting, Playback, and Setup Menus
Others
•Choosing Reset all also clears the current file number (A118) from the
memory. Numbering will continue from the lowest number available. To reset
file numbering to “0001”, delete all pictures (A99) before selecting Reset all.
•The following menu settings will remain unaffected when menus are reset with
Reset all.
Shooting menu: Preset manual data (A87) acquired for White balance
Setup menu: Date (A105), Language (A114), and Video mode (A114)
r Firmware Version
View the current camera firmware version.
See the Wireless LAN Connection Guide for more information on the camera’s MAC
address displayed with the COOLPIX S610c.
Option Default value
Paper size (A77, 78) Default
Slide show (A98) 3s
Monitor brightness boost (A23) Off
COOLPIX S610 Ver. 1.0
Back
xx-xx-xx-xx-xx-xx
COOLPIX S610c Ver. 1.0
Back
MAC address
COOLPIX S610
Firmware version
MAC address
COOLPIX S610c
Firmware version
Q7115_25_UM_EN.book Page 116 Monday, June 2, 2008 9:58 AM
117
Technical Notes
Technical Notes
Optional Accessories
Approved Memory Cards
The following memory cards have been tested and approved for use in this
camera. All cards of the designated make and capacity can be used, regardless of
speed.
1If the memory card will be used with a card reader or similar device, check that device
supports 2 GB cards.
2SDHC-compliant. If the memory card will be used with a card reader or similar
device, check that device supports SDHC.
Operation is not guaranteed with other makes of card. Contact the manufacturer
for details on the above cards.
Rechargeable battery Rechargeable Li-ion Battery EN-EL12
Battery charger Battery Charger MH-65
AC adapter AC Adapter EH-63
USB cable USB Cable UC-E13
A/V Cable Audio/Video Cable EG-CP15
SanDisk 128 MB, 256 MB, 512 MB, 1 GB, 2 GB1, 4 GB2, 8 GB2
Toshiba 128 MB, 256 MB, 512 MB, 1 GB, 2 GB1, 4 GB2, 8 GB2
Panasonic 128 MB, 256 MB, 512 MB, 1 GB, 2 GB1, 4 GB2, 8 GB2
Q7115_25_UM_EN.book Page 117 Monday, June 2, 2008 9:58 AM
Q7115_25_UM_EN_1st
118
Technical Notes
Image/Sound File and Folder Names
Pictures, movies, voice memos, and voice recordings are assigned file names as
follows.
•Files are stored in folders named with a folder number followed by a five-
character identifier: “SOUND” (normal quality sound) for voice recordings (e.g.,
“101SOUND”; A65), and “NIKON” for all other pictures (e.g., “100NIKON”). When
the number of files within a folder reaches 9999, a new folder will be created.
File numbers will be assigned automatically starting with “0001”.
•Voice memo file names have the same identifier and file number as the picture
to which the voice memo is attached.
•Files copied using Copy>Selected images or Copy sound files>Selected
files are copied to the current folder, where they are assigned new file numbers
in ascending order starting from the largest file number in memory. Copy>All
images and Copy sound files>Copy all files copy all folders from the source
medium; file names do not change but new folder numbers are assigned in
ascending order starting from the largest folder number on the destination
medium (A69, 101).
•A single folder can hold up to 200 pictures; if the current folder already contains
200 pictures, a new folder, named by adding one to the current folder name,
will be created the next time a picture is taken. If the current folder is numbered
999 and contains 200 pictures, or a picture is numbered 9999, no further
pictures can be taken until the internal memory or memory card is formatted
(A113), or a new memory card is inserted.
DSCN0001.JPG
Identifier
(not shown on camera monitor)
Original still pictures (voice
memo attachment included),
movies, voice memos, voice
recordings
DSCN
Cropped copies (voice memo
attachment included) RSCN
Small copies (voice memo
attachment included) SSCN
D-Lighting copies (voice
memo attachment included) FSCN
Extension
(signifies the file type)
Still pictures .JPG
Movies .AVI
Voice memos .WAV
Voice recordings
File number
(assigned automatically in ascending
order, starting with “0001”)
Q7115_25_UM_EN.book Page 118 Friday, May 30, 2008 2:32 PM
119
Technical Notes
Caring for the Camera
To ensure continued enjoyment of this Nikon product, observe the following
precautions when using or storing the device.
BKeep Dry
The device will be damaged if immersed in water or subjected to high humidity.
BDo Not Drop
The product may malfunction if subjected to strong shock or vibration.
BHandle the Lens and all Moving Parts with Care
Do not apply force to the lens, lens cover, monitor, memory card slot or battery chamber. These
parts are easily damaged. Applying force to the lens cover could result in camera malfunction or
damage to the lens. Should the monitor break, care should be taken to avoid injury caused by
broken glass and to prevent the liquid crystal from the display touching the skin or entering the eyes
or mouth.
BDo Not Point the Lens at Strong Light Sources for Extended Periods
Avoid pointing the lens at the sun or other strong light sources for extended periods when using or
storing the camera. Intense light may cause deterioration of the CCD image sensor, producing a
white blur effect in photographs.
BKeep Away from Strong Magnetic Fields
Do not use or store this device in the vicinity of equipment that generates strong electromagnetic
radiation or magnetic fields. Strong static charges or the magnetic fields produced by equipment
such as radio transmitters could interfere with the monitor, damage data stored on the memory
card, or affect the product’s internal circuitry.
BAvoid Sudden Changes in Temperature
Sudden changes in temperature, such as when entering or leaving a heated building on a cold day,
can cause condensation to form inside the device. To prevent condensation, place the device in a
carrying case or a plastic bag before exposing it to sudden changes in temperature.
BTurn the Product Off Before Removing or Disconnecting the Power Source
Do not remove the battery while the product is on, or while images are being recorded or deleted.
Forcibly cutting power in these circumstances could result in loss of data or in damage to product
memory or internal circuitry.
Q7115_25_UM_EN.book Page 119 Friday, May 30, 2008 2:32 PM
Q7115_25_UM_EN_1st
120
Caring for the Camera
Technical Notes
CThe Battery
•Check the battery level when taking the camera out, and charge the battery if necessary (A12,
16). Do not continue charging once the battery is fully charged, as this will result in reduced
battery performance. If possible, carry a fully-charged spare battery when taking pictures on
important occasions.
•Do not use the battery at ambient temperatures below 0 °C (32 °F) or above 40 °C (104 °F). When
recharging, the ambient temperature should be in the vicinity of 5 to 35 °C (41 to 95 °F).
The battery will not charge if its temperature is below 0 °C (32 °F) or above 60 °C (140 °F).
Charge capacity may be reduced at battery temperatures from 0 °C to 15 °C (32 °F to 59 °F) and
from 45 °C to 60 °C (113 °F to 140 °F). Note that the battery may become hot during use; wait for
the battery to cool before charging. Failure to observe these precautions could damage the
battery, impair its performance or prevent it from charging normally.
•On cold days, the capacity of batteries tends to decrease. Be sure that the battery is fully charged
before heading outside to take pictures in cold weather. Keep spare batteries in a warm place and
exchange as necessary. Once warmed, a cold battery may recover some of its charge.
•Dirt on the battery terminals can prevent the camera from functioning. Should the battery
terminals become dirty, wipe them off with a clean, dry cloth before use.
•When the battery is not in use, remove it from the camera or battery charger and replace the
terminal cover. The camera and battery charger draw minute amounts of current even when off; if
left in place, the battery could be drained to the point that it no longer functions. Turning the
camera on or off while the battery is exhausted can result in reduced battery life. Recharging an
exhausted battery within six months is recommended.
If the battery will not be used for an extended period, store it in a cool (15 to 25 °C / 59 to 77 °F),
dry place. Recharge it at least once every six months and run it flat before returning it to storage.
•Replace the battery when it no longer holds a charge. Used batteries are a valuable resource.
Please recycle used batteries in accordance with local regulations.
Q7115_25_UM_EN.book Page 120 Friday, May 30, 2008 2:32 PM
121
Caring for the Camera
Technical Notes
Cleaning
Do not use alcohol, thinner, or other volatile chemicals.
Storage
Turn the camera off when not in use. Check that the power-on lamp is off before
putting the camera away. Remove the battery if the camera will not be used for an
extended period. Do not store the camera with naptha or camphor moth balls, or
in any of the following locations:
•Next to equipment that produces strong electromagnetic fields, such as
televisions or radios
•Exposed to temperatures below –10 °C (14 °F) or above 50 °C (122 °F)
•Poorly ventilated or subject to humidities of over 60 %
To prevent mold or mildew, take the camera out of storage at least once a month.
Turn the camera on and release the shutter a few times before putting the camera
away again.
CNotes on the Monitor
•The monitor may contain a few pixels that are always lit or that do not light. This is a characteristic
common to all TFT LCD displays, and does not indicate a malfunction. Images recorded using the
product will not be affected.
•When framing bright subjects, vertical comet-like streaks that whiten toward either end may
appear in the display. This phenomenon, known as “smear,” does not appear in the final
photograph and does not indicate a malfunction. Some smear may appear in movies.
•Images in the monitor may be difficult to see under bright lighting.
•The monitor is lit by an LED backlight. Should the monitor begin to dim or flicker, contact your
Nikon-authorized service representative.
Lens
Avoid touching glass parts with your fingers. Remove dust or lint with a blower
(typically a small device with a rubber bulb attached to one end that is
pumped to produce a stream of air out the other end). To remove fingerprints
or other stains that cannot be removed with a blower, wipe the lens with a soft
cloth, using a spiral motion that starts at the center of the lens and working
toward the edges. If this fails, clean the lens using a cloth lightly dampened
with commercial lens cleaner.
Monitor Remove dust or lint with a blower. To remove fingerprints and other stains,
clean the monitor with a soft, dry cloth, being careful not to apply pressure.
Body
Use a blower to remove dust, dirt or sand then wipe gently with a soft, dry
cloth. After using the camera at the beach or seaside, wipe off any sand or salt
with a dry cloth lightly dampened with fresh water, then dry thoroughly. Note
that foreign matter inside the camera could cause damage not covered by the
warranty.
Q7115_25_UM_EN.book Page 121 Friday, May 30, 2008 2:32 PM
Q7115_25_UM_EN_1st
122
Technical Notes
Error Messages
The following table lists the error messages and other warnings displayed in the
monitor, as well as the solutions for dealing with them.
For Users of the COOLPIX S610c
See the Wireless LAN Connection Guide for error messages that may be displayed
with use of the wireless LAN feature.
Display Problem Solution A
O (blinks) Clock not set. Set clock. 105
BBattery running low. Prepare to charge or
change battery.
12, 16
N
Battery
exhausted.
Battery exhausted. Charge or change battery. 12, 16
P
Battery temperature
high
Battery temperature is
high.
Turn off camera, and allow
battery to cool down
before resuming use. After
five seconds, this message
will disappear, the monitor
will turn off, and the
power-on lamp will blink
rapidly. After the lamp
blinks for three minutes,
the camera will turn off
automatically, but you can
also press the power
switch to turn it off
manually.
15
Q (● blinks red) Camera cannot focus. Refocus. 26, 27
P
Please wait for the
camera to finish
recording.
O
Camera cannot perform
other operations until
recording is complete.
Wait until message clears
from display automatically
when recording is
complete.
27
N
Memory card is write
protected.
Write-protect switch is in
“lock” position.
Slide write-protect to
“write” position.
21
Q7115_25_UM_EN.book Page 122 Friday, May 30, 2008 2:32 PM
123
Error Messages
Technical Notes
P
This card cannot be
used.
Error accessing memory
card.
•Use approved card.
•Check that connectors
are clean.
•Confirm that memory
card is correctly inserted.
117
20
20
P
This card cannot be
read.
P
Card is not formatted.
Format card?
No
Yes
Memory card has not been
formatted for use in this
camera.
Choose Yes and press k
to format card, or turn
camera off and replace
card.
21
N
Out of memory.
Memory card is full. •Choose smaller image
size.
•Delete pictures or sound
files.
•Insert new memory card.
•Remove memory card
and use internal
memory.
84
28, 64,
68
20
21
P
Image cannot be
saved.
Error occurred while
recording picture.
Format internal memory or
memory card.
113
Camera has run out of file
numbers.
•Insert new memory card.
•Format internal memory
or memory card.
20
113
Picture cannot be used for
welcome screen.
Choose a picture taken at
any image mode setting
other than l 16:9 (3584)
and m 16:9 (1920), or a
small picture or cropped
copy of 640×480 pixels of
larger.
55, 56,
84
Cannot copy picture. Delete pictures from
destination.
99
P
Sound file cannot be
saved.
Camera has run out of file
numbers.
•Insert new memory card.
•Format internal memory
or memory card.
20
113
Display Problem Solution A
Q7115_25_UM_EN.book Page 123 Friday, May 30, 2008 2:32 PM
Q7115_25_UM_EN_1st
124
Error Messages
Technical Notes
N
Image cannot be
modified.
Cannot edit selected
picture.
•Select picture that
supports D-Lighting,
crop, or small picture.
•Movies cannot be
edited.
53
–
N
Cannot record movie.
Time out error while
recording movie.
Choose memory card with
faster write speed.
117
N
Memory contains no
images.
•No pictures or sound file
in the internal memory
or memory card.
•Memory card does not
contain pictures or
sound file.
–
To copy picture or sound
file from internal memory
to memory card, press the
d button. The copy
option screen or copy
sound file screen will be
displayed.
–
101, 69
N
No sound file.
N
File contains no image
data.
File not created with this
camera.
View file on computer or
other device.
–
P
This file cannot be
played back.
N
All images are hidden.
Date and time are not set
for pictures to be displayed
by list by date mode.
––
N
This image cannot be
deleted.
Picture is protected. Disable protection. 99
N
Travel destination is in
the current time zone.
Destination in same time
zone as home. –
107
Lens error
QLens error. Turn camera off and then
on again. If error persists,
contact retailer or Nikon
representative.
22
P
Communications error
USB cable disconnected
during printing.
Turn camera off and
reconnect cable.
76
Display Problem Solution A
Q7115_25_UM_EN.book Page 124 Friday, May 30, 2008 2:32 PM
125
Error Messages
Technical Notes
* See the documentation provided with your printer for further guidance and information.
System error
QError has occurred in
camera’s internal circuitry.
Turn camera off, remove
and reinsert battery, and
turn camera on. If error
persists, contact retailer or
Nikon representative.
14, 22
PR
Printer error:
Check printer status.
Running out of ink or
printer error.
Check printer. After
checking the ink or solving
the problem, select
Resume and press the k
button to resume
printing.*
–
PR
Printer error: check
paper
Specified size of paper is
not loaded in printer.
Load the specified paper,
select Resume, and press
the k button to resume
printing.*
–
PR
Printer error: paper
jam
Paper has jammed in the
printer.
Eject the jammed paper,
select Resume, and press
the k button to resume
printing.*
–
PR
Printer error: out of
paper
No paper is loaded in
printer.
Load the specified paper,
select Resume, and press
the k button to resume
printing.*
–
PR
Printer error: check ink
Ink error. Check ink, select Resume,
and press the k button to
resume printing.*
–
PR
Printer error: out of ink
Ink cartridge is empty. Replace ink, select
Resume, and press the k
button to resume
printing.*
–
PR
Printer error: file
corrupt
An error caused by the
image file has occurred.
Select Cancel and press
the k button to cancel
printing.
–
Display Problem Solution A
Q7115_25_UM_EN.book Page 125 Friday, May 30, 2008 2:32 PM
Q7115_25_UM_EN_1st
126
Technical Notes
Troubleshooting
If the camera fails to function as expected, check the list of common problems
below before consulting your retailer or Nikon representative. Refer to the page
numbers in the right-most column for more information.
For Users of the COOLPIX S610c
See the Wireless LAN Connection Guide for information on troubleshooting wireless
LAN problems.
Display, Settings and Power Supply
Problem Cause/Solution A
Monitor is blank •Camera is off.
•Battery is exhausted.
•Standby mode for saving power: press the
shutter-release button halfway.
•When flash lamp blinks red, wait until flash
has charged.
•Camera and computer are connected via USB
cable.
•Camera and TV are connected via audio/
video cable.
22
22
15, 27
31
71
70
Monitor is hard to read •Adjust monitor brightness.
•Monitor is dirty. Clean monitor.
•Monitor has dimmed to save power. Monitor
brightens when controls are used.
•Use monitor brightness boost.
108
121
15
23
Camera turns off without
warning
•Battery is low.
•Camera has turned off automatically to save
power.
•Battery is cold.
22
113
120
Date and time of recording are
not correct
•Pictures recorded before clock has been set,
and “Date not set” indicator blinks during
shooting, will have time stamp of “00/00/0000
00:00”; movies and voice recordings will be
dated “01/01/2008 00:00.”
•Check camera clock regularly against more
accurate timepieces and reset as required.
18
105
No indicators displayed in
monitor
Hide info is selected for Photo info.
Select Show info.
108
Q7115_25_UM_EN.book Page 126 Friday, May 30, 2008 2:32 PM
127
Troubleshooting
Technical Notes
Electronically Controlled Cameras
In extremely rare instances, unusual characters may appear in the monitor and the
camera may stop functioning. In most cases, this phenomenon is caused by a
strong external static charge. Turn the camera off, remove and replace the battery,
and then turn the camera on again. In the event of continued malfunction, contact
your retailer or Nikon representative. Note that disconnecting the power source as
described above may result in the loss of any data not recorded to internal
memory or the memory card at the time the problem occurred. Data already
recorded will not be affected.
Shooting
Date imprint not available Camera clock has not been set. 18,
105
Date not appearing on pictures
even when Date imprint is
enabled
Date does not appear on movies. 61, 109
Camera settings reset Backup battery is exhausted; all settings were
restored to their default values.
106
Monitor turns off, and the
power-on lamp blinks rapidly.
Battery temperature is high. Turn off camera,
and allow battery to cool down before resuming
use. After the lamp blinks for three minutes, the
camera will turn off automatically, but you can
also press the power switch to turn it off
manually.
15
Problem Cause/Solution A
No picture taken when shutter-
release button is pressed
•When camera is in playback mode, press the
c button.
•When menus are displayed, press the d
button.
•Battery is exhausted.
•When flash lamp blinks, flash is charging.
28
11
22
31
Camera cannot focus •The intended subject is one with which
autofocus does not perform well.
•Set AF assist in the setup menu to Auto.
•Focus error. Turn camera off and then on
again.
27
111
15
Problem Cause/Solution A
Q7115_25_UM_EN.book Page 127 Friday, May 30, 2008 2:32 PM
Q7115_25_UM_EN_1st
128
Troubleshooting
Technical Notes
Pictures are blurred •Use flash.
•Use vibration reduction or motion detection.
•Use D.
•Use tripod and self-timer.
30
110, 111
89
32
Bright specks appear in
pictures taken with flash
Flash is reflecting off particles in air. Turn flash
off.
31
Flash does not fire •Flash is off.
•Some scene modes that cannot turn on flash
are selected.
•D mode is selected.
•Continuous or BSS is selected for
Continuous in shooting menu.
30
35
61
89
Optical zoom cannot be used Optical zoom cannot be used while recording
movies.
61
Digital zoom cannot be used •Digital zoom is set to Off in the setup menu.
•Digital zoom is not available in the following
situations:
- when shooting in Portrait or Night
portrait scene mode
- when shooting in scene auto selector
mode
- when shooting in active child mode
- when shooting in smile mode
- before movie recording begins
112
36, 37
45
47
49
61
No sound when the shutter is
released
•Off is selected for Sound settings>Shutter
sound in setup menu.
•Continuous or BSS is selected for
Continuous in shooting menu.
•d (Sports scene mode) or l (Museum
scene mode) is selected.
•D mode is selected.
•The speaker is obstructed.
112
89
36, 39
61
4, 24
AF-assist illuminator does not
light
•Off is selected for AF assist option in camera
setup menu.
•AF-assist illuminator turns off automatically in
some modes.
111
36-40
Pictures appear smeared Lens is dirty. Clean lens. 121
Colors are unnatural White balance does not match light source. 86
Problem Cause/Solution A
Q7115_25_UM_EN.book Page 128 Friday, May 30, 2008 2:32 PM
129
Troubleshooting
Technical Notes
Playback
Randomly spaced bright pixels
(“noise”) appear in image
Shutter speed too slow. Noise can be reduced by:
•Using flash
•Specifying a lower ISO sensitivity setting
•Using a scene mode which has noise
reduction ability
30
90
36
Pictures are too dark
(underexposed)
•Flash is off.
•Flash window is blocked.
•Subject is beyond flash range.
•Adjust exposure compensation.
•Raise the ISO sensitivity.
•Subject is backlit. Select o (Backlight scene
mode) or use fill flash.
30
24
30
34
90
30, 40
Pictures are too bright
(overexposed)
Adjust exposure compensation. 34
Unexpected results when flash
mode is set to V (auto with
red-eye reduction)
When V (auto with red-eye reduction) or “fill
flash with slow sync and red-eye reduction” of
the Night portrait scene mode is applied
during shooting, In-Camera Red-Eye Fix may, in
very rare cases, be applied to areas not affected
by red-eye. Set a flash mode other than V
(auto with red-eye reduction) when taking
pictures in a shooting mode other than the
Night portrait scene mode.
30, 37
Problem Cause/Solution A
File cannot be played back File has been overwritten or renamed by
computer or another make or model of camera. –
Cannot zoom in on picture Playback zoom cannot be used with movies,
small pictures, or pictures that have been
cropped to below 320 × 240.
–
Cannot record voice memo •Voice memos cannot be appended to
movies.
•Voice memos cannot be appended to
pictures taken by other cameras, and voice
memos attached to the images using other
cameras cannot be played back.
64
57
Problem Cause/Solution A
Q7115_25_UM_EN.book Page 129 Friday, May 30, 2008 2:32 PM
Q7115_25_UM_EN_1st
130
Troubleshooting
Technical Notes
Cannot use D-Lighting, crop, or
small picture options
•These options cannot be used with movies.
•Choose a picture taken at any image mode
setting other than l 16:9 (3584) and m
16:9 (1920).
•Select picture that supports D-Lighting, crop,
or small picture.
•Pictures taken with another make or model of
camera cannot be edited.
•Other cameras may be unable to play back, or
transfer to a computer, pictures edited with
this camera.
64
84
53
53
53
Pictures not displayed on
television
•Choose correct video mode.
•Memory card contains no pictures. Replace
memory card. Remove memory card to play
back pictures from internal memory.
114
20
Nikon Transfer does not start
when camera is connected
•Camera is off.
•Battery is exhausted.
•USB cable is not correctly connected.
•If your computer is running Windows 2000
Professional, camera cannot be connected to
the computer.
•Camera is not recognized by the computer.
•Computer is not set to launch Nikon Transfer
automatically.
For more information on Nikon Transfer, refer to
help information contained in Nikon Transfer.
22
22
71
71
–
–
Pictures to be printed are not
displayed
Memory card contains no pictures. Replace
memory card. Remove memory card to print
pictures from internal memory.
20
Cannot select paper size with
camera
Paper size cannot be selected from the camera if
the printer does not support the page sizes used
by the camera or the printer automatically selects
the page size. Use the printer to select page size.
77, 78
Problem Cause/Solution A
Q7115_25_UM_EN.book Page 130 Friday, May 30, 2008 2:32 PM
131
Technical Notes
Specifications
Nikon COOLPIX S610/S610c Digital Camera
Type Compact digital camera
Effective pixels 10.0 million
Image sensor 1/2.33-in. CCD; total pixels: approx. 10.34 million
Lens 4× Zoom-Nikkor lens
Focal length 5-20mm (equivalent with 35mm [135] format picture angle:
28-112mm)
f/-number f/2.7–5.8
Construction 7 elements in 6 groups
Digital zoom Up to 4× (equivalent with 35mm [135] format picture angle:
approx. 448mm)
Vibration reduction Lens shift
Autofocus (AF) Contrast-detect AF
Focus range (from
lens)
•[W]: 50 cm (1 ft. 7.6 in.) to ∞, [T]: 60 cm (1 ft. 11.6 in.) to ∞
•Macro mode: 3 cm (1.1 in.) to ∞ (when the zoom indicator is
before G)
Focus-area selection Auto (9-area automatic selection), face priority, manual with
99 focus areas, center
Monitor 3.0 in., Approx. 230k-dot, TFT LCD with anti-reflection coating
and 5-level brightness adjustment (equipped with monitor
brightness boost function)
Frame coverage
(shooting mode)
Approx. 100 % horizontal and 100 % vertical
Frame coverage
(playback mode)
Approx. 100 % horizontal and 100 % vertical
Storage
Media •Internal memory (approx. ## MB)
•SD (Secure Digital) memory cards
File system DCF, Exif 2.2, and DPOF compliant
File formats Compressed: JPEG-Baseline compliant
Movies: AVI
Sound files: WAV
Image size (pixels) •3,648 × 2,736 High (3648P)/Normal (3648)
•3,072 × 2,304 Normal (3072)
•2,592 × 1,944 Normal (2592)
•2,048 × 1,536 Normal (2048)
•1,024 × 768 PC screen (1024)
•640 × 480 TV screen (640)
•3,584 × 2,016 16:9 (3584)
•1,920 × 1,080 16:9 (1920)
ISO sensitivity
(Standard output sensitivity)
ISO 100, 200, 400, 800, 1600, 3200#
Auto (auto gain from ISO 100 to 1600#)
Q7115_25_UM_EN.book Page 131 Friday, May 30, 2008 2:32 PM
Q7115_25_UM_EN_1st
132
Specifications
Technical Notes
Exposure
Metering 224-segment matrix, center-weighted
Exposure control Programmed auto exposure with motion detection and
exposure compensation (–2.0 to +2.0 EV in steps of 1/3 EV)
Range
(ISO 100)
[W]: 1.0 to 15.5 EV
[T]: 1.2 to 17.7 EV
Shutter Mechanical and charge-coupled electronic shutter
Speed 1/1500–1 s, 4 s (Fireworks show scene mode)
Aperture Electronically-controlled ND filter (-2 AV) selection
Range 2 steps (f/2.7 and f/5.8 [W])
Self-timer Can be selected from 10 and 2 seconds duration
Built-in flash
Range (approx.)
(ISO sensitivity: Auto)
[W]: ## to ## m (## in. to ## ft.)
[T]: ## to ## m (## in. to ## ft.)
Flash control TTL auto flash with monitor preflashes
Interface Hi-Speed USB
Data transfer protocol MTP, PTP
Video output Can be selected from NTSC and PAL
I/O terminal Multi connector
Supported
languages
Arabic, Chinese (Simplified and Traditional), Czech, Danish,
Dutch, English, Finnish, French, German, Greek, Hungarian,
Indonesian, Italian, Japanese, Korean, Norwegian, Polish,
Portuguese, Russian, Spanish, Swedish, Thai, Turkish
Power sources •One EN-EL12 Rechargeable Li-ion Battery (supplied)
•AC Adapter EH-63
Battery life*Approx. ## shots (EN-EL12)
Dimensions
(W × H × D)
COOLPIX S610: Approx. ## × ## × ## mm (## × ## × ## in.)
(excluding projections)
COOLPIX S610c: Approx. ## × ## × ## mm (## × ## × ## in.)
(excluding projections)
Weight Approx. ## g (## oz) (without battery and SD memory card)
Operating environment
Temperature 0 to 40 °C (32 to 104 °F)
Humidity Less than 85 % (no condensation)
Q7115_25_UM_EN.book Page 132 Friday, May 30, 2008 2:32 PM
133
Specifications
Technical Notes
•Unless otherwise stated, all figures are for a camera with a fully-charged
Rechargeable Li-ion Battery EN-EL12 operated at an ambient temperature of
25 °C (77 °F).
* Based on Camera and Imaging Products Association (CIPA) standards for measuring the life
of camera batteries. Measured at 23 °C (73 °F); zoom adjusted with each shot, flash fired
with every other shot, image mode set to i Normal (3648).
Battery life may vary depending on shooting interval and length of time menus and images
are displayed.
Rechargeable Li-ion Battery EN-EL12
Battery Charger MH-65 (supplied with the COOLPIX S610)
Wireless
(COOLPIX S610c only)
Standards IEEE 802.11b/g (standard wireless LAN protocol), ARIB STD-T66
(standard for low power data communications systems)
Communications
protocols
IEEE 802.11g: OFDM
IEEE 802.11b: DSSS
Range (line of sight) Approx. 50 m (98 ft.) (varies with location and weather)
Operating frequency 2412–2462 MHz (11 channels)
Data rates IEEE 802.11g: 6, 9, 12, 18, 24, 36, 48, and 54 Mbps
IEEE 802.11b: 1, 2, 5.5, and 11 Mbps
Security TKIP, 128/64-bit (104/40-bit) WEP, AES
Access protocols Infrastructure
Type Rechargeable lithium-ion battery
Rated capacity DC 3.7 V, 1050 mAh
Operating temperature 0 to 40 °C (32 to 104 °F)
Dimensions (W × H × D) Approx. 32 × 43.8 × 7.9 mm (1.3 × 1.7 × 0.3 in.)
Weight Approx. 22.5 g (0.8 oz) (excluding terminal cover)
Rated input AC 100-240 V, 50/60 Hz, 0.08-0.05 A
Rated capacity 8–12 VA
Rated output DC 4.2 V, 0.7 A
Supported batteries Nikon Rechargeable Li-ion Battery EN-EL12
Charging time Approx. 150 minutes when battery is fully discharged
Operating temperature 0 to 40 °C (32 to 104 °F)
Dimensions
(W × H × D)
Approx. 58 × 27.5 × 80 mm (2.3 × 1.1 × 3.1 in.)
(excluding projections)
Weight Approx. 65 g (2.3 oz) (excluding power cable)
Q7115_25_UM_EN.book Page 133 Friday, May 30, 2008 2:32 PM
Q7115_25_UM_EN_1st

134
Specifications
Technical Notes
AC Adapter EH-63 (supplied with the COOLPIX S610c)
BSpecifications
Nikon will not be held liable for any errors this manual may contain. The appearance of this product
and its specifications are subject to change without notice.
Supported Standards
•DCF: Design Rule for Camera File System is a standard widely used in the digital
camera industry to ensure compatibility among different makes of camera.
•DPOF: Digital Print Order Format is an industry-wide standard that allows
pictures to be printed from print orders stored on the memory card.
•Exif version 2.2: This camera supports Exif (Exchangeable Image File Format
for Digital Still Cameras) version 2.2, a standard that allows information stored
with photographs to be used for optimal color reproduction when images are
output from Exif-compliant printers.
•PictBridge: A standard developed cooperatively by the digital camera and
printer industries, allowing photographs to be output directly to a printer
without connecting the camera to a computer.
Rated input AC 100–240 V, 50/60 Hz, 0.18–0.1 A
Rated capacity 18–22 VA
Rated output DC 4.8 V, 1.5 A
Operating temperature 0 to 40 °C (32 to 104 °F)
Dimensions
(
W × H × D)
Approx. 41 × 23.5 × 79 mm (1.6 × 0.9 × 3.1 in.)
(excluding projections)
Length of cable Approx. 1.7 m (5 ft. 7 in.)
Weight Approx. 110 g (3.9 oz) (excluding power cable)
Q7115_25_UM_EN.book Page 134 Friday, May 30, 2008 2:32 PM
135
Technical Notes
Index
Symbols
a Smile mode 49
A (auto) mode 22
E Sound file playback mode 67
E Voice recording mode 65
C List by date mode 58
C Scene mode 35
F Setup mode 102
D Movie mode 61
g (tele) 24
f (wide) 24
i Playback zoom 52
h Thumbnail playback 51
j Help 11
k (apply selection) button 5, 9
s Active child mode 47
l (delete) button 5, 28, 29, 57, 64
c (shooting/playback) button 5, 8, 28
n Self-timer 9, 32
m Flash mode 9, 30
p Macro mode 9, 33
d (menu) button 5, 11
e (mode) button 5, 8
o (exposure compensation) 34
R 44
c D-Lighting 54
A
Accessories 117
Active child 39
AF area 26
AF area mode 91
AF assist 111
Audio/video cable 70
Auto off 113
Auto-focus mode 63
AVI 118
AV-out connect 70
B
Backlight (o) 40
Backlit subjects 30, 40
Battery 14
Battery charger 12, 117
Battery level indicator 122
Battery-chamber/memory card slot cover
5
Beach/snow (g) 37
Best shot selector 39
Blur 128
Brightness 108
C
Cable connector 5, 71, 76
Center-weighted 88
Cleaning
Body 121
Lens 121
Monitor 121
Close-up (k) 39
Color options 90, 95
Computer 71–74, 114
copying pictures to 71–74
Continuous 89
Copy 101
Copy (n) 40
Crop 55
Cyanotype 90
D
Date 18–19, 105, 109
printing 82
Date imprint 109
Daylight saving time 105
Delete 99
Digital print order format 81–82
Digital zoom 112
D-Lighting 54
DSCN 118
Dusk/dawn (i) 38
E
E Sound file playback mode 67
E-mail 84
Error messages 122–125
Exposure compensation 34
Extension 118
F
Face priority 91
shooting 93
File names 118
Q7115_25_UM_EN.book Page 135 Friday, May 30, 2008 2:32 PM
Q7115_25_UM_EN_1st
136
Index
Technical Notes
Fill flash 30
Fireworks show (m) 40
Firmware version 116
Flash 30, 114
lamp 5, 31
mode 30
Flash mode 95
Focus 6, 26
area 6, 26
face priority 93
Focus lock 92
Folder names 118
Food u 41
Format 21, 113
Framing 24
FSCN 118
Full-time AF 94
I
Image mode 35, 84
Internal memory 6–7, 20, 85, 113
capacity 85
formatting 113
ISO sensitivity 90
J
JPEG 131
JPG 118
L
Landscape (c) 36
Language 18, 114
Lens 4, 121
M
Macro mode 33
Matrix 88
Memory card 6–7, 20, 85, 117
approved 117
capacity of 85
formatting 113
Inserting and removing 20
slot 20
Menus 103
Metering 88
Monitor 5, 6–7, 22, 108, 121
brightness 108
indicators in 6–7
Monitor brightness boost 23
Monitor settings 108
Motion detection 111
Movie menu 62
Movie mode 61
Movie options 62
small size 62
TV movie 62
Movies 61, 64
deleting 64
playback 64
recording 61
Museum (l) 39
N
Night landscape (j) 38
Nikon Transfer 71, 72
P
Panorama assist (p) 41, 43
Party/indoor (f) 37
Pastel 90
PictBridge 75–81
Playback 28, 51–56
menu 96–101
thumbnail 51
zoom 52
Playback menu 96–101
Playback-mode selection menu 9
Power switch 4
Power-on lamp 4, 22
Print set 81, 96
Print size 85
Protect 99
R
Red-eye reduction 31
Reset all 114
Rotary multi selector 5, 9
Rotate image 100
S
Scene auto selector 45
Self-timer 32, 95
Self-timer lamp 4, 32
Setup menu 102–116
Q7115_25_UM_EN.book Page 136 Friday, May 30, 2008 2:32 PM
137
Index
Technical Notes
Shooting menu 83–90
Shooting-mode selection menu 8
Shutter-release button 4
Single AF 94
Slide show 98
Small picture 56
Smear 121
Sound settings 112
Sports (d) 36
SSCN 118
Strap, Camera 4
Sunset (h) 38
Support information 2
T
Television 70
connecting to 70
Thumbnail playback 51
Time differences 107
Time zone 18–19, 105, 107
Transfer 72
Tripod 5
U
USB cable 71, 72, 76
V
Vibration reduction 110
Video mode 70, 114
Voice memos 57
Voice recordings
Copying 69
making 65
Playing 67
Volume 64, 68
W
Welcome screen 102
White balance 86, 95
preset 87
Z
Zoom 24
buttons 5
indicator 6
playback 52
Q7115_25_UM_EN.book Page 137 Friday, May 30, 2008 2:32 PM
Q7115_25_UM_EN_1st