Nikon 3143EB Wireless LAN Module User Manual Q7115 Wireless EN
Nikon Corporation Wireless LAN Module Q7115 Wireless EN
Nikon >
Contents
User Manual 4 fo 4
Q7115_Wireless_EN.book Page 0 Tuesday, June 3, 2008 7:34 PM
Wireless LAN Connection Guide
En
How to Use
Q7115_Wireless_EN.book Page 1 Tuesday, June 3, 2008 7:34 PM
Q7115_Wireless_EN_1st

For Customers in Those Countries in which Public Wireless LAN is Supported
Disclaimer of Warranties. NIKON’S my Picturetown SERVICE IS PROVIDED ON AN “AS
IS” BASIS AND WITHOUT WARRANTIES OF ANY KIND, EITHER EXPRESS OR IMPLIED,
INCLUDING, WITHOUT LIMITATION, ANY WARRANTIES OF MERCHANTABILITY OR
FITNESS FOR A PARTICULAR PURPOSE WHICH ARE EXPRESSLY DISCLAIMED. YOU AND
ANY USER OF NIKON’S my Picturetown SERVICE ASSUME ALL RESPONSIBILITY AND
RISK IN YOUR USE OF THE NIKON COOLPIX SERVICE. IN NO EVENT DOES NIKON
CORPORATION, NIKON INC., OR ANY OF ITS RESPECTIVE SUBSIDIARIES, AFFILIATES,
DISTRIBUTORS OR DEALERS (collectively “NIKON”) WARRANT THAT THE NIKON my
Picturetown SERVICE WILL BE UNINTERRUPTED, ALWAYS AVAILABLE, ACCURATE,
FUNCTIONAL OR ERROR FREE. SOME STATES DO NOT ALLOW THE DISCLAIMER OF
IMPLIED WARRANTIES, SO THE ABOVE EXCLUSION MAY NOT APPLY TO YOU.
Limitation of Liability. EVEN IF NIKON HAS BEEN ADVISED OF THE POSSIBILITY OF
DAMAGES, NIKON WILL NOT BE LIABLE TO YOU OR ANY USER OF THE NIKON my
Picturetown OR ANY THIRD PARTY FOR ANY DAMAGES ARISING FROM USE OF THE
NIKON my Picturetown SERVICE, INCLUDING WITHOUT LIMITATION, PUNITIVE,
EXEMPLARY, INCIDENTAL, SPECIAL OR CONSEQUENTIAL DAMAGES; LOSS OF PRIVACY
OR SECURITY DAMAGES; PERSONAL INJURY OR PROPERTY DAMAGES; OR ANY
DAMAGES WHATSOEVER RESULTING FROM INTERRUPTION OR FAILURE OF SERVICE;
LOST PROFITS; LOSS OF BUSINESS; LOSS OF OR FAILURE TO PRESERVE DATA, PICTURES
OR IMAGES; LOSS DUE TO UNAUTHORIZED ACCESS OR DUE TO VIRUSES OR OTHER
HARMFUL COMPONENTS; THE INABILITY TO USE THE NIKON my Picturetown SERVICE;
OR THE INTERCEPTION OR LOSS OF ANY DATA, PICTURES, IMAGES OR TRANSMISSION.
SOME STATES DO NOT ALLOW THE EXCLUSION OR LIMITATION OF INCIDENTAL OR
CONSEQUENTIAL DAMAGES, OR OTHER MODIFICATIONS OF OR LIMITATIONS TO
CERTAIN REMEDIES, SO THE ABOVE EXCLUSION OR LIMITATION MAY NOT APPLY TO
YOU.
Privacy and Security. PRIVACY CANNOT BE GUARANTEED, AND NIKON IS NOT
LIABLE TO YOU OR ANY OTHER PARTY FOR ANY LACK OF PRIVACY WHILE USING THE
NIKON my Picturetown SERVICE. NIKON HAS THE RIGHT, BUT NOT THE OBLIGATION
TO MONITOR, INTERCEPT AND DISCLOSE ANY TRANSMISSIONS OVER OR USING THE
NIKON my Picturetown SERVICES. YOU AND ANY USER OF NIKON’S my Picturetown
SERVICE ACKNOWLEDGE THAT THIS SERVICE IS NOT INHERENTLY SECURE AND THAT
WIRELESS COMMUNICATIONS CAN BE INTERCEPTED BY EQUIPMENT AND SOFTWARE
DESIGNED FOR THAT PURPOSE.
Q7115_Wireless_EN.book Page 2 Tuesday, June 3, 2008 7:34 PM
i
Table of Contents
Notices ........................................................................................................iii
About the Wireless LAN Connection Guide ..............................................1
Important Information and Precautions...................................................2
The Wireless LAN Features and my Picturetown......................................4
my Picturetown.......................................................................................................... 4
Picture Mail .................................................................................................................. 5
Picture Bank................................................................................................................. 5
my Picturetown Setup Workflow...............................................................6
First Steps ....................................................................................................8
Confirming Wireless LAN Connection Requirements .................................. 8
Ready Information Required for Wireless LAN Connection....................... 9
Network Profile.........................................................................................................................9
my Picturetown User Information.............................................................................11
Picture Mail Recipients ....................................................................................................12
Protecting the Camera with a Password...............................................................12
Configuring the Camera’s Wireless Settings ......................................... 13
Wireless Settings Using the Utility ....................................................................13
kInstalling the Utility ..............................................................................................13
lStarting the Utility.................................................................................................15
mConfiguring a Network Profile.......................................................................17
nEntering my Picturetown User Information..........................................20
oSpecifying Picture Mail Recipients/Recipient Groups ....................22
pProtecting Wireless LAN Information Stored in the Camera
(Applying a Password/Resetting the Camera) ....................................23
qFinishing Wireless Settings..............................................................................25
Q7115_Wireless_EN.book Page i Tuesday, June 3, 2008 7:34 PM
Q7115_Wireless_EN_1st

Table of Contents
ii
Wireless Settings from the Camera...................................................................26
Basic Operation of the Wireless Settings...............................................................26
aConfiguring a Network Profile.......................................................................28
bEntering my Picturetown User Information..........................................33
cSpecifying Picture Mail Recipients/Recipient Groups ....................34
dProtecting Wireless LAN Information Stored in the Camera
(Applying a Password/Resetting the Camera) ....................................37
Configuring a Network Profile
for a Home Wireless LAN Using WPS.......................................................................39
Registering with my Picturetown........................................................... 41
Registering a Camera with my Picturetown ..................................................43
Uploading Pictures to the my Picturetown Server................................ 44
Sending Picture Mail ..............................................................................................44
Using Picture Bank ..................................................................................................46
Uploading All Pictures at Once ...................................................................................46
Uploading Selected Pictures.........................................................................................47
Connecting to a Wireless LAN.............................................................................49
Viewing Pictures on the my Picturetown Server................................... 51
Appendix .................................................................................................. 52
Error Messages..........................................................................................................52
Troubleshooting ......................................................................................................53
Index.............................................................................................................................55
Q7115_Wireless_EN.book Page ii Wednesday, June 4, 2008 6:01 PM
iii
Notices
This product, which contains encryption software developed in the United States, is
controlled by the United States Export Administration Regulations and may not be
exported or re-exported to any country to which the United States embargoes goods. As
of April 2007 the following countries were subject to embargo: Cuba, Iran, North Korea,
Sudan, and Syria.
Restrictions on Wireless Devices
The wireless transceiver included in this product conforms to wireless regulations in the
country of sale and is not for use in other countries (products purchased in the EU or
EFTA can be used anywhere within the EU and EFTA). Nikon does not accept liability for
use in other countries. Users who are unsure as to the original country of sale should
consult with their local Nikon service center or Nikon-authorized service representative.
This restriction applies to wireless operation only and not to any other use of the
product.
Notice for customers in the U.S.A. and Canada
Federal Communications Commission (FCC) and Industry of Canada (IC)
Declaration of Conformity
This device complies with Part 15 of FCC rules and RSS-Gen of IC rules. Operation is
subject to the following two conditions: (1) this device may not cause interference, and
(2) this device must accept any interference, including interference that may cause
undesired operation of this device.
FCC/IC RF Exposure Statement
The available scientific evidence does not show that any health problems are associated
with using low power wireless devices. There is no proof, however, that these low power
wireless devices are absolutely safe. Low power wireless devices emit low levels of radio
frequency energy (RF) in the microwave range while being used. Whereas high levels of
RF can produce health effects (by heating tissue), exposure to low-level RF that does not
produce heating effects causes no known adverse health effects. Many studies of low-
level RF exposures have not found any biological effects. Some studies have suggested
that some biological effects might occur, but such findings have not been confirmed by
additional research. Wireless LAN Module (GC-131) has been tested and found to
comply with FCC/IC radiation exposure limits set forth for an uncontrolled equipment
and meets the FCC radio frequency (RF) Exposure Guidelines in Supplement C to OET65
and RSS-102 of the IC radio frequency (RF) Exposure rules. Please refer to the SAR test
report that was uploaded at FCC website.
This device should not be co-located or operated in conjunction with any other antenna
or transmitter.
Q7115_Wireless_EN.book Page iii Wednesday, June 4, 2008 6:01 PM
Q7115_Wireless_EN_1st

Notices
iv
Notice for customers in Europe
Hereby, Nikon, declares that this digital camera is in compliance with the essential
requirements and other relevant provisions of Directive 1999/5/EC.
Notice for customers in France
Outdoor use of the wireless transceiver is prohibited in France.
Public Wireless LAN
Public wireless LAN connection is available only via T-Mobile hotspots in the
United States and Germany, by SingTel in Singapore, by PCCW in Hong Kong, by
KT in Korea, by Q-Ware in Taiwan, by Orange in France, and by TeliaSonera in
Sweden. When configuring network profiles for a public wireless LAN hotspot,
use the following SSIDs, displayed in the camera monitor with SSID detection:
Operation of the COOLPIX S610c wireless LAN features is only guaranteed and
supported with connection via the wireless service providers listed above, and
only within the borders of the country, or countries, in which service is provided
by a particular provider.
•T-Mobile in the United States: tmobile •KT: NESPOT
•T-Mobile in Germany: tmobile •Q-Ware: wifly
•SingTel: Wireless@SG •Orange: orange
•PCCW: PCCW •TeliaSonera: homerun
Q7115_Wireless_EN.book Page iv Tuesday, June 3, 2008 7:34 PM
1
About the Wireless LAN Connection Guide
This guide explains the wireless LAN features built into the COOLPIX S610c. This guide
was written to help you enjoy my Picturetown using the wireless LAN features. Read this
guide thoroughly before use, and keep it where all those who use the camera will read
it.
See the Quick Start Guide and the User’s Manual for more information on shooting and
playing back pictures.
Symbols and Conventions
To make it easier to find the information you need, the following symbols and
conventions are used:
Notations
•A Secure Digital (SD) memory card is referred to as a “memory card.”
•The setting at the time of purchase is referred to as the “default setting.”
•The names of menu items displayed in the camera monitor, and the names of buttons
or messages displayed in a computer monitor are indicated in bold text.
Illustrations and Screen Display
Illustrations shown in this guide may differ from actual display.
BBefore Using Wireless LAN Communication Features
Be sure to read the sections, “Notices” (Aiii) and “Important Information and Precautions” (A2), in
this guide. See also page ## of the COOLPIX S610/S610c User’s Manual for more information on
wireless transfer specifications.
This icon marks cautions, information
that should be read before use to
prevent damage to the camera.
BThis icon marks tips, additional
information that may be helpful when
using the camera.
D
This icon marks notes, information
that should be read before using the
camera.
CThis icon indicates that more
information is available elsewhere in
this guide.
A
Q7115_Wireless_EN.book Page 1 Tuesday, June 3, 2008 7:34 PM
Q7115_Wireless_EN_1st

2
Important Information and
Precautions
Note the following important points before using this product’s wireless LAN features.
Restrictions of Use Under Radio Laws and Precautions when Using
Radio Transmissions
•The wireless transceiver included in this product conforms to wireless regulations in
the country of sale and is not for use in other countries (products purchased in the EU
or EFTA can be used anywhere within the EU and EFTA).
•When using the wireless LAN features of this product, the product will search for
wireless networks automatically. At this time, the product may display wireless
networks (SSID) for which you are not an authorized user. Use of such wireless
networks may be regarded as unauthorized access. Never connect to an SSID that you
are not authorized to use.
•Always keep in mind that radio transmission or reception of data is subject to
interception by third parties.
Personal Information Management and Disclaimer
•User information registered and configured with the product, including wireless LAN
connection settings and other personal information, is susceptible to alteration and
loss resulting from operational error, static electricity, accident, malfunction, repair or
other handling. Always keep separate copies of important information. Nikon is not
responsible for any direct or indirect damages or lost profits resulting from alteration
or loss of content that is not attributable to Nikon.
•Before discarding this product or transferring it to another owner, it is recommended
that you apply the Reset option from the Wireless settings item in the camera’s
setup menu, to delete all user information registered and configured with the
product, including wireless LAN connection settings and other personal information.
•Nikon is not responsible for any communication charges stemming from
unauthorized access to a public wireless LAN by third parties, or any other damages
resulting from theft of the product.
•Nikon is not responsible for any damages stemming from unauthorized use of e-mail
addresses stored in the camera resulting from theft of the product.
Precautions and Limitations when Using the Wireless LAN Features
•Connection to a public wireless LAN for the wireless services (hereinafter referred to as
Services) using the COOLPIX S610c’s wireless LAN features is not guaranteed or
supported outside the United States, Hong Kong, Singapore, Korea, Taiwan, Germany,
France, and Sweden. Nikon is not responsible for any direct or indirect damages or
lost profits resulting from any connection made at your own risk.
Q7115_Wireless_EN.book Page 2 Tuesday, June 3, 2008 7:34 PM
Important Information and Precautions
3
•Use of these Services over a public wireless LAN requires a T-Mobile HotSpot subscription
if the product was originally purchased in the United States or Germany, a PCCW
subscription if purchased in Hong Kong, a SingTel subscription if purchased in Singapore,
a KT subscription if purchased in Korea, a Q-Ware subscription if purchased in Taiwan, an
Orange subscription if purchased in France, or a TeliaSonera subscription if purchased in
Sweden.
•Be sure to specify the e-mail addresses of Picture Mail recipients correctly. Errors will
not be indicated if the e-mail address is incorrect, nor will error notification be sent to
your e-mail address.
•Access to Picture Mail Web pages, indicated with links in Picture Mail e-mail
notification messages, is not restricted. Web pages can be viewed by anyone who
may obtain Picture Mail URLs.
•Nikon makes no guarantees whatsoever concerning the ability of these Services to
store or safeguard images. Be sure to maintain separate back-up copies of all
important images. Nikon is not responsible for any direct or indirect damages or lost
profits resulting from alteration or loss of content that is not attributable to Nikon.
•Your use of the Services is completely at your own risk and Nikon accepts no
responsibility on your behalf.
•By using the Services, you agree not to upload, post, e-mail or otherwise transmit or
communicate any material through the Services that is obscene, pornographic,
unlawful, threatening, an invasion of any privacy or publicity rights of any party,
defamatory, libelous, illegal or otherwise objectionable, or infringes on any copyright,
trademark or other intellectual property or contractual right of any party.
•You hereby irrevocably and unconditionally waive, discharge and release Nikon, its
affiliates and subsidiaries, and their respective officers, directors, employees, agents,
legal representatives, and successors (“Nikon Parties”) from and against any and all
claims by or against you related to any material you post, e-mail or otherwise transmit
or communicate through the Services.
•Furthermore, you agree to indemnify, defend, and hold harmless the Nikon Parties
from and against any claims, damages, liabilities, costs and expenses (including
reasonable attorneys’ and professionals’ fees and litigation costs) related to any
material you post, e-mail or otherwise transmit or communicate through the Services.
•You understand that (i) your right to use the Services may be terminated by Nikon
and/or (ii) the materials you post, e-mail or otherwise transmit or communicate
through the Services may be deleted or removed by Nikon in the event you breach
the foregoing, or any other terms and conditions that Nikon may require in
connection with your use of the Services.
•These Services are subject to change, suspension, or termination without notice.
•Be sure to read Nikon’s “Privacy Management Policy” located at the following URL:
http://www.nikon.co.jp/main/eng/privacy/index.htm
•If you are in Europe, click on your country of residence at the following URL and follow the
link <privacy policy>: http://www.europe-nikon.com/support/
•You can visit the my Picturetown Web site at the following URL:
http://mypicturetown.com/
Q7115_Wireless_EN.book Page 3 Tuesday, June 3, 2008 7:34 PM
Q7115_Wireless_EN_1st

4
The Wireless LAN Features and
my Picturetown
The wireless LAN communication features built into the COOLPIX S610c can be used to
upload pictures from the camera to the my Picturetown server over the Internet. Use the
Picture Mail service to share pictures with family and friends, and the Picture Bank service
to store pictures to dedicated space on the server. Connection to a wireless LAN access
point is required.
my Picturetown
my Picturetown is an Internet service for storing and viewing photos. The service offers
up to 2 GB of free storage.
•Pictures can be stored on the server using the wireless LAN features of the COOLPIX
S610c, or a computer connected to the Internet.
•Pictures stored on the server can be easily managed and sorted using a computer.
Access my Picturetown from the following URL:
http://mypicturetown.com/
BCOOLPIX S610c Wireless LAN Communication Features
Wireless LAN communication features cannot be used to connect the COOLPIX S610c to a
computer.
Q7115_Wireless_EN.book Page 4 Tuesday, June 3, 2008 7:34 PM
The Wireless LAN Features and my Picturetown
5
Picture Mail
Pictures and recipients are selected and uploaded to the my Picturetown server using the
camera. E-mail notification is automatically sent to selected recipients, allowing these family
and friends to view your pictures. Uploaded pictures can be viewed by accessing the Web
page specified in the e-mail notification from a computer or cellular telephone*. This feature
provides you with a convenient way to share pictures, such as those from vacations or that
record your children’s growth.
Movie, Pictmotion, and voice recording files cannot be uploaded.
* The use of cellular telephone e-mail addresses is only possible in the United States, and is supported
only for BlackBerry smartphones (version 4.0 or later recommended).
However, pictures cannot be viewed with some of these cellular telephones.
Picture Bank
Pictures and movies are uploaded to the my Picturetown server for storage. The my
Picturetown server can be used as your own personal storage space for pictures, and those
pictures can be downloaded to a computer any time. Upload of selected pictures can be
initiated, or picture upload can be set to begin automatically when the AC adapter is connected
to the camera to charge the battery, making this a convenient service when taking a large
number of pictures or for saving the pictures you take on an everyday basis.
Pictmotion and voice recording files cannot be uploaded.
my Picturetown
server
my Picturetown
server
Q7115_Wireless_EN.book Page 5 Tuesday, June 3, 2008 7:34 PM
Q7115_Wireless_EN_1st

6
my Picturetown Setup Workflow
Before taking advantage of my Picturetown services using the wireless LAN features of the
COOLPIX S610c, the camera’s wireless settings must be configured and you must register
with my Picturetown. These two processes are generally referred to as “setup.” The camera’s
wireless settings can be configured using a computer and the my Picturetown Utility
(supplied), or by using just the camera. Follow either of the procedures described below.
Applying wireless settings using
the my Picturetown Utility Applying wireless settings using the camera
Configuring a Network Profile (A17)
Configure the network profile necessary for
connecting the camera to the Internet via an
access point.
Wireless settings
Configuring a Network Profile (A28)
Configure the network profile necessary for
connecting the camera to the Internet via an
access point. Configuring the network profile is
simple using WPS (A7, 39).
Enter my Picturetown User Information (
A
20)
Enter the information, such as your e-mail address,
required to use the my Picturetown services.
Once this information has been specified, e-mail
notification requesting user registration with my
Picturetown will be sent to this e-mail address.
Enter my Picturetown User Information (
A
33)
Enter the information, such as your e-mail
address, required to use the my Picturetown
services, from the camera’s Sender option.
Specifying Picture Mail Recipients/Recipient
Groups (A22)*
Specifying Picture Mail Recipients/Recipient
Groups (A34)*
Protecting Wireless LAN Information Stored
in the Camera (A23)*
Apply password protection to the camera’s
wireless LAN features.
Protecting Wireless LAN Information Stored
in the Camera (A37)*
Apply password protection to the camera’s
wireless LAN features.
Uploading Pictures to the my Picturetown Server (A44)
Upload pictures using Picture Mail or Picture Bank. Once
pictures have been uploaded, e-mail notification requesting
user registration with my Picturetown will be sent to the e-
mail address specified from the camera’s Sender option.
Registering with my Picturetown (A41)
Use a computer to open the e-mail notification requesting user registration, click the URL provided in the e-
mail notification, and register the camera and user information with my Picturetown from the sign-up Web
page. Setup is complete when you receive an e-mail message confirming my Picturetown registration.
First Steps (be sure that all wireless LAN requirements are in place and ready necessary information) (
A
8)
Confirm network requirements for wireless LAN connection, and ready the necessary network profile for
wireless LAN connection and user information for my Picturetown.
* Picture Mail recipients and the camera’s password do not need to be specified immediately.
Q7115_Wireless_EN.book Page 6 Tuesday, June 3, 2008 7:34 PM
my Picturetown Setup Workflow
7
DThe my Picturetown Utility
•The my Picturetown Utility (hereafter “Utility“) is software that can be installed on a computer and
used to configure the camera’s wireless settings, and to request user registration with
my Picturetown when the camera is connected to a computer via the supplied USB cable. The
Utility is convenient for entering a large amount of text.
•The Utility is installed from the Software Suite CD supplied with the camera (A13).
DWi-Fi Protected Setup (WPS)
•Wi-Fi Protected Setup is a standard that simplifies home connection and security of wireless
devices.
•The COOLPIX S610c supports WPS. If your wireless LAN access point also supports WPS,
configuring the network connection between your home wireless LAN access point and the
camera is simple. (See the documentation provided with your access point to confirm whether or
not WPS is supported.)
See “Configuring a Network Profile for a Home Wireless LAN Using WPS” (A39) for detailed
information about using WPS to configure a network profile. Note that WPS cannot be used to
configure a network profile for a public wireless LAN access point.
Q7115_Wireless_EN.book Page 7 Tuesday, June 3, 2008 7:34 PM
Q7115_Wireless_EN_1st

8
First Steps
Confirming Wireless LAN Connection
Requirements
One of the following conditions must be met in order to use the wireless LAN
connection features.
CT-Mobile HotSpot Locations (the United States only)
See “Connecting via a Wireless LAN” (A50) for the latest list of public T-Mobile hotspots where
connection of the camera to the Internet is possible.
DSix-Month Complimentary T-Mobile HotSpot Subscription (the United States only)
Purchase of this camera includes six-month complimentary T-Mobile HotSpot subscription, which
allows you to connect to, and take advantage of, my Picturetown at thousands of locations
nationwide. Note that your six months of complimentary service is only available in the United
States and begins automatically the first time you connect using T-Mobile HotSpot. After the
complimentary service expires, if you wish to continue using the T-Mobile HotSpot service, you must
sign up and create an account with T-Mobile HotSpot. To upload pictures after signing up for the
T-Mobile HotSpot service, configure a new network profile with the camera.
This complimentary offer expires on May 30, 2009. To take advantage of this offer, you must connect
your COOLPIX S610c to the T-Mobile HotSpot network on or before this date.
Home wireless LAN
Home wireless LAN refers to a wireless LAN that utilizes a wireless LAN access point at
home.
A home wireless LAN that offers connection via an access point (infrastructure mode) is
required.
•my Picturetown is not available if the home wireless LAN uses a proxy server to connect
to the Internet.
•For more information on home wireless LAN configuration, contact the manufacturer of
the access point, or see other commercially available information on wireless LANs.
•The COOLPIX S610c is preconfigured with a default profile for T-Mobile @Home
branded wireless routers (the United States only). For more information, refer to the
supplied document, “Configuring the Camera’s Wireless Settings for Use with a T-
Mobile @Home Branded Wireless Router (the United States only).”
Public wireless LAN
Public wireless LAN refers to wireless LAN that utilizes a public wireless Internet access
point, such as those available in coffee shops, hotels, and airports.
A T-Mobile HotSpot subscription (United States only) is required.
Access the following URL for more information: http://hotspot.t-mobile.com/
See “Public Wireless LAN” (Aiv) for more information on countries in which public
wireless LANs can be accessed by, and the wireless service providers that support
connection of, this camera.
Q7115_Wireless_EN.book Page 8 Tuesday, June 3, 2008 7:34 PM
First Steps
9
Ready Information Required for
Wireless LAN Connection
Network Profile
Retrieve settings for the wireless LAN network to which the camera will be connected.
This information is necessary when setting up the camera’s network profile (A17, 28).
(There is no need to ready this information when using WPS to configure a network
profiles.)
•When connecting via a home wireless LAN, retrieve the wireless LAN network settings
from the network profile for a computer connected to the wireless LAN access point.
For information on displaying the network profile, see the documentation provided
with the wireless LAN access point, or contact the manufacturer of the device.
•When connecting via a public wireless LAN, retrieve the wireless LAN network settings
from information provided by the wireless service provider to which you subscribe (Aiv).
SSID (network name)
This is the name of the wireless LAN network to which the access point belongs. The SSID
is comprised of up to 32 alphanumerical characters.
Authentication
All data are encrypted to protect against interception by third parties. The same type of
encryption (authentication method) must be specified for both the wireless LAN access
point and the camera.
Select an authentication method from Open system, Shared key, WPA-PSK, or WPA2-PSK.
Encryption
This is the type of encryption for the method selected for Authentication.
The type of encryption available differs depending upon the authentication method.
Encryption key
This is the encryption key for the specified type of Authentication and Encryption. An
encryption key is not required when Authentication is set to Open system and
Encryption is set to None.
Key index
When Encryption is set to WEP, select a key index, which is the setting for the WEP key.
The camera’s default setting is 1. If selecting a key index other than 1, use the Utility to
specify a setting suited to the wireless LAN access point (A17). Specification of the a key
index is not required when Encryption is set to None, TKIP, or AES.
Authentication method Type of encryption available to the camera
Open system None or WEP
Shared key WEP
WPA-PSK TKIP or AES
WPA2-PSK
Q7115_Wireless_EN.book Page 9 Tuesday, June 3, 2008 7:34 PM
Q7115_Wireless_EN_1st
First Steps
10
IP address (home wireless LAN only)
This is a unique identifier assigned to communication devices on a computer network. The
IP address can be acquired automatically with this camera. If the network uses a fixed IP
address, manually enter the camera’s IP address, as well as the subnet mask, gateway,
primary DNS, and secondary DNS.
User name/Password (public wireless LAN only)
The user name and password provided by the wireless service provider to which you
subscribe may be necessary when configuring the camera’s network profile or connecting
to the network.
When MAC Address Filtering Disables Home Wireless LAN Access
If your access point’s SSID is not set to “any” (to allow connection of any wireless
device), or if MAC address filtering (a unique identifier attached to each device on a
LAN) is enabled, use a computer to modify access point settings to allow connection
of any wireless device and register the camera’s MAC address with the access point
beforehand. Follow the procedure below to confirm the camera’s MAC address.
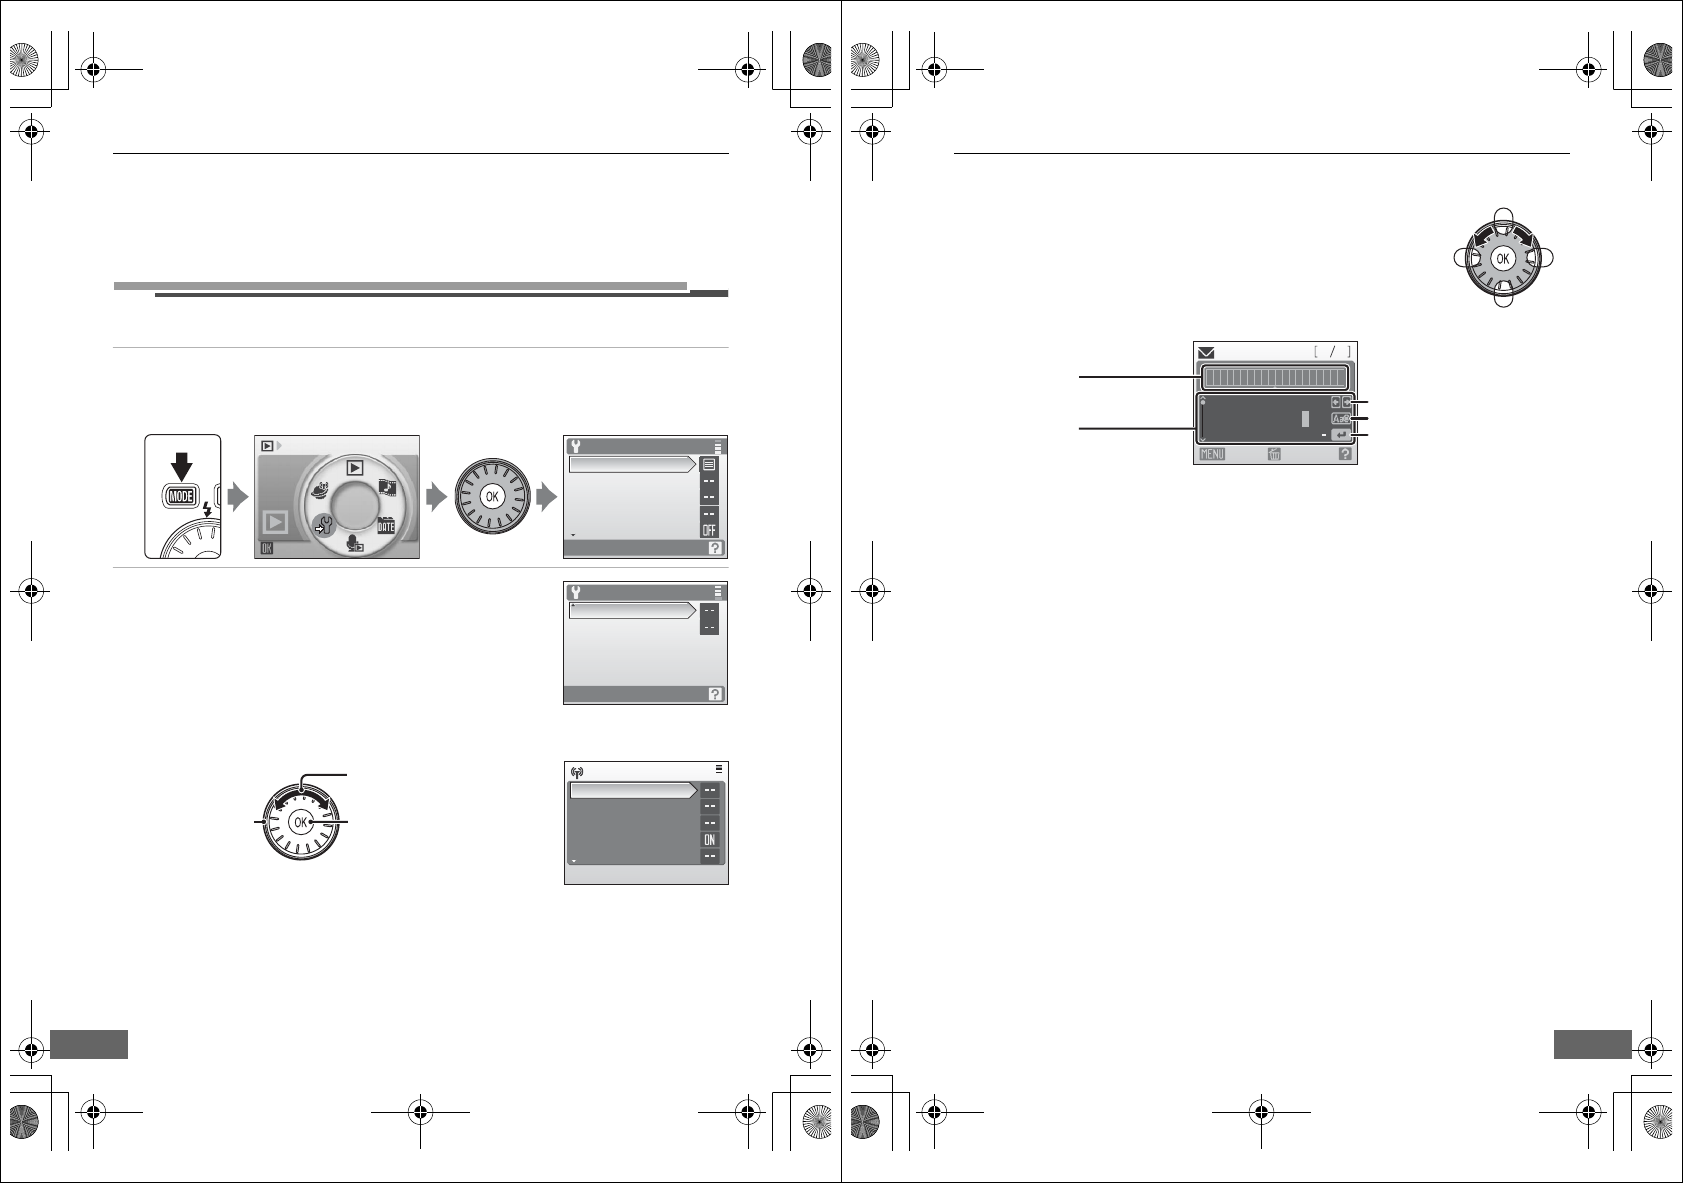
1Press the e button in playback mode or shooting mode. Use the
rotary multi selector to choose F and press the k button.
The setup menu is displayed.
For information on using the rotary multi selector, see “Basic Menu Operation” (A26).
2Use the rotary multi
selector to choose
Firmware version and
press the k button.
Set up Set up
Menus
Welcome screen
Date
Monitor settings
Date imprint
Back
MAC address
xx-xx-xx-xx-xx-xx
COOLPIX S610c Ver. 1.0
Set up
Firmware version
Wireless settings
MAC address
Q7115_Wireless_EN.book Page 10 Tuesday, June 3, 2008 7:34 PM
First Steps
11
my Picturetown User Information
The following information is required to register user information and the camera (A20,
33, 41) with my Picturetown, and to log-in to my Picturetown (A51) after picture
upload.
E-mail address
You must register a computer e-mail address with my Picturetown. Specify an e-mail
address, comprised of up to 64 alphanumerical characters. Cellular telephone e-mail
addresses are not supported.
•E-mail notification requesting user registration with my Picturetown will be sent to this
e-mail address.
•Once registered, use this e-mail address for the Email ID when logging in to my
Picturetown. This e-mail address is also used to identify you as the sender in e-mail
notification sent to recipients with picture upload using Picture Mail.
Alias
Specify an alias, comprised of up to 16 alphanumerical characters, to use with
my Picturetown.
The alias is also used to identify you as the sender in e-mail notification sent to recipients
with picture upload using Picture Mail.
Password
Use this password when logging in to my Picturetown from a computer or a cellular
telephone. Only certain models of cellular telephones, available in the United States, are
supported (A5). Specify a password, comprised of four to ten alphanumerical characters.
Key information
Key information refers to unique information attached to each camera.
•If using the Utility to configure wireless settings, you need not enter key information.
•If using the camera to configure wireless settings, enter key information in the my
Picturetown user registration page after uploading pictures for the first time.
•See “Registering with my Picturetown” (A41) for details on retrieving key information.
Q7115_Wireless_EN.book Page 11 Tuesday, June 3, 2008 7:34 PM
Q7115_Wireless_EN_1st

First Steps
12
Picture Mail Recipients
The following information is required to upload pictures using Picture Mail.
See “o Specifying Picture Mail Recipients/Recipient Groups” (A22) or “c Specifying
Picture Mail Recipients/Recipient Groups” (A34) for more information.
Protecting the Camera with a Password
A password (four-digit number) can be applied to prevent unauthorized access to the
camera’s wireless services by third parties, and to protect information stored in the
camera.
See “p Protecting Wireless LAN Information Stored in the Camera (Applying a
Password/Resetting the Camera)” (A23) or “d Protecting Wireless LAN Information
Stored in the Camera (Applying a Password/Resetting the Camera)” (A37) for more
information.
E-mail address
Recipient’s e-mail address is comprised of up to 64 alphanumerical characters. Up to 30
recipients can be specified with the camera. E-mail addresses for only certain models of
cellular telephones, available in the United States, are supported (A5).
Alias
Specify recipient’s alias, comprised of up to 16 alphanumerical characters.
Group
Recipients can be grouped for specification of multiple recipients as a single Picture Mail
recipient. Specify a name for the recipient group, comprised of up to 16 alphanumerical
characters.
(Required Only for Picture Mail)
Q7115_Wireless_EN.book Page 12 Tuesday, June 3, 2008 7:34 PM
13
Configuring the Camera’s
Wireless Settings
Wireless Settings Using the Utility
The camera’s wireless settings can be configured from a computer using the Utility (my
Picturetown Utility).
Bmy Picturetown Utility System Requirements
Windows
Compatible operating systems: 32-bit Windows Vista Service Pack 1 (Home Basic/Home Premium/
Business/Enterprise/Ultimate editions), Windows XP Service Pack 3 (Home Edition/Professional)
Macintosh
Compatible operating systems: Mac OS X (version 10.3.9, 10.4.11, 10.5.2)
Refer to the Nikon Web site for the latest information on operating system compatibility.
BNotes on Software Installation
•Exit all other applications and turn off any virus-checking software.
•Log on to an account with administrator privileges.
•The illustrations in this section are from Windows Vista.
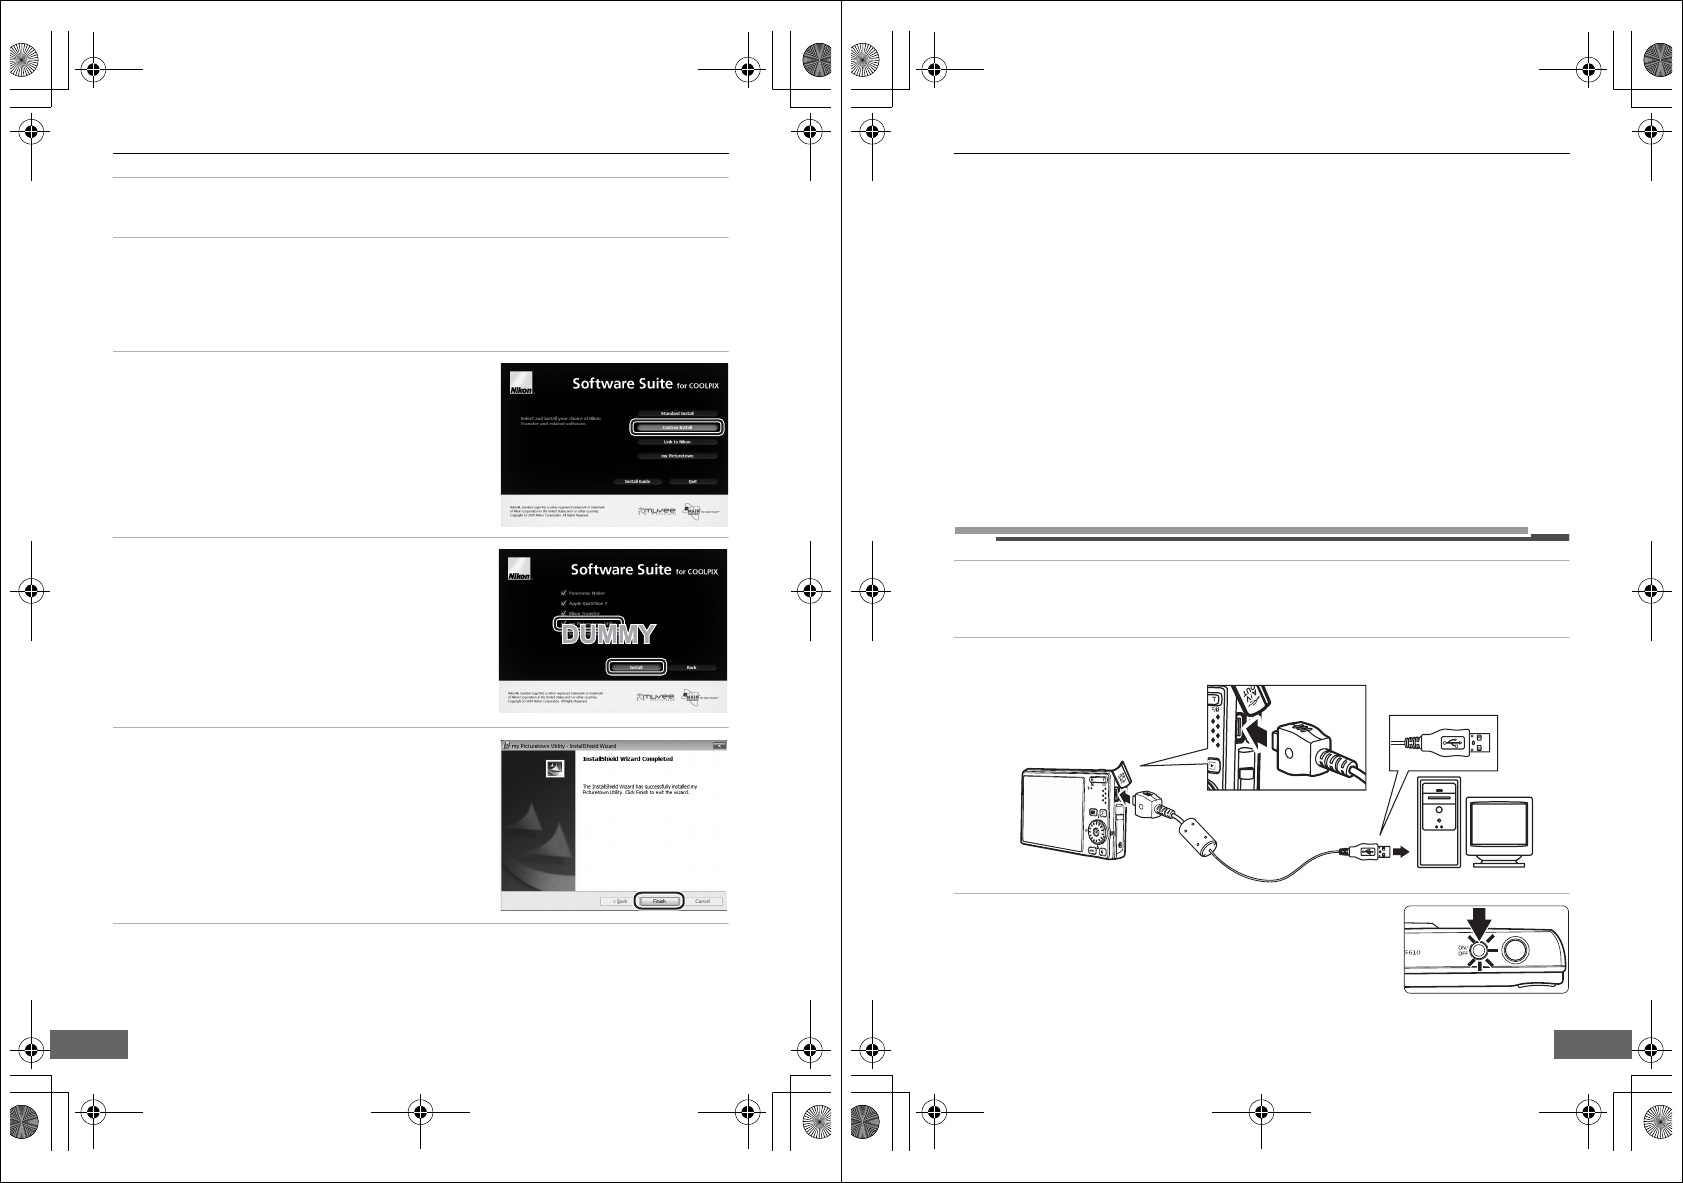
kInstalling the Utility
Install the Utility on a computer.
When configuring the network profile for a home wireless LAN (A17), using a
computer connected to the home wireless LAN, at a location where the home wireless
LAN can be accessed, is recommended.
1
Turn on the computer and insert the Software Suite CD into the CD-ROM drive.
Windows:
Choose Run Welcome.exe in the AutoPlay dialog to start the Install Center program. If your
computer is running Windows XP, the Install Center program will start.
Proceed to step 3.
Macintosh:
The Software Suite folder will open automatically. Double-click the Welcome icon.
If the folder does not open automatically, double-click on the Software Suite CD icon on the
desktop.
CIf the Install Center program Does not Start Automatically (Windows only)
Open the Software Suite by selecting Computer from the Start menu (Windows Vista), or My
Computer from the Start menu (Windows XP), and double-clicking the Software Suite CD
icon.
Q7115_Wireless_EN.book Page 13 Tuesday, June 3, 2008 7:34 PM
Q7115_Wireless_EN_1st
Configuring the Camera’s Wireless Settings
14
2Enter the computer’s administrator name and password (Macintosh only).
Enter the computer’s administrator name and password, and then click OK.
3Confirm the language and click Next.
CIf Nikon Transfer Is Already Installed
The Language Selection dialog will not be displayed if Nikon Transfer is installed. The Install
Center window is displayed in the language selected when Nikon Transfer was first installed.
4Click Custom Install.
5Select my Picturetown Utility (w) and
click Install.
The my Picturetown Utility installer will start.
Follow the on-screen instructions to complete the
installation.
6Finish the installation.
Click Finish (Windows) or Quit (Macintosh) and follow
the on-screen instructions to exit the Install Center
program.
7Remove the Software Suite CD from the CD-ROM drive.
This completes installation.
Q7115_Wireless_EN.book Page 14 Tuesday, June 3, 2008 7:34 PM
Configuring the Camera’s Wireless Settings
15
CUninstalling the Utility
Windows: Select Start>All Programs>my Picturetown Utility>my Picturetown Utility
Uninstall and follow the on-screen instructions to complete uninstallation.
Macintosh: Open Applications>Nikon Software>my Picturetown Utility, double-click the
my Picturetown Utility Uninstaller icon, and follow the on-screen instructions to complete
uninstallation.
lStarting the Utility
1Turn off the camera.
If the camera’s battery is exhausted while configuring wireless settings, the settings will not be
applied correctly.
2Connect the camera to the computer using the supplied USB cable.
3Turn on the camera.
If Nikon Transfer starts automatically, exit Nikon Transfer before
proceeding.
Q7115_Wireless_EN.book Page 15 Tuesday, June 3, 2008 7:34 PM
Q7115_Wireless_EN_1st
Configuring the Camera’s Wireless Settings
16
4Start the Utility.
Follow the instructions below to start the Utility:
Windows: Start the computer and select Start>All
Programs>my Picturetown Utility> my
Picturetown Utility.
Macintosh: Start the computer and open Applications>Nikon
Software>my Picturetown Utility folder, and
double-click the my Picturetown Utility icon.
When the Utility finishes loading, the screen shown at right will be
displayed. Take note of suggestions given and click Next.
You can also start the Utility by clicking the my Picturetown
Utility icon ( ) on the desktop (Windows) or the my Picturetown Utility icon ( ) in the
Dock (Macintosh).
BConnecting the USB Cable
•When connecting the USB cable, be sure that the connectors are oriented correctly. Do not use
force when connecting the USB cable. When disconnecting the USB cable, do not pull the
connector at an angle.
•Connection may not be recognized when the camera is connected to a computer via a USB hub.
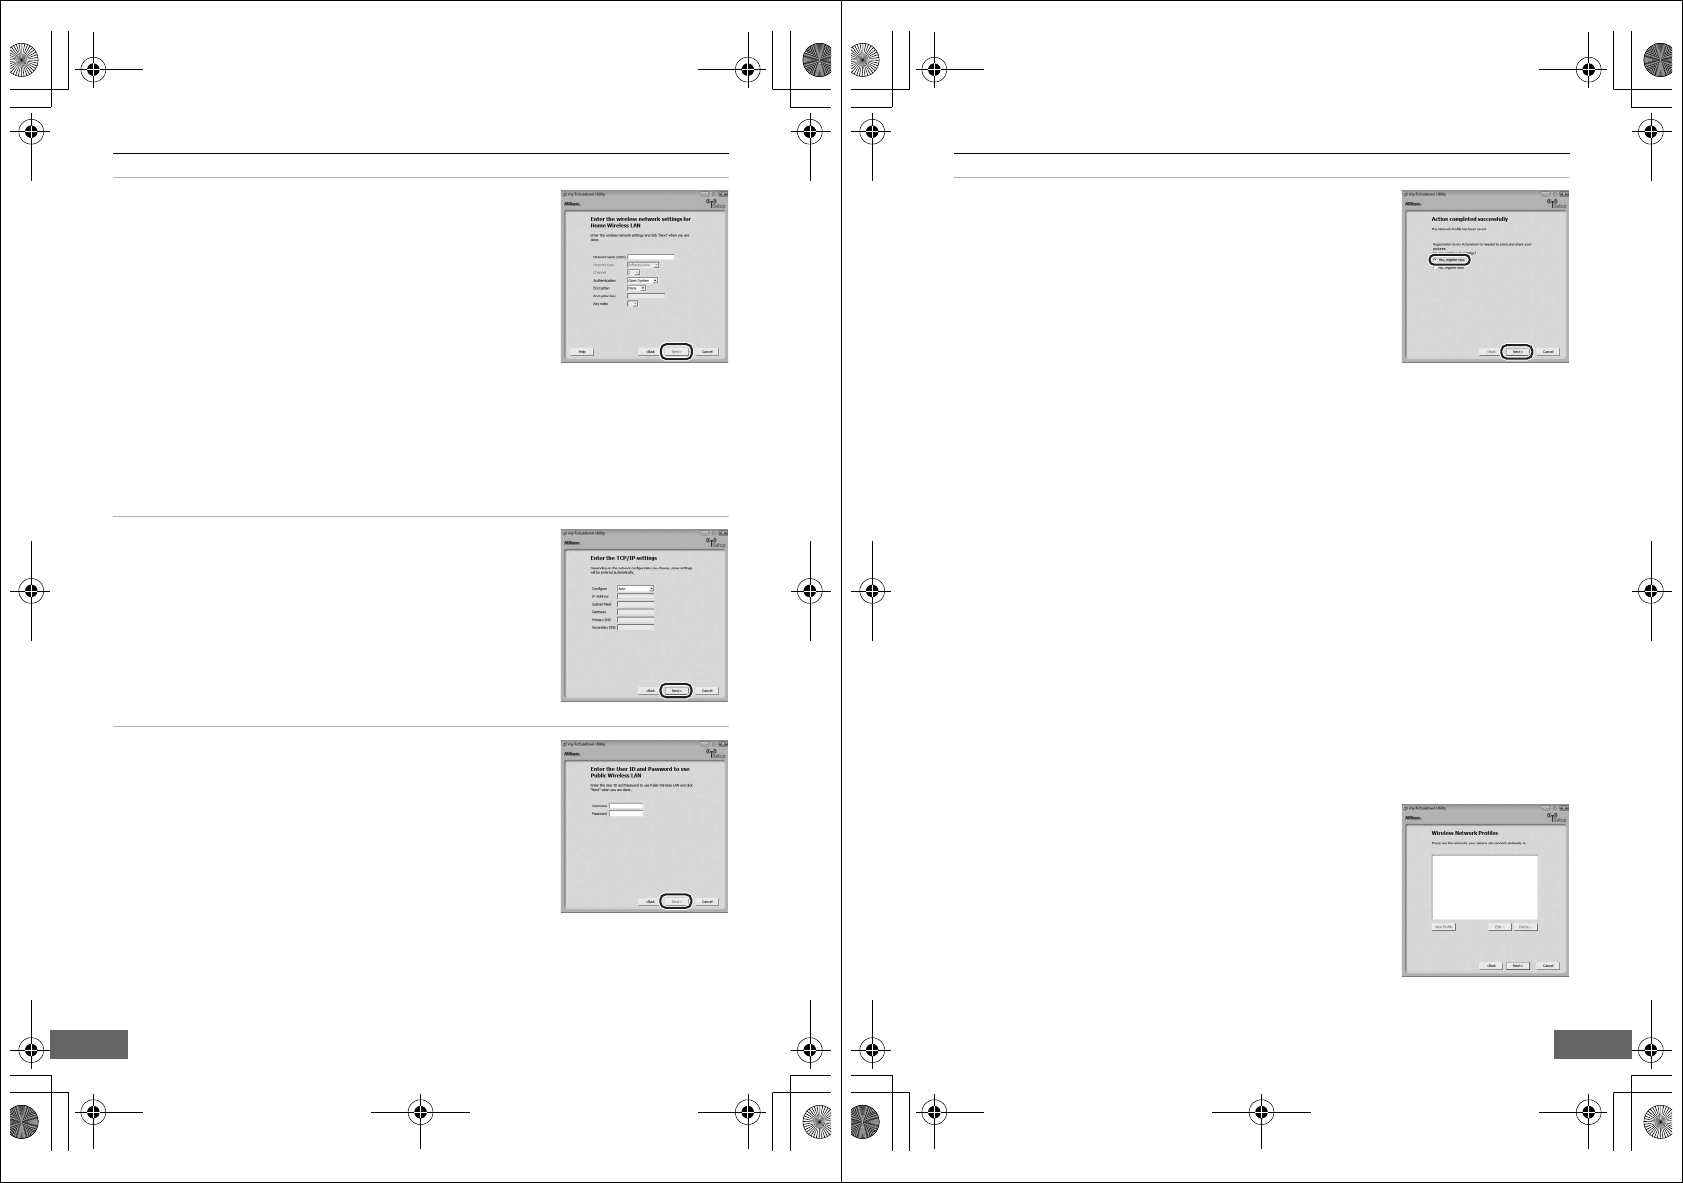
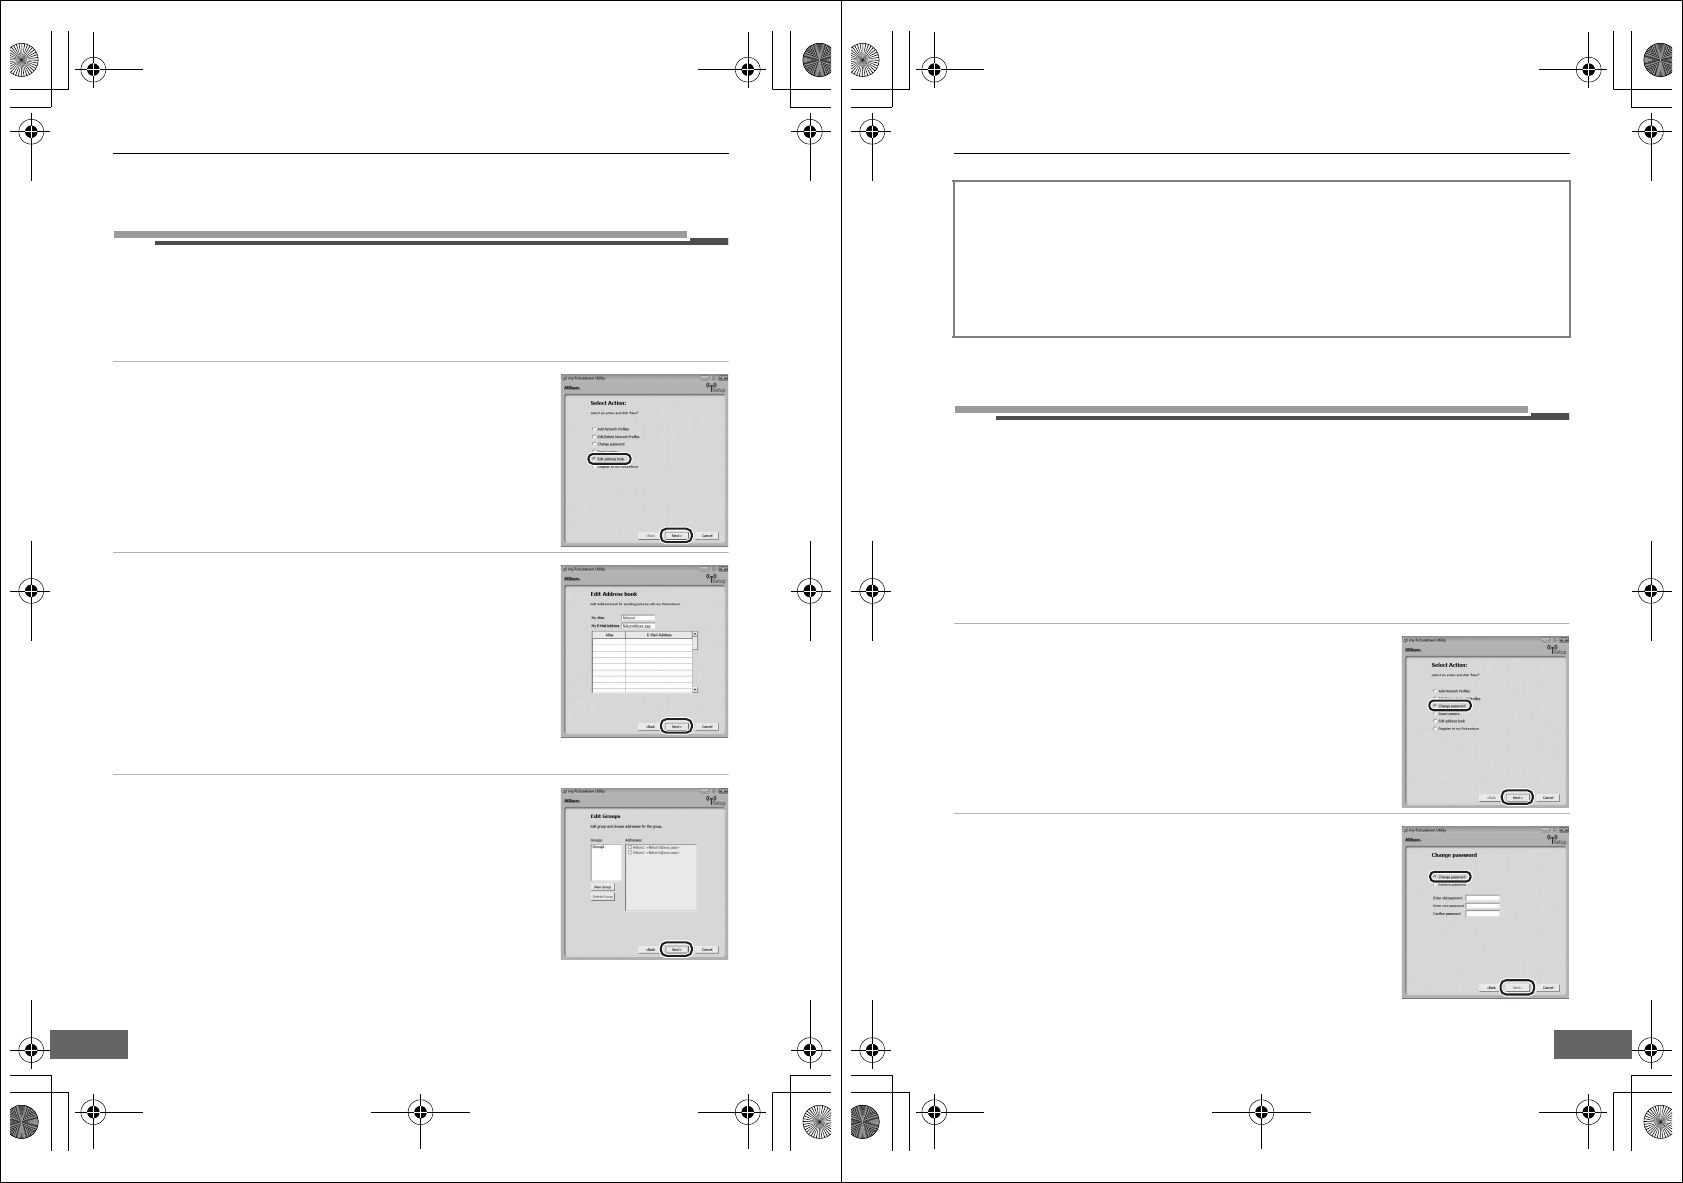
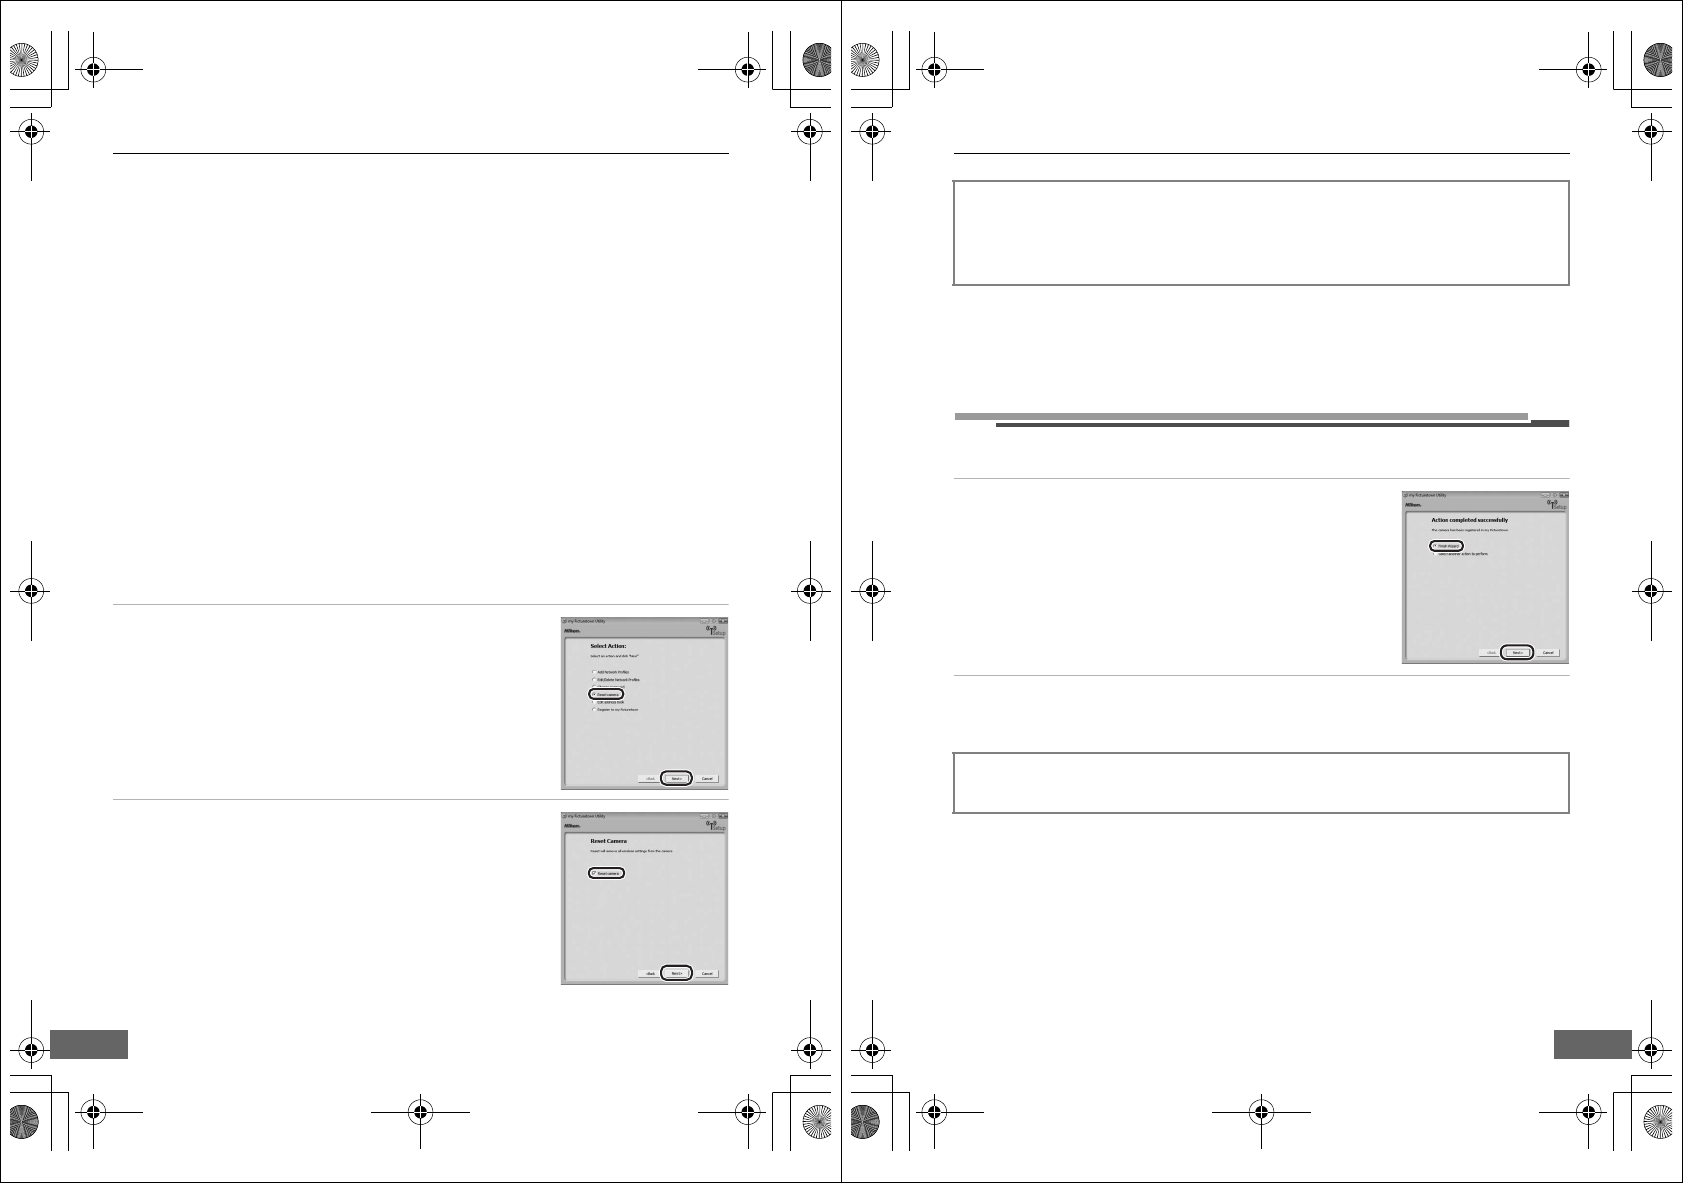
5The Select Action dialog is displayed.
1Configure wireless LAN settings information with the camera (A17).
2Edit or delete network profiles stored in the camera (A19).
3Apply, edit or delete the camera’s password (A23).
4Reset all wireless settings stored in the camera (A24).
5Enter Picture Mail recipient aliases and e-mail addresses, or create groups of Picture Mail
recipients (A22).
6Enter the information required for my Picturetown registration and send the information to
my Picturetown (A20). Connection to the Internet is required.
B
Six-Month Complimentary T-Mobile HotSpot Subscription (the United States only)
If using the six-month complimentary T-Mobile HotSpot subscription and connecting via a public
wireless LAN, choose Register to my Picturetown, click Next, and proceed to “n Entering my
Picturetown User Information” (A20) to set up the camera’s wireless settings. Do not choose Add
Network Profiles or Edit/Delete Network Profiles to modify a network profile of tmobile.
1 Add Network Profiles
2 Edit/Delete Network Profiles
3 Change password
4 Reset camera
5 Edit address book
6 Register to my Picturetown
Q7115_Wireless_EN.book Page 16 Tuesday, June 3, 2008 7:34 PM
Configuring the Camera’s Wireless Settings
17
mConfiguring a Network Profile
Enable connection of the camera to the Internet via a wireless LAN access point. Use the
Utility to apply the same network settings used by the wireless LAN network to the camera.
Up to ten network profiles to connect can be registered.
Accessing the wireless LAN network from the computer before configuring a network
profile is recommended.
If using the six-month complimentary T-Mobile HotSpot subscription, a network profile
has already been configured with the camera. Be sure to proceed to “n Entering my
Picturetown User Information” (A20) (in the United States only).
1Choose Add Network Profiles from the Select
Action dialog (A16) and click Next.
Click Cancel to cancel configuration.
2Choose the type of network profile and click Next.
If configuring a home wireless LAN profile, choose
Add Network
Profile at Home Wireless LAN
. If configuring a public wireless LAN
profile, choose
Add Network Profile at Public Wireless LAN
.
See “Public Wireless LAN” (Aiv) for more information on countries
in which public wireless LANs can be accessed by, and the wireless
service providers that support connection of, this camera.
•Windows:
If Add Network Profile at Home Wireless LAN is selected,
proceed to step 3.
If Add Network Profile at Public Wireless LAN is selected,
proceed to step 4.
•Macintosh:
Proceed to step 4.
3Choose a setup option and click Next.
If Automatic setup (recommended) is selected and the SSIDs
for one or more access points detected by the computer will be
displayed in the Network name (SSID) (A9) field, select the
desired SSID and enter the encryption key in the Encryption key
(A9) field. Click Next to apply the setting. The network profile is
stored in the camera. Proceed to step 7.
If connection by any wireless device is not allowed by the access
point, or the desired SSID is not detected, select Manual setup
(for advanced users) to specify the IP address manually, or to
configure wireless settings using a computer that is not
connected to the Internet, and click Next. Proceed to step 4.
Q7115_Wireless_EN.book Page 17 Tuesday, June 3, 2008 7:34 PM
Q7115_Wireless_EN_1st
Configuring the Camera’s Wireless Settings
18
4Configure Network name (SSID) (A9),
Authentication (A9), and Encryption (A9), and
click Next.
Enter the encryption key for the selected authentication
method in the Encryption key (A9) field and select a Key
index (A9) option.
•If Open System was selected for Authentication and WEP
was selected for Encryption, or Shared Key was selected for
Authentication, enter the encryption key in the Encryption
key field and select a Key index option.
•If WPA-PSK or WPA2-PSK was selected for Authentication, enter the encryption key in
the Encryption key field.
If Open System was selected for Authentication, and None was selected for Encryption,
make no other changes and click Next.
If Add Network Profile at Home Wireless LAN was selected in step 2, proceed to step 5. If
Add Network Profile at Public Wireless LAN was selected in step 2, proceed to step 6.
5Choose Auto configuration or Manual
configuration, and click Next.
To acquire the IP address automatically, choose Auto. When
Next is clicked, the settings are applied and the network profile
is stored in the camera. Proceed to step 7.
To specify a fixed IP address, choose Manual, enter the
appropriate information in the IP Address, Subnet Mask,
Gateway, Primary DNS, and Secondary DNS (A10) fields,
and click Next to apply the settings. The network profile is
stored in the camera. Proceed to step 7.
6Enter a Username and Password (A10) provided
by the wireless service provider to which you
subscribe (Aiv), and click Next.
The settings are applied and the network profile is stored in the
camera. Proceed to step 7.
Q7115_Wireless_EN.book Page 18 Tuesday, June 3, 2008 7:34 PM
Configuring the Camera’s Wireless Settings
19
7An Action completed successfully dialog will be
displayed.
When setting up the wireless LAN features of the camera for
the first time, choose Yes, register now and click Next.
Proceed to “n Entering my Picturetown User Information”
(A20).
When No, register later is selected and Next is clicked, an
Action completed successfully dialog, with options for finishing
or performing another action, will be displayed. To apply
additional settings, choose Select another action to perform,
and click Next. The monitor will return to the Select Action dialog (A16). To register user
information with my Picturetown after additional settings are applied, choose Register to my
Picturetown in the Select Action dialog and proceed to “n Entering my Picturetown User
Information” (A20).
If user information and the camera have already been registered with my Picturetown, the
dialog shown at right will not be displayed. The Action completed successfully dialog, with
options for finishing or performing another action, will be displayed instead. To apply
additional settings, choose Select another action to perform in the Action completed
successfully dialog, and click Next. The monitor will return to the Select Action dialog (A16).
CConfiguring Multiple Network Profiles
To configure more than one network profile, repeat the procedures described from step 1 (A17) for
each wireless LAN.
Network profiles can also be configured using the camera (A28).
CEditing/Deleting Network Profiles
Follow the procedures described below to delete or edit a network profile stored in the camera.
1Choose Edit/Delete Network Profiles from the Select Action dialog (A16) and click Next.
2Choose the desired SSID.
Click Edit... to display the screen displayed in step 4 of “m
Configuring a Network Profile” (A18). Repeat steps 4 through 6 to
edit the network profile.
Click Delete... to delete the selected SSID.
If using the six-month complimentary T-Mobile HotSpot
subscription, do not edit or delete the tmobile SSID (in the United
States only).
3Click Next.
Proceed to “q Finishing Wireless Settings” (A25).
AP1 Home wireless LAN
AP2 Home wireless LAN
AP3 Public wireless LAN
Q7115_Wireless_EN.book Page 19 Tuesday, June 3, 2008 7:34 PM
Q7115_Wireless_EN_1st
Configuring the Camera’s Wireless Settings
20
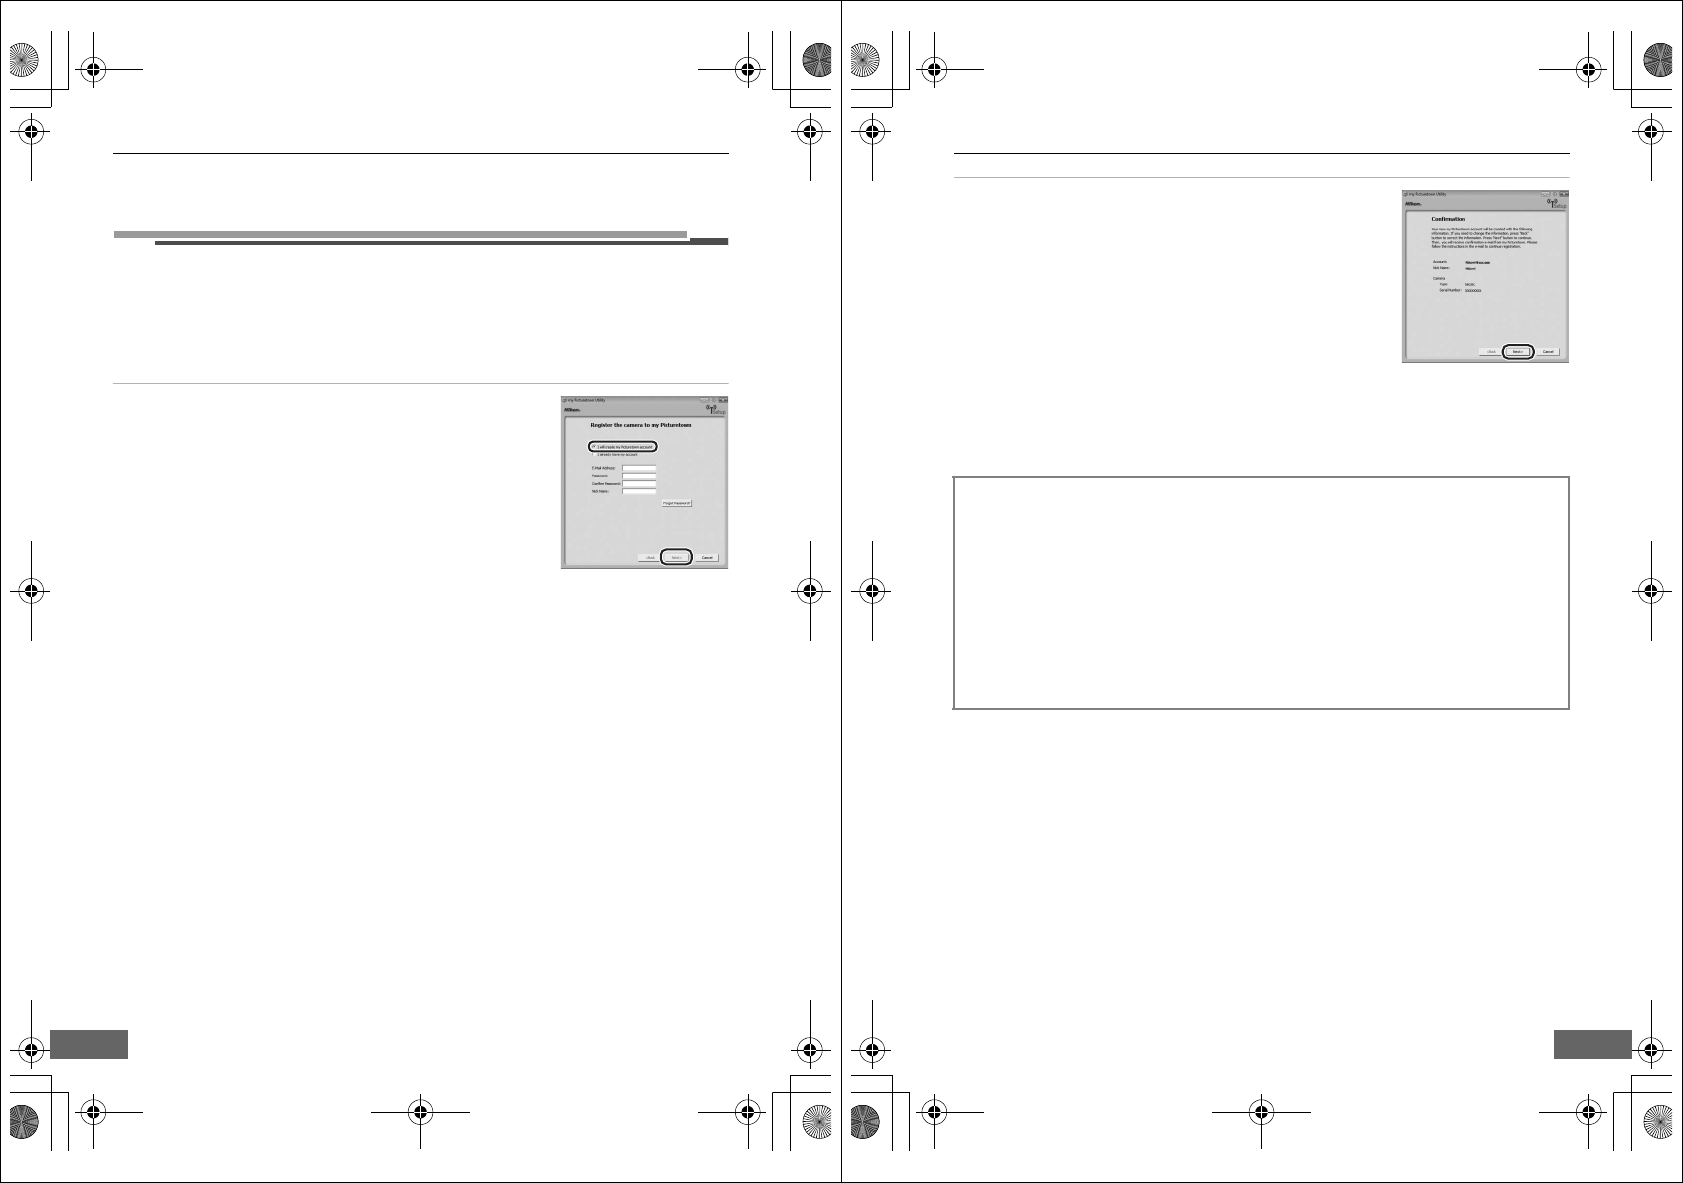
nEntering my Picturetown User Information
Store the information required for my Picturetown user registration with the camera and
send it to my Picturetown. This information is necessary to log-in to my Picturetown
after picture upload. The e-mail address and alias are automatically stored in the
camera’s Sender setting (A33), and are used to identify you as the sender in e-mail
notification sent to recipients with picture upload using Picture Mail.
1Choose I will create my Picturetown account and
enter the appropriate information in the E-Mail
Address (A11), Password (A11), Confirm
Password, and Nick Name (A11) fields.
Enter an e-mail address comprised of up to 64 alphanumerical
characters, a password comprised of four to ten alphanumerical
characters, and a nickname (alias) comprised of up to 16
alphanumerical characters. Enter the same password in the
Confirm Password field as that entered in the Password field.
Cellular telephone e-mail addresses are not supported.
No error message, or indication that an error has occurred, is sent from the server when
delivery errors occur due to incorrect entry of e-mail addresses.
If you have already registered with my Picturetown, choose I already have my account, and
enter the information already registered in the E-Mail Address and Password fields (A43).
The dialog shown above is also displayed when Register to my Picturetown is selected from
the Select Action dialog (A16), and Next is clicked. If the camera has been protected with a
password (A23, 37), enter the password.
Once all information has been entered, click Next.
Q7115_Wireless_EN.book Page 20 Tuesday, June 3, 2008 7:34 PM
Configuring the Camera’s Wireless Settings
21
2Check that the information is correct and click
Next.
The Action completed successfully dialog, with options for
finishing or performing another action, will be displayed, and
the e-mail address and nickname will be stored in the camera.
The specified user information and the camera’s key information
will be sent to the my Picturetown server over the Internet.
E-mail notification requesting user registration with
my Picturetown will be sent to the e-mail address configured
with the camera. Follow the instructions in the e-mail
notification to continue registration. See “Registering with my Picturetown” (A41) for
more information.
If you have already registered with my Picturetown, an e-mail message confirming
my Picturetown registration will be sent to the specified e-mail address.
BSending User Information
When sending the information required for my Picturetown user information to my Picturetown
from the Utility, the computer which uses a proxy server can be used. However, some proxy settings
may not allow the information to be sent to my Picturetown.
CEditing the my Picturetown User Information
When uploading pictures using Picture Mail or Picture Bank after user information has been
registered with my Picturetown, user information (including information stored in the camera’s
Sender setting) stored in the camera cannot be displayed or edited using the camera or the Utility
(A42). In addition, the my Picturetown password cannot be changed using the camera or the
Utility.
Once you have registered with my Picturetown, proceed as indicated below.
•Using Picture Mail: Choose Select another action to perform and click Next to
return to the Select Action dialog. Proceed to “o Specifying Picture Mail
Recipients/Recipient Groups” (A22).
•Not using Picture Mail: Choose Select another action to perform and click
Next to return to the Select Action dialog. Proceed to “p Protecting Wireless LAN
Information Stored in the Camera (Applying a Password/Resetting the Camera)”
(A23).
•Completing wireless settings: Proceed to “q Finishing Wireless Settings”
(A25).
Q7115_Wireless_EN.book Page 21 Tuesday, June 3, 2008 7:34 PM
Q7115_Wireless_EN_1st
Configuring the Camera’s Wireless Settings
22
o
Specifying Picture Mail Recipients/Recipient Groups
Specify recipients (aliases and e-mail addresses) of e-mail notification sent after picture
upload. Groups containing multiple recipients can also be created. This is useful when
Picture Mail is often sent to the same recipients. Recipients and groups can also be
added, or edited, later using the camera (A34).
1Choose Edit address book from the Select Action
dialog (A16) and click Next.
Click Cancel to cancel configuration.
2Enter recipient aliases (A12) and e-mail addresses
(A12), and click Next.
Enter an alias comprised of up to 16 alphanumerical characters
and an e-mail address comprised of up to 64 alphanumerical
characters.
Up to 30 recipients can be specified.
E-mail addresses for only certain models of cellular telephones,
available in the United States, are supported (A5).
If user information has been registered, My Alias and My E-
Mail Address are not displayed.
3Create or edit a recipient group (A12).
Enter a name for the group, comprised of up to 16
alphanumerical characters.
Up to five groups can be created.
If not creating or editing a recipient group, make no other
changes and click Next.
When Next is clicked, the Action completed successfully dialog,
with options for finishing or performing another action, is
displayed and the recipient settings are applied.
Q7115_Wireless_EN.book Page 22 Tuesday, June 3, 2008 7:34 PM
Configuring the Camera’s Wireless Settings
23
Protecting Wireless LAN Information Stored in the Camera
(Applying a Password/Resetting the Camera)
A password (A12) can be applied to prevent access to wireless LAN information stored
in the camera, including network profiles and recipient e-mail addresses, by third parties
if the camera should be lost or stolen, or otherwise compromised. In addition, all camera
settings can be restored to their default settings and data stored in the camera’s internal
memory can be deleted before the camera is transferred to another owner or discarded.
Applying a Password to the Camera
Applying a password to the camera to protect wireless LAN information is
recommended.
1Choose Change password from the Select Action
dialog (A16) and click Next.
Click Cancel to cancel configuration.
2Choose Change password and enter the same
password (four-digit number) in the Enter new
password and the Confirm password fields.
If changing the password, also enter the current password in the
Enter old password field.
When Next is clicked, the Action completed successfully dialog,
with options for finishing or performing another action, is
displayed and the password is applied to the camera.
Proceed to “q Finishing Wireless Settings” (A25).
Once recipients and recipients group have been specified,proceed as indicated below.
•Applying a password to the camera: Choose Select another action to
perform and click Next to return to the Select Action dialog. Proceed to “p
Protecting Wireless LAN Information Stored in the Camera (Applying a Password/
Resetting the Camera)” (A23).
•Completing wireless settings: Proceed to “q Finishing Wireless Settings”
(A25).
p
Q7115_Wireless_EN.book Page 23 Tuesday, June 3, 2008 7:34 PM
Q7115_Wireless_EN_1st
Configuring the Camera’s Wireless Settings
24
CEntering a Password
If the camera is protected with a password, the password entry screen is displayed when configuring
the camera’s wireless settings using the Utility (A13), or from the camera’s setup menu (A26), or
when uploading selected pictures using Picture Mail or Picture Bank (A44, 47).
CChoosing a Password
Avoid using a password that can be easily guessed, such as a birth date. Be sure that you do not
forget the password.
CRemoving Password Protection
Choose Remove password in step 2 and enter the current password in the Enter old password
field. Click Next to remove the password.
Resetting the Camera
Follow the instructions below to reset all wireless LAN connection settings, including the
password, stored in the camera. Use this option to delete all user information stored in
the camera before transferring it to another owner. This option can also be used to reset
the camera if you forget the password.
1Choose Reset camera from the Select Action
dialog (A16) and click Next.
Click Cancel to cancel configuration.
2Check Reset camera and click Next.
The camera is reset.
Q7115_Wireless_EN.book Page 24 Tuesday, June 3, 2008 7:34 PM
Configuring the Camera’s Wireless Settings
25
qFinishing Wireless Settings
Once the camera’s wireless settings have been configured, finish the Utility.
1Finish the Utility.
Choose Finish wizard and click Next.
2Disconnect the camera from the computer.
Turn off the camera before disconnecting the USB cable.
Once the camera is reset, the dialog shown in step 7 of “m Configuring a Network
Profile” (A19) will be displayed. Repeat “n Entering my Picturetown User
Information” (A20) procedures to enter user information, unless the camera was reset
prior to transferring ownership.
You must register with my Picturetown to complete the setup. See “Registering with
my Picturetown” (A41) for more information.
Q7115_Wireless_EN.book Page 25 Tuesday, June 3, 2008 7:34 PM
Q7115_Wireless_EN_1st
Configuring the Camera’s Wireless Settings
26
Wireless Settings from the Camera
This section explains wireless LAN setup using the camera.
Basic Operation of the Wireless Settings
Displaying the Wireless Settings Menu
1Press the e button in playback mode or shooting mode. Rotate the
rotary multi selector to choose F and press the k button.
The setup menu is displayed.
2Rotate the rotary multi selector, or press up or
down, to choose Wireless settings and press the k
button.
The wireless settings menu is displayed.
Basic Menu Operation
Use the rotary multi selector to choose menu items and apply selections.
1Items can also be selected by pressing the rotary multi selector up or down.
2Pressing right advances display to the next screen.
CNote on the Rotary Multi Selector
Since the rotary multi selector can be used in various ways, concrete descriptions are included only
in cases where necessary.
In this guide, up, down, left, and right presses of the rotary multi selector are indicated with H, I,
J, and K.
Set up Set up
Menus
Welcome screen
Date
Monitor settings
Date imprint
Set up
Firmware version
Wireless settings
Select options1
Apply selection
(advance display to
next screen)2
Return display to the
previous screen
Wireless settings
Network profile
Sender
Address options
Picture Bank
Password
Q7115_Wireless_EN.book Page 26 Tuesday, June 3, 2008 7:34 PM
Configuring the Camera’s Wireless Settings
27
Entering Text with the Camera
Text for information such as aliases, e-mail addresses, and WEP keys
can be entered using the camera’s rotary multi selector. Rotate the
rotary multi selector, or press H, I, J, or K, to choose a character
or G, H, I, or J in the keyboard area.
•Text is entered at the current cursor position in the text entry area.
•Highlight G or H and press the k button to move the cursor in the text entry area.
•Highlight I and press the k button to change the type of character entered. Each
time the k button is pressed, the type of character changes in the following order:
lowercase letters ➝ uppercase letters ➝ symbols ➝ lowercase letters.
•To delete a character, move the cursor to that character’s position and press the l
button to delete.
•Press the g (j) button to preview the characters that have been entered. Press the g
(j) button again to return to the text entry screen.
•Once all text necessary has been entered, highlight J and press the k button. The
monitor display proceeds to the next screen.
abcdefgh i j k l
n
m
opq r s t uvw y
0
z
123456789
@
.
6410
Nikon4
@
xxx
x
Email
Back Delete
Text entry area
Selected characters are
displayed here.
Keyboard area
Use the rotary multi selector to
highlight characters and
press the k button to select.
GH
I
J
Q7115_Wireless_EN.book Page 27 Tuesday, June 3, 2008 7:34 PM
Q7115_Wireless_EN_1st

Configuring the Camera’s Wireless Settings
28
aConfiguring a Network Profile
Enable connection of the camera to the Internet via a wireless LAN access point. Follow
the procedures indicated below to apply the same network settings used by the
wireless LAN network to the camera. See “Configuring a Network Profile from the
Camera” (A29) for more information.
If your wireless LAN access point supports WPS, configuring the network profile for a
home wireless LAN access point is simple (A39).
B
Six-Month Complimentary T-Mobile HotSpot Subscription (the United States only)
If using the six-month complimentary T-Mobile HotSpot subscription, a network profile has already
been configured with the camera. Be sure to proceed to “b Entering my Picturetown User
Information” (A33) to set up the camera’s wireless settings.
DMore on Configuring Network Profiles
Network profiles for wireless LANs can be configured (A29) after pictures and recipients have been
selected under the following circumstances:
•The public wireless LAN access point does not utilize the IEEE 802.1X standard.
•Home wireless LAN access points are configured as follows:
- The access point’s SSID is set to “any” (to allow connection of any wireless device).
- MAC address filtering is not enabled.
- Data is encrypted using WEP encryption, or data encryption is not enabled.
- IP addresses are acquired automatically (DHCP).
2Choose Configure manually.
3Choose the desired SSID (network name) or enter a new SSID.
4Choose the desired network type.
* See “Public Wireless LAN” (
A
iv) for more information on countries in which public wireless LANs
can be accessed by, and the wireless service providers that support connection of, this camera.
1Choose Network profile from the Wireless settings option in the
camera’s setup menu.
7Specify the camera’s IP address.
8Enter the user name and password.
5Choose the desired authentication method.
6Enter the encryption key.
Home wireless LAN Public wireless LAN*
Q7115_Wireless_EN.book Page 28 Tuesday, June 3, 2008 7:34 PM
Configuring the Camera’s Wireless Settings
29
Configuring a Network Profile from the Camera
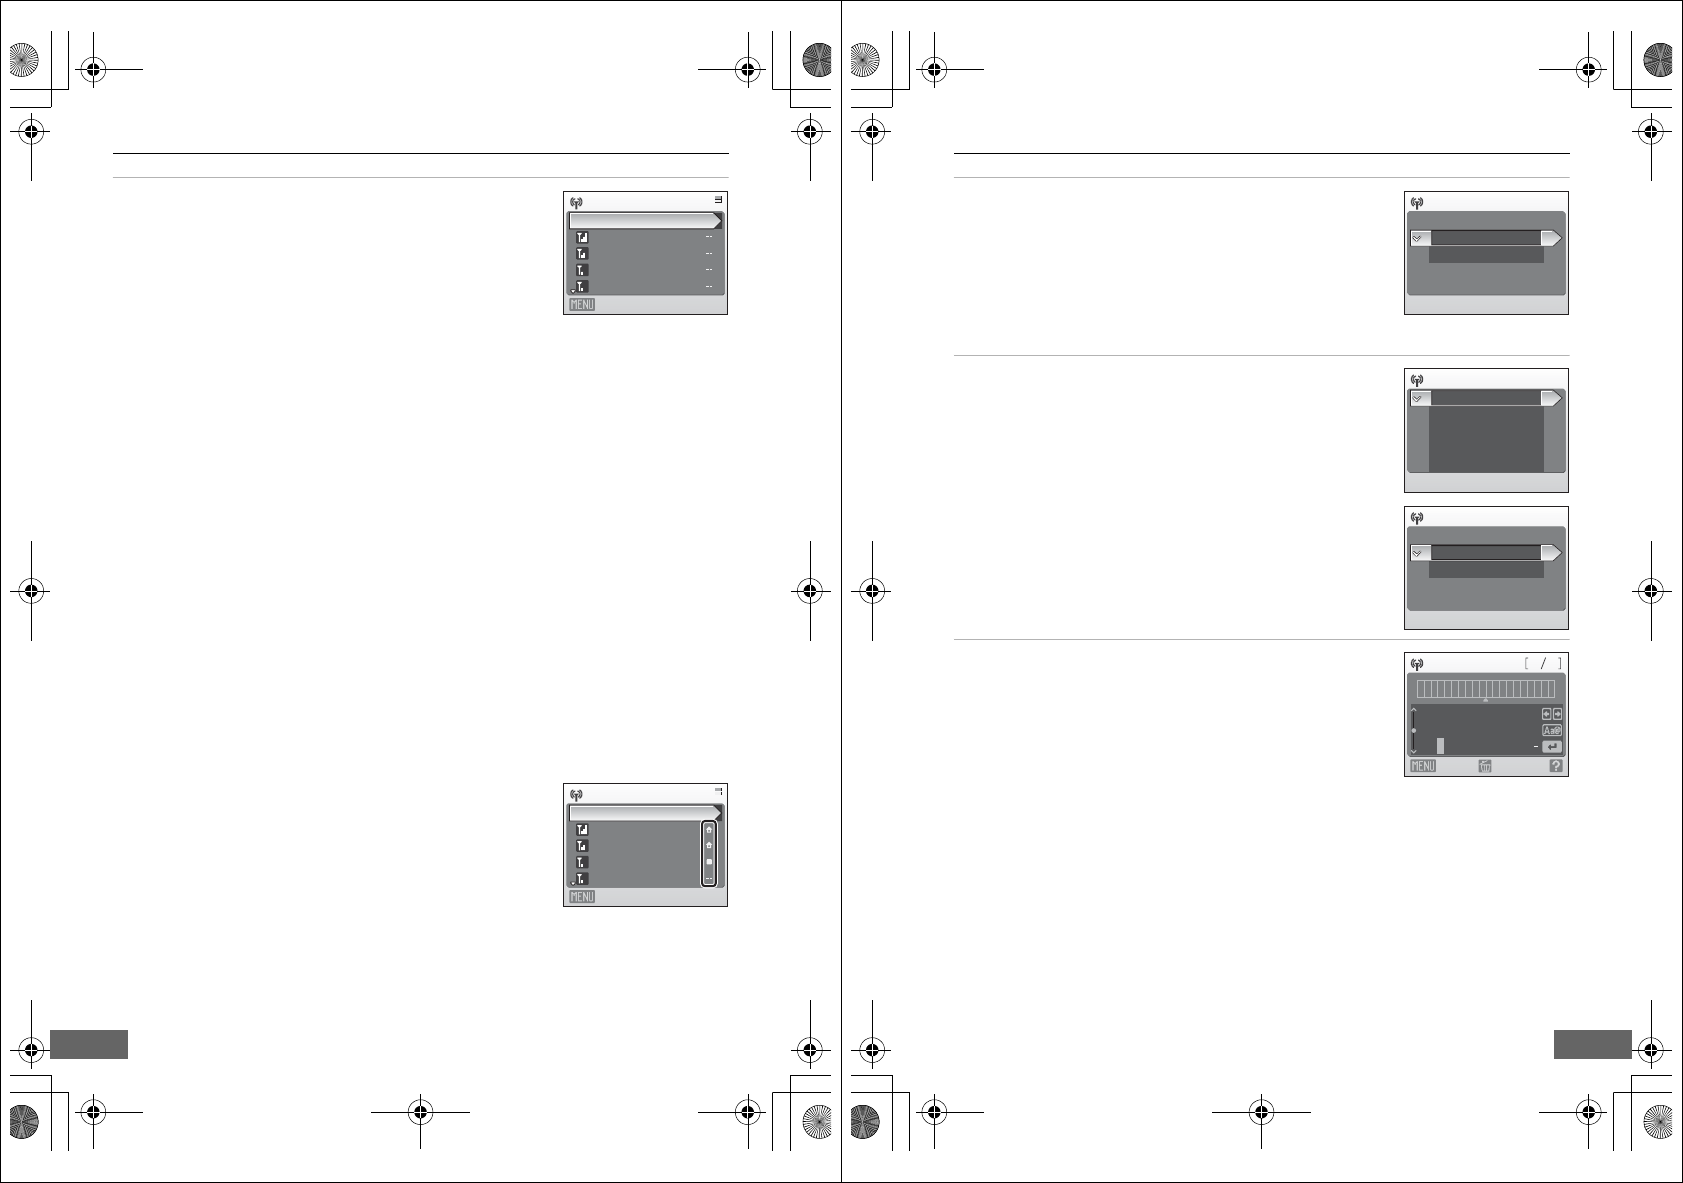
1Choose Network profile from the Wireless
settings option (A26) in the camera’s setup menu
and press the k button.
2Choose Configure manually and press the k
button.
The camera will search for available SSIDs and then the SSID
selection screen will be displayed.
Wireless settings
Network profile
Sender
Address options
Picture Bank
Password
Configure manually
Push-button WPS
PIN-code WPS
Network profile
Cancel
Searching for SSID
Q7115_Wireless_EN.book Page 29 Tuesday, June 3, 2008 7:34 PM
Q7115_Wireless_EN_1st
Configuring the Camera’s Wireless Settings
30
3Choose the desired SSID (A9) and press the k
button.
Up to ten SSIDs, with network profiles configured with the
camera and those detected by the camera, are listed.
If connection by any wireless device is not allowed with an access
point and the desired SSID (up to 32 alphanumerical characters)
is not detected, select New and press the k button. Enter a
network name (SSID) in the SSID screen. If using the six-month
complimentary T-Mobile HotSpot subscription, do not enter tmobile as a new network name
(SSID) (in the United States only).
For information on entering text, see “Entering Text with the Camera” (A27).
Choose an SSID with a network profile and press the k button. Profile settings can be edited
by following the same procedure used for SSIDs for which network profiles have not been
configured. To delete an existing SSID profile, select the SSID and press the l button. If using
the six-month complimentary T-Mobile HotSpot subscription, do not edit or delete the
tmobile SSID (in the United States only).
Up to ten wireless LAN network profiles can be stored in the camera. If ten profiles have already
been configured and you would like to add a new one, first use the camera or the Utility to
delete an existing network profile from the camera.
CSSID Selection Screen
SSIDs with network profiles are listed first regardless of signal strength.
The icon to the left of each SSID indicates signal strength and is
displayed in red when out of range (A52, 53).
The icon to the right of each SSID shows the status of the camera’s
network profiles:
B(home wireless LAN profile configured)
A(public wireless LAN profile configured)
See “Public Wireless LAN” (Aiv) for more information on countries
in which public wireless LANs can be accessed by, and the wireless service providers that support
connection of, this camera.
-- (no profile configured)
If the full network name cannot be displayed, highlight the SSID and press the g (j) button to
display the full name. Press the g (j) button again to return to the select SSID screen.
Select SSID
AP1
New
AP2
AP3
AP4
Back
Select SSID
AP1
New
AP2
AP4
AP3
Back
Q7115_Wireless_EN.book Page 30 Tuesday, June 3, 2008 7:34 PM
Configuring the Camera’s Wireless Settings
31
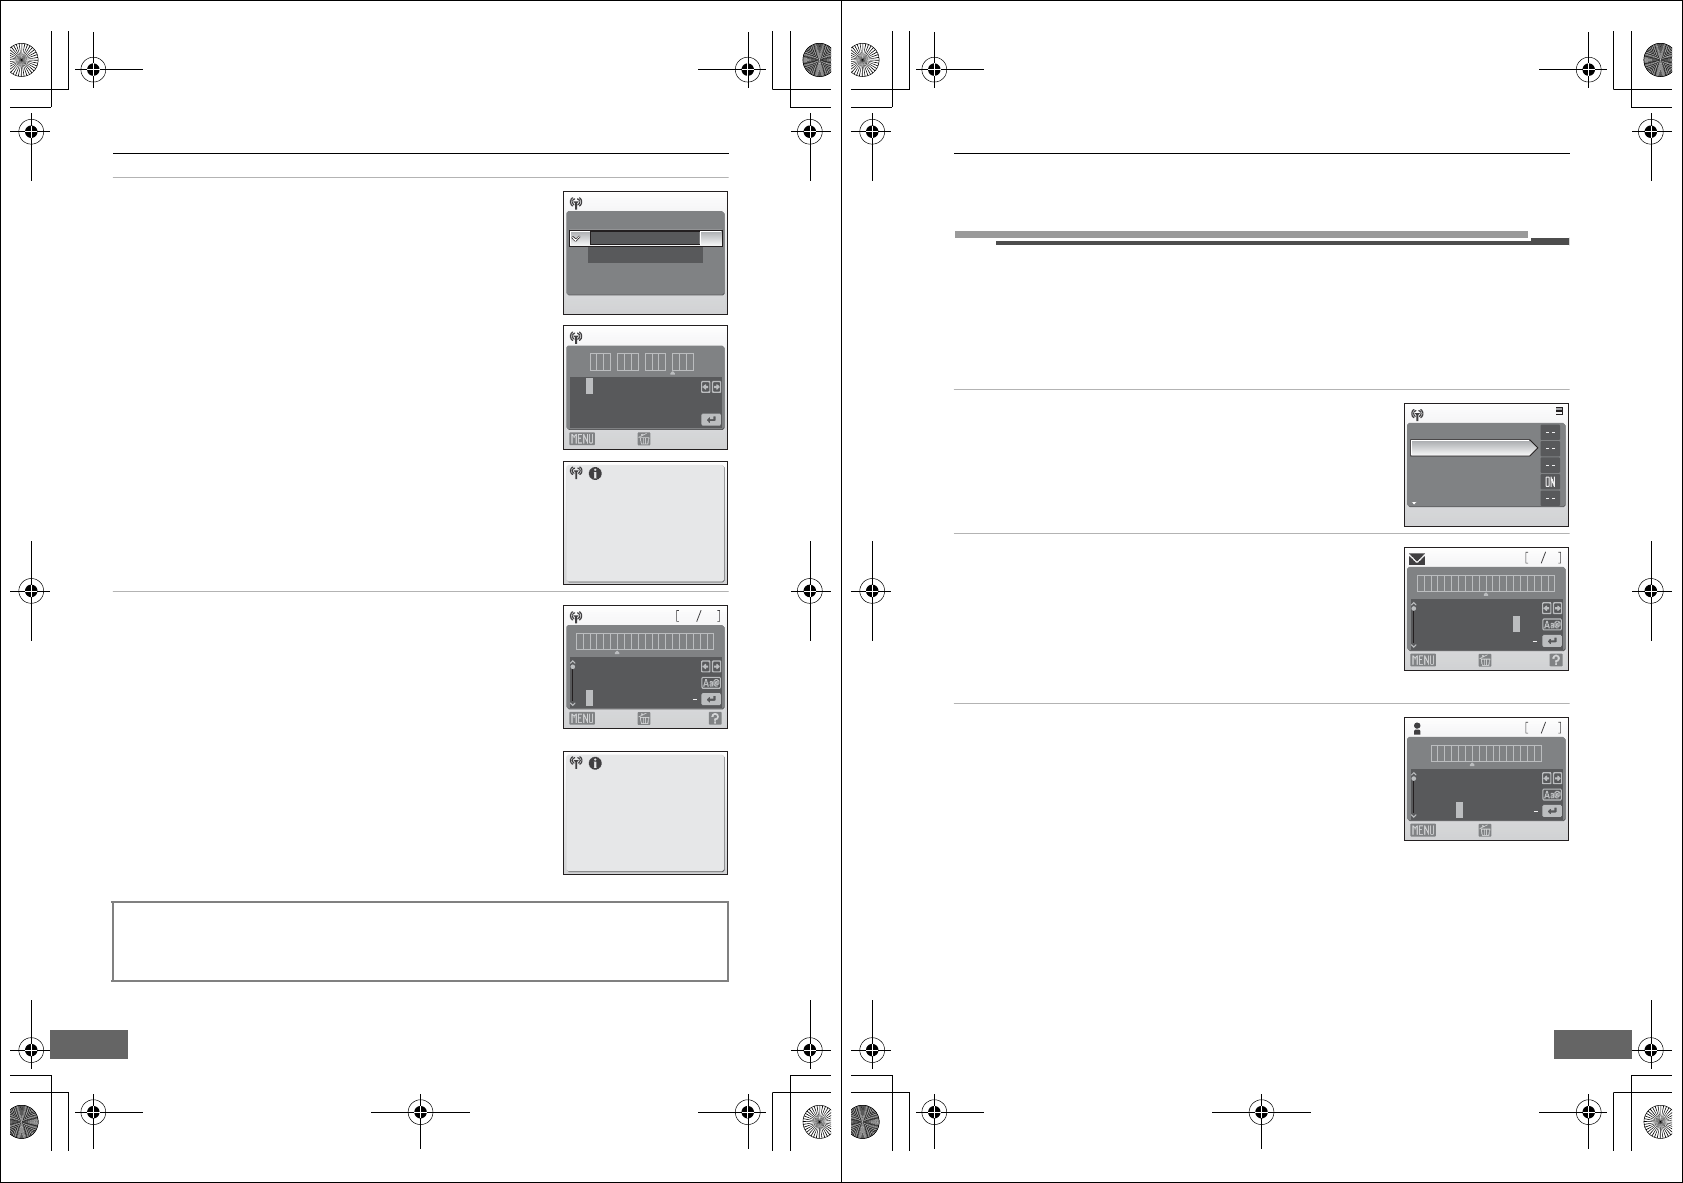
4Choose the network type and press the k button.
If connecting via a home wireless LAN, choose Home wireless
LAN.
If connecting via a public wireless LAN, choose Public wireless
LAN. See “Public Wireless LAN” (Aiv) for more information on
countries in which public wireless LANs can be accessed by, and
the wireless service providers that support connection of, this
camera.
5Choose the desired authentication method (A9)
and press the k button.
When Open system is selected, choose None or WEP in the
encryption screen and press the k button.
•When None is selected, proceed to step 7 if Home wireless
LAN was selected in step 4, or proceed to step 8 if Public
wireless LAN was selected in step 4.
•When WEP is selected, proceed to step 6.
6Enter the encryption key (A9).
The encryption key entry screen will vary depending upon the
selected authentication method.
•If Open system was set to WEP, or Shared key was
selected, enter the WEP key in the WEP key screen.
•If WPA-PSK or WPA2-PSK was selected, choose TKIP or AES
in the encryption screen and enter the TKIP or AES key.
For information on entering text, see “Entering Text with the Camera” (A27).
If Home wireless LAN was selected in step 4, proceed to step 7, or proceed to step 8 if Public
wireless LAN was selected.
Network type
Home wireless LAN
Public wireless LAN
Authentication
Shared key
Open system
WPA-PSK
WPA2-PSK
Encryption
None
WEP
2610
1ABCD 23412
ABCDEFGH I JKL
N
M
OPQRSTUVWXY
0
Z
123456789
@
.
WEP key
Back Delete
Q7115_Wireless_EN.book Page 31 Tuesday, June 3, 2008 7:34 PM
Q7115_Wireless_EN_1st
Configuring the Camera’s Wireless Settings
32
7Specify the camera’s IP address (A10).
To acquire the IP address automatically, choose Auto and press
the k button.
To enter a fixed IP address, choose Manual and press the k
button.
Specify the IP address, Subnet mask, Gateway, Primary
DNS, and Secondary DNS settings (A10).
When configuring IP address, Subnet mask, Gateway,
Primary DNS, and Secondary DNS settings, enter each set of
numbers so that they are aligned to the right. Numbers must be
entered correctly for the settings to be properly applied.
For information on entering text, see “Entering Text with the
Camera” (A27).
Once all network settings have been configured, Done will be
displayed and the monitor display will return to the wireless
settings screen. If connecting via a home wireless LAN, network
profile configuration is complete.
To connect to another wireless LAN access point, repeat the
procedures described from step 1.
8Enter user name and password (A10).
Enter your user name in the user name screen and your
password in the password screen. Your user name and
password are provided by the wireless service provider to which
you subscribe (Aiv).
For information on entering text, see “Entering Text with the
Camera” (A27).
Once all network settings have been configured, Done will be
displayed and the monitor display will return to the wireless
settings screen. If connecting via a public wireless LAN, network
profile configuration is complete.
To connect to another wireless LAN access point, repeat the
procedures described from step 1.
When setting up the wireless LAN features of the camera for the first time, next enter
the information required for my Picturetown user registration. Proceed to “b
Entering my Picturetown User Information” (A33).
Configuration
Auto
Manual
129010.168.
0123456789
IP address
Back Delete
Done
abcdefghi jkl
n
m
opq r s t uvwx y
0
z
123456789
@
.
1286
Nik no1
User name
Back Delete
Done
Q7115_Wireless_EN.book Page 32 Tuesday, June 3, 2008 7:34 PM
Configuring the Camera’s Wireless Settings
33
bEntering my Picturetown User Information
Enter the information required for user registration with my Picturetown from the
Sender option. This information is necessary to log-in to my Picturetown after picture
upload. The alias and e-mail address are used to identify you as the sender in e-mail
notification sent to recipients with picture upload using Picture Mail.
If you have already registered with my Picturetown, use the same e-mail address and
nickname (alias) currently used by my Picturetown (A43).
1Select Sender from the Wireless settings option
(A26) in the camera’s setup menu, and press the
k button.
2Enter your e-mail address (up to 64 alphanumerical
characters).
Cellular telephone e-mail addresses are not supported.
No error message, or indication that an error has occurred, is
sent from the server when delivery errors occur due to incorrect
entry of e-mail addresses.
For information on entering text, see “Entering Text with the
Camera” (A27).
3Enter your alias (up to 16 alphanumerical
characters).
Once the alias has been entered, the confirm address and alias
screen will be displayed. Press the k button to apply the
settings and return to the wireless settings screen.
Wireless settings
Network profile
Sender
Address options
Picture Bank
Password
abcdefgh i j k l
n
m
opq r s t uvwxy
0
z
123456789
@
.
Nik no4
@
xxx
6410
Email
Back Delete
Alias
Back Delete
abcdefgh i j k l
n
m
opq r s t uvwxy
0
z
123456789
@
.
Nik no4
166
Q7115_Wireless_EN.book Page 33 Tuesday, June 3, 2008 7:34 PM
Q7115_Wireless_EN_1st

Configuring the Camera’s Wireless Settings
34
CEditing the my Picturetown User Information
When uploading pictures using Picture Mail or Picture Bank after user information has been
registered with my Picturetown, user information (including information stored in the camera’s
Sender setting) stored in the camera cannot be displayed or edited using the camera or the Utility
(A42).
c
Specifying Picture Mail Recipients/Recipient Groups
Specifying Picture Mail Recipients
Follow the instructions below to specify a recipient (e-mail address and alias) for Picture
Mail e-mail notification.
Recipients can also be added, or edited, later using the Utility or the camera. See “o
Specifying Picture Mail Recipients/Recipient Groups” (A22) for more information on
performing these actions using the Utility.
1Select Address options from the Wireless
settings option (A26) in the camera’s setup menu
and press the k button.
2Select New and press the k button.
If recipients or groups have been specified, they are listed under
New.
The recipient’s information can be edited by following the same
procedure used for specifying a new recipient. Choose a
recipient, press the k button, and proceed to step 4.
To delete a specified recipient, highlight the recipient and press
l.
Once sender information has been configured, proceed as indicated below.
•Using Picture Mail: Proceed to “c Specifying Picture Mail Recipients/Recipient
Groups” (A34).
•Not using Picture Mail: Proceed to “d Protecting Wireless LAN Information
Stored in the Camera (Applying a Password/Resetting the Camera)” (A37).
Wireless settings
Network profile
Sender
Address options
Picture Bank
Password
Back
New
Choose address
Q7115_Wireless_EN.book Page 34 Tuesday, June 3, 2008 7:34 PM
Configuring the Camera’s Wireless Settings
35
3Select Address and press the k button.
4Enter recipient’s e-mail address (A12).
Enter an e-mail address comprised of up to 64 alphanumerical
characters.
E-mail addresses for only certain models of cellular telephones,
available in the United States, are supported (A5).
For information on entering text, see “Entering Text with the
Camera” (A27).
Up to 30 recipients can be specified.
5Enter recipient’s alias (A12).
Enter an alias comprised of up to 16 alphanumerical characters.
Once the alias has been entered, the confirm address and alias
screen will be displayed. Press the k button to apply the
settings and return to the choose address screen. To add
recipients, repeat step 2 through 5. To create recipient groups,
see “Creating Recipient Groups” (A36).
Once recipients have been specified, proceed to “d Protecting Wireless LAN
Information Stored in the Camera (Applying a Password/Resetting the Camera)”
(A37).
New
Address
Group
abcdefghi jkl
n
m
opq r s t uvwxy
0
z
123456789
@
.
Nik no5
@
xxx
6410
Email
Back Delete
abcdefgh i j k l
n
m
opq r s t uvwxy
0
z
123456789
@
.
Nik no5
16 6
Alias
Back Delete
Q7115_Wireless_EN.book Page 35 Tuesday, June 3, 2008 7:34 PM
Q7115_Wireless_EN_1st
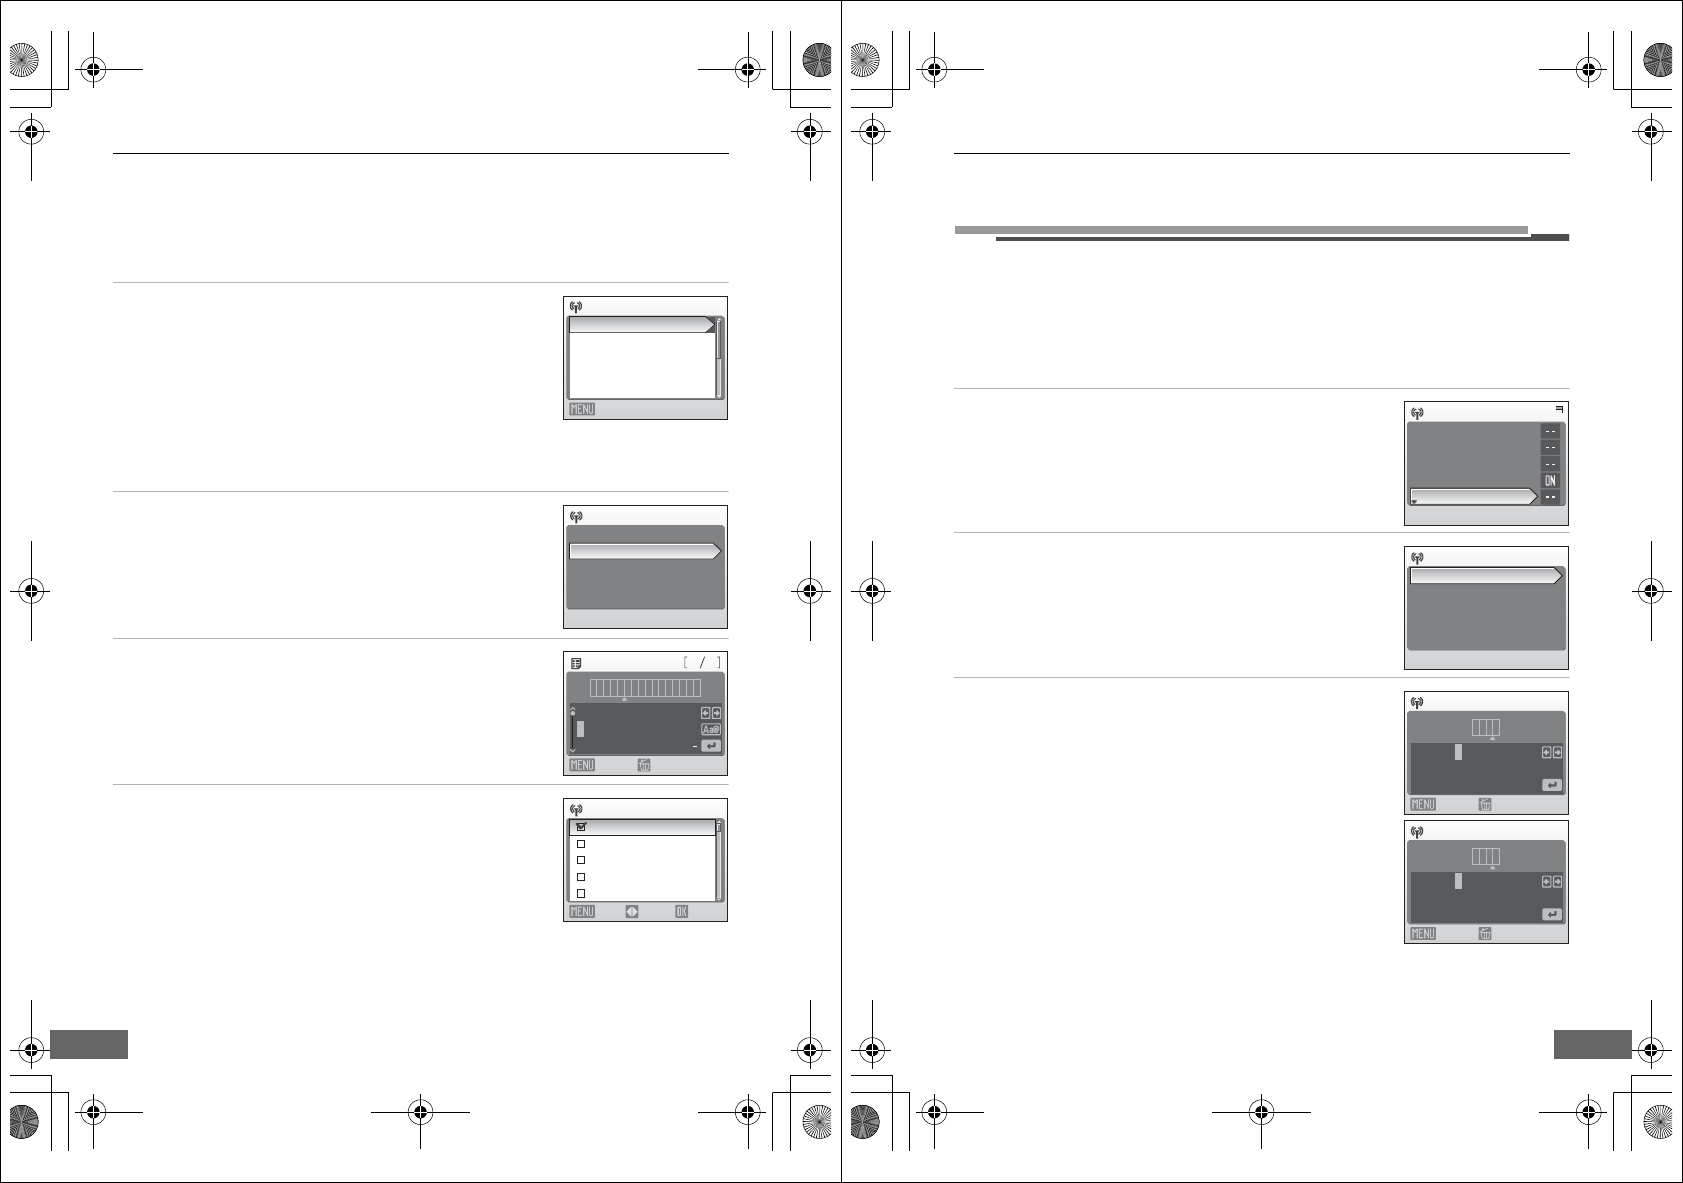
Configuring the Camera’s Wireless Settings
36
Creating Recipient Groups
Group (A12) containing multiple recipients can be created. This is useful when Picture
Mail is often sent to the same group of recipients. If individual recipients (A34) have not
been registered, register recipients before creating a recipient group.
1Select New in the choose address screen shown in
step 2 of “Specifying Picture Mail Recipients”
(A34), and press the k button.
If recipients or groups have been specified, they are listed under
New.
Group information can be edited by following the same
procedure used for specifying a new group. Choose a group,
press the k button, and proceed to step 3.
To delete a specified group, highlight the group and press the l button.
2Select Group and press the k button.
Up to 5 groups can be created.
3Enter the group’s name.
Enter a name for the group, comprised of up to 16
alphanumerical characters.
For information on entering text, see “Entering Text with the
Camera” (A27).
4Select recipients for the group.
Rotate the rotary multi selector, or press H or I, to highlight
recipients by their alias (or e-mail address), and press K to select
the recipient (w). Press J to cancel the selection. Repeat this
procedure to select additional recipients.
Press the k button to finalize recipient selection. Done will be
displayed and the monitor display will return to the choose
address screen.
Back
New
Choose address
Nikon5
Nikon4@xxx.aaa
Nikon3
Nikon2
New
Address
Group
abcdefgh i j k l
n
m
opq r s t uvwx y
0
z
123456789
@
.
Nik no
165
Group name
Back Delete
ON/OFF
Choose address
Back
Nikon4@xxx.aaa
Nikon5
Nikon3
Nikon2
Nikon1@xxx.aaa
Confirm
Q7115_Wireless_EN.book Page 36 Tuesday, June 3, 2008 7:34 PM
Configuring the Camera’s Wireless Settings
37
Protecting Wireless LAN Information Stored in the Camera
(Applying a Password/Resetting the Camera)
A password (A12) can be applied to prevent access to wireless LAN information stored
in the camera, including network profiles and recipient e-mail addresses, by third parties
if the camera should be lost or stolen, or otherwise compromised. In addition, all camera
settings can be restored to their default settings and data stored in the camera’s internal
memory can be deleted before the camera is transferred to another owner or discarded.
Applying a Password to the Camera
Applying a password to the camera to protect wireless LAN information is recommended.
1Select Password from the Wireless settings
option (A26) in the camera’s setup menu and
press the k button.
The password screen will be displayed.
2Select Set/change password and press the k
button.
3Specify a password for the camera, or edit the
current password.
To protect the camera with a password, enter a password in the
new password screen. The password should consist of four
numbers.
To edit the password, enter the current password in the current
password screen. When the new password screen is displayed,
enter a new password.
When a password is entered, the re-enter password screen will
be displayed for confirming the password. Enter the correct
password again.
For information on entering text, see “Entering Text with the
Camera” (A27).
When the password has been re-entered, the message,
Password settings complete.. will be displayed and the
monitor display will return to the wireless settings screen.
CEntering a Password
If the camera is protected with a password, the password entry screen is displayed when configuring
the camera’s wireless settings using the Utility (A13), or from the camera’s setup menu (A26), or
when uploading selected pictures using Picture Mail or Picture Bank (A44, 47).
d
Wireless settings
Network profile
Sender
Address options
Picture Bank
Password
Set/change password
Delete password
Password
1234
0123456789
New password
Back Delete
1234
0123456789
Current password
Back Delete
Q7115_Wireless_EN.book Page 37 Tuesday, June 3, 2008 7:34 PM
Q7115_Wireless_EN_1st
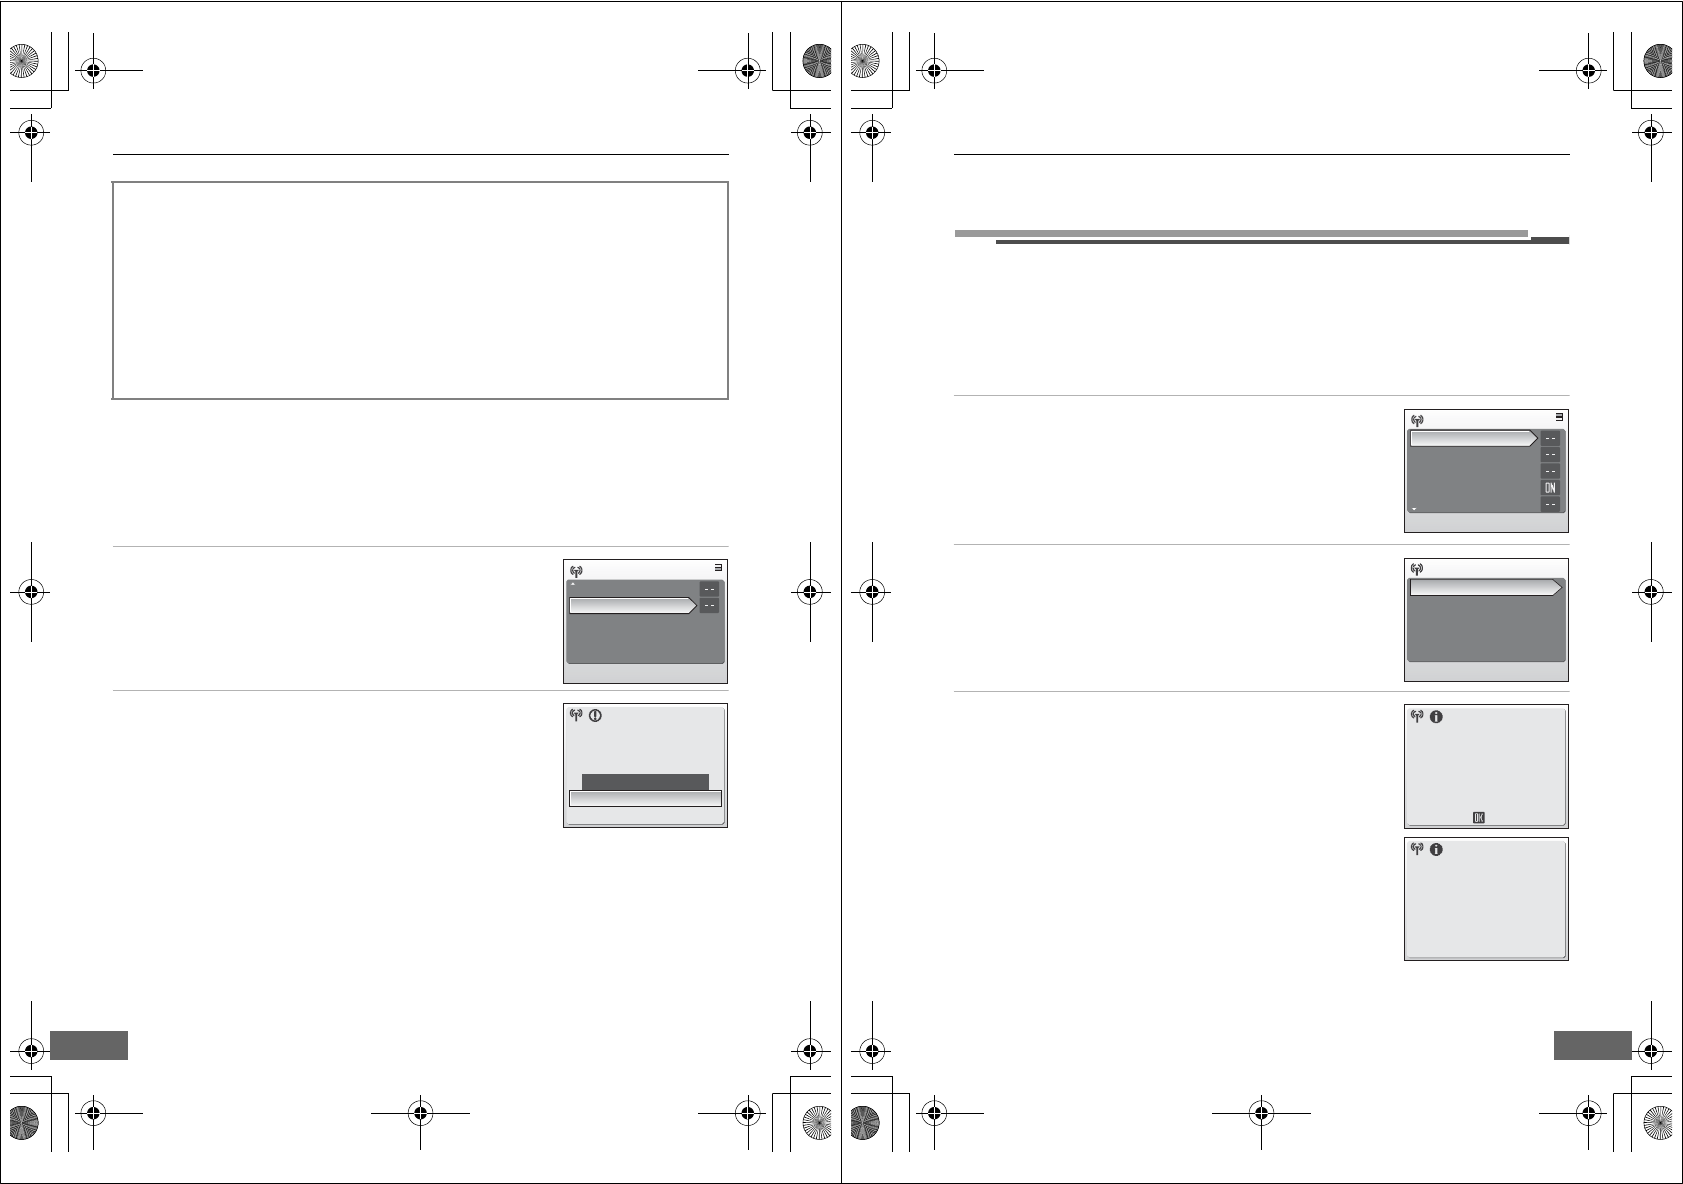
Configuring the Camera’s Wireless Settings
38
Resetting the Camera
Follow the instructions below to reset all wireless LAN connection settings, including the
camera’s password, stored in the camera. Use the Reset option to delete all user
information stored in the camera before transferring it to another owner. This option can
also be used to reset the camera if you forget the password.
1Select Reset from the Wireless settings option
(A26) in the camera’s setup menu and press the
k button.
The confirmation dialog will be displayed.
2Select Yes and press the k button.
The message, Wireless settings have been reset. will be
displayed and the monitor display will return to the wireless
settings screen.
To cancel the reset operation, select No in the confirmation
dialog and press the k button.
CResetting the Camera and Camera Password
•Avoid using a password that can be easily guessed, such as a birth date. Be sure that you do not
forget your password.
•To delete the current password without resetting the camera, select Delete password in step 2 of
“Applying a Password to the Camera,” and press the k button. Enter the password to be deleted
in the current password screen, highlight J, and then press the k button.
•When the Reset option is applied, user information must be registered with my Picturetown again
(A43).
When setting up the wireless LAN features of the camera for the first time, the final
step requires user registration with my Picturetown.
First, use Picture Mail (A44) or Picture Bank (A46, 47) to upload pictures to
my Picturetown.
Once pictures have been uploaded, e-mail notification requesting user
registration with my Picturetown will be sent to the e-mail address specified
as instructed in “b Entering my Picturetown User Information” (A33). See
“Registering with my Picturetown” (A41) for more information on user
registration.
Wireless settings
Key information
Reset
Existing network settings will
be deleted. OK?
Ye s
No
Q7115_Wireless_EN.book Page 38 Wednesday, June 4, 2008 6:01 PM
Configuring the Camera’s Wireless Settings
39
Configuring a Network Profile for a Home Wireless LAN Using
WPS
The network profile for a home wireless LAN can be easily configured if the wireless LAN
access point supports WPS.
WPS supports two configuration methods: Push-Button Configuration (PBC) and
Personal Identification Number (PIN) method.
Configuring a Network Profile Using the PBC Method
1Choose Network profile from the Wireless
settings option (A26) in the camera’s setup menu
and press the k button.
2Select Push-button WPS and press the k button.
3Press the WPS button on the access point, then
press the k button on the camera.
If the message, Configuration failed. is displayed, begin again
from step 1. If configuration fails repeatedly, configure the
network profile manually (A28).
Wireless settings
Network profile
Sender
Address options
Picture Bank
Password
Configure manually
Push-button WPS
PIN-code WPS
Network profile
Press the WPS button on the
wireless router, then press the
OK button on the camera.
Start
Done
Q7115_Wireless_EN.book Page 39 Wednesday, June 4, 2008 6:01 PM
Q7115_Wireless_EN_1st

Configuring the Camera’s Wireless Settings
40
Configuring a Network Profile Using the PIN Method
1Establish a cabled or wireless connection between the computer and access
point, and open the access point’s WPS configuration page.
For instructions on connecting the access point to a computer and displaying the
configuration pages, see the documentation provided with the wireless LAN access point.
2Choose Network profile from the Wireless
settings option (A26) in the camera’s setup menu
and press the k button.
3Choose PIN-code WPS and press the k button.
An eight-digit PIN will be displayed.
4Enter the PIN displayed in the camera’s monitor in the WPS configuration
page’s PIN field on the computer.
5Press the k button on the camera.
If the message, Configuration failed. is displayed, begin again
from step 2. If configuration fails repeatedly, configure the
network profile manually (A28).
When setting up the wireless LAN features of the camera for the first time, next enter
the information required for my Picturetown user registration. See “b Entering my
Picturetown User Information” (A33).
Wireless settings
Network profile
Sender
Address options
Picture Bank
Password
Configure manually
Push-button WPS
PIN-code WPS
Network profile
PIN: xxxxxxxx
Enter the above PIN into the
wireless router from a computer,
then press the OK button on the
camera.
Start
Done
Q7115_Wireless_EN.book Page 40 Wednesday, June 4, 2008 6:01 PM
41
Registering with my Picturetown
Registration (creation of a user account) with my Picturetown is required to take
advantage of my Picturetown services.
1Use a computer to open the e-mail notification requesting user registration.
E-mail notification requesting user registration with my Picturetown will be sent to the e-mail
address specified for user information.
If my Picturetown user information was configured using the Utility (A20), e-mail notification
requesting user registration with my Picturetown will be sent after user information is sent to
my Picturetown. User information has been sent to my Picturetown when the Action
completed successfully dialog is displayed.
If my Picturetown user information was configured using the camera (A33), use Picture Mail
(A44) or Picture Bank (A46, 47) to upload pictures to my Picturetown once to receive e-mail
notification requesting user registration with my Picturetown.
2Click the URL provided in the e-mail notification requesting user
registration, and register with my Picturetown from the sign-up Web page.
•The following information is required for user registration:
- Nickname (the alias stored in the camera’s Sender setting; A20, 33)
- Email ID (the e-mail address stored in the camera’s Sender setting; A20, 33)
- Password for my Picturetown (the password specified if user information was configured
using the Utility; A20)
- Key information* (not necessary if user information was configured using the Utility)
* Confirm key information by selecting Key information from the Wireless settings
option (A26) in the camera’s setup menu, and pressing the k button.
•For more information, follow the instructions and procedures provided in e-mail messages
received from my Picturetown and the sign-up Web page.
XXXX
Key information
Wireless settings
Key information
Reset
Q7115_Wireless_EN.book Page 41 Wednesday, June 4, 2008 6:01 PM
Q7115_Wireless_EN_1st

Registering with my Picturetown
42
3Receive the e-mail message confirming my Picturetown registration.
An e-mail message confirming my Picturetown registration will be sent to the registered e-mail
address.
BNotes on User Registration
•Register user information as soon as possible to protect pictures, along with other personal
information, from unsolicited viewing or theft. Until user information is registered, pictures are
uploaded to temporary space on the server with no security measures applied.
•Until user information is registered, e-mail notification requesting user registration will be sent
whenever pictures are uploaded. If you do not receive the e-mail notification, the information
stored in the camera’s Sender setting may be incorrect. Correct the information (A33) and
upload pictures again.
•When uploading pictures after user information has been registered with my Picturetown, the
user information (including information stored in the camera’s Sender setting) stored in the
camera cannot be displayed or edited from the camera or the Utility. In addition, the my
Picturetown password cannot be edited from the camera or the Utility. Use a computer’s Web
browser to access my Picturetown to edit user information.
•Before discarding the camera or transferring it to another owner, confirm whether or not pictures
have ever been uploaded using my Picturetown services. If pictures have been uploaded, ever
once, be sure that you have registered with my Picturetown, and then reset all wireless settings
(A24, 38).
•If this camera was given to you by a previous owner, reset all wireless settings (A24, 38) before
using the camera and taking advantage of wireless services.
DNote on Protecting Personal Information
Once the wireless LAN features have been used, personal information is stored in the camera and on
the my Picturetown server. To protect personal information from unsolicited viewing or theft, apply
a password to protect data stored in the camera (A23, 37), and register with my Picturetown to
protect uploaded data. It is highly recommended that these protection measures be applied.
DAccessing the my Picturetown Web site
You can visit the my Picturetown Web site at the following URL:
http://mypicturetown.com/
This completed setup of the wireless LAN features.
Q7115_Wireless_EN.book Page 42 Tuesday, June 3, 2008 7:34 PM
Registering with my Picturetown
43
Registering a Camera with my Picturetown
A camera must be registered with the my Picturetown server in any of the following
situations:
•You registered with my Picturetown before setting up the wireless LAN features of
this camera (e.g. this is a second camera).
•The camera is reset for any purpose other than transfer of ownership (A24, 38).
Follow the procedures indicated below to register the camera.
1Be sure that the network requirements for connecting the camera to a
wireless LAN (A8) have been met.
2Configure the camera’s network settings (A17, 28).
3Register my Picturetown user information with the camera (A20, 33).
Enter the same e-mail address and nickname (alias) currently used by my Picturetown.
If the current nickname uses characters or symbols that are not available using the camera,
enter a new nickname comprised of up to 16 alphanumerical characters. When a different
nickname (alias) is registered with the camera, the nickname (alias) currently used by my
Picturetown will be used to identify you in e-mail notification of picture upload sent to
recipients.
When entering a password for my Picturetown using the Utility, enter the password currently
used by my Picturetown.
4Register the camera with the my Picturetown server.
If user information for my Picturetown is configured using the Utility, the specified user
information and the camera’s key information are sent to the my Picturetown server, over the
Internet, once configuration is complete, finalizing registration.
If sender is configured using the camera, e-mail notification requesting user registration with
my Picturetown is sent to the specified e-mail address after picture upload using Picture Mail or
Picture Bank. Click the URL provided in the e-mail notification, enter the camera’s key
information, and register the camera with my Picturetown from the sign-up Web page (A41).
Once the camera has been registered with the my Picturetown server, an e-mail message
confirming my Picturetown registration will be sent to the registered e-mail address.
Q7115_Wireless_EN.book Page 43 Tuesday, June 3, 2008 7:34 PM
Q7115_Wireless_EN_1st
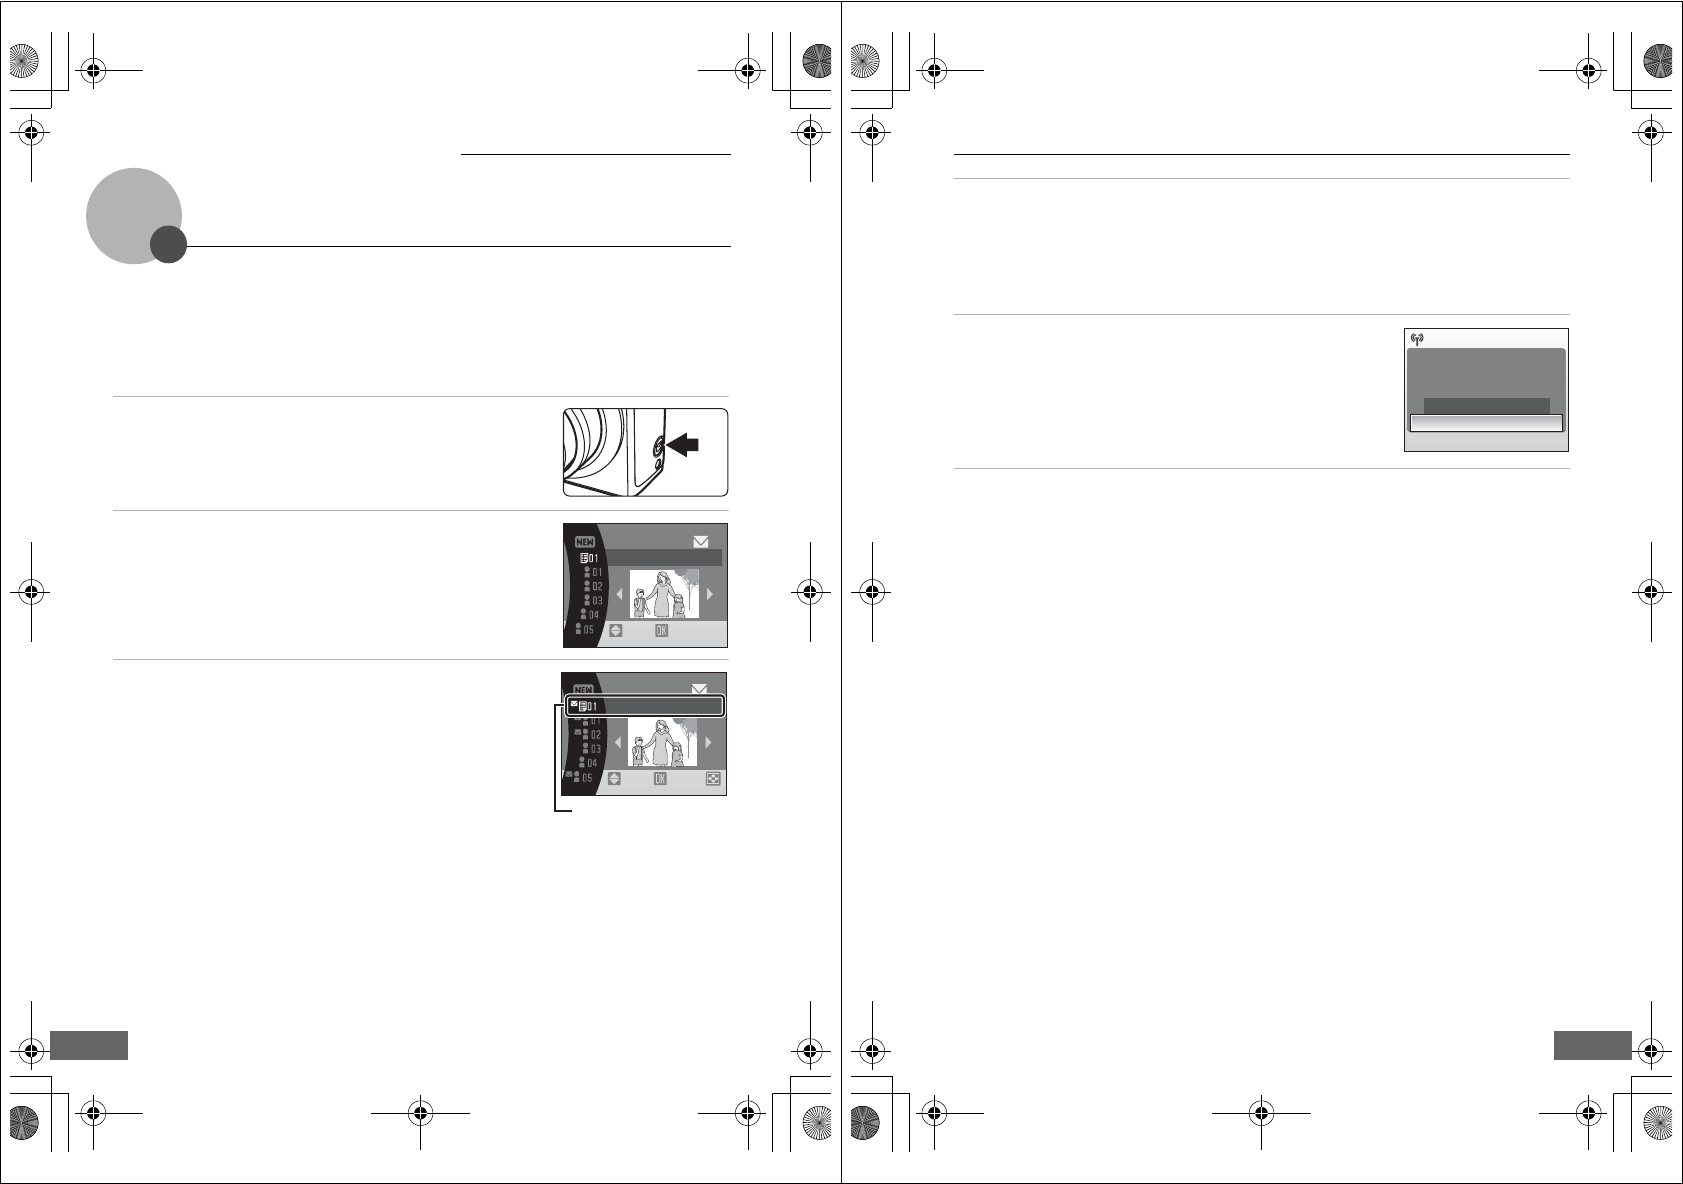
44
Uploading Pictures to the
my Picturetown Server
Sending Picture Mail
Select pictures, specify recipients, and send Picture Mail.
When a wireless LAN access point is unavailable, Picture Mail can be queued and sent at
a later time.
1Press the F button in shooting or playback mode.
If sender information has not been configured, enter your Email
ID (e-mail address) and Nickname (alias) necessary for my
Picturetown user information (A11, 33).
2Press the rotary multi selector J or K to select the
desired picture.
3Specify recipients.
Rotate the rotary multi selector to move D (recipients) or E
(recipient groups) to the selection area, and press the rotary
multi selector H to select the recipient or group (C), or I to
cancel the selection.
When E is selected, C will be displayed for all recipients in a
selected group.
To add a recipient or group, highlight K, press the k button,
and enter the recipient’s e-mail address (up to 64 alphanumerical
characters) or create a new group (A34, 36). Once the new
recipient or group has been created, monitor display will return to the queue mail screen. The first
16 characters of e-mail addresses are automatically used for corresponding aliases. Aliases can be
edited later (A34).
The number displayed at the top right of the monitor indicates the number of recipients specified
for the current picture.
0
ON/OFF
Confirm
Nikon
Queue mail
10
ON/OFF
Nikon
Confirm
Queue mail
Selection area
Q7115_Wireless_EN.book Page 44 Wednesday, June 4, 2008 6:02 PM
Uploading Pictures to the my Picturetown Server
45
4Press the k button to add the Picture Mail to the queue.
To specify recipients for different pictures, repeat steps 2 and 3 before applying the setting. Up
to 30 pictures can be selected.
Press the f (h) button before applying the setting to switch to thumbnail display to preview
the pictures, for which recipients are specified, in the queue mail screen. Press the g (i) button
to return to the queue mail screen.
5Choose whether to upload pictures immediately.
Choose Yes and press the k button to upload all the queued
pictures. Be sure that a wireless LAN access point is available.
Proceed to step 6.
Choose No and press the k button to finalize picture selection
and recipient specification in the queue. The camera will exit to
the last shooting or playback mode selected (A45).
6Connect to a wireless LAN and upload pictures.
See “Connecting to a Wireless LAN” (A49) for more information on connecting to a wireless
LAN.
BSending Picture Mail in the Queue
•When the F button is pressed in shooting or playback mode, the queue mail screen shown in
step 3 will be displayed (A44). Confirm the selected pictures and specified recipients, and press
the k button to send queued Picture Mail. To cancel the queue, cancel the recipients or groups
specified for pictures and press the k button.
•When a Picture Bank upload is initiated (A46, 47), queued Picture Mail will be sent at the same
time. If you do not wish to upload queued Picture Mail with Picture Bank upload (A46, 47), press
the F button before initiating picture upload to cancel the queue in the queue mail screen.
CFile Types Supported by Picture Mail
Still pictures, including those with voice memos attached, can be uploaded using the Picture Mail
service. Movie and voice recording files cannot be uploaded.
CPicture Size for Picture Mail
If pictures are shot at image sizes greater than 1,600 × 1,200 pixels, their sizes will be reduced to
1,600 × 1,200 pixels when uploaded to the my Picturetown server.
CAfter Sending Picture Mail
When pictures are uploaded using Picture Mail, e-mail notification will be sent automatically to the
specified recipients for the intended pictures. Recipients can click the URL included in e-mail
notification to view and download the pictures stored on the my Picturetown server.
DCellular Telephones Compatible with Picture Mail
E-mail addresses for only certain models of cellular telephones, available in the United States, are
supported (A5).
Your Picture Mail has
been added to the
queue. Send now?
Ye s
No
Send images
Q7115_Wireless_EN.book Page 45 Wednesday, June 4, 2008 6:02 PM
Q7115_Wireless_EN_1st
Uploading Pictures to the my Picturetown Server
46
Using Picture Bank
Uploading All Pictures at Once
The camera automatically uploads pictures that have not yet been uploaded to the my
Picturetown server whenever the AC adapter is connected to the camera. Charging
begins once pictures have been uploaded.
1Connect the power cable and AC adapter 1.
2Confirm that the camera and the monitor are off.
If the power-on lamp is lit, press the power switch to turn off the
camera. Picture upload cannot be initiated by connecting
the AC adapter when the camera is turned on.
3Connect the AC adapter to the camera’s cable connector 2.
The multi connector should be fully inserted.
4Plug the power cable into an outlet 3.
When the camera is turned on and the message, Starting upload to Picture Bank, is
displayed, Picture Bank begins uploading pictures.
If sender setting has not been configured, enter your Email ID (e-mail address) and Nickname
(alias) necessary for my Picturetown user information (A11, 33).
See “Connecting to a Wireless LAN” (A49) for more information on connecting to a wireless
LAN.
DModifying the Automatic Picture Bank Upload Setting
Choose On (default setting) or Off from the camera’s setup menu>Wireless settings (A26)>
Picture Bank. If Off is selected, the battery begins charging immediately when the AC adapter is
connected, and pictures are not uploaded.
1
2
3
4
Q7115_Wireless_EN.book Page 46 Wednesday, June 4, 2008 6:02 PM
Uploading Pictures to the my Picturetown Server
47
Uploading Selected Pictures
1Press the e button in playback mode
and use the rotary multi selector to
choose A, and press the k button.
If sender setting has not been configured, enter
your Email ID (e-mail address) and Nickname
(alias) necessary for my Picturetown user
information (A11, 27, 33).
If the previous transfer was not successfully completed over a wireless LAN connection, see
“When the Transfer is Unsuccessful” (A48) for more information.
2Choose pictures.
Rotate the rotary multi selector, or press J or K, to highlight a
picture, and press H or I to select the desired picture (y).
Press H or I again to cancel a selection. Repeat this process to
choose multiple pictures.
Up to 30 pictures can be selected.
Press the g (i) button to switch to full-frame playback; press
the f (h) button to return to thumbnail display.
Press the k button to finalize picture selection.
3Upload pictures.
Choose Yes and press the k button.
Choose No and press the k button to return to the screen
shown in step 2.
4Connect to a wireless LAN and upload pictures.
See “Connecting to a Wireless LAN” (A49) for more information on connecting to a wireless
LAN.
Picture Bank
ON/OFF
Select image
Back
5
Send images?
Ye s
No
Send images
Q7115_Wireless_EN.book Page 47 Wednesday, June 4, 2008 6:02 PM
Q7115_Wireless_EN_1st
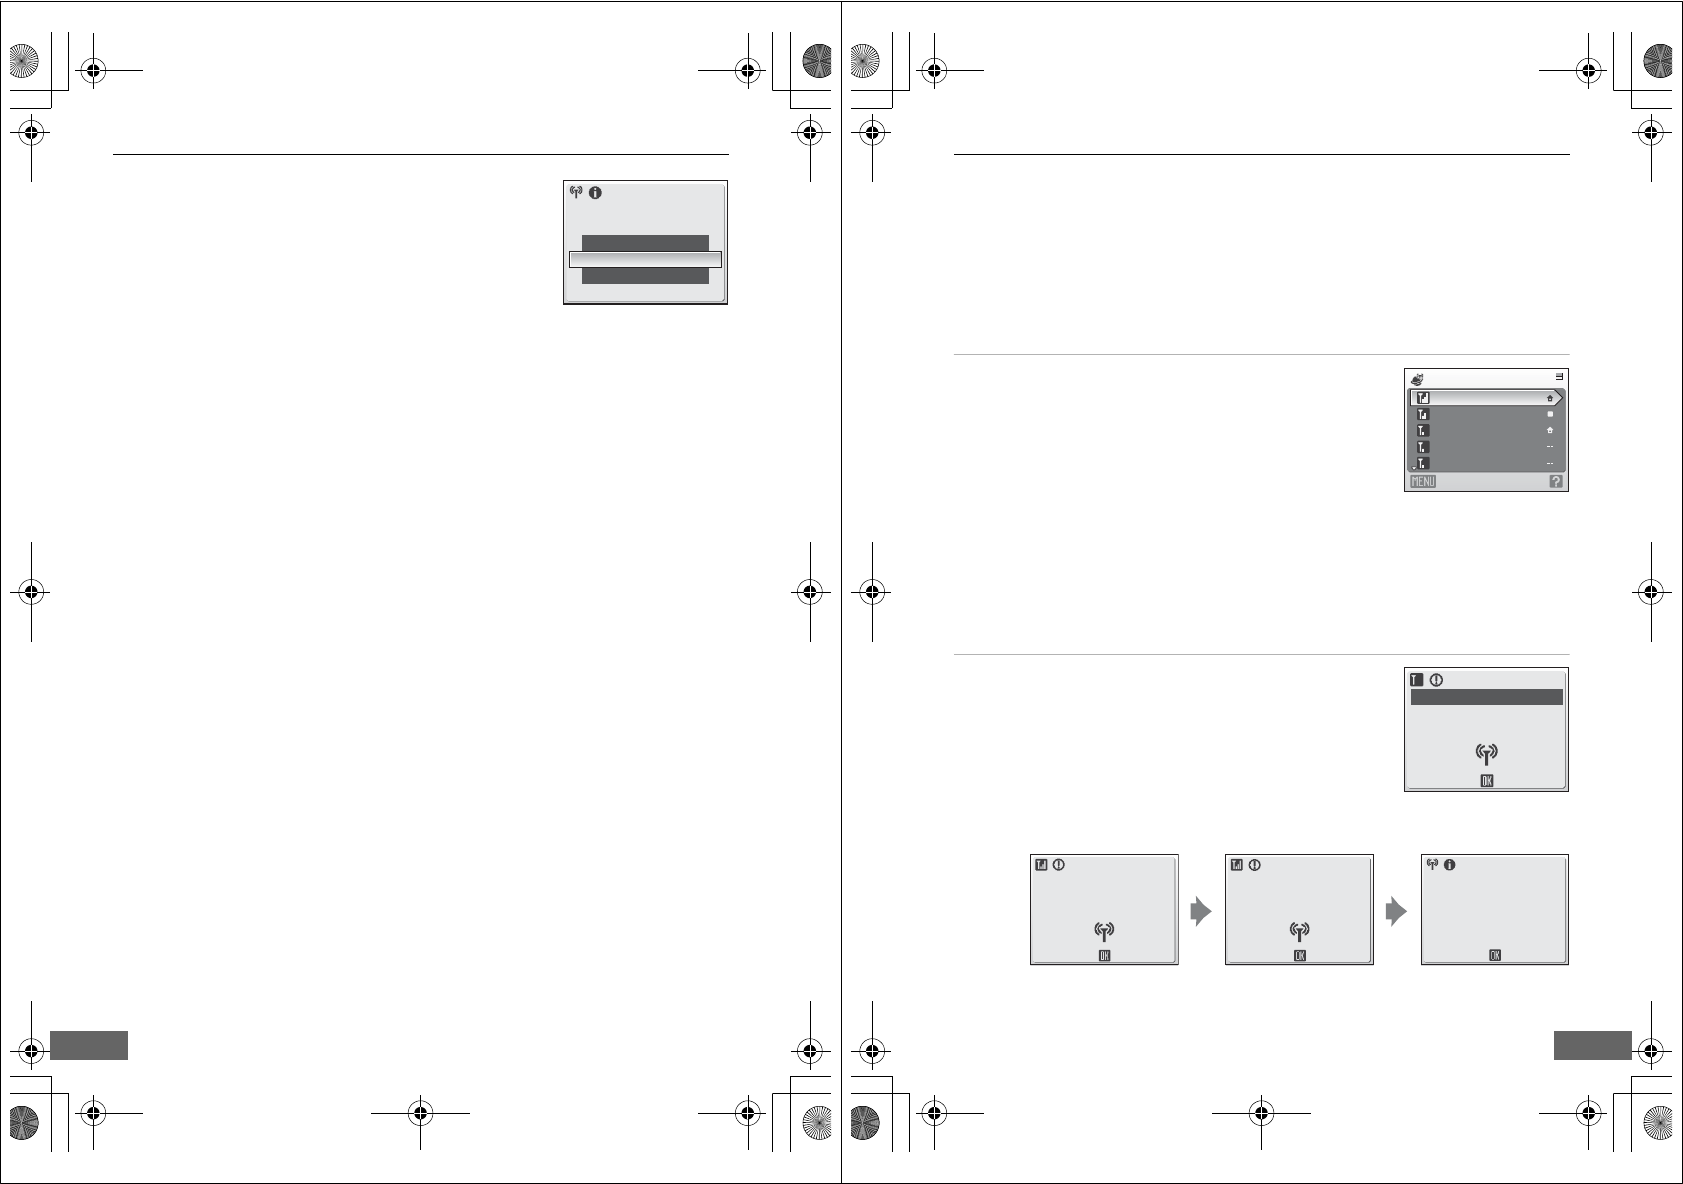
Uploading Pictures to the my Picturetown Server
48
CWhen the Transfer is Unsuccessful
When transfer over a wireless LAN connection is unsuccessful, the
next time you select A (Picture Bank) mode in the playback-mode
selection menu and press the k button, the confirmation dialog
shown at right will be displayed. If necessary, you can change the
SSID from the confirmation dialog. Select Yes to resume the
interrupted transfer. This confirmation dialog will not be displayed
when upload of all pictures using Picture Bank is initiated by
connecting the AC adapter (A46).
CFile Types Supported by Picture Bank
Still pictures, including those with voice memos attached, and movie files can be uploaded using
the Picture Bank service. Voice recording files cannot be uploaded.
CPicture Bank Images
Pictures that have been uploaded to the my Picturetown server are referred to as “Picture Bank
images” and can be recognized by L icon displayed with them in full-frame playback mode. Once
the icon has been displayed with a picture, that picture cannot be uploaded to the server a second
time using the automatic upload feature initiated when the AC adapter is connected to the camera.
If pictures have been deleted from the server, and you would like to upload them again, choose A
(Picture Bank) mode from the playback-mode selection menu (A47) and select the desired
pictures.
Resume interrupted transfer?
No
Change SSID
Ye s
Q7115_Wireless_EN.book Page 48 Wednesday, June 4, 2008 6:02 PM
Uploading Pictures to the my Picturetown Server
49
Connecting to a Wireless LAN
If the SSID selection screen is displayed when uploading pictures using the Picture Mail
(A44) or Picture Bank (A46, 47) service, follow the procedures indicated below to
select a wireless LAN network.
If the camera detects a network previously used to upload pictures using the Picture
Mail service, or the Picture Bank service while the AC adapter is connected to the
camera, picture upload will be initiated automatically.
1Choose the desired SSID (network name) and press
the k button.
SSIDs (up to ten) are listed in order of signal strength (A52, 53).
The icon to the left of each SSID is displayed in red when out of
range.
The icon to the right of each SSID shows the status of the network
profile registered to each SSID:
B(home wireless LAN profile configured)
A(pubic wireless LAN profile configured)
See “Public Wireless LAN” (Aiv) for more information on countries in which public
wireless LANs can be accessed by, and the wireless service providers that support
connection of, this camera.
-- (no profile configured)
If using the six-month complimentary T-Mobile HotSpot subscription, choose tmobile (in the
United States only).
2Connection to the wireless LAN is attempted.
If the selected SSID has not been configured with the camera, or
you are connecting to it for the first time, the WEP key (A9)
entry screen, or both the WEP key entry screen and the network
user name and password (A10) entry screen, may be displayed.
Enter the information required for connection (A31, 32).
The screens for connecting to the server, and for uploading
pictures to the server, will be displayed. To cancel upload, press the k button. When upload is
complete, the screen indicating transfer completion will be displayed. After upload is
complete, press the k button*.
* Once upload of all pictures using the Picture Bank service, initiated by connecting the AC
adapter, is complete, the camera turns off and the battery begins charging.
AP1
AP2
AP3
AP4
AP5
Select SSID
Back
Cancel
Connecting to access point
AP1
Connecting to server
Cancel Cancel
002
/
004
Transferring images
to server.
11MB:available
Transfer complete.
Connection terminated.
Exit
Q7115_Wireless_EN.book Page 49 Wednesday, June 4, 2008 6:02 PM
Q7115_Wireless_EN_1st
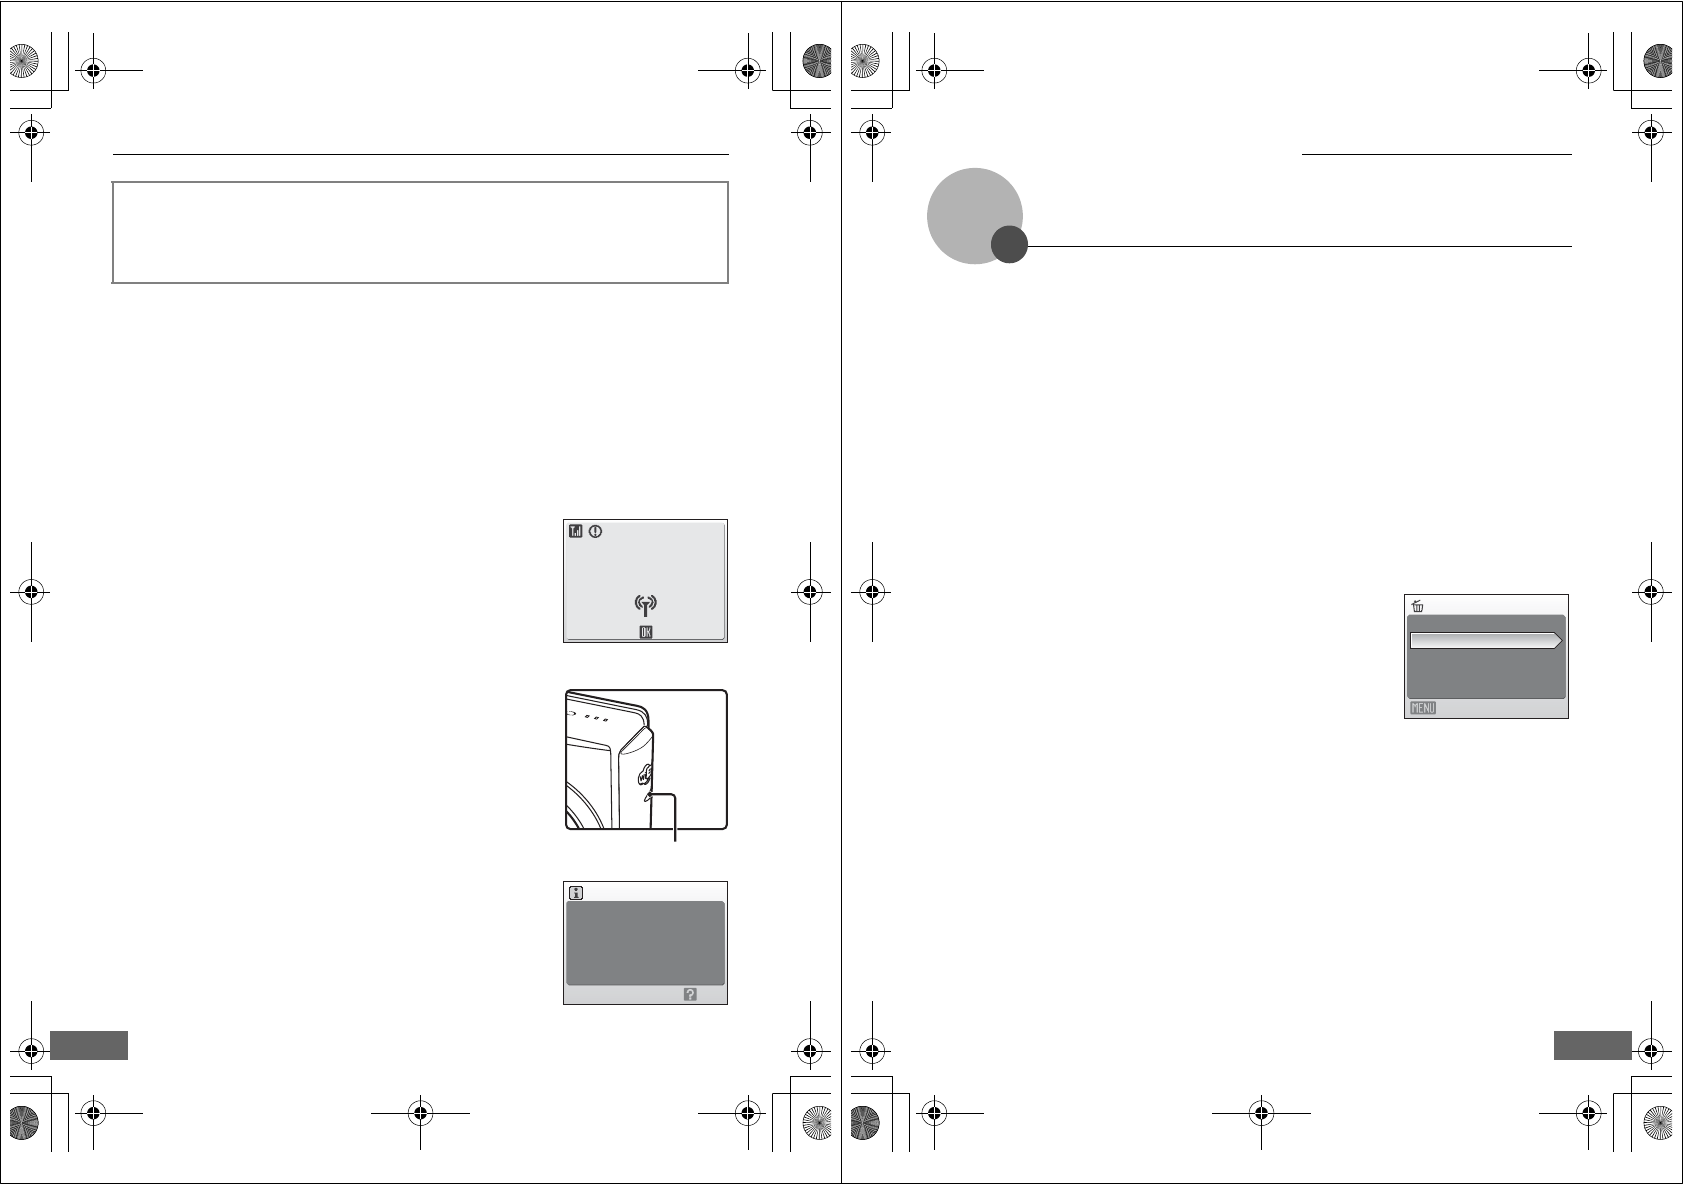
Uploading Pictures to the my Picturetown Server
50
BConnecting via a Wireless LAN
Be sure that you are in a location where connection of the camera to a wireless LAN is possible
before attempting to upload pictures.
Customers in the United States must locate a public T-Mobile hotspot where connection of the
camera to the Internet, via a public wireless LAN, is available before uploading pictures.
Access the following URL for the latest list of public T-Mobile hotspots.
http://hotspot.t-mobile.com/
See “Public Wireless LAN” (Aiv) for more information on countries in which public wireless LANs
can be accessed by, and the wireless service providers that support connection of, this camera.
CScreen Displayed During Transfer
The screen shown at right is displayed during picture upload. The
antenna icon in the top left corner of the screen indicates signal
strength (5 levels). The icon changes to red when out of range. When
signal strength is poor, be sure that you are not holding the camera in
such a way that the antenna is obstructed, or remove any obstacles
between the camera antenna and access point. Signal strength may
be improved (A52, 53).
CWireless LAN LED
The wireless LAN LED, located on the side of the camera with the
antenna, indicates connection status.
•Blinks: The camera is searching for a network.
•On: A connection has been established or data is being uploaded.
•Off: The camera is not connected to a wireless LAN.
DChecking SSID Contents
Pressing the g (j) button in the SSID selection screen displays the
SSID (network name) and the profile type.
If user information has not been registered, e-mail notification requesting
user registration with my Picturetown is sent to the specified e-mail address
after picture upload. Register user information with my Picturetown. See
“Registering with my Picturetown” (A41) for more information.
Cancel
002
/
004
Transferring images
to server.
11MB:available
Wireless LAN LED
Back
SSID:AP1
Type:Home SSID
Q7115_Wireless_EN.book Page 50 Wednesday, June 4, 2008 6:02 PM
51
Viewing Pictures on the
my Picturetown Server
Use a computer’s Web browser to access http://mypicturetown.com/, and enter the Email
ID (e-mail address) and password registered with my Picturetown to display the My
Photos page.
From this page, you can upload and sort pictures, create and share albums, and create
slide shows. Refer to help information contained in my Picturetown for more
information.
If you would like to use my Picturetown with your cellular telephone*, access
http://mypicturetown.com/ and select Log In. When the log-in page is displayed, enter
the registered Email ID (e-mail address) and password.
* The use of cellular telephone is only possible in the United States, and is supported
only for BlackBerry smartphones (version 4.0 or later recommended).
CDeleting Picture Bank Images
The pictures stored in the internal memory or on the memory card,
and taken on the specified date, that have already been uploaded to
the my Picturetown server can be deleted.
Register the camera and user information with my Picturetown
before deleting pictures from the internal memory or the memory
card (A41). When you receive the e-mail message confirming my
Picturetown registration, use a computer to be sure that the
uploaded pictures have all been saved to my Picturetown before
deleting those pictures.
1Press the e button in playback mode and use the rotary multi selector to choose C (list by
date), and press the k button.
The camera will enter list by date mode.
2Choose the date and press the k button.
The pictures will be displayed full frame in list by date mode.
3Press the d button and use the rotary multi selector to choose Delete in list by date mode,
and press the k button.
4Choose Picture Bank images and press the k button.
The picture selection screen is displayed.
Rotate the rotary multi selector, or press J or K, to choose pictures and press H to choose a
desired picture (y). Press I to cancel a selection.
Press the k button to finalize picture selection.
5When a confirmation dialog is displayed, choose Yes and press the k button.
The selected picture will be deleted.
Delete
Picture Bank images
Exit
Erase selected images
Erase all images
Q7115_Wireless_EN.book Page 51 Wednesday, June 4, 2008 6:02 PM
Q7115_Wireless_EN_1st

52
Appendix
Error Messages
Display Problem Solution A
N
Memory card is write
protected.
Write-protect switch is in
“lock” position.
Slide write-protect switch to
“write” position. ## of the
User’s Manual
q N
Battery exhausted.
Transfer terminated.
Battery exhausted during
picture upload.
Use the AC Adapter EH-63, or
charge the battery, turn the
camera on again, and apply
the last mode used for picture
upload.
## of the
User’s Manual
q P
SSID not found
SSID was not detected. •Signal strength may be poor.
Try the following and press
the k button.
-Be sure that your hand is
not obstructing the
camera’s antenna.
- Change the camera’s
direction.
- Move the camera closer to
the access point.
- Remove any obstacles
between the camera’s
antenna and access point.
•When Retry is displayed,
select Retry and press the
k button.
–
q P
Connection error.
Wireless connection to
the SSID was terminated.
Signal strength may be poor.
Try the following and press the
k button.
- Be sure that your hand is not
obstructing the camera’s
antenna.
- Change the camera’s
direction.
- Move the camera closer to
the access point.
- Remove any obstacles
between the camera’s
antenna and access point.
–
Q7115_Wireless_EN.book Page 52 Tuesday, June 3, 2008 7:34 PM
Appendix
53
Troubleshooting
q P
Connection error.
Connection to the server
failed, or error occurred
during picture upload.
•Select Resume and press
the k button to attempt
connection to the server
again.
•Choose Select SSID and
press the k button to select
SSID again.
49
q P
User information
incorrect.
Camera is not certified to
connect to the wireless
network.
Press the k button and select
SSID again. 49
q P
Server is full.
my Picturetown server is
full.
Delete unnecessary pictures
from the server. –
q P
Service not available.
Cannot use
my Picturetown network
service.
Press the k button and select
SSID again. 49
q P
Address incorrect.
An error occurred with
Picture Mail recipient
e-mail address.
Be sure that you have specified
the recipient’s e-mail address
correctly.
34
q P
Login failed.
Login error occurred. •Select Re-enter and press
the k button to configure
Email ID and password
again.
•Select Select SSID and
press the k button to select
SSID again.
28
49
Problem Cause/Solution A
The camera is not detected by the
my Picturetown Utility.
Confirm your camera’s connection to the
computer. 15
SSID is not displayed. •Configure a network profile.
•SSID is hidden.
•Signal strength may be poor.
- Be sure that your hand is not obstructing
the camera’s antenna.
- Change the camera’s direction.
- Move the camera closer to the access
point.
- Remove any obstacles between the
camera’s antenna and access point.
17, 28
10
Display Problem Solution A
Q7115_Wireless_EN.book Page 53 Tuesday, June 3, 2008 7:34 PM
Q7115_Wireless_EN_1st

Appendix
54
Connection to the access point or
server failed.
•Wireless LAN access point or network
settings stored in the camera may not be
the same as those for the wireless LAN to
which connection was attempted. Confirm
network profile information using the
camera’s setup menu and the Utility.
•If connecting via a public wireless LAN,
connection may fail if the public wireless
LAN’s operation standards or access point
specifications are modified. Should the
connection failure persist, refer to the Nikon
website or contact an authorized Nikon
service representative.
17, 28
–
Wireless connection was
terminated during picture upload,
and upload failed.
•Signal strength may be poor. Try the
following and upload pictures again.
- Be sure that your hand is not obstructing
the camera’s antenna.
- Change the camera’s direction.
- Move the camera closer to the access
point.
- Remove any obstacles between the
camera’s antenna and access point.
•Battery is exhausted.
–
## of the
User’s Manual
E-mail notification requesting user
registration with my Picturetown
not sent.
Be sure that the e-mail address specified for
sender information is correct. 33
The queue mail screen not
displayed when the F button is
pressed.
Memory card’s write-protect switch is in “lock”
position. Slide write protect switch to “write”
position.
## of the
User’s Manual
Cannot upload pictures stored in
the internal memory.
Eject the memory card to upload pictures
stored in internal memory.
21 of the
User’s Manual
Pictures uploaded using the
Picture Mail or Picture Bank service
not saved to my Picturetown.
Use a computer to open the e-mail
notification requesting user registration, click
the URL provided, and register the camera’s
key information.
41
Recipient did not receive e-mail
notification of Picture Mail.
Be sure that you have specified the recipient’s
e-mail address correctly. 22, 34
Problem Cause/Solution A
Q7115_Wireless_EN.book Page 54 Tuesday, June 3, 2008 7:34 PM
Appendix
55
Index
A
Alias 11
Authentication 9, 18, 31
E
Encryption 9, 18
Encryption key 9, 31
G
Gateway 10, 18, 32
H
Home wireless LAN 8
I
IP address 10, 18, 32
K
Key index 9
Key information 11
M
MAC address 10
my Picturetown 4, 41, 51
my Picturetown Utility (Utility) 7, 13, 15
N
Network name (SSID) 9, 17, 30, 49, 50
Network profile 9, 17, 28
P
Password 12, 23, 37
Picture Bank 5, 46
Picture Mail 5, 44
PIN method 40
Primary DNS 18, 32
Public wireless LAN 8
Push Button Configuration method 39
R
Recipient 12, 22, 34
Recipient group 12, 22, 36
Reset 24, 38
S
Secondary DNS 18, 32
SSID (network name) 9, 17, 30, 49, 50
Subnet mask 10, 18, 32
T
Text entry 27
U
User registration 41
Utility (my Picturetown Utility) 7, 13, 15
W
Wi-Fi Protected Setup 7
Wireless settings 13, 26
WPS 7
Q7115_Wireless_EN.book Page 55 Tuesday, June 3, 2008 7:34 PM
Q7115_Wireless_EN_1st

No reproduction in any form of this manual, in whole or in part
(except for brief quotation in critical articles or reviews), may be
made without written authorization from NIKON CORPORATION.
Printed in China
YP8D02(11)
6MMA6511-02
Q7115_Wireless_EN.book Page 56 Tuesday, June 3, 2008 7:34 PM
Q7115_Wireless_EN_1st