Nikon 3143EB 802.11b/g Transmitter Module User Manual Part 2 of 2
Nikon Corporation 802.11b/g Transmitter Module Part 2 of 2
Nikon >
Contents
User Manual Part 2 of 2
132
Wireless LAN Connection
Wireless Transfer Mode
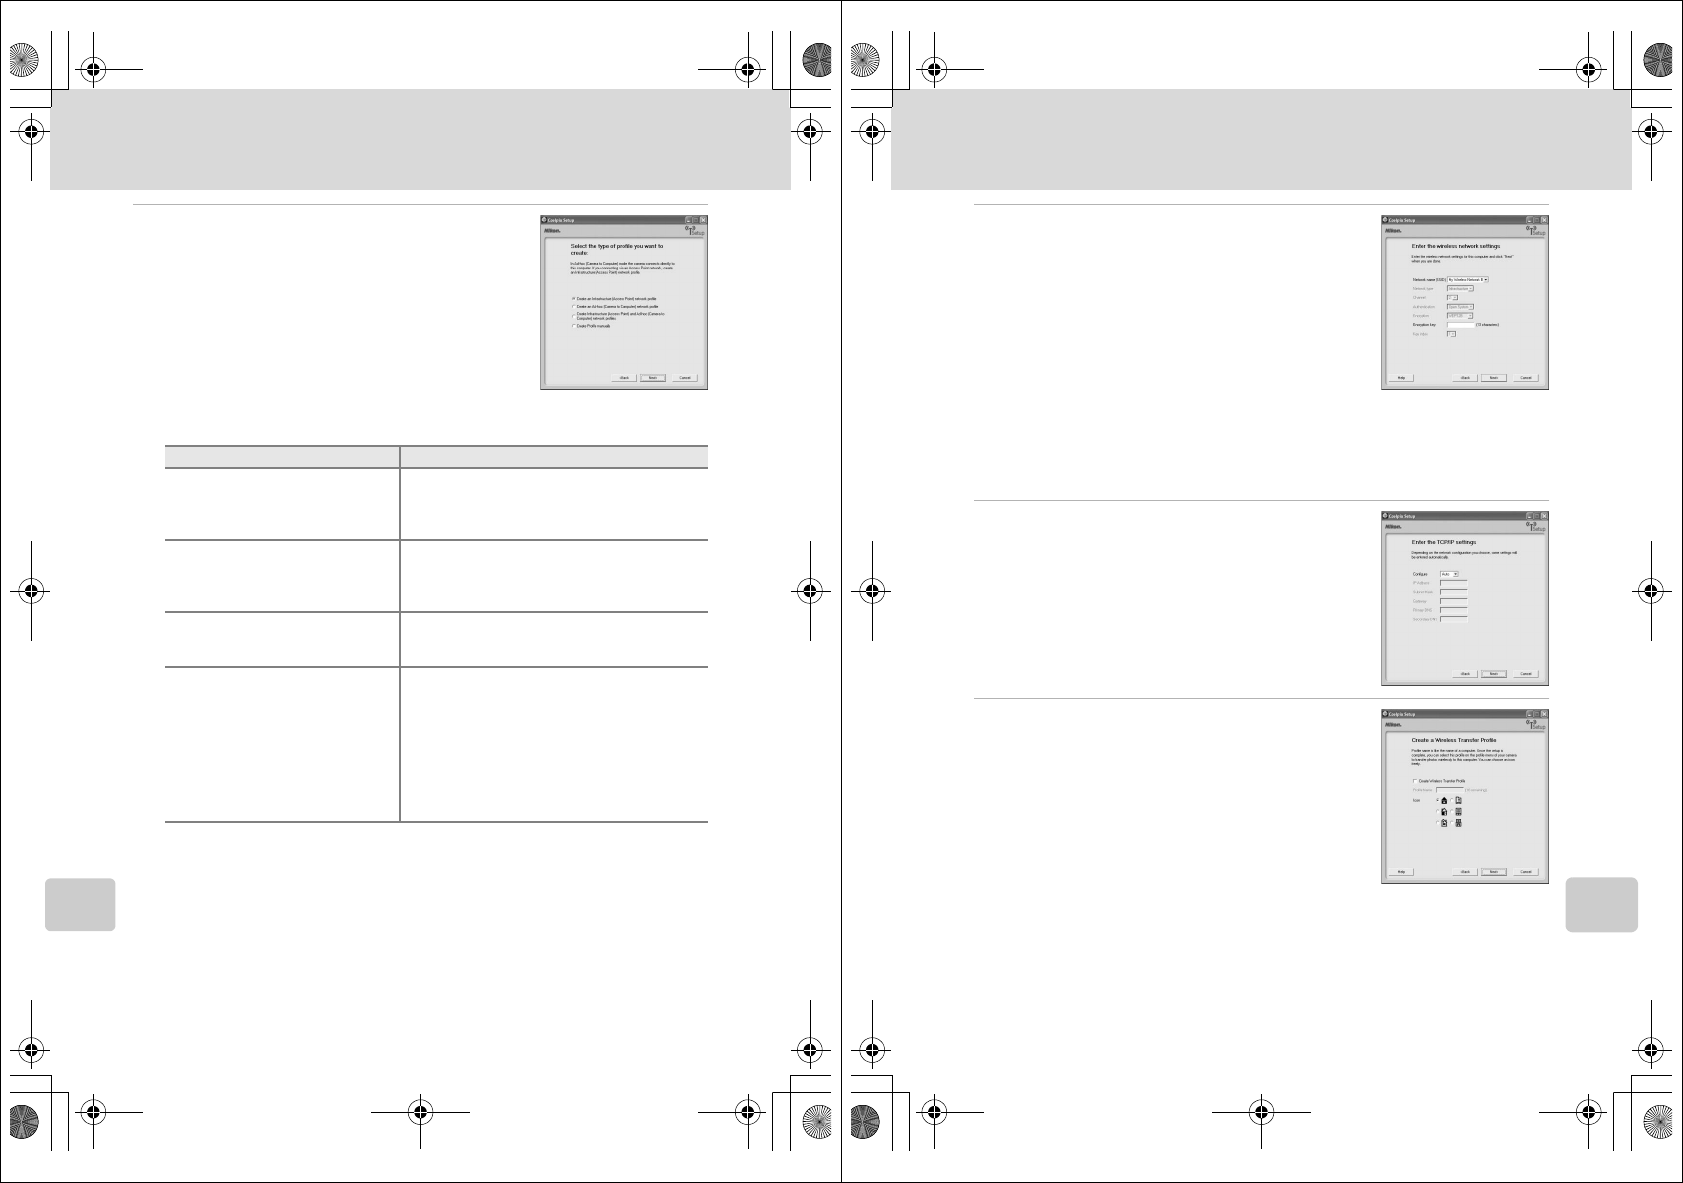
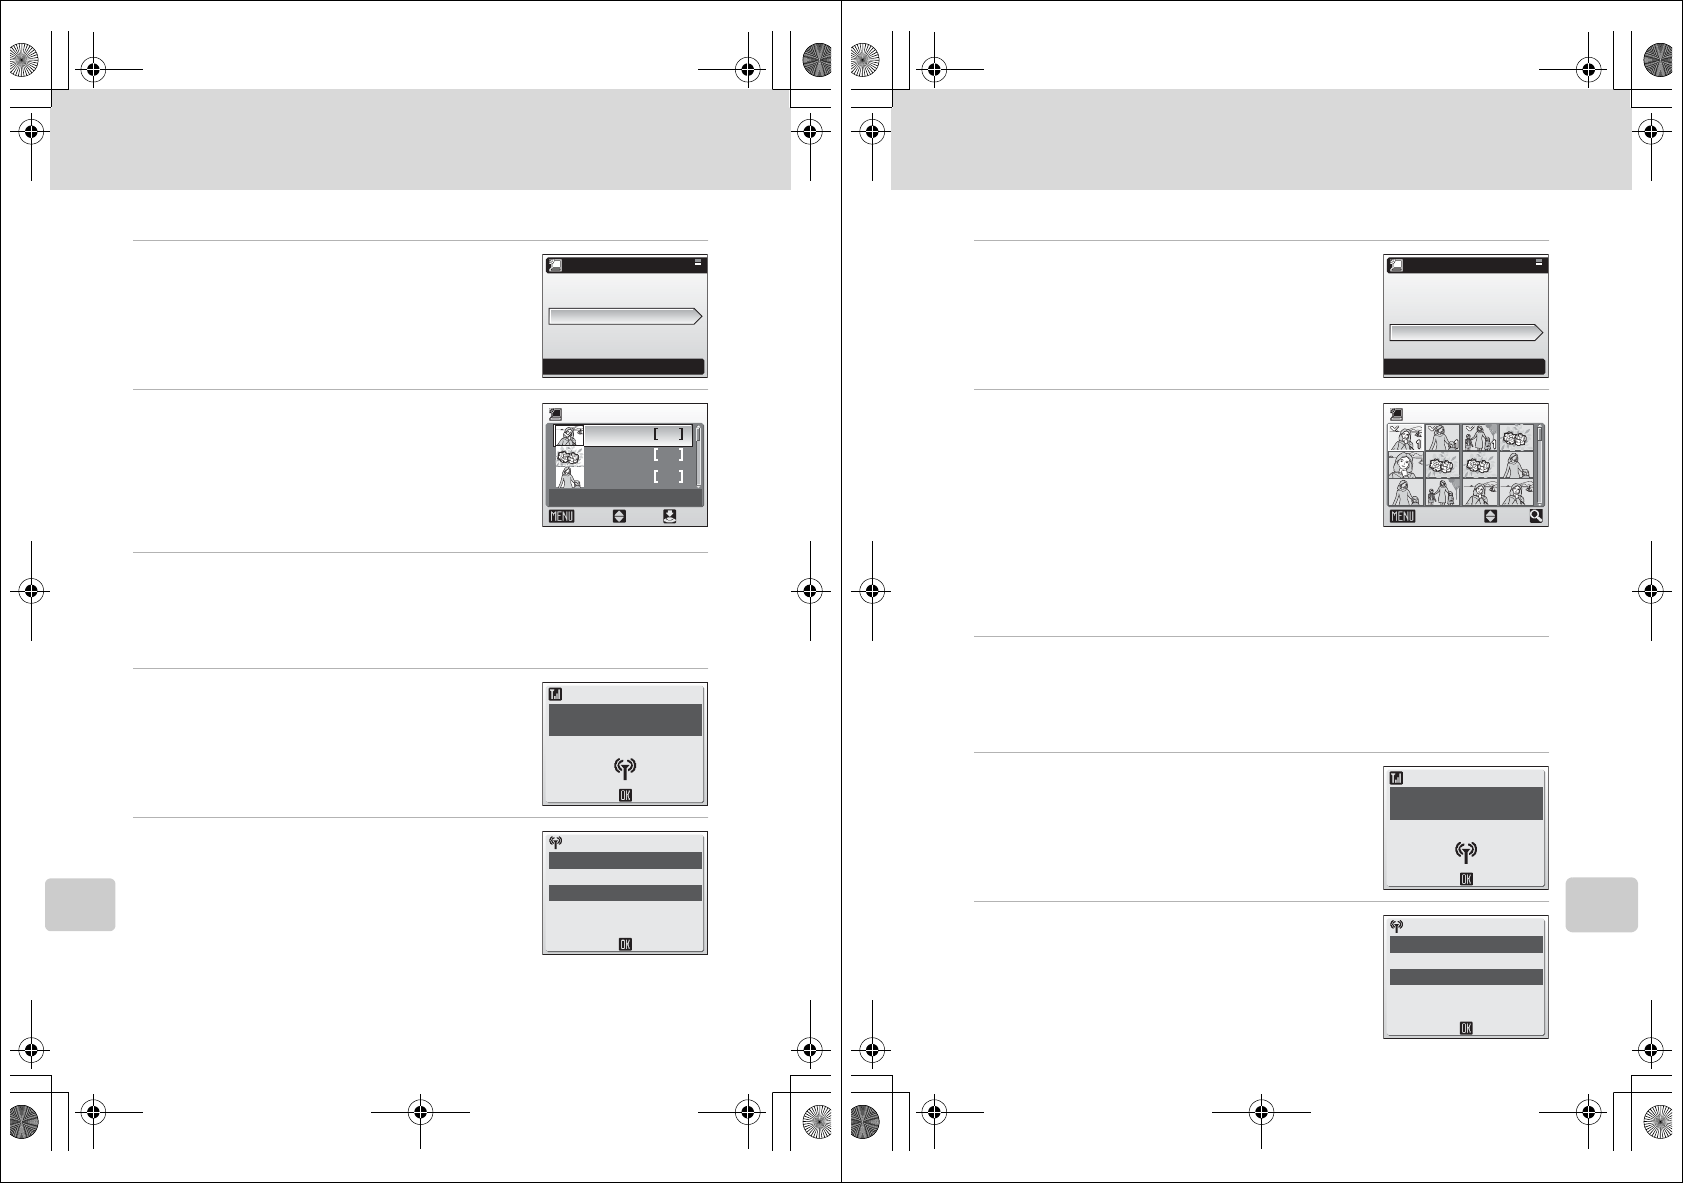
8Choose the connection method.
Available profile types (see the list below) for your
wireless LAN will be displayed on screen. Select the
desired profile type and click [Next].
When selecting [Create an Ad-hoc (Camera to Com-
puter) network profile], proceed to step 11 (c133).
If multiple wireless LAN devices are connected to the
computer, choose a device from the pop-up menu.
Select the desired configuration type from the options
listed. Options displayed will differ depending on the
selected wireless device.
jNote on Choosing [Create an Ad-hoc (Camera to Computer) network
profile] on Windows XP
• When configuring a profile device using an ad-hoc network between the camera and com-
puter, the computer’s fixed IP address (manually entered IP address) will be automatically
set to “169.254.x.x”. When adding an infrastructure network later, set the computer to
automatically obtain an IP address. For the added network profiles, configure wireless set-
tings between the camera and computer again.
• [Create an Ad-hoc (Camera to Computer) network profile] cannot be selected if an infra-
structure network has already been set up in your computer, or the fixed IP address is not
“169.254.x.x”.
Type of Profile Description
Infrastructure (Access Point)
network profile
For use when connecting the camera and
computer via an infrastructure network. An
infrastructure network must be configured
beforehand.
Ad-hoc (Camera to Computer)
network profile
For use when establishing a one-to-one con-
nection (when a wireless LAN access point is
not available) between the camera and com-
puter.
Infrastructure (Access Point)
and Ad-hoc (Camera to Com-
puter) network profiles
Recommended for users of multiple wireless
network profiles.
Create Profile manually
For use with manual settings. Only [Create
Profile manually] is available when:
- configuration for wireless LAN network is
not performed using the wireless network
setting function (Zero Config) for Windows
XP
- using a Windows XP SP1 or Mac OS X oper-
ating system
- your computer has a fixed IP address
12_Wireless_55.fm Page 132 Wednesday, November 1, 2006 10:06 AM
133
Wireless LAN Connection
Wireless Transfer Mode
9Enter network settings.
Enter the settings for connecting the camera and com-
puter via a wireless network.
When selecting [Create an Infrastructure (Access
Point) network profile] or [Create Infrastructure
(Access Point) and Ad-hoc (Camera to Computer) net-
work profiles] in step 8, select a network name from
the [Network Name (SSID)] list. This name will be used
when connecting the camera and computer.
When selecting [Create Profile manually] in step 8,
manually enter the same values set in the computer for all items except those that
are automatically provided. See “Settings for the Setup Utility” for reference
(c135).
When settings are complete, click [Next].
10Configure TCP/IP.
When selecting [Create Profile manually] in step 8, or
if the screen in step 8 does not appear, manually enter
the address type and IP address, referring to those
used in “Settings for the Setup Utility” (c135).
When settings are complete, click [Next].
11Set profile name and icon.
Enter a profile name (up to 16 single-byte alphanu-
meric characters).
The entered profile name will appear in the selection
list for the profile device (c149). We recommend
selecting a name that will let you easily tell devices
apart, such as “Desktop-Home”.
When settings are complete, click [Next].
12_Wireless_55.fm Page 133 Wednesday, November 1, 2006 10:06 AM
134
Wireless LAN Connection
Wireless Transfer Mode
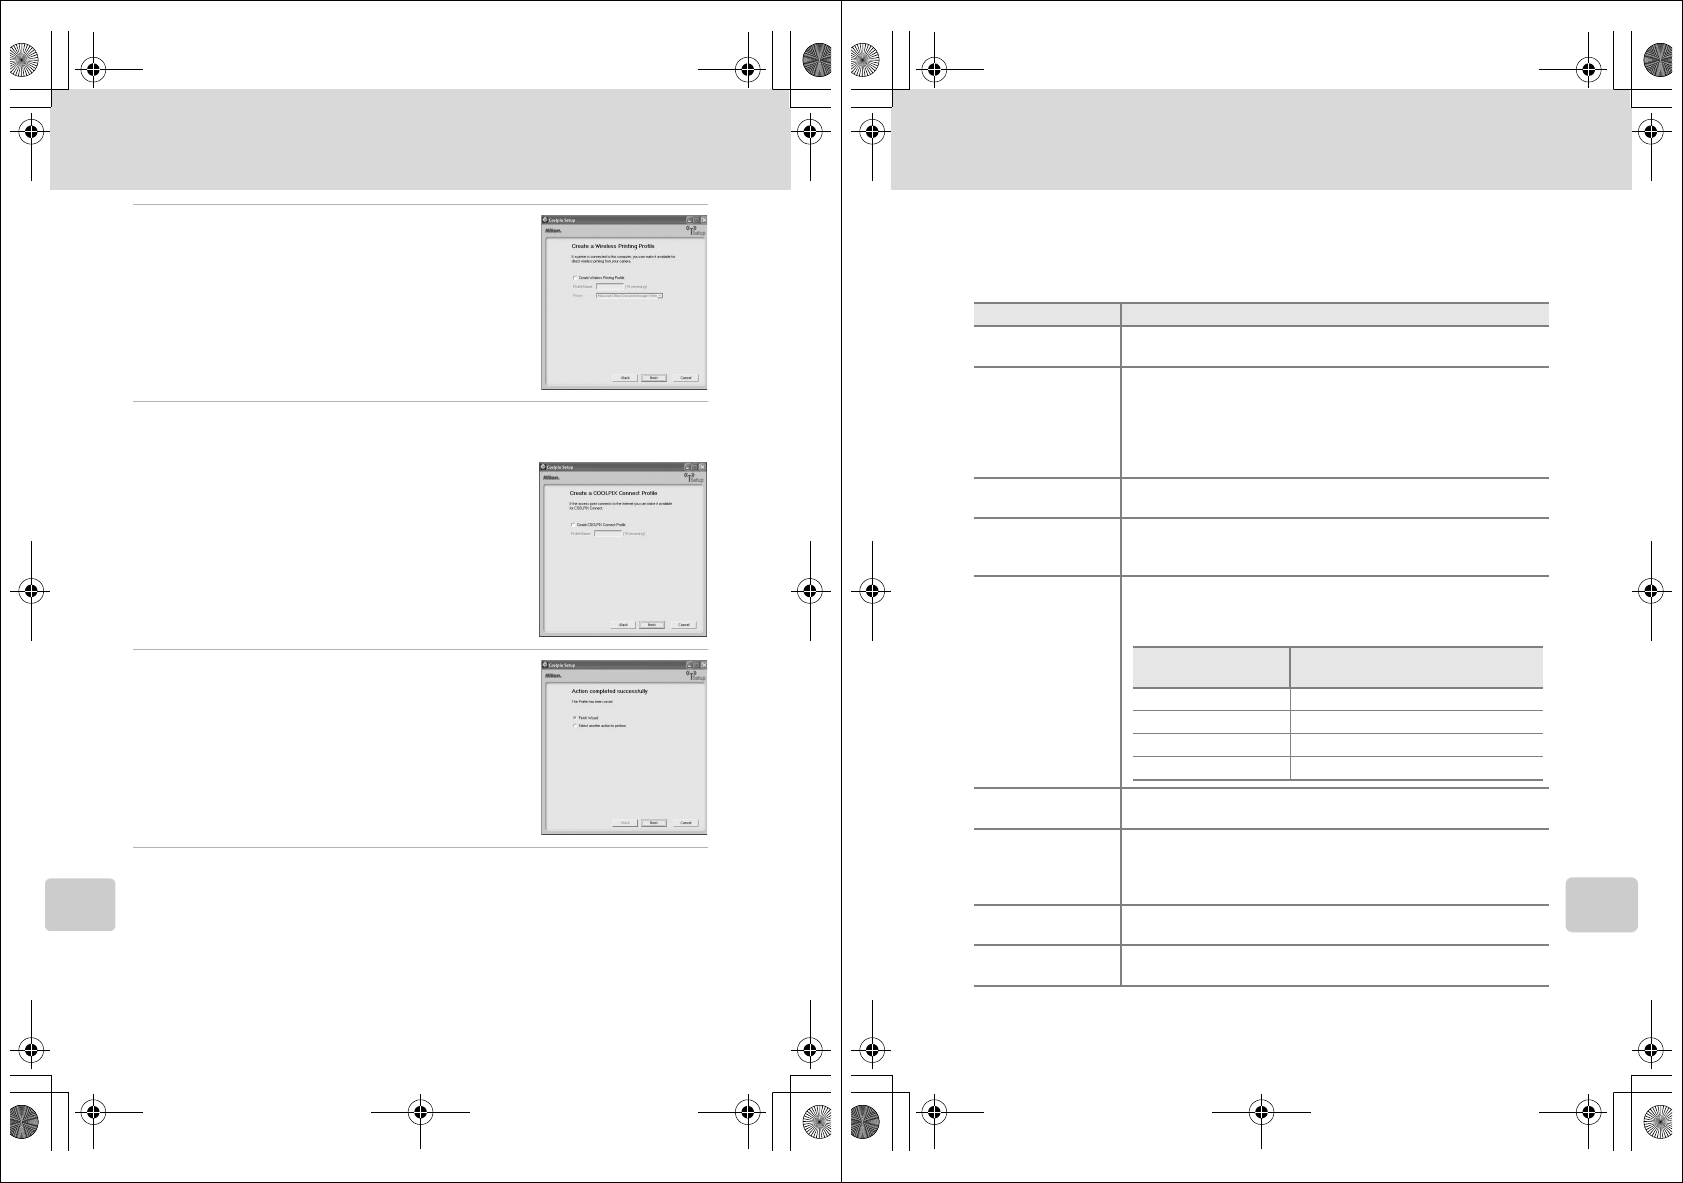
12Configure wireless printing.
If a printer is connected to the computer, check [Cre-
ate Wireless Printing Profile] and select the printer to
be used for wireless printing (c XX).
Enter a profile name (up to 16 single-byte alphanu-
meric characters), select a printer, and click [Next].
If no printers are connected to the computer, click
[Next] without selecting a printer.
13Configure COOLPIX CONNECT.
If using COOLPIX CONNECT, enter the profile name for COOLPIX CONNECT.
• Check [Create a COOLPIX CONNECT Profile] and
enter a profile name (up to 16 single-byte alphanu-
merical characters) and click [Next].
14Settings are complete.
Select [Finish wizard] and click [Next].
15Disconnect the computer and camera.
Turn off the camera before disconnecting the AV/USB cable.
12_Wireless_55.fm Page 134 Wednesday, November 1, 2006 10:06 AM
135
Wireless LAN Connection
Wireless Transfer Mode
Settings for the Setup Utility
When configuring a profile using the Setup Utility, refer to the description for
each item listed below. Settings are the same for Windows and Macintosh.
* Mandatory items
Setting Description
Network name
(SSID)*
Enter the network ID for the computer. Choose a value dis-
played. If multiple values are displayed, select one.
Network type*
Select [Ad-hoc] or [Infrastructure]. The camera and computer
must be set to the same configuration.
• Ad-hoc mode: This mode establishes a peer-to-peer (one-to-
one) connection between the camera and computer.
• Infrastructure mode: This mode connects the camera and
computer via a wireless LAN access point.
Channel Mandatory if [Ad-hoc] is selected for [Network type]. Select the
same channel (1 to 11) set in the computer.
Authentication
Select [Open System], [Shared Key], [WPA-PSK]* or [WPA2-
PSK]* (* [Infrastructure] only). Select the same method set in
the computer or access point.
Encryption
Available methods for the camera differ depending on the
selected authentication method (see below). Select the same
method set in the computer or access point.
Encryption key Enter the security key set in the computer or access point
(unnecessary when [Encryption] is set to [None]).
Key index
When [Encryption] is set to [WEP], and infrastructure mode is
used, select the same key index set in the computer or access
point (unnecessary when [Encryption] is set to [None], [TKIP] or
[AES]). The default setting is [1].
Configure* Select [Auto] (default setting) or [Manual] for the method of
setting the camera IP address.
IP Address When [Configure] is set to [Manual], enter the IP address for
the camera.
Selected authentica-
tion method
Available security method(s) for
the camera
[Open System] [None], [WEP]
[Shared Key] [WEP]
[WPA-PSK] [TKIP]
[WPA2-PSK] [AES]
12_Wireless_55.fm Page 135 Wednesday, November 1, 2006 10:06 AM
136
Wireless LAN Connection
Wireless Transfer Mode
jWireless LAN Channels
Wireless LAN channels for the COOLPIX S50c are from 1 to 11. Make sure that the channel
for your computer’s wireless LAN device is set to a channel between 1 and 11 (inclusive).
jMAC Address Filtering
When MAC address filtering is enabled, only devices with an authorized MAC address can
access the wireless LAN. Check the camera’s MAC address in [Firmware Version] of the setup
menu (c XX) and add it to the authorized list.
jPort Number
For wireless communication, the UDP port number is “5353” and the TCP port number is
“15740”. If the computer or access point has a firewall, the firewall settings may need to be
changed.
jNotes on Profile Devices
Configure profiles for each computer using the Setup Utility and install the Setup Utility to
each computer to transfer (receive) pictures from the camera remotely.
lManaging Device Profiles
• You can configure a maximum of nine profile devices (computers, printers connected to a
computer, etc.) in the camera. If nine have already been configured and you want to add a
new one, delete an unneeded profile device using the Setup Utility.
• Start the Setup Utility while the camera is connected to a computer via AV/USB cable, and
you can rename or delete profiles. Choose [Rename/Delete profiles] in the action selection
screen of the Setup Utility and click [Next]. Then choose a profile you wish to rename or
delete and click [Rename] or [Delete]. You can also confirm the details of a profile by click-
ing [View Profile]. Choose [Reset camera] in the action selection screen to delete all profiles
(all address book contents are also deleted).
12_Wireless_55.fm Page 136 Wednesday, November 1, 2006 10:06 AM
137
Wireless LAN Connection
Wireless Transfer Mode
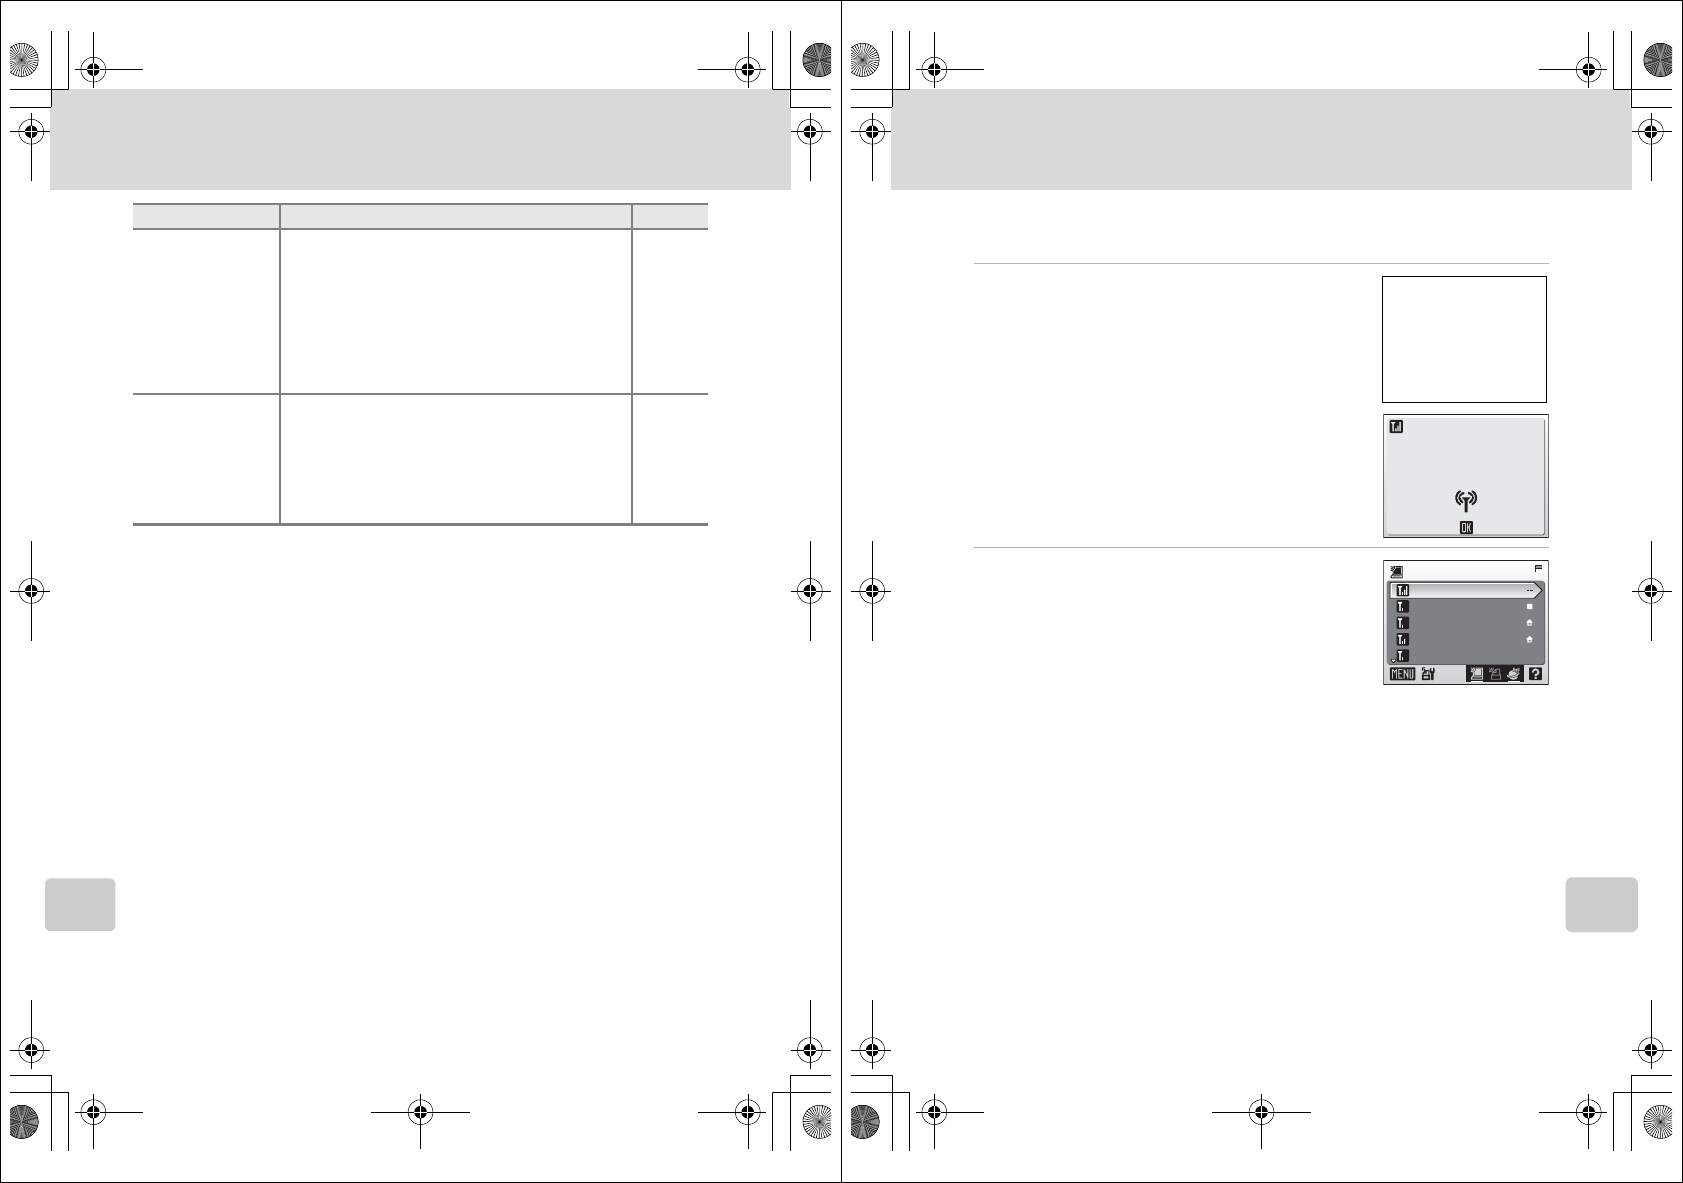
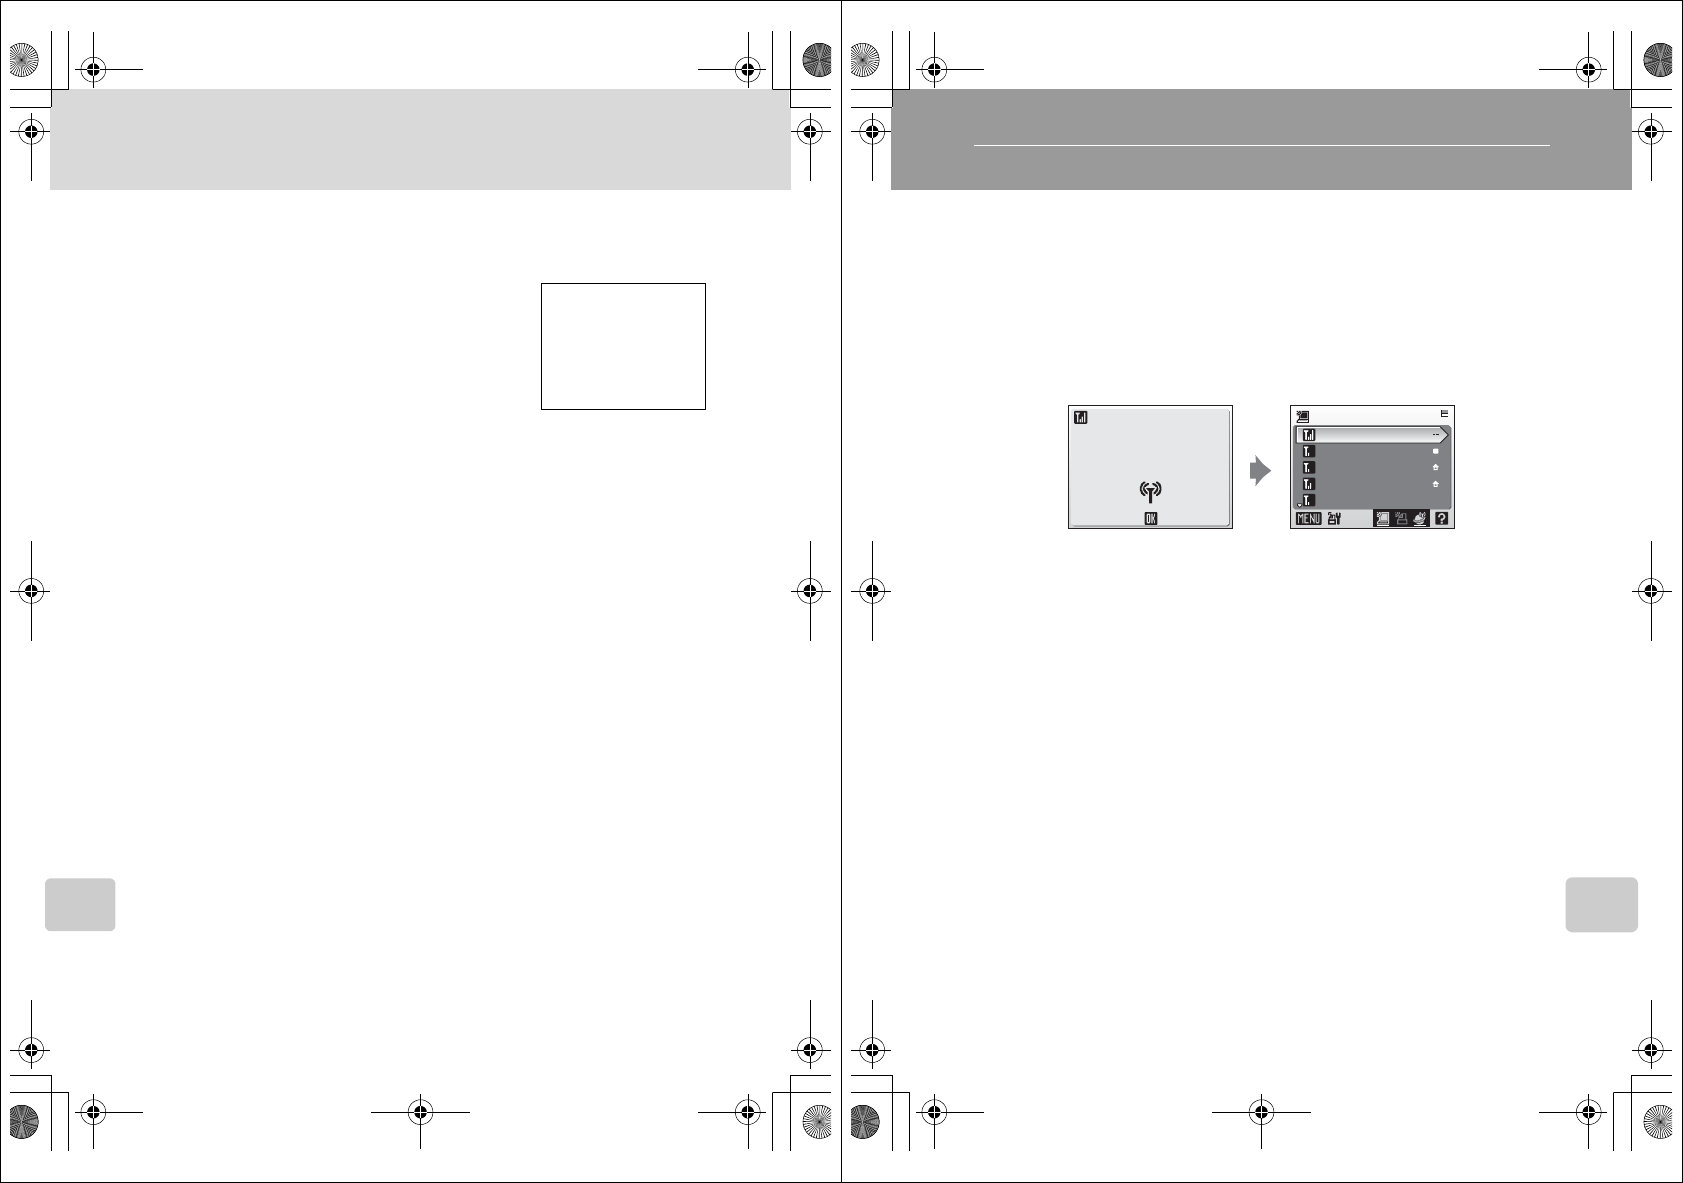
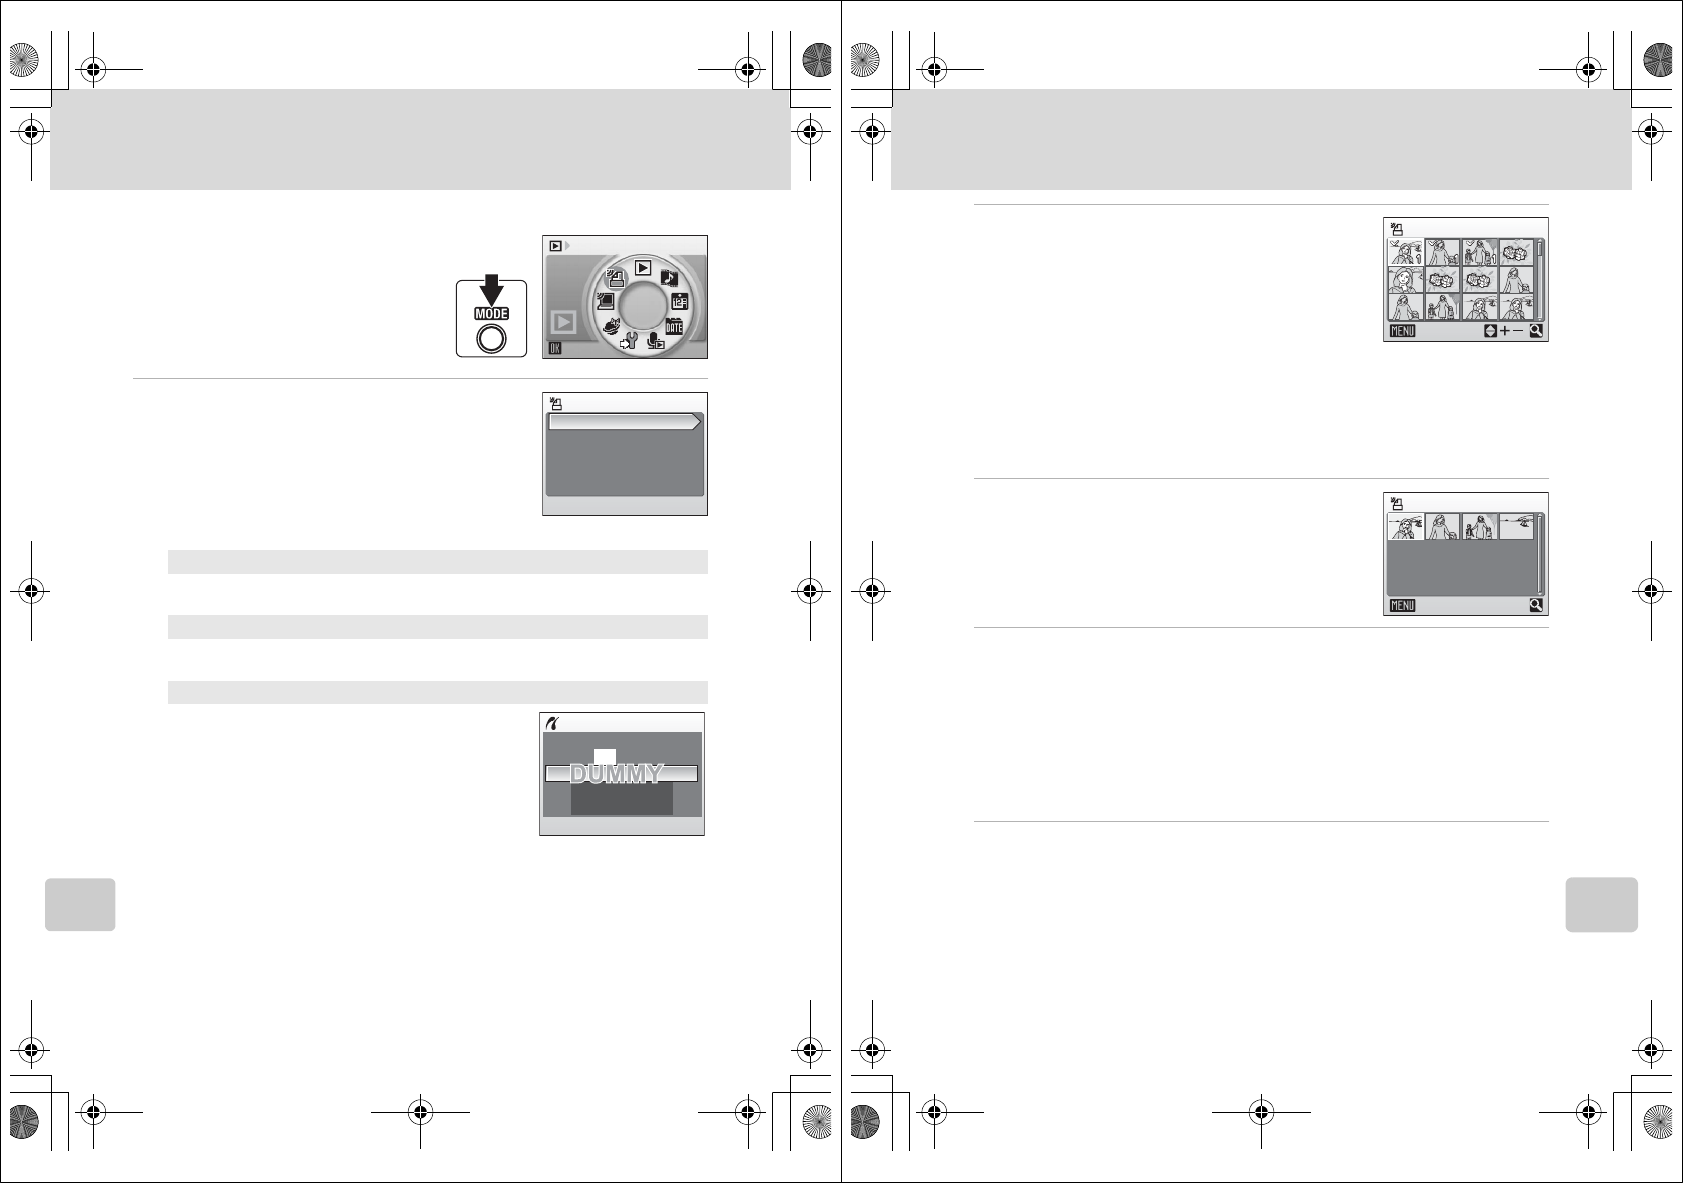
Configuring Wireless LAN Settings from the Camera
Select [Wireless settings] from the camera’s setup
menu (c XX) to configure the settings indicated
below for connection to a wireless LAN. Profiles and
e-mail addresses, configured using the Setup Utility
with the camera connected to a computer, can be
modified from the camera’s setup menu.
Setting Description c
Network profile Create profiles for connecting to COOLPIX CON-
NECT.
XX
XX
Sender
Enter or edit the nickname and e-mail address used
when uploading pictures to the COOLPIX CONNECT
server.
XX
Recipient e-mail
address
Enter or edit the nicknames and e-mail addresses
used for notification of picture upload to the
COOLPIX CONNECT server.
XX
Picture Bank
Choose whether pictures stored in the camera’s
internal memory, or on a memory card, are auto-
matically uploaded to the COOLPIX CONNECT
server when the AC adapter is connected to charge
the battery.
When [On] (default setting) is selected and the AC
adapter is connected (camera off), pictures are
automatically uploaded to Picture Bank. When [Off]
is selected and the AC adapter is connected to the
camera (camera off), the battery is charged.
XX
Password
Specify a password for COOLPIX CONNECT. If a
password is applied, that password must be entered
to use COOLPIX CONNECT.
XX
Key information Displays the encryption key used to authenticate the
camera when pictures are uploaded to Picture Bank. XX
Confirm transfer
Select whether picture transfer requires confirma-
tion prior to transfer when shooting in shoot and
transfer mode.
When [Off] (default setting) is selected, pictures are
immediately transferred to the computer as they are
taken. When [On] is selected, a confirmation dialog
asking whether the picture should be transferred to
the computer is displayed each time a picture is
taken.
—
[Wireless settings]
Screen
T.B.D.
12_Wireless_55.fm Page 137 Wednesday, November 1, 2006 10:06 AM
138
Wireless LAN Connection
Wireless Transfer Mode
lSaving Pictures
If a communication error occurs while performing [Shoot & Transfer] with [Save Images] set to
[Off], pictures taken are not saved. When taking pictures for important occasions, setting
[Save Images] to [On] is recommended.
Save images
Choose whether pictures taken in shoot and trans-
fer mode are stored in the camera’s memory, or to a
memory card, in addition to being transferred to the
computer.
When [Off] (default setting) is selected, pictures are
stored only on the computer and not in the cam-
era’s memory or memory card. When [On] is
selected, pictures are stored in the camera’s mem-
ory or memory card as well as on the computer.
—
Show page size
options
Select whether to confirm paper size when pictures
are printed over a wireless connection.
When [On] (default setting) is selected, the paper
size screen is displayed each time a picture is printed
over a wireless connection. Choose the desired
paper size from the paper size screen. When [Off] is
selected, the paper size screen is displayed.
—
Setting Description c
12_Wireless_55.fm Page 138 Wednesday, November 1, 2006 10:06 AM
139
Wireless LAN Connection
Wireless Transfer Mode
Specify Network Profiles for COOLPIX CONNECT
Follow the steps below to create COOLPIX CONNECT network profiles.
1Choose [Network profile] in the wireless
settings screen and press d.
If a password has been applied (c XX), enter the pass-
word and press the shutter-release button. For infor-
mation on entering text, see “Entering Text with the
Camera” (c142).
The camera will search for available SSIDs.
2Choose the SSID and press d.
The registered SSIDs (up to ten) are listed in order of
radio field strength.
Wireless connection is terminated once when the list
of available SSIDs is displayed.
The left icon of each SSID is indicated in red when out-
side the network area.
The right icon indicates the type of the profile registered to each SSID:
Z(profiles with home wireless LAN information),
-- (profiles with no information)
If an SSID is not detected, select [New] and enter a network name (SSID) in the
SSID screen. Press the shutter-release button and proceed to step 5. For informa-
tion on entering text, see “Entering Text with the Camera” (c142).
To delete an existing SSID, select the SSID and press T. When the deletion confir-
mation dialog is displayed, select [Yes] and press d to delete the selected SSID. To
cancel deletion, select [Cancel] and press d.
I
Cancel
Searching for SSID
[Network profile] is
chosen at
[Wireless settings]
Screen
T.B.D.
Select SSID
AP1
AP2
AP3
PC1
12345678912
12_Wireless_55.fm Page 139 Wednesday, November 1, 2006 10:06 AM
140
Wireless LAN Connection
Wireless Transfer Mode
3Select [Home wireless LAN] for the net-
work type and press d.
Set up for public wireless LAN is available only for T-
Mobile HotSpot in United States.
4Select the desired authentication method
and press d.
• When [Open system] is selected, proceed to step 5.
• When [Shared key] is selected, enter the WEP key in
the WEP key screen, press the shutter-release but-
ton, and proceed to step 6.
• When [WPA-PSK] is selected, enter the TKIP key in
the TKIP screen, press the shutter-release button, and proceed to step 6.
• When [WPA-PSK2] is selected, enter the AES key in the AES screen, press the
shutter-release button, and proceed to step 6.
For information on how to enter text, see “Entering Text with the Camera”
(c142).
5Select the desired encryption method and
press d.
When [Encryption] is set to [None], proceed to step 6.
When [Encryption] is set to [WEP], enter the WEP key
in the WEP key screen and press the shutter-release
button. For information on encryption settings, see
“Settings for the Setup Utility” (c135).
[Network profile]
Screen
T.B.D.
[Authentication]
Screen
T.B.D.
[Encryption]
Screen
T.B.D.
[WEP key]
Screen
T.B.D.
12_Wireless_55.fm Page 140 Wednesday, November 1, 2006 10:06 AM
141
Wireless LAN Connection
Wireless Transfer Mode
6Set the camera’s IP address or user name
and password.
Choose the desired method for setting the camera’s IP
address and press d.
• When [Configuration] is set to [Auto], connection is
established.
• When [Configuration] is set to [Manual], configure
the [IP address], [Subnet mask], [Gateway], [Primary
DNS], and [Secondary DNS] settings, pressing the
shutter-release button to apply each setting.
When all settings have been configured, “Done” will
be displayed.
[Configuration]
Screen
T.B.D.
[IP address]
Screen
T.B.D.
[User name]
Screen
T.B.D.
[Done]
Screen
T.B.D.
12_Wireless_55.fm Page 141 Wednesday, November 1, 2006 10:06 AM
142
Wireless LAN Connection
Wireless Transfer Mode
jEntering Text with the Camera
From the camera you can enter letters for information such as the e-mail address (up to 64)
and its (sender) name (up to 16), user ID and password.
• Rotate the rotary multi selector clockwise, or press the rotary multi selector G, to enter let-
ters (A to Z) in alphabetical order. Rotate the rotary multi selector counterclockwise, or
press the rotary multi selector H, to enter letters in reverse order.
• Press the rotary multi selector J to move the cursor right.
• Press the rotary multi selector I to move the cursor left. Press T to delete the letters at the
cursor position.
•Press d to change the character type in the following order: uppercase letters → lower-
case letters → numbers → symbols → uppercase letters, and so on.
• Press the shutter-release button to apply selection and return to the previous screen.
•Press v (l) to preview the letters that have been entered. v (l) cannot be used when
entering text for [IP address], [Primary DNS], [Gateway], or [Set/change password].
•Press m to return to the previous screen.
jCOOLPIX CONNECT Network Profiles
When using COOLPIX CONNECT service, you can set profiles with the camera, without using
the Setup Utility.
WEP key
Confirm
Delete
2424
123 14 23412 14232143
Back
12_Wireless_55.fm Page 142 Wednesday, November 1, 2006 10:06 AM
143
Wireless LAN Connection
Wireless Transfer Mode
Specifying the Sender with the Camera
1Select [Sender] in the wireless settings
screen and press d.
The sender information entry screen will be displayed.
If a password has been applied (c XX), enter the pass-
word and press the shutter-release button. If the mes-
sage “Password incorrect.” is displayed and the sender
information entry screen is displayed again, press d
and enter the correct password. For information on entering text, see “Entering
Text with the Camera” (c142).
2Enter sender’s nickname and press the
shutter-release button.
Up to 16 single-byte alphanumerical characters can be
entered for a sender’s nickname. For information on
entering text, see “Entering Text with the Camera”
(c142).
3Enter sender’s e-mail address and press
the shutter-release button.
Up to 64 single-byte alphanumerical characters can be
entered for a sender’s e-mail address. For information
on entering text, see “Entering Text with the Camera”
(c142).
[Sender] is chosen at
[Wireless settings]
Screen
T.B.D.
[Alias]
Screen
T.B.D.
[Email]
Screen
T.B.D.
12_Wireless_55.fm Page 143 Wednesday, November 1, 2006 10:06 AM
144
Wireless LAN Connection
Wireless Transfer Mode
Specifying a Recipient
1Select [Choose address] in the wireless
settings screen and press d.
If a password has been applied (c XX), enter the pass-
word and press the shutter-release button. If the mes-
sage “Password incorrect.” is displayed and the sender
information entry screen is displayed again, press d
and enter the correct password. For information on
entering text, see “Entering Text with the Camera” (c142).
2Select [New] and press d.
Up to 30 recipient e-mail addresses can be added.
To delete a recipient, select the recipient and press T.
When the deletion confirmation dialog is displayed,
select [Yes] and press d to delete the selected recipi-
ent. To cancel deletion, select [Cancel] and press d.
3Enter recipient’s nickname and press the
shutter-release button.
Up to 16 single-byte alphanumerical characters can be
entered for a recipient’s nickname. For information on
entering text, see “Entering Text with the Camera”
(c142).
4Enter recipient’s e-mail address and press
the shutter-release button.
Up to 64 single-byte alphanumerical characters can be
entered for a recipient’s e-mail address. For informa-
tion on entering text, see “Entering Text with the
Camera” (c142).
[Choose address] is
chosen at [Wireless
settings] Screen
T.B.D.
[Choose address]
Screen
T.B.D.
[Alias]
Screen
T.B.D.
[Email]
Screen
T.B.D.
12_Wireless_55.fm Page 144 Wednesday, November 1, 2006 10:06 AM
145
Wireless LAN Connection
Wireless Transfer Mode
Applying a Password for COOLPIX CONNECT
1Select [Password] in the wireless settings
screen and press d.
The set/change password screen will be displayed.
2Select [Set/change password] and press
d.
3Specify a password or edit the current
password.
• If a password has not been applied, enter a pass-
word in the new password screen and press the
shutter-release button. The password can consist of
the set of four numbers.
• If a password has been applied, enter the password
in the current password screen and press the shut-
ter-release button. After the new password screen is
displayed, enter a new password and press the shut-
ter-release button.
When a password is entered, the re-enter password
screen will be displayed for confirming the password.
Enter the correct password again and press the shut-
ter-release button.
[Password] is chosen
at [Wireless settings]
Screen
T.B.D.
[Set/change password]
Screen
T.B.D.
[New password]
Screen
T.B.D.
[Current password]
Screen
T.B.D.
12_Wireless_55.fm Page 145 Wednesday, November 1, 2006 10:06 AM
146
Wireless LAN Connection
Wireless Transfer Mode
lDeleting the Password
To delete the current password, select [Delete password], enter the password to be deleted in
the current password screen and press the shutter-release button.
lResetting COOLPIX CONNECT Settings
To reset the password and existing COOLPIX CONNECT net-
work settings, select [Reset] in step 2 and press d. When the
confirmation dialog is displayed, select [Yes] and press d. The
password and all existing COOLPIX CONNECT network settings
will be reset. To cancel the reset operation, select [No] in the
confirmation dialog and press d.
[Existing network set-
tings will be deleted.
OK?]
Screen
T.B.D.
12_Wireless_55.fm Page 146 Wednesday, November 1, 2006 10:06 AM
147
Wireless Transfer Mode
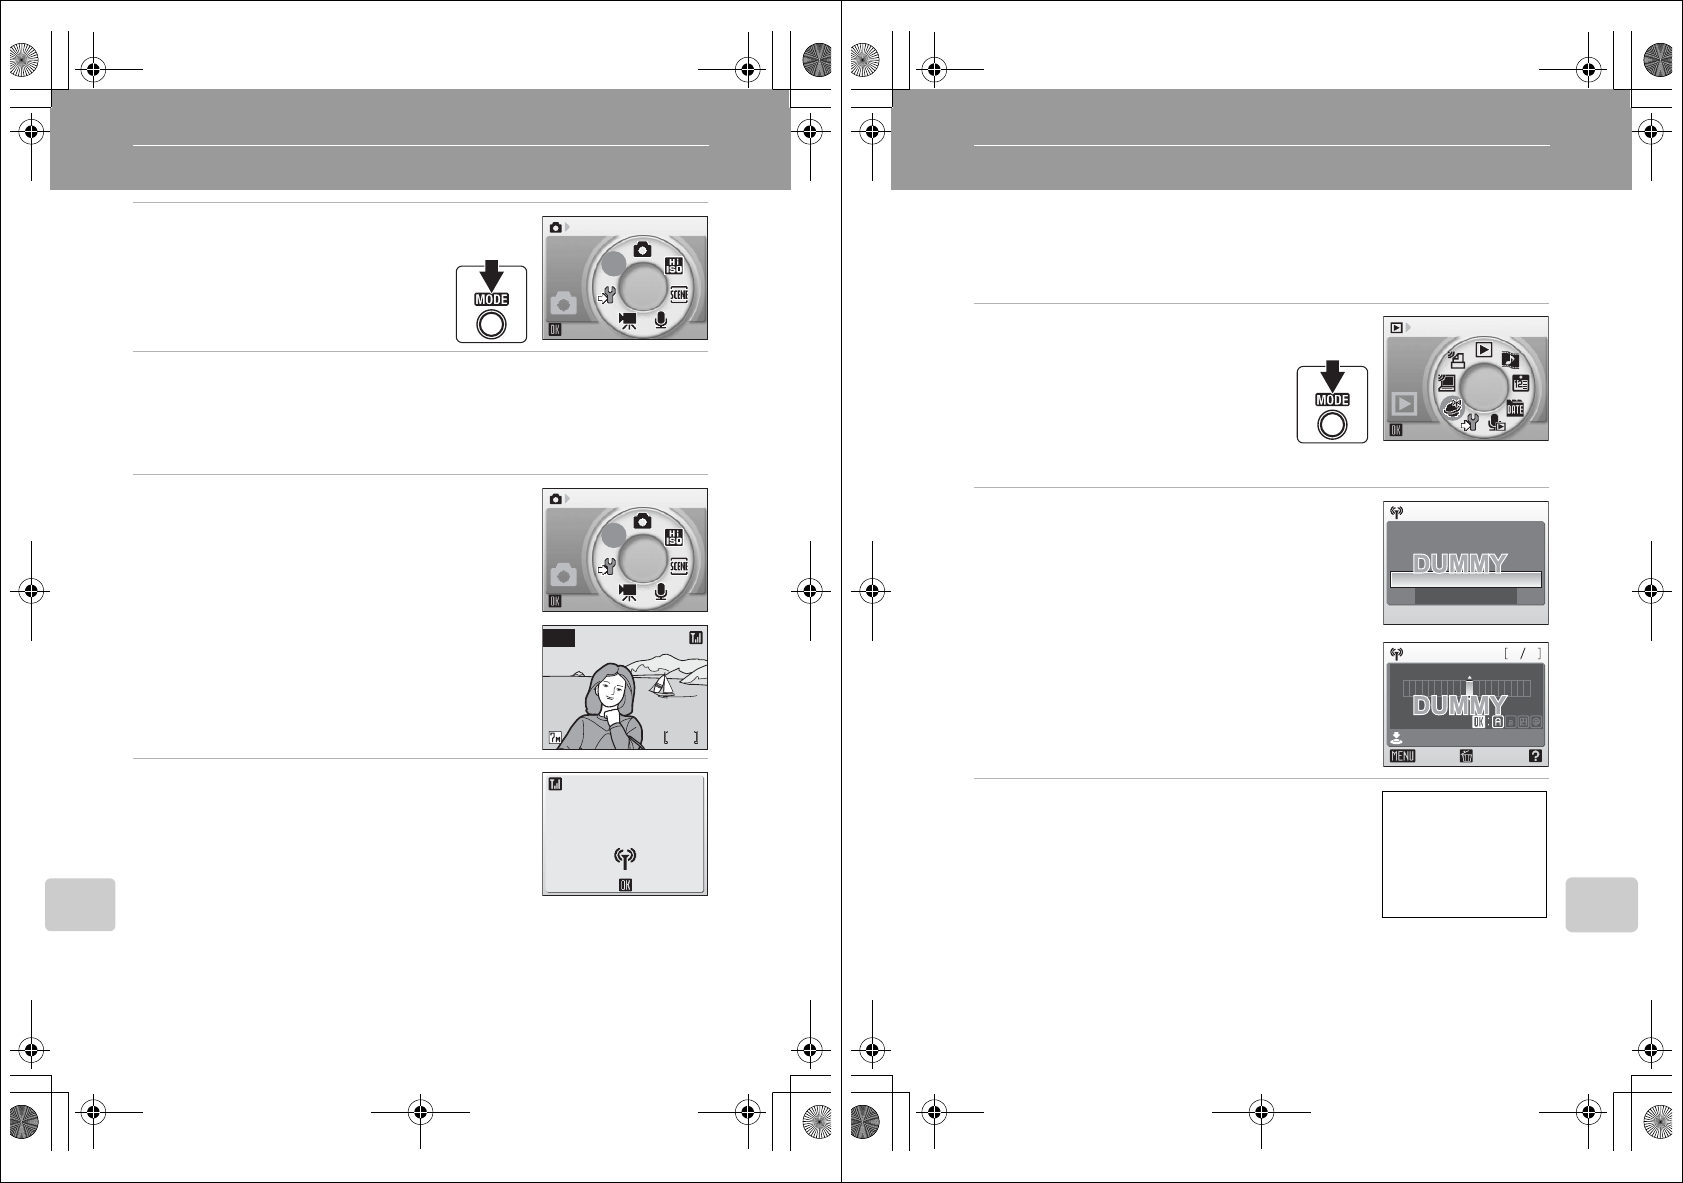
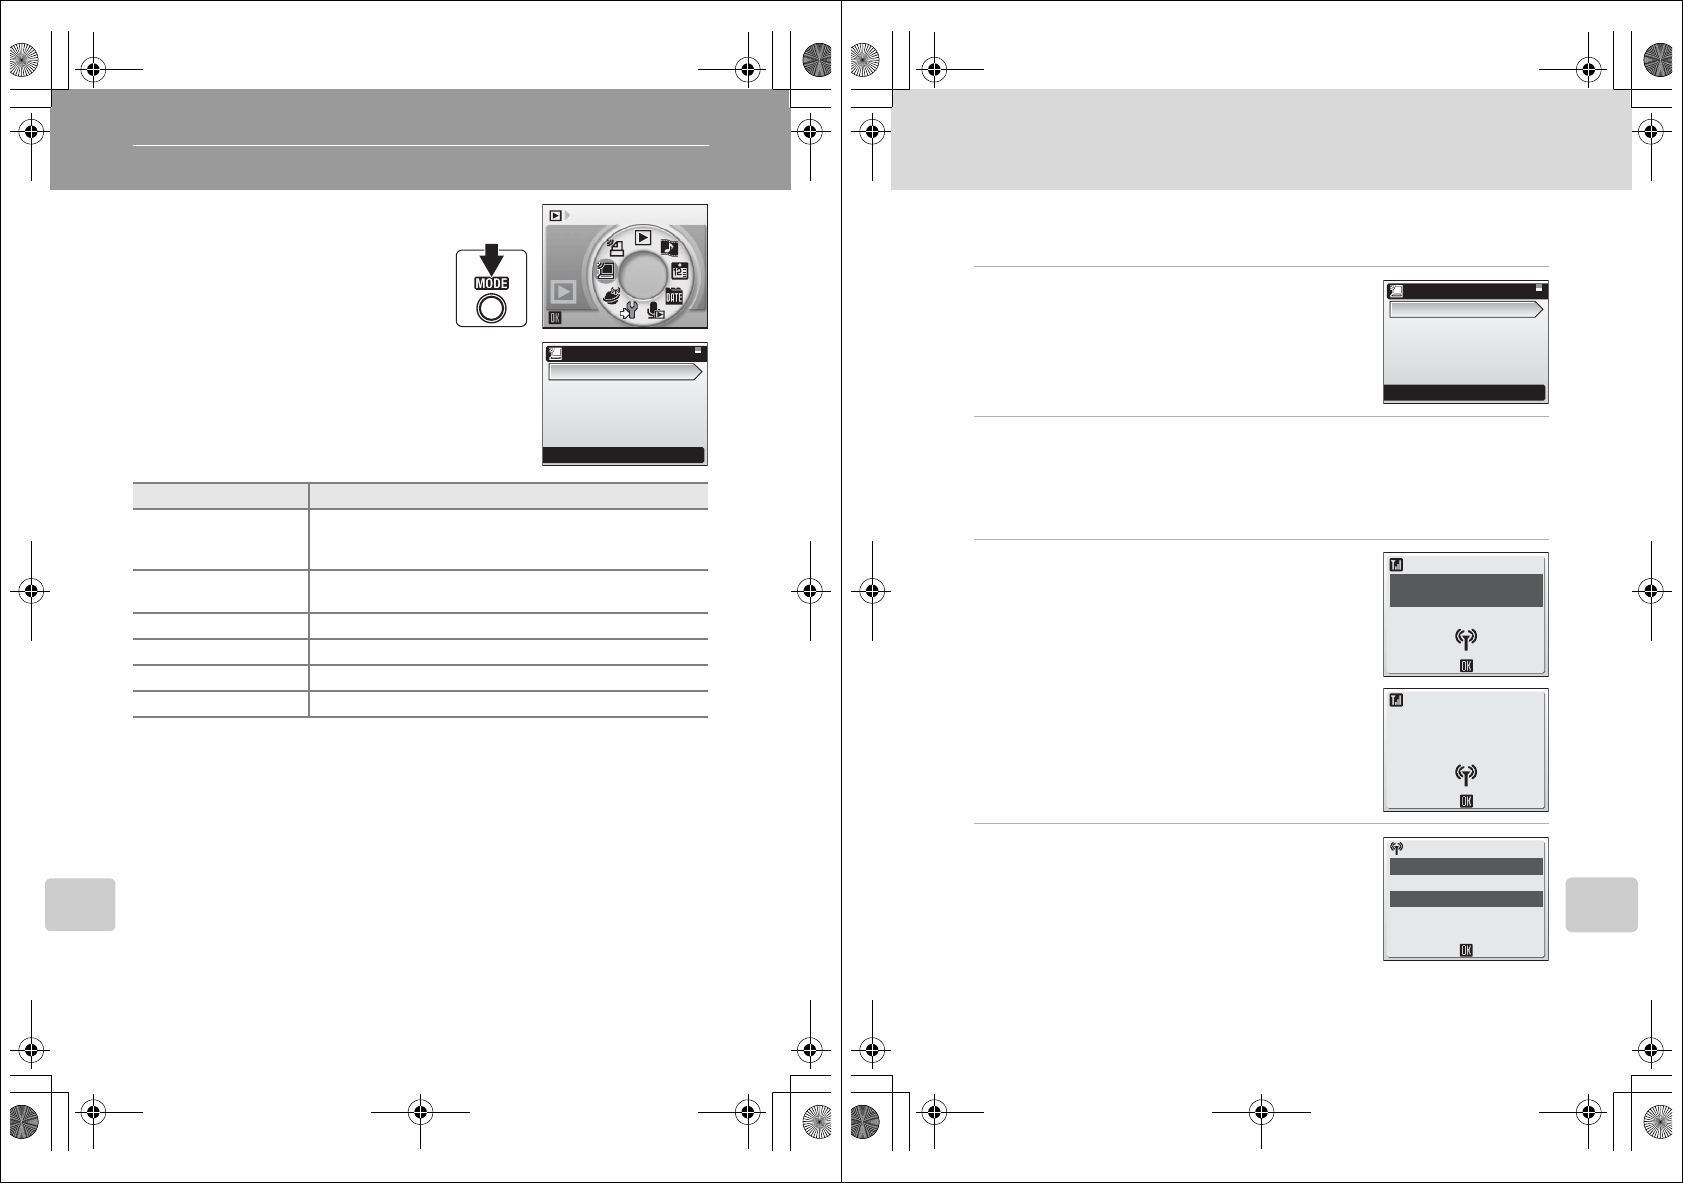
Establishing a Wireless Connection
When using a wireless transfer mode function, choose an SSID from those
detected by the camera with wireless connection. The wireless connection is
established and the camera searches for available SSIDs when the following
options are selected:
• [Wireless connection] (c XX) in the shooting- mode selection menu
• Picture transfer using [COOLPIX CONNECT] (c XX) or [Wireless PC trans-
fer] (c XX) in the playback-mode selection menu
• Picture printing using [Wireless printing] in the playback-mode selection
menu
SSIDs detected by the camera will be displayed in the select SSID screen.
Choose an SSID and press d. The wireless connection will be established.
The registered SSIDs (up to ten) are listed in order of radio field strength.
Wireless connection is terminated once when the list of available SSIDs is displayed.
The left icon of each SSID is indicated in red when outside the network area.
The right icon indicates the type of the profile registered to each SSID:
Z(profiles with home wireless LAN information),
-- (profiles with no information)
The icons at the bottom right of the select SSID indicate the functions available for the
selected SSID:
N(wireless PC connection)
O(wireless printing)
M(COOLPIX CONNECT)
Connection is attempted with the selected network (SSID) when picture transfer is
attempted.
I
Cancel
Searching for SSID
Select SSID
AP1
AP2
AP3
PC1
12345678912
12_Wireless_55.fm Page 147 Wednesday, November 1, 2006 10:06 AM

148
Establishing a Wireless Connection
Wireless Transfer Mode
The following options are available in wireless transfer mode:
•Immediately transferring pictures taken - shoot & transfer (c XX)
•Uploading pictures to COOLPIX CONNECT (c XX)
•Transferring pictures not yet saved
on a computer - easy transfer (c XX)
•Transferring pictures taken on selected date - shooting date (c XX)
•Transferring selected pictures - selected images (c XX)
•Transferring pictures marked for transfer - marked images (c XX)
•Transferring pictures using a computer - PC mode (c XX)
•Printing pictures (wireless printing) (c XX)
kWireless Transfer LED
The wireless transfer LED (c XX) is located on the side of the camera (inside the antenna).
The camera is searching for profiles when the LED blinks, a wireless connection is established
when the LED is lit, and the camera is disconnected from a wireless LAN when the LED is off.
If transfer is not performed for a while, the LED may blink to save power.
kNote on Wireless Transfer Mode
The camera strap eyelet may become hot during wireless communication (i.e., when the wire-
less transfer LED is lit or is blinking). Observe due caution when handling the camera.
kThe Memory Card Write-Protect Switch
When the memory card write-protect switch is in the “lock” position, transfer cannot be per-
formed. Unlock by sliding the switch to the “write” position before transferring pictures.
kWhen the Transfer is Unsuccessful
When transfer is unsuccessful, the next time you attempt
transfer, the confirmation dialog shown at right will be dis-
played. If necessary, you can change profiles from the confir-
mation dialog. Complete transfer, making sure that it was
successful.
This confirmation dialog will not be displayed when Picture
Bank is set to upload pictures to the COOLPIX CONNECT server
as the battery is charged.
Resume interrupted transfer?
No
Change SSID
Yes
K
12_Wireless_55.fm Page 148 Wednesday, November 1, 2006 10:06 AM
149
Establishing a Wireless Connection
Wireless Transfer Mode
kSelecting a Computer or Printer
When the selected SSID has multiple computers or printers
registered, the screen shown at right will be displayed after
selecting the desired SSID. Select the desired computer or
printer.
kChecking SSID Contents
Pressing v (l) in the SSID selection screen displays the infor-
mation for the selected profile including the network name
(SSID), type of computer and printer.
jMessage Displayed During Transfer
The message shown at right is displayed in the monitor during
picture transfer. The antenna icon in the top left corner of the
monitor indicates signal strength (5-levels). The icon changes
to red when outside the network area. When signal strength is
poor, remove any obstacles between the camera antenna and
computer (or access point). To cancel the current transfer,
press d.
lManaging Profile Devices
You can configure a maximum of nine profile devices (computers, printers connected to a
computer, etc.) in the camera. If nine have already been configured and you want to add a
new one, delete an unneeded profile device using the Setup Utility.
Choose profile
Profile-A
Profile-B
Profile-C
SSID:My Network
TYPE:Home SSID
Profile:
Profile-A
Iw
Cancel
0002
/
0004
Transferring images
to computer
12_Wireless_55.fm Page 149 Wednesday, November 1, 2006 10:06 AM
150
Wireless Transfer Mode
Immediately Transferring Pictures Taken - Shoot & Transfer
1Press C to display the shoot-
ing-mode selection menu, use
the rotary multi selector to
select n, and then press d.
2Choose the desired SSID and press d.
For information on selecting an SSID, see “Establishing a Wireless Connection”
(c147).
When multiple computers are set as profiles for the infrastructure network, the
profile selection screen is displayed. Choose a profile and press d.
3Select the desired shooting mode and
press d.
[Shoot & transfer] is not available in movie mode or
voice recording mode.
[Shoot & transfer] is not available at a [Continuous]
setting of [Continuous] or [Invl timer shooting], or in
[Sports] scene mode.
4Take a picture.
The just-taken picture will be transferred to the com-
puter. The camera returns to shooting mode (screen
in step 3) after transfer is complete. Note that pic-
tures cannot be taken while pictures are being trans-
ferred.
• If the confirm transfer screen (c XX) is displayed,
select [Yes] to transfer the picture. To cancel the transfer, select [No].
n
n
Shooting
88
L
W
W
n
n
Shooting
Iw
Cancel
Transferring images
to computer
12_Wireless_55.fm Page 150 Wednesday, November 1, 2006 10:06 AM
151
Wireless Transfer Mode
Uploading Pictures to COOLPIX CONNECT
Follow the procedure described below to upload pictures to Picture Bank
using COOLPIX CONNECT.
This section describes upload of selected pictures to Picture Bank. Automatic
upload of pictures not yet uploaded to Picture Bank is also possible (c XX).
1Press C in playback mode,
use the rotary multi selector to
choose M, and then press d
to enter COOLPIX CONNECT
mode.
If a password has been applied, enter
the password and press the shutter-
release button.
2Enter your e-mail address correctly.
Choose [Input] in the sender information entry screen
and press d.
Enter your e-mail correctly in the address screen and
press the shutter-release button. Then enter your
(sender) name for e-mail notification to recipients and
press the shutter-release button. For information on
how to enter text, see “Entering Text with the Cam-
era” (c142).
3Select [Picture Mail] or [Picture Bank],
and press d.
Play
Enter your alias and
email address
Input
Cancel
Enter sender info
Email
Confirm
Back Delete
xxx xxx. xxx
@
6411
[Choose service]
Screen
T.B.D.
12_Wireless_55.fm Page 151 Wednesday, November 1, 2006 10:06 AM
152
Uploading Pictures to COOLPIX CONNECT
Wireless Transfer Mode
4Choose the desired SSID and press d.
Connection is attempted with the selected SSID. When
the connection is established, the picture selection
screen will be displayed.
• For information on selecting an SSID, see “Establish-
ing a Wireless Connection” (c147).
5Choose [All images] or [List by date] and
press d.
When [All images] is selected, rotate the rotary multi
selector to highlight pictures and press the rotary
multi selector G to select a desired picture (up to 30).
A check mark (y) will be applied to selected pic-
tures. Press the rotary multi selector H to cancel a
selection. Press d to finalize picture selection.
Press v (k) to switch to full-frame playback.
Press t (j) to switch back to thumbnail display.
When [List by date] is selected, rotate the rotary multi
selector to highlight a shooting date and press d to
select the date (y). Press d again to cancel the
selection. Multiple dates can be selected.
Press the shutter-release button to finalize date selec-
tion.
When pictures taken on the selected date are dis-
played, rotate the rotary multi selector to highlight pictures and press the rotary
multi selector G to select a desired picture (up to 30). A check mark (y) will be
applied to selected pictures. Press the rotary multi selector H to cancel a selection.
Press d to finalize picture selection.
When [Picture Mail] is selected in the choose service screen, proceed to step 6.
When [Picture Bank] is selected in the choose service screen, proceed to step 8.
Select SSID
AP1
AP2
AP3
PC1
12345678912
All images
List by date
Picture selection
Back
ON/OFF
Selected image 30
Confirm
ON/OFF
Back
List by date
10/10/2007 3
2
5
09/10/2007
08/10/2007
Select images [30]
12_Wireless_55.fm Page 152 Wednesday, November 1, 2006 10:06 AM
153
Uploading Pictures to COOLPIX CONNECT
Wireless Transfer Mode
6Choose the size for the pictures to be
transferred and press d.
When [Picture Mail] is selected in the choose service
screen, proceed to step 7.
7Choose recipient nicknames (e-mail
addresses) and press the shutter-release
button.
When pictures are uploaded to the COOLPIX CON-
NECT server, e-mail notification will be sent to the
selected recipient addresses (up to 30) via e-mail.
• Press the rotary multi selector G or H to highlight
a recipient’s address and press d to apply the selected address.
• To add a recipient, select [New], press d, and enter the recipient’s e-mail
address and a nickname. Up to 64 single-byte alphanumerical characters can be
entered for e-mail addresses, up to 16 for nicknames. Once selection has been
made, press the shutter-release button to return to the choose address screen.
• After e-mail addresses have been selected, press v (k) to preview the informa-
tion registered in the address information screen. Press v (k) again to return to
the choose address screen.
Photoprint 1,600 × 1,200 pixels
PC size 1,024 × 768 pixels
TV size 640 × 480 pixels
Full size The same size as the original
Choose size
Photoprint
PC size
TV size
Full size
Confirm
ON/OFF
Back
Choose address
New
1234567890123456
12345678901234567
12345678901223456
12345789012345677
12_Wireless_55.fm Page 153 Wednesday, November 1, 2006 10:06 AM
154
Uploading Pictures to COOLPIX CONNECT
Wireless Transfer Mode
8Choose [Yes] and press d.
The screens for connecting to the access point, to the server, and to the wireless
LAN, will be displayed in order. To cancel transfer, press d.
When the transfer is complete, the message shown at
right will be displayed.
lDeleting Recipient E-mail Addresses
To delete recipient e-mail addresses, select the nicknames (e-mail addresses) to be deleted in
step 7 and press T. Select [Yes] in the confirmation dialog, and press d to delete those
selected.
Send pictures?
Yes
No
Send mail
I
Cancel
Connecting to access point
Connecting to server
Cancel
[Transferring
images to
computer] screen
T.B.D.
Transfer complete.
Connection
terminated.
Select SSID
12_Wireless_55.fm Page 154 Wednesday, November 1, 2006 10:06 AM
155
Uploading Pictures to COOLPIX CONNECT
Wireless Transfer Mode
Upload Pictures to Picture Bank Automatically
By default, the camera automatically uploads pictures that have not yet been
uploaded to Picture Bank whenever the AC adapter is connected to the cam-
era.
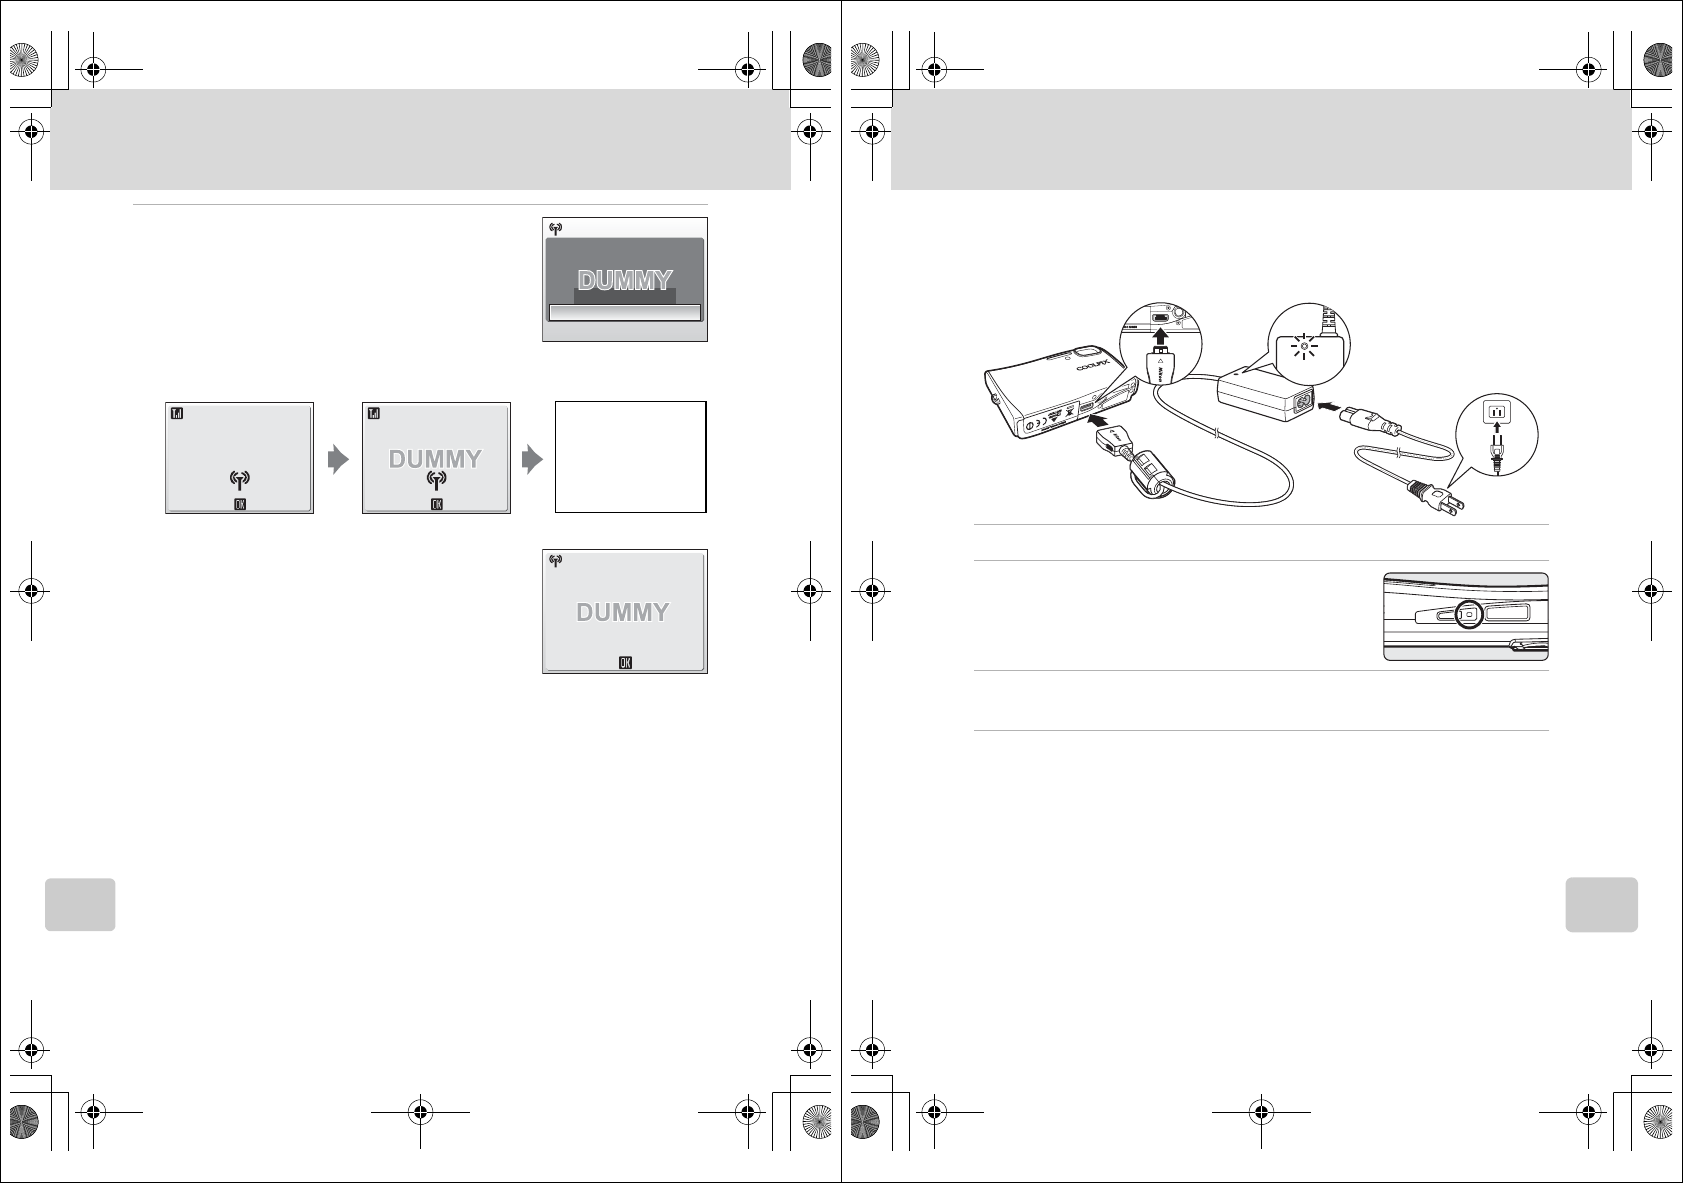
1Connect the power cable and AC adapter (1).
2Turn the camera off.
If the power-on lamp is lit, press the power switch to
turn off the camera. You cannot upload pictures
to Picture Bank while the camera is turned on.
3Connect the AC adapter to the camera’s multi connector (2).
The multi connector should be fully inserted.
4Plug the power cable into an outlet (3).
When the AC adapter is connected correctly, the power-on lamp will light. (4)
When the camera is turned on and the start Picture Bank screen is displayed, Pic-
ture Bank begins uploading pictures.
To cancel picture upload, press d when the message, “Start Picture Bank,”
“Searching for SSID,” or “Connecting to access point,” is displayed.
Once upload is complete, the battery will begin charging.
When the camera is turned off after picture upload, the “Transfer completed.”
message will be displayed in the monitor the next time the camera is turned on.
If the “Transfer terminated.” message is displayed, pictures may not have been
successfully uploaded. Enter COOLPIX CONNECT mode from the playback-mode
selection menu to try uploading pictures again.
lModifying the Automatic Upload Setting
Choose [off] from the camera’s setup menu > [Wireless settings] > [Picture Bank] (c XX).
1
24
3
12_Wireless_55.fm Page 155 Wednesday, November 1, 2006 10:06 AM
156
Wireless Transfer Mode
Transferring Pictures to a Computer (PC Connection)
To display the playback-mode selection
menu, press C in playback mode.
To display the wireless PC transfer
screen, use the rotary multi selector to
choose N and then press d. The fol-
lowing transfer options are available for
transferring pictures to a computer.
Function selection menu
Description
Easy transfer (PM)
Transfer pictures and Pictmotion movies not yet saved in
the computer. Pictmotion movies take time to transfer and
cannot be transferred to a Macintosh.
Easy trans. (no PM) Transfer pictures not yet saved in the computer. Pictmo-
tion movies cannot be transferred.
Shooting date Transfer all pictures taken on a specific shooting date.
Selected images Transfer only selected pictures.
Marked images Transfer pictures marked with a E (transfer) icon (c XX).
PC mode Transfer pictures to a profile device using a computer.
Play
Wireless PC transfer
Easy tran. (no PM)
Shooting date
Selected images
Easy transfer (PM)
Marked images
12_Wireless_55.fm Page 156 Wednesday, November 1, 2006 10:06 AM
157
Transferring Pictures to a Computer (PC Connection)
Wireless Transfer Mode
Transferring Pictures Not Yet Saved on a Computer -
Easy Transfer
1Choose [Easy transfer (PM)] or [Easy
trans. (no PM)] in the wireless PC transfer
screen and press d.
2Choose the desired SSID and press d.
For information on selecting an SSID, see “Establishing a Wireless Connection”
(c147).
When multiple computer profiles have been created for a single SSID, the profile
selection screen will be displayed. Choose a profile and press d.
3Picture transfer begins.
Pictures not yet saved on the computer will be trans-
ferred after the camera and computer are connected.
4When transfer is complete, press d to
return to the playback-mode selection
menu.
Wireless PC transfer
Easy tran. (no PM)
Shooting date
Selected Images
Easy transfer (PM)
Marked images
I
Cancel
Connecting
My Network
Profile-A
Iw
Cancel
0002
/
0004
Transferring images
to computer
K
Exit
Connection terminated.
Transfer completed.
My Network
Profile-A
12_Wireless_55.fm Page 157 Wednesday, November 1, 2006 10:06 AM
158
Transferring Pictures to a Computer (PC Connection)
Wireless Transfer Mode
Transferring Pictures Taken on Selected Date - Shooting Date
1Choose [Shooting date] in the wireless
PC transfer screen and press d.
The shooting date menu will be displayed.
2Rotate the rotary multi selector to high-
light a shooting date, press d to select
the date (y), and then press the shut-
ter-release button.
To cancel a selected date, highlight the date and
press d again.
Multiple dates can be selected.
3Choose the desired SSID and press d.
For information on selecting an SSID, see “Establishing a Wireless Connection”
(c147).
When multiple computer profiles have been created for a single SSID, the profile
selection screen will be displayed. Choose a profile and press d.
4Picture transfer begins.
5When transfer is complete, press d to
return to the playback-mode selection
menu.
jNote on Transferring Pictures with [Shooting date]
Pictures taken without the date and time set (c XX, XX) cannot be chosen for transfer with
[Shooting date].
Wireless PC transfer
Easy tran. (no PM)
Shooting date
Selected Images
Easy transfer (PM)
Marked images
ON/OFF
Back
Shooting date
10/10/2007 3
2
5
09/10/2007
08/10/2007
Confirm
Select images [30]
I
Cancel
Connecting
My Network
Profile-A
K
Exit
Connection terminated.
Transfer completed.
My Network
Profile-A
12_Wireless_55.fm Page 158 Wednesday, November 1, 2006 10:06 AM
159
Transferring Pictures to a Computer (PC Connection)
Wireless Transfer Mode
Transferring Selected Pictures - Selected Images
1Choose [Selected images] in the wireless
PC transfer screen and press d.
The selected images menu will be displayed.
2Rotate the rotary multi selector to high-
light the pictures, and press the rotary
multi selector G or H to select pictures
(y), and then press d to finalize pic-
ture selection.
• Press the rotary multi selector GH to apply selec-
tion or cancel the selection. Multiple pictures can
be selected.
• Press d to complete selection.
Press v (k) to switch to full-frame playback.
Press t (j) to switch back to thumbnail display.
3Choose the desired SSID and press d.
For information on selecting an SSID, see “Establishing a Wireless Connection”
(c147).
When multiple computer profiles have been created for a single SSID, the profile
selection screen will be displayed. Choose a profile and press d.
4Picture transfer begins.
5When transfer is complete, press d to
return to the playback-mode selection
menu.
Wireless PC transfer
Easy tran. (no PM)
Shooting date
Marked images
Selected Images
Easy transfer (PM)
Back
ON/OFF
Selected Images 30
I
Cancel
Connecting
My Network
Profile-A
K
Exit
Connection terminated.
Transfer completed.
My Network
Profile-A
12_Wireless_55.fm Page 159 Wednesday, November 1, 2006 10:06 AM
160
Transferring Pictures to a Computer (PC Connection)
Wireless Transfer Mode
Transferring Pictures Marked for Transfer - Marked
Images
1Choose [Marked images] in the wireless
PC transfer screen and press d.
2Choose the desired SSID and press d.
For information on selecting an SSID, see “Establishing a Wireless Connection”
(c147).
When multiple computer profiles have been created for a single SSID, the profile
selection screen will be displayed. Choose a profile and press d.
3Picture transfer begins.
Pictures marked with the g (transfer) icon (c XX)
will be transferred.
4When transfer is complete, press d to
return to the playback-mode selection
menu.
Wireless PC transfer
Easy tran. (no PM)
Shooting date
Marked images
Selected Images
Easy transfer (PM)
I
Cancel
Connecting
My Network
Profile-A
K
Exit
Connection terminated.
Transfer completed.
My Network
Profile-A
12_Wireless_55.fm Page 160 Wednesday, November 1, 2006 10:06 AM
161
Transferring Pictures to a Computer (PC Connection)
Wireless Transfer Mode
Transferring Pictures Using a Computer - PC Mode
1Choose [PC mode] in the wireless PC
transfer screen and press d.
2Choose the desired SSID and press d.
For information on selecting an SSID, see “Establishing a Wireless Connection”
(c147).
When multiple computer profiles have been created for a single SSID, the profile
selection screen will be displayed. Choose a profile and press d.
3The camera and computer are con-
nected.
The camera and computer will be connected.
• When the selected computer has PictureProject
installed, it will be launched automatically. To
transfer pictures, click the [Transfer] button in
PictureProject Transfer. See the PictureProject Ref-
erence Manual (on CD) for details.
• When the selected computer does not have PictureProject installed, drag and
drop pictures from the camera displayed on the computer.
• Pictmotion movies can be transferred (Windows only).
jNote on the Camera’s d (E) Button
Pictures marked with the E icon cannot be transferred in wireless transfer mode using the
camera’s d (E) button.
lSave Location of Transferred Images
• Pictures transferred to the computer are saved to the following location.
Windows XP: [Wireless Transfer] folder in [My Pictures] folder
Macintosh: [Wireless Transfer] folder in [Picture] folder
• A destination folder can be changed using the Setup Utility. Choose [Select destination
folder] in the screen in step 6 (c131) and choose a destination folder. Connection
between the camera and a computer is not necessary for this operation.
• When pictures are transferred over a wireless connection to a computer that has
PictureProject installed, in modes other than [PC mode], PictureProject automatically starts
and the transferred pictures will be displayed. Note that the save location can be changed.
• For computers without PictureProject installed, Explorer (for Windows) or Finder (for Macin-
tosh) starts and the save location will be displayed. Note that the save location cannot be
changed.
• If the camera is connected to a computer in [PC mode] without PictureProject installed,
drag and drop pictures from the camera icon or drive displayed on the computer to the
desired save location.
Wireless PC transfer
PC mode
I
Exit
Connected
My Network
Profile-A
12_Wireless_55.fm Page 161 Wednesday, November 1, 2006 10:06 AM
162
Transferring Pictures to a Computer (PC Connection)
Wireless Transfer Mode
Printing Pictures (Wireless Printing)
To display the playback-mode selection
menu, press C in playback mode.
To display the wireless printing screen,
use the rotary multi selector to choose
O and then press d.
1Choose [Print selection], [Print all images]
or [DPOF printing] and press d.
Play
Print menu
Print all images
Print selection
DPOF printing
Print selection
Select pictures and specify the number of prints for each picture. Proceed
to step 2.
Print all images
All pictures stored in the internal memory or memory card are printed.
Proceed to step 4.
DPOF printing
Print pictures for which a print order has
been created in [Print set] (c XX).
• The menu shown at right will be displayed.
• To print, choose [Start print] and press d.
Proceed to step 4.
• To view the current print order, choose [View
images] and press d. Proceed to step 3.
DPOF printing
Cancel
View images
004 prints
Start print
12_Wireless_55.fm Page 162 Wednesday, November 1, 2006 10:30 AM
163
Transferring Pictures to a Computer (PC Connection)
Wireless Transfer Mode
2Choose the pictures and number of cop-
ies (up to 9) of each and press d.
Rotate the rotary multi selector to select pictures and
GH to set the number of copies for each.
Pictures selected for printing can be recognized by the
check mark (y) and the numeral indicating the num-
ber of copies to be printed. A check mark is not dis-
played with pictures for which 0 copies have been specified and these pictures will
not be printed.
Press d when setting is complete.
Press v (k) to switch to full-frame playback.
Press t (j) to switch back to thumbnail display.
3Check the selected pictures you wish to
print and press d.
To modify selection, press m to return to the previ-
ous screen.
4Choose the SSID and press d.
• For information on selecting an SSID, see “Establishing a Wireless Connection”
(c147).
• When multiple computer profiles have been created for a single SSID, the profile
selection screen will be displayed. Choose a profile and press d.
• When [On] is selected for [Wireless settings] > [Show page size options] in the
camera’s setup menu (c XX), the paper size screen will be displayed. Choose a
paper size and press d. Choose [Default] to print pictures at the printer’s
default paper size.
5Printing begins.
• When printing is complete, the playback-mode selection menu will be displayed.
• To terminate printing once it has begun, press d.
lSwitching the Printer
When using multiple printers, the printer can be switched by using the Setup Utility. Start the
Setup Utility and choose [Select printer] in the action selection screen. Connecting the com-
puter and camera is not necessary for switching the printer.
Print selection 30
Back
4View images
Back
12_Wireless_55.fm Page 163 Wednesday, November 1, 2006 10:30 AM
174
Error Messages
Technical Notes
Wireless Transfer Mode
Display Problem Solution c
Transfer error Error during image trans-
fer.
Check signal strength.
Move the camera closer
to the profile device or
remove obstruction
between the camera and
device.
–
Profile not regis-
tered. Set up profile.
No profile devices are
configured for wireless
transfer.
Use Wireless Camera
Setup Utility, or [Wireless
setting] item in setup
menu, to configure
device profiles.
XX, XX
Battery
exhausted. Transfer
terminated.
Battery exhausted during
image transfer.
Use the AC Adapter EH-
64, or charge the battery,
turn the camera on
again, and apply the last
mode used for image
transfer.
XX
SSID not found SSID was not detected. Check signal strength.
Move the camera closer
to the profile device or
remove any obstructions
between the camera and
device. Select [Try again]
and press d.
–
Failed to connect to
(SSID/profile device)
Selected profile cannot
be used.
• Camera’s IP address
may be incorrect. Use
Wireless Camera Setup
Utility, or [Wireless set-
ting] item in setup
menu, to apply settings
again.
• Change firewall set-
tings.
XX, XX
Connection error. Wireless connection to
the profile was termi-
nated.
Check signal strength.
Move the camera closer
to the profile device or
remove obstruction
between the camera and
device.
–
13_Notes_55.fm Page 174 Wednesday, November 1, 2006 10:07 AM
175
Error Messages
Technical Notes
User information
incorrect.
Camera is not certified to
connect to the wireless
network.
Start Wireless Camera
Setup Utility, connect
camera and computer,
and reconfigure to con-
nect to the network.
XX, XX
Mailbox is full. Picture Bank is full. Delete unnecessary pic-
tures.
–
Service not available. Cannot use COOLPIX
CONNECT network ser-
vice.
Start Wireless Camera
Setup Utility, connect
camera and computer,
and reconfigure to con-
nect to the network.
XX
Address incorrect. An error occurred with
recipient e-mail address
using COOLPIX CON-
NECT.
Use Wireless Camera
Setup Utility, or [Wireless
setting] item in setup
menu to confirm recipi-
ent e-mail address and
correct if necessary.
XX
Login failed. Login error occurred
when connecting to
COOLPIX CONNECT.
Select [Re-enter] and
press d to re-enter user
name and password.
Choose [Select SSID] and
press d to select SSID
again.
XX
Display Problem Solution c
13_Notes_55.fm Page 175 Wednesday, November 1, 2006 10:07 AM

180
Troubleshooting
Technical Notes
Custom Pictmotion background
music tracks are not listed
Memory card contains no background
tracks. If background tracks were
deleted when memory card was format-
ted, copy tracks to card again.
62
Pictures not displayed on televi-
sion
Choose correct video mode. 120
PictureProject does not start
when camera is connected
• Camera is off.
• Battery is exhausted.
• AV/USB cable is not correctly con-
nected.
• Appropriate [USB] option is not
selected.
• Camera is not recognized by the com-
puter.
• Computer is not set to launch
PictureProject automatically.
See the supplied PictureProject Refer-
ence Manual (on CD) (silver) for more
information on PictureProject.
22
22
77
78
–
–
Cannot mark pictures for transfer No more than 1,000 pictures can be
marked for transfer. Use the [Transfer]
button in PictureProject to transfer pic-
tures.
79
Transfer marking does not
appear
Pictures were marked for transfer using
another model of camera. Mark pictures
for transfer using COOLPIX S50c.
80,
105
Cannot transfer pictures d cannot be used to transfer pictures
from internal memory when [Mass stor-
age] is selected for [USB] or if memory
card is locked. Transfer pictures using
the [Transfer] button in PictureProject.
21
Cannot transfer Pictmotion mov-
ies
• Pictmotion movies cannot be trans-
ferred to Mac OS.
•d cannot be used to transfer Pictmo-
tion movies. Use the [Transfer] button
in PictureProject.
–
–
Problem Cause/Solution c
Q5155_IM_EN.book Page 180 Tuesday, October 31, 2006 7:07 PM
181
Troubleshooting
Technical Notes
Wireless Transfer
Problem Cause/Solution c
The camera is not detected by
the Wireless Camera Setup Util-
ity.
• Set the camera to L (auto) mode.
• Select [PTP] for [Interface] > [USB] in
the setup menu.
XX,
XX
SSID is not displayed. • Configure a profile device.
• SSID is set to hide.
• Signal strength is poor.
• Move the camera closer to the access
point or computer.
• Remove obstruction between the
camera and profile device.
• Adjust the direction of the camera so
it can receive a better signal.
XXX
Connection to the access point or
server failed.
• A profile for home wireless LAN is set
in the procedure for public wireless
LAN.
• Connect the computer and camera
and start the Wireless Camera Setup
Utility. Then choose the action
[Rename/Delete profiles], choose the
profile from the list, and click [View
Profile] to confirm the information.
XXX
Wireless transfer was terminated
during image transfer, and trans-
fer failed.
• Turn the camera off and on again, and
try again.
• Battery is running out.
XX, XX
Pictmotion movies were not wire-
lessly transferred.
• [Easy Trans. (no PM)] is selected in
wireless PC transfer menu.
• Pictmotion movies cannot be trans-
ferred from a Macintosh.
XX
Q5155_IM_EN.book Page 181 Tuesday, October 31, 2006 7:07 PM
182
Technical Notes
Supported Standards
•DCF: Design Rule for Camera File System is a standard widely used in the
digital camera industry to ensure compatibility among different makes of
camera.
•DPOF: Digital Print Order Format is an industry-wide standard that allows
pictures to be printed from print orders stored on the memory card.
•Exif version 2.2: This camera supports Exif (Exchangeable Image File For-
mat for Digital Still Cameras) version 2.2, a standard that allows informa-
tion stored with photographs to be used for optimal color reproduction
when images are output from Exif-compliant printers.
•PictBridge: A standard developed cooperatively by the digital camera and
printer industries, allowing photographs to be output directly to a printer
without connecting the camera to a computer.
•ImageLink: The ImageLink standard allows pictures taken with a digital
camera to be printed directly on a household printer, without using a com-
puter. The camera can be connected directly to any ImageLink-compatible
printer for one-touch picture printing.
Q5155_IM_EN.book Page 182 Tuesday, October 31, 2006 7:07 PM
183
Technical Notes
Specifications
Nikon COOLPIX S50c Digital Camera
Type Compact digital camera
Effective pixels 7.2 million
CCD 1/2.5-in. CCD
Total pixels 7.41 million
Image size (pixels) • 3,072 × 2,304 [High (3072A)/Normal (3072)]
• 2,592 × 1,944 [Normal (2592)]
• 2,048 × 1,536 [Normal (2048)]
• 1,024 × 768 [PC screen (1024)]
• 640 × 480 [TV screen (640)]
• 3,072× 1,728 (16:9)
Lens 3× Zoom-Nikkor lens
Focal length 6.3-18.9mm (equivalent with 35mm [135] format picture
angle: 38-114mm)
f/-number f/3.3–4.2
Construction 12 elements in nine groups
Digital zoom Up to 4x (equivalent with 35mm [135] format picture angle:
approx. 456mm)
Autofocus (AF) Contrast-detect AF
Focus range (from
lens)
• 30 cm (1 ft.) to ∞
• Macro close-up mode: 4 cm (1.6 in.) to ∞ (wide zoom posi-
tion)
Focus-area selection Auto (five-area automatic selection), center, manual
(99 focus area)
AF-assist illumination Class 1 LED product (IEC 60825-1 Edition 1.2-2001); max.
output: 1,600 µW
Vibration reduction Optional
Monitor 3.0 in., 230,000-dot, wide viewing-angle low-temperature
polysilicon TFT LCD with anti-reflection coating and 5-level
brightness adjustment
Frame coverage
(shooting mode)
Approx. 97% horizontal and 97% vertical
Frame coverage
(playback mode)
Approx. 100% horizontal and 100% vertical
Storage
Media Internal memory (20 MB)
Secure Digital (SD) memory cards
File system DCF, Exif 2.2, and DPOF compliant
File formats Compressed: JPEG-Baseline-compliant
Movies: QuickTime
Audio files: WAV
Q5155_IM_EN.book Page 183 Tuesday, October 31, 2006 7:07 PM
184
Specifications
Technical Notes
Exposure
Metering Matrix, center-weighted (digital zoom)
Exposure control Programmed auto exposure with exposure compensation
(–2.0 to +2.0 EV in steps of 1/3 EV)
Range W: –0.2 to +16.4 EV
T: +0.5 to +17.1 EV
Shutter Mechanical and charge-coupled electronic shutter
Speed 4–1/2000 s
Aperture Electronically controlled preset aperture
Range 2 steps (f/3.3 and f/6.6 [W])
ISO sensitivity
(Standard output sen-
sitivity)
ISO 100, 200, 400, 800, 1600, Auto (auto gain to
ISO 100–800)
Self-timer 10 seconds, 3 seconds
Built-in flash
Range W: 0.3 to 3.5 m / 12 in. to 11 ft. 4 in.
T: 0.3 to 3.0 m / 12 in. to 9 ft. 8 in.
Flash control Sensor flash system
Interface Hi-Speed USB (2.0)
Video output Can be selected from NTSC and PAL
I/O terminal Multi connector (supports ImageLink)
Wireless
Standards
IEEE 802.11b/g (standard wireless LAN protocol), ARIB STD-
T66 (standard for low power data communications systems)
Communications
protocols
IEEE 802.11g: OFDM
IEEE 802.11b: DBPSK, DQPSK, CCK
Range (line of sight) Approximately 30 m/98.4 ft. (varies with location)
Operating frequency
2412–2462 MHz (11 channels)
Data rates* IEEE 802.11g: 6, 9, 12, 18, 24, 36, 48, and 54 Mbps
IEEE 802.11b: 1, 2, 5.5, and 11 Mbps
Security TKIP, 128/64-bit (104/40-bit) WEP, AES
Access protocols Infrastructure/ad-hoc
Supported
languages
Czech, Danish, German, English, Spanish, French, Indone-
sian, Italian, Dutch, Norwegian, Polish, Portuguese, Rus-
sian, Finnish, Swedish, Chinese (Simplified and
Traditional), Japanese, Korean, Thai
Power sources • Rechargeable Li-ion Battery EN-EL8 (supplied)
• AC Adapter EH-64 (supplied)
Battery life*Approx. 130 shots with EN-EL8
Q5155_IM_EN.book Page 184 Wednesday, November 1, 2006 10:07 AM
185
Specifications
Technical Notes
* Based on Camera and Imaging Products Association (CIPA) standards for measuring
the life of camera batteries. Measured at 25 °C (77 °F); zoom adjusted with each
shot, flash fired with every other shot, image mode set to [E Normal (3072)].
Battery life may vary depending on shooting interval and length of time menus and
images being displayed.
•
Unless otherwise stated, all figures are for a camera with a fully-charged
Rechargeable Li-ion Battery EN-EL8 operated at an ambient temperature of 25 °C
(77 °F).
Dimensions
(W × H × D)
Approx. 97.3 × 59.2 × 21.2 mm/3.8 × 2.3 × 0.8 in.
Weight Approx. 125 g (4.4 oz) without battery and memory card
Operating environment
Temperature 0 to +40 °C (+32 to 104 °F)
Humidity Less than 85% (no condensation)
Q5155_IM_EN.book Page 185 Wednesday, November 1, 2006 10:07 AM
186
Specifications
Technical Notes
PV-12 Dock Insert
AC Adapter EH-64
Rechargeable Li-ion Battery EN-EL8
jSpecifications
Nikon will not be held liable for any errors this manual may contain. The appearance of this
product and its specifications are subject to change without notice.
Dimensions
(W × H × D)
Approx. 135.5 × 17.5 × 63 mm/5.3 × 0.6 × 2.5 in.
(excluding projections)
Weight Approx. 28 g (0.9 oz)
Rated input
100–240 V AC, 50/60 Hz, 0.18–0.1 A
Rated capacity
18–22 VA
Rated output
DC 4.8 V/1.5 A
Operating temperature
0 to +40 °C (+32 to 104 °F)
Dimensions
(
W × H × D)
Approx. 41 × 23.5 × 79 mm /1.6 × 0.9 × 3.1 in. (exclud-
ing projections)
Length of cable
Approx. 1.7 m (5 ft. 7 in.)
Weight
Approx. 110 g (3.9 oz), excluding power cable
Type Rechargeable lithium-ion battery
Rated capacity 3.7 V/730 mAh
Operating temperature 0 to +40 °C (+32 to 104 °F)
Dimensions
(W × H × D)
Approx. 35 × 47 × 5 mm/1.4 × 1.9 × 0.2 in. (excluding
projections)
Weight Approx. 17 g (0.6 oz), excluding terminal cover
Q5155_IM_EN.book Page 186 Wednesday, November 1, 2006 10:07 AM
187
Technical Notes
Index
Symbols
F (anti-shake) button 6, 44
F Anti-shake mode 44
d (apply selection) button 7
L Auto mode 22–29
J Calendar mode 55
T (delete) button 11, 28, 49
z (D-Lighting) 52
I (exposure compensation) 7, 34
l Help 13
K High-sensitivity shooting mode 35
L List by date mode 56
m button 11
C (mode) button 7, 10
T Movie mode 10, 11, 65, 66
A (one-touch portrait/D-Lighting)
button 6, 45, 52
P Pictmotion mode 60
i Playback mode 10, 11, 28, 29
k Playback zoom 49, 51
n Scene mode 11, 36
i (shooting/playback) button 7, 10,
28
j Thumbnail playback 47, 51
E (transfer) button 77, 79, 105
b Vibration reduction 23, 116
q Voice playback mode 73
O Voice recording mode 10, 71, 108
y Wait icon 170
t and v (zoom) buttons 7, 24, 33,
70, 73, 83
A
Accessories 164
Ad-hoc mode 125
AE-L 43
AF area mode 99
AF assist 117
Anti-shake mode 44
Auto off 118
Auto transfer 120
Auto-focus mode 69
AV/USB cable 76, 79, 82
AV-out connect 76
B
Back light (L) 41
Backlit subjects 30, 41
Battery 15
Battery charger 164
Battery level indicator 170
Battery-chamber/memory card slot
cover 7
Beach/snow (H) 38
Best shot selector 40, 97
Blur 177
Brightness 113
BSS 100
C
Cable connector 79, 82
Cleaning
Body 169
Lens 169
Monitor 169
Close up (M) 40
Close-up 33, 40
Color options 98, 100
Computer 76–80, 120
copying pictures to 76–79
Continuous 95, 100
COOLPIX CONNECT 124, 151
Copy 106
Copy (O) 41
Crop 51
Cyanotype 98
D
Date 18–19, 110, 114
printing 88
Date counter 115
Date imprint 114
Daylight saving time 110
DCF 182
Q5155_IM_EN.book Page 187 Wednesday, November 1, 2006 10:07 AM