Nokia Solutions and Networks CPE25300 Non-line of Sight Wireless Data Link User Manual CPEi QSG front 110806 A
Nokia Solutions and Networks Non-line of Sight Wireless Data Link CPEi QSG front 110806 A
Contents
- 1. Manual
- 2. Manual 2
- 3. Manual 3
Manual 2

68P09281A65-A
68P09281A65-A
MOTOROLA and the Stylized M Logo are registered
in the US Patent & Trademark Office. All other
product or service names are the property of their
respective owners.
© Motorola, Inc., 2007.
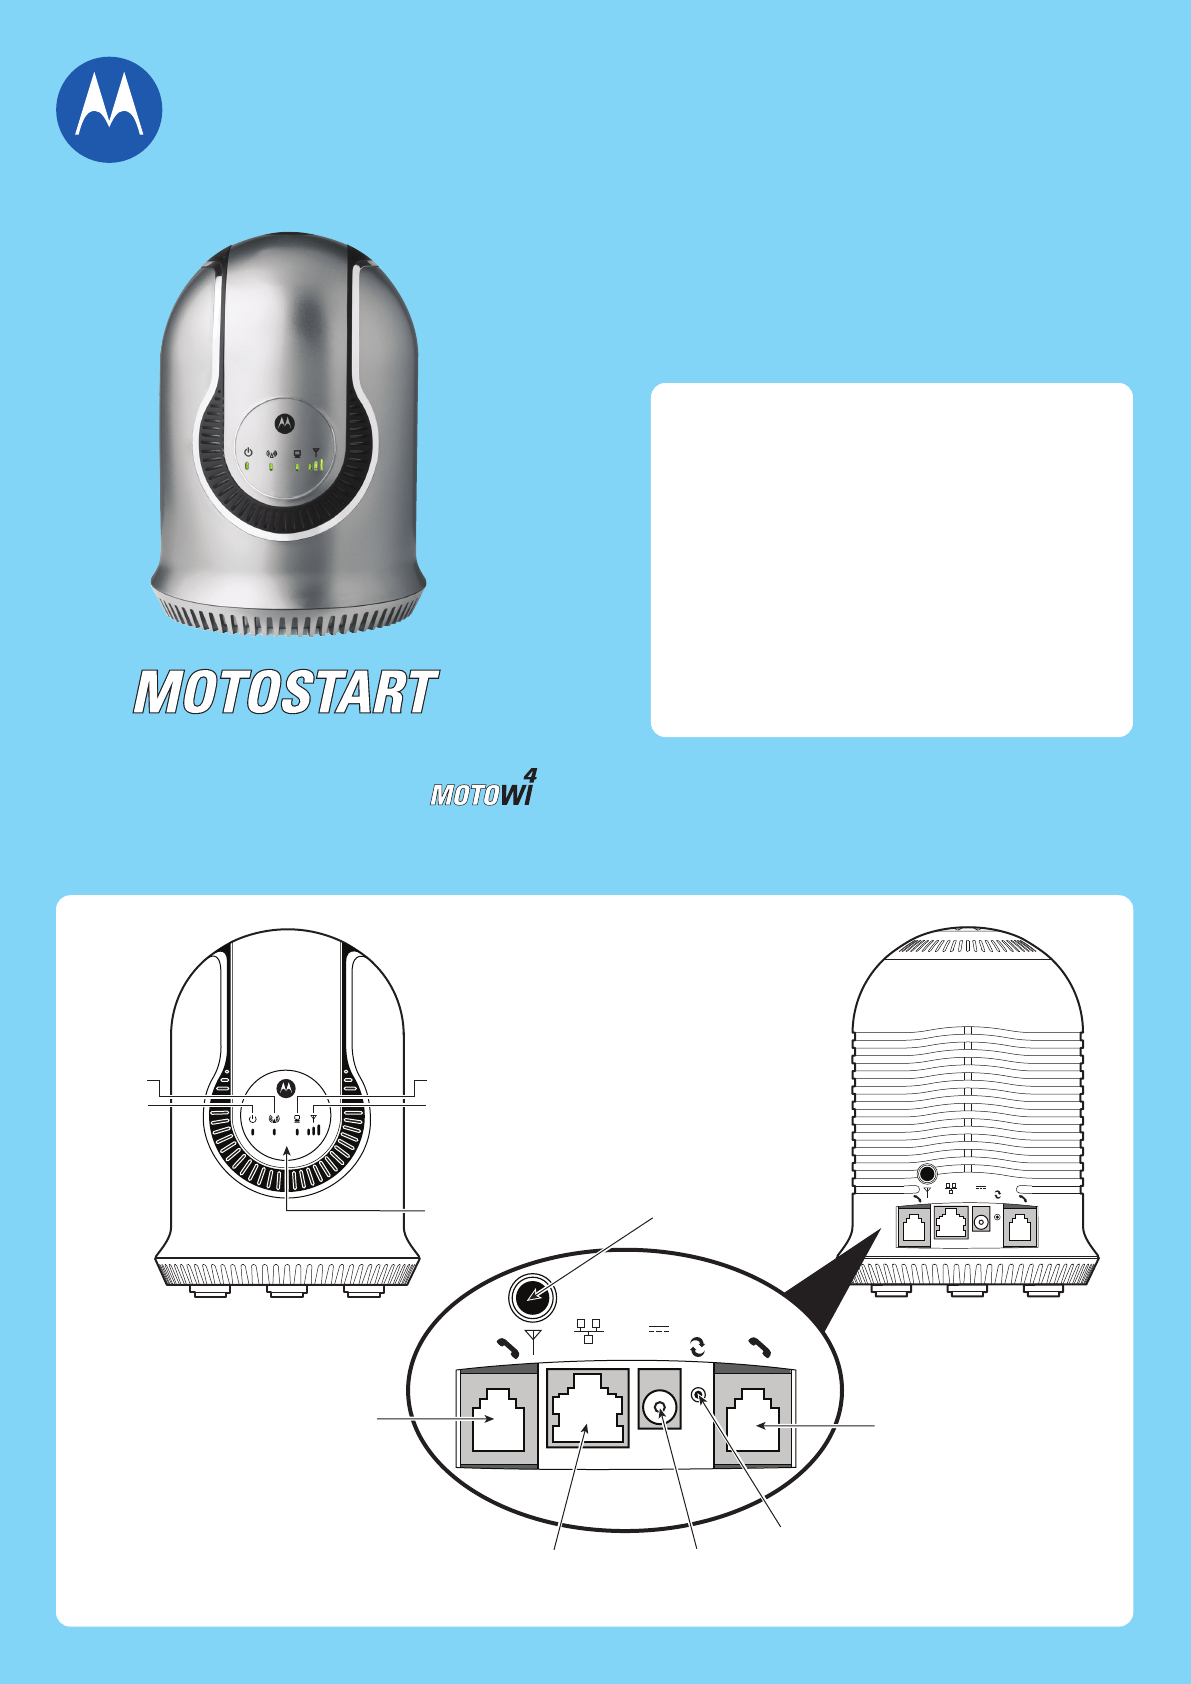
CPEi 300 Series
12V 2A
Power
FRONT
Signal Strength
Ethernet
WiMAX
Link/Activity
Indicators
BACK
Getting to know
your CPEi 300
External
Antenna
Connector
Phone
Line 1 Jack
Phone
Line 2 Jack
Ethernet
Connector
Reset
Switch
AC Power
Connector
12V 2A
L2
L1
L2L1
DRAFT
All text and images are FPO
PMS 286 C
100%
PMS 297 C
100%
A4 (210mm x 297mm) folds to A6 (105mm x 148mm)

12V 2A
12V 2A
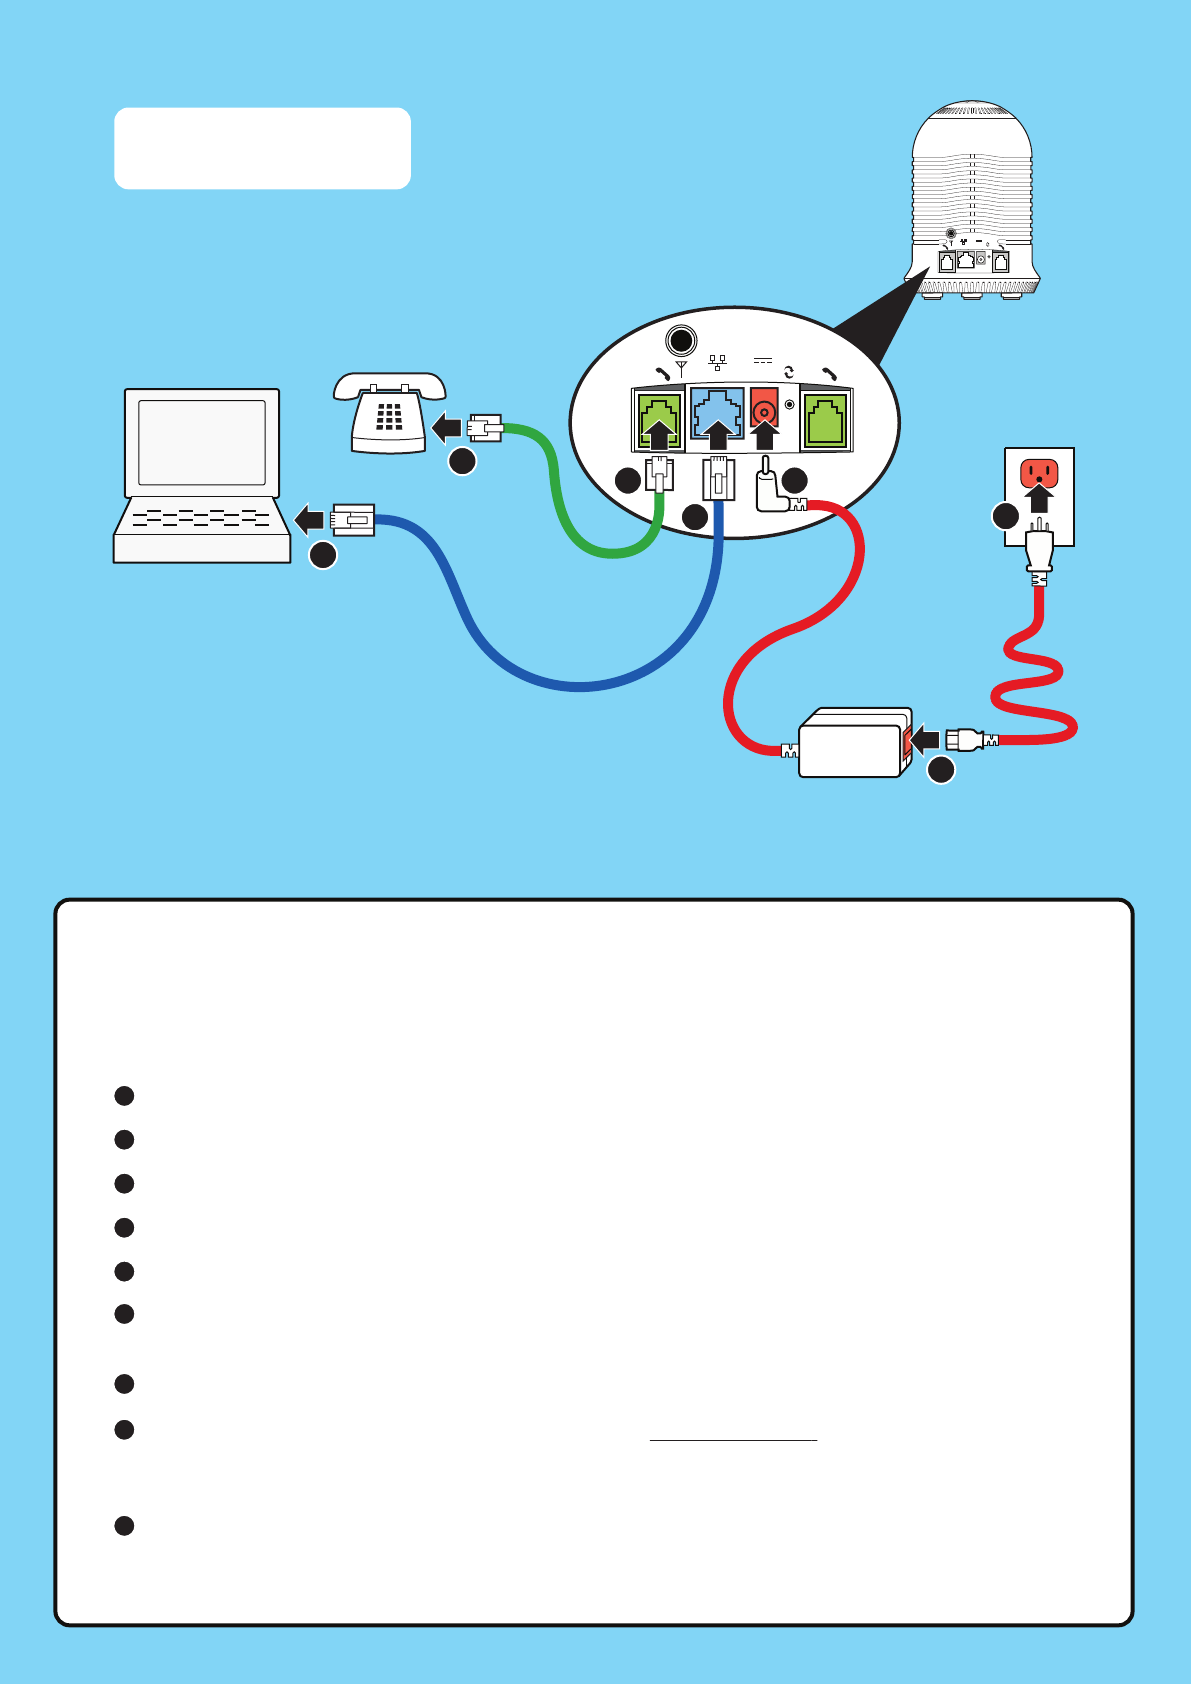
Computer
Phone
Power Cord
AC Power
Adapter
Ethernet
Cable
CPEi 300
Phone Line
*Optional
steps
L1 L2
L2L1
Connect the cables in
numerical order as shown.
Cable Connection Guide
1
2
*6
3
4
5
*7
No computer software applications or drivers are required to complete installation.
Connect the power cord and power adapter together.
Plug the power adapter into the power connector on the back of the unit.
Plug the power cord into an AC outlet. The unit will turn on.
Plug one end of the Ethernet cable into the Ethernet connector on the back of the unit.
Plug the other end of the Ethernet cable into the Ethernet connector of your computer.
Plug one end of the phone line into an activated phone line connector on the back of the
unit. Phone line activation is dependent upon your service contract.
Plug the other end of the phone line into the phone line connector of your telephone.
At your computer, open your browser and enter http://mywimax. (with a dot at the end)
into the address field and press the Enter key. A wizard will start up to guide you through
the installation.
Follow the directions in the wizard to complete the installation. When using the wizard
for the first time, use the default value provided by the wizard as the password.
Procedure to Install the Unit
5
*6
*7
8
9
4
3
2
1
DRAFT
PMS 297 C
100%
A4 (210mm x 297mm) folds to A6 (105mm x 148mm)