Novatron HD36WNTD MEDIA PLAYER User Manual NTD36HD English 0811
Novatron Co., Ltd MEDIA PLAYER NTD36HD English 0811
UserManual.wiki
>
Novatron
>
HD36WNTD User Manual
>
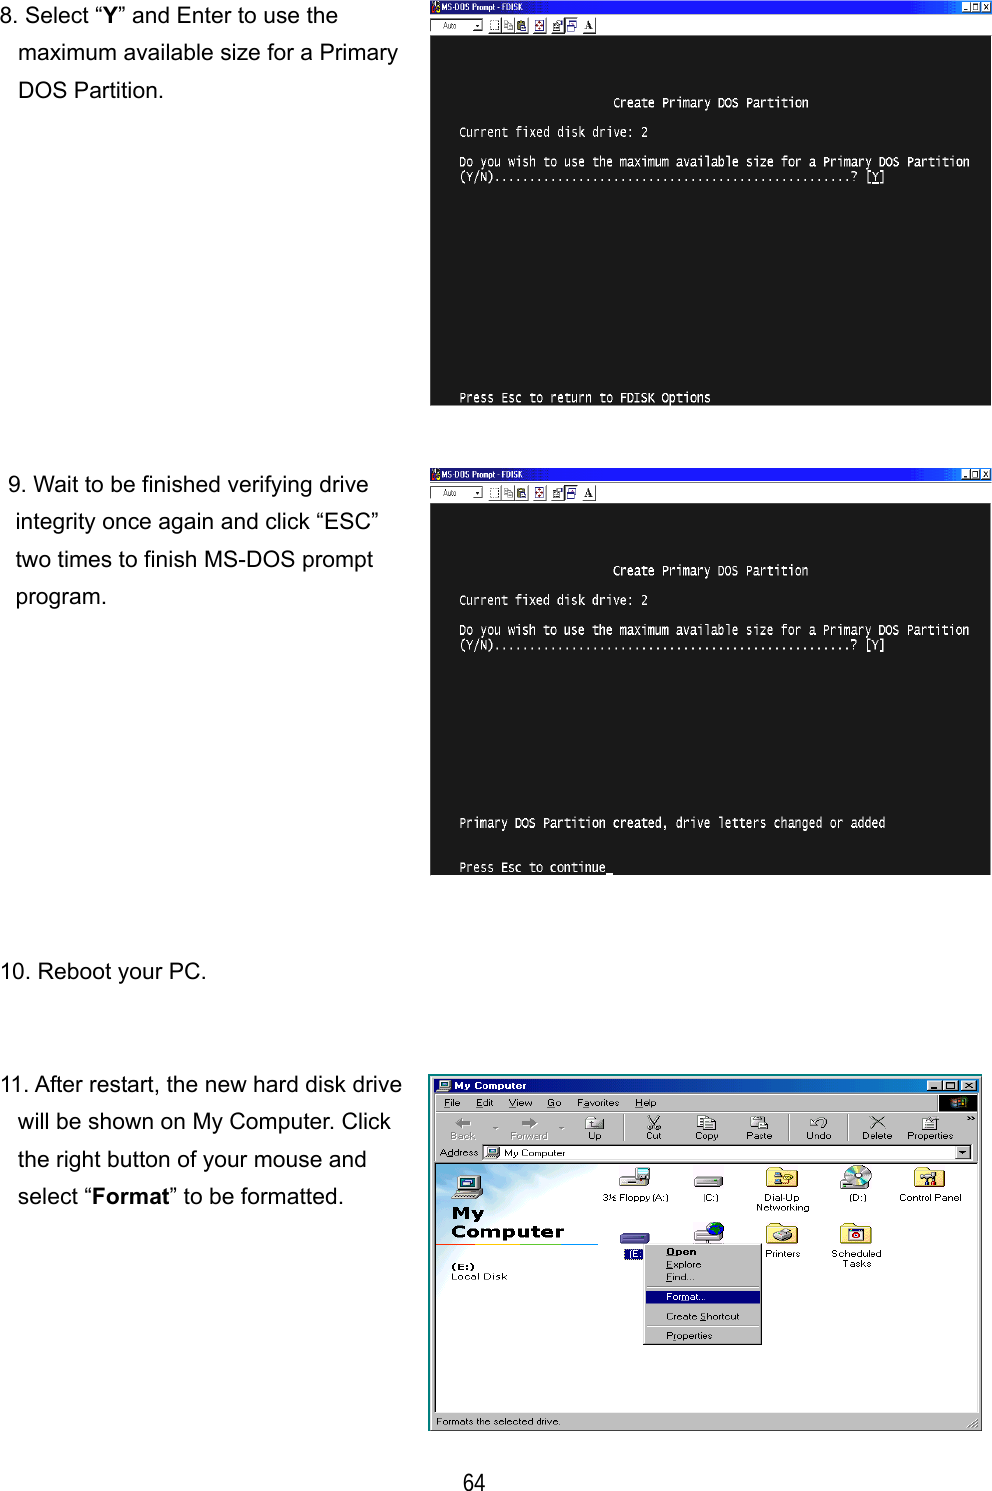
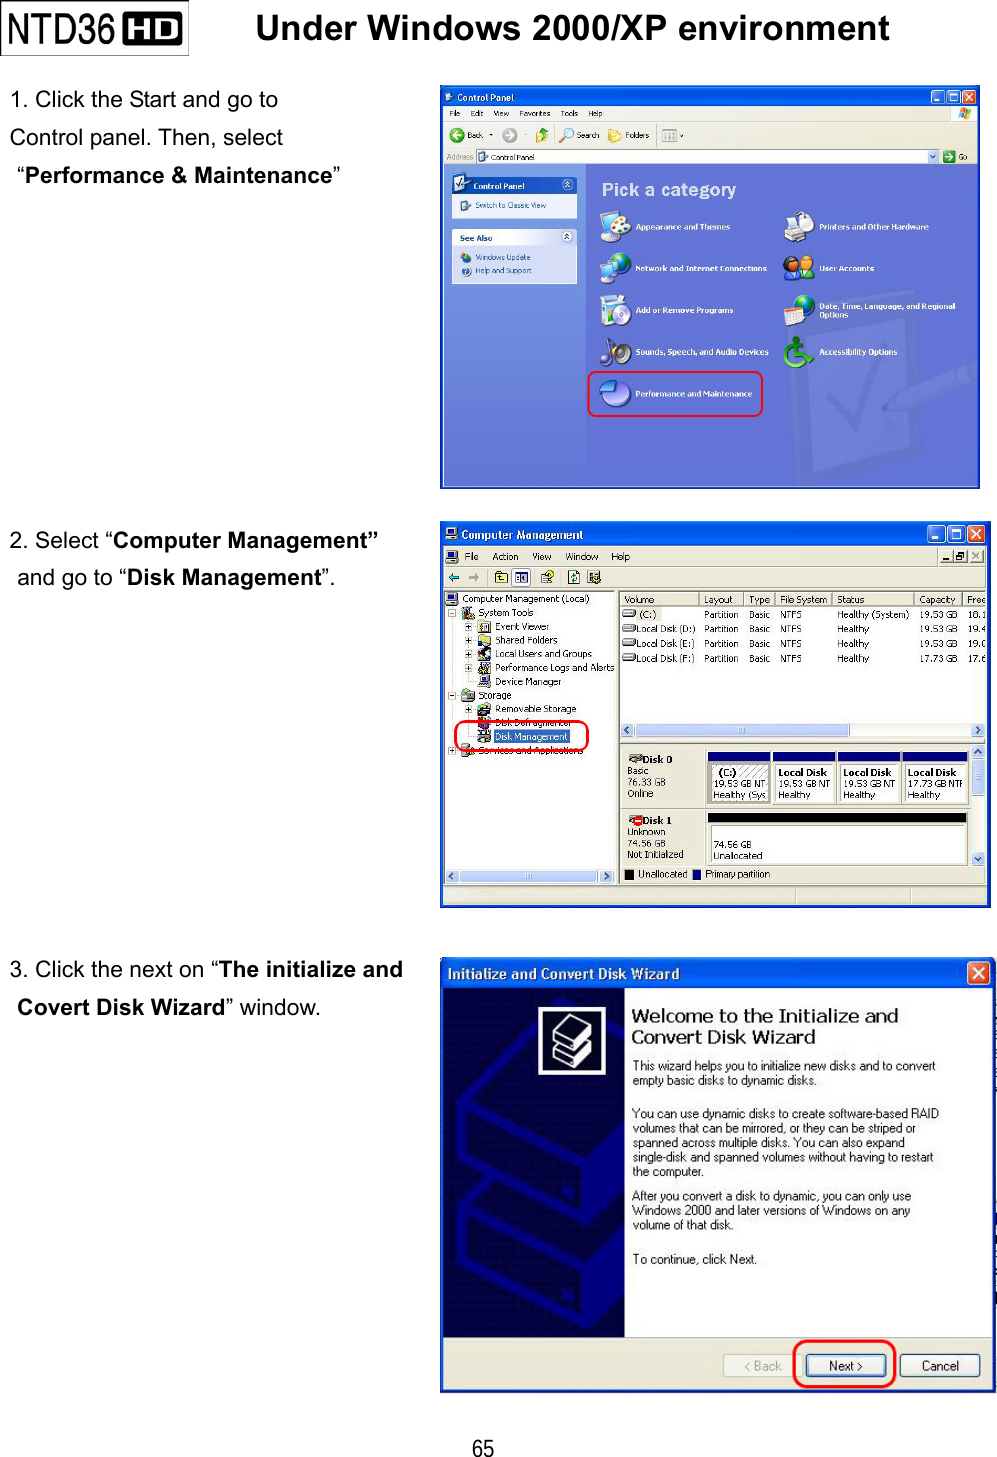
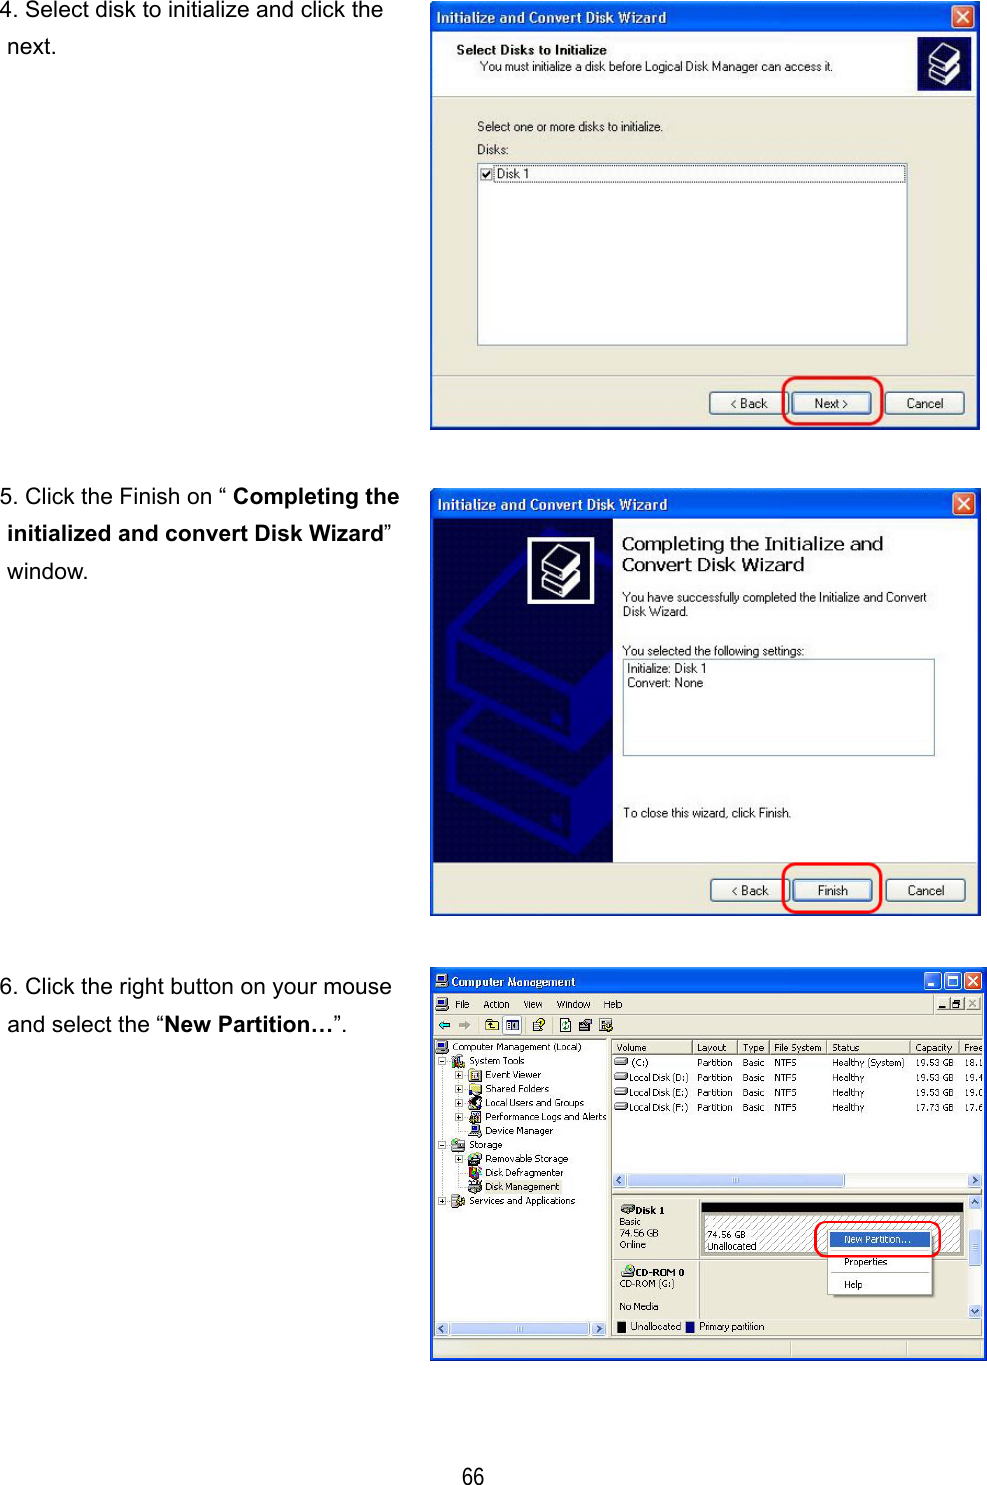
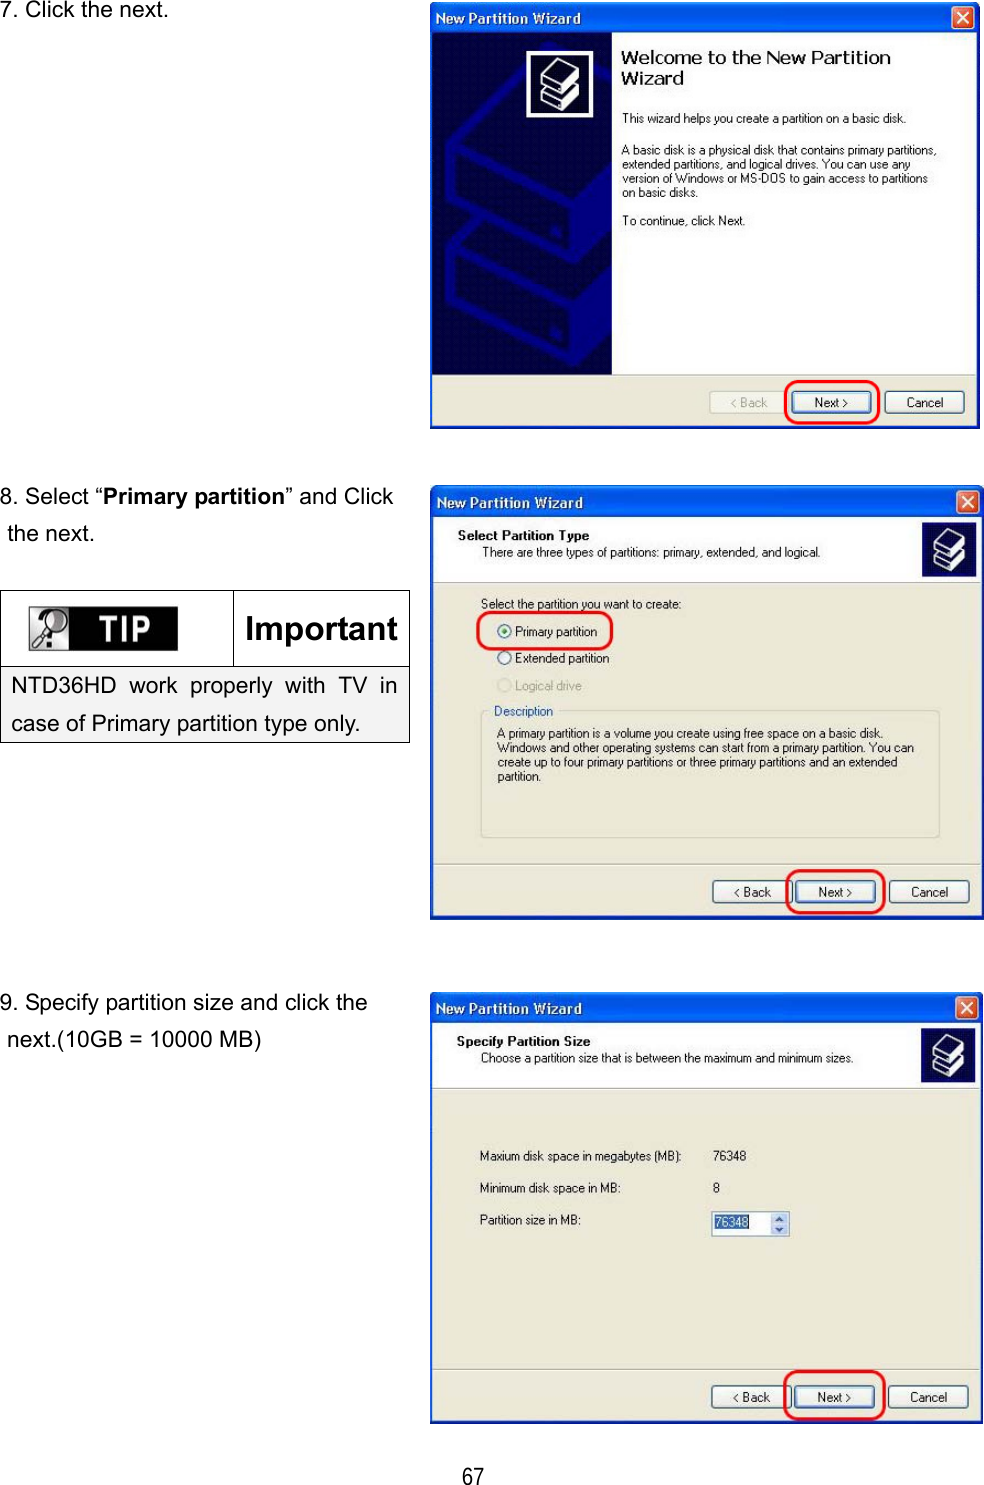
users manual 3
Contents
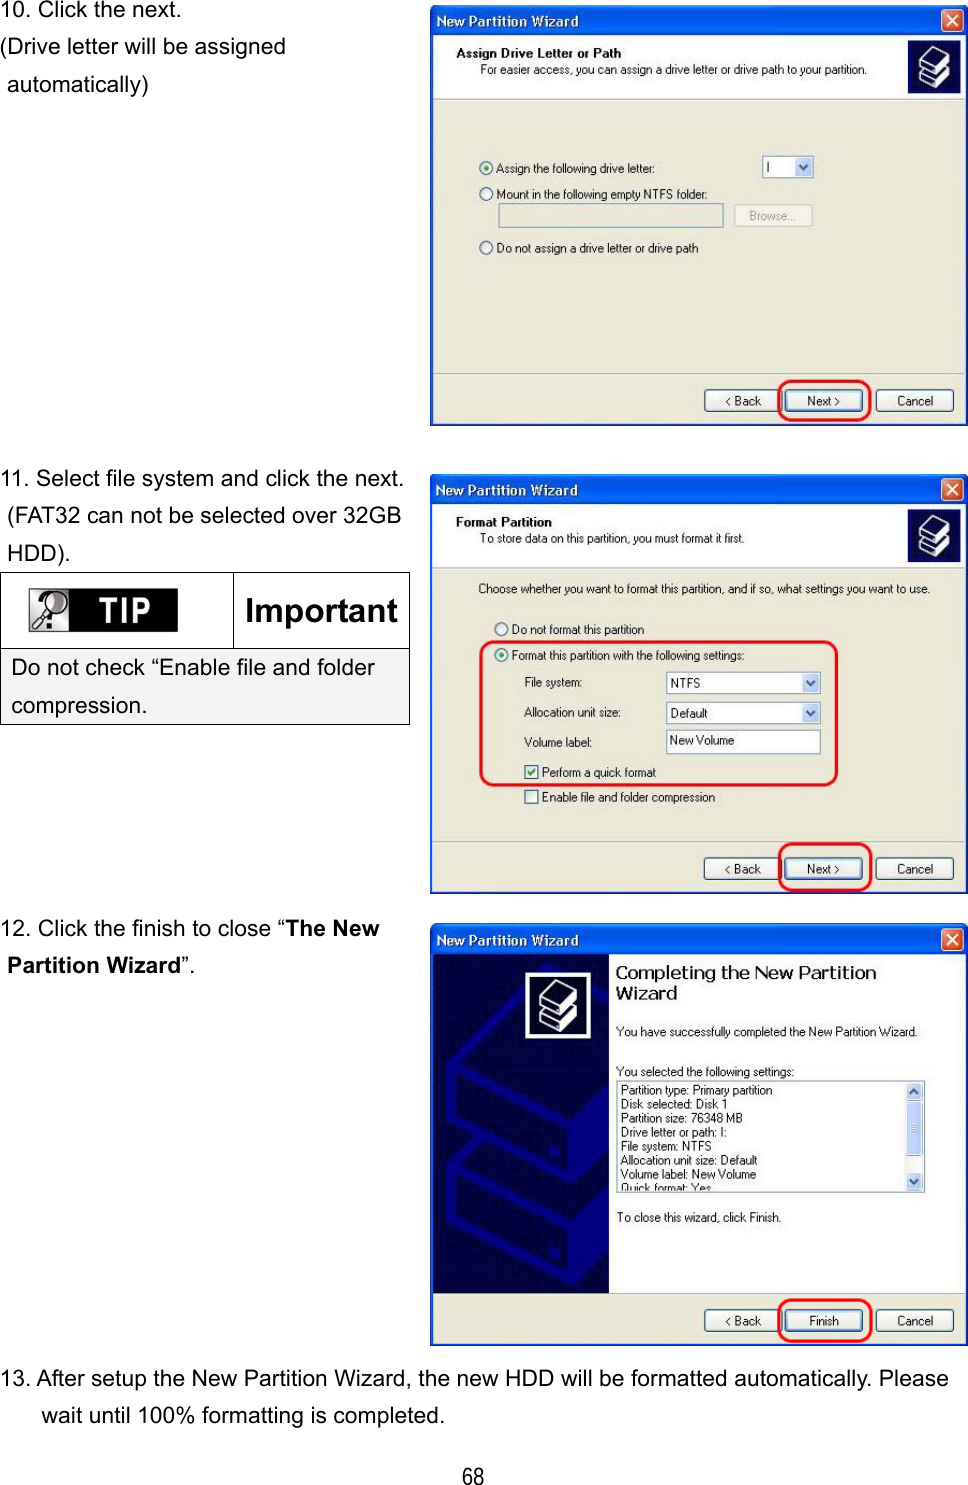
1.
users manual 1
2.
users manual 2
3.
users manual 3
users manual 3
Navigation menu
Upload a User Manual
Namespaces
Wiki Guide
HTML
PDF
Info
Views
User Manual
Discussion / Help
Navigation
![70 1. In case of no-sound or much noise Check whether stereo cable(A/V cable) is connected properly and tightly between NTD36HD and TV set. Check if [MUTE] button is pressed and volume level is set properly Check whether digital audio cable is connected properly and tightly to the audio input connectors of Home Theater System or Audio Amplifier Try changing the value(Down mix or pass through) of Audio Out on SET-UP menu Try changing audio cable with new one. Check the Audio channels(2channel or 5.1 channel) on SETUP MENU 2. In case of no-sound or bad sound quality when connected with digital audio system Check the Audio channels(2channel or 5.1 channel) on SETUP MENU Set as ‘pass through’ on SETUP menu. Check the status of connection and set up for digital audio system(Refer to the manual of digital audio system) Check whether optical cable or coaxial cable is connected properly and tightly Problems related to Sound](https://usermanual.wiki/Novatron/HD36WNTD.users-manual-3/User-Guide-702792-Page-16.png)