ORION ELECTRIC M2G1A VCR/DVD TV Interface Device User Manual Part 3
ORION ELECTRIC CO., LTD. VCR/DVD TV Interface Device Part 3
UserManual.wiki
>
ORION ELECTRIC
>
M2G1A User Manual
>
User Manual Part 3
Contents
1.
User Manual Part 1
2.
User Manual Part 2
3.
User Manual Part 3
User Manual Part 3
Navigation menu
Upload a User Manual
Namespaces
Wiki Guide
HTML
PDF
Info
Views
User Manual
Discussion / Help
Navigation
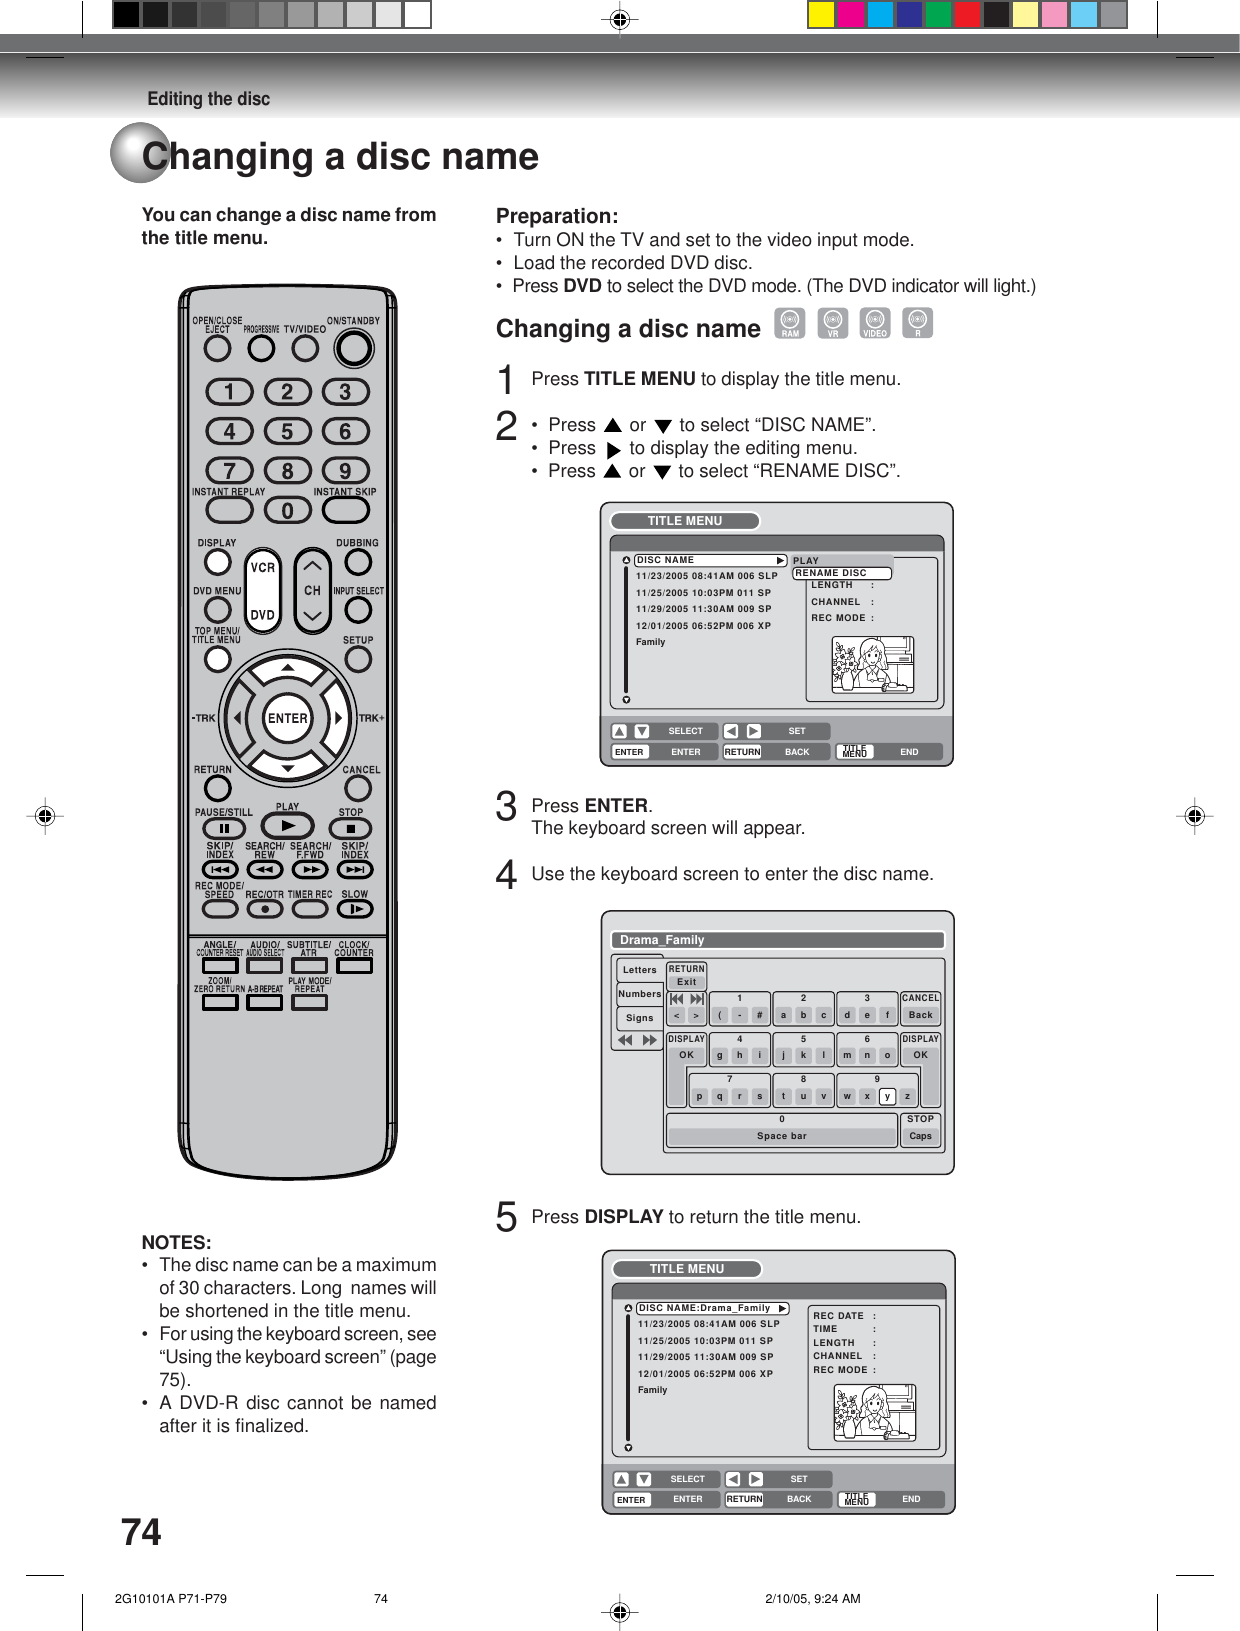
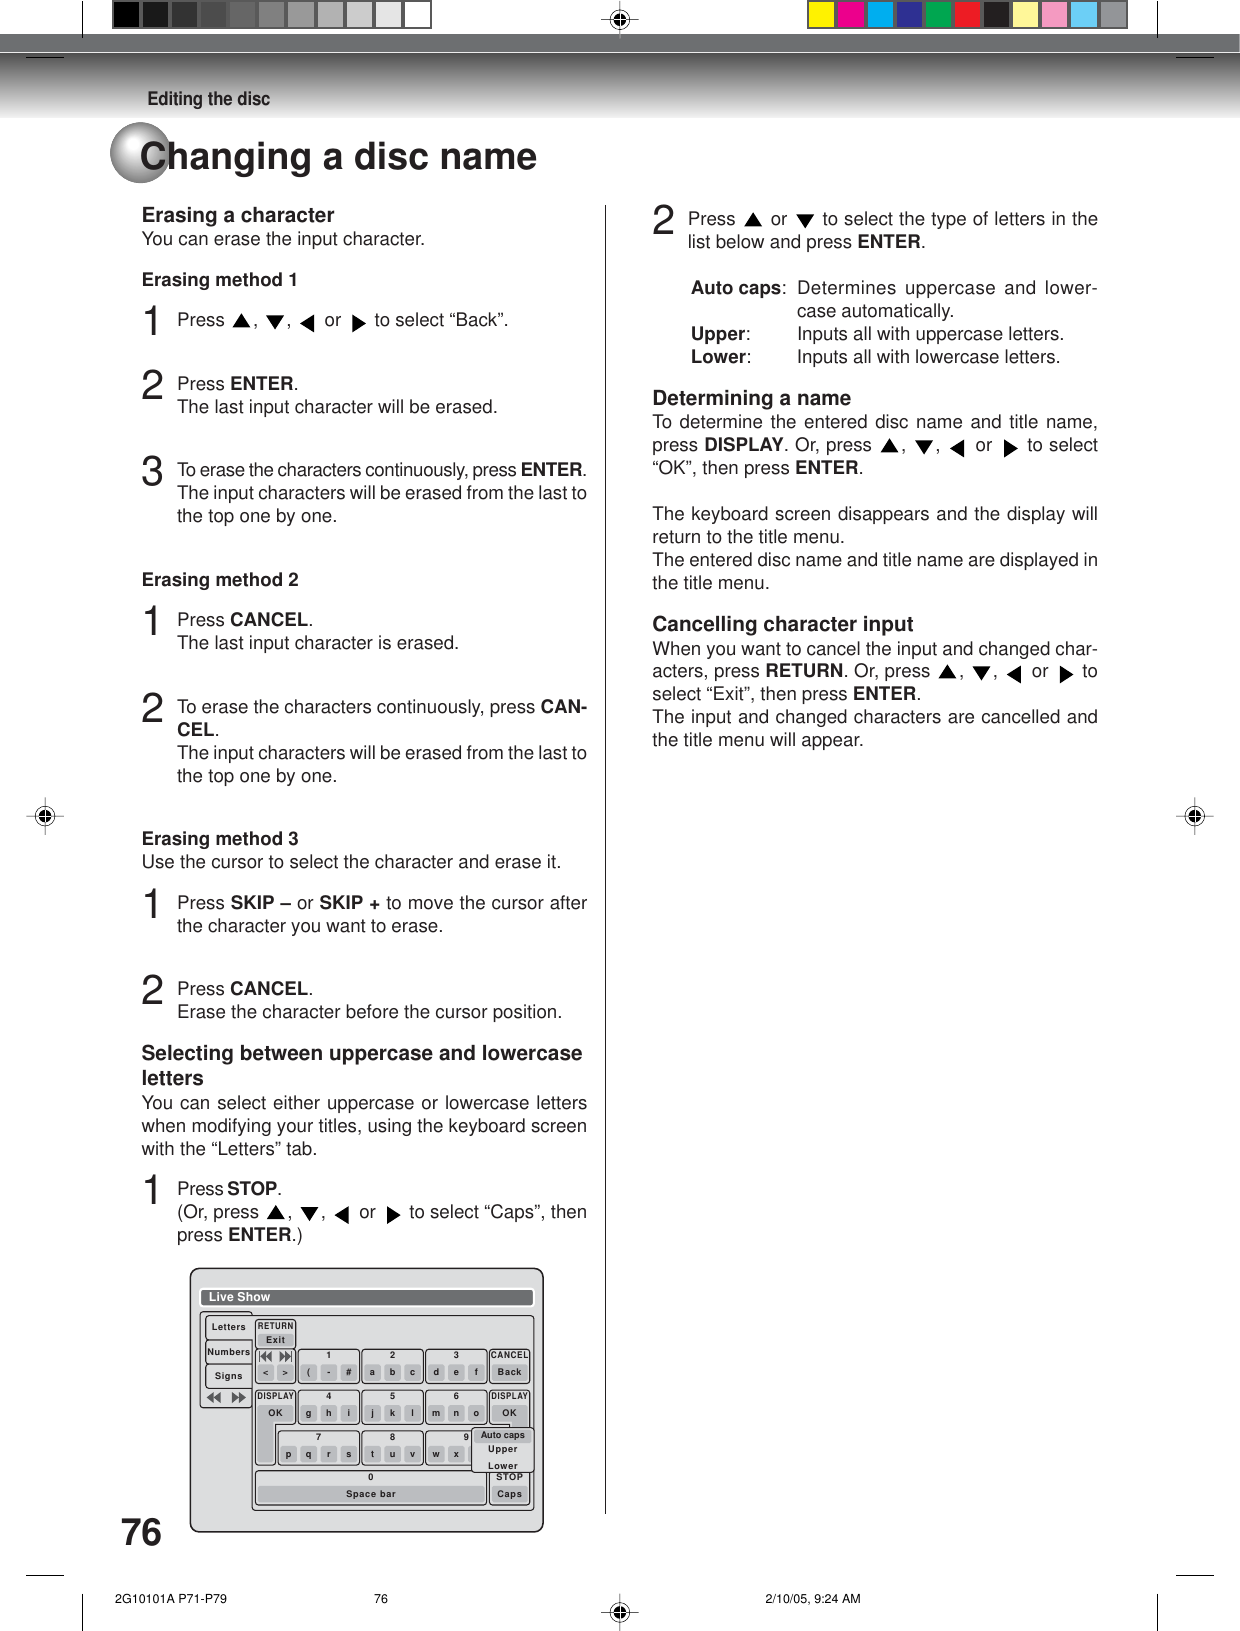
![Editing the disc75Changing a disc nameCharacter input 2Example: Explained here is the procedure when youinput “F” and “J”.1Press the numeric keys continuously and selectthe character to be input.To input F, press 3 twice.NOTE:When the interval between the pressing numeric keysis 2 seconds or more in selecting the input character,the selected character will automatically be input.2Stop the key operation when you select the char-acter to be input.The selected character will automatically be input.3Press the numeric keys where the following char-acter is assigned.4When the character to be input is selected, stopthe key operation.The selected character is automatically input.3de fF5jk lFjUsing the keyboard screenThis section explains the function of the keyboardscreen and how to input characters. The disc name andthe title name can be changed using the keyboardscreen.Keyboard screen typesThe keyboard screen has three types of “Letters”, “Num-bers” and “Signs”. The type can be switched over bypressing REW or F.FWD.Letters: This is mainly used for inputting alphabeti-cal letters.For the keyboard screen of Letters, see theprevious page.Numbers: This is used for inputting numbers.Live ShowNumbersSignsLetters1< > 2 3CANCELBackRETURNExit4 5 67 809DISPLAYOKDISPLAYOKSigns: This is used for inputting symbols.Live ShowNumbersSignsLetters1) !< > ,2? @ #3& % /CANCELBackRETURNExit0Space bar4. * _5- + =6[ ] :7¨; \ ‘8< > $9:·) :·( ;-/ :·}DISPLAYOKDISPLAYOKInputting charactersThere are two methods for inputting characters.Character input 11Press , , or to select the character tobe input.2Press ENTER.The selected character will be input. 2G10101A P71-P79 2/10/05, 9:24 AM75](https://usermanual.wiki/ORION-ELECTRIC/M2G1A.User-Manual-Part-3/User-Guide-520448-Page-5.png)