Panasonic Connect 210030A GSM Cellular Mobile with Bluetooth®, WLAN and RFID User Manual Part 2 of 6
Panasonic Mobile Communications Development of Europe Ltd GSM Cellular Mobile with Bluetooth®, WLAN and RFID Part 2 of 6
Contents
User Manual Part 2 of 6
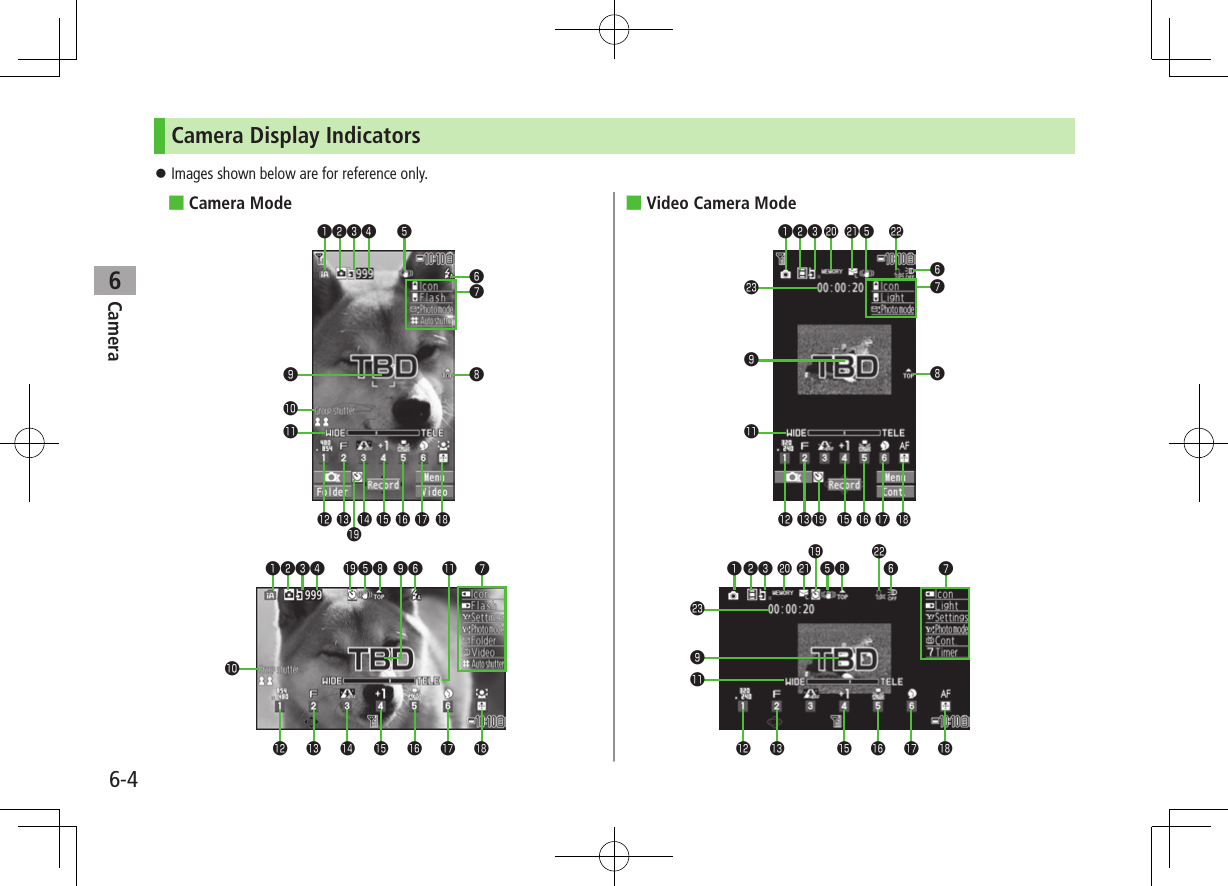
![6-5Camera6Item Description Operation❶Photo mode (ZP.6-9) Intelligent Auto Normal Scene My original set.(For Scene/My original set., indicators may vary depending on setting.)Press and hold A[ ] 7 Select a mode (7 For Scene/My original set., select an item)❷CHG Camera-mode Camera mode Video camera mode / / Action mode (Auto/Auto bracket/Manual) (Cont. shooting set.: ZP.6-6)[Video/Cont./Camera] Toggle Action mode (ZP.6-10)❸Storage setting Phone microSD Card❹No. of frames Show number of remaining frames —❺Img. stabilizer Correct camera shake (ZP.18-17, P.18-18)❻Flash setting (Still image) Auto Forced ON Always light ON Forced OFFPhoto light setting (Action/Video) ON OFF❼Key Guidance Show key operation guidance —❽Top indicator Indicate vertical direction —❾Focus Guide Auto focus guide AF tracking guide —Auto shutter1 (ZP.6-7) Love shutter (Sweetheart) Love shutter (Friends) Group shutter (Group)HZoom bar Indicate zoom level (ZP.6-8)/zoom in/out Long press: continuous zoomImage size2Show image size (ZP.6-8) 7 Select a sizeImage quality2 Normal Fine Super fine 7 Select a modeHigh sensitiv.2 ON OFF 7 Select ON/OFFBrightness2Adjust brightness (Level -3 to +3) 7 Select a levelWhite balance2 Auto Fine Cloudy Light bulb Fluorescent light 7 Select a modeScene2 Portrait Sports Food Scenery Night mode Backlight Character Snow Sunset Pet 7 Select a sceneFocus2 (ZP.6-11) Face Detection Auto Close-up Landscape AF tracking 7 Select a modeAuto timer (ZP.6-7) 7 Toggle ON/OFFMemory capacity bar Indicate memory status (appears in red when memory is full) —File size setting Mail restrict'n(S) Mail restrict’n(L) Long time (ZP.18-18)Movie type set Record video without audio (ZP.18-18)Recordable time Indicate recordable time —1 Key Guidance appears when Photo mode is set to Intelligent Auto and Auto shutter is not set.2 Alternatively, A[] 7 to highlight an item 7 to select a setting](https://usermanual.wiki/Panasonic-Connect/210030A.User-Manual-Part-2-of-6/User-Guide-1296396-Page-5.png)
![Camera6-66Pictures/Videos Confirm battery strength (ZP.1-11) and memory (ZP.18-17, P.18-18) before recording. When battery is low, video cannot be recorded. Captured images and videos are automatically saved to Data Folder. To select save location each time, turn Auto save set to OFF (ZP.18-17, P.18-18). Operation descriptions are based on Portrait View.Note For capturing images by , press firmly.Capturing Still Images (Camera Mode)1 or press and hold Picture Viewfinder appears.2 Frame subjectPicture Viewfinder3 [Record], or to capture the imageShutter click sounds at fixed volume. Image is automatically saved. When Focus is set to Face Detection, Auto or AF tracking, Camera automatically focuses on subject before capturing image.4 L to exitReturn to Standby.Continuous ShootingCapture a succession of up to 20 still images automatically with a single press. Number of captured images differs depending on image size and Continuous shooting setting (ZP.6-10).1 In Picture Viewfinder, [Video] 7 [Cont.] appears (Indicators vary by Action mode).2 Frame subject 7 [Record], or Images are automatically saved. When Focus is set to Auto, Camera automatically focuses on subject before capturing image. To stop shooting halfway:](https://usermanual.wiki/Panasonic-Connect/210030A.User-Manual-Part-2-of-6/User-Guide-1296396-Page-6.png)
![Camera6-76Recording Videos (Video Camera Mode)1 Press and hold Video Viewfinder appears.2 Frame subject3 [Record], or to start recordingTone sounds and appears. When Focus is set to Face Detection or Auto, Camera automatically focuses on subject before recording begins. During recording, auto focus functions regardless of Focus setting.4 [Stop], or to end recordingTone sounds. Video is automatically saved. Recording stops automatically at maximum recording time.5 L to exitReturn to Standby.Note Alternatively, 7 [Video] to activate Video CameraVideo ViewfinderFunctions Available while ShootingFrom Camera mode: Action mode: 4 [Video] 4 [Cont.]Video camera mode: Press and hold ■Auto Timer >S[Menu] 7 Auto timer 7 ON 7 Enter time (seconds) 7 [Record], or (7 For video, [Stop], or ) Auto timer tone sounds. After set period of time, shutter is released and recording starts. When Auto timer is active, A[Quit] or to return to Viewfinder without canceling Auto timer. Auto timer is not available when Cont. shooting set. is set to Manual. ■Auto Shutter (Camera Mode Only)Shutter automatically releases upon detecting number of people or distance between people (When Photo mode is set to Intelligent Auto or Focus is set to Face Detection). >S[Menu] 7 Auto shutter 7 Select an item (See below)Item Operation/DescriptionOFF Cancel Auto shutter settingLove shutter Shutter releases when two faces move close together. >Friends or Sweetheart When Sweetheart is set, distance between two faces is closer than Friends.Group shutter Camera detects up to five faces. When more people are in frame, Auto timer activates and shutter releases in three seconds. >Select number of people Alternatively, capture still images by [Record], or even when Auto shutter is set (Auto timer activates for Group shutter.).](https://usermanual.wiki/Panasonic-Connect/210030A.User-Manual-Part-2-of-6/User-Guide-1296396-Page-7.png)
![Camera6-86 ■Zoom > (zoom in) or (zoom out) to adjust zoom 7 [Record], or For continuous zoom: Press and hold Zoom is available during video recording. Zoom may change image quality. Maximum zoom levels per image size are as follows. Maximum zoom levels in Horizontal Open Position are indicated in ( ) if different from those in Normal Position.Camera modeSizeZoom levelZoom Ratio*Camera (High sensitiv.: OFF) 8M 1-21 2.6x 6M Wide 1-21 2.6x 5M 1-21 2.6x 3M 1-21 2.6x 2M Wide 1-21 2.6x 2M 1-21 2.6x Stand-by 1-21 2.6x VGA 1-21 2.6x QVGA 1-31 5.1x QCIF 1-31 8.5x Sub-QCIF 1-31 12.8xCamera (High sensitiv.: ON) 2M 1-21 2.6x Stand-by 1-21 2.6x VGA 1-21 2.6x QVGA 1-31 5.1x QCIF 1-31 8.5x Sub-QCIF 1-31 12.8xCamera modeSizeZoom levelZoom Ratio*Continuous shooting VGA 1-21 2.6x QVGA 1-31 5.1x QCIF 1-31 8.5x Sub-QCIF 1-31 12.8xVideo camera (Img. stabilizer: Auto) VGA 1-21 1.9x HVGA Wide 1-21 1.9x QVGA 1-31 2.9 (3.8)x QCIF 1-31 5.2 (6.4)x Sub-QCIF 1-31 7.2 (9.6)xVideo camera (Img. stabilizer: OFF) VGA 1-21 2.6x HVGA Wide 1-21 2.6x QVGA 1-31 3.8 (5.1)x QCIF 1-31 7.0 (8.5)x Sub-QCIF 1-31 9.6 (12.8)x* Values are approximates.](https://usermanual.wiki/Panasonic-Connect/210030A.User-Manual-Part-2-of-6/User-Guide-1296396-Page-8.png)
![Camera6-96 ■Use Flash/Photo LightSelect a Flash/Photo Light setting. >In Picture Viewfinder, S[Menu] 7 Flash setting 7 Select an item (See below)Item Operation/DescriptionAuto Flash goes off automatically in low-light situations.Forced ON Flash always goes off when capturing images.Always light ONPhoto Light illuminates.Forced OFF Flash/Photo Light is disabled. > In Continuous Shooting/Video Viewfinder, S[Menu] 7 Photo light set. 7 ON or OFF Flash/Photo light is not available when battery is low. When Camera is ended while a setting other than Forced OFF is set, Flash setting is changed to Auto next time Camera activates. When Forced OFF is set, setting remains. Even if Forced OFF (Flash setting) or OFF (Photo light set.) is set, Photo light illuminates or flashes when Camera is active or during shooting. When Photo mode is set to Intelligent Auto, Forced ON cannot be set. When using flash, maintain an appropriate distance from subject of 40 to 100 cm. When image is captured at close range or your hand is too close to Flash/Photo Light, image color and brightness may differ in appearance from actual subject. ■Set Photo Mode According to Scene >S[Menu] 7 Photo mode 7 Select an item (See below)Item Operation/DescriptionIntelligent AutoAutomatically switch Photo mode according to occasion (in Camera mode) Indicator is animated when mode changes (Example: Close-up). Mode does not change after Auto Focus Lock. Cancel Auto Focus Lock.Normal Capture an image in normal modeScene Adjust brightness and color tone according to scene >Select an itemMy original set.(ZP.6-10)](https://usermanual.wiki/Panasonic-Connect/210030A.User-Manual-Part-2-of-6/User-Guide-1296396-Page-9.png)
![Camera6-106 ■Change Continuous Shooting Settings >S[Menu] 7 Cont. shooting set. 7 Select an item (See below)Item Operation/DescriptionAction mode >Select an item・ Auto: Capture multiple still images automatically*・ Manual: Capture one by one manually・ Auto bracket: Capture nine different still images automaticallyShot interval Select an interval when Action mode is set to Auto >Select an intervalShot number Set number of images when Action mode is set to Auto or Manual >Select a number* Savable number of images is as follows:・ VGA (480×640): 4・ QVGA (240×320): 5 to 10・ QCIF (144×176): 5 to 20・ Sub-QCIF (96×128): 5 to 20 ■Save as Original Setting >Press and hold A 7 Photo mode MyOriginal 7 Follow the steps (See below)Item Operation/DescriptionSave setting >Highlight a setting 7 [Save] (7 YES) 7 Edit title Open setting >Select a settingEdit title >Highlight a setting 7 A[Edit] 7 Edit titleView detail >Highlight a setting 7 S[Detail]Delete setting >Highlight a setting 7 [Delete] 7 YES Save up to three settings each in Camera mode and Action mode.](https://usermanual.wiki/Panasonic-Connect/210030A.User-Manual-Part-2-of-6/User-Guide-1296396-Page-10.png)
![Camera6-116Focus FunctionsChanging Focus Settings<Default> Camera mode/Video camera mode: Face DetectionAction mode: AutoSelect a focus setting to suit the subject/occasion (Unavailable when Photo mode is set to Intelligent Auto). Face Detection: Focus locks on faces (Camera mode/Video camera mode only) Auto: Auto focus Close-up: Focus for close-ups Landscape: Focus on distant landscapes AF tracking: Focus on moving subject (Camera mode only)1 In Picture/Video Viewfinder, 2 to select an item 7 Note Camera focuses on subject at a distance of over 10 cm. When Photo mode is set to Intelligent Auto, toggle current focus setting and AF tracking by . While Camera is focusing, Focus sound is heard in the following situations:・ When Focus setting is set to AF tracking・ When Photo mode is set to Intelligent Auto・ During video recordingFace Detection Detect up to five faces within 2.5 meters. Show yellow Focus Guide when a face is detected. Automatically focus on one face when more than one is detected (Focus guide turns yellow once focus is on the face.). Faces may not be detected in following conditions:・ Face is tilted.・ A part of face is covered by glasses, hat, mask or shadow.・ Face is too small, big or dark for screen.・ Face is at edge of screen.・ Subject or handset moves too fast. Shoot with Auto focus if detection fails. AF TrackingPosition AF tracking guide on subject and press . Yellow AF tracking guide appears and tracks moving subject while adjusting focus and exposure for subject. During AF tracking, press [Record], or to lock focus on subject and capture an image. Alternatively, press halfway to lock focus, then to capture an image To cancel AF tracking: or When Camera is unable to track subject (e.g. when subject is out of Viewfinder), AF tracking is canceled. Depending on situation, AF tracking may track unintended subject. AF tracking is not available when Auto shutter is in use or certain image size is set.](https://usermanual.wiki/Panasonic-Connect/210030A.User-Manual-Part-2-of-6/User-Guide-1296396-Page-11.png)
![Camera6-126Auto Focus LockBring focus on subject at center of display automatically. Lock focus on subject, and recompose your picture.1 In Picture/Video Viewfinder, , G or halfway① When in focus, handset sounds.② Focus Guide turns green, and focus is locked. When out of focus, Focus Guide turns red. To cancel focus locked by or G: To cancel focus locked by : Release finger from 2 Determine composition3 Capture image in selected camera mode (Camera mode: ZP.6-6/Action mode: ZP.6-6/Video camera mode: ZP.6-7) In Step 1, press halfway to lock focus, then press firmly to shoot.Viewing Saved ImagesMain Menu 4 Camera1 Open PicturesPictures Open VideosVideos2 Select a folder3 Select a file ■Open Pictures Saved on microSD Card >In Step 1, Pictures 7 [microSD] 7 Select a folder ■Open Videos Saved on microSD Card >In Step 1, Videos 7 [microSD] 7 Select a folder ■Check Still Images in Picture Viewfinder >In Picture Viewfinder, [Folder] To return to Picture Viewfinder: Tip ●Editing Still Images (ZP.10-11)Example: Pictures](https://usermanual.wiki/Panasonic-Connect/210030A.User-Manual-Part-2-of-6/User-Guide-1296396-Page-12.png)
![Mobile Widget7-27Mobile Widget (Japanese)Paste widgets to Standby to access information or tools from Standby. Activating Mobile Widget enables Touchpad. Touchpad Indicators illuminate (Touchpad Operations: ZP.1-23, P.1-24).Network WidgetSome widgets may periodically connect to network, incurring packet transmission fees. While widgets appear in Standby, updated information for some widgets may be automatically retrieved. During transmission, other functions (e.g. Video Calls) may be disabled. ■Show/Hide Widget >In Standby, LTipSettings ●Set Touchpad to Activate for Web Browser/Mobile Widget (ZP.18-7) ●Deactivate Auto Update ●Activate Auto Roaming Abroad ●Hide Confirmation when Roaming Abroad ●Forbid Sending/Receiving Cookies ●Delete Cookies ●Change Pointer Speed (ZP.18-19)Using WidgetsPasting Widgets to StandbyPaste up to five widgets per sheet. Select from four sheets and organize sheets by theme.1 Widget List appears.2 Highlight a widget 7 A[Paste] 7 Select a sheet3 to move to target location 7 ■Delete Widgets from Standby Display >Main Menu 4 Widget 4 Settings 4 Delete Content 4 Select a sheet 4 Check Contents to delete 4 A[Release] 4 YESNote Alternatively, Main Menu 4 Widget 4 Widget Contents or Main Menu 4 Data Folder 4 Widget to select widgets When saving widgets from microSD to Standby, do not remove microSD Card.](https://usermanual.wiki/Panasonic-Connect/210030A.User-Manual-Part-2-of-6/User-Guide-1296396-Page-14.png)
![Mobile Widget7-37Activating WidgetsSelecting Widgets in Standby1 In Standby (widgets shown), Pointer ( ) appears. To disable pointer: L or 2 to move pointer 7 Select a widgetFollow onscreen instructions. ■Toggle Sheets >In Standby, 7 [Back] or [Forward]Selecting Widgets from Widget List1 Widget List appears.2 Select a widget 7 ■Move Widgets in List > 7 Highlight a widget 7 S[Move] 7 to determine a target location 7 [OK]Widget List](https://usermanual.wiki/Panasonic-Connect/210030A.User-Manual-Part-2-of-6/User-Guide-1296396-Page-15.png)
![Mobile Widget7-47Downloading WidgetsMain Menu 4 Widget1 Widget StoreHandset connects to the Network, and download site appears.Follow onscreen instructions.Installing WidgetsSome widgets may require you to install them manually; follow steps below: >In download completion window, S[Menu] 7 Install Once installation is completed, widgets appear in Widget List. Widget folder in Data Folder includes widgets that are not yet installed.Note Alternatively, Main Menu 4 Widget 4 Widget Contents 4 Download Widget 4 YES or Main Menu 4 Data Folder 4 Widget 4 Download Widget 4 YES to downloadArranging Widgets in Standby1 In Standby, 7 to move pointer to a widget 7 A[Operate]2 Select an item (See below)Item Operation/DescriptionMove > to move to a target location 7 Delete frm Standby >YESForward Move overlapping widget to foregroundRear Move overlapping widget to backgroundReload Update widget](https://usermanual.wiki/Panasonic-Connect/210030A.User-Manual-Part-2-of-6/User-Guide-1296396-Page-16.png)

![News/Entertainment8-28S! Information Channel/Weather (Japanese)Subscribe to content and periodically receive updates. Set Weather Indicator to appear on Standby. Transmission fees apply for updates. Auto download is not available overseas.Registering/CancelingMain Menu 4 News/Entertainment 4 S! Info Ch./Weather1 Register/Cancel 7 YESHandset connects to the Network.Follow onscreen instructions.Using S! Information Channel Up to seven updates are saved.Viewing New InformationWhen information arrives, and Event Indicator appear in Standby.1 In Standby, 7 to move pointer 7 Select Event Indicator2 [Select]Follow onscreen instructions. Option Menu Items (ZP.8-4) ■Manually Retrieve InformationSelect Event Indicator "Failed to download" Alternatively, Main Menu 4 News/Entertainment 4 S! Info Ch./Weather 4 Get Latest Contents 4 YES ■Delete Information >Main Menu 4 News/Entertainment 4 S! Info Ch./Weather 4 Highlight What's New? 4 S[Menu] 4 Delete 4 YESNote Alternatively, Main Menu 4 News/Entertainment 4 S! Info Ch./Weather 4 What's New? to retrieve information If there is unread information in both S! Quick News and S! Information Channel, does not appear. Only Event Indicator appears.Viewing Previously Received InformationMain Menu 4 News/Entertainment 4 S! Info Ch./Weather1 History 7 Select a date for unread news and for read news appear. ■Delete History >Main Menu 4 News/Entertainment 4 S! Info Ch./Weather 4 History 4 (Highlight a history) 4 S[Menu] 4 Delete or Delete all 4 YES ( 4 For Delete all, enter Phone Password)](https://usermanual.wiki/Panasonic-Connect/210030A.User-Manual-Part-2-of-6/User-Guide-1296396-Page-18.png)
![News/Entertainment8-38Using Weather IndicatorWeather Indicator for current forecast area appears in Standby.Viewing New InformationEvent Indicator and Weather Indicator appear for weather updates.1 In Standby, 7 to move pointer 7 Select Event Indicator or Weather Indicator2 [Select]Information appears.Follow onscreen instructions. Option Menu Items (ZP.8-4)Weather IndicatorIndicators are updated periodically.Example: Clear, Rain later thunderstorm, Cloudy with occasional snow, etc. See Weather Indicator List (ZP.19-24) for a complete list of indicators. ■Manually Update Weather IndicatorSelect Event Indicator "Failed to download" Alternatively, Main Menu 4 News/Entertainment 4 S! Info Ch./Weather 4 Weather Indicator 4 Manual Update 4 YES ■Hide Event Indicator >Main Menu 4 News/Entertainment 4 S! Info Ch./Weather 4 Weather Indicator 4 Missed Event Settings 4 OFFNote Alternatively, view forecast details from Main Menu 4 News/Entertainment 4 S! Info Ch./Weather 4 Weather Indicator 4 WeatherHiding Weather IndicatorMain Menu 4 News/Entertainment 4 S! Info Ch./Weather 4 Weather Indicator 4 Display Settings1 OFF When Display Settings is set to OFF, update is also deactivated.](https://usermanual.wiki/Panasonic-Connect/210030A.User-Manual-Part-2-of-6/User-Guide-1296396-Page-19.png)
![News/Entertainment8-48Option Menu ItemsOpen information and press S[Menu] for these options.Item Operation/DescriptionForward Go to next pageText Copy Copy page textSelect File View, play or save file to Data Folder (From Step 2 in Downloading Image/Sound Files: ZP.15-11)Jump in this pageJump to top/end of pageYahoo! Keitai View top menuFont Size* Change character sizeExit viewing thisExit content* Linked with Font Size setting in Internet option menu.S! Quick News (Japanese)Add news headlines, weather forecasts, etc. via S! Quick News List to scroll across Standby Window. Registering or viewing S! Quick News incurs transmission fees. No fees apply for viewing ticker information. For more information, visit SOFTBANK MOBILE Corp. Website (http://www.softbank.jp). Auto download is not available overseas.Registering S! Quick News Items Register a total of up to five items for Quick and General news and one item for Special news.Main Menu 4 News/Entertainment 4 S! Quick News 4 S! Quick News List1 Add News 7 YESYahoo! Keitai connects and contents list appears.2 Select an itemFollow onscreen instructions.](https://usermanual.wiki/Panasonic-Connect/210030A.User-Manual-Part-2-of-6/User-Guide-1296396-Page-20.png)
![News/Entertainment8-58Opening New InformationViewing New Information in StandbyWhen new information is received, appears in Standby.1 In Standby, 7 to move pointer 7 Select ticker2 [Select]Content list appears.3 Select informationDetails appear.TipSettings ●Show Only Unread Items in Standby ●Change Marquee Speed ●Hide S! Quick News ●Image Download (ZP.18-19)Opening S! Quick News ListMain Menu 4 News/Entertainment 4 S! Quick News 4 S! Quick News List1 Select an itemContent list appears.2 Select informationDetailed information appears.3 To connect to the Network, select a title 7 YES ■Update Manually >In Step1, S[Menu] 7 Update or All Update 7 YES ■View Summary >In Step 1, highlight information 7 S[Menu] 7 Summary Display ■Delete Registered Items >In Step 1, (highlight information 7) S[Menu] 7 Delete or All Delete 7 YES (7 For All Delete, enter Phone Password)Note Alternatively, Main Menu 4 News/Entertainment 4 S! Quick News 4 Settings 4 Del S! Quick News List 4 YES to delete all informationTipSettings ●Automatically Update S! Quick News List ●Delete S! Quick News Information (ZP.18-20)](https://usermanual.wiki/Panasonic-Connect/210030A.User-Manual-Part-2-of-6/User-Guide-1296396-Page-21.png)
![News/Entertainment8-78BloggingSave blog details to update or view blogs. Save up to 20 blog details.Saving Blog DetailsMain Menu 4 News/Entertainment 4 Post Blog1 [New] 7 Select an item (See below)Item Operation/DescriptionService name Save a blog service name >Enter a service nameBlogger addressSave a mail address for posting to a blog by mail >Enter a mail addressMail title Save a title to enter automatically when posting to a blog by mail >Enter a titleYahoo! Keitai URLSave a URL for posting to a blog from Yahoo! Keitai >Enter a mail addressPC Site BrowserSave a URL for posting to a blog from PC Site Browser >Enter a mail address2 A[Finish]Posting to BlogsMain Menu 4 News/Entertainment 4 Post Blog1 Post by MailHighlight an entry 7 [Post] 7 Compose a message (ZFrom Step 4 on P.14-4) 7 A[Send] Post from Yahoo! Keitai/PC Site BrowserHighlight an entry 7 A[To site] 7 By Yahoo! Keitai or By PC Site Browser 7 YESHandset connects to the Network and website appears.Follow onscreen instructions. ■Post Images to Blogs >While captured image is open, or from Data Folder, select an image 7 S[Menu] 7 Post blog* 7 Follow Step 1 above* When Post blog does not appear in sub menu, function is unavailable (e.g. when sub menu is opened from [Folder] in Picture Viewfinder). Set Auto save set (ZP.18-17) in Camera menu to OFF to capture and post images directly.](https://usermanual.wiki/Panasonic-Connect/210030A.User-Manual-Part-2-of-6/User-Guide-1296396-Page-23.png)
![News/Entertainment8-88Blogging FunctionsFrom Main Menu 4 News/Entertainment 4 Post Blog ■Edit Entries >Highlight an entry 7 [Edit] 7 Edit ■Delete Entries >Highlight an entry 7 S[Menu] 7 Delete 7 Select an item (See below)Item Operation/DescriptionDelete this >YESDelete selected >Check entries 7 A[Finish] 7 YESDelete all >Enter Phone Password 7 YES](https://usermanual.wiki/Panasonic-Connect/210030A.User-Manual-Part-2-of-6/User-Guide-1296396-Page-24.png)
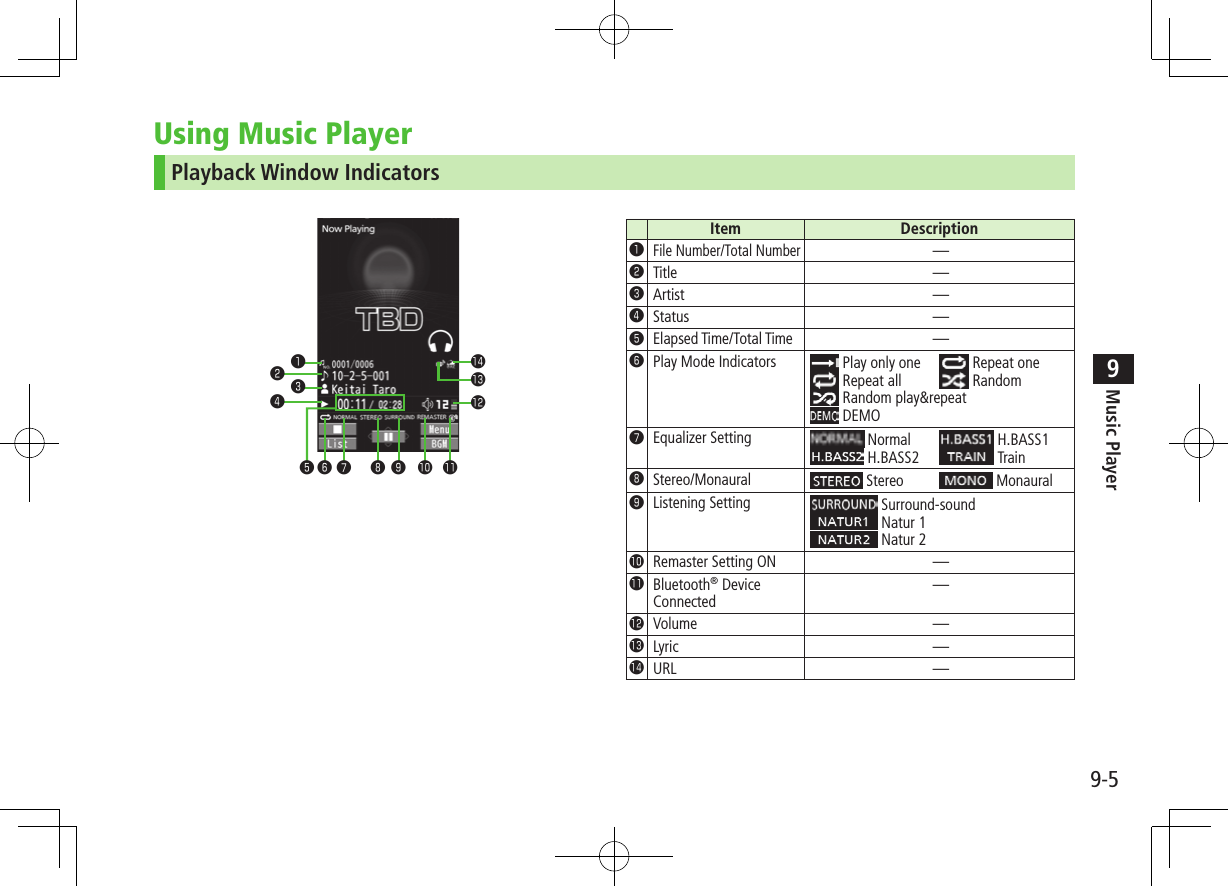
![Music Player9-69Playing Music1 Press and hold Player Menu window appears. Last playback window appears. S[Menu] 7 Player menu to show Player Menu window. 2 Select a category (See below)Item Operation/DescriptionAll Tracks Select files from handset & microSD CardPlay List Select group of files saved to Play ListArtist Select files from Artist folderAlbum Select files from Album folderGenreSelect files from Genre folder ★ appears for currently/previously played Play List.3 Select a fileSelected file plays. ★ appears for currently/previously played file. Playback Window Operations: ZP.9-7 To end playback, A[]Player Menu WindowNote Alternatively, play music from Main Menu 4 Tools 4 Music Player mp4/3gp files in Ring Songs&Tones folder can also be played in Music Player. Missed Call/New Message Notification Tone (ZP.18-8) is unavailable during playback while handset closed.Changing Play Mode1 Press and hold Player Menu window or Playback window appears.2 S[Menu] 7 Play mode setting3 Select an item (See below)Item Operation/DescriptionNormal Play all files in selected category/Play ListPlay only one Play selected fileRepeat one Repeat selected fileRepeat all Repeat all files in selected category/Play ListRandom Play selected category/Play List files randomlyRandom play&repeatRepeat selected category/Play List files randomly](https://usermanual.wiki/Panasonic-Connect/210030A.User-Manual-Part-2-of-6/User-Guide-1296396-Page-30.png)
![Music Player9-79Background MusicListen to music while using other handset functions.1 While music plays, [BGM]2 To end, L in Standby 7 End playerNote Some functions cannot operate simultaneously. Volume or play mode change is not available during Play Background.Playing Chaku-Uta Full®/WMA Files as DemoMain Menu 4 Data Folder 4 Music1 Select an item (See below)Item Operation/DescriptionMain Folder View Chaku-Uta Full® list >Select a folder To view file list in handset/microSD Card: [Phone/microSD] WMA View WMA list [Change] to toggle display views in Chaku-Uta Full® and WMA list.2 Select a Chaku-Uta Full® or WMA fileDemonstration playback starts.Playback Window OperationsAdjust Volume or Play Previous* or press and hold When playback time is over three seconds, previous file plays from beginning.Play Next* or press and hold Fast-rewind Press and hold Fast-forward Press and hold Pause/Resume [ / ]Stop A[]View Next Jacket/LyricView Previous Jacket/LyricToggle Jacket/Lyric DisplayToggle Playlist/Playback Window*[List/Player]Play Background*[BGM]Toggle Remaster On/Off (ZP.9-8)Toggle Sound Effect (Listening) Modes (ZP.9-8)Toggle Equalizer Modes (ZP.9-8)* Not available for playback as a demo](https://usermanual.wiki/Panasonic-Connect/210030A.User-Manual-Part-2-of-6/User-Guide-1296396-Page-31.png)
![Music Player9-89Functions while Playing Files ■Set Sound Effect >While playing file, S[Menu] 7 Sound effect 7 Select an item (See below)Item Operation/DescriptionRemaster Complement sound from earphone or Bluetooth® device to bring close to original sound >ON or OFFListening Add listening effect to sound from earphone or Bluetooth® device >Select an item・ Surround-sound: Reproduce natural and stereophonic sound・ Natur 1 or Natur 2: Complement sound specific to earphone to reproduce natural sound・ OFF: Turn off Listening settingEqualizer Change quality of sound from earphone or Bluetooth® device >Select an item・ Normal: Reproduce normal sound・ H. BASS1: Enhance low-pitched sound ・ H. BASS2: Enhance low-pitched sound even more・ Train: Minimize sound leakage ■Functions Available in Playback Window >While playing file, S[Menu] 7 Select an item (See below)Item Operation/DescriptionPlayer menu Show Player menuPlay mode settingChange play mode (ZP.9-6)Sound effect (ZLeft)Music info Show song title, artist and playback timeConnect to WebsiteOpen site link >YESDisplay ImageShow jacketDisplay lyricShow lyricPrevious image/Previous lyricShow previous jacket or lyricNext image/Next lyricShow next jacket or lyric](https://usermanual.wiki/Panasonic-Connect/210030A.User-Manual-Part-2-of-6/User-Guide-1296396-Page-32.png)
![Music Player9-99Chaku-Uta Full®/WMA ListFrom Main Menu 4 Data Folder 4 Music ■Confirm Memory Status >S[Menu] 7 Memory Status ■Functions Available in Chaku-Uta Full® Folder List >Main Folder 7 Highlight a folder 7 S[Menu] 7 Select an item (See below)Item Operation/DescriptionAdd folder >Enter folder nameEdit folder name >Enter folder nameDelete folder >Enter Phone Password 7 YESMemory Status >Confirm memory status/total files ■Functions Available in Chaku-Uta Full®/WMA File List >Main Folder or WMA (7 Select a folder) 7 Highlight a file 7 S[Menu] 7 Select an item (See below)Item Operation/DescriptionSet as ring tone (Fullsong ring tone)1Set Chaku-Uta Full® as ringtone >Fullsong ring tone 7 Select an itemSet as ring tone (Point ring tone)1Set a segment of Chaku-Uta Full® as ringtone >Point ring tone 7 Select a segment 7 Select an item To confirm segment: A[Play]Music info Show song title, artist and playback timeMove1 >Select a storageItem Operation/DescriptionMove to microSD1 Move a Chaku-Uta Full® to microSD CardAdd folder1 >Enter folder nameMultiple-choice1Select multiple Chaku-Uta Full® files >Check Chaku-Uta Full® files 7 S[Menu] 7 Delete, Move or Send Ir data 7 Operate selected itemConnect to Website1Open site link >YESDisplay imageShow jacketMemory StatusMemory status/total number of files appearsDEL all licenses2Delete all WMA licenses >Enter Phone Password 7 YESDelete this >YESDelete all Delete all files in folder >Enter Phone Password 7 YESAttach to message1Attach file to S! Mail/PC Mail (ZFrom Step 2 on P.14-4)Send Ir data1(ZP.11-3)IC transmission1(ZP.11-5)Take contents key1(ZP.10-5)1 Chaku-Uta Full® files only2 WMA files only](https://usermanual.wiki/Panasonic-Connect/210030A.User-Manual-Part-2-of-6/User-Guide-1296396-Page-33.png)
![Music Player9-109Using Play ListUse Play List to organize Data Folder music files. Select Music folder files to create Play List links to each file in its original folder.Creating New Play Lists Save up to 30 Play Lists with up to 100 songs per list. Music files saved on microSD Card are also savable.1 Press and hold Player Menu window or Playback window appears. When Playback window appears, S[Menu] 7 Player menu to show Player Menu window2 Play List 7 S[Menu] 7 Create play list 7 Select a category and show file list 7 Check files to save to Play List 7 A[Finish]3 Enter a Play List namePlay List WindowNote Create WMA Play Lists (using Windows Media® Player) or SD Audio Play Lists (using SD-Juke Box) on PC. Maximum number of Play Lists to create and songs to save is as follows: WMA Play Lists: 100 Play Lists; 250 songs per list SD Audio Play Lists: 99 Play Lists; 99 songs per listPlaying Songs from Play List1 Press and hold Player Menu window or Playback window appears. When Playback window appears, S[Menu] 7 Player menu to show Player Menu window2 Play List 7 Select a Play List To play back selected Play List from the beginning: A[Play]3 Select a fileSelected file plays back. Note mp4/3gp files in Ring Songs&Tones folder can also be added to Play List.Play List Contents Window](https://usermanual.wiki/Panasonic-Connect/210030A.User-Manual-Part-2-of-6/User-Guide-1296396-Page-34.png)
![Music Player9-119Play ListPress and hold (4 cS[Menu] 4 Player menu) 4 Play List ■Functions Available in Play List Window >(Highlight a Play List) S[Menu] 7 Select an item (See below)Item Operation/DescriptionPlayer menu Open Player menuPlay mode settingChange play mode (ZP.9-6)Create play listCreate a new Play List (ZP.9-10)Copy play list Copy Play List >Enter a Play List nameEdit pl. list nameEdit Play List name >Edit Play List nameAdd Add files to Play List >Select a category, and open a Play List 7 Check files to add 7 A[Finish]Delete play list >Select an item 7 Operate selected item ■Functions Available in Play List Contents Window >Select a Play List 7 (Highlight a file) 7 S[Menu] 7 Select an item (See below)Item Operation/DescriptionPlayer menu Open Player menuPlay mode settingChange play mode (ZP.9-6)Music info Show song title, artist and playback timeAdd Add files to Play List >Select a category, and show contents window 7 Check files to add 7 A[Finish]DEL from play listDelete files from Play List >Select an item 7 Operate selected itemOrder to play >Select a file from Play List to change playing order 7 to change order 7 [Select] Repeat steps above to change order 7 A[Set]Add to play listAdd files to another Play List >Add one or Add some (7 For Add some, check files 7 A[Finish]) 7 Select a Play ListDisplay image Show jacket](https://usermanual.wiki/Panasonic-Connect/210030A.User-Manual-Part-2-of-6/User-Guide-1296396-Page-35.png)
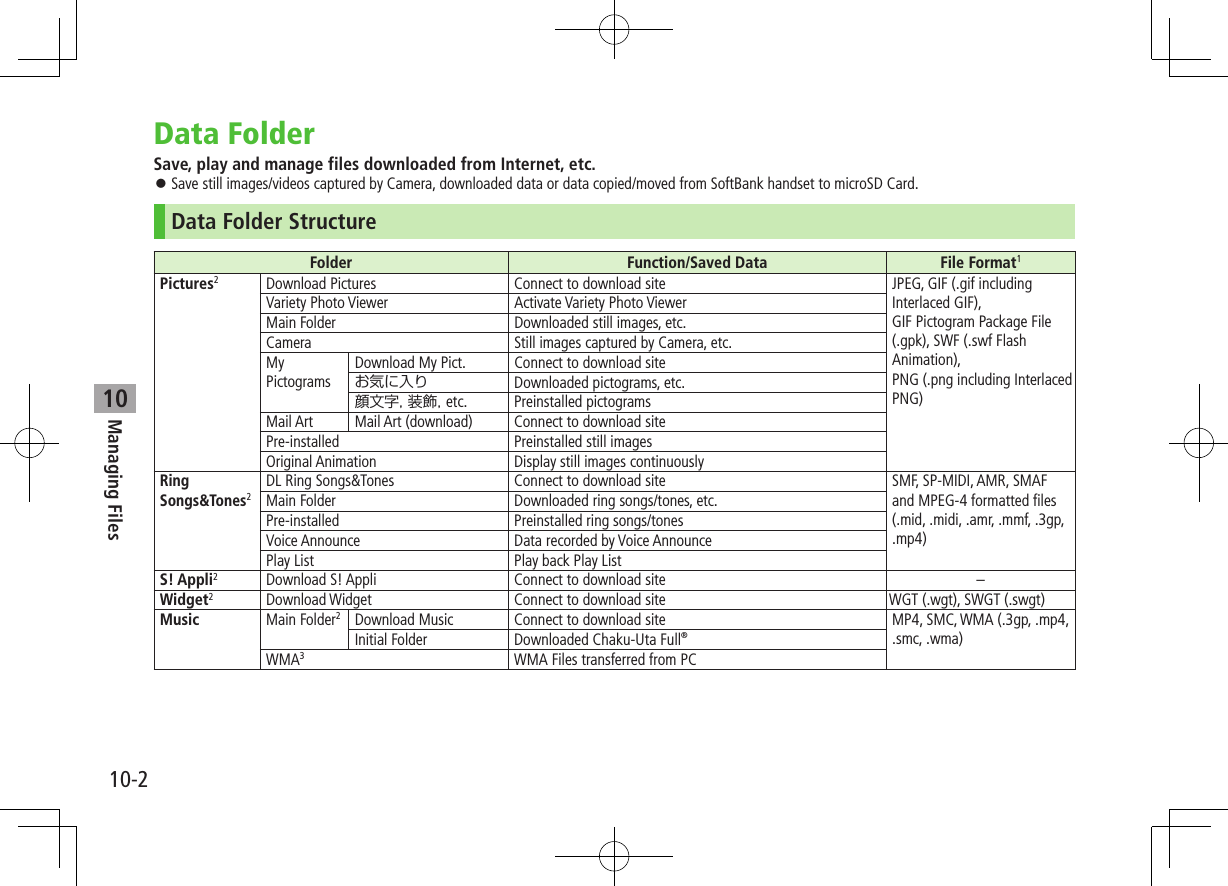
![10-3Managing Files10Folder Function/Saved Data File Format1Videos2Download Videos Connect to download site MP4 (including .mp4, .3gp, SDV), ASF (.asf)Main Folder Downloaded video files, etc.Camera Video files recorded by CameraPre-installed Preinstalled video filesBD/DVD Recorder3Videos transferred from HDD RecorderPlay List Play back Play ListPosition Memory Play back video files from saved resume positionPC Movies microSD3PC movie files saved from PCs WMA (.wma), WMV (.wmv), ASF (.asf)Position Memory Play PC movie files from a saved resume positionPlay History Select a file from playback historyTV Image Still images recorded by Digital TV JPEG (.jpg)Video3Programs recorded on handset TOD (.tod), MOI (.moi), MAI (.mai), PGI (.pgi)Position Memory Play back video files from saved resume positionLifestyle-Appli Download Connect to download site (Osaifu-Keitai®: ZP.13-9) –Books2Download Books Connect to download site CCF (.ccf), XMDF (.zbf, .zbk, .zbs), BMO (.bmo)Customized Screen2Customized Screen Connect to download site CUSR (.xcsf)Templates Download Templates Connect to download site –Font Download Font Connect to download site MTF (.mtf)Main Folder Downloaded fontsPre-installed Pre-installed fontsOther Documents2Main Folder Incompatible files attached to mail4–1 Some copy protected files have extensions different from above.2 When microSD Card is installed, press [microSD] in Folder list to view data saved in microSD Card.3 Available only when microSD Card is inserted.4 Some attachment files cannot be saved in Other Documents.](https://usermanual.wiki/Panasonic-Connect/210030A.User-Manual-Part-2-of-6/User-Guide-1296396-Page-39.png)
![Managing Files10-410Opening FilesViewing & Playing FilesMain Menu 4 Data Folder1 Select a folder In Folder List, press to toggle handset folder and microSD Card folder. 2 Select a folder 7 Select a fileFile appears/plays. To toggle list/thumbnail view: [Change]When Shortcut to a Download Site is SelectedHandset connects to a download site on Internet. ■Enlarge Still Images >Main Menu 4 Data Folder 4 Pictures 4 Select a folder 4 Select a file 4 S[Menu] 4 Display size 4 Fit in displayPictures FolderStill Image List Window ■Operations while Playing Files from Ring Songs&TonesStop [Stop]Volume /Attach to messages A[ ]](https://usermanual.wiki/Panasonic-Connect/210030A.User-Manual-Part-2-of-6/User-Guide-1296396-Page-40.png)
![Managing Files10-510Copy Protected FilesPlaying/forwarding/saving may be restricted and Content Key may be required for usage. If Content Key is expired, obtain a new Key to use file. or (Silver) appears for copy protected files requiring Content Keys. files are accessible. files are inaccessible. appears on images in Thumbnail view of expired files (Original icon appears for Books folder). When deleting files or folders containing files, confirmation appears asking whether to delete corresponding Content Key. Other files requiring same Content Key may become unusable. See File Properties to confirm restrictions such as expiry term or usage limitation (Options: ZP.10-6) 942P holds up to 1000 Content Keys. Multiple Keys may be required to use a file. Interrupted playback (by incoming calls or Alarm) of copy protected WMA files with limited usage in Data Folder is also counted as one usage.Using Copy Protected Files Files downloaded on handset cannot be used on PCs. Network setting may be required for usage. File usage may require insertion of USIM Card in use at time of download. When set as wallpaper or ringtone, settings may return to defaults if license has expired or different USIM Card is inserted. Limited use files cannot be set as wallpaper or ringtone.Obtaining Content KeyIf Content Key is expired, a message appears when the file is opened. To obtain a new Key, select YES. Handset connects to Content Key site.Note Alternatively, obtain Content Key as follows: Highlight a file 7 S[Menu] 7 Take contents key 7 YES Depending on contents, some Content Keys may not be obtained from websites even when warning for expired contents appears. When 1000 Content Keys have been saved, a message appears. Delete old Keys; otherwise downloads may fail (Connection fees apply).Tip ●Back Up Content Key (ZP.10-24)](https://usermanual.wiki/Panasonic-Connect/210030A.User-Manual-Part-2-of-6/User-Guide-1296396-Page-41.png)
![Managing Files10-610OptionsHighlight a file in Data Folder 7 S[Menu] for the following operations. Some functions may not be available depending on files. ■PicturesItem Operation/DescriptionEdit picture Edit files (ZP.10-11)Display pictureOpen filesSet display* Set as wallpaper, Phone Book image, Menu Icons, etc. >Select an item ★ appears for item.Picture info Show file name, file size, etc.Attach to messageAttach files to S! Mail/PC Mail (ZFrom Step 2 on P.14-4)Graphic mail Add selected files to Graphic Mail (ZP.14-9) Post blog Post file on a blog (ZP.8-7) Send Ir data Send files via Infrared (ZP.11-3)IC transmissionSend files via IC transmission (ZP.11-5)Add shortcut iconCreate shortcuts (ZP.1-25)Copy to microSDCopy files to microSD CardMove to microSDMove files to microSD CardPositioning Set where to paste files in Standby >Select a positionEdit file name Edit file namesMove Move files to other foldersItem Operation/DescriptionSlideshow Show files in a folder continuously. Select display speed >Normal or SlowDelete this Delete a file >YESDelete all Delete all files >Enter Phone Password 7 YESMultiple-choiceSelect multiple files to use >Check files to use 7 S[Menu] 7 Select an itemMemory StatusShow memory informationSort Change display order of files >Select an orderPictures/ File namesToggle list views Alternatively, [Change] to toggleTake contents keyConnect to site for Content Key* Before setting a file as Video Call related item (except for Incoming/Outgoing Video Calls), set Select Images to Original (Change Outgoing Image: ZP.18-13).To set a file as Menu Icon related item, set Menu Icons to Customize (ZP.18-4). If incoming calls arrive or handset is turned off while My Pictograms package file (.gpk) is being uncompressed, some pictograms in package file may not open. Retry uncompressing.Tip ●Enlarge Still Images (ZP.10-4)●Editing Still Images (ZP.10-11)●Creating Animations (ZP.10-12)●Saving Still Images to Phone Book (ZP.10-13)](https://usermanual.wiki/Panasonic-Connect/210030A.User-Manual-Part-2-of-6/User-Guide-1296396-Page-42.png)
![Managing Files10-710 ■Ring Songs&TonesItem Operation/DescriptionEdit file name Edit file namesPlay melody Play back filesSet as ring tone >Set as ringtone ★ appears for item.Add shortcut iconCreate shortcuts (ZP.1-25)Attach to messageAttach files to S! Mail/PC Mail (ZFrom Step 2 on P.14-4)Send Ir data Send files via Infrared (ZP.11-3)IC transmissionSend files via IC transmission (ZP.11-5)Copy to microSDCopy files to microSD CardSong·Tone infoShow titles, file names, etc.Memory StatusShow memory informationDelete >Select a type・ Delete this 7 YES・ Delete select 7 Check files to delete 7 A[Finish] 7 YES・ Delete all 7 Enter Phone Password 7 YESSort Change display order of files >Select an orderMove Move files to other foldersMove to microSDMove files to microSD CardTake contents keyConnect to site for Content Key ■WidgetItem Operation/DescriptionPaste on Stand-by(ZP.7-2)Widget InformationShow file names, sizes, etc.Attach to messageAttach files to S! Mail/PC Mail (ZFrom Step 2 on P.14-4)Send Ir data Send files via Infrared (ZP.11-3)IC transmissionSend files via IC transmission (ZP.11-5)Move to microSDMove files to microSD CardDelete this Delete a file >YESDelete all Delete all files >Enter Phone Password 7 YESMultiple-choiceSelect multiple files to use >Check files to use 7 S[Menu] 7 Select an item](https://usermanual.wiki/Panasonic-Connect/210030A.User-Manual-Part-2-of-6/User-Guide-1296396-Page-43.png)
![Managing Files10-810 ■S! Appli/Lifestyle-AppliItem Operation/DescriptionStart Activate S! Appli or Lifestyle-AppliSecurity level Set security level (ZP.16-4)S! Appli info Show file names, file sizes, etc.Add shortcut iconCreate shortcuts (ZP.1-25)Move to microSDMove files to microSD Card (Lifestyle-Appli cannot be moved)Delete Delete files >YES ■Music See "Functions Available in Chaku-Uta Full®/WMA File List" (ZP.9-9) ■VideosItem Operation/DescriptionRegister Set as ringtones, Standby Display or Start-up displayVideo info Show titles, file names, etc.Attach to messageAttach files to S! Mail/PC Mail (ZFrom Step 2 on P.14-4)Post blog Post file on a blog (ZP.8-7)Send Ir data Send files via Infrared (ZP.11-3)IC transmission Send files via IC transmission (ZP.11-5)Copy to microSDCopy files to microSD CardMove to microSDMove files to microSD CardMove Move files to other foldersItem Operation/DescriptionAdd shortcut iconCreate shortcuts (ZP.1-25)Edit file nameEdit file namesDelete this Delete a file >YESDelete all Delete all files >Enter Phone Password 7 YESMultiple-choiceSelect multiple files to use >Check files to use 7 S[Menu] 7 Select an itemMemory StatusShow memory informationSort Change display order of files >Select an orderListing Change list view [Change] to toggle viewsTake contents keyConnect to site for Content Key](https://usermanual.wiki/Panasonic-Connect/210030A.User-Manual-Part-2-of-6/User-Guide-1296396-Page-44.png)
![Managing Files10-910 ■PC MoviesItem Operation/DescriptionContents info Show titles, file names, etc.Move Move files to other foldersCopy Copy files to other foldersMultiple-choiceSelect multiple files to use >Check files to use 7 S[Menu] 7 Select an itemComment viewShow descriptionsMemory StatusShow memory informationDelete this Delete a file >YESDelete all Delete all files >Enter Phone Password 7 YES ■TV See Pictures folder for still images.Item Operation/DescriptionEdit title >Enter titlesVideo info Show titles, channel names, etc.Add shortcut iconCreate shortcuts (ZP.1-25)Delete >Select an item・ Delete this 7 YES・ Delete selected 7 Check files to delete 7 A[Finish] 7 YES・ Delete all 7 Enter Phone Password 7 YESMemory StatusShow memory informationListing Change list view [Change] to toggle views ■BooksItem Operation/DescriptionPlay Play back filesConnect to WebsiteOpen site linkBook info Show file names, file sizes, etc.Copy to microSDCopy files to microSD CardMove to microSDMove files to microSD CardAdd folder Add foldersEdit file nameEdit file namesMove Move files to other foldersTake contents keyConnect to site for Content KeyDelete Delete files >YES](https://usermanual.wiki/Panasonic-Connect/210030A.User-Manual-Part-2-of-6/User-Guide-1296396-Page-45.png)
![Managing Files10-1010 ■Customized ScreenItem Operation/DescriptionPreview Preview filesCollective SettingSet Customized Screen all at onceFile info Show titles, file names, etc.Copy to microSDCopy files to microSD CardMove to microSDMove files to microSD CardEdit file name Edit file namesDelete this Delete a file >YESDelete all Delete all files >Enter Phone Password 7 YESMultiple-choiceSelect multiple files to use >Check files to use 7 S[Menu] 7 Select an itemMemory StatusShow memory informationSort Change display order of files >Select an orderListing Change list view [Change] to toggle viewsTake contents keyConnect to site for Content KeyConnect to WebsiteOpen site link ■TemplatesItem Operation/DescriptionCompose S! MailSend files via S! Mail (ZP.14-5)Edit title Edit titlesTemplate info Show title and file sizeDelete this >YESDelete selected >Check files to delete 7 A[Finish] 7 YESDelete All >Enter Phone Password 7 YES ■FontItem Operation/DescriptionSet Apply selected fontFile info Show file names, file sizes, etc.Edit title Edit titlesDelete this Delete a file >YESDelete all Delete all files >Enter Phone Password 7 YESMultiple-choiceSelect multiple files to use >Check files to use 7 S[Menu] 7 Select an itemMemory StatusShow memory informationSort Change display order of files >Select an orderListing Change list view [Change] to toggle views](https://usermanual.wiki/Panasonic-Connect/210030A.User-Manual-Part-2-of-6/User-Guide-1296396-Page-46.png)
![Managing Files10-1110 ■Other DocumentsItem Operation/DescriptionFile info Show file names, file sizes, etc.Attach to messageAttach files to S! Mail/PC Mail (ZFrom Step 2 on P.14-4)Copy to microSDCopy files to microSD CardEdit file name Edit file namesMove Move files to other foldersDelete this Delete a file >YESDelete all Delete all files >Enter Phone Password 7 YESMultiple-choiceSelect multiple files to use >Check files to use 7 S[Menu] 7 Select an itemMemory StatusShow memory informationSort Change display order of files >Select an orderNote Titles of mp4/3gp Ring Songs&Tones files and Videos/Music/Customized Screen files appear in respective lists. Files without titles appear with file names (created when files are saved to handset). Titles cannot be changed; edited file names may not appear in lists.Using/Editing Still ImagesEditing Still Images Edit features are not available for all file types.Main Menu 4 Data Folder 4 Pictures1 Select a folder 7 Select a file 7 S[Menu] 7 Edit picture2 S[Menu] 7 Select an item (See below)Item Operation/DescriptionMarker stamp >Select a stamp 7 to move stamp 7 [Put] Following options are available when positioning a stamp:・ To rotate or scale up/down: S[Menu] 7 Select an item・ To start over: A[Cancel] To add: A[Add]Frame >Select a frame・ To rotate 180 degrees: S[Menu] 7 180° rotation・ To change frame: ・ To return to frame list: A[Cancel]Character stamp >Enter text 7 to move text 7 [Put] To change content/color/font/size: When positioning stamp, S[Menu] 7 Operate selected item To start over: A[Cancel] after positioningNext Page](https://usermanual.wiki/Panasonic-Connect/210030A.User-Manual-Part-2-of-6/User-Guide-1296396-Page-47.png)
![Managing Files10-1210Item Operation/DescriptionFit in screen Change image size to Standby (480 x 854) >YESChange size >Select a size To start over: A[Cancel]Trim away >Specify a size 7 to specify area 7 [Set] To start over: After specifying area, A[Cancel]Retouch >Select an item To start over: A[Cancel]Rotate >90° to right, 90° to left or 180° To start over: A[Cancel]Brightness > to adjust brightnessAttach to message1 2Attach edited file to S! Mail/PC Mail >[Set] 7 Compose message (ZFrom Step 2 on P.14-4) Alternatively, A[] to attach image to a messagePost blog1 2 Post on a blog >[Set] 7 Post on a blog(ZP.8-7)Save1 Overwrite/rename to save edited files1 Available after other editing operations.2 File is automatically saved.3 [Set] 7 [Save]4 YES (Overwrite) or NO (Save as)Creating AnimationsSaving Original AnimationMain Menu 4 Data Folder 4 Pictures 4 Original Animation1 <New> 7 <1st> - <20th>2 Select a folder 7 Select a file Repeat Step 2.3 A[Finish]Functions Available in Original Animation ListIn Original Animation list, press S[Menu] for following operations.Item Operation/DescriptionEdit title >Enter titleOrg. animation Add more files to an Original Animation (ZAbove)Display picturePlay back an Original Animation Alternatively, select an Original Animation from list to play back.Set display Set an Original Animation as Standby display, etc. >Select item to set Original Animation asPicture info View item set for Set displayRelease animationCancel a saved Original Animation >YES](https://usermanual.wiki/Panasonic-Connect/210030A.User-Manual-Part-2-of-6/User-Guide-1296396-Page-48.png)
![Managing Files10-1310Saving Still Images to Phone Book Savable sizes:・ Standby (480 x 854) or smaller in JPEG or GIF format (up to 300 Kbytes)・ VGA (640 x 480) or smaller in PNG format Save images to up to 100 Phone Book entries. Still images cannot be saved to USIM Card Phone Book entries.Main Menu 4 Data Folder 4 Pictures1 Select a folder 7 Select a file 7 S[Menu] 7 Set display 7 Phone Book2 New EntryNew 7 Enter details (7 From Step 2 on P.4-3) 7 A[Finish] Add to Existing EntryAdd 7 Select entry 7 A[Finish] 7 YESPlaying VideosPlaying Videos/PC MoviesMain Menu 4 Data Folder1 Play VideosVideos 7 Select a folder 7 Select a file Play PC MoviesPC Movies 7 microSD 7 Select a file To toggle file list views: [Change] ■Playback Operations Some operations are not available depending on files. Operation descriptions are based on Normal Position.Adjust Volume or Play Previous Starts from beginning when playback time is over three seconds.Play NextFast-rewind1Press and hold Fast-forward1Press and hold Playback Position2 repeatedlyChange Speed A[/1/ ]Mute/Resume S[/ ]Pause/Resume [ / ]Play Frame by Frame1While pausing, A[Frame] Play back frame by frame](https://usermanual.wiki/Panasonic-Connect/210030A.User-Manual-Part-2-of-6/User-Guide-1296396-Page-49.png)
![Managing Files10-1410Toggle Views Toggle: Portrait View 7 Landscape View (fit to Display size) 7 Full-size Landscape View2Toggle Remaster On/Off (ZP.9-8)Toggle Sound Effect (Listening) Modes (ZP.9-8)Toggle Equalizer Modes (ZP.9-8)1 Videos only2 May be unavailable depending on image size.Playing Videos Recorded on HDD RecorderTransfer programs recorded on HDD recorder to microSD Card via USB cable (not included) for playback on handset. Set USB Mode to microSD Mode before connecting handset to HDD recorder (ZP.11-17). For details about transferring videos, see HDD recorder manuals. Use Earphone Microphone for stereo sound. Use a Bluetooth® device for wireless audio output (ZP.11-10).Main Menu 4 Data Folder 4 Videos 4 BD/DVD Recorder1 Select a file ■Functions Available in Video Window Some functions may be unavailable depending on the file type. Operation descriptions are based on Portrait View.Adjust Volume or Play Previous Chapter When three seconds into the chapter, playback returns to beginning of current chapter.Play Next ChapterSkip (Forward) While playing/pausing, press and hold Skip about 30 seconds forward.Skip (Rewind) While playing/pausing, press and hold Skip about 10 seconds backward.Fast-rewind To play back: [ ] Play back at normal speed during 10x fast-forward. Play back at 10x speed during 30x fast-forward.Fast-forward To play back: [ ] Play back at normal speed during 10x fast-rewind. Play back at 10x speed during 30x fast-rewind.Playback Position repeatedlyChange Speed A[/1/ ]Mute/Resume S[/ ]Pause/Resume [ / ]Play Frame by FrameWhile pausing, A[Frame] Play back frame by frame](https://usermanual.wiki/Panasonic-Connect/210030A.User-Manual-Part-2-of-6/User-Guide-1296396-Page-50.png)
![Managing Files10-1510Toggle Views Toggle: Portrait View 7 Landscape View (fit to Display size) 7 Full-size Landscape ViewToggle Remaster On/Off (ZP.9-8)Toggle Sound Effect (Listening) Modes (ZP.9-8)Toggle Equalizer Modes (ZP.9-8)File Playback Functions ■Play Back from a Resume PositionResume playback (videos/PC Movies) from a saved position. >Main Menu 4 Data Folder 4 Videos or PC Movies 4 Position Memory 4 Select an item Save a resume position: ZRight Marker to resume is a resume position automatically saved when a call arrives, alarm goes off, battery runs low, or playback is terminated. ■Play Back from Play History (PC Movies Only) >Main Menu 4 Data folder 4 PC Movies 4 Play History 4 Select a record ■Functions Available in Video/PC Movie Playback Window Some operations are not available depending on files. >While playback is paused, S[Menu] 7 Select an item (See below)Item Operation/DescriptionNormal play1Play at normal speedSlow1Play at slow speedQuick View (1.25x)1Play 1.25 times faster than normalQuick View(2x)1Play at double speedFast2ForwardRewind2RewindStop Return to Videos/PC Movies List windowPosition to playStart playback from specified point > to highlight a play point 7 [Set]Connect to Website1Open site link >YESSound effectRemaster, Listening or Equalizer (ZP.9-8)Contents info2Show title, file name, etc.Position memorySave resume position >Select a resume position To play back from a saved position: ZLeftMail/blog1Attach file to a message to send or post on a blog >Select an item・ Attach to message (ZFrom Step 2 on P.14-4)・ Post blog (ZStep 1 on P.8-7)](https://usermanual.wiki/Panasonic-Connect/210030A.User-Manual-Part-2-of-6/User-Guide-1296396-Page-51.png)
![Managing Files10-1610Item Operation/DescriptionRegister (Ringtones)1Set as ringtone >Ringtones 7 Select a type ★ appears for item set as ringtone.Register (Stand-by Display/Start-up Window)1Save a file as Standby Display or Start-up Window >Select an item 7 YESVideo info1Show title, file name, etc.Send Ir data1Send file via Infrared (ZP.11-3)IC transmission1Send file via IC transmission (ZP.11-5)Add shortcut icon1Create a shortcut (ZP.1-25)Description2Show file information >The words view or Description viewCopy URL2Copy URLDisplay size Select a display size >Actual size or Fit in displayChange to full1Toggle: Portrait View 7 Landscape View (fit to Display size) 7 Full-size Landscape View3 To toggle views: 1 Video files only2 PC movie files only3 May be unavailable depending on image size.Managing Folders/FilesManaging FoldersThe following operations are available in Pictures, Music, Books, Videos, Ring Songs&Tones and Other Documents.Main Menu 4 Data Folder1 Select a folder 7 S[Menu] 7 Select an item (See below)Item Operation/DescriptionAdd folder Create user foldersEdit folder nameEdit user folder namesDelete folder Delete a user folder >Enter Phone Password 7 YES 7 YESFolder security1Hide files in folder unless Phone Password is entered >Enter Phone Password 7 YES appears for folder. To cancel: Repeat the stepDelete all image2 >Enter Phone Password 7 YES 7 YESEdit Play List3Edit Play ListsRelease Play List3Cancel edited Play Lists >YES](https://usermanual.wiki/Panasonic-Connect/210030A.User-Manual-Part-2-of-6/User-Guide-1296396-Page-52.png)
![Managing Files10-1710Item Operation/DescriptionSelect storage4Specify folders on microSD Card to save files to >YES Folders cannot be specified when saving Books files.Memory Status5View memory capacity/number of saved files1 Pictures/Videos folders only2 Pictures folder only3 Play List folder in Ring Songs&Tones folder only4 microSD Card only5 Music folder onlyUsing Play ListUse Play List to organize Data Folder Ring Songs&Tones/Videos files.Select Ring Songs&Tones, Music or Videos folder files to create Play List links to each file in its original folder.Creating Ring Songs&Tones Play ListsMain Menu 4 Data Folder 4 Ring Songs&Tones1 Highlight Play List 7 S[Menu] 7 Edit Play List2 Select a number 7 Select a folder 7 Select a file Repeat Step 2.3 A[Finish] ■Play Back Play List >Main Menu 4 Data Folder 4 Ring Songs&Tones 4 Play List Files are played back in the saved order. ■Delete a File >After Step 1, select a file 7 Release this ■Delete All Files >In Step 1, S[Menu] 7 Release Play List 7 YESNote mp4/3gp files cannot be added to Play List except in Music Player Play List.](https://usermanual.wiki/Panasonic-Connect/210030A.User-Manual-Part-2-of-6/User-Guide-1296396-Page-53.png)
![Managing Files10-1810Creating Video Play ListsMain Menu 4 Data Folder 4 Videos 4 Play List1 Select a Play List2 Select a number 7 Select a folder 7 Select a file Repeat Step 2.3 A[Finish] ■Play Back Play Lists >Main Menu 4 Data Folder 4 Videos 4 Play List 4 Highlight a Play List 7 A[Play] Files are played back in the saved order. ■Delete Files >After Step 1, (highlight a file 7) S[Menu] 7 Delete this or DEL all from list 7 YES ■Change Order >After Step 1, S[Menu] 7 Oder to play 7 Select a file 7 Select a target 7 A[Finish] 7 A[Finish]microSD Card 942P is compatible with up to 2 GB commercial microSD Cards and up to 16 GB commercial microSDHC Cards (as of December 2009). For information on memory card compatibility, visit the website below (Japanese). Note that microSD Cards not listed on the website may not function properly.・ From Yahoo! Keitai P-egg (as of December 2009) Main Menu 4 Yahoo! 4 Bookmarks 4 Panasonic Site (P-egg)・ From PC http://panasonic.jp/mobile/ Not all operations are guaranteed by the microSD/microSDHC Cards listed. Format new microSD/microSDHC Cards for use with handset (ZP.10-20).Note SoftBank is not liable for damages from accidental loss/alteration of microSD Card information. Keep a copy of Phone Book entries, etc. in a separate place. microSD Card has no write protect feature; there is a risk of accidental erasure/overwriting of files.](https://usermanual.wiki/Panasonic-Connect/210030A.User-Manual-Part-2-of-6/User-Guide-1296396-Page-54.png)
![Managing Files10-2010Format microSD Card Formatting microSD Card deletes all saved files/data.Main Menu 4 Tools 4 microSD Backup1 S[Menu] 7 microSD format2 Enter Phone Password 7 YESNote Do not turn handset power off or remove microSD Card or battery while formatting; may damage handset or microSD Card. microSD Cards formatted on other devices may not be used. Format microSD Card on 942P before use. Handset cannot format incompatible microSD Cards. If format fails, turn power off and remove microSD Card from handset. Reinsert microSD Card and format it again.Viewing microSD Card FilesView Phone Book entries, Calendar events, Tasks, mail messages, Notepads and Bookmarks backed up on microSD Card.Main Menu 4 Tools 4 microSD Backup1 Select a category2 Select a fileBackup date appears as file name.3 Select a dataNote If messages on microSD Card do not appear correctly, copy messages to handset (ZP.10-21) and execute Charset Conversion (ZP.14-23).Category ListFile ListDetailed DataData List](https://usermanual.wiki/Panasonic-Connect/210030A.User-Manual-Part-2-of-6/User-Guide-1296396-Page-56.png)
![Managing Files10-2110Handset Data BackupBack up handset data (Phone Book, Calendar, Tasks, Messages, Notepad, Bookmarks, Content Keys) to microSD Card; restore handset data after accidental loss/alteration. Back up Content Key: ZP.10-24Backing up to microSD CardMain Menu 4 Tools 4 microSD Backup1 Highlight a category 7 S[Menu] 7Copy to microSD (7 For Bookmarks, select an item)2 Enter Phone Password 7 YESAll files of selected category are backed up to microSD Card. ■One File Backup >Open a file 7 S[Menu] 7 Copy to microSD 7 YESRestoring from microSD CardMain Menu 4 Tools 4 microSD Backup1 Select a category2 Restore One ItemSelect a file 7 Highlight an item 7 S[Menu] 7 Add to phone Restore One FileHighlight a file 7 S[Menu] 7 Add to phone or Overwrite to phone 7 Enter Phone Password Restore All FilesS[Menu] 7 Add all to phone or Overwr. all to ph. 7 Enter Phone Password3 YESNote Note that Overwrite to phone or Overwr. all to ph. erases all filesof same category on handset. Video files of 100 MB or larger cannot be moved from microSD to handset. Files of 10 MB or larger except for Videos/Books files (BMO files) cannot be moved/copied from microSD to handset. Data backed up in other SoftBank handsets may not be restored in 942P depending on type and size.Tip ●Delete Items from microSD Card ●View microSD Card Memory Capacity (ZP.10-23)](https://usermanual.wiki/Panasonic-Connect/210030A.User-Manual-Part-2-of-6/User-Guide-1296396-Page-57.png)
![Managing Files10-2310Using Data on microSD CardWith a microSD Card inserted, connect handset with a PC via USB cable (not included) to read/write data from/onto microSD Card. Following equipment is required: Connector Cable: USB cable PC: PC with USB port (Universal Serial Bus Specification Rev 1.1/2.0 compliant) Compatible Operating Systems: Windows® XP, Windows Vista® (Japanese version in each)Main Menu 4 Settings 4 Connectivity 4 USB Mode 4 microSD Mode1 Connect handset to PC via USB cable while handset is on PC recognizes microSD Card. appears in Standby (handset).Note Even if incoming call arrives, reading/writing data continues during calls. After calls, check indicators on PC to see if reading/writing is complete. File names saved in microSD Card may not properly appear if changed on PC.microSD Card Functions ■Restore microSD Card items (Check microSD)Use Check microSD to repair microSD Card data errors. >Main Menu 4 Tools 4 microSD Backup 4 S[Menu] 4 Check microSD 4 YES Do not turn handset power off or remove microSD Card or battery while formatting; may damage handset or microSD Card. It may take 30 seconds or longer to complete Check microSD depending on data volume on microSD Card. Handset cannot check incompatible or unformatted microSD Cards. Handset may delete files and folders that fail to be restored. ■Delete Items from microSD Card >Main Menu 4 Tools 4 microSD Backup 4 Select a category 4 (Highlight a file 7) S[Menu] 4 Delete this or Delete all (4 For Delete all, enter Phone Password) 4 YES Content Key cannot be deleted. ■View microSD Card Memory Capacity >Main Menu 4 Tools 4 microSD Backup 4 S[Menu] 4 microSD info](https://usermanual.wiki/Panasonic-Connect/210030A.User-Manual-Part-2-of-6/User-Guide-1296396-Page-59.png)
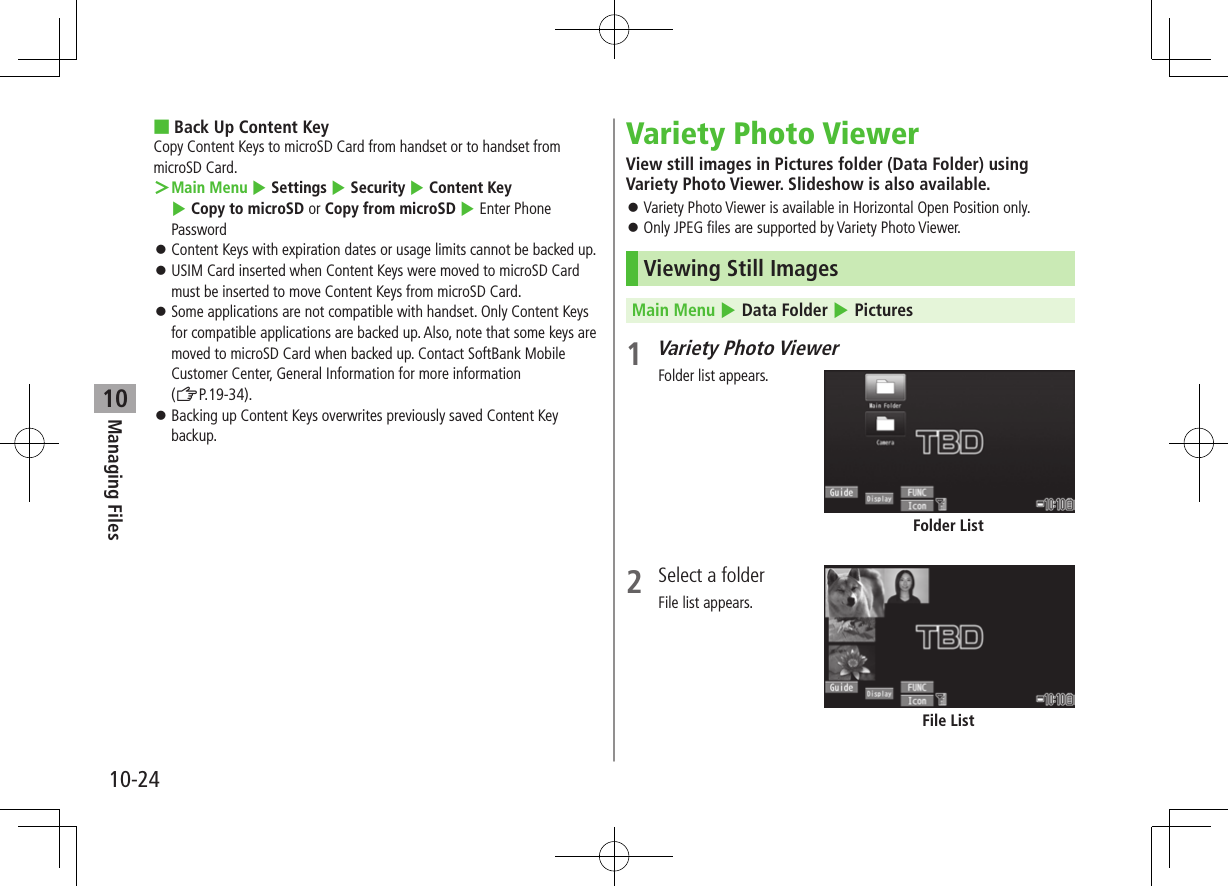
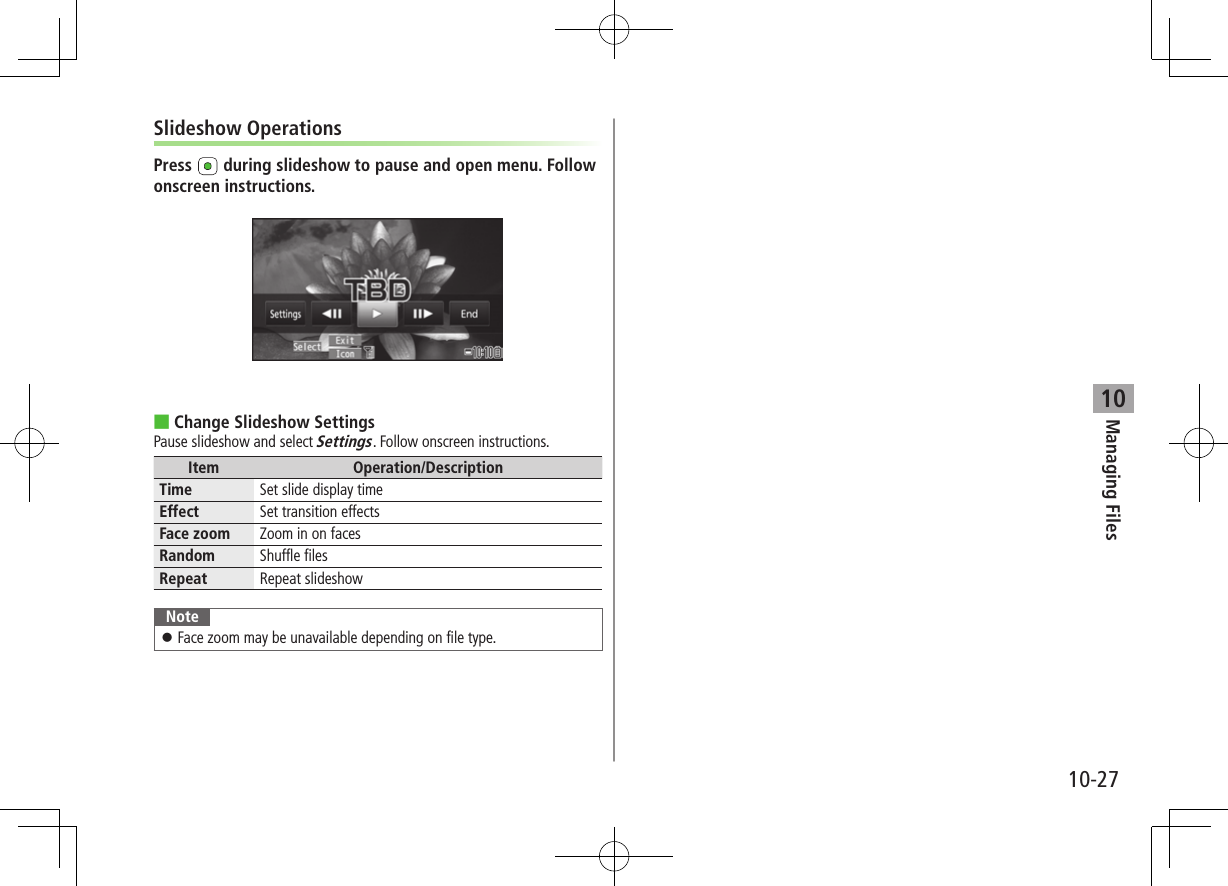
![Managing Files10-25103 Select a fileFile image appears. To zoom in/out: [Zoom]/[Return] To view previous/next file: (For Touchpad operations, slide from left to right for previous file or right to left for next file) ■Operation Guide >S[Guide] ■Toggle Icons On/Off >[Icon]Note Copy protected files are not viewable. Connect handset to a TV (ZP.11-18) and view images using Variety Photo Viewer.Image WindowAvailable Operations ■From Folder/List WindowIn folder/file list window, press [FUNC] for following operations. Follow onscreen instructions.Item Operation/DescriptionSlideshow Start slideshow (ZP.10-26)Kisekae* Change theme for folder list* Folder list window only ■From Image WindowIn Image Window, press [FUNC] for following operations. Follow onscreen instructions.Item Operation/DescriptionSlideshow Start slideshow (ZP.10-26)Zoom Enlarge to 200%Rotate Each press rotates image 90° clockwiseAttach to S! MailSend file via S! Mail (ZFrom Step 2 on P.14-4)Post blog Post file to a blog (ZP.8-7)Effect Set slideshow effectsDelete Delete fileNote Some files may not appear right side up when posted to a blog. ■Face ZoomFace Zoom is available when a face is detected. >In Image Window, A[FaceZoom] When more than one face is detected, each press zooms in on another face.](https://usermanual.wiki/Panasonic-Connect/210030A.User-Manual-Part-2-of-6/User-Guide-1296396-Page-61.png)
![Managing Files10-2610Touchpad OperationsUse Touchpad operations in Variety Photo Viewer. Touchpad: ZP.1-23 ■Scroll Page/Screen Slide left/right to scroll files in File List. Slide left/right to scroll images in Image Window. ■ZoomSlide up/down to zoom in/out from Image Window.SlideshowView files in succession.Main Menu 4 Data Folder 4 Pictures 4 Variety Photo Viewer1 View All Images[FUNC] 7 Slideshow View Selected FolderSelect a folder 7 [FUNC] 7 SlideshowSlideshow starts.Note Press and hold in Standby from Horizontal Open Position to show files in all folders.](https://usermanual.wiki/Panasonic-Connect/210030A.User-Manual-Part-2-of-6/User-Guide-1296396-Page-62.png)
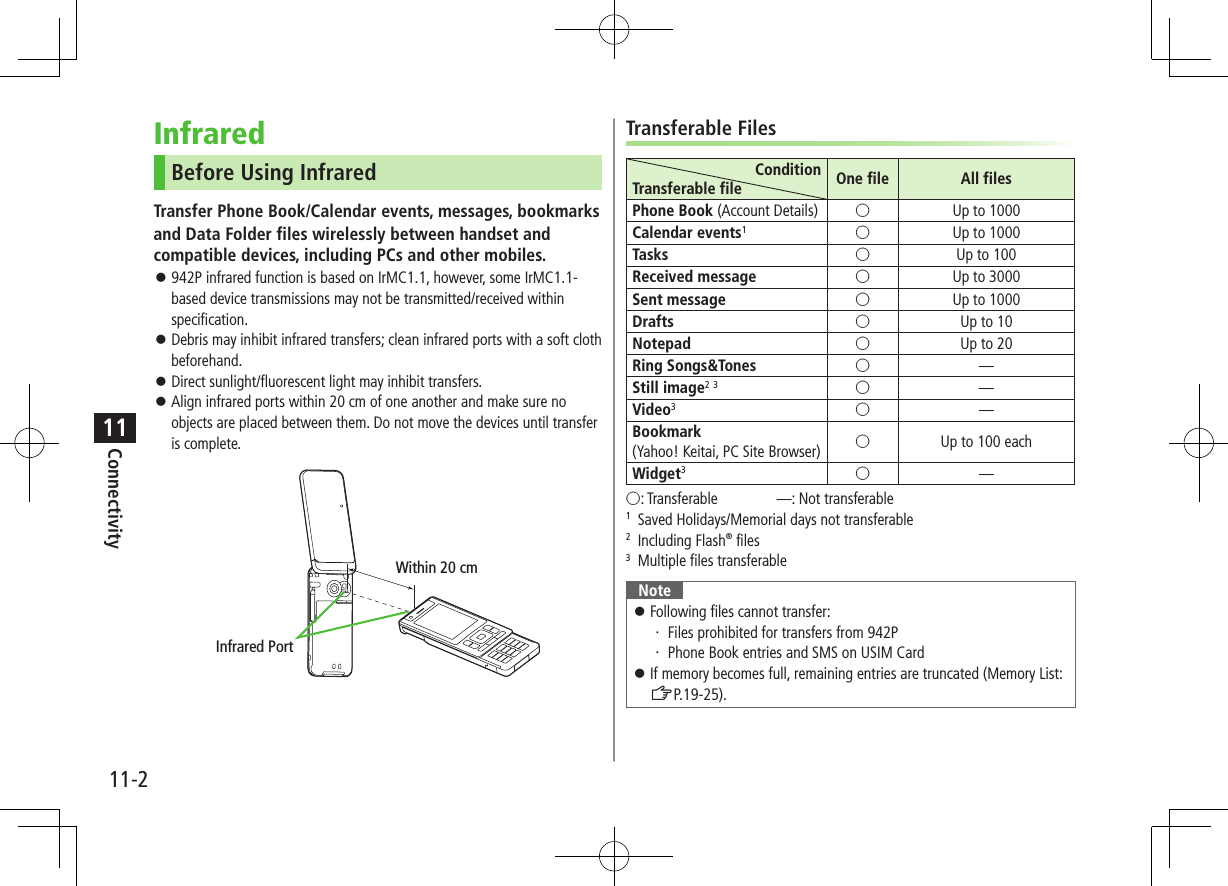
![Connectivity11-311One/Multiple File Transfer Transferable Files: ZP.11-2Sending1 Highlight a file, and follow the steps belowFiles to Send Operation/DescriptionPhone Book >S[Menu] 7 Send Ir data 7 Send phonebookAccount Details >[Ir]Messages >S[Menu] 7 Send Ir data 7 Send ThisBookmarks >S[Menu] 7 Send to ExtrnlDvcs 7 Send Ir data 7 Send ThisStill Images/ Videos/Widgets >S[Menu] 7 Send Ir data To send multiple files: S[Menu] 7 Multiple-choice 7 Select files to send 7 S[Menu] 7 Send Ir data Other Files >S[Menu] 7 Send Ir data2 YESReceivingMain Menu 4 Tools 4 Receive via Infrared 4 Receive1 When a file is received, YESSend files from sender side within 30 seconds. To receive subsequent files, select YES.All File TransfersPrecaution Receiving all files overwrites all saved files including secret/protected files. Sending all Phone Book entries transfers Account Details as well. User-saved Account Details is overwritten on receiving handset (handset number remains). Session NumberSession number (4 digits) is required for all file transfers via Infrared and IC transmission. Sender and recipient must enter same Session number to complete transfers.Sending1 Highlight a file, and follow the steps belowFiles to Send Operation/DescriptionPhone Book S[Menu] 7 Send Ir data 7 Send all phonebookMessages S[Menu] 7 Send Ir data 7 Send AllBookmarks S[Menu] 7 Send to ExtrnlDvcs 7 Send Ir data 7 Send AllOther Files S[Menu] 7 Send all Ir data2 Enter Phone Password 7 Enter Session number 7 YESRecipient must enter the same Session number to start transfers.](https://usermanual.wiki/Panasonic-Connect/210030A.User-Manual-Part-2-of-6/User-Guide-1296396-Page-67.png)
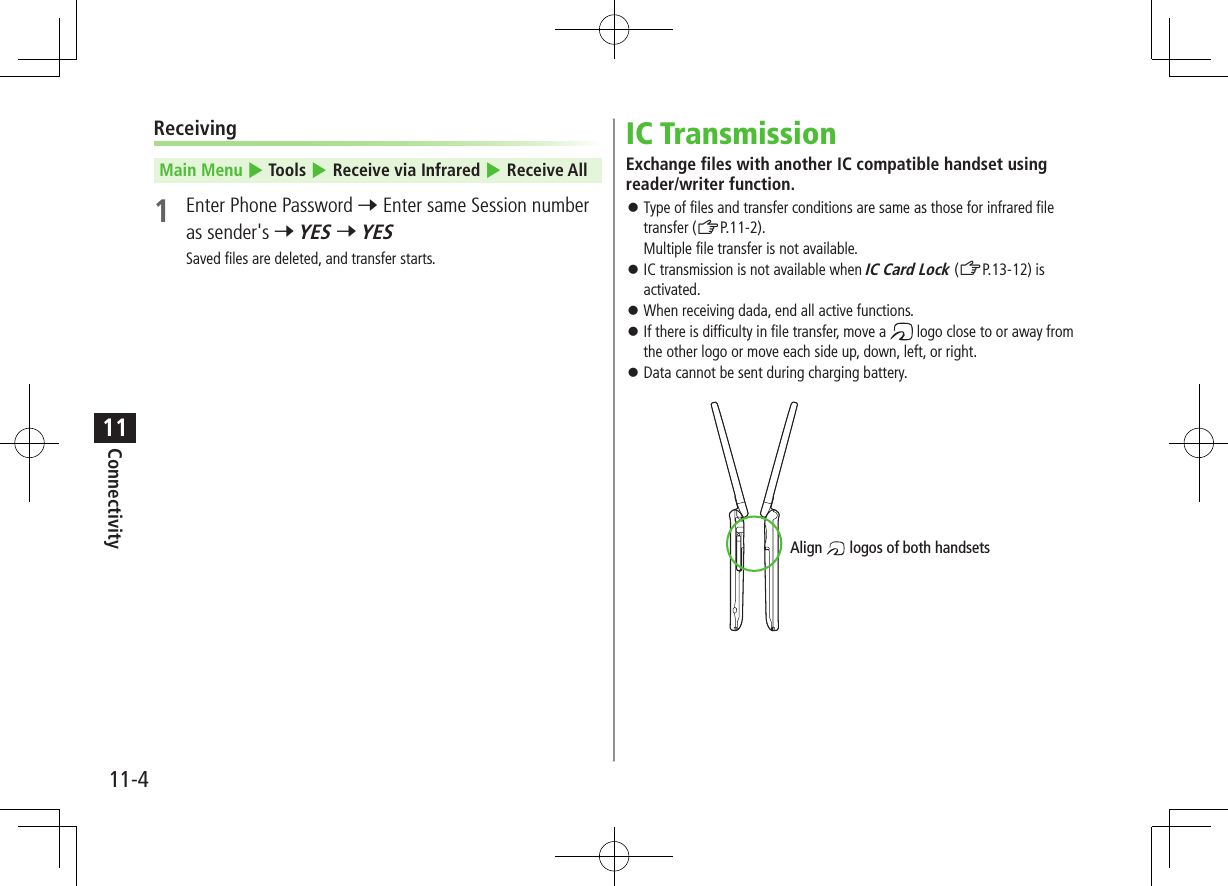
![Connectivity11-511One File TransferBefore Receiving a File Receive IC Datum is set to ON by default. When Receive IC Datum is OFF, One File Transfer is unavailable. To set Receive IC Datum on:Main Menu 4 Tools or S! Appli 4 Osaifu-Keitai 4 IC Card Settings 4 Receive IC Datum 4 ON or OFFSending1 Highlight a file, and follow the steps belowFiles to Send Operation/DescriptionPhone Book >S[Menu] 7 IC transmission 7 Send phonebookAccount Details >[ICtrans]Messages >S[Menu] 7 IC Transmission 7 Send ThisBookmarks >S[Menu] 7 Send to ExtrnlDvcs 7 IC transmission 7 Send ThisOther Files >S[Menu] 7 IC transmission2 YESReceiving1 Align logo on sender side with 942P (recipient) 7 YESAll File Transfers Precautions/Session number (ZP.11-3)Sending1 Highlight a file, and follow the steps belowFiles to Send Operation/DescriptionPhone Book >S[Menu] 7 IC transmission 7 Send all phonebookMessages >S[Menu] 7 IC Transmission 7 Send AllBookmarks >S[Menu] 7 Send to ExtrnlDvcs 7 IC transmission 7 Send AllOther Files >S[Menu] 7 AllIC transmission2 Enter Phone Password 7 Enter Session number 7 YESRecipient must enter the same Session number to start transfers.Receiving1 Align logo on sender side with 942P (recipient)2 YES 7 Enter Phone Password 7 Enter same Session number as sender'sSaved files are deleted. Transfer starts.](https://usermanual.wiki/Panasonic-Connect/210030A.User-Manual-Part-2-of-6/User-Guide-1296396-Page-69.png)
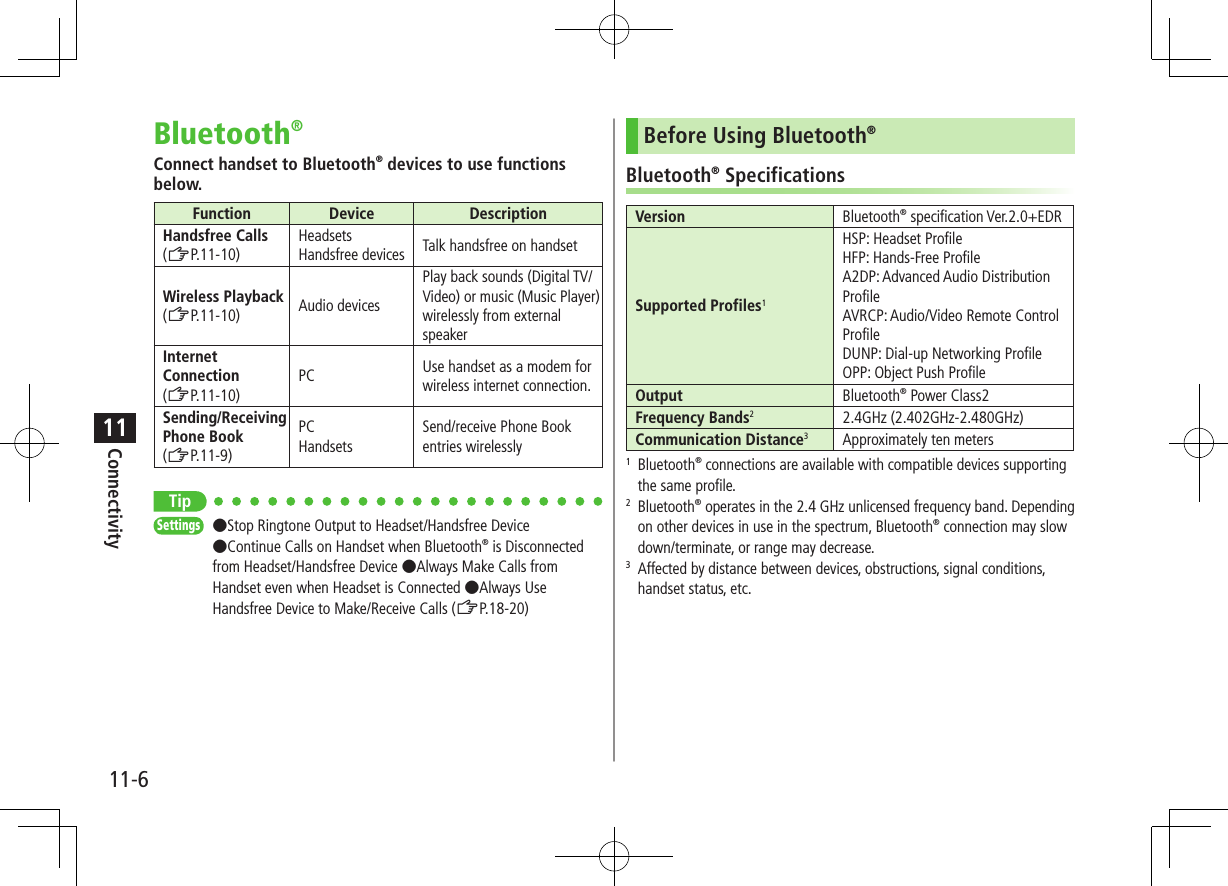
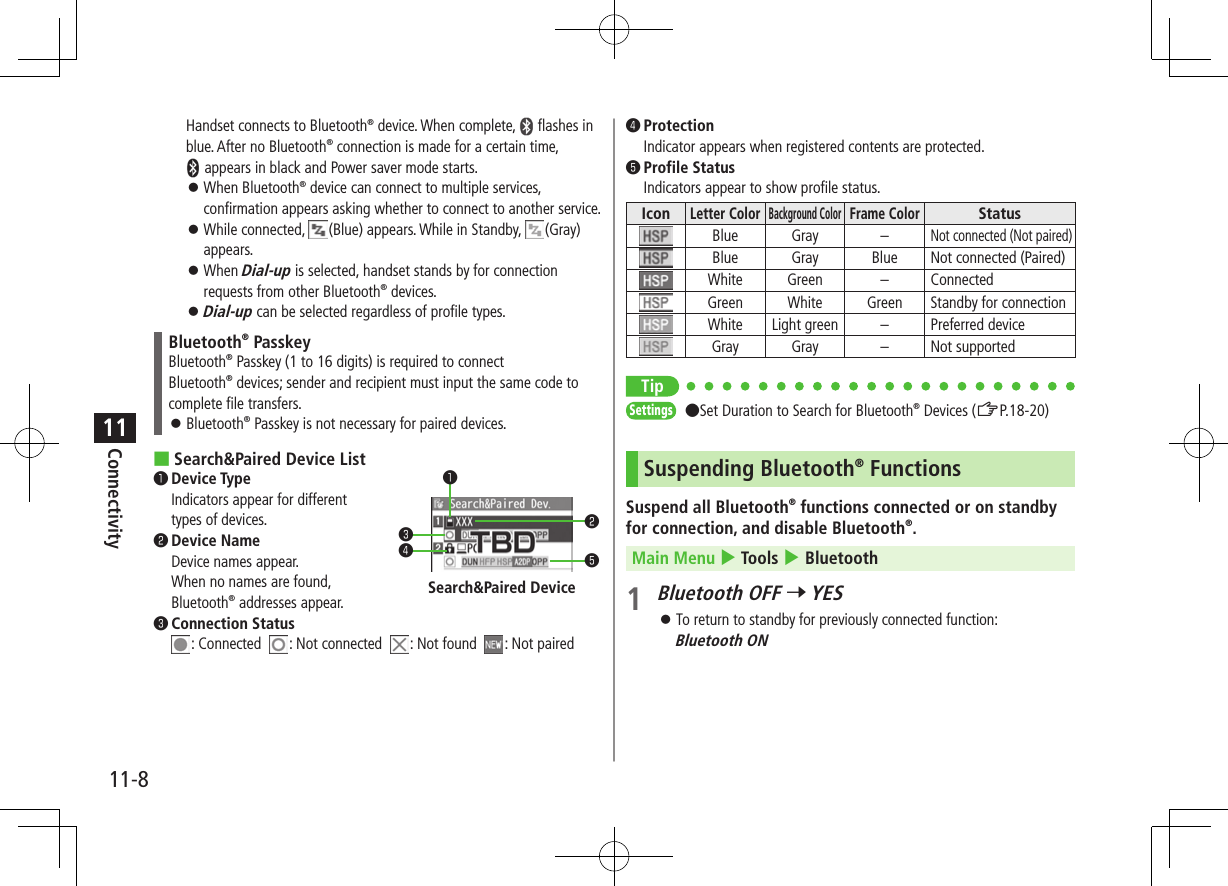
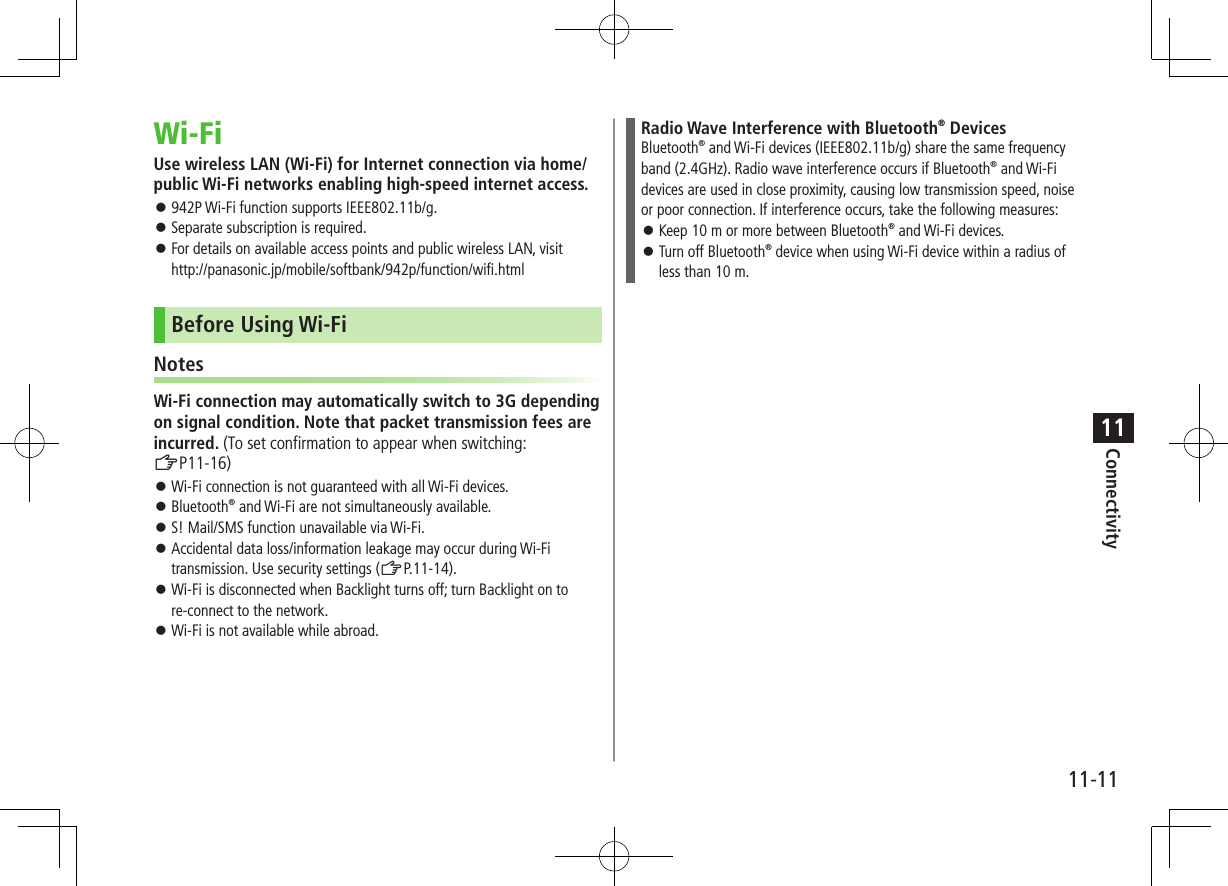
![Connectivity11-711Notes Bluetooth® connection is not guaranteed with all Bluetooth® devices. Establish connections with certified Bluetooth® devices that meet the specification standards developed by Bluetooth® SIG. Due to the unique characteristics/specifications of a certified Bluetooth® device, connections or transfers may fail; procedures, displayed results or operations may vary from those described in the manual. When data transfer is interrupted, it may take some time for process to complete. Noise may interfere with wireless or handsfree conversations depending on the status of connected devices or signal conditions. For details about headset/handsfree devices, see the device manuals. Bluetooth® and Wi-Fi are not simultaneously available.Radio Wave Interference with Wi-Fi DevicesBluetooth® and Wi-Fi devices (IEEE802.11b/g) share the same frequency band (2.4GHz). Use of both devices in close proximity may cause interference, affecting transmission speed, clarity or connection quality. If interference occurs: Maintain at least 10 m between Bluetooth® and Wi-Fi devices. Turn off Wi-Fi device when using Bluetooth® device within a 10 m radius.Using Bluetooth®Pair Bluetooth® devices with handset beforehand to establish connections for different Bluetooth® functions.Searching & Pairing DevicesSearch other Bluetooth® devices. Paired devices appear in Search&Paired Device list. Bluetooth® Passkey is not necessary for paired devices. Search up to 20 Bluetooth® devices at one time; pair with up to ten Bluetooth® devices. Place Bluetooth® devices on standby for connection.Main Menu 4 Tools 4 Bluetooth 4 Search&Paired Device1 YES*Device search starts and names of found devices appear. To search again: A[Search]* If there are already paired devices in list, select a device 7 Select a function2 Select a device 7 YES 7 Enter Phone Password3 Select text entry field 7 Enter Bluetooth® Passkey 4 Select a Bluetooth® function Next Page](https://usermanual.wiki/Panasonic-Connect/210030A.User-Manual-Part-2-of-6/User-Guide-1296396-Page-71.png)
![Connectivity11-911Placing Bluetooth® Devices on Standby for ConnectionMain Menu 4 Tools 4 Bluetooth 4 Accept Registered1 Check functions to be on standby for connection 7 A[Finish] To uncheck, select functions to remove check marks.Sending/Receiving Phone BookSending1 Open Phone Book 7 S[Menu] 7 Send to Bluetooth2 One File TransferSend phonebook 7 Select a recipient device All File TransferSend all phonebook 7 Select a recipient device 7 Enter Phone Password3 YESReceivingMain Menu 4 Tools 4 Bluetooth 4 Receive via Bluetooth1 One File TransferReceive 7 YES All File TransferReceive All 7 Enter Phone Password 7 YES 7 YES If memory becomes full, remaining entries are truncated (Memory List: ZP.19-25).TipSettings ●Set Authentication/Encryption to Send Phone Book Entries ●Enter Password when Sending All Phone Book Entries (ZP.18-20)](https://usermanual.wiki/Panasonic-Connect/210030A.User-Manual-Part-2-of-6/User-Guide-1296396-Page-73.png)
![Connectivity11-1011Bluetooth® FunctionsFrom Main Menu 4 Tools 4 Bluetooth ■Functions Available in Search&Paired Device Window >Search&Paired Device 7 S[Menu] 7 Select an item (See below)Item Operation/DescriptionRegister devices >Enter Phone Password 7 Pair devices (ZFrom Step 3 on P.11-7)Preferred deviceSet a preferred Bluetooth® device for incoming calls Available only for headset function compatible Bluetooth® devices. To cancel, perform same operation.Protect/releaseProtect/cancel devices. Protection prevents devices from being deleted or overwrittenChange device name >Enter a device nameDelete >YESDescription Show device name, Bluetooth® address, device class and supported profileAdd shortcut iconCreate shortcuts (ZP.1-25) ■Use Bluetooth® Headsets for Calls >Search&Paired Device 7 Select a device 7 Headset or Hands-free 7 YES 7 Make/receive a call using Bluetooth® device ■Use Bluetooth® Device for Listening to Music >Search&Paired Device 7 Select a device 7 Audio 7 Watch Digital TV or play back videos or music Digital TV/Video sounds are played only by A2DP profile compatible Bluetooth® devices compliant with SCMS-T copyright protection standard. ■Use Handset as Modem for Internet Access from PCs >Search&Paired Device 7 Select a device 7 Dial-up Handset waits for dial-up connection. Refer to a manual for Bluetooth® device for details.Download utility software (942P) "Modem Wizard" from website below to PC and install software. http://panasonic.jp/mobile/support/download/942p/index.html To establish a dial-up connection, see Help on "Modem Wizard." Connecting handset to a PC or PDA for Internet access may incur high packet transmission charges. ■Place Bluetooth® Device on Standby for Dial-up >Dialup Rgstry Standby 7 Enter Phone Password 7 YES 7 Select Bluetooth® Passkey text box 7 Enter Bluetooth® Passkey](https://usermanual.wiki/Panasonic-Connect/210030A.User-Manual-Part-2-of-6/User-Guide-1296396-Page-74.png)
![Connectivity11-1311Access Point SearchMain Menu 4 Tools 4 Wi-Fi 4 Profile Lists/Settings1 S[Menu] 7 New Profile 7 Search&SettingSelect YES when prompted to turn Wi-Fi ON. List of available access points appears. To search again: A[Search]2 Select an access point3 [Store] 7 YESHandset registers access point.4 [CNCT] 7 YESHandset connects to access point. ■Access Point List❶Access Point Name Detected SSID (ESSID) appears. Access point name appears for a registered access point.❷Registered Networks : Registered (not connected) : Registered (connected)❸Signal Strength Signal status appears.❹Security Status Security status appears.❶❷❸❹Wi-Fi Status Indicators Wi-Fi ON (out of range)* Wi-Fi ON (within range)* During Wi-Fi transmission* Number of blue arches indicates signal strength.Access Point List](https://usermanual.wiki/Panasonic-Connect/210030A.User-Manual-Part-2-of-6/User-Guide-1296396-Page-77.png)
![Connectivity11-1411Manual Registration/ConnectionCheck respective access point information (SSID, security/encryption type, encryption key) in advance. For details on access point devices, refer to respective manuals.Main Menu 4 Tools 4 Wi-Fi 4 Profile Lists/Settings1 S[Menu] 7 New Profile 7 Manual Setting2 Highlight an item (See below) 7 A[Edit]Item Operation/DescriptionProfile Name >Enter an access point nameSSID >Enter the same SSID (ESSID) as access pointIP Setting Set IP address and DNS server >IP Address Setting or DNS Server Setting 7 A[Edit] 7 Automatically or Manually (7 For Manually, edit respective items)Security SettingSet security/encryption method according to access point >Select a security type・ WEP 7 Enter WEP key 7 Select an encryption type 7 Enter encryption key・ WPA/WPA2-PSK or WPA2-PSK 7 Select an encryption type 7 Select an encryption method 7 Enter encryption key To cancel security setting: NonPublic W-Fi SettingSet public wireless LAN on/off >ON or OFF (7 For ON, select ID or Password 7 A[Edit] 7 Enter ID or password) Connection with all public wireless LAN services is not guaranteed.3 [Store] 7 YESHandset registers access point.4 [CNCT] 7 YESHandset connects to access point.](https://usermanual.wiki/Panasonic-Connect/210030A.User-Manual-Part-2-of-6/User-Guide-1296396-Page-78.png)
![Connectivity11-1511Registration/Connection Using AOSSTM For details on access point device operations, refer to access point device manual.Main Menu 4 Tools 4 Wi-Fi 4 Profile Lists/Settings1 [AOSS] Select YES to register/connect to an access point after disconnecting from registered access point.2 Press AOSS button at access pointPress within 120 seconds.Confirmation appears when setting is complete.3 [Store] 7 YESHandset registers access point.4 [CNCT] 7 YESHandset connects to access point.Functions Available for Wi-Fi ■Functions Available in Profile List/Setting Window >Main Menu 4 Tools 4 Wi-Fi 4 Profile Lists/Settings 4 S[Menu] 4 Select an item (See below)Item Operation/DescriptionConnect Connect to a registered access point >YESChange PriorityChange priority for registered access points >Select an access point 7 to move to target 7 7 A[Finish]New Profile >Select an item・ AOSS (ZFrom Step 2 (Left))・ Search&Setting (ZFrom Step 2 on P.11-13)・ Manual Setting (ZFrom Step 2 on P.11-14)New BB mobilepointEnter user ID/password to register BB mobilepoint >Select an item 7 A[Edit] 7 Enter user ID/password 7 [Store]Edit >Edit itemsCopy Copy registered access pointDelete >Select an item・ Delete this 7 YES・ Delete selected 7 Check access points 7 A[Finish]・ Delete all 7 Enter Phone Password 7 YES ■View Connection Status >Main Menu 4 Tools 4 Wi-Fi 4 Connection Status To update status: A[Update]](https://usermanual.wiki/Panasonic-Connect/210030A.User-Manual-Part-2-of-6/User-Guide-1296396-Page-79.png)
![12-10Handset Security12Secret Mode/Secret Data Only<Default> DeactivatePhone Book entries and calendar events saved as secret data appear only when Secret Mode/Secret Data Only is active. Set Phone Book or Calendar events as secret data (Phone Book: ZP.4-7, 4-8 / Calendar events: ZP.13-5)Main Menu 4 Settings 4 Security1 Select an item (See below)Item Operation/DescriptionSecret Mode View all data including secret data While set, appears in Standby.Secret Data OnlyView only secret data While set, flashes in Standby.2 Enter Phone PasswordFor Secret Data Only, number of saved secret data appears. ■Cancel Secret Mode/Secret Data Only >In Standby, L or follow Step 1 above disappears. When widgets are shown, L to hide and press L again. ■Cancel Secret Mode/Secret Setting >In Phone Book/Calendar event window, S[Menu] 7 Release secretNote Select whether to save data edited/saved in Secret Mode as secret data. Data saved/edited in Secret Data Only are saved as secret data. Turn off handset to cancel secret setting.only TipSettings ●Disable Learning for Secret Mode/Secret Data Only (ZP.18-11)](https://usermanual.wiki/Panasonic-Connect/210030A.User-Manual-Part-2-of-6/User-Guide-1296396-Page-92.png)
![Handset Security12-1112Setting Secret Mail<Default> ONHide messages to/from secret Phone Book entries. Even if Secret Mail Display is set to OFF, secret mail appears when Secret Mode/Secret Data Only is active.1 A 7 Settings2 Universal Settings 7 Secret Mail Display3 Enter Phone Password4 OFFNote When both Spam Filter and Secret Mail Display are set, messages from Phone Book entries saved as secret mode are sorted into Spam Folder (Safe List: ZP.14-18).Mail SecuritySet handset to require Phone Password for opening mail boxes or operating Server Mail. appears for set mail boxes and Server Mail box.1 A 7 Settings2 Universal Settings 7 Mail Security3 Enter Phone Password 7 Check items 7 A[Finish] ■Set/Cancel Mail Security by Folder (Incoming Mail or Sent/Unsent) >A 7 Incoming Mail or Sent/Unsent 7 Highlight a folder 7 S[Menu] 7 Mail Security 7 Enter Phone Password appears for set folders.](https://usermanual.wiki/Panasonic-Connect/210030A.User-Manual-Part-2-of-6/User-Guide-1296396-Page-93.png)
![12-12Handset Security12Call RestrictionsReject/accept/forward calls from specified phone numbers, or restrict calling unspecified phone numbers.1 7 Search Phone Book2 Select an entry 7 S[Menu] 7 Restrictions3 Enter Phone Password4 Select an item (See below)Item Operation/DescriptionRestrict DialingAllow calls only to specified numbersCall Rejection Reject specified numbersCall AcceptanceAccept from specified numbers onlyCall ForwardingAutomatically forward specified numbers Set destination numbers (Call Forwarding: ZP.2-17) To cancel, repeat operation. ■View/Cancel Phone Book Restrictions > Main Menu 4 Phone 4 Restrictions 4 Enter Phone Password 4 Select an item* 4 Select a Phone Book entry 4 Select a number 4 YES* ★ appears for set item. Highlight an item, S[Menu] 7 Release Settings 7 YES to cancel restriction on all specified numbers.Note Missed call indicator appears in Standby for calls from rejected numbers.Delaying Ringtone<Default> OFFDelay ringtone/vibration for Voice/Video Calls from unknown numbers.Main Menu 4 Settings 4 Incoming Settings 4 Ring Time Settings 4 Ring Starting Time1 ON 7 Enter start time ■Hide Missed Call Records (Disconnected during Ringtone Delay) >Main Menu 4 Settings 4 Incoming Settings 4 Ring Time Settings 4 Missed Calls Display 4 Not Display](https://usermanual.wiki/Panasonic-Connect/210030A.User-Manual-Part-2-of-6/User-Guide-1296396-Page-94.png)
![Tools13-213CalendarView by day, week or month; set Alarms for events.Opening CalendarMain Menu 4 Tools 4 CalendarCurrent month appears. When a date with Calendar events is selected, number of AM and PM events and up to three contents appear. Press [Prev.] or [Next] to show previous/next month calendar. To switch Monthly/Weekly view: ZP.13-4Monthly ViewCreating Calendar EventsSave up to 1000 entries.Main Menu 4 Tools 4 Calendar1 to highlight a date 7 A[New] 7 Schedule2 Select an item (See below)Item Operation/DescriptionSelect icon/ Edit summary >Select an icon 7 Edit subjectEdit location >Enter locationWhole day setting >OFF or ON When ON is set, Alarm goes off at 0:00 a.m.Date (from) >Enter start date and timeDate (to) >Enter end date and timeRepeat >Select a repeat type 7 (For Select day, check days 7 A[Finish])Alarm >Select an Alarm type (7 For ON/Set time, enter time) Alarm Tone: ZP.13-6Alarm tone >Select an Alarm tone type 7 Select a folder 7 Select an Alarm toneContents >Enter event description](https://usermanual.wiki/Panasonic-Connect/210030A.User-Manual-Part-2-of-6/User-Guide-1296396-Page-98.png)
![Tools13-3133 A[Finish]Note Calendar events between 00:00 on 2000/01/01 and 23:59 on 2037/12/31 can be saved on handset. Alarm tone does not sound when Privacy Key Lock or Personal Data Lock is set. However, settings can be changed even while Personal Data Lock is set (ZP.12-6).Calendar Event IndicatorsFollowing indicators appear in Calendar Window. (Blue): Morning event (Orange): Afternoon event_ (Underscore): Event that lasts for two days or longer Following indicators appear on Display. : Alarm : Monthly : Daily : Yearly : WeeklySaving Holidays/Memorial DaysSave up to 100 entries (one entry a day) each for Holidays or Memorial days.Main Menu 4 Tools 4 Calendar1 (Highlight a date 7) A[New] 7 Holidays or Memorial days2 Select an item (See below)Item Operation/DescriptionDate setting >Enter a dateRepeat >Select a repeat type 1 time does not repeat Holidays/Memorial days events.Edit holiday/anniversary >Enter description3 A[Finish]IndicatorsHolidays appear in red.Memorial days are marked with a red circle. Following indicators appear in Calendar/Calendar Event List Window: : Holidays : Memorial days : Yearly repeat](https://usermanual.wiki/Panasonic-Connect/210030A.User-Manual-Part-2-of-6/User-Guide-1296396-Page-99.png)
![Tools13-413Viewing/Editing Calendar Event DetailsMain Menu 4 Tools 4 Calendar1 to select a date2 Select an eventDetailed schedule appears. To edit: [Edit] 7 Edit selected item (Schedule: ZFrom Step 2 on P.13-2/Holiday, Anniversary: ZFrom Step 2 on P.13-3)Calendar FunctionsFrom Main Menu 4 Tools 4 Calendar ■Functions Available in Calendar Window >Highlight a date 7 S[Menu] 7 Select an item (See below)Item Operation/DescriptionNew Create a new entry (ZP.13-2, P.13-3)Calendar Event ListCalendar Event DetailsItem Operation/DescriptionWeekly display/ 1 MonthToggle Monthly/Weekly viewIcon display Entries in category of selected icon appear >Select an iconNo. of schedulesDisplay number of saved Schedule, Holiday or Anniversary entriesAdd shortcut iconCreate a shortcut (ZP.1-25)Send all Ir data(ZP.11-3)AllIC transmission(ZP.11-5)Delete past Delete past entries/items, prior to highlighted date >Select a category to delete 7 YESDelete all >Enter Phone Password 7 Select an item 7 YESReset holidaysRestore deleted Holidays >YES ■Functions Available in Calendar Events List/Details >Select a date (7 Select a Schedule, Holiday or Anniversary) 7 S[Menu] 7 Select an item (See below)Item Operation/DescriptionNew Create a new entry (ZP.13-2, P.13-3)Edit Edit selected item (ZLeft)Copy Copy an entry to another day >Enter date and time to copy an entry toCalendar displaySwitch from Icon display to Calendar display](https://usermanual.wiki/Panasonic-Connect/210030A.User-Manual-Part-2-of-6/User-Guide-1296396-Page-100.png)
![Tools13-513Item Operation/DescriptionIcon display Entries in category of selected icon appear >Select an iconSet secret mode/Release secretActivate/deactivate Secret Mode >YES (7 For Set secret mode, enter Phone Password) Secret entries appear only in Secret Mode or Secret Data Only (ZP.12-10).Compose messageInsert event date and details to message text (ZFrom Step 2 on P.14-4)Send Ir data (ZP.11-3)Send all Ir data(ZP.11-3)IC transmission(ZP.11-5)AllIC transmission(ZP.11-5)Copy to microSDCopy an entry to microSD Card >YES To display data on microSD Card: ZP.10-20Delete this >YESDelete past Delete past entries/items, prior to highlighted date >Select a category to delete 7 YESDelete select >Check entries to delete 7 A[Finish] 7 YESTasksMake quick notes of task to manage in Task list.Saving a TaskMain Menu 4 Tools 4 Tasks 1 A[New] 7 Select an item (See below) To check saved Tasks, select a Task. To edit, press [Edit] in detail window.Item Operation/DescriptionEdit Tasks >Enter contentDue date >Select how to enter due date 7 Enter due date Select No date to enter none.Priority >Select a priority levelCategory >Select a categoryAlarm >Select an Alarm type (7 For ON/Set time, enter time) Alarm Tone: ZP.13-6Alarm tone >Select an Alarm tone type 7 Select a folder 7 Select an Alarm tone2 A[Finish] When content is not entered, Tasks cannot be saved.Note Alarm tone does not sound when Privacy Key Lock or Personal Data Lock is set. However, settings can be changed even while Personal Data Lock is set (ZP.12-6).](https://usermanual.wiki/Panasonic-Connect/210030A.User-Manual-Part-2-of-6/User-Guide-1296396-Page-101.png)
![Tools13-613Using TasksIn Tasks window, press S[Menu] for following operations.Item Operation/DescriptionNew Create a new entry (ZP.13-5)Edit Edit an entry (ZP.13-5)Change statusChange status indicator shown in Tasks list >Select a status (7 For Completion, select an item 7 Enter Completion date) Overdue status indicator turns red.Show by category >Select a categorySort/Filter Sort list by due date, entry order, status, etc. >Select a conditionAdd shortcut iconCreate a shortcut (ZP.1-25)Send Ir data (ZP.11-3)Send all Ir data(ZP.11-3)IC transmission(ZP.11-5)AllIC transmission(ZP.11-5)Copy to microSDCopy a Task to microSD Card >YES To display data on microSD Card: ZP.10-20Delete this >YESDelete select >Check entries 7 A[Finish] 7 YESDelete completedDelete an entry in Completion status >YESDelete all >Enter Phone Password 7 YESAlarmsAlarm ToneWhen scheduled time arrives, alarm tone sounds and Notification Light illuminates. For Calendar events and Tasks, alarm message and animation corresponding to selected icon appear on Display.To Stop Alarm Tone for Calendar Events, Tasks or AlarmPress any key.Missed Alarm"Missed alarm" Event Indicator appears in Standby for alarms missed during Privacy Key Lock, Personal Data Lock or Infrared transmission once locks are canceled or transmission ends. Select indicator to view content.Note When one or more Alarms are set to the same time, alarm sounds in the order of : "Alarm" 7 "Timer Recording" 7 "Tasks" 7 "Calendar" 7 "Timer Watching"For Tasks, "Missed alarm" indicator appears. If alarms are set for more than one Calendar event, press S[Next] when alarm sounds to toggle Calendar event entries.](https://usermanual.wiki/Panasonic-Connect/210030A.User-Manual-Part-2-of-6/User-Guide-1296396-Page-102.png)
![Tools13-713Setting AlarmSet up to 12 alarms. Alarm tone sounds at the specified time once, everyday or weekly as set. appears in Standby when Alarm is set.Main Menu 4 Tools 4 Alarms1 Highlight an Alarm 7 A[Edit]2 Select an item (See below)Item Operation/DescriptionAlarm Activate or cancel Alarm >ON or OFFTime >Set Alarm timeRepeat >Select a repeat type (7 For Select day, check days 7 A[Finish])Tone >Select an Alarm tone type 7 Select a folder 7 Select an Alarm toneVolume > to set Alarm tone volumeSnooze When Snooze is set to ON, Alarm tone sounds for 60 seconds, repeating up to six times at five minute intervals. >ON or OFF (7 For OFF, enter time)Prefer manner modeSet Manner Mode or Alarm priority. >ON or OFF3 A[Finish] ■Cancel & Reactivate Alarm >In Step 1 (highlight an Alarm), S[Menu] 7 Select an item 7 YES Cancel or reactivate an alarm entry as required. Highlight an entry 7 to reactivate/cancel Alarm.Snooze FunctionIf ON, press any key; Snooze window appears. To cancel Alarm, press L.Note Alarm tone does not sound when Privacy Key Lock or Personal Data Lock is set. However, settings can be changed even while Personal Data Lock is set (ZP.12-6).Alarm Indicators Following indicators appear: : Repeats daily : Repeats weekly](https://usermanual.wiki/Panasonic-Connect/210030A.User-Manual-Part-2-of-6/User-Guide-1296396-Page-103.png)
![Tools13-813Calculator Calculates up to 10 digits.Main Menu 4 Tools 4 CalculatorOperation Assigned keyNumber (0 - 9) - +–x÷=Decimal point A%SClearExample:-17+28.5=11.5 A NotepadSave up to 20 notes.Saving a NoteMain Menu 4 Tools 4 Notepad1 <Not Recorded> Select a saved note to view content. [Edit] to edit.2 Enter text Up to 256 double-byte or 512 single-byte characters can be entered.Notepads Window](https://usermanual.wiki/Panasonic-Connect/210030A.User-Manual-Part-2-of-6/User-Guide-1296396-Page-104.png)
![Tools13-913Notepad FunctionsIn Notepad list window, press S[Menu] for following operations.Item Operation/DescriptionEdit Edit a saved noteCompose messageInsert Notepad text to message (ZFrom Step 2 on P.14-4)Edit schedule Copy a note to Schedule to create a Calendar event >Schedule 7 Save a new note (ZFrom Step 2 on P.13-2)Add shortcut iconCreate a shortcut (ZP.1-25)Send Ir data (ZP.11-3)Send all Ir data(ZP.11-3)IC transmission(ZP.11-5)AllIC transmission(ZP.11-5)Copy to microSDCopy a note to microSD Card >YES To display data on microSD Card: ZP.10-20Notepad Info Display entry date, latest modified date and category of noteCategory >Select a category When no category applies, select None.Delete this >YESDelete selected >Check notes 7 A[Finish] 7 YESDelete all >Enter Phone Password 7 YESOsaifu Keitai®"Osaifu-Keitai®" is a range of IC Card-based services used by Osaifu-Keitai® compatible handsets. Make purchases using e-money or e-ticketing. Hold handset up to a reader/writer to pay for your purchase. ■Osaifu-Keitai® TermsOsaifu-Keitai®A contactless IC Card technology to read/write data by holding an IC card up to a reader/writerIC CardAn IC chip embedded in Osaifu-Keitai®-compatible handsetsLifestyle-AppliApplications to use Osaifu-Keitai®. Some applications are preinstalled.Precautions Data saved in IC Card vary by service content and usage history. Procedures to delete IC Card data vary by Lifestyle-Appli. Contact Osaifu-Keitai® service providers for details. SoftBank is not liable for damages from accidental loss or alteration of IC Card data or settings. IC Card data can be misused if your Osaifu-Keitai® compatible handset is lost or stolen. SoftBank is not liable for any resulting damages. Downloading Lifestyle-Appli and using applications may incur high packet transmission charges.](https://usermanual.wiki/Panasonic-Connect/210030A.User-Manual-Part-2-of-6/User-Guide-1296396-Page-105.png)
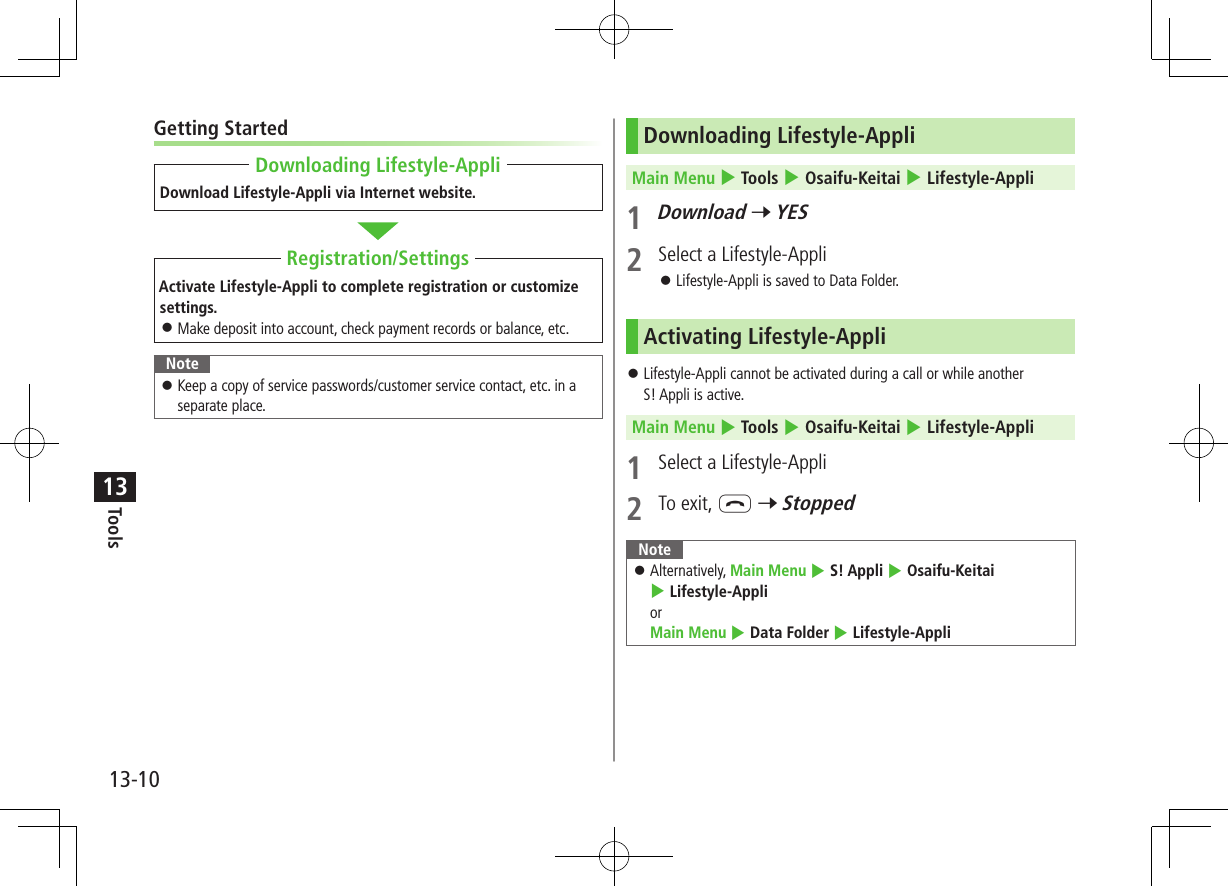
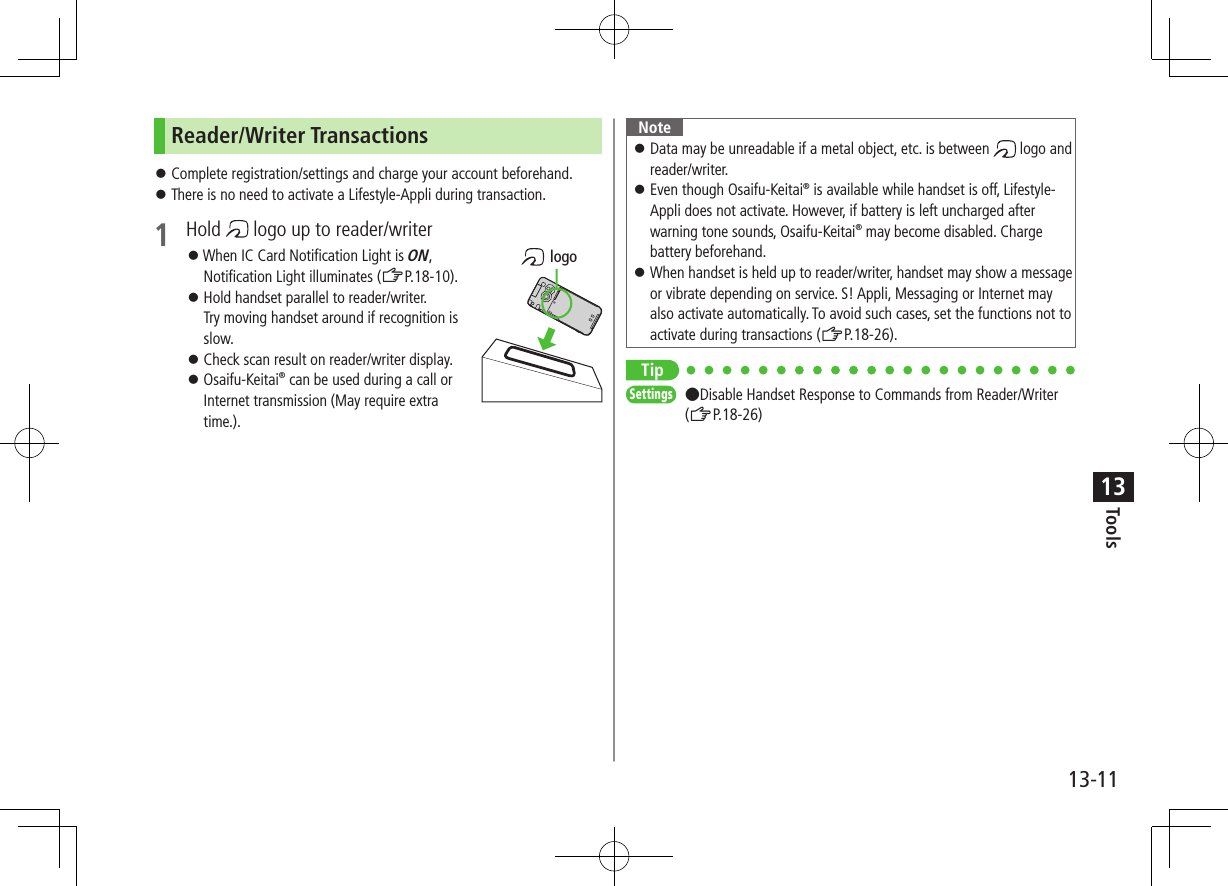
![Tools13-1213IC Card LockActivating IC Card Lock<Default> OFF While set, appears in Standby.1 Press and hold 7 Enter Phone Password Repeat the step as required to unlock.Note Alternatively, Main Menu 4 Tools 4 Osaifu-Keitai 4 IC Card Settings 4 IC Card Lock or Main Menu 4 Settings 4 Security 4 IC Card LockRemote Lock<Default> OFF Save up to three phone numbers to enable Remote Lock.Main Menu 4 Tools 4 Osaifu-Keitai 4 IC Card Settings 4 Remote Lock1 Enter Phone Password 7 ON2 Select an item (See below)Item Operation/DescriptionNumbers to PermitSave numbers to activate Remote Lock ><Not Recorded> 7 Enter phone numbers 7 A[Return] To save numbers from Phone Book/Incoming Call Logs or to use a payphone number: S[Menu] 7 Refer to or Payphone# of Incoming CallSpecify the number of incoming calls for activating IC Card Lock >Enter a number3 A[Set]](https://usermanual.wiki/Panasonic-Connect/210030A.User-Manual-Part-2-of-6/User-Guide-1296396-Page-108.png)
3 Select a wordDefinition appears.4 To end, L 7 StoppedNote While Dictionary application is active, press A[メニュー] for useful functions. Word search is available while composing messages or viewing sent/received messages or website contents (ZP.14-8, P14-23, P.15-13).](https://usermanual.wiki/Panasonic-Connect/210030A.User-Manual-Part-2-of-6/User-Guide-1296396-Page-109.png)
![Tools13-1413Sound RecordersVoice RecorderSet recorded sounds for ringtones. Record for about 60 seconds each.Main Menu 4 Tools 4 Sound Recorders 4 Voice Recorder1 YESRecording starts.2 [Stop]/ /L (7 OK) to stop recordingRecorded sounds are saved in Ring Songs&Tones folder.Voice AnnounceSet recorded sound for on hold tone/holding tone, Alarm, Calendar event alarm, Tasks alarm, ringtones, Answer Phone message, Timer Watching (Digital TV), Ring Songs&Tones Play List. Record only one item for about 15 seconds. Select Voice Announce in individual window to set Voice Announce as specific tone.Main Menu 4 Tools 4 Sound Recorders 4 Voice Announce1 RecordRecording starts.Tone beeps five seconds before recording ends.2 [Stop] to end recordingTone beeps twice and previous screen returns. To play back: Play To delete: Erase 7 YES](https://usermanual.wiki/Panasonic-Connect/210030A.User-Manual-Part-2-of-6/User-Guide-1296396-Page-110.png)
![Tools13-1513Bar Code ReaderScan barcodes (JAN) or QR Codes with built-in camera. Access websites, send messages, etc. from QR Codes.JAN CodesJAN Code is a one-dimensional bar code denoting numerals with bars and spaces of different widths.QR CodesQR Code is a two-dimensional bar code containing information.Example: SoftBank mobile phonesScanning Barcodes Up to five items can be saved. For split data, up to 16 QR Codes can be scanned at a time and saved as one item.Main Menu 4 Tools 4 Bar Code Reader 4 Scan Barcodes1 Frame barcode in the center of Display To adjust Display brightness: S[Menu] 7 Brightness 7 Adjust to -3 (dark) - +3 (light) To zoom: To use Focus Lock: 2 [Start]Scanning starts, and scanned results appear when completed. For split data, OK 7 Repeat Step 1 and 2 To use scanned data: ZStep 2 on P.13-163 S[Menu] 7 Save result 7 OK To start over: 7 YESNote Handset cannot read barcodes or two-dimensional codes other than JAN/QR Codes. Some barcodes may be unreadable. Barcode recognition may be slow. Hold handset steady while scanning. Barcodes may not be correctly read owing to scratch, dirt, damage, quality of printed material, light reflection, or QR code version.](https://usermanual.wiki/Panasonic-Connect/210030A.User-Manual-Part-2-of-6/User-Guide-1296396-Page-111.png)
![Tools13-1613Viewing/Editing Scanned DataMain Menu 4 Tools 4 Bar Code Reader 4 Saved Data List1 ViewSelect an item Edit TitleHighlight an item 7 S[Menu] 7 Edit title 7 Edit ■Delete Saved Data >In Step 1, (highlight an item 7) S[Menu] 7 Delete 7 Delete this or Delete all (7 For Delete all, enter Phone Password) 7 YESUsing Scanned DataMain Menu 4 Tools 4 Bar Code Reader 4 Saved Data List1 Select an item2 S[Menu] 7 Select an item (See below)Item Operation/DescriptionSave result Save scanned resultsDisplay list Display Saved Data ListInternet Access website >Yahoo! Keitai or PC Site Browser 7 YES Alternatively, select the URL.Compose messageInsert address to message recipient field (ZFrom Step 4 on P.14-4) Alternatively, select the address.Dialing Call selected phone number >Select a dialing method 7 Dial Alternatively, select phone number to dial.Add to Phone BookSave scanned results to Phone Book (ZFrom Step 2 on P. 4-5)Add bookmarkSave URL to Bookmark >YES 7 [OK]Copy Copy selected characters to another place (ZFrom Step 2 on P.3-10)](https://usermanual.wiki/Panasonic-Connect/210030A.User-Manual-Part-2-of-6/User-Guide-1296396-Page-112.png)
![Messaging14-214BasicsSend messages via S! Mail, SMS or PC Mail.S! Mail[Separate subscription required]Exchange text messages with SoftBank or e-mail compatible handsets, PCs, etc.; attach image or sound files etc. 942P is compatible with Graphic Mail (ZP.14-5) Send/receive up to 2 MB messages.SMS Exchange short text messages with SoftBank handsets.PC Mail[Setup required](ZP.14-24)Send/receive messages via PC mail account. For more information, visit SOFTBANK MOBILE Corp. Website (http://www.softbank.jp).Operations while Using PC MailSetting PC Mail accounts creates account folders in Messaging Folders. S! Mail/SMS operations may change as a result (ZP.14-24).Note Messaging functions are also available in Horizontal Open Position. Switching Normal Position to Horizontal Open Position may end active screen.Available Entry Items & Character Entry LimitsItem S! Mail/PC Mail SMSAddressE-mailaddress ○Up to 246 single-byte alphanumerics/ Up to 20 recipients––Phone number1 2 ○ ○Up to 21 single-byte alphanumerics/Up to 1 recipientSubject ○Up to 256 double-byte/ Up to 512 single-byte alphanumerics––Text ○30 KB ○Up to 70 double-/single-byte alphanumerics3Attachment ○4 5 – –1 SoftBank handset numbers only2 Phone numbers cannot be used for PC Mail address.3 When text entry mode is set to English (160char.) (ZP.18-23), up to 160 single-byte alphanumerics can be entered.4 Up to 2 MB S! Mail including subject, message text and attachment. Message size is changeable (Create Msg. Size: ZP.18-22)5 Up to 1 MB PC Mail including subject, message text and attachment.Note Character limit varies with attachment size. Change message type while creating a message (ZP.14-9).](https://usermanual.wiki/Panasonic-Connect/210030A.User-Manual-Part-2-of-6/User-Guide-1296396-Page-114.png)
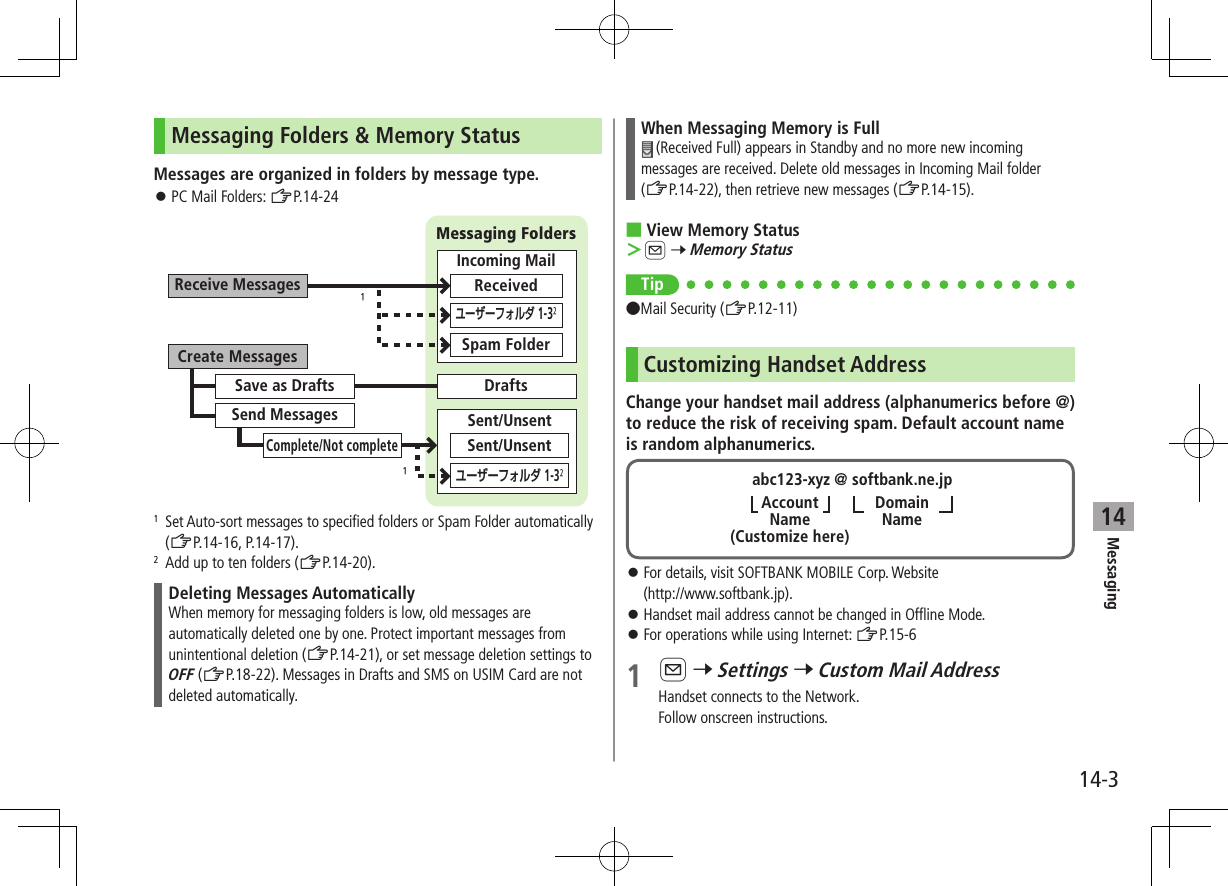
![Messaging14-414Sending S! Mail & SMSSending S! Mail Text entry (ZP.3-2)Example: Select a Phone Book entry to send S! Mail.1 Press and hold A2 Select Address field 7 Phone Book3 Select a Phone Book entry 7 Select a SoftBank handset number or mail address Press to toggle tabs if both mail addresses and phone numbers are saved.Composition WindowAddress fieldMail sizeSubject fieldAttachment fieldText field4 Select Subject field 7 Enter subject5 Select Text field6 Enter text7 A[Send]Note Alternatively, A 7 Create New to open Composition window.Tip ●Addresses ●Additional Functions (ZP.14-8) ●Sending Options (ZP.14-10)Settings ●Request Delivery Confirmation (ZP.18-21)●Set Reply-to Address ●Set Signature (ZP.18-22)Text Entry Window](https://usermanual.wiki/Panasonic-Connect/210030A.User-Manual-Part-2-of-6/User-Guide-1296396-Page-116.png)
![Messaging14-514Next PageAdding Attachments1 After Step 6 on P.14-4, select Attachment field2 Select a folder in Data Folder 7 Select a file3 A[Send] ■Attach Captured Pictures/Videos >After Step1, Activate Camera 7 Photo mode or Video mode 7 Frame subject 7 [Record], or (7 For video, [Stop], or ) 7 [Save], or Note Some files can not be attached depending on the file format or size. Some copy protected files can not be sent. Attachments exceeding size limit are automatically compressed (Width and height of compressed images may change.). If the compressed file still exceeds maximum size, message cannot be sent. Ring Songs&Tones, Music and Videos files cannot be attached directly from microSD Card. Move files to handset before attaching to messages.Tip●Attachments (ZP.14-8)Settings ●Set Attachment Size (ZP.18-21)Graphic MailCreate HTML messages; select font color/size, background color, or insert images, etc.Example: Use various Templates to create Graphic Mail. Change font size Scroll text1 After Step 4 on P.14-4, S[Menu] 7 Load Template 7 Highlight a template 7 A[View] 7 to return to Template list.2 Select Text field 7 Delete "ここに文章をいれてね! "3 J 7 Font Size Alternatively, S[Menu] 7 Set Graphic Mail to open Graphic PaletteGraphic Palette](https://usermanual.wiki/Panasonic-Connect/210030A.User-Manual-Part-2-of-6/User-Guide-1296396-Page-117.png)
![Messaging14-6144 Select a font size 7 Enter text5 J 7 Select area6 Place cursor before a sentence to scroll 7 [Start] 7 Move cursor to end of sentence 7 [End]Text is highlighted. To cancel selection: 7 Set Scrolling 7 S[Exit]8 to preview 7 Alternatively, S[Menu] 7 Preview to view text field9 7 A[Send] ■Reset Operations >To cancel previous operation: Close Graphic Palette 7 S[Menu] 7 Undo >To reset all Graphic Mail operations: J 7 Graphic all reset 7 YES 7 YES ■Use Mail Art >In text entry window, J 7 Mail Art 7 Select an item 7 S[Exit] ■Use Files Saved in microSD Card >In text entry window, J 7 Insert files 7 File Select 7 Select a folder 7 [microSD] 7 Select a folder 7 Select a fileTip ●Use Other Graphic Mail Settings (ZP.14-9) ●Download Templates via Internet (ZP.14-10)](https://usermanual.wiki/Panasonic-Connect/210030A.User-Manual-Part-2-of-6/User-Guide-1296396-Page-118.png)
![Messaging14-714Sending SMS Messages Text entry (ZP.3-2)Example: Select a Phone Book entry to send SMS.1 A 7 Create New SMS2 Select Address field 7 Phone Book3 Select a Phone Book entry 7 Select a SoftBank handset numberAddress fieldText fieldComposition Window4 Select Text field5 Enter text When number of entered character exceeds limit, S! Mail conversion option message appears.6 A[Send]Note When a single-byte text message including | { } [ ] ̃ ^ is sent or a draft including such text is edited, some characters may be cut out of text field.Tip ●Addresses ●Additional Functions (ZP.14-8)Settings ●Request Delivery Confirmation (ZP.18-21) ●Change SMS Center Number ●Set Input Character to English (ZP.18-23)Text Entry Window](https://usermanual.wiki/Panasonic-Connect/210030A.User-Manual-Part-2-of-6/User-Guide-1296396-Page-119.png)
![Messaging14-814Creating MessagesAddressesFrom Composition window, select Address field ■Enter Address Directly >S! Mail: Address Input or Phone Number Input 7 Enter a mail address/SoftBank handset number >SMS: Direct Entry 7 Enter a SoftBank handset number ■Select Address from Sent Address/Received Address Logs >Sent Address or Received Address 7 Select a log ■Select S! Mail Address from Mail Group >Mail Group 7 Select a Mail Group ■Add/Edit/Delete Address >Follow the steps (See below)Item Operation/DescriptionAdd recipients* ><Not entered> 7 Search/enter address 7 Select an address or enter directlyEdit >Select an address 7 Edit (For SMS: Direct Entry) 7 Edit addressDelete* >Highlight an address 7 S[Menu] 7 Delete receiver 7 YES* S! Mail only ■Change To/Cc/Bcc (S! Mail only) >Highlight an address 7 S[Menu] 7 Destination types 7 Select a typeAttachmentsFrom After attaching a file, select Attachment field ■Open/Play Attached Files >Select a file ■Add Attachments > S[Menu] 7 Add Attached Files 7 Select a folder 7 Select a file 7 A[Finish] To capture still images or videos to attach: ZP.14-5 ■Delete Attachments >Highlight a file 7 S[Menu] 7 Del Attached Files 7 YESAdditional Functions ■Look Up Words from Text Entry Window >In S! Mail text entry window, S[Menu] 7 Look up in dict. 7 Move cursor before/after word 7 [Start] 7 to highlight the word 7 [End] 7 Read disclaimer 7 OK Dictionary operations: ZP.13-13](https://usermanual.wiki/Panasonic-Connect/210030A.User-Manual-Part-2-of-6/User-Guide-1296396-Page-120.png)
![Messaging14-914 ■Functions Available in Composition Window >In Composition window, S[Menu] 7 Select an item (See below)Item Operation/DescriptionSend Send messagePreview Preview messageSave as DraftsSave message to Drafts box without sendingAttached files1View attached file listLoad Template1 >Select a templateSave Template1Save edited template >YESAdd Signature1Add signature Create and save signature beforehand (ZP.18-22).Send Settings1(ZP.14-10)Image Compression1Set image compression size for attachment >Select a size or OFFCreate Msg. Size1300KB or 2MBConfirm Delivery2(ZP.14-10)Input character2Select character input mode >Japanese or EnglishChange mail typeSwitch mail type >Select an item1 S! Mail only2 SMS onlyGraphic Mail Functions ■Use Other Graphic Mail Settings >In S! Mail text entry window, J 7 Select an arrange item (See below)Item Operation/DescriptionInsert files Insert still images, music or Flash® files; activate Camera and insert captured image Music files are sent as BGM >Select an item・ File Select 7 Select a file type 7 Select a folder 7 Select a file・ Camera 7 Frame subject 7 [Record] 7 [Save] To delete inserted music files: Delete BGM 7 YESFont Color >Change font colorBackground color >Change background colorInsert Lines Insert separator lineMail Art Insert Mail Art >Select a fileGraphic all resetCancel all Graphic Mail Settings >YESSelect area Specify text to be arranged >Place cursor before/after text 7 [Start] 7 to highlight area 7 [End] 7 Select other items 7 Follow the steps for selected items To cancel selection: [End] 7 Font Size >Change font size](https://usermanual.wiki/Panasonic-Connect/210030A.User-Manual-Part-2-of-6/User-Guide-1296396-Page-121.png)
![Messaging14-1014Item Operation/DescriptionSelect BlinkingFlash textSet Scrolling Scroll textSet Swinging Swing textAlignment >Select a type One file of music or Flash®, and up to 40 types of My Pictograms or images can be inserted per Graphic Mail. To delete inserted images, lines, Mail Art, etc.: Close Graphic Palette 7 Move cursor before images, etc. 7 Ring Songs&Tones or Music files cannot be inserted directly from microSD Card. Move files to handset beforehand. ■Save Edited Templates >In S! Mail Composition window, S[Menu] 7 Save Template 7 YES ■Download Templates via Internet >A 7 Templates 7 Download Templates 7 YES Handset connects to the Network. Follow onscreen instructions.Sending OptionsFrom Composition window, cS[Menu] ■Confirm Delivery >(For S! Mail, Send Settings 7) Confirm Delivery 7 ON Request Delivery Confirmation (ZP.18-21) ■Notify Recipients of Message Priority Level (S! Mail only) >Send Settings 7 Priority 7 Select a level ■Set Reply-to Address (S! Mail only) >Send Settings 7 Set Reply-To 7 ON Specify reply-to address beforehand (ZP.18-22)](https://usermanual.wiki/Panasonic-Connect/210030A.User-Manual-Part-2-of-6/User-Guide-1296396-Page-122.png)
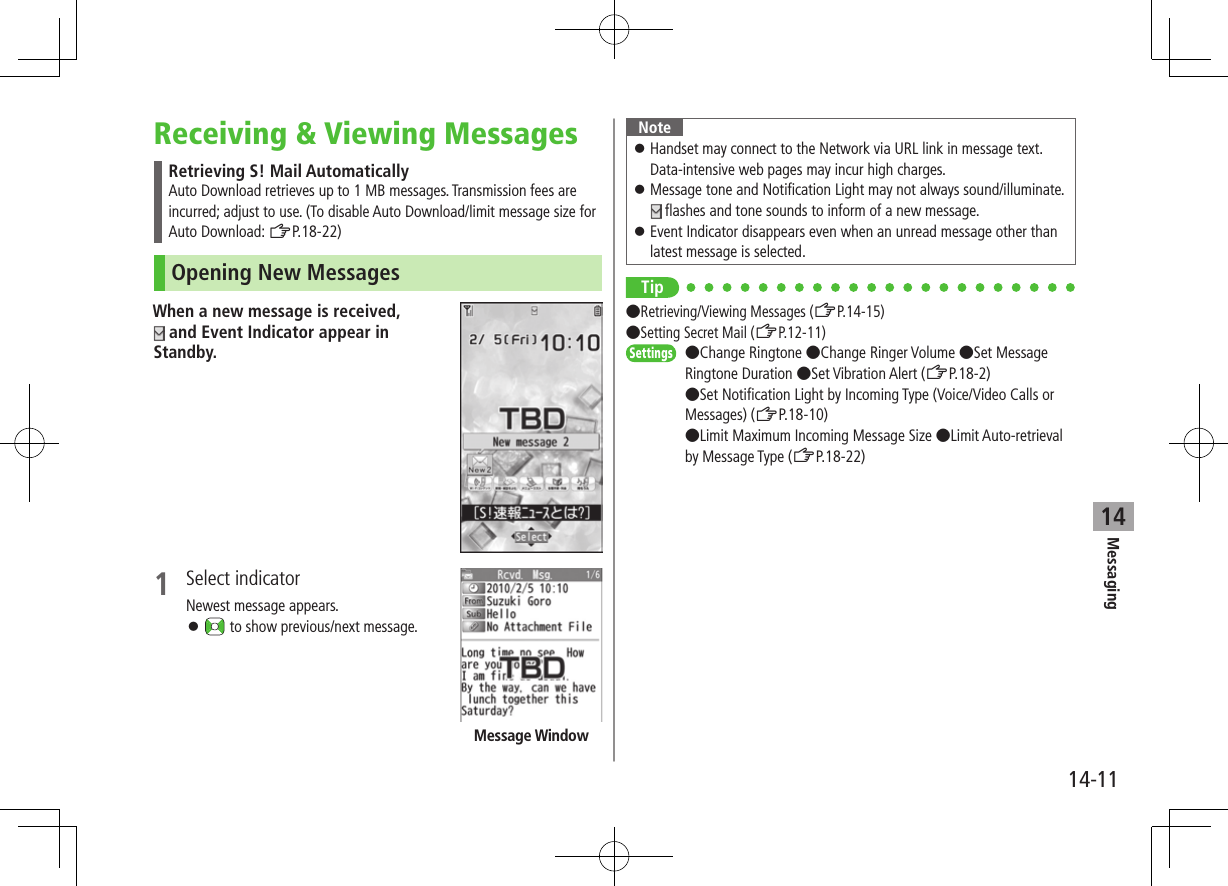
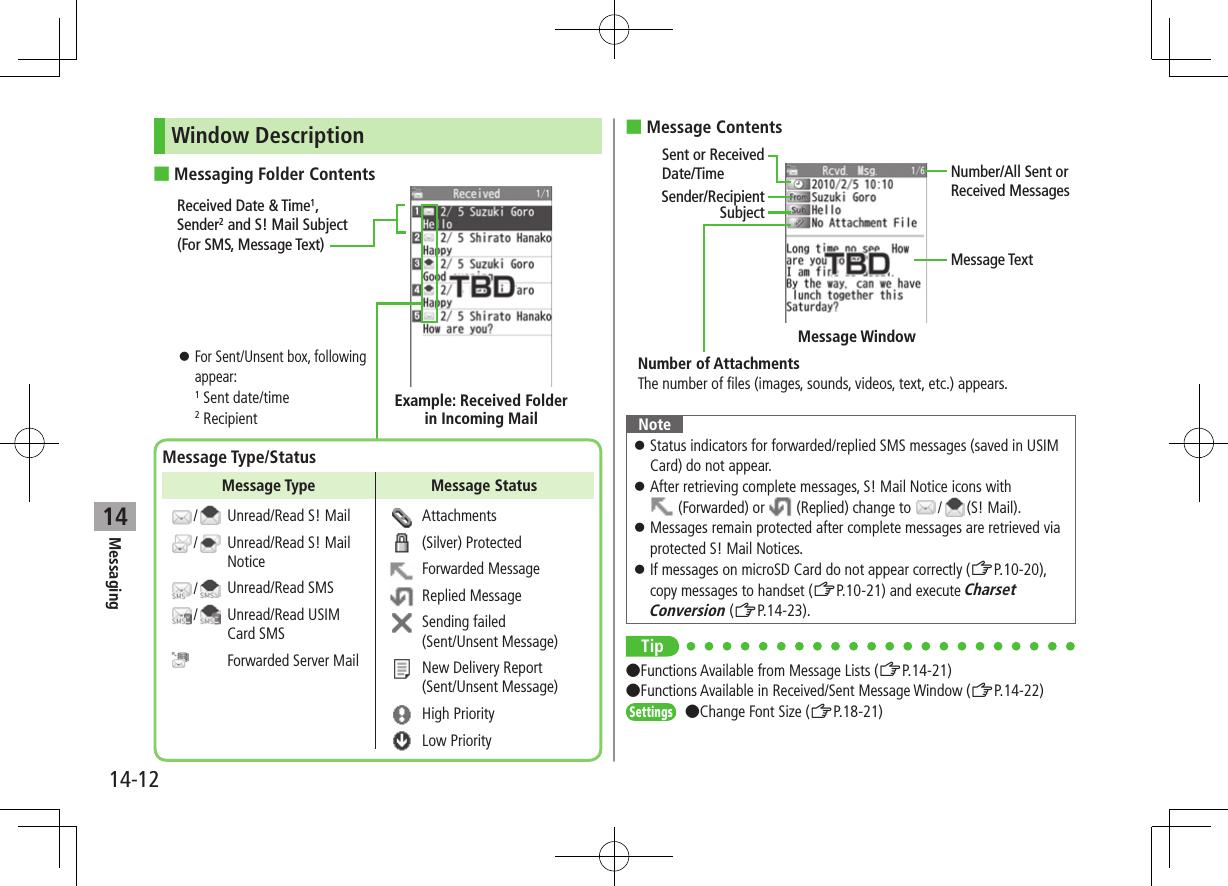
![Messaging14-1314Retrieving Complete S! MailThe complete message may not be downloaded during handset operations. Center sends initial portion of message as an S! Mail Notice. Manually retrieve the complete message.1 Select continue (xxxKB) at end of S! Mail Notice (xxxKB) is an estimated Server Mail size; may differ from actual message size. ■Retrieve from Message List >In received message list, S[Menu] 7 Retrieve 7 This one ■Retrieve Multiple Messages >In received message list, S[Menu] 7 Retrieve 7 Selected 7 Check messages 7 A[Finish] 7 YESOpening & Saving Attachments1 In Message window, S[Menu] 7 Attached files2 Select a fileFile plays or shows.3 After viewing, Attached files window returns.4 To save the file, highlight file 7 A[Save] 7 YES 7 Select a folderNote When messages are opened, attached image files appear/play automatically. (Silver) appears with file requiring a Content Key. If Content Key has expired, warning appears when opening a file. Acquire new Content Key (ZP.10-5). Incompatible files are saved to Other Documents in Data Folder. Some files may not be saved to handset.File Formats Supported by Auto Playback Image files (JPEG, GIF, PNG) Music files (SMAF, AMR, SMF, SP-MIDI)TipSettings ●Play Attached Music Files Automatically (ZP.18-22)](https://usermanual.wiki/Panasonic-Connect/210030A.User-Manual-Part-2-of-6/User-Guide-1296396-Page-125.png)
![Messaging14-1414Showing Sent/Received Mail Address1 Sent AddressPress and hold Received AddressPress and hold : SMS (successfully sent) : S! Mail (successfully sent) To show Redial/Incoming Call Logs: [Change]2 To view entry details, select an entry To send S! Mail/SMS to recipient shown: 7 Mail composition operation (S! Mail: ZFrom Step 4 on P.14-4 or SMS: ZFrom Step 4 on P.14-7) To save to Phone Book: [Store] 7 Operation for saving to Phone Book (ZFrom Step 2 on P.4-5)Tip ●Sent/Received Address (ZP.14-20)Using Server MailRetrieve mail list stored at the Center to view Server Mail.Viewing Server Mail List1 A 7 Server Mail2 Retrieve Mail List 7 YES ■Update Server Mail List >After Step1, Retrieve Mail List 7 A[Update] 7 YESRetrieving Server Mail1 A 7 Server Mail 7 Retrieve Mail List If no Server Mail is in the list, YES 7 OK2 Retrieve a New MessageSelect an S! Mail Retrieve Multiple MessagesS[Menu] 7 Retrieve 7 Retrieve Selected 7 Check messages 7 A[Finish] 7 YES ■Retrieve All Messages >A 7 Server Mail 7 Retrieve All](https://usermanual.wiki/Panasonic-Connect/210030A.User-Manual-Part-2-of-6/User-Guide-1296396-Page-126.png)
![Messaging14-1514Deleting Server Mail1 A 7 Server Mail 7 Retrieve Mail List2 S[Menu] 7 Del Server Mail3 Delete a MessageDelete This 7 YES Delete Multiple MessagesDelete Selected 7 Check messages 7 A[Finish] 7 YES ■Delete All Messages >A 7 Server Mail 7 Delete All 7 Enter Phone Password 7 YESTip●Mail Security (ZP.12-11) ●Server Mail Functions (ZRight)Retrieving/Viewing MessagesManually Retrieving New MessagesRetrieve S! Mail messages saved on Server while handset is off/out-of-range. >A 7 Retrieve NewServer Mail functionsFrom cA 4 Server Mail ■Forward Server Mail >Retrieve Mail List 7 Highlight an S! Mail 7 S[Menu] 7 Fwd Server Mail 7 Select Address field 7 Search/enter address 7 Select an address or enter directly 7 A[Send] To forward Server Mail from S! Mail Notice: In Message list, highlight S! Mail Notice 7 S[Menu] 7 Forward 7 Fwd Server Mail 7 <Add Address> 7 Select/enter and address 7 A[Send] Forwarded S! Mail cannot be deleted from Server Mail List. appears for Server Mail saved to Drafts or Sent/Unsent after forwarded. ■Sort Server Mail >Retrieve Mail List 7 S[Menu] 7 Sort 7 Select a condition ■View Server Mail Information >Retrieve Mail List 7 Highlight a message 7 S[Menu] 7 Mail Information ■View Server Mail Memory >Server Mail Memory](https://usermanual.wiki/Panasonic-Connect/210030A.User-Manual-Part-2-of-6/User-Guide-1296396-Page-127.png)
![Messaging14-1614Organizing/Using MessagesChecking Messages in Messaging Folders At time of purchase, information message is provided for your convenience (Transmission fee does not apply).1 A 7 Incoming Mail, Drafts, Sent/Unsent appears for unread messages in Incoming Mail folder. appears for draft or unsent messages in Drafts or Sent/Unsent folder. In Incoming Mail or Sent/Unsent folder, select a folder then message. Messaging Folders: ZP.14-32 Select a message To toggle previous/next messages in Received/Sent Message window: Tip ●Functions Available in Incoming Mail or Sent/Unsent Folder (ZP.14-20)●Functions Available from Message Lists (ZP.14-21)Auto-sortSave messages that satisfy set conditions to designated folder automatically. Previously sent/received messages are not sorted. Sent/received messages are sorted by subject if both address and subject match sort condition applied to specific folder. Messages with no subject are sorted by address. Either address or mail subject can be specified per folder.1 A 7 Incoming Mail or Sent/Unsent2 Highlight a folder 7 S[Menu] 7 Auto-sort Setting3 S[Menu] 7 Select an item (See below)Item Operation/DescriptionAdd Address Sort messages by address >Search/enter address 7 Select/enter an address Save up to 10 addresses per folder.Add Subject Sort messages by mail subject >Enter a subject Save one subject per folder. SMS cannot be sorted by mail subject.Add Group Sort messages by Group in Phone Book >Select a group Save up to 10 groups per folder.Add Mail groupSort messages by Mail Group >Select a Mail Group Save up to 10 Mail Groups per folder.](https://usermanual.wiki/Panasonic-Connect/210030A.User-Manual-Part-2-of-6/User-Guide-1296396-Page-128.png)
![Messaging14-1714 ■Edit Sort Conditions >After Step 2, highlight an item 7 [Edit] 7 Edit address, subject or Mail Group ■Change Auto-sort List ViewSwitch Name view or Address view for Auto-sort. >After Step 2, S[Menu] 7 Display the List 7 Name or Address ■Delete Auto-sort Settings >After Step 2, (highlight an item 7) S[Menu] 7 Delete or Delete All (7 For Delete All, enter Phone Password) 7 YES ■Re-sort Set Folders >To re-sort messages in a specific folder: In Step 2, highlight a folder 7 S[Menu] 7 Re-sort in This 7 YES >To re-sort messages in all folders: After Step 1 7 S[Menu] 7 Sort in All 7 YESFilter SpamSort messages from unknown senders into Spam Folder without incoming notification. Use Safe List to receive messages from certain addresses/phone numbers and domains.Note Messages from secret Phone Book entries may be sorted into Spam Folder. Be careful when deleting messages from Spam Folder.Setting Spam Folder<Default> OFF1 A 7 Settings 7 Universal Settings 7 Anti-Spam Measures2 Spam Filter 7 Enter Phone Password3 ON 7 YES](https://usermanual.wiki/Panasonic-Connect/210030A.User-Manual-Part-2-of-6/User-Guide-1296396-Page-129.png)
![Messaging14-1814Safe List Specify up to 20 addresses and domains (for example, @softbank.ne.jp) to receive messages from without sorting into Spam Folder.1 A 7 Settings 7 Universal Settings 7 Anti-Spam Measures 7 Safe List2 Add AddressesS[Menu] 7 Add Address 7 Received Address or Direct Entry 7 Select or enter an address Add DomainsS[Menu] 7 Add Domain 7 Enter a domain 3 A[Finish] ■Edit Saved Addresses >After Step 1, highlight an address 7 [Edit] 7 Edit address ■Delete Addresses >After Step 1, (highlight an address 7) S[Menu] 7 Delete or Delete All (7 For Delete All, enter Phone Password) 7 YESTip ●Report Spam (ZP.14-23)Replying to Messages1 In Message window, A[Reply] Re: appears before Subject when replying to S! Mail. Received message text is quoted.2 Complete message 7 A[Send] ■Reply without Quoting >In Step 1, S[Menu] 7 Reply 7 Reply to Sender or Reply to All 7 Compose S! Mail or Compose SMS Selectable items differ by mail type.Note Alternatively, reply from Message List window without opening messages (ZP.14-20)Tip ●Quote Original Message in Reply (ZP.18-21)](https://usermanual.wiki/Panasonic-Connect/210030A.User-Manual-Part-2-of-6/User-Guide-1296396-Page-130.png)
![Messaging14-1914Using Mail GroupsSave mail addresses by group. Messages can be sent to specified group of recipients. Save up to 20 recipients per group. Create up to 20 groups.Creating Mail GroupsMain Menu 4 Phone 4 Settings 4 Mail Group1 Select a group to save2 Enter Mail Address DirectlyHighlight <Not stored> 7 A[Edit] 7 Enter mail address Select Mail Address from Phone Book or Sent/Received Address LogsHighlight <Not stored> 7 S[Menu] 7 Look-up address 7 Select an item 7 Select an entry Repeat Step 2 to save mail addresses.Mail Group List ■Change Group Names >In Step 1, highlight a Mail Group 7 S[Menu] 7 Edit group name 7 Edit name ■Reset Group Names >In Step 1, highlight a Mail Group 7 S[Menu] 7 Reset group name 7 YES ■Edit Mail Addresses >After Step 1, highlight a mail address 7 A[Edit] 7 Edit ■Delete Saved Mail Addresses > After Step 1, (highlight a mail address 7) S[Menu] 7 Delete this or Delete all (7 For Delete all, enter Phone Password) 7 YES ■Send a Message to All Group Members > In Step 1, highlight a Mail Group 7 A[ ] To select a Mail Group from S! Mail Composition window: ZP.14-8](https://usermanual.wiki/Panasonic-Connect/210030A.User-Manual-Part-2-of-6/User-Guide-1296396-Page-131.png)
![Messaging14-2014Sent/Received Address >Sent address logs: Press and hold 7 Highlight an address 7 S[Menu] 7 Select an item (See below) >Received address logs: Press and hold 7 Highlight an address 7 S[Menu] 7 Select an item (See below)Item Operation/DescriptionCharacter sizeToggle font sizesAdd to Phone BookSave selected mail address/number to Phone Book (ZFrom Step 2 on P.4-5)Add shortcut iconCreate a shortcut (ZP.1-25) Select a shortcut in Standby to open Composition window with selected mail address/number in Address fieldCompose messageCreate a message to selected address/phone number (ZFrom Step 4 on P.14-4)Compose SMSCreate SMS to selected phone number (ZFrom Step 4 on P.14-7)Dialing >Select a dialing method 7 DialDialed calls1Show Redial logsReceived calls2Show Incoming Call LogsDelete this >YESDelete selected >Check logs to be deleted 7 A[Finish] 7 YESDelete all >Enter Phone Password 7 YES1 Sent address logs only2 Received address logs onlyOrganizing Messages ■Functions Available in Incoming Mail or Sent/Unsent Folder >A 7 Incoming Mail or Sent/Unsent 7 (Highlight a folder) 7 S[Menu] 7 Select an item (See below)Item Operation/DescriptionAdd folder Add up to 10 user folders to each of Incoming Mail and Sent/Unsent folders >Enter folder nameEdit folder name* >Edit folder nameAuto-sort Setting* >Sort messages (ZFrom Step 3 on P.14-16)Re-sort in ThisRe-sort messages in selected folder >YESSort in AllRe-sort messages in all folders >YESSort folder*Sort user folders >Select a target locationMail SecuritySet to require Phone Password for opening a folder >Enter Phone Password To cancel: repeat the stepDelete folder* >Enter Phone Password 7 YES* ユーザーフォルダ only](https://usermanual.wiki/Panasonic-Connect/210030A.User-Manual-Part-2-of-6/User-Guide-1296396-Page-132.png)
![Messaging14-2114 ■Functions Available from Message Lists >A 7 Incoming Mail, Drafts or Sent/Unsent (7 Select a folder) 7 Highlight a message 7 S[Menu] 7 Select an item (See below)Item Operation/DescriptionEdit1 2Edit message to send(S! Mail: ZFrom Step 2 on P.14-4/SMS: ZFrom Step 2 on P.14-7)Send2Send DraftsRetrieve3Retrieve complete S! Mail >This one or Selected (7 For Selected, check messages 7 A[Finish] 7 YES)Reply3Reply without quoting message >Reply to Sender or Reply to All 7 Select an item 7 Compose a message (S! Mail: ZFrom Step 4 on P.14-4/SMS: ZFrom Step 4 on P.14-7) Selectable items differ by mail type.Reply with Quote3Quote received message to reply >Reply to Sender or Reply to All 7 Select an item 7 Compose a message (S! Mail: ZFrom Step 4 on P.14-4/SMS: ZFrom Step 4 on P.14-7) Selectable items differ by mail type.Item Operation/DescriptionForward3 >Forward or Fwd Server Mail 7 Select Address field 7 Search/enter address 7 Select an address or enter directly 7 A[Send] Forward Server Mail (ZP.14-15) When forwarding S! Mail, Fw: appears before Subject. Dotted line appears in the first line of Text field. Attachments are also forwarded (Messages with copy protected attachments may not be forwardable.).Dial >Select an item 7 Make a call/compose a message/add to Phone BookAdd Address1 3Save addresses to Phone Book >Select phone number or mail address 7 YES(ZFrom Step 2 on P.4-5)Protect/Unprotect1 3Protect received/sent messages >This one or Selected (7 For Selected, check messages 7 A[Finish]) To unprotect, repeat the step. SMS saved in USIM Card cannot be deleted.Unread/ Read3Switch status to Unread/ReadMove1 3Move messages to specific folders >Move This or Move Selected (7 For Move Selected, check messages 7 A[Finish] 7 YES) 7 Select a folder SMS saved in USIM Card cannot be moved.](https://usermanual.wiki/Panasonic-Connect/210030A.User-Manual-Part-2-of-6/User-Guide-1296396-Page-133.png)
![Messaging14-2214Item Operation/DescriptionDelete >Select an item 7 Operate selected item If messages are received while selecting multiple messages, message deletion may fail.ConfirmDelivery1View Delivery reportSend Ir data (ZP.11-3)IC Transmission(ZP.11-5)Copy to microSDCopy messages to microSD Card >YESCopy to USIM/Copy to Phone3Copy SMS to USIM Card/handset >YESMove to USIM/Move to Phone3Move SMS to USIM Card/handset >YESSort Change display order >Select a display orderMail InformationView detailed information (Subject, From, To, etc.)Mail history1 3 Show up to 1000 sent/received mail records >Select a sender/recipient address or appears. Select a record to show Message window. to return to previous window.1 Sent messages only2 Drafts only3 Received messages onlyUsing Messages ■Functions Available in Received/Sent Message Window >In Message window, S[Menu] 7 Select an item (See below)Item Operation/DescriptionRetrieve1Retrieve complete S! MailEdit2Edit message to send(S! Mail: ZFrom Step 2 on P.14-4/SMS: ZFrom Step 2 on P.14-7)Reply1Reply without quoting message >Reply to Sender or Reply to All 7 Select an item 7 Compose a message (S! Mail: ZFrom Step 4 on P.14-4/SMS: ZFrom Step 4 on P.14-7) Selectable items differ by mail type.Reply with Quote1Quote received message to reply >Reply to Sender or Reply to All 7 Select an item 7 Compose a message (S! Mail: ZFrom Step 4 on P.14-4/SMS: ZFrom Step 4 on P.14-7) Selectable items differ by mail type.Forward1 >Forward or Fwd Server Mail Forward Server Mail (ZP.14-15)Dial >Select an item 7 Make a call/compose a message/add to Phone BookAdd Address Save addresses to Phone Book >Select phone number or mail address 7 YES(ZFrom Step 2 on P.4-5)](https://usermanual.wiki/Panasonic-Connect/210030A.User-Manual-Part-2-of-6/User-Guide-1296396-Page-134.png)
![Messaging14-2314Item Operation/DescriptionAdd to Phone BookSave highlighted phone number/mail address to Phone Book >YES(ZFrom Step 2 on P.4-5)Attached files Show attached filesSave TemplatesSave edited templates >YESAdd Shortcut IconCreate a shortcut (ZP.1-25) Select a shortcut in Standby to open Composition window with selected mail address/number in Address fieldCopy Copy address, subject or textSelect an item 7 Copy (ZAfter Step 2 on P.3-10)Look up in dict.Look up a word in dictionary >Move cursor before/after text 7 [Start] 7 to highlight target area 7 [End] 7 Read disclaimer 7 OK Dictionary operations (ZP.13-13)Font Size >Select a sizeScroll Unit Change scroll unit >Select an itemCharset Conversion1Convert characters when not properly shown >Select an itemDelete >Select an item 7 Operate selected itemConfirm Delivery2View Delivery reportMail InformationView detailed information (Subject, From, To, etc.)Send Ir data (ZP.11-3)IC Transmission(ZP.11-5)Item Operation/DescriptionCopy to microSDCopy messages to microSD Card >YESCopy to USIM or Copy to Phone1Copy SMS to USIM Card/handset >YESMove to USIM or Move to Phone1Move SMS to USIM Card/handset >YESReport Spam1Report received mail as Spam >A[Send] Change destination to report to (ZP.18-21).Mail history Show up to 1000 sent/received mail records >Select a sender/recipient address or appears. Select a record to show Message window. to return to previous window.1 Received Message window only2 Sent Message window only](https://usermanual.wiki/Panasonic-Connect/210030A.User-Manual-Part-2-of-6/User-Guide-1296396-Page-135.png)
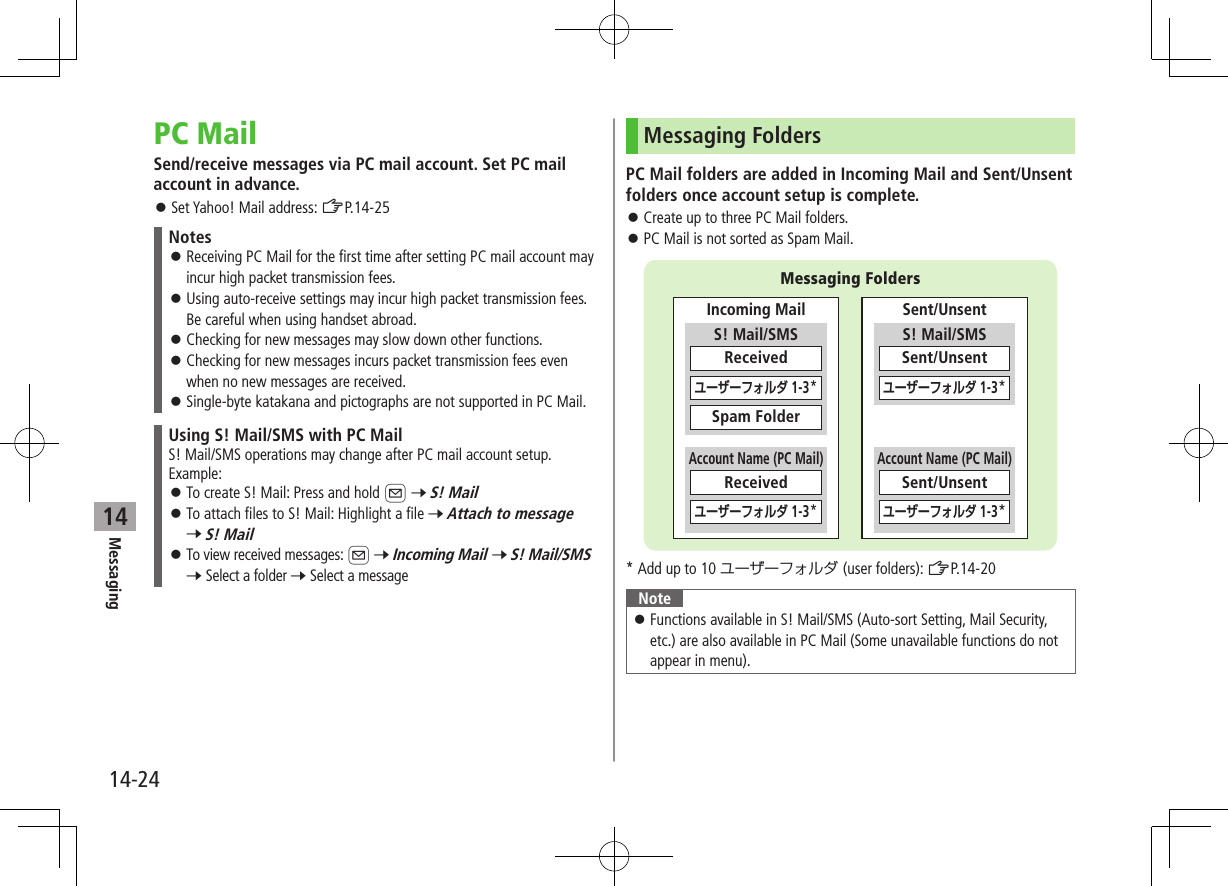
![Messaging14-2514PC Mail Account SetupSet up accounts to use PC Mail. Set up to three PC mail accounts. Check ISP information in advance. PC Mail services may not be available depending on services, settings, contract details for PC mail account. Set Quick Yahoo Mail is available for setting your Yahoo! account.1 A 7 Settings 7 PC Mail Settings 7 Account Settings2 <Not Recorded> 7 Select an item (See below)Item Operation/DescriptionAccount Name >Enter an account nameIncoming Options >Select an item 7 Enter/select an item User Name, Password and Receiving Server are required.Sending Options >Select an item 7 Enter/select an item Mail Address and Sender Server are required. To confirm settings: In Incoming Options/Sending Options window, A[Confirmati] 7 After information is entered in Incoming Options/Sending Options, to return to Account Settings window.3 A[Finish] 7 OK To retrieve new messages immediately, select YES ■Quick Yahoo! Mail Address Setup >After Step 1, Set Quick Yahoo Mail 7 YES or NO Follow onscreen instructions. ■Set Default Account >After Step 1, highlight an account 7 S[Menu] 7 Default account ★ appears for selected account. ■Delete Account >After Step 1, highlight an account 7 S[Menu] 7 Delete account 7 Enter Phone Password 7 YES Tip ●Reset All Incoming Message Logs ●Delete All Server Mail (ZP.14-26)Sending PC Mail Default account (ZAbove) is automatically selected.1 Press and hold A 7 PC MailPC Mail Composition window appears.2 Compose a message and send(ZAfter Step 2 on P.14-4) ■Change Account >After Step 1, select Account field 7 Select an accountNote Alternatively, open PC Mail Composition window from A 7 Create New PC MailAccount fieldPC Mail Composition Window](https://usermanual.wiki/Panasonic-Connect/210030A.User-Manual-Part-2-of-6/User-Guide-1296396-Page-137.png)
![Messaging14-2614Retrieving/Viewing PC Mail If auto-retrieve setting is on, open new PC Mail from Event Indicator: ZP.14-11Note When Center sends initial portion of PC Mail, manually retrieve the complete message.Retrieving PC Mail by Account1 A 7 Retrieve New 7 Select an accountViewing Previously Retrieved PC Mail1 A 7 Incoming Mail 7 Select an account 7 Select a messageTipSettings ●Disable Auto-retrieval for New Messages ●Set Auto-retrieval Interval for New Messages ●Automatically Retrieve New Messages while Abroad ●Disable Auto-retrieval between Set Time Period (ZP.18-23)PC Mail Indicators/ Unread/read PC Mail/ Unread/read PC Mail (notice only)PC Mail Functions ■Attach Image/Music Files >Highlight a file 7 S[Menu] 7 Attach to message 7 PC Mail 7 Compose a message and send (ZAfter Step 2 on P.14-4) ■Reset All Incoming Message Logs >A 7 Settings 7 PC Mail Settings 7 Account Settings 7 Select an account 7 Server Maintenance 7 Reset Mail Log 7 YES ■Delete All Server Mail >A 7 Settings 7 PC Mail Settings 7 Account Settings 7 Select an account 7 Server Maintenance 7 Delete All 7 Enter Phone Password 7 YESNote If over 10001 messages are on your PC mail server, retrieving/deleting messages from that PC Mail account is disabled.](https://usermanual.wiki/Panasonic-Connect/210030A.User-Manual-Part-2-of-6/User-Guide-1296396-Page-138.png)
![15-4Internet15Entering URLEnter URLs (addresses beginning with "http://" or "https://") directly to access websites, or open previously viewed pages using URL histories. Up to 20 URL histories are stored.Main Menu 4 Yahoo! 4 Enter URL1 Enter URL DirectlyDirect Entry 7 Enter URL Use URL HistoryURL History List 7 Select a URL ■Delete URL Histories >In Step1, URL History List 7 (Highlight a URL 7) S[Menu] 7 Delete or Delete All 7 YESURL History List WindowUsing Access HistoriesOpen previously viewed pages using access histories. Up to 100 access histories are stored (The number of savable histories varies depending on data amount.).Main Menu 4 Yahoo! 4 History1 Select a history ■Delete Access Histories >In Step 1, (highlight a history 7) S[Menu] 7 Delete or Delete All 7 YES (7 For Delete All, enter Phone Password) ■Show Access History URLs >In Step 1, highlight a history 7 S[Menu] 7 Display URLExiting Mobile Internet1 L 7 YESNote Closing handset does not affect active browser.History Window](https://usermanual.wiki/Panasonic-Connect/210030A.User-Manual-Part-2-of-6/User-Guide-1296396-Page-142.png)
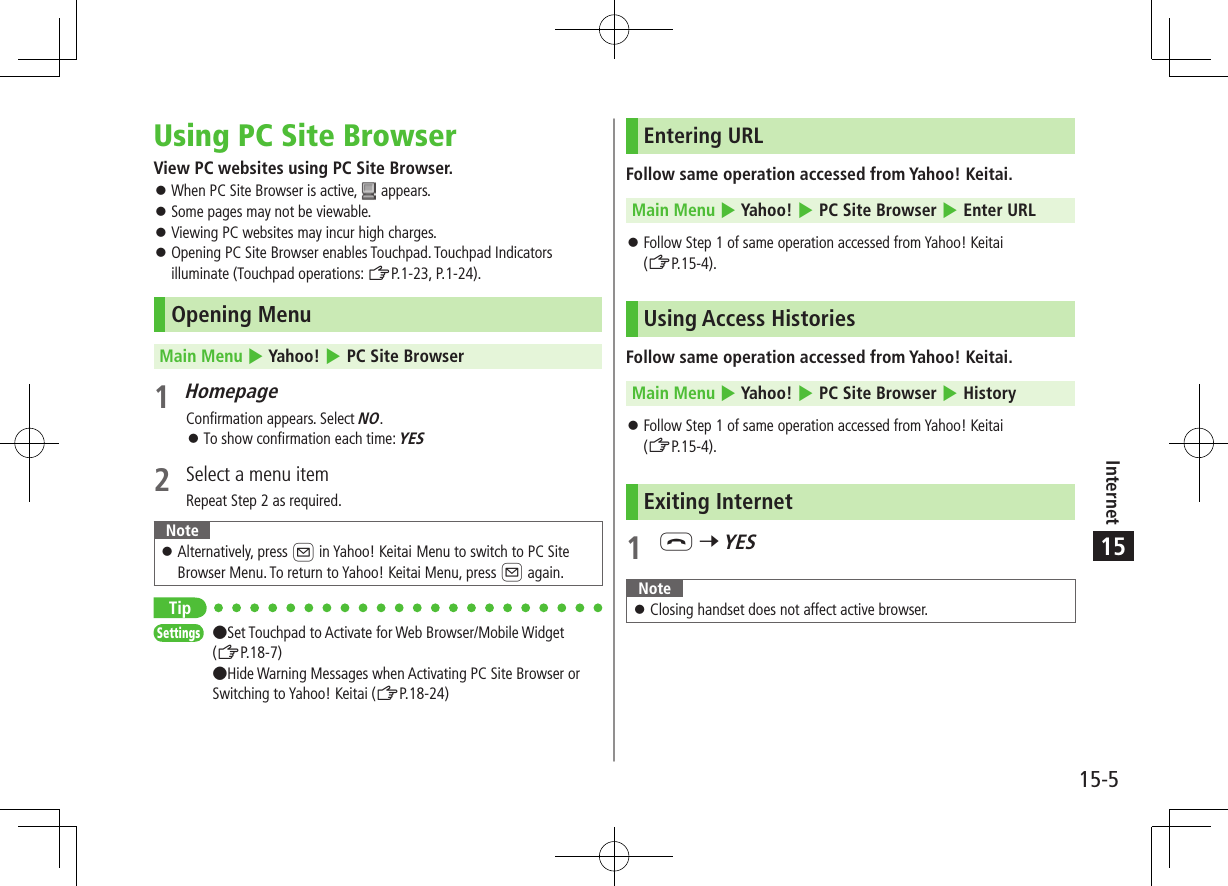
![15-6Internet15Basic OperationsUsing Cursor Operation descriptions are based on Portrait View.Move CursorUse cursor to select underlined menu items. to move right to move left to move to previous line to move to next lineScroll PagesScroll bar appears on right side or at bottom of Display when page content continues beyond view. scroll up/down scroll left/right scroll page up by a screenful scroll page down by a screenful To scroll continuously, press and hold above keys.Move to previous page/ next pagePreviously viewed pages are temporarily saved in Cache Memory (ZP.15-2).A[Back]: Return to previous pageS[Menu] 7 Forward: View next page Some web pages may not appear after performing the steps above. Touchpad operations (ZP.1-23, P.1-24)When Authentication is RequiredSome pages require user authentication for access.If required, enter user ID or password.Note While page is open, press and hold to switch to Digital TV.TipSettings ●Font Size ●Scroll Unit ●Images Off ●Sound Off ●Delete User ID or Password Entered when Authentication is Required (ZP.18-24)](https://usermanual.wiki/Panasonic-Connect/210030A.User-Manual-Part-2-of-6/User-Guide-1296396-Page-144.png)
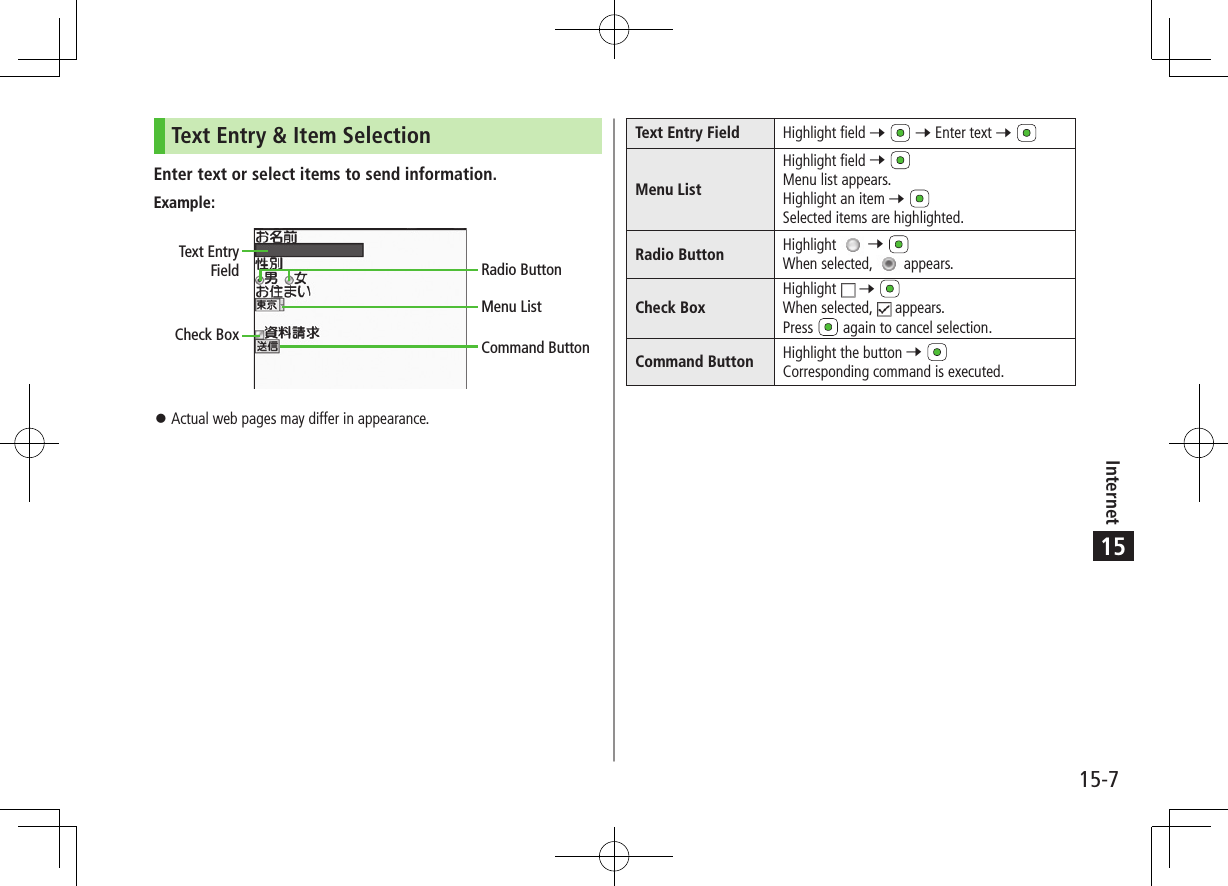
![15-8Internet15Using InformationBookmarks & Saved PagesBookmark websites or save page content to Saved Pages. Some copy protected materials cannot be saved.Bookmarks Save links to websites. Handset connects to the Network to open the link.Saved Pages Save page content. Handset opens saved pages without connecting to the Network.Saving Web Pages1 Open a web page 7 S[Menu] 7Bookmarks or Saved Pages 7 Add2 Select title 7 Edit title3 OK 7 OKViewing Bookmarks & Saved PagesMain Menu 4 Yahoo! (4 PC Site Browser)1 Bookmarks or Saved Pages 7 Select an itemExample: Yahoo! Keitai Browser ■Open Bookmarks/Saved Pages in Web Page >Open a web page 7 S[Menu] 7 Bookmarks or Saved Pages 7 View ListNote Create folders in Bookmarks/Saved Pages List to organize Bookmarks/ Saved Pages (ZP.15-9).Tip●Send Bookmarks via Infrared (ZP.11-3) ●Send Bookmarks via IC Transmission (ZP.11-5) ●Add Bookmark Shortcuts to Standby ●Save URLs to Bookmarks ●Send Bookmark URLs (ZP.15-10)Saved Pages List WindowBookmarks List Window](https://usermanual.wiki/Panasonic-Connect/210030A.User-Manual-Part-2-of-6/User-Guide-1296396-Page-146.png)
![Internet15-915Managing Bookmarks & Saved PagesFollow the steps below to open Bookmarks or Saved Pages list: ■Yahoo! KeitaiMain Menu 4 Yahoo! 4 Bookmarks or Saved Pages ■PC Site BrowserMain Menu 4 Yahoo! 4 PC Site Browser 4 Bookmarks or Saved PagesNote When a different USIM Card is inserted, Saved Pages do not appear or title name cannot be changed.Creating New Bookmarks/Saved Pages Folders Folders cannot be created within existing folders.1 BookmarksIn Bookmarks list window, S[Menu] 7 Create New 7 Folders 7 Enter title Saved PagesIn Saved Pages list window, S[Menu] 7 New Folder 7 Enter title ■Move Bookmarks/Saved Pages to Folder① Before moving to folders, set Sort to Saved/Used Order or Saved/Moved Order (ZP.15-10)② In Bookmarks/Saved Pages list window (ZP.15-8), highlight a bookmark/saved page 7 S[Menu] 7 Move to 7 Select a folder 7 Select a destination ■Edit Folder Title >In Bookmarks/Saved Pages list window (ZP.15-8), highlight a folder 7 S[Menu] 7 Edit 7 Edit folder titleEditing Bookmark Titles/URLs1 In Bookmarks list window, highlight a bookmark 7 S[Menu] 7 Edit2 Edit title/URLRenaming Saved Pages1 In Saved Pages list window, highlight a saved page 7 S[Menu] 7 Edit2 Edit titleTip ●Delete Bookmarks/Saved Pages/Folders ●Display Bookmark/Saved Page URLs ●Change Bookmarks/Saved Pages/Folders Display Order ●Sort Bookmarks/Saved Pages/Folders (ZP.15-10)](https://usermanual.wiki/Panasonic-Connect/210030A.User-Manual-Part-2-of-6/User-Guide-1296396-Page-147.png)
![15-10Internet15Bookmarks/Saved Pages FunctionsFrom Main Menu 4 Yahoo! (4 PC Site Browser)4 Bookmarks or Saved Pages ■Add Bookmark Shortcuts to Standby >Highlight a bookmark 7 S[Menu] 7 Add shortcut icon 7 YES ■Save URLs to Bookmarks >S[Menu] 7 Create New 7 Bookmarks 7 Enter a title/URL 7 OK ■Delete Bookmarks/Saved Pages/Folders >Follow the steps belowItem Operation/DescriptionDelete >Highlight a bookmark, saved page or folder 7 S[Menu] 7 Delete 7 YESDelete Selected Items Select items to delete >S[Menu] 7 Delete selected 7 Check items to delete 7 S[Delete] 7 YESDelete All >S[Menu] 7 Delete All 7 YES 7 Enter Phone Password ■Display Bookmark/Saved Page URLs >Highlight a bookmark/saved page 7 S[Menu] 7 Display URL ■Change Bookmarks/Saved Pages/Folders Display Order >Highlight a bookmark/saved page/folder 7 S[Menu] 7 Move to 7 to select a position Before changing order, set Sort (ZRight) to Saved/Used Order or Saved/Moved Order. ■Sort Bookmarks/Saved Pages/Folders >S[Menu] 7 Sort 7 Select a condition ■Send Bookmark URLs > Highlight a bookmark 7 S[Menu] 7 Send URL 7 S! Mail or SMS 7 Create a message (S! Mail: ZFrom Step 2 on P.14-4/SMS: ZFrom Step 2 on P.14-7)](https://usermanual.wiki/Panasonic-Connect/210030A.User-Manual-Part-2-of-6/User-Guide-1296396-Page-148.png)
![Internet15-1115Downloading Image/Sound FilesSave images, sounds, etc. to Data Folder or microSD Card. For PC Site Browser, only still images can be saved.1 Open a web page 7 S[Menu] 7 Select File2 Select a fileFile details appear.3 Save 7 YESAvailable menu items vary by saved content. Save location is determined by Save Settings (ZP.18-24). However, save location may change depending on situations. Check confirmation when download is complete.Note Do not remove/install microSD Card while saving files to it. Do not turn handset power off while downloading or saving files. Files may be damaged. Some copy protected files may not be saved. Videos selected from web pages play while being downloaded. Files 10 MB and larger are saved to microSD Card regardless of settings.Using Number, Address or URLUse linked numbers, addresses or URLs to make calls, send messages, access websites, or save directly to Phone Book.1 Open a web page containing phone numbers, mail addresses or URLs2 Phone NumberSelect a phone number 7 Select an item (See below)Item Operation/DescriptionVoice call Make a Voice CallVideo call Make a Video CallSelect image Select outgoing imageAdd to Phone BookSave a number to Phone Book (ZFrom Step 2 on P.4-5) E-mail AddressSelect an address 7 Select an item (See below)Item Operation/DescriptionCompose S! MailCreate S! Mail (ZFrom Step 4 on P.14-4)Compose SMS Create SMS (ZFrom Step 4 on P.14-7)Add to Phone BookSave mail address to Phone Book (ZFrom Step 2 on P.4-5) URLSelect URLHandset connects to the Network.](https://usermanual.wiki/Panasonic-Connect/210030A.User-Manual-Part-2-of-6/User-Guide-1296396-Page-149.png)
![15-12Internet15Streaming Supported by compatible files on Yahoo! Keitai sites only. Streaming files cannot be saved.Main Menu 4 Yahoo! 4 Yahoo! Keitai1 Open a web page 7 Select a fileStreaming starts.2 L or to exit ■Engaged Streaming OperationsMute/Release Mute S[/]Pause/Resume*[/]Volume /Set Playback Position* to start playback from specified pointToggle Views Toggle: Portrait View 7 Landscape View (Fit to Display size) 7 Full-size Landscape View* Not available during playback for live events such as live sports programsNote Streaming requires a continuous Network connection. Network remains connected even during a pause (Transmission fees apply). Paused streams may stop after three minutes of inactivity. Pausing playback while streaming via Wi-Fi (handset closed) may end streaming after 10 seconds. When roaming abroad, streaming may be unavailable or not be performed properly.Incoming Voice Calls while StreamingIncoming call pauses an active stream. Video Calls cannot be received while streaming.](https://usermanual.wiki/Panasonic-Connect/210030A.User-Manual-Part-2-of-6/User-Guide-1296396-Page-150.png)
![Internet15-1315Option Menu ItemsIn Yahoo! Keitai, press S[Menu] for these options: Some functions may not be available depending on web pages.Item Operation/DescriptionForward Go to next page (ZP.15-6)Bookmarks View Bookmarks list, add bookmarks, or add bookmark shortcuts to StandbySaved Pages View Saved Pages list or save page content to Saved PagesText Copy Copy page textReload Page Refresh page informationEnter URL Enter URL directly or use URL History to access pagesSelect File View, play or save file to Data Folder (Downloading Image/Sound Files: ZFrom Step 2 on P.15-11)Handy FunctionsSwitch PC Browser1/Switch Browser2: Toggle Yahoo! Keitai/PC siteConnect to Wi-Fi/Connect to 3G: Toggle Wi-Fi/3G connectionInternet Search: Search text in InternetLook up in dict.: Look up specified text in dictionarySearch In Page: Search text within pageJump in this page: Jump to top/end of pageSend URL: Send URL via S! Mail/SMSHistory: Open previously viewed pagesExpand/Shrink2: Zoom page in/outSet Display Range2: Specify displayed area of pageFlash(R) Menu: Playback/pause Flash® filesProperties: View page details or server certificates for secure pagesItem Operation/DescriptionYahoo! Keitai1/Home Page2View top menuSettingsFont Size: Change font sizeEncoding: Change encoding typePointer: Set Pointer2Switch screen2Toggle between Small Screen and PC ScreenExit Browser Exit Browser1 Yahoo! Keitai only2 PC Site Browser only](https://usermanual.wiki/Panasonic-Connect/210030A.User-Manual-Part-2-of-6/User-Guide-1296396-Page-151.png)
