SD Biosensor 01GM24 NFC Blood Glucose Monitor User Manual Link part1 manual
SD Biosensor, Inc. NFC Blood Glucose Monitor Link part1 manual
Contents
- 1. Link part1 manual
- 2. Link part2 manual
- 3. Mentor manual
- 4. Link manual part1
- 5. Link manual part2
Link part1 manual
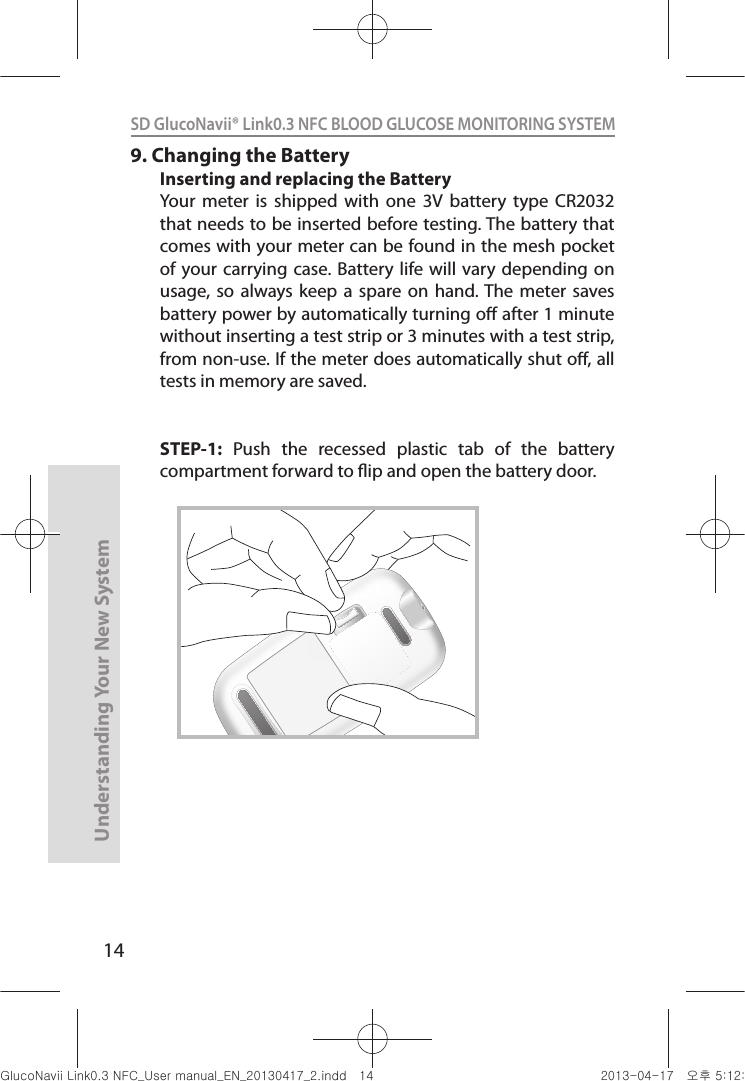
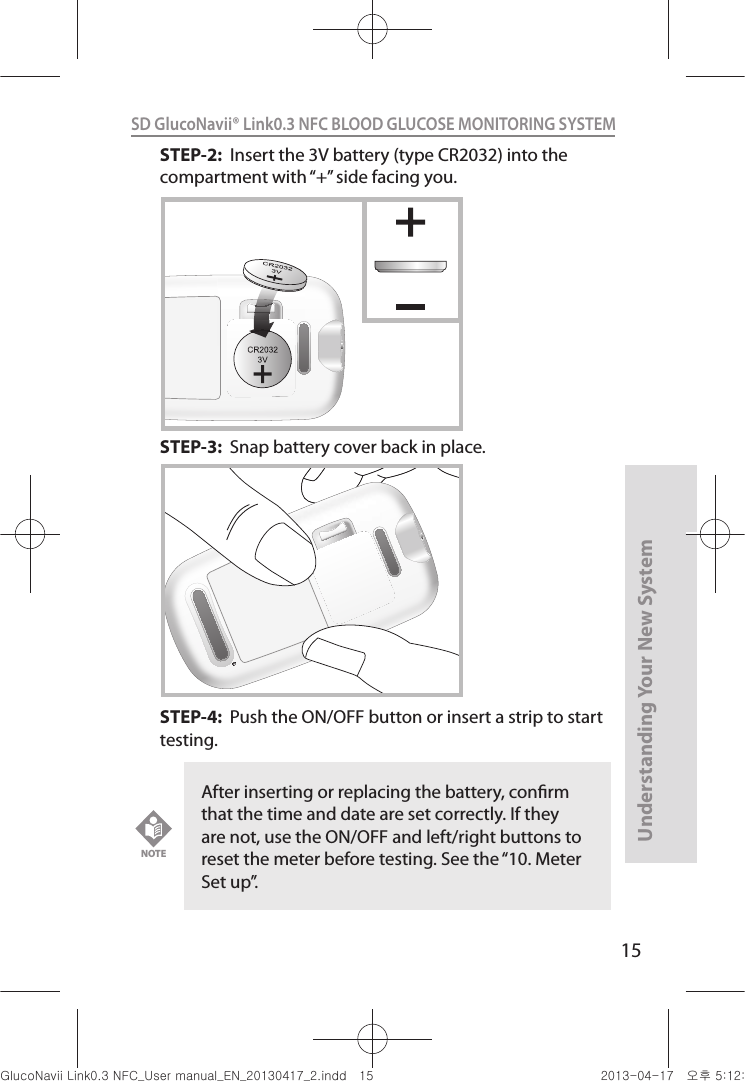
![6Understanding Your New SystemSD GlucoNavii® Link0.3 NFC BLOOD GLUCOSE MONITORING SYSTEM healthcare professional. Never ignore symptoms or make signicant changes to your diabetes control program without speaking to your healthcare professional. t Consult your physician to determine if it is appropriate for your child to be taught how to use the meter system or any other medical products.2. Special Information for Healthcare Providers and Caregiverst Do not use this device to measure blood glucose in people who are experiencing cardiovascular collapse (severe shock) or decreased peripheral blood ow. t Hematocrit: A hematocrit (percentage of your blood that is red blood cells) that is over 60% or below 20% can cause false results. 3. Indication for use (Purpose of the devices)Your new SD GlucoNavii® Link0.3 NFC meter and accessories work together to measure the amount of glucose (sugar) in your blood. Your SD GlucoNavii® Link0.3 NFC blood glucose monitoring system is indicated for monitoring glucose in fresh capillary whole blood or fresh venous blood. Testing is done outside the body. (in vitro diagnostic use) This system is indicated for home (over-the-counter or OTC) by person with diabetes, or in clinical settings by healthcare professionals, as an aid to monitor the eectiveness of diabetes control. This system should not be used for the diagnosis of diabetes.The SD GlucoNavii® Link0.3 NFC blood glucose monitoring system is suitable for self-testing.4. Product Description and the Principle of the useSD GlucoNavii® Link0.3 test strip is designed with an electrode that measures glucose levels. Glucose in the blood sample mixes with reagent on the test strip that nuGsWUZGumj|GluYWXZW[X^YUGGG] YWXZTW[TX^GGG㝘䟸G\aXYa[X](https://usermanual.wiki/SD-Biosensor/01GM24.Link-part1-manual/User-Guide-1989232-Page-7.png)

![16Understanding Your New SystemSD GlucoNavii® Link0.3 NFC BLOOD GLUCOSE MONITORING SYSTEM 10. Meter Set upSTEP-1 : Setting the Audible Beep1. In Strip Stand-by Display, if you press the ON/OFF button during 3 seconds, the display for setting the beep will appear, the rst step of the setting mode.2. Set the beep mode on or o by pressing either the left or the right button and then selecting the preferred feature by pressing the ON/OFF button. If you select the beep on feature, a ‘beep’ sound is made at the same time; otherwise, if you select the beep o feature, no sound is made. [ During 3 sec. ]Link0.3[ Left or right button ]Link0.3 Link0.3[ ON/OFF button ]nuGsWUZGumj|GluYWXZW[X^YUGGGX] YWXZTW[TX^GGG㝘䟸G\aXYa[^](https://usermanual.wiki/SD-Biosensor/01GM24.Link-part1-manual/User-Guide-1989232-Page-17.png)
![18Understanding Your New SystemSD GlucoNavii® Link0.3 NFC BLOOD GLUCOSE MONITORING SYSTEM STEP3: Setting the date and time[ Date Setting ]1. The third step of setting mode is the Date & Time setting. After setting the hypo warning, the display for setting Date & Time will appear, the third step of the setting mode. Set the correct year by pressing either the left or the right button and then select the correct year by pressing the ON/OFF button. Your new meter comes with a preset time and date. You may need to change the time to your time zone. Having the right time and date in your meter is important if you use the meter memory. It also helps your healthcare team interpret your results.NOTEnuGsWUZGumj|GluYWXZW[X^YUGGGX_ YWXZTW[TX^GGG㝘䟸G\aXYa[^](https://usermanual.wiki/SD-Biosensor/01GM24.Link-part1-manual/User-Guide-1989232-Page-19.png)
![19Understanding Your New SystemSD GlucoNavii® Link0.3 NFC BLOOD GLUCOSE MONITORING SYSTEM [ Left or right button ]Link0.3 Link0.3[ ON/OFF button ]2. Next will appear the setting display for month and day format. The meter can display the month and day in either a Month-Day (m-d) format or a Day-Month (d-m) format. Set the preferred format on the display by pressing either the left or the right button and select by pressing the ON/OFF button.3. Set the correct month or day on the display by pressing either the left or the right button and select by pressing the ON/OFF button.nuGsWUZGumj|GluYWXZW[X^YUGGGX` YWXZTW[TX^GGG㝘䟸G\aXYa\W](https://usermanual.wiki/SD-Biosensor/01GM24.Link-part1-manual/User-Guide-1989232-Page-20.png)
![20Understanding Your New SystemSD GlucoNavii® Link0.3 NFC BLOOD GLUCOSE MONITORING SYSTEM [ Time Setting ]1. Next will appear the display for setting the 12 or 24 Hour clock format. The meter can display the time in either the 12h format or the 24h format. Set the preferred format on the display by pressing either the left or the right button and select by pressing the ON/OFF button. 2. Next will appear the setting display for time format. Set the correct hour and minute on the display by pressing either the left or the right button and select the correct time by pressing the ON/OFF button.[ Left or right button ]Link0.3Link0.3[ ON/OFF button ]nuGsWUZGumj|GluYWXZW[X^YUGGGYW YWXZTW[TX^GGG㝘䟸G\aXYa\Z](https://usermanual.wiki/SD-Biosensor/01GM24.Link-part1-manual/User-Guide-1989232-Page-21.png)
![21Understanding Your New SystemSD GlucoNavii® Link0.3 NFC BLOOD GLUCOSE MONITORING SYSTEM [ Left or right button ]Link0.3 Link0.3[ ON/OFF button ]STEP4: Post-meal alarmYou can use the meter’s post-meal alarm function to remind you to test your blood glucose after meal.1. After day and time setting, the display for setting the post-meal alarm will appear the fourth of setting mode.2. Set the post-meal alarm mode ‘2h’ or ‘o’ by pressing either the left or the right button and then select the preferred feature by pressing the ON/OFF button. nuGsWUZGumj|GluYWXZW[X^YUGGGYX YWXZTW[TX^GGG㝘䟸G\aXYa\\](https://usermanual.wiki/SD-Biosensor/01GM24.Link-part1-manual/User-Guide-1989232-Page-22.png)
![23Understanding Your New SystemSD GlucoNavii® Link0.3 NFC BLOOD GLUCOSE MONITORING SYSTEM STEP5: Setting the alarmYou can use the meter’s alarm function to remind you to test your blood glucose.1. After Post-meal alarm setting the display for setting the alarm will appear, the fth of setting mode. 2. Set the rst alarm on or o by pressing either the left or the right button and then select the preferred feature by pressing the ON/OFF button.t If you select the alarm o feature, next will appear the Strip Stand-by Display. t If you select the alarm on feature, you can set the alarm up to four times a day at any time you want.NOTE[ Left or right button ]Link0.3 Link0.3[ ON/OFF button ]nuGsWUZGumj|GluYWXZW[X^YUGGGYZ YWXZTW[TX^GGG㝘䟸G\aXYa\_](https://usermanual.wiki/SD-Biosensor/01GM24.Link-part1-manual/User-Guide-1989232-Page-24.png)
![24Understanding Your New SystemSD GlucoNavii® Link0.3 NFC BLOOD GLUCOSE MONITORING SYSTEM 3. If you select the alarm on feature in rst alarm mode, the clock will blink. Set the correct time and minute you want to set an alarm on the display by pressing either the left or the right button and then select the preferred feature by pressing the ON/OFF button.4. If you nish setting the rst alarm, next will appear the second alarm setting mode. Set the alarm with the same way as above. [2, 3]5. You can set the third and fourth alarm mode with the same way as above. [2, 3]If you select the alarm o feature in rst (also second, third and fourth) alarm mode, next will appear the Strip Stand-by Display.NOTE[ Left or right button ]Link0.3 Link0.3[ ON/OFF button ]nuGsWUZGumj|GluYWXZW[X^YUGGGY[ YWXZTW[TX^GGG㝘䟸G\aXZaWY](https://usermanual.wiki/SD-Biosensor/01GM24.Link-part1-manual/User-Guide-1989232-Page-25.png)
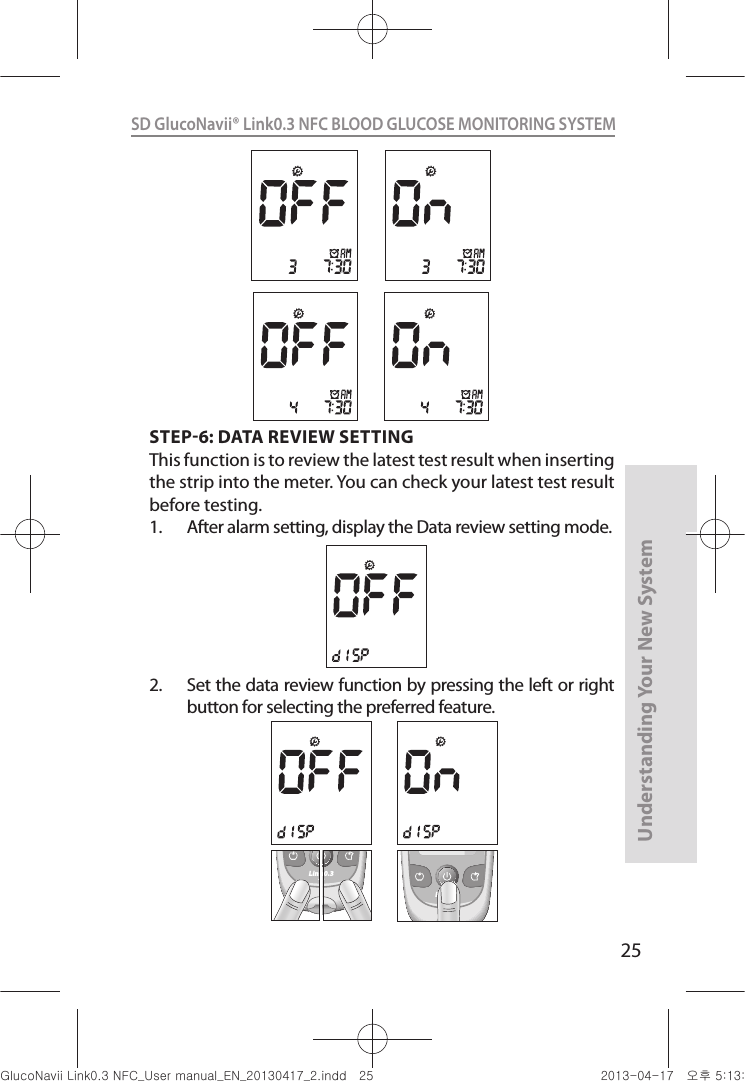
![26Understanding Your New SystemSD GlucoNavii® Link0.3 NFC BLOOD GLUCOSE MONITORING SYSTEM 3. If you nish data review setting mode, next appear at the strip-stand by display. 11. Using SD GlucoNavii® Link0.3 Test Strips[ Important Test Strip Information ]t SD GlucoNavii® Link0.3 blood glucose test strip should be used with SD GlucoNavii® Link0.3 NFC meter. Using other glucose test strip can cause inaccurate the result or ‘E-1’ error message.t After removing a test strip from the container, replace the container cap immediately and close it tightly. t Use the test strip within three minutes after you take it out of the container. t Store test strip containers in a cool, dry place at 2-32°C(36-90°F). Keep away from direct sunlight and heat. Do not refrigerate test strips. t Do not expose strips to heat, moisture or humidity. Temperatures outside the required range, as well as moisture and humidity (e.g. bathroom, kitchen, laundry room, car, or garage) can damage your test strips and lead to inaccurate results. t Store test strips in their original container only to avoid damage or contamination. Do not transfer test strips to any other storage device, and do not store outside of their original container. t Do not use test strips from any container that is damaged or left open to air. nuGsWUZGumj|GluYWXZW[X^YUGGGY] YWXZTW[TX^GGG㝘䟸G\aXZaW]](https://usermanual.wiki/SD-Biosensor/01GM24.Link-part1-manual/User-Guide-1989232-Page-27.png)
![27Understanding Your New SystemSD GlucoNavii® Link0.3 NFC BLOOD GLUCOSE MONITORING SYSTEM t Write the opening date on the container label when you rst open it. Discard remaining SD GlucoNavii® Link0.3 Test Strips after the discard date. (6 months after rst opening from the container.) t SD GlucoNavii® Link0.3 Test Strips are for single use only. Never reuse a test strip that has had either blood or control solution applied to it. t Avoid getting dirt, food or liquids on the test strip. With clean, dry hands, you may touch the test strip anywhere on its surface. t Do not bend, cut, or alter SD GlucoNavii® Link0.3 Test Strip in any way. Do not swallow test strips. The test strip container may contain drying agents that are harmful if inhaled or swallowed and may cause skin or eye irritation.CAUTIONnuGsWUZGumj|GluYWXZW[X^YUGGGY^ YWXZTW[TX^GGG㝘䟸G\aXZaW]](https://usermanual.wiki/SD-Biosensor/01GM24.Link-part1-manual/User-Guide-1989232-Page-28.png)
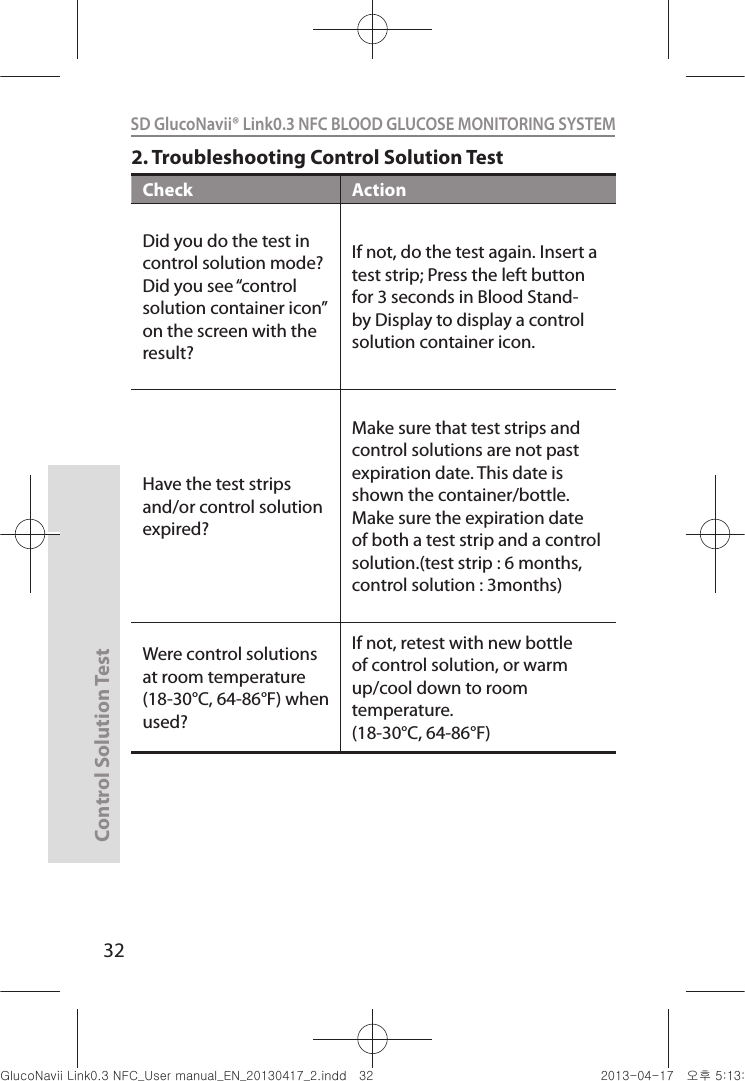
![Control Solution Test28SD GlucoNavii® Link0.3 NFC BLOOD GLUCOSE MONITORING SYSTEM CHAPTER 2 : Control Solution TestWhy you do control solution test ; t SD Glucose control solution is used to check that the meter and the test strips are working together as a system and that you are performing the test correctly. t It is very important that you do this simple check routinely to make sure you get an accurate result. When you do control solution test ;t You open a new box test strips. t You left the test strip container open or you think your test strips have been damaged. t Your test strips were stored in extreme temperatures and/or humidity. t You want to check the meter and test strips. t You dropped the meter. t Your test result does not agree with how you feel. t You want to check if you are testing correctly. Before you begin ; t Use only SD Glucose control solution. t Check the expiration date on the control solution container. Record the opening date on the container label. Do Not use after expiration or discard date (date opened plus three months), whichever comes rst. t Control solution, meter and test strips should be at room temperature 18-30°C (64-86°F) before testing with control solution. nuGsWUZGumj|GluYWXZW[X^YUGGGY_ YWXZTW[TX^GGG㝘䟸G\aXZaW]](https://usermanual.wiki/SD-Biosensor/01GM24.Link-part1-manual/User-Guide-1989232-Page-29.png)
![Control Solution Test29SD GlucoNavii® Link0.3 NFC BLOOD GLUCOSE MONITORING SYSTEM t Shake the container, discard the rst drop of control solution, and wipe o the tip to ensure a proper sample and an accurate result. t Store SD Glucose control solution tightly closed at temperatures between 8-30°C (46-86°F). Do Not refrigerate. 1. Performing Control Solution TestYou need the meter, a test strip, and control solution Level M or Level H. The control level is printed on the test strip label.For more information how to obtain SD Glucose control solution, call at +82-31-300-0400.t Do not swallow SD Glucose control solution; it is not for human consumption. t Do not apply SD Glucose control solution to the skin or eyes as it may cause irritation. CAUTIONA set of Level M and H control solutions is available for purchase. To order control solutions, talk to your pharmacist or medical surgical supply dealers. Your meter is designed to recognize the dierence between Control Solution and blood. The meter automatically stores the test results using a control solution, letting your review them. But the meter does not include them in averages.NOTEnuGsWUZGumj|GluYWXZW[X^YUGGGY` YWXZTW[TX^GGG㝘䟸G\aXZaW]](https://usermanual.wiki/SD-Biosensor/01GM24.Link-part1-manual/User-Guide-1989232-Page-30.png)
![Control Solution Test30SD GlucoNavii® Link0.3 NFC BLOOD GLUCOSE MONITORING SYSTEM STEP-1:1) Remove a new test strip from container. Be sure to tightly replace container cap after removing test strip. 2) Insert a test strip (yellow window printed ‘Link0.3’ facing up) into test strip slot. The meter turns on automatically.STEP-2:1) Press the left button for 3 seconds to check the testing system using a control solution in Blood Stand-by Display. If you don’t want a control solution test, press the left button again.2) Shake the control solution container and discard the rst drop of solution. Gently squeeze the container to form one small drop. Bring the drop to the edge of the strip, and allow the strip to automatically draw the control solution into the yellow window. When control solution is applied to the test strip, the meter counts down from 5 to 1 second on the display. Tightly replace the cap on control solution. Link0.3[ Left button ]Link0.3nuGsWUZGumj|GluYWXZW[X^YUGGGZW YWXZTW[TX^GGG㝘䟸G\aXZaW^](https://usermanual.wiki/SD-Biosensor/01GM24.Link-part1-manual/User-Guide-1989232-Page-31.png)
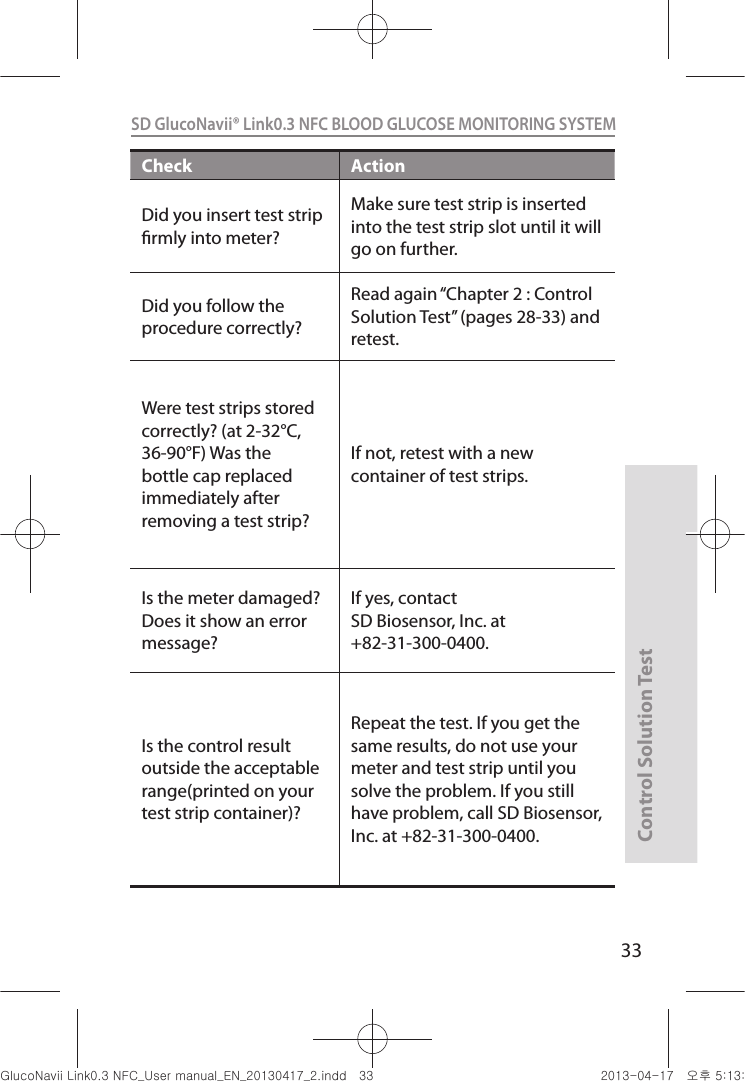
![Control Solution Test31SD GlucoNavii® Link0.3 NFC BLOOD GLUCOSE MONITORING SYSTEM 3) The control solution result appears on the screen in just 5 seconds. 4) Compare control solution result with the range printed on the test strip container. If the results are not within the control range printed on the test strip container, then the meter and strips may not be working properly. Repeat the control solution test.5) Remove the used test strip for control solution from the meter and discard it.mg/dLmmol/LLink0.3NFCNOTE The control solution range printed on the test strip container is for SD GlucoNavii® Control Solution only. It is not a recommended range for your blood glucose level. [This is an example. Refer to the ranges on your test strip container.]Control RangeLevel M Level H90-140 mg/dL 170-240 mg/dL5.0-7.8 mmol/L 9.4-13.3 mmol/Lmg/dLmmol/L[Example]nuGsWUZGumj|GluYWXZW[X^YUGGGZX YWXZTW[TX^GGG㝘䟸G\aXZaW^](https://usermanual.wiki/SD-Biosensor/01GM24.Link-part1-manual/User-Guide-1989232-Page-32.png)