SKYPINE ELECTRONICS SD9614SV CAR DVD ENTERTAINMENT CENTER (BLUETOOTH PORTION ONLY) User Manual SD 9614 SV
SKYPINE ELECTRONICS (SHEN ZHEN) CO., LTD. CAR DVD ENTERTAINMENT CENTER (BLUETOOTH PORTION ONLY) SD 9614 SV
Contents
- 1. USERS MANUAL 1
- 2. USERS MANUAL 2
- 3. USERS MANUAL 3
USERS MANUAL 3
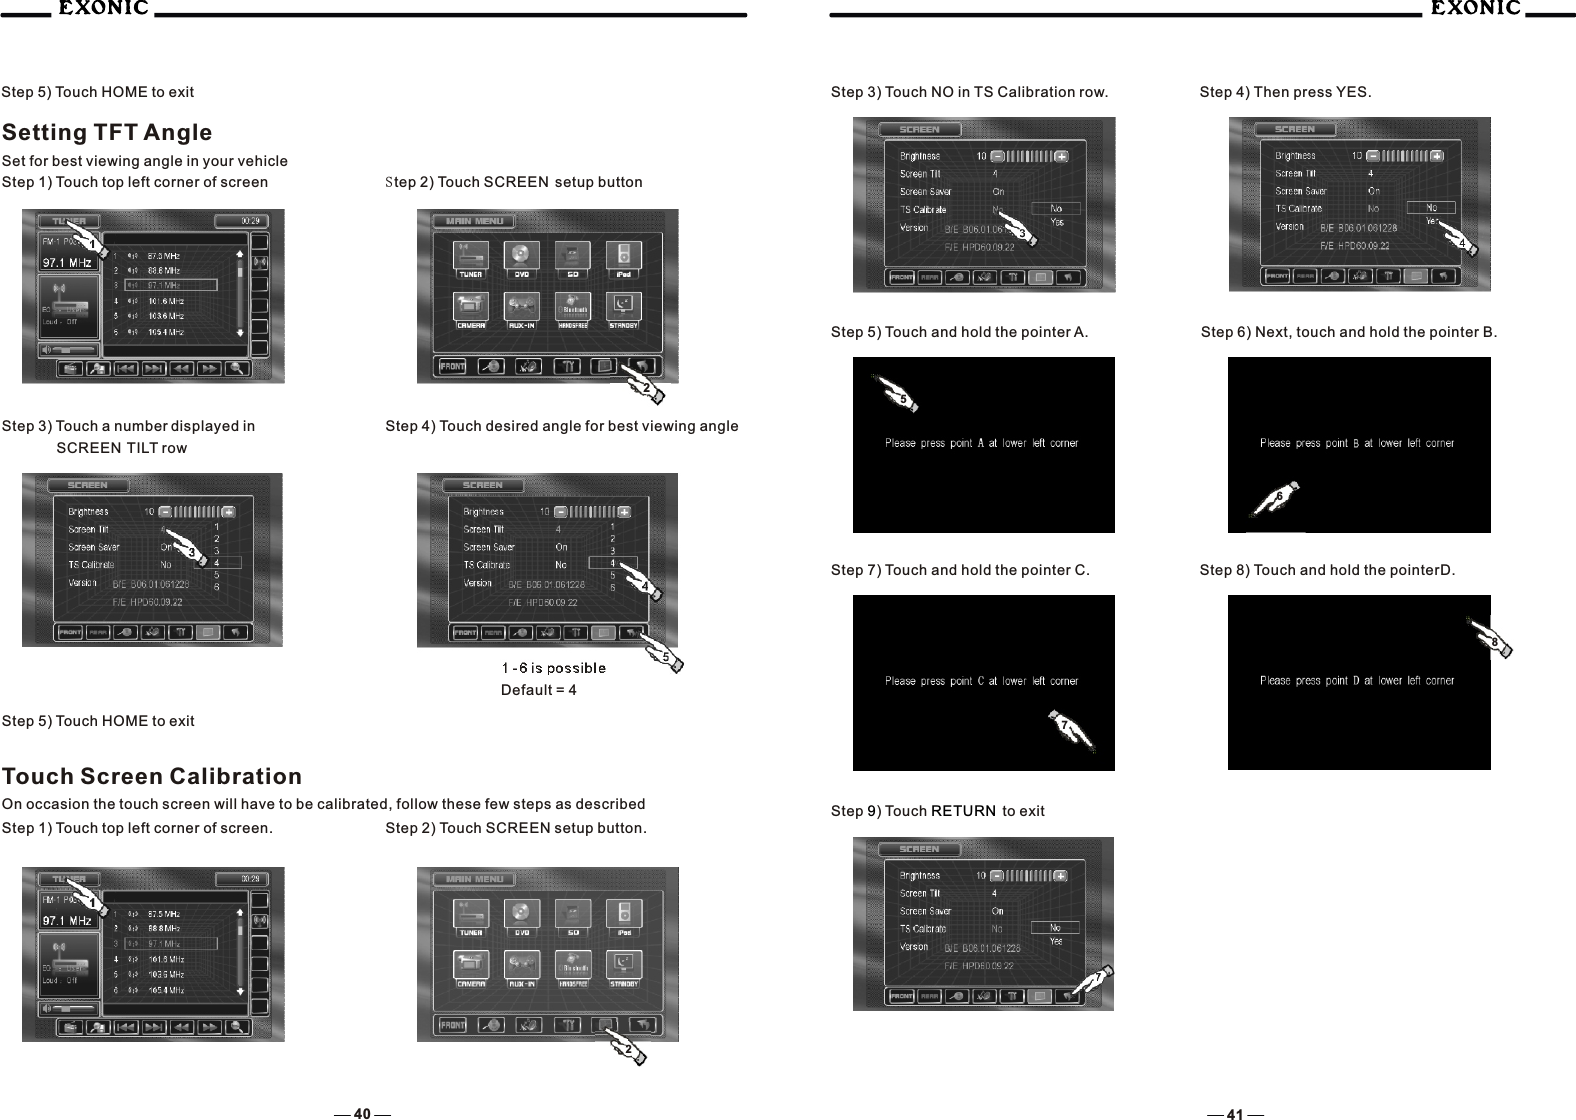
![38 39System SCREEN Setup MenuScreen Setup Menu Press the SCREEN Setup button to access the SCREEN SETUP modeSelect desired parameter you wish to changePage will return back to previous screen after 10 seconds of inactivity or by pressing the RETURN buttonAdjusting a FeatureSettings Default Options Function Brightness 10 0 to +20Press the < / > buttons on the remote or rotate the ENTER button clockwise / count-clockwise to adjust the BRIGHTNESS to the desired settingScreen Tilt 4 1 - 6 Select 1 to 6 to adjust the default tilt angle of the screenScreen SaverOnOn Off Select On to activate the screen saver, Off to deactivateTouch "Yes" to enter the Touch Screen calibration modeNoNoTouch ScreenCalibrationVersionYesSetting TFT BrightnessThis will set the default setting for the TFT display brightness, this setting can also be set by pressing the INFO button on the front TFT panel.Step 2) Touch SCREEN setup buttonStep 3) Touch [-] to DIM TFTSoftware version of unit2To conserve the LCD backlight lifespan or to stop annoying glare while night driving, press STANDBY, the TFT screen only will black out, however all other operations are still possible, press any button except VOLUME or touch screen again to return normal viewing.Step 1) Touch top left corner of screen Step 4) Touch [+] to brighten TFT0 to + 20 is possibleDefault = 10](https://usermanual.wiki/SKYPINE-ELECTRONICS/SD9614SV.USERS-MANUAL-3/User-Guide-939329-Page-1.png)