SZ DJI TECHNOLOGY 800RX1504 RONIN RX User Manual 1
SZ DJI TECHNOLOGY CO., LTD RONIN RX 1
Contents
- 1. User Manual 1
- 2. User Manual 2
User Manual 1
Thumb Controller
V1.0 2015.4
User Manual

2
© 2015 DJI. All Rights Reserved.
Disclaimers and Warnings
Congratulations on purchasing your new DJI product. Carefully read
the manual and all disclaimers before using this product. By using
this product, you hereby agree to this disclaimer and signify that you
have read it in its entirety. You agree that you are responsible for your
own conduct, for all content that is created using this product, and for
any consequences that may arise from either. You agree to use this
product only for purposes that are proper and in accordance with local
regulations, stated terms, and all applicable polices and guidelines.
By reading this disclaimer, you also agree that:
1. Any part of this disclaimer is subject to change without prior
notice. Refer to www.dij.com for the latest version.
2. DJI reserves the right of nal interpretation of this disclaimer.
As DJI has no control over use, setup, nal assembly, modication,
or misuse of its products, no liability shall be assumed or accepted
for any resulting damage or injury. By using, setting up, or
assembling the product, the user accepts all resulting liability. DJI
assumes no liability for damages or injuries incurred directly or
indirectly from the use of this product.
DJI is a registered trademark. All names of products, brands, etc.
appearing in this manual are trademarks or registered trademarks
of their respective owner companies. This product and manual are
copyrighted by DJI, with all rights reserved. No part of this product
or manual shall be reproduced in any form without the prior written
consent or authorization of DJI. No patent liability is assumed with
respect to the use of the product or information contained herein.

© 2015 DJI. All Rights Reserved.
3
Content
Disclaimers and Warnings 2
In the Box 4
Introduction 5
Thumb Controller 5
External Receiver (For Ronin Only) 6
Installation 7
Installing the Thumb Controller 7
Installing the External Receiver (For Ronin Only) 8
Connecting the Thumb Controller to the Gimbal 9
Connecting the Thumb Controller to the Ronin-M 9
Connecting the Thumb Controller to the Ronin 9
Indicator Status 11
Using the Thumb Controller 12
Mode 12
Function 13
Gimbal Settings 13
Device Settings 14
DJI Assistant App Tuning 16
DJI PC/MAC Assistant Tuning 17
Settings 17
Updating the Thumb Controller and the Receiver 18
Specications 20

4
© 2015 DJI. All Rights Reserved.
In the Box
Check to ensure that all of the following items are included in the
package. If any items are missing, contact DJI or your local dealer.
The following items are included with the Thumb Controller for the
Ronin-M:
The following items are included with the Thumb Controller for the Ronin:
Thumb Controller×1 Quick Release Accessory
Mount×1
USB Cable×1 Rubber
Ring×1
Receiver×1 Adhesive Tape×14-Pin Cable×1
Thumb Controller×1 Quick Release Accessory
Mount ×1
USB Cable×1
© 2015 DJI. All Rights Reserved.
5
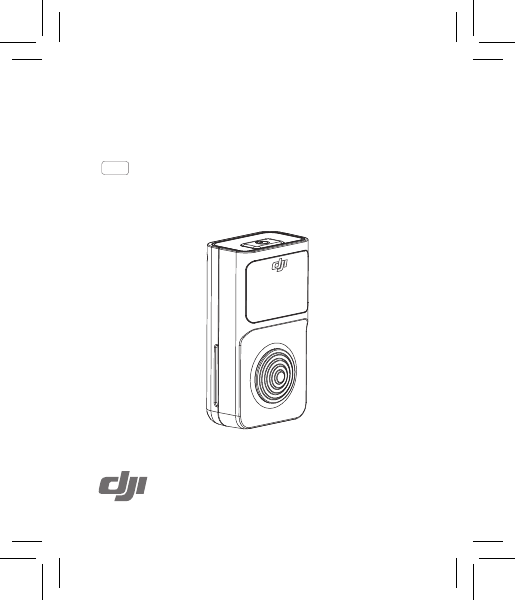
Introduction
The Thumb Controller is designed specically for DJI Ronin series
handheld gimbals. It provides a simple, intuitive interface for
controlling the gimbal’s pan, tilt, and roll motion. The pressure-
sensitive stick and the easy-to-read OLED display give Ronin users
more control than ever before.
The Thumb Controller communicates with the Ronin-M via a
preinstalled internal receiver. An external receiver is needed when
the Thumb Controller is used with the Ronin.
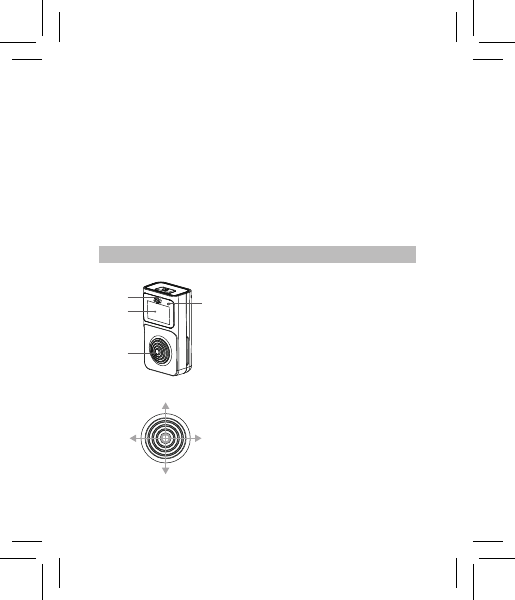
Thumb Controller
[1] Power Button
Press and hold the power
button to turn on/off the Thumb
Controller
[2] Status Indicator
Indicates the status of the
Thumb Controller
[3] OLED Display
Displays the menu of the
Thumb Controller
[4] Pressure-Sensitive Stick
Transmits the user’s input to
the force sensor
[1] [2]
[3]
[4]
6
© 2015 DJI. All Rights Reserved.
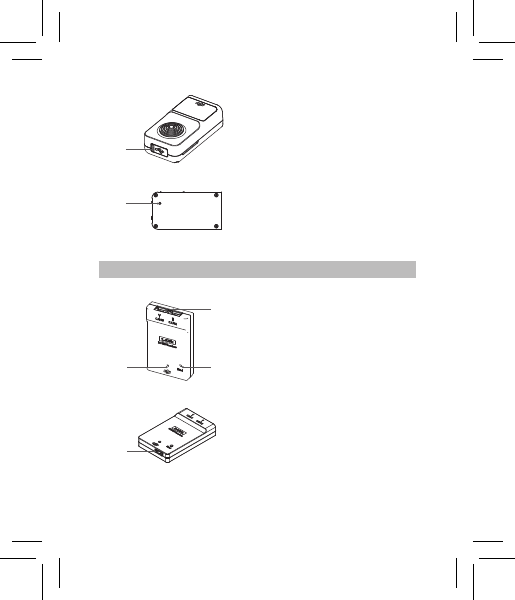
[5] Micro-USB Port
For charging the Thumb
Controller and upgrading its
rmware
[6] Override Button
Allow the Thumb Controller
to reactivated and updated
following a failure update
process
[1] CAN Port
Connects the receiver to the
Ronin
[2] Bind Button
Connects the Thumb
Controller to the Ronin
[3] LED Indicator
Indicates the status of the
receiver
[4] Micro-USB Port
For upgrading the rmware
External Receiver (For Ronin Only)
[5]
[6]
[1]
[2]
[3]
[4]
© 2015 DJI. All Rights Reserved.
7
Installation
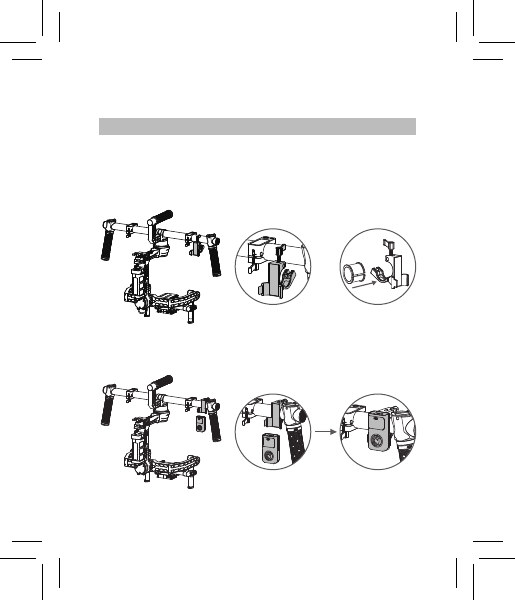
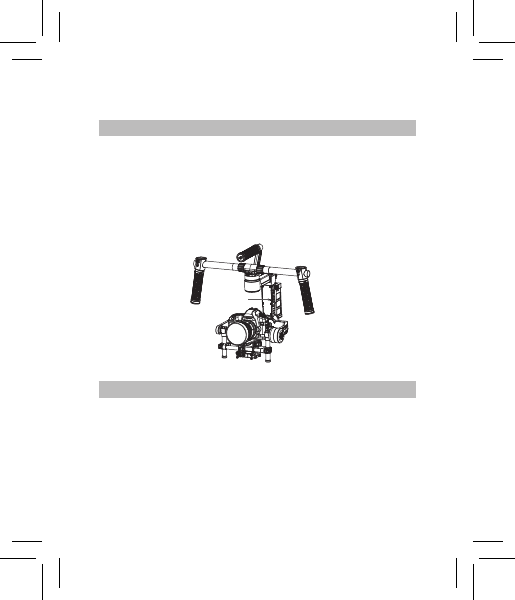
Installing the Thumb Controller
1. Install the quick-release accessory mount by clamping it around
the handlebar of the Ronin and tightening the screw. Remember
to place the rubber ring on the on the handlebar and clamp the
accessory mount around it when installing the unit on the Ronin-M.
2. Insert the Thumb Controller into the quick-release accessory
mount and ensure that it is secure.
8
© 2015 DJI. All Rights Reserved.
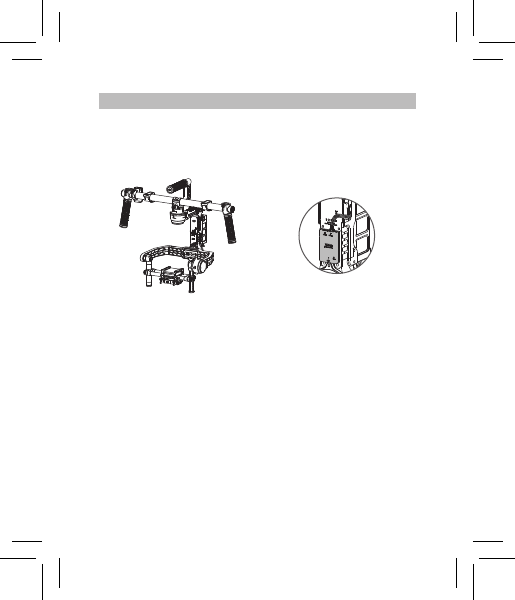
Installing the External Receiver (For Ronin Only)
1. Use the 4-pin cable to connect the CAN port on the Ronin to the
CAN 1 or Can 2 port on the receiver.
2. Use the adhesive tape to secure the receiver on the Ronin.
© 2015 DJI. All Rights Reserved.
9
Connecting the Thumb Controller to the Gimbal
Connecting the Thumb Controller to the Ronin-M
1. Turn on the Ronin-M.
2. Press the Ronin-M’s Bind Button (shown below) one time. The
LED indicator on the Ronin-M will rapidly blink green.
3. Turn on the Thumb Controller. If the LED indicator on the Ronin-M
and the LED indicator on the Thumb Controller both glow solid
green, they have been successfully connected.
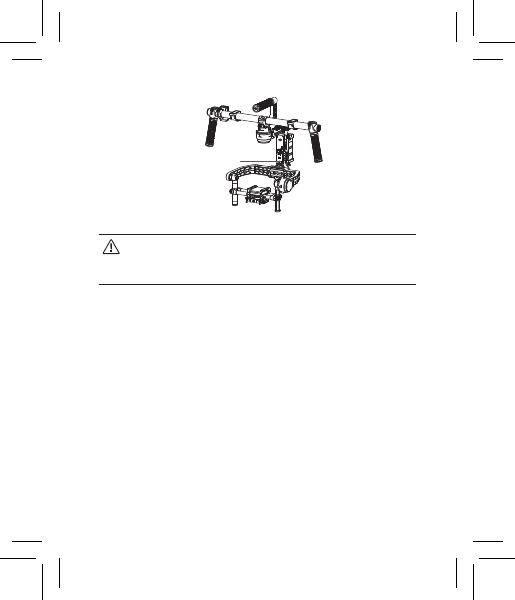
Connecting the Thumb Controller to the Ronin
1. Turn on the Ronin.
2. Press the Bind Button on the receiver one time. The LED indicator
on the receiver will rapidly blink green.
3. Turn on the Thumb Controller. If the LED indicator on the receiver
and the LED indicator on the Thumb Controller both glow solid
green, they have been successfully connected.
Bind Button
10
© 2015 DJI. All Rights Reserved.
The binding process only needs to be completed one time,
unless the bind button is pressed or the Ronin/Ronin-M
needs to be connected to another Thumb Controller.
Bind Button
© 2015 DJI. All Rights Reserved.
11
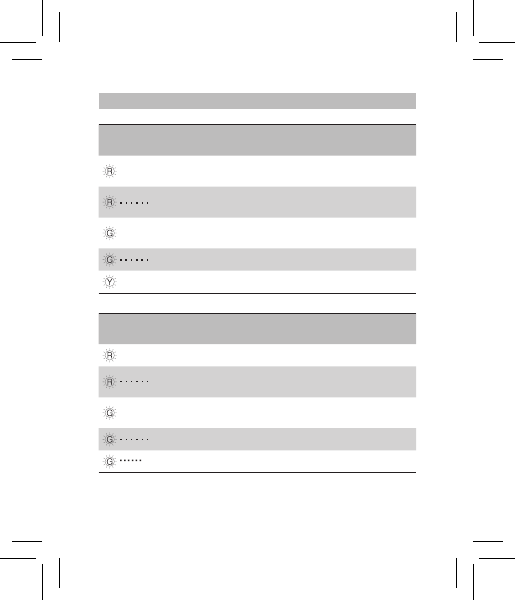
Indicator Status
Thumb Controller
LED Indicator Status Description
— Solid Red The Thumb Controller is being
updated
Blinking Red The Thumb Controller is not connected
to the receiver
—
Solid Green The Thumb Controller is connected to
the receiver
Blinking Green The update process is complete
—
Solid Yellow The Thumb Controller is fully charged
External Receiver LED
Indicator Status Description
— Solid Red The receiver is being updated
Blinking Red The Thumb Controller is not
connected to the receiver
—
Solid Green The Thumb Controller is
connected to the receiver
Blinking Green The update process is complete
Blinking Green Quickly Binding
12
© 2015 DJI. All Rights Reserved.
Using the Thumb Controller
To enter the Main Menu, press and hold the center of the pressure-
sensitive stick.
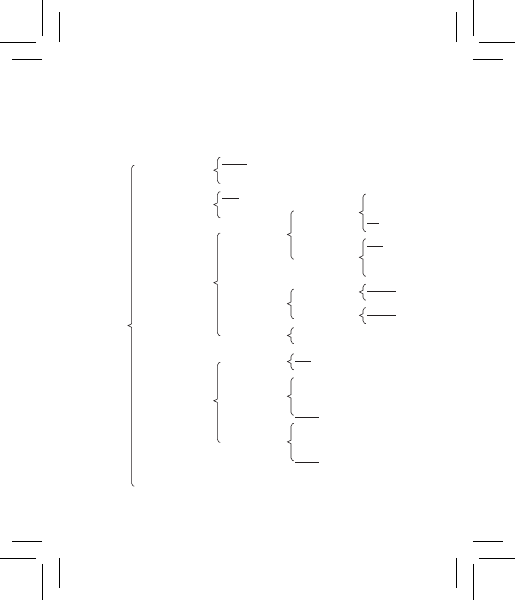
Menu
Mode
Gimbal Setting
Device Setting
Default Setting
About
Function
ST Off
ST On
Auto Center
Fast
Normal
Slow
Channel
Direction
Calibration
Sleep
Sensitivity
Power off
Restore
Version **
Up/Down
1min
5min
10min
Never
10min
30min
60min
Never
Pan
Roll
Tilt
None
Pan
Roll
Tilt
None
Normal
Reverse
Normal
Reverse
Left/Right
Up/Down
Left/Right
Cali System
Auto Tune
Soft
Hard