Samsung Electronics Co DV180F Digital Camera User Manual DV150F UM ENG 121112
Samsung Electronics Co Ltd Digital Camera DV150F UM ENG 121112
Contents
- 1. User manual 1 of 3
- 2. User manual 2 of 3
- 3. User manual 3 of 3
User manual 2 of 3
Extended functions
51
Using Magic modes
Capture a photo or record a video with various effects.
4
Align your subject in the frame, and then half-press
[Shutter] to focus.
5
Press [Shutter] to capture the photo.
In Magic Frame mode, the resolution is automatically set to .
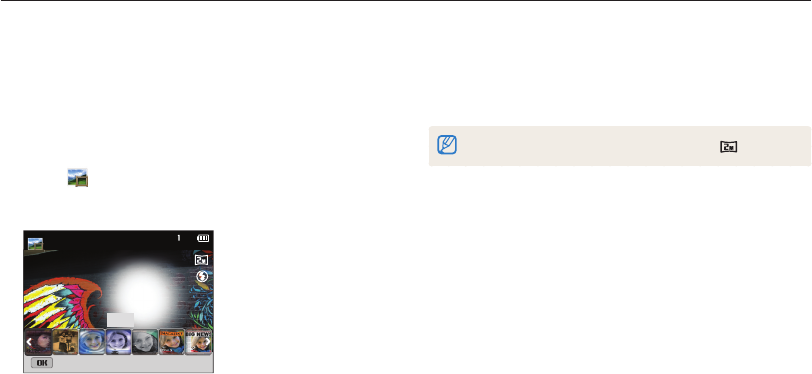
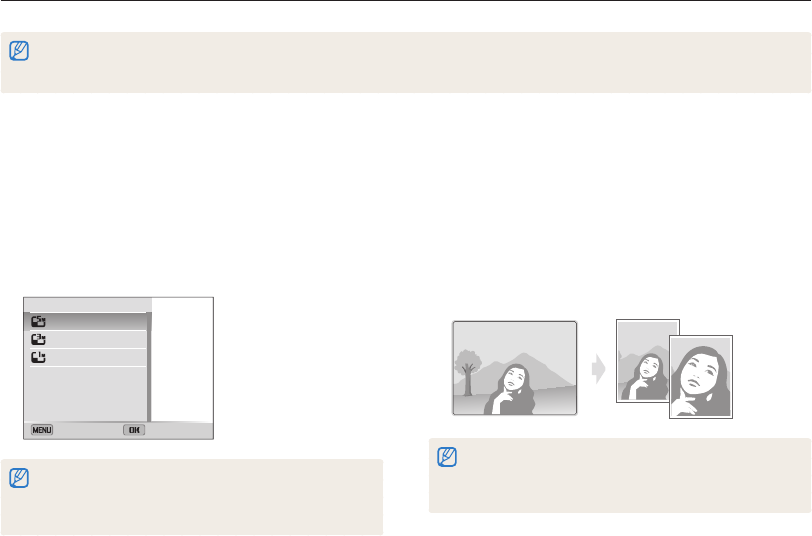
Using the Magic Frame mode
In Magic Frame Shot mode, you can apply various frame effects
to your photos. The shape and the feel of the photos will change
according to the frame you select.
1
On the Home screen, scroll to <Magic>.
2
Select .
3
Select a desired frame.
Mural
Panel off

Extended functions
52
Using Magic modes
Using the Photo Filter mode
Apply various filter effects to your photos to create unique images.
Miniature Vignetting
Fish-eye Sketch
1
On the Home screen, scroll to <Magic>.
2
Select .
3
Select an effect.
Option Description
Miniature Apply a tilt-shift effect to make the subject appear
in miniature.
Vignetting Apply the retro-looking colors, high contrast, and
strong vignette effect of Lomo cameras.
Ink Painting Apply a watercolor painting effect.
Oil Painting Apply an oil painting effect.
Cartoon Apply a cartoon painting effect.
Cross Filter Add lines that radiate outward from bright objects to
imitate the visual effect of a cross filter.
Sketch Apply a pen sketch effect.
Soft Focus Hide facial imperfections or apply dreamy effects.
Fish-eye Blacken the edges of the frame and distort objects
to imitate the visual effect of a fisheye lens.
Old Film Apply a vintage film effect.
Half Tone Dot Apply a halftone effect.
Classic Apply a black and white effect.
Retro Apply a sepia tone effect.
Zooming Shot Blur the edges of a photo to emphasize the subjects
in the center.
Extended functions
53
Using Magic modes
4
Align your subject in the frame, and then half-press
[Shutter] to focus.
5
Press [Shutter] to capture a photo.
Depending on the option you select, the resolution may change to or
smaller automatically.
Using the Movie Filter mode
Apply various filter effects to your videos to create unique images.
1
On the Home screen, scroll to <Magic>.
2
Select .
3
Select an effect.
Option Description
Miniature Apply a tilt-shift effect to make the subject
appear in miniature.
Vignetting Apply the retro-looking colors, high contrast,
and strong vignette effect of Lomo cameras.
Half Tone Dot Apply a halftone effect.
Sketch Apply a pen sketch effect.
Option Description
Fish-eye Distort close objects to imitate the visual effect
of a fisheye lens.
Classic Apply a black and white effect.
Retro Apply a sepia tone effect.
Palette Effect 1 Create a vivid look with sharp contrast and
strong color.
Palette Effect 2 Make scenes clean and clear.
Palette Effect 3 Apply a soft brown tone.
Palette Effect 4 Create a cold and monotone effect.
4
Press [Shutter] to start recording.
5
Press [Shutter] again to stop recording.
•
If you select Miniature, the miniature recording time is also displayed
and is shorter than the real recording time.
•
If you select Miniature, you cannot record the video sound.
•
Depending on the option you select, the recording speed may change
to and the recording resolution may change to or smaller
automatically.
Extended functions
54
Using Magic modes
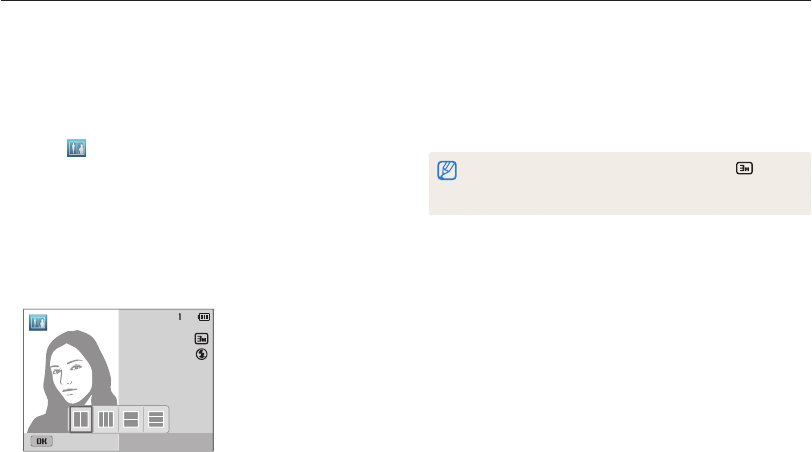
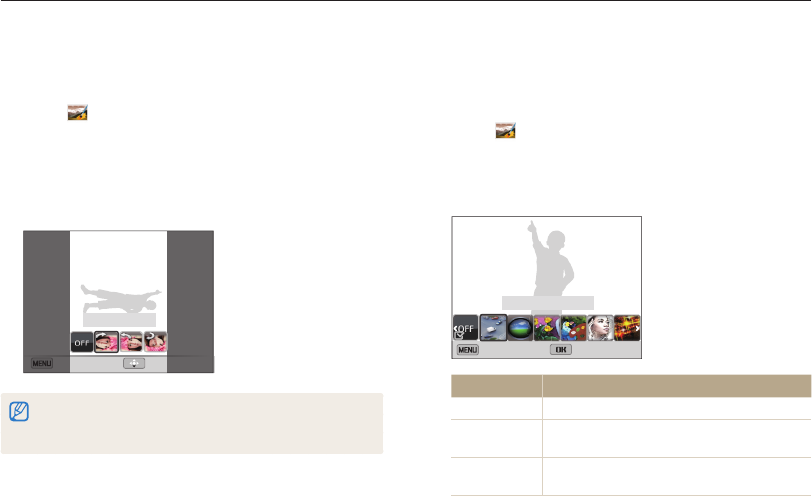
Using the Split Shot mode
In Split Shot mode, you can capture several photos and arrange
them with preset layouts.
1
On the Home screen, scroll to <Magic>.
2
Select .
3
Select a split style.
•
To adjust the sharpness of the dividing line, press [
m
],
and then select Line Blur a desired value.
•
To apply a Smart Filter effect to part of the shot, press
[
m
], and then select Smart Filter a desired option.
You can apply different Smart Filter effects to each part of the
shot.
Panel off
4
Align your subject in the frame, and then half-press
[Shutter] to focus.
5
Press [Shutter] to capture a photo.
•
Repeat steps 4 and 5 to capture the rest of the photos.
•
To recapture a photo, press [
f
].
•
In Split Shot mode, the resolution is automatically set to or smaller.
•
In Split Shot mode, the available zoom range may be less than in other
shooting modes.
Extended functions
55
Using Magic modes
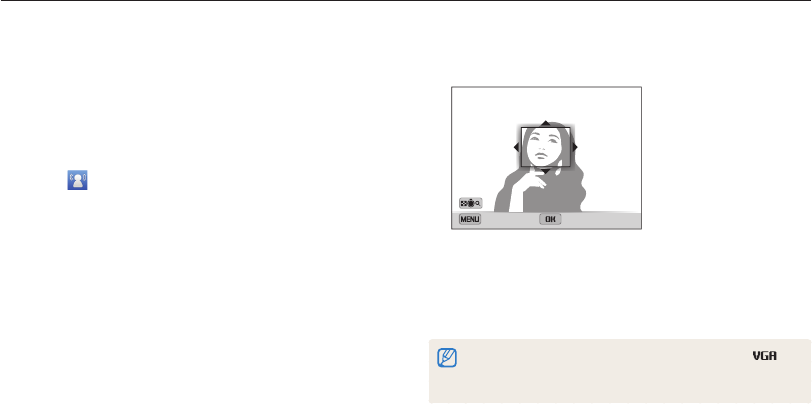
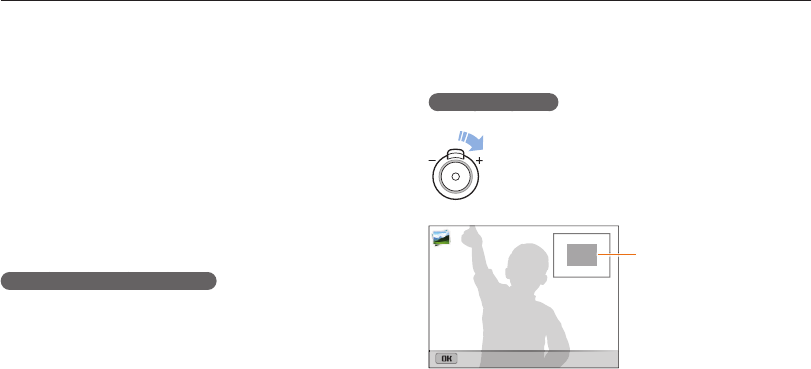
6
Rotate [Zoom] to the left or right to reduce or enlarge
the area.
Cancel Save
Frame Size
7
Press [
o
] to save the photo.
•
The camera saves an animated GIF and one JPG of the first
scene from the GIF file. You cannot view the JPG file on your
camera. To view it, connect your camera to a PC. (p. 101)
•
In Motion Photo mode, the resolution is automatically set to .
•
Use a tripod to prevent your camera from shaking.
•
In Motion Photo mode, it may take longer to save files.
Using the Motion Photo mode
In Motion Photo mode, you can capture and combine a series of
photos, and then select an area to be animated to create a GIF
animation. This mode is available only when you insert a memory
card into the camera.
1
On the Home screen, scroll to <Magic>.
2
Select .
3
Align your subject in the frame, and then half-press
[Shutter] to focus.
4
Press [Shutter] to capture the photo.
•
The camera captures multiple photos while the status lamp
is blinking.
5
Press [
D
/
c
/
F
/
t
] to scroll to an area to be
animated.

Selecting a resolution and quality
………… 57
Selecting a resolution
…………………… 57
Selecting an image quality
………………… 58
Using the timer
……………………………… 59
Shooting in the dark
……………………… 60
Preventing red-eye
……………………… 60
Using the flash
…………………………… 60
Adjusting the ISO sensitivity
……………… 62
Changing the camera’s focus
…………… 63
Using macro
……………………………… 63
Using tracking auto focus
………………… 64
Adjusting the focus area
………………… 65
Using Face Detection
……………………… 66
Detecting faces
…………………………… 66
Capturing a smile shot
…………………… 67
Detecting eye blinking
…………………… 67
Adjusting brightness and color
…………… 68
Adjusting the exposure manually (EV)
…… 68
Compensating for backlighting (ACB)
…… 69
Changing the metering option
…………… 69
Selecting a White Balance setting
………… 70
Using burst modes
………………………… 72
Adjusting images
…………………………… 73
Reducing the sound of the zoom
………… 74
Available shooting options by shooting
mode
………………………………………… 75
Shooting options
Learn how to set the options in Shooting mode.
Shooting options
57
Selecting a resolution and quality
Learn how to change the image resolution and quality settings.
Setting the video resolution
1
In Video Shooting mode, press [
m
].
2
Select Movie Size.
3
Select an option.
Icon Description
1280 X 720: HD files to play back on an HDTV.
640 X 480: SD files to play back on an analog TV.
320 X 240: Post on a web page.
For Sharing: Post on a website using the wireless
network (30 seconds maximum).
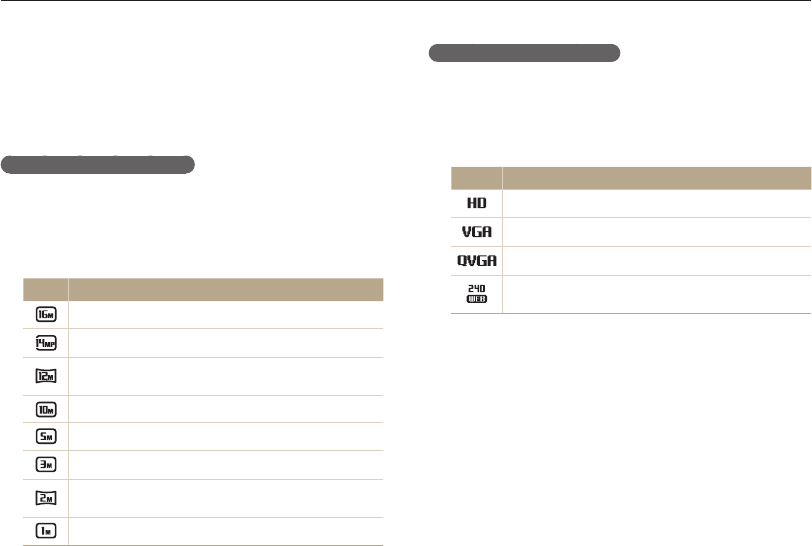
Selecting a resolution
As you increase the resolution, your photo or video will include
more pixels, so it can be printed on larger paper or displayed on
a larger screen. When you use a high resolution, the file size will
also increase.
Setting the photo resolution
1
In Shooting mode, press [
m
].
2
Select Photo Size.
3
Select an option.
Icon Description
4608 X 3456: Print on A1 paper.
4608 X 3072: Print on A1 paper in wide ratio (3:2).
4608 X 2592: Print on A1 paper in panorama ratio (16:9)
or play back on an HDTV.
3648 X 2736: Print on A2 paper.
2592 X 1944: Print on A4 paper.
1984 X 1488: Print on A5 paper.
1920 X 1080: Print on A5 paper in panorama ratio (16:9)
or play back on an HDTV.
1024 X 768: Attach to an email.

Shooting options
58
Selecting a resolution and quality
Selecting an image quality
Set the photo and video quality settings. Higher image quality
settings will result in larger file sizes.
Setting the photo quality
The camera compresses and saves the photos you capture in
the JPEG format.
1
In Shooting mode, press [
m
].
2
Select Quality.
3
Select an option.
Icon Description
Super Fine: Capture photos in super high quality.
Fine: Capture photos in high quality.
Normal: Capture photos in normal quality.
Setting the video quality
The camera compresses and saves the videos you record in
MP4 (H.264) format.
1
In Video Shooting mode, press [
m
].
2
Select Frame Rate.
3
Select an option.
Icon Description
30 FPS: Record 30 frames per second.
15 FPS: Record 15 frames per second.
Shooting options
59
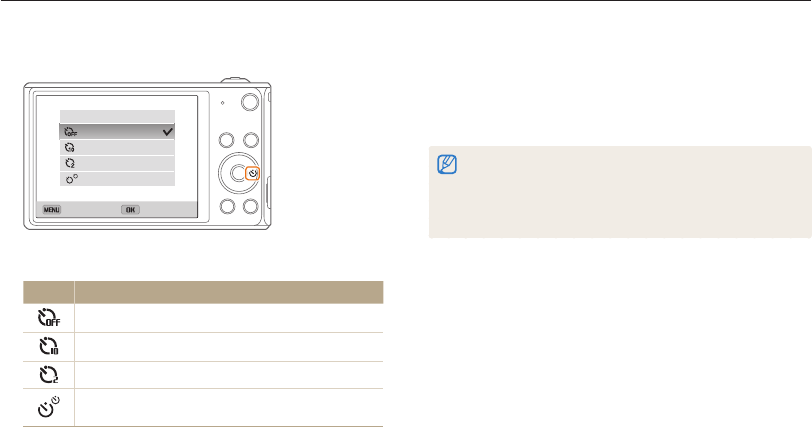
Using the timer
Learn how to set the timer to delay shooting.
3
Press [Shutter] to start the timer.
•
The AF-assist light/timer lamp blinks. The camera will
automatically capture a photo after the specified time has
elapsed.
•
The front display will start a countdown before shooting.
•
Press [Shutter] or [
t
] to cancel the timer.
•
Depending on the Face Detection options you selected, the timer
function may not be available.
•
In some modes, you can also set the timer option by pressing
[
m
], and then selecting Timer.
1
In Shooting mode, press [
t
].
Back Select
Timer
Off
10 Sec
2 Sec
Double
2
Select an option.
Icon Description
Off: The timer is not active.
10 Sec: Capture a photo after a 10-second delay.
2 Sec: Capture a photo after a 2-second delay.
Double: Capture one photo after a 10-second delay
and another photo after a 2-second delay.
Available options may differ depending on the shooting conditions.

Shooting options
60
Shooting in the dark
Learn how to capture photos at night or in low light conditions.
Using the flash
Use the flash when you capture photos in the dark or when you
need more light in your photos.
1
In Shooting mode, press [
F
].
Back Select
Flash
Off
Auto
Red-eye
Fill in
Slow Sync
Red-eye Fix
2
Select an option.
Icon Description
Off:
•
The flash will not fire.
•
The camera will display the shake warning when
you are shooting in low light.
Auto: The camera will select a proper flash setting for
the scene it detects in Smart Auto mode.
Auto: The flash will fire automatically when the subject or
background is dark.
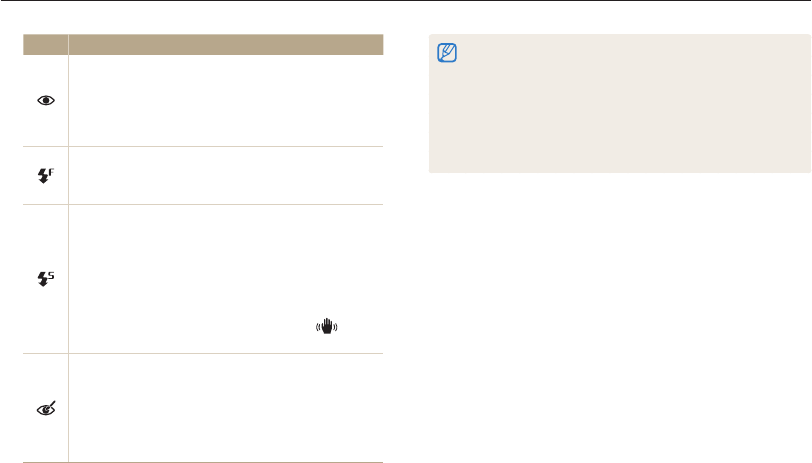
Preventing red-eye
If the flash fires when you capture a photo of a person in the dark,
a red glow may appear in the person’s eyes. To prevent this,
select Red-eye or Red-eye Fix. Refer to flash options in
“Using the flash.”
S
Before correction
S
After correction
Shooting options
61
Shooting in the dark
•
Flash options are not available if you set burst options or select
Blink Detection.
•
Make sure that your subjects are within the recommended distance
from the flash. (p. 150)
•
If light from the flash is reflected or there is a substantial amount of
dust in the air, tiny spots may appear in your photo.
•
In some modes, you can also set the flash option by pressing [
m
],
and then selecting Flash.
Icon Description
Red-eye:
•
The flash will fire twice when the subject or
background is dark to reduce the red-eye effect.
•
There is an interval between the 2 bursts of the flash.
Do not move until the flash fires a second time.
Fill in:
•
The flash always fires.
•
The camera automatically adjusts light intensity.
Slow Sync:
•
The flash fires and the shutter stays open longer.
•
This option is recommended when you want to
capture more ambient light to reveal more details in
the background.
•
Use a tripod to prevent your photos from blurring.
•
The camera will display the shake warning when
you are shooting in low light.
Red-eye Fix:
•
The flash fires twice when the subject or background
is dark. The camera corrects red-eyes through its
advanced software analysis.
•
There is an interval between the 2 bursts of the flash.
Do not move until the flash fires a second time.
Available options may differ depending on the shooting conditions.

Shooting options
62
Shooting in the dark
Adjusting the ISO sensitivity
The ISO sensitivity is the measure of a film’s sensitivity to light as
defined by the International Organization for Standardization (ISO).
The higher ISO sensitivity you select, the more sensitive to light
your camera becomes. Use a higher ISO sensitivity to capture
better photos and reduce camera shake when not using the
flash.
1
In Shooting mode, press [
m
].
2
Select ISO.
3
Select an option.
•
Select to use an appropriate ISO sensitivity based on the
brightness of the subject and lighting.
Higher ISO sensitivities may result in more image noise.
Shooting options
63
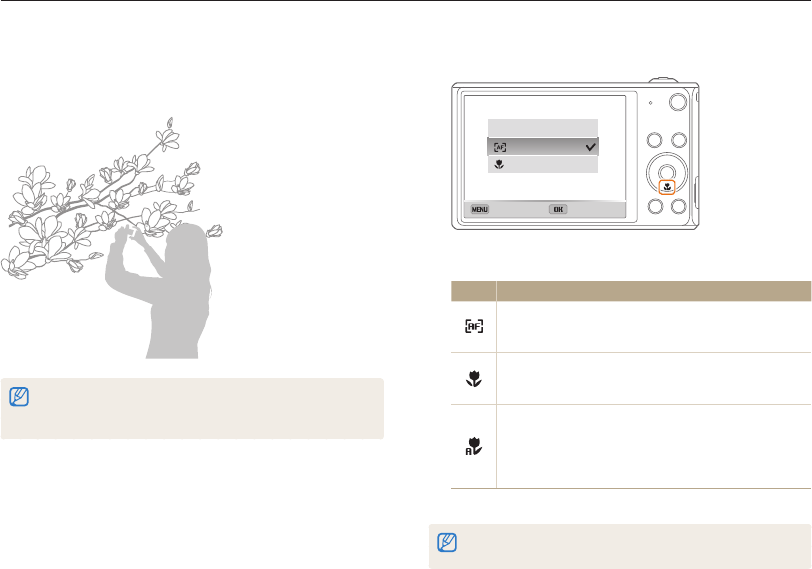
Changing the camera’s focus
Learn how to adjust the camera’s focus to suit the subject and the shooting conditions.
1
In Shooting mode, press [
c
].
Back Select
Focus
Normal (AF)
Macro
2
Select an option.
Icon Description
Normal (AF): Focus on a subject farther than
32 in. (80 cm) away. Farther than 98 in. (250 cm) away
when you use the zoom.
Macro: Focus on a subject that is 2–32 in. (5–80 cm)
from the camera. 39–98 in. (100–250 cm) when you use
the zoom.
Auto Macro:
•
Focus on a subject farther than 2 in. (5 cm) away.
Farther than 39 in. (100 cm) away when you use the
zoom.
•
It is set automatically in some shooting modes.
Available options may differ depending on the shooting conditions.
In some modes, you can also set the focus option by pressing [
m
],
and then selecting Focus.
Using macro
Use macro to capture close-up photos of subjects, such as
flowers or insects.
•
Try to hold the camera firmly to prevent blurry photos.
•
Turn off the flash if the distance to the subject is less than
15.7 in. (40 cm).

Shooting options
64
Changing the camera’s focus
•
If you do not select a focus area, the focus frame will appear in the
center of the screen.
•
Tracking a subject may fail when:
- the subject is too small
- the subject moves excessively
- the subject is backlit or you are shooting in a dark place
- colors or patterns on the subject and the background are the same
- the subject includes horizontal patterns, such as blinds
- the camera shakes excessively
•
When tracking a subject fails, the focus frame will appear as a white
single-line frame ( ).
•
If the camera fails to track the subject, you must reselect the subject
to track.
•
If the camera fails to focus, the focus frame will change to a red
single-line frame ( ).
•
If you use this function, you cannot set Face Detection options, Timer
options, Burst options, and Intelli zoom.
Using tracking auto focus
Tracking AF allows you to track and auto focus on your subject,
even when you are moving.
1
In Shooting mode, press [
m
].
2
Select Focus Area Tracking AF.
3
Focus on the subject you want to track, and then
press [
o
].
•
A focus frame appears on the subject and follows the subject
as you move the camera.
•
The white frame means that your camera is tracking the
subject.
•
When you half-press [Shutter], the green frame means that
your subject is in focus.
4
Press [Shutter] to capture the photo.

Shooting options
65
Changing the camera’s focus
Adjusting the focus area
You can get clearer photos by selecting an appropriate focus
area according to your subject's location in the scene.
1
In Shooting mode, press [
m
].
2
Select Focus Area.
3
Select an option.
Icon Description
Center AF: Focus on the center of the frame (suitable
when subjects are located at or near the center).
Multi AF: Focus on one or more of 9 possible areas.
Tracking AF: Focus on and track the subject. (p. 68)
Available shooting options may differ depending on the shooting
conditions.
Shooting options
66
Using Face Detection
If you use Face Detection options, your camera can automatically detect a human face. When you focus on a human face, the camera
adjusts the exposure automatically. Use Blink Detection to detect closed eyes or Smile Shot to capture a smiling face. You can also use
Smart Face Recognition to register faces and prioritize the focus on them.
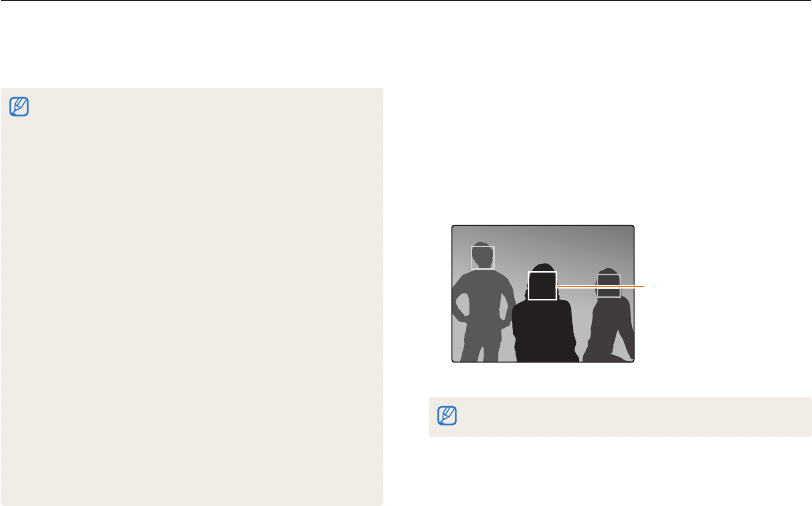
Detecting faces
Your camera automatically detects up to 10 human faces in one
scene.
1
In Shooting mode, press [
m
].
2
Select Face Detection Normal.
The face nearest the camera
or nearest the center of the
scene appears in a white
focus frame and the rest
of the faces appear in gray
focus frames.
The closer you are to the subjects, the quicker your camera will detect faces.
•
When your camera detects a face, it tracks the detected face
automatically.
•
Face Detection may not be effective when:
- the subject is far from the camera (The focus frame will appear
orange for Smile Shot and Blink Detection.)
- it is too bright or too dark
- the subject is not facing the camera
- the subject is wearing sunglasses or a mask
- the subject’s facial expression changes drastically
- the subject is backlit or the lighting conditions are unstable
•
Face Detection is not available when you set the Tracking AF.
•
Depending on the shooting options you selected, available Face
Detection options may differ.
•
Depending on the Face Detection options you selected, the timer
function may not be available.
•
When you set Face Detection options, the AF area is automatically
set to Multi AF.
•
Depending on the Face Detection options you selected, Burst options
may not be available.
•
When you set Smart Face Recognition option and capture photos of
detected faces, they will be registered in the face list.
•
You can view registered faces in order of priority in Playback mode.
(p. 86) Even though faces are registered successfully, they may not be
classified in Playback mode.
•
A face detected with Smart Face Recognition option may not appear
in the face list or Smart Album.
Shooting options
67
Using Face Detection
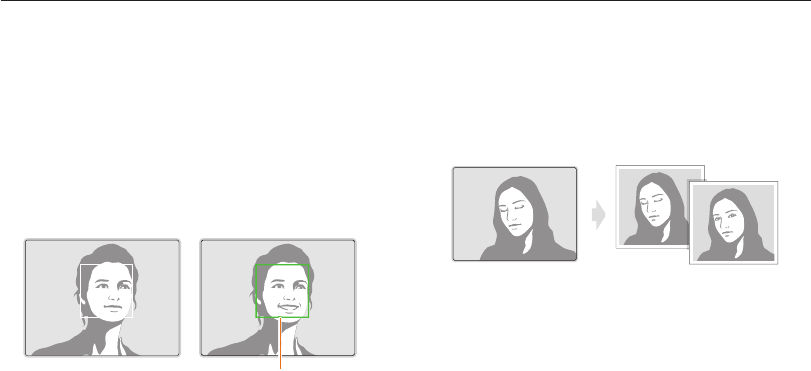
Capturing a smile shot
The camera automatically releases the shutter when it detects a
smiling face.
1
In Shooting mode, press [
m
].
2
Select Face Detection Smile Shot.
3
Compose your shot.
•
The camera automatically releases the shutter when it detects
a smiling face.
When your subject smiles
broadly, your camera can detect
the smile more easily.
Detecting eye blinking
If your camera detects closed eyes, it will automatically capture
2 photos in succession.
1
In Shooting mode, press [
m
].
2
Select Face Detection Blink Detection.
Shooting options
68
Adjusting brightness and color
Learn how to adjust the brightness and color for better image quality.
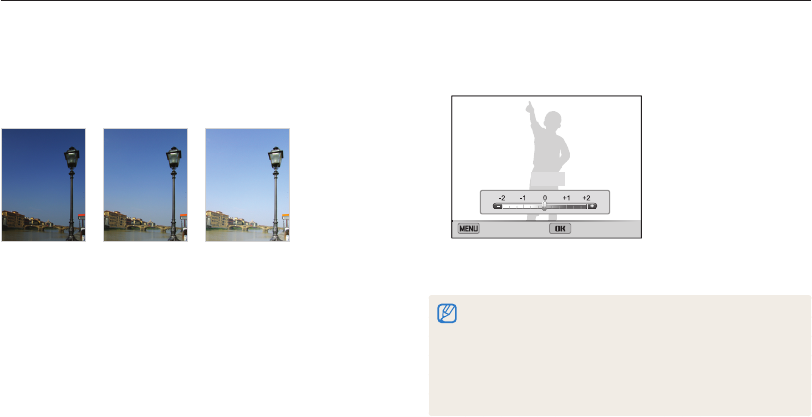
3
Select a value to adjust the exposure.
•
The photo will be brighter as the exposure value increases.
Cancel Set
EV : +1
4
Press [
o
] to save your settings.
•
Once you adjust the exposure, the setting will be stored automatically.
You may need to change the exposure value later to avoid
overexposure or underexposure.
•
If you cannot decide on an appropriate exposure, select the
AEB (Auto Exposure Bracket) option. The camera will capture
3 consecutive photos, each with a different exposure: normal,
underexposed, and overexposed. (p. 78)
Adjusting the exposure manually (EV)
Depending on the intensity of the ambient light, your photos
may be too bright or dark. In these cases, you can adjust the
exposure to get a better photo.
S
Darker (-)
S
Neutral (0)
S
Brighter (+)
1
In Shooting mode, press [
m
].
2
Select EV.
Shooting options
69
Adjusting brightness and color
Changing the metering option
The metering mode refers to the way in which a camera
measures the quantity of light. The brightness and lighting of your
photos will vary depending on the metering mode you select.
1
In Shooting mode, press [
m
].
2
Select Metering.
3
Select an option.
Icon Description
Multi:
•
Your camera divides the frame into several areas,
and then measures the light intensity of each area.
•
Suitable for general photos.
Spot:
•
Your camera measures only the light intensity at the
very center of the frame.
•
If a subject is not in the center of the frame, your
photo may be improperly exposed.
•
Suitable for a subject with backlighting.
Center-weighted:
•
Your camera averages the meter reading of the entire
frame with emphasis placed on the center.
•
Suitable for photos with subjects in the center of the
frame.
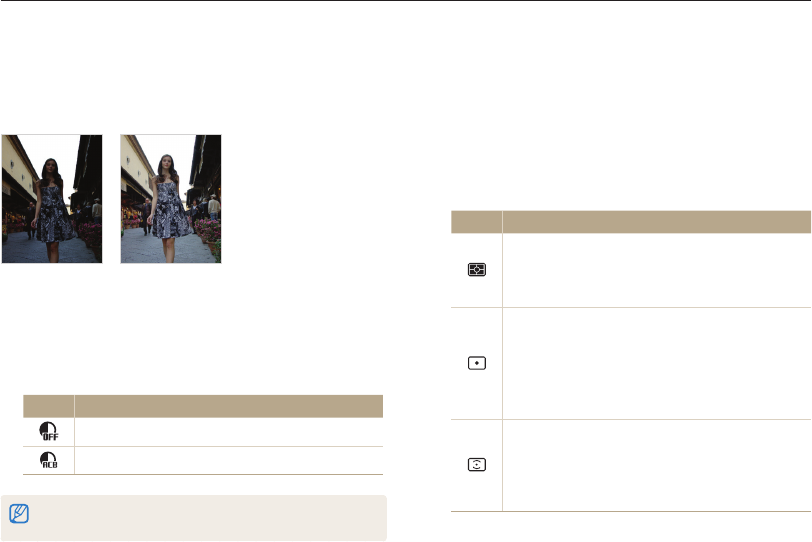
Compensating for backlighting (ACB)
When the light source is behind your subject or there is high
contrast between your subject and the background, your subject
is likely to appear dark in the photo. In this case, set the Auto
Contrast Balance (ACB) option.
SWithout ACB SWith ACB
1
In Shooting mode, press [
m
].
2
Select ACB.
3
Select an option.
Icon Description
Off: ACB (Auto Contrast Balance) is deactivated.
On: ACB (Auto Contrast Balance) is activated.
•
The ACB feature is always on in Smart Auto mode.
•
The ACB feature is not available when you set Burst options.
Shooting options
70
Adjusting brightness and color
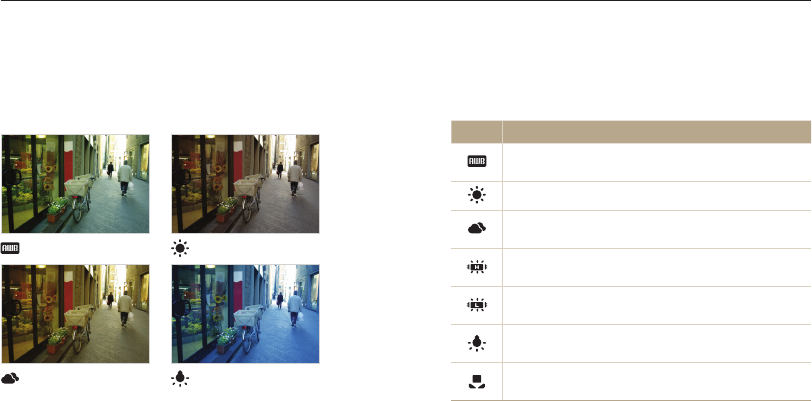
Selecting a White Balance setting
The color of your photo depends on the type and quality of the
light source. If you want the color of your photo to be realistic,
select a White Balance setting that is appropriate for the lighting
conditions, such as Auto WB, Daylight, Cloudy, or Tungsten.
Auto WB Daylight
Cloudy Tungsten
1
In Shooting mode, press [
m
].
2
Select White Balance.
3
Select an option.
Icon Description
Auto WB: Automatically set the White Balance based
on the lighting conditions.
Daylight: For outdoor photos on a sunny day.
Cloudy: For outdoor photos on a cloudy day or in
shadows.
Fluorescent_H: For shooting under a daylight
fluorescent or 3-way fluorescent light.
Fluorescent_L: For shooting under white fluorescent
light.
Tungsten: For shooting indoor photos under
incandescent bulbs or halogen lamps.
Custom Set: To use White Balance settings that you
define. (p. 77)

Shooting options
71
Adjusting brightness and color
Defining your own White Balance
You can customize the White Balance by capturing a photo of
a white surface, such as a piece of paper, under the lighting
conditions in which you intend to capture a photo. The White
Balance feature will help you to match the colors in your photo
with the actual scene.
1
In Shooting mode, press [
m
].
2
Select White Balance Custom Set.
3
Aim the lens at a piece of white paper, and then press
[Shutter].
Shooting options
72
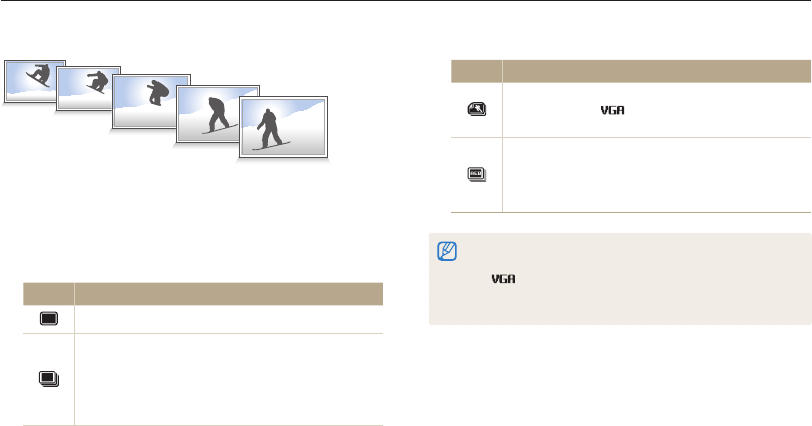
Using burst modes
It can be difficult to capture photos of fast-moving subjects or capture natural facial expressions and gestures of your subjects in photos.
Also, it can be difficult to adjust the exposure correctly and select a proper light source. In these cases, select one of the burst modes.
Icon Description
Motion Capture: While you are pressing [Shutter], the
camera captures photos (5 photos per second;
maximum of 30 photos).
AEB:
•
Capture 3 consecutive photos, each with a different
exposure: normal, underexposed, and overexposed.
•
Use a tripod to prevent blurry photos.
•
You can use the flash and timer only when you select Single.
•
When you select Motion Capture, your camera will set the resolution
to and set the ISO sensitivity to Auto.
•
Depending on the Face Detection option you selected, some Burst
options may not be available.
1
In Shooting mode, press [
m
].
2
Select Drive.
3
Select an option.
Icon Description
Single: Capture a single photo.
Continuous:
•
While you are pressing [Shutter], the camera
continuously captures photos.
•
The maximum number of photos depends on the
capacity of your memory card.
Shooting options
73
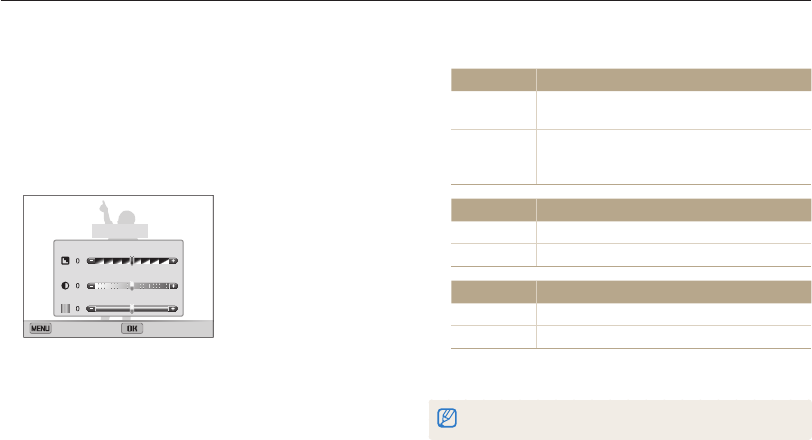
Adjusting images
Adjust the sharpness, contrast, or saturation of your photos.
4
Press [
F
/
t
] to adjust each value.
Sharpness Description
-Soften the edges on your photos (suitable for
editing the photos on your computer).
+
Sharpen the edges to improve the clarity of your
photos. This may also increase the noise in your
photos.
Contrast Description
-Decrease the color and brightness.
+Increase the color and brightness.
Saturation Description
-Decrease the saturation.
+Increase the saturation.
5
Press [
o
] to save your settings.
Select 0 if you do not want to apply any effects (suitable for printing).
1
In Shooting mode, press [
m
].
2
Select Image Adjust.
3
Select an option.
•
Sharpness
•
Contrast
•
Saturation
Image Adjust
Sharpness
Contrast
Saturation
Cancel Set

Shooting options
74
1
In Video Shooting mode, press [
m
].
2
Select Voice.
3
Select an option.
Icon Description
Sound Alive On: Turn on the Sound Alive function to
reduce the zoom noise.
Sound Alive Off: Turn off the Sound Alive function.
The camera can record the zoom noise.
Mute: Do not record sounds.
•
Do not block the microphone when you use the Sound Alive
function.
•
Recordings made with Sound Alive may differ from actual
sounds.
•
In Picture-in-Picture mode, you cannot set the Sound Alive
options.
Reducing the sound of the zoom
When you use the zoom while recording videos, the camera can record the sound of the zoom. Use the Sound Alive function to reduce the
zoom noise.

Shooting options
75
Available shooting options by shooting mode
For details about shooting options, refer to "Shooting options".
Smart
Auto Program Smart
Movie Movie Scene Live
Panorama
Picture in
Picture Self Shot Children Jump
Shot
Beauty
Shot
Resolution OOOOO
UU
OOOO
Quality
U
OOOO
U
- OOOO
Timer
U
O
UU
O-
U
-O
UU
Flash
U
O- -
U
-
U
O
U
-
U
ISO sensitivity -O---------
Macro
U
O
U
O
U
--
U
--
U
Focus area -O------
U
--
Face detection
U
O- -
U
--
UU
-
U
EV -O-O-------
ACB
U
O---------
Metering -O-O-------
White balance -O-O-------
Drive -O------
U
--
Image adjust -O--------
U
Sound Alive --OO-------
Digital zoom -O- -
U
------
Intelli zoom
UU
--
U
------
OIS OOOOO - OOOOO
U: In these modes, some options are limited or a certain option is set by default. O: The option is available in this mode.

Shooting options
76
Available shooting options by shooting mode
Intelligent
Portrait Night Shot Close-up
Shot
Magic
Frame
Funny
Face
Photo
Filter
Movie
Filter Split Shot Artistic
Brush
Motion
Photo
Resolution OOO
U
O
UUUUU
Quality OOOOOO
U
OO
U
Timer
U
OO
U
OO
UUUU
Flash
UU
-
UUU
-
UU
-
ISO sensitivity ----------
Macro
U
-
U
---
U
--
U
Focus Area ----------
Face detection
U
---
U
-----
EV ----------
ACB ----------
Metering ----------
White balance ----------
Drive ----------
Image adjust -----
U
-
UU
-
Sound Alive ------
U
---
Digital zoom ----------
Intelli zoom ----------
OIS OOO - OOOOOO
U: In these modes, some options are limited or a certain option is set by default. O: The option is available in this mode.

Viewing photos or videos in Playback
mode
………………………………………… 78
Starting Playback mode
………………… 78
Viewing photos
…………………………… 82
Playing a video
…………………………… 85
Editing a photo
……………………………… 87
Resizing photos
…………………………… 87
Cropping portraits automatically
………… 87
Rotating a photo
………………………… 88
Applying Smart Filter effects
……………… 88
Adjusting your photos
…………………… 89
Viewing files on a TV
……………………… 91
Transferring files to your Windows
computer
…………………………………… 92
Transferring files with Intelli-studio
………… 93
Transferring files by connecting the
camera as a removable disk
……………… 95
Disconnecting the camera
(for Windows XP)
………………………… 96
Transferring files to your Mac computer
… 97
Playback/Editing
Learn how to play back photos or videos, and edit photos or videos. Also, learn how to
connect your camera to your computer, photo printer, or TV.
Playback/Editing
78
Viewing photos or videos in Playback mode
Learn how to play back photos or videos and how to manage files.
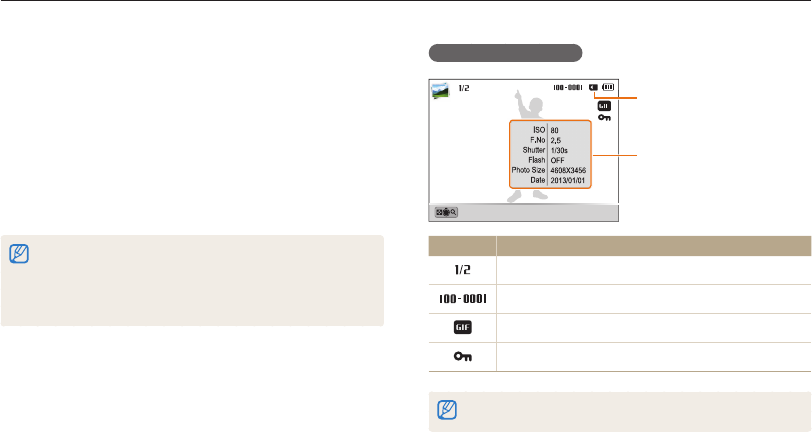
Photo file information
File Information
Memory in use
Album/Zoom In
Icon Description
Current file/Total files
Folder name–File name
GIF file
Protected file
To display file information on the screen, press [
D
].
Starting Playback mode
View photos or play videos stored in your camera.
1
Press [
P
].
•
The most recent file will be displayed.
•
If the camera is off, it will turn on and display the most recent
file.
2
Press [
F
/
t
] to scroll through files.
•
Press and hold [
F
/
t
] to scroll through files quickly.
•
If you want to view files stored in the internal memory, remove your
memory card.
•
You may not be able to edit or play back files that were captured with
other cameras, due to unsupported sizes (image size, etc) or codecs.
Use a computer or another device to edit or play back these files.

Playback/Editing
79
Viewing photos or videos in Playback mode
Viewing files by category in Smart Album
View files by category, such as date, face, or file type.
1
In Playback mode, rotate [Zoom] to the left.
•
You can also access Smart Album by scrolling to <Album>
on the Home screen, and then selecting .
2
Press [
m
].
3
Select Filter a category.
All
Date
Face List
File Type
Back Select
Filter
Icon Description
All: View files normally.
Date: View files by the date they were saved.
Face List: View files by recognized faces and favorite
faces. (Up to 20 people)
File Type: View files by the file type.
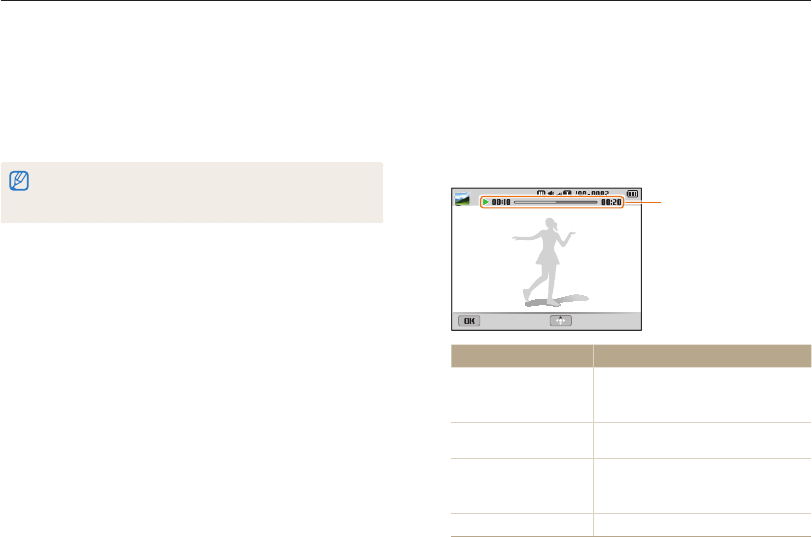
Video file information
Play Capture
File Information
Album
Icon Description
Current file/Total files
Folder name-File name
Current playback time
Video length
Protected file
To display file information on the screen, press [
D
].

Playback/Editing
80
Viewing photos or videos in Playback mode
Viewing files as thumbnails
Scan thumbnails of files.
In Playback mode, rotate [Zoom] to the left to view
thumbnails (12 at a time). Rotate [Zoom] to the left once
more to display more thumbnails (24 at a time). Rotate
[Zoom] to the right to return to the previous view.
Menu
• You can also view files as thumbnails by scrolling to <Album>
on the Home screen, and then selecting .
Press [
D
/
c
/
F
/
t
] to scroll through files.
4
Scroll to a desired list, and then press [
o
] to
open the list.
5
Scroll to a desired file, and then press [
o
] to
view the file.
6
Rotate [Zoom] to the left to return to the previous view.
It may take some time for the camera to open Smart Album, change the
category, or reorganize files.

Playback/Editing
81
Viewing photos or videos in Playback mode
Deleting multiple files
You can select multiple files, and then delete them at once.
1
In Playback mode, press [
f
].
•
When in thumbnails view, press [
m
], select
Delete Select, and then skip to step 3, or press [
f
],
select Select, and then skip to step 3.
2
When the pop-up message appears, select Multiple
Delete.
3
Scroll to each file you want to delete, and then
press [
o
].
•
Press [
o
] again to cancel your selection.
4
Press [
f
].
5
When the pop-up message appears, select Yes.
Protecting files
Protect your files from accidental deletion.
1
In Playback mode, press [
m
].
2
Select Protect On.
You cannot delete or rotate a protected file.
Deleting files
Select files to delete in Playback mode.
Deleting a single file
You can select one file, and then delete it.
1
In Playback mode, select a file, and then press [
f
].
2
When the pop-up message appears, select Yes.
You can also delete files in Playback mode by pressing [
m
], and then
selecting Delete Delete Yes.
Playback/Editing
82
Viewing photos or videos in Playback mode
Deleting all files
You can select all files, and then delete them at once.
1
In Playback mode, press [
m
].
•
When in thumbnails view, press [
m
], select
Delete Delete All, and then skip to step 3, or press [
f
],
select Delete All, and then skip to step 3.
2
Select Delete Delete All.
3
When the pop-up message appears, select Yes.
•
All unprotected files are deleted.
Copying files to a memory card
Copy files from the internal memory to a memory card.
1
In Playback mode, press [
m
].
2
Select Copy to Card.
Viewing photos
Enlarge part of a photo or view photos as a slide show.
Enlarging a photo
In Playback mode, rotate [Zoom] to the right to enlarge
a portion of the photo. Rotate [Zoom] to the left to zoom
out.
Enlarged area
Crop
Playback/Editing
83
Viewing photos or videos in Playback mode
Viewing panoramic photos
View photos captured in Live Panorama mode.
1
In Playback mode, press [
F
/
t
] to scroll to a desired
panoramic photo.
•
The entire panoramic photo appears on the screen.
2
Press [
o
].
•
The camera automatically scrolls through the photo from left to
right for a horizontal panoramic photo and from top to bottom
for a vertical panoramic photo. The camera then switches to
Playback mode.
•
While playing back a panoramic photo, press [
o
] to pause
or resume.
•
After you have paused the playback of a panoramic photo,
press [
D
/
c
/
F
/
t
] to move the photo horizontally or
vertically, depending on the direction you moved when
capturing the photo.
3
Press [
m
] to return to Playback mode.
The camera automatically scrolls through the panoramic photo only if the
longest side of the photo is two or more times longer than the shortest side.
To Description
Move the enlarged area Press [
D
/
c
/
F
/
t
].
Trim the enlarged photo
Press [
o
], and then select Yes.
(The trimmed photo will be saved as a
new file. The original photo is retained in its
original form.)
When you view photos that were captured by another camera, the zoom
ratio may differ.

Playback/Editing
84
Viewing photos or videos in Playback mode
Playing a slide show
Apply effects and audio to a slide show of your photos.
The slide show function does not work for videos and GIF files.
1
In Playback mode, press [
m
].
2
Select Slide Show Options.
3
Select a slide show effect option.
•
Skip to step 4 to start a slide show with no effects.
* Default
Option Description
Play Mode Set whether or not to repeat the slide show.
(One Play*, Repeat)
Interval
•
Set the interval between photos.
(1 sec*, 3 sec, 5 sec, 10 sec)
•
You must set the Effect option to Off to set the
interval.
Music Set background audio.
Effect
•
Set a scene change effect between photos.
(Off, Calm*, Shine, Relax, Lively, Sweet)
•
Select Off to cancel effects.
•
When you use the Effect option, the interval
between photos will be set to 1 second.
Viewing animated photos
View animated GIF files repeatedly that were captured in Motion
Photo mode or Jump Shot mode.
1
In Playback mode, press [
F
/
t
] to scroll to a desired
GIF file.
2
Press [
o
].
•
The GIF file plays back repeatedly.
3
Press [
o
] to return to Playback mode.
Playback/Editing
85
Viewing photos or videos in Playback mode
Playing a video
In Playback mode, you can view a video, and then capture or trim
parts of the playing video. You can save the captured or trimmed
segments as new files.
1
In Playback mode, select a video, and then press [
o
].
2
View the video.
Current playback time/
Video length
Pause Stop
To Description
Scan backward
Press [
F
]. Each time you press [
F
],
you change the scan speed in this
order: 2X, 4X, 8X.
Pause or resume
playback Press [
o
].
Scan forward
Press [
t
]. Each time you press [
t
],
you change the scan speed in this
order: 2X, 4X, 8X.
Adjust the volume level Rotate [Zoom] to the left or right.
4
Press [
m
].
5
Select Start Slide Show.
6
View the slide show.
•
Press [
o
] to pause the slide show.
•
Press [
o
] again to resume the slide show.
•
Press [
o
], and then press [
F
/
t
] to stop the slide show and return
to Playback mode.
•
Rotate [Zoom] to the left or right to adjust the volume level.
Playback/Editing
86
Viewing photos or videos in Playback mode
Trimming a video
1
In Playback mode, select a video, and then press
[
m
].
2
Select Trim Movie.
3
Press [
o
] to start playing the video.
4
Press [
o
] [
c
] at the point where you want the
trimming to begin.
5
Press [
o
] to resume playing the video.
6
Press [
o
] [
c
] at the point where you want the
trimming to end.
7
Press [
c
] to trim.
8
When the pop-up message appears, select Yes.
•
The original video should be at least 10 seconds long.
•
The camera will save the edited video as a new file and leave the
original video intact.
Capturing an image from video
1
While viewing a video, press [
o
] at the point where you
want to capture an image.
2
Press [
c
].
•
The resolution of the captured image will be the same as the original
video.
•
The captured image is saved as a new file.
Playback/Editing
87
Editing a photo
Learn how to edit photos.
•
The camera will save edited photos as new files.
•
When you edit photos, the camera will automatically convert them to a lower resolution. Photos that you rotate or resize manually are not automatically converted to
a lower resolution.
Cropping portraits automatically
Extract and save close-up portraits from landscape shots.
1
In Playback mode, select a photo, and then press
[
m
].
2
Select Intelligent Portrait.
•
The camera detects the face of a subject, crops the photo
around the face, and then saves 2 cropped photos under
consecutive file names.
The Intelligent Portrait feature will not function if:
- no face is detected
- more than 2 faces are detected
- the detected facial area is larger than a certain ratio
Resizing photos
Change the size of a photo and save it as a new file.
1
In Playback mode, select a photo, and then
press [
m
].
2
Select Resize.
3
Select an option.
Back Select
2592 X 1944
1984 X 1488
1024 X 768
Resize
•
Available resize options differ depending on the original size of the
photo.
•
You may not be able to resize photos created with the Intelligent
Portrait feature.
Playback/Editing
88
Editing a photo
Rotating a photo
1
On the Home screen, scroll to <Album>.
2
Select .
3
Rotate [Zoom] to the left, and then select a photo.
4
Select Rotate an option.
5
Press [
c
] to save.
Cancel Save
Rotate : Right 90˚
•
The camera will overwrite the original file.
•
In Playback mode, press [
m
], and then select Rotate to rotate
a photo.
Applying Smart Filter effects
Apply special effects to your photos.
1
On the Home screen, scroll to <Album>.
2
Select .
3
Rotate [Zoom] to the left, and then select a photo.
4
Select Smart Filter an option.
Back Set
Smart Filter : Miniature
Option Description
Normal No effect
Miniature Apply a tilt-shift effect to make the subject
appear in miniature.
Vignetting Apply the retro-looking colors, high contrast, and
strong vignette effect of Lomo cameras.
Playback/Editing
89
Editing a photo
Adjusting your photos
Learn how to adjust the brightness, contrast, or saturation or how
to correct the red-eye effect. If the center of a photo is dark, you
can adjust it to be brighter. The camera will save an edited photo
as a new file, but may convert it to a lower resolution.
•
You can adjust brightness, contrast, and saturation and apply Smart
Filter effects at the same time.
•
You cannot apply the ACB, Face Retouch, and Red-eye Fix effects
at the same time.
Adjusting brightness, contrast, or saturation
1
On the Home screen, scroll to <Album>.
2
Select .
3
Rotate [Zoom] to the left, and then select a photo.
4
Select an adjusting option.
Icon Description
Brightness
Contrast
Saturation
Option Description
Ink Painting Apply a watercolor painting effect.
Oil Painting Apply an oil painting effect.
Cartoon Apply a cartoon painting effect.
Cross Filter
Add lines that radiate outward from bright
objects to imitate the visual effect of a cross
filter.
Sketch Apply a pen sketch effect.
Soft Focus Hide facial imperfections or apply dreamy
effects.
Fish-eye Distort close objects to imitate the visual effect
of a fisheye lens.
Old Film Apply a vintage film effect.
Half Tone Dot Apply a halftone effect.
Classic Apply a black and white effect.
Retro Apply a sepia tone effect.
Zooming Shot Blur the edges of a photo to emphasize the
subjects in the center.
5
Press [
c
] to save.

Playback/Editing
90
Editing a photo
5
Press [
F
/
t
] to adjust the option.
6
Press [
o
].
7
Press [
c
] to save.
Adjusting dark subjects (ACB)
1
On the Home screen, scroll to <Album>.
2
Select .
3
Rotate [Zoom] to the left, and then select a photo.
4
Select ACB.
5
Press [
c
] to save.
Retouching faces
1
On the Home screen, scroll to <Album>.
2
Select .
3
Rotate [Zoom] to the left, and then select a photo.
4
Select Face Retouch.
5
Press [
F
/
t
] to adjust the option.
•
As the number increases, the skin tone becomes brighter and
smoother.
6
Press [
c
] to save.
Removing red-eye
1
On the Home screen, scroll to <Album>.
2
Select .
3
Rotate [Zoom] to the left, and then select a photo.
4
Select Red-eye Fix.
5
Press [
c
] to save.

Playback/Editing
91
Viewing files on a TV
Play back photos or videos by connecting your camera to a TV with the A/V cable.
7
Turn on your TV, and then select the A/V video source
with the TV remote control.
8
Turn on your camera.
•
The camera automatically enters into Playback mode when
you connect it to a TV.
9
View photos or play videos using the camera buttons.
•
Depending on the TV model, you may see some digital noise or part
of an image may not appear.
•
Images may not be centered on the TV screen depending on your
TV settings.
1
On the Home screen, scroll to <Basic>.
2
Select .
3
Select Connectivity Video Out.
4
Select the video signal output for your country or region.
(p. 131)
5
Turn off your camera and TV.
6
Connect your camera to your TV with the A/V cable.
VideoAudio

Playback/Editing
92
Transferring files to your Windows computer
Transfer files to your Windows computer, edit them with Intelli-studio, and upload them to the web.
•
The requirements are recommendation only. Intelli-studio may not work
properly even when the computer meets the requirements, depending
on the condition of your computer.
•
If your computer does not meet the requirements, videos may not play
correctly or it may take longer to edit videos.
•
Install DirectX 9.0c or later before you use Intelli-studio.
•
Your computer must be running Windows XP, Windows Vista, or
Windows 7 for you to connect the camera as a removable disk.
The manufacturer is not responsible for any damage that results from using
unqualified computers such as a computer you assembled yourself.
Requirements
Item Requirements
CPU Intel
®
Pentium
®
4 3.2 GHz or higher/
AMD Athlon™ FX 2.6 GHz or higher
RAM Minimum 512 MB RAM (1 GB or more recommended)
OS* Windows XP SP2, Windows Vista, or Windows 7
Hard disk
capacity 250 MB or more (1 GB and above recommended)
Others
•
CD-ROM drive
•
1024 X 768 pixels, 16-bit color display compatible
monitor (1280 X 1024 pixels, 32-bit color display
recommended)
•
USB 2.0 port
•
nVIDIA Geforce 7600GT or higher/
ATI X1600 series or higher
•
Microsoft DirectX 9.0c or higher
* A 32-bit version of Intelli-studio will be installed—even on 64-bit editions of
Windows XP, Windows Vista, and Windows 7.

Playback/Editing
93
Transferring files to your Windows computer
6
Turn on the camera.
•
When the Intelli-studio installation pop-up appears on the
computer screen, follow the on-screen instructions to
complete the installation.
•
Once the Intelli-studio is installed on your computer, the
computer recognizes the camera and launches the
Intelli-studio automatically.
If you set the USB option to Select Mode, select Computer in the
pop-up window.
7
Select a destination folder on your computer, and then
select Yes.
•
New files stored on the camera will automatically transfer to
the selected folder.
•
If your camera has no new files, the pop-up window for saving
new files will not appear.
For Windows Vista and Windows 7, select Run iLinker.exe from the
Auto Play window to start Intelli-studio. If Run iLinker.exe does not appear on
the computer, click Computer Intelli-studio, and then follow the
on-screen instructions to complete the Intelli-studio installation.
Transferring files with Intelli-studio
You can download Intelli-studio from the linked webpage and
install it on your computer. When you connect the camera to
a computer with Intelli-studio installed, the program will launch
automatically.
The battery will charge while the camera is connected to a computer with the
USB cable.
1
On the Home screen, scroll to <Basic>.
2
Select .
3
Select Connectivity PC Software On.
4
Turn off the camera.
5
Connect the camera to your computer with the USB
cable.
You must plug the small end of the USB cable into your camera. If the
cable is reversed, it may damage your files. The manufacturer is not
responsible for any loss of data.
Playback/Editing
94
Transferring files to your Windows computer
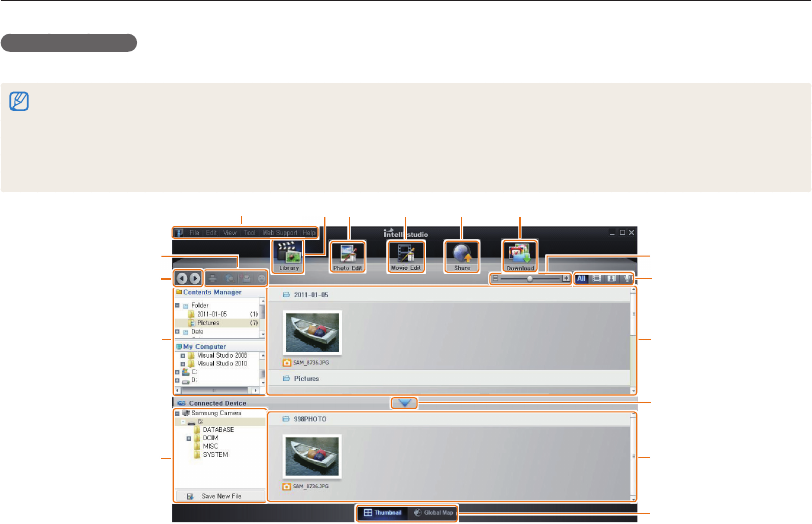
Using Intelli-studio
Intelli-studio allows you to play back and edit files. For details, select Help Help from the program toolbar.
•
You can update the firmware of your camera by selecting Web Support Upgrade firmware for the connected device from the program toolbar.
•
You can download short animations for use in Children mode.
•
You cannot edit files directly on the camera. Transfer files to a folder on your computer before editing.
•
Intelli-studio supports the following formats:
- Videos: MP4 (Video: H.264, Audio: AAC), WMV (WMV 7/8/9), AVI (MJPEG)
- Photos: JPG, GIF, BMP, PNG, TIFF
123456
7
8
9
0
!
@
#
$
:
^

Playback/Editing
95
Transferring files to your Windows computer
No. Description
1
Open menus.
2
Display files in the selected folder.
3
Switch to the Photo edit mode.
4
Switch to the Video edit mode.
5
Switch to the Sharing mode (to send files by email or
upload files to websites, such as Flickr or YouTube).
6
Download short animations for use in Children mode.
7
Enlarge or reduce the thumbnails in the list.
8
Select a file type.
9
View files in the selected folder on your computer.
0
Show or hide files on the connected camera.
!
View files in the selected folder on the camera.
@
View files as thumbnails or on a map.
#
Browse folders stored on the camera.
$
Browse folders stored on your computer.
:
Move to the previous or next folder.
^
Print files, view files on a map, store files in My Folder, or
register faces.
Transferring files by connecting the camera
as a removable disk
Connect the camera to your computer as a removable disk.
1
On the Home screen, scroll to <Basic>.
2
Select .
3
Select Connectivity PC Software Off.
4
Turn off the camera.
5
Connect the camera to your computer with the USB
cable.
You must plug the small end of the USB cable into your camera. If the
cable is reversed, it may damage your files. The manufacturer is not
responsible for any loss of data.
Playback/Editing
96
Transferring files to your Windows computer
Disconnecting the camera (for Windows XP)
With Windows Vista and Windows 7, the methods for
disconnecting the camera are similar.
1
Verify that the status lamp is not blinking.
•
The status lamp blinks when transferring files. Wait until it
stops.
2
Click on the tool bar at the bottom right of your
computer screen.
3
Click the pop-up message.
4
Click the message box that indicates the camera can be
removed safely.
5
Remove the USB cable.
The camera may not disconnect safely while Intelli-studio is running. End the
program before disconnecting the camera.
6
Turn on the camera.
•
The computer recognizes the camera automatically.
If you set the USB option to Select Mode, select Computer in the
pop-up window.
7
On your computer, select My Computer Removable
Disk DCIM 100PHOTO.
8
Drag or save files to your computer.
Playback/Editing
97
Transferring files to your Mac computer
When you connect the camera to a Macintosh computer, the computer will automatically recognize the device. You can transfer files directly
from the camera to the computer without installing any programs.
Mac OS 10.4 or later is supported.
2
Turn on the camera.
•
The computer recognizes the camera automatically and
displays a removable disk icon.
If you set the USB option to Select Mode, select Computer in the
pop-up window.
3
Double-click the removable disk icon.
4
Drag or save files to your computer.
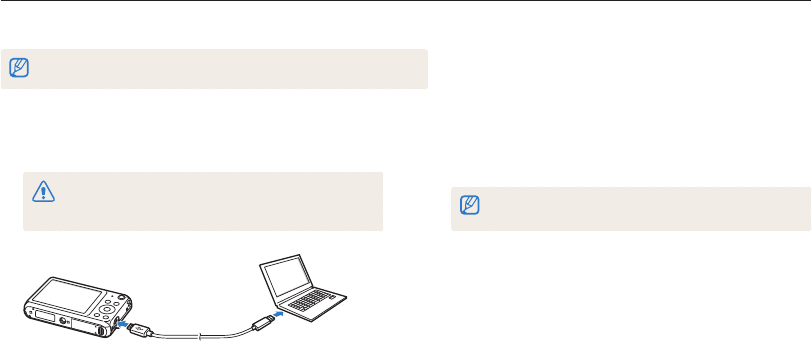
1
Connect your camera to a Macintosh computer with the
USB cable.
You must plug the small end of the USB cable into your camera. If the
cable is reversed, it may damage your files. The manufacturer is not
responsible for any loss of data.

Connecting to a WLAN and configuring
network settings
…………………………… 99
Connecting to a WLAN
…………………… 99
Using the login browser
………………… 100
Network connection tips
……………… 101
Entering text
…………………………… 102
Sending photos or videos to a smart
phone
…………………………………… 103
Using a smart phone as a remote shutter
release
…………………………………… 104
Using photo or video sharing
websites
………………………………… 106
Accessing a website
…………………… 106
Uploading photos or videos
…………… 106
Sending photos or videos via email
…… 108
Changing email settings
……………… 108
Sending photos or videos via email
…… 109
Using Auto Backup to send photos or
videos
…………………………………… 111
Installing the program for Auto Backup
on your PC
…………………………… 111
Sending photos or videos to a PC
…… 111
Viewing photos or videos on a TV
Link-enabled TV
………………………… 113
Sending photos using Wi-Fi Direct
…… 115
About the Wake on LAN (WOL)
feature
…………………………………… 116
Wireless network
Learn to connect to wireless local area networks (WLANs) and use functions.
Wireless network
99
Connecting to a WLAN and configuring network settings
Learn to connect via an access point (AP) when you are in a range of a WLAN. You can also configure network settings.
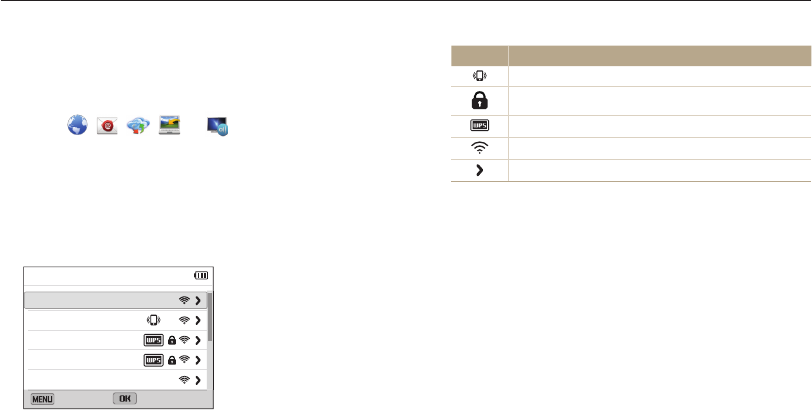
Icon Description
Ad hoc AP
Secured AP
WPS AP
Signal strength
Press [
t
] to open network setting options.
•
When you select a secured AP, a pop-up window appears.
Enter the required passwords to connect to the WLAN. For
information about entering text, refer to "Entering text". (p. 111)
•
When a login page appears, refer to "Using the login browser".
(p. 109)
•
When you select an unsecured AP, the camera will connect to
the WLAN.
•
If you select a WPS profile supported AP, select WPS PIN,
and then enter a PIN on the AP device. You can also connect
to a WPS profile supported AP by selecting WPS PBC on the
camera, and then pushing the WPS button on the AP device.
Connecting to a WLAN
1
On the Home screen, scroll to <Wi-Fi>.
2
Select , , , , or .
3
Press [
m
], and then select Wi-Fi Setting.
•
In some modes, press [
m
] or follow the on-screen
instructions until the Wi-Fi Setting screen appears.
•
The camera automatically searches for available AP devices.
4
Select an AP.
Wi-Fi Setting
Samsung 2
Samsung 1
Samsung 3
Samsung 4
Samsung 5
Back Select
•
Select WPS PBC to connect to a WPS AP.
•
Select Refresh to refresh connectable APs.
•
Select Add wireless network to add an AP manually.