Samsung Electronics Co EM7700-W Cellular/PCS WCDMA and LTE Band 04/17 Model User Manual T Mobile SGH T779 Galaxy Tab
Samsung Electronics Co Ltd Cellular/PCS WCDMA and LTE Band 04/17 Model T Mobile SGH T779 Galaxy Tab
Contents
- 1. User Manual (Host) Part 1
- 2. User Manual (Host) Part 2
- 3. User Manual (Host) Part 3
- 4. User Manual (Host) Part 4
- 5. User Manual (Host) Part 5
User Manual (Host) Part 4
DRAFT
Internal Use Only
Settings 202
Section 11: Settings
This section explains Settings for customizing your device.
Accessing Settings
From a Home screen, tap
Apps
➔
Settings
.
– or –
From any screen, tap the Time in the System Bar, then
tap
Settings
. For more information, refer to “Quick
Settings” on page 33.
The Settings screen displays.
The Settings Screen
The Settings screen has tabs on the left side of the screen.
Information related to the tabs displays on the right side of
the screen. There are four major groups of settings: Wireless
and network, Device, Personal, and System.
Wireless and Network
Control your device’s wireless connections.
Wi-Fi
Your device supports Wi-Fi a/b/g/n. Use Wi-Fi settings to
manage your device’s Wi-Fi connections.
For more information about using your device’s Wi-Fi
features, see “Wi-Fi” on page 150.
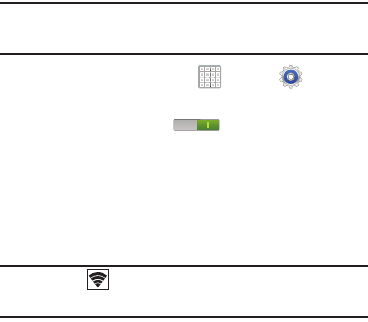
Turning Wi-Fi On or Off
When you turn Wi-Fi service on, your device automatically
searches for available, in-range Wireless Access Points
(WAPs).
From any Home screen, tap the time, then tap
Wi-Fi
from the Quick Settings menu.
For more information, refer to “Quick Settings” on
page 33.
– or –
From a Home screen, tap
Apps
➔
Settings
.
On the Wi-Fi tab, tap the
OFF / ON
icon to turn
Wi-Fi on or off.
For PRA Only, Printing NOT approved by Technical Writing Team
DRAFT
Internal Use Only
203
Add Wi-Fi Network
To open a dialog where you can add a Wi-Fi network by
entering its Network SSID (the name it broadcasts), security
type, and other properties:
1. From a Home screen, tap
Apps
➔
Settings
➔
Wi-Fi
, and then select
Add Wi-Fi network
.
2. Use the keyboard to enter
Network SSID
.
3. Tap the
Security
field and then select a security type.
Note:
Depending on the Security protocol used by the WAP,
additional network information may be required, such as
a Password.
4. If necessary, tap
Password
and enter the password or
hex key.
Note:
COnfirm you have entered the correct password by
placing a green check mark in the
Show password
field.
5. Select
Save
.
Advanced Settings
Set up and manage wireless access points.
1. From a Home screen, tap
Apps
➔
Settings
➔
Wi-Fi
.
2. Tap
Menu
➔
Advanced
.
The following options display:
• Network notification
: Have your device alert you to new
Wireless Access Points (WAPs). Tap
Network notification
to turn notifications On or Off. When enabled, a check mark
appears in the check box.
• Keep Wi-Fi on during sleep
: Specify when to disconnect
from Wi-Fi. Option are: Always, Only when plugged in, or
Never.
•MAC address
: View your device’s MAC address, required
when connecting to some secured networks (not configurable).
•IP address
: View your device’s IP address.
For PRA Only, Printing NOT approved by Technical Writing Team
DRAFT
Internal Use Only
Settings 204
Bluetooth
Use Bluetooth settings to manage Bluetooth connections, set
your device’s name, and control your device’s visibility.
Turning Bluetooth On or Off
From any Home screen, touch the time, then tap
Bluetooth
from the Quick Settings menu.
For more information, refer to “Quick Settings” on
page 33.
– or –
From a Home screen, tap
Apps
➔
Settings
.
On the Bluetooth tab, tap the
OFF / ON
icon to
turn Bluetooth on or off.
For more information about using Bluetooth to exchange
information with other Bluetooth devices, see “Bluetooth” on
page 154.
Additional Bluetooth Settings
When Bluetooth is on, additional settings are available.
1. From a Home screen, tap
Apps
➔
Settings
➔
Bluetooth
.
2. Tap
Scan
to scan for nearby discoverable devices.
After searching, tap a device to pair with it. For more
information, refer to “Pairing with a Bluetooth Device”
on page 155.
3. Tap
Menu
and select a Bluetooth setting to
configure:
• Rename device
: Your device’s default name displays on
screen. Tap to change the device name. Available when
Bluetooth is turned On.
• Visible time-out
: Use this setting to control when to
automatically turn off the Discoverable option: 2 min, 5 min,
1 hour, or Never timeout.
• Received files
: Show the list of files received by using
Bluetooth.
For PRA Only, Printing NOT approved by Technical Writing Team
DRAFT
Internal Use Only
205
Data Usage
From this screen you can view the Wi-Fi or Ethernet data
usage.
1. From a Home screen, tap
Apps
➔
Settings
➔
Data usage
.
2. Tap the
OFF / ON
icon to turn the Mobile data
on or off.
To set a mobile data limit:
1. Tap the
OFF / ON
icon to turn the Mobile data
on or off.
2. Place a check mark in the
Set mobile data limit
field.
3. Read the on-screen disclaimer info and tap
OK
.
4. Touch and drag the far right ends of the red or orange
horizontal lines to manually adjust both the Warning
and Maximum data limits.
5. Touch and drag the bottom grey vertical lines to adjust
the time frames.
6. Tap the
Data usage cycle
button and select either the
current cycle or define your own by selecting
Change
cycle
.
7. Tap
Upgrade data service
to access your account
information and review your current plan information
and possible upgrade options.
8. Tap an application link (bottom of screen) to review
application settings and access restrict background
data options.
9. Tap
Menu
and then select from the available
on-screen options:
• Data roaming
allows you to connect to your service provider’s
partner networks and access data services when you are out of
your service providers area of coverage. For more information,
refer to
“Data Roaming”
on page 207.
• Restrict background data
prevents background data usage.
This can help prevent over usage of your data minutes.
•Show Wi-Fi usage
activates an additional Wi-Fi tab that shows
you your Wi-Fi data usage.
Note:
Data is measured by your device. Your service provider
may account for data usage differently.
For PRA Only, Printing NOT approved by Technical Writing Team
DRAFT
Internal Use Only
Settings 206
More Settings
This tab displays additional wireless and network
information.
From a Home screen, tap
Apps
➔
Settings
➔
More settings
.
Options display for Airplane mode, Mobile networks,
Wi-Fi Direct, Data usage, VPN, Kies via Wi-Fi, and
Nearby devices.
Airplane Mode
Airplane mode allows you to use many of your tablet’s
features, such as Camera, Games, and more, when you are
in an airplane or in any other area where accessing data is
prohibited.
Important!
When your tablet is in Airplane Mode, it cannot
access online information or applications.
Press and hold the
Power/Lock Key
then
select
Airplane mode
.
– or –
From any Home screen, touch the time, then tap
Airplane mode from the Quick Settings menu.
– or –
From a Home screen, tap
Apps
➔
Settings
➔
More settings
➔
Airplane mode
, tap the check box,
and then select
OK
to turn on Airplane mode.
A check mark appears in the check box when
Airplane mode is On. The Airplane mode icon is
displayed at the top of your screen.
Kies via Wi-Fi
Wi-Fi configuration and usage by Kies Air.
1. From a Home screen, tap
Apps
➔
Settings
➔
More settings
➔
Kies via Wi-Fi
.
2. Select the source of the Wi-Fi connection for Kies air.
For PRA Only, Printing NOT approved by Technical Writing Team
DRAFT
Internal Use Only
207
Using Mobile networks
Before you use applications such as Google Maps and find
your location or search for places of interest, you must
enable the Mobile networks options.
From a Home screen, tap
Apps
➔
Settings
➔
More settings
➔
Mobile networks
.
The following options display:
Mobile data
Allows you to activate data network usage on your device.
From a Home screen, tap
Apps
➔
Settings
➔
More settings
➔
Mobile networks
➔
Mobile data
.
Data Roaming
Connects to your service provider’s partner networks and
accesses data services when you are out of your service
providers area of coverage.
1. From a Home screen, tap
Apps
➔
Settings
➔
More settings
➔
Mobile networks
.
2. Tap
Data roaming
to connect to data services while
roaming outside your network.
– or –
Tap
Data roaming
again to remove the green check
mark and deactivate the feature.
Access Point Names
To access a wireless access point:
From a Home screen, tap
Apps
➔
Settings
➔
More settings
➔
Mobile networks
➔
Access Point
Names
. A list of the Access point names display. The
active access point displays a bright green, filled circle
to the right of the name.
For PRA Only, Printing NOT approved by Technical Writing Team
DRAFT
Internal Use Only
Settings 208
Network mode
You can configure your device to either manually detect and
use either an Auto (GSM/WCDMA), 2G (GSM only) or
3G (WCDMA only) data network connection.
From a Home screen, tap
Apps
➔
Settings
➔
More settings
➔
Mobile networks
➔
Network mode
.
Using the 4G Network
To confirm you are always using the fastest possible
connection, the device has an automatic detection method
where it finds both the fastest and most stable connection/
communication method. This device is capable of using
either 4G/3G services for this connection.
Note:
WCDMA is only available on the 4G network.
1. From a Home screen, tap
Apps
➔
Settings
➔
More settings
➔
Mobile networks
➔
Network mode
.
2. Tap
GSM/WCDMA (Auto mode)
. A check mark displays
next to this option to indicate that it is active. This is
the default mode for this device.
Using the 2G (EDGE) Network
If you are not using applications that require the 3G network
speed (any application that accesses the network or uses a
browser), using the 2G network saves battery life.
1. From a Home screen, tap
Apps
➔
Settings
➔
More settings
➔
Mobile networks
➔
Network mode
.
2. Tap
GSM only
. A check mark displays next to this option
to indicate that it is active.
Note:
Connecting to 2G networks slows the data transfer
speed and time.
Using the 3G Network
If you are using applications that require the 3G network
speed, follow these instructions to connect to the 3G
network.
1. From a Home screen, tap
Apps
➔
Settings
➔
More settings
➔
Mobile networks
➔
Network mode
.
2. Tap
WCDMA only
. A check mark displays next to this
option to indicate that it is active.
For PRA Only, Printing NOT approved by Technical Writing Team
DRAFT
Internal Use Only
209
Network Operators
Using this feature you can view the current network
connection. You can also scan and select a network operator
manually, or set the network selection to Automatic.
1. From a Home screen, tap
Apps
➔
Settings
➔
More settings
➔
Mobile networks
.
2. Tap
Network operators
. The current network connection
displays at the bottom of the list.
Important!
You must deactivate data service prior to searching
for an available network.
3. Tap
Search now
to manually search for a network.
4. Tap
Select automatically
to automatically select a
network connection.
Note:
Connecting to 2G networks slows the data transfer
speed and time.
Default Setup Options
Your device default is set to Automatic (to automatically
search for an available network. You can set this option to
Manual to select a network each time you connect.
1. From a Home screen, tap
Apps
➔
Settings
➔
More settings
➔
Mobile networks
➔
Network
operators
.
2. Tap
Default setup
.
3. Tap
Manual
to locate and connect to a network
manually.
– or –
4. Tap
Automatic
to allow the device to automatically
select a network.
For PRA Only, Printing NOT approved by Technical Writing Team
DRAFT
Internal Use Only
Settings 210
Tethering and Portable HotSpot
The Tethering option allows you to share your device’s
mobile data connection via a direct USB connection between
your device and computer.
The Portable HotSpot feature allows you to turn your device
into a Wi-Fi hotspot. The feature works best when used in
conjunction with HSPA+ (4G) data services (although 3G
service can also be used).
For more information, see “USB Tethering” on page 157 or
see “Portable Wi-Fi HotSpot” on page 158.
Wi-Fi Direct Settings
You can configure your device to connect directly with other
Wi-Fi capable devices. This is an easy way to transfer data
between devices. These devices must be enabled for Wi-Fi
Direct communication. This connection is direct and not via a
hot spot or WAP.
Note:
Activating this feature will disconnect your current Wi-Fi
network connection.
1. From a Home screen, tap
Apps
➔
Settings
➔
More settings
➔
Wi-Fi Direct
.
2. Tap the
OFF / ON
icon to turn Wi-Fi Direct on.
If you are currently connected to a Wi-Fi network, a
prompt displays
Start Wi-Fi Direct operation. This will
turn off Wi-Fi client/hotspot operation
.
3. Tap
OK
to continue. Your device will begin to search for
other devices enabled with Wi-Fi direct connections.
Note:
Confirm (
Wi-Fi Direct On
) appears at the bottom of
the screen.
4. Tap the Wi-Fi Direct tab to display Available devices.
For PRA Only, Printing NOT approved by Technical Writing Team
DRAFT
Internal Use Only
211
5. Enable Wi-Fi Direct (similar to Steps 1 and 2) on the
device to which you want to connect.
Note:
The target device must also have Wi-Fi Direct service
active and running before it is detected by your device.
6. Tap
Scan
and select the single device name to begin
the connection process to another Wi-Fi Direct
compatible device.
7. Once the device you want to connect to is displayed,
tap it.
An Invitation to connect displays on the device to which
you want to connect.
8. On that target device, tap
Accept
.
You have 2 minutes to tap
Accept
on the device to
which you want to connect for the connection to be
made.
9. Once connected, the other device will show as
Connected
in your list of Wi-Fi Direct devices and the
icon will display at the bottom of your screen.
For more information, refer to “Wi-Fi Direct” on page 152.
VPN
The VPN settings menu allows you to set up and manage
Virtual Private Networks (VPNs).
Important!
Before you can use a VPN you must establish and
configure one.
Adding a VPN
Before you add a VPN you must determine which VPN
protocol to use: PPTP, L2TP/IPSec PSK, L2TP/IPSec RSA,
IPSec Xauth PSK, IPSec Xauth RSA, IPSec Hybrid RSA.
Note:
You must also set a screen unlock PIN or password
before you can use credential storage via VPN. For more
information, refer to “Screen Lock” on page 225.
1. From a Home screen, tap
Apps
➔
Settings
➔
More settings
➔
VPN
.
2. Tap
Add VPN
network
.
3. In the form that appears, fill in the information provided
by your network administrator.
4. Tap
Save
to save your VPN settings.
For PRA Only, Printing NOT approved by Technical Writing Team

DRAFT
Internal Use Only
Settings 212
Connecting To a VPN
1. From a Home screen, tap
Apps
➔
Settings
➔
More settings
➔
VPN
.
2. Tap the VPN to which you want to connect.
3. In the pop-up that opens, enter any requested
credentials.
4. Tap
Connect
.
Edit a VPN
1. From a Home screen, tap
Apps
➔
Settings
➔
More settings
➔
VPN
.
2. Touch and hold the VPN that you want to edit.
3. In the pop-up that opens, touch
Edit network
.
4. Make the desired VPN setting changes.
5. Touch
Save
.
Delete a VPN
1. From a Home screen, tap
Apps
➔
Settings
➔
More settings
➔
VPN
.
2. Touch and hold the VPN that you want to delete.
3. In the pop-up that opens, touch
Delete network
.
Kies via Wi-Fi
This feature provides Wi-Fi configuration and usage by Kies
Air.
1. From a Home screen, tap
Apps
➔
Settings
➔
More settings
➔
Kies via Wi-Fi
.
2. Select the source of the Wi-Fi connection for Kies air.
Nearby Devices
This option allows you to share your media files with nearby
DLNA (Digital Living Network Alliance) enabled devices.
Warning!
If file sharing is enabled, other devices can access
your data. Use the Wi-Fi network and this option with
care.
To configure this option:
1. From a Home screen, tap
Apps
➔
Settings
➔
More settings
➔
Nearby devices
.
2. Tap
File sharing
to turn File sharing on.
A check mark appears in the check box when File
sharing is On.
For PRA Only, Printing NOT approved by Technical Writing Team
DRAFT
Internal Use Only
213
3. In the Advanced section, set the following options:
• Shared contents
: Select the content to share. Choices are:
Videos, Photos, and Music.
• Device name
: Enter the name for your device. The default is
the model number: SAMSUNG-SGH-XXX.
• Allowed devices list
: Indicate the devices accessible to your
device.
• Not-allowed devices list
: Indicate the devices not accessible
to your device.
•Download to
: Set whether to download data to USB storage or
SD card.
• Upload from other devices
: If a nearby device attempts to
upload data, this setting indicates the response. Options are:
Always accept, Always ask, and Always reject.
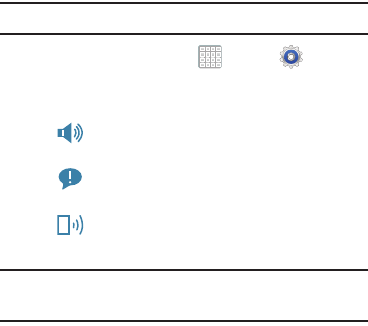
Sound Settings
General Volume
Set the volume level for all types of sounds.
Note:
You can only set volume when Silent Mode is disabled.
1. From a Home screen, tap
Apps
➔
Settings
➔
Sound
➔
Volume
.
2. Touch and drag the sliders to set the volume for:
•
Music
,
video
,
games
,
and other media
: Sounds made
by music apps, video apps, and more.
•
Notifications
: Sounds for alerts to new messages and
other events.
•
System
: Application sounds and other sounds made by
your device.
Tip:
You can also set System volume from the Home screen by
pressing the Volume Key.
3. Tap
OK
to save your settings.
For PRA Only, Printing NOT approved by Technical Writing Team
DRAFT
Internal Use Only
Settings 214
Setting a Default Notification
Select a default ringtone for message, alarm, and other
notifications.
1. From a Home screen, tap
Apps
➔
Settings
➔
Sound
➔
Default notifications
.
2. Tap a ringtone to hear a sample and select it.
3. Tap
OK
to save the setting.
Audible System Tone Settings
These options are used when you use the dialing pad, make
a screen selection, lock your screen, or tap the screen. Each
time you press a key or make a selection the selected tone
sounds. You can activate or deactivate both touch and screen
lock sounds.
1. From a Home screen, tap
Apps
➔
Settings
➔
Sound
.
2. Tap
Touch sounds
to activate a tone when you touch the
screen. A check mark displayed next to this feature
indicates active status. When enabled, a check mark
appears in the check box.
3. Tap
Screen lock sound
to activate a tone when you use
the Lock screen. A check mark displayed next to this
feature indicates active status. When enabled, a check
mark appears in the check box.
For PRA Only, Printing NOT approved by Technical Writing Team

DRAFT
Internal Use Only
215
Display Settings
In this menu, you can change various settings for the display
such as the font, orientation, pop-up notifications, puzzle
lock feature, animation, brightness, screen timeout, and
power saving mode.
Adjusting the General Display Features
Brightness
Set the default screen brightness.
1. From a Home screen, tap
Apps
➔
Settings
➔
Display
➔
Brightness
.
2. Touch and drag the slider to set the brightness or tap
Automatic brightness
.
3. Tap
OK
to save the setting.
Screen Timeout
Set the length of delay between the last key press or screen
tap and the automatic screen timeout (dim and lock).
1. From a Home screen, tap
Apps
➔
Settings
➔
Display
.
2. Tap
Screen timeout
and select the screen delay time.
The screen delays shutting off after inactivity for the
selected period of time.
•
Selections are: 15 seconds, 30 seconds, 1 minute, 2 minutes,
5 minutes, 10 minutes, or 30 minutes.
Auto-Rotate Screen
When this option is checked, the screen orientation changes
when you rotate the device. When this option is not checked,
the screen orientation locks in the current orientation
(landscape or portrait) and the orientation does not change
when you rotate the device.
1. From a Home screen, tap
Apps
➔
Settings
➔
Display
.
2.
Tap
Auto-rotate screen
to enable or disable the auto-rotate
feature
.
For PRA Only, Printing NOT approved by Technical Writing Team

DRAFT
Internal Use Only
Settings 216
Tip:
Tap the Time in the System Bar to display the Quick
Settings pop-up. Tap
Screen rotation
to enable or disable
the auto-rotate feature. For more information, refer to
“Quick Settings” on page 33.
Font Style and Size
Set the font for screen displays and the size you want it to
display.
1. From a Home screen, tap
Apps
➔
Settings
➔
Display
.
2. Tap
Font style
then select a font.
•
Selections are:
Default font
,
Choco cooky
,
Helvetica S
,
Rosemary
, or
Get fonts online
.
Tap
Get fonts online
to download additional fonts.
3. Tap
Font size
and select a font size.
Quick Launch
The Quick Launch feature allows you to set multifunctional
softkey to open applications.
1. From a Home screen, tap
Apps
➔
Settings
➔
Display
.
2. Tap
Quick launch
.
3. Tap
None
,
Screen capture
,
Applications
,
Search
, or
Camera
.
If you choose Screen capture, tap the softkey to
capture an image of the current screen and edit the
image. Touch and hold to capture and add an image of
the current screen to the clipboard.
The screen image is saved in the /Root/Pictures/
Screenshots folder. For more information, refer to “My
Files” on page 182.
For PRA Only, Printing NOT approved by Technical Writing Team
DRAFT
Internal Use Only
217
Wallpaper
To set the Home Screen and Lock Screen Wallpaper:
You can choose a picture to display on the Home Screen or
Lock screen. Choose from preloaded wallpaper images or
select a photo you have downloaded or taken with the
Camera.
1. From a Home screen, tap
Apps
➔
Settings
➔
Wallpaper
.
2. Tap
Home screen wallpaper
or
Lock screen wallpaper
.
The Select wallpaper from screen displays the
following options:
Gallery
,
Live wallpapers
, and
Wallpapers
.
For more information, refer to “Wallpapers” on
page 42.
Power Saving Mode
This feature allows you both automatically set the device to
use a power saving mode and configure additional power
saving options manually, all in an effort to conserve battery
power.When enabled, your device automatically analyzes the
screen and adjusts the brightness to conserve battery power.
1. From a Home screen, tap
Apps
➔
Settings
➔
Power saving
.
2. On the Power saving tab, tap the
OFF / ON
icon
to turn Power saving on or off.
3. Tap
Custom power saving
to enable or disable the
mode. When enabled, a check mark appears in
the check box.
4. Tap
Screen timeout
to set the length of delay between
the last key press or screen touch and the automatic
screen timeout (dim and lock).
5. Tap
Learn about power saving
to display more
information about saving power.
For PRA Only, Printing NOT approved by Technical Writing Team
DRAFT
Internal Use Only
Settings 218
Storage
From this menu you can view the device memory or mount,
unmount, or format an SD card.
Device Memory
From a Home screen, tap
Apps
➔
Settings
➔
Storage
.
The Device memory displays as Total space, Apps,
Pictures, videos, Audio (music, ringtones, podcasts,
etc.), Downloads, Miscellaneous files, and Available
space.
To view the memory allocation for your external SD card:
From a Home screen, tap
Apps
➔
Settings
➔
Storage
.
The available SD card memory displays under the SD
card heading.
To mount the SD card:
1. From a Home screen, tap
Apps
➔
Settings
➔
Storage
.
2. Tap
Mount
SD card
.
Important!
When formatting an SD card you will want to
backup your music and photo files that are stored
on the card because formatting the SD card
deletes all the stored data.
To Format the SD Card:
1. Ensure the SD card is mounted.
2. From a Home screen, tap
Apps
➔
Settings
➔
Storage
.
3. Tap
Format SD card
➔
Format SD card
➔
Delete all
to
format the SD card. The SD card formats and erases all
the data stored on it.
For PRA Only, Printing NOT approved by Technical Writing Team
DRAFT
Internal Use Only
219
Battery
This option allows you to view a list of those components
using battery power. The amount of time the battery was
used also displays. Battery usage displays in percentages
per application.
1. From a Home screen, tap
Apps
➔
Settings
➔
Battery
.
The battery level displays in percentage. The amount
of time the battery was used also displays. Battery
usage displays in percentages per application.
2. From the upper-right tap
Refresh
to update the
list.
– or –
Tap an entry to view more detailed information.
3. Tap
Screen
,
Android OS
, or
Android System
to view how
the display and the Android system are affecting
battery use.
Note:
Other applications may be running that affect battery
use.
Application Manager
You can download and install applications from Google Play
or create applications using the Android SDK and install them
on your device. Use Applications settings to manage
applications.
Warning!
Because this device can be configured with system
software not provided by or supported by Google or
any other company, end-users operate these devices
at their own risk.
For PRA Only, Printing NOT approved by Technical Writing Team
DRAFT
Internal Use Only
Settings 220
Memory Usage
See how memory is being used by Downloaded or Running
applications.
1. From a Home screen, tap
Apps
➔
Settings
➔
Application manager
.
2. Tap the
Downloaded
or
Running
tabs to display memory
usage for that category of applications.
The graph at the bottom of the Downloaded tab shows
used and free device memory. The graph at the bottom
of the Running tab shows used and free RAM.
– or –
Tap
All
to see all current applications.
Downloaded Apps
Displays apps you have downloaded onto your device.
1. From a Home screen, tap
Apps
➔
Settings
➔
Application manager
.
2. Tap
Downloaded
to view a list of all the downloaded
applications on your device.
3. To switch the order of the lists displayed in the
Downloaded tabs, tap
Menu
➔
Sort by size
.
4. Tap an application to view and update information
about the application, including memory usage, default
settings, and permissions. The following options are
displayed:
• Force stop
: Stops an app that is misbehaving. Restart your
device if stopping an app, process, or service causes your
device to stop working correctly.
• Uninstall
: Deletes the application from the tablet.
•Clear data
: Clears application data from memory.
•Clear cache
: If the app stores data in a temporary area of the
device's memory, and the amount of information stored is
displayed, touch this button to clearing the temporary storage.
For PRA Only, Printing NOT approved by Technical Writing Team
DRAFT
Internal Use Only
221
• Clear defaults
: If you have configured an app to launch
certain file types by default, clear that setting.
•Permissions
: Lists the kinds of information about your device
and data to which the app has access.
Uninstalling Third-party Applications
Important!
You must have downloaded applications installed
to use this feature.
1. From a Home screen, tap
Apps
➔
Settings
➔
Application manager
.
2. Tap the
Downloaded
tab and select your desired
application.
3. Tap
Uninstall
(from within the top area of the
Application info page).
4. At the prompt, tap
OK
to uninstall the application.
5. Select a reason for uninstalling the application, then
tap
OK
.
Running Services
To view and control services running on your device:
1. From a Home screen, tap
Apps
➔
Settings
➔
Application manager
.
2. Tap the
Running
tab.
All the applications that are currently running on the
device display.
3. Tap
Show cached processes
to display all the cached
processes that are running.
4. Tap
Show services in use
to switch back.
5. Select one of the applications to view application
information.
The following options display:
•Stop
: Stops the application from running on the device. This is
usually done prior to uninstalling the application.
Warning!
Not all services can be stopped. Stopping services
may have undesirable consequences on the
application or Android System.
•Report
: Report failure and other application information.
For PRA Only, Printing NOT approved by Technical Writing Team
DRAFT
Internal Use Only
Settings 222
Note:
Options vary by application.
Storage Used
This option allows you to view a list (on the current tab) of
current applications as sorted by size.
1. From a Home screen, tap
Apps
➔
Settings
➔
Application manager
.
2. Tap the
All
tab to display all available applications.
3. Tap
Menu
➔
Sort by size
to change the current list
to show items based on the amount of storage they
occupy.
Accounts and Synchronization
Set up and manage accounts, including your Google and
email accounts.
To activate Accounts and sync
1. From a Home screen, tap
Apps
➔
Settings
➔
Accounts and sync
.
2. Tap the
Auto sync
icon to turn the feature on.
To deactivate Accounts and sync
1. From a Home screen, tap
Apps
➔
Settings
➔
Accounts and sync
.
2. Tap the
Auto sync
icon again to turn the
feature off.
Adding an Account
1. From a Home screen, tap
Apps
➔
Settings
➔
Accounts and sync
.
2. Tap
Add account
.
3. Select one of the account types.
4. Use the keyboard and follow the prompts to enter your
credentials and set up the account.
For PRA Only, Printing NOT approved by Technical Writing Team
DRAFT
Internal Use Only
223
Tip:
For more information about the types of accounts that you
can add, see “Accounts” on page 65.
Removing an Account
Important!
Removing an account also deletes all of its
messages, contacts, and other data from the
device.
1. From a Home screen, tap
Apps
➔
Settings
➔
Accounts and sync
.
2. Tap an account to display its settings.
3. Tap
Remove account
➔
Remove
account
at the
prompt to remove the account and delete all its
messages, contacts, and other data.
Synchronizing All Accounts
Select the items you want to synchronize on your account
such as Books, Calendar, Contacts, and more.
1. From a Home screen, tap
Apps
➔
Settings
➔
Accounts and sync
.
2. Tap
Sync all
to synchronize all your accounts.
Tap
Cancel sync
to stop the synchronization.
3. On the
Auto-sync
field, tap the
OFF / ON
icon to
turn Auto-sync on or off, which controls whether
changes you make to information on your device or on
the web are automatically synced with each other.
Data and Synchronization
To sync account information manually:
1. From a Home screen, tap
Apps
➔
Settings
➔
Accounts and sync
.
2. Tap an account to display its settings.
3. Tap
Sync now
to synchronize all data for the selected
account.
– or –
Under
Data and synchronization
, tap the account data
to synchronize it, such as, Calendar, Contacts, etc...
For PRA Only, Printing NOT approved by Technical Writing Team

DRAFT
Internal Use Only
Settings 224
Location Services
You value your privacy. So, by default, your device only
acquires your location when you allow it. To use
Location-Based Services, you must first enable location
services on your device.
Use Wireless Networks
Before you use applications such as Google Maps and find
your location or search for places of interest, you must
enable the Use wireless networks option or enable the GPS
satellites.
1. From a Home screen, tap
Apps
➔
Settings
➔
Location services
.
2. Tap
Use wireless networks
to enable location
information using the wireless network.
Use GPS Satellites
1. From a Home screen, tap
Apps
➔
Settings
➔
Location services
.
2. Tap
Use GPS satellites
to enable the GPS satellite.
Location and Google Search
1. From a Home screen, tap
Apps
➔
Settings
➔
Location services
.
2. Touch
Location and Google search
to use your location
data for improved Google Search results and other
Google services.
Security
This menu contains features that allows you to configure the
device’s security parameters.
Screen Unlock Pattern Overview
To secure data and limit access, set the device to require a
screen unlock pattern each time you turn on the device, or
every time the device wakes up from sleep mode (when the
screen automatically turns off).
The Screen lock menu allows to choose from a variety of
locking features such as:
Swipe
,
Face Unlock
,
Pattern
,
PIN
,
Password
, and
None
.
For PRA Only, Printing NOT approved by Technical Writing Team
DRAFT
Internal Use Only
225
Screen Lock
Choose settings for unlocking your screen. For more
information about using the lock and unlock features, see
“Securing Your Device” on page 20.
1. From a Home screen, tap
Apps
➔
Settings
➔
Security
.
2. Tap
Screen lock
for these settings:
•None
: No pattern, PIN, or password is required.
•Swipe
: Swipe the screen to unlock it.
• Pattern
: A screen unlock pattern is a touch gesture you create
and use to unlock your device. Follow the prompts to create or
change your screen unlock pattern.
•PIN
: Select a PIN to use for unlocking the screen.
• Password
: Create a password for unlocking the screen.
Note:
Additional options are available only if you set
Screen
lock
to display the lock screen (any setting other than
Swipe
or
None
).
Using Swipe
This feature is the least secure locking method and only
requires that a user swipe the screen to unlock the device.
1. From a Home screen, tap
Apps
➔
Settings
➔
Security
.
2. Tap
Screen lock
➔
Swipe
.
Using Face Unlock
This feature used facial recognition to unlock your device.
This feature is less secure than PIN, Pattern, and Password
locks and can be bypassed by someone else who looks
similar to you.
1. From a Home screen, tap
Apps
➔
Settings
➔
Security
.
2. Tap
Screen lock
➔
Face unlock
.
3. Read the on-screen notification and tap
Set it up
.
4. Follow the on-screen instructions.
For PRA Only, Printing NOT approved by Technical Writing Team

DRAFT
Internal Use Only
Settings 226
Setting an Unlock Pattern
Creating a screen unlock pattern increases security on the
device. When you enable the User visible pattern field, you
will draw an unlock pattern on the screen whenever you
want to unlock the device’s touch screen.
The feature is now paired with a backup PIN code that acts
as a backup to the pattern lock. If you forget your pattern,
you can regain access to the device by entering a PIN code.
Note:
Make sure the Require Pattern field is activated.
1. From a Home screen, tap
Apps
➔
Settings
➔
Security
.
2. Tap
Screen lock
➔
Pattern
.
3. Review the on-screen animation procedure for drawing
a pattern and tap
Next
when you are ready to draw a
pattern.
4. Draw your pattern by touching your first on-screen
point. Then,
without removing your finger from the
screen, drag your finger over adjacent points until the
gray trace line overlaps each point
and they are
highlighted with a green circle.
5. When you have connected at least four dots in a
vertical, horizontal or diagonal direction, lift your finger
from the screen and tap
Continue
.
6. Confirm the new pattern by redrawing it and then
tapping
Confirm
. The Unlock pattern is set.
7. Enter the backup PIN code and tap
Continue
.
Reenter the PIN to reconfirm the previous entry and tap
OK
.
Changing the Screen Lock Pattern
This feature allows you to change the previously stored
unlock pattern and update it if necessary. This process is
similar to changing your password from time to time.
1. From a Home screen, tap
Apps
➔
Settings
➔
Security
.
2. Tap
Screen lock
.
3. Retrace your current pattern on the screen.
4. Tap
Pattern
and repeat steps 3 - 7 from the previous
section.
For PRA Only, Printing NOT approved by Technical Writing Team
DRAFT
Internal Use Only
227
Deleting the Screen Lock Pattern
1. From a Home screen, tap
Apps
➔
Settings
➔
Security
.
2. Tap
Screen lock
.
3. Retrace your current pattern on the screen.
Tap
None
.
PIN Lock and Unlock
1. From a Home screen, tap
Apps
➔
Settings
➔
Security
.
2. Tap
Screen lock
➔
PIN
.
3. Enter a PIN number using the numeric keypad and
touch
Continue
to confirm the password.
4. Confirm the PIN by re-entering it and tap
OK
to confirm.
Your device now requires you to enter this PIN number
in order to unlock the device.
Password Lock and Unlock
1. From a Home screen, tap
Apps
➔
Settings
➔
Security
.
2. Tap
Screen lock
➔
Password
.
3. Enter a password using the keypad and tap
Continue
to
confirm the password.
Confirm the password by re-entering it and tap
OK
to
confirm.
With Swipe Lock
Display a lock screen that has to be swiped and then display
a lock screen on which the face unlock, pattern, PIN, or
password has to be entered.
1. From a Home screen, tap
Apps
➔
Settings
➔
Security
.
2. Tap the
With swipe lock
check box to activate or
deactivate the option. When enabled, a check mark
appears in the check box.
For PRA Only, Printing NOT approved by Technical Writing Team
DRAFT
Internal Use Only
Settings 228
Lock Screen Options
You can customize the Lock screen with the lock screen
options.
Note:
This feature is not active until
With swipe lock
is
activated.
1. From a Home screen, tap
Apps
➔
Settings
➔
Security
.
2. Tap
Lock screen options
and set the following options:
•Clock
: Activate or deactivate the Lock screen clock. When
enabled, a check mark appears in the check box.
•Dual clock
: Tap the
OFF / ON
icon
to turn this
option on or off. This option shows a dual clock on the lock
screen when roaming.
•Help text
: Display help text on the lock screen.
Note:
After a screen lock feature has been enabled, additional
on-screen features appear such as: Make pattern
visible, Lock automatically, etc..
Make Pattern Visible
When the
Make pattern visible
option is enabled, the device
displays the on-screen lock grid that is used for unlocking.
Note:
This option only appears when a screen lock option is
active.
Locking Automatically
This option allows you to define the amount of time that must
pass before the device can automatically lock on its own.
Note:
This option only appears when a screen lock option is
active.
Lock Instantly With Power Key
Use this option to enable the lock screen when the power key
is pressed. If this option is not enabled, the screen dims or
brightens when the power key is pressed.
1. From a Home screen, tap
Apps
➔
Settings
➔
Security
.
2. Tap
Lock instantly with power key
.
For PRA Only, Printing NOT approved by Technical Writing Team
DRAFT
Internal Use Only
229
Note:
When enabled, a green check mark appears in the
adjacent box.
Owner Information
Use this option to enable or disable whether to show owner
information on the lock screen.
1. From a Home screen, tap
Apps
➔
Settings
➔
Security
➔
Owner information
.
2. Tap the
Show owner info on lock screen
checkbox to
create a checkmark if you want your owner information
displayed.
3. Enter text that you would like displayed on your Lock
screen.
4. Tap
Back
twice to save the new text and return to
the previous screen.
Encrypt device
To require a numeric PIN or password to decrypt your tablet
each time you power it on:
1. From a Home screen, tap
Apps
➔
Settings
➔
Security
.
2. Tap
Encrypt device
. For more information, read the
displayed help screen.
Tip:
Make sure your battery is charged more than 80 percent.
Encryption takes an hour or more.
Encrypt SD card
To require a numeric PIN or password to decrypt the data on
the SD card:
1. From a Home screen, tap
Apps
➔
Settings
➔
Security
.
2. Tap
Encrypt external SD card
.
3. Follow the on-screen instructions.
For PRA Only, Printing NOT approved by Technical Writing Team
DRAFT
Internal Use Only
Settings 230
Setting up SIM Card Lock
Prevent another user from using your SIM card to make
unauthorized calls or from accessing information stored on
your SIM card by protecting the information using a PIN code.
1. From a Home screen, tap
Apps
➔
Settings
➔
Security
.
2. Tap
Set up SIM card lock
.
3. Tap
Lock SIM card
, enter your SIM PIN code, then tap
OK
.
Note:
You must activate Lock SIM card before you can change
your SIM PIN code.
To change an existing SIM Card PIN:
1. Tap
Change SIM PIN
.
2. Enter the old SIM PIN code and tap
OK
.
3. Enter the new SIM PIN code and tap
OK
.
4. Re-type the new SIM PIN code and tap
OK
.
Password Settings
When you create a device password you can also configure
the device to display the password as you type it instead of
using an asterisk (*).
1. From a Home screen, tap
Apps
➔
Settings
➔
Security
.
2. Tap
Make passwords visible
to activate this feature.
When enabled, a check mark appears in the check
box.
Device Administration
To add or remove device administrators:
1. From a Home screen, tap
Apps
➔
Settings
➔
Security
.
2. Tap
Device administrators
to begin configuring this
setting.
3. Select an administrator device and follow the prompts.
For PRA Only, Printing NOT approved by Technical Writing Team
DRAFT
Internal Use Only
231
Unknown Sources
Before you can download a web application you must enable
the Unknown sources feature (enables downloading).
Developers can use this option to install non-Play Store
applications.
1. From a Home screen, tap
Apps
➔
Settings
➔
Security
.
2. Tap
Unknown sources
to active this feature.
An informational pop-up displays.
3. Read the message and tap
OK
to allow installation of
non-Google Play applications.
When enabled, a check mark appears in the check
box.
Warning!
Enabling this option causes your tablet and personal
data to be more vulnerable to attack by applications
from unknown sources.
Note:
If you are notified that you can not download a Play
Store application because it comes from an “Unknown
source”, enabling this option corrects this issue.
Credential Storage
This option allows certain applications to access secure
certificates and other credentials. Certificates and
credentials can be installed to the SD card and password
protected.
Trusted Credentials
If a certificate authority (CA) certificate gets compromised or
for some other reason you do not trust it, you can disable or
remove it.
1. From a Home screen, tap
Apps
➔
Settings
➔
Security
.
2. Tap
Trusted credentials
to display only trusted CA
certificates. A check mark displayed next to the feature
indicates secure credentials.
The trusted credentials screen has two tabs:
• System
: Displays CA certificates that are permanently installed
in the ROM of your device.
•User
: Displays any CA certificates that you installed, for
example, in the process of installing a client certificate.
3. Tap a CA certificate to examine its details.
A scrolling screen displays the details.
For PRA Only, Printing NOT approved by Technical Writing Team
DRAFT
Internal Use Only
Settings 232
4. Scroll to the bottom of the details screen and touch
Disable
to disable a System certificate or
Remove
to
remove a User certificate.
Caution!
When you disable a system CA certificate, the
Disable
button changes to
Enable
, so you can enable the
certificate again, if necessary. When you remove a
user-installed CA certificate, it is permanently
deleted and must be re-installed, if needed.
5. Tap
OK
to return to the certificate list.
When enabled, a check mark appears in the check
box.
Install from Device Storage
Install encrypted certificates from a storage device, such as a
PC, with the USB cable.
1. From a Home screen, tap
Apps
➔
Settings
➔
Security
.
2. Tap
Install from device storage
, then choose a
certificate and follow the prompts to install.
Clear Credentials
Clear stored credentials.
Note:
This setting only appears if you have installed encrypted
certificates.
1. From a Home screen, tap
Apps
➔
Settings
➔
Security
.
2. Tap
Clear credentials
to remove all certificates.
For PRA Only, Printing NOT approved by Technical Writing Team
DRAFT
Internal Use Only
233
Language and Input
This setting allows you to configure the language in which to
display the menus. You can also set on-screen keyboard
options.
Language Settings
To set the language that the menus display on the device:
1. From a Home screen, tap
Apps
➔
Settings
➔
Language and input
➔
Language
.
2. Select a language and region from the list.
Select Input Method
1. From a Home screen, tap
Apps
➔
Settings
➔
Language and input
➔
Default
.
2. Select an input method.
– or –
Tap
Configure input methods
to alter/modify the
available input methods.
Configure Google Voice Typing
1. From a Home screen, tap
Apps
➔
Settings
➔
Language and input
.
2. Tap
Google voice typing
to automatically enable use of
Google voice typing.
3. Tap next to the Google voice typing entry.
4. Select a language by tapping
Select input languages
area.
5. Remove the check mark from the
Automatic
field. This
allows you to select additional languages.
6. Select the desired languages.
7. Activate
Block offensive words
to block recognition of
known offensive words or language. (A green check
mark indicates the feature is active).
When enabled, a check mark appears in the check
box.
For PRA Only, Printing NOT approved by Technical Writing Team

DRAFT
Internal Use Only
Settings 234
Configuring the Samsung keyboard
1. Tap (bottom-right of screen) ➔
Set up input
methods
in the Status bar and tap adjacent to
Samsung keyboard
.
2. Set any of the following options:
• Input language
: Used to set a default text entry language.
Tap this field, scroll through the options, and select the desired
input language. When activated, a check appears in the box.
• Predictive text
: Enable or disable XT9 predictive text. When
enabled the system suggests words matching your text entries,
and, optionally, completes common words automatically. When
XT9 is enabled, tap the
Predictive text
field to set the following
options:
–
Word completion
: Enable or disable automatic word
completion for words matching your text entries.
–
Word completion point
: Choose the number of letters for the
system to use to predict words for automatic completion.
–
Spell correction
: Enable or disable automatic spell checking
and correction.
–
Next word prediction
: When enabled, the system predicts the
next word based on common usage patterns.
–
Auto-append
: When enabled, the most common predicted
word is automatically added to your text.
–
Auto-substitution
: When enabled, the system automatically
replaces words you enter with words from the XT9 auto-
substitution list.
–
Regional correction
: When enabled, the system automatically
changes the spelling of words based on norms for your locale.
–
Recapture
: When enabled, the system re-displays matching
words when you make corrections to a word inserted by the
system.
–
Auto substitution list
: Manage the list of words the system
uses for auto-substitution (Auto-substitution setting must be
enabled).
•My word list
: Add words to your XT9 predictive text dictionary.
• Continuous input
: Allows you to enter text by sliding your
finger across the keyboard.
• Handwriting
: Activate the feature then tap to display the
following options:
–
Recognition time
: Set the recognition time to 100, 300, 500,
1000, or 2000 milliseconds.
–
Pen thickness
: Set the pen thickness to 1, 3, 5, 7, or 9 pixels.
For PRA Only, Printing NOT approved by Technical Writing Team

DRAFT
Internal Use Only
235
–
Pen color
: Choose a pen color.
–
Recognition type
: Set the recognition after each stroke or after
completion.
–
Gesture guide
: Displays examples of the various gestures that
can be used to edit handwriting.
–
Tutorial
: Help for using Handwriting recognition.
–
About
: Displays information about the handwriting software.
• Voice input
: Enable or disable the Voice input feature. When
enabled, you can choose to enter text by speaking the words,
using Google’s networked speech recognition feature.
• Auto capitalization
: Enable or disable auto-capitalization.
When enabled, the system automatically capitalizes words in
your text based on common usage, such as at the beginning of
sentences.
• Auto-punctuate
: Enable or disable automatic insertion of a
“full stop” (period and space to end a sentence) by touching the
space bar twice.
• Character preview
: Check to display an automatic preview of
the current character selection within the text string. This is
helpful when multiple characters are available within one key.
• Key-tap sound
: Check to play a brief sound each time you
touch a key on the on-screen keyboard.
•Tutorial
: Displays help for using the Samsung keyboard and
XT9 predictive text.
• Reset settings
: Reset keyboard settings except XT9 my words
and auto-substitution.
Configuring the Swype Keypad
1. Tap (bottom-right of screen) ➔
Set up input
methods
in the Status bar and tap adjacent to
Swype
.
•
For more information, refer to
“Language and Input”
on
page 233.
2. Tap
How to Swype
to view an on-screen manual for
Swype. Displays Swype help information. Tap a topic to
view the information.
3. Tap
Preferences
to alter these settings:
• Sound on keypresses
: turns on sounds generated by the
Swype application.
• Show helpful tips
: turns on a flashing indicator for quick help.
•Auto-spacing
: When enabled, inserts spaces automatically
when you pause entering text.
For PRA Only, Printing NOT approved by Technical Writing Team

DRAFT
Internal Use Only
Settings 236
•Auto-capitalization
: When enabled, automatically capitalizes
the first letter of the first word in a sentence.
• Show complete trace
: When enabled, briefly display the
Swype trace.
• Next word prediction
: When enabled, suggests the next word
based on your currently entered text.
Note:
If incorrect words are being entered as you type,
disabled this feature.
•Remove
: Delete all words you have added to the Swype
dictionary.
•Version
: View the current Swype software version.
4. Tap
Language Options
to activate and select the current
text input language. Default language is US English.
•
Allows you to select the languages available from the Swype
keyboard.
•
Your are now also able to download additional language sets.
5. Tap
Swype Connect
to activate social media
personalization and configure data settings.
• Facebook
: allows you to log into your current Facebook
account from where contact names are added to your Swpe’s
personal dictionary for later use when you enter names into text
fields. Helps recognize familiar names.
•Twitter
: allows you to sing into your existing Twitter account
from where names and words are added to your personal
dictionary. Helps recognize familiar names and words.
•Gmail
: allows you to sign in to your existing Gmail account from
where existing contact information is added to your personal
dictionary. Helps recognize familiar names.
• Contribute data usage
: when enabled, allows the Nuance
®
application to collect usage data for better word predictions.
• Cellular data
: when enabled, activates cellular data usage by
the Swype application so it can receive program updates,
language downloads, and other related features via your
existing data connection.
6. Tap
Personal dictionary
to access and manage your
personal dictionary.
7. Tap
Updates
to update the application if new software
is available.
For PRA Only, Printing NOT approved by Technical Writing Team

DRAFT
Internal Use Only
237
Configure Google Voice Typing
1. Tap (bottom-right of screen) ➔
Set up input
methods
in the Status bar and tap adjacent to
Google voice typing
.
2. Select a language by tapping
Select input languages
area.
3. Remove the check mark from the
Automatic
field. This
allows you to select additional languages.
4. Select the desired languages.
5. Activate
Block offensive words
to block recognition of
known offensive words or language. (A green check
mark indicates the feature is active).
Configuring Voice Input Recognition
This feature allows the device to correctly recognize verbal
input.
1. From a Home screen, tap
Apps
➔
Settings
➔
Language and input
➔
Voice search
.
2. Configure the available options to alter the settings
associated with this feature:
• Language
: selects an input language and associated dialect
recognition (if available).
• SafeSearch
: sets the explicit image filter settings. These
settings apply to only Google voice search results. Choose
from:
Off
,
Moderate
, or
Strict
.
• Block offensive words
: allows you to block recognition of
known offensive words or language. (A green check mark
indicates the feature is active).
• Personalized recognition
: improves the accuracy of the
speech recognition feature.
• Google Account dashboard
: manages your Google collected
data.
For PRA Only, Printing NOT approved by Technical Writing Team

DRAFT
Internal Use Only
Settings 238
Configuring Text-to-speech
This feature allows the device to provide a verbal readout of
on-screen data such as messages and incoming caller
information. This action is called TTS (Text To Speech).
1. From a Home screen, tap
Apps
➔
Settings
➔
Language and input
➔
Text-to-speech output
.
2. Select a current Preferred TTS engine from the list of
available options. The default is Google Text-to-
speech.
3. Tap next to the preferred TTS engine and
configure.
4. Configure the General options to alter the settings
associated with this feature:
• Speech rate
: adjusts the rate at which on-screen text is
spoken by the device. Choose from:
Very slow
,
Slow
,
Normal
,
Fast
, and
Very fast
.
• Listen to an example
: plays a short example of what the text-
to-speech feature sounds like on your device when activated.
• Driving mode
: when enabled, incoming calls and new
notifications are automatically ready out loud.
–
Once active, tap the Driving mode field to reveal the associated
settings.
• Driving mode settings
: Tap the Driving mode field and select
which applications can use TTS while the Driving Mode is
enabled.
Choose from: New emails, Alarm, Schedule, or Unlock
screen.
Configuring the Mouse-TrackPad
This feature allows you to configure the pointer speed for the
mouse/trackpad.
1. From a Home screen, tap
Apps
➔
Settings
➔
Language and input
.
2. Tap
Pointer speed
then drag the slide to the right to go
faster or to the left to go slower.
3. Tap
OK
to save your setting.
For PRA Only, Printing NOT approved by Technical Writing Team

DRAFT
Internal Use Only
239
Back up and Reset
Location settings, backup configurations, or reset the device
to erase all personal data.
From a Home screen, tap
Apps
➔
Settings
➔
Back up and reset
.
Device Backup and Restore
The device can be configured to back up your current
settings, application data and settings.
1. From a Home screen, tap
Apps
➔
Settings
➔
Back up and reset
.
2. Tap
Back up my data
to create a backup of your current
device settings and applications.
3. Tap
Backup account
to assign the account being
backed up.
4. Tap
Automatic restore
to assist in the re-installation of
a previously installed application (including
preferences and data).
5. Tap
Factory data reset
to reset your device and sound
settings to the factory default settings.
Prior to doing a Factory Reset
Before initiating a factory reset, it is recommended that you
backup your personal data prior to use.
Factory Data Reset
From this menu you can reset your device and sound settings
to the factory default settings.
Use Factory data reset to return your device to its factory
defaults. This setting erases all data from the device,
including Google or other email account settings, system and
application data and settings, and downloaded applications,
as well as your music, photos, videos, and other files. If you
reset the tablet in this way, the next time you turn on your
tablet you are prompted to reenter the same kind of
information as when you first started Android.
1. From a Home screen, tap
Apps
➔
Settings
➔
Back up and reset
➔
Factory data reset
.
2. Tap
Reset
device.
3. If necessary, enter your password and tap
Delete all
.
The device resets to the factory default settings
automatically and when finished displays the Home
screen.
For PRA Only, Printing NOT approved by Technical Writing Team
DRAFT
Internal Use Only
Settings 240
Note:
If you have set up your Samsung account, it has to be
deleted before performing this function. For more
information, refer to “Removing an Account” on
page 223.
Collect Diagnostics
This feature only collects diagnostic data for troubleshooting
use.
1. From a Home screen, tap
Apps
➔
Settings
➔
Back up and reset
➔
Collect diagnostics.
2. Read the on-screen System Manager Application
information.
Note:
This software collects only diagnostic data from your
device so that T-Mobile technicians can better
troubleshoot issues with your device.
3. Choose to enable or disable the feature by placing a
check mark in the
Allow Diagnostics
field.
4. Select either
More Info..
(to read additional information)
or
Close
to close the message screen.
Important!
Selecting
Close
only closes the current description
scree and does not disable data collection.
To disable data collection, go to
Settings
➔
Back
up and reset
➔
Collect diagnostics
and turn off the
Allow Diagnostics
feature.
Accessory
This menu allows you to assign external speakers when the
device is docked.
1. From a Home screen, tap
Apps
➔
Settings
➔
Dock
.
Tap
Dock sound
to play sounds when inserting or
removing the device from the dock. When enabled, a
check mark appears in the check box.
2. Tap
Audio output mode
to set the HDMI (High-Definition
Multimedia Interface) audio setting. Choose from:
Stereo or Surround.
For PRA Only, Printing NOT approved by Technical Writing Team

DRAFT
Internal Use Only
241
Date and Time
By default, your device receives date and time information
from the wireless network. When you are outside network
coverage, you may want to set date and time information
manually using the Date & time settings.
1. From a Home screen, tap
Apps
➔
Settings
➔
Date and time
.
2. Tap
Automatic date and time
to allow the network set
the date and time.
Important!
Deactivate
Automatic date and time
to manually set
the rest of the options.
3. Tap
Automatic time zone
to allow the network set the
time zone information automatically. Configure the
following settings:
•Set date
: Enter the current date (only available when the
Automatic setting is disabled).
•Set time
: Enter the current time (only available when the
Automatic setting is disabled).
• Select time zone
: Choose your local time zone (only available
when the Automatic setting is disabled).
• Use 24-hour format
: Set the format for time displays.
• Select date format
: Set the format for date displays.
Accessibility
Accessibility services are special features to make using the
device easier for those with certain physical disabilities. Use
the Accessibility settings to activate these services.
Note:
You can download accessibility applications from Google
Play and manage their use here.
System
1. From a Home screen, tap
Apps
➔
Settings
➔
Accessibility
.
2. Configure the following settings:
• Auto-rotate screen
: Automatically rotates the screen from
landscape to portrait orientation and vice versa.
• Speak passwords
: Speaks passwords to enter them.
• Accessibility shortcut
: Add a shortcut to Accessibility settings
that displays when you press and hold the Power key.
• Screen timeout
: Select the screen delay time The screen
delays shutting off after inactivity for the selected period of
time.
For PRA Only, Printing NOT approved by Technical Writing Team
DRAFT
Internal Use Only
Settings 242
• Lock automatically
: Lock the screen after it automatically
turns off. Options are: Immediately; 5, 15, or 30 seconds; or
1, 2, 5, 10, or 30 minutes.
Note:
The Lock automatically option only appears depending
on the Screen lock setting.
Services
Enable or disable accessibility services.
Note:
You must activate
Accessibility
before enabling services.
1. From a Home screen, tap
Apps
➔
Settings
➔
Accessibility
.
2. Tap
TalkBack
to activate TalkBack.
Note:
TalkBack, when installed and enabled, speaks feedback
to help blind and low-vision users.
3. Tap the
OFF / ON
icon to turn TalkBack on.
4. Tap
Settings
to configure TalkBack.
Important!
TalkBack can collect all of the text you enter,
except passwords, including personal data and
credit card numbers. It may also log your user
interface interactions with the device.
Vision
To install Web scripts:
1. From a Home screen, tap
Apps
➔
Settings
➔
Accessibility
.
2. Touch
Install Web scripts
.
3. Touch
Allow
to allow applications to install scripts from
Google that make their Web content more accessible.
To set the font size:
1. From a Home screen, tap
Apps
➔
Settings
➔
Accessibility
.
2. Touch
Font size
.
3. Touch a font size. Options are: Tiny, Small, Normal,
Large, and Huge.
For PRA Only, Printing NOT approved by Technical Writing Team
DRAFT
Internal Use Only
243
Hearing
When Mono audio is enabled, you can listen through one
earphone to mono audio sound.
1. From a Home screen, tap
Apps
➔
Settings
➔
Accessibility
.
2. Touch
Mono audio
.
When enabled, a check mark appears in the check
box.
To turn off all sounds including receiver voice:
1. From a Home screen, tap
Apps
➔
Settings
➔
Accessibility
.
2. Touch
Turn off all sounds
.
When enabled, a check mark appears in the check
box.
Mobility
This option allows you to set the Press and hold delay time.
1. From a Home screen, tap
Apps
➔
Settings
➔
Accessibility
.
2. Tap
Press and hold delay
, and then touch a delay time.
Options are: Short, Medium, and Long.
Developer Options
Set options for application development.
USB Debugging
When enabled, allows debugging when the device is
attached to a PC by a USB cable.
Note:
This setting is used for development purposes.
1. From a Home screen, tap
Apps
➔
Settings
➔
Developer options
.
2. Tap
USB debugging
to enable or disable the setting.
When enabled, a check mark appears in the check
box.
Development Device ID
The identification number for your tablet when using it as a
development tool displays in this field.
For PRA Only, Printing NOT approved by Technical Writing Team
DRAFT
Internal Use Only
Settings 244
Allowing Mock Locations
This setting is used by developers when developing
location-based applications. If you are a developer who is
testing a GPS applications using this device, you can tell the
device that the device is at different GPS locations. In other
words, the device is allowed to “mock” the coordinates.
Note:
This setting is used for development purposes.
1. From a Home screen, tap
Apps
➔
Settings
➔
Developer options
.
2. Tap
Allow mock locations
to enable or disable the
setting.
When enabled, a check mark appears in the check
box.
Desktop Backup Password
Protect the desktop with a backup password ID.
1. From a Home screen, tap
Apps
➔
Settings
➔
Developer options
.
2. Tap
Desktop backup password
.
3. In the Settings screen, enter the current full backup
password, the new password for full backups, then
enter the new password again.
4. Tap
Set backup password
to save the password
change.
User Interface Options
Configure the user interface by setting the behavior for the
way the screen behaves when using applications or
displaying data.
1. From a Home screen, tap
Apps
➔
Settings
➔
Developer options
.
2. Tap the check box next to each option to enable:
• Strict mode
: Makes the screen flash when applications
perform long operations on the main thread.
• Show pointer location
: Highlights the data that was touched
on the screen.
• Show touches
: Displays touch interactions on the screen.
• Show screen updates
: Areas of the screen flash when they
update.
• Show CPU usage
: Screen highlights the current CPU usage.
• Force GPU rendering
: Uses a 2D acceleration in applications.
For PRA Only, Printing NOT approved by Technical Writing Team

DRAFT
Internal Use Only
245
• Window animation scale
: Configure the scale for animation
(ranges from off to 10x).
• Transition animation scale
: Configure the scale for
transitioning when using animation (ranges from off to 10x).
Application Options
1. From a Home screen, tap
Apps
➔
Settings
➔
Developer options
.
2. Tap
Do not keep activities
to destroy every activity as
soon as the application is closed.
3. Tap
Limit background processes
to set the number of
processes that can run in the background. Options are:
Standard limit, No background processes, and 1 to 4
processes at most.
4. Tap
Show all ANRs
to display a prompt when
applications running in the background are not
responding.
About Device
View information about your device, including status, legal
information, hardware and software versions, and battery
use.
1. From a Home screen, tap
Apps
➔
Settings
➔
About device
.
2. Tap items to view details:
• Software update
: Connect to the network and download new
software. For more information, refer to
“Software Update”
on page 246.
• Status
: displays the Battery status, the Battery level
(percentage), the Network connection, Signal strength, Mobile
network type, Service state, Roaming status, Mobile network
state, MDN, ERI, IMEI number, IMEI SV, IP address, Wi-Fi MAC
address, Bluetooth address, Serial number, Up time, and
Device status.
• Legal information
: Display
Open source licenses
,
Google
legal
, and
License settings
information.
For PRA Only, Printing NOT approved by Technical Writing Team
DRAFT
Internal Use Only
Settings 246
Tip:
To find your device’s DivX® registration code and
information about registering your device to play DivX
protected video, touch
License settings
➔
DivX
®
VOD
.
• Model number
: displays the device’s model number.
• Android version
: displays the firmware version loaded on this
device.
• Baseband version
: displays the baseband version loaded on
this device.
• Kernel version
: displays the kernel version loaded on this
device.
• Build number
: displays the software, build number.
Software Update
The Software Update feature enables you to use your device
to connect to the network and download any new software
directly to your device. The device automatically updates
with the latest available software.
Note:
Before you can check for system updates, you must set
up a Gmail account. For more information, refer to
“Setting Up Your Gmail Account” on page 84.
Software Update Options
Once you have set up your Gmail account, you can check for
a software update.
Note:
The software update notification appears as at the
bottom-right of the screen.
1. From a Home screen, tap
Apps
➔
Settings
➔
About device
➔
Software update
.
2. Read the Software update information screen.
3. Select an available option:
Note:
You configure the device’s software update parameters.
For PRA Only, Printing NOT approved by Technical Writing Team
DRAFT
Internal Use Only
247
• Cancel
: Tap this option to cancel the operation.
• Wi-Fi settings
: Enable this option to only download available
updates via an active Wi-Fi connection. If disabled, the device
will begin available downloads via its’ T-Mobile connection.
•OK
: Tap this option to connect to the remote server, detect if
there is an available update, the begin the download over your
existing data connection.
–
Software updates can include bug fixes, enhancements to
services, to the device or currently installed software.
For PRA Only, Printing NOT approved by Technical Writing Team