Samsung Electronics Co HLM617W DLP Projection TV User Manual BP68 00120A cover
Samsung Electronics Co Ltd DLP Projection TV BP68 00120A cover
Contents
- 1. Users Manual 1
- 2. Users Manual 2
- 3. Users Manual 3
Users Manual 2
33
Operation
32
Channel Memory
Your TV can memorize and store all of the channels available. Once the channels are memorized,
you can use the CH and CH buttons to scan through the available channels.
Selecting the Broadcast Source
Before memorizing available channels, you must select what broadcast source your TV is connect-
ed to, either an antenna or a cable system.
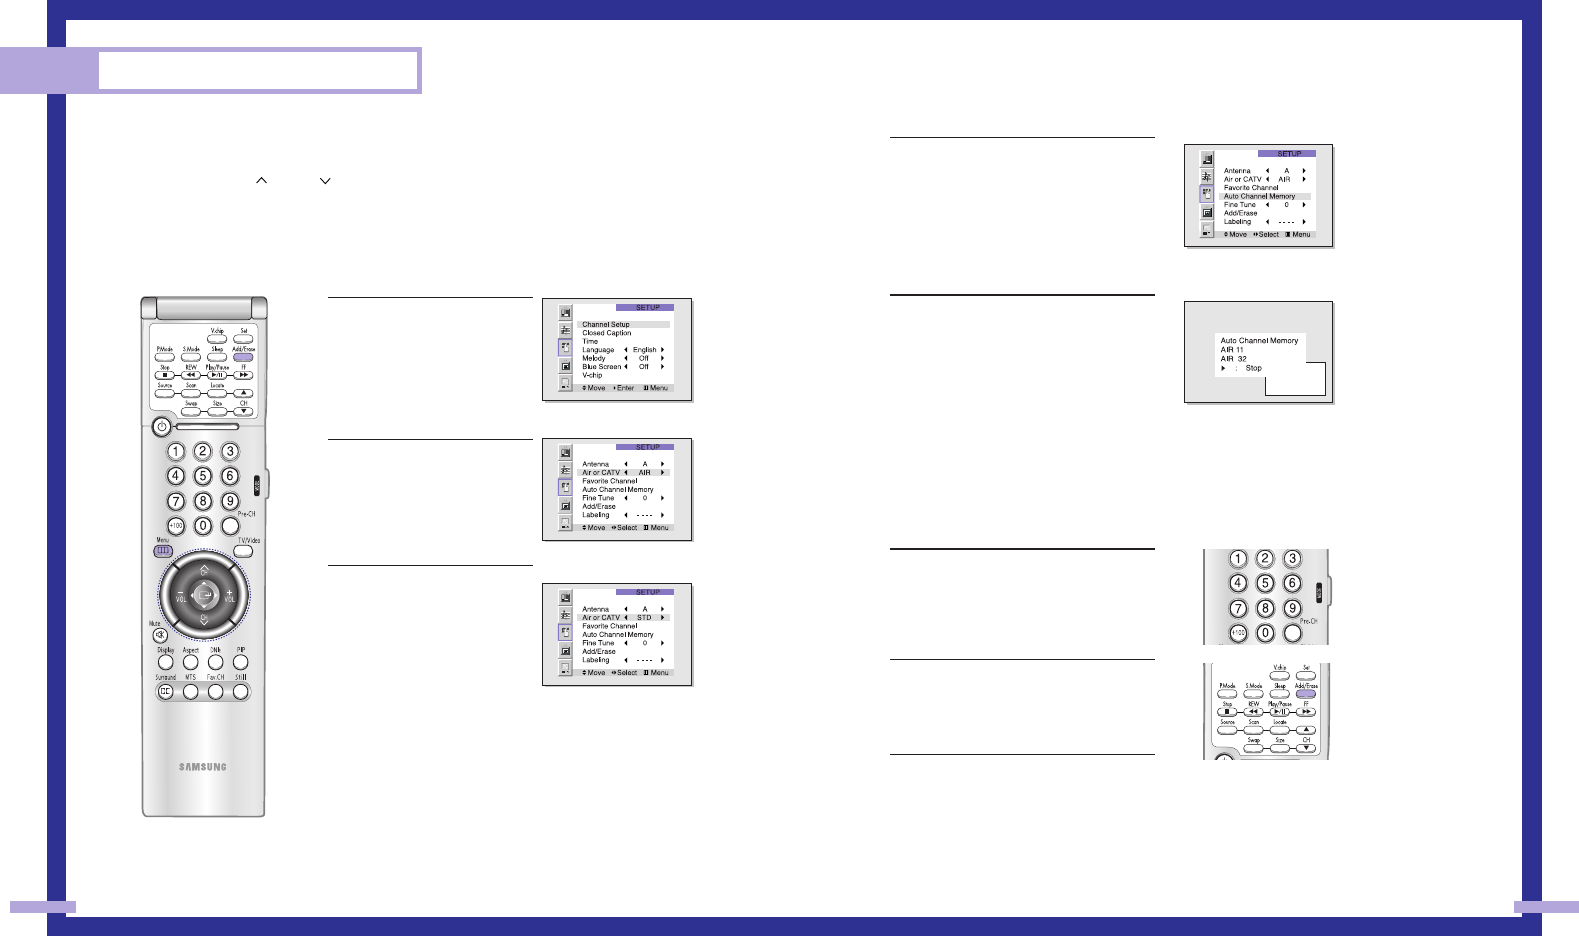
1Press the Menu button.
Move the joystick down to
select SETUP, then press the
joystick to enter.
2Press the joystick to enter. The
channel setup menu will
appear. Move the joystick
down to select “Air or CATV”.
3If you are connected to an
antenna, leave “AIR” dis-
played. If you connected
cable, press the joystick to the
right to display the type of
cable system: “STD,” “HRC,”
or “IRC.”
(If you are not sure which type
of cable system you have,
contact your cable company.)
Storing Channels in Memory Automatically
1First, select the broadcast source as
described on the previous page. With
the Channel Setup menu on screen,
move the joystick down to select “Auto
Channel Memory.”
2Press the joystick to enter. The TV will
begin memorizing all of the available
stations. Press the VOL+ button at any
time to interrupt the memorization
process.
NOTE
•When the ANT B mode is selected, the auto programming runs on the main screen.
Adding and Erasing Channels
1Use the number buttons to select the
channel you want to add or erase.
2To add a channel, select it and press the
Add/Erase button on the remote control.
The channel will be added to the TV’s
memory and the word “Channel added”
will appear in the corner of the screen.
3To erase a channel, select it and then
press the Add/Erase button on the
remote control. The word “Channel
erased” will appear in the corner of the
screen. You can still view a channel that
has been erased from memory by using
the number buttons on the remote control
to select the channel directly.
BP68-00120A-3 3/27/03 8:25 AM Page 32
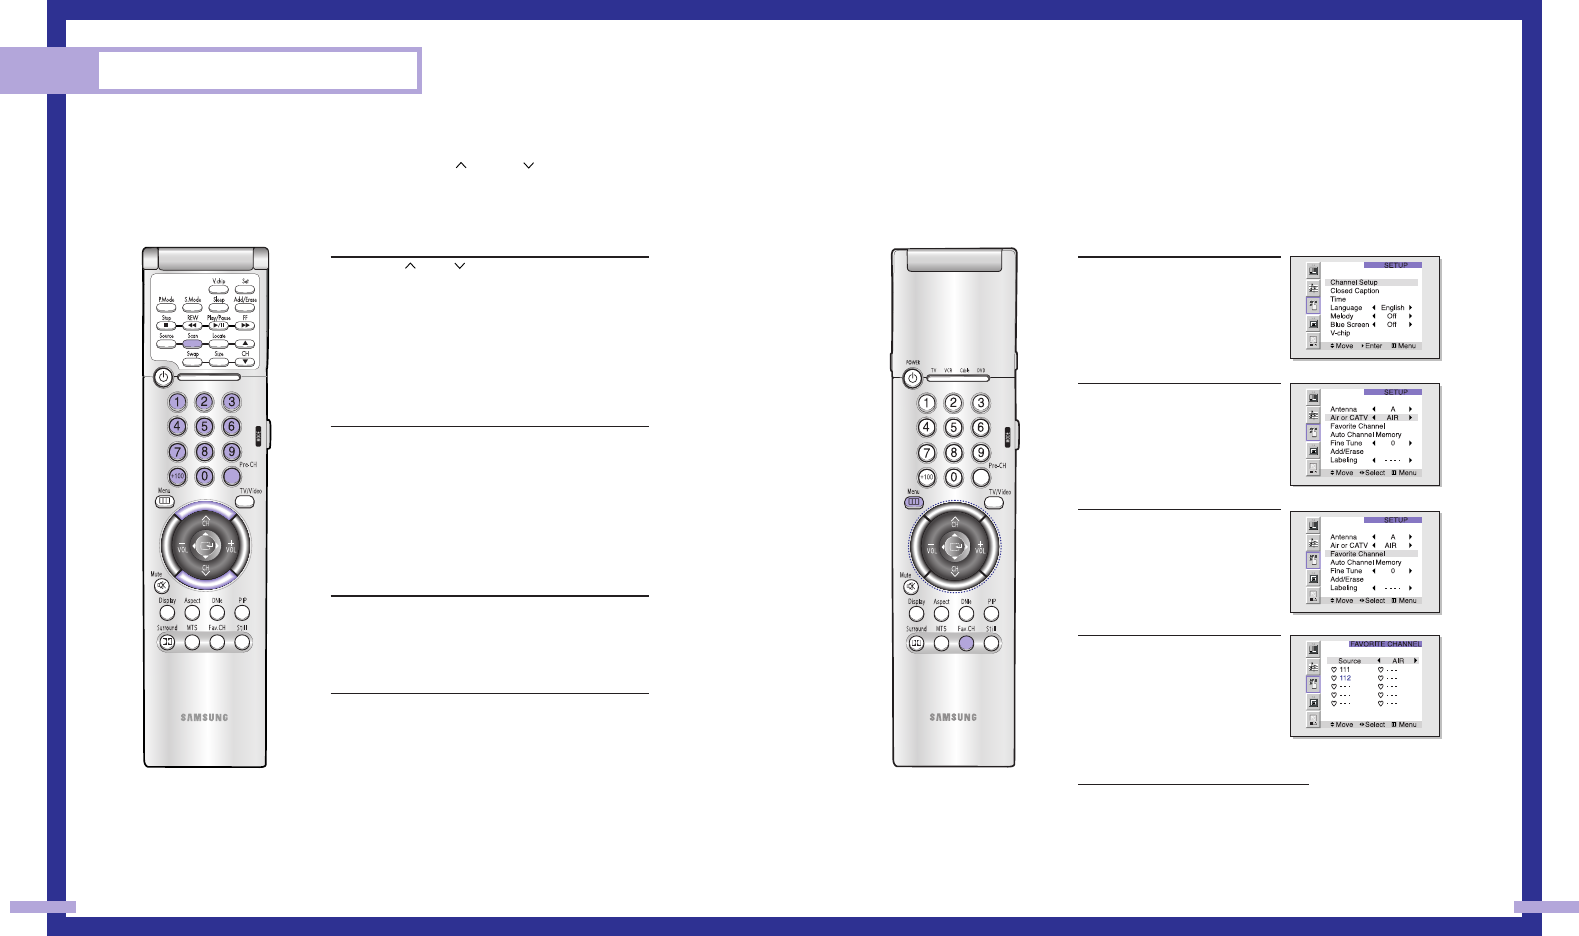
Selecting Your Favorite Channels
You can store up to ten of your favorite channels for each available input source (such as TV and
CATV). Then, when you press the Fav.CH button on the remote control, the TV displays only the
favorite channels you previously stored, allowing you to quickly and easily find frequently
watched channels.
To Store Your Favorite Channels:
1Press the Menu button. Move
the joystick down to select
SETUP, then press the joystick
to enter.
2Press the joystick to enter.
The channel setup menu will
appear. Move the joystick
down to select Air or CATV,
then move the joystick to
the right to display the type of
cable system or Air.
3Move the joystick down to
select “Favorite Channel”,
then press the joystick to
enter.
4Move the joystick to the left
or right to select channel.
Note: Only memorized chan-
nels can be set as Favorite
channels.
To View Your Favorite Channels:
Press the Fav.CH button repeatedly to
jump from one favorite channel
to another.
The favorite channels are selected in
ascending sequence.
35
Changing Channels
You can change channels on your TV by using the CH and CH buttons, or by direct selec-
tion using the number buttons. You can use the number buttons to tune to any channel (even one
that has been erased or has not been memorized).
Using the Channel Buttons
Press the CH or CH buttons to change channels.
The TV changes each channel in order, up or down,
depending on which button you press. You will see all
the channels that the TV has memorized. (The TV must
have memorized at least three channels.) You will not
see channels that were not memorized or have been
erased.
Using the Number Buttons
To change to single-digit channels (0–9) faster, press
“0” before the single digit.
Example: For channel 4, press “0,” then “4.”
To select a channel over 100, press the +100 button
first.
Example: For channel 122, press “+100,” then “2,” then “2.”
Using the Previous Channel
Press the Pre-ch button on the remote control. The TV
changes to the last channel you were watching.
Scanning channels
You can automatically scan all of the channels in memo-
ry at the touch of just one button. Press the Scan button
on the remote control. The TV will change the channels
automatically, one by one. Scanning channels will be
displayed in the PIP window. To stop channel scan,
press the Scan button again.
NOTE
•When the ANT B mode is selected, the channel scan function
doesn’t work.
Operation
34
BP68-00120A-3 3/27/03 8:25 AM Page 34
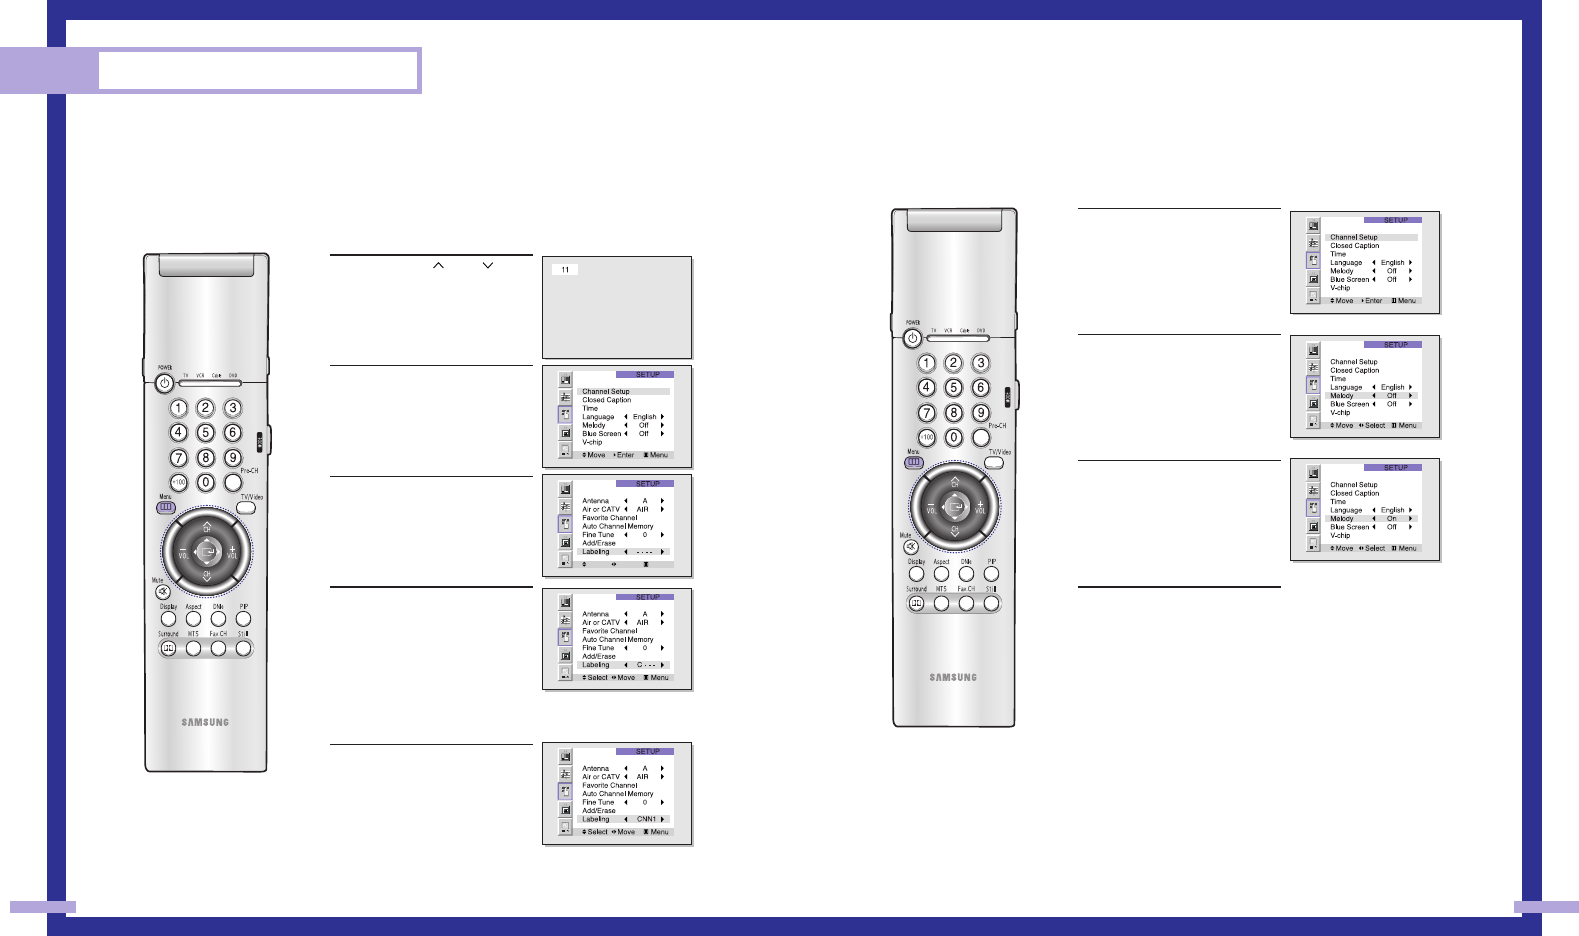
Setting The On/Off Melody
You can hear clear melody sound when the TV is powered On or Off.
1Press the Menu button. Move
the joystick down to select
SETUP, then press the joystick
to enter.
2Move the joystick down to
select Melody.
3Move the joystick to the right
or left to select “On”.
4Press the Menu button to exit.
37
Labeling the Channels
Use this feature to assign an easy-to-remember label to any channel (i.e., “CBS”, “ESPN”,
“PBS2”, CNN1”, etc.) A label consists of four fields, where each field is a letter, a number, or a
blank. When the DISPLAY button is pressed, the channel label will appear next to the channel
number.
1Press the CH or CH but-
ton to tune to the channel that
will be labeled.
2Press the Menu button. Move
the joystick down to select
SETUP, then press the joystick
to enter.
3Press the joystick to enter.
Move the joystick down to
select Labeling.
4Move the joystick to the right
to begin labeling. (Each label
has four fields. See top para-
graph.)
Move the joystick up or down
to select a letter, a number, or
a blank. (Pressing the CH but-
ton results in this sequence:
A,B,...Z, blank,0,1,...9).
5Move the joystick to the right
to switch to the next field,
which will be selected. Select
a second letter or digit using
joystick(up or down), as
above. Repeat the process to
select the last two digits.
Press the Menu button to exit.
Operation
36
Move Select Menu
BP68-00120A-3 3/27/03 8:25 AM Page 36
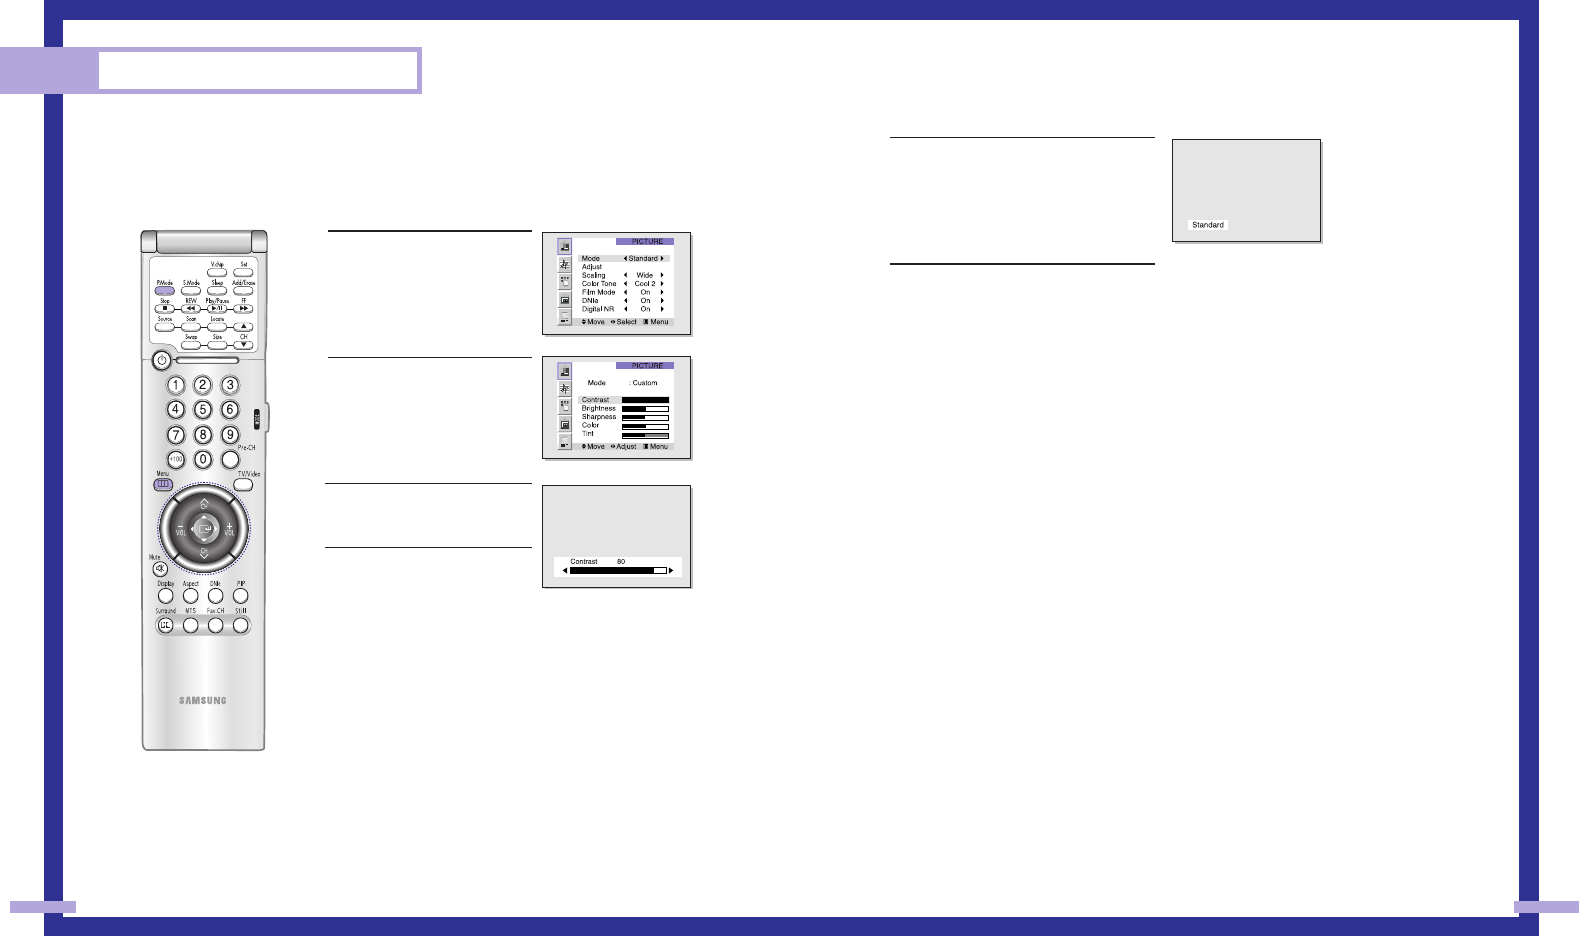
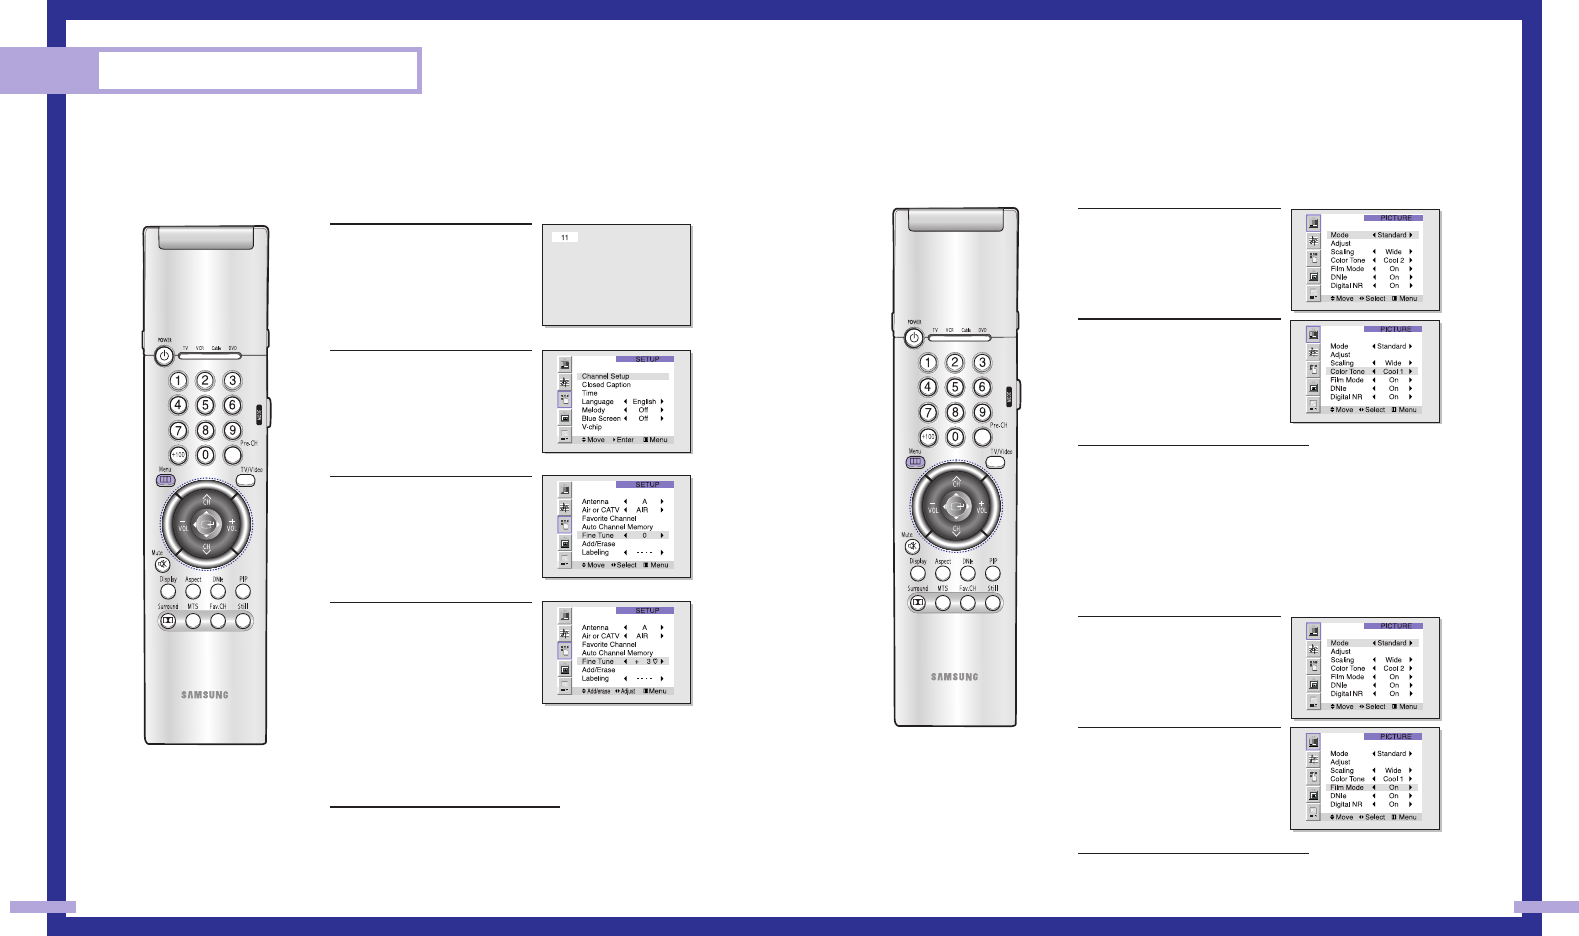
Picture Control
Using the remote, you can change the contrast, brightness, tint, color, and sharpness settings of
the TV.
Customizing the Picture
1Press the Menu button.
Press the joystick to enter.
2Move the joystick down to
select Adjust, then press the
joystick to enter. You will see
the items “Contrast”,
“Brightness”, “Sharpness”,
“Color” and “Tint”.
3Move the joystick up or down
to select the item you want to
change.
4Move the joystick right or left
to raise or lower the value of
the item, using the on-screen
gauge as your guide.
When you are finished adjusting an item, wait a moment. The
level indicator will disappear and the Video menu will return.
You can continue to make adjustments, or press the Menu button to
exit.
Using Automatic (“Standard”) Picture Settings
1 Press the P.Mode button on the remote
control to change the picture settings.
2Press P.Mode repeatedly to select the
“Dynamic”, “Standard”, “Movie” or
“Custom” picture setting.
Guide to Automatic Picture Settings
•Choose Standard to set the TV to operate at top performance according to your TV’s
specifications.
•Choose Dynamic for viewing the TV during the day or when there is bright light in the room.
•Choose Movie when viewing the movie.
•Choose Custom if you want to adjust the settings yourself.
39
Operation
38
BP68-00120A-3 3/27/03 8:25 AM Page 38
3Move the joystick up or down to select
the item you want to change.
4Move the joystick right or left to raise or
lower the value of the item, using the on-
screen gauge as your guide.
You can continue to make adjustments, or press the Menu button to exit.
Using Automatic(Standard) Sound Settings
1Press the S.Mode button on the remote
control to change the automatic sound
setting.
2Press the S.Mode button again to select
the “Standard”, “Music”, “Movie”,
“Speech” or “Custom” sound setting.
Guide to Automatic Sound Settings
• Choose Standard for the “factory” settings (the best choice for most people).
• Choose Music when watching music videos or concerts.
• Choose Movie when watching a movie.
• Choose Speech when watching a show that is mostly dialogue, like a news show.
• Choose Custom if you want to adjust the settings yourself.
41
Sound Control
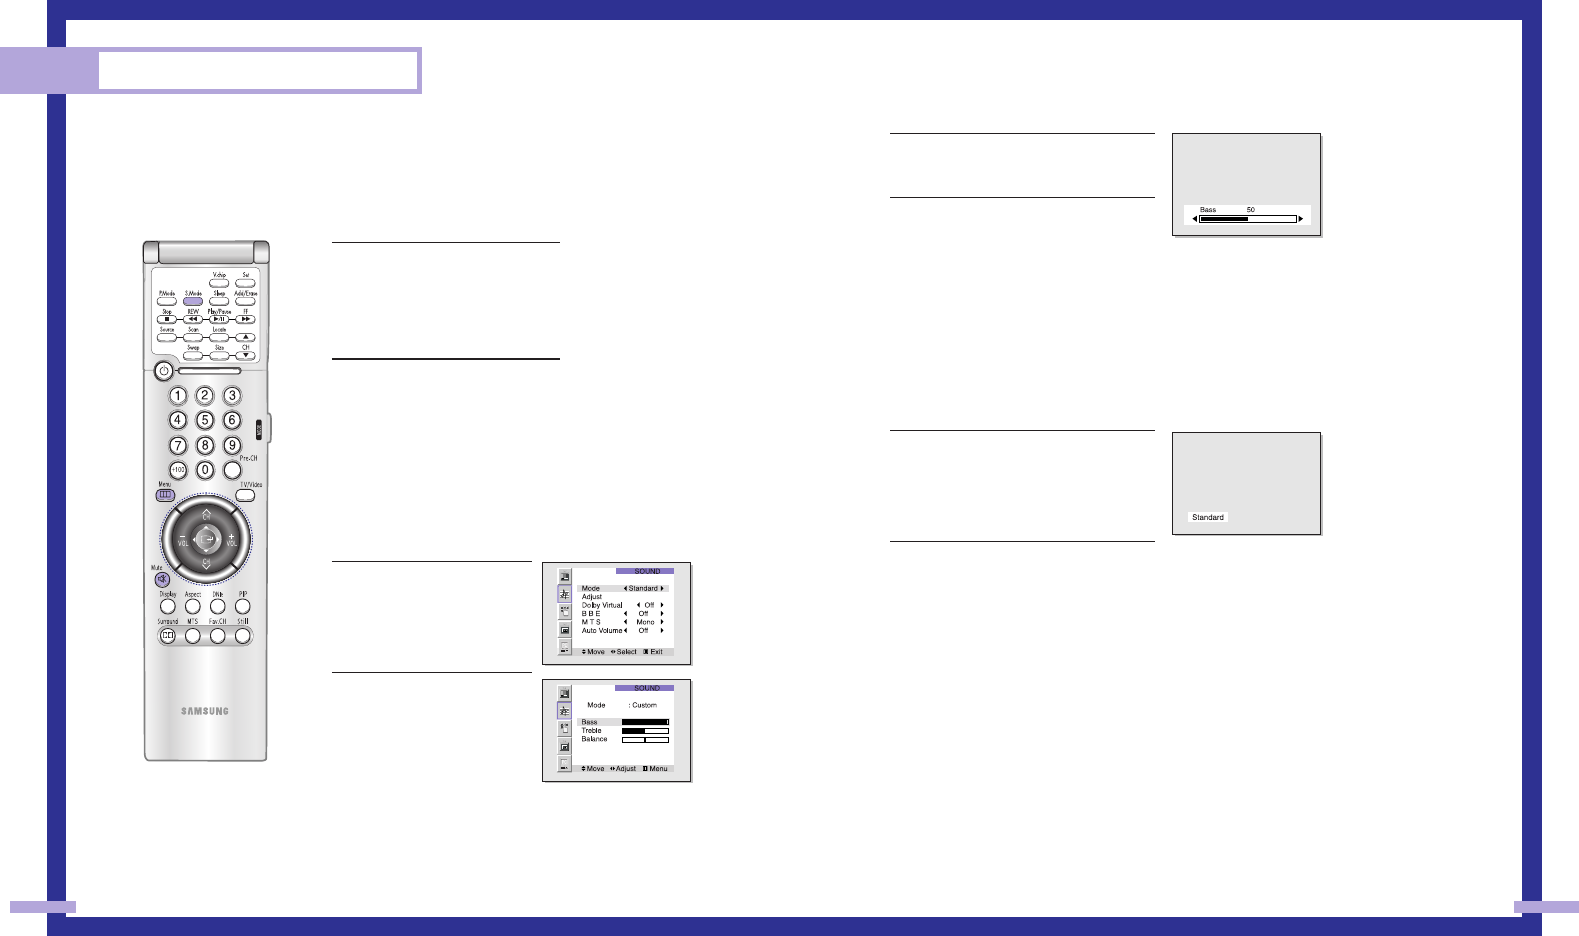
You can control and customize the sound levels and settings of the TV with the remote control.
Using the on-screen menus, you can change the TV’s bass, treble, and balance settings.
Adjusting the Volume
Press VOL + to raise the volume or
VOL –to lower the volume.
Using the Mute Button
Press the Mute button on the remote
control to silence the volume. The word
“Mute” will appear in the lower left cor-
ner of the screen.
To turn mute off, press the Mute button
again, or raise or lower the volume
with the VOL – and VOL + buttons.
Customizing the Sound
1Press the Menu button.
Move the joystick down to
select SOUND, then press the
joystick to enter.
2Move the joystick down to
select Adjust, then press the
joystick to enter. You will see
the items “Bass”, “Treble” or
“Balance”.
Continued...
Operation
40
BP68-00120A-3 3/27/03 8:25 AM Page 40
Setting the Timers
This TV can be set to turn on or off automatically at specific times that you choose. Before using
the timers, you must set the TV’s clock, as described previously.
Setting the On/Off Timer
1 Press the Menu button. Move the joystick
down to select SETUP, then press the
joystick to enter.
2Move the joystick down to select Time,
then press the joystick to enter.
3Move the joystick down to select the
“On Time”. Move the joystick right to
select the hour, then Move the joystick
up or down to adjust the hour for the TV
to turn on. When selecting the hours, be
sure to select the proper time of day (am
or pm).
4Move the joystick right to select the
minute. Move the joystick up or down to
adjust the minute.
Continued...
43
Setting the Clock
This TV has a built-in clock that will appear on screen when you press the Display button on the
remote control. Setting this clock also allows you to use it to automatically turn the TV on or off.
1Press the Menu button.
Move the joystick down to
select SETUP, then press the
joystick to enter.
2Move the joystick down to
select Time, then press the
joystick to enter.
3Move the joystick right to
select the hour. Move the joy-
stick up or down to select the
correct hour.
4Move the joystick right to
select the minute. Move the
joystick up or down to select
the correct minute.
When selecting the hours, be
sure to select the proper time
of day (am or pm).
5Press Menu to exit the menus.
Operation
42
BP68-00120A-3 3/27/03 8:25 AM Page 42
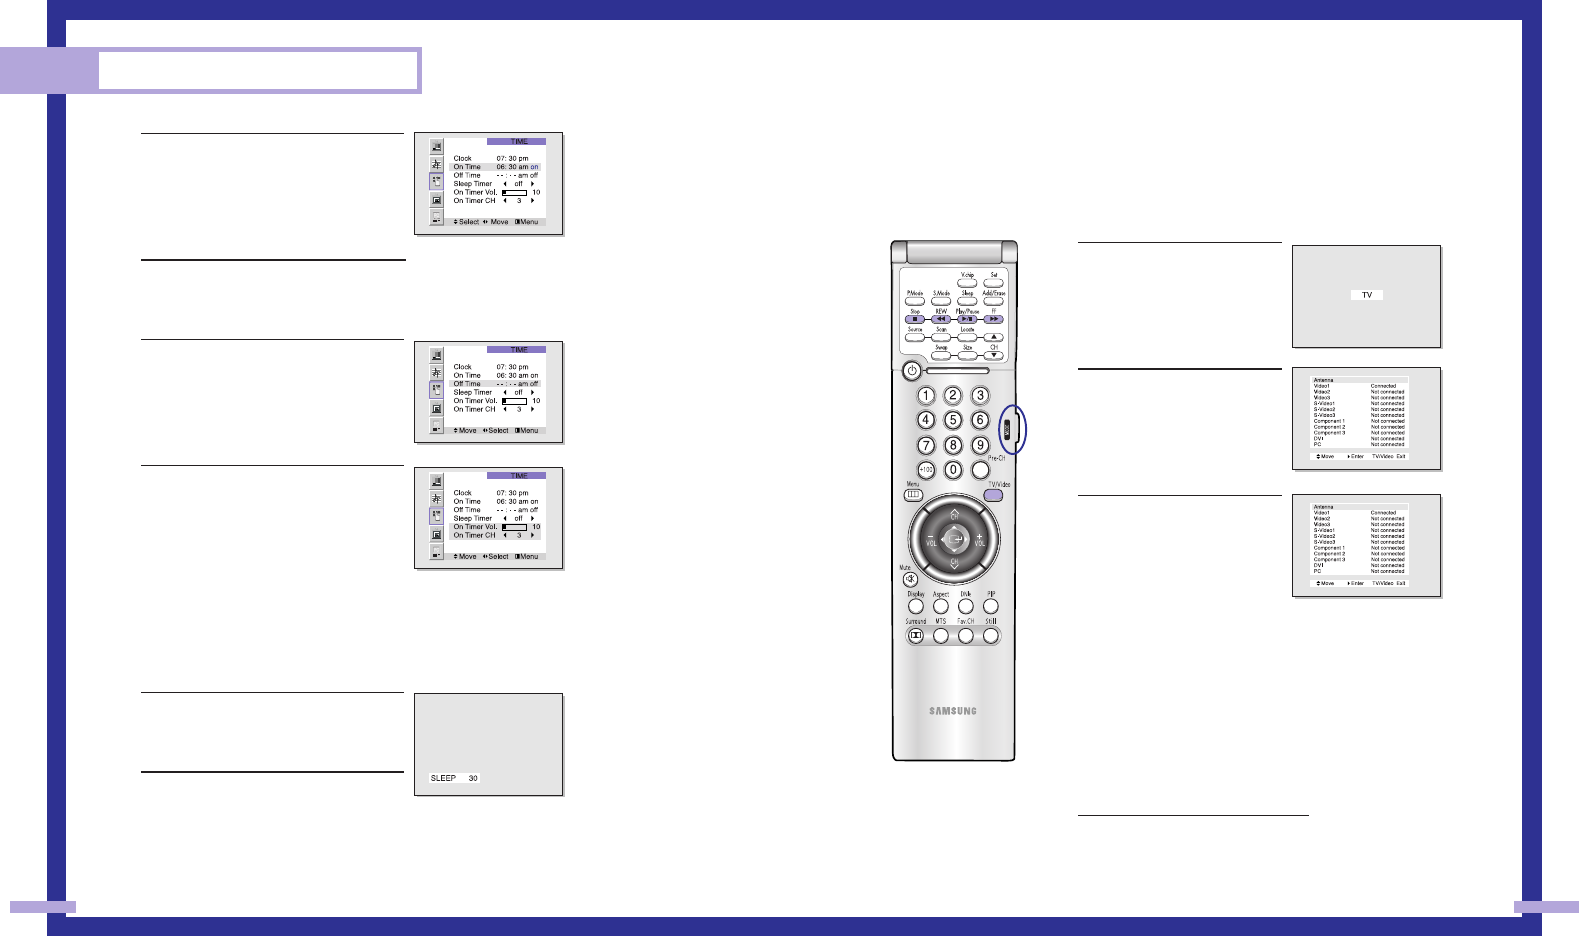
Viewing an External Signal Source
Selecting the Signal Source
Use the remote control to switch between viewing signals from connected equipment, such as
VCRs, DVD, Set-Top box and the TV source (broadcast or cable).
1Make sure that the remote
control is controlling the TV
set. Press the MODE button
and make sure that the “TV”
LED is illuminated.
2Press TV/VIDEO on the
remote control, and the fol-
lowing on-screen menu will
appear.
3Move the joystick up or down
to select a particular signal
source, and then press the
joystick to activate it.
When you connect equipment to the TV, you can choose
between the following sets of jacks: Video 1, Video 2, S-video 1,
S-video 2, Component 1, Component 2, Component 3, DVI or
PC on the TV’s rear panel, and Video 3 or S-Video 3 on the TV’s
side panel.
Remote Control VCR/DVD Buttons
Flip the cover of the remote control up to access buttons that can
control the tape functions of a connected VCR or DVD, including
Rewind, Play, Fast Forward, Stop and Pause.
1Flip the cover of your remote con-
trol unit for access to the tape func-
tion controls. Press the appropriate
buttons to control your VCR or
DVD.
45
5Move the joystick right to select off, then
move the joystick up or down to select
“on”.
When any of the timers are set, the
“Timer” LED will illuminate (front or side
panel of TV.).
6When you are finished, move the joy-
stick right.
7If you want to set the Off time, move the
joystick down to select the “Off Time”.
Set the “Off Time” just as you set the
“On Time”.
8If you want to set the volume level or
channel when the TV turns on, move the
joystick down to select “On Timer Vol.”
or “On Timer CH”. Move the joystick
right to set the volume level or to select
the channel you want when the TV turns
on. Press the Menu button to return to
normal viewing.
Setting the Sleep Timer
You can set your TV to automatically turn off after a preset interval.
1Press the Sleep button on the remote con-
trol.
2You’ll see “Off” at the bottom of the
screen. Press the Sleep button to select
the time interval for the TV to stay on.
The interval ranges from 10 to 360 min-
utes.
Operation
44
BP68-00120A-3 3/27/03 8:25 AM Page 44

Special Features
SAMSUNG
BP68-00120A-4 3/27/03 8:28 AM Page 46
Special Features
48 49
Setting Up Your Remote Control
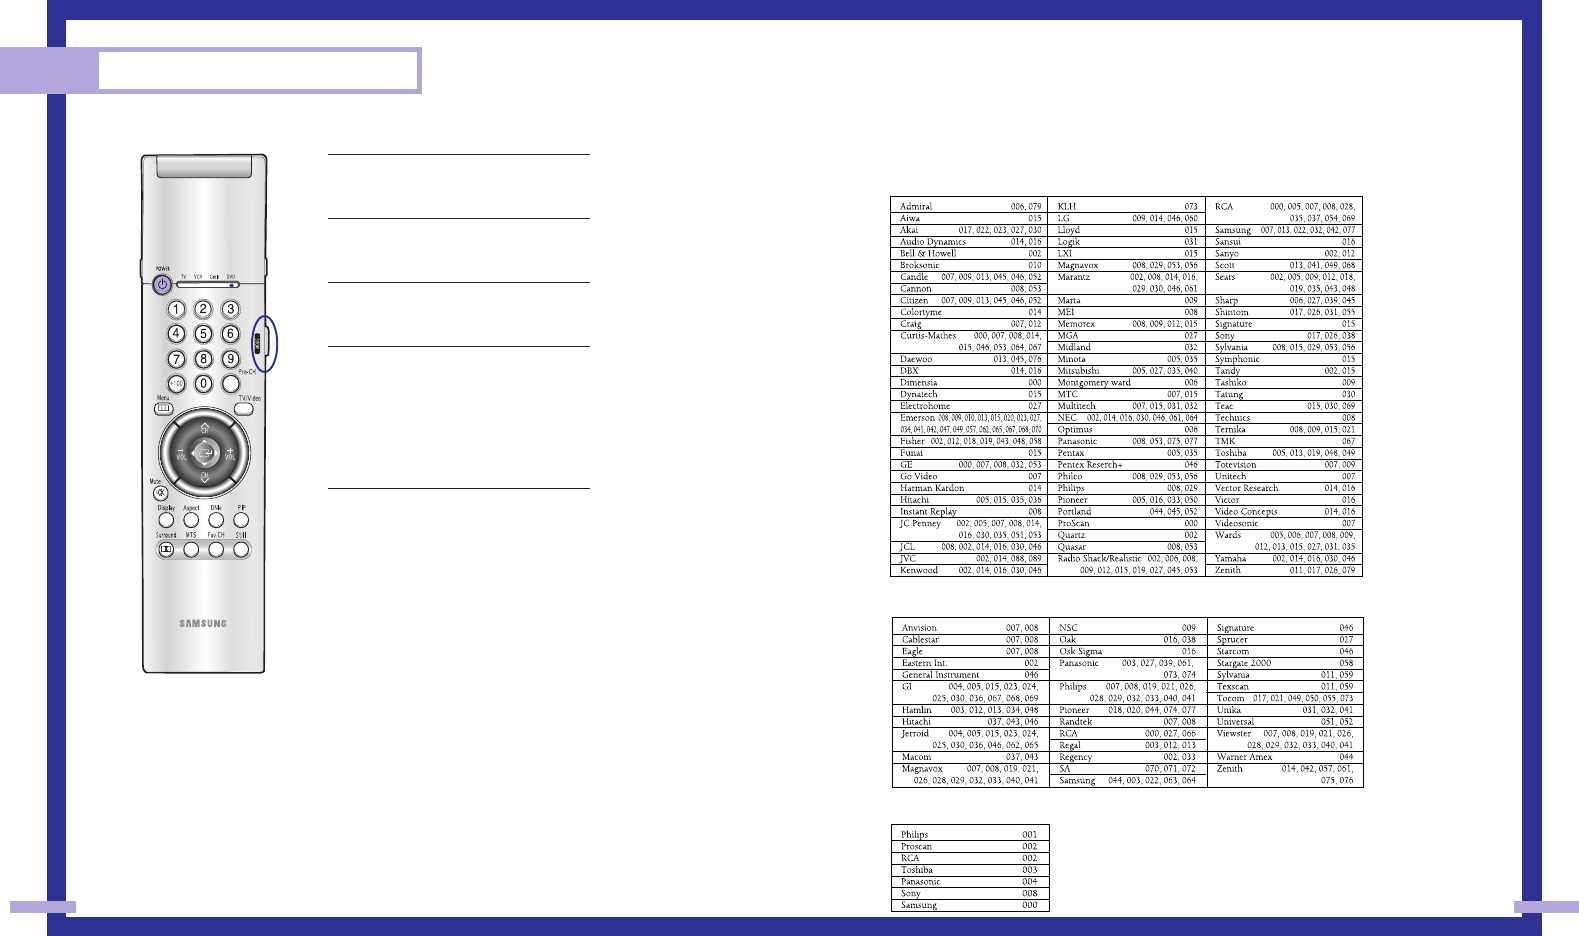
This TV’s remote control can operate almost any VCR, cable box, or DVD. After it has been set up
properly, your remote control can operate in four different modes: TV, VCR, Cable, or DVD.
Pressing the corresponding button on the remote control allows you to switch between these modes,
and control whichever piece of equipment you choose.
Note
The remote control might not be compatible with all DVD Players, VCRs and Cable boxes.
Setting Up the Remote to Operate Your VCR
1Turn off your VCR.
2Press the MODE button and make sure
that the VCR LED is illuminated.
3Press the Set button on your TV’s remote
control.
4Using the number buttons on your remote
control, enter three digits of the VCR
code listed on page 51 of this manual
for your brand of VCR. Make sure you
enter three digits of the code, even if the
first digit is a “0”. (If more than one code
is listed, try the first one.)
5Press the Power button on the remote
control. Your VCR should turn on if your
remote is set up correctly.
If your VCR does not turn on after set up,
repeat steps 2, 3, and 4, but try one of
the other codes listed for your brand of
VCR. If no other codes are listed, try
each VCR code, 000 through 089.
Note on Using Remote Control Modes: VCR
•When your remote control is in “VCR” mode, the volume buttons still control your TV’s volume.
Setting Up the Remote to Operate Your Cable Box
1Turn off your cable box.
2Press the MODE button and make sure
that the Cable LED is illuminated.
3Press the SET button on your TV’s remote
control.
4Using the number buttons on your remote
control, enter three digits of the cable
box code listed on page 51 of this manu-
al for your brand of cable box. Make
sure you enter three digits of the code,
even if the first digit is a “0.” If there is
more than one code listed, try the first
one.
5Press the Power button on the remote
control. Your cable box should turn on if
your remote is set up correctly.
If your cable box does not turn on after
set up, repeat steps 2, 3, and 4, but try
one of the other codes listed for your
brand of cable box. If no other codes
are listed, try each code, 000 through
077.
Note on Using Remote Control Modes: Cable Box
•When your remote control is in “Cable Box” mode, the volume buttons still control your TV’s vol-
ume.
BP68-00120A-4 3/27/03 8:28 AM Page 48
51
Special Features
50
Setting Up the Remote to Operate Your DVD
1Turn off your DVD.
2Press the MODE button and make sure
that the DVD LED is illuminated.
3Press the SET button on your TV’s remote
control.
4Using the number buttons on your
remote control, enter three digits of the
DVD code listed on page 51 of this
manual for your brand of DVD. Make
sure you enter three digits of the code,
even if the first digit is a “0.” If there is
more than one code listed, try the first
one.
5Press the Power button on the remote
control. Your DVD should turn on if your
remote is set up correctly.
If your DVD does not turn on after set
up, repeat steps 2, 3, and 4, but try
one of the other codes listed for your
brand of DVD. If no other codes are list-
ed, try each code, 000 through 008.
Note on Using Remote Control Modes: DVD
•When your remote control is in “DVD” mode, the volume buttons still control your TV’s volume.
Remote Control Codes
VCR Codes
Cable Box Codes
DVD Codes
BP68-00120A-4 3/27/03 8:28 AM Page 50
Selecting the Color Tone
1Press the Menu button.
Press the joystick to enter.
2Move the joystick down to
select Color Tone, then
move the joystick right
repeatedly to select
“Normal”, “Warm1”,
“Warm2”, “Cool2” or
“Cool1”.
3Press the Menu button to exit.
Setting the Film Mode
On: Automatically senses and processes film signals from all
sources and adjusts the picture for optimum quality.
Off: Switches off the Film mode.
1Press the Menu button.
Press the joystick to enter.
2Move the joystick down to
select Film Mode, then
move the joystick to the right
or left to select “On” or
“Off”.
3Press the Menu button to exit.
Note: Film mode is supported in
480i only. 53
Fine Tuning Channels
Fine tuning lets you manually adjust the TV’s tuner if you have difficulty tuning in a channel.
1Using the number buttons on
the remote control, select the
channel you want to fine tune.
2Press the Menu button on the
remote control. Move the joy-
stick down to select SETUP,
then press the joystick to
enter.
3Press the joystick to enter in
the Channel setup menu.
4Move the joystick down to
select the Fine tune, then
move the joystick right or left
to adjust the fine tuning.
To store the fine tuning setting
in the TV’s memory, move the
joystick up. (A heart icon will
appear.)
To reset the fine tuning to “0,”
move the joystick down .
5Press the Menu button to exit.
Special Features
52
BP68-00120A-4 3/27/03 8:28 AM Page 52
54 55
Special Features
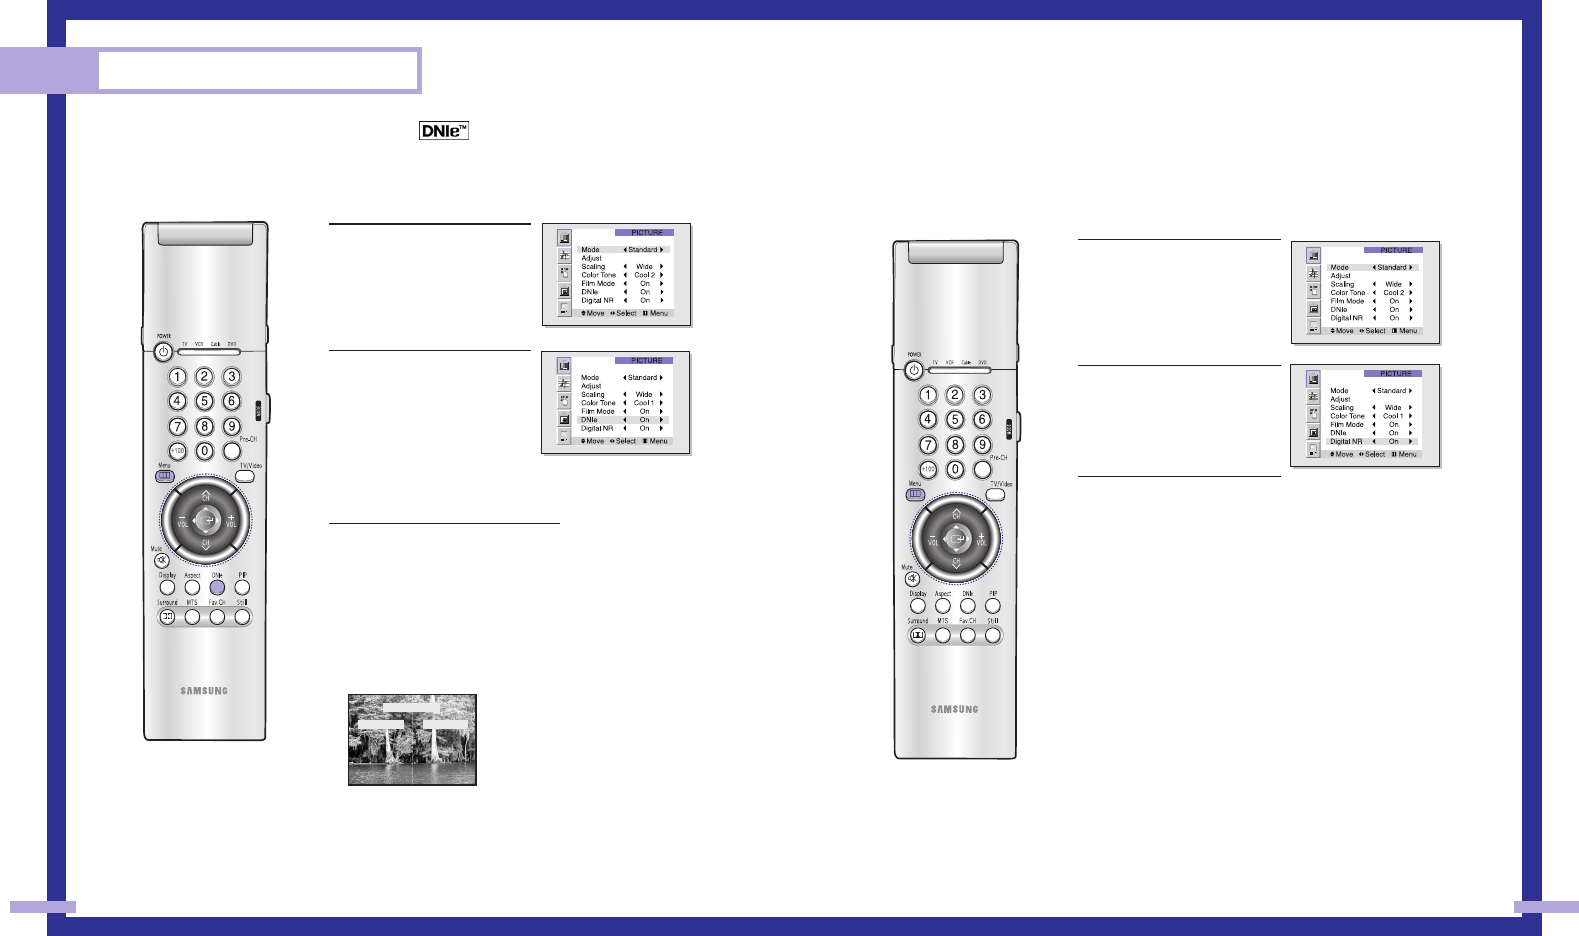
DNIeTM (Digital Natural Image engine)
Samsung’s New Technology enables an improved image with detail, contrast and white enhance-
ment and 3D noise reduction.
1Press the Menu button.
Press the joystick to enter.
2Move the joystick down to
select DNIe, then move the
joystick to the right or left to
select “On”, “Demo” or “Off”.
Quick way to access DNIe:
Just press the “DNIe” button
on the remote control to select
“DNIe On” or “DNIe Demo”.
3Press the Menu button to exit.
Guide to DNIe Settings
•On: Switches on the DNIe mode.
•Demo: The screen before applying DNIe appears on the right
and the screen after applying DNIe appears on the left.
•Off: Switches off the DNIe mode.
NOTE
•The DNIe function doesn’t operate in the PC and DVI modes.
Digital Noise Reduction
If the broadcast signal received by your TV is weak, you can activate the Digital Noise Reduction
feature to help reduce any static and ghosting that may appear on the screen.
1Press the Menu button.
Press the joystick to enter.
2Move the joystick down to
select Digital NR, then
move the joystick to the right
or left to select “On” or
“Off”.
3Press the Menu button to
exit.
DNIe Demo
DNIe On DNIe Off
BP68-00120A-4 3/27/03 8:28 AM Page 54
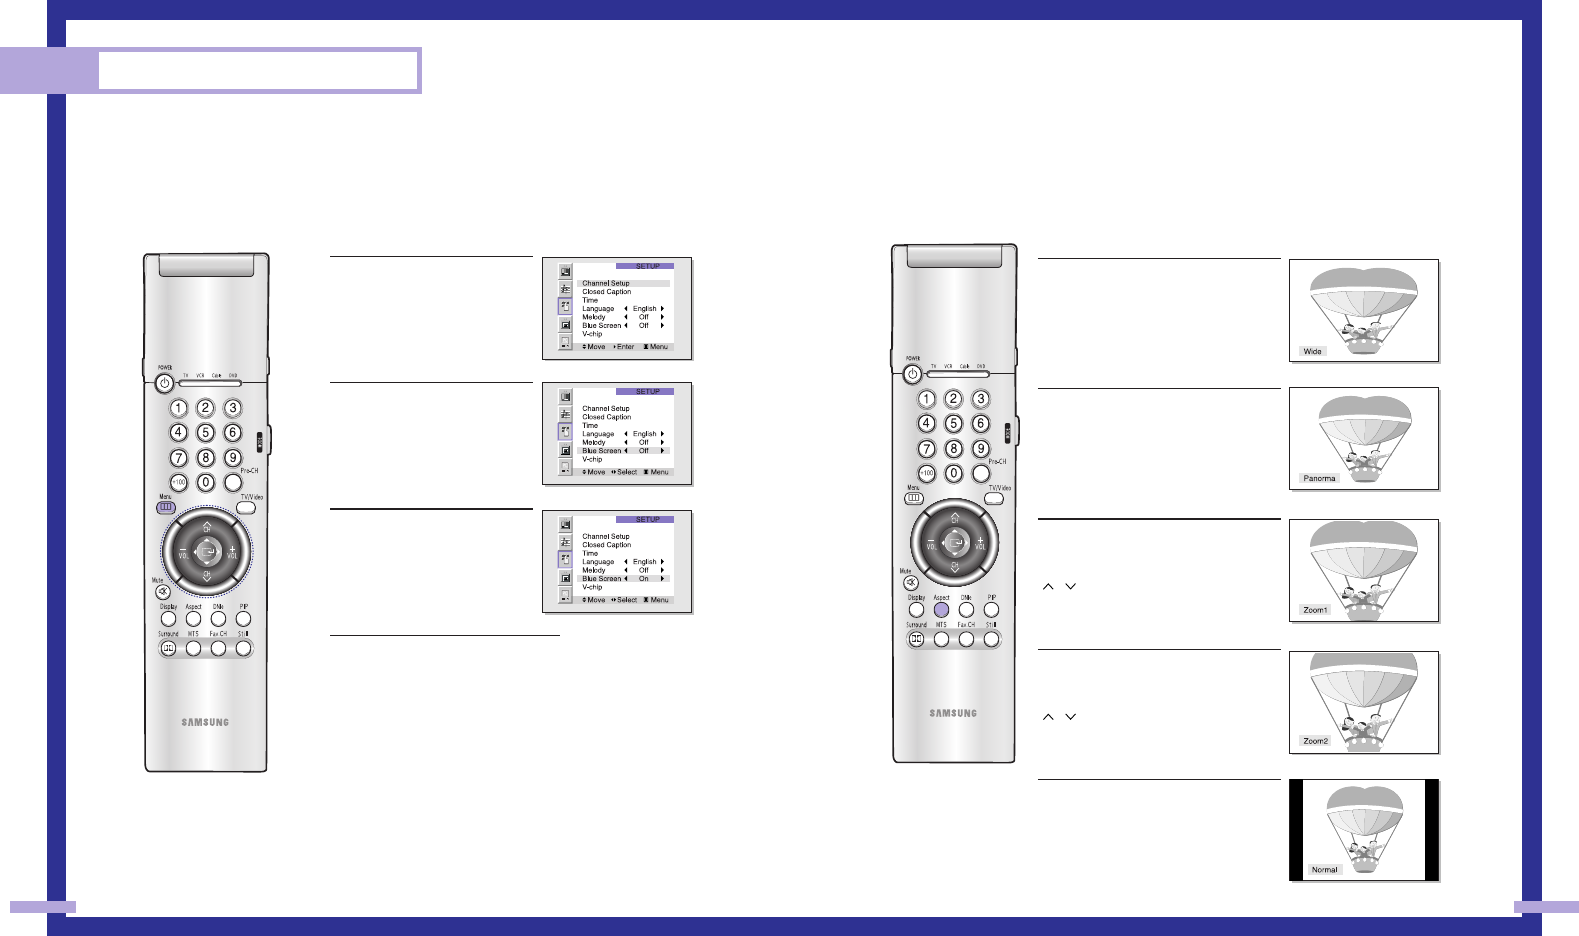
Changing the Screen Size
When you press the ASPECT button on the remote control, the TV’s screen mode choices appear
in sequence. The screen displays in this order: Wide, Panorama, Zoom1, Zoom2, Normal.
The name of the screen mode will be displayed at the bottom of the TV screen.
Wide
Sets the picture to 16:9 wide mode.
Panorama
Use this mode for the wide aspect ratio of
a panoramic picture.
Zoom1
Magnifies the size of the picture on
screen.
You can also move the picture on screen
using the “Scroll” function. Press the CH
(, )
buttons to scroll the picture.
Zoom2
Magnifies the size of the picture more
than Zoom1.
You can also move the picture on screen
using the “Scroll” function. Press the CH
(, )
buttons to scroll the picture.
Normal
Sets the picture to 4:3 normal mode.
This is a standard TV screen size.
continued...
57
Setting the Blue Screen Mode
If no signal is being received or the signal is very weak, a blue screen automatically
replaces the noisy picture background. If you wish to continue viewing the poor picture,
you must set the “Blue screen” mode to “Off”.
1Press the Menu button on the
remote control. Move the joy-
stick down to select SETUP,
then press the joystick to
enter.
2Move the joystick down to
select Blue Screen.
3Move the joystick to the right
or left to select “On” or “Off”.
4Press the Menu button to exit.
Special Features
56
BP68-00120A-4 3/27/03 8:28 AM Page 56