Samsung Electronics Co HMXQF20BN Digital Camcorder User Manual
Samsung Electronics Co Ltd Digital Camcorder
Contents
- 1. User manual 1 of 3
- 2. User manual 2 of 3
- 3. User manual 3 of 3
User manual 3 of 3
70
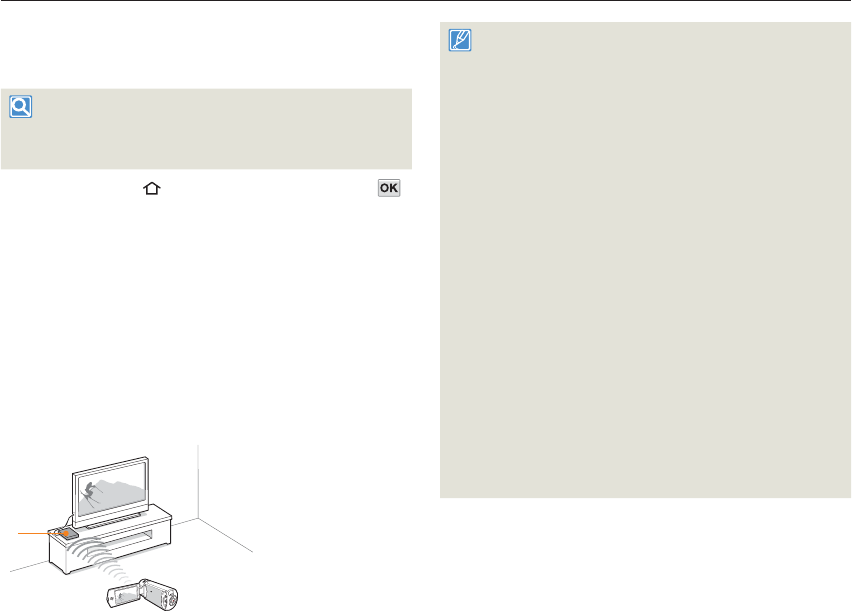
Wireless network (HMX-QF20 only)
Connecting to a WLAN
You can connect to a WLAN using an AP (access point) in the wireless
network service area.
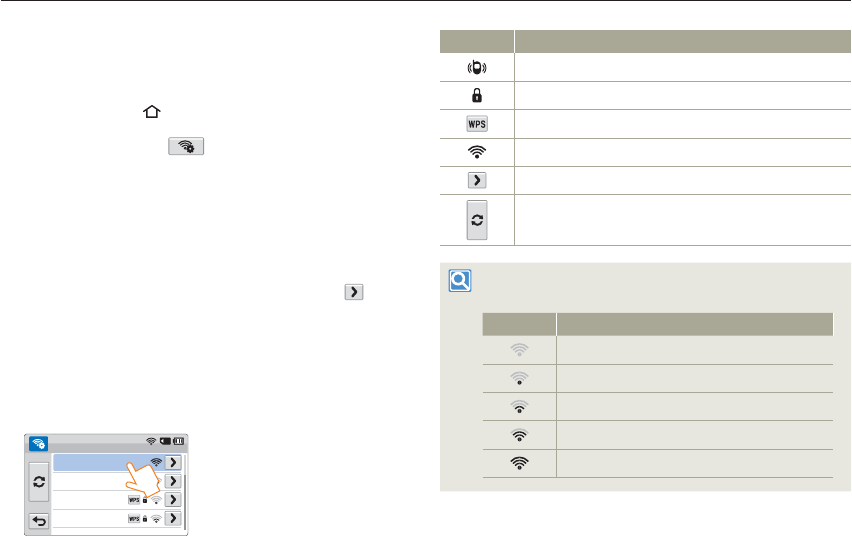
1 Press the [Home ( )] button touch Social Sharing.
2 Touch the AP setting ( ) tab.
The camcorder automatically searches for available AP devices.
3 Touch an AP.
When you select an unsecured AP, the camcorder will connect
to the network.
When you select a secured AP, input the required passwords
with the virtual keyboard to connect to the WLAN. page 73
If you select a WPS profile supported AP, touch the tab
WPS PIN, and then enter the PIN code at the AP device. You
can also connect to a WPS profile supported AP by dragging
the current screen down, touching WPS PBC, and then
pressing the [WPS] button on the AP device.
If there is not the desired AP on the AP devices list, drag the
current screen down and then touch Add Wi-Fi Network to
input and search the desired AP name manually.
Samsung 2
Samsung 4
Samsung 3
Samsung 1
AP Setting
•
•
•
•
•
Icon Description
Ad hoc AP
Secured AP
WPS AP
Signal strength
AP setting options
Refreshing connectable APs
You can check the signal strength in the top right corner of
the screen.
Icon Signal strength
Not connected
Very weak
Weak
Normal
Very strong
Connecting to a WLAN and configuring network settings
Connecting to a WLAN and configuring network settings
71
Wireless network (HMX-QF20 only)
Configuring the network settings
1 Press the [Home ( )] button touch Social Sharing.
2 Touch the AP setting ( ) tab.
The camcorder automatically searches for available AP devices.
3 Touch the tab next to an AP.
Samsung 2
Samsung 4
Samsung 3
Samsung 1
AP Setting
4 Touch each submenu and enter the required information.
item Description
Authentication
Select an authentication type according to your AP’s
setting.
(Open, Shared, WPA-PSK, WPA2-PSK, WPA-PSK/
WPA2-PSK).
When you select Open or Shared, WPA is automatically
set.
Data Encryption Select an encryption type according to your AP’s setting.
(Disabled, WEP, TKIP, AES, TKIP/AES Mixed)
Network Key Enter the password using the virtual keyboard. page 73
IP Setting The default is Auto. Set the IP address manually.
•
5 Touch the tab.
The camcorder connects to the network via the selected AP.
Even if AP authentication and Data Encryption have been detected,
set the authentication mode to Open or Shared.
If the camcorder does not detect the AP automatically, you can set
the network properties directly. page 72
Data encryption settings by authentication type are below:
- Open Disabled or WEP
- Shared WEP
- WPA-PSK TKIP, AES, or TKIP/AES Mixed
- WPA2-PSK TKIP, AES, or TKIP/AES Mixed
- WPA-PSK/WPA2-PSK TKIP, AES, or TKIP/AES Mixed
When the Data Encryption function is set to WEP or TKIP for
802.11n AP connection, you can access in the 802.11g mode.
In the 802.11g mode, the network connection and speed are not
guaranteed.
•
•
•
•
•
Connecting to a WLAN and configuring network settings
72
Wireless network (HMX-QF20 only)
Manually setting the IP address
By entering the IP address, you can connect to a WLAN via an AP
(access point) in the wireless network service area.
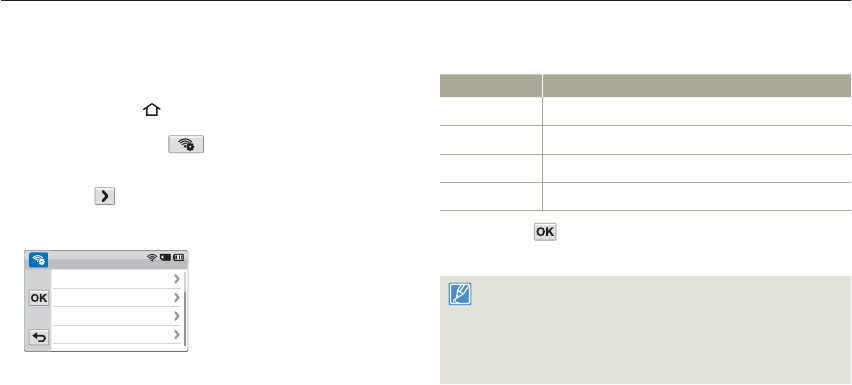
1 Press the [Home ( )] button touch Social Sharing.
2 Touch the AP setting ( ) tab.
The camcorder automatically searches for available AP devices.
3 Touch the tab next to an AP.
4 Touch IP Setting Manual.
Subnet Mask
DNS Server
Gateway
IP
Manual
. . .
. . .
. . .
. . .
•
5 Touch each submenu item and then enter the required value
by using the virtual keyboard. page 73
Item Description
IP Enter the static IP address.
Subnet Mask Enter the subnet mask.
Gateway Enter the gateway.
DNS Server Enter the DNS address.
6 Touch the tab.
The camcorder connects to the network via the selected AP.
For more information about the network settings, contact the network
administrator or the service provider.
The network settings may differ, depending on network conditions.
Do not try to connect to a network that you have no permission to
access.
Use a fully charged battery while you are using network services.
•
•
•
•
•
Connecting to a WLAN and configuring network settings
73
Wireless network (HMX-QF20 only)
Network connection tips
Compatibility with an AP that has not been formally Wi-Fi certified cannot be
guaranteed.
The wireless network connection may not be stable, depending on the
connected AP.
When the distance from AP is large, the network connection takes longer and
video stuttering may occur.
If there is an electric device using the same frequency range as the network
near the camcorder, you may experience wireless interference.
If an AP device is named in a language other than English, it may not be
displayed in the AP list or, if it is, it may appear in a corrupted format or font.
For the network settings and password, contact the network administrator or
the service provider.
The letters and numbers used in passwords may differ, depending on the
encryption type.
You may not be able to connect to the wireless network, depending on the
conditions.
The AP search may find a printer that supports the wireless network, but you
cannot use the printer to connect to the network.
The service provider may charge you a fee for the wireless connection under
the contract made between you and the service provider.
Channels available for the networking differ according to the region (country).
Some countries may restrict wireless networking under local radio regulation
laws. We recommend you connect your camcorder to networks only inside the
country where you purchased it.
If your AP name is not in English, the camcorder may not be able to locate the
device or the name may appear incorrectly.
If a WLAN requires authentication from the service provider, you may not be
able to connect to it. To connect the WLAN, contact your network service
provider.
•
•
•
•
•
•
•
•
•
•
•
•
•
•
Entering text
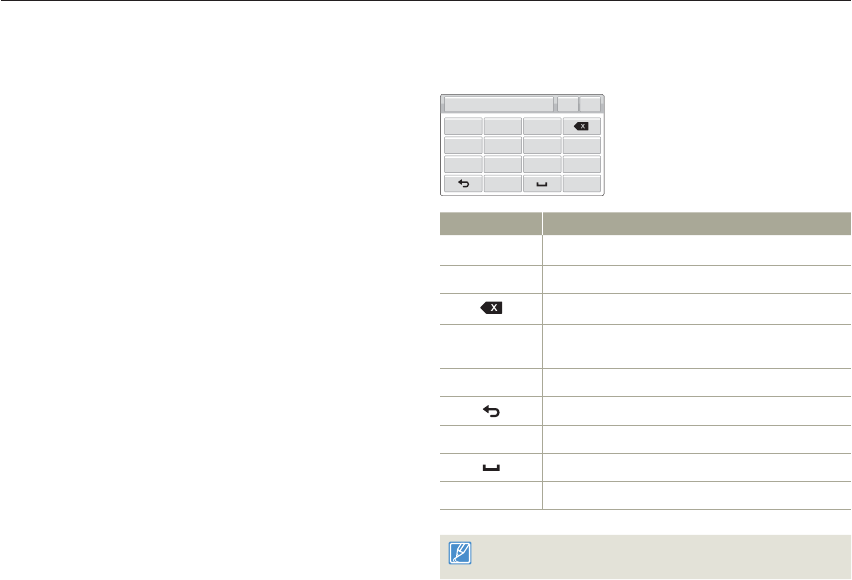
You can use the virtual keyboard to enter your information and settings.
Touch the desired characters, numbers, or symbols.
@. abc def
ghi jkl mno 123/Syn
pqrs tuv wxyz Kr/En
OK
I
Item Description
Move the cursor.
@. Enter ‘@.’.
Delete the last letter.
123/Syn In abc/ABC mode, switch to 123 mode.
In 123 mode, switch to symbol mode.
Kr/En Switch to Korean or English mode.
Return to the previous screen.
In ABC mode, change the case.
Enter a space.
OK Save the displayed text.
You can enter the information only in English or Korean, regardless of
the language settings.

74
Wireless network (HMX-QF20 only)
Accessing a web site
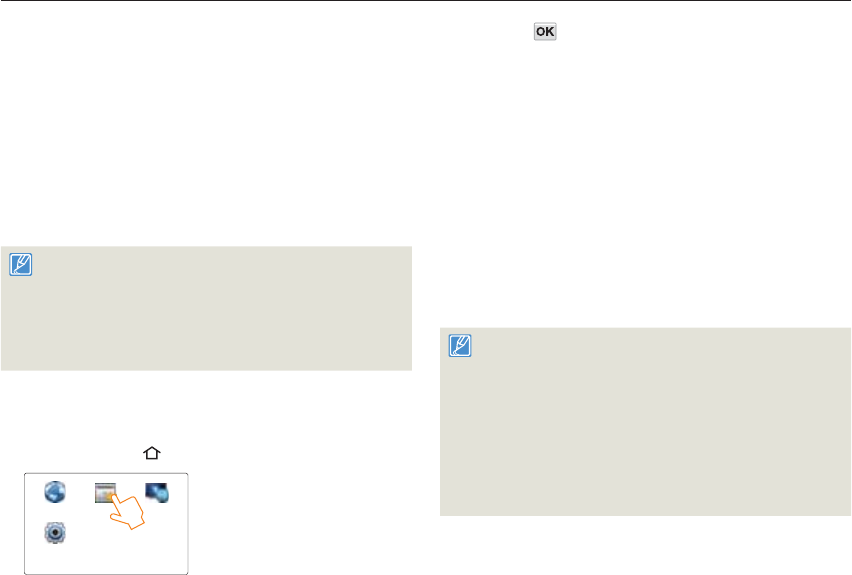
1 Press the [Home ( )] button touch Social Sharing.
2 Select a web site.
The camcorder will automatically attempt to connect to a WLAN
via the most recently connected AP device.
If the camcorder has not previously been connected to a
WLAN, it will search for available AP devices. page 70
Social Sharing
Facebook Picasa YouTube
3 Enter your ID and password, and then touch the Login
( ) tab.
You may be logged in automatically, if you have previously
logged in to the web site.
ID or Email
I
Password
I
You must have an existing account on the file sharing web site to use
this feature.
•
•
•
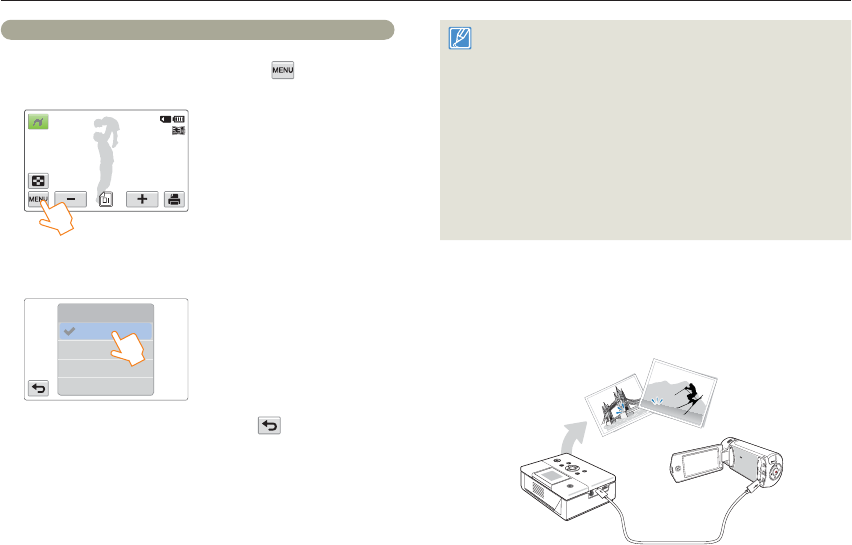
Uploading videos or photos
1 Access a sharing web site with your camcorder.
2 Touch files the tab.
You can select up to 20 photos and the total size must be
10 MB or less.
3 Touch the Comment box input your comments.
4 Touch the Upload ( ) tab.
The maximum photo resolution you can upload is 2M, and the
longest video you can upload is 30 seconds at 480/60p resolution.
If the selected photo resolution is higher than, it will be automatically
resized to a lower resolution.
The method of uploading videos or photos may differ depending on
the selected web site.
If you cannot access a web site because of firewall or user
authentication settings, contact your network administrator or
network service provider.
The speed of your internet connection may affect how quickly videos
or photos upload or web pages open.
•
•
•
•
•
Using video or photo sharing web sites
75
Wireless network (HMX-QF20 only)
Viewing videos or photos on an AllShare-enabled TV
View your videos or photos on a TV that supports the AllShare
function. Your camcorder acts as a server and you can search for
shared videos or photos with the TV remote control.
AllShare
AllShare is an international technology standard for sharing media files
between networked devices in your home. With this technology, you
can view your videos or photos on a widescreen TV.
1 Press the [Home ( )] button touch TV Link the
tab.
The camcorder will automatically attempt to connect to a WLAN
via the most recently connected AP device.
If the camcorder has not previously been connected to a
WLAN, it will search for available AP devices. page 70
2 Connect your TV to a WLAN via an AP device.
Refer to your TV’s user manual for more information.
3 On the TV, search for the camcorder and browse the shared
videos or photos.
For information about searching for the camcorder and browsing
the videos or photos on the TV, refer to the TV user manual.
•
•
•
•
On a TV, you can play back only the videos and photos recorded by
the camcorder.
The effective network connection range between the camcorder and
the TV may differ depending on the AP.
If the camcorder is turned off abnormally (ex: network disconnection)
while you are playing a video or photo on the TV, the TV considers
itself still connected to the camcorder.
Depending on the size of the video or photo file, it may take longer to
connect to the TV and display.
You cannot enable this function if there are no recorded videos or
photos in your camcorder.
When playing HD quality videos on a TV, use an 802.11n AP and set
it to 802.11n. Important: If you set the Data Encryption function on
your network to WEP or TKIP, the network defaults to 802.11g and
the camcorder cannot play HD quality videos on the TV.
You can select up to 1000 photos and videos files to watch through
your TV. The more files you select, the slower the camcorder
operates. We recommend selecting fewer than 1000 files.
This function may not operate properly on a Samsung HDTV that has
no AllShare™ mark on it.
Video stuttering may occur, depending on the TV type and network
status.
If video stuttering occurs, record videos you intend to play through a
wireless connection at lower video resolution.
If video stuttering occurs frequently when you use a wireless
connection, change to HDMI or AV cable. pages 80~81
If you play back videos on a Samsung HDTV supporting AllShare™
and video stuttering occurs repeatedly for over 3 seconds, consult
the Samsung call center. See the back cover for the phone number.
•
•
•
•
•
•
•
•
•
•
•
•
AP
76
Wireless network (HMX-QF20 only)
Using Auto Backup to send videos or photos
Installing the program for Auto backup on
your PC
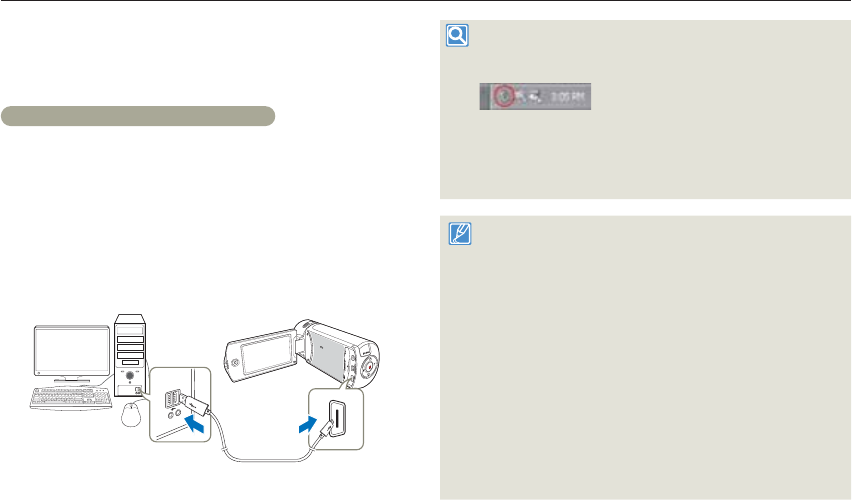
1 Connect the camcorder to a PC with the USB cable.
2 Turn on the camcorder.
The computer recognizes the camcorder and Intelli-studio
launches automatically.
3 When the pop-up appears, touch OK.
The program will be installed automatically.
Before install the program, ensure that the PC is connected to a
network.pages 70~72
If no internet connection is available, you must install the program
from the provided CD.
This program is for backing up files to the PC based on Windows
OS.
Refer to the Auto Backup instruction manual for more information.
•
•
•
•
Sending photos or videos to a PC
1 Press the [Home ( )] button touch Auto Backup.
Social Sharing Auto Backup TV Link
Settings
•2
•
•
2 Touch the tab.
The camcorder will automatically attempt to connect to a WLAN
via the most recently connected AP device.
If the camcorder has not previously been connected to a
WLAN, it will search for available AP devices. page 70
If your PC has turned on, the PC recognizes the camcorder and
Intelli-studio launches automatically.
If your PC supports the Wake on LAN (WOL) feature, you can
turn on the PC automatically by searching for the PC from your
camcorder. pages 77~78
3 The camcorder will prepare to send the files and send them
to the PC.
You cannot select individual files to send. This function is
available only for newly stored files on the camcorder.
The progress will be shown on the PC monitor.
The camcorder will search for available access points even if you are
connecting to the same access point again.
If you turn off the camcorder or remove the battery while sending
files, the file transfer will be interrupted.
While you are using this feature, the buttons on the camcorder will
be disabled.
You can connect only one camcorder to the PC at a time for sending
files.
The backup may be canceled due to network conditions.
Videos or photos can be sent to a PC one time only.
Files cannot be sent again even if you reconnect your camcorder.
•
•
•
•
•
•
•
•
•
•
•
•
•

Using Auto Backup to send videos or photos
77
Wireless network (HMX-QF20 only)
Setting the PC to wake up from sleep mode
1 Click Start, and then open the Control Panel.
2 Configure the network connection.
Windows 7:
Click Network and Internet Network and Sharing Center
Change adapter settings.
Windows Vista:
Click Network and Internet Network and Sharing Center
Manage network connections.
Windows XP:
Click Network and Internet Connection Network
Connection.
3 Right click Local Area, and then click Properties.
4 Click Configure the Power manage tab Allow this
device to wake the computer.
5 Click OK.
6 Restart the PC.
•
•
•
Setting the PC to turn on
1 Turn on the PC and press F2 while the PC is booting.
The BIOS setting menu will appear.
2 Select Advanced tab Power management Setup.
3 Select Resume on PME Enabled.
4 Press F10 to save your changes and continue booting.
5 Click Start, and then open the Control Panel.
6 Configure the network connection.
Windows 7:
Click Network and Internet Network and Sharing Center
Change adapter settings.
Windows Vista:
Click Network and Internet Network and Sharing Center
Manage network connections.
Windows XP:
Click Network and Internet Connection Network
Connection.
•
•
•
•
About the Wakeup on LAN (WOL) feature
WOL (Wakeup on LAN)
WOL is a technology that allows you to turn on a PC from another location over a network connection or Internet or to set a PC to wake up from sleep mode.
With the WOL feature, you can automatically turn on or wake up a PC with your camcorder by touching Auto Backup.

Using Auto Backup to send videos or photos
78
Wireless network (HMX-QF20 only)
7 Select drivers related to network adapter.
8 Click Advanced tab and then set WOL menus.
Any changes to your PC’s BIOS settings other than the ones described
below may damage your PC. The manufacturer is not responsible for
damage caused by your changing your PC’s BIOS settings.
You cannot use this feature across a firewall or if a security program
has been installed.
To turn on the PC with the WOL feature, the PC must have an active
connection to the LAN. Ensure that the indicator light on the PC’s
LAN port is on, which shows that the LAN connection is active.
Depending on your PC model, the camcorder may only be able to
wake the PC.
Depending on your PC’s OS or drivers, the names of the WOL
setting menu may vary.
- examples of setting menu names: Enable PME, Wake on LAN etc.
- examples of setting menu values: Enable, Magic packet etc.
•
•
•
•

Using with other devices
Learn how to connect your camcorder to your TV, VCR or DVD/
HDD recorders, photo printer, or computer.
Connecting to a TV .............................................................. 80
Connecting to a high definition TV with HDMI ........................... 80
Connecting to a regular TV ...................................................... 81
Viewing on a TV screen ........................................................... 82
Dubbing videos to VCR or DVD/HDD recorders ................. 83
Printing photos with a PictBridge photo printer .................. 84
Transferring files to your Windows computer ..................... 86
Transferring files with Intelli-studio ............................................ 87
Transferring files by connecting the camcorder as a removable
disk ........................................................................................ 91
80
Using with other devices
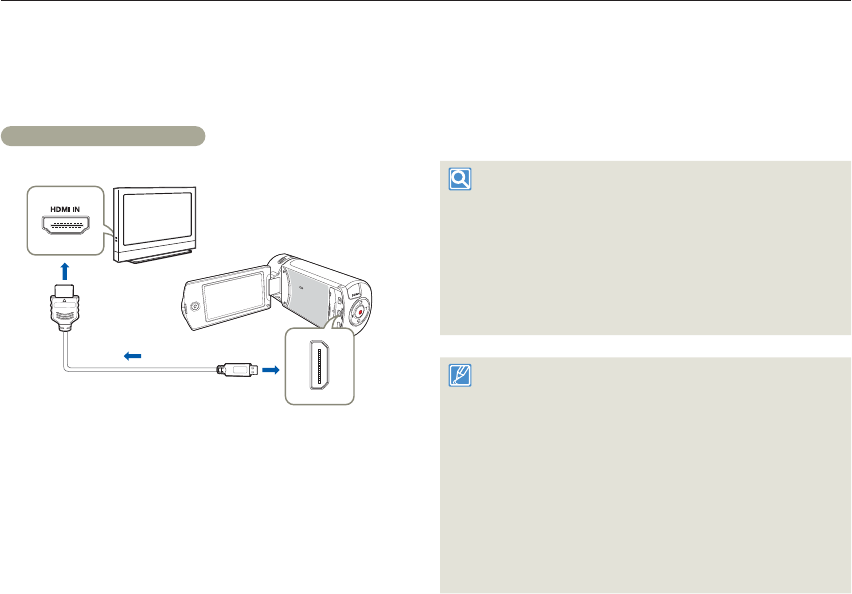
Connecting to a high definition TV with HDMI
You can view High Definition (HD) quality videos recorded in HD
resolution on an HDTV using an HDMI connection. This camcorder
supports HDMI output to deliver high-definition video transfer.
Using a mini HDMI cable
Camcorder
HDTV
Signal flow
Mini HDMI Cable
1 Select HDMI TV Out. page 98
2 Turn on the camcorder.
If you do not turn on the camcorder first, the camcorder may fail
to recognize the connected TV.
Use the AC power adaptor to power the camcorder when you
attach it to a TV.
3 Connect the camcorder to the TV with a mini HDMI cable.
•
•
4 Set the TV’s input or source selector to the HDMI input
you’ve attached the camcorder to.
Refer to the TV’s instruction manual to see how to select the
TV’s input or source.
5 Select the playback mode on your camcorder, and then
start to play back videos or photos. pages 57~62
Understanding the HDMI
HDMI (High Definition Multimedia Interface) is a compact audio/video
interface for transmitting uncompressed digital data.
What is Anynet+ function?
The Anynet+ function lets you control all devices that support the
Anynet+ function with the same remote. You can use the Anynet+
function on the camcorder if the camcorder is connected with an HDMI
cable to an Anynet+ supported TV. For more information, refer to the
Anynet+ supported TV’s user manual.
This camcorder is provided with the TV Connect Guide menu
function. If you try to connect the camcorder to a TV and don’t have
your user’s manual, you can use the TV Connect Guide menu
function to view connection instructions on the camcorder’s screen.
page 99
You can use only a D to A type Mini HDMI cable with this camcorder.
The HDMI jack on the camcorder is for output only.
If an Anynet+ supported TV is connected to the camcorder by an
HDMI cable, turning on the camcorder may turn the TV’s power on.
(an Anynet+ function) If you don’t want this to occur, set Anynet+
(HDMI-CEC) to Off. page 99
Use only HDMI 1.3 cable when connecting to the HDMI jack of this
camcorder. If the camcorder is connected with HDMI cables that are
not version 1.3, the screen display may not work.
•
•
•
•
•
•
Connecting to a TV
Connecting to a TV
81
Using with other devices
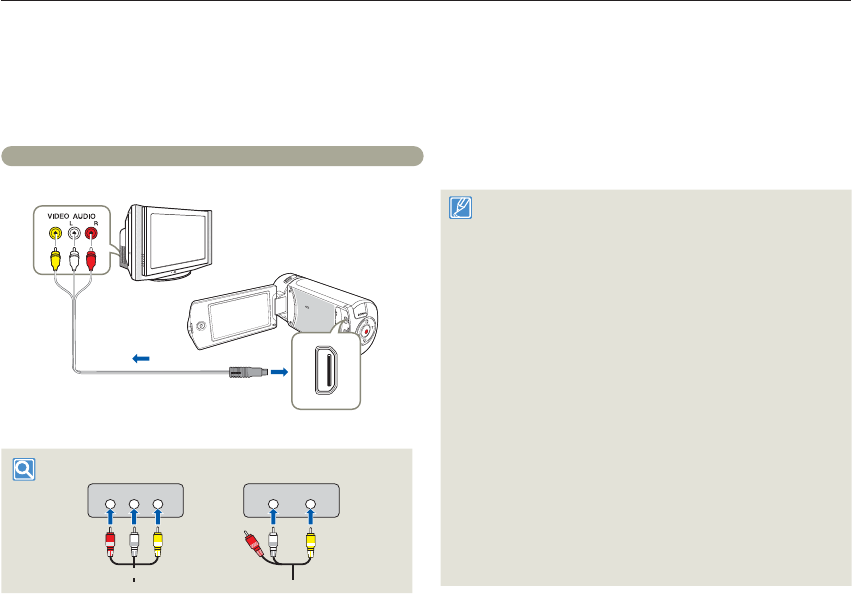
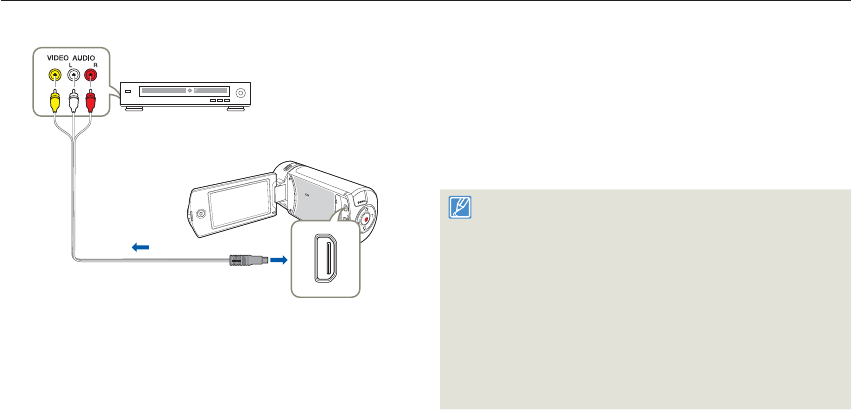
Connecting to a regular TV
You can view images recorded with your camcorder on a regular
TV that supports standard definition. This camcorder supports the
composite output for standard definition video transfer.
Connecting an Audio/Video cable for the composite output
Camcorder
Signal flow
Audio/Video cable
Regular TV
VIDEOAUDIO
LR
VIDEOAUDIO
Stereo Type Mono Type
Red Yellow
White
White Yellow
1 Connect the camcorder to a TV with an Audio/Video cable.
2 Set the TV’s input or source selector to the input you’ve
attached the camcorder to.
Refer to the TV’s instruction manual to see how to select the TV
input.
3 Select the playback mode on your camcorder, and then
start to play back videos or photos. pages 57~62
Make sure you’ve connected the camcorder to the correct input
jacks. The TV screen may not display the right video information if
connected incorrectly.
When connecting to a TV using the Audio/Video cable, match the
color of the cables to the color of the corresponding jacks.
Video input may appear green depending on the TV. If this occurs,
connect the yellow plug of the Audio/Video cable to the green jack of
the TV.
When the camcorder is connected to a TV with more than one kind
of cable, the camcorder outputs video signals in the following order
of priority:
- HDMI Audio/Video (composite) output
This camcorder is provided with the TV Connect Guide menu
function. If you try to connect the camcorder to a TV and don’t have
your user’s manual, you can use the TV Connect Guide menu
function to view connection instructions on the camcorder’s screen.
page 99
If your TV has one audio jack (mono input), connect the yellow plug
of the Audio/Video cable to the video jack, the white plug to the
audio jack, and leave the red plug unconnected.
When you connect the camcorder to a TV using the Audio/Video
cable, images recorded in high-definition image quality (Full HD
1080/60i or HD 720/60p) are played back in standard definition
image quality.
•
•
•
•
•
•
•
•
Connecting to a TV
82
Using with other devices
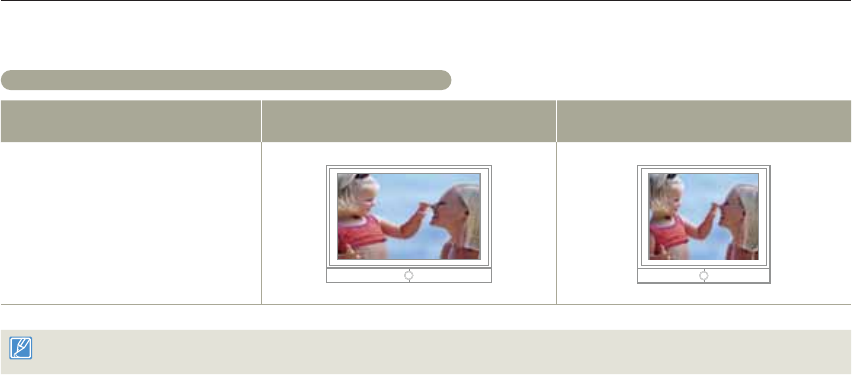
Viewing on a TV screen
Image appearance depends on the TV screen aspect ratio
Recording ratio Appearance on Wide (16:9) TV Appearance on 4:3 TV
Images recorded in a 16:9 ratio
Adjust the volume to a moderate level. If the volume is too high, the video information may include noise.
If TV Display is set Off, the TV screen does not display the camcorder’s OSD (On Screen Display) menus. page 98
•
•
83
Using with other devices
Camcorder
Signal flow
Audio/Video cable
VCR or DVD/HDD
recorder
1 Connect your camcorder to the recording device (VCR or
DVD/HDD recorder) with the Audio/Video cable.
Connect your camcorder to the input jacks of the recording
device.
If your recording device has an input selector, set it to the
correct input mode.
2 Insert the storage device (tape, disc, etc.) into the recording
device.
•
•
3 Start the playback on your camcorder, and record it on the
recording device.
Refer to the instruction manuals supplied with your recording
device for details.
4 When dubbing is finished, stop the recording device, and
then your camcorder.
Videos recorded on this camcorder can only be dubbed using
the Audio/Video cable in SD (standard definition) image quality,
regardless of the recording resolution.
You cannot dub to a recorder with an HDMI cable.
To copy a video recorded in HD (high definition) image quality in HD,
use the built-in software of your camcorder, and copy the video to
your computer. page 87
Because dubbing is performed via analog data transfer, the image
quality may deteriorate.
To hide the screen indicators (such as the counter, etc.) on the
screen of the connected monitor device set TV Display: Off.
page 98
To record the date/time, display it on the screen. page 98
•
•
•
•
•
•
•
Dubbing videos to VCR or DVD/HDD recorders
You can dub videos recorded on your camcorder to a VCRs or DVD/HDD recorders.

84
Using with other devices
Printing photos with a PictBridge photo printer
1 Set USB Connect to PictBridge. page 99
USB Connect
PictBridge
Mass Storage
2 Use a USB cable to connect your camcorder to the printer.
Camcorder
Photo Printer
(Compatible with PictBridge)
3 Turn your printer on.
The photo thumbnails appear on the LCD screen.
•
4 Touch the photos you want to print, and then touch the
Print ( ) tab.
The corresponding message appears.
1/12 100_0001
5 Touch Yes.
The selected photo is printed.
To set the number of prints
Touch the / tab to set the number of copies to print.
To cancel the print setting
Touch the Thumbnail view ( ) tab on the LCD screen.
To stop printing after printing starts
Touch Cancel on the screen.
If the camcorder fails to recognize the printer, remove the USB cable,
and then turn off the printer. Set USB Connect to PictBridge, and
then connect the USB cable again.
Use the supplied USB cable.
•
•
•
•
You can print photos directly by connecting your camcorder to a PictBridge printer (sold separately) using a USB cable.
Printing photos with a PictBridge photo printer
85
Using with other devices
To set the date/time imprint for Pictbridge printers
1 In the printer mode, touch the MENU ( ) tab
Date/Time.
1/12 100_0001
2 Touch the desired submenu item.
The selected date and time display option is set.
Time
Date/Time
Date
Date/Time
Off
3 To exit the menu, touch the Return ( ) tab.
The selected date and time will be printed on photos.
•
•
The date/time imprint option may not be supported by all printers.
Check with your printer manufacturer. The date/time imprint option
cannot be setup if the printer does not support the option.
PictBridge™ is a registered trademark of CIPA (Camera & Imaging
Products Association), an image transfer standard developed by
Canon, Fuji, HP, Olympus, Seiko Epson, and Sony.
Use the AC power adaptor to power the camcorder during
PictBridge printing. If the camcorder shuts off during printing, it might
damage data on the storage media.
You cannot print video images.
You cannot print photos recorded on other devices.
Various printing options are available depending on the printer. Refer
to the printer’s user manual for details.
•
•
•
•
•
•
JAN/01/2012 12:00AM
JAN/01/2012 12:00
86
Using with other devices
System requirements
Your computer must meet the following requirements to run Intelli-
studio:
Items Requirement
OS Microsoft Windows XP SP2, Windows Vista,
or Windows 7
CPU Intel® Core 2 Duo® 1.66 GHz or higher is recommended
AMD Athlon™ X2 Dual-Core 2.2 GHz or higher is
recommended
(Notebook: Intel Core 2 Duo 2.2GHz or AMD Athlon
X2 Dual-Core 2.6GHz or higher is
recommended)
RAM 1GB or higher is recommended
Video Card NVIDIA GeForce 8500 or higher, ATI Radeon HD 2600
series or higher
Display 1024 x 768, 16-bit color or higher (1280 x 1024, 32-bit
color recommended)
USB micro USB 2.0
Direct X DirectX 9.0c or higher
Recommended
Memory Card 6MB/s (Class 6) or above
System requirements are recommendations. Even on a system that
satisfies the requirements, Intelli-studio may not operate optimally.
On a slower computer than recommended, video playback may skip
frames or operate unexpectedly.
If the version of DirectX on your computer is lower than 9.0c, install
DirectX 9.0c or higher.
We recommend transferring the recorded videos to a PC before
playing back or editing the video data.
To run Intelli-studio, a laptop computer requires better and faster
components than a desktop PC.
Intelli-studio is not Mac OS compliant.
•
•
•
•
•
•
Samsung is not responsible for any damage that results from using a
computer that does not meet the requirements such as a computer you
have assembled yourself.
Transferring files to your Windows computer
Intelli-studio is a built-in program that allows you to play back and edit files. You can upload files to web sites, such as YouTube or Flickr.
Transferring files to your Windows computer
87
Using with other devices
Transferring files with Intelli-studio
When you connect the camcorder to a PC with a USB cable, Intelli-
studio automatically launches.
Step 1. Connecting the USB cable
1 Set USB Connect: Mass Storage and PC Software: On.
page 99
2 Connect the camcorder to a PC with the USB cable.
A new file saving window appears along with the Intelli-studio
main window. If your camcorder has no new files, the pop-up
window for saving new files will not appear.
Depending on your version of Windows, the Windows
removable disk window may also appear.
3 Click Yes in the new file saving window. The uploading
procedure starts. Click Yes to confirm.
If you do not want to save any new files, select No.
•
•
•
To disconnect the USB cable
To disconnect the USB cable after completing the file transfer, you must
follow these steps:
1. Click the Safely Remove Hardware icon on the taskbar.
2. Select USB Mass Storage Device, and then click Stop.
3. If the Stop a Hardware device window appears, click OK.
4. Disconnect the USB cable from the camcorder and PC.
Use the provided USB cable. (Supplied by Samsung)
Make sure you insert the USB plug into the micro USB jack with the
plug facing in the correct direction.
Use the AC power adaptor to power the camcorder when
transferring files to your computer.
When the USB cable is connected, turning the camcorder on or off
may cause the PC to malfunction.
If you disconnect the USB cable from the PC or the camcorder while
transferring files, the data transmission will stop and the data may be
damaged.
If you connect the camcorder to a PC via a USB HUB or
simultaneously connect the camcorder along with other USB
devices, the camcorder may not work properly. If this occurs, remove
all USB devices from the PC, and then reconnect the camcorder.
Intelli-studio may not automatically run. If this occurs, access My
Computer or Windows Explorer, open the drive that corresponds to
your camcorder, find Intelli-studio, and then run iStudio.exe.
•
•
•
•
•
•
•
Transferring files to your Windows computer
88
Using with other devices
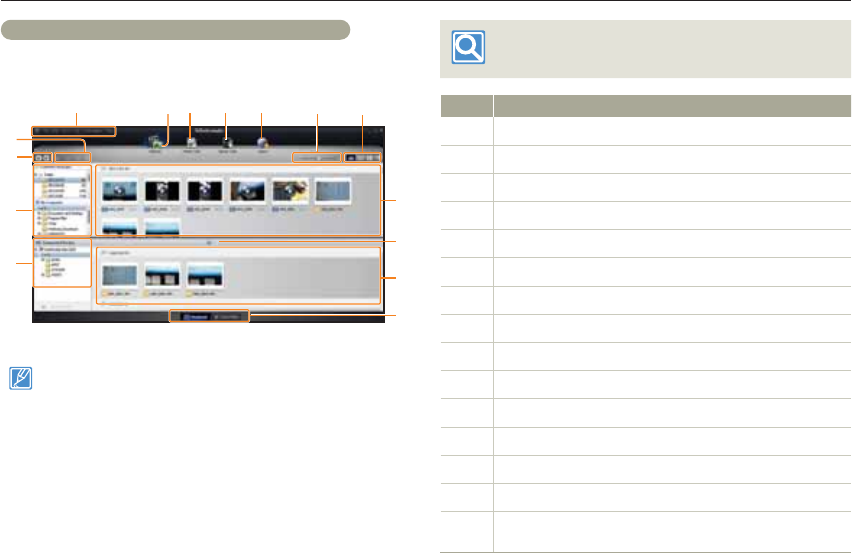
Step 2. About the Intelli-studio main window
When the Intelli-studio starts up, video and photo thumbnails appear in
the main window.
For details, select Help Help on the Intelli-
studio screen.
No. Description
1Menu items
2Display files in the selected folder.
3Switch to Photo edit mode.
4Switch to Video edit mode.
5Switch to Share mode.
6Enlarge or reduce the thumbnails in the list.
7Select a file type.
8View videos and photos of the selected folder on your computer.
9Show or hide videos and photos of the connected device.
0View videos and photos of the selected folder on the device.
!View files as thumbnails or on a map
@Browse folders in the connected device.
#Browse folders stored on your computer
$Move to the previous or next folder
%Print files, view files on a map, store files in Contents Manager, or
register faces.
If you install Intelli-studio on your PC, the program will launch more
quickly. To install the program, select Tool Install Intelli-studio
on PC.
You can update the latest version of Intelli-studio software by clicking
on Web Support Update Intelli-studio Start Update.
You can update the firmware of this camcorder by selecting Web
Support Upgrade firmware for the connected device from
the program toolbar.
The camcorder’s built-in Intelli-studio software is intended for
home use. It is not for precision or industrial productions. For these
applications, we recommend an editing software designed for
professional use.
•
•
•
•
$
#
@
%
1234567
9
8
0
!
Transferring files to your Windows computer
89
Using with other devices
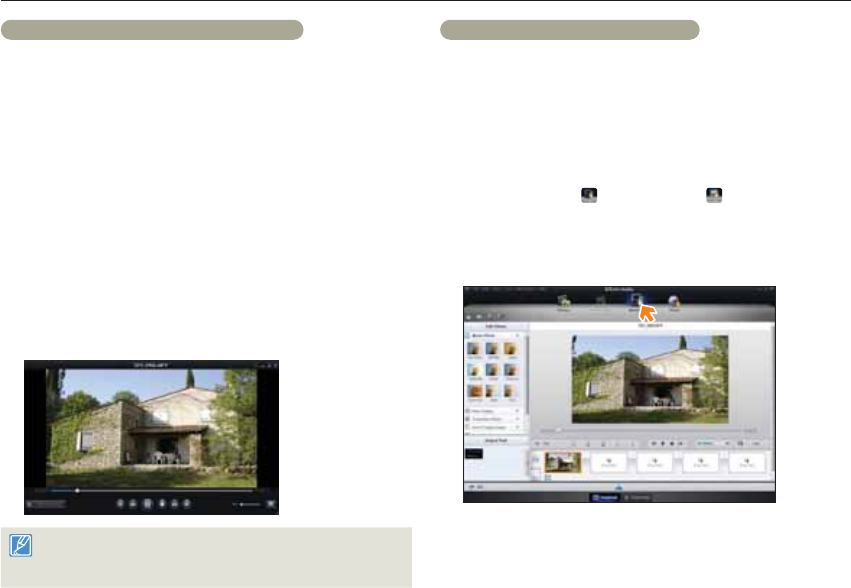
Step 3. Playing back videos or photos
You can play back the recordings conveniently using the Intelli-studio
application.
1 With Intelli-studio, click the desired folder to display your
recordings.
Video or photo thumbnails appear on the screen, depending on
the folder you selected.
2 Choose the video or photo that you want to play back.
You can view the file information by moving the mouse over the
file.
If you click a video thumbnail once, the video plays back inside
the thumbnail frame, allowing you to search for a desired scene
with ease.
3 After you select the video or photo you want, double-click to
play back.
Playback starts and the controls appear.
Intelli-studio supports the following file formats:
- Video formats: MP4 (Video: H.264, Audio: AAC), WMV (WMV 7/8/9)
- Photo formats: JPG, GIF, BMP, PNG, TIFF
•
•
•
•
Step 4. Editing videos or photos
You can edit the videos or photos in various ways with various
functions. (Change Size, Fine-Tuning, Image Effect, Insert Frame, etc.)
Before editing a video or photo in Intelli-studio, make a backup copy of
the video or photo file and store it on your computer for safe-keeping
using My Computer or Windows Explorer.
1 Choose the videos or photos you want to edit.
2 Click Movie Edit ( ) or Photo Edit ( ) according to the
selected file on the Intelli-studio browser.
The selected file appears in the editing window.
3 Edit a video or photo with various edit functions.
•
Transferring files to your Windows computer
90
Using with other devices
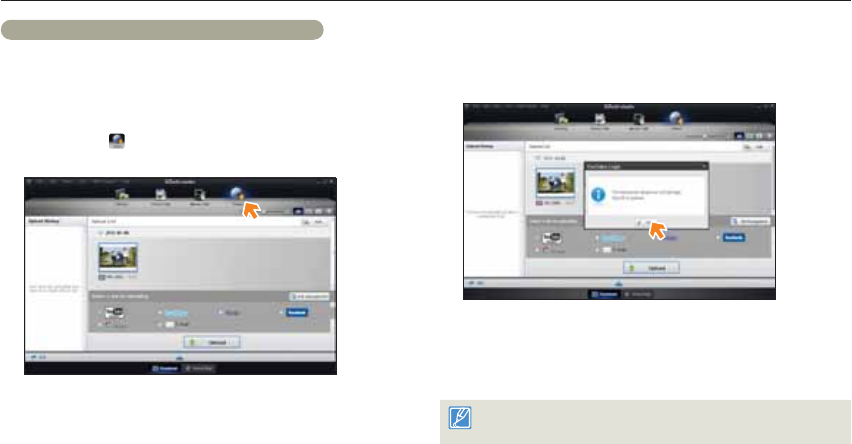
Step 5. Sharing the videos/photos online
Share your contents with the world by uploading photos and videos
directly to a web site with one click.
1 Choose the videos or photos you want to share.
2 Click Share ( ) on the Intelli-studio browser.
The selected file appears in the sharing window.
3 Click the web site you would like to upload files to.
You can choose YouTube, twitter, Flickr, Facebook,
Picasa, Email, or another web site you want to use for your
site management.
•
•
4 Click Upload to start uploading.
A pop-up window appears to open the web browser of the
selected site or a pop-up window appears asking for your ID
and password.
5 Enter your ID and the password to access.
Access to the web site contents can be limited depending on
your web access environment.
The recording time and capacity available for uploading videos can be
changed depending on each web site’s policy.
•
•
Transferring files to your Windows computer
91
Using with other devices
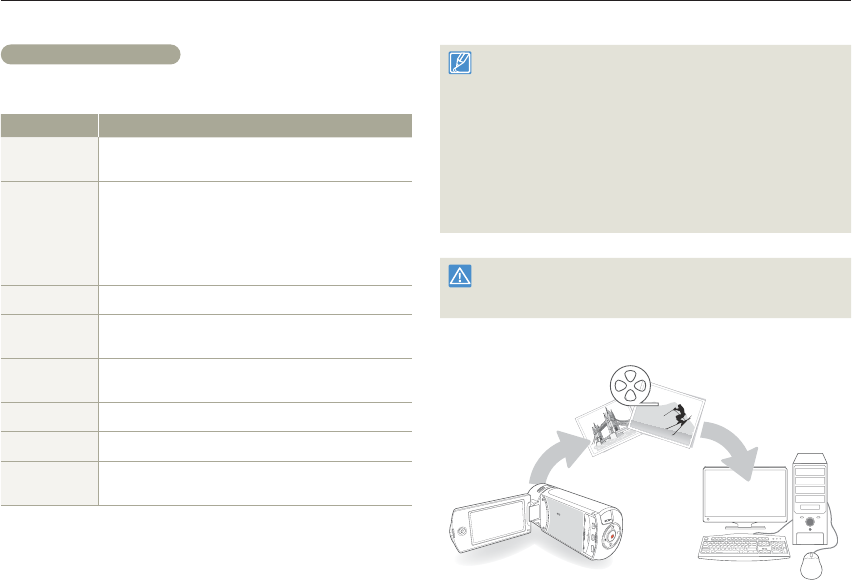
Transferring files by connecting the camcorder as a removable disk
You can copy video or photo files recorded by the camcorder to a Windows computer by connecting the camcorder to the computer using a USB
cable.
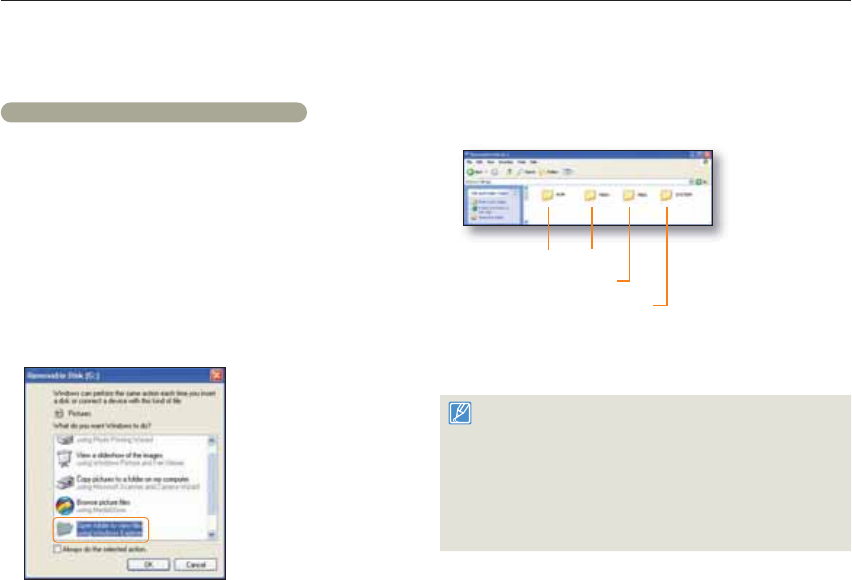
Viewing the contents of storage media
1 Set USB Connect to Mass Storage. page 99
2 Set PC Software to Off. page 99
3 Insert a memory card. page 16
4 Connect the camcorder to the PC with the USB cable.
page 87
The Removable Disk or Samsung window appears on the
PC’s screen after a moment.
Select Open folders to view files using Windows Explorer,
and then click OK.
•
•
5 The folders in the storage media appear.
Different file types are stored in different folders.
Photos Videos
Setting folder
System folder
6 Copy and paste or drag and drop the files from the storage
media to your PC.
If the Removable Disk window does not appear, confirm the
connection (page 87) or perform steps 1 to 4 again. If the
removable disk does not appear automatically, open the removable
disk folder in My Computer.
If the connected camcorder’s disk drive does not open or the
context menu that appears when right clicking your mouse (open or
browse) appears broken, your computer may be infected by Autorun
virus. Please update your anti-virus software to its latest version and
scan your disk drives.
•
•
•
Transferring files to your Windows computer
92
Using with other devices
Video file (H.264) 1
HD-quality videos have an HDV_####.MP4 name format.
The file number used in the file name automatically increases when
you create a new video file.
A new folder is created when the file number has reached
999~1,000.
The folder names are given in the following order: 100VIDEO,
101VIDEO, etc. The maximum number of folders is 999.
The camcorder can create a maximum of 9,999 files in a storage
media.
Photo file 2
As with video files, the file number used in the file name
automatically increases when you create a new photo file.
Photos have a SAM_####.JPG name format.
The folder names are given in the following order: 100PHOTO,
101PHOTO, etc.
•
•
•
•
•
•
•
•
File format
Video files
Video files are compressed in H.264 format. The file extension is
‘.MP4’.
Refer to page 95 for the video resolution.
Photo files
Photo images are compressed in JPEG (Joint Photographic Experts
Group) format. The file extension is ‘.JPG’.
Refer to page 95 for the photo resolution.
File naming follows DCF (Design rule for Camera File System) rules
Do not modify the name of a video file recorded by the camcorder.
For proper playback, the camcorder requires that files have their
original folder and file names.
•
•
•
•
•
•

Settings
Refer to items to configure your camcorder’s settings.
Settings menu ..................................................................... 94
Accessing the settings menu .................................................. 94
Shooting ................................................................................ 95
Playback ................................................................................ 96
Display ................................................................................... 97
Connectivity............................................................................ 99
General ................................................................................ 100
94
Settings
Settings menu
Accessing the settings menu
The instructions below are an example of how to access and use the
Settings menu items. When you access and use other Settings menu
items (pages 95~102), use this example as a guide.
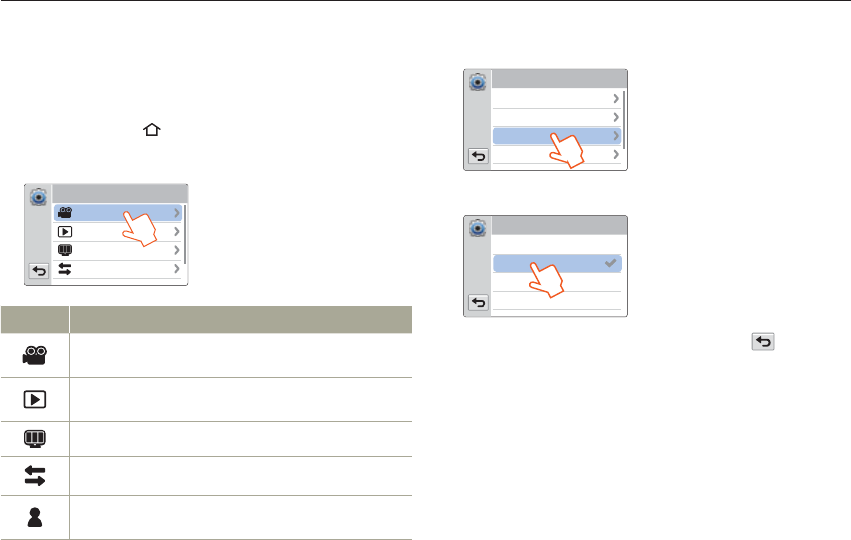
1 Press the [Home ( )] button touch Settings.
2 Touch a menu.
Settings
Playback
Connectivity
Display
Shooting
Menu Description
Shooting:
Set the items in the video or photo recording mode.
pages 95~96
Playback: Set the items in the video or photo playback mode.
pages 96~97
Display: Customize the display settings. pages 97~98
Connectivity: Set the connection items. page 99
General: Change the settings for the camcorder system such as
memory format and default set. pages 100~102
3 Touch a submenu.
The OIS Duo function is used here as an example.
Shooting
Photo Resolution
Tele Macro
Video Resolution
OIS Duo
4 Touch the desired submenu item.
OIS Duo
On
Plus
0GG
5 To exist the menu setting, touch the Return ( ) tab.
•

Settings menu
95
Settings
Shooting
* : Default
Item Description
Video
Resolution
Set the video resolution.
Full HD 1080/60i* ( ): Records in the Full HD
(1920x1080/60i) format.
HD 720/60p ( ): Records in the HD (1280x720/
60p) format.
•
•
60i indicates the camcorder will record in interlaced
scan mode at 60 fields per second.
60p indicates the camcorder will record in progressive
scan mode at 60 frames per second.
Recorded files are encoded using Variable Bit Rate
(VBR). VBR is an encoding system that automatically
adjusts the bit rate in response to the image being
recorded.
The available video recording time differs according to
the video resolution you select. page 19
•
•
•
•
Photo
Resolution
Set the photo resolution.
5.3M 3072X1728* ( ): Records in the
2944x1656 resolution.
2M 1920X1080 ( ): Records in the 1920x1080
resolution.
•
•
The number of recordable images differs according to
the photo resolution you select. page 19
Photos that are recorded on your camcorder may not
playback properly on other digital devices that do not
support these photo sizes.
•
•
Item Description
OIS Duo
Set to compensate for camcorder shake/blur.
Off*: Disables the function.
On ( ): Enables to compensate for camcorder
shake.
•
•
Tele Macro
Set to record close-up images of very small objects.
Off*: Disables the function.
On ( ): Focuses on a small portion of a large
object at a tele angle.
•
•
When recording in the Tele Macro mode, the focus
speed may be lowered.
Use a tripod (not supplied) to prevent camcorder
shake in the Tele Macro mode.
Avoid shadows when recording in the Tele Macro
mode.
As the distance to the subject decreases, focusing
area narrows.
When the distance between the camcorder and a
subject is too close and the camcorder cannot be in
the focus, press the [W] button and then adjust the
focal distance between them.
When the Tele Macro function is On and the
camcorder magnifies a subject in tele mode, the
minimum focal distance between the camcorder and
a subject is 50cm.
•
•
•
•
•
•
* : Default
Settings menu
96
Settings
Item Description
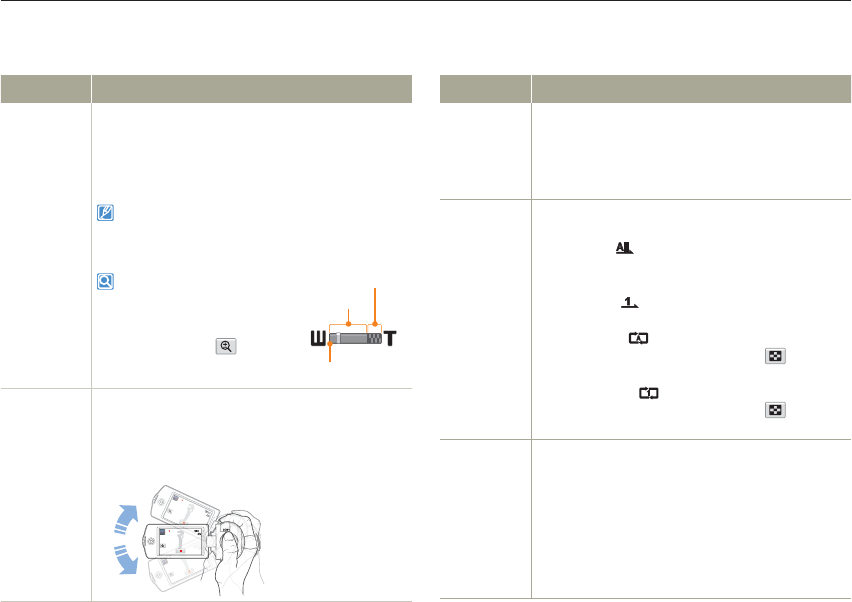
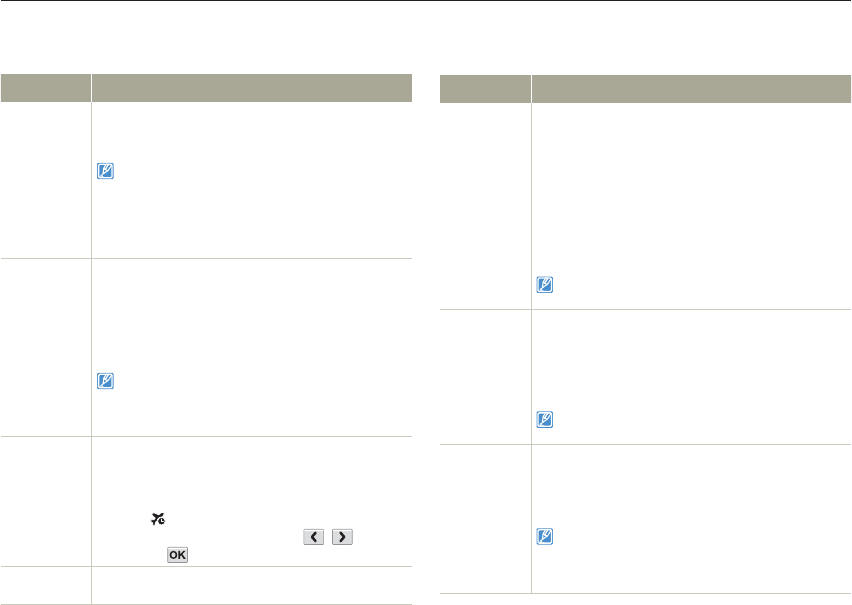
Digital Zoom
Set to increases the amount of zoom available with a
zoom lens.
Off*: Disables the digital zoom function. Only
optical zoom is available.
On: Enables higher digital zoom magnification.
•
•
When you use the digital zoom, the camcorder processes
the image digitally more than in the optical zoom mode.
As a result, the image resolution may deteriorate.
The top of the bar shows the
digital zooming zone.
The zooming zone appears
when you press the [T/W] button
or use the Zoom ( ) tab.
;PPNJOEJDBUPS
%JHJUBMSBOHF
0QUJDBMSBOHF
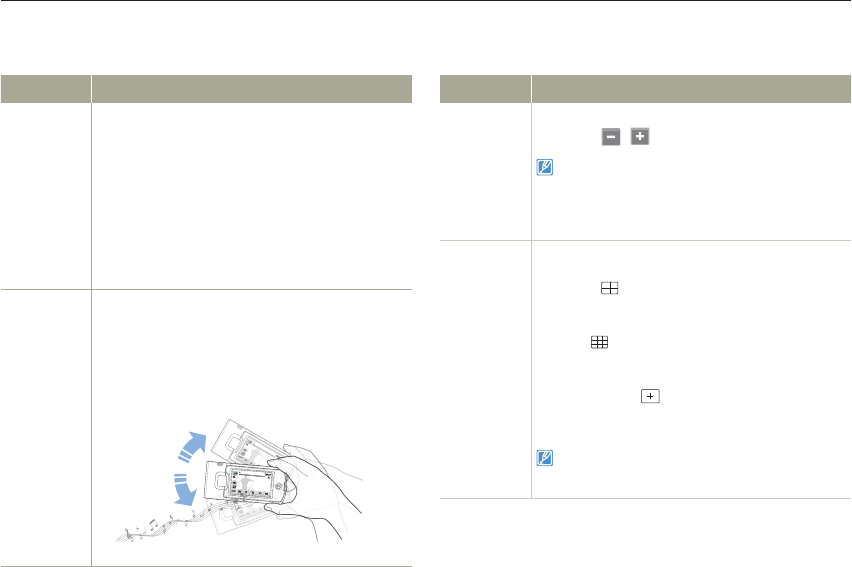
Shake It
Set to apply digital effects by shaking the camcorder.
Off*: Disables the Shake It function.
On: Enables to apply the digital effects in order
by shaking the camcorder in Art Film or Art Time
Lapse mode.
00:00:00 [253Min]
00:00:00 [253Min]
00 [253M
•
•
Playback
* : Default
Item Description
Thumbnail
Set the 3x3 or 4x4 type as the thumbnail view display.
3X3*: Displays the 3x3 type as the thumbnail view
display.
4X4: Displays the 4x4 type as the thumbnail view
display.
•
•
Video Play
Option
Set a specific playback style according to your
preference.
Play All* ( ): Plays video clips in succession
starting from the selected video to the last one,
then returns to the thumbnail view.
Play One ( ): Plays the selected video only, and
returns to the thumbnail view.
Repeat All ( ): Plays all the video clips
repeatedly until the Thumbnail view ( ) tab is
touched.
Repeat One ( ): Plays the selected video only
repeatedly until the Thumbnail view ( ) tab is
touched.
•
•
•
•
Smart BGM
Option
Set the desired background music to play back a
video with it.
The Flea Waltz*: Plays back The Flea Waltz.
Canon In D: Plays back Canon in D.
Cello Suite No.1: Plays back Cello Suite No.1.
Nocturne: Plays back Nocturne.
Random: Plays back from The Flea Waltz to
Nocturne randomly.
•
•
•
•
•
Shooting
* : Default
Settings menu
97
Settings
Item Description
Slide Show
Option
Set the playback options for a slide show.
Interval: Continuously plays back photos at the
interval you select. You can choose 1 sec. or 3
sec.
Music: Turns the background music on or off.
If the Music function is On when the slide show
starts, the 7 melodies will play back in shuffle
mode.
Effect: Continuously plays back photos using the
fade in/out effect to transition between photos.
•
•
•
Shake It
Set to play back the background music by shaking
the camcorder.
Off*: Disables the Shake It function.
On: Enables to play back the background music
by shaking the camcorder while a video is playing
back.
00:00:20/00:01:03 100_0001
0:
:00
0:00
0:0
0
0:
:00
0:0
00:00:20/00:01:03 100_0001
0:
0:
0
00
00
00
0
00
00
•
•
Display
* : Default
Item Description
LCD
Brightness
Set the brightness of the LCD screen.
Touch the / tab between 0 and 10.
If the surroundings are too bright, adjust the brightness
of the LCD screen.
Adjusting the LCD screen does not affect the image
you are recording.
A brighter LCD screen consumes more power.
•
•
•
Guideline
Set a grid to help you compose a scene.
Off*: Disables the function.
Cross ( ): Placing the subject at the center
cross point puts the subject in the middle of the
frame.
Grid ( ): For recording multiple subjects. Putting
subjects at or near the grid cross points creates a
balanced composition.
Safety Zone ( ): Positioning subjects within
the Safety Zone rectangle ensures they will be
recorded.
•
•
•
•
Positioning a subject at the cross point of a guideline
provides a balanced composition.
Guidelines are not recorded.
•
•
Playback
* : Default

Settings menu
98
Settings
Item Description
Date/Time
Display
Set to display the date and time on the camcorder’s
display.
Off*: Dose not display the current date/time
information.
Date: Displays the current date.
Time: Displays the current time.
Date & Time: Displays the current date and time.
•
•
•
•
The date/time will read JAN/01/2012 12:00 AM in
the following case:
- When the internal rechargeable battery is depleted.
The date and time displayed by this function depend
on the Date Type and Time Type settings.
page 100
•
•
TV Display
Set whether or not to display the camcorder’s On
Screen Display (OSD) on the TV screen.
Off: Displays the OSD menus only on the LCD
screen.
On*: Displays the OSD menus on the LCD screen
and the TV screen as well.
•
•
The menu screen, thumbnail display, and demo screens
are displayed on a TV even if you set TV Display to Off.
* : Default
Item Description
HDMI TV
Out
Set the HDMI video output to match the TV you have
connected the camcorder to.
Auto*: The video signals are output in the same
format as the recorded file. Use this setting only
when connecting to an HDTV.
480p: The recorded file is output in the 720x480p
format. Use this setting only when connecting
to a standard and analog TV which supports SD
(Standard Definition) progressive scan (480p)
signals through its HDMI jacks.
•
•
Auto LCD
Off
Set to darken the LCD screen for low power
consumption.
Off: Disables the function.
On*: When the camcorder is idle for more than 2
minutes in STBY mode, or for more than 5 minutes
when recording a video, the power saving mode
starts by dimming the LCD screen.
•
•
When the Auto LCD Off function is On, you can press
any button on the camcorder to return LCD brightness
to normal.
The Auto LCD Off function is Off in the following
cases:
- When the camcorder has a cable connection. (USB
cable, AC power adaptor, etc.)
- While the Demo function is in operation.
•
•
Display
* : Default

Settings menu
99
Settings
Connectivity
* : Default
Item Description
PC
Software
Set to launch the built-in editing software (Intelli-studio)
automatically when connecting the camcorder to your
PC.
Off: Disables the function.
On*: Launches Intelli-studio when connecting the
camcorder to your PC.
•
•
The PC Software function is not available in the
following conditions:
- If USB Connect is set to PictBridge
To enable the PC Software function, set USB
Connect to Mass Storage in the Setting menu.
The PC Software is compatible with the Windows
OS’s only.
•
•
•
USB
Connect
Select a mode to use when connecting the
camcorder to a PC or printer with a USB cable.
Mass Storage*: Connect to a PC to transfer
videos or photos. page 91
PictBridge: Connect to a PictBridge printer to
print photos directly (when using the PictBridge
function). page 84
•
•
Item Description
TV Connect
Guide
View the instructions before connecting the camcorder
to your TV set.
HDMI: Displays the HDMI guide.
Composite: Displays the Composite guide.
•
•
Anynet+
(HDMI-CEC)
Set to control some functions of the camcorder with a
Samsung’s TV remote control that supports Anynet+.
Off: Disables the function.
On*: Enables to operate some functions of
the camcorder with a TV remote control when
connecting the camcorder to a Samsung’s
Anynet+ supported TV
•
•
When you turn the camcorder on and connect it to
a Samsung’s Anynet+ supported TV with an HDMI
cable, the TV automatically turns on.
For details on the Anynet+ (HDMI-CEC) function, refer
to the user manual of Samsung’s Anynet+ supported
TV.
•
•
* : Default
Settings menu
100
Settings
* : Default
General
* : Default
Item Description
Card Info
View the storage information of the inserted storage
media such as used memory space and available
memory space.
The actual capacity may be less than the capacity
displayed on the LCD screen as the camcorder’s
system files occupy a part of the capacity.
If there is no storage media inserted, you cannot
select the Card Info function and it will look dim on the
menu.
•
•
File No.
Assign file names to the recorded images.
Series*: Assigns file numbers in sequence even
after you replace or format the storage media or
delete all files.
Reset: Resets the file number to 0001 after you run
format, delete all files or insert a new memory card.
•
•
When you set File No. to Series, each file is assigned
a different number to avoid duplicating file names. This
numbering scheme is very useful when you want to
manage your files on a PC.
Time Zone
Set the time zone for your location.
Home*: Select the Home function when using your
camcorder for the first time or returning the clock to
your hometown date/time.
Visit ( ): Select the Visit function when traveling
a different time zone. Touch the / tab, and
then the tab.
•
•
Date/Time
Set Set the date and time. page 25
Item Description
Date Type
Set a date format.
2012/01/01: Displays the date in the year/month
(two-digit)/day format.
JAN/01/2012*: Displays the date in the month/
day/year format.
01/JAN/2012: Displays the date in the day/month/
year format.
01/01/2012: Displays the date in the day/month
(two-digit)/year format.
•
•
•
•
This function depends on the Date/Time Display setting.
page 98
Time Type
Set a time format.
12 Hr*: Displays the time information in 12 hour
units.
24 Hr: Displays the time information in 24 hour
units.
•
•
This function depends on the Date/Time Display setting.
page 98
Beep Sound
Set whether or not to hear the beep sound.
Off: Disables the function.
On*: Turns on the beep sound to hear when
pressing buttons or touching tabs.
•
•
The Beep Sound function is disabled in the following cases:
- During recording and playing
- When the camcorder has a cable connection. (Audio/
Video cable, mini HDMI cable, etc.)

Settings menu
101
Settings
Item Description
Shutter
Sound
Set whether or not to hear the shutter sound.
Off: Disables the function.
On*: Turn on the shutter sound to hear when
taking a photo with the [Recording start/stop]
button.
•
•
The Shutter Sound function is disabled in the following
cases:
- When the camcorder has a cable connection. (Audio/
Video cable, mini HDMI cable, etc.)
Auto Power
Off
Set the camcorder to automatically turn off when
performing no operations for 5 minutes.
Off*: Disables the function.
5 Min: Turns off the camcorder when performing
no operations for 5 minutes.
•
•
The Auto Power Off function does not work in the
following situations:
- When the camcorder has a cable connection. (USB
cable, AC power adaptor, etc.)
- While the Demo function is in operation.
- While you are recording (including the recording
pause), playing (except pause), or running a photo
slide show.
To turn the camcorder on again, close the LCD
screen and then open it.
•
•
Item Description
Quick On
STBY
Use to reduce energy consumption and battery drain
when recording frequently for an extended time.
Off*: Turns off the camcorder by closing the LCD
screen.
5 Min: Starts the Quick On STBY mode by closing
the LCD screen after a short period of time. After 5
minutes in Quick On STBY mode, the camcorder
turns off.
•
•
We recommend turning off the camcorder after use
to reduce energy consumption. However, as an
alternative, you can use the Quick On STBY function
under most shooting conditions to reduce energy
consumption effectively.
The charging indicator keeps blinking in Quick On
STBY mode.
The Quick On STBY mode is not available under the
following conditions:
- When the LCD screen is open.
- When operating the buttons on the camcorder.
- While recording.
•
•
•
Switch Grip
Set to use the camcorder conveniently with either
your right or left hand.
Off : Disables the function.
On* : Uses the camcorder easily with both your
hands.
•
•
When you change the Switch Grip direction while
recording, the recording may be temporarily interrupted.
* : Default
General
* : Default

Settings menu
102
Settings
Item Description
Format
Use to delete all files completely of correct problems
on the storage media.
Do not remove the storage media or perform any
other operation (such as turning off the power)
during formatting. Also, be sure to use the provided
AC power adaptor, as the storage media may be
corrupted if the battery becomes exhausted during
formatting.
If the storage media becomes corrupted, format it
again.
•
•
Do not format the storage media on a PC or other
device. Make sure to format the storage media on this
camcorder.
You cannot format a memory card with the protection
tab set to lock. page 17
If there is no storage media inserted, you cannot
select the Format function, and its name will be
dimmed on the menu.
Formatting completely deletes all files and options on
a memory card, including protected files. By deleting
all files and options, formatting typically corrects
problems, enabling stable read/write speeds and
operation.
•
•
•
•
Item Description
Default Set
Reset all menu settings to the default conditions
(factory settings).
Touch Yes if you want all the settings returned to the
defaults.
Do not turn off the power while using this function.
Initializing the camcorder settings to factory defaults
does not affect recorded images.
•
•
Language Select the language the camcorder uses to display
the menu and messages. page 26
Demo
Show the major demo functions for the camcorder.
Off: Disables the function.
On*: Enables the Demo function.
•
•
The Demo mode is canceled in the following cases:
- If the LCD screen is touched.
- If you press any button (Recording start/stop,
Home ( ), etc.). However, the camcorder enters
the Demo mode automatically after 5 minutes in STBY
mode if it is idle for 5 minutes without an operation. If
you don’t want the Demo function to start, set Demo to
Off.
The Demo function does not work in the following case:
- If you set Auto Power Off to 5 Min and you are using
the battery to power the camcorder, the Auto Power
Off function turns the camcorder off before the Demo
function runs.
* : Default
General
* : Default

Appendixes
Get information about error messages, maintenance, and
specifications.
Troubleshooting ................................................................ 104
Warning icons and messages ............................................... 104
Symptoms and solutions ....................................................... 110
Maintenance ...................................................................... 117
Using your camcorder abroad .......................................... 119
Glossary ............................................................................ 120
Specifications .................................................................... 121

104
Appendixes
Troubleshooting
Warning icons and messages
Problems may occur because of the following reasons. Check the information and take corrective action.
Battery
Message Icon Informs that... Action
Low Battery -The battery is almost discharged. Replace with a charged battery or connect the AC
power adaptor.
•
Check authenticity
of the battery. -The battery cannot pass authenticity check.
Check whether the battery is authentic. If not,
change to an authentic Samsung battery.
We recommend you use only genuine Samsung
batteries in this camcorder.
•
•
Storage media
Message Icon Informs that... Action
Insert Card There is no memory card inserted in the memory card
slot. Insert a memory card.•
Card Full There is not enough space to record on the memory
card.
Delete unnecessary files from the memory card.
Back-up files to a PC or another storage media,
and then delete unneeded files.
Replace the memory card with another card that
has enough free space.
•
•
•
Card Locked The write protection tab on an SD or SDHC card has
been set to lock. Release the write protection tab.•
Before contacting a Samsung authorized service center, perform the following simple checks.
They may save you the time and expense of an unnecessary call.

Troubleshooting
105
Appendixes
Storage media
Message Icon Informs that... Action
Card Error The memory card has a problem and the camcorder
cannot recognize it. Replace the memory card with another card.•
Not Formatted The memory card is not formatted in this camcorder. Format the memory card using this camcorder.•
Not Supported
Format
The memory card may have been formatted by
another device and may still have existing images on
it.
Files cannot be played as the memory card format
is not supported by the camcorder.
Format the card using the camcorder or replace
the card with a card formatted correctly.
•
•
Not Supported Card The memory card is not supported in this camcorder. Replace the memory card with a recommended
card.
•
Low Speed Card.
Please record at a
lower resolution.
-The memory card is not fast enough to record at this
resolution.
Record video at a lower resolution and quality.
Replace memory card with a faster card.
•
•
Recording
Message Icon Informs that... Action
Write Error -Some problem occurred while writing data to storage
media.
Turn the camcorder's power off and on for data
recovery.
If a file is not recovered, use the camcorder
to format the storage media after backing up
important files to a PC or another storage media.
•
•
Recovering Data…
Don’t power off and
keep card inside.
-The file was not created normally.
Wait until data recovery is finished.
Never turn off the power or eject memory card
during recording.
•
•

Troubleshooting
106
Appendixes
Recording
Message Icon Informs that... Action
The limit of video
files is reached.
Cannot record
video.
-The number of video files that can be stored is 9,999.
Delete unnecessary files from the storage media.
Back up files to your PC or another storage media
and delete files.
Change to another card which has enough free
space.
Set File No. to Reset.
Format the storage media.
•
•
•
•
•
The limit of photo
files is reached.
Cannot take a
photo.
-The number of photo files that can be stored is 9,999.
Delete unnecessary files on the storage media.
Back up files to your PC or another storage media
and delete files.
Change to another card which has enough free
space.
Set File No. to Reset.
Format the storage media.
•
•
•
•
•
File Limit is reached.
Cannot record
video.
-Folder and file number have reached the maximum
number and you cannot record.
Set File No. to Reset and format the storage
media. Remember to back up important files before
formatting.
•
File Limit is reached.
Cannot take a
photo.
-Folder and file number have reached the maximum
number and you cannot record.
Set File No. to Reset and format the storage
media. Remember to back up important files before
formatting.
•
Check the lens
cover Lens cover is closed. Open the lens cover.•

Troubleshooting
107
Appendixes
Playback
Message Icon Informs that... Action
Read Error -A problem has occurred while the camcorder was
reading data from the storage media.
Use the camcorder to format the storage media
after backing up important files to a PC or another
storage device.
•
Corrupted file -This file cannot be read.
Use the camcorder to format the storage media
after backing up important files to a PC or another
storage device.
•
Editing videos
Message Icon Informs that... Action
Cannot select
different resolution. -The files you want to combine have different
resolutions.
You cannot combine files that have different
resolutions.
•
Not enough free
space in Card. -You cannot edit due to insufficient space on memory
card. Edit after deleting unnecessary files.•
Select 2 files for
combine. -Only two files can be combined.
Combine two files first, and then combine the
resulting file with an additional file. Note that
you cannot combine files if the total size of the
combined files exceeds 1.8GB.
•
Total file size is over
than 1.8GB. -The files whose total size is likely to exceed 1.8GB
cannot be combined.
Perform a divide or partial delete function first to
delete unnecessary parts of the files, and then
perform the combine function.
•

Troubleshooting
108
Appendixes
USB
Message Icon Informs that... Action
Fail Printer
Connecting
Change 'USB
Connect'
-A problem occurred when connecting the camcorder
via USB to a printer.
Check the USB cable.
Try the connection procedure again.
Switch USB connect function to PictBridge.
•
•
•
Fail USB
Connecting
Change 'USB
Connect'
-A problem occurred when connecting the camcorder
via USB to a PC.
Check the USB cable.
Try the connection procedure again.
Switch USB connect function to Mass Storage.
•
•
•
Ink Error -There is a problem with an ink cartridge. Check the ink cartridge.
Put a new ink cartridge into the printer.
•
•
Paper Error -There is a problem with the paper. Check the paper in the printer. If there is no paper,
insert paper.
•
File Error -There is a problem with the file. Your camcorder does not support this file format.
Try another file recorded on your camcorder.
•
•
Printer Error -There is a problem with the printer. Turn the printer’s power off and on.
Contact the printer manufacturer’s service center.
•
•
Print Error -A problem occurred during printing. Do not remove power source or eject memory card
during printing.
•

Troubleshooting
109
Appendixes
Wireless Network
Message Icon Informs that... Action
Connection failed. -Camcorder’s WLAN configuration does not match to
that of AP.
Configure the IP settings (auto or manual) of your
camcorder to match the AP’s.
•
No devices found. -No renderer that can be connected to the camcorder
is found in the connected network.
Use the Refresh ( ) tab to search for the
renderer.
Check your network connection.
•
•
No Wi-Fi AP found. -No available AP is found around you or the camcorder’
s WLAN is not working properly.
Check whether an AP is available near you.
If an available AP does exist and the problem
persists, contact Samsung Service Center.
•
•
File reception failed. -Device on the other end is turned off or network
connection has problem.
Check if recipient’s device is turned on.
Check if network connection works properly and
try again.
•
•

Troubleshooting
110
Appendixes
Symptoms and solutions
If these instructions do not solve your problem, contact your nearest Samsung authorized service center.
Power
Symptom Explanation/Solution
The camcorder does not turn on.
The battery may not be installed in your camcorder. Insert the battery into the camcorder.
The inserted battery may be discharged.
Charge the battery or replace it with a charged one.
If you use the AC power adaptor, make sure it is properly connected to a wall outlet.
•
•
•
The power turns off automatically.
Is Auto Power Off set to 5 Min? If no button is pressed for about 5 minutes, the camcorder
is automatically turned off (Auto Power Off). To disable this option, change the setting of
Auto Power Off to Off. page 101
The battery is almost exhausted. Charge the battery or replace it with a charged one.
•
•
The power cannot be turned off. Remove the battery or unplug the AC power adaptor, and connect the power supply to the
camcorder again before turning it on.
•
The battery discharges quickly.
The temperature is too low.
The battery is not fully charged. Charge the battery again.
The battery has reached the end of its lifespan and cannot be recharged. Use another
battery.
•
•
•
Display
Symptom Explanation/Solution
The TV screen or LCD display has distorted
images or has stripes at the top/bottom or on
the left/right.
This can occur when recording or viewing a 16:9 ratio image on a 4:3 ratio TV, or vice versa.
For more details, see the display specification. page 82
•
Unknown image appears on the LCD screen. The camcorder is in Demo mode. If you do not want to see Demo images, change the
setting Demo to Off. page 102
•

Troubleshooting
111
Appendixes
Display
Symptom Explanation/Solution
Unknown icon appears on the screen. A warning icon or message appears on the screen. pages 104~109•
An afterimage remains on the LCD screen. This occurs if you disconnect the AC power adaptor or remove the battery before turning the
power off.
•
The image on the LCD screen looks dark. Ambient light is too bright. Adjust the brightness and angle of the LCD.•
Recording
Symptom Explanation/Solution
Pressing the [Recording start/stop] button
does not start recording.
Set your camcorder to the recording mode. page 37
There is not enough free space to record on the storage media.
Check if memory card is not inserted or write-protect tab is set to lock.
•
•
•
The actual recording time is less than the
estimated recording time.
The estimated recording time may vary depending on content and features used.
When you record an object that moves fast, the actual recording time may be shortened.
•
•
The recording stops automatically.
There is no more free space for recording on the storage media. Back up important files on
your PC and format the storage media or delete the unnecessary files.
If you make recordings or delete files frequently, the performance of the storage media
deteriorates. If this occurs, format the storage media again.
If you use a memory card with low writing speed, the camcorder automatically stops
recording videos and a corresponding message appears on the LCD screen.
•
•
•
When recording a subject illuminated by bright
light, a vertical line appears. This is not a malfunction.•
When the screen is exposed to direct sunlight
during recording, the screen becomes red or
black for an instant.
This is not a malfunction.•

Troubleshooting
112
Appendixes
Recording
Symptom Explanation/Solution
During recording, the date/time does not
display. Date/Time Display is set to Off. Set the Date/Time Display to On. page 98•
You cannot record a photo image.
Set your camcorder to the photo recording mode. page 41
Release the lock on the write-protection tab of the memory card if any.
The storage media is full. Use a new memory card or format the storage media.
page 102 Or remove unnecessary images. page 63
•
•
•
You don’t hear the shutter sound when you
record a photo image.
Set Shutter Sound to On.
When the Mini HDMI cable or Audio/Video cable is connected to the camcorder, the Shutter
Sound is not available.
•
•
You don’t hear the beep sound.
Set Beep Sound to On.
Beep sound is temporally off while recording videos.
When the Mini HDMI cable or Audio/Video cable is connected to the camcorder, the Beep
Sound is not available.
•
•
•
There is a time difference between the point
where you press the [Recording start/stop]
button and the point where the recorded video
starts/stops.
On your camcorder, there may be a slight time delay between the point when you press the
[Recording start/stop] button and the actual point where the recorded video starts/stops.
This is not an error.
•
Horizontal stripes appear on the images. This occurs when recording images under a fluorescent lamp, sodium lamp, or mercury
lamp. This is not a malfunction.
•

Troubleshooting
113
Appendixes
Storage Media
Symptom Explanation/Solution
Memory card functions do not operate.
Insert a memory card into your camcorder properly. page 16
If you use a memory card formatted on a computer, format it again directly on your
camcorder. page 102
•
•
Image cannot be deleted.
Release the lock on the write-protect tab of the memory card (SDHC/SD memory card), if
any. page 17
You cannot delete a protected images. Release protection of the image using the Protect
function. page 65
•
•
You cannot format the memory card.
Release the lock on the write-protect tab of the memory card (SDHC/SD memory card), if
any. page 17
The memory card is not supported on your camcorder or card has some problems.
•
•
The data file name is not indicated correctly.
The file may be corrupted.
The file format is not supported by your camcorder.
Only the file name is displayed if the directory structure complies with the international
standard.
•
•
•
Adjusting the image during recording
Symptom Explanation/Solution
Focus does not adjust automatically.
Set Focus to Auto. (Video recording mode only) page 48
The recording conditions are not suitable for auto focus. Adjust the focus manually. (Video
recording mode only) page 48
The lens is dusty on the surface. Clean the lens and check the focus.
Recording is being made in a dark location. Use a light to brighten the area.
•
•
•
•

Troubleshooting
114
Appendixes
Adjusting the image during recording
Symptom Explanation/Solution
Image’s color balance is not natural. The white balance is incorrect. Set the proper White Balance. page 45•
A subject passing quickly through the frame
appears distorted.
This is called the focal plane phenomenon. This is not a malfunction. Because of the way
the image device (CMOS sensor) reads out video signals, a subject passing through a frame
rapidly may appear to bend, depending on the recording conditions.
•
Playback on your camcorder
Symptom Explanation/Solution
Playback (playback/pause) function does not
work.
Image files recorded using another device may not play back on your camcorder.
Check memory card compatibility. page 17
•
•
Photo images stored on a storage media are
not displayed in the actual size.
Photo images recorded on other devices may not appear in their actual size. This is not an
error.
•
Playback is interrupted unexpectedly. Check if the AC power adaptor or battery back is properly connected and secure.•
Playback on other devices (TV, etc.)
Symptom Explanation/Solution
You cannot view the image on or hear the
sound from the connected device. Make sure that the connection cable is connected to the proper jack.•
The image appears distorted on a TV. This phenomenon is caused by connecting to a TV with 4:3 aspect ratio.•
You cannot view the image on or hear the
sound from a TV connected using the HDMI
cable.
The camcorder cannot output Images from the HDMI jack if the material is copyright
protected.
•

Troubleshooting
115
Appendixes
Connecting/Dubbing with other devices (Recorder, PC, Printer, etc.)
Symptom Explanation/Solution
You cannot dub correctly using the HDMI
cable. You cannot dub images using the HDMI cable.•
You cannot dub correctly using the Audio/
Video cable.
The Audio/Video cable is not connected properly. Make sure that the Audio/Video cable is
connected to the proper jack, i.e. to the input jack of the device used for dubbing images
from your camcorder. page 83
•
Your PictBridge printer cannot print photos
from your camcorder.
Your printer may not print images edited on a computer or recorded using other devices.
This is not an error.
•
Connecting to a computer
Symptom Explanation/Solution
Your computer does not recognize your
camcorder.
Disconnect the USB cable from the computer and camcorder, restart the computer, and
then connect the USB cable again correctly.
•
Cannot play back a video file properly on a
PC.
You need a video codec to play back the file recorded on your camcorder. Install the
software provided with your camcorder. page 87
Make sure you insert the connector in the correct direction, and connect the USB cable to
the micro USB jack on your camcorder firmly.
Disconnect the cable from the computer and camcorder, restart the computer, and then
connect the cable again properly.
To play back an HD video file, you need a computer with better specifications.
Use a computer with the recommended specifications. page 86
•
•
•
•
Intelli-studio does not function properly. Exit the Intelli-studio application, and restart the Windows computer.•
Intelli-studio does not start. Set PC Software to On in the Settings menu or install Intelli-studio on the computer.
pages 87, 99
•

Troubleshooting
116
Appendixes
Connecting to a computer
Symptom Explanation/Solution
Your computer is not playing videos, images,
or sound located on your camcorder properly.
Video playback or sound may stop temporarily depending on your computer. The video or
sound copied to your computer is not affected.
If your camcorder is connected to a computer that does not support Hi-speed USB (micro
USB 2.0), the image or sound may not play back correctly. Images, video, and sound
copied from the camcorder to your computer are not affected.
•
•
The playback screen is paused or distorted.
Check the system requirements to play a video.
Shut down all other applications currently running on the computer.
If you play back a video on your camcorder when it is connected to a computer, the video
may not play back smoothly on the computer, depending on the transfer speed. Please
copy the file to your PC, and then play it back.
•
•
•
Overall operations
Symptom Explanation/Solution
The date and time are incorrect. Has the camcorder been left unused for a long period of time?
The backup internal rechargeable battery may be discharged. page 25
•
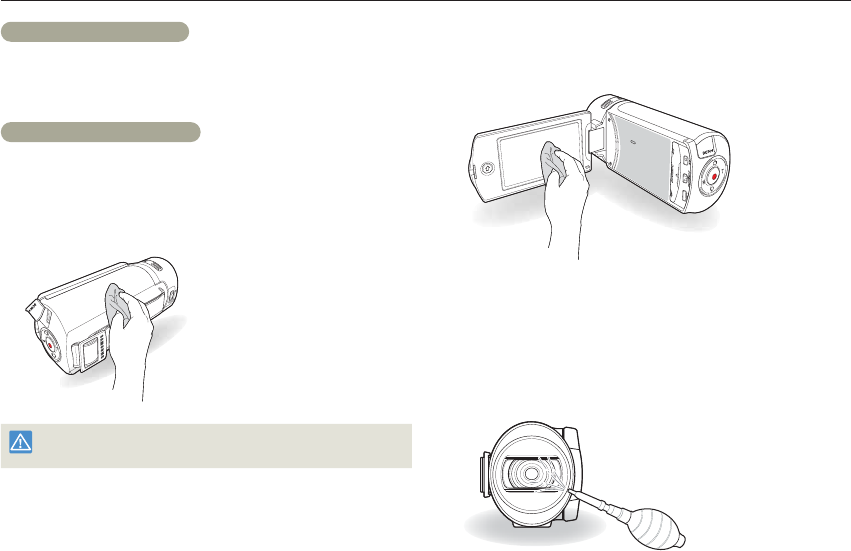
117
Appendixes
Maintenance
Cautions when storing
For safekeeping of the camcorder, turn off the camcorder.
- Remove the battery.
- Remove the memory card.
Cleaning the camcorder
Before cleaning, turn off the camcorder and remove the battery.
To clean the exterior
- Wipe gently with a soft dry cloth. Do not apply excessive force
when cleaning. Gently rub the surface.
Do not use benzene or thinner to clean the camcorder. The exterior
coating could peel off or the case could deteriorate.
•
•
To clean the LCD screen
Wipe very gently with a soft dry cloth. Be careful not to damage the
screen.
To clean the lens
Use a blower brush to remove dust, and then wipe the lens gently
with a soft cloth.
If necessary, wipe gently with lens paper or tissue.
- Mold may form if the lens is left dirty.
- If the lens looks dim, turn off the camcorder and leave it off for
about 1 hour.
•
•

Maintenance
118
Appendixes
LCD screen
To prolong its service life, do not rub the LCD screen with a coarse
cloth.
Be aware of the following LCD screen phenomena. They are not
malfunctions.
- When you use the camcorder, the surface around the LCD
screen may heat up.
- If you leave the power on for a long time, the surface around the
LCD screen becomes hot.
- When using the camcorder in cold conditions, an afterimage
may appear on the LCD screen.
An LCD screen is manufactured using advanced technology
which creates screens with pixel failure rates of less than 0.01%.
However, a black or bright spot (red, blue, white) may appear in the
center of the LCD screen and up to two spots may appear outside
the center. These spots, which are normally incurred during the
manufacturing process, do not affect the recorded images.
•
•
•
When there is dew condensation, put the camcorder aside
for a while before using
What is dew condensation?
Dew condensation happens when a camcorder is moved to a
location where there is a significant temperature difference from the
previous location. The dew condenses on the external or internal
parts of the camcorder, and on the reflection lens. If there is dew on
or in your camcorder, it may cause the camcorder to malfunction or
damage the camcorder when you turn the power on.
Exactly when does dew condensation occur?
When you move the camcorder to a location with a higher
temperature than the previous location, or when you move it to a hot
area suddenly. Examples:
- You record outside in cold weather during the winter and then
move the camcorder in indoors.
- You record outside in hot weather after being indoors or inside a
car where the A/C was running.
What can I do?
- Turn the power off, detach the battery, and leave the camcorder in
a dry area for 1~2 hours before using it.
•
•
•
Use the camcorder only after dew condensation has completely
disappeared.
Be sure to use the recommended accessories supplied with the
camcorder. For service, contact your nearest Samsung authorized
service center.
•
•

119
Appendixes
Power sources
The AC adaptor provided lets you power, recharge, and use your
camcorder in any country/region that has AC power in the 100 V to
240 V, 50/60 Hz range. You may need a commercially available AC
plug adaptor depending on the design of local wall outlets.
On TV color systems
Your camcorder is an NTSC based camcorder. If you want to view
your recordings on a TV or copy them to an external device, it must
be an NTSC based TV or external device and have the appropriate
Audio/Video jacks. Otherwise, you may need to use a separate video
format transcoder (For example, an NTSC to PAL format converter).
The format transcoder is not provided by Samsung.
NTSC-compatible countries/regions
Bahamas, Canada, Central America, Japan, Korea, Mexico,
Philippines, Taiwan, United States of America, etc.
PAL-compatible countries/regions
Australia, Austria, Belgium, Bulgaria, China, CIS, Czech Republic,
Denmark, Egypt, Finland, France, Germany, Greece, Great Britain,
Holland, Hong Kong, Hungary, India, Iran, Iraq, Kuwait, Libya,
Malaysia, Mauritius, Norway, Romania, Saudi Arabia, Singapore,
Slovak Republic, Spain, Sweden, Switzerland, Syria, Thailand,
Tunisia, etc.
You can make recordings with your camcorder and view pictures
on the LCD screen anywhere in the world.
Using your camcorder abroad
Each country or region has its own electric and color systems. Before using your camcorder abroad, check the following items.

120
Appendixes
AF (Auto Focus)
A system that automatically focuses the camcorder lens on the subject. Your camcorder
uses the contrast to focus automatically.
Aperture
The aperture controls the amount of light that reaches the camcorder’s sensor.
Camcorder shake (Blur)
If the camcorder is moved while the shutter is open, the entire image may appear blurred.
This occurs more often when the shutter speed is slow. Prevent camcorder shake by
raising the sensitivity, using a faster shutter speed. Alternately, use a tripod, the DIS or OIS
function to stabilize the camcorder.
Composition
Composition in photography means arranging objects in a photo. Usually, abiding by the
rule of thirds leads to a good composition.
Complementary Metal-Oxide-Semiconductor (CMOS)
CMOS is an image sensor producing images approaching the quality of CCD (charge
coupled device) sensors. It consumes less power, meaning a longer battery life on your
camcorder.
Digital zoom
A feature that artificially increases the amount of zoom available with zoom lens (Optical
zoom). When using the Digital zoom, the image quality will deteriorate as the magnification
increases.
Effective Pixel Count
Unlike the total pixel count, this is the actual number of pixels used to capture an image.
EV (Exposure Value)
All the combinations of the camcorder’s shutter speed and lens aperture that result in the
same exposure.
Exposure
The amount of light allowed to reach the camcorder’s sensor. Exposure is controlled by a
combination of the shutter speed, the aperture value, and ISO sensitivity.
Focal length
The distance from the middle of the lens to its focal point (in millimeters). Longer focal
lengths result in narrower angles of view and the subject is magnified. Shorter focal
lengths result in wider angles of view.
F. No (F-Number)
The f-number defines the brightness of lens. Smaller number lens has generally brighter
image. The f-number is directly proportional to the focal length and inversely proportional
to the lens diameter.
*F.No=focal length/diameter of lens aperture
MPEG-4 AVC/H.264
MPEG-4 AVC/H.264 defines the latest video coding format standardized by the ISO-IEC
and the ITU-T, in 2003. Compared with the conventional MPEG-2 format, MPEG-4 AVC/
H.264 has more than twice the efficiency. Your camcorder employs MPEG-4 AVC/H.264
to encode high definition videos.
Optical zoom
This is a general zoom which can enlarge images with a lens and does not deteriorate
quality of images.
Quality
An expression of the rate of compression used in a digital image. Higher quality images
have a lower rate of compression, which usually results in a larger file size.
Resolution
The number of pixels present in a digital image. High resolution images contain more
pixels and typically show more detail than low resolution images.
Shutter speed
Shutter speed refers to the amount of time it takes to open and close the shutter, and it
is an important factor in the brightness of a photo, as it controls the amount of light which
pass through the aperture before it reaches the image sensor. A fast shutter speed allows
less time to let light in and the photo becomes darker and more easily freezes subjects in
motion.
Tele Macro
This feature allows you to capture close-up images of very small objects. When using the
Tele Macro feature, the camcorder can maintain a sharp focus on small objects at a near
life-size ratio (1:1).
White balance (color balance)
An adjustment of the intensities of colors (typically the primary colors red, green, and
blue), in an image. The goal of adjusting the white balance, or color balance, is to correctly
render the colors in an image.
Glossary

121
Appendixes
Specifications
Model name
HMX-Q20BN
HMX-Q200BN
HMX-QF20UN
System
Video signal NTSC
Picture compression format H.264 (MPEG-4.AVC)
Audio compression format AAC (Advanced Audio Coding)
Image device 1/4” CMOS
Effective pixels 1.75 mega pixels
Total pixels 5.1 mega pixels
Lens F1.8 ~ F3.9, X20 Optical Zoom, X40 Digital Zoom
Focal length 2.6mm ~ 52mm
Wireless networking protocol WiFi (802.11b/g/n)
LCD screen Size/dot number 2.7” Wide Touch LCD / 230k
LCD screen method TFT LCD
Connectors
Composite output 1Vp-p (75 terminated)
HDMI output D type connector
USB output micro USB 2.0
General
Power source DC 5 V, Lithium Ion battery 3.7 V
Power source type Lithium Ion battery, Power supply (100 V ~ 240 V) 50/60 Hz
Power consumption 3.0W (LCD on)
Operating temperature 32 ˚F ~ 104 ˚F (0 ˚C ~ 40 ˚C)
Operating humidity 40% ~ 60%
Storage temperature -4 ˚F ~ 140 ˚F (-20 ˚C ~ 60 ˚C)
Storage media Memory card (SD/SDHC) (not supplied)
External dimensions (W x H x D) Approx. 42.8mm (1.69 inches) x 52.45mm (2.06 inches) x119mm (4.69 inches)
Weight Approx. 170g (0.37 lb, 6 oz) (Except for Lithium Ion battery)
Internal MIC Omni-directional stereo microphone
Ú The technical specifications and design may be changed without notice.

FCC ID : A3LHMXQF20BN
This device complies with part 15 of the FCC Rules. Operation is subject to the following two conditions: (1) This device
may not cause harmful interference, and (2) this device must accept any interference received, including interference that
may cause undesired operation.
Caution:
Any changes or modifications in construction of this device which are not expressly approved by the party responsible for compliance could void
the user’s authority to operate the equipment.
Note:
This equipment has been tested and found to comply with the limits for a Class B digital device, pursuant to part 15 of the FCC Rules. These
limits are designed to provide reasonable protection against harmful interference in a residential installation This equipment generates, uses and
can radiate radio frequency energy and, if not installed and used in accordance with the instructions, may cause harmful interference to radio
communications, However, there is no guarantee that interference will not occur in a particular installation. If this equipment does cause harmful
interference to radio or television reception, which can be determined by turning the equipment off and on, the user is encouraged to try to
correct the interference by one or more of the following measures:
- Reorient or relocate the receiving antenna.
- Increase the separation between the equipment and receiver.
- Connect the equipment into an outlet on a circuit different from that to which the receiver is connected.
- Consult the dealer or an experienced radio/TV technician for help.
Operation is subject to the following two conditions:
(1) This device may not cause harmful interference, and
(2) This device must accept any interference received, including interference that may cause undesired operation.
Caution:
Any changes or modifications to the equipment not expressly approved by the party responsible for compliance could void user’s authority to
operate the equipment.

FCC ID : A3LHMXQF20BN
FCC RF Radiation Exposure Statement: This equipment complies with FCC RF Radiation exposure limits set forth for
an uncontrolled environment. This device and its antenna must not be co-located or operating in conjunction with any
other antenna or transmitter.
RF du FCC d'exposition aux radiations: Cet équipement est conforme à l'exposition de la FCC rayonnements RF limites
établies pour un environnement non contrôlé. Cet appareil et son antenne ne doivent pas être co-localisés ou fonctionnant
en conjonction avec une autre antenne ou transmetteur.
IC ID : 649E-HMXQF20BN
Operation is subject to the following two conditions: (1) this device may not cause interference, and (2) this device must
accept any interference, including interference that may cause undesired operation of the device.
Le présent appareil est conforme aux CNR d'Industrie Canada applicables aux appareils radio exempts de licence.
L'exploitation est autorisée aux deux conditions suivantes : (1) l'appareil ne doit pas produire de brouillage, et
(2) l'utilisateur de l'appareil doit accepter tout brouillage radioélectrique subi, même si le brouillage est susceptible d'en
compromettre le fonctionnement.

Warranty
SAMSUNG
LIMITED WARRANTY
SAMSUNG Electronics America Inc. (SEA), warrants that this product is free from defective material and workmanship.
SEA further warrants that if product fails to operate properly within the specified warranty period and the failure is due to improper workmanship or
defective material, SEA will repair or replace the product at it’s option.
All warranty repairs must be performed by a SEA authorized service center. The name and address of the location nearest you can be obtained by
calling toll free: 1-800 SAMSUNG (1-800-726-7864).
Labor
1 year carry-in
Parts
1 year
On carry-in models, transportation to and from the service center is the customer’s responsibility.
The original dated sales receipt must be retained by the customer and is the only acceptable proof of purchase.
It must be presented to the authorized service center.
EXCLUSIONS (WHAT IS NOT COVERED)
This warranty does not cover damage due to accident, fire, flood and/or other acts of God; misuse, incorrect line voltage, improper installation,
improper or unauthorized repairs, commercial use, or damage that occurs in shipping.
Exterior and interior finish, lamps, and glass are not covered under this warranty.
Customer adjustments which are explained in the instruction manual are not covered under the terms of this warranty.
This warranty will automatically be voided for any unit found with a missing or altered serial number. This warranty is valid only on products
purchased in the United States and Puerto Rico.
Some States do not allow the exclusions or limitations of incidental or consequential damages, or allow limitations on how long an implied warranty
lasts, so the above limitations or exclusions may not apply to you.
This warranty gives you specific legal rights, and you may also have other rights which vary from State to State.

Correct disposal of batteries in this product
(Applicable in the European Union and other
European countries with separate battery return
systems)
This marking on the battery, manual or packaging
indicates that the batteries in this product should
not be disposed of with other household waste at the end of their
working life. Where marked, the chemical symbols Hg, Cd or Pb
indicate that the battery contains mercury, cadmium or lead above the
reference levels in EC Directive 2006/66. If batteries are not properly
disposed of, these substances can cause harm to human health or
the environment.
To protect natural resources and to promote material reuse, please
separate batteries from other types of waste and recycle them through
your local, free battery return system.
Correct Disposal of This Product
(Waste Electrical & Electronic Equipment)
(Applicable in the European Union and other
European countries with separate collection systems)
This marking shown on the product or its literature,
indicates that it should not be disposed with other
household wastes at the end of its working life.
To prevent possible harm to the environment or human health from
uncontrolled waste disposal, please separate this from other types of
wastes and recycle it responsibly to promote the sustainable reuse of
material resources. Household users should contact either the retailer
where they purchased this product, or their local government office,
for details of where and how they can take this item for environmentally
safe recycling. Business users should contact their supplier and check
the terms and conditions of the purchase contract. This product should
not be mixed with other commercial wastes for disposal.

RoHS compliant
Our product complies with “The Restriction Of the use of certain Hazardous Substances in electrical and electronic equipment”,
and we do not use the 6 hazardous materials- Cadmium (Cd), Lead (Pb), Mercury (Hg), Hexavalent Chromium (Cr +6), Poly
Brominated Biphenyls (PBBs), Poly Brominated Diphenyl Ethers (PBDEs)- in our products.
QUESTIONS OR COMMENTS?
COUNTRY CALL OR VISIT US ONLINE AT WRITE
IN THE US 1-800-SAMSUNG
(726-7864) www.samsung.com Samsung Electronics America, lnc.
85 Challenger Road Ridgefield Park, NJ 07660-2112