Samsung Electronics Co HTBD8200 HOME THEATER SYSTEM User Manual HT BD8200 XAA 0530 1 indd
Samsung Electronics Co Ltd HOME THEATER SYSTEM HT BD8200 XAA 0530 1 indd
Contents
- 1. USERS MANUAL 1
- 2. USERS MANUAL 2
- 3. USERS MANUAL 3
USERS MANUAL 2
30
Connections
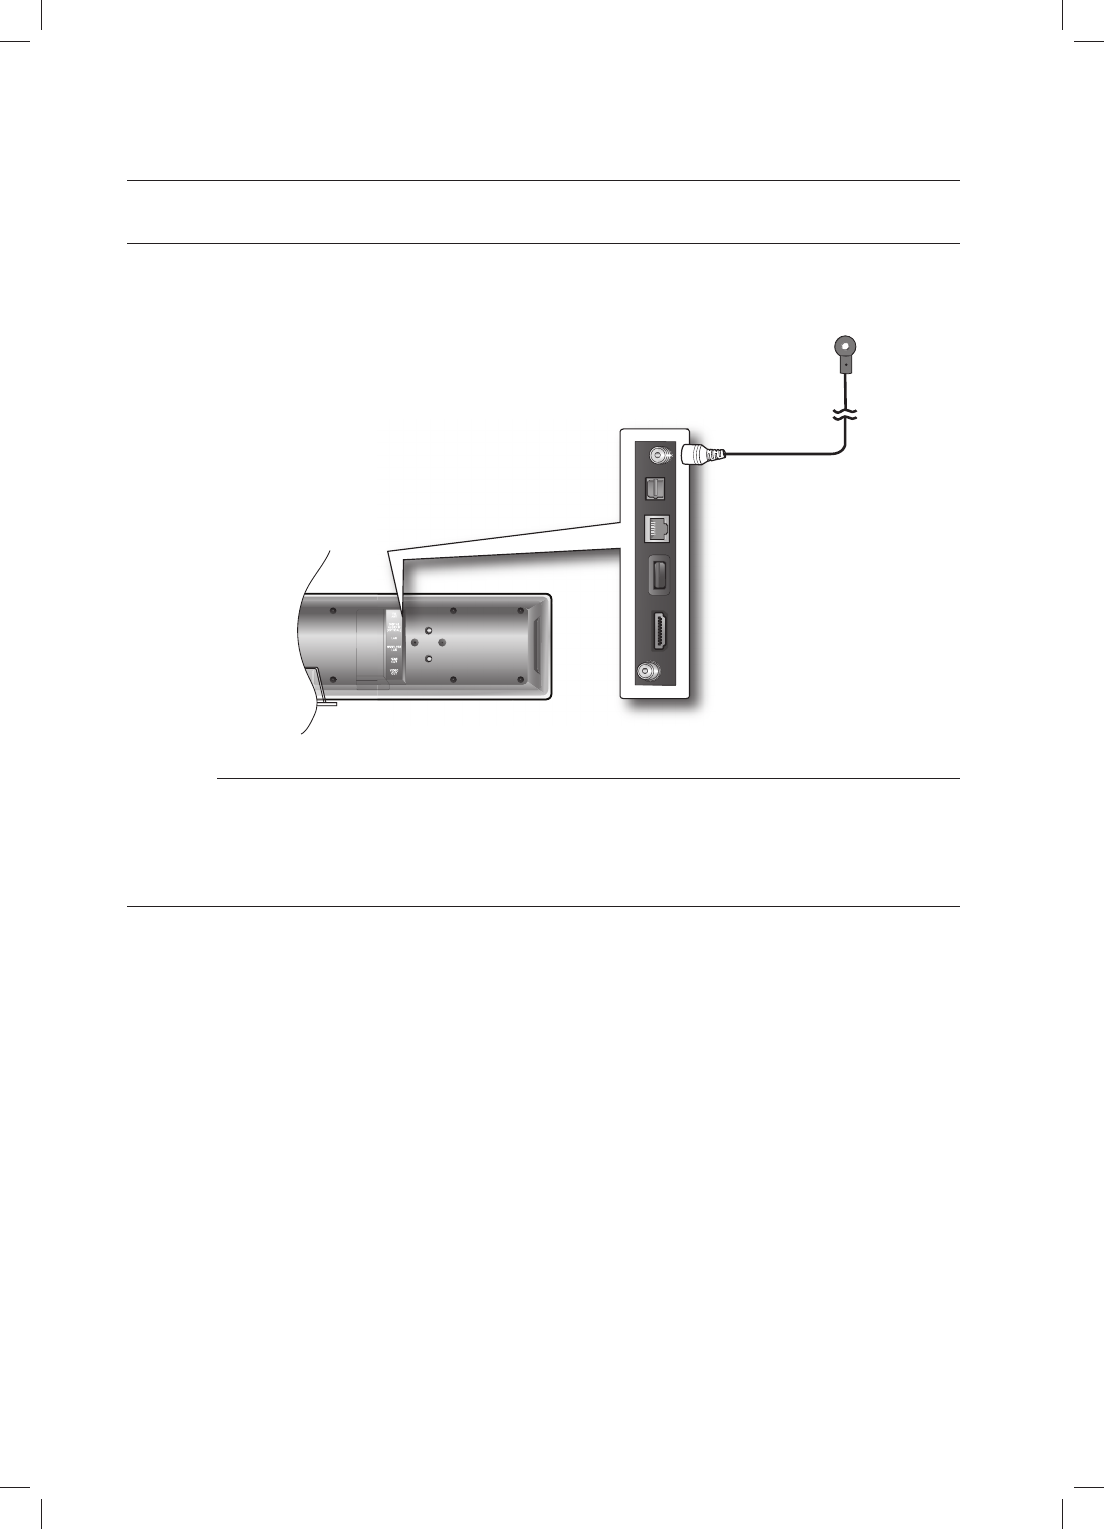
CONNECTING THE FM ANTENNA
Connect the FM antenna supplied to the FM 75Ω COAXIAL Jack.
Slowly move the antenna wire around until you fi nd a location where reception is good, then fasten it
to a wall or other rigid surface.
This unit does not receive AM broadcasts.
COOLING FAN
The cooling fan supplies cool air to the unit to prevent overheating.
Please observe the following cautions for your safety.
Make sure the unit is well-ventilated. If the unit has poor ventilation, the temperature inside the unit may rise
and may damage it.
Do not obstruct the cooling fan or ventilation holes. (If the cooling fan or ventilation holes are covered with a
newspaper or cloth, heat may build up inside the unit and fi re may result.)
1.
2.
M
•
•
FM Antenna
(supplied)
HT-BD8200_XAA_0530-1.indd 30HT-BD8200_XAA_0530-1.indd 30 2009-05-30 2:02:012009-05-30 2:02:01

31
ENG ● BASIC FUNCTIONS
This section introduces basic playback functions and playback by disc type.
BEFORE PLAYING
Turn on your TV and set it to the correct Video Input (the input the Blu-ray Home Theater is connected to).
If you connected an external Audio System, turn on your Audio System and set it to the correct Audio Input.
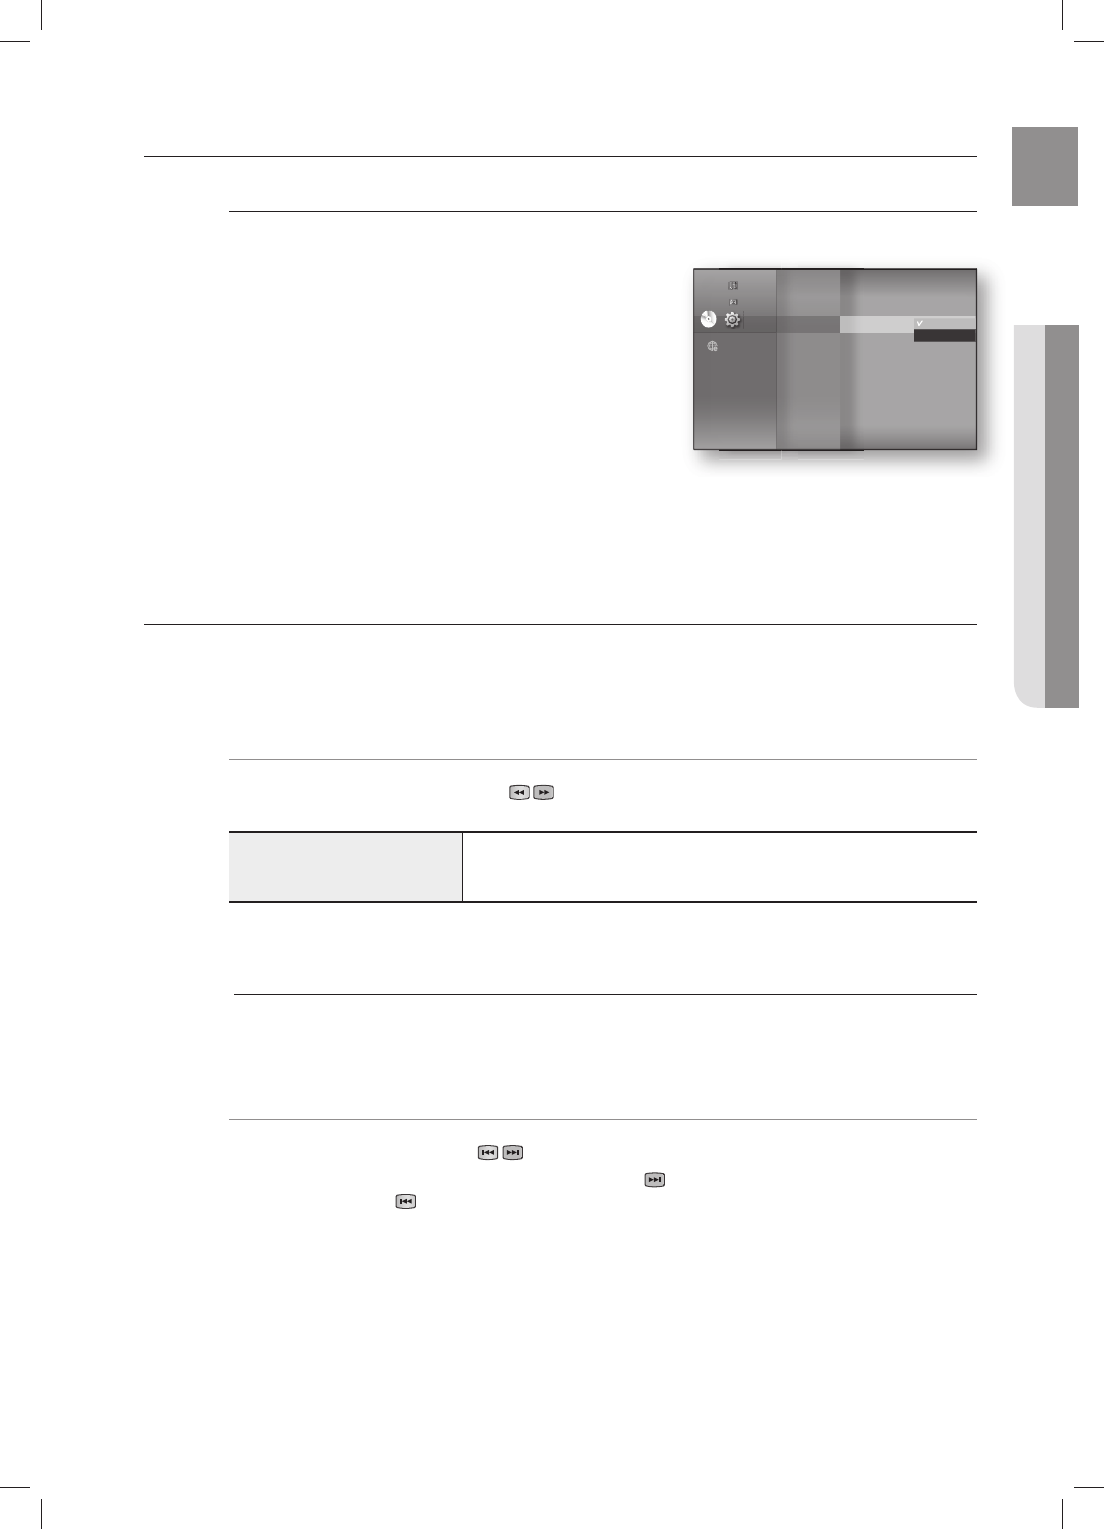
After plugging in the player, the fi rst time you press the
POWER button, this screen comes up:
If you want to select a language, press a NUMBER button.
(This screen will only appear when you plug in the player for
the fi rst time.) If the language for the startup screen is not set,
the settings may change whenever you turn the power on or
off. Therefore, make sure that you select the language you
want to use. Once you select a menu language, you can
change it by pressing the STOP () button on the front panel
of the unit for more than 5 seconds with no disc in the unit.
Then the MENU LANGUAGE SELECTION window appears
again where you can reset your preferred language.
Discs which can be played on this player (For the following discs, the ability to play back
may depend on recording conditions.)
• BD-ROM • BD-RE • BD-R
• DVD-R • DVD-RW (V mode) • CD-RW/CD-R
• The unit may not play certain CD-RW/CD-R and DVD-R due to the disc type or
recording conditions.
Discs which cannot be played on this player.
• HD DVD • DVD+RW • DVD+R
• DVD-ROM • DVD-RAM • CDV
• CD-ROM • CVD • CD-I
• Super Audio CD(except CD layer) • CDGs play audio only, not graphics.
Blu-ray is a new and evolving format. Accordingly, disc compatibility issues with new and
existing format discs are possible. Not all discs are compatible and not every disc will
playback.
For additional information, refer to the Disc Type and Characteristics and Compliance and
Compatibility Notice sections of this Manual. If you encounter compatibility problems,
please contact SAMSUNG customer care center
.
•
•
M
Basic functions of your Blu-ray Home Theater
MENU LANGUAGE SELECTION
Press 1 for English
Pulsar 2 para Español
Touche 3 pour Français
Macrovision : BSS41
HT-BD8200_XAA_0530-1.indd 31HT-BD8200_XAA_0530-1.indd 31 2009-05-30 2:02:012009-05-30 2:02:01
Basic functions of your Blu-ray Home Theater
32
ON-SCREEN MENU NAVIGATION
PLAYING A DISC
Press EJECT button to open the compartment.
Load a disc vertically into the disc slot.
Place a disc gently into the slot with the disc’s label facing up.
Playback starts automatically.
When you stop disc play, the player remembers where you stopped, so when you press
PLAY button again, it will pick up where you left off. This is called the "Resume" function.
With some Blu-ray discs(BD-J), this function may not work.
Press the STOP button twice during playback to disable the Resume function.
To pause the playback, press the PAUSE button during playback.
To resume, press the PLAY button.
If the player is left in the stop mode more than 5 minutes without any user interface, a
screen saver will appear on your TV. If the player is left in the screen saver mode for more
than 30 minutes, the power will automatically turn off except during playback of an CD-DA
(Automatic Power-Off Function).
If no buttons are pressed on the unit or remote control for more than 5 minutes when the
unit is in Pause mode, operation will stop (except for some Blu-ray Discs).
1.
2.
•
•
M
Audio
Subtitle
DivX Subtitle
Disc Menu
Menu
TV Aspect
Movie Frame (24 Fs)
Resolution
Progressive Mode
Still Mode
Screen Message
Light Effect
Network Selection
Cable Network
Wireless Network
Proxy
NTP Server
Network Connection Test
BD-LIVE Internet Connection
Video
Music
Photo
Setup
System
Language
Audio
Display
HDMI
Network
Parental
System Information
Time Zone
Clock Set
Power On/Off sound
BD Data Management
DivX(R) Registration
DivX(R) Deactivation
System Update
Dynamic Compression
AV Sync
Test Tone
Speaker Distance
Sound Edit
Anynet + (HDMI-CEC)
HDMI Format
BD Wise
HDMI Audio
Parental Lock
Rating Level
New Password
e-Contents Netfl ix
Pandora
HT-BD8200_XAA_0530-1.indd 32HT-BD8200_XAA_0530-1.indd 32 2009-05-30 2:02:022009-05-30 2:02:02
33
ENG ● BASIC FUNCTIONS
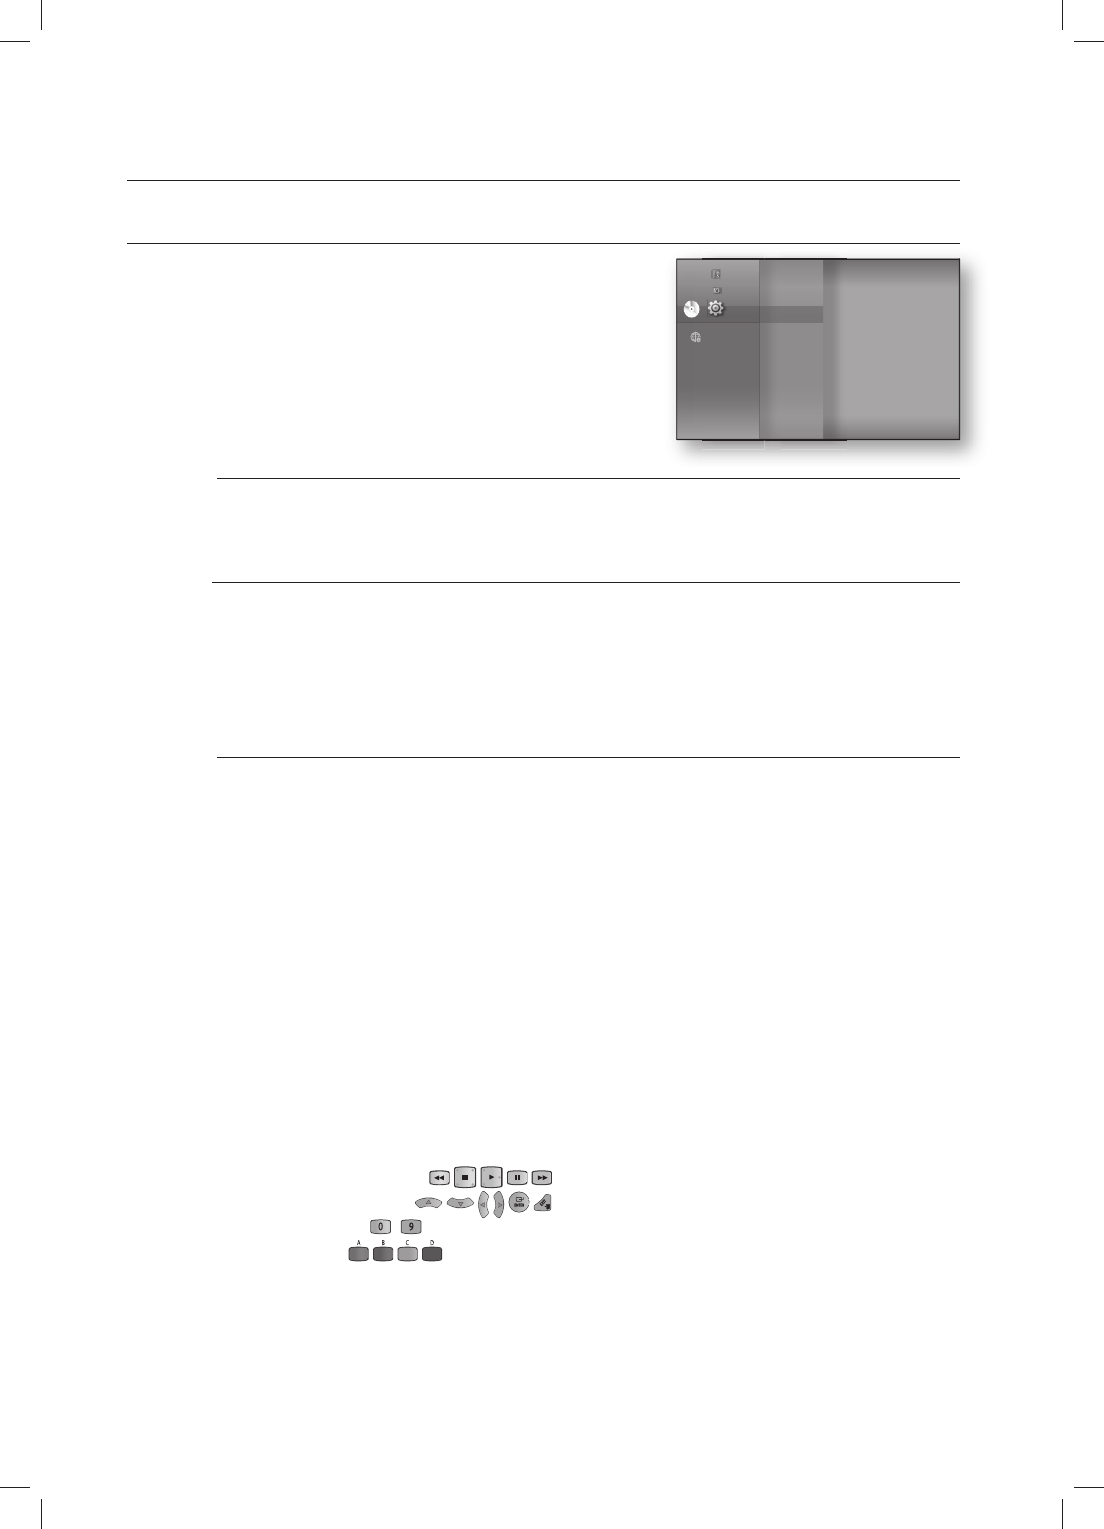
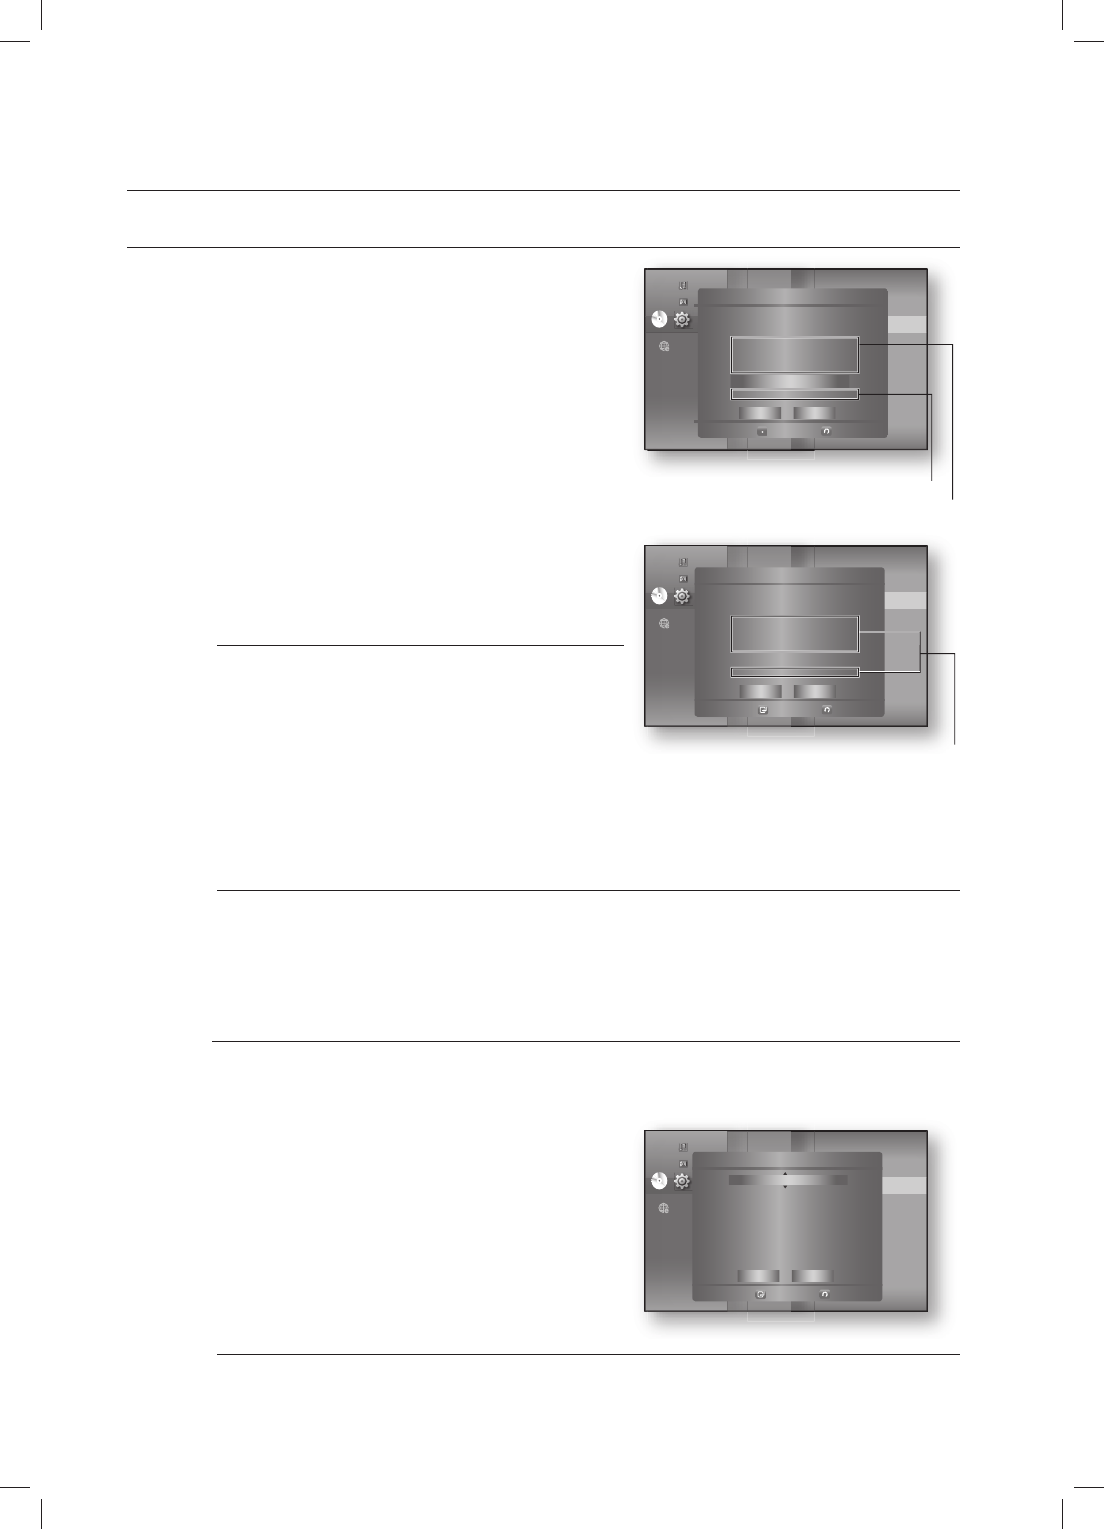
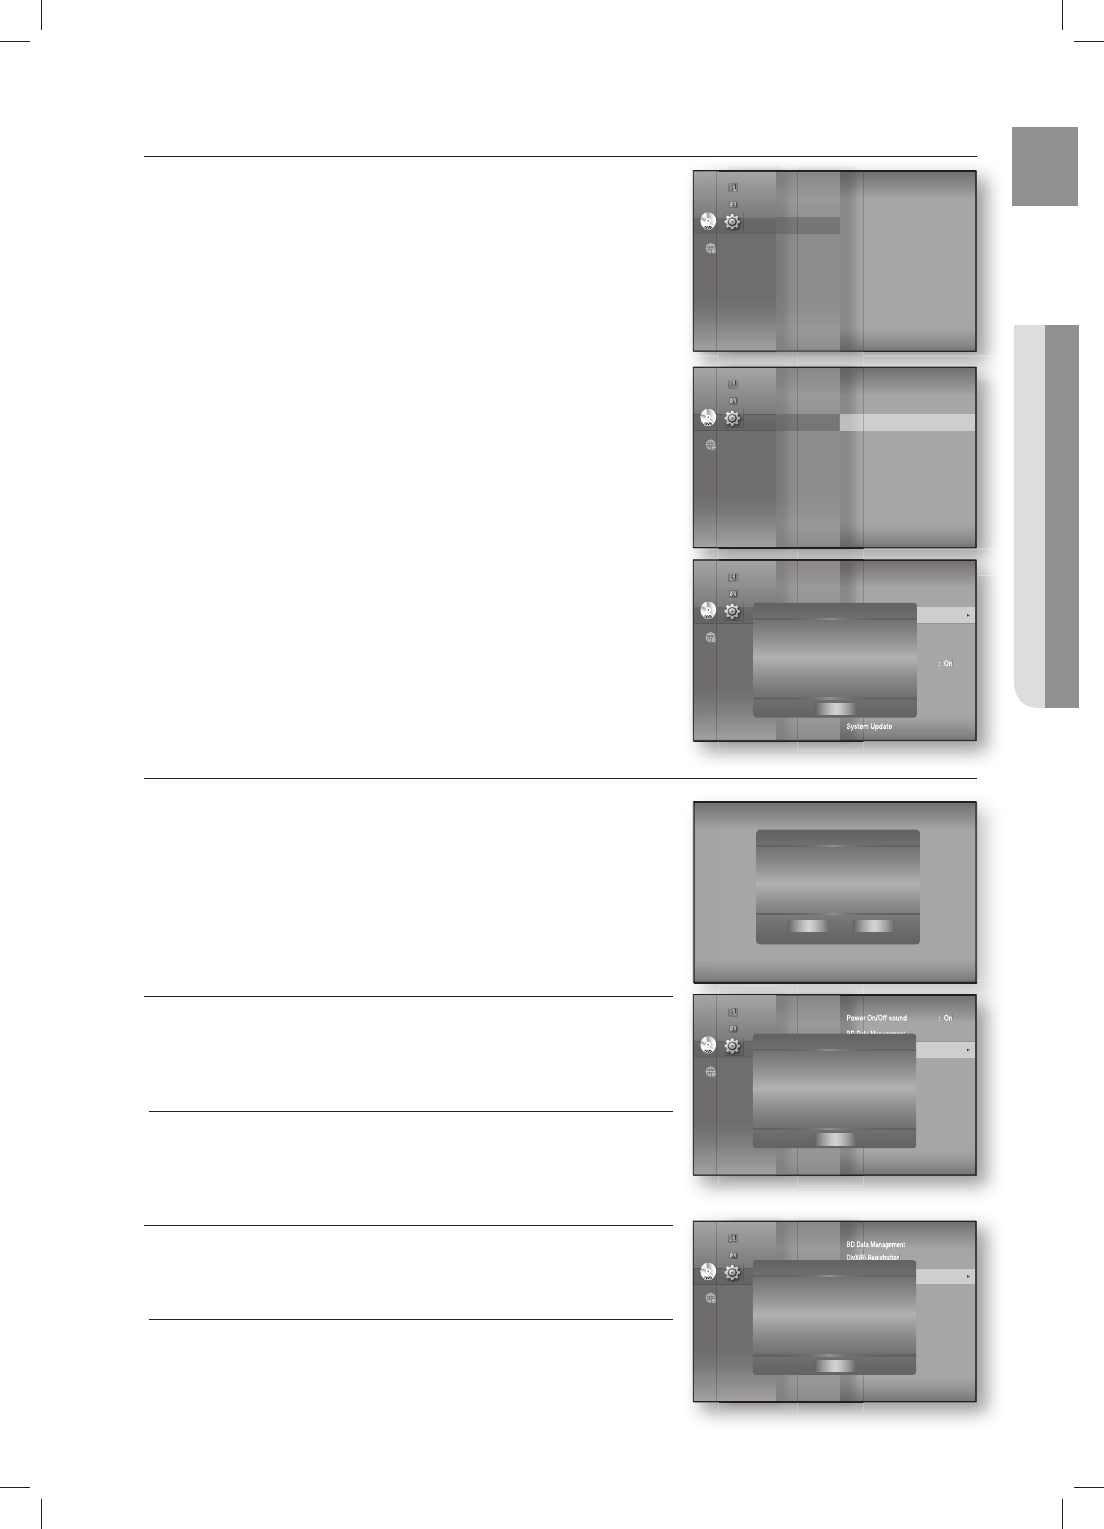
SETTING THE SOUND
Setting the Power On / Off Melody Sound
A Melody sound can be set so it is heard each time you turn the player on or off.
With the unit in Stop mode, press the MENU button.
Press the
▲▼
buttons to select Setup, then press the
ENTER or
►
button.
Press the
▲▼
buttons to select System, then press the
ENTER or
►
button.
Press the
▲▼
buttons to select Power On/Off sound,
then press the ENTER or
►
button.
Press the
▲▼
buttons to select On or Off, then press the
ENTER or
►
button.
Press the MENU button to exit the setup menu.
USING THE SEARCH AND SKIP FUNCTIONS
During play, you can search quickly through a chapter or track, and use the skip function to jump to the next selection.
Searching through a Chapter or Track hgfZCV
During playback, press the SEARCH (
) button.
Each time you press the SEARCH button, the playback speed will change as follows.
BD-ROM, BD-RE, BD-R, DVD-VIDEO,
DVD-RW, DVD-R
X 2 ➞
X 4 ➞
X 8 ➞
X 16 ➞
X 32 ➞
X 128
X 2 ➞
X 4 ➞
X 8 ➞
X 16 ➞
X 32 ➞
X 128
You can scan the program in reverse.
To return to normal speed playback, press the PLAY button.
No sound is heard during search mode.
Skipping Tracks hgfZCV
During playback, press the SKIP ( ) button.
When playing a Blu-ray Disc/DVD, if you press the SKIP ( ) button, it moves to the next chapter.
If you press the SKIP ( ) button, it moves to the beginning of the chapter. One more press makes it
move to the beginning of the previous chapter.
1.
2.
3.
4.
5.
6.
•
•
M
DVD
DVD
System
◄
Language
Audio
Display
HDMI
Network
Parental
System Information
Time Zone
Clock Set
Power On/Off sound : On ►
BD Data Management
DivX(R) Registration
DivX(R) Deactivation
System Update
On
Off
Music
Photo
Setup
HT-BD8200_XAA_0530-1.indd 33HT-BD8200_XAA_0530-1.indd 33 2009-05-30 2:02:022009-05-30 2:02:02
Basic functions of your Blu-ray Home Theater
34
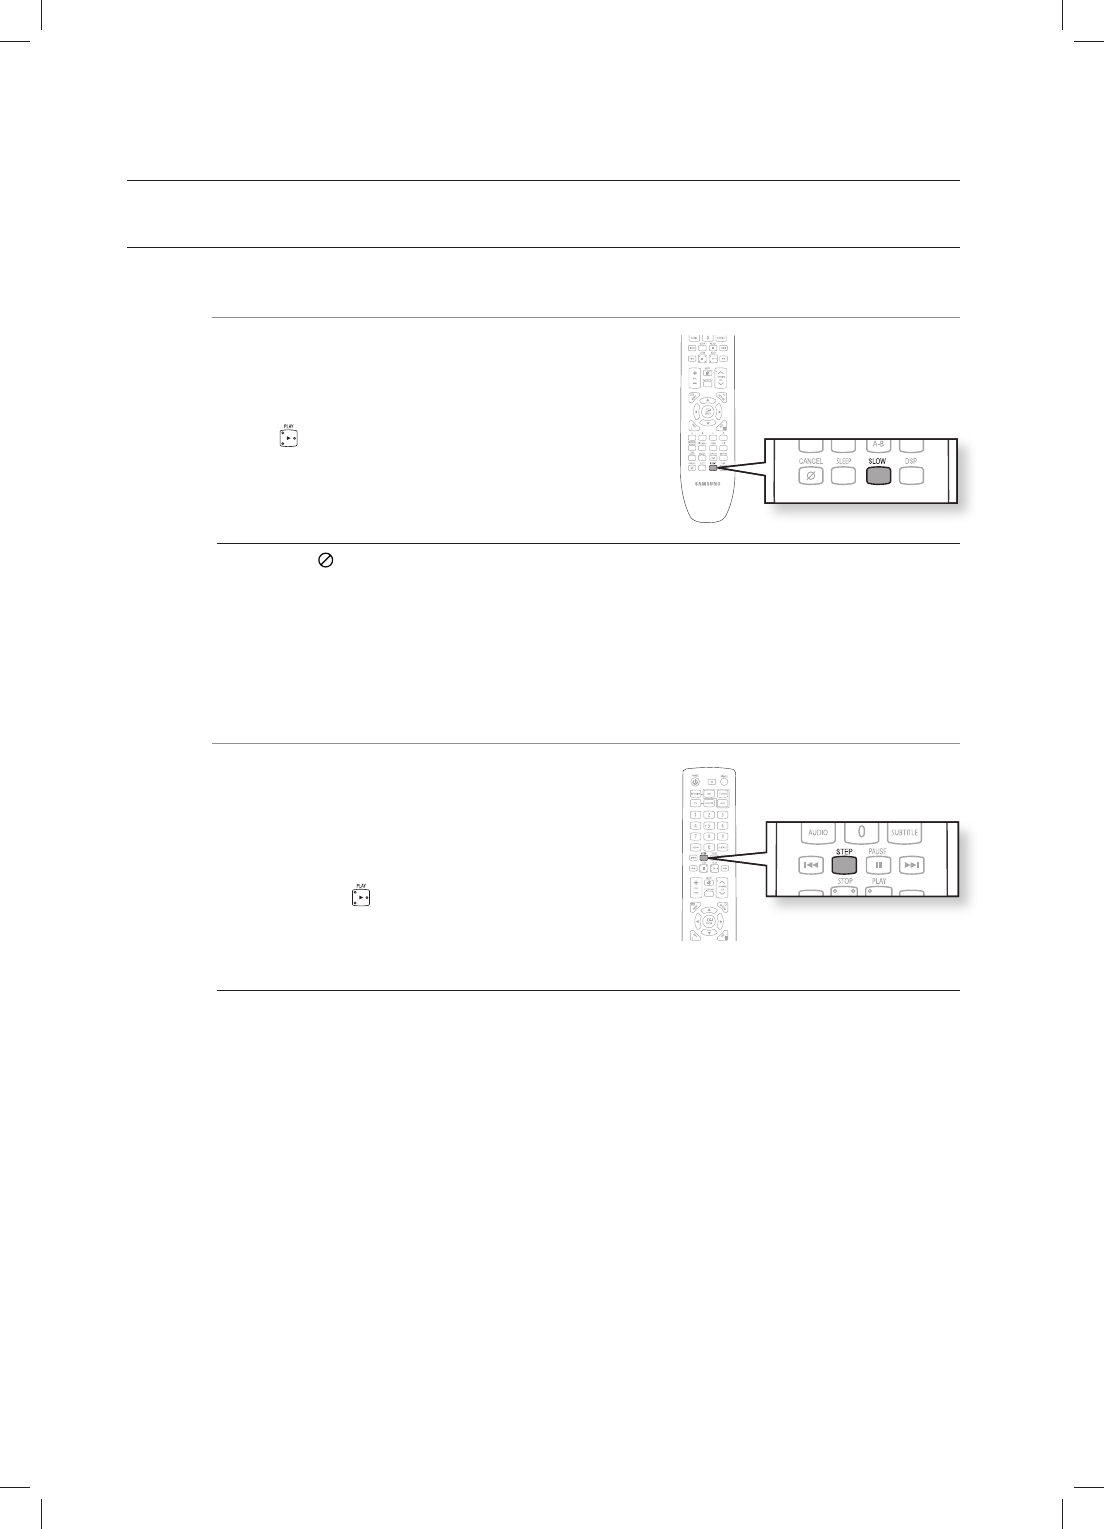
SLOW MOTION PLAY/STEP MOTION PLAY
Slow Motion Play hgfZCV
In pause or step mode, press the SLOW button on the
remote control for Slow Motion play.
If you press the SLOW button,
1/8
1/4
1/2
To return to normal speed playback, press the
PLAY ( ) button.
This ( ) icon indicates an invalid button press.
No sound is heard during slow mode.
Slow motion operates only in the forward direction.
Step Motion Play
hgfZCV
Press the STEP button on the remote control during play for Step
Motion play.
Each time the button is pressed a new frame will appear.
When the STEP button is pressed, the next frame will be
activated.
Press the PLAY ( ) button to resume normal play.
No sound is heard during step mode.
Step motion operates only in the forward direction.
•
•
M
•
•
•
M
HT-BD8200_XAA_0530-1.indd 34HT-BD8200_XAA_0530-1.indd 34 2009-05-30 2:02:042009-05-30 2:02:04
35
ENG ● SYSTEM SETUP
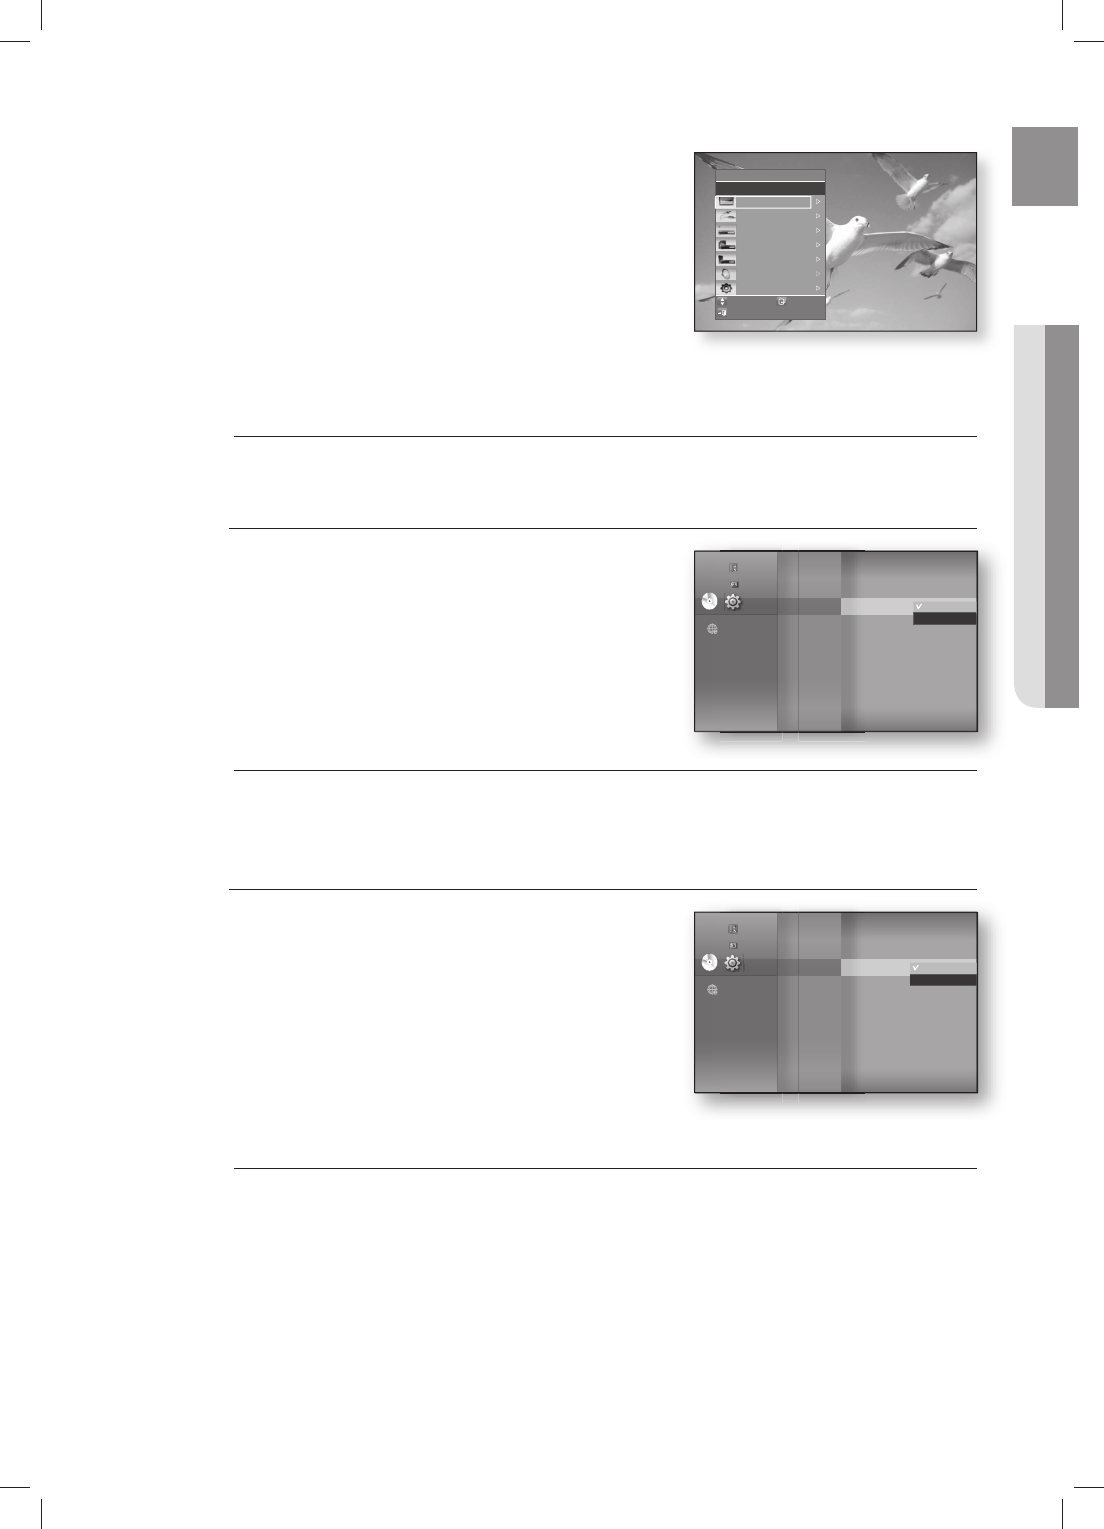
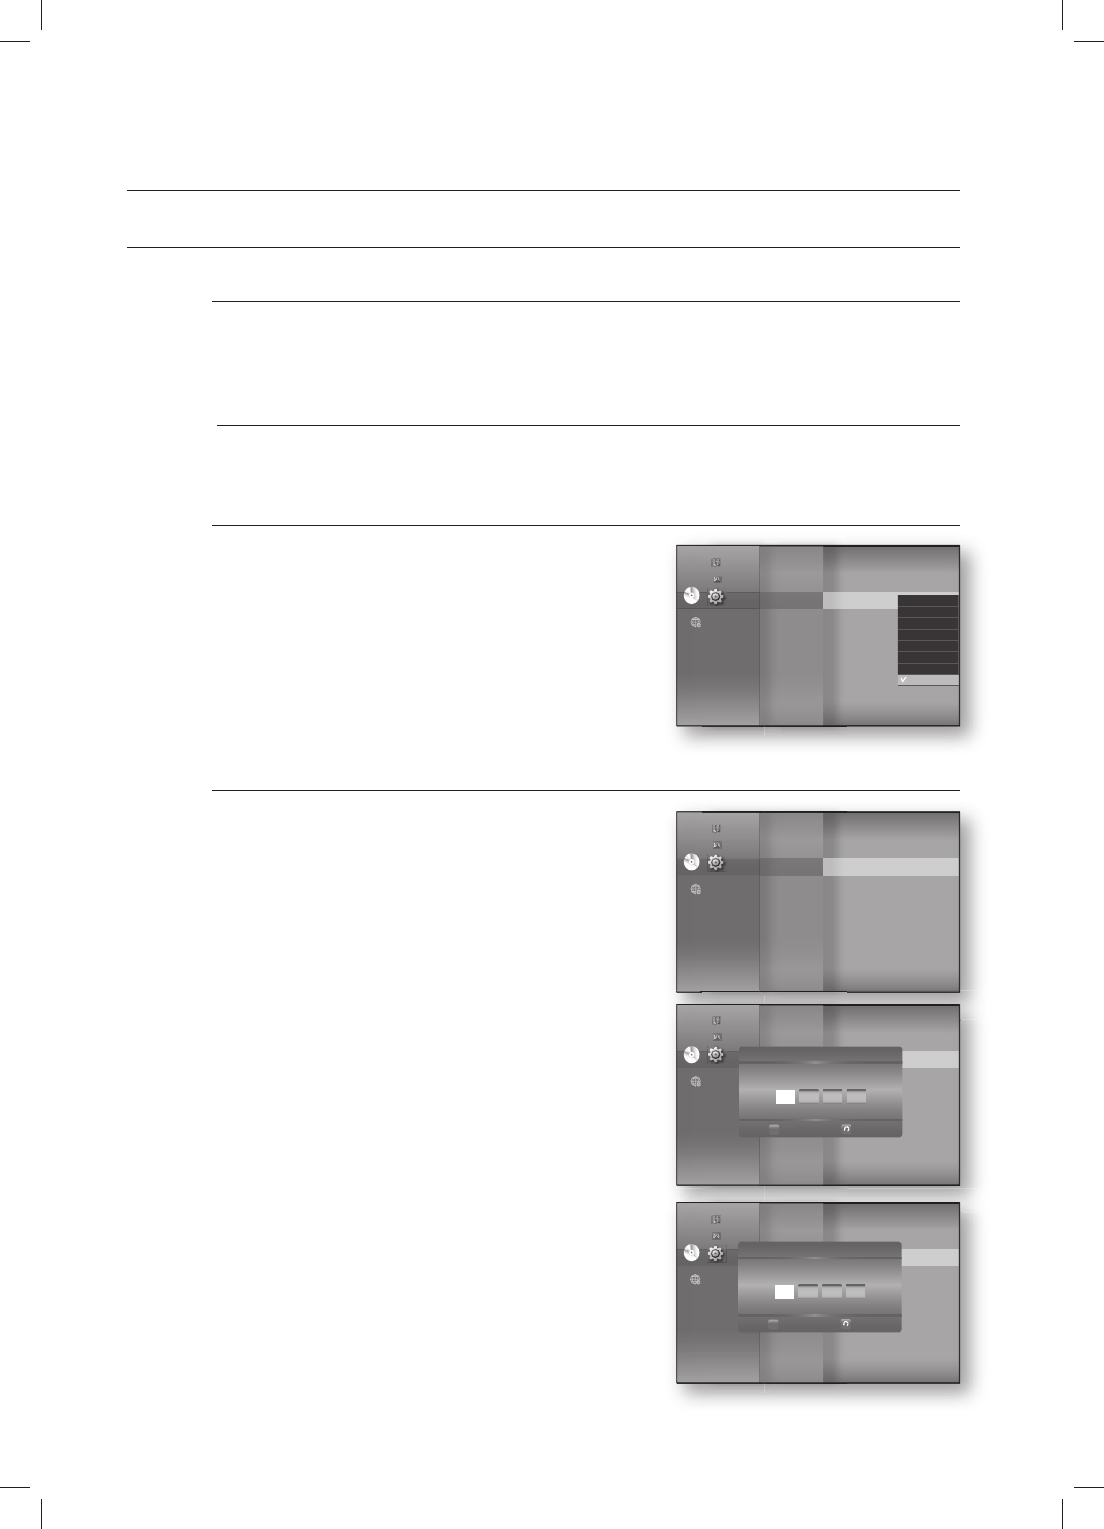
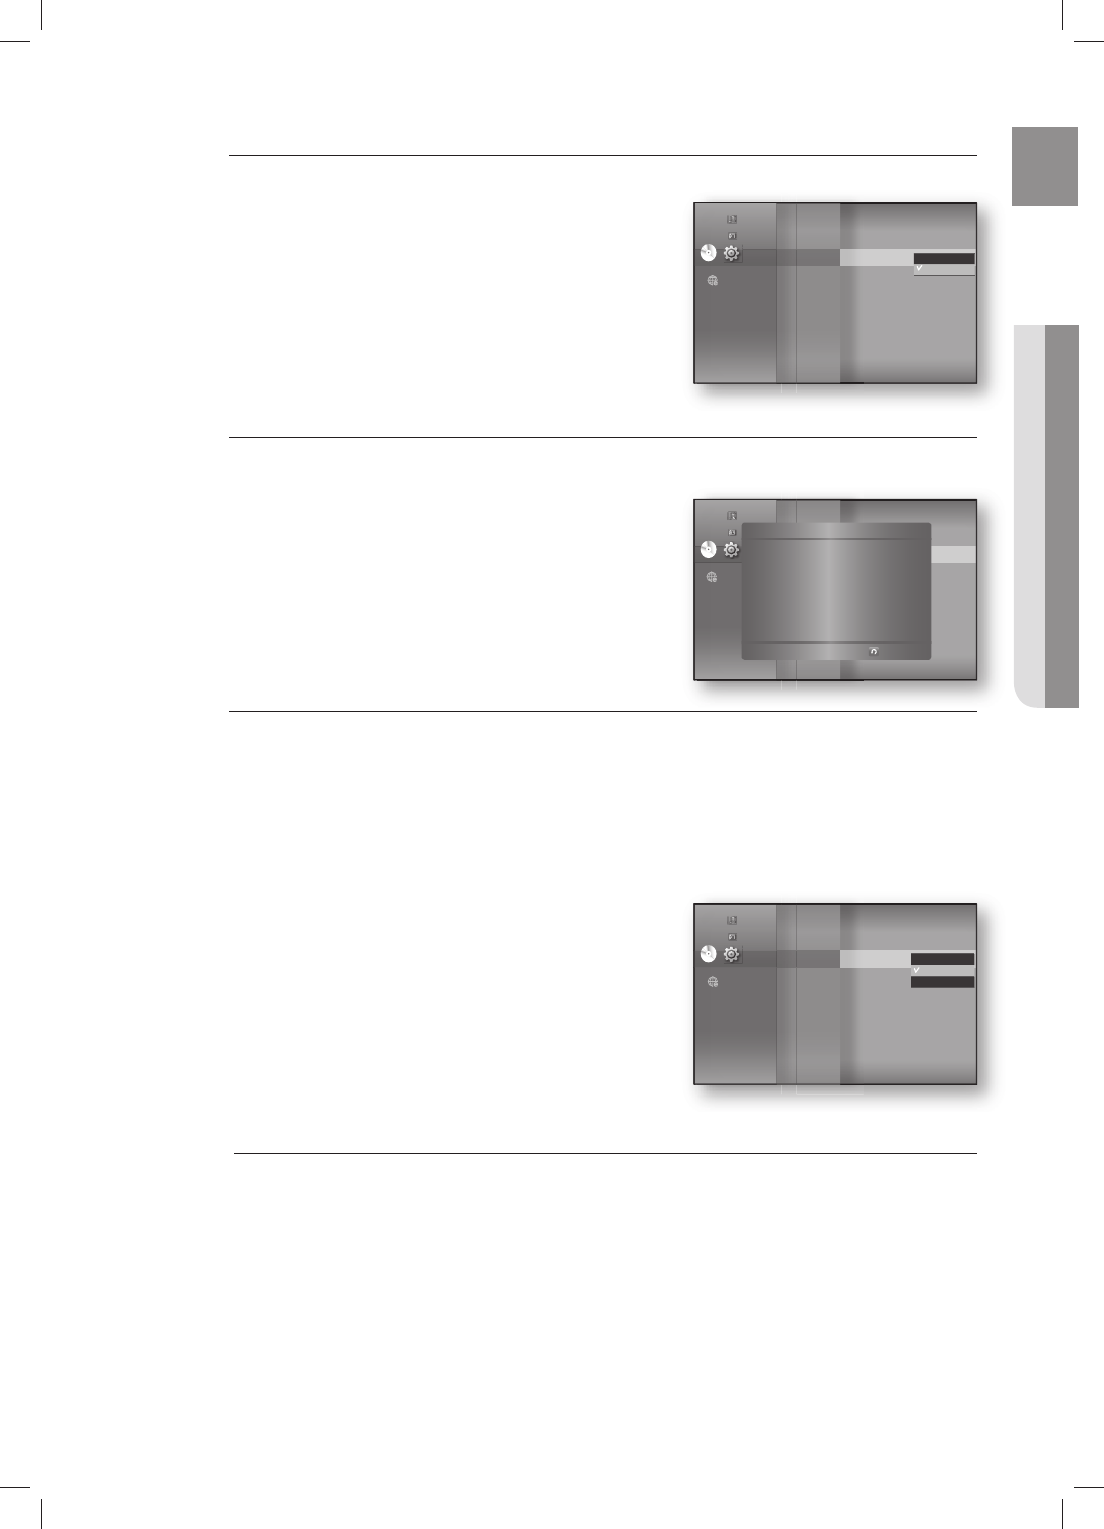
SETTING THE CLOCK
Choose your time zone
With the unit in Stop mode, press the MENU button.
Press the
▲▼
buttons to select Setup, then press the
ENTER or
►
button.
Press the
▲▼
buttons to select System, then press the
ENTER or
►
button.
Press the
▲▼
buttons to select Time Zone, then press the
ENTER or
►
button.
Use the
◄ ►
button to place the cursor to the appropriate
time zone for your area and press the ENTER button.
To set the time automatically, set the NTP server to On (see page 53).
Set the clock
To setup, follow steps 1 through 3 above.
Press the
▲▼
buttons to select Clock Set, then press the
ENTER or
►
button.
Press the
◄ ►
buttons to move to “da.”(date), “hr” (hour),
“min” (minute). Set the date and time by pressing the
▲▼
buttons, then press the ENTER button.
1.
2.
3.
4.
5.
M
4.
5.
System setup
DVD
DVD
System
◄
Language
Audio
Display
HDMI
Network
Parental
System Information
Time Zone ►
Clock Set
Power On/Off sound : On
BD data management
DivX(R) Registration
DivX(R) Deactivation
System Update
Music
Photo
Setup
DVD
DVD
System Setup
◄
Language Setup
Audio Setup
Display Setup
HDMI Setup
Network Setup
Parental Setup
System Information
Time Zone ►
Clock Set
Power On/Off sound : On
BD data management
DivX(R) Registration
DivX(R) Deactivation
System Update
Music
Photo
Setup
Time Zone
London, Lisbon
◄ GMT + 00:00 ►
Save
Return
DVD
DVD
System
◄
Language
Audio
Display
HDMI
Network
Parental
System Information
Time Zone
Clock Set ►
Power On/Off sound : On
BD data management
DivX(R) Registration
DivX(R) Deactivation
System Update
Music
Photo
Setup
DVD
DVD
System
◄
Language
Audio
Display
HDMI
Network
Parental
System Information
Time Zone
Clock Set ►
Power On/Off sound : On
BD data management
DivX(R) Registration
DivX(R) Deactivation
System Update
Music
Photo
Setup
JAN/01/2009 01 01
da. hr. min.
Thursday
Clock Set
Save
Return
HT-BD8200_XAA_0530-2.indd 35HT-BD8200_XAA_0530-2.indd 35 2009-05-30 2:28:332009-05-30 2:28:33
Language setup
36
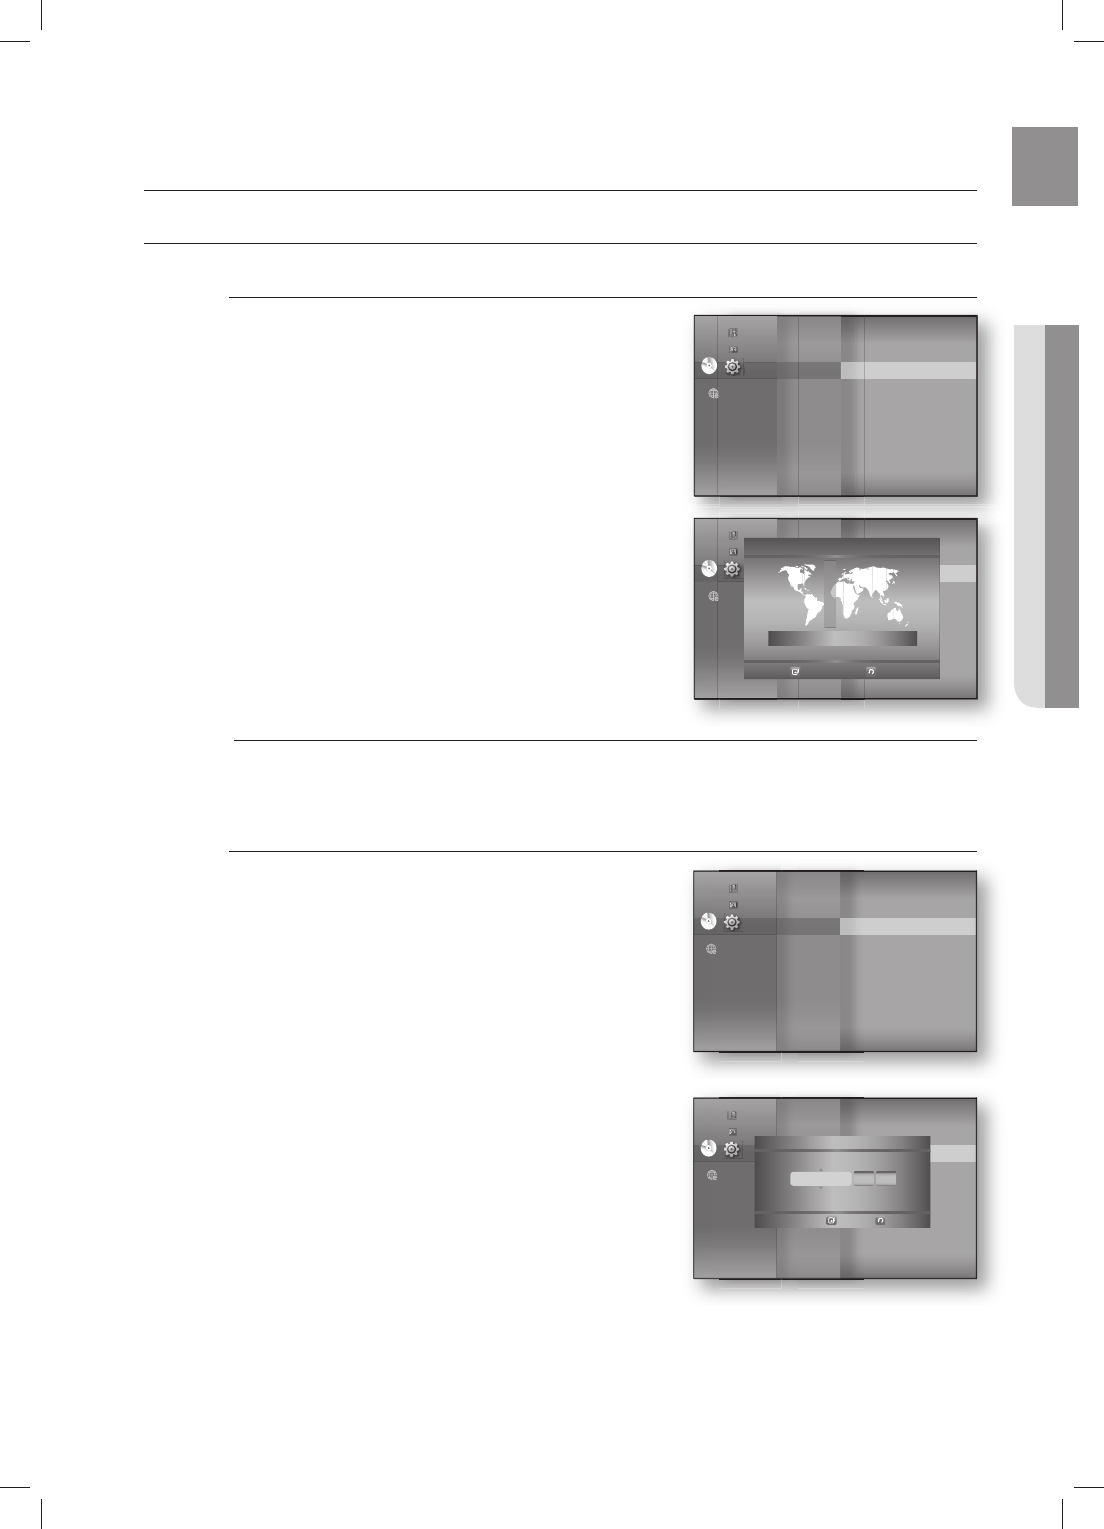
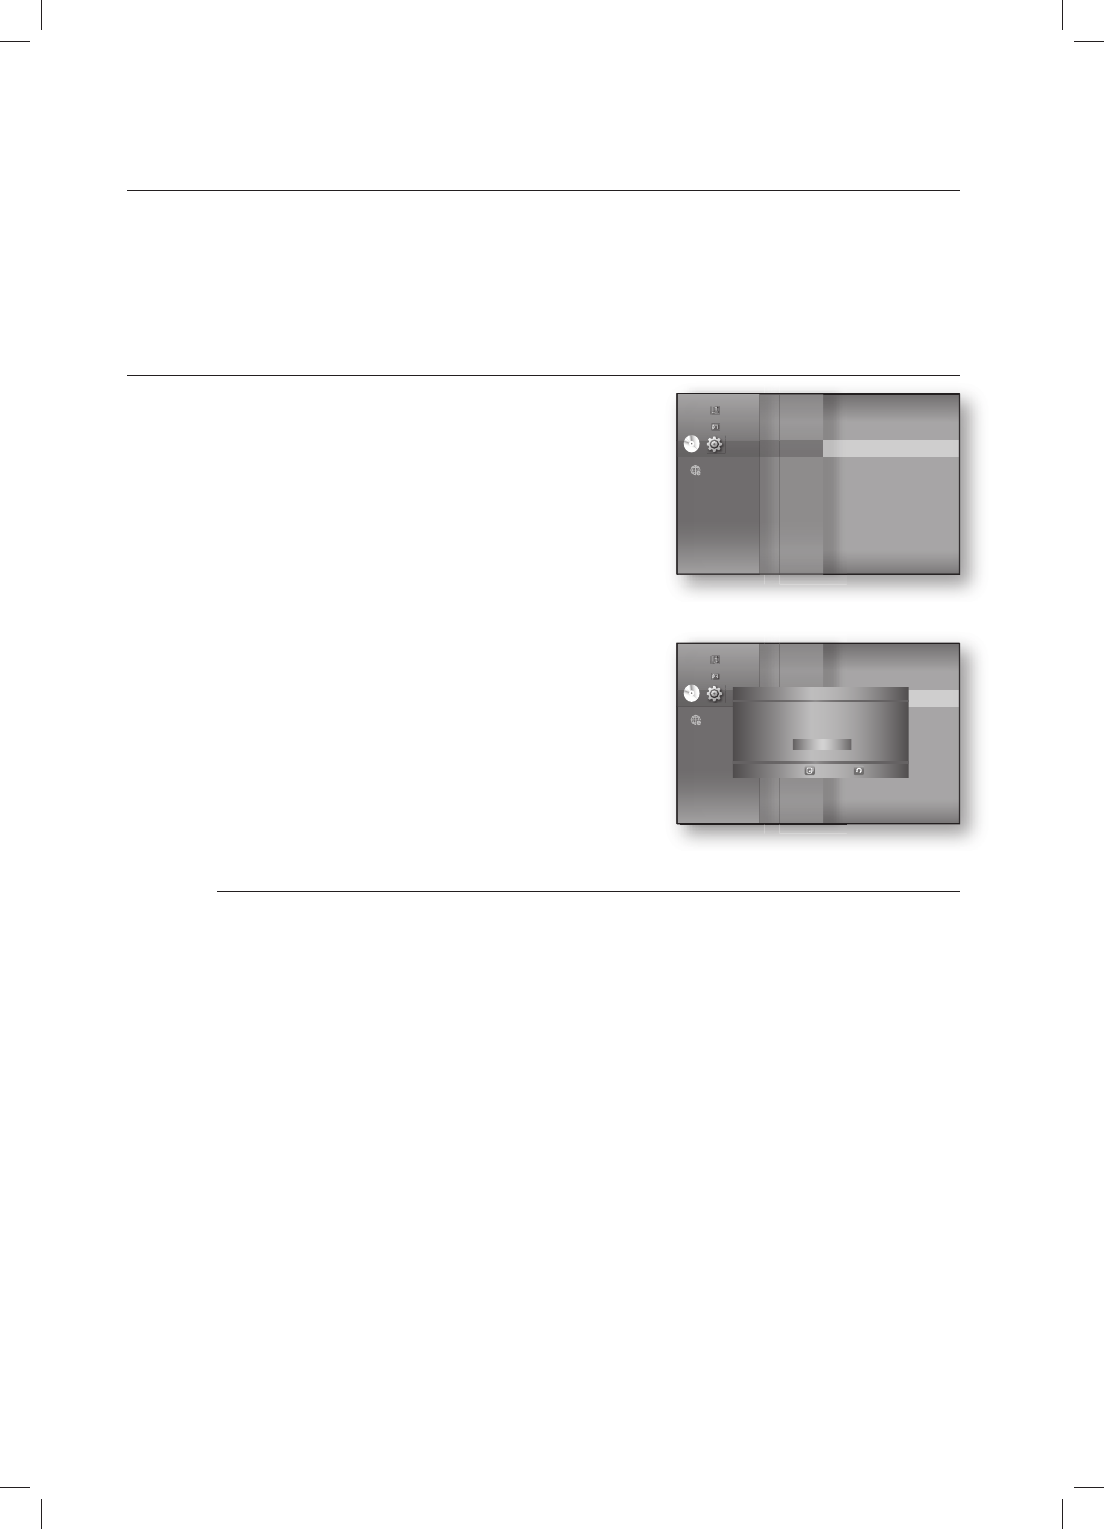
SETTING UP THE LANGUAGE OPTIONS
Once you set the audio, subtitle, disc menu and player menu language options, they will be applied automatically
every time you watch a movie.
If you want to choose a different audio and subtitle language while playing a disc, you can
also use the disc menu to make the selection.
With the unit in Stop mode, press the MENU button.
Press the
▲▼
buttons to select Setup, then press the
ENTER or
►
button.
Press the
▲▼
buttons to select Language, then press
the ENTER or
►
button.
Language setup menu will be displayed.
Press the
▲▼
buttons to select the desired language
option, press the ENTER or
►
button.
Audio : For the disc audio language.
Subtitle : For the disc subtitles.
DivX Subtitle :
For the DivX subtitle language by region.
Western Afrikaans, Basque, Catalan, Danish, Dutch, English, Faeroese, Finnish, French, German, Icelandic,
Indonesian, Italian, Malay, Norwegian, Portuguese, Spanish, Swahili, Swedish
Central English, Albanian, Croatian, Czech, Hungarian, Polish, Romanian, Serbian(Latin), Slovak, Slovenian
Greek English, Greek
Cyrillic
English, Azeri, Belarusian, Bulgarian, Kazakh, Macedonian, Russian, Serbian, Tatar, Ukrainian, Uzbek
Disc Menu : For the disc menu contained on the disc
Menu : For the on-screen menu of your Blu-ray Home Theater.
Press the
▲▼
buttons to select the desired language, then press the ENTER button.
Press the RETURN or ◄ button to return to the previous menu. Press the MENU button to
exit the menu.
The selected language will only appear if it is supported on the disc.
If the subtitle language is displayed in broken fonts, change DivX Subtitle to the appropriate region.
If is still does not work, the format is not supported.
M
1.
2.
3.
4.
•
•
•
•
•
5.
M
System
Language
Audio
Display
HDMI
Network
Parental
DVD
DVD
◄
◄
Music
Photo
Setup
System
Language
◄
Audio
Display
HDMI
Network
Parental
Audio : Original ►
Subtitle : Auto
DivX Subtitle : Western
Disc Menu : English
Menu : Auto
DVD
DVD
Music
Photo
Setup
System
Language
◄
Audio
Display
HDMI
Network
Parental
Audio : Original ►
Subtitle : Auto
DivX Subtitle : Western
Disc Menu : English
Menu : Auto
Original
English
Français
Deutsch
Español
Italiano
DVD
DVD
Music
Photo
Setup
HT-BD8200_XAA_0530-2.indd 36HT-BD8200_XAA_0530-2.indd 36 2009-05-30 2:28:432009-05-30 2:28:43
37
ENG ● AUDIO SETUP
SETTING UP THE SPEAKER OPTIONS
Dynamic Compression
This is only active when a Dolby Digital signal is detected.
On : When Movie soundtracks are played at low volume or
from smaller speakers, the system can apply appropriate
compression to make low-level content more intelligible and
prevent dramatic passages from getting too loud.
Off : You can enjoy the movie with the standard Dynamic
Range.
AV Sync
Video may look slower than the audio when the player is
connected to a digital TV. If this occurs, adjust the audio
delay time to match the video.
You can set the audio delay time between 0 ms and 300 ms.
Set it to the optimal status.
•
•
•
Audio setup
Setting the Test Tone
Use the Test Tone feature to check the speaker connections.
With the unit in Stop mode, press the MENU button.
Press the
▲▼
buttons to select Setup, then press the
ENTER or
►
button.
Press the
▲▼
buttons to select Audio, then press the
ENTER or
►
button.
Audio setup menu will be displayed.
Press the
▲▼
buttons to select Test Tone, then press the
ENTER or
►
button.
Press the RED(A) button
A test tone will be sent to L
R
LFE in order so you
can make sure the speakers are set up correctly.
To end the test tone, press the RED (A) button again.
Press the RETURN button to return to the previous menu.
When playing a BD/DVD or CD, this will work only in Stop mode.
Use this function to check that each speaker is correctly connected and that there is no
problem.
When HDMI AUDIO is on (audio is produced through TV speakers), the TEST TONE function is
not available.
1.
2.
3.
•
4.
5.
•
6.
M
Dynamic Compression : On
►
AV Sync : 50msec
Test Tone
Speaker Distance
Sound Edit
System
Language
Audio
◄
Display
HDMI
Network
Parental
DVD
DVD
On
Off
Music
Photo
Setup
DVD
Dynamic Compression : On
AV Sync : 50msec
Test Tone
Speaker Distance
Sound Edit
System
Language
Audio
◄
Display
HDMI
Network
Parental
0msec
25msec
50msec
75msec
100msec
125msec
Music
Photo
Setup
Dynamic Compression : On
►
AV Sync : 50msec
Test Tone
Speaker Distance
Sound Edit
System
Language
Audio
◄
Display
HDMI
Network
Parental
DVD
DVD
Music
Photo
Setup
DVD
Dynamic Compression : On
AV Sync : 50msec
Test Tone
►
Speaker Distance
Sound Edit
System
Language
Audio
◄
Display
HDMI
Network
Parental
Music
Photo
Setup
HT-BD8200_XAA_0530-2.indd 37HT-BD8200_XAA_0530-2.indd 37 2009-05-30 2:28:462009-05-30 2:28:46

Audio setup
38
SETTING UP THE SPEAKER OPTIONS
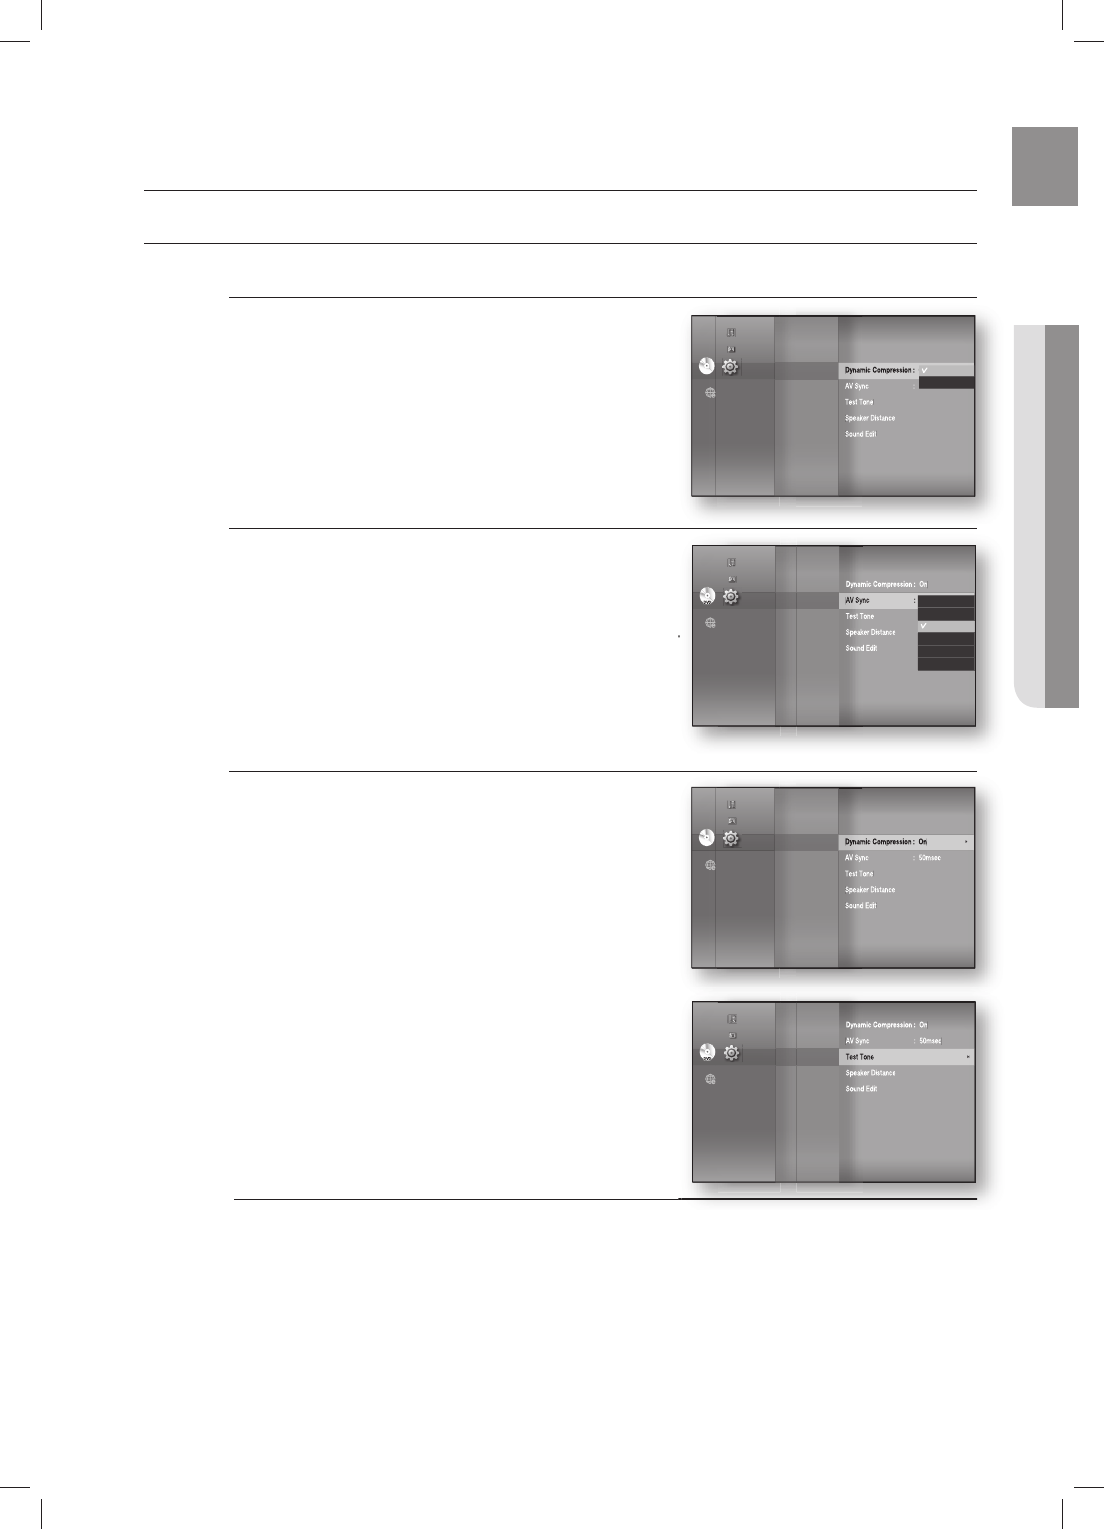
Setting the Speaker Distance
If the speakers cannot be placed at equal distances from the listening position, you can adjust the delay
time of the audio signals from the front, subwoofer speakers.
With the unit in Stop mode, press the MENU button.
Press the
▲▼
buttons to select Setup, then press the
ENTER or
►
button.
Press the
▲▼
buttons to select Audio, then press the
ENTER or
►
button.
Audio setup menu will be displayed.
Press the
▲▼
buttons to select Speaker Distance,
then press the ENTER or
►
button.
Press the
▲▼
buttons to select the desired Speaker,
then press the
◄►
buttons to set the Speaker Distance.
You can set the Speaker Distance between 1ft(0.3m) and 30ft(9m).
When done, use the
▲▼◄►
buttons to select Save,
then press the ENTER button.
If you don’t want to save your settings, use the
▲▼◄►
buttons to select Cancel, then press the ENTER button.
Press the RETURN button to return to the previous menu.
Setting the Sound Edit
You can adjust the balance and level for each speaker.
With the unit in Stop mode, press the MENU button.
Press the
▲▼
buttons to select Setup, then press the
ENTER or
►
button.
Press the
▲▼
buttons to select Audio, then press the
ENTER or
►
button.
Audio setup menu will be displayed.
1.
2.
3.
•
4.
5.
•
6.
M
1.
2.
3.
•
Dynamic Compression : On
►
AV Sync : 50msec
Test Tone
Speaker Distance
Sound Edit
System
Language
Audio
◄
Display
HDMI
Network
Parental
DVD
DVD
Music
Photo
Setup
System
Language
Audio
◄
Display
HDMI
Network
Parental
DVD
DVD
Dynamic Compression : On
AV Sync : 50msec
Test Tone
Speaker Distance
►
Sound Edit
Music
Photo
Setup
Dynamic Compression : On
►
AV Sync : 50msec
Test Tone
Speaker Distance
Sound Edit
System
Language
Audio
◄
Display
HDMI
Network
Parental
DVD
DVD
Music
Photo
Setup
HT-BD8200_XAA_0530-2.indd 38HT-BD8200_XAA_0530-2.indd 38 2009-05-30 2:28:512009-05-30 2:28:51
39
ENG ● AUDIO SETUP
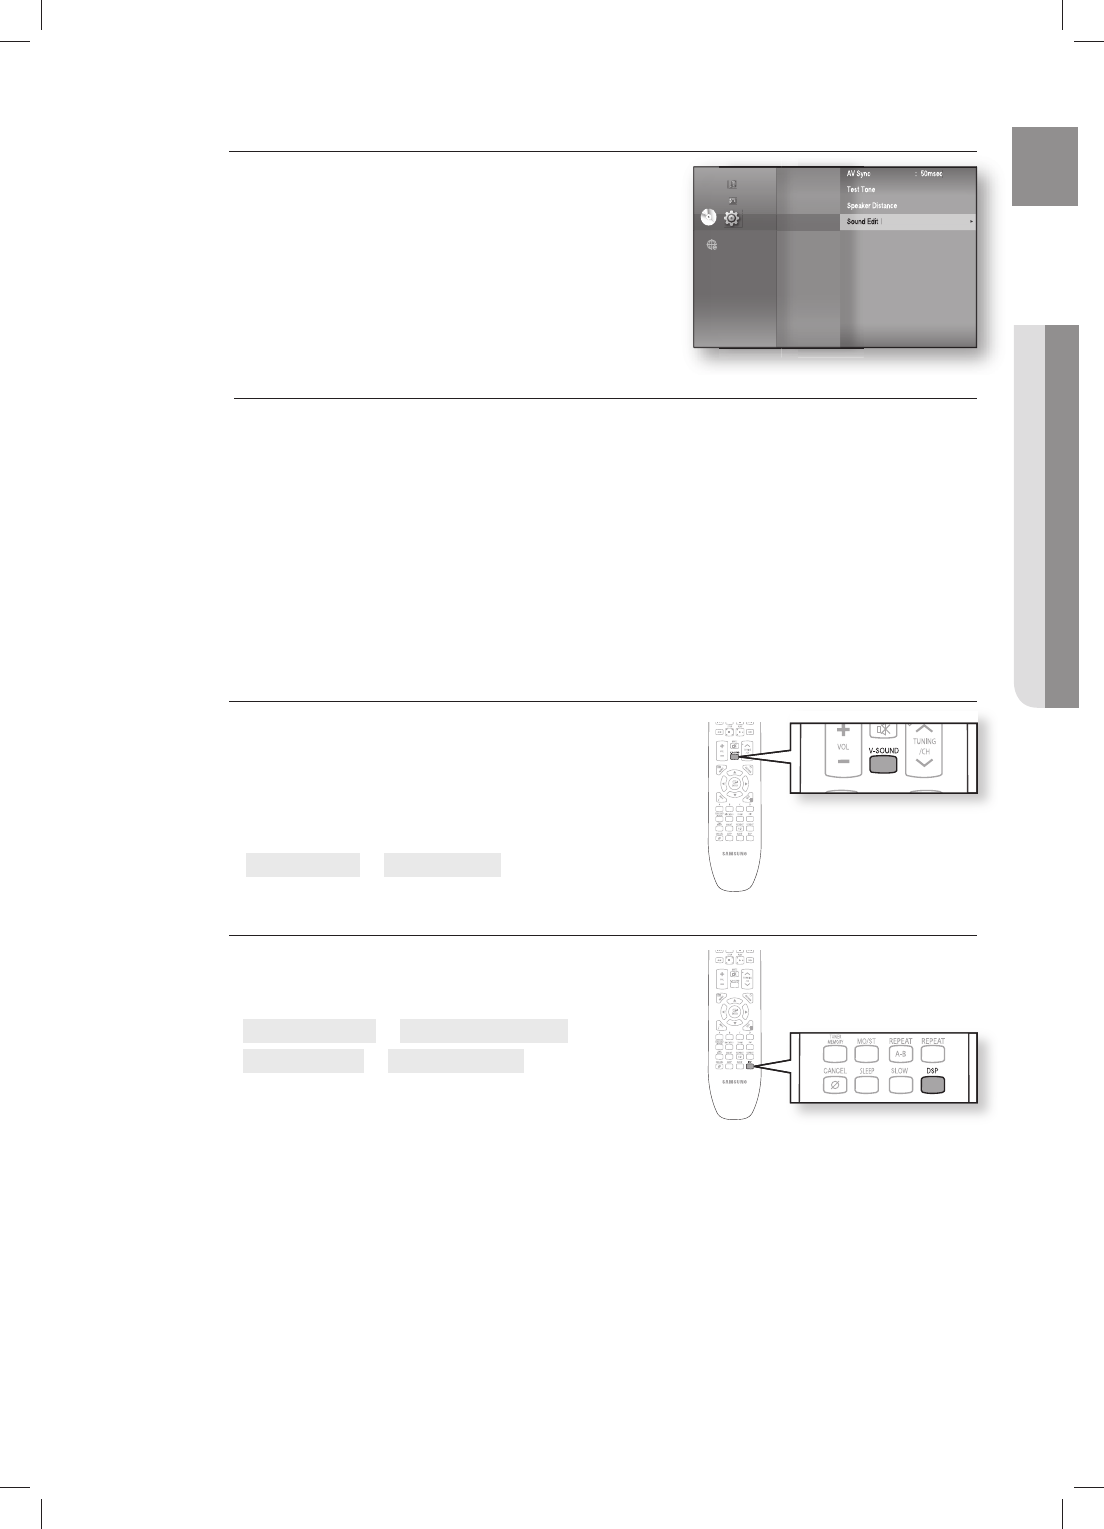
V-SOUND (Virtual Sound)
Produces realistic sound through 2-channel audio with the aid
of virtual effects, this gives the user thefeeling they are listening
to 5.1 channel audio.
Press the V-SOUND button.
Each time the button is pressed, the selection changes as
follows :
V.SOUND ON ➝ V.SOUND OFF
DSP Function
Press the DSP button.
Each time the button is pressed, the selection changes as
follows:
SMART SOUND ➝ AUDIO UPSCALING ➝
POWER BASS ➝ DSP MODE OFF
SMART SOUND : This will regulate and stabilize the
volume level against a drastic volume change when
changing channels or during a scene transition.
AUDIO UPSCALING : This also helps enhance your sound experience (ex. mp3 music).
You can upscale your MP3 level sound(24 kHz, 8bit) to CD level sound(44.1 kHz, 16bit).
POWER BASS : POWER BASS function stresses low tones providing thudding sound effects.
•
•
•
•
•
Setting the Sound Edit
Press the
▲▼
buttons to select Sound Edit,
then press the ENTER or
►
button.
Press the
▲▼
buttons to select the desired Speaker,
then press the
◄►
button to adjust the settings.
When done, use the
▲▼◄►
buttons to select Save,
then press the ENTER button.
If you don’t want to save your settings, use the
▲▼◄►
buttons to select Cancel, then press the ENTER button.
Press the RETURN butt on to return to the previous menu.
Adjusting Front Speaker Balance
• You can select between 0, -6, and OFF.
• The volume decreases as you move closer to –6.
Adjusting Subwoofer Speaker Level
• The volume level can be adjusted in steps from +6dB to 6dB.
• The sound gets louder as you move closer to +6dB and quieter as you get closer to -6dB.
4.
5.
6.
M
AV Sync : 50msec
Test Tone
Speaker Distance
Sound Edit
►
System
Language
Audio
◄
Display
HDMI
Network
Parental
DVD
DVD
Music
Photo
Setup
HT-BD8200_XAA_0530-2.indd 39HT-BD8200_XAA_0530-2.indd 39 2009-05-30 2:28:552009-05-30 2:28:55
Display setup
40
SETTING UP THE DISPLAY OPTIONS
This function allows you to setup the TV screen settings. This function depends on the disc or TV type. It may not
work with some discs or TVs.
With the unit in Stop mode, press the MENU button.
Press the
▲▼
buttons to select Setup, then press the
ENTER or
►
button.
Press the
▲▼
buttons to select Display, then press the
ENTER or
►
button.
Video setup menu will be displayed.
Press the
▲▼
buttons to select the desired display option
from the options on the following pages.
Press the
▲▼
buttons to select the desired sub-menu
item from a video display option, then press the ENTER
button.
Each video option is described in detail below.
Press the RETURN or ◄ button to return to the previous
menu. Press the MENU button to exit the menu.
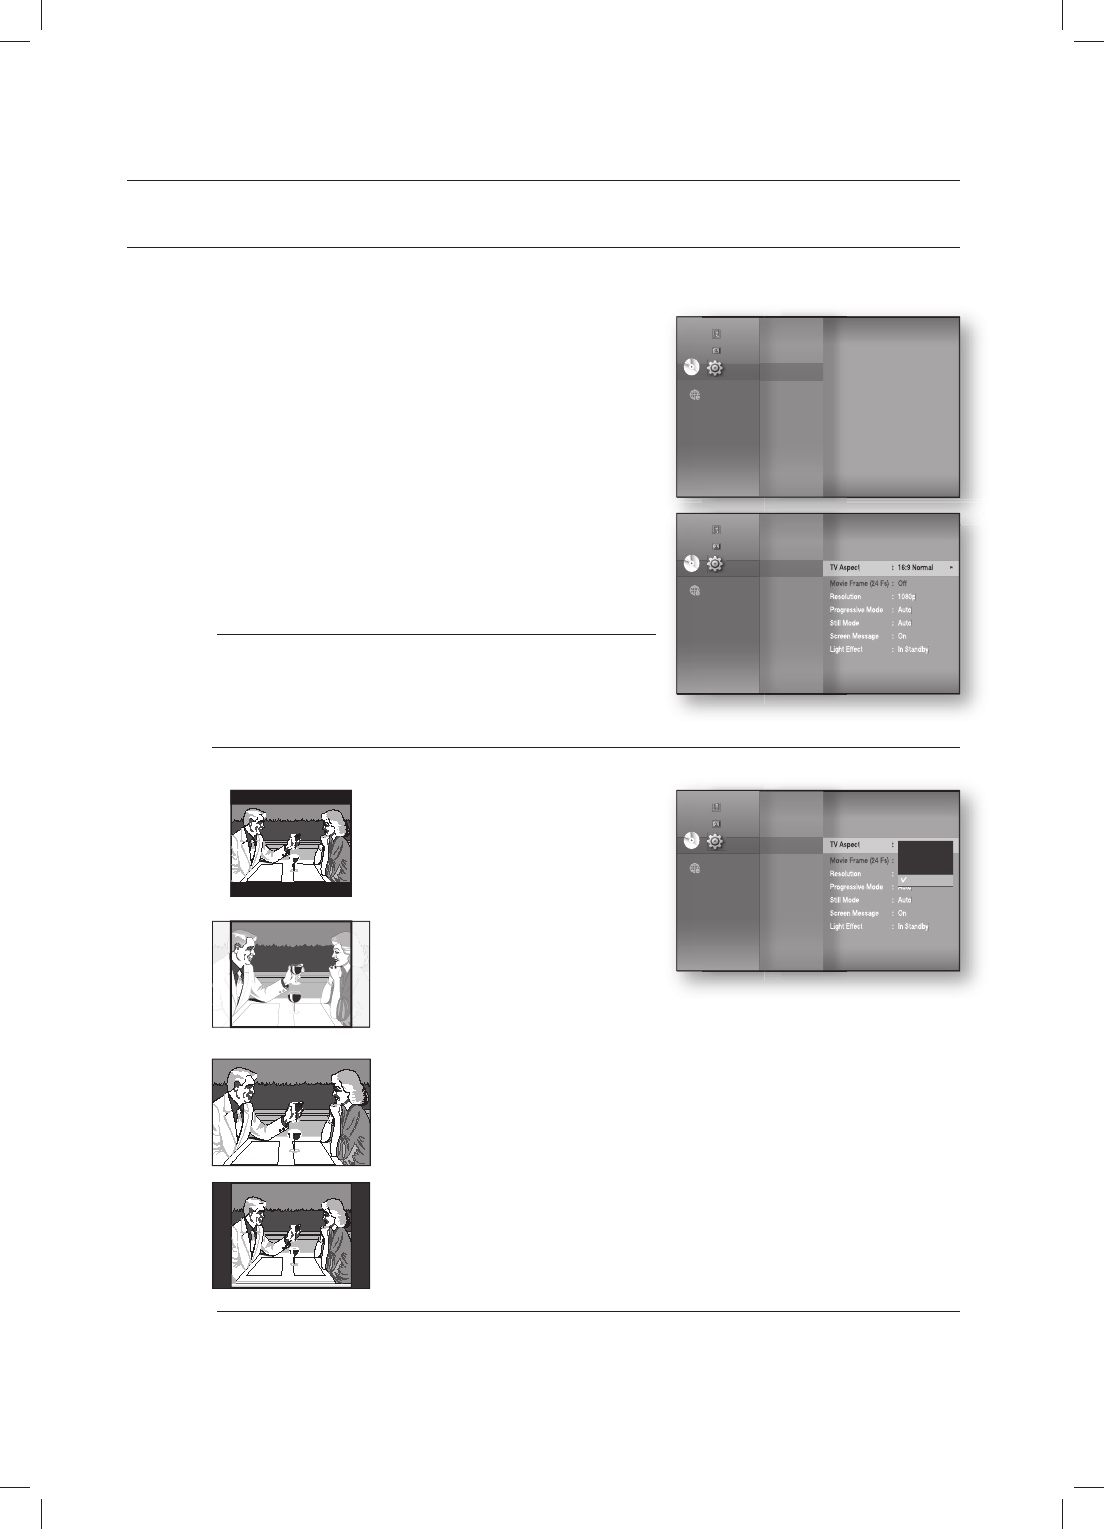
TV Aspect
Depending on the type of television you have, you may want to adjust the screen setting. (aspect ratio)
• 4:3 Letter Box :
Select when you want to see the total 16:9
ratio screen a Blu-ray Disc/DVD supplies,
even though you have a TV with a 4:3 ratio
screen. Black bars will appear at the top
and bottom of the screen.
• 4:3 Pan-Scan :
Select when you want to see the 16:9 video
supplied by the Blu-ray Disc/DVD without the
black bars on top and bottom, even though you
have a TV with a 4:3 ratio screen(extreme left and
right portion of the movie picture will be cut off).
• 16:9 Wide :
You can view the full 16:9 picture on your widescreen TV.
• 16:9 Normal :
Certain movies(4:3 source) will be displayed in 4:3 Pillarbox (black bars on sides of picture)
if 16:9 normal is selected.
Depending on the disc type, some aspect ratios may not be available.
If you select an aspect ratio which is different than the aspect ratio of your TV screen, then
the picture might appear to be distorted.
1.
2.
3.
4.
5.
6.
M
M
DVD
DVD
System
Language
Audio
Display
►
HDMI
Network
Parental
◄
Music
Photo
Setup
TV Aspect : 16:9 Normal
►
Movie Frame (24 Fs) : Off
Resolution : 1080p
Progressive Mode : Auto
Still Mode : Auto
Screen Message : On
Light Effect : In Standby
System
Language
Audio
Display
◄
HDMI
Network
Parental
DVD
DVD
Music
Photo
Setup
TV Aspect : 16:9 Normal
►
Movie Frame (24 Fs) : Off
Resolution : 1080p
Progressive Mode : Auto
Still Mode : Auto
Screen Message : On
Light Effect : In Standby
System
Language
Audio
Display
◄
HDMI
Network
Parental
DVD
DVD
4:3 Letter Box
4:3 Pan-Scan
16:9 Wide
16:9 Normal
Music
Photo
Setup
HT-BD8200_XAA_0530-2.indd 40HT-BD8200_XAA_0530-2.indd 40 2009-05-30 2:28:572009-05-30 2:28:57
41
ENG ● DISPLAY SETUP
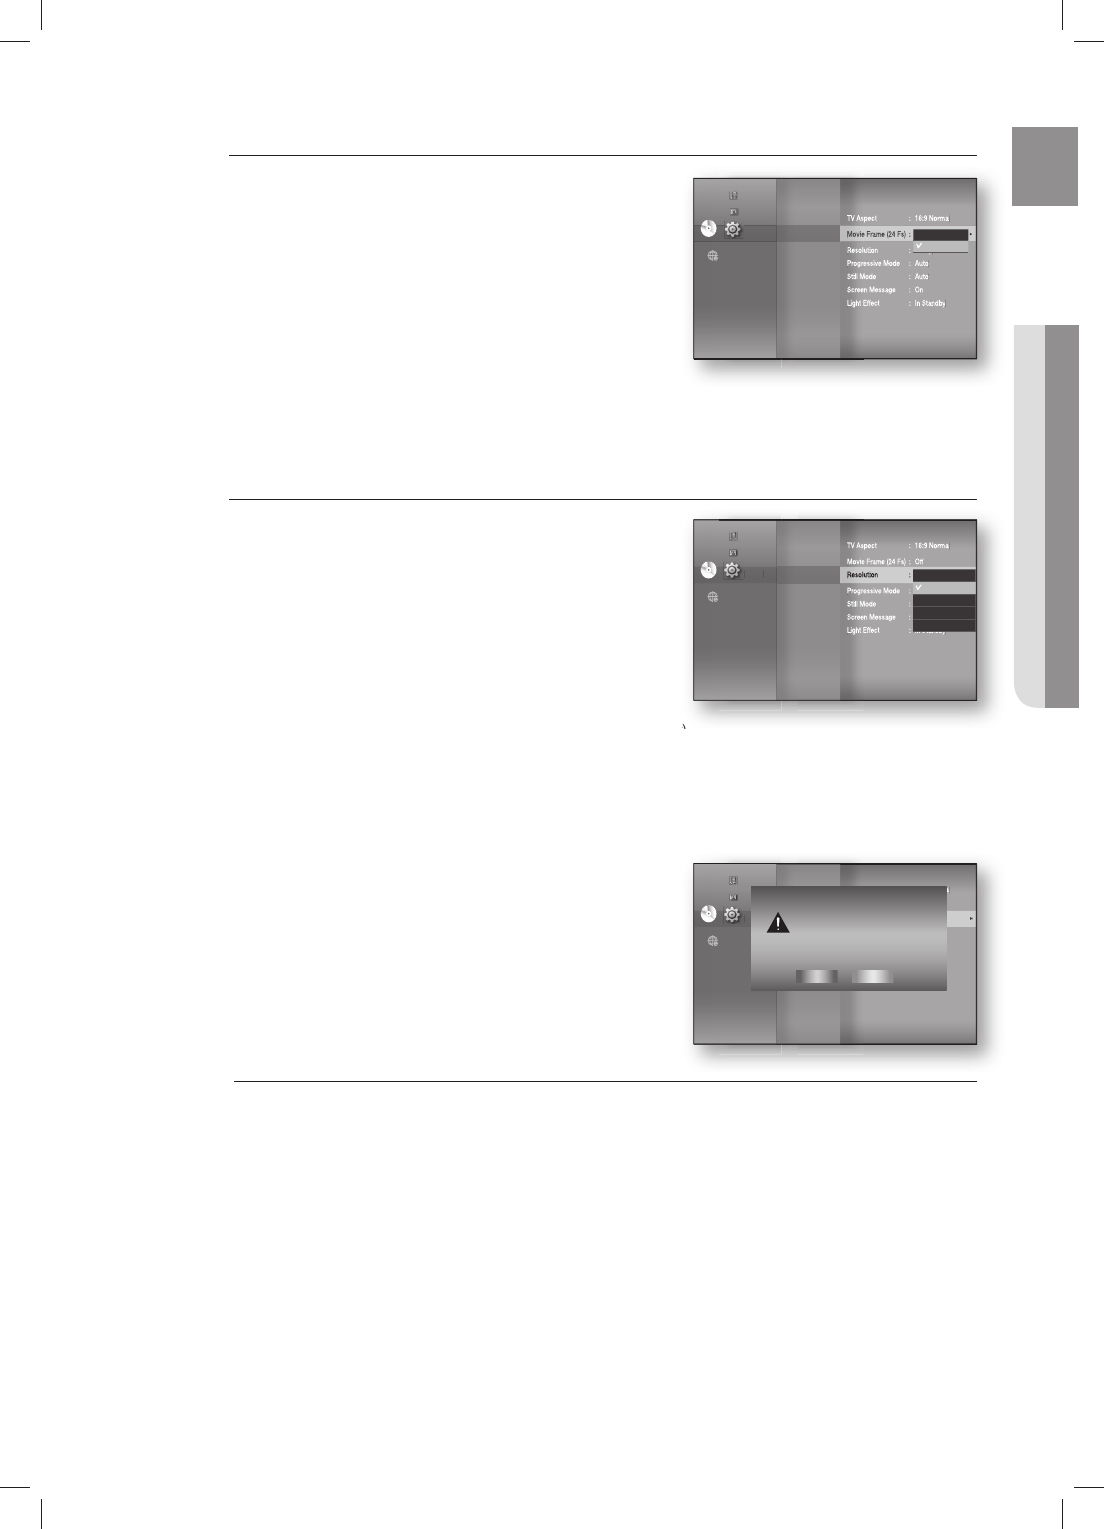
Movie Frame (24 Fs)
Movies are usually fi lmed at 24 frames per second. Some
Blu-ray Discs have the capability of playing back at this frame
rate. Setting the Movie Frame (24Fs) feature to ON allows you
to adjust the Blu-ray Home Theater's HDMI output to 24
frames per second for improved picture quality.
You can enjoy the Movie Frame (24Fs) feature only on a TV
supporting this frame rate.
This menu can only be selected in 1080i or 1080p HDMI
output resolution modes.
Depending on the disc, two types of frame rates may be included: Movie material (24 frame) and Video
material (30 frame). When the setting switches between Movie (24 frame) and Video (30 frame),
the screen may blink for a few seconds.
Resolution
Sets the output resolution of the HDMI and Composite video
signal.
The number in 480i, 480p, 720p, 1080p and 1080i
indicates the number of lines of video. The i and p indicate
interlace and progressive scan, respectively.
- BD Wise : Automatically sets the optimal resolution when
connected via HDMI to a TV with the BD Wise
feature. (The BD Wise menu item appears only
if BD Wise is set to On.)
- 1080p : Outputs 1080 lines of progressive video (HDMI only).
- 1080i : Outputs 1080 lines of interlaced video.
- 720p : Outputs 720 lines of progressive video.
- 480p : Outputs 480 lines of progressive video.
- 480i : Outputs 480 lines of interlaced video (Composite only).
If the connected TV does not support Movie Frame or the
selected resolution, you will see the following message:
If you select Yes and the resolution is not supported, the TV's
screen will be blank. Please wait for 15 seconds and
the resolution will revert to the previous value automatically.
If the screen is blank, press and hold the
STOP ()
button on the front of the player for
more than 5 seconds (no disc inserted). All settings are restored to the factory default.
Follow the steps on the previous page to access each mode and select the Display Setup
that your TV will support.
When the factory default settings are restored, all the user data stored in the BD data will
be deleted.
•
M
TV Aspect : 16:9 Normal
Movie Frame (24 Fs) : Off
►
Resolution : 1080p
Progressive Mode : Auto
Still Mode : Auto
Screen Message : On
Light Effect : In Standby
System
Language
Audio
Display
◄
HDMI
Network
Parental
DVD
DVD
On
Off
Music
Photo
Setup
TV Aspect : 16:9 Normal
Movie Frame (24 Fs) : Off
Resolution : 1080p
Progressive Mode : Auto
Still Mode : Auto
Screen Message : On
Light Effect : In Standby
System
Language
Audio
Display
◄
HDMI
Network
Parental
DVD
DVD
1080p
1080i
720p
480p
480i
Music
Photo
Setup
TV Aspect : 16:9 Normal
Movie Frame (24 Fs) : Off
Resolution : 1080p
►
Progressive Mode : Auto
Still Mode : Auto
Screen Message : On
Light Effect : In Standby
System
Language
Audio
Display
◄
HDMI
Network
Parental
DVD
DVD
Music
Photo
Setup
If no pictures are shown after the selection,
please wait for 15 seconds. And then,
the resolution will be reverted
to the previous value automatically.
Would you like to make a selection?
Yes No
HT-BD8200_XAA_0530-2.indd 41HT-BD8200_XAA_0530-2.indd 41 2009-05-30 2:29:012009-05-30 2:29:01
Display setup
42
SETTING UP THE VIDEO DISPLAY/OUTPUT OPTIONS
Resolution according to the output mode
Blu-ray Disc playback
Output
Setup HDMI COMPOSITE
1080p, Movie Frame(24Fs) off
1080p@60F 480i
1080p/1080i, Movie Frame (24Fs) on
1080p@24F 480i
1080i, Movie Frame (24Fs) off
1080i 480i
720p 720p 480i
480p 480p 480i
480i 480p 480i
DVD playback
Output
Setup HDMI COMPOSITE
1080p 1080p@60F 480i
1080i 1080i 480i
720p 720p 480i
480p 480p 480i
480i 480p 480i
This player has the HDMI Auto Detect Feature. When the player is fi rst connected to a TV
via HDMI, the player's output will be set automatically to HDMI.
If the HDMI Auto Detection feature does not work, you can't select the 1080p resolution or
Movie Frame (24Fs).
The Blu-ray Disc must have the 24 frame feature in order to use the Movie Frame (24Fs)
mode.
•
•
M
HT-BD8200_XAA_0530-2.indd 42HT-BD8200_XAA_0530-2.indd 42 2009-05-30 2:29:042009-05-30 2:29:04
43
ENG ● DISPLAY SETUP
Progressive Mode
The Progressive Mode helps to improve picture quality when
viewing 480i resolution DVD discs.
Auto : Select this to have the player automatically set the
best picture for the DVD you're watching.
Video : Select this for the best picture from Concert or TV
show DVDs.
Frame & Field bar
Still Mode
Set the Auto, Field or Frame setting for the best possible still
picture (pause mode) from a DVD.
Auto: Select this setting to have the player automatically
display the best Still picture depending on the content.
Field Mode: Select this when pausing a scene with a lot of
action.
Frame Mode: Select this to increase the resolution of the
Still picture.
Screen Message
On : Displays messages related to operation mode.
Off : Does not display messages related to operation mode.
Light Effect
Light Effect mode adds moody lighting under the main unit.
Off : Always off
In Standby : Lights on while in stand-by
Playing : Off in stand-by mode, lights on while playing
Always : Always on
•
•
•
•
•
•
•
•
•
•
•
System
Language
Audio
Display
◄
HDMI
Network
Parental
DVD
DVD
TV Aspect : 16:9 Normal
Movie Frame (24 Fs) : Off
Resolution : 1080p
Progressive Mode : PCM
►
Still Mode : Auto
Screen Message : On
Light Effect : In Standby
Auto
Video
Music
Photo
Setup
System
Language
Audio
Display
◄
HDMI
Network
Parental
DVD
DVD
Movie Frame (24 Fs) : Off
Resolution : 1080p
Progressive Mode : Auto
Still Mode : Auto
Screen Message : On
Light Effect : In Standby
Auto
Field
Frame
Music
Photo
Setup
System
Language
Audio
Display
◄
HDMI
Network
Parental
DVD
DVD
Resolution : 1080p
Progressive Mode : Auto
Still Mode : Auto
Screen Message
Light Effect : In Standby
On
Off
Music
Photo
Setup
System
Language
Audio
Display
◄
HDMI
Network
Parental
DVD
DVD
Progressive Mode : Auto
Still Mode : Auto
Screen Message : On
Light Effect : In Standby
Music
Photo
Setup Off
In Standby
Playing
Always
HT-BD8200_XAA_0530-2.indd 43HT-BD8200_XAA_0530-2.indd 43 2009-05-30 2:29:042009-05-30 2:29:04
HDMI setup
44
SETTING UP THE HDMI SETUP OPTIONS
With the unit in Stop mode, press the MENU button.
Press the
▲▼
buttons to select Setup, then press the
ENTER or
►
button.
Press the
▲▼
buttons to select HDMI, then press the
ENTER or
►
button.
HDMI setup menu will be displayed.
Press the
▲▼
buttons to select the desired display option,
then press the ENTER or
►
button.
Press the RETURN or ◄ button to return to the previous menu. Press the MENU button to exit the menu.
Anynet+ (HDMI-CEC) Samsung products only
What is Anynet+?
Anynet+ is a convenient function that offers linked operations with other Samsung products with the
Anynet+ feature.
You can operate this unit using a Samsung TV remote control or power on your Samsung TV and Home
theater and start disc playback simply by pressing the PLAY button on the TV’s remote.
This function is not available if the HDMI cable does not support CEC.
To use Anynet+
Connect the Blu-ray Home Theater to a Samsung TV with an HDMI cable. (See pages 22~23)
Set the Anynet+ function on your TV. (See the TV instruction manual for more information.)
Anynet+ Functions
One touch play
You can power on your Samsung TV and Home Theater, and play the disc in this unit simply by
pressing the PLAY button on the TV’s remote.
One touch watching
Select “Watching Blu-ray Home Theater” or “Connected to Blu-ray Home Theater” (depending on
your TV's menu) in the Anynet+ menu on the TV. The Blu-ray Home Theater will automatically turn on
and the TV will be switched to HDMI mode.
Remote control Link
You can operate this player with your Samsung TV remote control.
Available buttons on the Samsung TV remote: These buttons work the same as this Blu-ray Home
Theater's remote control.
- Playback control buttons :
- Menu operation button :
- Numeric buttons : ~
- Color buttons :
1.
2.
3.
4.
M
M
1.
2.
•
•
•
•
Language
Audio
Display
HDMI
Network
Parental
DVD
DVD
◄
◄
Music
Photo
Setup
HT-BD8200_XAA_0530-2.indd 44HT-BD8200_XAA_0530-2.indd 44 2009-05-30 2:29:092009-05-30 2:29:09
45
ENG ● HDMI SETUP
TV Anynet+ Menu
When you press the Anynet+ button on your Samsung TV's remote
control, the following On-Screen Display (OSD) will be shown.
Blu-ray Home Theater Menu
- When playing a movie : brings up the disc’s menu (same
as DISC MENU button on the Blu-ray Home Theater’s
remote control)
-
In Stop mode : brings up the SETUP menu (same as the
MENU button on the Blu-ray Home Theater’s remote
control.)
Blu-ray Home Theater Operation Menu
- When playing a DVD VIDEO, DVD-RW/-R, BD-ROM, BD-RE :
shows INFO OSD (same as INFO button on the player's remote control)
These menus may look different depending on your Samsung TV.
HDMI Format
You can optimize the HDMI output for connection to a TV or
Monitor.
TV : Select if connected to a TV via HDMI.
Monitor : Select if connected to a Monitor via HDMI.
If the player is connected to a TV, the Monitor
option is unavailable.
TV or monitor has to be connected to the player before you select this option.
•
•
M
•
•
M
THEATER
n
View TV
Select Device
Record
Menu on Device
Device Operation
Receiver : Off
Setup
Move
Enter
Exit
BD Wise Samsung products only
BD Wise is Samsung's latest inter-connectivity feature.
When you connect Samsung products with BD-Wise to each
other via HDMI, the optimum resolution will be set
automatically.
On : The original resolution of the BD/DVD disc will be
output to the TV direct.
Off : The output resolution will be fi xed according to the
Resolution previously set, regardless of the resolution of the
disc.
If you want to change the resolution when you set BD Wise on, you must set BD Wise to Off in advance.
If you set BD Wise to off, the resolution of the connected TV will be automatically adjusted to its maximum
resolution.
If the player is connected to a device that does not support BD Wise, you can not use the BD wise function.
For a proper operation of BD Wise, set BD Wise to ON in the menus of the player and the TV.
•
•
M
Language
Audio
Display
HDMI
◄
Network
Parental Stup
DVD
DVD
Anynet + (HDMI-CEC)
: On
HDMI Format
: Tv
BD Wise : On
HDMI Audio : Off
TV
Monitor
Music
Photo
Setup
Language
Audio
Display
HDMI
◄
Network
Parental Stup
DVD
DVD
Anynet + (HDMI-CEC)
: On
H
DMI Format : TV
BD Wise : PCM
►
HDMI Audio : Off
On
Off
Music
Photo
Setup
HT-BD8200_XAA_0530-2.indd 45HT-BD8200_XAA_0530-2.indd 45 2009-05-30 2:29:102009-05-30 2:29:10
HDMI setup
46
SETTING UP THE HDMI SETUP OPTIONS
HDMI Audio
The audio signals transmitted over the HDMI Cable can be
toggled ON/OFF.
• On : Both video and audio signals are transmitted over the
HDMI connection cable, and audio is output through
your TV speakers only.
• Off : Video is transmitted over the HDMI connection cable
only, and audio is output through the Blu-ray Home
Theater speakers only.
The default setting of this function is HDMI Audio Off.
HDMI AUDIO is automatically down-mixed to 2ch for TV speakers.
M
Language
Audio
Display
HDMI
◄
Network
Parental Stup
DVD
DVD
Anynet + (HDMI-CEC)
: On
HDMI Format : TV
BD Wise : On
HDMI Audio : Off
On
Off
Music
Photo
Setup
HT-BD8200_XAA_0530-2.indd 46HT-BD8200_XAA_0530-2.indd 46 2009-05-30 2:29:132009-05-30 2:29:13
47
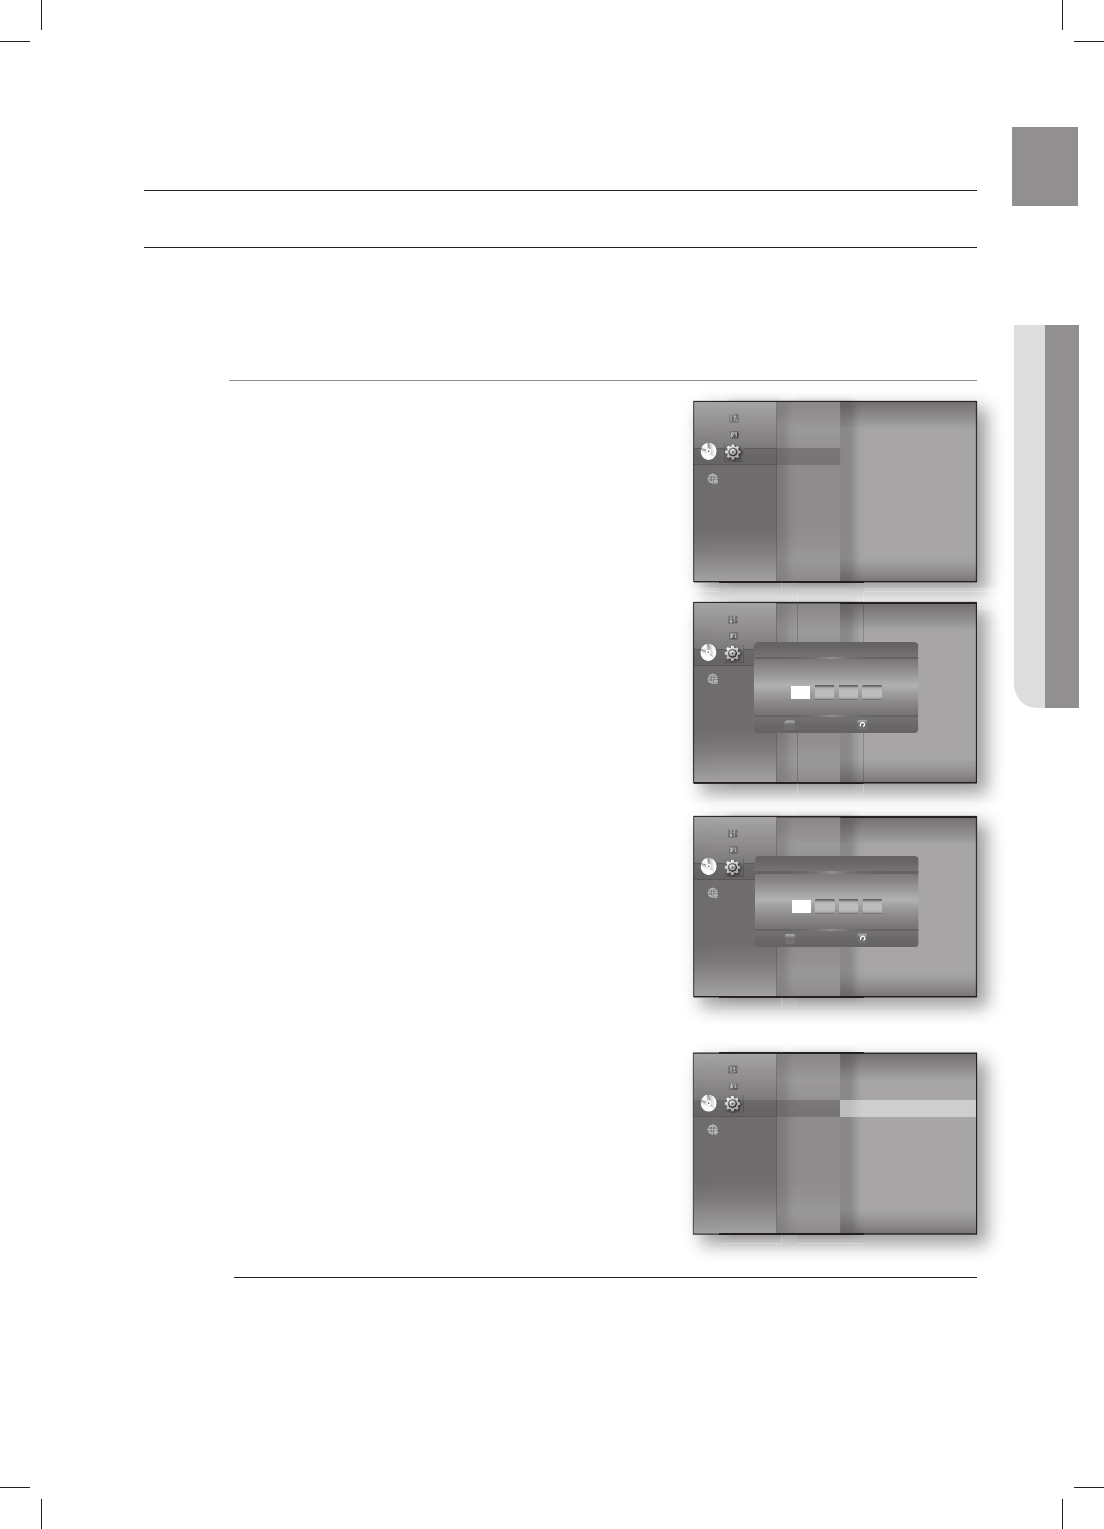
ENG ● PARENTAL SETUP
Parental setup
SETTING UP THE PARENTAL LOCK
The Parental Lock function works in conjunction with Blu-ray Disc/DVDs that have been assigned a rating which
helps you control the types of Blu-ray Disc/DVDs that your family watches. There are up to 8 rating levels on a disc.
hZ
With the unit in Stop mode, press the MENU button.
Press the
▲▼
buttons to select Setup, then press the
ENTER or
►
button.
Press the
▲▼
buttons to select Parental, then press the
ENTER or
►
button.
When you operate your Blu-ray Home Theater for the fi rst
time, the “Enter New password.” message will be
displayed.
Enter the 4-digit password using the number buttons on
the remote control.
The “Confi rm the password.” message will be displayed.
Enter your password again.
Press the ENTER or
►
button to select Parental Lock.
Press the
▲▼
buttons to select On or Off, then press the
ENTER button.
Press the RETURN or ◄ button to return to the previous menu. Press the MENU button to
exit the menu.
1.
2.
3.
4.
5.
6.
M
Display
HDMI
Network
Parental
◄
DVD
DVD
Music
Photo
Setup
Display
HDMI
Network
Parental
DVD
DVD
Music
Photo
Setup Parental Setup
Enter New password.
Return
Number
0.9
Display
HDMI
Network
Parental
DVD
DVD
Music
Photo
Setup Parental Setup
Confi rm the password.
Return
Number
0.9
Display
HDMI
Network
Parental
◄
DVD
DVD
Parental Lock : Off ►
Rating Level : 1(Kids)
New Password
Music
Photo
Setup
HT-BD8200_XAA_0530-2.indd 47HT-BD8200_XAA_0530-2.indd 47 2009-05-30 2:29:142009-05-30 2:29:14
Parental setup
48
SETTING UP THE PARENTAL LOCK
If you forgot your password
Remove the disc.
Press and hold the STOP () button on the front panel for 5 seconds or more.
All settings will revert to the factory settings.
When the factory default settings are restored, all the user data stored in the BD data will
be deleted.
Setting the Rating Level
Press the
▲▼
buttons to select Rating Level, then press
the ENTER or
►
button.
Press the
▲▼
buttons to select the rating level you want,
then press the ENTER button. For example, if you select
up to Level 6, discs that contain Level 7, 8 will not play.
A larger number indicates that the program is intended for
adult use only.
Level 1 is the most restrictive and Level 8 is the least.
Changing the Password
Press the
▲▼
buttons to select New Password, then
press the ENTER or
►
button.
Enter the 4-digit password using the number buttons on
the remote control. The “Enter New password.” message
will be displayed.
Enter your password again using the number buttons on
the remote control.
1.
2.
•
M
1.
2.
1.
2.
3.
Display
HDMI
Network
Parental
◄
DVD
DVD
Parental Lock : Off
Rating Level : 1(Kids) ►
New Password
8(Adults)
7
6
5
4
3
2
1(Kids)
Music
Photo
Setup
Display
HDMI
Network
Parental
◄
DVD
DVD
Parental Lock : Off
Rating Level : 1(Kids)
New Password ►
Music
Photo
Setup
Display
HDMI
Network
Parental
◄
DVD
DVD
Parental Lock : Off
Rating Level : 1(Kids)
New Password ►
Music
Photo
Setup Parental Setup
Enter New password.
Return
Number
0.9
Display
HDMI
Network
Parental
◄
DVD
DVD
Parental Lock : Off
Rating Level : 1(Kids)
New Password ►
Music
Photo
Setup Parental Setup
Confi rm the password.
Return
Number
0.9
HT-BD8200_XAA_0530-2.indd 48HT-BD8200_XAA_0530-2.indd 48 2009-05-30 2:29:192009-05-30 2:29:19
49
ENG ● NETWORK SETUP
Network setup
SETTING UP THE NETWORK SETUP OPTIONS
To obtain information on the proper settings, check the network settings on your computer or contact
your Internet provider.
To set the network of your Blu-ray Home Theater, follow the
steps below.
With the unit in Stop mode/No Disc mode, press the
MENU button.
Press the
▲▼
buttons to select Setup, then press the
ENTER or
►
button.
Press the
▲▼
buttons to select Network, then press the
ENTER or
►
button.
Press the
▲▼
buttons to select the desired network
option from the options described below, then press the ENTER or
►
button.
Press the
▲▼
buttons to select the desired item, then press the ENTER button.
Each network option is described in detail below.
Network Selection
Select Cable or Wireless as the method to connect to
network.
To setup, follow steps 1~3 above.
Press the
▲▼
buttons to select Network Selection, then
press the ENTER or
►
button.
Cable : Select this to connect to the network using a
cable. (see page 28)
Wireless : Select this to connect to the network
wirelessly. (see page 29)
Cable Network
To setup, follow steps 1~3 above.
Press the
▲▼
buttons to select Cable Network, then
press the ENTER or
►
button.
Press the
▲▼
buttons to select DHCP, then press the
ENTER button.
If DHCP is set to On, you can't select IP Address,
Subnet Mask or Gateway.
If DNS is set to Auto, you can’t select Primary/
Secondary DNS.
1.
2.
3.
4.
5.
4.
•
•
4.
5.
M
Display
HDMI
Network
◄
Parental
DVD
DVD
Network Selection : Cable
Cable Network ►
Wireless Network
Proxy
NTP Server : Off
Network Connection Test
BD-LIVE
Connection : Allow (Valid Only)
Music
Photo
Setup
DVD
DVD
Display
HDMI
Network
◄
Parental
Music
Photo
Setup
Display
HDMI
Network
◄
Parental
DVD
DVD
Network Selection : Cable ►
Cable Network
Wireless Network
Proxy
NTP Server : Off
Network Connection Test
BD-LIVE
Connection : Allow (Valid Only)
Music
Photo
Setup
Display
HDMI
Network
◄
Parental
Network Selection : Cable
Cable Network ►
Wireless Network
Proxy
NTP Server : Off
Network Connection Test
BD-LIVE Internet : Allow (Vaild Only)
Connection
DVD
DVD
Music
Photo
Setup ◄
Cable Network
Select
Return
DHCP : On
IP Address : 000 . 000 . 000 . 000
Subnet Mask : 255 . 255 . 255 . 000
Gateway : 000 . 000 . 000 . 000
DNS : Auto
Primary DNS : 000 . 000 . 000 . 000
Secondary DNS : 000 . 000 . 000 . 000
Save Cancel
HT-BD8200_XAA_0530-2.indd 49HT-BD8200_XAA_0530-2.indd 49 2009-05-30 2:29:232009-05-30 2:29:23
Network setup
50
SETTING UP THE NETWORK SETUP OPTIONS
Press the
▲▼
buttons to select a desired item, then
press the ENTER button.
If DHCP is set to Off and, DNS to Manual, enter
your IP Address, Subnet Mask, Gateway and
Primary DNS settings (Secondary DNS is optional).
If DHCP is set to On and, DNS to Manual, enter
your Primary DNS setting (Secondary DNS is
optional).
If DHCP is set to On and, DNS to Auto, you don’t
need further or additional settings.
When you select an item, use the number
and ▲▼◄ ► buttons.
If the automatic settings don’t work, contact
your ISP.
When done, use the
▲▼
buttons to select Save, then press the ENTER button.
If you don’t want to save your work, use the
▲▼◄ ►
buttons to select Cancel, then press the
ENTER button.
The IP address used in this manual is for illustrative purposes only. You must refer to your
network settings for the actual IP address.
To obtain settings for IP address, Subnet mask, Gateway and Primary DNS, check the
network settings in your computer or contact your internet service provider.
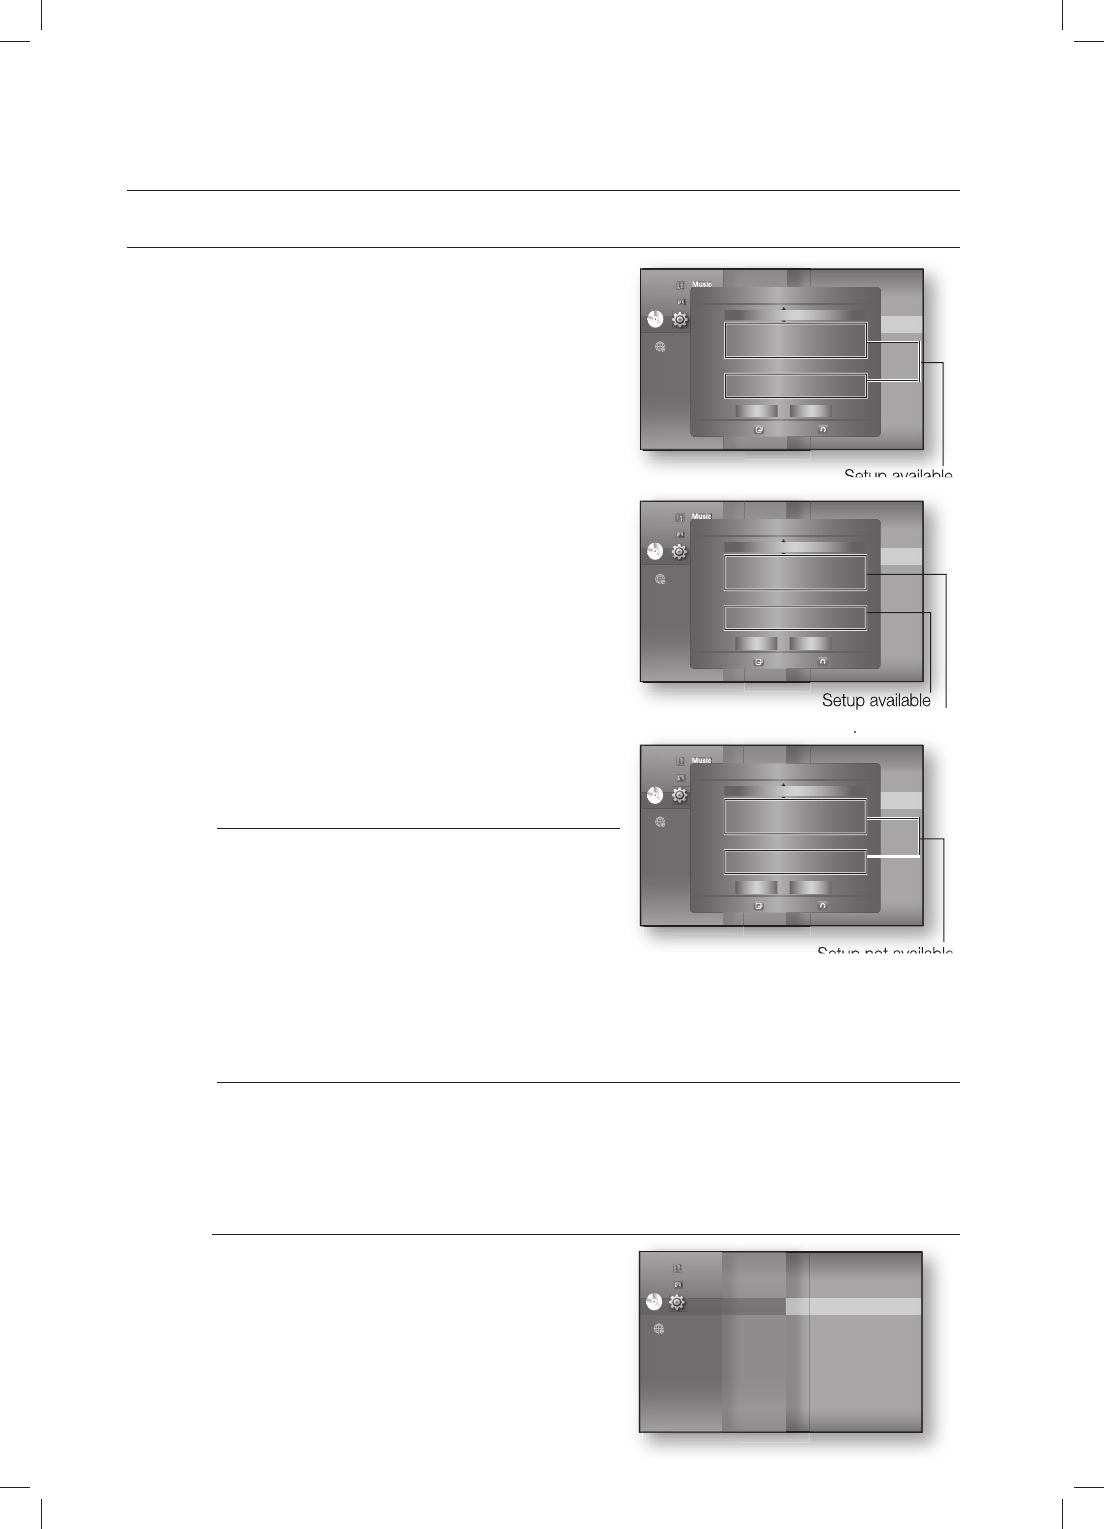
Wireless Network
To setup, follow steps 1~3 on page 49.
Press the
▲▼
buttons to select Wireless Network,
then press the ENTER or
►
button.
6.
•
•
•
M
7.
8.
M
4.
Setup available
Music
Photo
Setup
Audio
Display
HDMI
Network
◄
Parental
Network Selection : Cable
Cable Network ►
Wireless Network
Proxy
NTP Server : Off
Network Connection Test
BD-LIVE Internet : Allow (Vaild Only)
Connection
◄
DVD
DVD
Cable Network
Select
Return
DHCP : Off
IP Address : 000 . 000 . 000 . 000
Subnet Mask : 255 . 255 . 255 . 000
Gateway : 000 . 000 . 000 . 000
DNS : Manual
Primary DNS : 000 . 000 . 000 . 000
Secondary DNS : 000 . 000 . 000 . 000
Yes No
Setup not available
Setup available
Music
Photo
Setup
Audio
Display
HDMI
Network
◄
Parental
Network Selection : Cable
Cable Network ►
Wireless Network
Proxy
NTP Server : Off
Network Connection Test
BD-LIVE Internet : Allow (Vaild Only)
Connection
◄
DVD
DVD
Cable Network
Select
Return
DHCP : On
IP Address : 000 . 000 . 000 . 000
Subnet Mask : 255 . 255 . 255 . 000
Gateway : 000 . 000 . 000 . 000
DNS : Manual
Primary DNS : 000 . 000 . 000 . 000
Secondary DNS : 000 . 000 . 000 . 000
Yes No
Setup not available
Music
Photo
Setup
Audio
Display
HDMI
Network
◄
Parental
Network Selection : Cable
Cable Network ►
Wireless Network
Proxy
NTP Server : Off
Network Connection Test
BD-LIVE Internet : Allow (Vaild Only)
Connection
◄
DVD
DVD
Cable Network
Select
Return
DHCP : On
IP Address : 000 . 000 . 000 . 000
Subnet Mask : 255 . 255 . 255 . 000
Gateway : 000 . 000 . 000 . 000
DNS : Auto
Primary DNS : 000 . 000 . 000 . 000
Secondary DNS : 000 . 000 . 000 . 000
Yes No
Audio
Display
HDMI
Network
◄
Parental
Network Selection :
Wireless
Cable Network
Wireless Network ►
Proxy
NTP Server : Off
Network Connection Test
BD-LIVE Internet : Allow (Vaild Only)
Connection
DVD
DVD
Music
Photo
Setup
HT-BD8200_XAA_0530-2.indd 50HT-BD8200_XAA_0530-2.indd 50 2009-05-30 2:29:282009-05-30 2:29:28
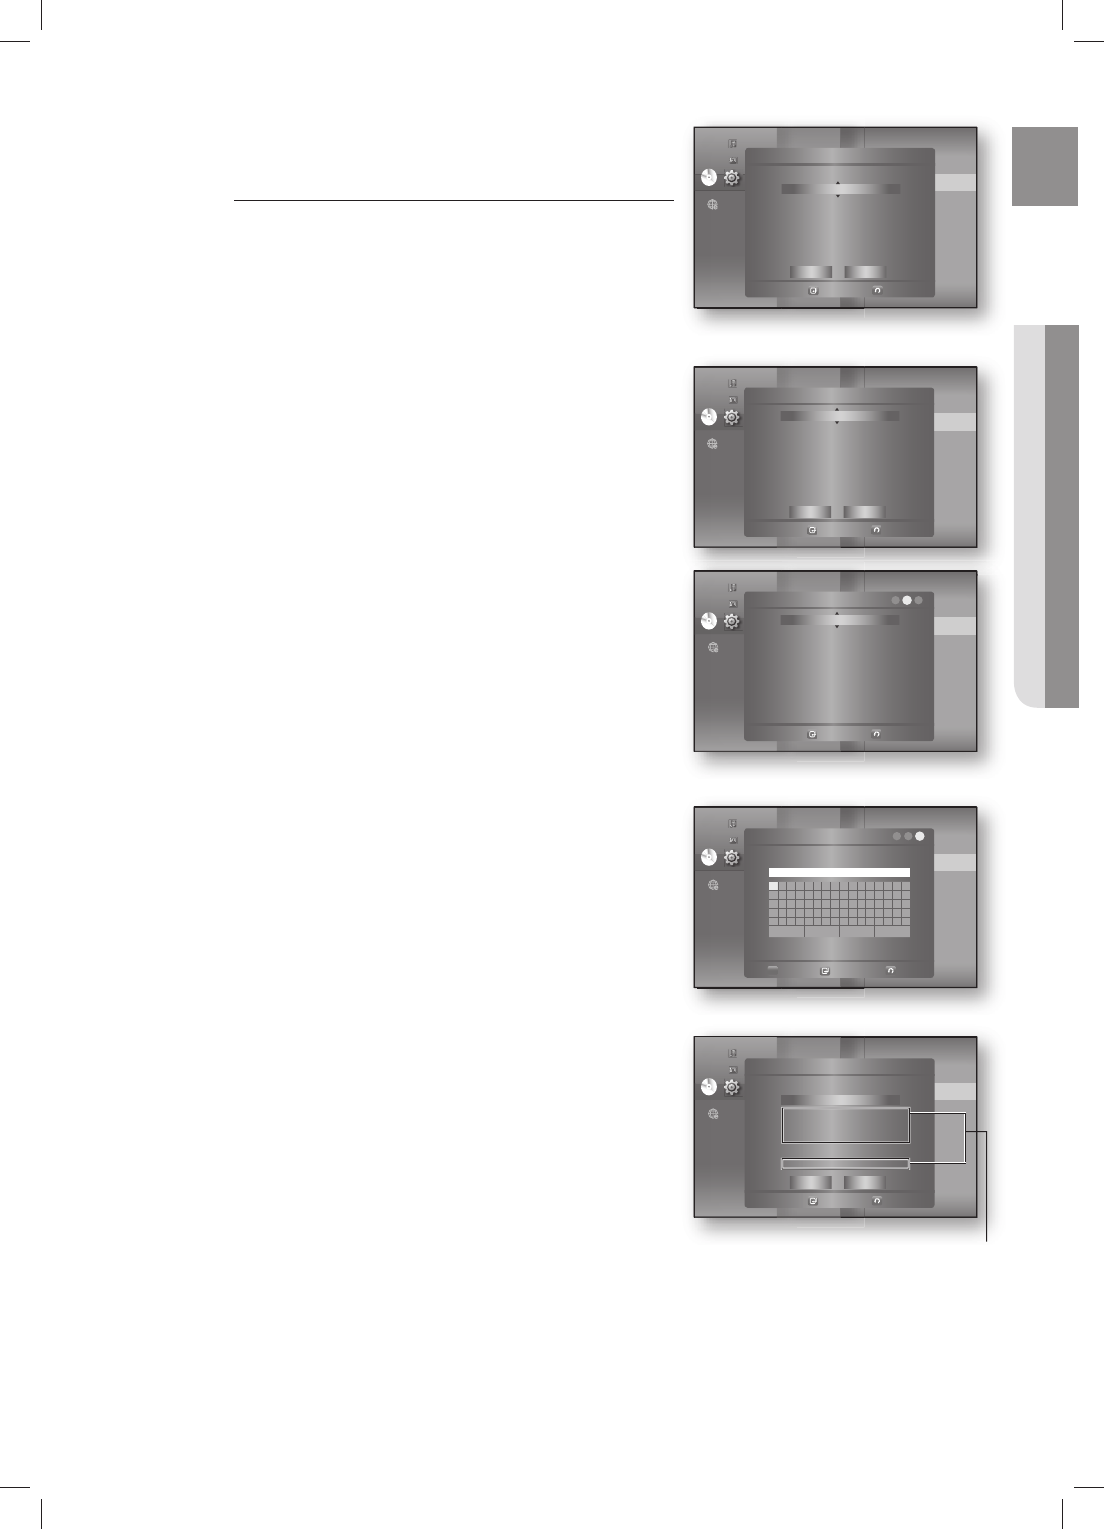
51
ENG ● NETWORK SETUP
Press the
▲▼
buttons to select DHCP, then press the
ENTER button.
If DHCP is set to On, you can't select IP Address,
Subnet Mask or Gateway.
If DNS is set to Auto, you can’t select Primary/
Secondary DNS.
Press the
▲▼
buttons to select a desired item, then press
the ENTER button.
Select an Access Point, and then press the ENTER
button to display available list of APs.
(It may take several seconds to search.)
- When you select an AP and press the ENTER
button, it tries to connect to the designated AP.
- If successful, a notifi cation appears.
(If selected AP shows a Lock icon, you may need to
provide security authentication.)
- Select your appropriate Security Access Point if it is
known. If it is not, select WEP, WPAPSK or
WPA2PSK from the list below and enter in the
password. Keep trying each Security Access Point
and enter the Password until a connection is made.
- Enter in the Password then press the BLUE (D)
button to connect to your access point (Router).
For further details on AP security, refer to the AP’s
(Router) user manual.
If DHCP is set to Off and, DNS to Manual, enter your IP
Address, Subnet Mask, Gateway and DNS Server.
5.
M
6.
•
•
Audio
Display
HDMI
Network
◄
Parental
Network Selection :
Wireless
Cable Network
Wireless Network ►
Proxy
NTP Server : Off
Network Connection Test
BD-LIVE Internet : Allow (Vaild Only)
Connection
DVD
DVD
Music
Photo
Setup ◄
Wireless Network
Select
Return
Access Point : Not Selected
DHCP : On
IP Address : 000 . 000 . 000 . 000
Subnet Mask : 255 . 255 . 255 . 000
Gateway : 000 . 000 . 000 . 000
DNS : Auto
DNS Server : 000 . 000 . 000 . 000
Save Cancel
Audio
Display
HDMI
Network
◄
Parental
Network Selection :
Wireless
Cable Network
Wireless Network ►
Proxy
NTP Server : Off
Network Connection Test
BD-LIVE Internet : Allow (Vaild Only)
Connection
DVD
DVD
Music
Photo
Setup ◄
Access Point – Security
Select
Return
OPEN
WEP
WPAPSK
WPA2PSK
123
Audio
Display
HDMI
Network
◄
Parental
Network Selection :
Wireless
Cable Network
Wireless Network ►
Proxy
NTP Server : Off
Network Connection Test
BD-LIVE Internet : Allow (Vaild Only)
Connection
DVD
DVD
Music
Photo
Setup ◄
Password
0-9
Number
Select
Return
123
ABCDEFGH I JK LMNOP
QRSTUVWXYZabcde f
gh i j k lmnopqr s tuv
wxyz1234567890−_
+=.~!@#$%^&( ) /? |
a
Back Space
b
Space
c
Clear
d
Save
_
Audio
Display
HDMI
Network
◄
Parental
Network Selection :
Wireless
Cable Network
Wireless Network ►
Proxy
NTP Server : Off
Network Connection Test
BD-LIVE Internet : Allow (Vaild Only)
Connection
DVD
DVD
Music
Photo
Setup
Setup available
◄
Wireless Network
Select
Return
Access Point : Not Selected
DHCP : Off
IP Address : 000 . 000 . 000 . 000
Subnet Mask : 255 . 255 . 255 . 000
Gateway : 000 . 000 . 000 . 000
DNS : Manual
DNS Server : 000 . 000 . 000 . 000
Save Cancel
HT-BD8200_XAA_0530-2.indd 51HT-BD8200_XAA_0530-2.indd 51 2009-05-30 2:29:332009-05-30 2:29:33
Network setup
52
SETTING UP THE NETWORK SETUP OPTIONS
If DHCP is set to On and, DNS to Manual, enter
your DNS Server.
If DHCP is set to On and, DNS to Auto, you don’t
need further or additional settings.
When you select an item, use the number and
▲▼◄ ► buttons.
If the automatic settings don’t work, contact
your ISP.
When done, use the
▲▼
buttons to select Save, then press the ENTER button.
If you don’t want to save your work, use the
▲▼◄ ►
buttons to select Cancel, then press the
ENTER button.
The IP address used in this manual is for illustrative purposes only. You must refer to the
your network settings for the actual IP address.
To obtain settings for IP address, Subnet mask, Gateway and DNS Server, check the
network settings in your computer or contact your internet service provider.
Proxy Setting
A proxy server services requests by forwarding them to other servers.
If you are required to confi gure the proxy setting, enter the settings specifi ed by the ISP.
To setup, follow steps 1~3 on page 49.
Press the
▲▼
buttons to select Proxy, then press
the ENTER or
►
button.
Server
Port
User
Password
For more information, contact your ISP (Internet Service Provider).
•
•
M
7.
8.
M
4.
•
•
•
•
M
Audio
Display
HDMI
Network
◄
Parental
Network Selection :
Wireless
Cable Network
Wireless Network ►
Proxy
NTP Server : Off
Network Connection Test
BD-LIVE Internet : Allow (Vaild Only)
Connection
DVD
DVD
Music
Photo
Setup
Setup not available
Setup available
◄
Wireless Network
Select
Return
Access Point : Not Selected
DHCP : On
IP Address : 000 . 000 . 000 . 000
Subnet Mask : 255 . 255 . 255 . 000
Gateway : 000 . 000 . 000 . 000
DNS : Manual
DNS Server : 000 . 000 . 000 . 000
Save Cancel
Audio
Display
HDMI
Network
◄
Parental
Network Selection :
Wireless
Cable Network
Wireless Network ►
Proxy
NTP Server : Off
Network Connection Test
BD-LIVE Internet : Allow (Vaild Only)
Connection
DVD
DVD
Music
Photo
Setup
Setup not available
◄
Wireless Network
Select
Return
Access Point : Not Selected
DHCP : On
IP Address : 000 . 000 . 000 . 000
Subnet Mask : 255 . 255 . 255 . 000
Gateway : 000 . 000 . 000 . 000
DNS : Manual
DNS Server : 000 . 000 . 000 . 000
Save Cancel
Audio
Display
HDMI
Network
◄
Parental
Network Selection :
Wireless
Cable Network
Wireless Network ►
Proxy
NTP Server : Off
Network Connection Test
BD-LIVE Internet : Allow (Vaild Only)
Connection
DVD
DVD
Music
Photo
Setup ◄
Proxy
Select
Return
Proxy : Off
Server :
Port : 8080
User :
Password :
Save Cancel
HT-BD8200_XAA_0530-2.indd 52HT-BD8200_XAA_0530-2.indd 52 2009-05-30 2:29:382009-05-30 2:29:38
53
ENG ● NETWORK SETUP
NTP Server (Used to Retrieve Time Information from NTP Server)
To setup, follow steps 1~3 on page 49.
Press the
▲▼
buttons to select NTP Server, then press
the ENTER or
►
button.
On : the player automatically connects to the Internet
server in order to adjust the time setting.
Off : the player does not connect to the Internet server
to adjust the time setting.
Network Connection Test
Use this menu to check whether your network connection is working or not.
To setup, follow steps 1~3 on page 49.
Press the
▲▼
buttons to select Network Connection
Test, then press the ENTER or
►
button.
BD-LIVE Internet Connection
The Blu-ray Home Theater supports BD-LIVE which enables you to enjoy a variety of interactive service
contents provided by the disc manufacturer through a network connection. To enjoy this feature, you
must fi rst perform the LAN connection (see page 28) or Wireless Lan adapter connection to the USB slot.
* You must have a minimum 1 GB USB Memory device inserted in one of the USB slots in order to
download content from BD-LIVE.
The Internet connection may be restricted while you are using BD-LIVE contents.
To setup, follow steps 1~3 on page 49.
Press the
▲▼
buttons to select BD-LIVE Internet
Connection, then press the ENTER or
►
button.
Allow (All) : The Internet connection will be allowed for
all BD-LIVE contents.
Allow (Valid Only) : The Internet connection will be
allowed only for BD-LIVE contents containing a valid
certifi cate.
Prohibit : No Internet connection will be allowed for
any BD-LIVE content.
What is a valid certifi cate? When the Blu-ray Home Theater uses BD-LIVE to send the disc
data and request to the server to certify the disc, the server uses the transferred data to
check if the disc is valid and sends the certifi cate back to the player.
The Internet connection may be restricted while you are using BD-LIVE contents.
4.
•
•
4.
4.
•
•
•
M
Audio
Display
HDMI
Network
◄
Parental
Cable Network
Wireless Network
Proxy
NTP Server : Off ►
Network Connection Test
BD-LIVE Internet : Allow (Vaild Only)
Connection
DVD
DVD
Music
Photo
Setup On
Off
Audio
Display
HDMI
Network
◄
Parental
Cable Network
Wireless Network
Proxy
NTP Server : Off ►
Network Connection Test
BD-LIVE Internet : Allow (Vaild Only)
Connection
DVD
DVD
Music
Photo
Setup ◄
Network Connection Test
Return
✔ MAC Address (00:10:18:00:00:70)
✔
IP Address.Subnet Mask.Gateway.DNS Server
✔ Gateway Ping
✔ Internet Service Test
Your network is operating properly
Audio
Display
HDMI
Network
◄
Parental
Proxy
NTP Server : Off
Network Connection Test
BD-LIVE Internet : Allow (Vaild Only)
Connection
DVD
DVD
Music
Photo
Setup Allow(All)
Allow(Valid Only)
Prohibit
HT-BD8200_XAA_0530-2.indd 53HT-BD8200_XAA_0530-2.indd 53 2009-05-30 2:29:422009-05-30 2:29:42
BD data management
54
BD Data (stored in external USB fl ash memory) is Blu-ray Disc content such as trailers and other
special features downloaded from the BD-LIVE service or Blu-ray Discs.
*
You must have a minimum 1GB USB Memory device inserted in one of the USB slots in order to download
content from BD-LIVE.
SYSTEM DEVICE MANAGEMENT
You can manage user data stored in BD data.
With the unit in Stop mode, press the MENU button.
Press the
▲▼
buttons to select Setup, then press the
ENTER or
►
button.
Press the
▲▼
buttons to select System, then press the
ENTER or
►
button.
Press the
▲▼
buttons to select BD Data Management,
then press the ENTER or
►
button.
- To delete the fl ash memory -
Press the ENTER button to select BD Data Delete.
The message "All BD data will be deleted. Do you want to
continue?" will be displayed.
Press the
◄►
button to select Yes, then press the
ENTER button.
Description of Device(Storage) Information on the Player
Total Size : Total size of the Device(Storage).
Available Size : Available size of the Device(Storage).
Memory size information on the current device(storage) is located to the right of the BD
Data Management menu.
In the external memory mode, disc playback will be stopped if you disconnect the USB
device in the middle of the playback.
We recommend using an USB device that supports USB 2.0 protocols, FAT32 format and
4MB or more read /write speed.
The Resume Play function may not work after formatting the storage device.
1.
2.
3.
4.
1.
2.
•
•
M
System
◄
Language
Audio
Display
HDMI
Network
Parental
Time Zone
Clock Set
Power On/Off sound : On
BD Data Management ►
System Update
DVD
DVD
Music
Photo
Setup
System
◄
Language
Audio
Display
HDMI
Network
Parental
Time Zone
Clock Set
Power On/Off sound : On
BD Data Management ►
System Update
DVD
DVD
Music
Photo
Setup BD Data Management
Select
Return
Current Device : External Flash Memory
Total Size : 953MB Available Size : 889MB
BD Data Delete
HT-BD8200_XAA_0530-2.indd 54HT-BD8200_XAA_0530-2.indd 54 2009-05-30 2:29:452009-05-30 2:29:45
55
ENG ● SYSTEM UPGRADE
System upgrade
Samsung may offer upgrades to your Blu-ray Home Theater's fi rmware in the future. To upgrade this fi rmware you must :
Go to samsung.com and refer to the ‘SUPPORT’ page to download the latest fi rmware.
You can use a CD-R or a USB fl ash drive to perform the fi rmware upgrade. For more information, see “Upgrade
Manual” at the website mentioned above.
or
Connect the network (see pages 28~29) and follow the steps below.
FIRMWARE UPGRADE
With the unit in Stop mode/No Disc mode, press the
MENU button.
Press the
▲▼
buttons to select Setup, then press the
ENTER or
►
button.
Press the
▲▼
buttons to select System, then press the
ENTER or
►
button.
Press the
▲▼
buttons to select System Update, then
press the ENTER or
►
button.
The player will check the cable or network connection
status automatically. The connection checking window will
be displayed.
If the upgrade is possible : You will see information on the
current and new versions of fi rmware in a message box.
If the upgrade is not possible : You will see the following
description in the message box.
If the cable is not connected :
“Ethernet cable is not connected. Please, check the
Ethernet cable”
If the network connection has failed :
“This system can not connect to internet for update.
Please, check the network setup”
If no latest version is released (the latest version has
been already installed) :
"The latest version of the fi rmware is already installed.
There is no need to update."
If there is a disc in the player :
"Please maintain "No Disc" state for network update."
This indicates that you must remove all discs from the
unit to perform the update.
If the server service is not available :
“ Update Server is under maintenance. Please try again
later.”
1.
2.
1.
2.
3.
4.
5.
•
•
•
•
•
DVD
System
◄
Language
Audio
Display
HDMI
Network
Parental
◄
Music
Photo
Setup
DVD
System
◄
Language
Audio
Display
HDMI
Network
Parental
BD Data Menagement
DivX(R) Registration
DivX(R) Deactivation(R)
System Update
►
Music
Photo
Setup
DVD
System Setup
◄
Language Setup
Audio Setup
Display Setup
HDMI Setup
Network Setup
Parental Setup
BD Data Menagement
DivX(R) Registration
DivX(R) Deactivation(R)
System Update
►
Music
Photo
Setup
System Update
Now, Checking.
Please wait...
1234
DVD
System Setup
◄
Language Setup
Audio Setup
Display Setup
HDMI Setup
Network Setup
Parental Setup
BD Data Menagement
DivX(R) Registration
DivX(R) Deactivation(R)
System Update
►
Music
Photo
Setup
System Update
The new update data was found.
Current Version : XXXXX
New Version : XXXXX
1234
CancelStart
DVD
System Setup
◄
Language Setup
Audio Setup
Display Setup
HDMI Setup
Network Setup
Parental Setup
BD Data Menagement
DivX(R) Registration
DivX(R) Deactivation(R)
System Update
►
Music
Photo
Setup
System Update
This system can not connect
to internet for update.
Please, check the network setup.
OK
1234
HT-BD8200_XAA_0528-3.indd 55HT-BD8200_XAA_0528-3.indd 55 2009-05-30 2:58:432009-05-30 2:58:43

System upgrade
56
FIRMWARE UPGRADE
To perform the system upgrade, press the
◄ ►
buttons
to select Start and then press the ENTER button.
The system update gets started.
If you select Cancel during the download process, you are
prompted to confi rm your selection in a message box.
If you want to cancel the download, select Yes and press
the ENTER button.
Verifi cation will proceed. When download is done, the
fi rmware update process will begin automatically.
When the installation is done, the player will automatically
turn off in 5 seconds.
All settings will revert to the factory settings. The next
time you start the system and you will see the menu
language selection window.
If you want to cancel the upgrade in the process of
downloading the upgrade data, press the ENTER
button. You will see a confi rmation message.
Selecting Yes will end the upgrade process, and
selecting No will continue the upgrade process.
When the system upgrade is done, check the
fi rmware details in the System Upgrade menu.
Do not turn off the player during the System Upgrade,
as it may cause the player to not work properly.
You must use a USB Flash Drive to do software upgrades using the USB Host jack.
Other USB devices(ex. MP3 player) are not guaranteed to work.
There should be only one fi rmware upgrade fi le in USB fl ash drive for the player to properly
perform an upgrade.
Oversized USB drives may not be able to be inserted when a LAN or HDMI cable is connected.
6.
7.
8.
9.
10.
M
DVD
System Setup
◄
Language Setup
Audio Setup
Display Setup
HDMI Setup
Network Setup
Parental
BD Data Menagement
DivX(R) Registration
DivX(R) Deactivation(R)
System Update
►
Music
Photo
Setup
System Update
The new update data was found.
Current Version : XXXXX
New Version : XXXXX
1234
Start Cancel
DVD
System Setup
◄
Language Setup
Audio Setup
Display Setup
HDMI Setup
Network Setup
Parental
BD Data Menagement
DivX(R) Registration
DivX(R) Deactivation(R)
System Update
►
Music
Photo
Setup
System Update
Downloading update data...
Please, do not turn off the power.
34
Cancel
12
60%
DVD
System Setup
◄
Language Setup
Audio Setup
Display Setup
HDMI Setup
Network Setup
Parental
BD Data Menagement
DivX(R) Registration
DivX(R) Deactivation(R)
System Update
►
Music
Photo
Setup
System Update
Do you want to cancel the update operation?
3412
Yes No
DVD
System Setup
◄
Language Setup
Audio Setup
Display Setup
HDMI Setup
Network Setup
Parental
BD Data Menagement
DivX(R) Registration
DivX(R) Deactivation(R)
System Update
►
Music
Photo
Setup
System Update
Verifying update data
Please wait.
41 32
DVD
System Setup
◄
Language Setup
Audio Setup
Display Setup
HDMI Setup
Network Setup
Parental
BD Data Menagement
DivX(R) Registration
DivX(R) Deactivation(R)
System Update
►
Music
Photo
Setup
System Update
Firmware Update.
Now, Processing...
Please, do not turn off the power.
The power will be off automatically
after update is fi nished.
31 42
HT-BD8200_XAA_0528-3.indd 56HT-BD8200_XAA_0528-3.indd 56 2009-05-30 2:58:582009-05-30 2:58:58
57
ENG ● SYSTEM UPGRADE
SYSTEM INFORMATION
When the fi rmware upgrade is done, check the fi rmware details by
following the steps below.
With the unit in Stop mode/No Disc mode, press the
MENU button.
Press the
▲▼
buttons to select Setup, then press the
ENTER or
►
button.
Press the
▲▼
buttons to select System, then press the
ENTER or
►
button.
Press the
▲▼
buttons to select System Information,
then press the ENTER or
►
button.
You can see detailed information about the current
fi rmware.
Press the ENTER button to select OK.
System Setup menu will be displayed.
FIRMWARE UPGRADE NOTIFICATION
This popup menu appears when a newer fi rmware version is available
from SAMSUNG's update server than what is currently on the Blu-ray
Home Theater.
Yes
: Select this to upgrade now.
No : Select this if you plan to upgrade later.
DIVX(R) REGISTRATION
Please use the Registration code to register this Home Theater System
with the DivX(R) Video On Demand format. For more information, visit
www.divx.com/vod
This option is not activated if you select the OK. To activate this
option, please activate the DivX(R) Deactivation.
DIVX(R) DEACTIVATION
If you want to deactivate the registration code on the website, please
select the Yes. Then, you can get a new registration code.
This function can be operated when DivX(R) Registration function
is available.
1.
2.
3.
4.
5.
•
•
M
M
System Update
New Firmware is available.
Do you want to update now?
Yes No
DVD
System
Language
Audio
Display
HDMI
Network
Parental
◄
◄
Music
Photo
Setup
DVD
System
◄
Language
Audio
Display
HDMI
Network
Parental
System Information
►
Time Zone
Clock Set
Power On/Off sound : On
BD Data Management
DivX(R) Registration
DivX(R) Deactivation(R)
System Update
Music
Photo
Setup
DVD
System Setup
◄
Language Setup
Audio Setup
Display Setup
HDMI Setup
Network Setup
Parental Setup
System Information
►
Time Zone
Clock Set
Power On/Off sound : On
BD Data Management
DivX(R) Registration
DivX(R) Deactivation(R)
System Update
Music
Photo
Setup System Information
S/W : XXXXXXX
Loader : XXXXXXX
Region : B/2 (BD/DVD)
ESN : XXXX
OK
DVD
System Setup
◄
Language Setup
Audio Setup
Display Setup
HDMI Setup
Network Setup
Parental Setup
Power On/Off sound : On
BD Data Management
DivX(R) Registration
►
DivX(R) Deactivation(R)
System Update
Music
Photo
Setup
DivX(R) Registration
DivX(R) Video On Demand
Your registration code is : XXXXXXXXXX
To learn more visit www.divx.com/vod
OK
DVD
System Setup
◄
Language Setup
Audio Setup
Display Setup
HDMI Setup
Network Setup
Parental Setup
BD Data Management
DivX(R) Registration
DivX(R) Deactivation(R)
►
System Update
Music
Photo
Setup
DivX(R) Registration
DivX(R) Video On Demand
Your registration code is : XXXXXXXXXX
To learn more visit www.divx.com/vod
OK
HT-BD8200_XAA_0528-3.indd 57HT-BD8200_XAA_0528-3.indd 57 2009-05-30 2:59:042009-05-30 2:59:04