Samsung Electronics Co NX2000 Digital Camera User Manual 2 of 4
Samsung Electronics Co Ltd Digital Camera 2 of 4
Contents
- 1. User manual 1 of 4
- 2. User manual 2 of 4
- 3. User manual 3 of 4
- 4. User manual 4 of 4
User manual 2 of 4
My Camera > Shooting modes
59
Using Z
The Z allows you to zoom in on a subject with less degradation of
photo quality than the Digital zoom. However, the photo resolution may
change compared to when you zoom in by rotating the zoom ring.
1 Rotate the mode dial to P, A, S, M, or i.
2 Press [i-Function] on the lens to select Z.
•
You can also press [i-Function], and then press [C/F] or drag the
screen to select Z.
3 Adjust the focus ring to select a zoom ratio.
•
You can also scroll the jog dial or drag the screen to select an
option.
•
Photo resolution varies according to the zoom ratio if you use the
Z.
3:2 16:9 1:1
x1.2
4560X3040 (13.9M) 4560X2568 (11.7M) 3040X3040 (9.2M)
x1.4
3888X2592 (10.1M) 3888X2184 (8.5M) 2592X2592 (6.7M)
x1.7
3264X2176 (7.1M) 3264X1840 (6.0M) 2176X2176 (4.7M)
x2
2736X1824 (5.0M) 2736X1536 (4.2M) 1824X1824 (3.3M)
These gures are based on the maximum resolution at each image ratio.
4 Half-press [Shutter] to focus, and then press [Shutter] to
capture the photo.
•
Z is not available when you capture burst shots.
•
Z is not available when you capture photos in the RAW le format.
•
Z is deactivated when you record videos by pressing the video
recording button.
•
This function is not available when you set 3D Auto Mode in 3D mode.
My Camera > Shooting modes
60
s Smart mode
In Smart mode, you can capture photos with options that are preset for a
specic scene.
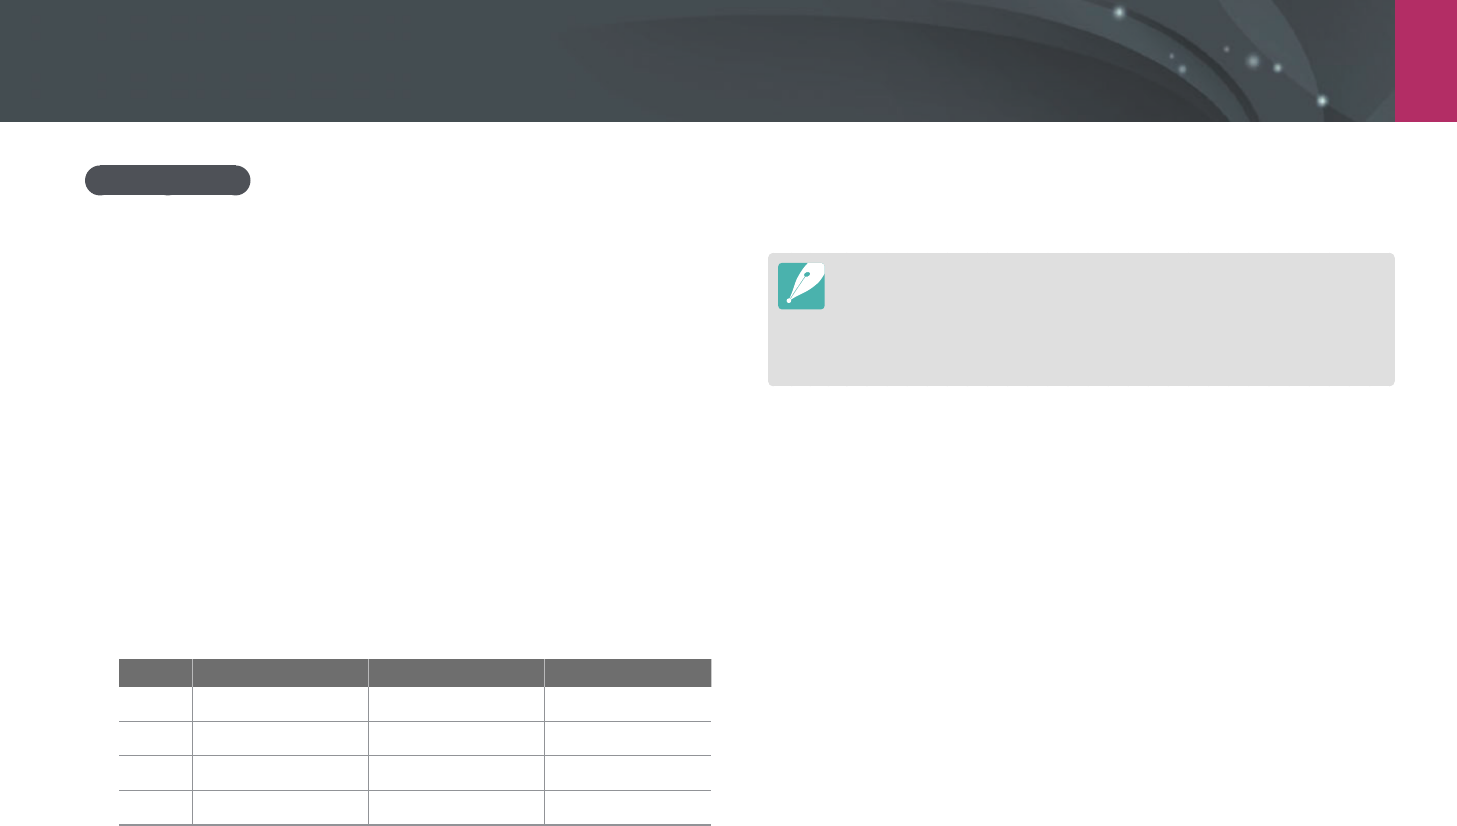
1 Rotate the mode dial to s.
2 Select a scene.
•
To select a shooting mode when the mode dial is set to s, press
[f] or touch , and then select a desired mode.
Smart : Beauty Face
Set
Option Description
Beauty Face
Capture a portrait with options to hide facial
imperfections.
Best Face
Capture multiple photos and replace faces to create
the best possible image.
Landscape
Capture still-life scenes and landscapes.
Macro
Capture small or close-up subjects.
Action Freeze
Capture subjects moving at high speed.
Option Description
Rich Tones
Capture a photo with vibrant colors.
Panorama
Capture a wide panoramic scene in a single photo.
Waterfall
Capture scenes with waterfalls.
Silhouette
Capture subjects as dark shapes against a light
background.
Sunset
Capture scenes at sunset, with natural-looking reds
and yellows.
Night
Capture multiple photos in low light conditions
without a ash. The camera combines them to create a
single image that is brighter and has less blurring.
Fireworks
Capture scenes with reworks.
Light Trace
Capture scenes with the light trailing in low-light
conditions.
Creative Shot
Capture photos with eects applied automatically.
3 Half-press [Shutter] to focus, and then press [Shutter] to
capture.
My Camera > Shooting modes
61
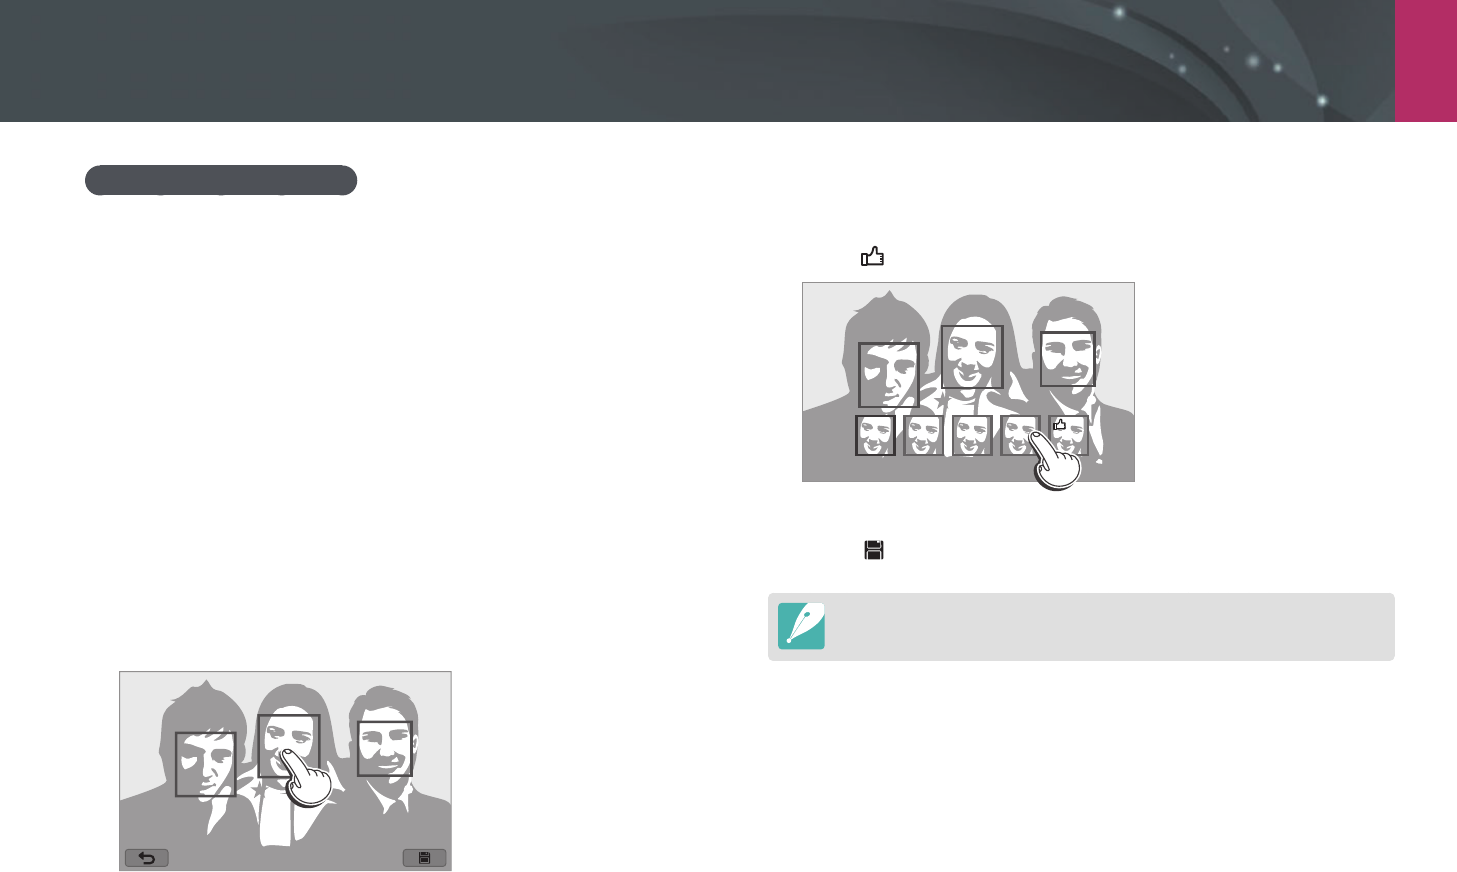
Using the Best Face mode
In Best Face mode, you can capture multiple photos and replace faces to
create the best possible image. Use this mode to select the best image for
each individual when capturing group photos.
1 Rotate the mode dial to s, and then select Best Face.
2 Align your subject in the frame, and then half-press [Shutter]
to focus.
3 Press [Shutter] to capture the photo.
•
The camera captures 5 photos consecutively.
•
The rst photo is set as the background image.
•
The camera automatically detects faces after shooting.
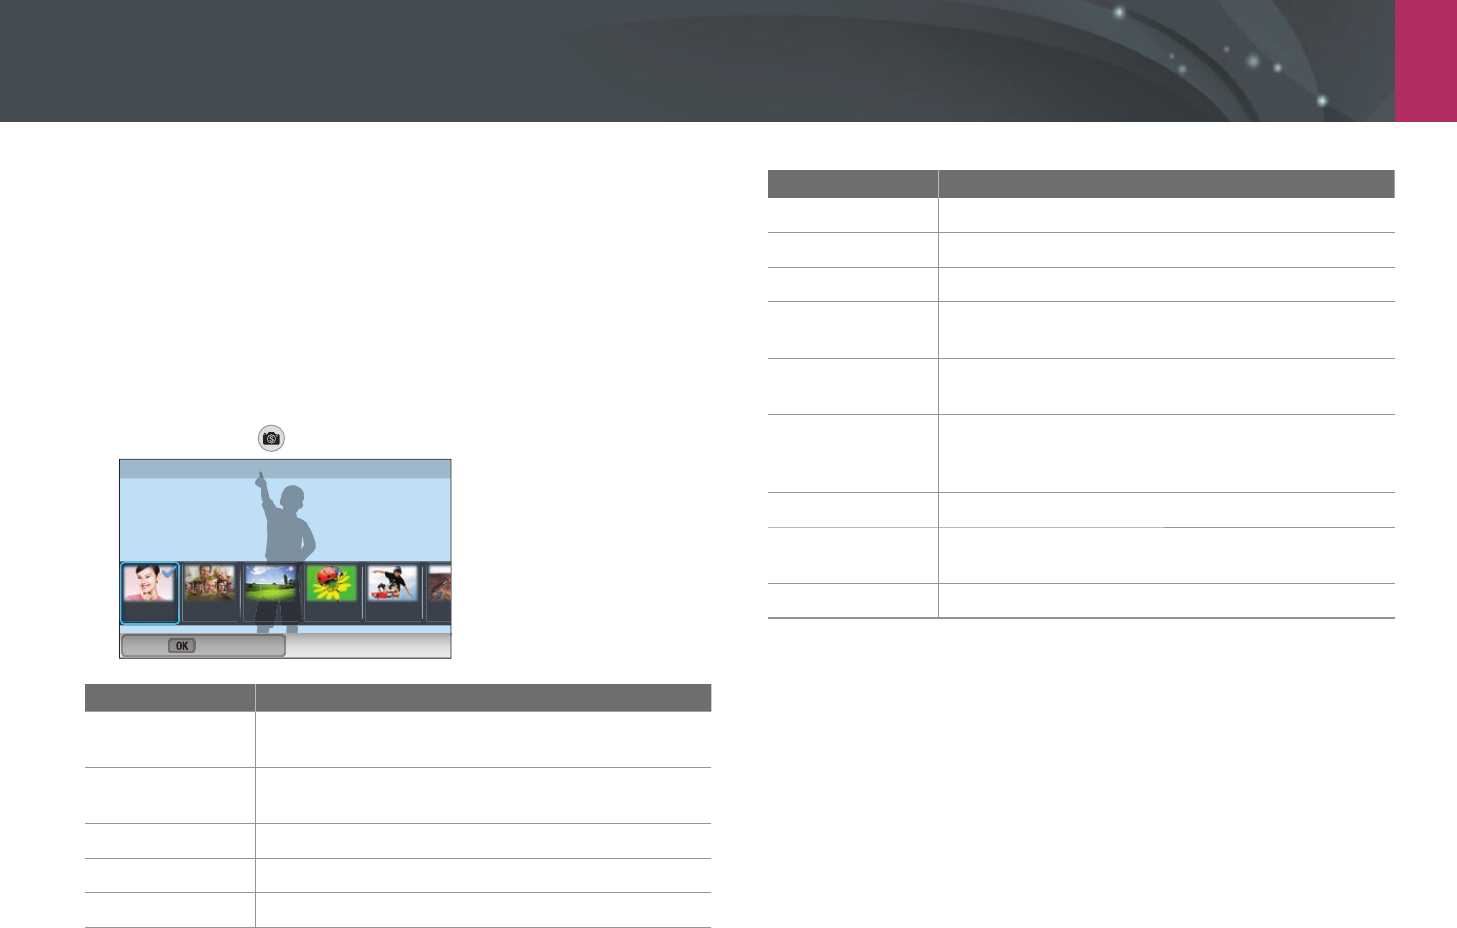
4 Touch a face to replace.
5 Touch the best image from the 5 faces that were captured.
•
Repeat steps 4 and 5 to replace the rest faces of the photo.
•
The icon will appear on the image that the camera recommends.
6 Touch to save the photo.
•
Use a tripod to prevent your camera from shaking.
•
The resolution is set to 5.9M or smaller.

My Camera > Shooting modes
62
Capturing panoramic photos
Capture a 2D or 3D panoramic photo. Captured 3D panoramic photos can
be viewed only on a 3D TV or 3D monitor.
1 Rotate the mode dial to s, and then select Panorama.
2 Press [m]
→
1
→
Panorama
→
Live Panorama or 3D.
3 Press [m] to return to Shooting mode.
4 Press and hold [Shutter] to start shooting.
5 With [Shutter] pressed, slowly move the camera in the
direction you selected.
•
In 3D Panorama mode, you can capture a scene only in horizontal
directions.
•
An arrow toward the direction of motion is displayed, and the entire
shooting image is displayed in the preview box.
•
When the scenes are aligned, the camera captures the next photo
automatically.
6 When you are nished, release [Shutter].
•
The camera will automatically save the shots into one photo.
•
If you release [Shutter] while shooting, the panoramic shooting
stops and photos that have been captured are saved.

My Camera > Shooting modes
63
•
The resolution varies depending on the panoramic photo you captured.
•
In Panorama mode, some shooting options are not available.
•
The camera may stop shooting due to the shooting composition or the
subject's movement.
•
In Panorama mode, your camera may not capture the entire last scene if you
stop moving the camera to improve the photo quality. To capture the entire
scene, move your camera slightly beyond the point where you want the
scene to end.
•
In 3D Panorama mode, your camera may not capture the very beginning or
end of a scene due to the nature of the 3D eect. To capture the entire scene,
move slightly beyond the beginning and end points you want to capture.
•
Photos captured with the 3D function are saved in JPEG (2D) and MPO (3D)
formats. On your camera's display, you can view only JPEG les.
•
To view 3D les, connect your camera to a 3D TV or 3D monitor with an
optional HDMI cable. While viewing, wear proper 3D glasses.
•
Capturing photos in 3D Panorama mode may result in a less pronounced 3D
eect than those captured with a 3D lens. To increase the 3D eect, attach
the optional 3D lens and use 3D mode. (p. 65)
•
For best results when capturing panoramic photos, avoid the following:
-
moving the camera too quickly or too slowly
-
moving the camera too little to capture the next image
-
moving the camera at irregular speeds
-
shaking the camera
-
shooting in dark places
-
capturing moving subjects nearby
-
shooting conditions where the brightness or color of light is changing
•
Photos taken are automatically saved, and shooting is stopped under the
following conditions:
-
if you change the shooting direction while shooting
-
if you move the camera too rapidly
-
if you don't move the camera
My Camera > Shooting modes
64
Recording a video
In Shooting mode, you can record Full HD videos (1920X1080) by pressing
(Video recording). The camera lets you record a video up to 29 minutes
and 59 seconds in length at 60, 30, 24, or 15 fps, and saves the les in
MP4 (H.264) format. 60 fps is available only with 1920X1080 and 1280X720
and 24 fps is available only with 1920X810. 15 fps is available only
with some Smart Filter options. The sound is recorded via the camera's
microphone.
You can set the exposure by adjusting the aperture value and shutter
speed for the mode you selected. When you use a lens that does not have
an AF/MF switch while recording a video, press [F] to deactivate or
activate the AF function. When you use the lens that has an AF/MF switch,
the AF function works according to the switch’s setting.
Select Fader to fade in or out a scene. You can also select Voice, Wind Cut,
or other options to set recording options. (p. 105)
1 Rotate the mode dial to t, P, A, S, M, i, or s.
•
This feature may not work in some modes.
2 Set the desired options.
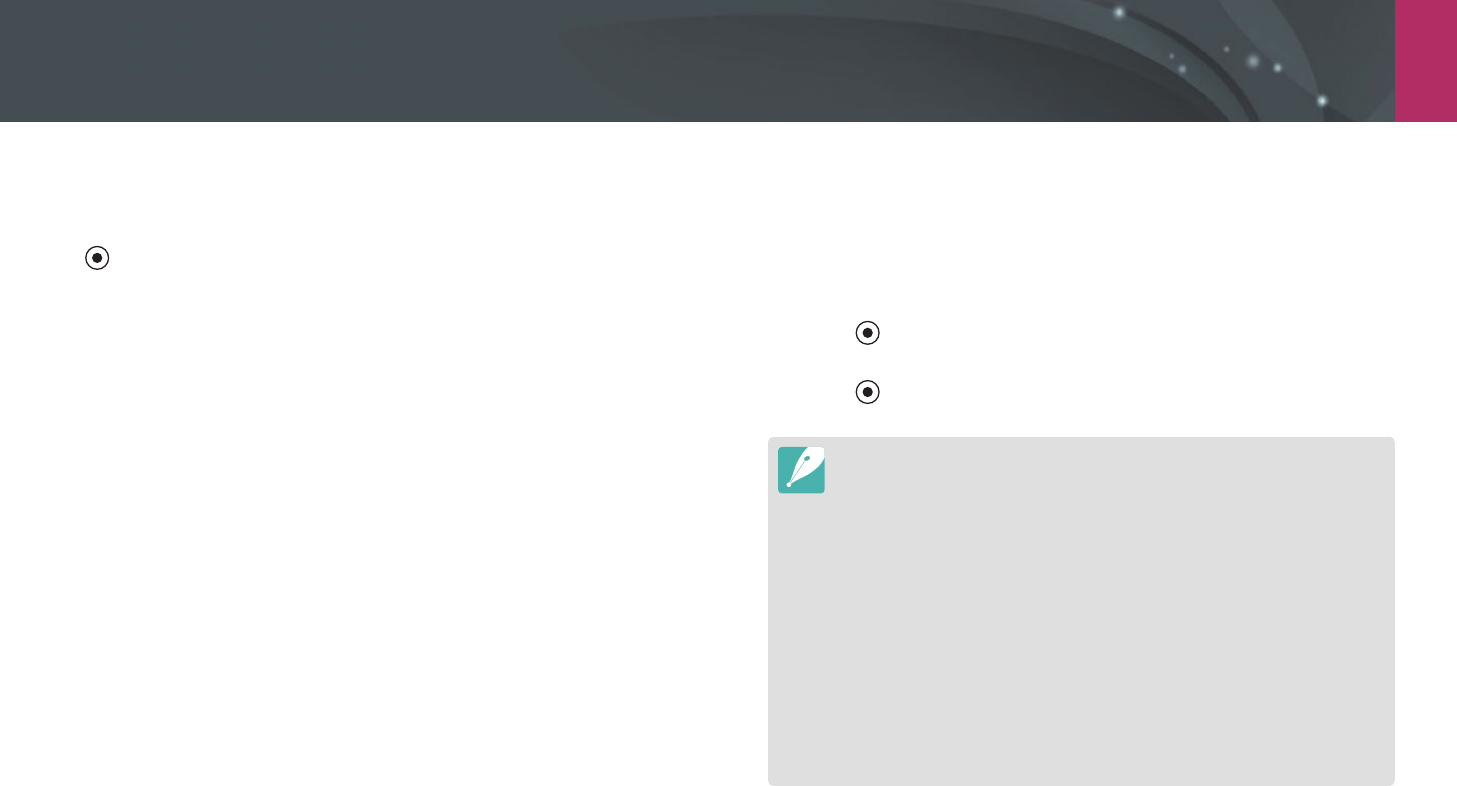
3 Press (Video recording) to start recording.
4 Press (Video recording) again to stop.
•
H.264 (MPEG-4 part10/AVC) is the latest video coding format established
in 2003 collaboratively by ISO-IEC and ITU-T. Since this format uses a high
compression rate, more data can be saved in less memory space.
•
If you have the image stabilizer option on when shooting a movie, the
camera may record the image stabilizer sound.
•
The zoom sound or other lens sounds may be recorded if you adjust the lens
while recording a video.
•
When using an optional video lens, the autofocus noise is not recorded.
•
If you remove the camera lens while recording a movie, the recording will be
interrupted. Do not change the lens while recording.
•
If you attach an external microphone while recording a movie, sound will not
be recorded through the external microphone. (The previous settings are
maintained.) If you remove the external microphone while recording a movie,
sound will not be recorded. Turn o the camera before attaching or removing
the external microphone.
My Camera > Shooting modes
65
•
If you change the shooting angle of the camera suddenly while shooting a
movie, the camera may not be able to record images accurately. Use a tripod
to minimize camera shake.
•
The camera supports only the Multi AF function when recording a video. You
cannot use any other focus area setting functions, such as Face Detection AF.
•
When the size of a movie le exceeds 4 GB, the camera automatically stops
recording even if the maximum recording time (29 minutes and 59 seconds)
has not been reached.
•
If you use a slow writing memory card, the recording of your movie can
be interrupted because the card cannot process data at the rate the video
is being shot. If this occurs, replace the card with a faster memory card or
reduce the video size (for example, from 1280X720 to 640X480).
•
When formatting a memory card, always format using the camera. If you
format on another camera or a PC, you can lose les on the card or cause a
change in the capacity of the card.
•
When you press the video recording button, Z turns o.
•
While recording a video in the same ISO sensitivity, the screen may be darker
than taking a photo. Adjust the ISO sensitivity.
•
When you record a video in P, A, or S mode, ISO is automatically set to Auto.
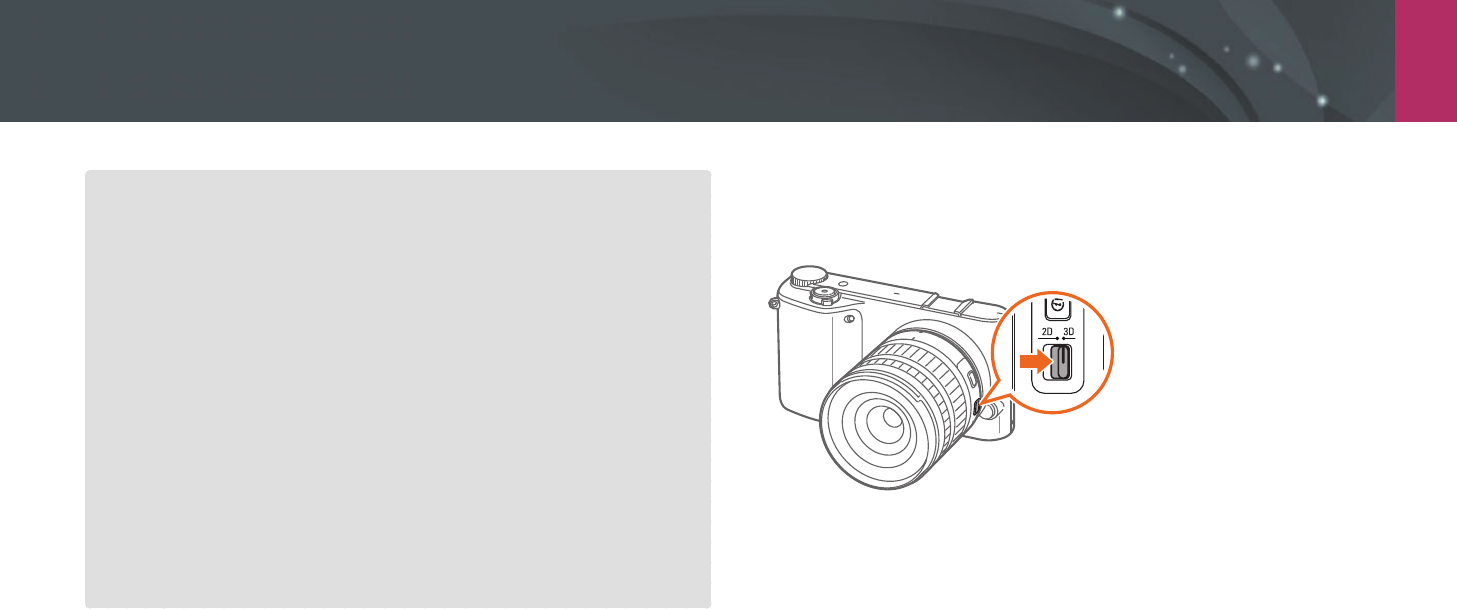
3D mode
You can capture 3D photos or videos with an optional 3D lens.
SAMSUNG 45 mm F1.8 [T6] 2D/3D lens (example)
Set the 2D/3D switch on the lens to 3D, and then capture a photo or video
1.5-5 m away from the subject.

My Camera > Shooting modes
66
•
3D mode is always on, regardless of the mode dial of the camera, except
B.
•
To use auto 3D options that enable the camera to set shooting options
automatically depending on shooting conditions in 3D mode, press
[m]
→
1
→
3D Auto Mode
→
On.
•
To change the 3D recording option, press [m]
→
6
→
3D REC Mode
→
a desired option.
* Default
Icon Description
Side by Side*: Displays two images next to each other.
Frame Packing: Displays the images for the left and right eye
alternately in frames.
•
Available shooting options dier compared to other shooting modes.
•
You can select either 4.1M (2688X1512) or 2.1M (1920X1080) photo size.
•
The video resolution is set to 1920X1080.
•
Videos recorded in 3D may be dark or playback may be jittery.
•
Shooting in low temperatures may result in color distortion in images and
may consume more battery power.
•
You may not be able to shoot properly in conditions below 8.5 LV/900 lux. For
best results, capture photos in places with sucient light.
•
When you photograph objects that contain polarizing material, such as a
display, sunglasses, or a polarizing lter, or use the polarizing material with
your lens, the images may appear dark or the 3D eect may not be applied
properly.
•
Use a tripod to prevent your camera from shaking.
•
If you rotate or tilt the camera vertically while shooting, the 3D eect may not
be applied properly. Capture images with the camera in the normal position.
•
If you shoot in uorescent lighting or capture images displayed by projectors
or TVs, the images may appear black due to the icker eect.
•
In 3D mode, the Enlarge x8 option of MF Assist may not be available.
•
The camera's display shows 3D videos only in 2D.
•
Photos captured with the 3D function are saved in JPEG (2D) and MPO (3D)
formats. On your camera's display, you can view only JPEG les.
•
To view 3D les, connect your camera to a 3D TV or 3D monitor with an
optional HDMI cable. While viewing, wear proper 3D glasses.

My Camera > Shooting modes
67
Available functions by shooting mode
For details about shooting functions, see Chapter 2.
Press a shortcut for each function.
Function Available in
Photo Size (p. 72)
P/A/S/M/s*/t/3D*
Quality (p. 73)
P/A/S/M/s*
ISO (p. 74)
P/A/S/M
White Balance (p. 75)
P/A/S/M/3D*
Picture Wizard (p. 78)
P/A/S/M/3D
Smart Filter (p. 100)
P/A/S/M
AF Mode (p. 79)
P/A/S/M/s*/3D*
AF Area (p. 82)
P/A/S/M/s*
Touch AF (p. 85)
P/A/S/M/s*/t/3D*
MF Assist (p. 87)
P/A/S/M/s/t/3D*
Focus Peaking (p. 87)
P/A/S/M/s/t
Function Available in
Link AE to AF Point
(p. 98)
P/A/S/M
Framing Mode (p. 56)
P/A/S/M
OIS (Anti-Shake) (p. 88)
P/A/S/M/s*/t*
Drive (Continuous/Burst/
Timer/Bracketing) (p. 89)
P/A/S/M/s*/t*/3D*
Metering (p. 96)
P/A/S/M
Dynamic Range
(p. 99)
P/A/S/M
Flash (p. 93)
P*/A*/S*/M*/s*/t*
Exposure compensation (p.
101)
P/A/S
Exposure lock (p. 102)
P/A/S
* Some functions are limited in these modes.

Chapter 2
Shooting Functions
Learn about the functions you can set in Shooting mode.
You can enjoy more customized photos and videos by using the shooting functions.

Shooting Functions
6969
Sh
ooting FunctionsShooting Functions
Photo size
As you increase the resolution, your photo or video will include more
pixels, so it can be printed on larger paper or displayed on a larger screen.
When you use a high resolution, the le size will also increase. Select a low
resolution for photos that will be displayed in a digital picture frame or
uploaded to the web.
To set the size,
In Shooting mode, press [m]
→
1
→
Photo Size
→
an option.
Icon Size Recommended for
5472x3648 (3:2) Printing on A1 paper.
3888x2592 (3:2) Printing on A2 paper.
2976x1984 (3:2) Printing on A3 paper.
1728x1152 (3:2) Printing on A5 paper.
5472x3080 (16:9) Printing on A1 paper or viewing on an
HDTV.
3712x2088 (16:9) Printing on A3 paper or viewing on an
HDTV.
2944x1656 (16:9) Printing on A4 paper or viewing on an
HDTV.
1920x1080 (16:9) Printing on A5 paper or viewing on an
HDTV.
3648x3648 (1:1) Printing a square photo on A1 paper.
2640x2640 (1:1) Printing a square photo on A3 paper.
2000x2000 (1:1) Printing a square photo on A4 paper.
1024x1024 (1:1) Printing a square photo on A5 paper.
Available options may dier depending on shooting conditions.
Size and Resolution
70
Shooting Functions > Size and Resolution
Quality
The camera saves photos in either the JPEG or RAW format.
Photos captured by a camera are often transformed to the JPEG format
and stored in the memory according to the settings of the camera at the
time of shooting. RAW les are not transformed to the JPEG format and are
stored in the memory without any changes.
RAW les have the le extension “SRW”. To adjust and calibrate exposures,
White Balances, tones, contrasts, and colors of the RAW les, or to convert
them into JPEG or TIFF format, use the Adobe Photoshop Lightroom
program found on the supplied DVD-ROM.
Ensure you have enough space on the memory card to save photos in the
RAW format.
To set the quality,
In Shooting mode, press [m]
→
1
→
Quality
→
an option.
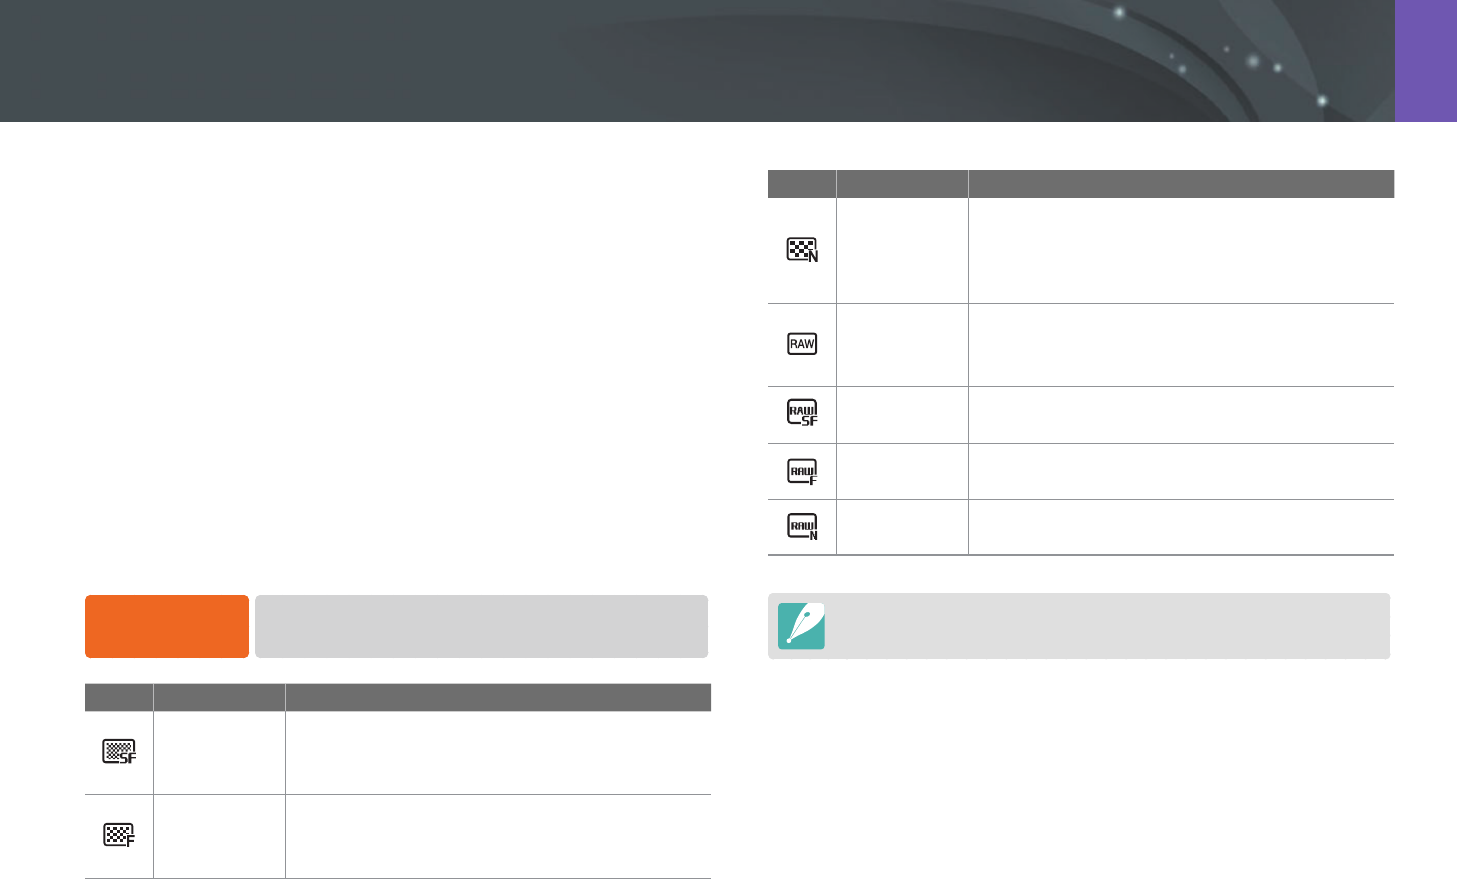
Icon Format Description
JPEG
Super Fine:
• Compressed for the best quality.
• Recommended for printing in large size.
JPEG
Fine:
• Compressed for better quality.
• Recommended for printing in normal size.
Icon Format Description
JPEG
Normal:
• Compressed for normal quality.
• Recommended for printing in small size or
uploading to the web.
RAW
RAW:
• Save a photo without data loss.
• Recommended for editing after shooting.
RAW+JPEG RAW + S.Fine: Save a photo in both the JPEG
(S.Fine quality) and RAW format.
RAW+JPEG RAW + Fine: Save a photo in both the JPEG (Fine
quality) and RAW format.
RAW+JPEG RAW + Normal: Save a photo in both the JPEG
(Normal quality) and RAW format.
Available options may dier depending on shooting conditions.
Shooting Functions
7171
Sh
ooting FunctionsShooting Functions
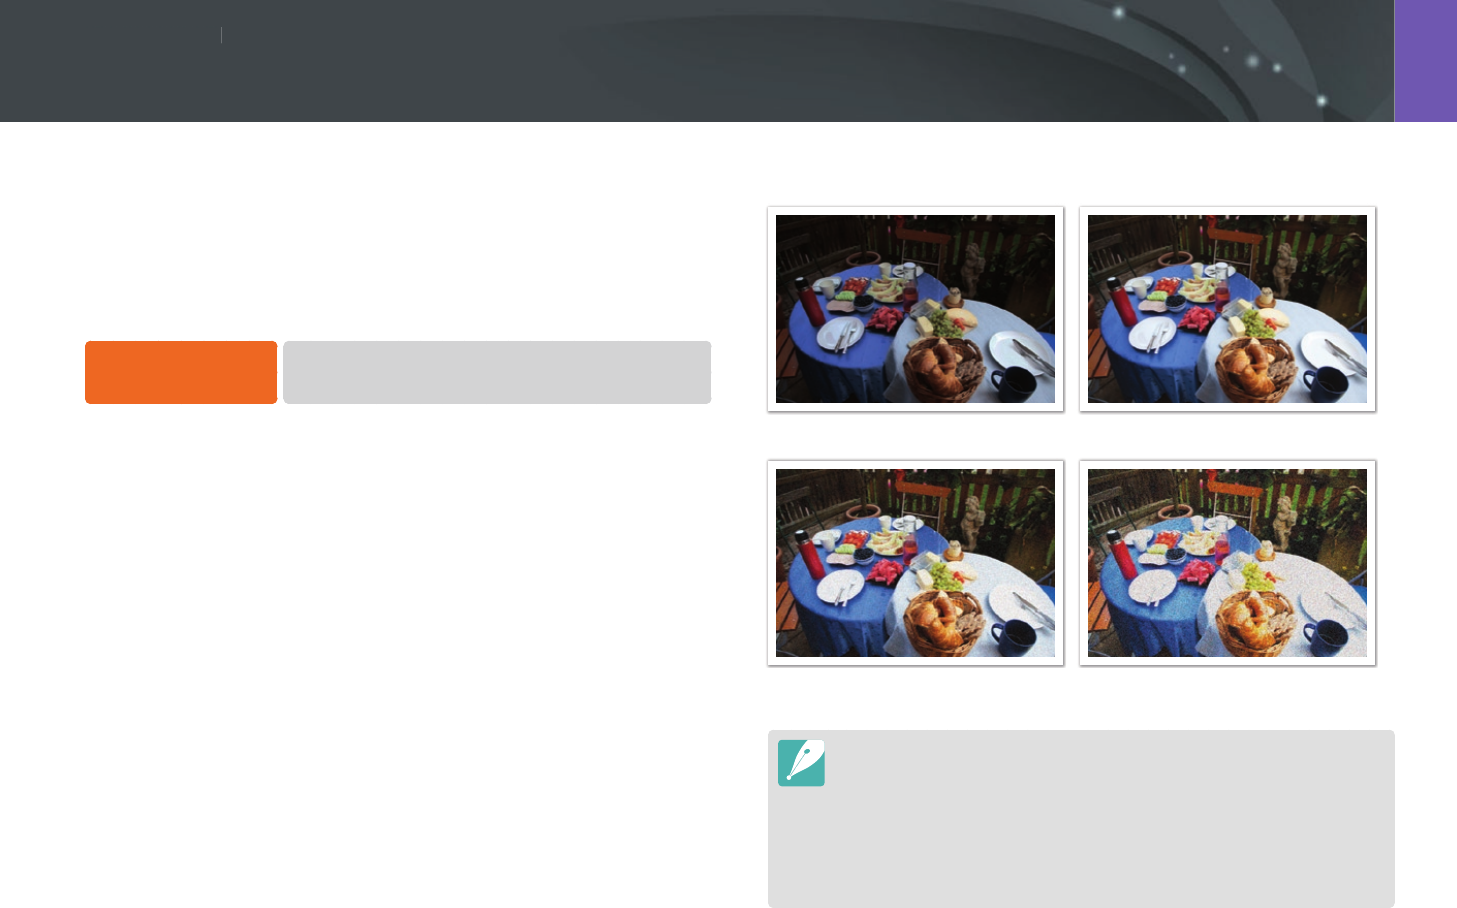
The ISO sensitivity value represents the sensitivity of camera to light.
The larger the ISO value, the more sensitive the camera is to light.
Consequently, by selecting a higher ISO sensitivity value, you can capture
photos in dim or dark places at faster shutter speeds. However, this may
increase electronic noise and result in a grainy photo.
To set ISO sensitivity,
In Shooting mode, press [I]
→
an option.
Examples
ISO 100 ISO 400
ISO 800 ISO 3200
•
You can also set the option by pressing [m]
→
1
→
ISO
→
an option
in Shooting mode.
•
Increase the ISO value in places where ash use is prohibited. You can capture
a clear photo by setting a high ISO value without having to secure more light.
•
Use the Noise Reduction function in order to reduce the visual noise that can
appear on photos of a high ISO value. (p. 145)
•
Available options may dier depending on the shooting conditions.
ISO sensitivity
Shooting Functions
7272
Sh
ooting FunctionsShooting Functions
White Balance represents the light source that inuences on the color of a
photo.
The color of a photo depends on the type and quality of the light source.
If you want the color of your photo to be realistic, select an appropriate
lighting condition to calibrate the White Balance, such as Auto WB,
Daylight, Cloudy, Tungsten, or adjust color temperature manually.
You can also adjust color for the preset light sources so that the colors of
the photo match the actual scene under mixed lighting conditions.
To set the White
Balance,
In Shooting mode, press [m]
→
1
→
White Balance
→
an option.
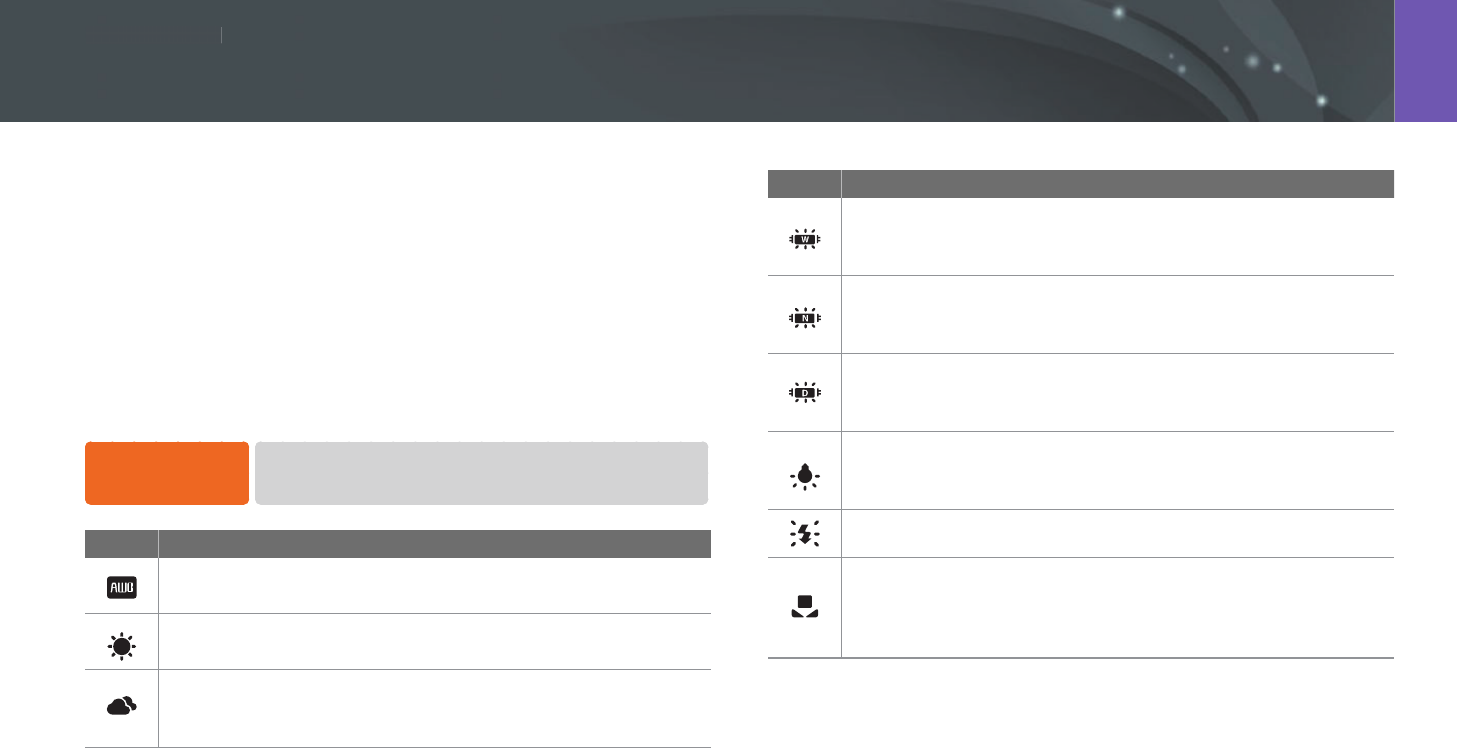
Icon Description
Auto WB: Use automatic settings depending on the lighting
conditions.
Daylight: Select when taking outdoor photos on a sunny day. This
option results in photos closest to the natural colors of the scene.
Cloudy: Select when taking outdoor photos on a cloudy day or in
shadows. Photos captured on cloudy days tend to be more bluish
than on sunny days. This option osets that eect.
Icon Description
Fluorescent White: Select when shooting under a daylight
uorescent lamp. Especially for white uorescent light with a color
temperature of about 4,200K.
Fluorescent NW: Select when shooting under a daylight
uorescent lamp. Especially for white uorescent light of very
white hues with a temperature of about 5,000K.
Fluorescent Daylight: Select when shooting under a daylight
uorescent lamp. Especially for white uorescent light of slightly
bluish hue with a temperature of about 6,500K.
Tungsten: Select when taking indoor photos under incandescent
bulbs or halogen lamps. Incandescent tungsten bulbs tend to have
a reddish hue. This option osets that eect.
Flash WB: Select when using a ash.
Custom Set: Use your pre-dened settings. You can manually set
the White Balance by pressing [D], and then shooting a white
sheet of paper. Fill the spot metering circle with the paper and set
the White Balance.
White Balance

73
Shooting Functions > White Balance
Icon Description
Color Temperature: Manually adjust the color temperature of
the light source. Color temperature is a measurement in degrees
Kelvin that indicates the specic type of light source. As the color
temperature increases, the color distribution becomes cooler.
Alternatively, as the color temperature decreases, the color
distribution becomes warmer. Press [D], and then adjust the
color temperature.
Clear sky
Fluorescent H
Fluorescent L
Cloudy
Halogen lamp
Daylight
Tungsten
Candle light
Available options may dier depending on shooting conditions.
Customizing preset White Balance options
You can also customize preset White Balance options.
To customize
preset options,
In Shooting mode, press [m]
→
1
→
White Balance
→
an option
→
[D]
→
scroll the jog dial, or press
[D/I/C/F].
White Balance
Back Set Reset
You can also touch an area on the screen.
74
Shooting Functions > White Balance
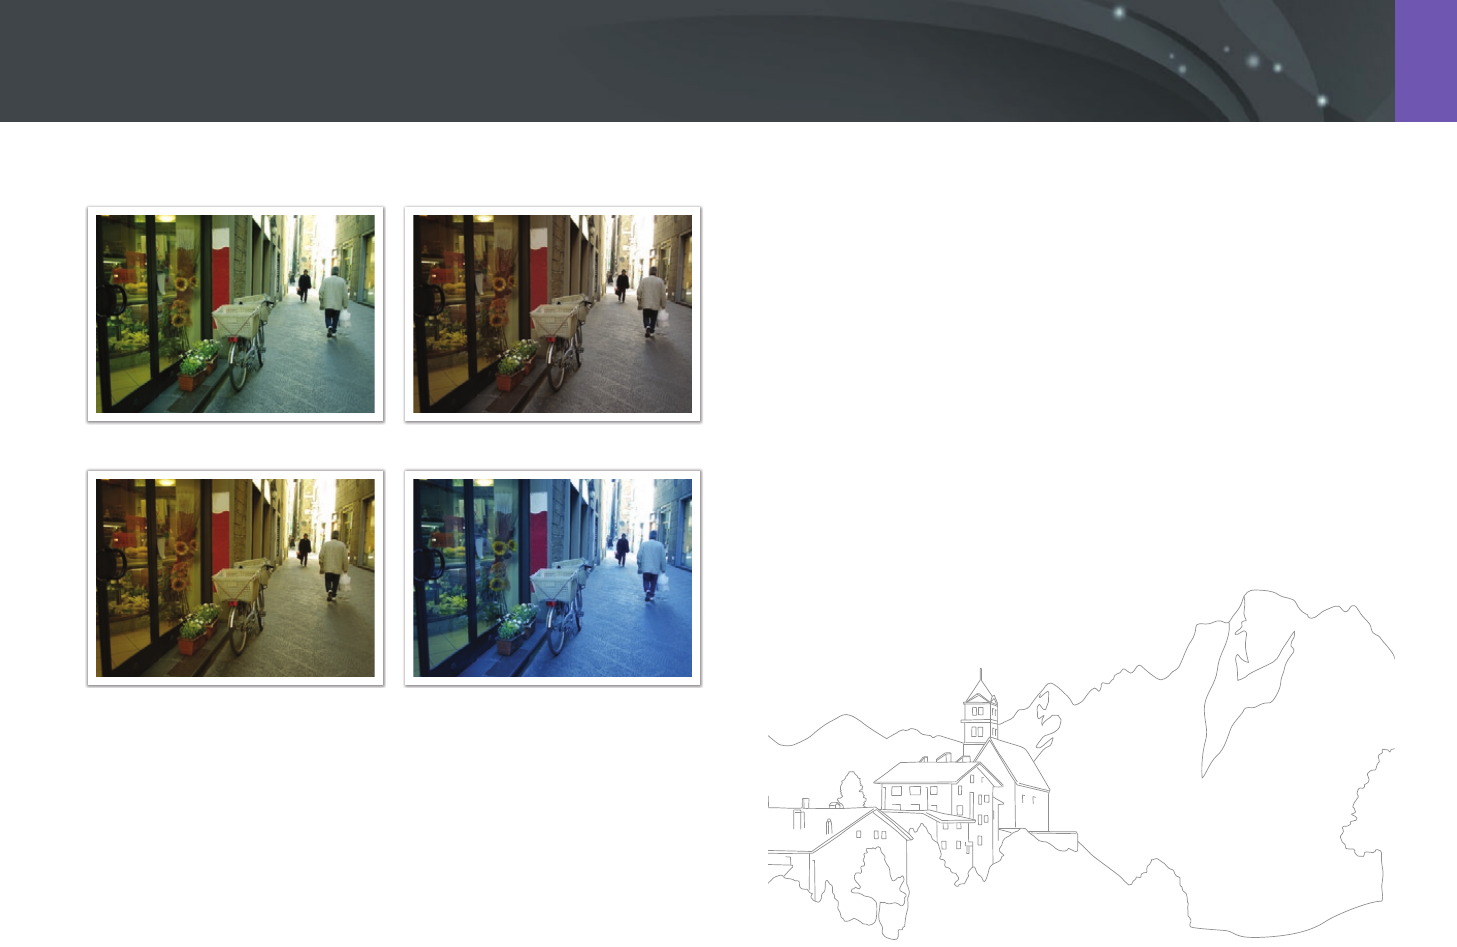
Examples
Auto WB Daylight
Fluorescent Daylight Tungsten
Shooting Functions
7575
Sh
ooting FunctionsShooting Functions
Picture Wizard lets you apply dierent photo styles to your photo to create
various looks and emotional moods. You can also create and save your
own photo styles by adjusting color, saturation, sharpness, and contrast for
each style.
There is no rule for which style is suitable in which conditions. Experiment
with dierent styles and nd your own settings.
To set a photo style,
In Shooting mode, press [m]
→
1
→
Picture Wizard
→
an option.
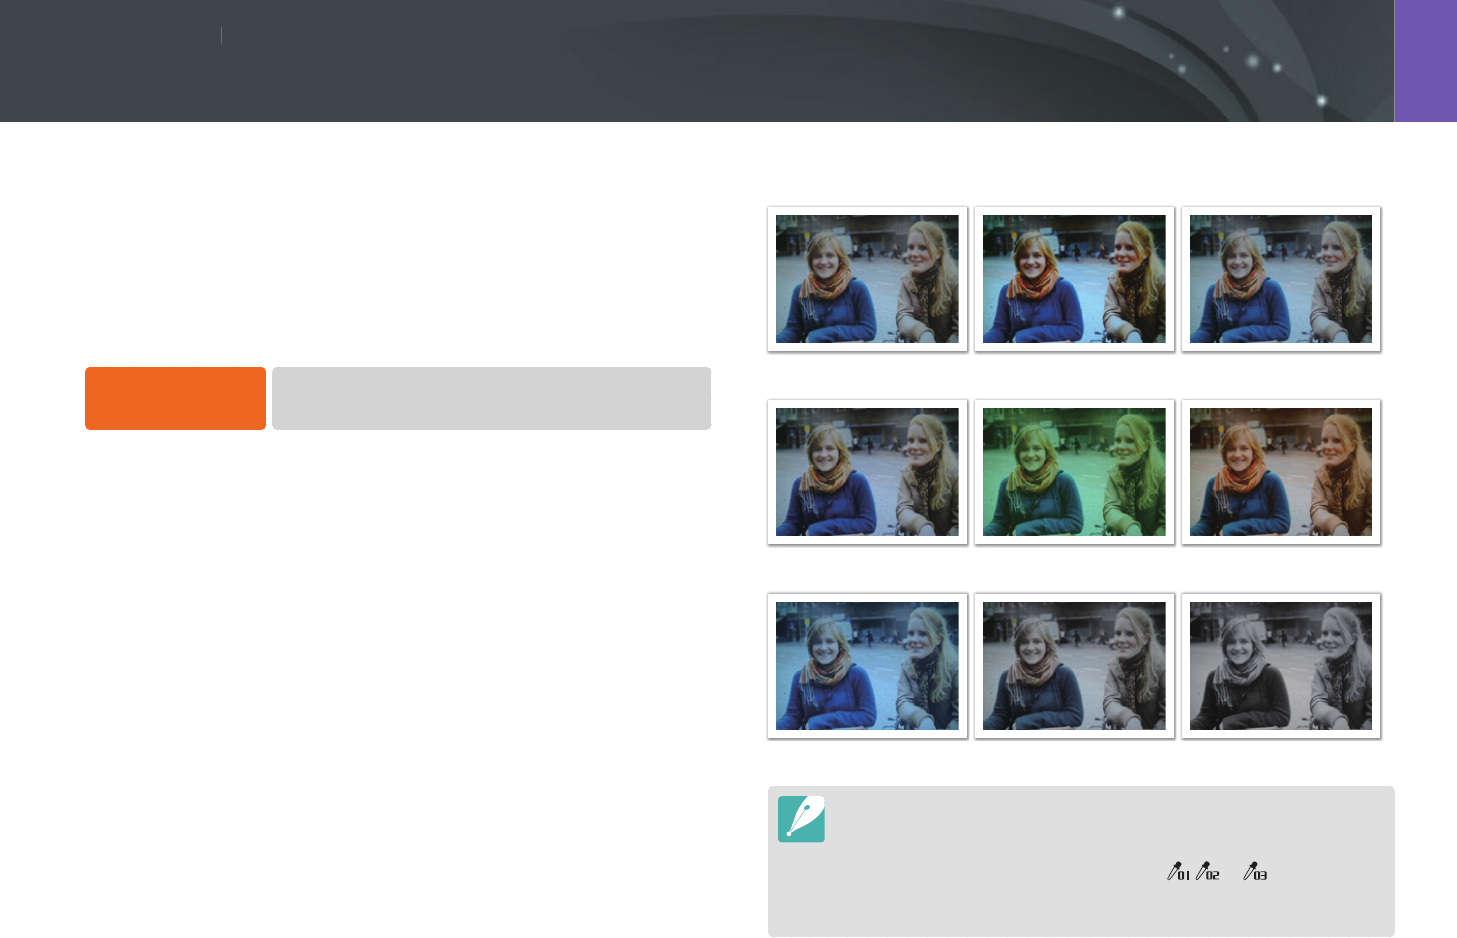
Examples
Standard Vivid Portrait
Landscape Forest Retro
Cool Calm Classic
•
You can also adjust the value of the preset style settings. Select a Picture
Wizard option, press [D], and then adjust color, saturation, sharpness, or
contrast.
•
To customize your own picture wizard, select , , or , and then adjust
the color, saturation, sharpness, and contrast.
•
Picture Wizard options cannot be set with Smart Filter options at the same time.
Picture Wizard (photo styles)
Shooting Functions
7676
Sh
ooting FunctionsShooting Functions
AF mode
Learn how to adjust the camera’s focus according to the subjects.
You can select a focusing mode appropriate to the subject among Single
Auto Focus, Continuous Auto Focus, and Manual Focus. The AF function is
activated when you press [Shutter] halfway. In the MF mode, you have to
rotate the focus ring on the lens to focus manually.
In most cases, you can have a focus by selecting Single AF. Fast moving
subjects or subjects of a color similar to the background are dicult to
focus. Select an appropriate focusing mode for such instances.
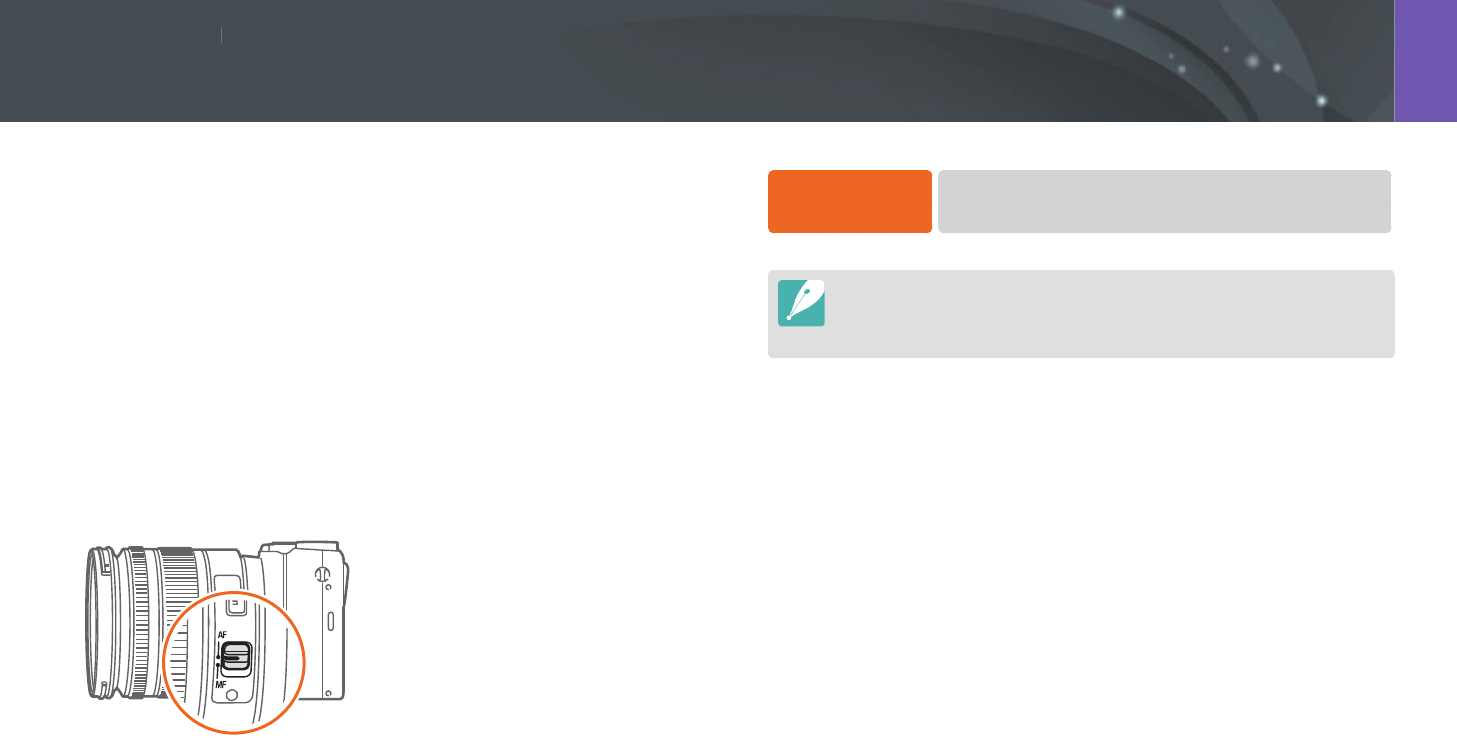
If your lens has an AF/MF switch, you must set the switch according to
the selected mode. Set the switch to AF when you select Single AF or
Continuous AF. Set the switch to MF when you select Manual Focus.
When your lens has no AF/MF switch, press [F] to select a desired AF
mode.
To set the auto
focus mode,
In Shooting mode, press [F]
→
an option.
•
You can also set the option by pressing [m]
→
1
→
AF Mode
→
an option in Shooting mode.
•
The available options may dier depending on the lens in use.

77
Shooting Functions > AF mode
Single AF
Single AF is appropriate for shooting a still subject. When you press
[Shutter] halfway, the focus xes in the focus area. The area turns green
when the focus is achieved.
Continuous AF
While you are pressing [Shutter] halfway, the camera continues to
automatic focusing. Once the focus area is xed on the subject, the subject
is always in focus even when moving. This mode is recommended for
shooting a person on a bicycle, a running dog, or a car racing scene.
78
Shooting Functions > AF mode
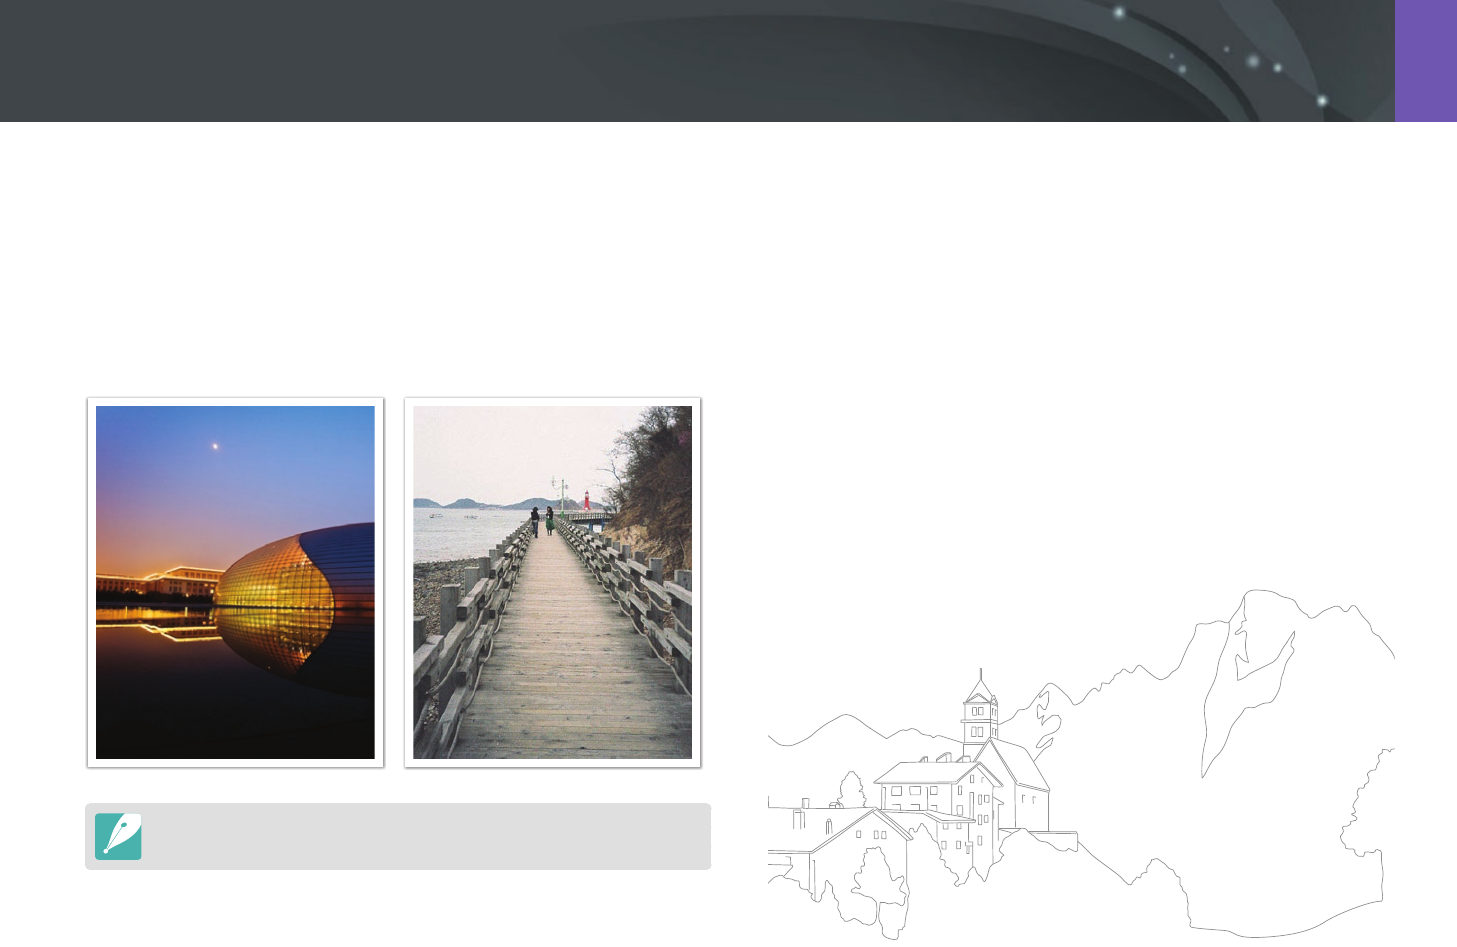
Manual focus
You can manually focus on a subject by rotating the focus ring on the
lens. The MF Assist function lets you easily achieve a focus. While you are
rotating the focus ring, the focus area is magnied. When you use the
Focus Peaking function, the color you selected appears on the focused
subject. This mode is recommended for shooting an object similar in color
to the background, a night scene, or reworks.
If you use this function, you cannot set Touch AF, AF Area, and Link AE to AF
Point options.
Shooting Functions
7979
Sh
ooting FunctionsShooting Functions
The AF area function changes the positions of the focus area.
Generally, cameras focus on the nearest subject. When there are a lot of
subjects, however, unwanted subjects can be in focus. In order to prevent
unwanted subjects from being in focus, change the focus area so that
a desired subject is in focus. You can get a clearer and sharper photo by
selecting an appropriate focus area.
To set the auto
focus area,
In Shooting mode, press [m]
→
1
→
AF Area
→
an option.
•
Available options may dier depending on shooting conditions.
•
When the AF/MF switch is set to MF, you cannot change the AF area from the
shooting menu.
•
When you use the Face Detection AF option, the camera focuses on the area
with the white frame automatically.
•
Depending on the Picture Wizard options, Face Detection may not be
eective.
•
When you set manual focus, Face Detection may not be available.
•
Face Detection may not be eective when:
-
the subject is far from the camera
-
it is too bright or too dark
-
the subject is not facing the camera
-
the subject is wearing sunglasses or a mask
-
the subject’s facial expression changes drastically
-
the subject is backlit or the lighting conditions are unstable
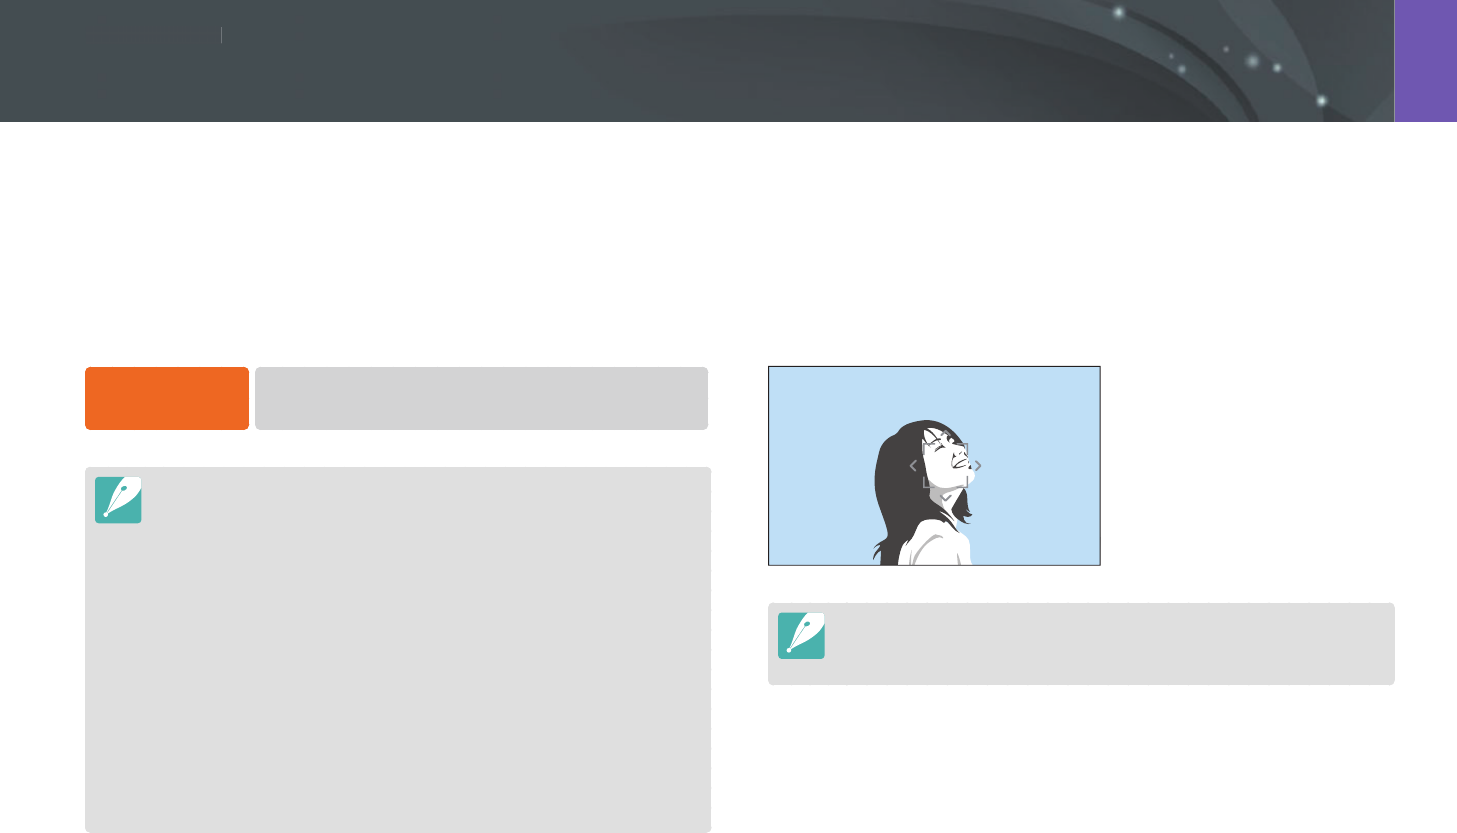
Selection AF
You can set the focus on an area you want. Apply an out-of-focus eect to
make the subject more distinguishable.
The focus on the photo below was repositioned and resized so that it ts
the subject’s face.
To resize or move the focus area, in Shooting mode, press [o]. Use the
navigation button to move the focus area. Scroll the jog dial to resize the focus
area.
AF area
80
Shooting Functions > AF area
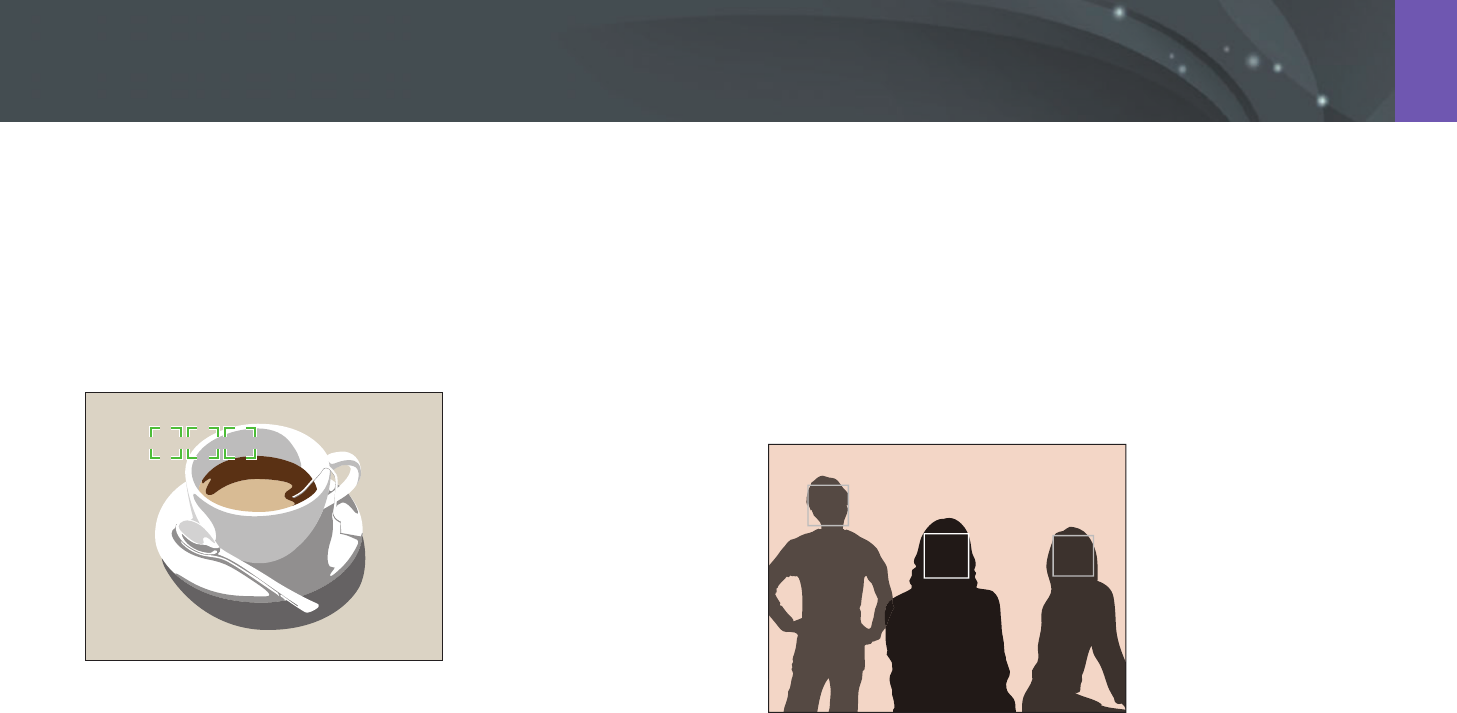
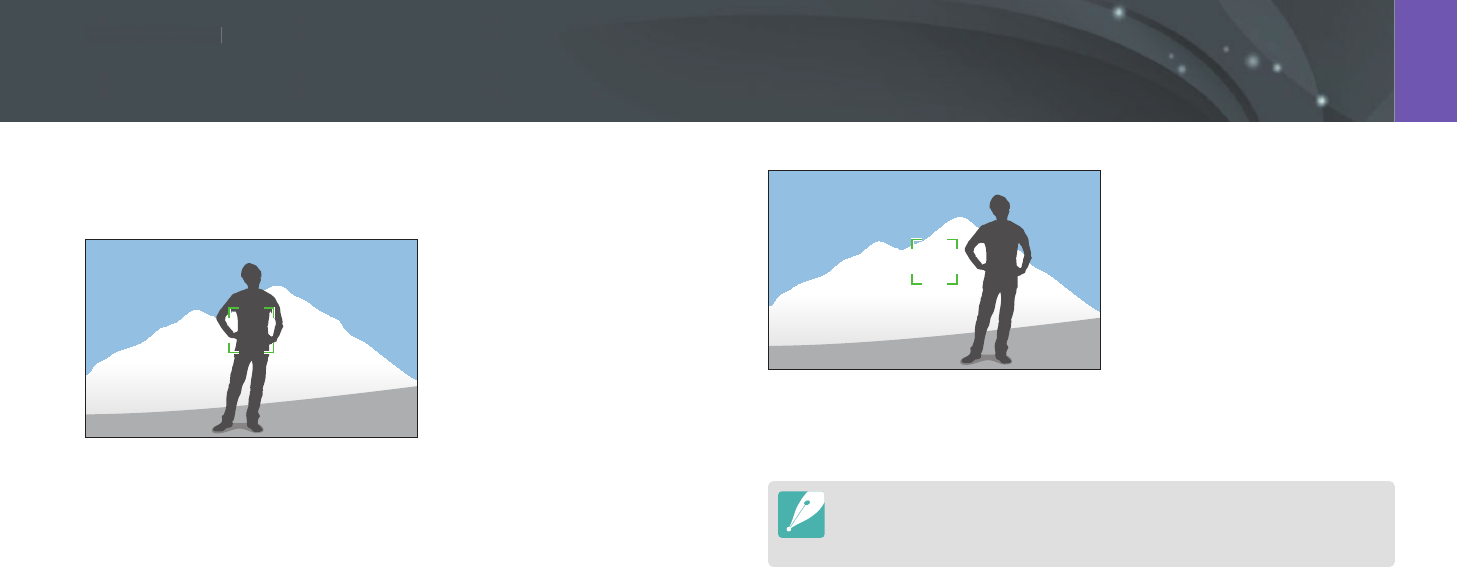
Multi AF
The camera displays a green rectangle in places where focus is set
correctly. The photo is divided into two or more areas, and the camera
obtains focus points of each area. It is recommended for scenery photos.
When you press [Shutter] halfway, the camera displays the focus areas as
shown in the photo below.
Face detection AF
The camera focuses on human faces preferentially. Faces of up to
10 people can be detected. This setting is recommended for shooting a
group of people.
When you press [Shutter] halfway, the camera focuses on faces as shown
in the photo below. In cases of shooting a group of people, the camera
displays the focus on the nearest person’s face in white and the rest of the
people’s faces in gray.

81
Shooting Functions > AF area
Self-Portrait AF
It can be dicult to check whether your face is in focus when you are
taking a self-portrait. When this function is on, the beep from the camera
gets faster when your face is located at the center of the composition.

Shooting Functions
8282
Sh
ooting FunctionsShooting Functions
Tracking AF
Tracking AF allows you to track and automatically focus on your subject,
even when the subject is moving or when you change the shooting
composition.
White frame: Your camera is
tracking the subject.
Green frame: Your subject is
in focus when you half-press
[Shutter].
Red frame: Your camera failed to
focus.
Focus on the subject or capture a photo by touching on the screen.
To set Touch AF,
In Shooting mode, press [m]
→
1
→
Touch AF
→
an option.
Available options may dier depending on the shooting conditions.
Touch AF
Touch AF allows you to focus on the subject that you touch on the screen.
Touch AF
83
Shooting Functions > Touch AF
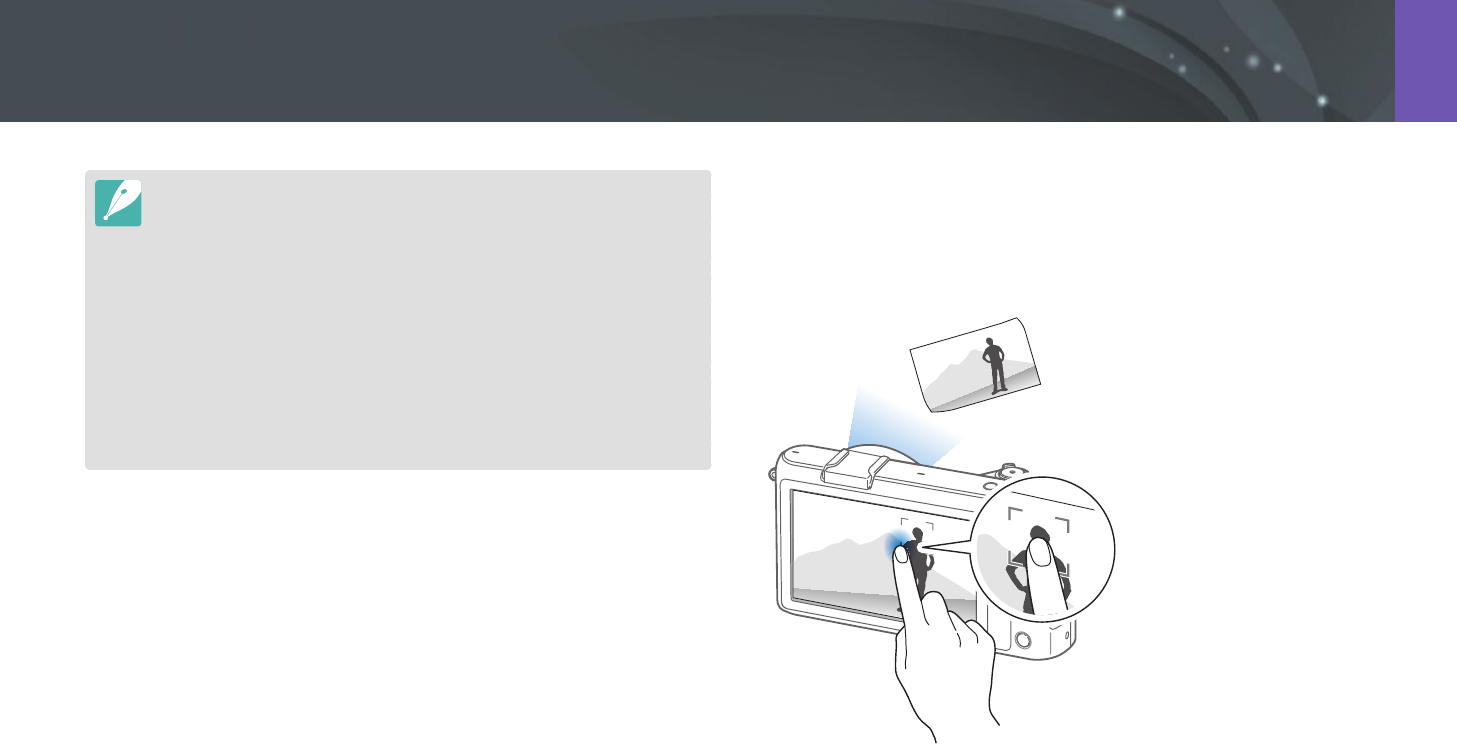
One touch shot
You can capture a photo with the touch of your nger. As you touch on a
subject, the camera focuses on the subject automatically and captures a
photo.
•
If you do not select a focus area, the Auto Focus function does not work.
•
Tracking a subject may fail when:
-
the subject is too small
-
the subject moves excessively
-
the subject is backlit or you are shooting in a dark place
-
colors or patterns on the subject and the background are the same
-
the subject includes horizontal patterns, such as blinds
-
the camera shakes excessively
•
When tracking fails, the feature will be reset.
•
If the camera fails to track the subject, the focus area will be reset.
•
If the camera fails to focus, the focus frame will change to red and the focus
will be reset.

Shooting Functions
8484
Sh
ooting FunctionsShooting Functions
In the manual focus mode, you have to rotate the focus ring on the lens to
focus. When you use the MF Assist function or the Focus Peaking function,
you can achieve a clearer focus. This function is only available on a lens
that supports manual focus.
MF Assist
In the manual focus mode, you can enlarge the scene and easily adjust the
focus while rotating the focus ring.
To set the manual
focus assist,
In Shooting mode, press [m]
→
1
→
MF Assist
→
an option.
* Default
Option Description
O
Do not use the MF Assist function.
Enlarge x5*
The focus area is magnied by 5 times when you rotate the
focus ring.
* Default
Option Description
Enlarge x8
The focus area is magnied by 8 times when you rotate the
focus ring.
Focus Peaking
In the manul focus mode, the color you selected appears on the focused
subject to help you focus while rotating the focus ring.
To set Focus
Peaking options,
In Shooting mode, press [m]
→
1
→
Focus Peaking
→
an option.
* Default
Option Description
Level
Set a sensitivity for detecting the focused subject.
(O, High, Normal*, Low)
Color
Set a color to appear on the focused subject.
(White*, Red, Green)
Focus assist
Shooting Functions
8585
Sh
ooting FunctionsShooting Functions
Use the Optical Image Stabilization (OIS) function to minimize camera
shake. OIS may not be available with some lenses.
Camera shake tends to occur in dark places or when shooting indoors.
In such cases, the camera uses slower shutter speeds in order to increase
the amount of light taken in, which can result in a blurry photo. You can
prevent this situation by using the OIS function.
If your lens has an OIS switch, you have set the switch to ON to use the OIS
function.
To set OIS options,
In Shooting mode, press [m]
→
1
→
OIS (Anti-Shake)
→
an option.
* Default
Icon Description
O: The OIS function is o. (This option may not be available with
some lenses.)
Mode 1*: The OIS function is applied only when you press
[Shutter] in full or half.
Mode 2: The OIS function is on.
Optical Image Stabilization (OIS)
Without OIS correction With OIS correction
•
OIS may not function properly when:
-
you move your camera to follow a moving subject
-
there is too much camera shake
-
the shutter speed is slow (for example, when you select Night in
s mode)
-
the battery is low
-
you capture a close-up shot
•
If you use the OIS function with a tripod, your images may be blurred by
the vibration of the OIS sensor. Deactivate the OIS function when you use a
tripod.
•
If the camera is hit or dropped, the display will be blurry. If this occurs, turn o
the camera, and then turn it on again.
•
Use the OIS function only when needed because the function consumes
more battery power.
•
To set an OIS option on the menu, set the OIS switch on your lens to ON.
•
This option may not be available with some lenses.
•
O may not be available with some lenses.
Shooting Functions
8686
Sh
ooting FunctionsShooting Functions
You can set the shooting method such as Continuous, Burst, Timer and so
on.
Select Single to capture one photo at a time. Select Continuous or Burst
to shoot fast moving subjects. Select AE Bracket, WB Bracket, or P Wiz
Bracket to adjust exposure, White Balance, or apply Picture Wizard eects.
You can also select Timer to capture a photo of yourself.
To set the shooting
method,
In Shooting mode, press [C]
→
an option.
•
You can also set the option by pressing [m]
→
1
→
Drive
→
an option in Shooting mode.
•
Available options may dier depending on shooting conditions.
Single
Capture one photo whenever you press [Shutter]. Recommended for
general conditions.
Continuous
Continuously capture photos while you are pressing [Shutter]. You can
capture up to 5 photos (Continuous Normal) or 8.6 photos (Continuous
High) per second.
If you select Continuous High, the noise reduction function is not available.
Drive (shooting method)
87
Shooting Functions > Drive (shooting method)
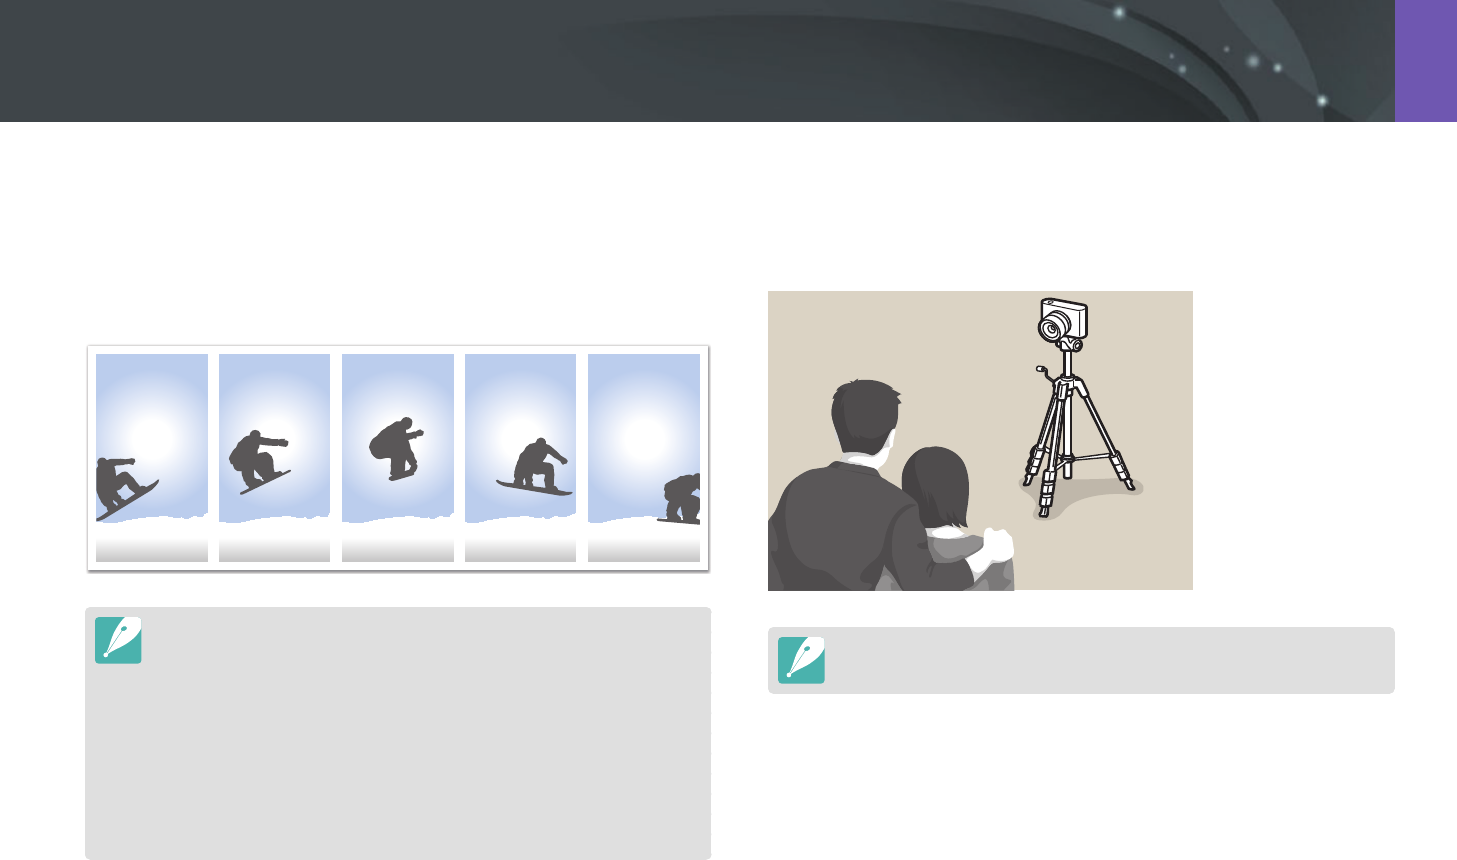
Burst
Consecutively capture up to 10 shots per second (3 seconds), 15 shots per
second (2 seconds), or 30 shots per second (1 second) when you press
[Shutter] once. It is recommended for shooting the rapid motion of fast
moving subjects such as racing cars.
•
To set the number of shots, in Shooting mode, press [C]
→
Burst, and then
press [D].
•
The photo size is set to 5M.
•
It may take longer to save a photo.
•
You cannot use the ash with this option.
•
Shutter speed must be faster than 1/30 second.
•
Photos captured with this option may be slightly enlarged when saving.
•
You cannot set an ISO option higher than ISO 3200.
•
This option cannot be used with the RAW le format and is not available
when the photo quality is set to RAW.
Timer
Capture a photo with a delay of 2 to 30 seconds. The delay is adjustable in
increments of 1 second.
To set the delay, in Shooting mode, press [C]
→
Timer, and then press [D].
88
Shooting Functions > Drive (shooting method)
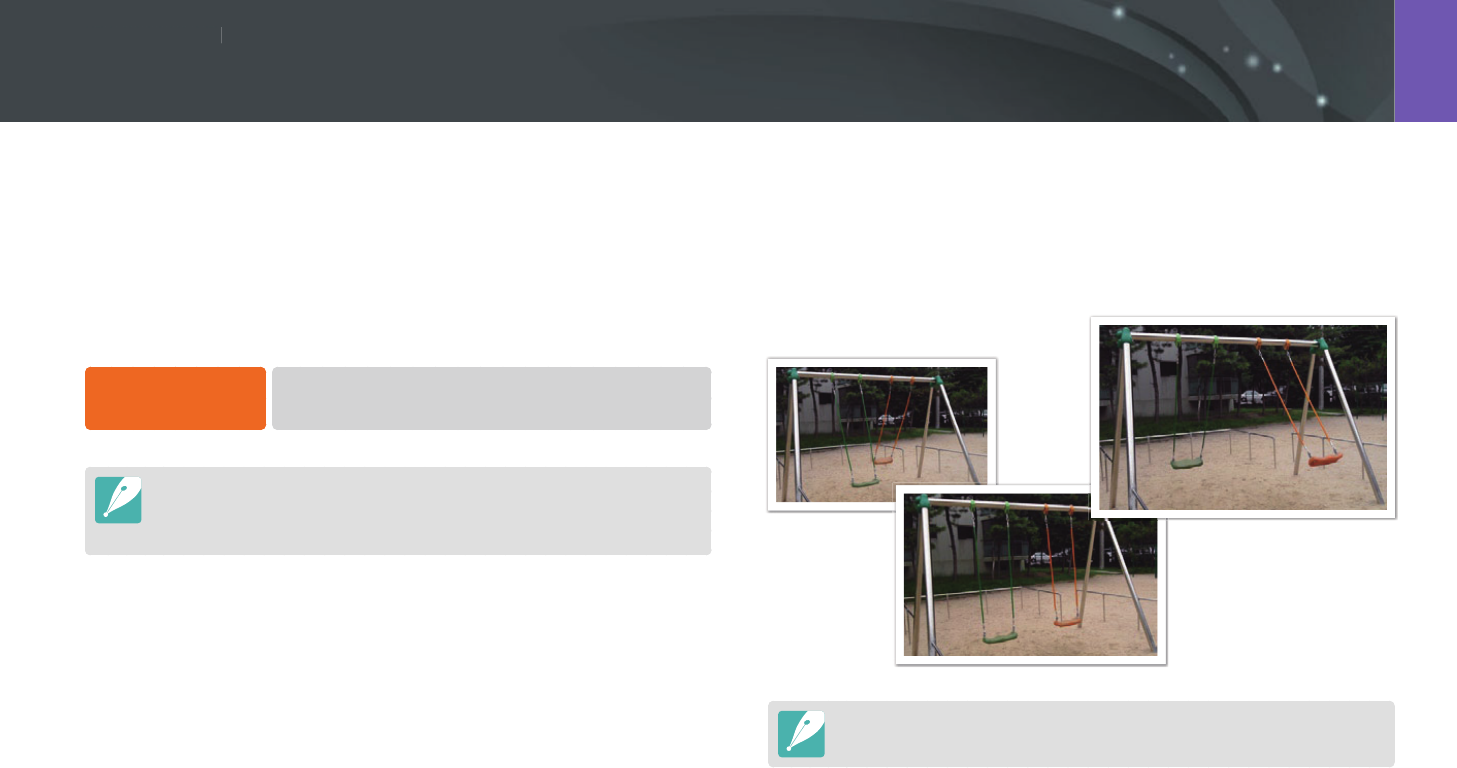
Auto Exposure Bracketing (AE Bracket)
When you press [Shutter], the camera captures 3 consecutive photos: the
original, one a step darker, and one a step lighter. Use a tripod to prevent
blurry photos as the camera captures three photos continuously. You can
adjust the settings in Bracket Set menu.
Exposure -2
Original
Exposure +2
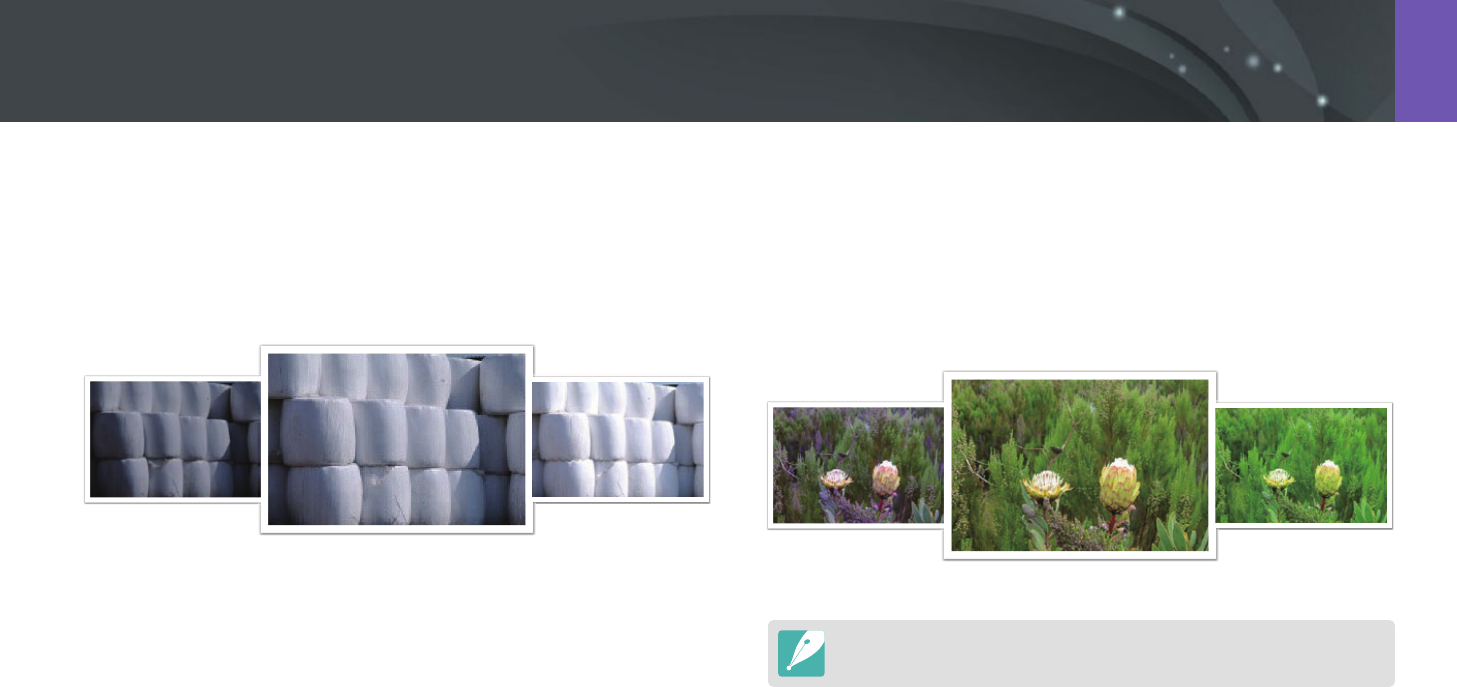
White Balance Bracketing (WB Bracket)
When you press [Shutter], the camera captures 3 consecutive photos:
the original and two more with dierent White Balance settings. The
original photo is captured when you press [Shutter]. The other two are
automatically adjusted according to the White Balance you have set. You
can adjust the settings in Bracket Set menu.
WB-2
Original
WB+2
This option cannot be used with the RAW le format and is not available when
the photo quality is set to RAW.
89
Shooting Functions > Drive (shooting method)
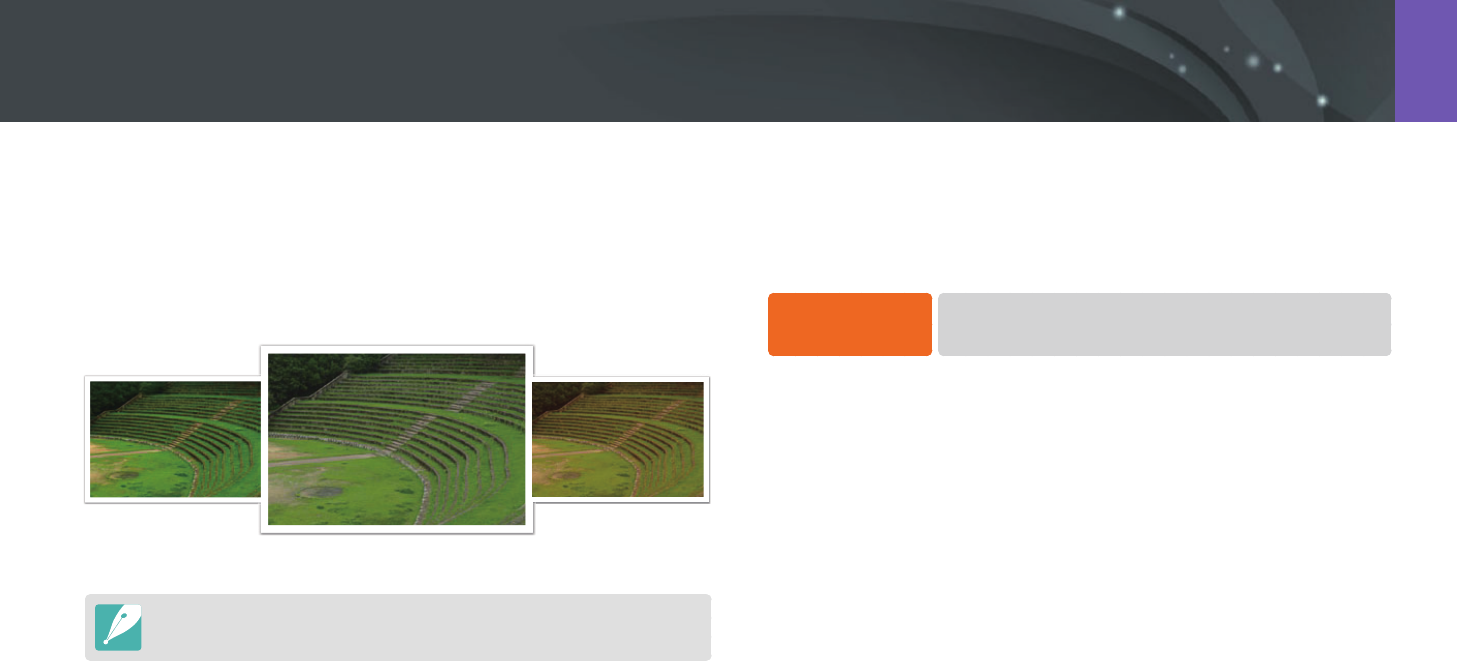
Picture Wizard Bracketing (P Wiz Bracket)
When you press [Shutter], the camera captures three consecutive photos,
each with a dierent Picture Wizard setting. The camera captures a photo
and applies the three Picture Wizard options you have set to the image
captured. You can select three dierent settings in Bracket Set menu.
Vivid
Standard
Retro
This option cannot be used with the RAW le format and is not available when
the photo quality is set to RAW.
Bracketing setting
You can set up the options for AE Bracket, WB Bracket, and P Wiz Bracket.
(p. 146)
To set a bracketing
option,
In Shooting mode, press [m]
→
5
→
Bracket Set
→
an option.
Shooting Functions
9090
Sh
ooting FunctionsShooting Functions
In order to capture a realistic photo of a subject, the amount of light
should be constant. When the light source varies, you can use a ash and
supply a constant amount of light. Select appropriate settings according to
a light source and a subject.
To set ash options,
In Shooting mode, press [m]
→
1
→
Flash
→
an option.
Icon Description
O: Do not use the ash.
Smart Flash: The camera automatically adjusts the brightness
of the ash according to the amount of light in the surrounding
environment.
Auto: The ash automatically res in dark places.
Auto Red-eye: The ash automatically res and reduces red-eyes.
Fill in: The ash res whenever you capture a photo. (Brightness is
automatically adjusted.)
Fill-in Red: The ash res whenever you capture a photo and
reduces red-eyes.
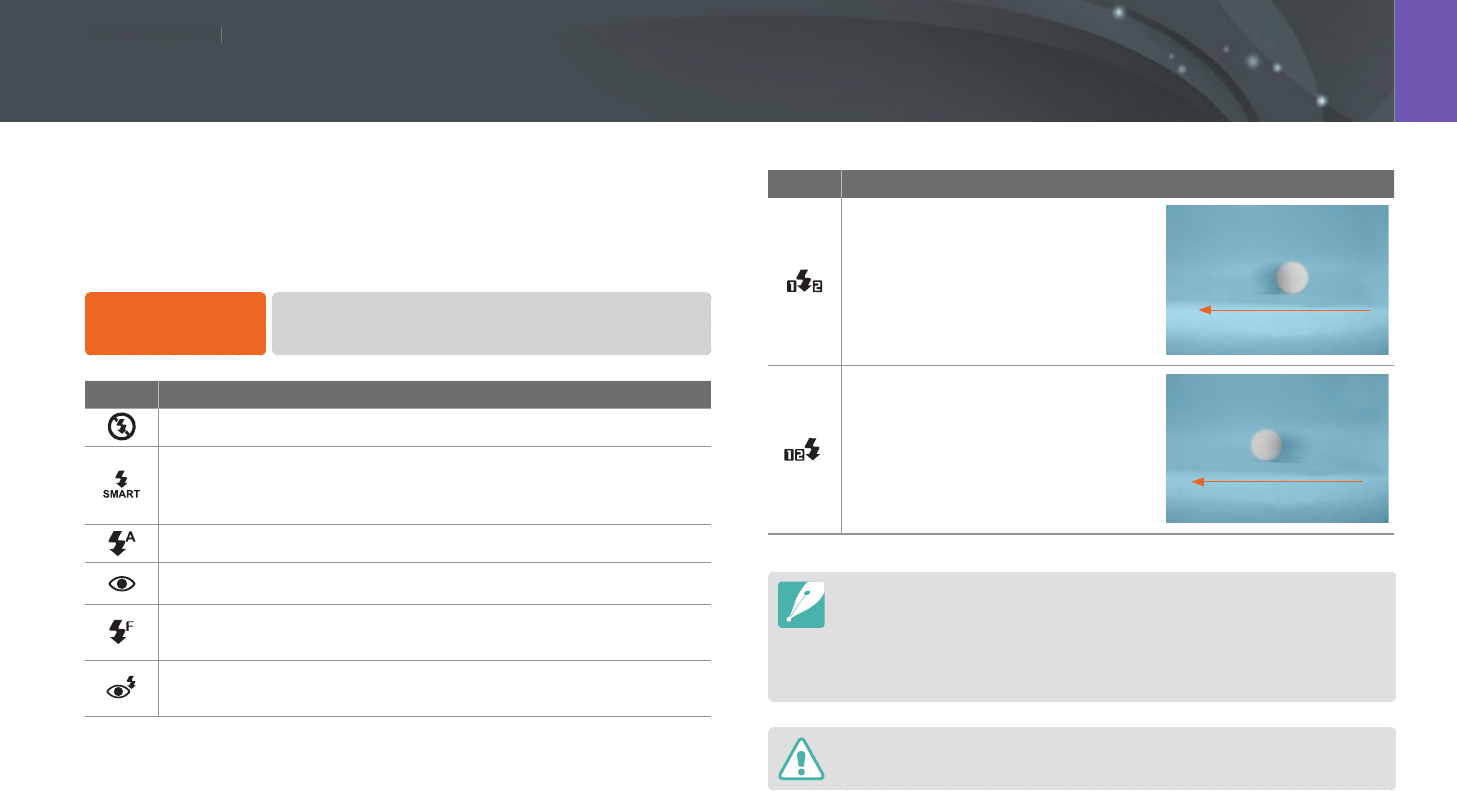
Icon Description
1st Curtain: The ash res
immediately after the shutter opens.
The camera captures a photo of a
subject earlier in an action sequence
clearly. Ball moving direction
2nd Curtain: The ash res just
before the shutter closes. The
camera captures a photo of a
subject later in an action sequence
clearly. Ball moving direction
•
The available options may dier depending on shooting conditions.
•
There is an interval between two bursts of the ash. Do not move until the
ash res a second time.
•
If you select O, the ash does not re even when an external ash is
attached.
Use only Samsung-approved ashes. Using incompatible ashes may damage
your camera.
Flash
91
Shooting Functions > Flash
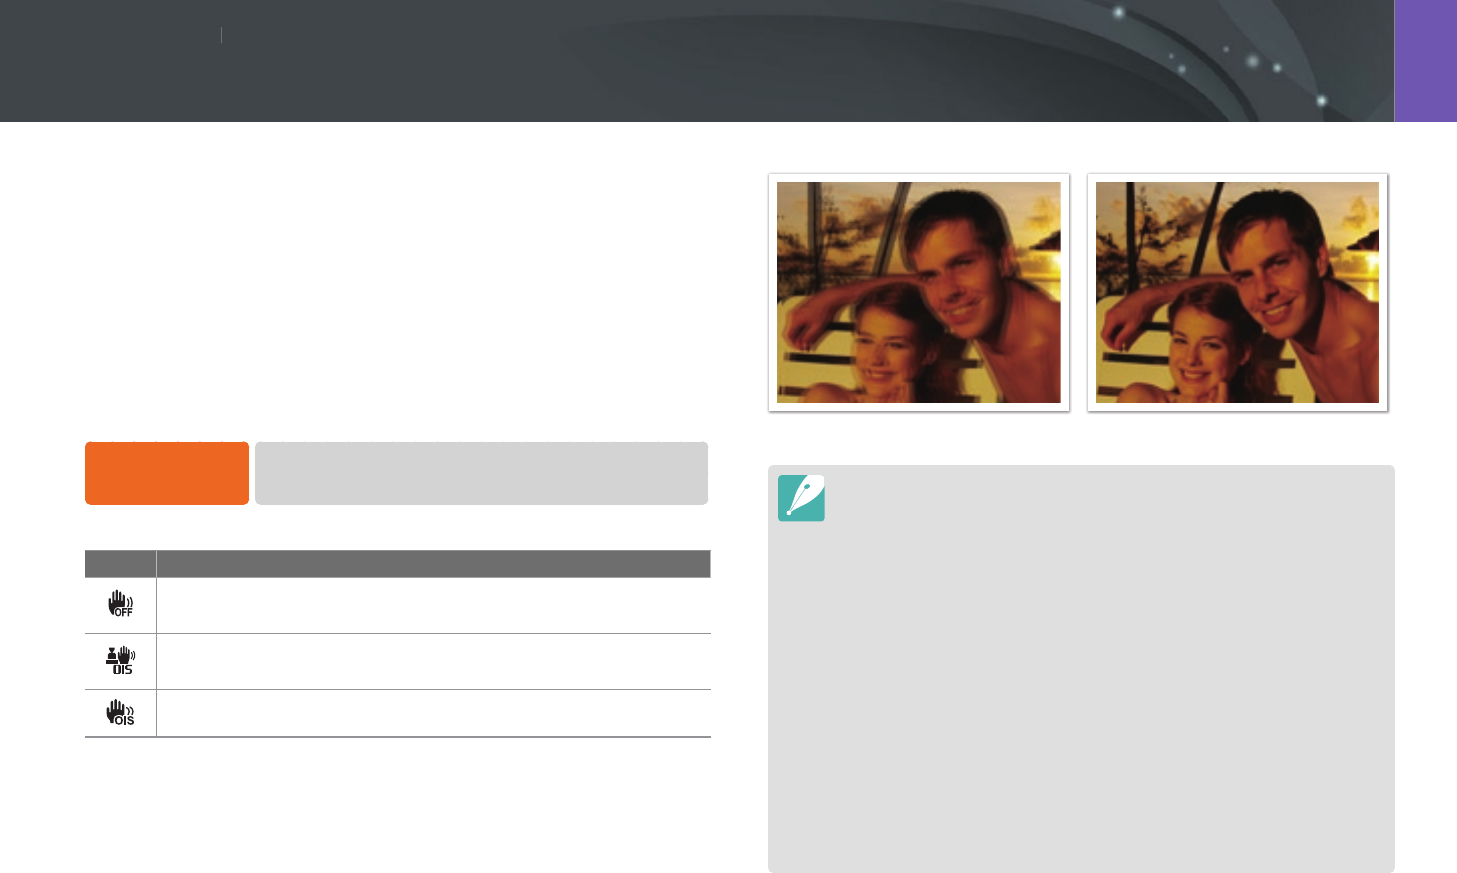
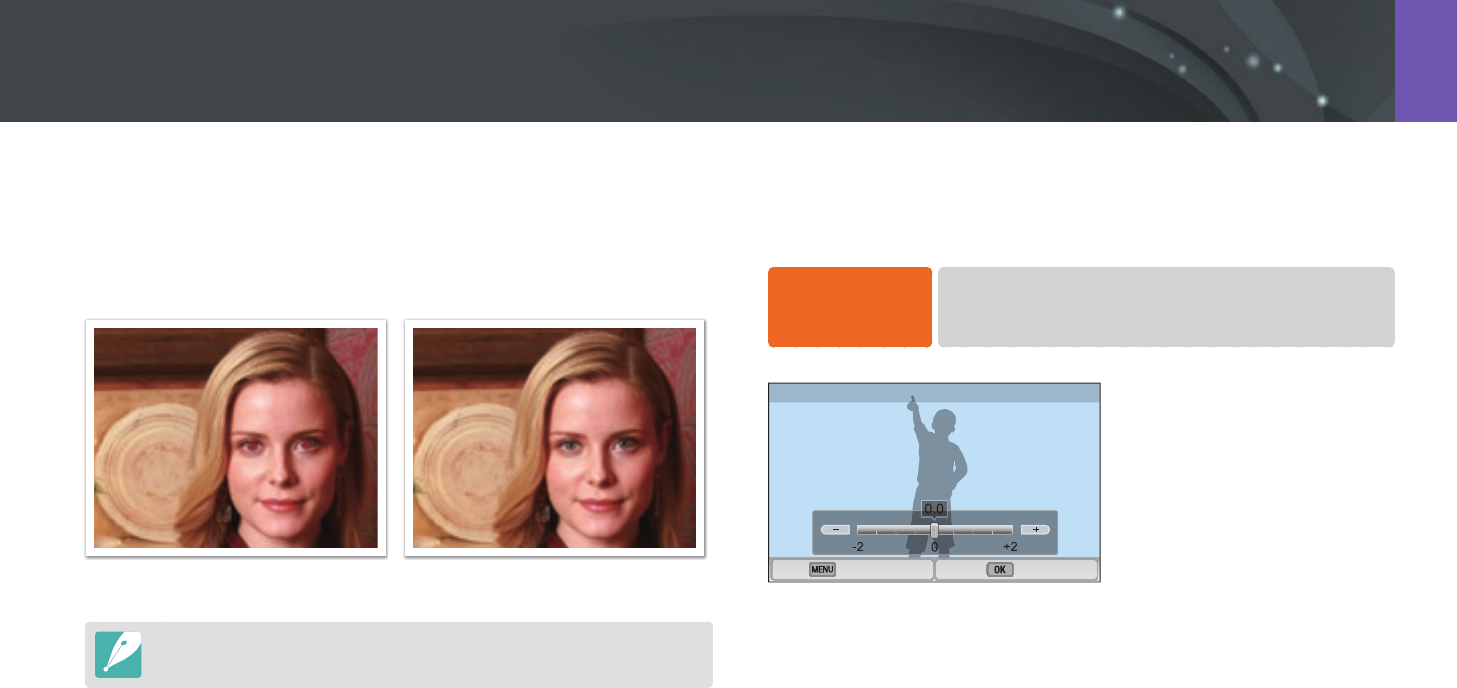
Reducing the red-eye eect
If the ash res when you capture a photo of a person in the dark, a red
glow may appear in the eyes. To reduce the red-eye eect, select Auto
Red-eye or Fill-in Red.
Without red-eye reduction With red-eye reduction
If the subject is too far from the camera or moves when the rst ash res, red-
eyes may not be reduced.
Adjusting the ash intensity
When the ash is on, adjust the ash intensity +/-2 levels.
To set the ash
intensity,
In Shooting mode, press [f]
→
Flash
→
an option
→
[D]
→
scroll the jog dial or press [C/F] to adjust the ash
intensity.
Back Set
Flash : 0.0

92
Shooting Functions > Flash
•
You can also drag the slider or touch +/- to adjust the intensity.
•
Adjusting the flash intensity may not be eective when:
-
the subject is too close to the camera
-
you set a high ISO sensitivity
-
the exposure value is too big or too small
•
In some shooting modes, you cannot use this function.
•
If you attach an intensity-adjustable external ash to the camera, the intensity
settings of the ash will be applied.
•
If the subject is too close when you use the ash, some light may be blocked,
resulting in a dark photo. Ensure that the subject is within the recommended
range, which varies by lens.
•
When a lens hood is attached, the light from the ash can be blocked by the
hood. Remove the hood to use the ash.

Shooting Functions
9393
Sh
ooting FunctionsShooting Functions
The metering mode refers to the way in which a camera measures the
quantity of light.
The camera measures the amount of light in a scene, and in many of its
modes, uses the measurement to adjust various settings. For example,
if a subject looks darker than its actual color, the camera captures an
overexposed photo of it. If a subject looks lighter than its actual color, the
camera captures an underexposed photo of it.
The brightness and overall mood of the photo can also be aected by how
the camera measures the amount of light. Select an appropriate setting for
a shooting condition.
To set a metering
option,
In Shooting mode, press [m]
→
1
→
Metering
→
an option.
Multi
The Multi mode calculates the amount of light in multiple areas. When
light is sucient or insucient, the camera adjusts the exposure by
averaging the overall brightness of the scene. This mode is suitable for
general photos.
Metering

94
Shooting Functions > Metering
Spot
The Spot mode calculates the amount of light in the center. When you
capture a photo in conditions where there is a strong backlight behind a
subject, the camera adjusts the exposure so as to shoot a subject correctly.
For example, when you select the Multi mode in a strong backlight
condition, the camera calculates that the overall amount of light is
abundant, which results in a darker photo. The Spot mode can prevent this
situation as it calculates the amount of light in a designated area.
The subject is in bright color while the background is dark. The Spot mode
is recommended for a situation like this where a huge dierence in the
exposure exists between a subject and a background.
Center-weighted
The Center-weighted mode calculates a broader area than the Spot mode
does. It sums up the amount of light in the center portion of the shot
(60–80 %) and that of the rest of the shot (20–40 %). It is recommended
for situations where there is a slight dierence in brightness between a
subject and a background or an area of the subject is large compared to
the overall composition of the photo.

95
Shooting Functions > Metering
Measuring the exposure value of the focus area
When this function is turned on, the camera automatically sets an optimal
exposure by calculating the brightness of the focus area.
This function is only available when you select Spot metering or Multi
metering, and Selection AF.
To set this
function,
In Shooting mode, press [m]
→
1
→
Link AE to AF
Point
→
an option.

Shooting Functions
9696
Sh
ooting FunctionsShooting Functions
This function automatically corrects the loss of bright detail that can occur
due to shading dierences in the photo.
To set Smart Range
options,
In Shooting mode, press [m]
→
1
→
Dynamic Range
→
an option.
Without Dynamic Range eect With Dynamic Range eect
Icon Description
O: Do not use Dynamic Range.
Smart Range+: Correct the loss of bright detail.
You cannot set ISO 100.
HDR: Capture 2 photos with dierent exposures, and then
combine them to create a single image automatically.
You cannot set an ISO option higher than ISO 3200.
Dynamic Range

Shooting Functions
9797
Sh
ooting FunctionsShooting Functions
Smart Filter lets you apply special eects to your photos. You can select
various lter options to create special eects that are dicult to be
achieved with normal lenses.
To set Smart Filter
options,
In Shooting mode, press [m]
→
1
→
Smart Filter
→
an option.
Option Description
O
No eect
Vignetting
Apply the retro-looking colors, high contrast, and strong
vignette eect of Lomo cameras.
Miniature
Apply a tilt-shift eect to make the subject appear in
miniature.
Colored Pencil
Apply a colored pencil painting eect.
Watercolor
Apply a watercolor painting eect.
Wash drawing
Apply a washed-out eect.
Oil Sketch
Apply an oil painting eect.
Ink Sketch
Apply an ink painting eect.
Acryl
Apply an acryl painting eect.
Option Description
Negative
Apply a negative lm eect.
Red
Desaturate all colors but red.
Green
Desaturate all colors but green.
Blue
Desaturate all colors but blue.
Yellow
Desaturate all colors but yellow.
Smart lter options cannot be set with Picture Wizard options at the same time.
Smart Filter
Shooting Functions
9898
Sh
ooting FunctionsShooting Functions
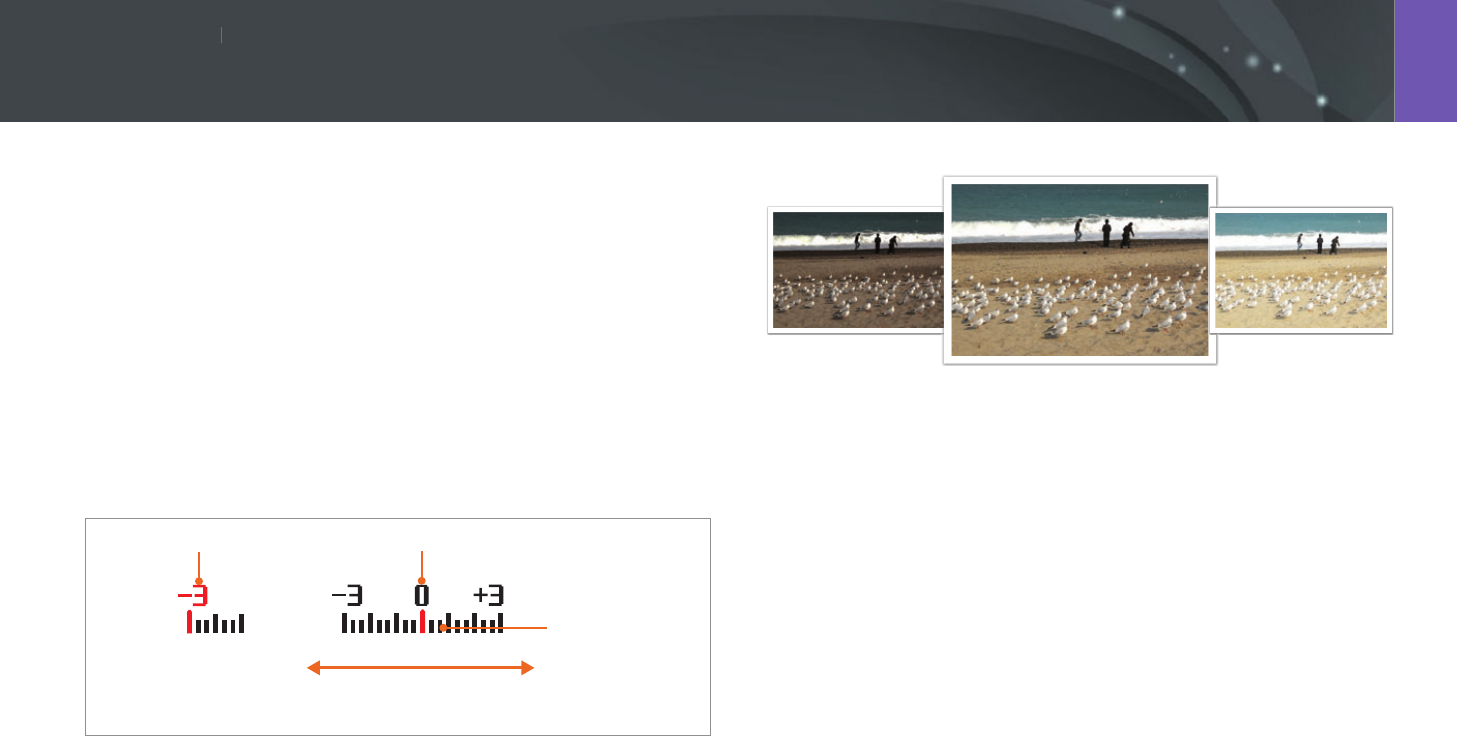
The camera automatically sets the exposure by measuring the levels of
light from the photo’s composition and the position of a subject. If the
exposure set by the camera is higher or lower than you expected, you can
adjust the exposure value manually. The exposure value is adjustable in ±3
increments. The camera displays the exposure warning in red for each step
beyond ±3 range.
To adjust the exposure value, while holding down [W], scroll the jog
dial. You can also adjust the exposure value by pressing [f], and then
selecting EV.
You can check the exposure value by the position of the exposure level
indicator.
Exposure level
indicator
Increased exposure
(brighter)
Decreased exposure
(darker)
Exposure warning Standard exposure index
-2
Original
+2
Exposure compensation
Shooting Functions
9999
Sh
ooting FunctionsShooting Functions
When you cannot achieve an appropriate exposure because of a strong
color contrast, lock the exposure, and then capture a photo.
To lock the exposure value, adjust the photo’s exposure, and then press the
custom button.
After locking the exposure, aim the lens where you desire, and then press
[Shutter].
•
Set a function of the custom button to AEL to lock the current exposure
value. (p. 149)
•
This feature is not available in Manual mode.
Exposure lock
Shooting Functions
100100
Sh
ooting FunctionsShooting Functions
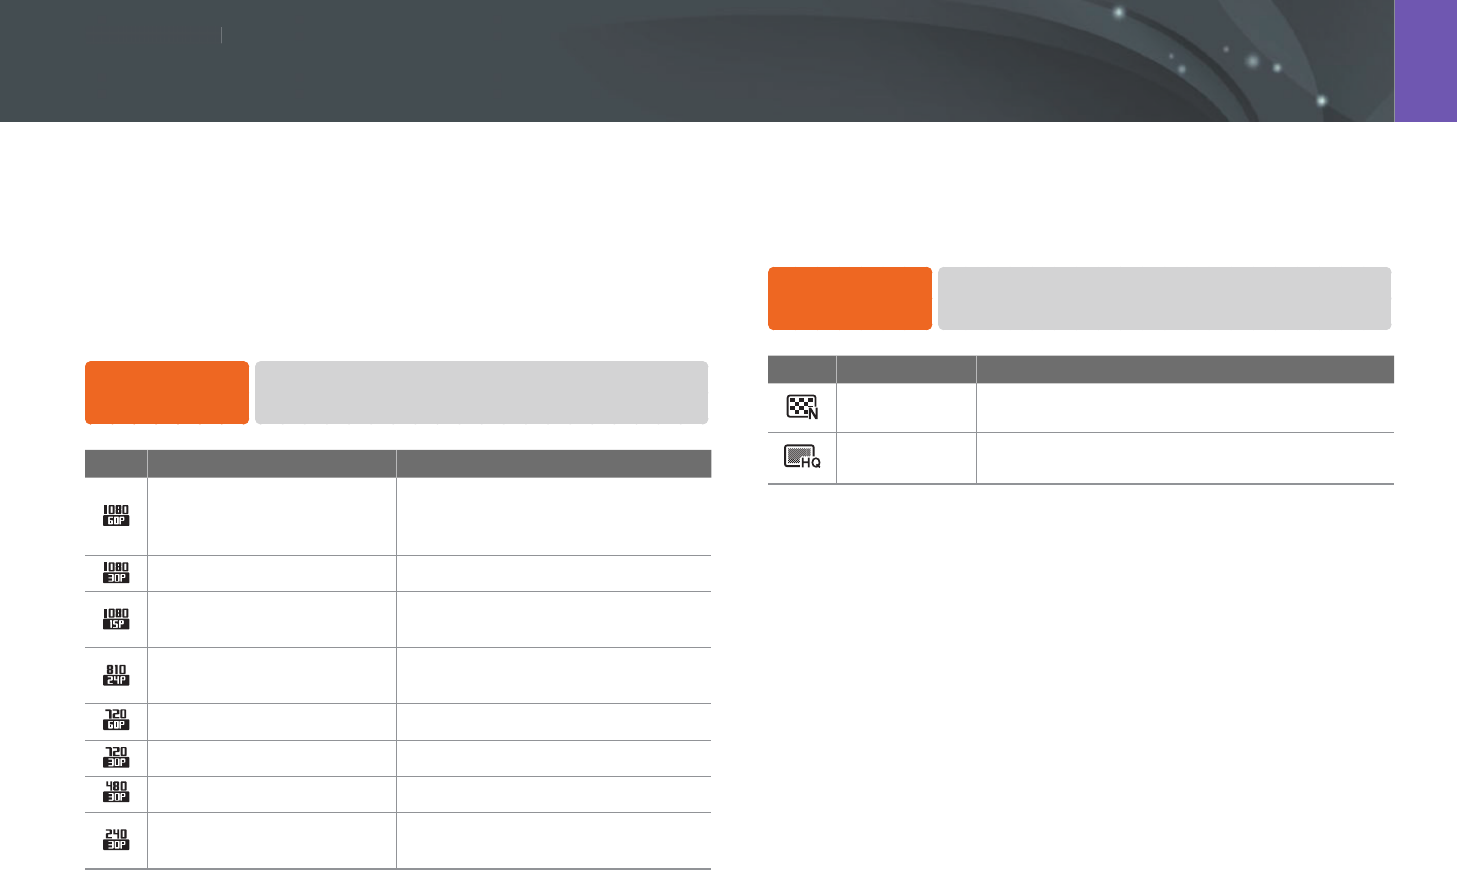
The functions available for video are explained below.
Movie size
Set the movie size.
To set movie size
options,
In Shooting mode, press [m]
→
6
→
Movie Size
→
an option.
Icon Size Recommended for
1920X1080 (60 fps) (16:9)
View on a Full HDTV. (Playable only
on full HDTVs capable of playback at
60 fps.)
1920X1080 (30 fps) (16:9) View on a Full HDTV.
1920X1080 (15 fps) (16:9) View on a Full HDTV. (Available only
with some Smart Filter options.)
1920X810 (24 fps)
(Approx. 2.35:1) View on an HDTV.
1280X720 (60 fps) (16:9) View on an HDTV.
1280X720 (30 fps) (16:9) View on an HDTV.
640X480 (30 fps) (4:3) View on a TV.
320X240 (30 fps) (4:3) Post on a website using the wireless
network (30 seconds maximum).
Movie quality
Set the Movie quality.
To set movie
quality options,
In Shooting mode, press [m]
→
6
→
Movie Quality
→
an option.
Icon Extension Description
MP4 (H.264) Normal: Record videos in normal quality.
MP4 (H.264) HQ: Record videos in high quality.
Video functions
101
Shooting Functions > Video functions
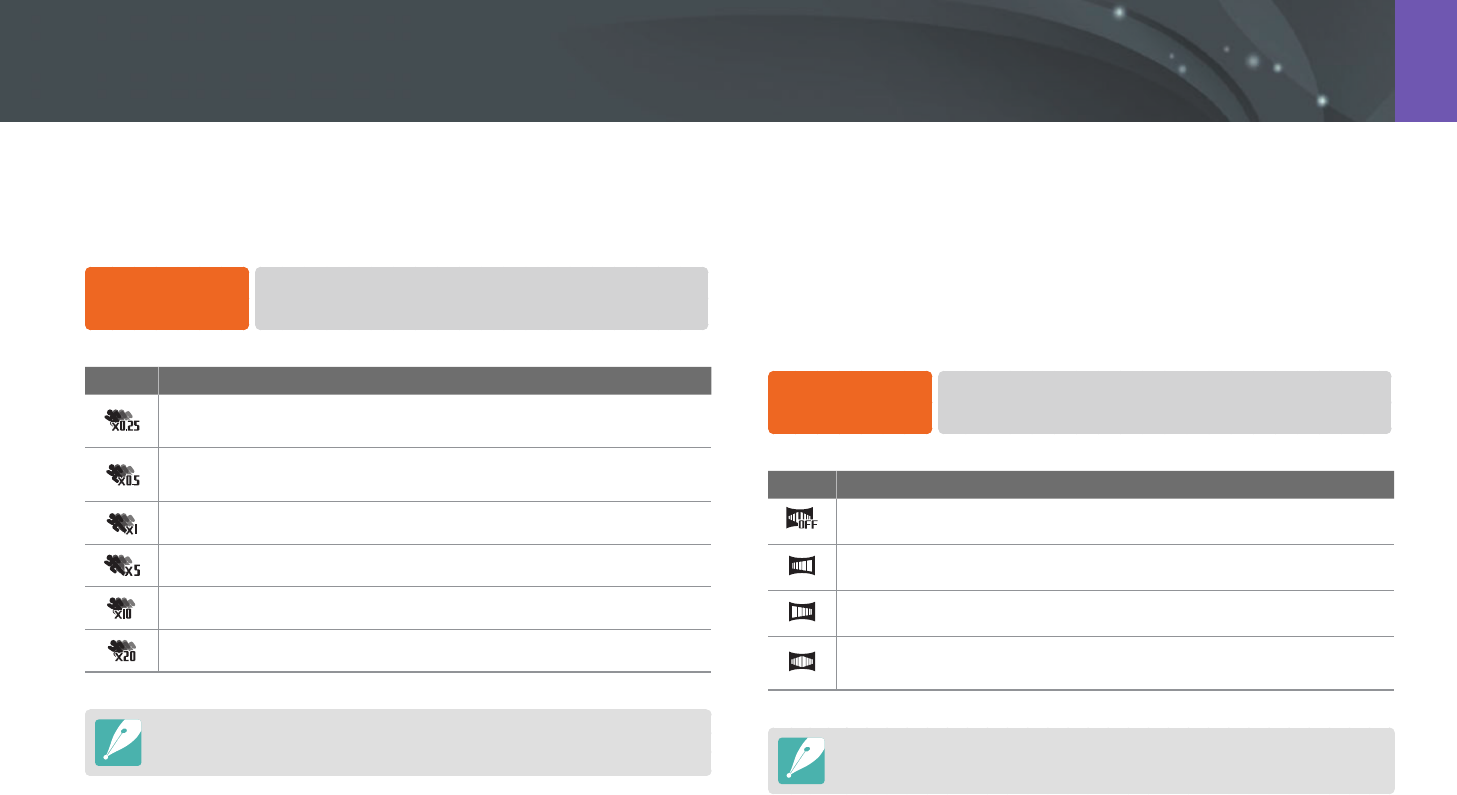
Multi Motion
Set the playing speed of a video.
To set playing
speed options,
In Shooting mode, press [m]
→
6
→
Multi Motion
→
an option.
Icon Description
x0.25: Record a video and play it at 1/4 normal speed. (Available
only with 640x480 or 320x240)
x0.5: Record a video and play it at 1/2 normal speed. (Available
only with 1280x720 (30 fps), 640x480, or 320x240)
x1: Record a video and play it at normal speed.
x5: Record a video and play it at 5X normal speed.
x10: Record a video and play it at 10X normal speed.
x20: Record a video and play it at 20X normal speed.
•
If you select an option other than x1, sound will not be recorded.
•
The available options may dier depending on shooting conditions.
Fader
You can fade in or fade out a scene using the fader function on the camera
without having to do it on a PC. Set the fade in option to gradually fade in
at the start of the scene. Set the fade out option to gradually fade out the
scene. Use the function appropriately and add dramatic eects on your
videos.
To set fader
options,
In Shooting mode, press [m]
→
6
→
Fader
→
an option.
Icon Description
O: Fader function not used.
In: Scene gradually fades in.
Out: Scene gradually fades out.
In-out: The fader function is applied at the start and end of the
scene.
When you use the fader function, it may take longer to save a le.

102
Shooting Functions > Video functions
Voice
Sometimes, a muted video is more appealing than the one with sound.
Turn the voice o to record a muted video.
To set voice
options,
In Shooting mode, press [m]
→
6
→
Voice
→
an option.
Wind cut
When you record videos in noisy environments, unintended sounds can
be recorded in videos. In particular, severe wind noise recorded in videos
distracts you from enjoying your videos. Use the Wind Cut function to
remove some surrounding noise in addition to wind noise.
To reduce wind
sound,
In Shooting mode, press [m]
→
6
→
Wind Cut
→
an option.

Chapter 3
Playback/Editing
Learn about how to play back and edit photos and videos.
Refer to chapter 6 for editing les on a PC.
104
Playback/Editing
Learn how to view photo and video thumbnails and how to protect or
delete les.
If you perform no operations for a while, information and icons on the screen
disappear. When you operate the camera again, they will reappear.
Viewing photos
1 Press [y].
•
The most recent le you captured will be displayed.
2 Press [C/F] to scroll through les.
•
You can also drag the image left or right to move to another le.
You may not be able to edit or play back les that were captured with other
cameras, due to unsupported sizes or codecs. Use a computer or another device
to edit or play back these les.
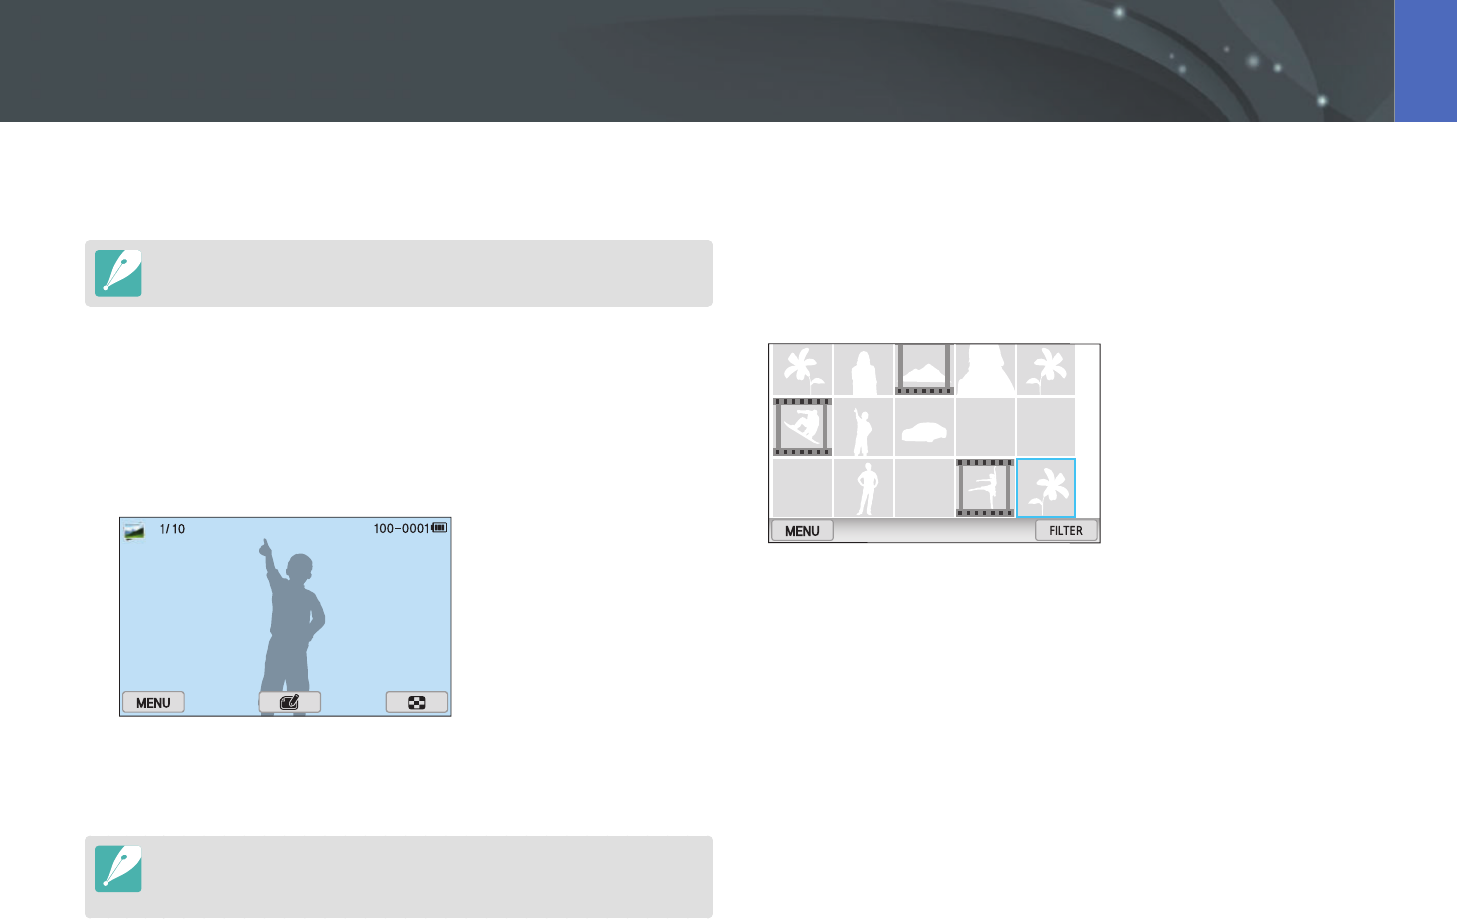
Viewing image thumbnails
In order to search for photos and videos you want, convert to the
thumbnail view. The thumbnail view displays multiple images at a time
so that you can easily look through items you wish to nd. You can also
classify and display les by category, such as date or le type.
Scroll the jog dial to the left to select the thumbnail view mode.
(Scroll the jog dial to the right to return to the previous mode.)
Searching and managing les
105
Playback/Editing > Searching and managing les
Viewing les by category
1 In the thumbnail view, press [m]
→
z
→
Filter
→
a category.
•
You can also touch FILTER to select a category.
* Default
Option Description
All*
View les normally.
Date
View les by the date they were saved.
Type
View les by the le type.
Location
View les by the place they were saved. (Only the
photos captured with an optional GPS module have
the location information.)
2 Select a list to open it.
3 Select a le to view it.
4 Touch to return to the previous view.
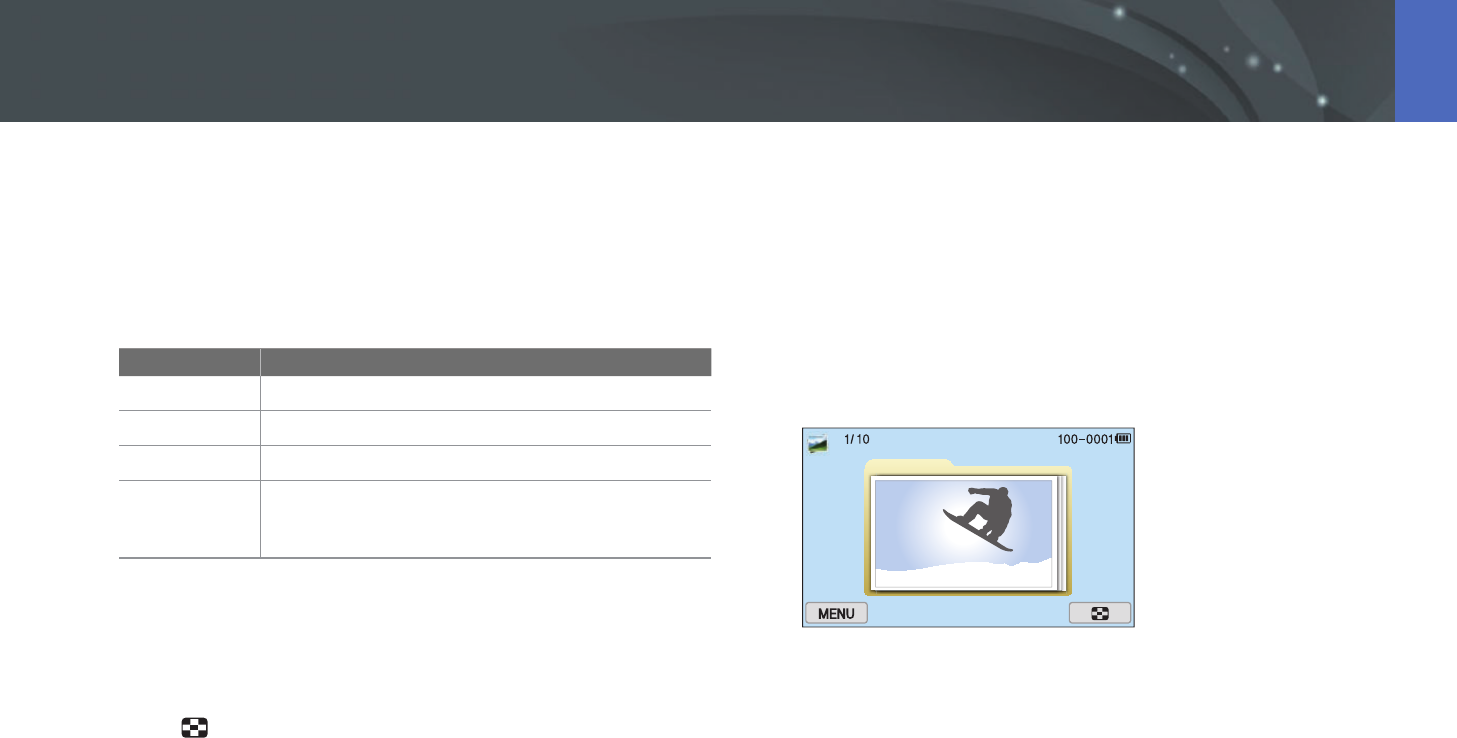
Viewing les as a folder
Continuous and burst shots appear as a folder. Selecting a folder will play
back all photos automatically. Deleting a folder will delete all photos in the
folder.
1 In Playback mode, press [C/F] or drag the image left or
right to move to a desired folder.
•
The camera will automatically play back photos in the folder.
2 Scroll the jog dial to the right to open the folder.
•
You can also touch the folder on the screen to open the folder.
3 Press [C/F] or drag the image left or right to move to
another le.
4 Scroll the jog dial to the left to return to Playback mode.

106
Playback/Editing > Searching and managing les
Protecting les
Protect your les from accidental deletion.
1 In Playback mode, press [m]
→
z
→
Protect
→
Select.
2 Press [C/F] to select a le, and then press [o].
3 Press [f].
You cannot delete or rotate a protected le.
Lock/Unlock all les
Lock or unlock all les.
1 In Playback mode, press [m]
→
z
→
Protect
→
All.
2 Select an option.
Option Description
Lock
Lock all les.
Unlock
Unlock all les.
Cancel
Return to the previous menu.

107
Playback/Editing > Searching and managing les
Deleting les
Delete les in Playback mode and secure more space on your memory
card. Protected les are not deleted.
Deleting a single le
You can select a single le and delete it.
1 In Playback mode, select a le, and then press [n].
2 When the pop-up message appears, select Ye s.
Deleting multiple les
You can select multiple les and delete them.
1 In Playback mode, press [m]
→
z
→
Delete
→
Select.
•
Alternatively, in thumbnails view, press [n], and then select les to
delete.
2 Select les you want to delete by pressing [C/F], and then
press [o].
•
Press [o] again to cancel your selection.
3 Press [n].
4 When the pop-up message appears, select Ye s.

108
Playback/Editing > Searching and managing les
Deleting all les
You can delete all les on the memory card at once.
1 In Playback mode, press [m].
2 Select z
→
Delete
→
All.
3 When the pop-up message appears, select Yes.
109
Playback/Editing
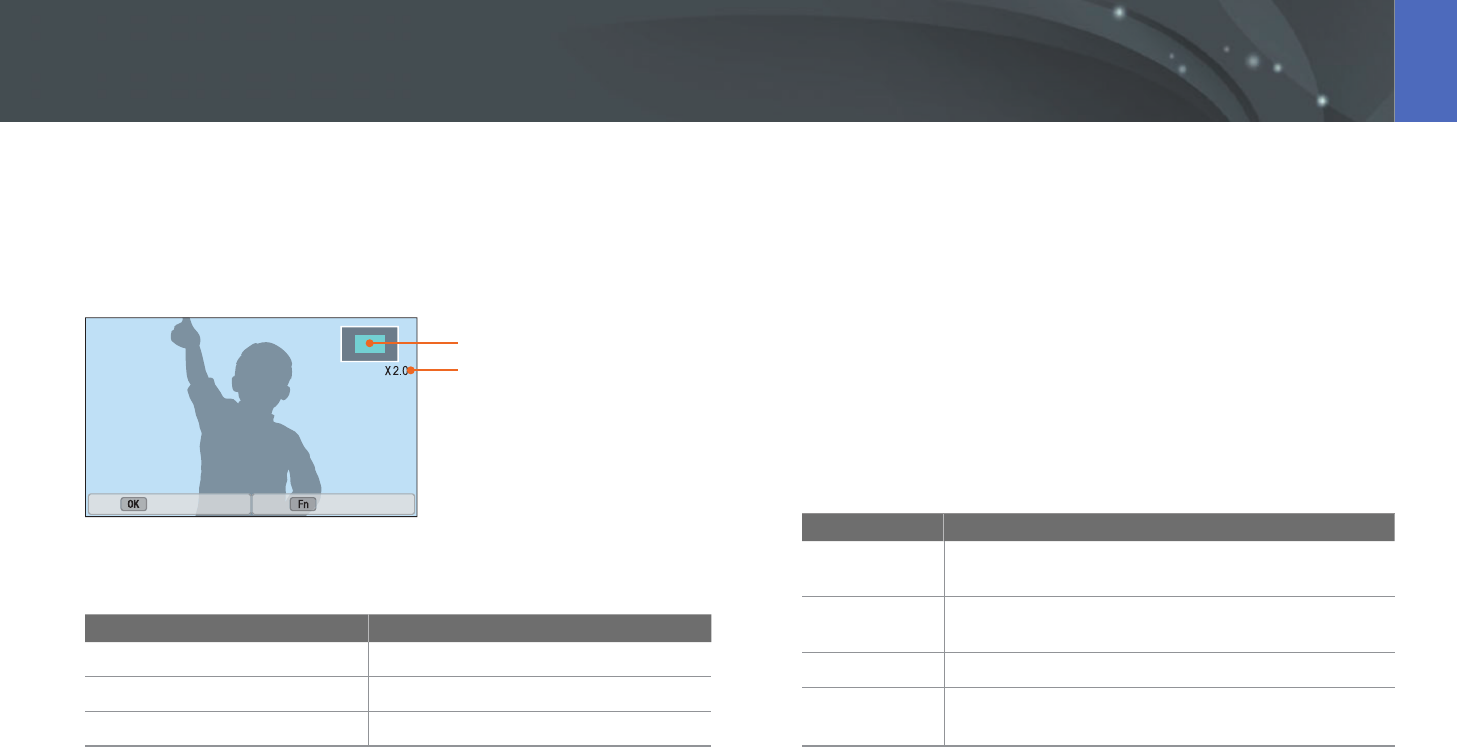
Enlarging a photo
You can enlarge photos when viewing them in Playback mode. You can
also use the Trim function to extract the portion of the image displayed on
the screen and save it as a new le.
Magnied area
Magnication (the maximum
magnication may dier by
resolution)
Full Image Crop
Scroll the jog dial to the right to enlarge a photo.
(Scroll the jog dial to the left to reduce a photo.)
To Do this
Move magnied area
Press [D/I/C/F].
Crop the enlarged image
Press [f]. (saved as a new le)
Return to the original image
Press [o].
Viewing a slide show
You can view photos in a slide show, apply various eects to the slide
show, and play background music.
1 In Playback mode, press [m].
2 Select z
→
Slide Show Options.
3 Select a slide show eect option.
•
Skip to step 4 to start a slide show with no eects.
* Default
Option Description
Play Mode
Set whether or not to repeat the slide show.
(One Play*, Repeat)
Interval
Set the interval between photos. (1 sec*, 3 sec, 5 sec,
10 sec)
Music
Set background audio.
Eect
• Set a scene change eect between photos.
• Select O to cancel eects.
Viewing photos

110
Playback/Editing > Viewing photos
4 Press [m].
5 Select Start Slide Show.
6 View the slide show.
•
Press [o] to pause.
•
Press [o] again to resume.
•
Press [m] to stop the slide show and return to Playback mode.
•
Press [D/I] to adjust the volume level.
Auto rotating
With Auto Rotate on, the camera automatically rotates photos you have
captured vertically so they t the screen horizontally.
To set auto rotate
options,
In Playback mode, press [m]
→
z
→
Auto Rotate
→
an option.
Creating a print order (DPOF)
DPOF (Digital Print Order Format) lets you set the print size of a photo and
the number of copies to be printed.
The camera saves the DPOF information in the MISC folder of your memory
card. If you have set DPOF information for your images, you can take the
memory card to a digital printing shop for printing. You cannot set the
print order of RAW format les.
Photos with dimensions that are wider than the paper may be cut o
on the left and right edges. Ensure that your photo dimensions are
compatible with the paper you select.
1 In Playback mode, select a photo, and then press [m].
2 Select z
→
DPOF.
3 Press [D/I] to set the number of copies.
•
To select another photo, press [C/F].
4 Press [o] to save.

111
Playback/Editing
In Playback mode, you can play a video, capture an image from a video, or
crop a video to save as another le.
Stop Capture
Video viewing controls
Icon/Button Description
//[C]
View previous le/Scan backward. (Each time you
touch the icon or press the button while playing the
video, you change the scan speed in this order: 2X, 4X,
8X.)
//[o]
Pause or resume playback.
//[F]
View next le/Scan forward. (Each time you touch the
icon or press the button while playing the video, you
change the scan speed in this order: 2X, 4X, 8X.)
/[D/I]
Adjust the volume or mute the sound.
Trimming a video during playback
1 In Playback mode, scroll to a video, and then touch .
2 Press [o] or touch to start playing the video.
3 Press [o] or touch at the point where you want the trimming
to begin.
4 Press [f] or touch Start Point.
5 Press [o] or touch to resume playing the video.
6 Press [o] or touch at the point where you want the trimming
to end.
Playing videos

112
Playback/Editing > Playing videos
7 Press [f] or touch End Point.
8 Press [f] or touch Trim to trim a video.
•
You can adjust the scene to be cropped by dragging the handles
that appear on the progress bar.
9 When the pop-up message appears, select Yes.
•
You cannot trim a video recorded in 3D mode.
•
The original video should be at least 10 seconds long.
•
The camera will save the edited video as a new le and leave the original
video intact.
Capturing an image during playback
1 While viewing a video, press [o] or touch at the point where
you want to capture an image.
2 Press [f] or touch Capture.
•
You cannot capture an image from a video recorded in 3D mode.
•
The resolution of the captured image will be the same as the original video.
•
The captured image is saved as a new le.
113
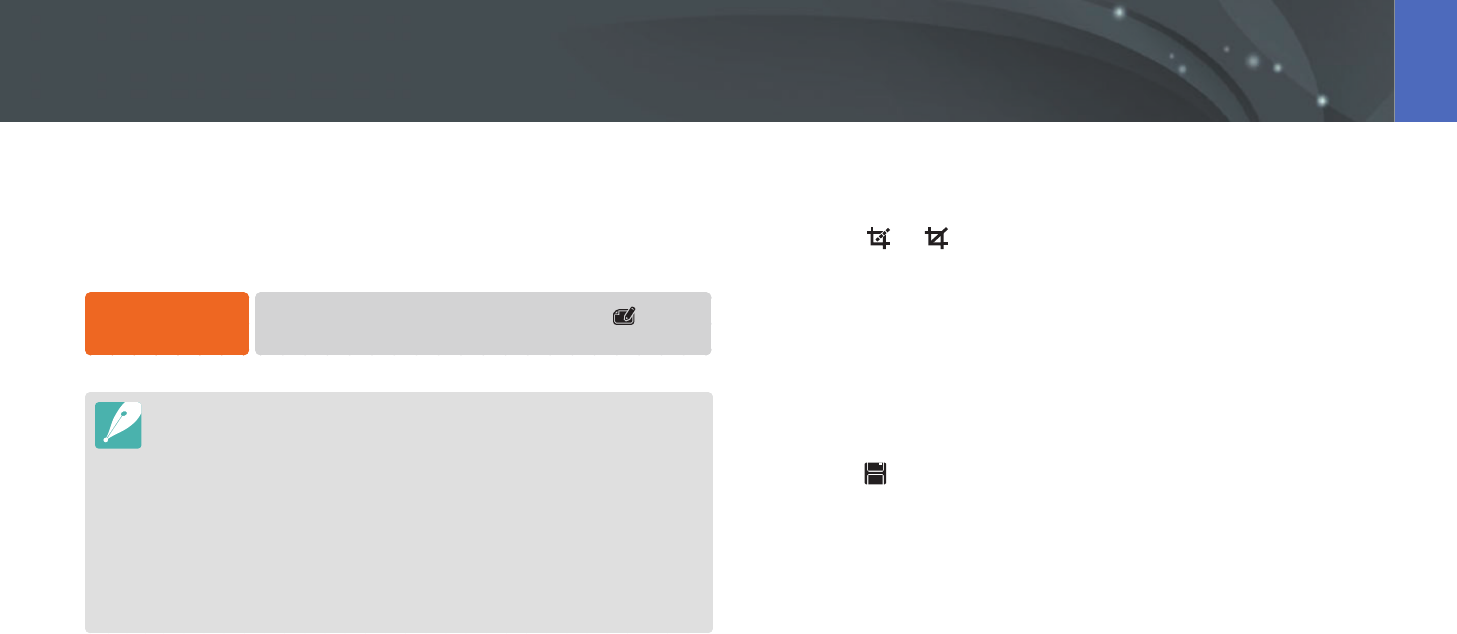
Playback/Editing
Perform photo editing tasks, such as resizing, rotating, or reducing red-eye
eects. Edited photos are saved as new les under dierent le names.
Photos captured in some modes cannot be edited with the Image Edit
function.
To edit images,
In Playback mode, scroll to a photo, and then touch
→
an option.
•
You can also edit images in Playback mode by selecting a photo, and then
pressing [f] or [m]
→
Edit Image.
•
Some images may not be edited with the Image Edit function. In this case, use
a supplied image editing software.
•
The camera will save edited photos as new les.
•
When you edit photos, the camera will automatically convert them to a lower
resolution. Photos that you rotate or resize manually are not automatically
converted to a lower resolution.
•
You cannot edit photos while viewing les as a folder. Open the folder and
select a photo to edit each photo.
Cropping a photo
1 Touch
→
.
2 Drag the corners of the box to adjust the size of the area.
3 Drag the box to move the location of the area.
4 Touch OK.
5 Touch to save.
Editing photos

114
Playback/Editing > Editing photos
Rotating a photo
1 Touch
→
.
2 Touch an option.
Rotate : Right 90°
3 Touch OK.
4 Touch to save.
•
You can also rotate a photo in Playback mode by pressing [m], and then
selecting z
→
Rotate
→
a desired option.
•
The camera will overwrite the original le.
Resizing photos
Change the size of a photo and save it as a new le.
1 Touch
→
.
2 Touch an option.
Resize : 10.1M 3:2
3 Touch OK.
4 Touch to save.
Available resize options dier depending on the original size of the photo.

115
Playback/Editing > Editing photos
Adjusting your photos
You can correct captured photos by adjusting the brightness, contrast, or
saturation.
1 Touch .
2 Touch an adjusting option.
Icon Description
Original (Reset to the original image)
Auto adjustment
Brightness
Contrast
Saturation
RGB
Color Temperature
Exposure
Hue
3 Press [C/F] to adjust the option.
•
You can also drag the slider or touch +/- to adjust the option.
4 Touch OK.
5 Touch to save.
116
Playback/Editing > Editing photos
Retouching faces
1 Touch
→
.
2 Press [C/F] to adjust the option.
•
You can also drag the slider or touch +/- to adjust the option.
•
As the number increases, the skin tone becomes brighter and
smoother.
3 Touch OK.
•
To cancel correction, touch .
4 Touch to save.
Reducing red-eye
1 Touch
→
.
2 Touch OK.
•
To cancel correction, touch .
3 Touch to save.
117
Playback/Editing > Editing photos
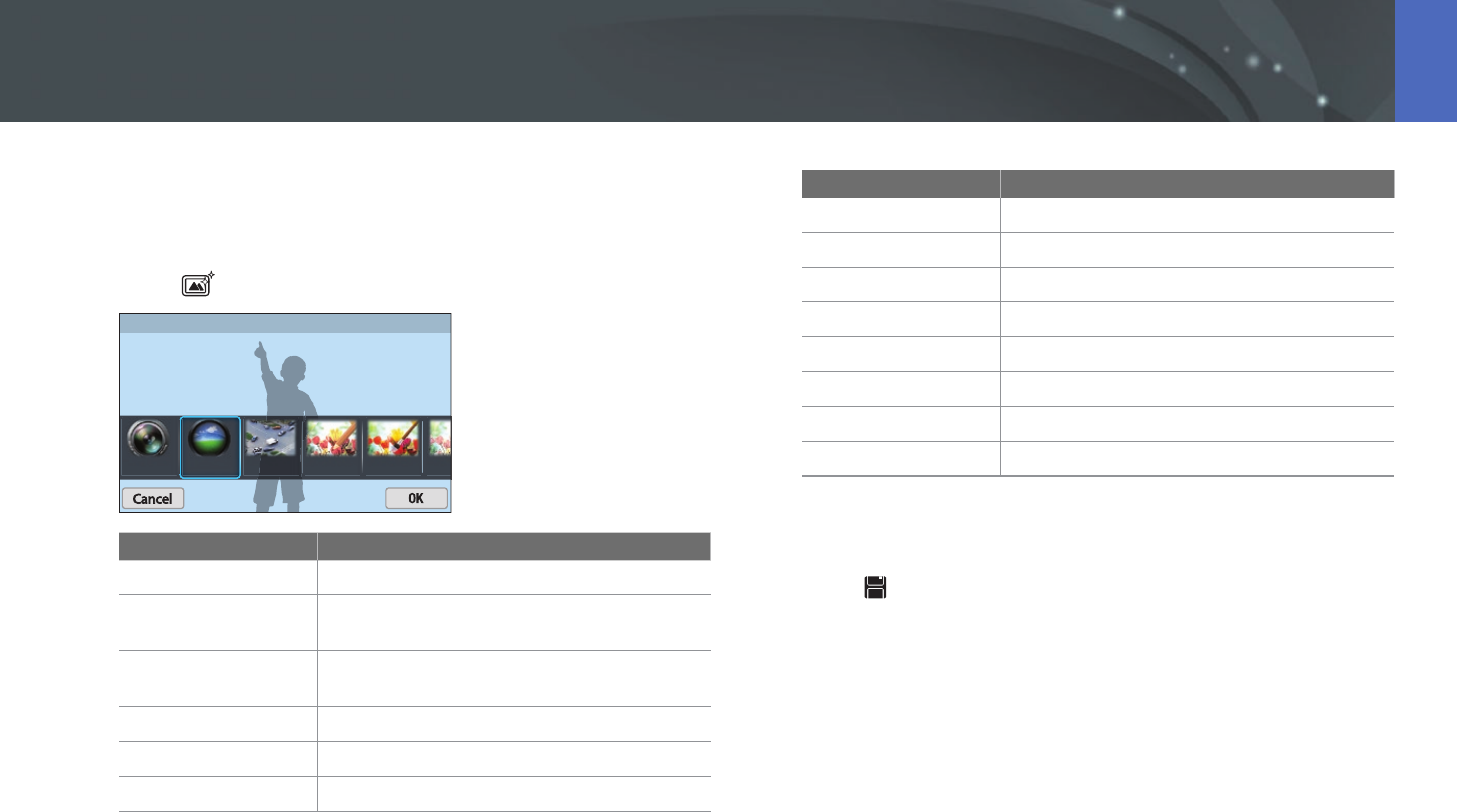
Applying Smart Filter eects
Apply special eects to your photos.
1 Touch , and then touch an option.
Smart Filter : Vignetting
Option Description
Original
No eect
Vignetting
Apply the retro-looking colors, high contrast,
and strong vignette eect of Lomo cameras.
Miniature
Apply a tilt-shift eect to make the subject
appear in miniature.
Colored Pencil
Apply a colored pencil painting eect.
Watercolor
Apply a watercolor painting eect.
Wash drawing
Apply a washed-out eect.
Option Description
Oil Sketch
Apply an oil painting eect.
Ink Sketch
Apply an ink painting eect.
Acryl
Apply an acryl painting eect.
Negative
Apply a negative lm eect.
Red
Desaturate all colors but red.
Green
Desaturate all colors but green.
Blue
Desaturate all colors but blue.
Yellow
Desaturate all colors but yellow.
2 Touch OK.
3 Touch to save.

Chapter 4
Wireless network
Learn how to connect to wireless local area networks (WLANs) and use functions.