Samsung Electronics Co SLM3065FW Multi Function Printer User Manual
Samsung Electronics Co Ltd Multi Function Printer
UserManual.wiki
>
Samsung Electronics Co
>
SLM3065FW User Manual
>
Users Manual Part 8
Contents
1.
Users Manual Part 1
2.
Users Manual Part 2
3.
Users Manual Part 3
4.
Users Manual Part 4
5.
Users Manual Part 5
6.
Users Manual Part 6
7.
Users Manual Part 7
8.
Users Manual Part 8
9.
Users Manual Part 9
10.
Users Manual Part 10
11.
Users Manual Part 11
12.
Users Manual Part 12
13.
Users Manual Part 13
Users Manual Part 8
Navigation menu
Upload a User Manual
Namespaces
Wiki Guide
HTML
PDF
Info
Views
User Manual
Discussion / Help
Navigation
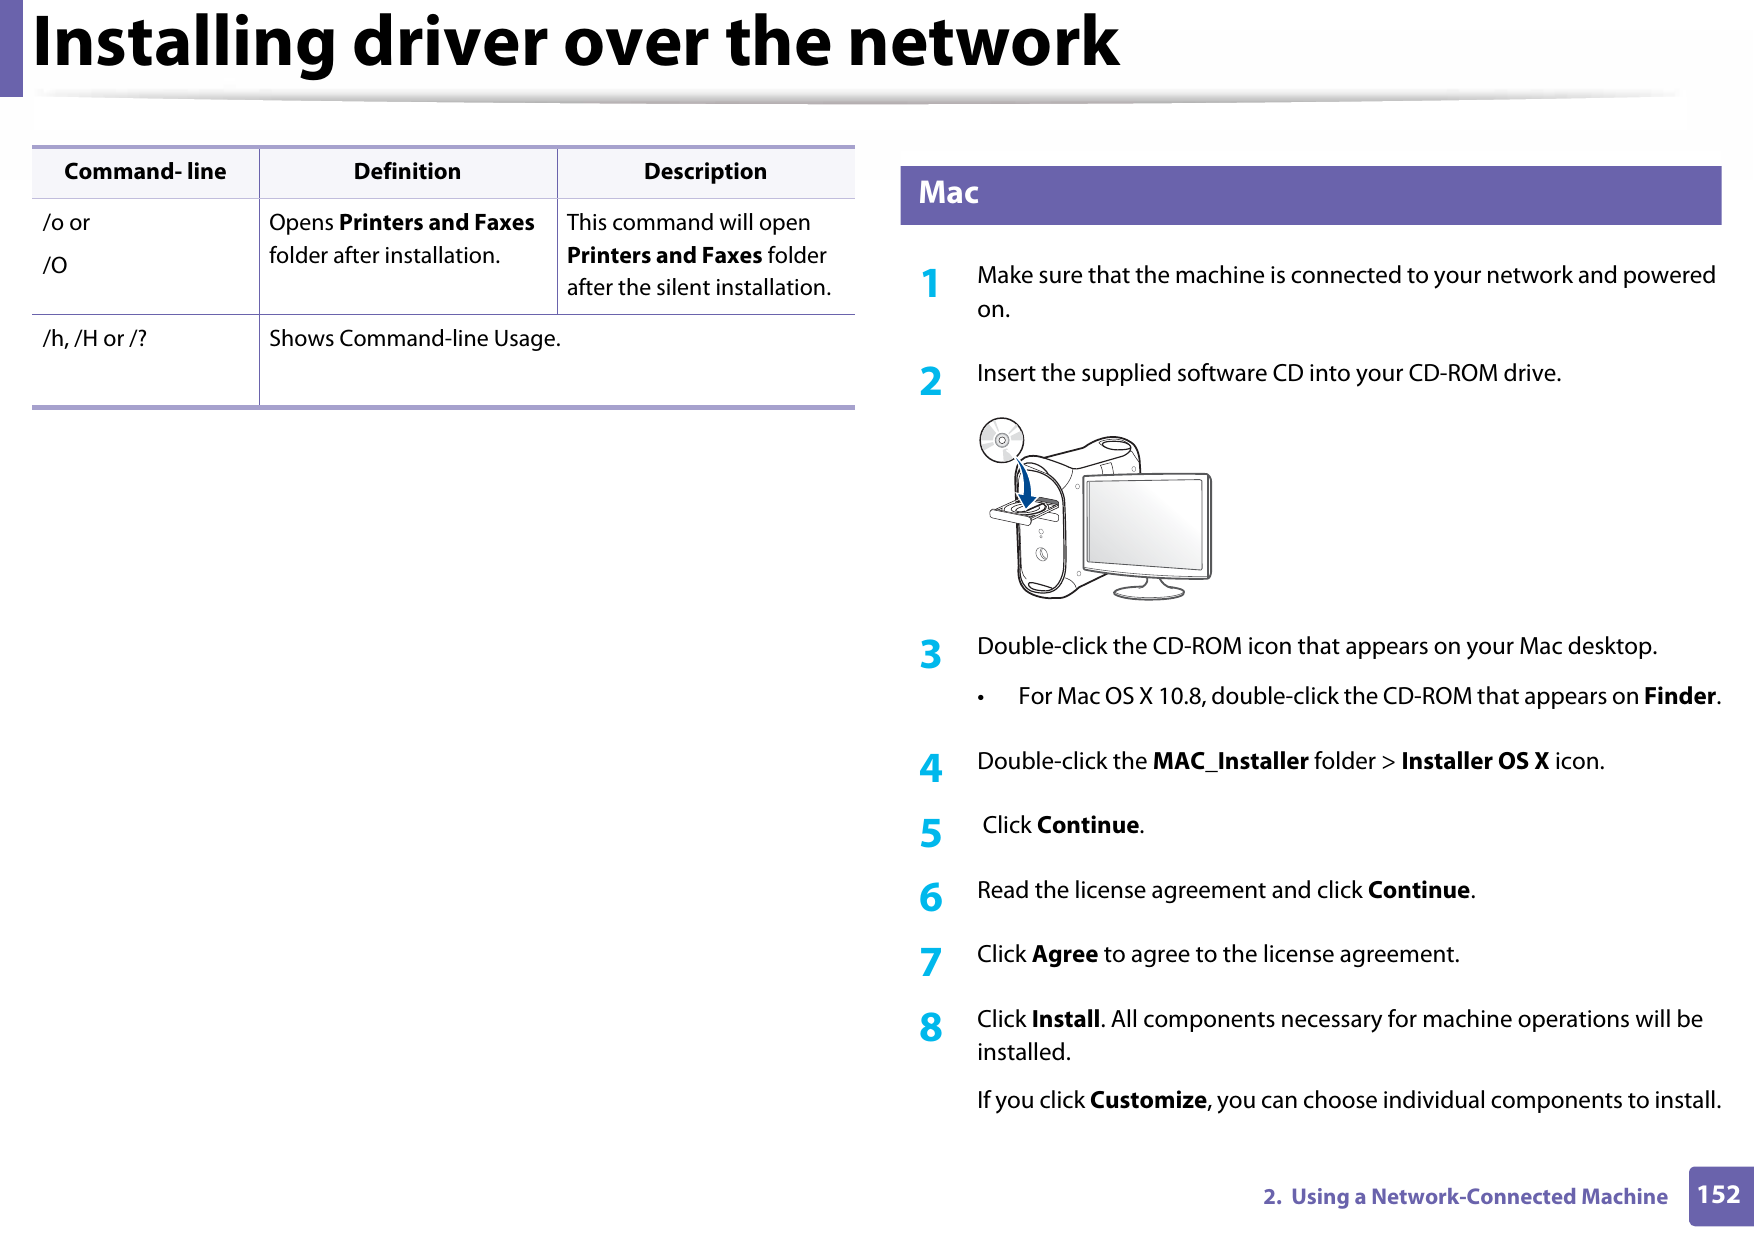

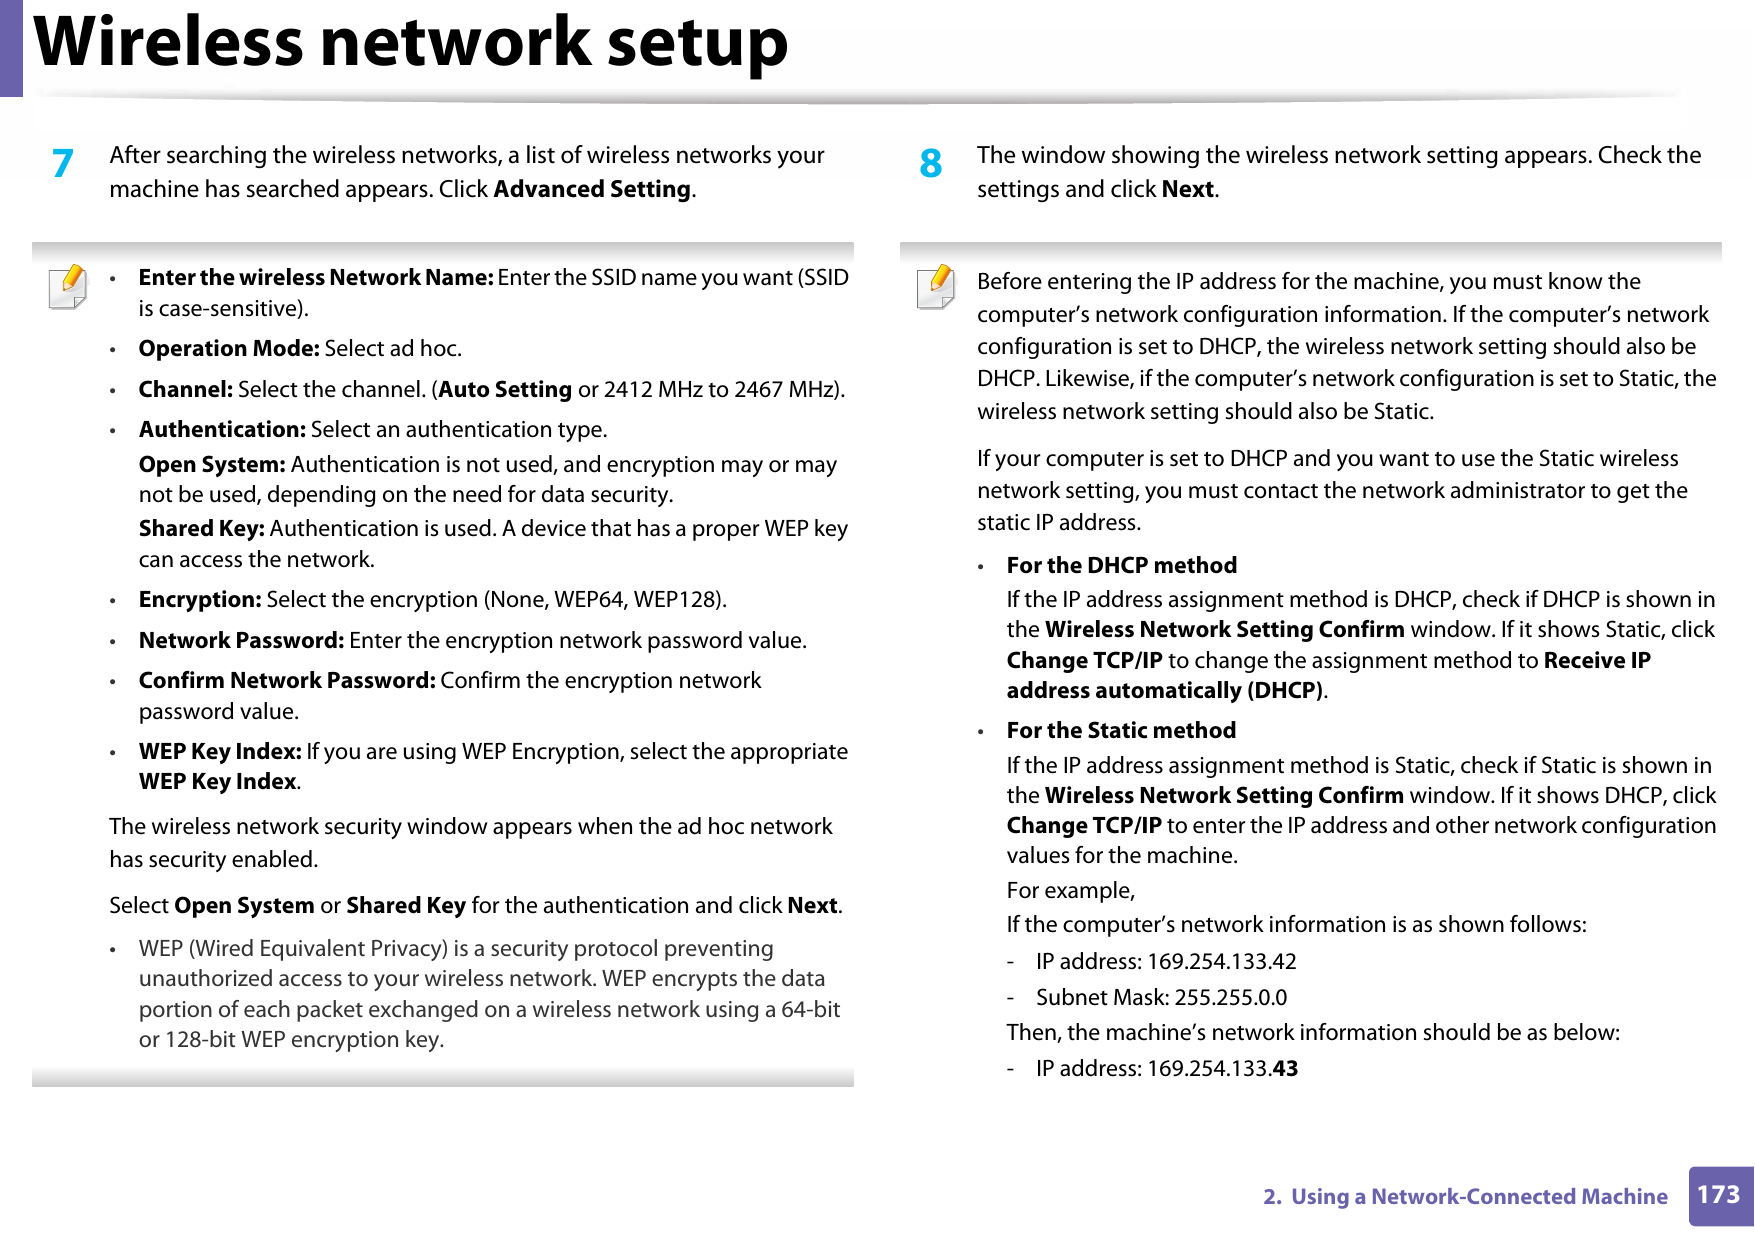
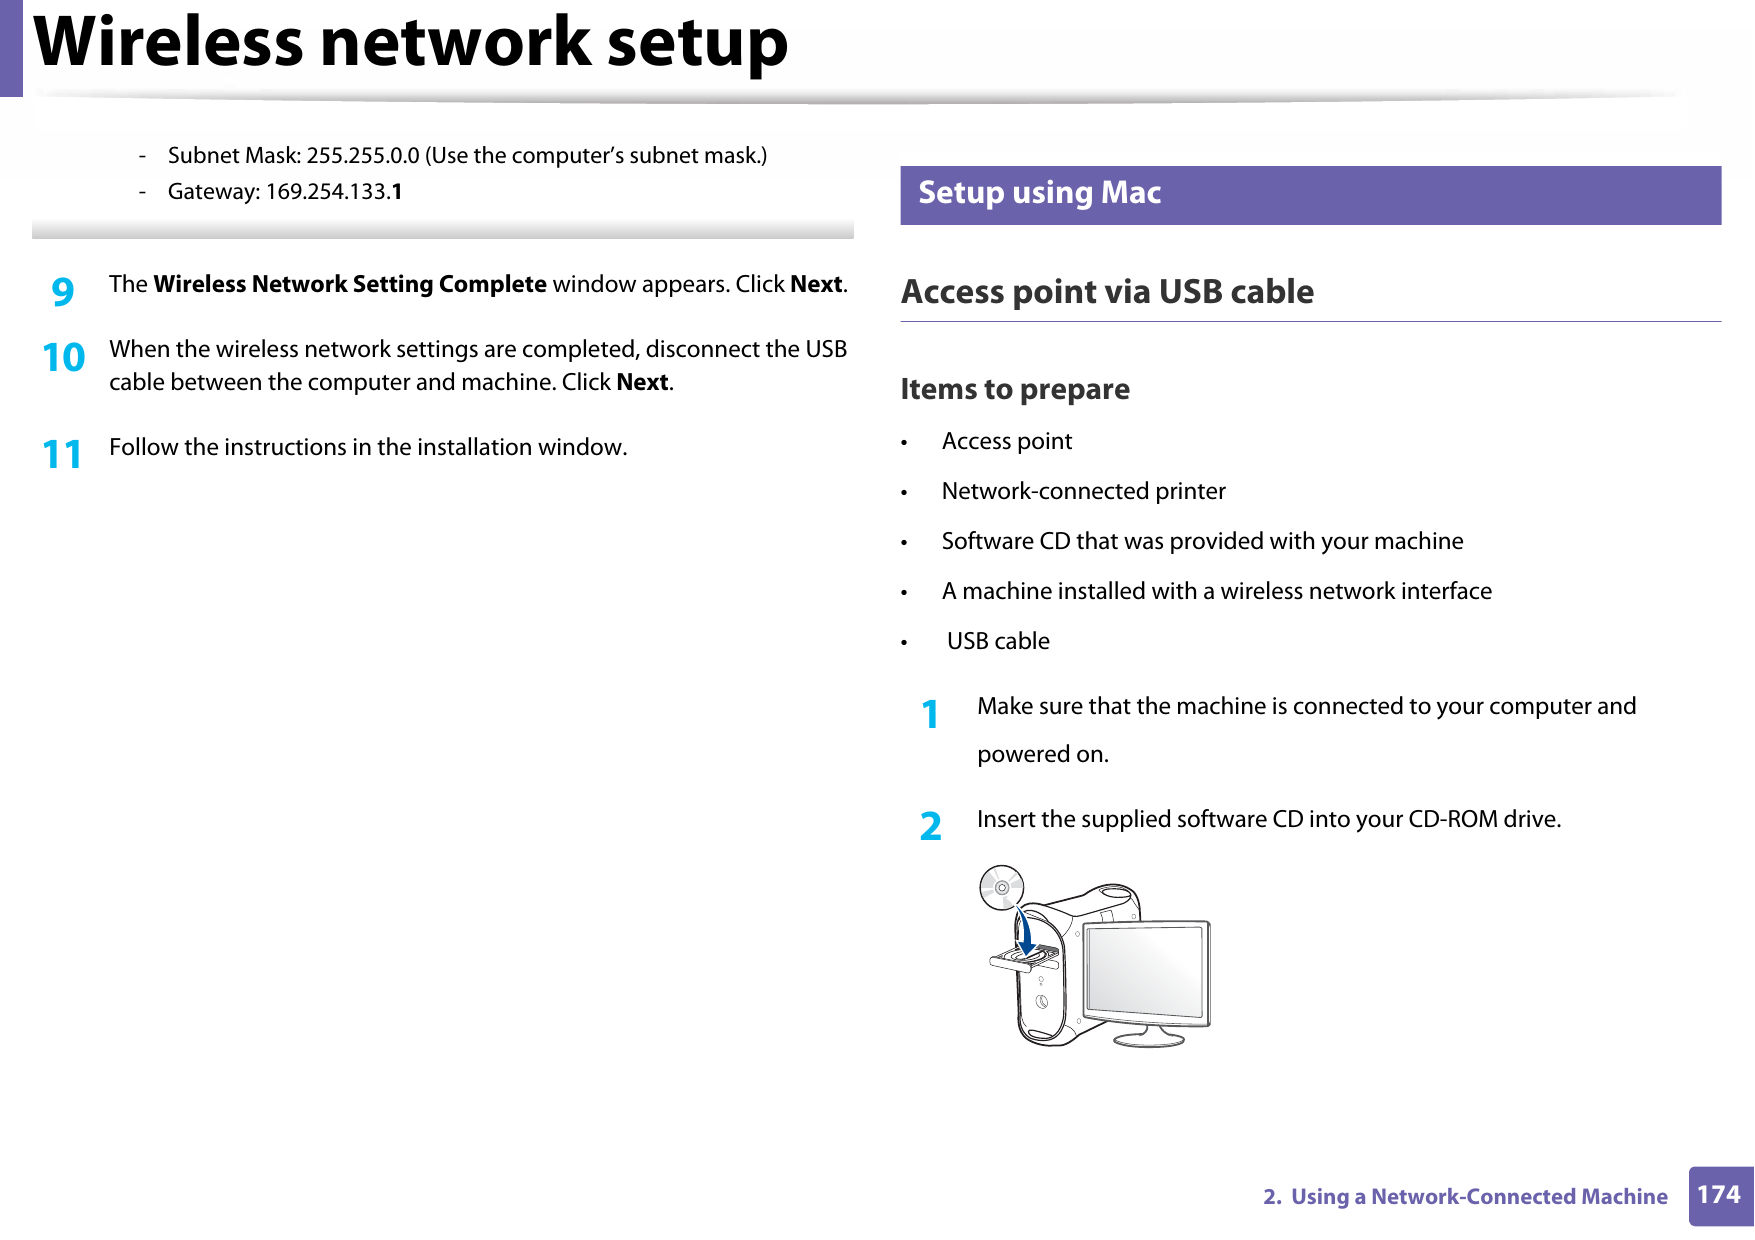
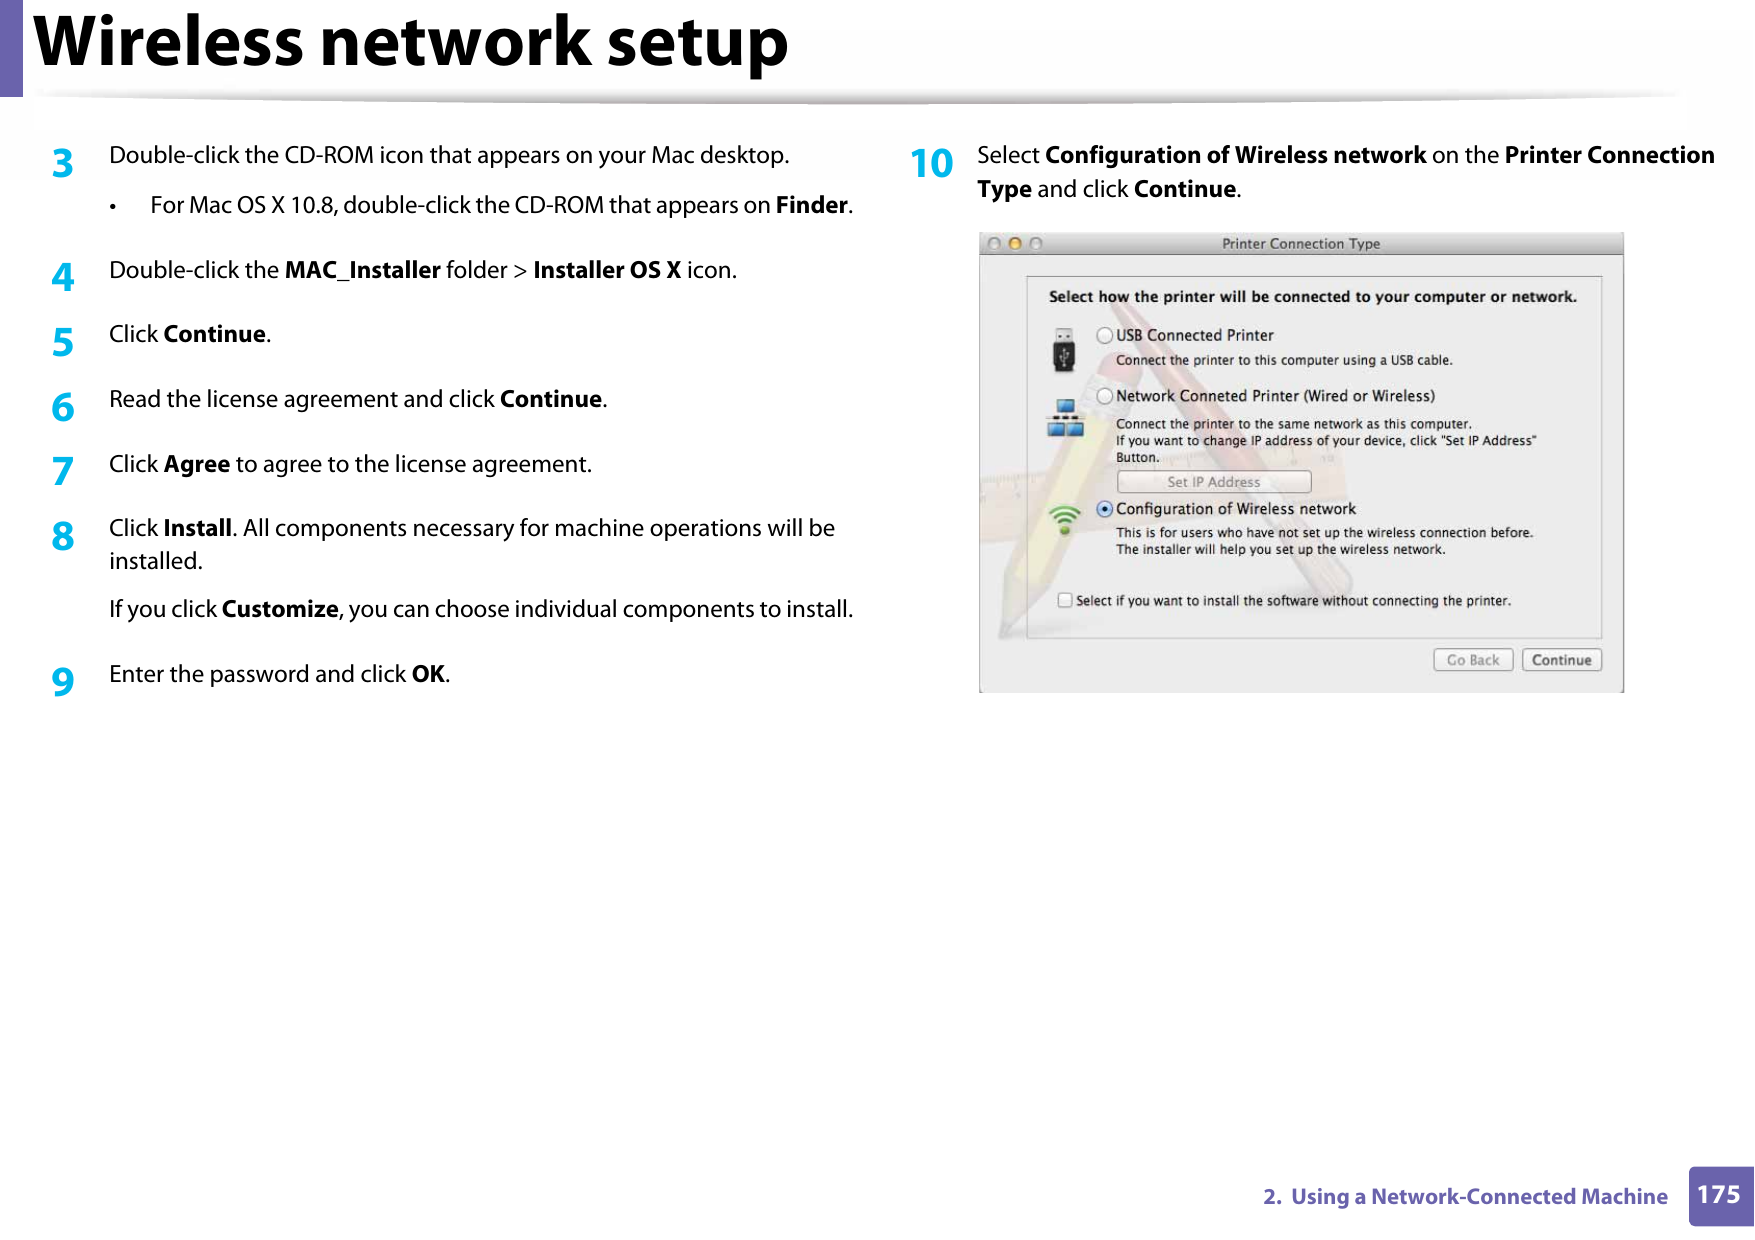
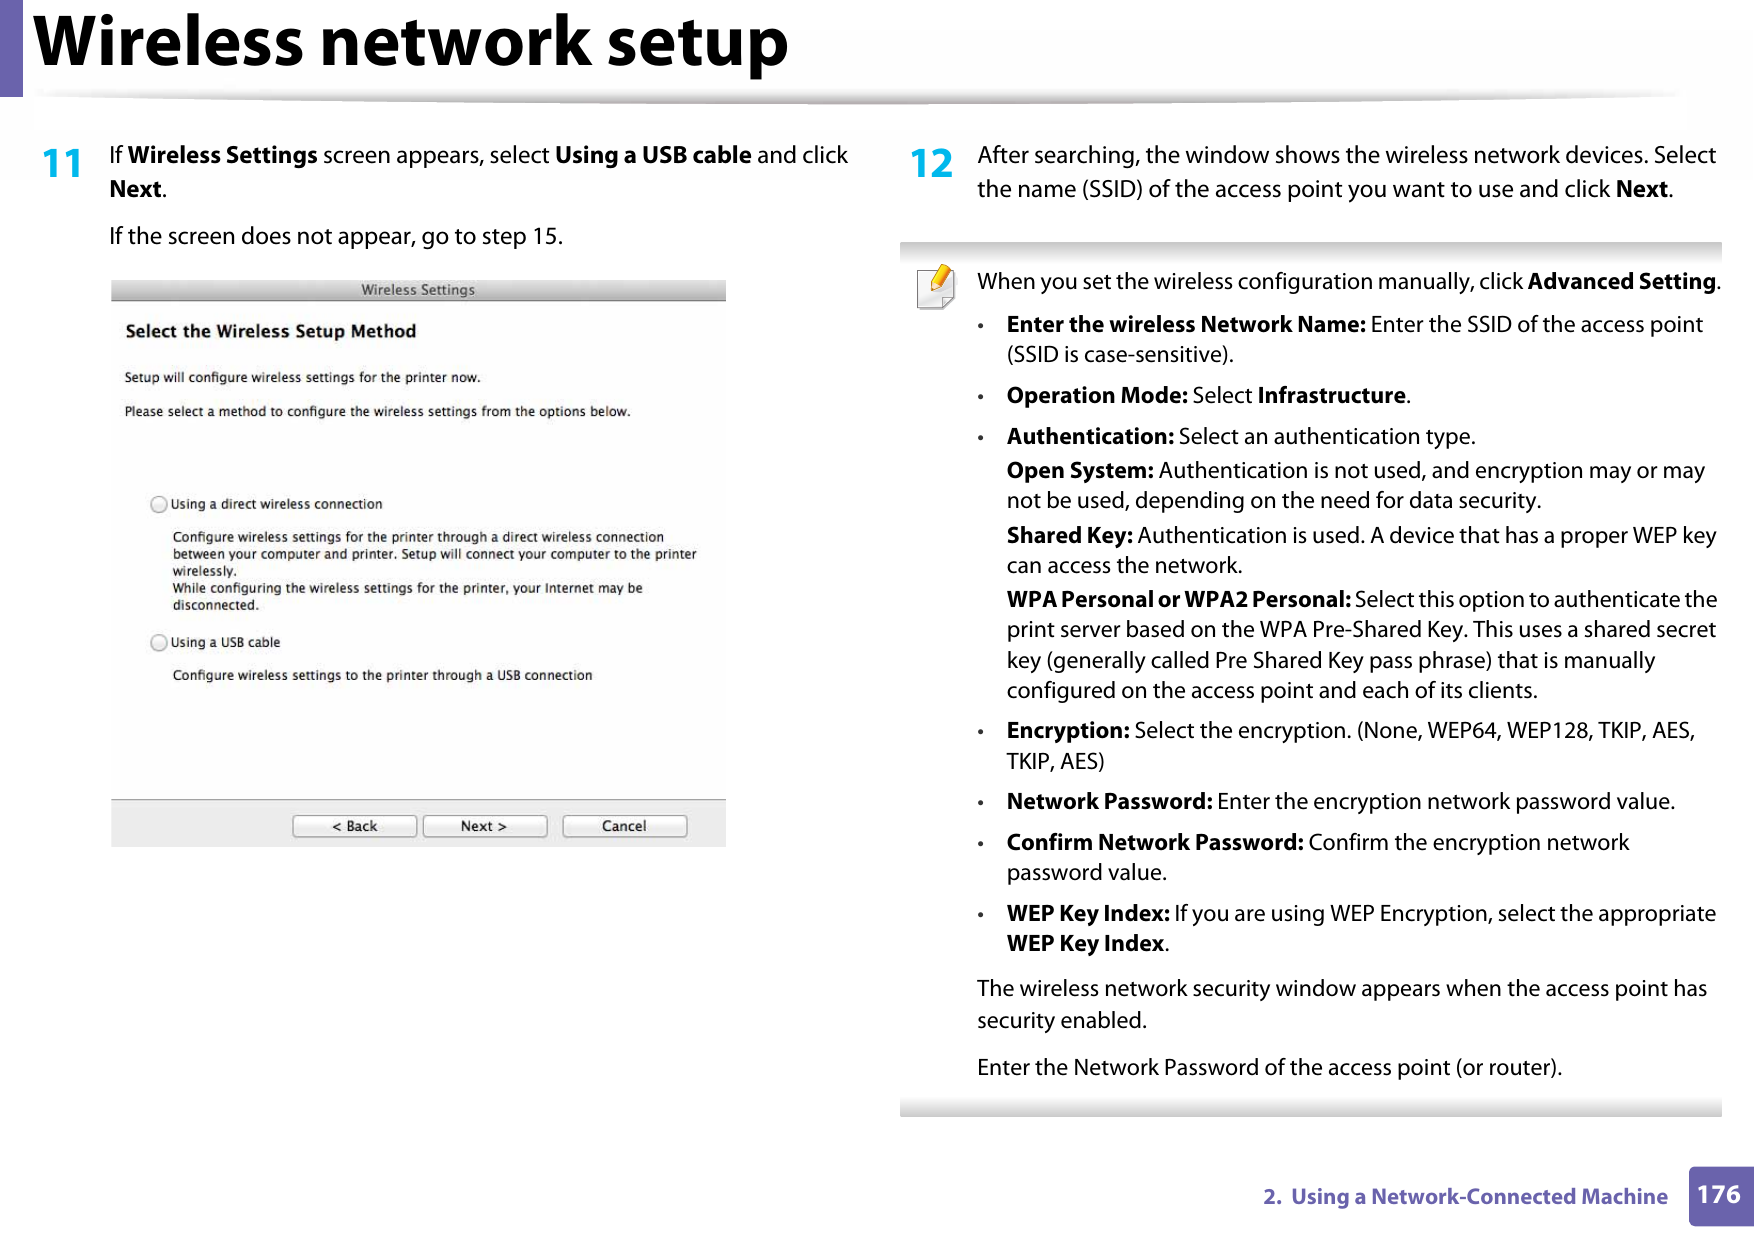
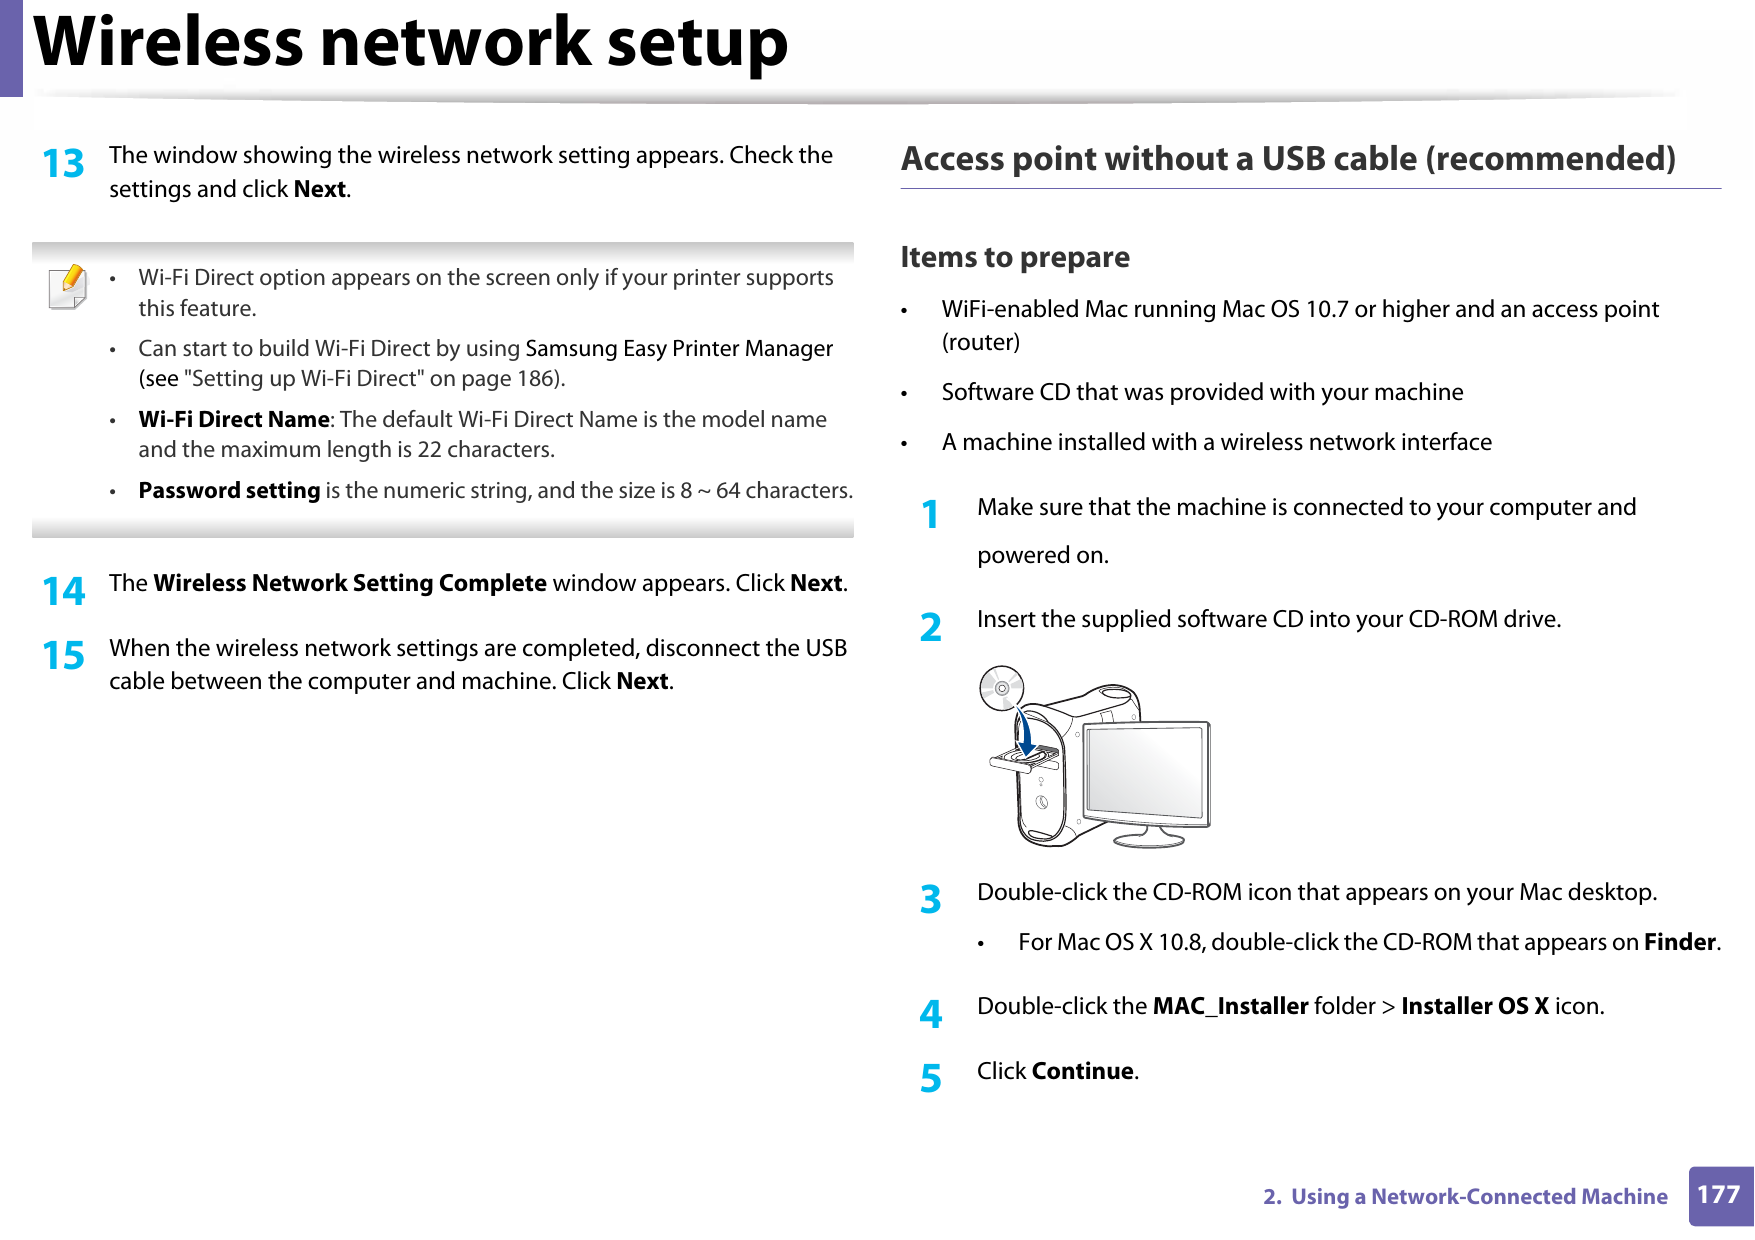
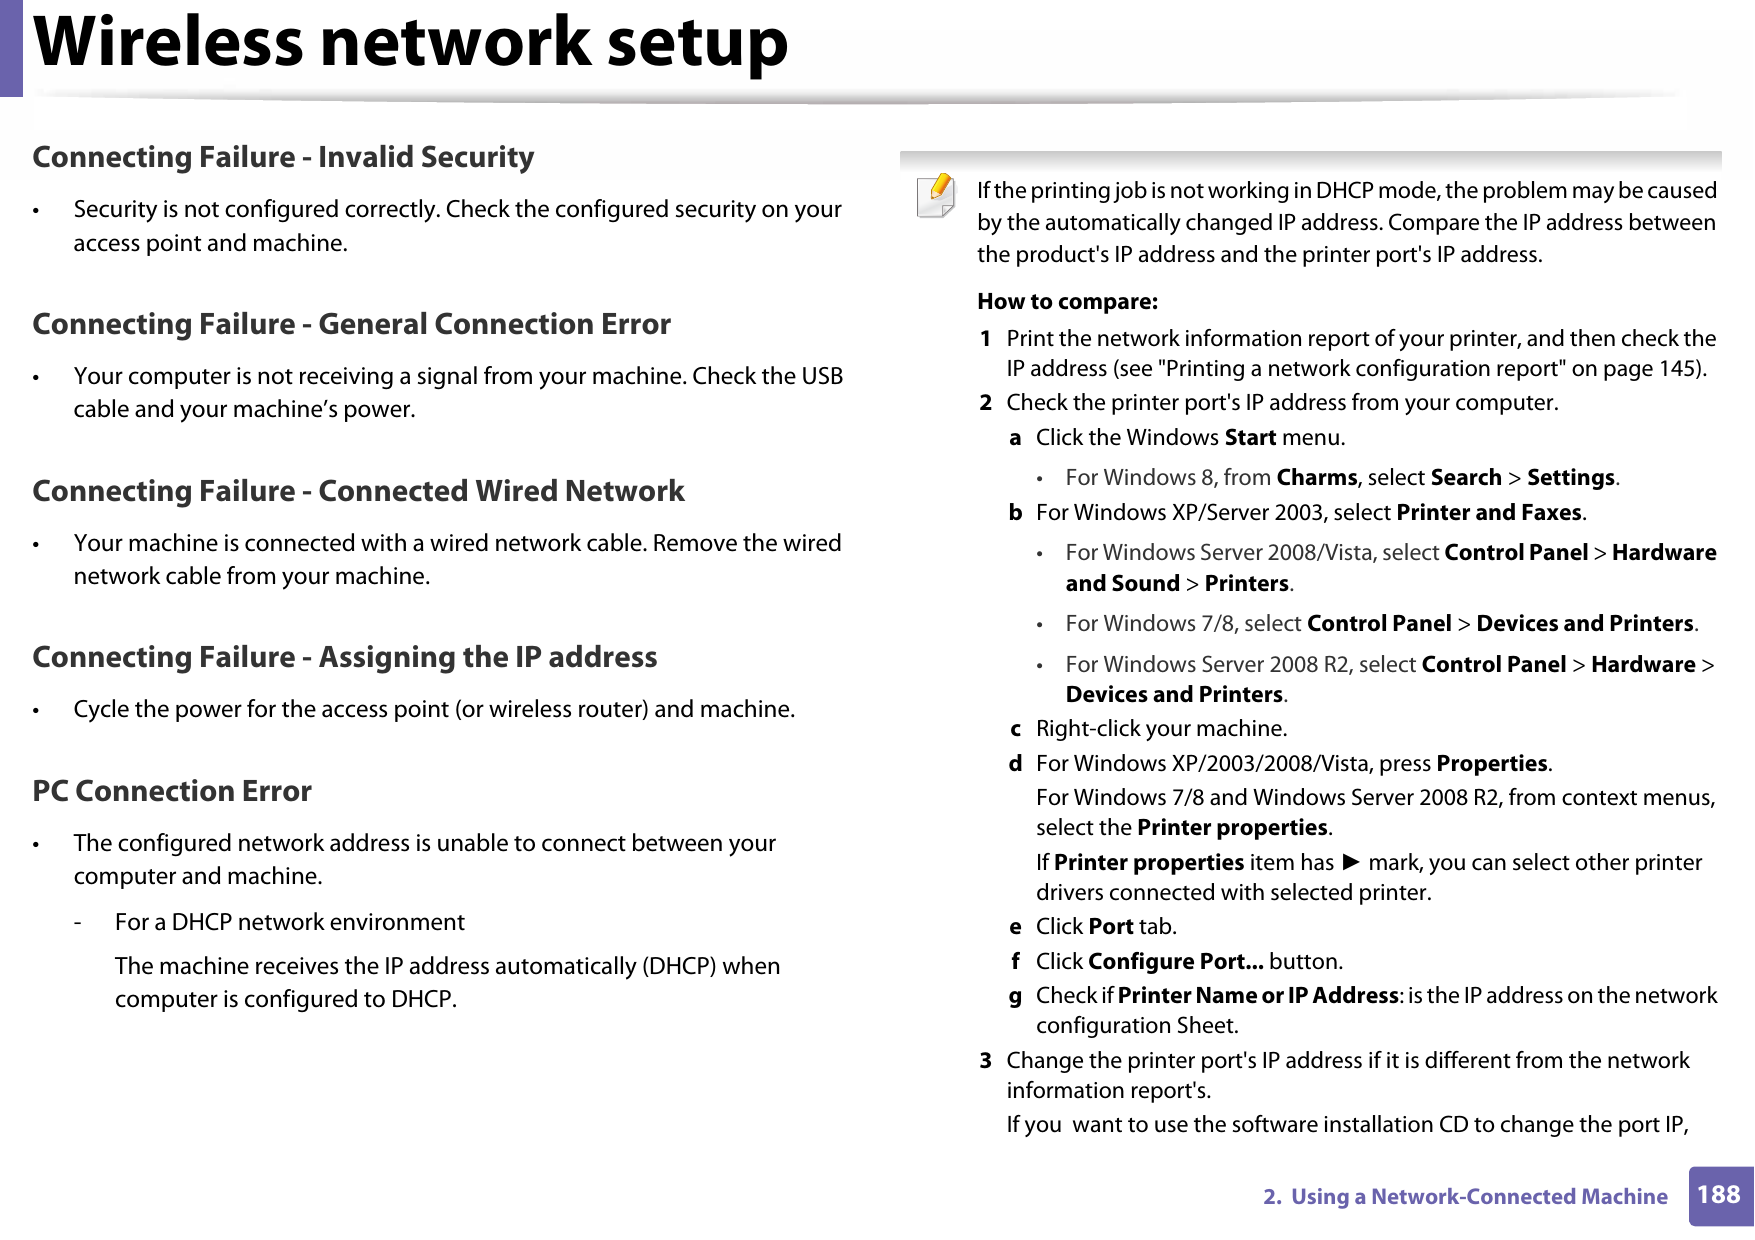
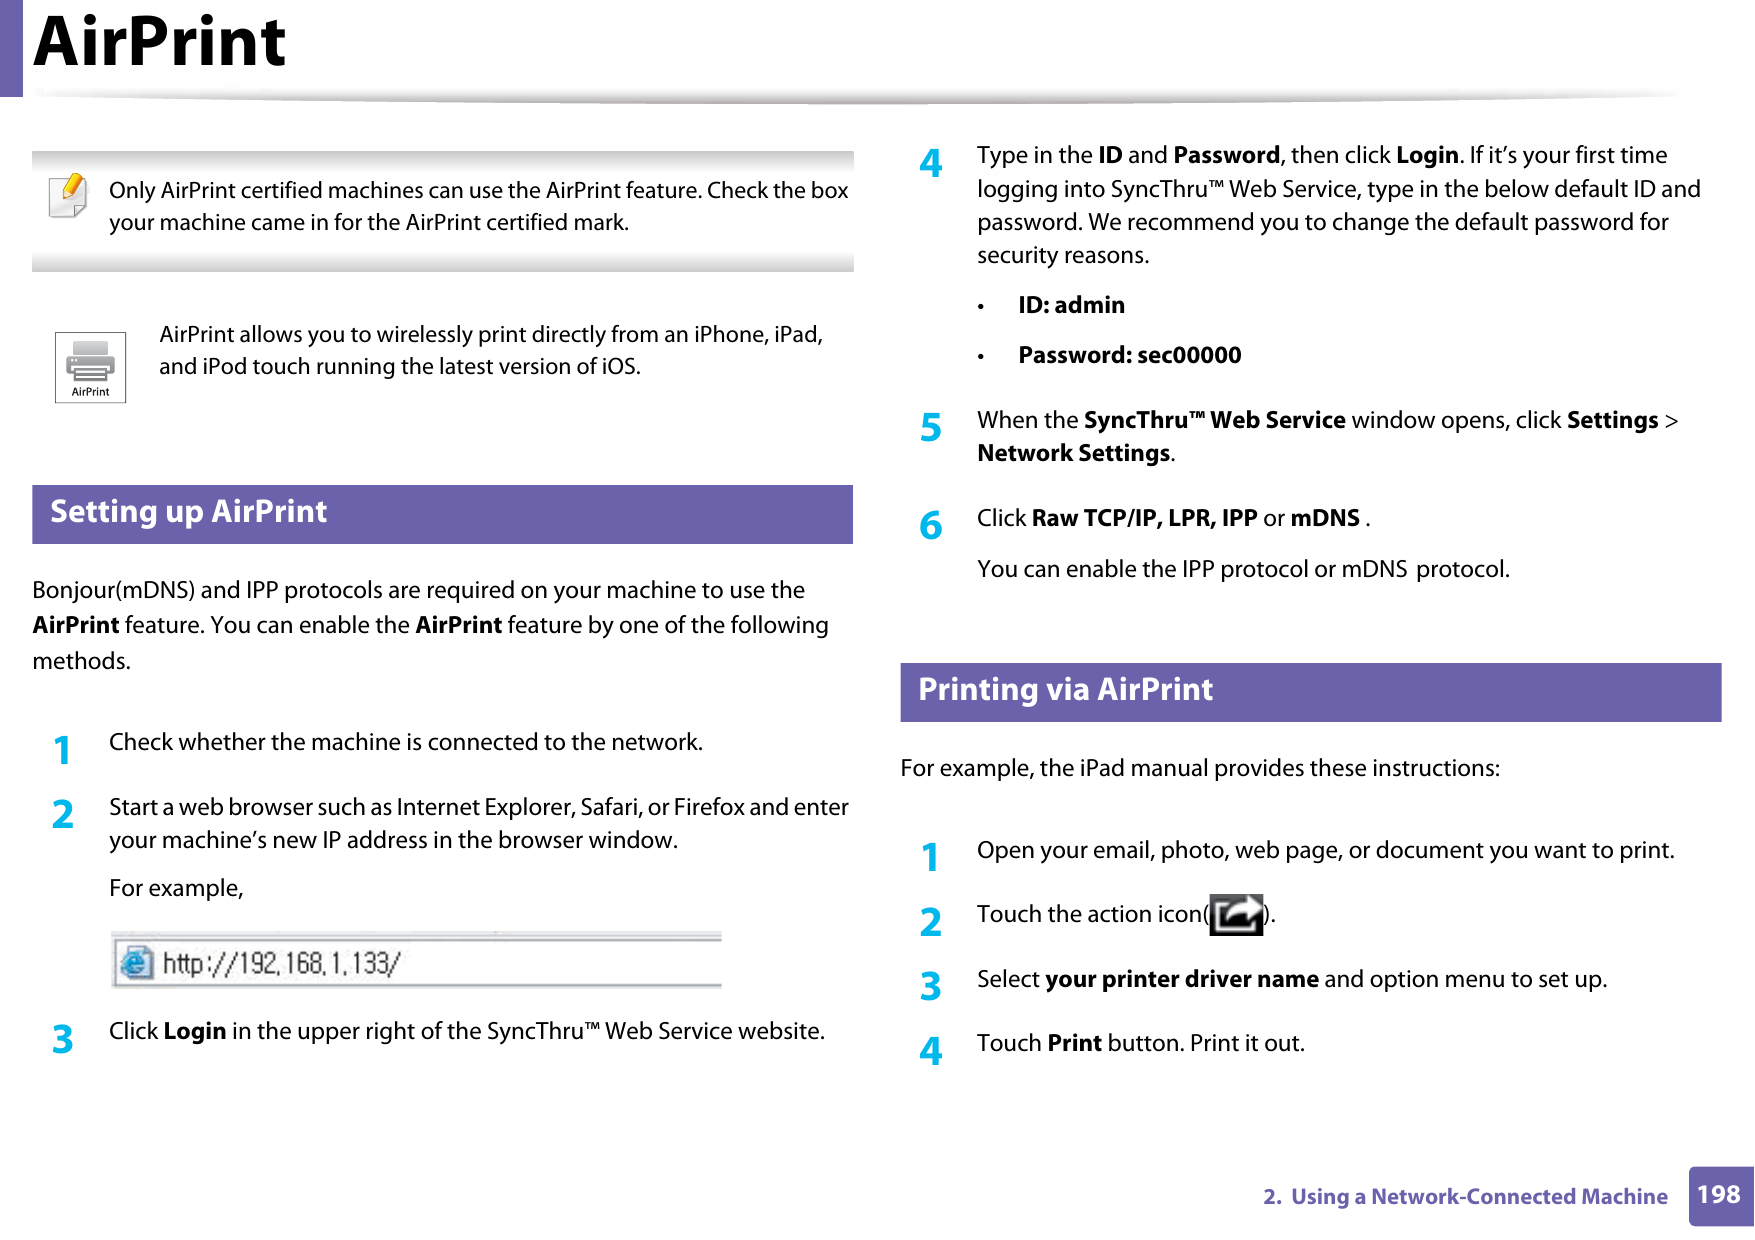
![IPv6 configuration1592. Using a Network-Connected Machine • You can also set the DHCPv6.• To manually set the IPv6 address:Check the Manual Address check box. Then, the Address/Prefix text box is activated. Enter the rest of the address (e.g.,:3FFE:10:88:194::AAAA. “A” is the hexadecimal 0 through 9, A through F). IPv6 address configuration1Start a web browser, such as Internet Explorer, that supports IPv6 addressing as a URL.2 Select one of the IPv6 addresses (Link-local Address, Stateless Address, Stateful Address, Manual Address) from Network Configuration Report (see "Printing a network configuration report" on page 145).•Link-local Address: Self-configured local IPv6 address (Address starts with FE80).•Stateless Address: Automatically configured IPv6 address by a network router.•Stateful Address: IPv6 address configured by a DHCPv6 server.•Manual Address: Manually configured IPv6 address by a user.3 Enter the IPv6 addresses (e.g.,: http://[FE80::215:99FF:FE66:7701]). Address must be enclosed in '[ ]' brackets.](https://usermanual.wiki/Samsung-Electronics-Co/SLM3065FW.Users-Manual-Part-8/User-Guide-2775400-Page-9.png)